JVC LT 32D1 19J1, 22J10 User Manual J56V0101A
User Manual: JVC LT-32D1 LT-32D1 English,
Open the PDF directly: View PDF ![]() .
.
Page Count: 32
- Safety precautions
- Contents
- How to attach the stand
- Location of controls
- Remote Control
- Connections
- Auto setup
- Quick guide for Menu operation
- Selecting the input source
- On-screen Language Selection
- Channel Setup
- Basic Operation
- Teletext
- Stereo reception in analogue cableTV channel mode
- Channel Lock Setup
- Picture Format
- Other convenience functions
- Disc
- Playing a disc
- Zooming (DVD)
- Locating desired scene (DVD/AudioCD)
- Changing Soundtrack Language(DVD)
- Subtitles (DVD)
- Changing angles (DVD)
- Title selection (DVD)
- DVD menu (DVD)
- Disc status
- Using HOME MENU
- Play mode
- Audio Settings menu
- Video Adjust menu
- Customizing The Function Settings
- Customizing The Function Settings
- Parental Control
- Language Code List
- Country/Area Code List
- PC connection
- Connecting an HDMI or a DVI device to the HDMI input
- Connection to other equipment
- Troubleshooting table
- License information
- Specifications
INSTRUCTIONS
LT-32D1
LCD TV/DVD Combo
56V0101A_EN.indd 156V0101A_EN.indd 1 2/1/11 11:46:48 AM2/1/11 11:46:48 AM
2
Safety precautions
Important Warning
CAUTION:
A UNIT IS A CLASS 1 LASER PRODUCT. HOWEVER THIS UNIT USES A VISIBLE LASER BEAM WHICH COULD
CAUSE HAZARDOUS RADIATION EXPOSURE IF DIRECTED. BE SURE TO OPERATE THE PLAYER CORRECTLY
AS INSTRUCTED.
THE FOLLOWING CAUTION LABEL IS LOCATED ON THE REAR PANEL OF THE UNIT.
WHEN THIS UNIT IS PLUGGED INTO THE WALL OUTLET, DO NOT PLACE YOUR EYES CLOSE TO THE OPEN-
INGS TO LOOK INTO THE INSIDE OF THIS UNIT.
USE OF CONTROLS OR ADJUSTMENTS OR PERFORMANCE OF PROCEDURES OTHER THAN THOSE SPECI-
FIED HEREIN MAY RESULT IN HAZARDOUS RADIATION EXPOSURE.
DO NOT OPEN COVERS AND DO NOT REPAIR YOURSELF. REFER SERVICING TO QUALIFIED PERSONNEL.
CLASS 1
LASER PRODUCT
Thank you for buying this JVC LCD panel television.
To make sure you understand how to use your new TV, please read this manual thoroughly before
you begin.
• Follow this manual regarding setup!
- Connect only to a 110-240 V, 50/60Hz AC outlet.
• Make enough room for inserting and removing the
power plug!
• Place the TV as close to the outlet as possible!
- The main power supply for this TV is controlled by
inserting or removing the power plug.
• Never cut or damage the power cord!
- If the AC plug is not the right shape, or the power cord
is not long enough, use an appropriate plug adapter or
extension cable. (Consult your retailer)
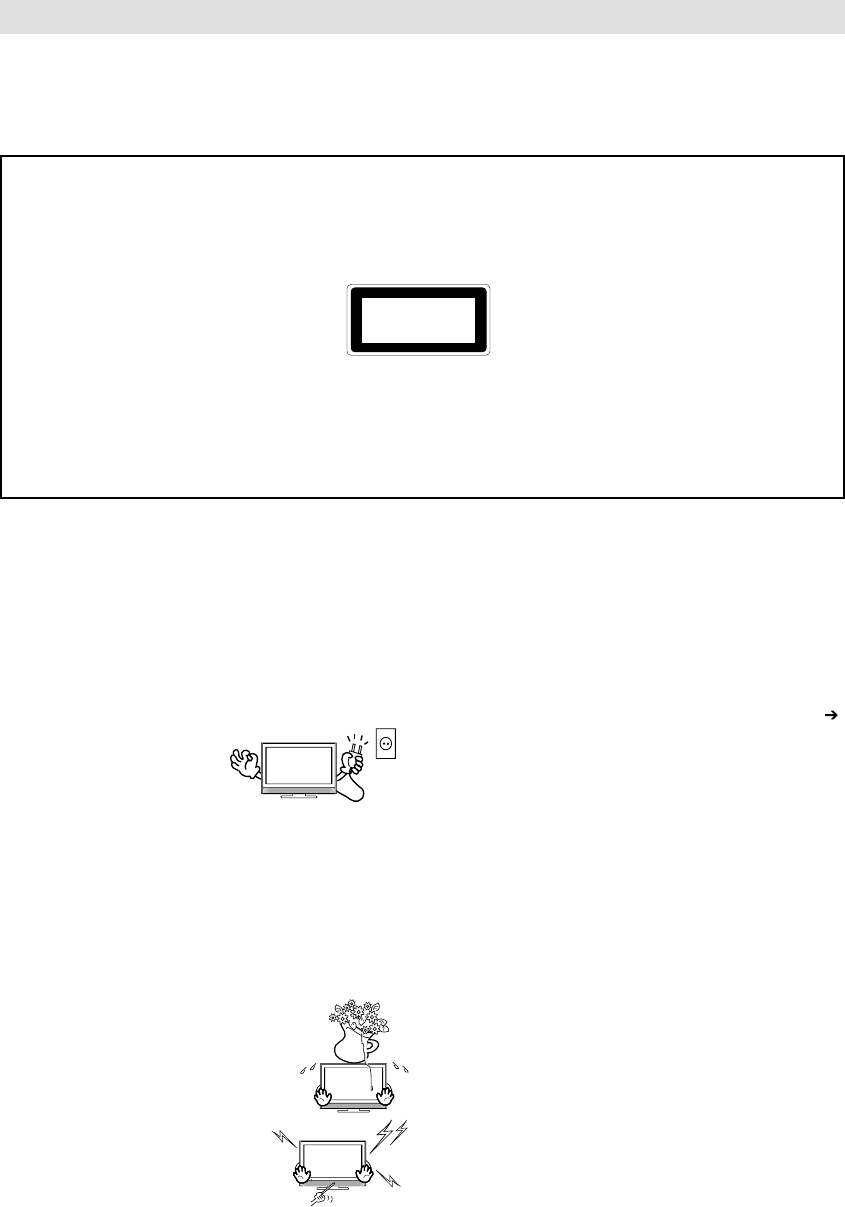
• Unplug the power cord when going out!
- The power buttons on the
remote control and the TV
unit cannot completely turn
off the TV. (Make appropriate
arrangements for bedridden
people.)
• Do not allow the TV to fall!
- Do not rest your elbows on, or allow children to hang
from the TV.
- There is a risk that the TV will fall and cause injuries.
- Make use of the hole on the back of the stand to
prevent the TV from falling easily.
• If the TV is damaged or behaving strangely, stop
using it at once!
- Unplug the power cord and contact your retailer.
• Never place anything on the TV!
- Placing liquid, naked flames, cloths,
paper, etc. on the TV may cause a fire.
• Never expose to rain or moisture!
- To prevent fire or electric shock, never
allow liquids to enter the unit.
• Never insert objects into the cabinet
openings!
- It may cause a fatal electric shock.
- Take care when children are near.
• Hold the TV so as not to scratch
the screen!
- Do not touch the screen when
carrying the TV.
• Do not carry the TV on your own!
- In order to prevent accidents, ensure that the TV is
carried by two or more people.
• Never insert the power cord by wet hand!
- It may cause a fatal electric shock.
• Keep the TV set away from direct sunlight!
- TV set can be damaged.
• Place the TV set in a neat and dry place. Do not
place the product close to source of steam, heat,
moisture or oil. Because it may cause a fire hazard
or electric shock hazard!
•
For more details on installation, usage and safety
Consult
your retailer.
• Don’t touch an external metal part of the TV set!
- It may cause an electrocuted.
• The unit becomes warm when in operation. Do not
place any covers or blankets on the unit in order to
prevent overheating. The ventilation holes are not
to be blocked. Do not set up near radiators. Do not
place in direct sunshine. When placing on a shelf
leave 10 cm free space around the whole unit. Make
some space around TV (Correct shelf assembly).
• Never dismantle the rear panel!
- It may cause an electric shock.
• Never obstruct the ventilation holes!
- It may cause overheating or a fire.
• Handle LCD panel with care!
- Use a soft, dry cloth when cleaning.
• Never try repair the TV yourself!
- If the problem cannot be solved in “Troubleshooting”
unplug the power cord and contact your retailer.
56V0101A_EN.indd 256V0101A_EN.indd 2 2/1/11 11:03:32 AM2/1/11 11:03:32 AM

3
Safety precautions .................................................2
Contents ................................................................3
How to attach the stand .........................................4
Location of controls ................................................5
Remote Control ......................................................6
Connections...........................................................8
Auto setup..............................................................9
Quick guide for Menu operation .............................9
Selecting the input source ......................................9
On-screen Language Selection ...........................10
Channel Setup .....................................................10
Basic Operation ...................................................11
Teletext ................................................................11
Stereo reception in analogue cable TV channel
mode ...................................................................12
Channel Lock Setup ............................................12
Picture Format .....................................................12
Other convenience functions ...............................13
Disc......................................................................15
Playing a disc .......................................................17
Zooming (DVD) ....................................................18
Locating desired scene (DVD/Audio CD) .............18
Changing Soundtrack Language (DVD) ...............18
Subtitles (DVD) ....................................................18
Changing angles (DVD) .......................................19
Title selection (DVD) ............................................19
DVD menu (DVD) .................................................19
Disc status ...........................................................19
Using HOME MENU ............................................19
Play mode ............................................................20
Audio Settings menu ............................................21
Video Adjust menu ...............................................21
Customizing The Function Settings ......................21
Parental Control ...................................................23
Language Code List .............................................24
Country/Area Code List .......................................24
PC connection .....................................................25
Connecting an HDMI or a DVI device to
the HDMI input .....................................................26
Connection to other equipment ............................27
Troubleshooting table ...........................................29
License information ..............................................30
Specifications ......................................................31
Contents
• If a television is not positioned in a sufficiently
stable location, it can be potentially hazardous due
to falling. Many injuries, particularly to children, can
be avoided by taking simple precautions such as:
- Using cabinets or stands recommended by the
manufacturer of the television.
- Only using furniture that can safely support the
television.
- Ensuring the television is not overhanging the edge of
the supporting furniture.
- Not placing the television on tall furniture (for example,
cupboards or bookcases) without anchoring both the
furniture and the television to a suitable support.
- Not standing the television on cloth or other materials
placed between the television and supporting furniture.
- Educating children about the dangers of climbing on
furniture to reach the television or its controls.
• Keep away from rodents. Rodents (and also
cockatiels) enjoy biting into electric flexes.
• The animal can cause a short cut (fire hazard!) and
receive a fatal electric shock.
• Headphone Warning
- Loud music can damage your hearing irreversibly,
therefore do not set the volume to a high level when
listening through headphones, particularly for extended
listening periods.
• If the unit is mounted on the wall, contact the shop
where you purchased the unit for advice, and
leave the installation work to experts. Incomplete
installation work can cause you injuries.
Possible Adverse Effects on LCD Screen: If a fixed
(non-moving) pattern remains on the LCD screen for
long periods of time, the image can become permanently
engrained in the LCD TV panel and cause subtle but
permanent ghost images. This type of damage is NOT
COVERED BY YOUR WARRANTY. Never leave your TV
on for long periods of time while it is displaying the follow-
ing formats or images:
• Fixed Images, such as stock tickers, video game
patterns, TV station logos, and websites.
• Special Formats that do not use the entire screen.
For example, viewing letterbox style (16:9) media
on a normal (4:3) display (Black bars at top and bot-
tom of screen); or viewing normal style (4:3) media
on a widescreen (16:9) display (Black bars on left
and right sides of screen).
Saving electricity
The backlight’s brightness (power) can be set manually to
match the surrounding illumination. At bright daylight the
backlight’s full power is required to perform a brillant result.
During lower illumination, e.g. at night, you set a lower
backlight-brightness (see p. 13). Figures lower than 100
reduce the brightness, save energy and offer dazzle-free,
fatigueless watching at night.
Safety precautions
56V0101A_EN.indd 356V0101A_EN.indd 3 2/1/11 11:03:33 AM2/1/11 11:03:33 AM
4
How to attach the stand
NOTE:
• Unplug the AC cord from the AC INPUT terminal.
• Before beginning this process, assure that TV is laid on a clean, safe, and cushioned space to avoid any
damage to the unit.
• Do not touch or press the TV-screen, glass might break under pressure.
• Be sure to follow the instructions. Incorrect installation of the stand may result in the TV falling over.
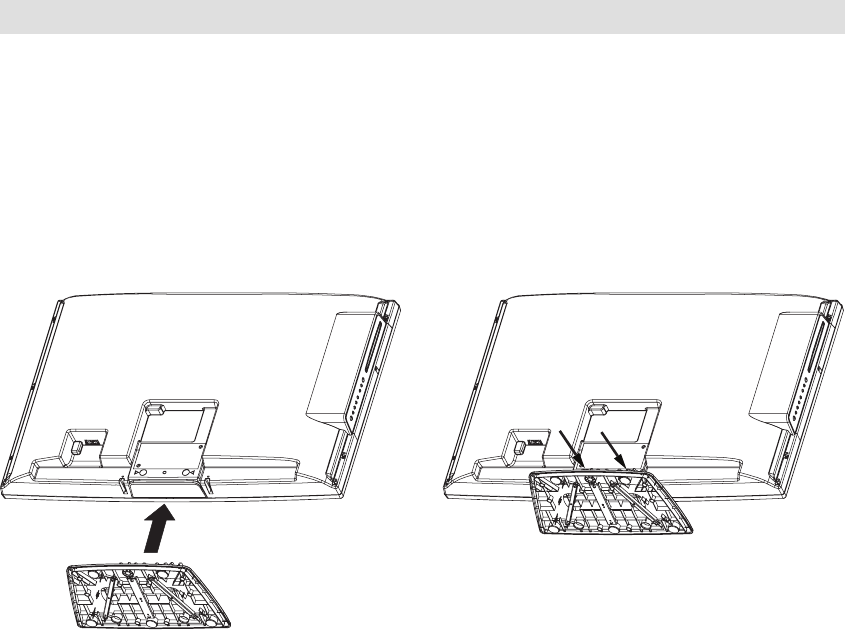
1) Place the TV on its front onto a table.
2) Align the stand’s bottom-plate (supplied) as seen here.
It will fit in only one direction.
3) Hold the unit and attach the stand slowly. Finally secure the bottom-plate with 2 screws (included)
(M6x35mm).
Dismantling the base
For wall mounting, the base must be dismantled. To do this, remove 2 screws (J, see page 8) from the back.
Take off the base entirely.
NOTE:
To detach the stand, perform these steps in reverse order.•
56V0101A_EN.indd 456V0101A_EN.indd 4 2/16/11 12:29:53 PM2/16/11 12:29:53 PM

5
Location of controls
Description of Indicators and Controls
1. Remote sensor
2. (Standby/On) indicator: The LED indicator lights up red in standby mode, and green in the power
ON mode.
3. Loudspeakers
4. EJECT ( ): Eject a disc.
5. VOL+/–/◀/▶ buttons: To control volume / In Menu: Setting.
6. CH /▶ (PLAY) buttons: Press to change to a higher numbered channel set into memory. DVD
mode : Playback. In Menu: Setting.
7. CH /■ (STOP) buttons: Press to change to a lower numbered channel set into memory. DVD
mode : Stop. In Menu: Setting.
8. MENU button: To display the menu screen.
9. INPUT/ENTER button: Select input mode. Press INPUT/ENTER. Then press ▲/▼ to select input
source. In Menu : Using as ENTER button.
10. (Power)-button: Preparation: Connect AC Cord to AC110~240V, 50/60Hz.
a) If standby-LED is red, you may power-off. To power-off, press power-button 1x and release.
For confirmation, standby-LED will change to dark. Power-on by remote control is not available.
b) If standby-LED is off, you may power-on. To power-on, press power-button 1x and release.
For confirmation, standby-LED will change to green.
For complete disconnection from the network, remove the supplied
AC Cord
from the socket.
3
DVD-Player
12
4
5
6
7
8
9
10
56V0101A_EN.indd 556V0101A_EN.indd 5 2/1/11 11:03:34 AM2/1/11 11:03:34 AM

6
Remote Control
/
-
1
)
*
'
,
!
Function Page
1Enter standby mode or turn on the power 9
2Display program position number 11
3Select to operate TV/DVD 17
4Eject a disc 17
5
Select channel
Select Teletext page
Enter password
Select title/chapter/track
11
11
12
20
6Select an input source 9
7Select picture format 12
8Switches between the present channel and the last
selected channel
11
9Turn the sound on/off 11
0Activate the menu
Call HOME MENU
9
19
!In menu, return 1 step / exit menu 19
@Volume 11
#Change the TV channel or Teletext page up or down 11
$Cursor buttons
%Memorize
Channel List 11
^Still picture 11
&Teletext ON / Text mix / OFF 11
*Display the subtitle 18
(Select between the available broadcast audio
Change sound track language of DVD
12
18
)Select menu of a DVD disc 19
qSelect title of a DVD disc 19
wCancel the Program Step 18, 20
eCall Play Mode screen 20
rHold the text page
Reverse slow motion
11
18
tReveal quiz page answers
Change playback angle of a DVD disc
11
19
ySub page selection
Zoom (for DVD/JPEG playback)
11
18
uTeletext enlargement
Forward slow motion
11
18
iDVD control buttons 17
oFastext/TOPtext buttons
DVD control buttons
11
17, 18
56V0101A_EN.indd 656V0101A_EN.indd 6 2/1/11 11:03:35 AM2/1/11 11:03:35 AM
7
30 30
Remote Control
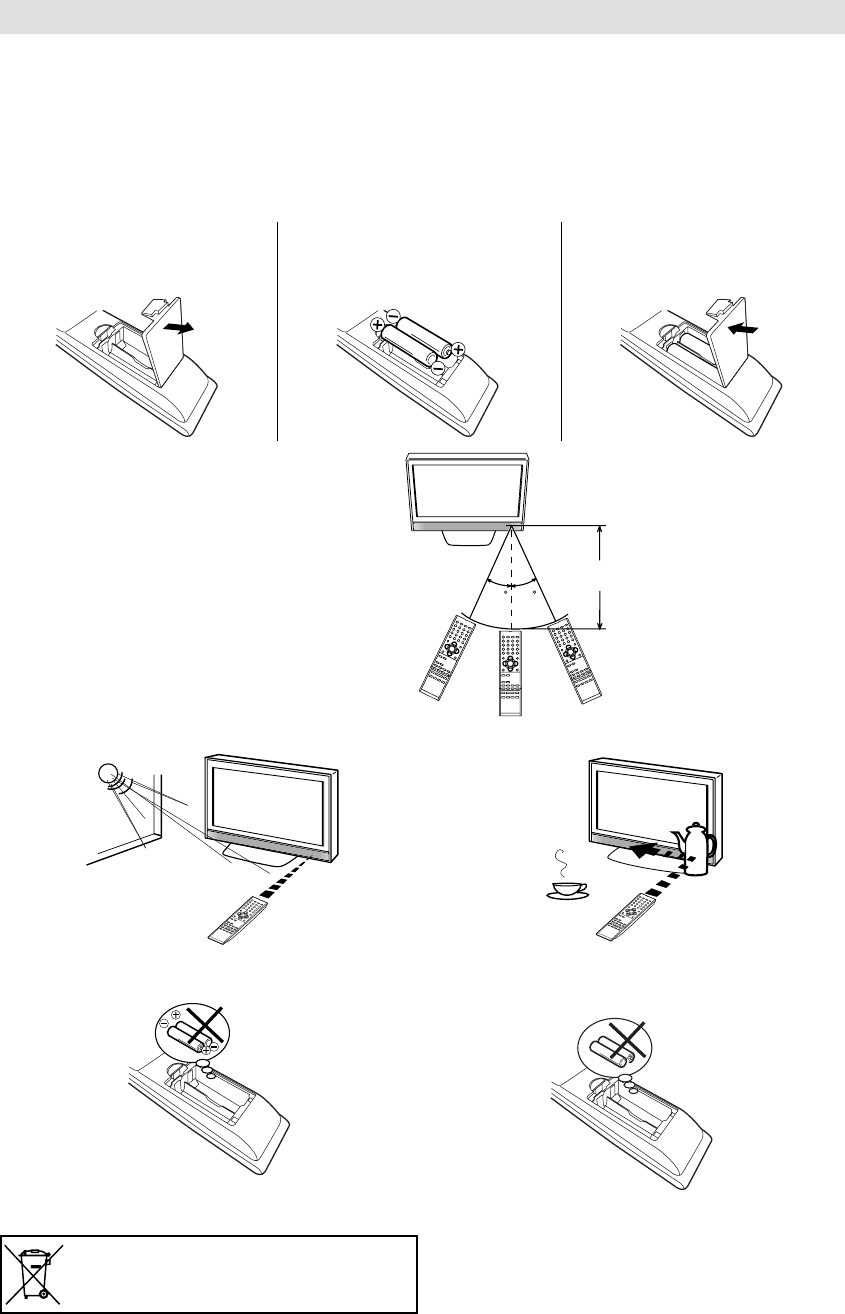
Install the batteries
Use batteries type UM3 (AA-Size).
Do not use old or weak batteries. The remote control may not work properly with a weak voltage from such
batteries. Replace exhausted batteries with new ones. Never try to recharge normal batteries - this could
cause an explosion.
Note:
Exhausted batteries can leak corrosive electrolyte, which may cause damage to the remote
control - therefore remove exhausted batteries immediately.
Batteries should not be exposed to excessive heat such as sunshine, fire or the like.
1Open the battery
compartment. 2Install the batteries as shown
below, ensuring the correct
polarity.
3Close the battery
compartment.
•
•
The remote control handset will not work properly in the following cases:
a) If bright sunlight directly beams onto the unit front. b) If an obstacle is placed between the unit and the
handset.
Z
Z
Z
Z
Z
Z
c) If the batteries have not been installed according
to their polarities.
d) If the batteries are weak.
Distance of Remote Control Operation
Point the remote control
directly at the remote sensor.
Transmitter window
Maximum distance approx. 5m
Remote sensor
If this symbol is shown, it is only valid in the
European union.
56V0101A_EN.indd 756V0101A_EN.indd 7 2/1/11 11:03:36 AM2/1/11 11:03:36 AM
8
M6 x 10
200 mm
200 mm
Connections
Note: Before you connect other appliances:
To avoid potentially damaging your set, make sure all items are switched off and disconnected from the
mains power when you make the connections.
Arrange the desired connection.
When you have finished making the connections, reconnect the mains power to the unit and switch it
back on.
Connect your antenna as shown below (B). Connections to other equipment is explained further on
P.27, 28. If you have problems with reception, consult a specialist of antenna.
•
•
•
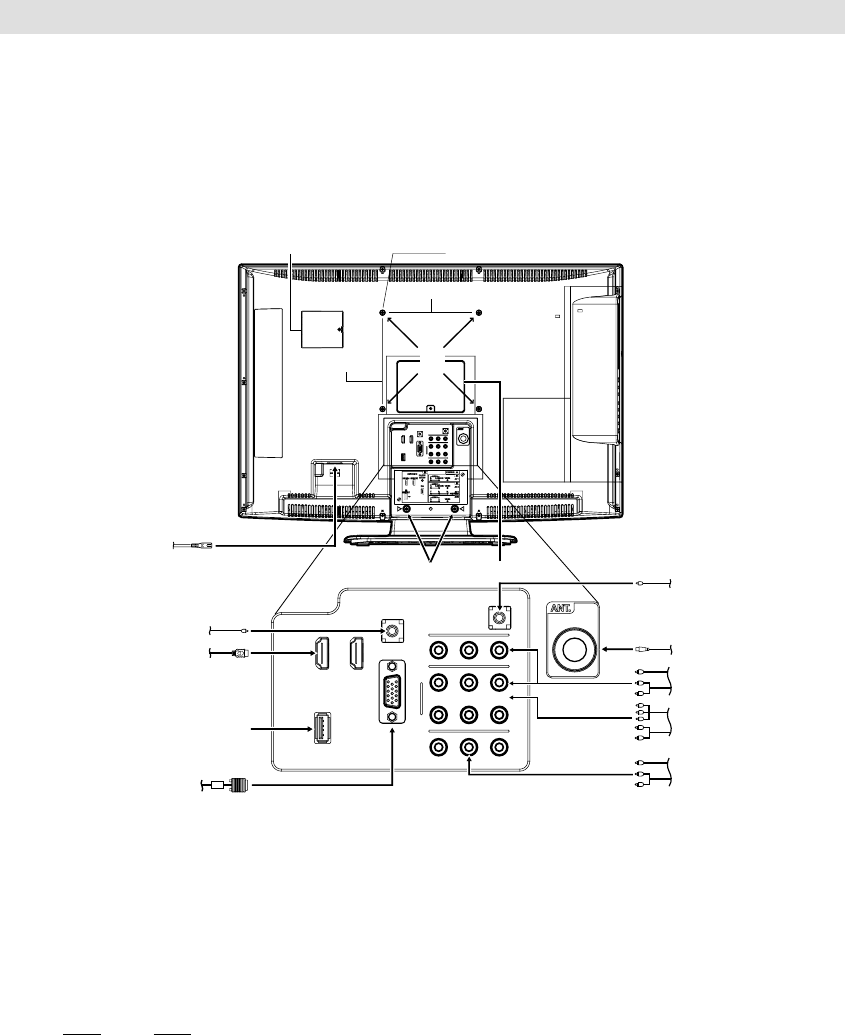
(A) HEADPHONE jack: Plug headphones with a mini plug (3.5 mm) into this jack.
(B) ANT. input: Connect to an analogue cable connection.
(C) AV1/AV2 input: Input for analogue AV-Signal (Composite) See P.27, 28.
(D) COMPONENT input: See P.28.
Note : AUDIO input of AV2 is sharing with COMPONENT AUDIO input.
(E) AV Output: Output analogue AV-Signal (Composite) See P.28.
(F) PC input: See P.25.
(G) PC/DVI AUDIO input: See P.25, 26.
(H) HDMI1/DVI/HDMI2 input: See P.26.
(I) FOR SERVICE PERSONNEL USE ONLY
Do NOT insert ANY USB device into this port. Use of this port by other than Service Personnel may
void this products warranty.
(J) To hang the television on a wall, remove these screws and then remove a stand.
Before performing work spread cushioning over the base area to lay the TV on.
(K) Power supply: Connect the supplied power cable to an AC 110-240V/50/60Hz mains power supply
only - do not attempt to connect it to any other type of supply. Never try to repair a damaged AC power
cord with isolation-tape - this should be repaired by a specialist or replaced. Do not let your pet loose
near the cable. Animals biting into the cable could receive a fatal electric shock, and could cause a
hazard to others.
(L) Bracket holes: To attach a wall mounting bracket (not supplied), attach where indicated in the drawing
above.
(M) Service connector cover: Please do not open this cover. There is a socket only for service purpose inside.
(C)
(A)
(B)
(D)
(E)
(I)
(J)
(L)
(K)
(M)
Back Side
(F)
(G)
(M)
(H)
56V0101A_EN.indd 856V0101A_EN.indd 8 2/1/11 11:03:37 AM2/1/11 11:03:37 AM
9
Auto setup
Your television has an Automatic Tuning
System which makes tuning in your television
easy. This Automatic tuning System scans
the entire reception range in your area and
automatically stores all available analogue
channels of suitable signal strength
in the correct order.
Preparation:
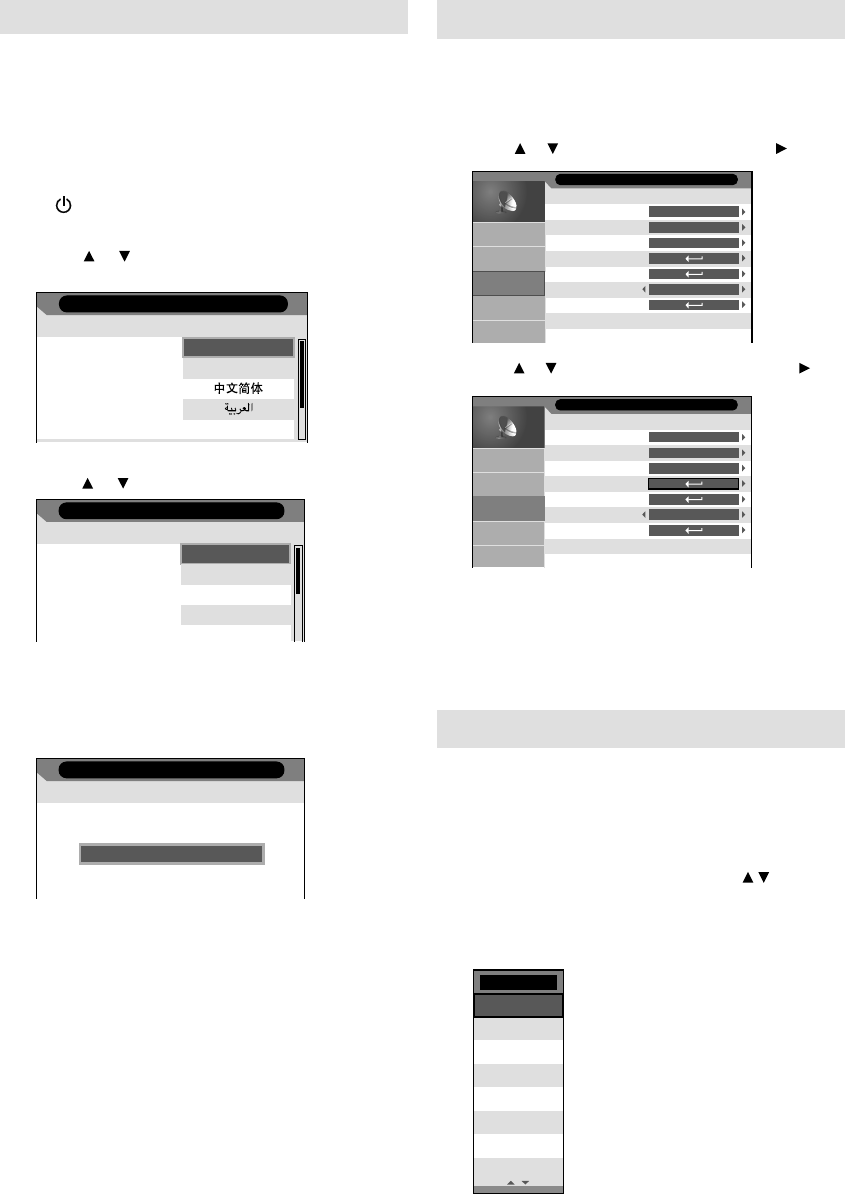
Press (Power) on the unit or on the remote.
1Auto Installation menu will appear.
Press or to select desired language.
Then press ENTER.
Auto Installation
- Step 1 -
Language English
ภาษาไทย
Français
2If you cancel Auto Power Off (see page 14),
press or to select Off. Then press ENTER.
Auto Installation
- Step 2 -
Auto Power Off
Your TV has been set to
power off after 4 hours of
continuous viewing. If you
want to change this setting,
please choose Off. This
setting can also be changed
in the MENU
Off
4 Hr
2 Hr
1 Hr
3TV will search for TV-channels. Connect your
antenna now.
Continue with ENTER to start auto tuning.
The tuning’s progress will be displayed in
percent for confirmation.
Auto Installation
- Step 3 -
Start Auto Tune
Note:
Please be patient - the Auto Tuning process
can take several minutes to complete.
•
4When the display reads 100%, normal TV-screen will
appear.
Note:
To cancel the auto tuning, press RETURN during the
process.
THE AUTOMATIC TUNING PROCESS WILL
ONLY START BY ITSELF THE FIRST TIME YOU
SWITCH THE SET ON. HOWEVER YOU CAN
RESTART THIS PROCESS VIA THE MENU
SYSTEM (see page 10).
If you could not set up a correct language in this auto
setup process, you will be able to make your preferred
language selection as illustrated in page 10 (On-screen
Language Selection).
•
•
Quick guide for Menu operation
Call Menu and for example: Select “Auto
Search”.
1Press INPUT SELECT. Select TV, then press
ENTER. Press MENU.
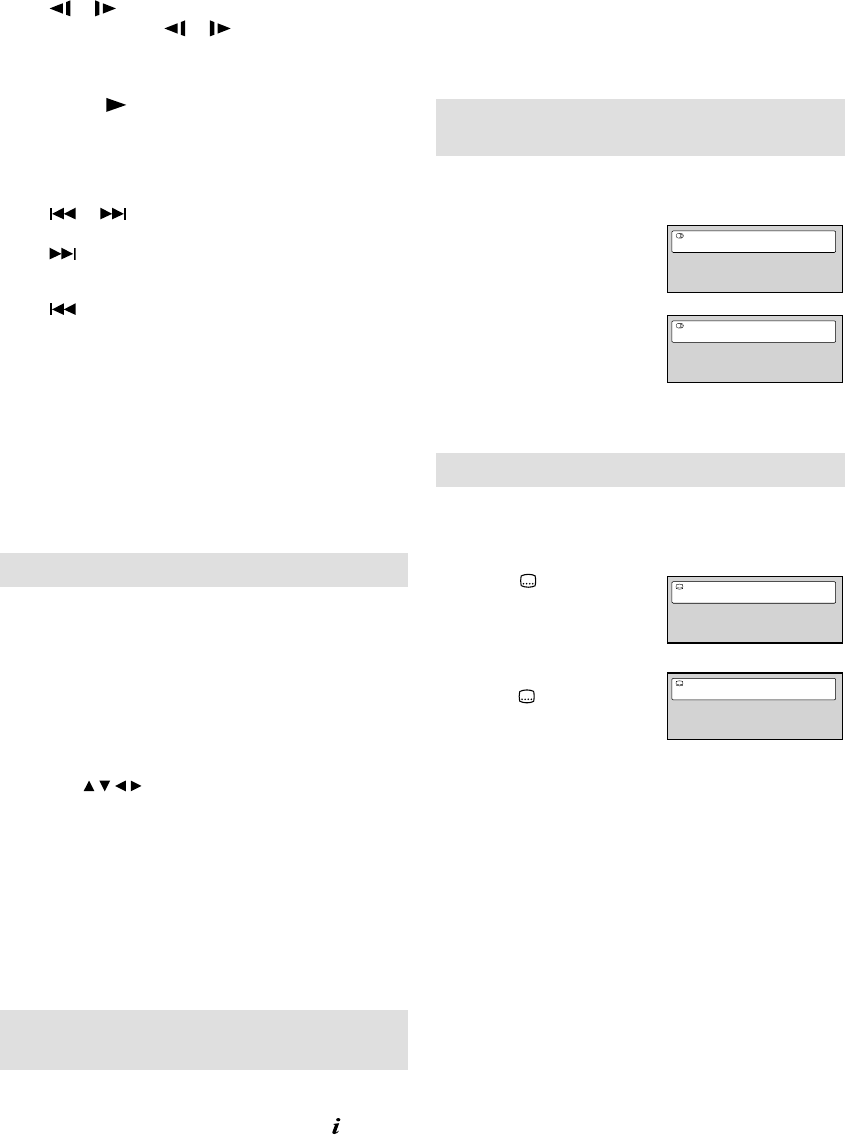
2Press or to select “Channel” then press .
Current Channel
Color System
Sound System
Auto Search
Manual Search
Fine Tune
Channel Management
Picture
Sound
PC Setup
Feature
Channel
1
Auto
BG
45.25 MHz
Channel
3Press or to select “Auto Search”, then press .
Channel
1
Auto
BG
45.25 MHz
Current Channel
Color System
Sound System
Auto Search
Manual Search
Fine Tune
Channel Management
Picture
Sound
PC Setup
Feature
Channel
... on the following pages the MENU can be called in
the same way as here.
4Press MENU to exit the menu.
Note:
The Menu screen disappears automatically after a
defined period of time with “OSD Timer”. (see page 14)
•
Selecting the input source
Press INPUT SELECT to view a signal from
another device connected to your TV, such as a
VCR or DVD player. You can select each input
source depending on which input jacks you used to
connect your devices.
To select the video input source, press / , then
press ENTER.
Each time INPUT SELECT is pressed, the input
source toggles.
Input
TV
AV1
AV2
AV3
HDMI1
HDMI2
PC
DVD
56V0101A_EN.indd 956V0101A_EN.indd 9 2/1/11 11:03:40 AM2/1/11 11:03:40 AM
10
On-screen Language Selection
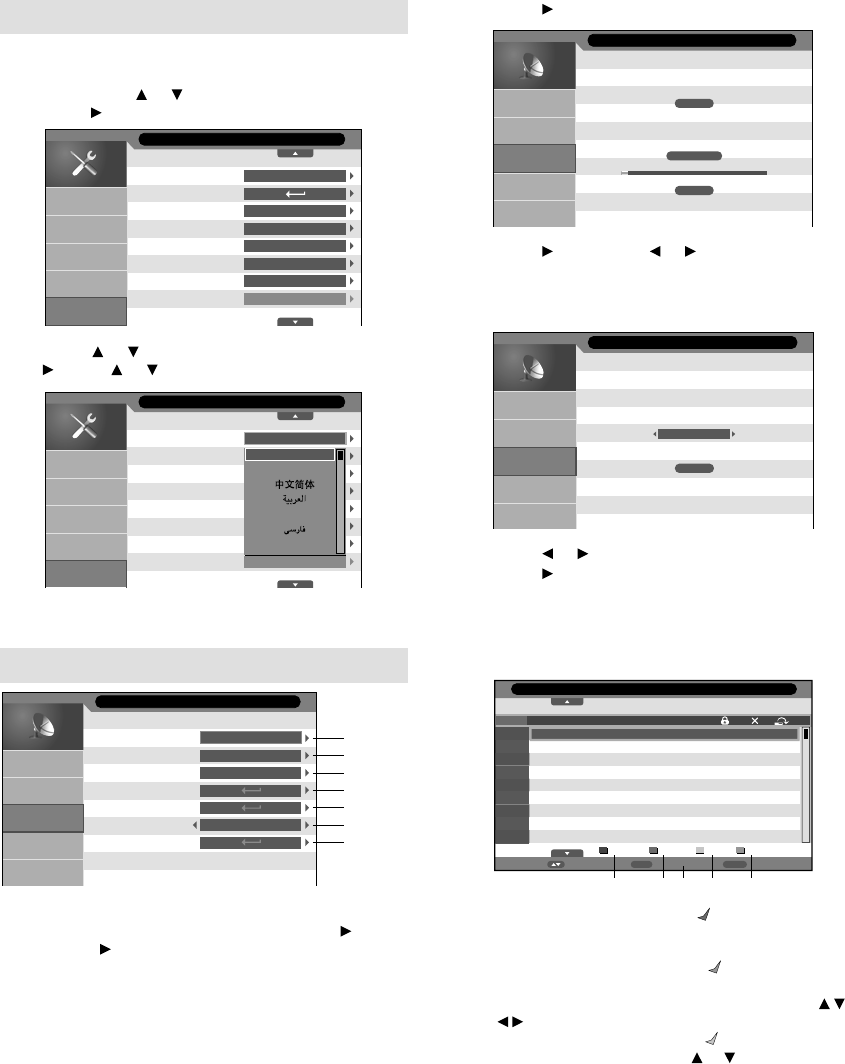
1Press MENU (unless you have already
selected when the set was first switched on)
Then press or to select “Feature”, then
press .
Language
Lock
Blue Back
OSD Timer
Sleep Timer
Auto Power Off
Power On LED
HDMI Mode
Feature
English
On
Off
Off
Off
On
Auto
Picture
Sound
PC Setup
Feature
Channel
2Press or to select “Language”, then press
. Press or to select the desired language.
English
English
Français
ภาษาไทย
Tiếng Việt
Auto
Language
Lock
Blue Back
OSD Timer
Sleep Timer
Auto Power Off
Power On LED
HDMI Mode
Feature
Picture
Sound
PC Setup
Feature
Channel
3Press MENU to exit the menu.
Channel Setup
1
Auto
BG
45.25 MHz
Channel
Current Channel
Color System
Sound System
Auto Search
Manual Search
Fine Tune
Channel Management
Picture
Sound
PC Setup
Feature
Channel
Preparation:
Press MENU. Select “Channel”, then press .
1 Press , then press ▲ or ▼ to select the current
channel, then press ENTER.
2 Colour System has already been preset to Auto.
Do not change anything here. Any changes
can cause picture or sound disruption.
3 The correct sound system is already
installed. Any changes can cause sound
disruption.
Note:
When the TV received NTSC3.58 BG/DK or
NTSC4.43 BG/DK/I signal, it is necessary to
change the “Color system” or “Sound system”.
•
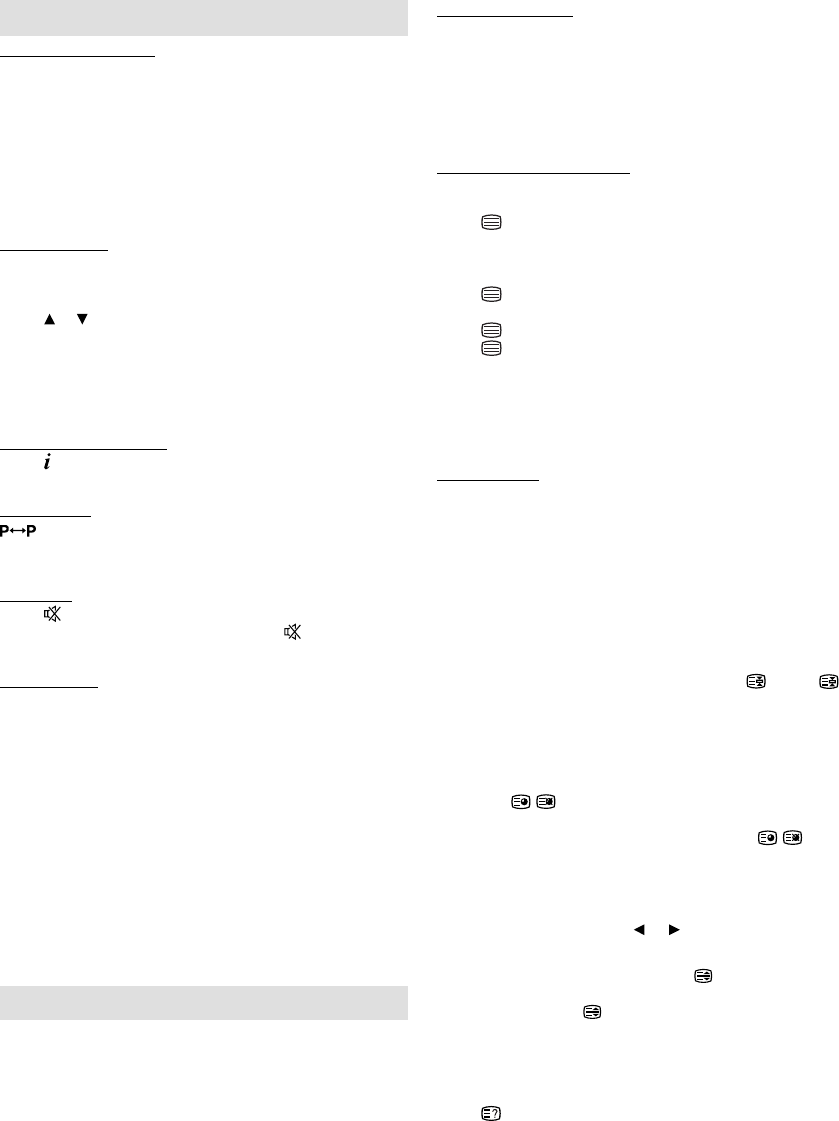
4 Press to start auto search.
Channels found:
Frequency :
89.50 MHz
5%
2
Channel - Auto Search
Picture
Sound
PC Setup
Feature
Channel
5 Press , then press or to perform
intermittent search from current selected
channel’s frequency position. Finally, press
ENTER on “Save”.
Frequency
Save
48.75 MHz
Channel - Manual Search
Picture
Sound
PC Setup
Feature
Channel
6 Press or to fine tune.
7 Press , then press ▲/▼ to select the
channel that you want to input or change,
then select desired option from the below of
the TV-screen. Then press the appropriate
coloured button on the remote control.
Return
Return
Enter
RenameMove
No.
Program Name Frequency Sound System
CH Lock Skip SwapDelete
001
002
003
004
005
006
007
008
009
48.25 MHz
175.25 MHz
205.25 MHz
217.25 MHz
295.25 MHz
471.25 MHz
543.25 MHz
631.25 MHz
647.25 MHz
BG
M
M
BG
M
M
BG
BG
BG
Channel - Channel Management
abcde
a CH Lock (red button): Red mark will appear.
(Lock is available only when Lock is On. See
page12.)
b
Delete (green button): Green mark will appear.
c
Rename (ENTER button): You can input or change
the name of a channel on the cursor screen with /
//, ENTER and Red/Green/Yellow buttons.
d Skip (yellow button): Yellow mark will appear.
e Swap (blue button): Press or to select the
position that you want to swap the channel with,
then press Blue.
56V0101A_EN.indd 1056V0101A_EN.indd 10 2/1/11 11:03:42 AM2/1/11 11:03:42 AM
11
Fastext/TOPtext
The Fastext/TOPtext is teletext with a special directory.
On the lower part of the screen there are four different
coloured fields (red, green, yellow and blue). These fields
lead directly to the pages shown within. The coloured
buttons on the remote control correspond to the coloured
fields. Press the appropriate coloured button in order to
activate the desired colour field.
Switch on / off Teletext
Teletext is not transmitted by all channels.
Select a channel that shows teletext.
Press . You will now see a teletext page.
(If “100” is shown without any text information, it may mean
that the channel you have selected does not support
teletext.)
Press again. Teletext and TV picture are shown
simultaneously.
Press again in order to switch off teletext.
Press again in order to switch on teletext again. The
last page which was stored is now shown.
Note:
You cannot select any other channels as long as
teletext is switched on. Switch teletext off when you
want to switch over to another channel.
Select Page
Press CH + or - until the page you desire appears. Or
... enter the requested page number by using the 10
Number Buttons.
And if you mistype something, just enter the complete
3-digit wrong page number then enter the desired number
again. Or ... press one of the coloured teletext buttons so
that a page from Fastext/TOPtext is shown.
Hold Pages
Some pages are divided up into subpages by the channel.
Subpages are automatically shown in turn, as they are
transmitted. In order to hold the page, press . Press
again in order to display the next subpage.
Directly Select Subpages
You can directly select the subpages if required. You may use
one of two operations.
1.
Press in order to select subpage 2. 0 0 0
0
is shown. Enter 0 0 0 2. It can take a minute
before subpage 0002 appears. Press
again in order to switch off the subpage feature.
Or:
2. Wait a few seconds, and the right now available
subpages will be shown in the bottom line.
Select your page with or .
Enlargement
In order to enlarge the display, press .
Either the upper or lower half of the screen is enlarged.
Each time you press you switch between the display of
the upper or lower half of the screen or the full picture.
Answering Quiz Questions
Some pages contain quiz questions with concealed
answers.
Press in order to show the answers.
•
Basic Operation
Channel selection
With the Numbered buttons (0-9).
Example:
No. 2: Press 2.
No. 29: Press 2 and within 2 seconds, press 9.
No. 929: Press 9, 2, 9 same as above.
Press CH + or - to change up or down a channel. This
takes approx. 2 seconds. If the auto search only stored 5
stations, only these 5 will appear. Skipped channels will
not appear (see P.10).
Channel List
The Channel List shows a list of all receivable
programmes.
Press CH LIST to display the Channel List.
Press or to select the desired channel.
Press CH LIST to display the selected channel.
Note:
To display the programmes on the channel list, it is
necessary to input the programme name in “Channel
Management” mode (see page 10).
Information display
Press . The program information will appear for approx. 4
seconds.
QuickView
button allows you to go back to the last selected TV
channel.
This feature is not available in external input mode.
MUTING
Press . The sound will be cut off.
The muting can be released by pressing again or
VOL + or –.
Still picture
Press FREEZE to make a still picture. To cancel the still
picture, press FREEZE again.
Note:
The still picture function is not available for 1080p
(50Hz/60Hz)-input mode.
During still picture mode, PICTURE SIZE feature is
not available. (If you press PICTURE SIZE, still picture
mode will be canceled.)
Note:
During TV or external input mode (except PC input
mode), if there is no signal reception, the TV will change
to standby after approx. 15 minutes (in PC input mode:
2 minutes).
Some functions are activated and de-activated with the
same key. Others require RETURN key for de-activating.
Teletext
Teletext is sent page by page. This unit is able to
automatically store up to 899 pages, but they can
only be accessed once they have been stored. This
can take a few moments.
TXT Language menu allows the installation of the
teletext language.
The languages displayed are only those supported
by the channel.
•
•
•
•
•
•
•
•
•
56V0101A_EN.indd 1156V0101A_EN.indd 11 2/1/11 11:03:46 AM2/1/11 11:03:46 AM
12
Stereo reception in analogue cable
TV channel mode
You can see the each signal type of STEREO,
MONO and Sound multiplex on the TV-screen when
you press .
When 2-channel sound reception is available,
you can select your preferred audio with the
AUDIO.
Each time you press AUDIO, the sound channel will
switch to the alternative channel available.
Note:
In case of bad reception, the stereo sound also can be
disturbed.
The broadcast sound type may not be saved if Power
off.
Channel Lock Setup
1Press MENU. Select Lock option in “Feature”
menu, then press .
2‘Password’ will appear. Press ‘0 0 0 0’ using
the Number buttons (0-9). (This is the default
password.)
Lock: To activate the “Lock” feature in “CH Lock”,
select On with / , then press ENTER.
Change PIN Code:
Old Password
Enter the current password with Number
buttons.
New Password
Enter your chosen new password (please
call Service, if you have forgotten the new
number).
Confirm New Password
After you have entered the new password,
you need to enter the same password again
for confirmation.
•
•
•
3Press RETURN several times to return to the
normal screen.
While toggling between channels, if a channel
which you have set the Lock to On is selected,
the channel will be locked. The password entering
screen will appear. Then enter the password to view
that channel.
•
•
Picture Format
Picture Size
The required picture format can be set by pressing
the PICTURE SIZE button. Press PICTURE SIZE
until the required format is displayed.
You move through the following formats when you
press the button: 4:3, 16:9, Cinema, Real (HDMI
mode only).
Other formats
Press PICTURE SIZE until the desired size is
reached.
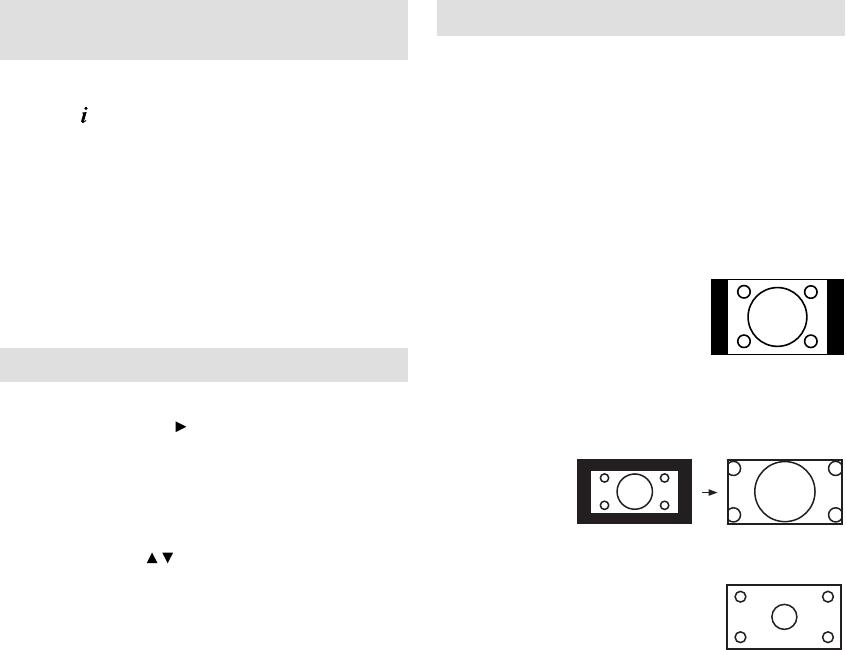
4:3
The picture is displayed in 4:3
format with black bars to the
right and left.
16:9
The width of the picture will be zoomed evenly.
Cinema
Use Cinema to increase a small 4:3 letterbox signal.
4:3 Letterbox picture increased to Cinema format.
Real (HDMI mode only)
All images are displayed on the
TV screen of 16:9 ratio without
overscanning.
Note:
In PC mode, the picture size feature is available only for
16:9 or 4:3 format.
•
56V0101A_EN.indd 1256V0101A_EN.indd 12 2/1/11 11:03:48 AM2/1/11 11:03:48 AM
13
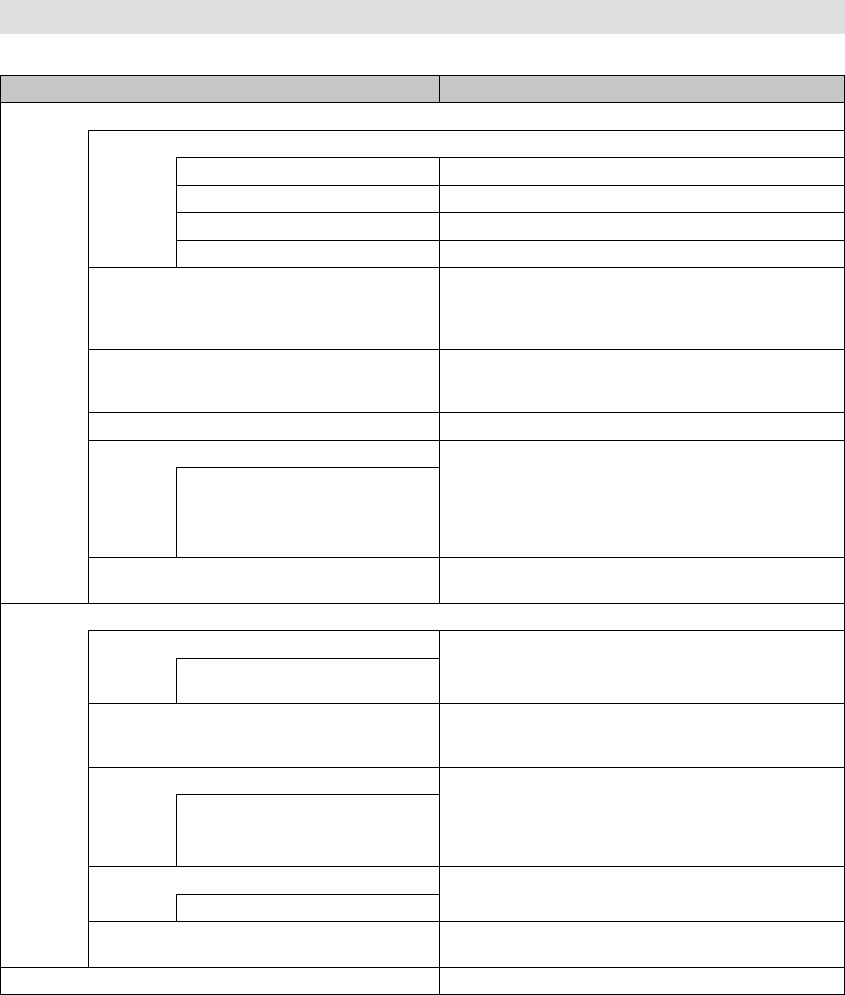
Other convenience functions
You can change the default settings to convenience use.
Selected Items Setup hint
Picture
Picture Mode
Standard Standard picture quality (factory-set)
Dynamic Enhanced picture contrast and sharpness (factory-set)
Natural Intended for bad-quality signals (factory-set)
Favorite Your personal preferences
Brightness / Contrast / Sharpness / Color / Tint
(available only when you selected “Favorite” at
Picture Mode)
You can adjust the picture to your preference.
Tint is available in NTSC-signal mode or Component/
HDMI-signal with 60Hz.
In PC mode, Sharpness and Tint are not available.
•
•
Backlight
(available only when you selected “Favorite” at
Picture Mode)
You can use the Backlight feature to adjust the screen
brightness for improved picture clarity.
Color Temperature Normal (Neutral) / Warm (Reddish) / Cool (Bluish)
Noise Reduction Sometimes it is not possible to input a high-quality HD
signal. The actual signal input is too small and noisy,
e.g. a video film in letterbox format, or a noisy analogue
cable TV signal. This feature can slightly reduce
interferences caused by the faulty input signal.
This option is not available in 1080i/p
and PC mode.•
Off / Low / Middle / High
Reset Select “Reset” to reset Picture options to the factory
preset values.
Sound
Sound Mode You can change the sound mode setting. If you select
“Favorite”, you can change the setting of Bass and
Treble and TV memorizes your setting.
Standard / Movie / Music / Speech
/ Favorite
Bass / Treble / Balance
(Bass / Treble are available only when you
selected “Favorite” at Sound Mode)
You can adjust the sound quality to your preference.
Surround The Surround-Sound feature processes the audio signal
to expand the listening field wider and deeper to create
a ‘pseudo surround-sound’ from the TV’s speakers.
The feature works with stereo signals from TV broadcast
or AV input.
On / Off
Stable Sound This will automatically adjust volume so each channel
and input has the same average volume level.
On / Off
Reset Select “Reset” to reset Sound options to the factory
preset values.
Channel See page 9-10.
56V0101A_EN.indd 1356V0101A_EN.indd 13 2/1/11 11:03:48 AM2/1/11 11:03:48 AM
14
Other convenience functions
Selected Items Setup hint
PC Setup See page 25.
Feature
Language See page 10.
Lock See page 12.
Blue Back On: You can set the TV to automatically change to a
blue screen and mute the sound if the signal is weak or
absent.
On / Off
OSD Timer OSD is cleared automatically as per this setting. But
if you select “Off”, OSD is not cleared automatically.
(Press RETURN to clear.)
“CH LIST” and “INPUT SELECT” OSD will disappear
after 5 seconds in spite of this setting.
•
5/10/15/20/25/30 sec / Off
Sleep Timer Sleep Timer switches the TV to standby after a defined
period of time.
To cancel the Sleep Timer, set to “Off”.
Off/15/30/45/60 Min
Auto Power Off When the Set and Remote key operation are not
operated with specified period by this setting(1/2/4
Hr), the power status is changed to stand by mode
automatically.
Off/1/2/4 Hr
Power On LED To cancel the lighting of indicator (P.5 (2)) during
operation, set to “Off”.
On / Off
HDMI Mode See page 26.
Reset to Default Press to enter the Reset to Default screen.
Press to select “OK”, then press ENTER. Reset the TV
function will now begin, and this unit will automatically
turn off.
TXT Language See page 11.
Software Version If you press , the μ-com’s software version is displayed.
56V0101A_EN.indd 1456V0101A_EN.indd 14 2/1/11 11:03:48 AM2/1/11 11:03:48 AM
15
The loaded Disc (DVD and Audio-CD) will be recognized automatically.
The suitable disc formats are: DVD-Video, DVD-R/-RW (Video format only), Audio CD, Fujicolor CD and
CD-R/CD-RW.
Some CD-R/RW discs may be incompatible.
This unit can play an 8cm disc. Please do not use a
disc adapter. It may cause trouble.
Please do not insert any disc of an irregular shape into
the unit, as it may interfere with the function of the unit.
You may not be able to remove it.
If you tilt or move the unit while DVD or CD discs are
placed inside, your discs may be damaged.
Please do not use after market accessories, such as
a ring protector, as this may cause trouble with the
operation of the unit.
Use only UDF (Universal Disc Format) discs for
recording.
When you play a movie that has been edited with
a DVD recorder (partially deleted, etc), it may be
paused for a moment where edited.
When you play a movie that has been edited with a
DVD recorder or such, it may not be played exactly
as you edited it.
Do not play DVD-ROM, DVD-Audio, CD-G, Video CD, SVCD or Photo CD to prevent accidental erasure of
prerecorded material.
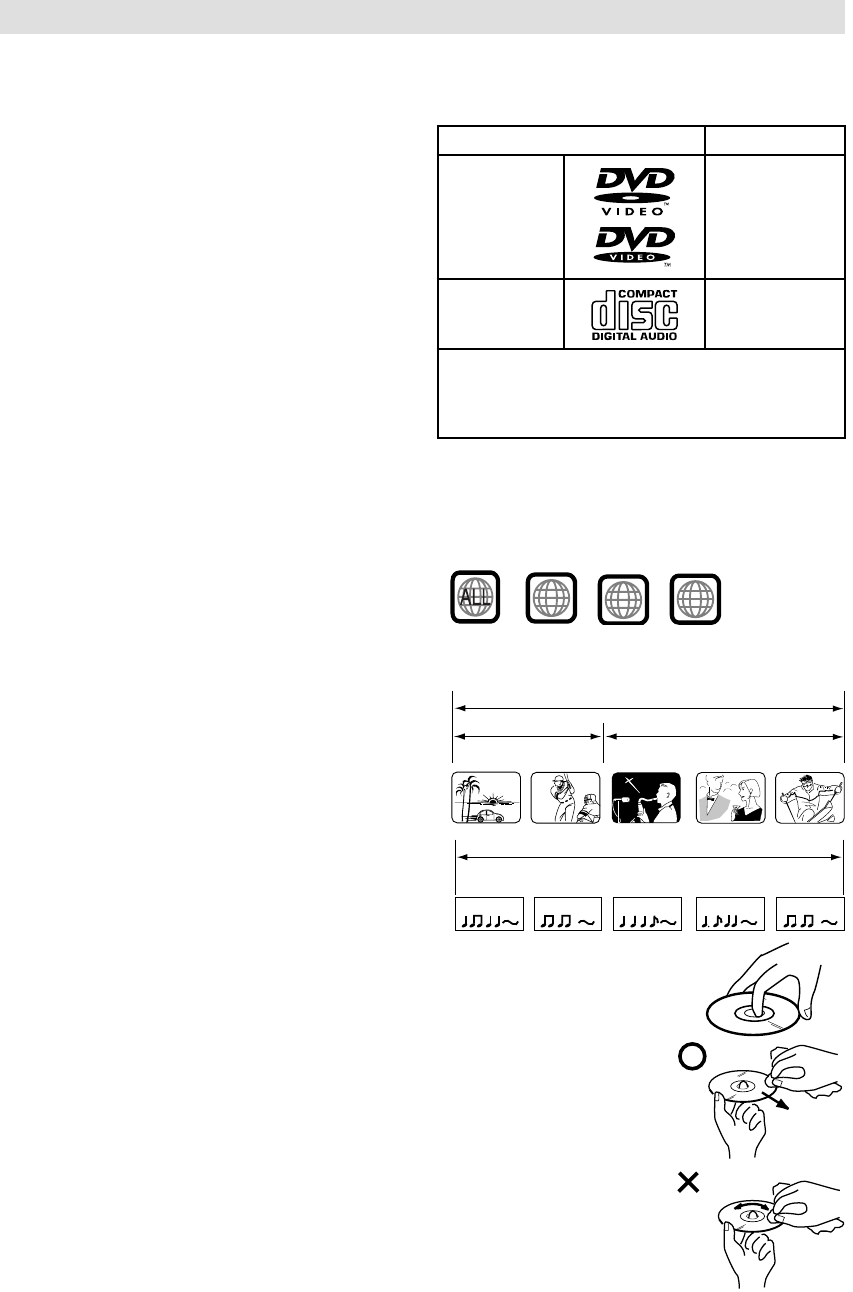
Region code of DVD VIDEO
DVD VIDEO players and DVD VIDEO discs have
their own region code numbers. This system can
play back a DVD VIDEO whose region code number
includes the system’ s region code, which is
indicated on the rear panel of the main unit.
Title
When two or more movies are recorded on a disc, the
disc is divided into two or more sections. Each section is
called a “TITLE”.
Chapter
The titles can be subdivided into many sections.
Each section is called a “CHAPTER”.
Track
An Audio CD can contain several items.
These are assigned to tracks.
Removing Disc from Case
Be sure to hold the edge of disc. Do not touch the
surface of the disc.
Pick up the disc gently from the case.
Do not scratch the disc.
Do not get dirt on the surface of the disc.
Do not stick a label or adhesive tape on the disc.
Do not drop or bend the disc.
Storing Disc
Store the disc in the case to avoid risk of scratches, dirt or damage.
Do not leave disc exposed to direct sunlight or in hot or humid places.
Cleaning Disc
Wipe the disc with a clean, dry cloth from center to edge.
Do not wipe in circular direction.
Do not use liquid or aerosol cleaners.
•
•
•
•
•
•
•
•
•
•
•
•
•
•
•
CHAPTER 1
TITLE1 TITLE2
DVD DISC
CHAPTER 2 CHAPTER 2 CHAPTER 3CHAPTER 1
TRACK 1 TRACK 2 TRACK 3 TRACK 4 TRACK 5
Audio-CD
Disc
Examples:
If a DVD VIDEO with an improper region code
number is loaded, playback cannot start.
Disc type and logo mark content
DVD Video
Audio
+
Video
(moving
pictures)
CD-DA Audio
The following discs are also available.
DVD-R/RW discs of DVD video format and
MP3/WMA/JPEG.
CD-R/RW discs of MP3/WMA/JPEG.
•
•
2
25
23
45
56V0101A_EN.indd 1556V0101A_EN.indd 15 2/1/11 11:03:49 AM2/1/11 11:03:49 AM

16
Disc
PC-created disc compatibility
You may not be able to play discs recorded
using a personal computer or recorder for disc
compatibilities, scratches or marks on the disc,
dirty lenses of the unit or condensation and so on.
Discs recorded using a personal computer may
not be playable in this unit due to the setting of
the application software used to create the disc.
In these particular instances, check with the
software publisher for more detailed information.
•
•
Playable files
ISO 9660 Level 1 or 2 compliant.
Romeo and Joliet file systems are both
compatible with this player.
DRM (Digital Rights Management) protected files
will not play in this player.
For detailed information, please see the
instruction manuals or help files that came with
your PC and/or software.
File structure (may differ): Up to 299 folders on a
disc; up to 648 files within each folder
Folder and file names can be displayed as long
as they are typed in alphabets and numbers. If
folder and file names are other than alphabets
and numbers, they may be replaced and
displayed as “_”. Garbled characters may also be
displayed in this case.
•
•
•
•
Playing image files
JPEG files recorded in DVD-R/-RW and CD-R/-RW
can be played.
JPEG file compatibility
Image files should be saved in JPEG format.
Files recorded in Fuji Colour CD or CD-R/-RW
can be played.
Compatible formats: Baseline JPEG and EXIF
2.2* still image files up to a resolution of 3072 x
2048.
*File format used by digital still cameras.
Files with extensions .jpg or .JPG can be played.
Progressive JPEG formatted files do not work.
It may take some more time to start to play larger
files than usual.
JPEG files with different aspect ratio may be
displayed with black bands (either vertical or
horizontal).
•
•
•
•
•
•
•
Playing Audio files
WMA and MP3 files recoded in DVD-R/-RW, CD-
R/-RW can be played.
Windows Media Audio (WMA) compatibility
WMA is an acronym for Windows Media Audio
and refers to an audio compression technology
developed by Microsoft Corporation.
You can encode your files by using Windows
Media Player Ver.7, 7.1, Windows Media Player
for Windows XP or Windows Media Player 9
Series.
When encoding your files, use only applications
approved by Microsoft Corporation. If you use
non-approved application, it may not work
properly.
This unit is compatible with audio files recorded
with the following sampling frequency: 32 kHz,
44.1 kHz and 48 kHz.
It is not compatible with loss-less encoding.
Files with extensions .wma or .WMA can be
played.
•
•
•
•
•
•
Playing MP3 (MPEG-1 Audio Layer-3) files
This unit is compatible with audio files recorded
with the following sampling frequency: 32 kHz,
44.1 kHz and 48 kHz.
Files with extensions .mp3 or .MP3 can be
played.
For the best quality of sound, 128 kbps or higher
bit rate is recommended.
•
•
•
Copy Control CD (CCCD)
This product is designed to conform to CD-DA
(Compact Disc Digital Audio). Any other discs than
CD-DA are not guaranteed with their operation and
performance in this product.
56V0101A_EN.indd 1656V0101A_EN.indd 16 2/1/11 11:03:50 AM2/1/11 11:03:50 AM

17
To pause playback (still mode)
Press during playback.
To resume normal playback, press PLAY ( ).
The sound is muted during still mode.•
To stop playback
Press .
To remove the disc
Press .
Remove the disc after the disc comes out.
Using inferior discs may result that you cannot
remove the disc. In this case, press PLAY ( ) to
play the disc and then press EJECT .
•
Note:
If a non-compatible disc is loaded, “Can’t play disc”
or “Incompatible disc region number Can’t play disc”
will appear on the TV screen according to the type of
loaded disc. In this case, check your disc again (see
page 15).
Some discs may take a minute or so to start playback.
When you set a single-faced disc label backwards (i.e.
the wrong way), “Loading” will appear on the display for
a few minutes and then “Can’t play disc” will continue to
be displayed.
Some playback operations of DVDs may be
intentionally fixed by software producers. Since this unit
plays DVDs according to the disc contents the software
producers designed, some playback features may not
be available. Also refer to the instructions supplied with
the DVDs.
Do not move the unit during playback. Doing so may
damage the disc.
In many instances, a menu screen will appear after
playback of a movie is completed. Prolonged display
of an on-screen menu may damage your television
set, permanently etching that image onto its screen. To
avoid this, be sure to press (Power) on your remote
control once the movie is completed.
There may be a slight delay between the button is
pressed and the function activates.
•
•
•
•
•
•
•
Playing in fast reverse or fast forward
directions (DVD/Audio CD)
Press or during playback.
: Fast reverse playback
: Fast forward playback
Each time you press or , the playback
speed changes.
To resume normal playback
Press PLAY ( ).
Note:
The unit mutes sound during reverse and forward scan
of DVD discs.
The playback speed may differ depending on the disc.
•
•
Playing frame by frame (DVD)
Press during playback.
Each time you press or , the picture
advances one frame.
To resume normal playback
Press PLAY ( ).
Note:
The sound is muted during frame by frame playback.•
Playing a disc
This section shows you the basics on how to
play a disc.
Basic playback (DVD/Audio CD)
Preparation
Make sure that the (Power) key on the unit is
pressed (ON). (The Standby/On indicator lights up.)
1Press TV/DVD on the remote control to select
the DVD mode.
2Place the disc
in the disc slot
with the label
side facing
forward. (If
the disc has a
label.)
Do not place a disc which is unplayable in
this unit.
•
3On the TV-screen, “ ” changes to “Loading”
and then playback commences.
A menu screen will appear on the TV screen
if the disc has a menu feature.
Press / / / to select title, then press
ENTER.
Title is selected and play commences.
•
•
4Press to end playback.
The unit can record where you stop a video,
but it depends on a disc you are using.
Press PLAY ( ) to resume a playback point.
The unit can store a memory of stopped point
of last five discs that you have played. When
one of these discs is next loaded, you can
resume playback from where you stopped
playing last time.
If you press again (“Resume off” appears
on the screen.), the unit will clear the memory
of its stopped point.
It is only DVD videos that a stopped point can
be stored in the unit with.
You cannot save a stopped point for some
discs.
If a number of discs played and stored in
the unit exceeds five, a new memory will
overwrite the old stored memory.
•
•
•
•
To start playback in the stop mode
Press PLAY ( ).
Note:
If the unit does not operate property:
Static electricity, etc., may affect the player’s
operation.
Disconnect the AC power cord once, then
connect it again.
If a disc is inserted during some modes other than
DVD mode, it may switch to DVD mode and then
playback may be begun automatically.
•
•
56V0101A_EN.indd 1756V0101A_EN.indd 17 2/1/11 11:03:50 AM2/1/11 11:03:50 AM
18
Playing in slow-motion (DVD)
Press or during playback.
Each time you press or , the slow-motion
speed changes.
To resume normal playback
Press PLAY ( ).
Note:
The sound is muted during slow-motion playback.•
Locating a chapter or track (DVD/Audio CD)
Press or repeatedly to display the chapter or
track number you want.
Press to playback starts from the selected
chapter or track.
Press to locate succeeding chapters or tracks.
Playback starts from the beginning of the current
chapter or track.
Note:
A prohibition message “Depending on the
disc, this operation may be prohibited” or “This
operation can’t be performed” may appear at the
screen. This message means either the feature
you tried is not available on the disc, or the unit
cannot access the feature at this time. This does
not indicate a problem with the unit.
•
Zooming (DVD)
This unit will allow you to zoom in on the frame
image. You can then make selections by switching
the position of the frame.
1Press ZOOM during playback.
The centre part of the image will be zoomed in.
Each press of ZOOM will change the Zoom 2x
and 4x.
2Press / / / to view a different part of the
frame.
You may move the frame from the centre
position
to UP, DOWN, LEFT or RIGHT direction.
3In the zoom mode, press ZOOM repeatedly to
return to a 1:1 view.
Note:
You can select the Pause or Slow in the zoom
mode.
Some discs may not respond to zoom feature.
•
•
Locating desired scene (DVD/Audio
CD)
Use the title, chapter or track recorded on the disc
to locate the desired point to playback.
To check the title and chapter/track, press .
1Press Number buttons (0–9) to input the
number during playback or stop mode.
If you input a wrong number, press CANCEL.
Refer to the package supplied with the disc
to check the numbers.
•
•
2Press ENTER. Playback starts.
When you change the title, playback starts
from Chapter 1 of the selected title.
Some discs may not work in the above
operation.
•
•
Changing Soundtrack Language
(DVD)
You can select the language when you play a
multilingual disc.
1Press AUDIO during
playback.
The current soundtrack
language will appear.
Current/Total
Audio 1/2 English Dolby Digital 2/0CH
2Press AUDIO
repeatedly until the
desired language is
selected.
Current/Total
Audio 2/2 French Dolby Digital 2/0CH
The on screen display will disappear after a
few seconds.
•
Subtitles (DVD)
When playing back a disc recorded with subtitles,
you can select the subtitle language or turn the
subtitle off.
1Press repeatedly
during playback until
the desired language is
selected.
Current/Total
Subtitle 1/2 English
2To turn off the subtitle,
press until “Off”
appears.
Subtitle Off
The on screen display will disappear after a
few seconds.
•
Note:
If the desired language is not heard after pressing the
button several times, the language is not recorded on
the disc.
The selected soundtrack language is cancelled when
you eject the disc. The initial default language or
available language will be heard if the disc is played
back again.It does not go back to the initial default
language if the unit has a resuming memory.
Depending on the DVD, you may not be able to change
subtitles, or to turn subtitles on or off.
While playing a DVD, the subtitle may change when you
loaded or eject the disc.
In some cases, a selected subtitle language may not be
changed immediately.
There will be no sound output if DTS audio is selected
on the disc. In this case, select other usable audio
format, such as Dolby Digital, PCM, or etc.
•
•
•
•
•
•
56V0101A_EN.indd 1856V0101A_EN.indd 18 2/1/11 11:03:51 AM2/1/11 11:03:51 AM
19
Changing angles (DVD)
When playing back a disc recorded with multi-angle
facility, you can change the angle that you are
viewing the scene from.
1Press ANGLE during
playback.
The current angle will
appear.
Current/Total
Angle 1/2
2Press ANGLE repeatedly until the desired
angle is selected.
Note:
Depending on the DVD, you may not be able
to change the angles even if multi-angles are
recorded on the DVD.
•
Title selection (DVD)
Two or more titles are recorded on some discs.
If the title menu is recorded on the disc, you can
select the desired title.
1Press TOP MENU during playback.
Title menu appears on the screen.
2Press /// to select the desired title.
3Press ENTER.
The playback of the selected title will start.
Note:
Some DVDs allow you to select the disc contents
using the menu.
When you playback these DVDs, you can select
the subtitle language and soundtrack language,
etc. using the menu.
•
•
DVD menu (DVD)
Two or more titles are recorded on some discs.
If the title menu is recorded on the disc, you can
select the desired title.
1Press DVD MENU during playback.
The DVD menu appears on the screen.
Press DVD MENU again to resume playback
at the scene when you pressed DVD MENU.
•
2Press / / / to select the desired item.
3Press ENTER.
The menu continues to another screen. Repeat
steps 2 and 3 to set the item completely.
Note:
Depending on the DVD, you may not be able to
resume playback from the scene point when you
press DVD MENU.
•
Disc status
With press of , the status of the disc will appear
on the screen. To cancel the display, press
repeatedly.
Display messages may change at every time when you
press for some discs or files.
•
Using HOME MENU
Playing a disc
1Press SETUP during stop mode.
HOME MENU will appear.
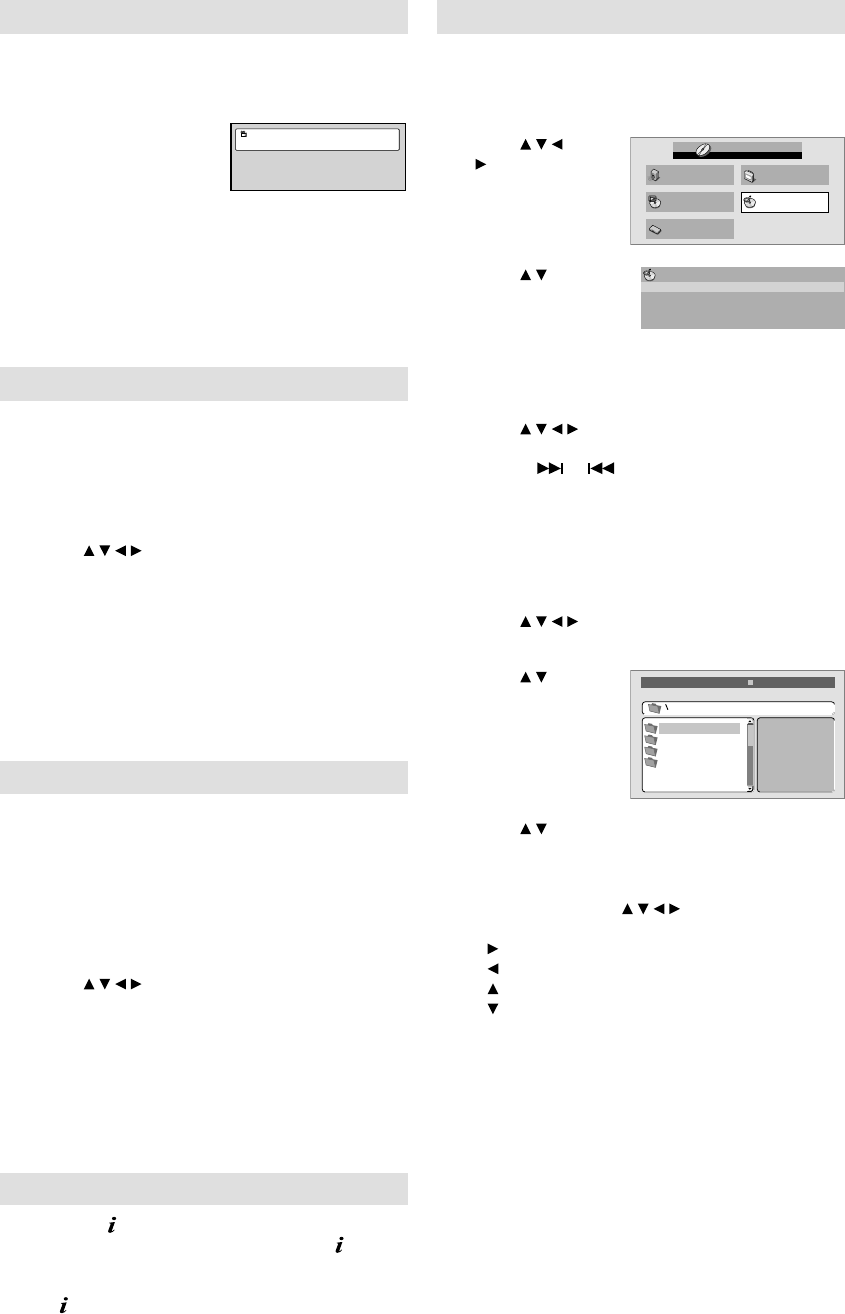
2Press //
/ to select “Disc
Navigator”, then
press ENTER.
Audio Settings Video Adjust
Disc Navigator
Play Mode
Initial Settings
HOME MENU
DVD
3Press / to
select desired
option, then press
ENTER.
Disc Navigator
Title
Chapter
Some discs may not work Disc Navigator.
Depending on a disc, you can select Title,
Chapter, or both.
•
•
4Press / / / or Number Buttons (0-9) to
select Title or Chapter, then press ENTER.
Press or to move next/previous page.
Press RETURN to go to previous step.
•
•
Playing a file
1Press SETUP during stop mode.
HOME MENU will appear.
2Press /// to select “Disc Navigator”, then
press ENTER.
3Press / to
select folder, then
press ENTER.Folder1
Folder2
Folder3
Folder4
00:00/ 00:00 0kbps
4Press / to select file, then press ENTER.
If you select JPEG file, unit shows the
pictures one after another automatically.
You can rotate the picture in JPEG playback
using ANGLE or /// as follows.
ANGLE: Rotate clockwise by 90-degree.
: Rotate clockwise by 90 degree.
: Rotate counterclockwise by 90-degree.
: Turn around up and down.
: Turn around right and left.
Press RETURN to return to previous step
screen.
Press SETUP to exit the menu.
Note:
When music files and JPEG files are
recorded in one disc, you can play
simultaneously. Please select the music file
then select the JPEG file.
•
•
•
•
•
56V0101A_EN.indd 1956V0101A_EN.indd 19 2/1/11 11:03:52 AM2/1/11 11:03:52 AM

20
Play mode
A-B repeat playback
A-B repeat playback allows you to repeat selection
between two selected points.
1Press PLAY
MODE during
playback.
Play Mode
screen will
appear.
A(Start Point)
B(End Point)
Off
A-B Repeat
Repeat
Random
Program
Search Mode
Play Mode
2Press / to select “A-B Repeat”, then press
or ENTER.
3Press / to select “A(Start Point)”, then press
ENTER. The start point is selected.
4Press / to select “B(End Point)”, then press
ENTER.
The end point is selected. Playback starts
at the point that you selected. Playback
stops at the end point and returns to Point A
automatically, then starts again.
To resume normal playback
Select “Off” in step 3.
Note:
Some discs may not work Play mode function.
A-B Repeat playback does not work with MP3/
WMA CD.
•
•
Repeat playback
1Press PLAY MODE during playback.
Play Mode screen will appear.
2Press / to select “Repeat”, then press or
ENTER.
3Press / to select desired repeat option, then
press ENTER.
The unit automatically starts repeat playback
after finishing the current title or chapter.
To resume normal playback
Select “Repeat Off” in step 3.
Note:
Some discs may not work with the repeat operation.
Random playback
1Press PLAY MODE during playback.
Play Mode screen will appear.
2Press / to select “Random”, then press or
ENTER.
3Press / to select desired random playback
option, then press ENTER.
The unit automatically starts random playback.
To resume normal playback
Select “Random Off” in step 3.
Note:
During Random playback, it may repeat the same
title, chapter or track.
In stop mode, you can also enter Play Mode
screen by selecting “Play Mode” in HOME MENU.
•
•
Program playback
1Press PLAY MODE during playback.
Play Mode screen will appear.
2Press / to select “Program”, then press or
ENTER.
3Press / to
select “Create/
Edit”, then press
ENTER. “Create/
Edit” display
differs, depending
on discs or files.
Program Step
01. 01
02.
03.
04.
05.
06.
07.
08.
Title 1-38
Title 01
Title 02
Title 03
Title 04
Title 05
Title 06
Title 07
Title 08
Chapter 1-004
Chapter 001
Chapter 002
Chapter 003
Chapter 004
Program Current Title:02 Chapter:001
4Press / / / to select Title, Chapter or Track,
then press ENTER.
When you add a program, find where you
want to add it (Program Step) and select
Title, Chapter or Track then press ENTER. (It
will be added to the bottom if File is added.)
To go to previous step, press RETURN.
To delete a program, select Program Step
that you want to delete and press CANCEL.
•
•
•
5Press PLAY ( ).
To play existing programmed contents, select
“Playback Start” from Play Mode screen and
press ENTER.
To delete all programmed contents, select
“Program Delete” in Play Mode screen and
press ENTER.
Note:
You can repeat the programmed contents.
Select “Program Repeat” from “Repeat” in the
Play Mode screen during Program playback.
In stop mode, you can also enter Play Mode
screen by selecting “Play Mode” in HOME
MENU.
•
•
•
•
Locating desired scene
1Press PLAY MODE during playback.
Play Mode screen will appear.
2
Press / to select “Search Mode”, then press
or ENTER
.
3Press / to select desired search mode
option, then press or ENTER.
Search Mode options differs, depending on
discs or files.
•
4Input Title,
Chapter, Track or
Folder number
or Time by using
Number buttons
(0-9) and press
ENTER.
0 0 1
Title Search
Chapter Search
Time Search
Input Chapter
A-B Repeat
Repeat
Random
Program
Search Mode
Play Mode
For instance, if you want to enter 1hr 4min
(64:00), input 6, 4, 0, 0.
•
Note:
You can locate desired scene in Menu screen for
some DVD video.
In stop mode, you can also enter Play Mode
screen by selecting “Play Mode” in HOME MENU.
•
•
56V0101A_EN.indd 2056V0101A_EN.indd 20 2/1/11 11:03:53 AM2/1/11 11:03:53 AM
21
Audio Settings menu
The Audio Settings menu offers features for
adjusting the way discs sound.
1Press SETUP during stop mode.
HOME MENU will appear.
2Press / / /
to select “Audio
Settings”, then
press ENTER.
Audio Settings Video Adjust
Disc Navigator
Play Mode
Initial Settings
HOME MENU
DVD
3Press / /
/ to setting the
option, then press
ENTER.
Audio Settings
Equalizer
Audio DRC
Dialog
Off
Rock
Pop
Live
Dance
Techno
Classic
Soft
4Press SETUP to save the setting.
Equalizer
Select the most suitable setting to match a
category of music that you are listening to.
Audio DRC
Loud sound level goes down and quiet sound
level goes up while playing. This is useful, for
instance, when you watch a film in the late
night.
It only works with Dolby Digital Sound.
Dialog
Adjust setting when you cannot hear dialogs
very well.
Note
It may not be very effective for some discs or
files.
•
•
•
Video Adjust menu
From the Video Adjust menu you can adjust various
settings that affect how the picture is presented.
1Press SETUP during stop mode.
HOME MENU will appear.
2Press / //
to select “Video
Adjust”, then
press ENTER.
Audio Settings Video Adjust
Disc Navigator
Play Mode
Initial Settings
HOME MENU
DVD
3Press / /
/ to setting the
option, then press
ENTER.
Sharpness
Brightness
Contrast
Gamma
Hue
Chroma Level
Fine
Standard
Soft
Video Adjust
4Press SETUP to save the setting.
Sharpness
Adjust sharpness of images.
Brightness
Adjust brightness of images.
Contrast
Adjust a ratio of brightness between the brightest
part and the darkest part.
Gamma
Emphasize dark part of images.
Hue
Adjust a balance between green and red.
Chroma Level
Adjust color density. It is effective with animation or
something with high color density.
Note
It may not be very effective for some discs or files.•
Customizing The Function Settings
You can change the default settings to
customize performance to your preference.
Setting procedure
1Press SETUP in stop mode.
HOME MENU will appear.
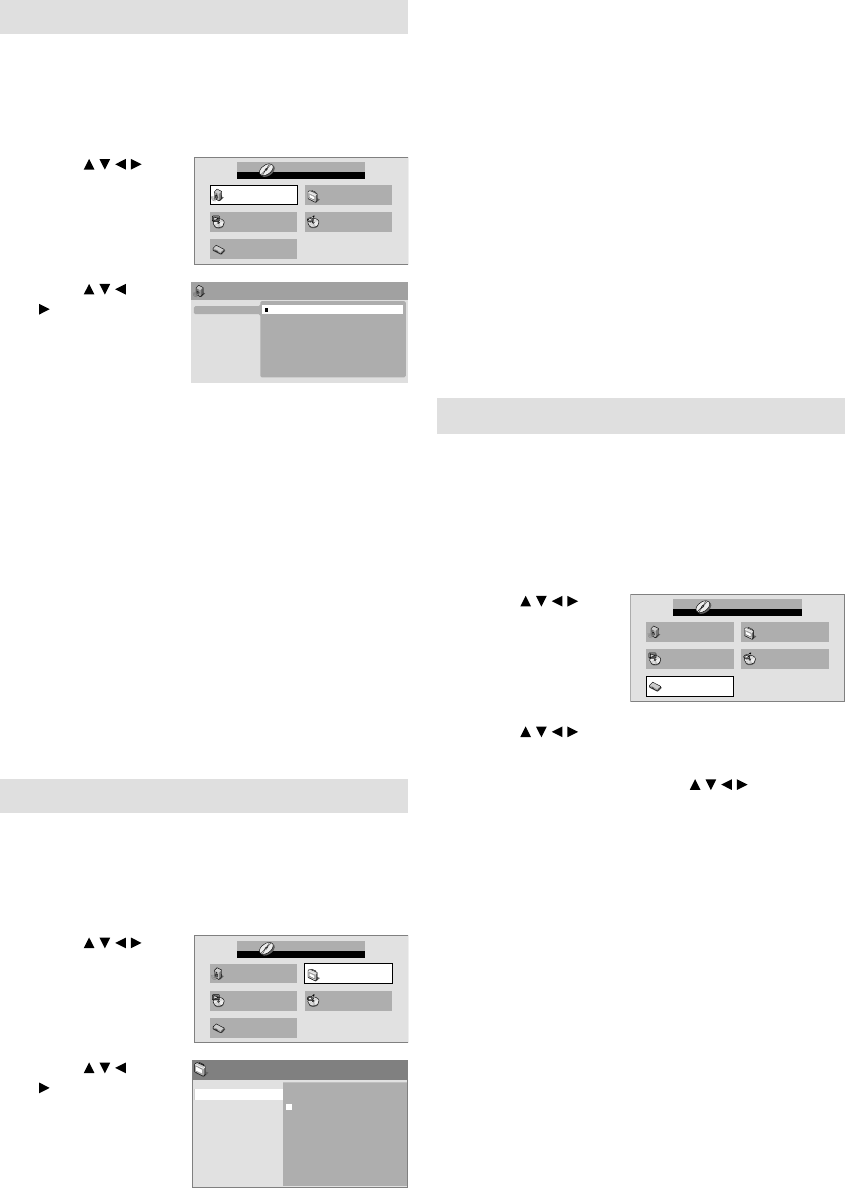
2Press ///
to select “Initial
Settings”, then
press ENTER.
Audio Settings Video Adjust
Disc Navigator
Play Mode
Initial Settings
HOME MENU
DVD
3Press / / / to select the desired option, then
press ENTER.
4Change the selection using / / / or ENTER,
by referring to the corresponding page 22.
Repeat steps 3 and 4 to change other option.•
5To clear HOME MENU screen, press SETUP.
56V0101A_EN.indd 2156V0101A_EN.indd 21 2/1/11 11:03:55 AM2/1/11 11:03:55 AM

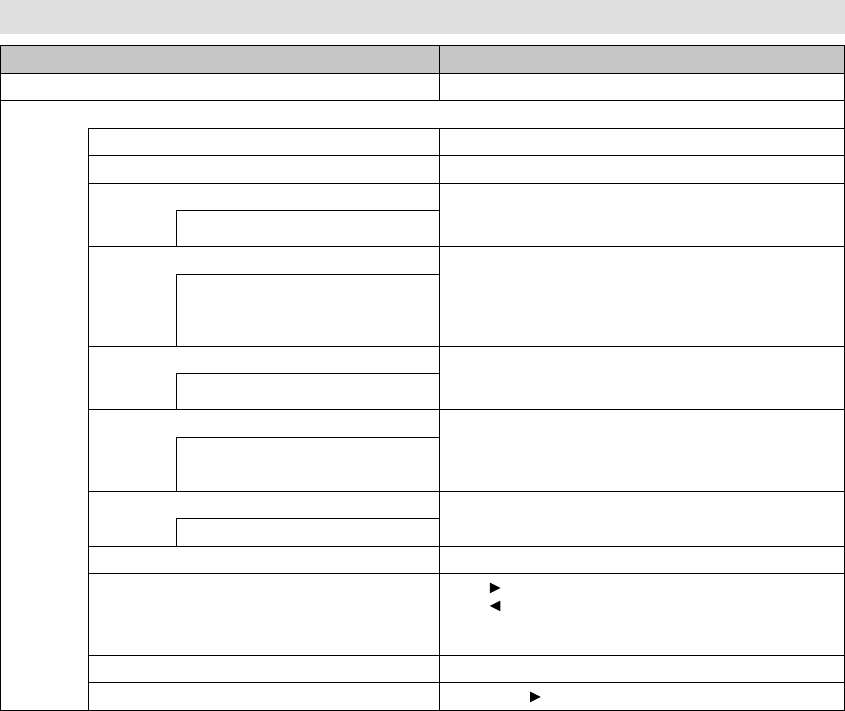
22
Setting Option Setup hint
Video Output settings
TV Screen 4:3 (Letter Box)
Set Picture Size to Natural. Widescreen movies are shown with black
bars top and bottom.
4:3 (Pan & Scan)
Set Picture Size to Natural. Widescreen movies are shown with the sides
cropped so that the image fills the screen.
16:9 (Wide) Set if you have a widescreen TV.
NTSC Out NTSC Display the picture of NTSC discs as NTSC-TV system.
NTSC > PAL Display the picture of NTSC discs converting to PAL-TV system.
Language settings
Audio Language English If there is an English soundtrack on the disc then it will be played.
Languages as
displayed
If there is the language selected on the disc, then it will be played.
Other Language Select to choose a language other than the ones displayed. (see
Language Code List on page 24)
Subtitle Language English
If there is an English subtitle on the disc, then it will be displayed.
Languages as
displayed
If there is the subtitle language selected on the disc, then it will be
displayed.
Other Language Select to choose a language other than the ones displayed. (see
Language Code List on page 24)
DVD Menu Lang. w/Subtitle Lang. DVD disc menus will be displayed in the same language as your
selected subtitle language, if possible.
Languages as
displayed
DVD disc menus will be displayed in the selected language, if possible.
Other Language Select to choose a language other than the ones displayed. (see
Language Code List on page 24)
Subtitle Display On Subtitles are displayed according to your selected subtitle language
(see above).
Off Subtitles are always off by default when you play a DVD disc (note that
some discs override this setting).
Display settings
OSD Language On-screen displays are shown in the language selected.
Angle Indicator On
A camera icon is displayed on-screen during multi-angle scenes on a DVD disc.
Off No multi-angle indication is shown.
Options settings
Parental Lock See page 23.
Customizing The Function Settings
56V0101A_EN.indd 2256V0101A_EN.indd 22 2/1/11 11:03:56 AM2/1/11 11:03:56 AM
23
Parental Control
Some discs are specified as not suitable for
children. Such discs can be limited not to playback
with the unit.
How to into the Parental menu
1Press SETUP in stop mode.
HOME MENU will appear.
2Press / / /
to select “Initial
Settings”, then
press ENTER.
Audio Settings Video Adjust
Disc Navigator
Play Mode
Initial Settings
HOME MENU
DVD
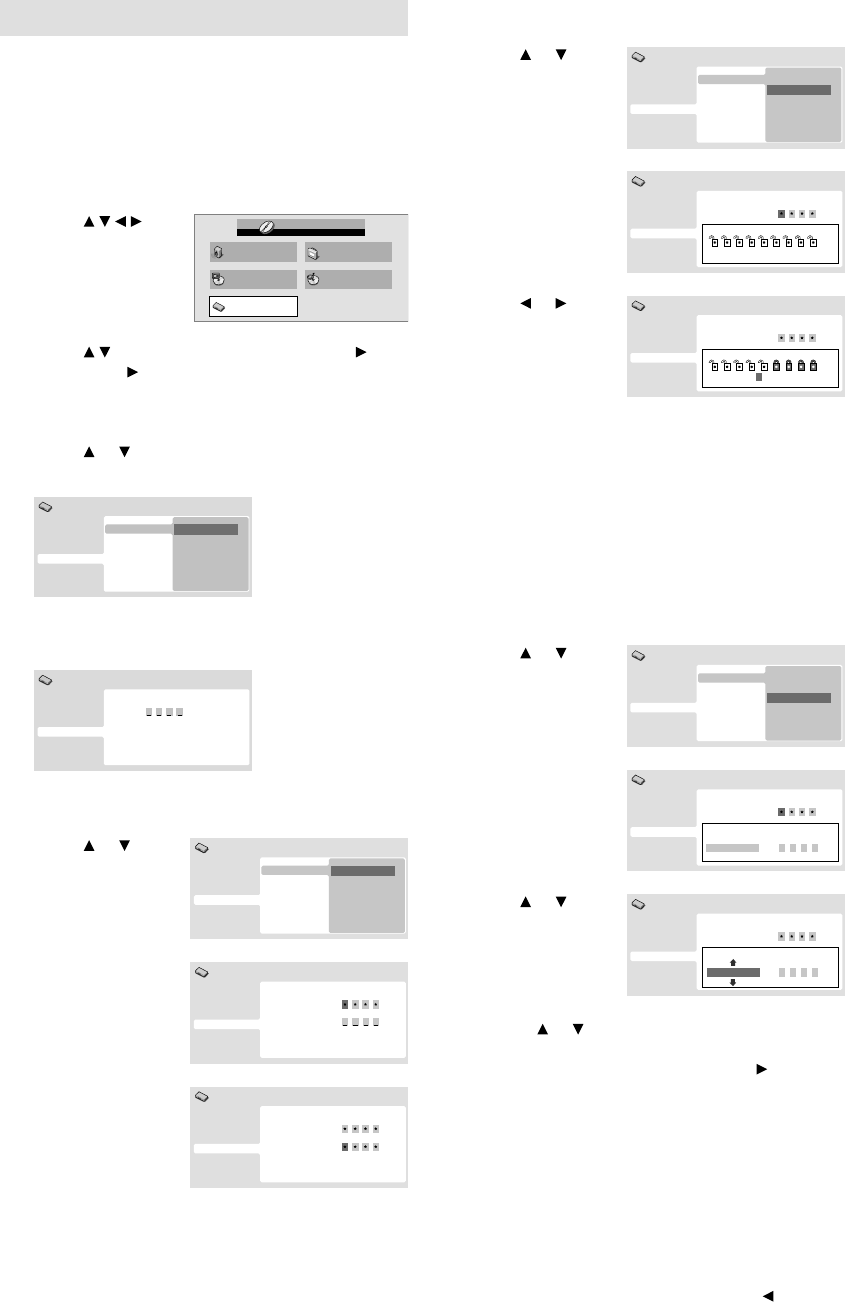
3Press / to select “Options”, then press .
Then press to enter the Parental Lock menu.
Set Password
1Press or to select “Password”, then press
ENTER.
Parental Lock
Initial Settings
Password
Level Change
Country Code
Video Output
Language
Display
Options
2Press Number buttons (0–9) to input the
password, then press ENTER.
Video Output
Language
Display
Options
Initial Settings
Parental Lock: Register Code Number
Change Password
1Press or to
select “Password
Change”, then
press ENTER.
Parental Lock
Video Output
Language
Display
Options
Initial Settings
Password Change
Level Change
Country Code
2Press Number
buttons (0–9) to
input the current
password, then
press ENTER.
Initial Settings
Video Output
Language
Display
Options
Parental Lock: Password Change
Password
New Password
3Press Number
buttons (0–9)
to input the
new password.
Press ENTER.
Now your new
password has
been set. Be sure
to remember this
number!
Video Output
Language
Display
Options
Parental Lock: Password Change
Password
New Password
Initial Settings
Level Change
1Press or to
select “Level
Change”, then
press ENTER.
Video Output
Language
Display
Options
Parental Lock
Initial Settings
Password Change
Level Change
Country Code
2Press Number
buttons (0–9) to
input the current
password, then
press ENTER.
Video Output
Language
Display
Options
1 2 3 4 5 6 7 8 Off
Initial Settings
Parental Lock: Level Change
Password
3Press or to
select from the
level 1 to level
8. The limitation
will be more
severe as the
level number is
lower. Then press
ENTER.
Video Output
Language
Display
Options
1 2 3 4 6 7 8 Off
Initial Settings
Parental Lock: Level Change
Password
5
Level 1: DVD software for adults cannot be
played back.
Level 8: Virtually all DVD software can be
played back.
Level Off: The parental control setting does
not function.
Country Code
1Press or to
select “Country
Code”, then press
ENTER.
Video Output
Language
Display
Options
Parental Lock
Initial Settings
Password Change
Level Change
Country Code
2Press Number
buttons (0–9) to
input the current
password, then
press ENTER.
Video Output
Language
Display
Options
Initial Settings
Parental Lock: Change Country Code
Password
Country Code List Code
us 2119
3Press or to
select the input
mode from
“Country Code
List” or “Code”.
Video Output
Language
Display
Options
Initial Settings
Parental Lock: Change Country Code
Password
Country Code List Code
2119
us
When you selected “Country Code List”:
Press or to select Country Code, then
press ENTER.
When you selected “Code”: Press then
use the Number buttons (0-9) to enter the
4-digit Country Code. Press ENTER. (see
Country/Area Code List on page 24)
•
•
Note:
Depending on the discs, the unit cannot limit
playback.
Some discs may not be encoded with
specific rating level information though its
disc jacket says “adult.” For those discs, the
age restriction will not work.
If you input a wrong number, press , then
input correct number.
•
•
•
56V0101A_EN.indd 2356V0101A_EN.indd 23 2/1/11 11:03:57 AM2/1/11 11:03:57 AM

24
Language Code List
Language (Language code letter), Language code
Japanese (ja), 1001
English (en), 0514
French (fr), 0618
German (de), 0405
Italian (it), 0920
Spanish (es), 0519
Chinese (zh), 2608
Dutch (nl), 1412
Portuguese (pt), 1620
Swedish (sv), 1922
Russian (ru), 1821
Korean (ko), 1115
Greek (el), 0512
Afar (aa), 0101
Abkhazian (ab), 0102
Afrikaans (af), 0106
Amharic (am), 0113
Arabic (ar), 0118
Assamese (as), 0119
Aymara (ay), 0125
Azerbaijani (az), 0126
Bashkir (ba), 0201
Byelorussian (be), 0205
Bulgarian (bg), 0207
Bihari (bh), 0208
Bislama (bi), 0209
Bengali (bn), 0214
Tibetan (bo), 0215
Breton (br), 0218
Catalan (ca), 0301
Corsican (co), 0315
Czech (cs), 0319
Welsh (cy), 0325
Danish (da), 0401
Bhutani (dz), 0426
Esperanto (eo), 0515
Estonian (et), 0520
Basque (eu), 0521
Persian (fa), 0601
Finnish (fi), 0609
Fiji (fj), 0610
Faroese (fo), 0615
Frisian (fy), 0625
Irish (ga), 0701
Scots-Gaelic (gd), 0704
Galician (gl), 0712
Guarani (gn), 0714
Gujarati (gu), 0721
Hausa (ha), 0801
Hindi (hi), 0809
Croatian (hr), 0818
Hungarian (hu), 0821
Armenian (hy), 0825
Interlingua (ia), 0901
Interlingue (ie), 0905
Inupiak (ik), 0911
Indonesian (in), 0914
Icelandic (is), 0919
Hebrew (iw), 0923
Yiddish (ji), 1009
Javanese (jw), 1023
Georgian (ka), 1101
Kazakh (kk), 1111
Greenlandic (kl), 1112
Cambodian (km), 1113
Kannada (kn), 1114
Kashmiri (ks), 1119
Kurdish (ku), 1121
Kirghiz (ky), 1125
Latin (la), 1201
Lingala (ln), 1214
Laothian (lo), 1215
Lithuanian (lt), 1220
Latvian (lv), 1222
Malagasy (mg), 1307
Maori (mi), 1309
Macedonian (mk), 1311
Malayalam (ml), 1312
Mongolian (mn), 1314
Moldavian (mo), 1315
Marathi (mr), 1318
Malay (ms), 1319
Maltese (mt), 1320
Burmese (my), 1325
Nauru (na), 1401
Nepali (ne), 1405
Norwegian (no), 1415
Occitan (oc), 1503
Oromo (om), 1513
Oriya (or), 1518
Panjabi (pa), 1601
Polish (pl), 1612
Pashto, Pushto (ps),
1619
Quechua (qu), 1721
Rhaeto-Romance (rm),
1813
Kirundi (rn), 1814
Romanian (ro), 1815
Kinyarwanda (rw), 1823
Sanskrit (sa), 1901
Sindhi (sd), 1904
Sangho (sg), 1907
Serbo-Croatian (sh),
1908
Sinhalese (si), 1909
Slovak (sk), 1911
Slovenian (sl), 1912
Samoan (sm), 1913
Shona (sn), 1914
Somali (so), 1915
Albanian (sq), 1917
Serbian (sr), 1918
Siswati (ss), 1919
Sesotho (st), 1920
Sundanese (su), 1921
Swahili (sw), 1923
Tamil (ta), 2001
Telugu (te), 2005
Tajik (tg), 2007
Thai (th), 2008
Tigrinya (ti), 2009
Turkmen (tk), 2011
Tagalog (tl), 2012
Setswana (tn), 2014
Tonga (to), 2015
Turkish (tr), 2018
Tsonga (ts), 2019
Tatar (tt), 2020
Twi (tw), 2023
Ukrainian (uk), 2111
Urdu (ur), 2118
Uzbek (uz), 2126
Vietnamese (vi), 2209
Volapük (vo), 2215
Wolof (wo), 2315
Xhosa (xh), 2408
Yoruba (yo), 2515
Zulu (zu), 2621
Country/Area Code List
Country/Area, Country/Area code, Country/Area code letter
Argentina, 0118, ar
Australia, 0121, au
Austria, 0120, at
Belgium, 0205, be
Brazil, 0218, br
Canada, 0301, ca
Chile, 0312, cl
China, 0314, cn
Denmark, 0411, dk
Finland, 0609, fi
France, 0618, fr
Germany, 0405, de
Hong Kong, 0811, hk
India, 0914, in
Indonesia, 0904, id
Italy, 0920, it
Japan, 1016, jp
Republic of Korea,
1118, kr
Malaysia, 1325, my
Mexico, 1324, mx
Netherlands, 1412, nl
New Zealand, 1426, nz
Norway, 1415, no
Pakistan, 1611, pk
Philippines, 1608, ph
Portugal, 1620, pt
Russian Federation,
1821, ru
Singapore, 1907, sg
Spain, 0519, es
Sweden, 1905, se
Switzerland, 0308, ch
Taiwan, 2023, tw
Thailand, 2008, th
United Kingdom,
0702, gb
USA, 2119, us
56V0101A_EN.indd 2456V0101A_EN.indd 24 2/1/11 11:04:00 AM2/1/11 11:04:00 AM
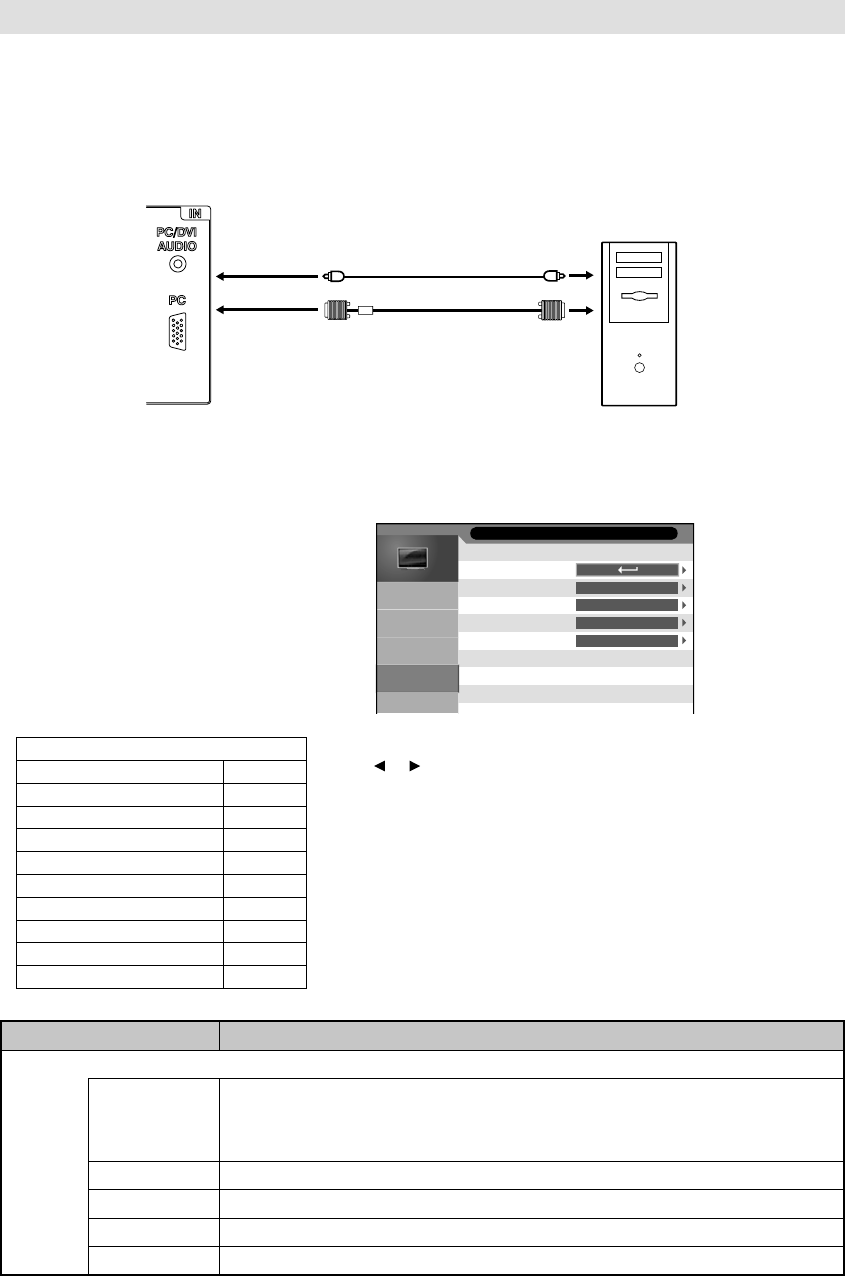
25
PC connection
Follow these steps: On your PC monitor choose a resolution of 1360 × 768 at 60Hz and save this
configuration. Shut down your PC and connect the shut off LCD TV.
Use a screensaver to avoid burning-in of static picture content.
Selected Items Setup hint
PC Setup
Auto Adjust “H Position”, “V Position”, “Phase” and “Clock” are adjusted automatically as per the
input PC video signal.
When PC-input mode was selected and a PC-signal was input, Auto Adjust will be
performed automatically.
•
H Position To adjust the horizontal placing of the image.
V Position To adjust the vertical placing of the image.
Phase Eliminates the horizontal (Phase) interfering lines.
Clock Eliminates the vertical (Clock) interfering lines.
Select PC input
Switch on the LCD-TV.
Select the PC mode (see page 9).
Note:
If no signal or a signal with a non-
supported resolution is connected, No
Signal is displayed.
As this LCD-TV is not a PC monitor
correct display cannot be guaranteed for
every PC / graphics card.
When the signal 1280x768/1360x768
on 16:9 is input, the black bar or line will
appear on the screen. This is to display
the image to dot by dot.
•
•
•
Example: Adjust the “H Position”.
1During PC mode press MENU.
Auto Adjust
H Position
V Position
Phase
Clock
0
0
0
0
PC Setup
Picture
Sound
PC Setup
Feature
Channel
2Select “PC Setup” > “H Position”, then press ENTER. Press
or to adjust “H Position”.
3Press RETURN several times to return to the normal
screen.
Supported PC resolutions
resolution fps (Hz)
640x480 60
800x600 60
1024x768 60
1280x720 60
1280x768 60
1360x768 60
1280x1024 60
1440x900 60
1920x1080 60
Use a PC-VGA cable (not supplied) to connect the LCD-Monitor to your PC. Make the connections carefully
so as not to break or bend the contacts inside the plug.
VGA Cable (not supplied)
Audio cable (not supplied)
TV (Rear view)
To AUDIO PC/DVI input
PC
To PC input
56V0101A_EN.indd 2556V0101A_EN.indd 25 2/1/11 11:04:00 AM2/1/11 11:04:00 AM
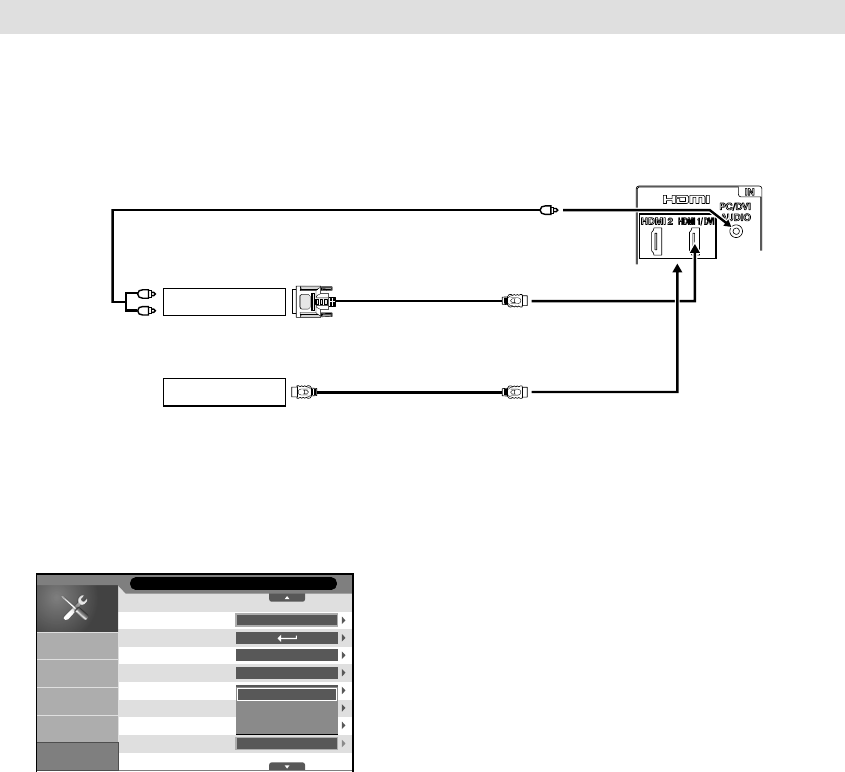
26
The HDMI input receives digital audio and uncompressed video from a HDMI equipped device or
uncompressed digital video from a DVI equipped device.
When you connect to a DVI device with a HDMI-to-DVI adapter cable, it only transfers the video signal, so it
is necessary to use separate analogue leads to transfer the audio signals.
Select the HDMI input mode (see P.9).
Connecting an HDMI or a DVI device to the HDMI input
Selecting the HDMI signal
1Select Feature/HDMI Mode option.
English
On
Off
Auto
PC
Video
Auto
Language
Lock
Blue Back
OSD Timer
Sleep Timer
Auto Power Off
Power On LED
HDMI Mode
Feature
Picture
Sound
PC Setup
Feature
Channel
2Then press ▲ or ▼ to select the desired mode.
Auto: Auto (factory setting), can remain in this mode. Change not necessary.
PC: PC (for PC), if desired.
Video: Video (for Video), if desired.
3Press MENU to exit the menu.
Note:
Please notice the operating manual for the HDMI device to be set up.•
or
DVI device
HDMI device
To DVI output
Audio cable (not supplied)
HDMI - to - DVI adapter cable
(HDMI type A connector)
(not supplied)
HDMI cable
(type A connector)
(not supplied)
To HDMI output
To AUDIO PC/DVI input
TV (Rear view)
56V0101A_EN.indd 2656V0101A_EN.indd 26 2/1/11 11:04:02 AM2/1/11 11:04:02 AM
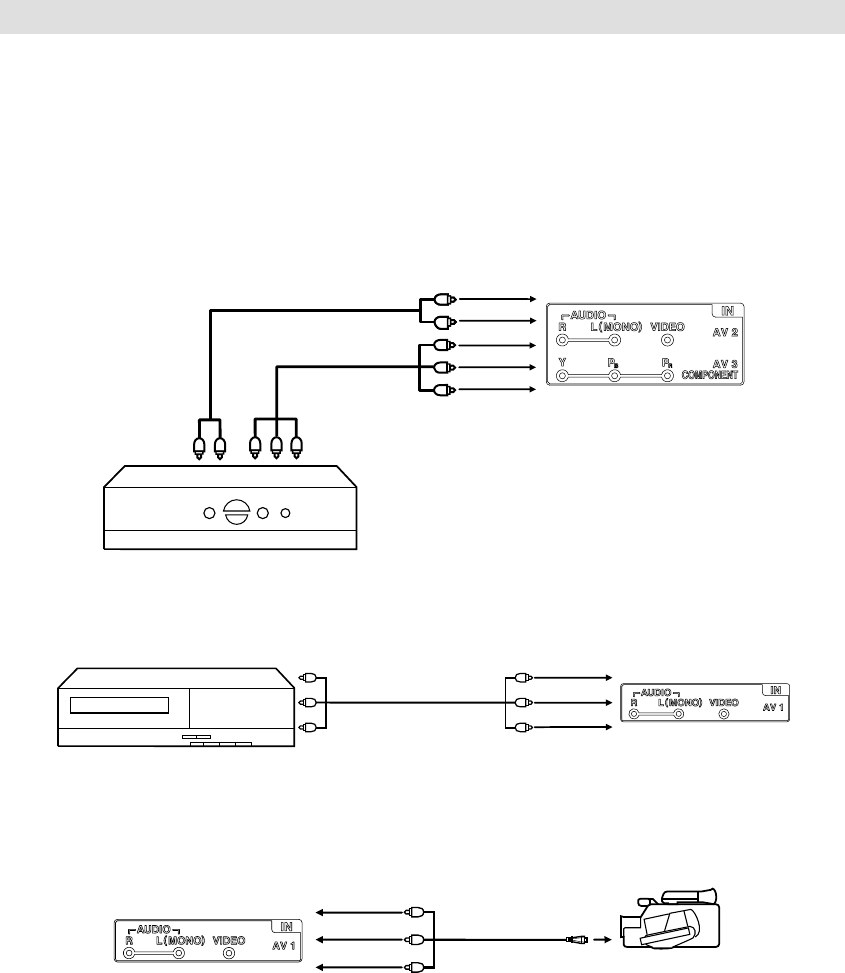
27
Connection to other equipment
Attention: Preparation:
• Disconnect all equipment from the AC-supply, to prevent any possible damage.
• Make the necessary connections.
• Make sure all connections are safe & secure before reconnecting your equipment the AC-supply.
Note:
Select a appropriate external input mode. (See page 9)
1. Connect to a receiver/set-top box
If you connect a receiver/set-top box, connect your Television to a receiver/set-top box using a
component video cord.
YPbPr
2. Connect to a VCR
3. Connecting a Video camera or Games console to AV input
(AV cable, not supplied)
AV output
Video camera
(example)
•
TV (Rear view)
TV (Rear view)
To Component OUTTo Audio OUT
Video cable (not supplied)
Audio cable (not supplied)
To COMPONENT IN
TV (Rear view)
Video/Audio cable
(not supplied)
To AUDIO IN
56V0101A_EN.indd 2756V0101A_EN.indd 27 2/1/11 11:04:02 AM2/1/11 11:04:02 AM
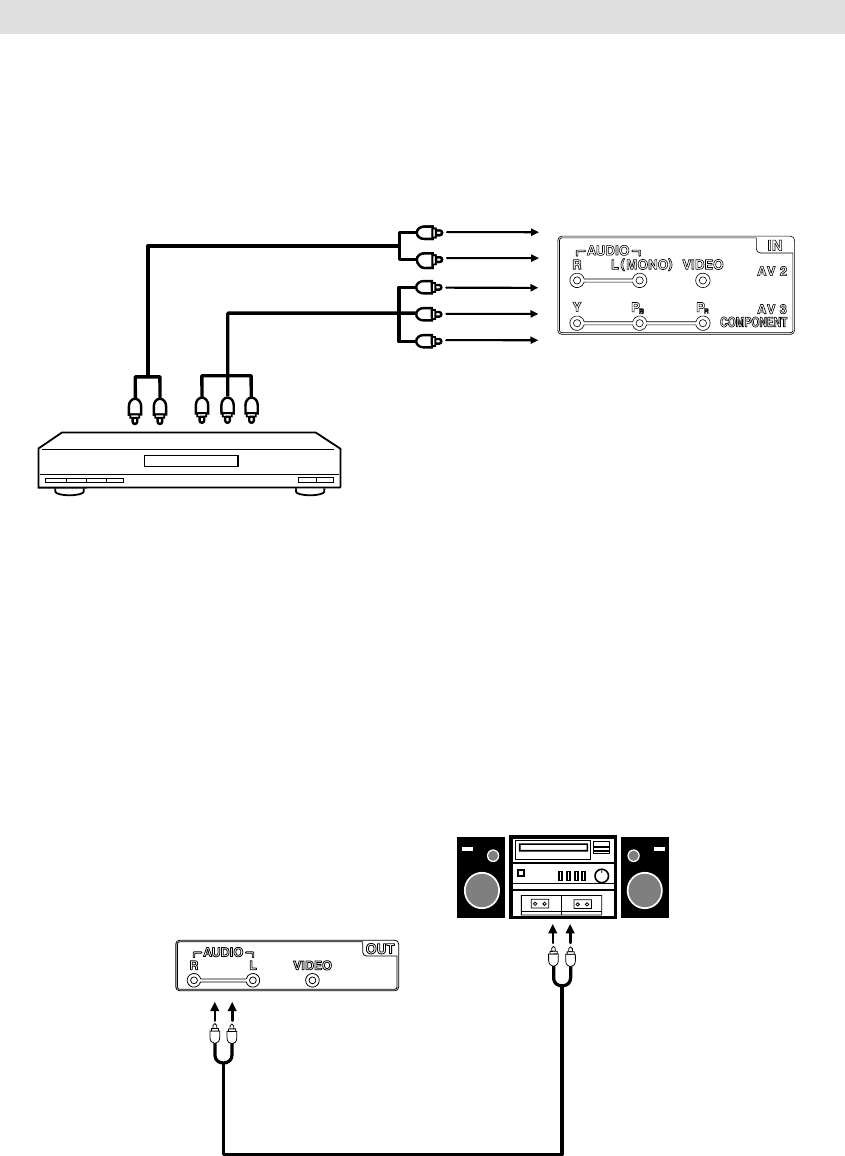
28
YPbPr
Connection to other equipment
4. Connecting to a DVD player or other AV device with Component Video outputs
If your DVD player (or other device) has Component Video output jacks, use a suitable set of leads (RCA/
Phono) to connect these to the Component Video inputs on this TV as shown - it can greatly enhance
the picture quality and performance. Please remember that you will also need to connect separate leads
(RCA/Phono) for the audio signals.
Component output
Audio output
TV (Rear view)
Note:
The Component Video input of this unit are for use with equipment which outputs interlaced signals (PAL: 576i/1080i or
NTSC: 480i/1080i) and progressive signals (PAL: 576p/720p or NTSC: 480p/720p).
•
DVD player
5. Connecting an audio system
You can supply the TV sound to the stereo equipment with the Audio output jacks. Use a Audio cable
(RCA/Phono) for the connection which sold at the accessory shop. (please consult your hi-fi instructions
for details).
Note:
The Bass/Treble/Balance adjustments (see P.13) only function with the sound from the TV speakers - it does not affect
the audio output sockets.
Only TV and AV1 audio signal will be output from Audio output jacks.
•
•
TV (Rear view)
Stereo amplifier
Audio input
Audio output
Audio cable (not supplied)
Video cable (not supplied)
Audio cable (not supplied)
To COMPONENT IN
To AUDIO IN
56V0101A_EN.indd 2856V0101A_EN.indd 28 2/1/11 11:04:03 AM2/1/11 11:04:03 AM

29
Troubleshooting table
Please check the following list before requesting service.
Symptom Possible solution Page
TV
No picture, no sound Switch on the set.
Check that the mains power outlet is properly connected.
Select appropriate input mode.
Unplug unit for 1 minute, then plug it back in.
5
9
No reception with built-in
tuner.
Connect the antenna.
Try another antenna.
8
8
The TV switches off with
missing antenna or external
input signal
This is normal.
15 minutes after the antenna or external input signal has
disappeared, the set will change to standby mode. (in PC
input mode: after 2 minutes)
11
Channel option cannot be
selected.
The unit is set to AV mode. Press 1 on the remote control. 9
Wrong Colours Colour and Brightness errors can occur when the viewing
angle/ambient air temperature (see technical specifications)
are exceeded.
DVD
The playback picture has
occasional distortion.
The disc is dirty. Eject the disc and clean it.
Some times a small amount of picture distortion may appear.
This is not a malfunction.
15
The unit does not start
playback or disc ejects
automatically.
No disc is inserted. Insert a disc.
An unplayable disc is inserted. Insert a playable disc (Check
the disc type and colour system).
Place the disc in the disc slot with the label side facing
forward.
The disc is dirty. Clean the disc.
The disc is scratched or warped.
Cancel the parental lock function or change the parental lock
level.
17
15
17
15
15
23
The LCD panel is a very high technology product, giving you fine picture details. Occasionally, a few nonactive pixels
may appear on the screen as a fixed point of blue, green or red. Please note that this does not affect the performance
of your product.
•
56V0101A_EN.indd 2956V0101A_EN.indd 29 2/1/11 11:04:04 AM2/1/11 11:04:04 AM

30
* This item incorporates copy protection technology that is protected by U.S. patents and other
intellectual property rights of Rovi Corporation. Reverse engineering and disassembly is prohibited.
* Manufactured under license from Dolby Laboratories. Dolby and the double-D symbol are trademarks
of Dolby Laboratories.
* is a trademark of DVD Format/Logo Licensing Corporation.
* This product is protected by certain intellectual property rights of Microsoft. Use or distribution of such
technology outside of this product is prohibited without a license from Microsoft.
* HDMI, the HDMI Logo, and High-Definition Multimedia Interface are trademarks or registered
trademarks of HDMI Licensing LLC in the United States and other countries.
License information
Information on software license
The following open source software component is included in this product:
* Posix Compatibility Layer
Portions of this software is
CYGPKG_POSIX Copyright © 1990, 1999 The Regents of the University of California.
All rights reserved.
* MIPS HAL
Portions of this software is
CYGPKG_HAL_MIPS Copyright © 1992 The Regents of the University of California.
All rights reserved.
* Standard C Library
Portions of this software are
CYGPKG_LIBC_STDIO Copyright © 1990 The Regents of the University of California.
CYGPKG_LIBC_STDLIB Copyright © 1990, 1992, 1993 The Regents of the University of California.
CYGPKG_LIBC_STRING Copyright © 1988 Regents of the University of California.
CYGPKG_LIBC_TIME Copyright © 1999 Kungliga Tekniska Hogskolan (Royal Institute of
Technology, Stockholm, Sweden).
All rights reserved.
56V0101A_EN.indd 3056V0101A_EN.indd 30 2/1/11 11:04:04 AM2/1/11 11:04:04 AM
31
Specifications
TV
Broadcasting System
(Analog):
PAL(B/G, D/K, I), SECAM(B/G, D/K)
NTSC 3.58(M, B/G, D/K), NTSC 4.43(B/G, D/K,I)
Preset channels: Analog 110 Carrier
Frequency Range: 44.25 MHz-863.25 MHz
Sound-multiplex
systems:
NICAM(B/G/D/K/I), A2(B/G/D/K), MTS(US system)
LCD: 80 cm visible
TFT Active Matrix Colour LCD, 1366 x 768 Pixel
HDMI input: HDMI compliant (type A connector), HDCP compliant
Supported scan rates: PAL: 576i/576p/720p/1080i/1080p
NTSC: 480i/480p/720p/1080i/1080p
HDMI Audio: 2-channel PCM, 32/44.1/48 kHz sampling frequency
16/20/24 bits per sample
Audio Output Power: 5.0W (MAX) x 2
DVD
Signal system: NTSC, PAL
Applicable disc: DVD (12cm, 8cm), CD (12cm, 8cm)
Pickup: CD : Wavelength: 775 - 815 nm
Maximum output power: 0.5 mW
DVD : Wavelength: 650 - 666 nm
Maximum output power: 2.0 mW
GENERAL
Power Source: AC 110-240V, 50/60Hz
Power Consumption: Operation: 110W at AC230V, 50Hz
Standby: 0.5W at AC230V, 50Hz
Weight: 9.6 kg
Dimensions: 80(W)x59(H)x22(D)cm
Surrounding:
Operation: 5°C ~ 40°C/Storage: –20°C ~ 60°C
Operating Humidity:
Less than 80%RH
ACCESSORIES
2 batteries (AA/R6/UM-3)/Remote control unit /AC cord*1/Stand/3 screws for stand/Antenna plug*2
*1 Product figure varies in some countries.
*2 For Philippines exclusively
Weight and Dimensions are approximate. Because we continuously strive to improve our products we may
change specifications and designs without prior notice.
56V0101A_EN.indd 3156V0101A_EN.indd 31 2/16/11 12:29:54 PM2/16/11 12:29:54 PM

J56V0101A SH 11/03 N
© 2011 Victor Company of Japan, Limited 0211TMH-OR-OR
56V0101A_EN.indd 3256V0101A_EN.indd 32 2/1/11 11:04:04 AM2/1/11 11:04:04 AM
