JVCKENWOOD K1027 Digital Media Receiver User Manual Short Term Confidential
JVC KENWOOD Corporation Digital Media Receiver Short Term Confidential
UserManual.wiki
>
JVCKENWOOD
>
K1027 User Manual
(Short-Term Confidential) User Manual
Navigation menu
Upload a User Manual
Namespaces
Wiki Guide
HTML
PDF
Info
Views
User Manual
Discussion / Help
Navigation
![ENGLISH 3Before UseBefore UseHow to read this manual:• The example screens used in this manual may be different from those actually shown due to the following reasons. – Example screens are of plug-in hybrid vehicles unless mentioned otherwise. – Example screens are used to provide clear explanations of the operations.• This manual mainly explains operations using the buttons on the monitor panel and touch panel. For operations using the buttons on the steering wheel, see page 72.• The following illustrations are used to explain the operations using buttons on the touch panel. – Selecting a button: – Touching and holding a button: – Selecting button 1 first, then selecting button 2:(Hold)• < > Indicates the various screens/menus/operations/settings that are displayed on the touch panel.• [ ] indicates the buttons on the touch panel.• On-screen language: English is initially selected for the on-screen language.You can select on-screen language using <Language Settings> on the <Settings> screen. (Page 77)V Caution on the volume setting:Digital devices produce very little noise compared with other sources. Lower the volume before playing the digital sources to avoid damaging the speakers by sudden increase of the output level.User Terms1By using the product, the customer agrees that the customer is bound by and complies with these terms as well as any other written terms and conditions, or policy that the customer may receive or be provided with.To the extent permitted by law, Mitsubishi Motors reserves the right to modify, revise and add to these user terms. Mitsubishi Motors will exercise due care in order to notify the customer in advance of the modification of the terms, e.g., by publishing the information about such modification on Mitsubishi Motors web page [details of website]. The changes of these terms enter into force within 14 days as of publishing it on such website. If the customer does not agree with the modifications, revisions or additions, the customer’s sole and exclusive remedy is to not use the product. In certain jurisdictions, the limitations and exclusions contained in sections 1-3 will not apply to consumers.1 Please note that the amendments included within this document are summaries of our understanding of the key points from each local counsel in the launching countries and, as such, are not intended to constitute legal advice. It should also be noted that as the User Terms are used with consumers this means consumer laws which differ in each of the launching countries will apply which could make using the current User Terms unenforceable as it is not always possible for a supplier of goods when contracting with a consumer, to exclude statutory warranties or limit or exclude liability towards consumers.1. Disclaimer of Warranties1.1 SOME JURISDICTIONS DO NOT PERMIT THE EXCLUSION OF IMPLIED WARRANTIES OR CONSUMER OR STATUTORY GUARANTEES, AND IN THOSE JURISDICTIONS THE EXCLUSIONS BELOW APPLY TO THE MAXIMUM EXTENT PERMITTED BY THE APPLICABLE LAWS OF THE JURISDICTION. THE CUSTOMER MAY HAVE OTHER RIGHTS WHICH VARY BY JURISDICTION 1.2 THE CUSTOMER EXPRESSLY ACKNOWLEDGES AND AGREES THAT THIS PRODUCT AND ANY APPLICATION AND SOFTWARE INCLUDED THEREIN IS PROVIDED “AS IS” AND “AS AVAILABLE”, WITH ALL FAULTS. AND WITHOUT ANY FURTHER WARRANTY OF ANY KIND, WHETHER EXPRESS OR IMPLIED, INCLUDING WITHOUT LIMITATION Continued on the next page...LinkDisplayAudio_NAS.indb 3LinkDisplayAudio_NAS.indb 3 5/12/16 5:38 PM5/12/16 5:38 PM](https://usermanual.wiki/JVCKENWOOD/K1027/User-Guide-2992794-Page-3.png)
![ENGLISH 5Before UseBefore Use3. Indemnification• To the maximum extent permitted by applicable law and subject to section 2 above, the customer agrees to indemnify, defend, and hold harmless Mitsubishi Motors, its subsidiaries, affiliates, employees, officers, directors and agents thereof from any claims, suits, damages, loses, costs, lawsuits, fines, penalties, liabilities, interests, additional taxes, demands, and expenses (including legal and other professional fees) arising out of or relating to: (a) the customer’s failure to comply with or breach of these terms and any other terms and conditions and policies to be provided by Mitsubishi Motors.4. Third-Party Applications• The product may display or make available content, data, information, services, software or materials from third-party applications which run on the customer’s device, equipment and smartphone. Mitsubishi Motors has no control over and is not responsible for examining or evaluating the security, content, accuracy, validity, legality or any other aspect of such third-party applications. Mitsubishi Motors assumes no responsibility or liability for the availability, content, security, privacy policies, practices, or performances of any such third party application. • To the maximum extent permitted by applicable law, Mitsubishi Motors does not warrant, guarantee or endorse any third-party applications and is not liable to the customer or any other party for its use or misuse of any third-party application. The customer expressly acknowledges and agrees that the use of third-party applications is subject to the third party’s terms and conditions and policies, including its privacy policy, and such terms and conditions and policies are agreed between the customer and the third party. The customer is consequently advised to check the third parties applications’ terms and conditions and privacy policies prior to accepting them. Mitsubishi Motors is not responsible for any third-party applications and any term and conditions relating to the third-party applications. Mitsubishi Motors may change, reduce, limit, suspend, remove, modify access to or disable access to any third-party applications at any time and without notice to the customer5. Modifications• Mitsubishi Motors reserves the right to improve, modify and change without liability to the customer in its sole discretion: (a) the specifications or external appearance of the product. Mitsubishi Motors will exercise due care in order to notify the customer in advance of the modification of the specification or external appearance of the product e.g. by publishing the information about such modification on Mitsubishi Motors web page [details of website]. If the customer does not agree with the improvements, modifications and changes, the customer’s sole and exclusive remedy is to not use the product. • The customer expressly acknowledges and agrees that this User Manual is for multiple vehicle models, and there may be some functions which may be not available and workable in some vehicles models. To the maximum extent permitted by applicable law, Mitsubishi Motors will not be liable in any case whatsoever for the difference or inconsistency of functionality or performance from or with this User Manual. The customer further expressly acknowledges and agrees that images and illustrations used in this User Manual are either those used in development, or for the purpose of explanations, and these may differ from the actual images and illustrations used in the product.6. Force Majeure• Mitsubishi Motors will not be liable for any loss and damage due to acts, events or causes constituting force majeure, including, but not limited to, wars, riots, acts of terrorism, epidemic diseases, civil commotion, fire, earthquake, storm, flood, failure of public utilities or common carriers, labor dispute, general strikes, lock-outs, restrictions of law or regulations.Continued on the next page...LinkDisplayAudio_NAS.indb 5LinkDisplayAudio_NAS.indb 5 5/12/16 5:38 PM5/12/16 5:38 PM](https://usermanual.wiki/JVCKENWOOD/K1027/User-Guide-2992794-Page-5.png)
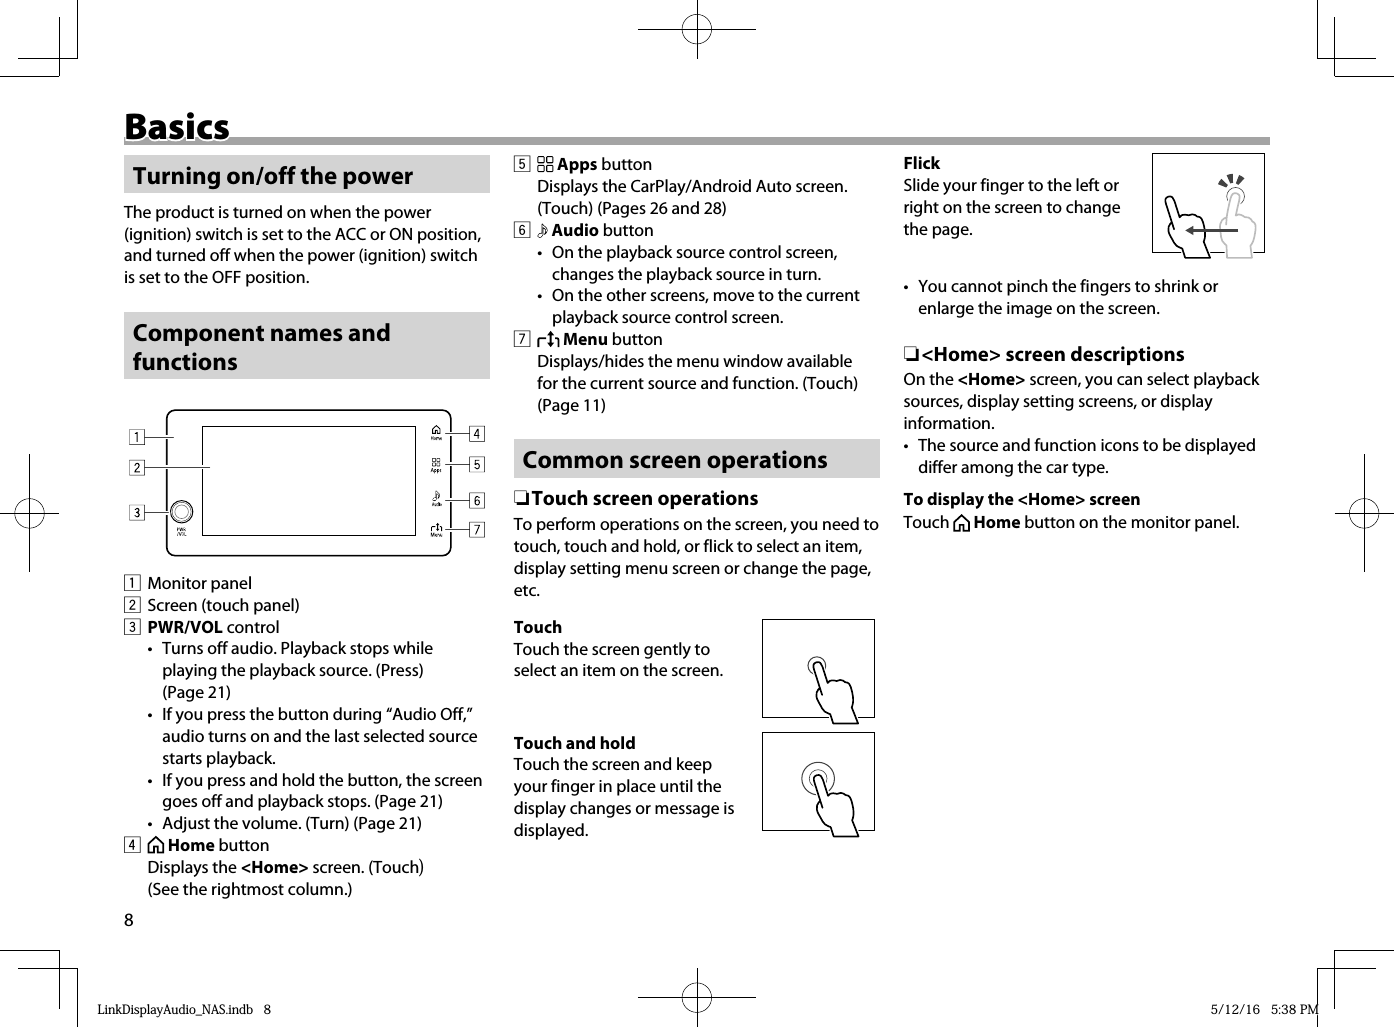
![ENGLISH 9BasicsBasicsIndication and buttons on the <Home> screen 533221154455321 41 Page indication Shows the page currently displayed.2 Battery level and signal strength of the connected Bluetooth mobile phone• Appears when a Bluetooth mobile phone is connected.3 Bluetooth indicator• Lights up when a Bluetooth device is connected.• Touching this indicator displays the <Bluetooth> setting screen. (Page 77)4 Clock indication• Touching this indication displays the <Clock> setting screen. (Page 80)5 Page scroll buttons• You can also change the page by flicking the screen.• While displaying any page other than the first page of the <Home> screen, you can display the first page by touching the Home button on the monitor panel.Items selectable on the <Home> screen[FM] Switches to the FM radio broadcast. (Page 46)[AM] Switches to the AM radio broadcast. (Page 46)[Bluetooth Audio] Plays tracks on a device connected via Bluetooth. (Page 68)[Phone] Displays the <Phone> screen to make a call. (Page 31)[SiriusXM]*1 Switches to the SiriusXM radio broadcast. (Page 52)[Apps]*2 Switches to the CarPlay screen (Page 25) or Android Auto screen (Page 27).[iPod] Plays tracks on iPod/iPhone. (Page 38) [Settings] Displays the <Settings> screen to configure the settings. (Page 76)[USB] Plays tracks on a USB device. (Page 42)[Clock] Displays the clock screen. (Page 21)[Screen Off] Turns off the screen. (Page 22)[Day/Night] Changes the brightness of the screen and the button illumination. (Page 22)[Vehicle Info]*3*4 Displays the vehicle information. (Page 81)[Timed Air Conditioning]*5 Sets the timers for air conditioner. (Page 91)[Timed Charging]*5 Sets the timers for battery charging. (Page 92)[Charging Cost]*6 Displays the electrical cost for charging. (Page 88)[Air Conditioner]*3 Displays the current operating status of air conditioner (Page 88)[Vehicle Setting]*3 Customizes the vehicle functions. (Page 90)Continued on the next page...LinkDisplayAudio_NAS.indb 9LinkDisplayAudio_NAS.indb 9 5/12/16 5:38 PM5/12/16 5:38 PM](https://usermanual.wiki/JVCKENWOOD/K1027/User-Guide-2992794-Page-9.png)
![10BasicsBasics[GPS] Displays the GPS information. (Page 89)[HDMI]*7 Plays content on a device connected to the HDMI input terminal. (Page 71)*1 [SiriusXM] is displayed only for USA and Canadian models.*2 When connecting iPhone compatible with CarPlay, [Apple CarPlay] is displayed. When connecting an Android™ phone compatible with Android Auto, [Android Auto] is displayed.These cannot be displayed at the same time.*3 This cannot be displayed depending on the car type.*4 [Vehicle Info] for gasoline cars differs from the one shown here.*5 This is displayed only for plug-in hybrid vehicles equipped with the Mitsubishi Remote Control.*6 This is displayed only for plug-in hybrid vehicles.*7 [HDMI] is not displayed when the car is not equipped with the HDMI input terminal or when an HDMI device is not connected.Customizing the <Home> screenYou can change the item order on the <Home> screen.1 Touch and hold the item you want to move.• To change the page, flick the screen. (Hold)Cursors appear around the selected item.2 Move the item.Touch the cursor of the desired direction repeatedly until the item is placed in the desired position. 3 Finish the procedure. ❏Source control screen descriptionsYou can perform source playback operations on the source control screen.• The indicators and operation buttons displayed on the screen differ among the sources.Indications on the source control screen 1324LinkDisplayAudio_NAS.indb 10LinkDisplayAudio_NAS.indb 10 5/12/16 5:38 PM5/12/16 5:38 PM](https://usermanual.wiki/JVCKENWOOD/K1027/User-Guide-2992794-Page-10.png)
![ENGLISH 11BasicsBasics1 Source name2 Battery level and signal strength of the connected Bluetooth mobile phone• Appears when a Bluetooth mobile phone is connected.3 Bluetooth indicator• Lights up when a Bluetooth device is connected.4 Operation buttonsAbout the audio source status windowWhen you perform operations for the audio source while displaying any screen other than the audio source (such as the <Home> screen), the status window for the audio source is displayed. To display the menu windowYou can display the menu window on the source control screen. On the menu window, you can change settings or jump to the <Settings> screen.• The items on the menu window differ among the sources.1 Display the menu window.While the source control screen is displayed, touch the Menu button on the monitor panel. 2 Select an item. • To hide the menu window, touch the Menu button on the monitor panel again. ❏List screen descriptionsWhile displaying a list to make a selection, you can display more items or change the page.Indications and buttons on the list screen21345671 Battery level and signal strength of the connected Bluetooth mobile phone• Appears when a Bluetooth mobile phone is connected.2 Bluetooth indicator• Lights up when a Bluetooth device is connected.3 [ ] button Displays the previous page.4 [ ] button Scrolls up the list.5 [ ] button Scrolls down the list.6 [ ] button Displays the next page.7 Slider Scrolls the list.• For some lists, the initial letters of the displayed items are shown in the balloon as its category.LinkDisplayAudio_NAS.indb 11LinkDisplayAudio_NAS.indb 11 5/12/16 5:38 PM5/12/16 5:38 PM](https://usermanual.wiki/JVCKENWOOD/K1027/User-Guide-2992794-Page-11.png)
![12BasicsBasics ❏ <Settings> screen descriptionsYou can change the precise settings. (Page 76)Indications and buttons on the <Settings> screen16754321 Setting menu tabs Selects the setting menu category.2 Page indication Shows the page currently displayed.3 Battery level and signal strength of the connected Bluetooth mobile phone• Appears when a Bluetooth mobile phone is connected.4 Bluetooth indicator• Lights up when a Bluetooth device is connected.5 [<<] button Displays the previous setting tabs.6 [>>] button Displays the next setting tabs.7 [ ] button Returns to the previous screen.LinkDisplayAudio_NAS.indb 12LinkDisplayAudio_NAS.indb 12 5/12/16 5:38 PM5/12/16 5:38 PM](https://usermanual.wiki/JVCKENWOOD/K1027/User-Guide-2992794-Page-12.png)
![ENGLISH 13Initial SettingsInitial SettingsStartupWhen the power (or ignition) switch is set to the ACC or ON position, the product is turned on. The first time the product is turned on, the caution message screen is displayed. Perform the following procedure to start the system.1 Set the power (or ignition) switch to the ACC or ON position.2 Select the language used for on-screen information. 3 Read the message, then touch [Agree].The <Home> screen is displayed. Setting the clockSet the clock time displayed on the screen.1 Display the <Settings> screen.On the <Home> screen, touch [Settings]. 2 Display the <Clock> settings screen (1), then select the setting method (2).• Touch [<<]/[>>] repeatedly to display the [Clock] setting tab. (Page 12)<Auto> Synchronizes the clock time with the GPS. (Go to step 3 .)• When the GPS signal reception is not good, it takes time to set the clock time.<Manual> Set the date and clock time manually. (Go to step 4 .)• The check mark ( ) appears in the check box of a selected item.LinkDisplayAudio_NAS.indb 13LinkDisplayAudio_NAS.indb 13 5/12/16 5:38 PM5/12/16 5:38 PM](https://usermanual.wiki/JVCKENWOOD/K1027/User-Guide-2992794-Page-13.png)
![14Initial SettingsInitial Settings 3 To set the clock automatically: Display the time zone selection screen (1), select time zone (2), then confirm the setting (3). Then, go to step 5.4 To set the date/time manually: Display the manual clock setting screen (1), set the date (2) and time (3), then confirm the setting (4).• To change the time display format, select [12H] or [24H].• When 12 hour time display format is selected, you can change AM/PM by selecting [AM]/[PM]. 5 Select the time format and daylight saving time setting .<Switch 12H/24H Display>Selects the time format ([12H]: 12 hours/[24H]: 24 hours).<Daylight Saving Time>Select your country to activate the daylight saving time. To deactivate it, select [Off].• In Mexico, select [US/CA] where US daylight saving time is used. 6 Select the date display (1) and clock type (2), then confirm the setting (3).• To finish the procedure, touch the Home button on the monitor panel.LinkDisplayAudio_NAS.indb 14LinkDisplayAudio_NAS.indb 14 5/12/16 5:38 PM5/12/16 5:38 PM](https://usermanual.wiki/JVCKENWOOD/K1027/User-Guide-2992794-Page-14.png)
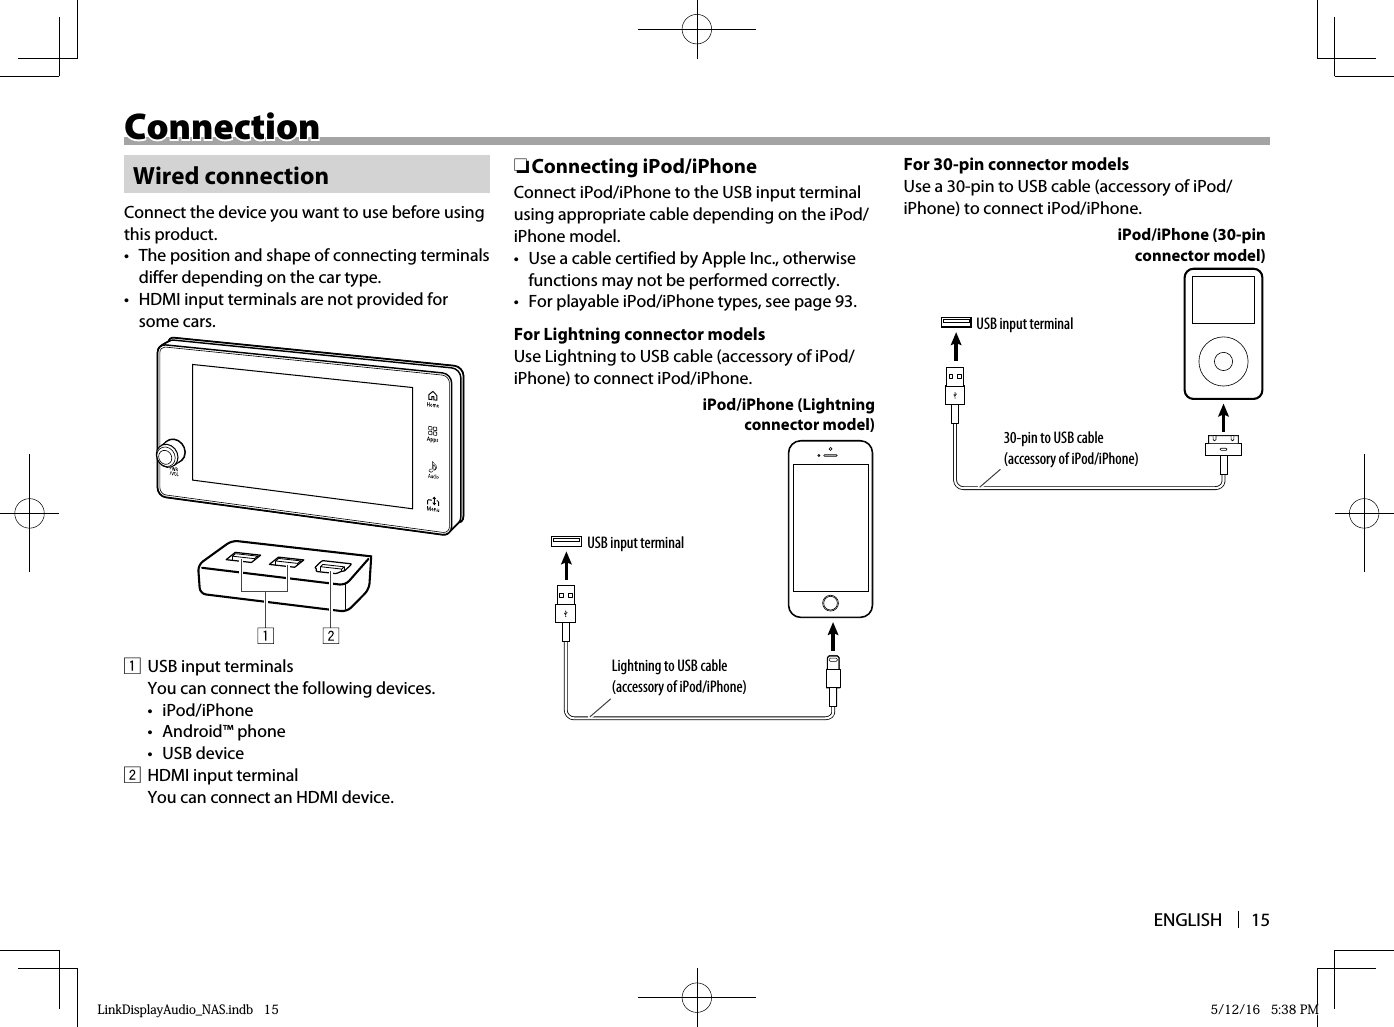
![ENGLISH 17ConnectionConnection Bluetooth connection ❏Information for using Bluetooth® devicesBluetooth is a short-range wireless radio communication technology for mobile devices such as mobile phones, portable PCs, and other devices. Bluetooth devices can be connected without cables and communicate with each other.• For notes on using Bluetooth devices, see page 93.V CautionWhile driving, do not perform complicated operations such as dialing numbers, using the address book, etc. When you perform these operations, stop your car in a safe place. ❏ Registering a new Bluetooth deviceWhen you connect a Bluetooth device to the product for the first time, pair this product and the device. Pairing allows Bluetooth devices to communicate with each other.• When iPhone compatible with CarPlay is connected to the USB input terminal, it cannot be connected via Bluetooth. Use the phone and audio player function on the CarPlay screen. (Page 25)• If you use CarPlay using iPhone connected via Bluetooth, the Bluetooth connection is canceled.• When an Android phone compatible with Android Auto is connected to the USB input terminal, the device is connected via Bluetooth automatically, and the Bluetooth mobile phone currently connected is disconnected. – If the mobile phone currently connected is in use, it remains connected and the Android phone compatible with Android Auto is automatically registered. However, if 5 devices are already registered, registration cannot be performed.• Once the connection is established, it is registered in this product even if you turn off the product. Up to 5 devices can be registered in total.• To use the Bluetooth function, you need to turn on the Bluetooth function of the device. 1 Display the <Settings> screen.On the <Home> screen, touch [Settings]. 2 Display the <Bluetooth> settings screen (1), then start registration (2).• Touch [<<]/[>>] repeatedly to display the [Bluetooth] setting tab. (Page 12)• To change the passkey (initial: “0000”), see page 18.• To check the device information of this product, select [Unit Details].LinkDisplayAudio_NAS.indb 17LinkDisplayAudio_NAS.indb 17 5/12/16 5:38 PM5/12/16 5:38 PM](https://usermanual.wiki/JVCKENWOOD/K1027/User-Guide-2992794-Page-17.png)
![18ConnectionConnection3 Activate the Bluetooth function on the device, then select [Next].• To cancel the procedure, touch [Cancel].4 Operate the device to select “Mitsubishi Motors Bluetooth” and confirm the request.• If a passkey is required, enter the passkey displayed on the screen.When the registration is complete, the <Bluetooth> settings screen is displayed. To change the passkey for registration1 Display the <Bluetooth> settings screen. (Page 17)2 Display the <Unit Bluetooth Details> screen.3 Display the <Change Passkey> screen.4 Enter a 4 digit passkey (1), then confirm the entry (2).• Touch [ ] to delete the last entry.LinkDisplayAudio_NAS.indb 18LinkDisplayAudio_NAS.indb 18 5/12/16 5:38 PM5/12/16 5:38 PM](https://usermanual.wiki/JVCKENWOOD/K1027/User-Guide-2992794-Page-18.png)
![ENGLISH 19ConnectionConnection ❏ Connecting/disconnecting a registered Bluetooth deviceOnce the devices are registered, you can disconnect the current device and connect another device from the registered devices.To connect a Bluetooth device manuallyYou can connect one mobile phone and one audio device from the registered devices.1 Display the <Bluetooth> settings screen. (Page 17)2 Select the device usage for the target device.[ ] Connect as a mobile phone.[ ] Connect as an audio device.The button for the connected device is highlighted.• When selecting the device usage while another device is connected, a message window is displayed. Select [Yes]. The previously connected device will be disconnected.• To check the device information of the registered device, touch the device name.• When a mobile phone is connected, the signal strength and battery level are displayed when the information is acquired.To disconnect a Bluetooth device1 Display the <Bluetooth> settings screen. (Page 17)2 Select the device usage for the device you want to disconnect.A message window is displayed. Select [Yes].LinkDisplayAudio_NAS.indb 19LinkDisplayAudio_NAS.indb 19 5/12/16 5:38 PM5/12/16 5:38 PM](https://usermanual.wiki/JVCKENWOOD/K1027/User-Guide-2992794-Page-19.png)
![20ConnectionConnectionTo connect a Bluetooth device automaticallyWhen <Auto Connect> is set to [On], the registered device last connected is automatically connected via Bluetooth whenever it is turned on.• If the last connected device is not present, another registered device is automatically connected if present.1 Display the <Bluetooth> settings screen. (Page 17)2 Display the <Auto Connect. Set.> screen.3 Activate the auto connection.• To cancel the auto connection, select [Off]. ❏ Deleting a registered Bluetooth deviceIf you want to register a new device after 5 devices have been registered, or if a registered device is no longer used, delete the registration.1 Display the <Bluetooth> settings screen. (Page 17)2 Select the device to delete.3 Delete the registration of the selected device.• A message window is displayed. Select [Yes].LinkDisplayAudio_NAS.indb 20LinkDisplayAudio_NAS.indb 20 5/12/16 5:38 PM5/12/16 5:38 PM](https://usermanual.wiki/JVCKENWOOD/K1027/User-Guide-2992794-Page-20.png)
![ENGLISH 21General OperationsGeneral Operations Adjusting the volumeYou can adjust the volume for the following situations.• While listening to a source ( : 0 to 45)• During a call ( : 0 to 11)• During voice guidance ( : 0 to 11)IncreasesDecreases Turning off the audio sourceYou can turn off the audio source.1 Press the PWR/VOL control on the monitor panel. To restore the audio sourcePress the PWR/VOL control on the monitor panel again. Displaying the clock screenYou can display the large clock screen.1 Touch [Clock] on the <Home> screen. To return to the <Home> screenTouch the Home button on the monitor panel.You can display the <Clock> settings screen to change the clock settings from the clock screen. Touch the time/date display area to display the <Clock> settings screen. (Pages 13 )LinkDisplayAudio_NAS.indb 21LinkDisplayAudio_NAS.indb 21 5/12/16 5:38 PM5/12/16 5:38 PM](https://usermanual.wiki/JVCKENWOOD/K1027/User-Guide-2992794-Page-21.png)
![22General OperationsGeneral Operations Turning off the screenYou can turn off the screen.1 Touch [Screen Off] on the <Home> screen To turn on the screenTouch the screen or the Home button or Apps button on the monitor panel.• You can also turn off the screen and audio source at the same time by touching and holding the PWR/VOL control on the monitor panel. – To restore the screen and audio source, press the PWR/VOL control. Changing the brightness of the screen and the button illumination—day/night settingYou can change the brightness of the screen and the button illumination on the monitor panel.1 Display the <Day/Night> settings screen.On the <Home> screen, touch [Day/Night]. 2 Select the brightness setting.[Auto]Dims the screen and button illumination when you turn on the headlights or position lamps.[Day] Brightens the screen and button illumination.[Night]Dims the screen and button illumination. Displaying the picture from the connected cameraThe around view or rear view screen from the connected camera is displayed when you shift the gear to the reverse (R) position.• Around view can be displayed when you press the Multi around button on the steering.• For details about viewing the screen from the connected camera, refer to the owner’s manual supplied with your car.When a multi around monitor is connected:When a rear view camera is connected:LinkDisplayAudio_NAS.indb 22LinkDisplayAudio_NAS.indb 22 5/12/16 5:39 PM5/12/16 5:39 PM](https://usermanual.wiki/JVCKENWOOD/K1027/User-Guide-2992794-Page-22.png)
![ENGLISH 23General OperationsGeneral Operations Using voice controlYou can use 4 types of the voice recognition function—voice recognition of this product, Bluetooth interfaced voice recognition, CarPlay, and Android Auto.• For CarPlay, see page 26, and for Android Auto, see page 28.• For changing the settings for voice control, see page 78. ❏ Using the voice (control) recognition of this product1 Press the button on the steering wheel. (Page 72)• To not display this screen from the next time on, touch the check box of <Do not show this screen again.> so that the check mark ( ) appears.Once this is checked, pressing displays the screen in step 2 from the next time on.2 Press the button again on the steering wheel.The <Voice Control> screen for this product appears.3 Speak a voice command through the microphone built in the car.• For the available voice commands on this product, see page 95.About <Voice Control> screen for this product123541 Voice recognition status indicator• You can speak voice commands only when the indicator is highlighted.2 Instruction message Follow the message displayed.3 [End] button Touch or say “End” to exit the <Voice Control> screen.4 Voice command list Say a command from the list.• You can also perform an operation by touching a voice command on the list.• Unavailable commands are grayed out.• To change the page, say “Prev. Page” or “Next Page.”• To return to previous screen, say “Back.”• If you need help, say “Help” to activate voice guidance.5 Current page/total pages of the voice command list• When voice tags are registered for the contacts registered in the <Favorites> screen, you can call a contact by speaking the voice tag after activating voice control. (Page 35)To finish using voice control (recognition), press and hold button on the steering wheel or touch [End].LinkDisplayAudio_NAS.indb 23LinkDisplayAudio_NAS.indb 23 5/12/16 5:39 PM5/12/16 5:39 PM](https://usermanual.wiki/JVCKENWOOD/K1027/User-Guide-2992794-Page-23.png)
![24General OperationsGeneral Operations ❏ Using the Bluetooth interfaced voice recognition (control)1 Press the button on the steering wheel. (Page 72)• To not display this screen from the next time on, touch the check box of <Do not show this screen again.> so that the check mark ( ) appears.• For the Bluetooth interfaced voice recognition (control): Without checking the box, you can start the voice recognition (control) procedure in step 2 below from the next time on.2 Press and hold the button on the steering wheel. • By touching [Start] on the screen, you can also activate voice control (recognition).3 Speak to the connected Bluetooth device through the microphone built in the car.• Voice control (recognition) may not work when the Bluetooth connection is not good.To finish using voice control (recognition), press and hold button on the steering wheel or touch [End].LinkDisplayAudio_NAS.indb 24LinkDisplayAudio_NAS.indb 24 5/12/16 5:39 PM5/12/16 5:39 PM](https://usermanual.wiki/JVCKENWOOD/K1027/User-Guide-2992794-Page-24.png)
![ENGLISH 25 Apps Apps Using Apps of iPhone—Apple CarPlay ❏ About CarPlayCarPlay is a smarter, safer way to use your iPhone in the car. CarPlay takes the things you want to do with iPhone while driving and displays them on the screen of the product. You can get directions, make calls, send and receive messages, and listen to the music from iPhone while driving. You can also use Siri voice control to make it easier to operate iPhone.• For details about CarPlay, visit <https://ssl.apple.com/ios/carplay/> or <https://support.apple.com/HT205634>.• For CarPlay available Apps, visit <http://www.apple.com/ios/carplay/>.Although the service area is expanding, CarPlay service is NOT available in some markets. Please check the latest information concerning availability in your region from the below website.http://www.apple.com/ios/feature-availability/#applecarplay-applecarplay Compatible iPhone devicesYou can use CarPlay with the following iPhone models of iOS 8 or later.• iPhone 5• iPhone 5c• iPhone 5s• iPhone 6• iPhone 6 Plus• iPhone 6s• iPhone 6s Plus ❏ Connecting iPhone compatible with CarPlayConnect iPhone compatible with CarPlay to the USB input terminal using Lightning to USB cable (accessory of iPhone).• Use a cable certified by Apple Inc., otherwise functions may not be performed correctly.iPhone compatible with CarPlayUSB input terminalLightning to USB cable (accessory of iPhone)• Bluetooth connection is canceled when the iPhone is connected to the USB input terminal. Use the phone and audio player function on the CarPlay screen.• If two iPhone devices compatible with CarPlay are connected, the device recognized first is used for CarPlay. ❏Starting CarPlaySelect [Apple CarPlay] on the <Home> screen to display the CarPlay screen and enable use of the Apps of the connected iPhone.Preparation: Unlock your iPhone beforehand.1 Touch [Apple CarPlay] on the <Home> screen.The home screen of CarPlay is displayed.• [Apple CarPlay] is displayed only when a compatible iPhone is connected.LinkDisplayAudio_NAS.indb 25LinkDisplayAudio_NAS.indb 25 5/12/16 5:39 PM5/12/16 5:39 PM](https://usermanual.wiki/JVCKENWOOD/K1027/User-Guide-2992794-Page-25.png)
![26AppsApps ❏ Operation buttons on the home screen of CarPlayYou can use the Apps of the connected iPhone.• The items displayed and the language used on the screen differ among the connected devices.3121 App/information button Starts the App or displays the information.2 [ ] (Home) button• Displays the home screen of CarPlay. (Touch)• Activates Siri. (Hold) (See the right column.)3 [Main Menu] button Exits the CarPlay screen and displays the <Home> screen. ❏ Using the voice control (recognition) of CarPlay (Siri)You can activate Siri while the CarPlay screen is displayed.1 Touch and hold [ ] (Home) to activate Siri.(Hold)• To deactivate Siri, touch [ ] (Home).2 Talk to Siri through the microphone built in the car.To operate using the buttons on the steering wheel, press and hold the button. (Page 72)• To deactivate Siri, press the button on the steering wheel. ❏ Switching to the CarPlay screen while displaying another screenYou can switch to the CarPlay screen while listening to another source or displaying another screen.• The screen cannot be switched in some cases, such as while the picture from the connected camera is displayed.1 Touch the Apps button to activate CarPlay.To exit the CarPlay screenTouch the Home button on the monitor panel.LinkDisplayAudio_NAS.indb 26LinkDisplayAudio_NAS.indb 26 5/12/16 5:39 PM5/12/16 5:39 PM](https://usermanual.wiki/JVCKENWOOD/K1027/User-Guide-2992794-Page-26.png)
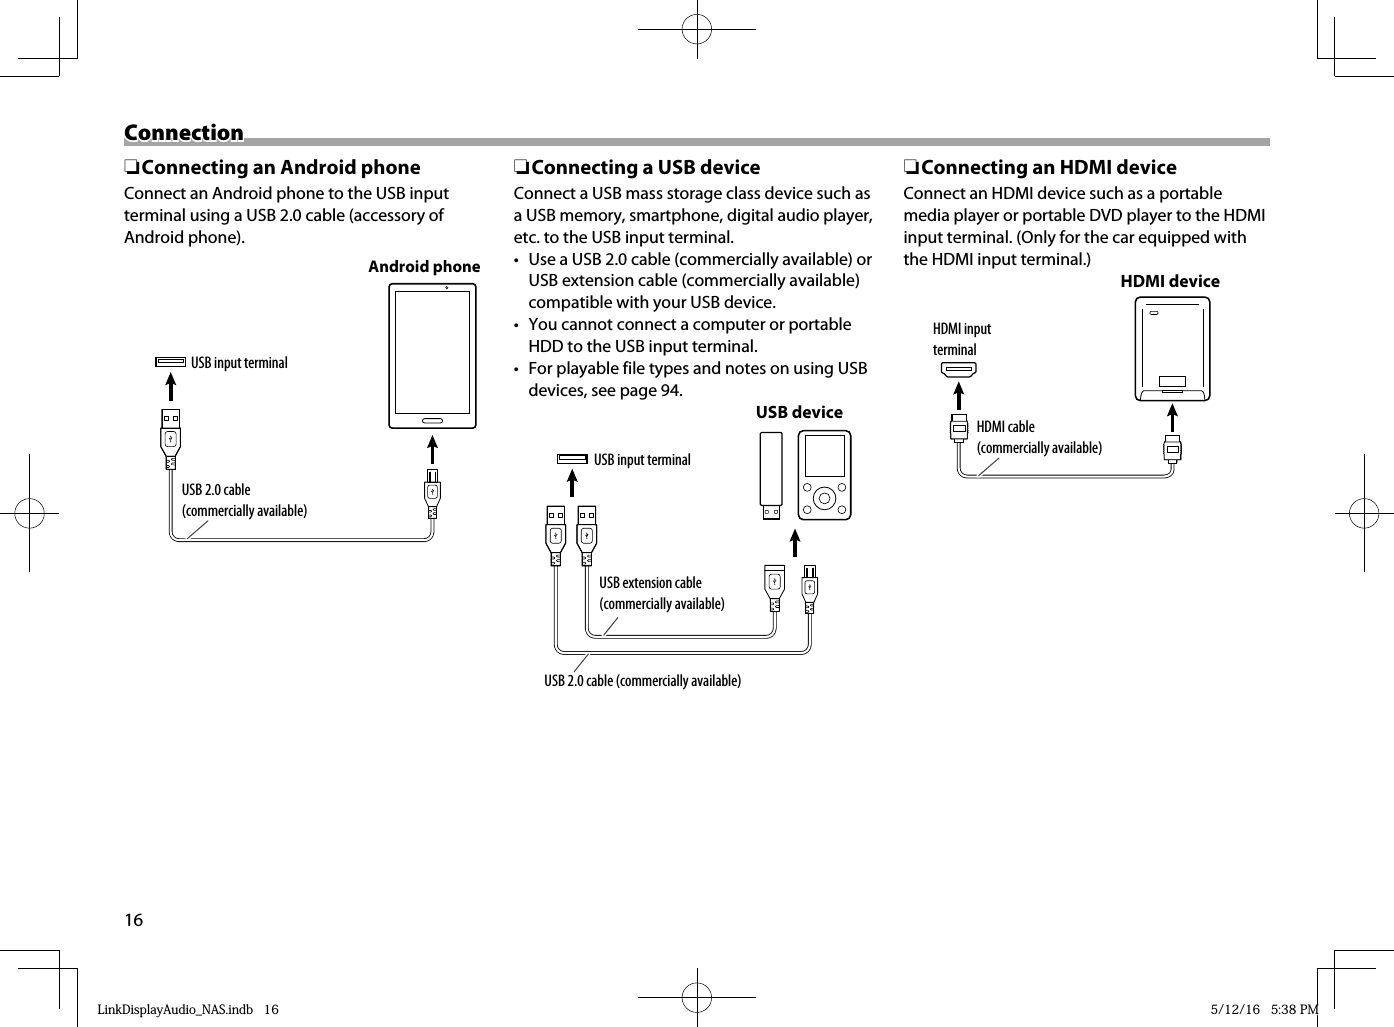
![ENGLISH 27AppsApps Using the Apps of an Android phone—Android Auto™ ❏ About Android AutoAndroid Auto enables you to use functions of your Android phone convenient for driving. You can easily access route guidance, make calls, listen to music, and access convenient functions on the Android phone while driving.• For details about Android Auto, visit <https://www.android.com/auto/> or <https://support.google.com/androidauto>.• For available Android Auto Apps, visit <http://g.co/androidauto>.Although the service area is expanding, Android Auto service is NOT available in some markets. Please check the latest information concerning availability in your region from the below website.http://www.android.com/auto/#hit-the-road Compatible Android phonesYou can use Android Auto with Android phones compatible with Android Auto of Android 5.0 (Lollipop) or later. ❏ Connecting an Android phone compatible with Android AutoConnect an Android phone compatible withAndroid Auto to the USB input terminal using a USB 2.0 cable (accessory of Android phone).• If Android Auto and Apps are not ready, install Android Auto and Apps beforehand.USB input terminalUSB 2.0 cable (commercially available)Android phone• Bluetooth connection is canceled when the Android phone is connected to the USB input terminal. Use the phone and audio player function on the Android phone.• If two Android phones compatible with Android Auto are connected, the device recognized first is used for Android Auto. ❏ Starting Android AutoSelect [Android Auto] on the <Home> screen to display the Android Auto screen and enable use of the Apps of the connected Android phone.Preparation:• To use the hands-free function, connect the Android phone via Bluetooth. (Page 17) – When an Android phone compatible with Android Auto is connected to the USB input terminal, the device is connected via Bluetooth automatically, and the Bluetooth mobile phone currently connected is disconnected.• Unlock your Android phone beforehand.1 Touch [Android Auto] on the <Home> screen.The Android Auto screen is displayed.• [Android Auto] is displayed only when a compatible Android phone is connected.LinkDisplayAudio_NAS.indb 27LinkDisplayAudio_NAS.indb 27 5/12/16 5:39 PM5/12/16 5:39 PM](https://usermanual.wiki/JVCKENWOOD/K1027/User-Guide-2992794-Page-27.png)
![28AppsApps ❏Operation buttons on the Android Auto screenYou can perform the operations of the Apps of the connected Android phone.• The items displayed on the screen differ among the connected Android phones.11 App/information button Starts the App or displays the information. ❏ Using voice control (recognition) of the Android AutoYou can activate the voice control (recognition) of the Android phone as follows.1 Touch [ ] to activate voice control (recognition).2 Talk to the Android phone through the microphone built in the car.• To deactivate voice control (recognition), touch [ ].To operate using the buttons on the steering wheel, press and hold the button. (Page 72)• To deactivate voice control (recognition), press and hold the button on the steering wheel. ❏ Switching to the Android Auto screen while displaying another screenYou can switch to the Android Auto screen while listening to another source or displaying another screen.• The screen cannot be switched in some cases, such as while the picture from the connected camera is displayed.1 Touch the Apps button to activate Android Auto.To exit the Android Auto screenTouch the Home button on the monitor panel.LinkDisplayAudio_NAS.indb 28LinkDisplayAudio_NAS.indb 28 5/12/16 5:39 PM5/12/16 5:39 PM](https://usermanual.wiki/JVCKENWOOD/K1027/User-Guide-2992794-Page-28.png)
![ENGLISH 29 Phone—Hands-free Phone—Hands-freePreparation:Connect a mobile phone compatible with Phone Book Access Profile (PBAP) or Object Push Profile (OPP) via Bluetooth. (Page 17)• To check whether your mobile phone is compatible with PBAP/OPP, consult with the product information provided by the dealer or the manufacturer.About mobile phones compatible with Phone Book Access Profile (PBAP)If your mobile phone supports PBAP, phone book and call histories stored on the mobile phone are automatically transferred to the product when the mobile phone is connected.• Phone book: up to 1000 entries• History (dialed calls, received calls, and missed calls): up to 20 entries in totalReceiving a callWhen a call comes in, the incoming call screen is displayed.• You can select the incoming call screen size on the <Phone Function> settings screen. (Page 37)To receive a callTouch [Answer].• Incoming screen is shrunk when <Incoming Screen Size> is set to [Small Screen] (Page 37).• When <Auto Answer> is set to [On] (Page 37), the product answers incoming calls automatically.• To adjust the volume, touch [+]/[−].• Call information is displayed if acquired.• The incoming call screen is not displayed while the picture from the connected camera is displayed. (Page 22)Use the buttons on the steering wheel to answer/end a call. (Page 72)To reject a callTouch [Decline].LinkDisplayAudio_NAS.indb 29LinkDisplayAudio_NAS.indb 29 5/12/16 5:39 PM5/12/16 5:39 PM](https://usermanual.wiki/JVCKENWOOD/K1027/User-Guide-2992794-Page-29.png)
![30 Phone—Hands-free Phone—Hands-freePhone operations while talkingWhile talking, available operation buttons are displayed. You can make adjustments to the mobile phone on the talking screen. ❏Ending a callSelect [End] on the talking screen to end the call. ❏Adjusting the volume during a callYou can adjust the volume level between 0 to 11 (initial: 6). • You can also adjust the volume by turning the PWR/VOL control on the monitor panel. ❏Muting the microphone volumeYou can turn off the microphone temporarily.• While muting, the [Mute] button is highlighted.To restore the microphone volume: Touch [Mute] again. ❏Turning off the hands-free modeYou can turns off the hands-free mode and talk on the phone directly during a call.• When the hands-free mode is off, any buttons other than [End], [Small Screen], and [Hands-free OFF] are disabled on the screen. ❏Entering numbers during a callYou can enter numbers when required during a call using the DTMF (Dual Tone Multi Frequency) function.1 Display the keypad.2 Enter numbers.• To return to the talking screen, touch [ ].LinkDisplayAudio_NAS.indb 30LinkDisplayAudio_NAS.indb 30 5/12/16 5:39 PM5/12/16 5:39 PM](https://usermanual.wiki/JVCKENWOOD/K1027/User-Guide-2992794-Page-30.png)
![ENGLISH 31 Phone—Hands-free Phone—Hands-free ❏Shrinking/enlarging the talking screen during a callYou can shrink or enlarge the talking screen during a call so that you can see the current source screen, or fully display the talking screen to make adjustments.• When <Incoming Screen Size> is set to [Small Screen], the talking screen is also shrunk. (Page 37)To shrink the talking screen, touch [Small Screen].To enlarge the talking screen, touch [Full Screen].• You can also hide the talking screen by touching the [ ] tab on the shrunk screen. To restore, touch the [ ] tab. Making a call ❏ Displaying the <Phone> screenSelect [Phone] on the <Home> screen to display the <Phone> screen and select a method to make a call from direct number entry, address book, history, or favorites list.• When <Phone Function Lock> is set to [On], a password is required. (Page 36)To unlock the security, enter the password, then select [Enter].1 Touch [Phone] on the <Home> screen.1234561 Enters the phone number directly. (Page 32)2 Makes a call.3 Displays the address book. (Page 32)4 Displays the call history. (Page 33)5 Displays the favorites lists. (Page 33)6 Displays <Bluetooth> settings screen. (Page 17)• If no mobile phone is connected via Bluetooth, a message window is displayed. – Select [Pair Device] to register a new device. – Select [Select Device] to connect a registered device. – Select [Cancel] to cancel connection.LinkDisplayAudio_NAS.indb 31LinkDisplayAudio_NAS.indb 31 5/12/16 5:39 PM5/12/16 5:39 PM](https://usermanual.wiki/JVCKENWOOD/K1027/User-Guide-2992794-Page-31.png)
![32Phone—Hands-freePhone—Hands-free ❏ Making a call by direct number entryYou can enter the phone number on the <Phone> screen to make a call.1 Display the <Phone> screen. (Page 31)2 Enter the phone number (1), then make a call (2).• Touch [ ] to delete the last entry. ❏ Selecting the phone number from the address bookYou can select the contact from the phone book of the connected mobile phone.• To customize the address book of this product, see page 34.1 Display the <Phone> screen. (Page 31)2 Display the <Address Book List> screen.• When an update of the address book is required, see page 34.3 Select the contact from the address book.• To search for the contact by initial, select [Alphabet Search] to display the keypad, then select the initial. – If the initial of the contact is not a letter or number, select [#$%]. – To close the keypad screen, touch [ ].4 Select the phone number (1), then make a call (2).LinkDisplayAudio_NAS.indb 32LinkDisplayAudio_NAS.indb 32 5/12/16 5:39 PM5/12/16 5:39 PM](https://usermanual.wiki/JVCKENWOOD/K1027/User-Guide-2992794-Page-32.png)
![ENGLISH 33Phone—Hands-freePhone—Hands-free ❏ Selecting the phone number from the call historyYou can select the contact from missed calls, received calls, and dialed calls stored on the connected mobile phone.1 Display the <Phone> screen. (Page 31)2 Display the <Recent Calls> screen.3 Select the phone number (1), then make a call (2).• The call history types are indicated by the icons shown at the right of the phone number ([ ]: missed calls/[ ] : received calls/[ ] : dialed calls). ❏ Selecting the phone number from the favorites listYou can register a contact from the address book as a favorite to make access to the frequently used phone numbers easier.• To customize the favorites list, see page 34.1 Display the <Phone> screen. (Page 31)2 Display the <Favorites > screen.3 Select the contact from the favorites list.• When a voice tag is registered, “ ” appears besides the contact on the <Favorites> screen.4 Select the phone number (1), then make a call (2).LinkDisplayAudio_NAS.indb 33LinkDisplayAudio_NAS.indb 33 5/12/16 5:39 PM5/12/16 5:39 PM](https://usermanual.wiki/JVCKENWOOD/K1027/User-Guide-2992794-Page-33.png)
![34Phone—Hands-freePhone—Hands-free Customizing the address book/favorites list ❏ Transferring the phone bookYou can transfer items from the mobile phone to the address book of the product.1 Display the <Address Book List> screen. (Page 32)2 Display the transfer method selection window.3 Select the transfer method from the mobile phone.[All] Transfers all items registered in the phone book of the mobile phone.[Individual] Selects items to transfer by operating the mobile phone.• To cancel the transfer, select [Cancel].When the [All] transfer is completed, “Address book update complete. ” is displayed.• For some mobile phones, all items may not be transferred.• For some mobile phones, you may need to operate the mobile phone to start transfer of the phone book. ❏ Registering items to the favorites listYou can register up to 20 items from the address book to the favorites list.• When the mobile phone is unregistered, the items on the favorites list are also cleared.1 Display the <Favorites > screen. (Page 33)2 Display the <Register to Favorites> screen.3 Select the items to register from the address book (1), then register the selected items (2).• The check mark ( ) appears in the check box of a selected item.A message window is displayed. Select [Yes].• To search for the contact by initial, select [Alphabet Search] to display the keypad, then select the initial. – If the initial of the contact is not a letter or number, select [#$%]. – To close the keypad screen, touch [ ].LinkDisplayAudio_NAS.indb 34LinkDisplayAudio_NAS.indb 34 5/12/16 5:39 PM5/12/16 5:39 PM](https://usermanual.wiki/JVCKENWOOD/K1027/User-Guide-2992794-Page-34.png)
![ENGLISH 35Phone—Hands-freePhone—Hands-free ❏Deleting items from the address book/favorites listYou can delete all items at once, or delete individual items from the address book/favorites list.• Even if you delete items on the product, they are not deleted on the mobile phone.1 Display the <Address Book List> (Page 32) or <Favorite s> (Page 33) screen.2 Display the delete screen.3 Select items (1), then delete them (2).• The check mark ( ) appears in the check box of a selected item.A message window is displayed. Select [Yes].• To select all items, select [Select All]. – To cancel all selections, select [Clear All].• To search for the contact by initial, select [Alphabet Search] to display the keypad, then select the initial. – If the initial of the contact is not a letter or number, select [#$%]. – To close the keypad screen, touch [ ]. ❏ Registering voice tags for contacts in the favorites listYou can register voice tags for the contacts registered in the favorites list to make calling easier using voice control.• You can call a contact by speaking the voice tag after activating voice control. (Page 23)1 Select the contact from the favorites list. (Page 33)2 Display the voice tag recording screen.3 Record the voice tag.R REC lights up on the screen while recording.• To stop recording, touch [R Record].• To listen to the recorded voice tag, touch [I Play]. – To stop playback, touch [W Stop].• To delete the voice tag, touch [Delete].• When a voice tag is registered, “ ” appears besides the contact on the <Favorites> screen.LinkDisplayAudio_NAS.indb 35LinkDisplayAudio_NAS.indb 35 5/12/16 5:39 PM5/12/16 5:39 PM](https://usermanual.wiki/JVCKENWOOD/K1027/User-Guide-2992794-Page-35.png)
![36Phone—Hands-freePhone—Hands-free Settings for mobile phone usage ❏ Activating the mobile phone security—Phone Function LockYou can lock some functions of the mobile phone. When activating the mobile phone security, you are required to enter a password to make calls and view the address book and history.• You can set <Phone Function Lock> for each registered mobile phone.• No password is set initially at the factory. Once you have registered your password, note it somewhere.1 Display the <Phone Function> settings screen.• To display from the menu window, see page 37.• To display from the <Settings> screen, see page 76.2 Activate the mobile phone security. The password setting screen is displayed.3 Enter a 4 digit password (1), then confirm the entry (2). • Touch [ ] to delete the last entry.• Touch [What is Phone Function Lock?] to know about the <Phone Function Lock>. – To close the message window, select [Cancel].4 Repeat step 3 to enter the password again for confirmation.The mobile phone security is activated. • When displaying the <Phone> screen, a password is required. Enter the password, then touch [Enter] to unlock the security.To deactivate the mobile phone securitySelect [Off] for <Phone Function Lock>.• The registered password is required. Enter the password, then select [Set] to deactivate.LinkDisplayAudio_NAS.indb 36LinkDisplayAudio_NAS.indb 36 5/12/16 5:39 PM5/12/16 5:39 PM](https://usermanual.wiki/JVCKENWOOD/K1027/User-Guide-2992794-Page-36.png)
![ENGLISH 37Phone—Hands-freePhone—Hands-free ❏ Displaying the settings menu from the menu windowYou can change the settings for using a mobile phone from the menu window.1 Display the menu window.While the <Phone> screen is displayed, touch the Menu button on the monitor panel. 2 Select the setting menu. [Device Select]Displays the <Bluetooth> settings screen to select another mobile phone. (Page 19)[Phone Settings]Displays the <Phone Function> settings screen to change the settings for using a mobile phone. (See below.)[Sound Settings]Displays the <Sound> settings screen to adjust the sound. (Page 73)The selected settings screen is displayed. ❏ Settings on the <Phone Function> settings screenYou can change the settings for using a mobile phone.1 Display the <Phone Function> settings screen.• To display from the menu window, see the left column.• To display from the <Settings> screen, see page 76.2 Change the settings. <Phone Volume>Adjusts the volume level during a call. <Auto Answer>Activates/deactivates auto answer.• Off: The product does not answer calls automatically. Answer the calls manually.• On: The product answers incoming calls automatically after 5 seconds. <Incoming Screen Size>Selects the incoming call screen size.• Full Screen: Displays the incoming call screen at full size.• Small Screen: Displays the incoming call screen at the smaller size.<Phone Function Lock>Activates/deactivates the mobile phone security. (Page 36)LinkDisplayAudio_NAS.indb 37LinkDisplayAudio_NAS.indb 37 5/12/16 5:39 PM5/12/16 5:39 PM](https://usermanual.wiki/JVCKENWOOD/K1027/User-Guide-2992794-Page-37.png)
![38 iPod/iPhone iPod/iPhonePlayback operationsPreparation:Connect iPod/iPhone to this product via the USB input terminal. (Page 15)• For playable iPod/iPhone types, see page 93. ❏ Playing tracks on iPod/iPhoneSelect [iPod] on the <Home> screen to display the <iPod> source control screen and start playback.• You cannot play video on the product.1 Touch [iPod] on the <Home> screen. ❏ Indications and buttons on the source control screenYou can perform operations to play tracks contained in the connected iPod/iPhone.123456Playback information1 Repeat mode indicator (Page 39)2 Track number/total track number in the current category• Touching the number displays the track list of the current category.3 Shuffle mode indicator (Page 39)4 Artwork (shown if the track contains artwork)• To activate/deactivate the artwork, see page 40.5 Track information• Touching the information area displays detailed information of the current track. To return to the source control screen, touch [ ].6 Progress bar and playing time/total playing time• By dragging the position indicator ( ) on the bar, you can change the playback position.Operation buttons[ ] Displays the information of the current track.[S] [T]• Selects a track. (Touch)• Rewinds/fast-forwards. (Hold) [W]* Pauses playback.[I]* Starts playback.[ ]Displays the track/category list.* During playback, [W] is displayed, and when playback is paused, [I] is displayed. ❏ Selecting a track from the track/category listYou can select a track from the track/category list.• You can also select a track from the track list of the current category by touching the track number/total track number on the <iPod> source control screen.1 Display the track/category list.LinkDisplayAudio_NAS.indb 38LinkDisplayAudio_NAS.indb 38 5/12/16 5:39 PM5/12/16 5:39 PM](https://usermanual.wiki/JVCKENWOOD/K1027/User-Guide-2992794-Page-38.png)
![ENGLISH 39iPod/iPhoneiPod/iPhone2 Select a category.The list previously displayed is shown.3 Select a desired item.Select an item in each layer until you reach and select the desired track.• To select another category, touch [ ] repeatedly until the <iPod Category> screen is displayed.• To search for the track name by initial, select [Alphabet Search] to display the keypad, then select the initial. – If the initial of the track is not a letter or number, select [#$%]. – To close the keypad screen, touch [ ].• To return to the current track playback screen, select [Current Track]. ❏ Selecting the playback modeYou can select the repeat mode and shuffle mode.1 Display the menu window.While the <iPod> source control screen is displayed, touch the Menu button on the monitor panel. 2 Select a playback mode.[ Repeat Song] Repeats the current track.[ Repeat Category]Repeats all tracks in the current category.[Repeat Off] Deactivates the repeat mode.[ Shuffle] Shuffles all tracks.[Shuffle Off] Deactivates the shuffle mode.• You can also select the playback mode by touching the repeat mode or shuffle mode indicator on the <iPod> source control screen.LinkDisplayAudio_NAS.indb 39LinkDisplayAudio_NAS.indb 39 5/12/16 5:39 PM5/12/16 5:39 PM](https://usermanual.wiki/JVCKENWOOD/K1027/User-Guide-2992794-Page-39.png)
![40iPod/iPhoneiPod/iPhone. Settings for iPod/iPhone playbackYou can change the settings for playing iPod/iPhone from the menu window. ❏ Switching to another iPod/iPhoneWhen two iPod/iPhone devices are connected to the USB input terminals, you can switch iPod/iPhone to play.• If iPhone compatible with CarPlay is connected, you cannot switch to it.1 Display the menu window.While the <iPod> source control screen is displayed, touch the Menu button on the monitor panel. 2 Select [Switch iPod]. • Each time you touch [Switch iPod], the iPhone/iPod changes alternately. ❏ Displaying/hiding the album artworkYou can display/hide the album artwork if the file has tag data that includes the album artwork.1 Display the menu window.While the <iPod> source control screen is displayed, touch the Menu button on the monitor panel. 2 Display the <iPod> settings screen.3 Change the settings. [Off] Hides the artwork.[On] Displays the artwork.LinkDisplayAudio_NAS.indb 40LinkDisplayAudio_NAS.indb 40 5/12/16 5:39 PM5/12/16 5:39 PM](https://usermanual.wiki/JVCKENWOOD/K1027/User-Guide-2992794-Page-40.png)
![ENGLISH 41iPod/iPhoneiPod/iPhone. ❏ Setting the speed of audiobookYou can change the speed of audiobook playback.1 Display the menu window.While the <iPod> source control screen is displayed, touch the Menu button on the monitor panel. 2 Display the <iPod> settings screen.3 Change the settings. [Slower] Reads the contents slowly.[Normal] Reads the contents at normal speed.[Faster] Reads the contents faster. ❏ Adjusting the sound during playbackYou can adjust the sound for playing iPod/iPhone.1 Display the menu window.While the <iPod> source control screen is displayed, touch the Menu button on the monitor panel. 2 Display the <Sound> settings screen. 3 Make adjustment on the <Sound> settings screen. (Page 73)LinkDisplayAudio_NAS.indb 41LinkDisplayAudio_NAS.indb 41 5/12/16 5:39 PM5/12/16 5:39 PM](https://usermanual.wiki/JVCKENWOOD/K1027/User-Guide-2992794-Page-41.png)
![42 USB USBPlayback operationsPreparation:• Connect a USB device to the product via the USB input terminal. (Page 16)• For playable file types and notes on using USB devices, see page 94. ❏ Playing tracks on a USB deviceSelect [USB] on the <Home> screen to display the <USB> source control screen and start playback.1 Touch [USB] on the <Home> screen: ❏Indications and buttons on the source control screenYou can perform operations to play tracks contained in the connected USB device.12 34657Playback information1 Repeat mode indicator (Page 43)2 Track number/Total track number in the current folder• Touching the number displays the track list of the current folder.3 Shuffle mode indicator (Page 43)4 Album artwork (shown while playing if the file has tag data that includes the album artwork)• Touching artwork area displays detailed information of the current track. To return to the source control screen, touch [ ].• To activate/deactivate the album artwork, see page 45.5 Current folder• Touching [ ] /[ ] skips to a track in the previous/next folder.6 Track information• Touching the information area displays detailed information of the current track. To return to the source control screen, touch [ ].7 Progress bar and playing time/total playing time• By dragging the position indicator ( ) on the bar, you can change the playback position.Operation buttons[ ] Displays the information of the current track.[S] [T]• Selects a track. (Touch)• Rewinds/fast-forwards. (Hold) [W]* Pauses playback.[I]* Starts playback.[ ]Displays the track/folder list.* During playback, [W] is displayed, and when playback is paused, [I] is displayed. ❏Selecting a track from the track/folder listYou can select a track from the track/folder list.• You can also select a track from the track list of the current folder by touching the track number/total track number on the <USB> source control screen. (See above.)LinkDisplayAudio_NAS.indb 42LinkDisplayAudio_NAS.indb 42 5/12/16 5:39 PM5/12/16 5:39 PM](https://usermanual.wiki/JVCKENWOOD/K1027/User-Guide-2992794-Page-42.png)
![ENGLISH 43USBUSB1 Display the track/folder list.2 Select a folder.• The list previously displayed is shown.• The speaker mark ( ) appears beside the folder which contains the track currently played back.• To return to the current track playback screen, select [Current Track].3 Select a desired item.Select an item in each layer until you reach and select the desired track.• The speaker mark ( ) appears beside the track currently played back.• To return to the higher folder, select [Higher Folder].• To return to the root folder, select [TOP Folder].• To return to the current track playback screen, select [Current Track]. ❏ Selecting the playback modeYou can select the repeat mode and shuffle mode.• You cannot activate both the repeat mode and shuffle mode at the same time.• You can play up to 65535 tracks in shuffle mode.1 Display the menu window.While the <USB> source control screen is displayed, touch the Menu button on the monitor panel. 2 Select a playback mode.[ Repeat Song] Repeats the current track.[ Repeat Folder] Repeats all tracks in the current folder.[Repeat All] Repeats all tracks in the USB device.[ Shuffle] Shuffles all tracks.[Shuffle Off] Deactivates the shuffle mode.• You can also select the playback mode by touching the repeat mode or shuffle mode indicator on the <USB> source control screen.LinkDisplayAudio_NAS.indb 43LinkDisplayAudio_NAS.indb 43 5/12/16 5:39 PM5/12/16 5:39 PM](https://usermanual.wiki/JVCKENWOOD/K1027/User-Guide-2992794-Page-43.png)
![44USBUSB ❏ Playing the beginning of a track—track scanYou can listen to the first 10 seconds of each track by scanning the tracks.1 Display the menu window.While the <USB> source control screen is displayed, touch the Menu button on the monitor panel. 2 Start the track scan.• To scan all the tracks in the current folder, select [ Scan Folder].• To scan all tracks in the USB device, select [ Scan]. • To stop the track scan, select [Stop].Settings for USB playbackYou can change the settings for playing USB devices from the menu window. ❏ Switching to another USB deviceWhen two USB devices are connected to the USB input terminals, you can switch the USB device to play.1 Display the menu window.While the <USB> source control screen is displayed, touch the Menu button on the monitor panel. 2 Select [Switch USB]. • Each time you touch [Switch USB], the USB devices change alternately.LinkDisplayAudio_NAS.indb 44LinkDisplayAudio_NAS.indb 44 5/12/16 5:39 PM5/12/16 5:39 PM](https://usermanual.wiki/JVCKENWOOD/K1027/User-Guide-2992794-Page-44.png)
![ENGLISH 45USBUSB ❏ Displaying/hiding the album artworkYou can display/hide the album artwork if the file has tag data that includes the album artwork.1 Display the menu window.While the <USB> source control screen is displayed, touch the Menu button on the monitor panel. 2 Display the <USB> settings screen. 3 Change the settings. [Off] Hides the album artwork.[On] Displays the album artwork. ❏ Adjusting the sound during playbackYou can adjust the sound for playing USB devices.1 Display the menu window.While the <USB> source control screen is displayed, touch the Menu button on the monitor panel. 2 Display the <Sound> settings screen. 3 Make adjustment on the <Sound> settings screen. (Page 73)LinkDisplayAudio_NAS.indb 45LinkDisplayAudio_NAS.indb 45 5/12/16 5:39 PM5/12/16 5:39 PM](https://usermanual.wiki/JVCKENWOOD/K1027/User-Guide-2992794-Page-45.png)
![46Tuner—FM/AM/HD RadioTuner—FM/AM/HD RadioTMTMYou can tune in to both conventional radio station and HD Radio stations.• In Canada, HD Radio is not available. You can only enjoy the conventional analog broadcast.About FM/AM radio ❏ Selecting FM/AMSelect [FM] or [AM] on the <Home> screen to display the <FM> or <AM> source control screen and tune in to a station.1 Touch [FM] or [AM] on the <Home> screen. ❏Indications and buttons on the source control screenYou can perform operations to listen to a desired station.FM (analog stations)12345AM (analog stations)154Tuner reception information for analog stations: 1 Station frequency currently tuned in2 Station name*3 Preset list switch tab (only for FM) Selects one of the preset lists where 6 stations are registered.4 Program information* Touching the information area displays detailed information sent by the current station.To close the information screen, touch [ ].5 Preset list (Page 49)* Displayed when the FM station sends the related signals. No information is displayed for AM stations.Operation buttons[<]/[>] Changes the frequency step by step. (Page 48)[I<<]/[>>I] Searches for a station. (Page 48) [ Tune] Enables direct entry of station frequency. (Page 48) [ Station] Displays the station list. (Page 49) About HD Radio™ TechnologyLinkDisplayAudio_NAS.indb 46LinkDisplayAudio_NAS.indb 46 5/12/16 5:39 PM5/12/16 5:39 PM](https://usermanual.wiki/JVCKENWOOD/K1027/User-Guide-2992794-Page-46.png)
![ENGLISH 47Tuner—FM/AM/HD RadioTuner—FM/AM/HD RadioTMTM• Adjacent to traditional main stations are HD2/HD3 Channels, providing new original formats on the FM dial.• HD Radio broadcasts deliver crystal-clear, CD-like digital audio quality to consumers.• Provides song name, artist, station ID, and other relevant data to enrich the listening experience.Artist Experience is the synchronous transmission, delivery, and display of images on the HD Radio receiver that are related to the specific audio segment.• HD Radio is available in USA and Mexico. To find HD Radio stations in your area, visit<http://www.hdradio.com>.FM (HD Radio stations)345678912AM (HD Radio stations)592648Tuner reception information for HD Radio stations: 1 Message area (only for FM)2 Live indicator• When receiving a live broadcast like a baseball game, the indicator lights up. Reception mode for HD Radio is automatically switched to analog reception.(Page 50)3 Sub-channel indicator• Lights up when the received station sends sub-channel (HD2 – HD8) signals as well as main channel signals (HD1). The currently tuned channel lights up in orange.4 HD Radio indicator• Lights up in orange while receiving the digital signals of HD Radio station.• Lights up in gray while receiving the analog signals of HD Radio station.• Not displayed while receiving the signals of conventional radio stations.5 Station frequency currently tuned in6 Station name7 Preset list switch tab (only for FM) Selects one of the preset lists where 6 stations are stored. 8 Program information Touching the information area displays detailed information sent by the current station. (Related picture or station logo is also displayed if the related signals are sent.)To close the information screen, touch [ ].9 Preset listIncludes 6 preset stations. You can store either main channel or sub-channel. (Page 49)Operation buttons[HD Radio] Selects the HD Radio reception mode. When the digital reception is selected, the indicator lights up in orange. (Page 50) [<]/[>] Changes the frequency step by step. (Page 48)[I<<]/[>>I] Searches for a station. (Page 48) [ Tune] Enables direct entry of station frequency. (Page 48) [ Station] Displays the station list. (Page 49) LinkDisplayAudio_NAS.indb 47LinkDisplayAudio_NAS.indb 47 5/12/16 5:39 PM5/12/16 5:39 PM](https://usermanual.wiki/JVCKENWOOD/K1027/User-Guide-2992794-Page-47.png)
![48Tuner—FM/AM/HD RadioTuner—FM/AM/HD RadioTMTM Tuning in to a station ❏ Searching for a stationYou can search for a station manually or automatically on the <FM> or <AM> source control screen.To tune in to a station manuallyTouch [<]/[>] repeatedly. Each time you touch the button, the frequencies change step by step.• Touching and holding [<]/[>] changes the frequencies continuously.• For HD Radio: If the tuned HD Radio station offers sub-channel programs, touching the button will select each channel in turn, then move to another station.To search for a station automaticallyTouch [I<<]/[>>I] until the station (main channel and sub-channel for HD Radio) search starts. When a station of sufficient signal strength is found, the search stops automatically.• Touching and holding [I<<]/[>>I] changes the frequencies continuously. When you release the button, search starts.• To stop searching, touch [I<<]/[>>I]. To select sub-channels directly You can select sub-channel (and main channel) directly by touching the sub-channel indicator on the source control screen. To enter the station frequency directly If you know the station frequency, you can enter it directly to tune in to the station.1 Display the <Direct Tune Entry> screen.2 Enter the station frequency.• Touch [ ] to delete the incorrect entry. Each time you touch the button, the last entered number is deleted.LinkDisplayAudio_NAS.indb 48LinkDisplayAudio_NAS.indb 48 5/12/16 5:39 PM5/12/16 5:39 PM](https://usermanual.wiki/JVCKENWOOD/K1027/User-Guide-2992794-Page-48.png)
![ENGLISH 49Tuner—FM/AM/HD RadioTuner—FM/AM/HD RadioTMTM Selecting a station from the listYou can easily find a station on the station list which shows only the available stations.• Only for HD Radio FM stations: You can list up the programs being broadcast by selecting category.1 Display the <Station List> screen.2 Select a station from the list.• To update the station list, select [Update]. – Only for AM: A message window is displayed. To cancel the update, touch [Cancel] on the message window.To search for a station by category—Category Filter (only for FM HD Radio FM stations )1 Display the <Station List> screen. (See the left column.) 2 Display the <Category Filter> screen (category list). • To deactivate Category Filter, select [Filter Off]. You can select a station from all received stations.3 Select a category.The available stations for the selected category are listed. The currently selected category is highlighted.4 Select a station from the list. (See the left column.) Presetting stations ❏Storing stations in memoryYou can preset 6 stations for AM and 12 stations for FM (6 stations for each preset list).• For HD Radio stations: You can store either main channel (HD1) or sub-channel (HD2 – HD8). 1 Tune in to a station you want to preset. (Page 48)2 Select a preset list (for FM only) (1), then touch and hold a preset button to store (2).(Hold)The station selected in step 1 is stored. If another station has been preset in the button, it will be replaced.3 Repeat steps 1 and 2 to preset other stations.LinkDisplayAudio_NAS.indb 49LinkDisplayAudio_NAS.indb 49 5/12/16 5:39 PM5/12/16 5:39 PM](https://usermanual.wiki/JVCKENWOOD/K1027/User-Guide-2992794-Page-49.png)
![50Tuner—FM/AM/HD RadioTuner—FM/AM/HD RadioTMTM ❏Selecting a preset stationYou can select your favorite station easily from the preset list. Select a preset list (for FM only) (1), then a preset button (2). Changing the HD Radio reception modeYou can change HD Radio reception mode each for FM and AM broadcast. ❏ Changing on the source control screen Each time you touch [HD Radio] on the source control screen, HD Radio reception mode changes to digital (On) or analog (Off) reception. ❏ Changing on the tuner setting menu (only for HD Radio)1 Display the menu window.While the <FM> or <AM> source control screen is displayed, touch the Menu button on the monitor panel. 2 Display <Tuner> settings screen.3 Change the settings.<HD Radio (FM)>Selects the HD Radio reception mode for FM.<HD Radio (AM)>Selects the HD Radio reception mode for AM.• When the digital reception (On) is selectedThe indicator of the [HD Radio] button lights up in orange. You can listen to the digital broadcast. But if reception becomes poor, digital reception changes automatically to analog reception.• When the analog reception (Off) is selectedThe indicator of the [HD Radio] button goes off. You can listen to the analog broadcast. LinkDisplayAudio_NAS.indb 50LinkDisplayAudio_NAS.indb 50 5/12/16 5:39 PM5/12/16 5:39 PM](https://usermanual.wiki/JVCKENWOOD/K1027/User-Guide-2992794-Page-50.png)
![52 SiriusXM® Satellite Radio SiriusXM® Satellite RadioOnly SiriusXM brings you more of what you love to listen to, all in one place. Get over 140 channels, including commercial-free music plus the best sports, news, talk, comedy and entertainment. A SiriusXM Subscription is required. For more information, visit www.siriusxm.com.• SiriusXM is available in USA and Canada only.Activating subscription 1 Check your Radio ID.The SiriusXM Satellite Radio ID is required for activation and can be found by tuning in to Channel 0. (Page 53)Radio ID• The Radio ID does not include the letters I, O, S or F.2 Activate the built-in SiriusXM Tuner using one of the two methods below:• For users in the USA: – Online: Visit www.siriusxm.com/activatenow – Phone: Call SiriusXM Listener Care at 1-866-635-2349• For users in Canada: – Online: Visit www.siriusxm.ca/activatexm – Phone: Call XM customer Care at 1-877-438-96773 When a confirmation message is displayed, select [OK]. ❏ Selecting SiriusXMTouch [SiriusXM] on the <Home> screen to display the <SiriusXM> source control screen and listen to a channel.1 Touch [SiriusXM] on the <Home> screen. ❏Indications and buttons on the source control screenYou can perform operations to listen to a favorite service. 21345678SiriusXM Satellite Radio reception information1 Warning message area2 Progress bar/time code (Page 56)3 Channel logo4 Channel number/Category5 SiriusXM Satellite Radio indicators• [ TuneMix]: Lights up in blue when TuneMix is activated, and in white when it is ready to use. (Page 56)• [ On Air]: Lights up in yellow when a selected alert program has started. (Pages 60, 61)• [Go Back]: Lights up when tuning in to a SportsFlash alerted program. (Page 59)6 Program information*• Album picture is also displayed if the related signals are sent.• Touching the information area displays detailed information sent by the current station. Touching [>>] scrolls the text, if not all of the text is shown.To close the information screen, touch [ ].7 Preset list switch tab Selects one of the preset lists where 6 channels are stored. The mark ( ) in the tab indicates that channels preset in this group can be used for Smart Favorites. (Page 57)8 Preset listIncludes 6 preset channels. (Page 55)LinkDisplayAudio_NAS.indb 52LinkDisplayAudio_NAS.indb 52 5/12/16 5:39 PM5/12/16 5:39 PM](https://usermanual.wiki/JVCKENWOOD/K1027/User-Guide-2992794-Page-52.png)
![ENGLISH 53SiriusXM Satellite RadioSiriusXM Satellite RadioOperation buttons while listening• For Replay operation buttons, see page 61.[? Help] Displays the help list to know about SiriusXM. (Page 67) [<]/[>] Changes the channel one by one. [ Tune] Enables direct entry of channel number. (See the rightmost column.)[ Station] Displays the station list. (Page 54) [ ] Register or unregister the current song or artist for Artist/Song Alert. (Page 61) White • When the button lights up in white, it is not registered.• When the button lights up in yellow, it is registered.[ TuneMix] Starts TuneMix. (Page 56) [ On Air] Tunes in to your alert-set program. (Pages 60, 61) [Go Back] For SportsFlash: Returns to your last tuned program from SportsFlash alerted-program. (Page 59) Tuning in to a channel ❏ Searching for a channelYou can search for a channel on the <SiriusXM> source control screen.To tune in to a channel manuallyTouch [<]/[>] repeatedly. Each time you touch the button, the channels change one by one.• Touching and holding [<]/[>] changes the channels continuously. ❏ Entering the channel number directly If you know the channel number, you can enter it directly to tune in to the channel.1 Display the <Direct Channel Entry> screen.2 Enter the channel number. • Touch [ ] to delete the incorrect entry. Each time you touch the button, the last entered number is deleted.LinkDisplayAudio_NAS.indb 53LinkDisplayAudio_NAS.indb 53 5/12/16 5:39 PM5/12/16 5:39 PM](https://usermanual.wiki/JVCKENWOOD/K1027/User-Guide-2992794-Page-53.png)
![54SiriusXM Satellite RadioSiriusXM Satellite Radio ❏ Selecting a channel from the listYou can easily find a channel on the channel list which shows only the available channels.• You can also list up the channels being broadcast by selecting the category.1 Display the <Station List> screen.2 Select a channel from the list.Channel numbers are displayed with their channel names, artist names, or song titles on the list.• To change the indications beside the channel numbers, touch [Info].Each time you touch the button, the indications change in turn.• The currently playing channel is highlighted and also indicated by the speaker mark ( )• When the channels are parental-locked, the lock mark ( ) is displayed. To select this channel, you are required to enter the password. (Page 64)Once lock is canceled temporarily, the unlock mark ( ) is displayed.To list up channels by category—Category Filter1 Display the <Station List> screen. (See the left column.)2 Display the <Category Filter> screen (category list). 3 Select a category.The available channels for the selected category are listed. The currently selected category is highlighted.• To deactivate Category Filter, select [All Channels]. You can select a channel from all received channels.4 Select a channel from the list. (See the leftmost column.)LinkDisplayAudio_NAS.indb 54LinkDisplayAudio_NAS.indb 54 5/12/16 5:39 PM5/12/16 5:39 PM](https://usermanual.wiki/JVCKENWOOD/K1027/User-Guide-2992794-Page-54.png)
![ENGLISH 55SiriusXM Satellite RadioSiriusXM Satellite Radio ❏ Selecting a channel while scanning—Channel ScanYou can easily find a channel by scanning all available channels.To activate Channel Scan 1 Display the menu window. While the <SiriusXM> source control screen is displayed, touch the Menu button on the monitor panel. 2 Select [Channel Scan].Scanning starts, and the detected channel plays for 10 seconds, then skips to the next channels.3 Find a favorite channel.• To play the currently detected song, touch [Stop].• To skip to the previous/next song, touch [O] or [N]. Presetting channels ❏ Storing channels in memoryYou can preset 36 channels (6 for each preset list).• You can only use the preset channels in preset lists 1 and 2 for Smart Favorites. (Page 57) 1 Tune in to a channel you want to preset. (Page 53)2 Select a preset list (1), then touch and hold a preset button to store (2).(Hold)The channel selected in step 1 is stored. If another channel has been preset in the button, it will be replaced.3 Repeat steps 1 and 2 to preset other channels. ❏Selecting a preset channelYou can select your favorite channel easily from the preset list. Select a preset list (1), then a preset button (2).LinkDisplayAudio_NAS.indb 55LinkDisplayAudio_NAS.indb 55 5/12/16 5:39 PM5/12/16 5:39 PM](https://usermanual.wiki/JVCKENWOOD/K1027/User-Guide-2992794-Page-55.png)
![56SiriusXM Satellite RadioSiriusXM Satellite RadioReplaying the contentsThis product records the programs automatically for replay. So you do not miss any of the news, talk, sports or music content you like. You can pause, rewind and replay the program.• For the currently tuned programs: This product continually buffers up to 60 minutes of the contents.• For the preset channels (Smart Favorites): This product buffers up to 30 minutes of 12 preset channels of preset list 1 and 2 (Smart Favorites channels). ❏ Indications on the Replay mode screen1 21 Progress bar• While recording, the bar shows the amount of buffered content and the remaining capacity.• While replaying, the position indicator ( ) on the bar shows where you are on the buffered content.• While listening to a live program, the position indicator ( ) on the bar goes off.2 Time code Shows you the point in the Replay buffer you are listening to.• Example: –5:00 – You are listening to the portion of 5 minutes behind the current broadcast.Operation buttons (for Replay)The following buttons work for Replay and Smart Favorites.[W]/[I]• [W]: Pauses Replay.• [I]: Starts Replay.[S]/[T]• [S]: Skips Replay position backward (touch), and reverses (hold).• [T]: Skip Replay position forward (touch), and fast-forwards (hold).[Live] Finishes Replay and goes back to the current broadcast.• When you turn off the power switch (or ignition), all buffer recording is deleted. Using TuneMix™You can listen to the music played or being played in the 6 preset channels of the current preset list. Playback order is randomly determined.TuneMix is only enabled if the following conditions are satisfied.• TuneMix works for the music channels certified by SiriusXM.• Preset channels are not parental-locked.• At least 2 channels of above conditions have been preset in the current preset list.To activate TuneMixWhen you can use this function, the [ TuneMix] button lights up in white. Otherwise, it will be grayed out.1 Touch [ TuneMix] on the <SiriusXM> source control screen.When the TuneMix starts, the [ TuneMix] button lights up in blue.LinkDisplayAudio_NAS.indb 56LinkDisplayAudio_NAS.indb 56 5/12/16 5:39 PM5/12/16 5:39 PM](https://usermanual.wiki/JVCKENWOOD/K1027/User-Guide-2992794-Page-56.png)
![ENGLISH 57SiriusXM Satellite RadioSiriusXM Satellite RadioTo stop TuneMixTouch [ TuneMix] again.The [ TuneMix] button lights up in white.• TuneMix is also canceled when you select another preset list or channel. Using TuneStart™When you select a Smart Favorites channel, you can listen to the current song from the beginning.To activate TuneStart 1 Display the menu window. While the <SiriusXM> source control screen is displayed, touch the Menu button on the monitor panel. 2 Display <Settings> screen for SiriusXM. 3 Display <TuneStart> screen.4 Select [On].• To deactivate TuneStart, select [Off]. To return to previous screens, touch [ ]. Using TuneScan™You can scan the buffer recordings (current channel and Smart Favorites channels). So you can find your favorite songs.• TuneScan works for the music channels certified by SiriusXM.• You can also scan the buffer recording of the channels which are not parental-locked.• When no buffer recording is available, you cannot activate TuneScan.To activate TuneScan 1 Display the menu window. While the <SiriusXM> source control screen is displayed, touch the Menu button on the monitor panel. 2 Select [TuneScan].Scanning starts, and the detected songs plays for 10 seconds, then skips to the next song.Continued on the next page...LinkDisplayAudio_NAS.indb 57LinkDisplayAudio_NAS.indb 57 5/12/16 5:39 PM5/12/16 5:39 PM](https://usermanual.wiki/JVCKENWOOD/K1027/User-Guide-2992794-Page-57.png)
![58SiriusXM Satellite RadioSiriusXM Satellite Radio3 Find your favorite song.• To play the currently detected song, touch [Stop].• To skip to the previous/next song, touch [O] or [N]. Receiving alerts for big plays—SportsFlash™SportsFlash will notify you when a big play happens during a game played by one of your favorite sports teams. You can tune in to the channel and hear the play unfold as though it is live. Continue listening to the game, or you can return to your previous channel. ❏Selecting your favorite teamsYou can register up to 12 teams for SportsFlash. You can receive information for up to 5 games at the same time.1 Display the menu window. While the <SiriusXM> source control screen is displayed, touch the Menu button on the monitor panel. 2 Display <Settings> screen for SiriusXM. 3 Display <SportsFlash> screen.4 Display <Team Settings> screen.5 Select a league.6 Select favorite teams.• To select teams of other leagues, touch [ ] and repeat this step.• To select teams by the team name, touch [ Alphabet Search] then enter the first letter of the team name.To return to previous screens after setting is done, touch [ ] repeatedly.LinkDisplayAudio_NAS.indb 58LinkDisplayAudio_NAS.indb 58 5/12/16 5:39 PM5/12/16 5:39 PM](https://usermanual.wiki/JVCKENWOOD/K1027/User-Guide-2992794-Page-58.png)
![ENGLISH 59SiriusXM Satellite RadioSiriusXM Satellite Radio ❏Activating SportsFlash alertActivation is required once you select the favorite teams. 1 Display the menu window. While the <SiriusXM> source control screen is displayed, touch the Menu button on the monitor panel.:2 Display <Settings> screen for SiriusXM.3 Display <SportsFlash> screen.4 Select [On] for <SportsFlash>.• To deactivate SportsFlash, select [Off]. To return to previous screens after setting is done, touch [ ]. ❏ Switching to the game informationWhen a big play happens during one of the games, an alert screen appears.Touch [Jump] to listen to the big play.• To cancel the currently received alert, touch [Ignore]. – You will receive future alerts for the game.• To cancel the alert for this game, touch [Skip Game].Once you move to the alerted game, you can go back to the previous channel by touching [Go Back]. • If you remain tuning in to the alerted game for about 5 minutes, [Go Back] disappears from the screen. LinkDisplayAudio_NAS.indb 59LinkDisplayAudio_NAS.indb 59 5/12/16 5:39 PM5/12/16 5:39 PM](https://usermanual.wiki/JVCKENWOOD/K1027/User-Guide-2992794-Page-59.png)
![60SiriusXM Satellite RadioSiriusXM Satellite Radio Receiving alerts for favorite games—Game AlertGame Alert will notify you when your favorite teams start playing. You can tune in to the channel broadcasting the games. ❏Selecting your favorite teamsYou can register up to 48 teams for Game Alert. 1 Display the menu window. While the <SiriusXM> source control screen is displayed, touch the Menu button on the monitor panel. 2 Display <Settings> screen for SiriusXM. 3 Display <Game Alert> screen.4 Display <Select Leagues> screen.5 Select a league.6 Select favorite teams.• To select teams of other leagues, touch [ ] and repeat this step.• To select teams by the team name, touch [ Alphabet Search] then enter the first letter of the team name.To return to previous screens after setting is done, touch [ ] repeatedly. ❏ Activating Game AlertActivation is required once you select the favorite teams. 1 Display the menu window. While the <SiriusXM> source control screen is displayed, touch the Menu button on the monitor panel. LinkDisplayAudio_NAS.indb 60LinkDisplayAudio_NAS.indb 60 5/12/16 5:39 PM5/12/16 5:39 PM](https://usermanual.wiki/JVCKENWOOD/K1027/User-Guide-2992794-Page-60.png)
![ENGLISH 61SiriusXM Satellite RadioSiriusXM Satellite Radio2 Display <Settings> screen for SiriusXM. 3 Select [SiriusXM] or [All] for <Game Alert> settings.[SiriusXM] You can receive alerts only when the playback source is SiriusXM.[All] You can receive alerts regardless of the playback source.• To deactivate Game Alert, select [Off].To return to previous screens after setting is done, touch [ ] repeatedly. ❏Switching to the gameWhen a game of your favorite teams starts, an alert screen appears.Touch [Jump] to tune in to the alerted game broadcast program.• To cancel the alert for this game, touch [Cancel]. Receiving alerts for favorite contents—Artist/Song AlertArtist/Song Alert will notify you when your favorite contents (artists/songs) start playing. You can tune in to the channel broadcasting your favorite contents (artists/songs). ❏ Registering your favorite artists and songsYou can register the artists and songs while listening to your favorite songs. (Total number of contents (artists/songs) you can register is 60).• Touch [ ] beside the artist name to register the artist. Each time you touch the button, it changes registered and unregistered• Touch [ ] beside the song title to register the song. Each time you touch the button, it changes registered and unregistered ❏Selecting your favorite artists and songsYou need to select your favorite artists and songs for Artist/Song Alert. 1 Display the menu window. While the <SiriusXM> source control screen is displayed, touch the Menu button on the monitor panel. Continued on the next page...LinkDisplayAudio_NAS.indb 61LinkDisplayAudio_NAS.indb 61 5/12/16 5:39 PM5/12/16 5:39 PM](https://usermanual.wiki/JVCKENWOOD/K1027/User-Guide-2992794-Page-61.png)
![62SiriusXM Satellite RadioSiriusXM Satellite Radio2 Display <Settings> screen for SiriusXM. 3 Display <Artist/Song Alert> screen.4 Display <Artist Setting> or <Song Setting> screen.5 Select favorite artists or songs.Ex.: On the <Artist Setting> screenThe star mark ( ) beside the artist name or song title turns yellow when activated for Artist/Song Alert.• To select artists and songs by name, touch [ Alphabet Search] then enter the first letter of the name.To return to previous screens after setting is done, touch [ ] repeatedly. ❏Activating Artist/Song AlertYou need to activate Artist Alert and Song Alert separately. Song Alert has priority over Artist Alert if both alerts are received at the same time. 1 Display the menu window. While the <SiriusXM> source control screen is displayed, touch the Menu button on the monitor panel. 2 Display <Settings> screen for SiriusXM.LinkDisplayAudio_NAS.indb 62LinkDisplayAudio_NAS.indb 62 5/12/16 5:39 PM5/12/16 5:39 PM](https://usermanual.wiki/JVCKENWOOD/K1027/User-Guide-2992794-Page-62.png)
![ENGLISH 63SiriusXM Satellite RadioSiriusXM Satellite Radio3 Display <Artist/Song Alert> screen.4 Select [SiriusXM] or [All] for <Artist Alert> and <Song Alert>.[SiriusXM] You can receive alerts only when the playback source is SiriusXM.[All] You can receive alerts regardless of the playback source.• To deactivate Artist/Song Alert, select [Off]. To return to previous screens after setting is done, touch [ ] repeatedly. ❏Switching to the broadcast channel of your favorite artist/song When one of your favorite contents (artists/songs) starts playing, an alert screen appears.Touch [Jump] to tune in to the alerted broadcast program.• To cancel the alert for this content, touch [Cancel]. ❏Deleting artists and songs from the listYou can delete unwanted artists and songs from the lists. 1 Display the menu window. While the <SiriusXM> source control screen is displayed, touch the Menu button on the monitor panel. 2 Display <Settings> screen for SiriusXM.3 Display <Artist/Song Alert> screen.4 Display <Artist Setting> or <Song Setting> screen.Continued on the next page...LinkDisplayAudio_NAS.indb 63LinkDisplayAudio_NAS.indb 63 5/12/16 5:39 PM5/12/16 5:39 PM](https://usermanual.wiki/JVCKENWOOD/K1027/User-Guide-2992794-Page-63.png)
![64SiriusXM Satellite RadioSiriusXM Satellite Radio5 Display the <Delete> screen.Ex.: On the <Artist Setting> screen6 Select unwanted contents (artists/songs).Ex.: On the <Artist Setting> screenThe check mark ( ) appears beside the artist name or song title.• To select artists and songs by name, touch [ Alphabet Search] then enter the first letter of the name.7 Delete unwanted artists or songs.A message window is displayed. Select [Yes].To return to previous screens after setting is done, touch [ ] repeatedly. Restricting channel reception—Parental LockYou can restrict access to some SiriusXM channels. ❏Restricting channel receptionYou need to enter the password to restrict channel reception.• No password is set initially at the factory. Once you have registered your password, note it somewhere. 1 Display the menu window. While the <SiriusXM> source control screen is displayed, touch the Menu button on the monitor panel. 2 Display <Settings> screen for SiriusXM. 3 Display <Parental Lock>.LinkDisplayAudio_NAS.indb 64LinkDisplayAudio_NAS.indb 64 5/12/16 5:39 PM5/12/16 5:39 PM](https://usermanual.wiki/JVCKENWOOD/K1027/User-Guide-2992794-Page-64.png)
![ENGLISH 65SiriusXM Satellite RadioSiriusXM Satellite Radio4 Select [Mature] or [User] for <Parental Control>.[Mature] Channels specified by SiriusXM can not be tuned.[User] You can restrict channel reception yourself on the channel list.• To deactivate Parental Lock, select [Off]. 5 Enter your password.• Touch [ ] to delete the incorrect entry. Each time you touch the button, the last entered number is deleted.6 When no password has been set, you are required to enter your password again for reconfirmation.For [Mature] setting, Parental Lock is completed. The following steps are only for [User] setting.7 Select the channels on the channel list. The lock ( ) marks beside the channel numbers are highlighted, once Parental Lock is set for the channels.• To change the channel list, touch [Category] or [All Channel].To return to previous screens after setting is done, touch [ ] repeatedly. ❏Changing the passwordYou can use your own password (4-digit number).• Once you change the password, note it somewhere.• If you forget the password, reset the system (Page 75). Remember all other settings will be also reset. 1 Display the menu window. While the <SiriusXM> source control screen is displayed, touch the Menu button on the monitor panel. Continued on the next page...LinkDisplayAudio_NAS.indb 65LinkDisplayAudio_NAS.indb 65 5/12/16 5:39 PM5/12/16 5:39 PM](https://usermanual.wiki/JVCKENWOOD/K1027/User-Guide-2992794-Page-65.png)
![66SiriusXM Satellite RadioSiriusXM Satellite Radio2 Display <Settings> screen for SiriusXM. 3 Display <Parental Lock>.4 Select [Change] for <Lock Password>.5 Enter the current password.• Touch [ ] to delete the incorrect entry. Each time you touch the button, the last entered number is deleted. 6 Enter a new password.• Touch [ ] to delete the incorrect entry. Each time you touch the button, the last entered number is deleted.7 Enter the new password again for confirmation.• Touch [ ] to delete the incorrect entry. Each time you touch the button, the last entered number is deleted. Resetting SiriusXM settingsYou can reset all SiriusXM settings.To reset settings 1 Display the menu window. While the <SiriusXM> source control screen is displayed, touch the Menu button on the monitor panel. 2 Display <Settings> screen for SiriusXM. LinkDisplayAudio_NAS.indb 66LinkDisplayAudio_NAS.indb 66 5/12/16 5:39 PM5/12/16 5:39 PM](https://usermanual.wiki/JVCKENWOOD/K1027/User-Guide-2992794-Page-66.png)
![ENGLISH 67SiriusXM Satellite RadioSiriusXM Satellite Radio3 Select [Reset SiriusXM].A message window is displayed.• Touch [Yes] to reset the settings.• Touch [No] to cancel reset. Reading help informationTo know what this function is, you can use the[? Help] button on the current screen if available. 1 Display the <Help> screen.While the <SiriusXM> source control screen is displayed, touch [? Help].2 Select the function that you want to know about.• To use the functions listed on the screen, touch [SXM Settings]. The <Settings> screen for SiriusXM is displayed.3 Close the help window.Adjusting the sound during playbackYou can adjust the sound for listening to the SiriusXM from the menu window.1 Display the menu window.While the <SiriusXM> source control screen is displayed, touch the Menu button on the monitor panel. 2 Display the <Sound> settings screen. 3 Make adjustment on the <Sound> settings screen. (Page 73)LinkDisplayAudio_NAS.indb 67LinkDisplayAudio_NAS.indb 67 5/12/16 5:39 PM5/12/16 5:39 PM](https://usermanual.wiki/JVCKENWOOD/K1027/User-Guide-2992794-Page-67.png)
![68Bluetooth AudioBluetooth AudioPlayback operationsPreparation: Connect a Bluetooth audio device via Bluetooth. (Page 19)• Some operations cannot be performed depending on Bluetooth audio device. ❏ Playing tracks on a Bluetooth audio deviceSelect [Bluetooth Audio] on the <Home> screen to display the <Bluetooth Audio> source control screen and start playback.1 Touch [Bluetooth Audio] on the <Home> screen. ❏ Indications and buttons on the source control screenYou can perform operations to play tracks contained in the connected Bluetooth audio device.• The operation buttons, indications and information displayed on the screen differ among the connected devices.12 345Playback information1 Repeat mode indicator (Page 69)*12 Track number/Total track number3 Shuffle mode indicator (Page 69)*14 Track information*2• Touching the information area displays detailed information of the current track. To return to the source control screen, touch [ ].5 Progress bar and playing time/total playing timeOperation buttons[ ]*2Displays the information of the current track.[S] [T]*1• Selects a track. (Touch)• Rewinds/fast-forwards. (Hold) [I]Starts playback.[W]Pauses playback.*1 Available only when the connected device is compatible.*2 Not displayed when the device is only compatible with AVRCP 1.0.LinkDisplayAudio_NAS.indb 68LinkDisplayAudio_NAS.indb 68 5/12/16 5:39 PM5/12/16 5:39 PM](https://usermanual.wiki/JVCKENWOOD/K1027/User-Guide-2992794-Page-68.png)
![ENGLISH 69Bluetooth AudioBluetooth Audio ❏ Selecting the playback modeYou can select the repeat mode and shuffle mode. 1 Display the menu window.While the <Bluetooth Audio> source control screen is displayed, touch the Menu button on the monitor panel. 2 Select a playback mode.[ Repeat Song] Repeats the current track.[Repeat All] Repeats the all tracks.[ Shuffle] Shuffles all tracks.[Shuffle Off] Deactivates the shuffle mode.• You can also select the playback mode by touching the repeat mode or shuffle mode indicator on the <Bluetooth Audio> source control screen. ❏ Playing the beginning of a track—track scanYou can listen to the first 10 seconds of each track by scanning the tracks.1 Display the menu window.While the <Bluetooth Audio> source control screen is displayed, touch the Menu button on the monitor panel. 2 Start the track scan. • To stop the track scan, select [Stop].Settings for Bluetooth audio device playbackYou can change the settings for playing Bluetooth audio devices from the menu window. ❏ Switching to another Bluetooth deviceWhen two Bluetooth devices are connected, you can switch the Bluetooth device to use.1 Display the menu window.While the <Bluetooth Audio> source control screen is displayed, touch the Menu button on the monitor panel. Continued on the next page...LinkDisplayAudio_NAS.indb 69LinkDisplayAudio_NAS.indb 69 5/12/16 5:39 PM5/12/16 5:39 PM](https://usermanual.wiki/JVCKENWOOD/K1027/User-Guide-2992794-Page-69.png)
![70Bluetooth AudioBluetooth Audio2 Select [Switch Connected Device]. 3 Select the usage of another device to use. (Page 77)A message window is displayed. Select [Yes]. ❏ Setting Bluetooth audio devices 1 Display the menu window.While the <Bluetooth Audio> source control screen is displayed, touch the Menu button on the monitor panel. 2 Select [Bluetooth Settings]. 3 Change the settings.• For details on settings, see page 77. ❏ Adjusting the sound during playbackYou can adjust the sound for playing Bluetooth audio devices.1 Display the menu window.While the <Bluetooth Audio> source control screen is displayed, touch the Menu button on the monitor panel. 2 Display the <Sound> settings screen. 3 Make adjustment on the <Sound> settings screen. (Page 73)LinkDisplayAudio_NAS.indb 70LinkDisplayAudio_NAS.indb 70 5/12/16 5:39 PM5/12/16 5:39 PM](https://usermanual.wiki/JVCKENWOOD/K1027/User-Guide-2992794-Page-70.png)
![ENGLISH 71External Components—HDMIExternal Components—HDMIPlaying an HDMI devicePreparation: Connect an HDMI device to the product via the HDMI input terminal. (Page 16) ❏ Playing content on an HDMI deviceSelect [HDMI] on the <Home> screen to display the screen of the connected HDMI device and start playback.• [HDMI] is not displayed when the car is not equipped with the HDMI input terminal or when an HDMI device is not connected.• Video will not be displayed while driving.1 Select [HDMI] as the source.On the <Home> screen, touch [HDMI]. 2 Turn on the connected HDMI device and start playback.Adjusting the sound during playbackYou can adjust the sound for playing external components from the menu window.1 Display the menu window.While the <HDMI> source control screen is displayed, touch the Menu button on the monitor panel. 2 Display the <Sound> settings screen. 3 Make adjustment on the <Sound> settings screen. (Page 73)LinkDisplayAudio_NAS.indb 71LinkDisplayAudio_NAS.indb 71 5/12/16 5:39 PM5/12/16 5:39 PM](https://usermanual.wiki/JVCKENWOOD/K1027/User-Guide-2992794-Page-71.png)
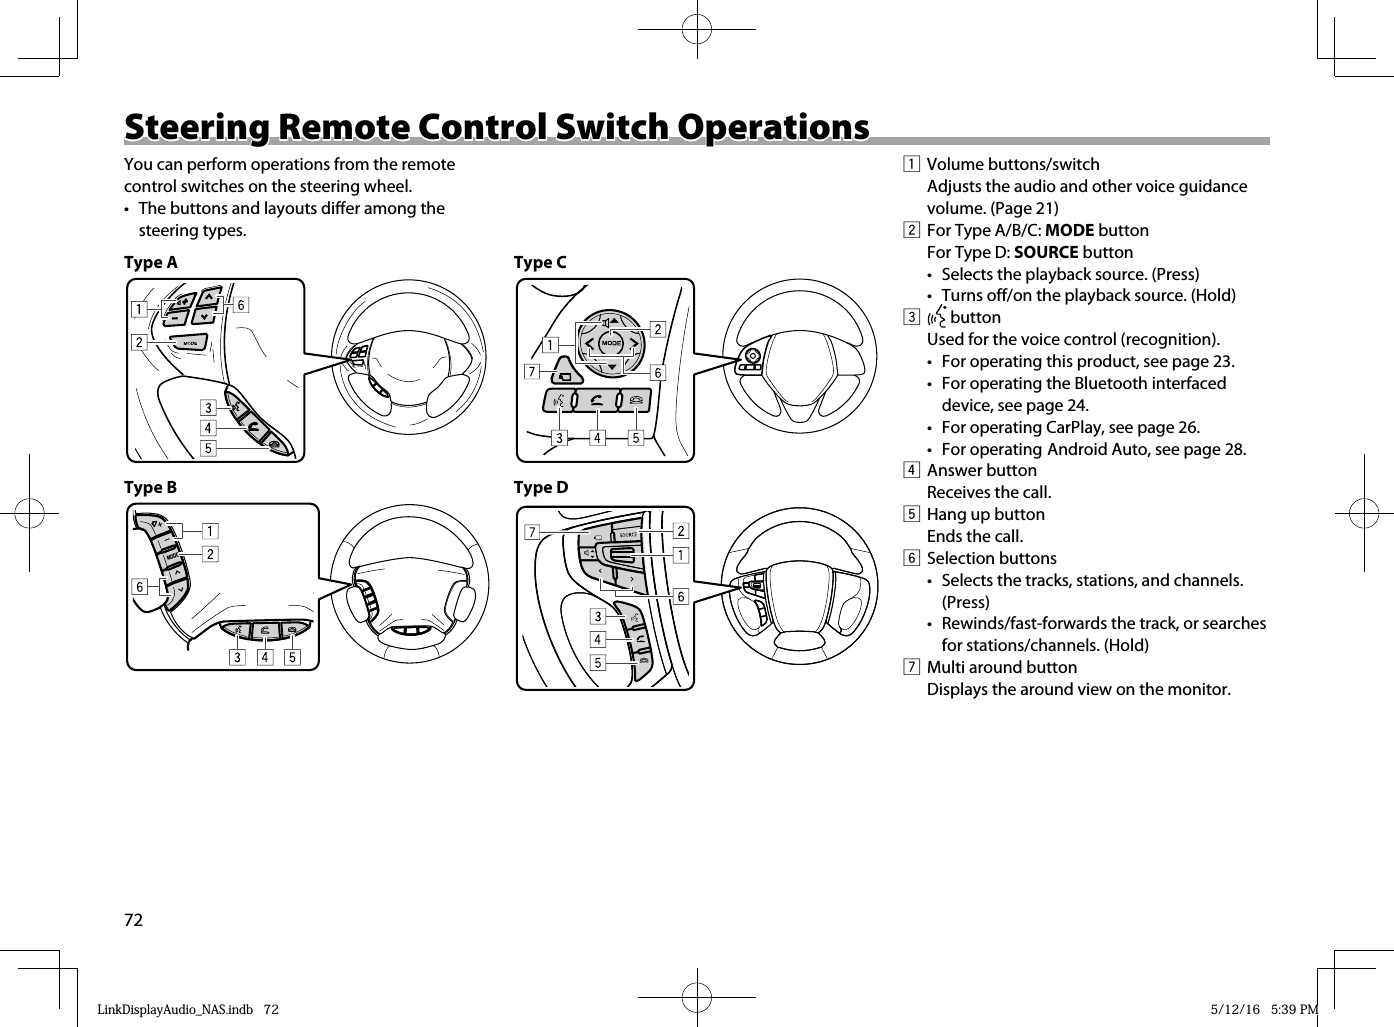
![ENGLISH 73SettingsSettings Adjusting the soundYou can adjust the sound for listening to the playback source on the <Sound> settings screen.1 Display the <Settings> screen.On the <Home> screen, touch [Settings]. 2 Display the <Sound> settings screen (1), then select the setting item (2).• Touch [<<]/[>>] repeatedly to display the [Sound] tab.*• To clear the adjustments made on all <Sound> setting items, select [Reset]. – A message window is displayed. Select [Yes].* [Surround] is displayed only when your car is equipped with a premium audio system.3 Adjust the settings.• You can also select setting items by touching tabs on the <Sound> settings screen. ❏ Adjusting the sound toneYou can adjust the tone for treble/middle/bass/punch* sounds.1 Select [Tone] on the <Sound> settings screen. (See the left column.)2 Adjust the tone for each sound.*• Touch [+] to increase and [–] to decrease.• To clear the adjustments on the [Tone] setting screen, select [Reset].* The <Punch> setting is adjustable only when your car is equipped with a premium audio system (with sub-woofer). ❏ Adjusting the speaker output balanceYou can adjust the output balance of the front/rear speakers and the left/right speakers.1 Select [Fader/Balance] on the <Sound> settings screen. (See the far left column.)2 Adjust the speaker output balance.• Touch [J]/[K] to adjust front and rear speaker output balance (Fader).• Touch [H]/[I] to adjust left and right speaker output balance (Balance).• You can also adjust the speaker output balance by dragging cursor ( ).• To clear the adjustments on the <Fader/Balance> setting screen, select [Reset].LinkDisplayAudio_NAS.indb 73LinkDisplayAudio_NAS.indb 73 5/12/16 5:39 PM5/12/16 5:39 PM](https://usermanual.wiki/JVCKENWOOD/K1027/User-Guide-2992794-Page-73.png)
![74SettingsSettings ❏ Selecting the music type suitable for the current trackYou can apply the sound equalization to the music by selecting the music type.1 Select [Music Type] on the <Sound> settings screen. (Page 73)2 Select the music type ❏ Enjoying surround sound (only when your car is equipped with a premium audio system)You can activate surround and select the listening position when your car is equipped with a premium audio system.1 Select [Surround] on the <Sound> settings screen. (Page 73)2 Change the surround settings. <Surround> Sets the surround type.• Off: Deactivates surround.• dts Neural Surround*1*2• PremiDIA WIDE*2<Sound Field>*1Sets the center position in the sound field.• Stage: Select this when only the driver is in the car.• Normal: Select this when the listeners are sitting on the front seats.• Live: Select this when the listeners are sitting on both the front and rear seats.• To clear the adjustments on the <Surround> setting screen, select [Reset].*1 Displayed when your car is equipped with a premium audio system (with sub-woofer).*2 Does not work when the playback source is the tuner (FM/AM analog broadcast).LinkDisplayAudio_NAS.indb 74LinkDisplayAudio_NAS.indb 74 5/12/16 5:39 PM5/12/16 5:39 PM](https://usermanual.wiki/JVCKENWOOD/K1027/User-Guide-2992794-Page-74.png)
![ENGLISH 75SettingsSettings ❏ Adjusting audio/volume settingsYou can adjust the following audio/volume settings precisely:• The sensitivity of the speed compensated volume to adjust the volume automatically according to the car speed• The compressed audio correction level using PremiDIA HD technology• The automatic volume adjustment level using Dolby volume technology1 Select [Other] on the <Sound> settings screen. (Page 73)2 Change the surround settings.When your car is equipped with a premium audio system (with sub-woofer):When your car is equipped with a premium audio system (without sub-woofer):When your car is not equipped with a premium audio system: <SCV> Selects the sensitivity of the speed compensated volume.• Low/Med./High• Off: Deactivates the speed compensated volume effect.<PremiDIA HD>*1Selects the compressed audio correction level.• Low/High• Off: Deactivates the effect.<DOLBY VOLUME>*2Selects the automatic volume adjustment level.• Low/Med./High• Off: Deactivates the effect.• To clear the adjustments on the <Other> settings screen, select [Reset].*1 Displayed when your car is equipped with a premium audio system (with/without sub-woofer).*2 Displayed when your car is equipped with a premium audio system (with sub-woofer). Initializing the settingsTo restore the initial settings, follow the procedure below.1 Display the <Settings> screen.On the <Home> screen, touch [Settings]. 2 Display the <System> settings screen (1), then select [Reset All] (2).• Touch [<<]/[>>] repeatedly to display the [System] tab.A message window is displayed. Select [Yes]. The product is reset and the initial screen is displayed.LinkDisplayAudio_NAS.indb 75LinkDisplayAudio_NAS.indb 75 5/12/16 5:39 PM5/12/16 5:39 PM](https://usermanual.wiki/JVCKENWOOD/K1027/User-Guide-2992794-Page-75.png)
![76SettingsSettings Setting menu items ❏Displaying the <Settings> screenYou can make adjustments and change settings on the <Settings> screen.1 Display the <Settings> screen.On the <Home> screen, touch [Settings]. 2 Select the setting tab (1), then select an item (2).• Touch [<<]/[>>] repeatedly to display other setting tabs. ❏<Sound> settings screenAdjust the sound for listening to the audio sources.• For details, see page 73– 75. ❏<Brightness/Contrast> settings screenAdjust the brightness and contrast of the screen.<Brightness>Adjusts the brightness of the screen.• –5 to +5 (Initial: +3 for <Day>/+2 for <Night>)<Contrast>Adjusts the contrast of the screen.• –5 to +5 (Initial: 0)• To clear the adjustments on the <Brightness/Contrast> settings screen, select [Reset].LinkDisplayAudio_NAS.indb 76LinkDisplayAudio_NAS.indb 76 5/12/16 5:39 PM5/12/16 5:39 PM](https://usermanual.wiki/JVCKENWOOD/K1027/User-Guide-2992794-Page-76.png)
![ENGLISH 77SettingsSettings ❏<System> settings screenChange the settings for operating the product. <Operating Sound>Activates/deactivates key-touch tone.• Off/On (Initial)<Caption Display Time>Selects the display time for the message windows and information on the screen.• 3 seconds (Initial)/7 seconds/10 seconds <Language Settings>Selects the language used for on-screen information.• English (Initial)/Français/Español<Voice Guidance Volume>Adjusts the volume of the voice guidance.• The <Voice Guidance Volume> of the other settings screens is also changed.• 0 to 11 (Initial: 6) ❏<Information> screenConfirm the information about the product.<Version Information>Shows the version of the product.<Open Source License>Shows the open source license.• Touch [Display] to display the Open Source License. – To close the screen, touch [ ]. ❏ <Bluetooth> settings screenConfigure settings for using Bluetooth devices, such as registration, connection and other general operations.• For details, see pages 17 – 20.• Touching the Bluetooth mark ( ) on the source control screen also displays the <Bluetooth> settings screen.[ ]/[ ]Activates the Bluetooth device either as phone or audio device. <Pair Device>Displays the pairing screen.<Unit Details>Displays the <Unit Bluetooth Details> screen.<Auto Connect. Set.>Displays the <Auto Connect. Set.> screen. LinkDisplayAudio_NAS.indb 77LinkDisplayAudio_NAS.indb 77 5/12/16 5:39 PM5/12/16 5:39 PM](https://usermanual.wiki/JVCKENWOOD/K1027/User-Guide-2992794-Page-77.png)
![78SettingsSettings ❏<Phone Function> settings screenConfigure settings for using mobile phones.• For details, see pages 36 – 37.<Phone Volume>Adjusts the volume level of the mobile phone. • 0 to 11 (initial: 6) <Auto Answer>Activates/deactivates auto answer.• Off (Initial)/On <Incoming Screen Size>Selects the incoming call screen size.• Full Screen (Initial)/Small Screen<Phone Function Lock>Activates/deactivates the mobile phone security.• This can be used when a mobile phone is connected via Bluetooth.• Off (Initial)/On ❏ <Voice Recognition> settings screenConfigure settings for using voice control.<Talkback>Activates/deactivates talk back which helps you with audio guidance to operate the product.• Off/On (Initial)<Remember Voice>Changes the learning method for voice commands of the product.• Manual: Learns voice commands manually to recognize your voice better. – Selecting [Manual] displays the voice command setup screen. After the message window is displayed, select [Yes]. Select [Start] on the next message window, then register voice commands. – Use the manual setup in the quiet place when your car is parked.• Auto (Initial): Learns your voice automatically as you speak voice commands.<Voice Recognition Language>Selects the language used for voice control of the product.• English (Initial)/Français/Español – Does not affect the on-screen language set on the <Language Settings> screen.(Page 77)<Voice Guidance Volume>Adjusts the volume level of the voice guidance.• The <Voice Guidance Volume> of the other settings screens is also changed.• 0 to 11 (initial: 6)LinkDisplayAudio_NAS.indb 78LinkDisplayAudio_NAS.indb 78 5/12/16 5:39 PM5/12/16 5:39 PM](https://usermanual.wiki/JVCKENWOOD/K1027/User-Guide-2992794-Page-78.png)
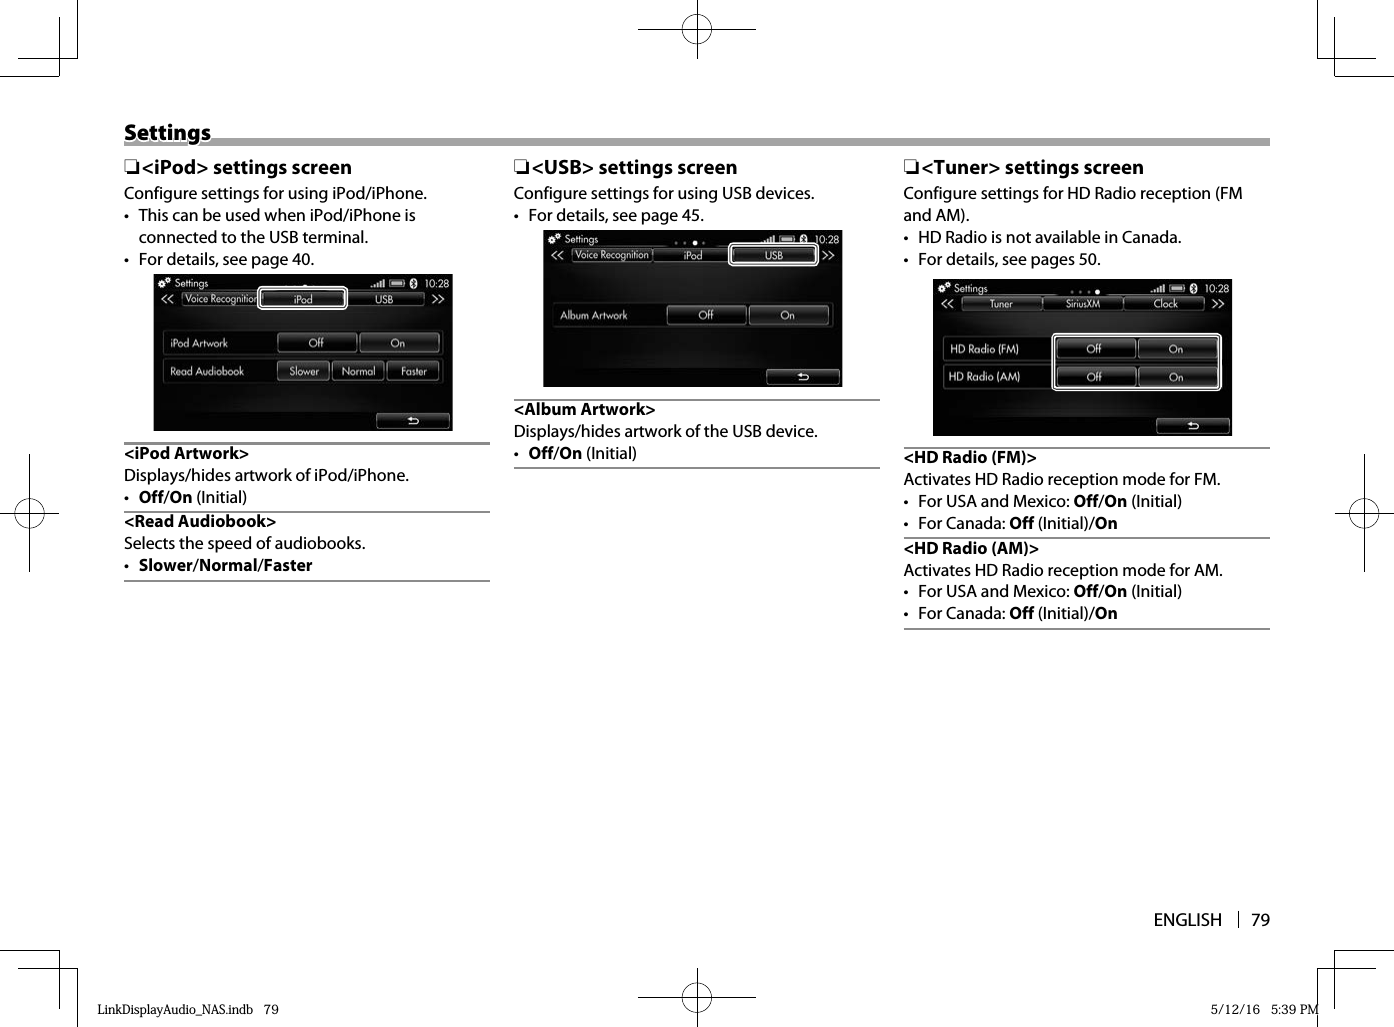
![80SettingsSettings ❏ <SiriusXM> settings screenConfigure settings for SiriusXM reception.• SiriusXM is available in USA and Canada.• For details, see pages 56 – 66.<SportsFlash>Activates/deactivates SportsFlash to notify you when a big play happens during a game played by one of your favorite sports teams. <Game Alert>Activates/deactivates Game Alert to notify you when your favorite teams start playing games. You can tune in to the channel broadcasting the games.<Artist/Song Alert>Activates/deactivates Artist/Song Alert to notify you when your favorite contents (artists/songs) start playing. <Parental Lock>You can restrict access to some SiriusXM channels.<TuneStart>You can scan the buffer recordings (current channel and Smart Favorites channels). • This function can be used for the music channels certified by SiriusXM. ❏ <Clock> settings screenConfigure settings for the clock time and clock design. • For details, see pages 13 – 14.• Touching the clock indication on the source control screen also displays the <Clock> settings screen. <Auto>Synchronizes the date and the clock time with the GPS. • Off/On (Initially checked: Eastern) <Manual>To set the clock manually, check [Manual], then touch the date and time button shown here to display manual clock settings screen.• Off (Initial)/On <Switch 12H/24H Display>Selects the time display format.• 12H (Initial)/24H<Daylight Saving Time>Select your country to activate the daylight saving time.• In Mexico, select [US/CA] where US daylight saving time is used.• Off (Initial)/US/CA/MX<Select Date Display/Clock Type>Select the data and clock display type. ❏ <Energy Monitor> settings screenOnly for plug-in hybrid vehicles: Configure settings for peak hold indication in the <Charge> graph and display limit for cumulative amount of regenerated electrical power.• For details, see pages 81 – 82. <Peak Hold>Displays instantaneous maximum value for <Charge> graph.• Off/On (Initial) <Reset Timing>Sets the reset timing of peak value (only used when <Peak Hold> is set to [On]).• Power Off (Initial)/Drive<Cumulative Amount Display Limit>Selects the display limit .• 3 kWh/6 kWh (Initial)/12 kWh• To check the function description, touch [What is Peak Hold?].LinkDisplayAudio_NAS.indb 80LinkDisplayAudio_NAS.indb 80 5/12/16 5:39 PM5/12/16 5:39 PM](https://usermanual.wiki/JVCKENWOOD/K1027/User-Guide-2992794-Page-80.png)
![ENGLISH 81Vehicle InformationVehicle Information Checking Vehicle InformationYou can check the following information.• Available functions differ among the car type.• For plug-in hybrid vehicles – Energy Monitor – Energy Flow – Eco Information – History Information• For gasoline cars – MPG Information – Eco Information (for only the cars equipped with Idling Stop System) – History Information ❏For plug-in hybrid vehiclesTo monitor energy consumption—[Energy Monitor]You can check the energy consumption and remaining energy.1 Display the <Vehicle Info> screen.On the <Home> screen, touch [Vehicle].2 Display the <Energy Monitor> screen.• Touch [<<]/[>>] to display the [Energy Monitor] setting tab if this screen is not displayed.Indications on the screen<EV Power> Indicates instantaneous electrical power consumption.<Instant MPG>Indicates instantaneous fuel consumption.<Charge> Indicates instantaneously regenerated electrical power.• This shows the electrical power charged by Regenerative Brake, but not by the engine.<Cumul.> Indicates cumulative amount of regenerated electrical power.Function buttons on the screen[Function Description]You can read the function description. After you read it, touch [ ] to close the window.[Reset Cumulative Amount]Resets cumulative amount of regenerated electrical power. When a message window is displayed, select [Yes].[Change Settings]Displays the <Energy Monitor> settings screen. (See page 80 to change the settings.) To display the settings menu from the menu window1 Display the menu window.While the <Energy Monitor> screen is displayed, touch the Menu button on the monitor panel. 2 Select the setting menu. The <Energy Monitor> settings screen is displayed (Page 80).Continued on the next page...LinkDisplayAudio_NAS.indb 81LinkDisplayAudio_NAS.indb 81 5/12/16 5:39 PM5/12/16 5:39 PM](https://usermanual.wiki/JVCKENWOOD/K1027/User-Guide-2992794-Page-81.png)
![82Vehicle InformationVehicle Information To change the settings<Peak Hold> • [On]: Displays instantaneous maximum value.• [Off]: Does not display.<Reset Timing>Sets the reset timing of peak value (only used when <Peak Hold> is set to [On] ).• [Power Off]: Resets when the power switch is set to the OFF or ACC position.• [Drive]: Reset when you start the car after stop.<Cumulative Amount Display Limit>Select from [3 kWh] / [6 kWh] / [12 kWh]. • To check the function description, touch [What is Peak Hold?].To monitor energy flow—[Energy Flow]You can check how energy is generated by the battery and engine and how it is consumed by them.1 Display the <Vehicle Info> screen.On the <Home> screen, touch [Vehicle Info].2 Display the <Energy Flow> screen.• Touch [<<]/[>>] to display the [Energy Flow] setting tab if this screen is not displayed.2157634 4Indications on the energy flow screen1 Distance you can drive only by electric power2 Total distance you can drive (both by electricity and fuel)3 Engine status indicator4 Energy flow indicatorThis indicator changes its position, direction, and color depending on the running status.5 Regenerating status of the front wheels6 Battery capacity indicator (16 steps)7 Regenerating status of the rear wheelsLinkDisplayAudio_NAS.indb 82LinkDisplayAudio_NAS.indb 82 5/12/16 5:39 PM5/12/16 5:39 PM](https://usermanual.wiki/JVCKENWOOD/K1027/User-Guide-2992794-Page-82.png)
![ENGLISH 83Vehicle InformationVehicle InformationTo know more about indications on <Energy Flow> screen• While running by electrical power:• While running by fuel:• The car is driven by 4 wheels (4WD). • While running by both electrical power and fuel:• While charging electrical power with the engine:• While regenerating electrical power by braking (Regenerative Brake): To monitor energy consumption—[Eco Information]You can check your Eco driving level (Average Consumption of electricity and gasoline).1 Display the <Vehicle Info> screen.On the <Home> screen, touch [Vehicle Info].2 Display the <Eco Information> screen.• Touch [<<]/[>>] to display the [Eco Information] setting tab if this screen is not displayed.<EV Drive Ratio> will be reset and become 100% when the battery is fully charged.Continued on the next page...LinkDisplayAudio_NAS.indb 83LinkDisplayAudio_NAS.indb 83 5/12/16 5:39 PM5/12/16 5:39 PM](https://usermanual.wiki/JVCKENWOOD/K1027/User-Guide-2992794-Page-83.png)
![84Vehicle InformationVehicle InformationFunction buttons on the screen[Reset Driving Data]Resets driving data on this screen. When a message window is displayed, select [Yes].[Auto Reset Mode]Displays the automatic reset mode screen where you can change the reset mode setting. Select [Yes] to use Auto Reset.• With Auto Reset Mode activated: The indicator on the button lights up. Driving data is reset when the power switch has been off for about 4 hours.• To manually reset the driving data, select [No]—Manual Reset Mode.• Auto Reset and Manual Reset are both linked to settings of the meters.To monitor fuel and electricity consumption—[History Information]You can check the fuel consumption and electricity consumption both in a long term and in a short term.1 Display the <Vehicle Info> screen.On the <Home> screen, touch [Vehicle Info].2 Display the <History Information> screen.• Touch [<<]/[>>] to display the [History Information] setting tab if this screen is not displayed.Function buttons on the screen[MPG] Displays fuel consumption (MPG).[Elec Consump]Displays electricity consumption. (mile/kWh).[Power] Displays electricity consumption used for driving and for air conditioner.• Regenerated electricity level is also displayed.You can switch the above graphs to check the long term history and the short term history. Touch the title of graph [Long] or [Short].[Reset Driving Data]Resets driving data on this screen. When a message window is displayed, select [Yes].[Auto Reset Mode]Displays the automatic reset mode screen where you can change the reset mode setting. Select [Yes] to use Auto Reset.• With Auto Reset Mode activated: The indicator on the button lights up. Driving data is reset when the power switch has been off for about 4 hours.• To manually reset the driving data, select [No]—Manual Reset Mode.• Auto Reset and Manual Reset are both linked to settings of the meters.LinkDisplayAudio_NAS.indb 84LinkDisplayAudio_NAS.indb 84 5/12/16 5:39 PM5/12/16 5:39 PM](https://usermanual.wiki/JVCKENWOOD/K1027/User-Guide-2992794-Page-84.png)
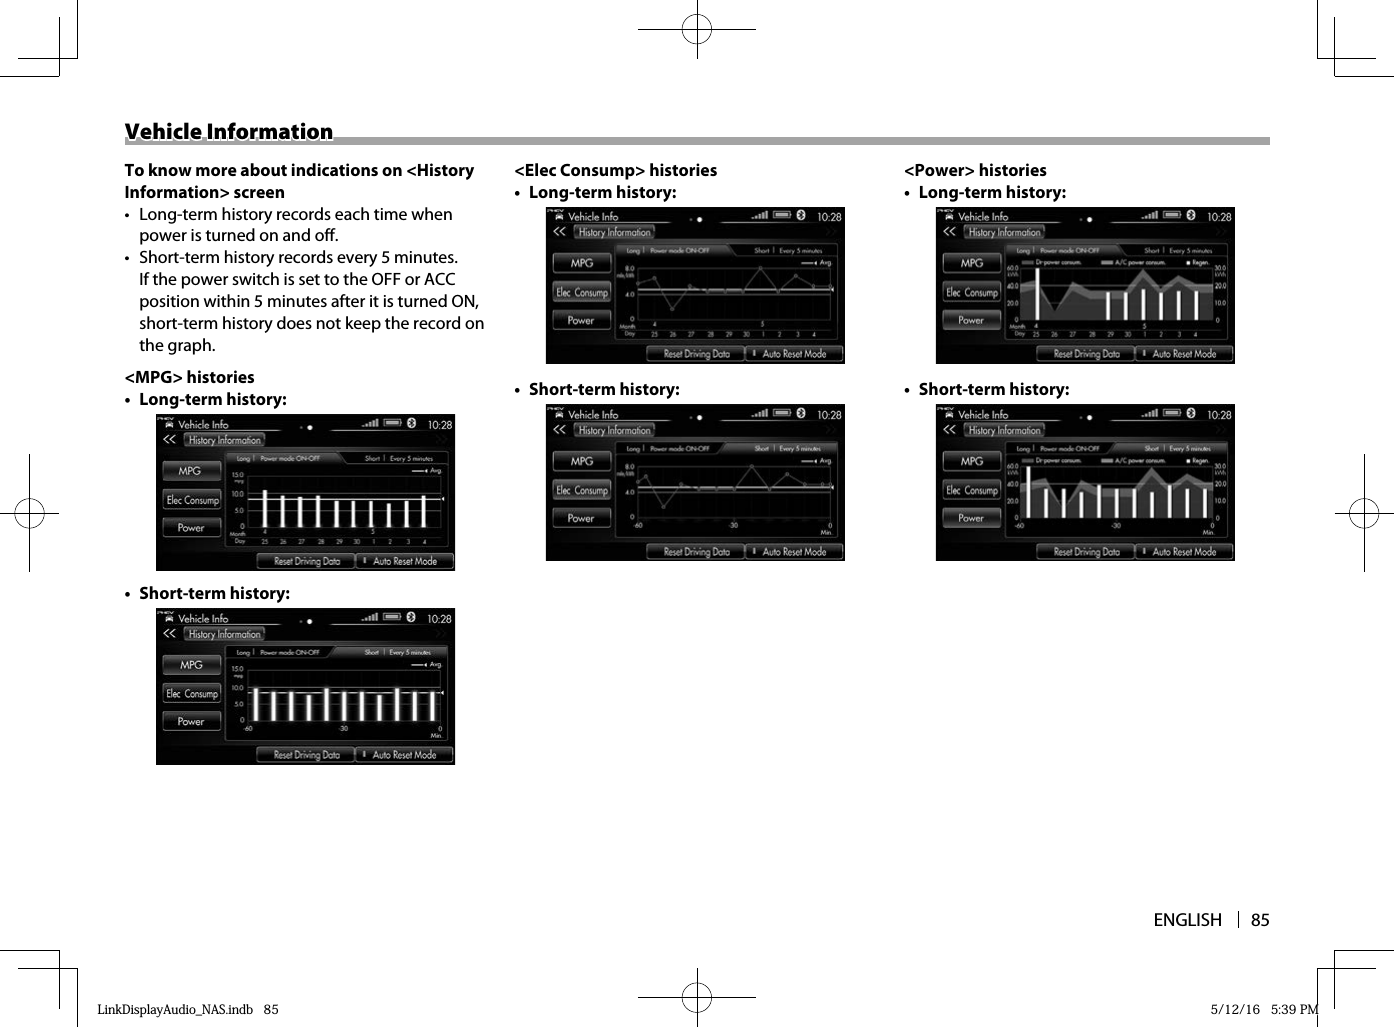
![86Vehicle InformationVehicle Information ❏For gasoline carsTo monitor fuel consumption—[MPG Information]You can check instantaneous fuel consumption and average consumption.1 Display the <Vehicle Info> screen.On the <Home> screen, touch [Vehicle].2 Display the <MPG Information> screen.Function buttons on the screen[Reset Average MPG]Resets average MPG data on this screen. When a message window is displayed, select [Yes].[Auto Reset Mode]Displays the automatic reset mode screen where you can change the reset mode setting. Select [Yes] to use Auto Reset.• With Auto Reset Mode activated: The indicator on the button lights up. MPG is reset when the power switch has been off for about 4 hours.• To manually reset average MPG data, select [No]—Manual Reset Mode.• Auto Reset and Manual Reset are both linked to settings of the meters.To monitor your Eco driving level—[Eco Information] You can check your Eco driving level—Driving Score.• This function is only for the cars equipped with Idling Stop System.1 Display the <Vehicle Info> screen.On the <Home> screen:2 Display the <Eco Information> screen.• The screen to be displayed differs among the car type.• When operating the buttons on the screen, consider your car type not to operate wrong.• For the car without Idling Stop System:LinkDisplayAudio_NAS.indb 86LinkDisplayAudio_NAS.indb 86 5/12/16 5:39 PM5/12/16 5:39 PM](https://usermanual.wiki/JVCKENWOOD/K1027/User-Guide-2992794-Page-86.png)
![ENGLISH 87Vehicle InformationVehicle Information• For the car with Idling Stop System and Eco Driving Score:• For the car only with Idling Stop System:<Green Driving Score>You are scored according to how you step on the accelerator pedal and brake. The more stars, the better your driving is for fuel economy.<Idling Stop Time>• <Engine start-stop>: The total idling time after the previous engine-start time to the current time. • <Total>: Total time of idling stop time after the driving data is reset previously.• To know about Driving Score, touch [What is Driving Score?].To monitor fuel consumption—[History Information]You can check the fuel consumption both in a long term and in a short term, and the history of your driving scores.1 Display the <Vehicle Info> screen.On the <Home> screen, touch [Vehicle].2 Display the <History Information> screen. Function buttons on the screen[Short MPG] Displays fuel consumption in a short term every 5 minutes when the engine is on.[Long MPG] Displays fuel consumption in a long term, recorded each time when the engine is turned on and off.[Driving Score]*Displays the history of your driving scores.• To know about Driving Score, touch [What is Driving Score?].* This button is not displayed for the car not equipped with Driving Score function.LinkDisplayAudio_NAS.indb 87LinkDisplayAudio_NAS.indb 87 5/12/16 5:39 PM5/12/16 5:39 PM](https://usermanual.wiki/JVCKENWOOD/K1027/User-Guide-2992794-Page-87.png)
![88Vehicle InformationVehicle Information Checking the Charging CostYou can check the electricity cost used for charging the battery.To use this function, you must enter the electricity unit price first. (See steps 2 and 3.)• This function is available only for plug-in hybrid vehicles.1 Display the <Charging Cost> screen.On the <Home> screen, touch [Charging Cost].211 Cost of the last charging2 Total charging cost of this month• Select the [Long-term History] or [Short-term History] screen.• To know about Charging Cost, touch [What is Charging Cost?].• To reset all history, touch [Reset History]. 2 Touch [Cost Unit Price Input].3 Enter the electricity unit price per kWh. • Touch [ ] to delete the incorrect entry. Each time you touch the button, the last entered number is deleted.After you enter the price, you can check the following on the screen. • On [Long-term History], you can check the electricity price for the last 12 months by touching [Cost].• On [Short-term History], you can check the electricity cost of each day of the month. Electricity cost for the last charge and total cost for the month are also shown. Checking the Air Conditioner InformationYou can check the current air conditioner settings and outside temperature, etc.• This function is not available depending on the car type.• When you operate the air conditioner, the information window appears temporarily on the monitor screen.1 Touch [Air Conditioner] on the <Home> screen. For the car equipped with dual air conditioning system:3 56421q7 9 p8w1LinkDisplayAudio_NAS.indb 88LinkDisplayAudio_NAS.indb 88 5/12/16 5:39 PM5/12/16 5:39 PM](https://usermanual.wiki/JVCKENWOOD/K1027/User-Guide-2992794-Page-88.png)
![ENGLISH 89Vehicle InformationVehicle Information1 Air outlet indicatorsTo upper body/to windowshield/to feet2 Recirculation indicators (internal air recirculation and external air intake)3 Air conditioner indicatorLights up when air conditioner is in use.4 Front defroster indicatorLights up when front defroster is in use.5 Rear defroster indicatorLights up when rear defroster is in use.6 Heated windowshield indicatorLights up when heated windowshield is in use.7 Temperature set for the left air conditioner8 AUTO indicatorLights up when air conditioning system is set to AUTO.9 DUAL indicatorLights up when dual air conditioning system is in use.p Temperature set for the right air conditionerq Wind strength indicatorsw Outside temperaturee Temperature set for the air conditioner Checking the current position of your carYou can check the current position of your car and the number of the satellites you are receiving the signals from.1 Touch [GPS] on the <Home> screen. For the car equipped with single air conditioning system:3 5642qe 8w1 1LinkDisplayAudio_NAS.indb 89LinkDisplayAudio_NAS.indb 89 5/12/16 5:39 PM5/12/16 5:39 PM](https://usermanual.wiki/JVCKENWOOD/K1027/User-Guide-2992794-Page-89.png)
![90Vehicle SettingsVehicle Settings Setting vehicle—ETACSOn the <Vehicle Setting> screen, you can set the following. (Some of the following cannot be displayed for your car, depending the car type and the provided equipment.)• Keyless Entry System or Keyless Operation (depending on your car type and provided equipment)• Wipers• Lights• Security Alarm• Turn Signal• Door Unlock & Lock• Air Conditioner• Others1 Display the <Vehicle Setting> screen.On the <Home> screen, touch [Vehicle Setting].2 Select the function to set.• Touch [<<]/[>>] if the function setting tab you want is not displayed.The screen shows the menu item name and its current setting. (Ex.: <Keyless Entry System> screen)3 Select the item to change (1), then display the setting screen (2).Ex.: To set <Turn Signal Lights Answerback>Available functions are displayed on the screen.• To know about the function, touch [Explanation].• To reset the function, touch [Reset]. A message window is displayed. Select [Yes].4 Change the setting as you want on the setting screen.Available setting values are displayed on the screen.• For details on the available functions for <Vehicle Setting>, refer to the User Manual supplied for your car.LinkDisplayAudio_NAS.indb 90LinkDisplayAudio_NAS.indb 90 5/12/16 5:39 PM5/12/16 5:39 PM](https://usermanual.wiki/JVCKENWOOD/K1027/User-Guide-2992794-Page-90.png)
![ENGLISH 91Vehicle SettingsVehicle Settings Setting the timers for the air conditioningYou can preset 5 timers for air conditioning. You can turn on the air conditioner automatically.• This function is available only for plug-in hybrid vehicles equipped with the Mitsubishi Remote Control.• You cannot set the timers while driving.To set the timer1 Display the <Timed Air Conditioning> screen.On the <Home> screen, touch [Timed Air Conditioning].2 Display the timer you want to set.• The currently used air conditioning is checked on the screen. You can change the air conditioning type by touching the button. ([Heater] and [Defroster] are displayed for the car equipped with the electric heater.)• To know about this function, touch [What is Timed AC?].• To reset all timers, touch [Reset All]. A message window is displayed. Select [Yes].3 Set the timer.• Select the day of the week, start time, and timer operating duration.• To reset the timer, touch [Reset]. A message window is displayed. Select [Yes].4 Set the other timers by repeating steps 2 and 3. To activate the timerThe timer is activated by either the clock built in this product or the one built in the bluetooth phone connected. Depending on the timer settings, the timer may start working at the time you have not expected.1 Display the <Timed Air Conditioning> screen.On the <Home> screen, touch [Timed Air Conditioning].2 Activate the timers you want to use. • To deactivate the timers, select [Off].LinkDisplayAudio_NAS.indb 91LinkDisplayAudio_NAS.indb 91 5/12/16 5:39 PM5/12/16 5:39 PM](https://usermanual.wiki/JVCKENWOOD/K1027/User-Guide-2992794-Page-91.png)
![92Vehicle SettingsVehicle Settings Setting the timers for charging the batteryYou can preset 5 timers for charging the battery.• This function is available only for plug-in hybrid vehicles equipped with the Mitsubishi Remote Control.• You cannot set the timers while driving.1 Display the <Timed Charging> screen.On the <Home> screen, touch [Timed Charging].2 Display the timer you want to set.• To know about this function, touch [What is Timed Charging?].• To reset all timers, touch [Reset All]. A message window is displayed. Select [Yes].3 Set the timer.• Select the day of the week, start time, and end time.• To fully charge the battery, touch [On] for <Full Charge>. Charging stops only after fully charged.• To reset the timer, touch [Reset]. A message window is displayed. Select [Yes].4 Set the other timers by repeating steps 2 and 3. To activate the timerThe timer is activated by either the clock built in this product or the one built in the bluetooth phone connected. Depending on the timer settings, the timer may start working at the time you have not expected.1 Display the <Timed Charging> screen.On the <Home> screen, touch [Timed Charging].2 Activate the timers you want to use. • To deactivate the timers, select [Off].LinkDisplayAudio_NAS.indb 92LinkDisplayAudio_NAS.indb 92 5/12/16 5:39 PM5/12/16 5:39 PM](https://usermanual.wiki/JVCKENWOOD/K1027/User-Guide-2992794-Page-92.png)
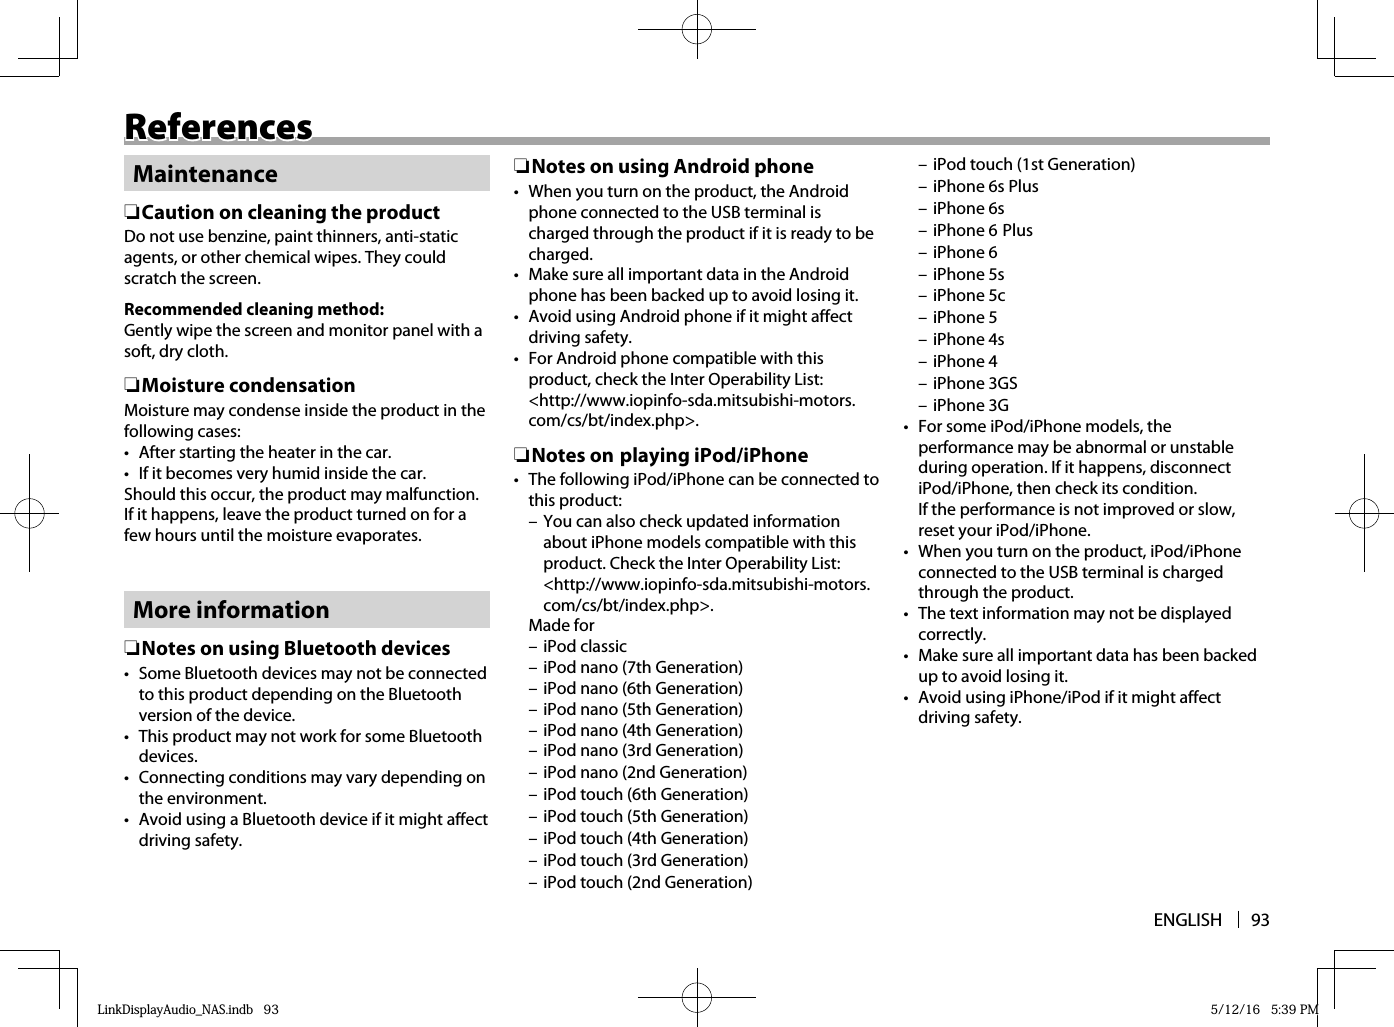
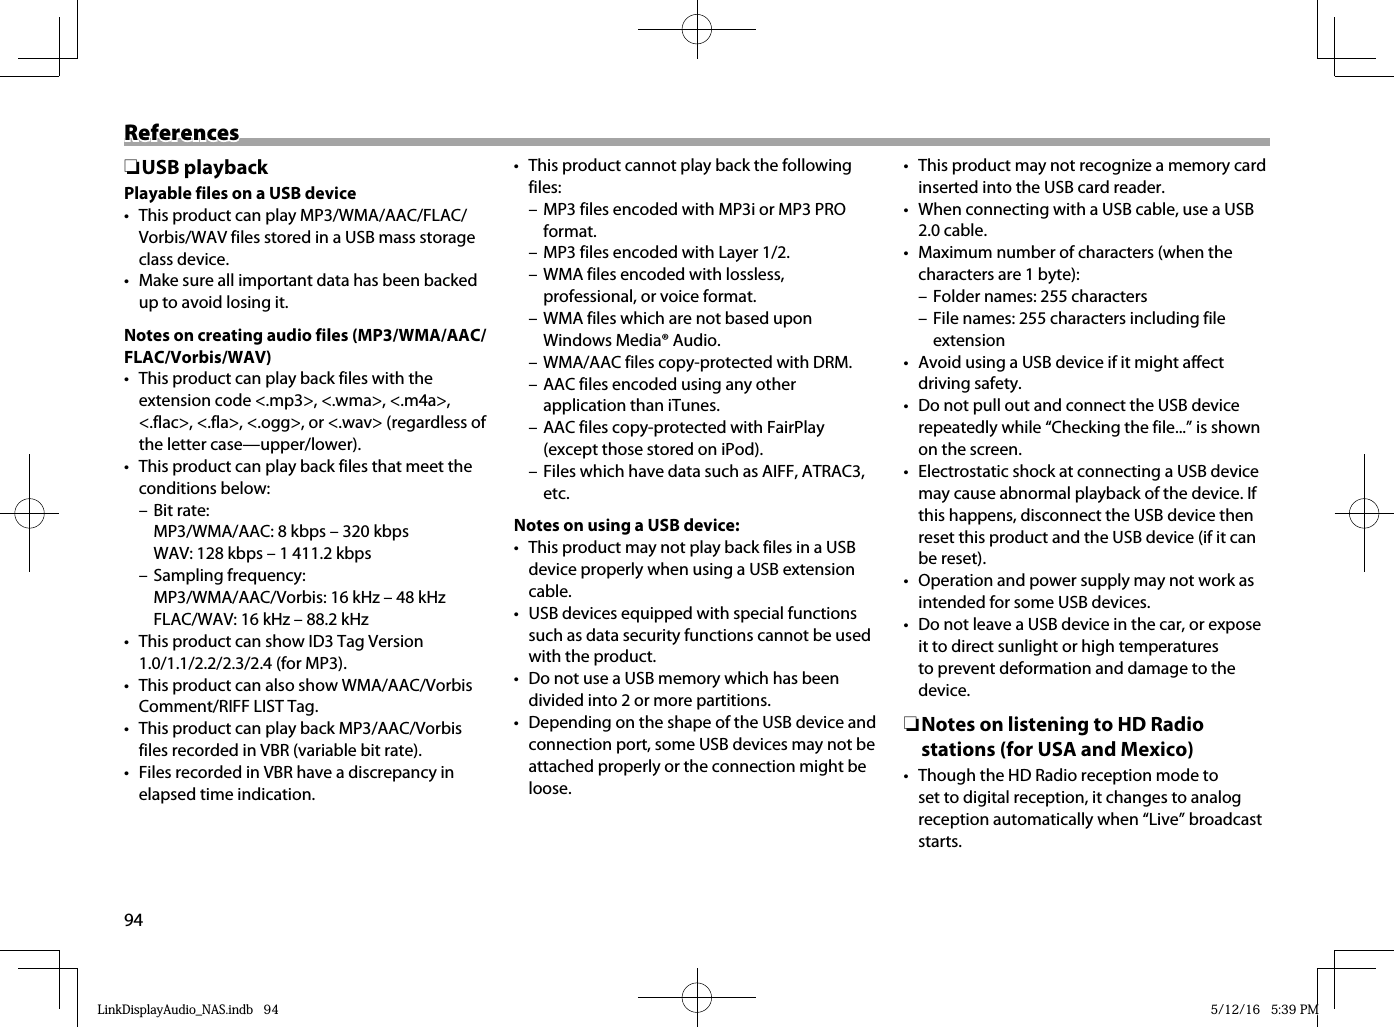
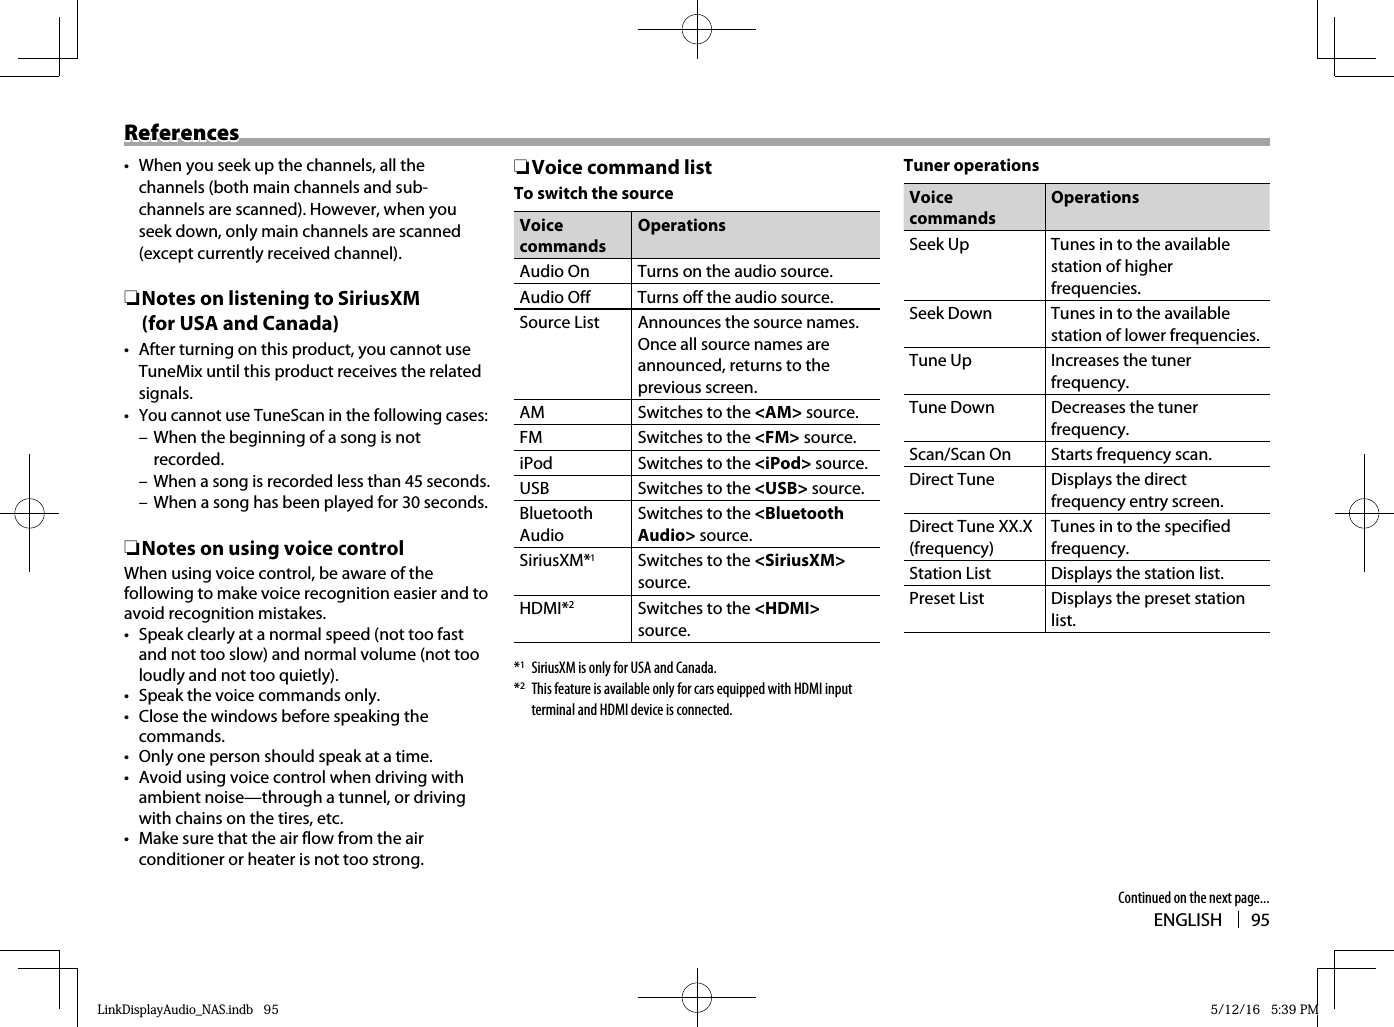
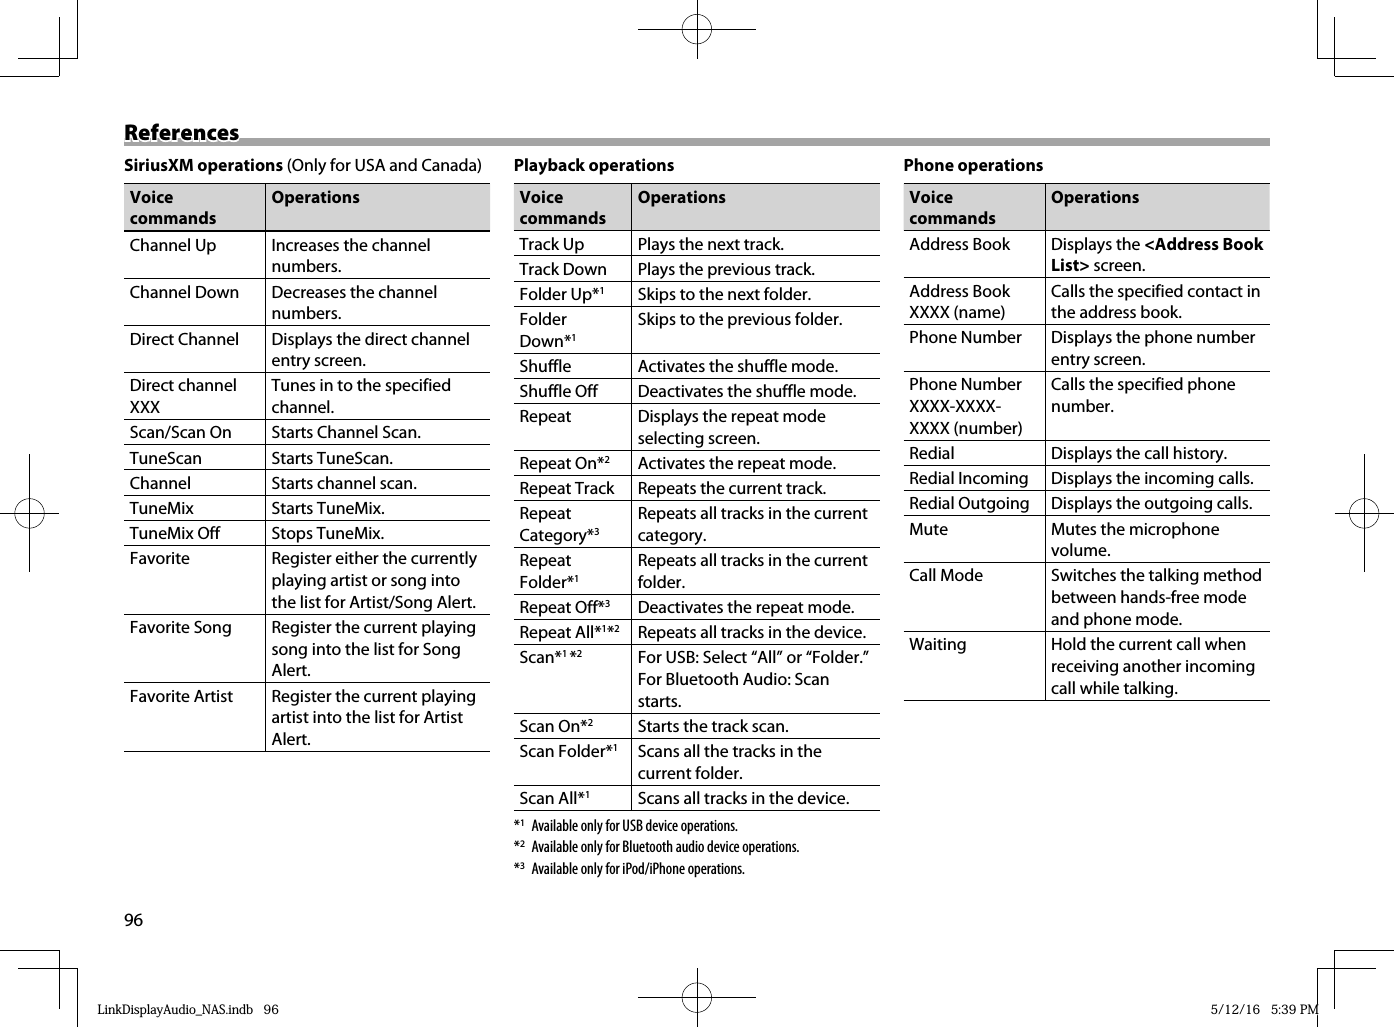
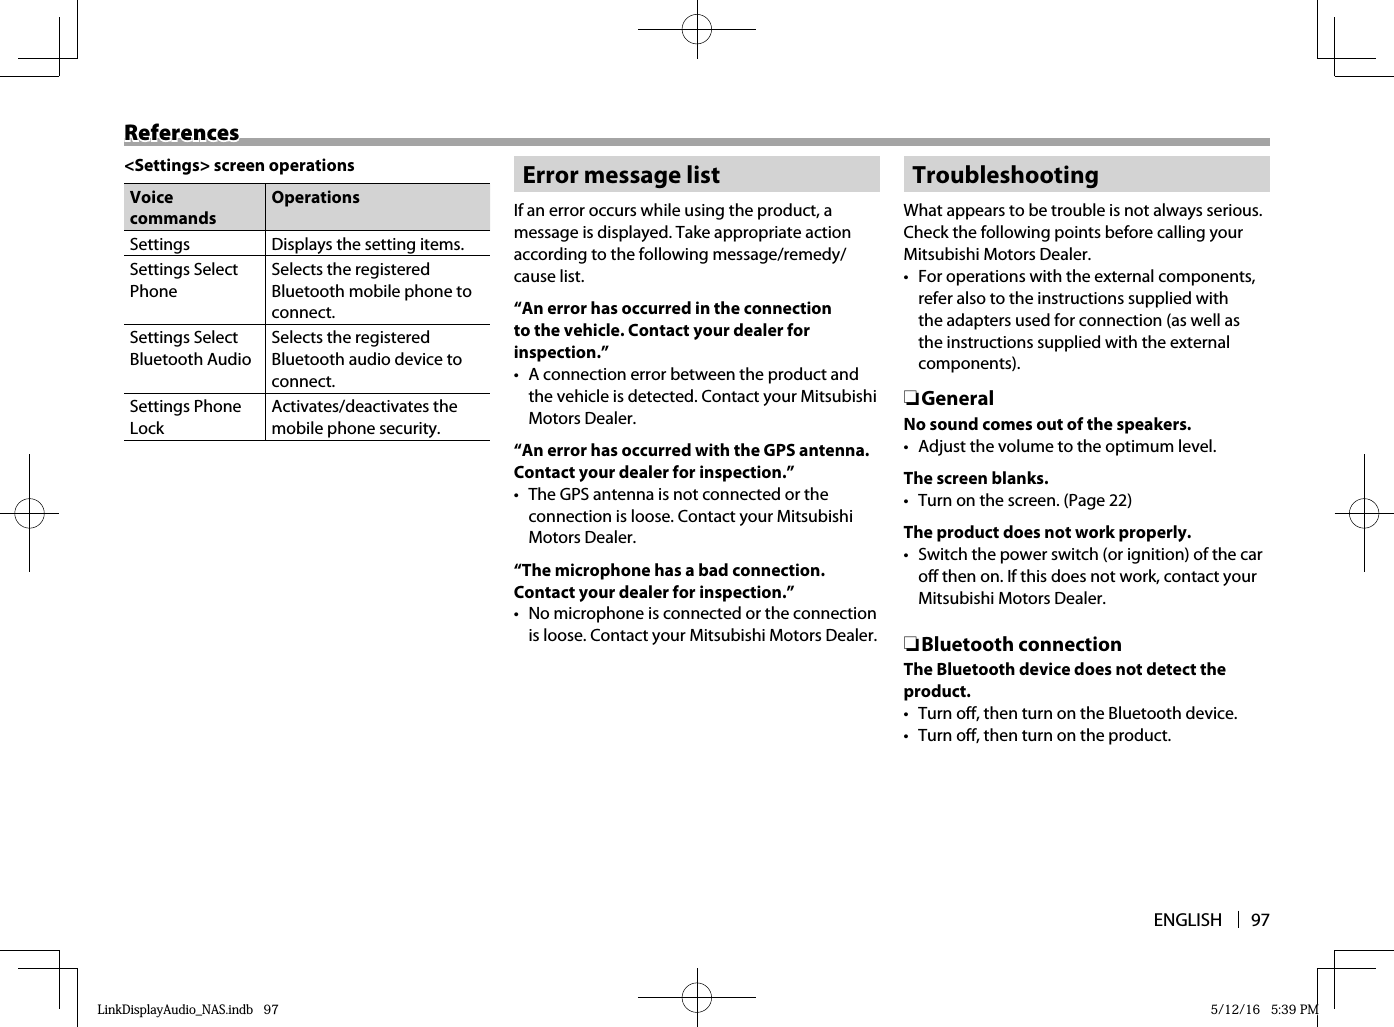
![98ReferencesReferencesThe product does not pair with the Bluetooth device.• When the device is connected via cable, disconnect it.• Turn off, then turn on the Bluetooth device.• When the connected Bluetooth device is used for Android Auto, pairing is not allowed.The device is disconnected automatically or the device cannot be connected.• When iPhone compatible with CarPlay is connected to the USB input terminal, it cannot be connected via Bluetooth. Use the phone and audio player function on the CarPlay screen. (Page 25)• When an Android phone compatible with Android Auto is connected to the USB input terminal, the device is connected via Bluetooth automatically, and the Bluetooth mobile phone currently connected is disconnected.You forgot the passkey for the Bluetooth registration.• Check the passkey on the <Unit Bluetooth Details> screen. (Page 18) ❏Apps (Apple CarPlay/Android Auto)[Apple CarPlay] or [Android Auto] is not displayed on the <Home> screen.• Check the connected device is compatible with CarPlay or Android Auto. (Pages 25 and 27)• When iPhone is connected, check whether the cable is certified by Apple Inc.• Disconnect the device, then connect it again.• Check restriction function is activated for the connected iPhone.App (such as map) does not work correctly.• You cannot use some Apps when reception status of the connected device is poor. This is not a malfunction of the product. ❏PhonePhone sound quality is poor.• Reduce the distance between the product and the Bluetooth mobile phone.• Move the car to a place where you can get a better signal reception. ❏iPod/iPhoneNo sound comes out of the speakers.• Disconnect iPod/iPhone from the USB input terminal, then connect it again.• Select another source, then select [iPod] again.iPod/iPhone does not turn on or does not work.• Check the connecting cable and its connection.• Update the firmware version.• Charge the battery.• Reset iPod/iPhone.Sound is distorted.• Deactivate the equalizer on iPod/iPhone and select [Normal] for <Music Type>. (Page 74)A lot of noise is generated.• Turn off (uncheck) “VoiceOver” on iPod/iPhone. For details, visit <http://www.apple.com>.No operations are available when playing back a track containing artwork.• Operate the product after the artwork has been displayed. ❏USB“Checking the file...” does not disappear from the screen.• Disconnect then connect the USB device.While playing a track, sound is sometimes interrupted.• The files have not been properly recorded into the USB device. Record the files again, and try again.Tracks are not played back as you have intended them to play.• The playback order may differ depending on the USB device.LinkDisplayAudio_NAS.indb 98LinkDisplayAudio_NAS.indb 98 5/12/16 5:39 PM5/12/16 5:39 PM](https://usermanual.wiki/JVCKENWOOD/K1027/User-Guide-2992794-Page-98.png)