Jasco HCHWS1 The In/Out Thermo-Hygrometer Alarm User Manual THGR198N COVER
Jasco Products Company The In/Out Thermo-Hygrometer Alarm THGR198N COVER
UserManual.wiki
>
Jasco
>
HCHWS1 User Manual
User Manual
Navigation menu
Upload a User Manual
Namespaces
Wiki Guide
HTML
PDF
Info
Views
User Manual
Discussion / Help
Navigation
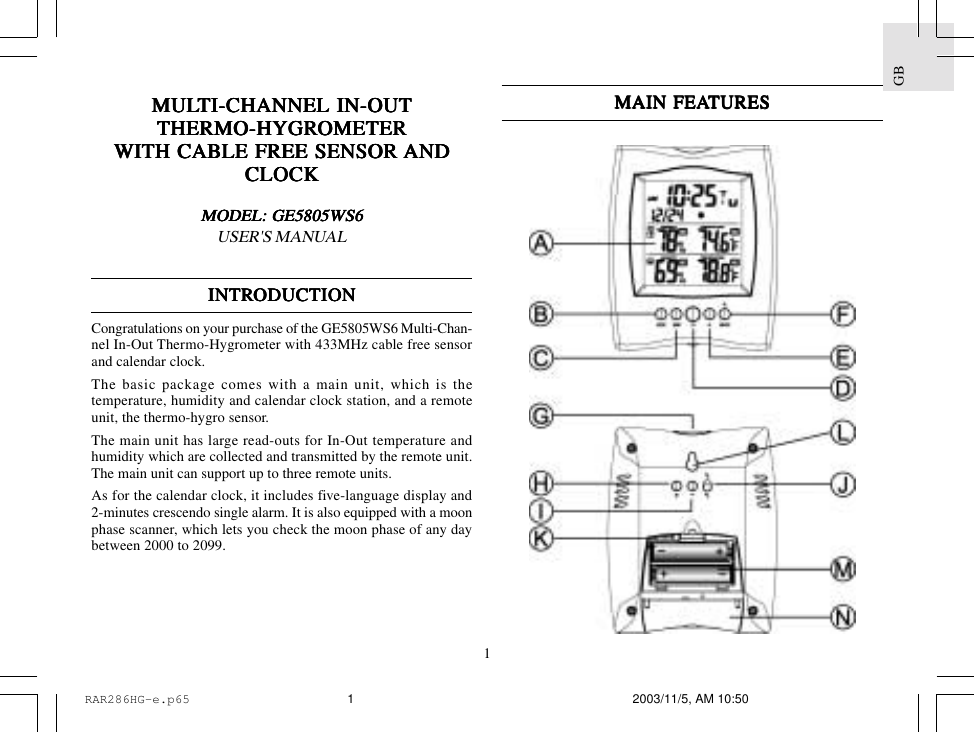
![GB2K.K.K.K.K. RESET BRESET BRESET BRESET BRESET BUTTUTTUTTUTTUTTONONONONONReturns all settings to default valuesL.L.L.L.L. WWWWWALL-MOUNT RECESSED HOLEALL-MOUNT RECESSED HOLEALL-MOUNT RECESSED HOLEALL-MOUNT RECESSED HOLEALL-MOUNT RECESSED HOLEFor mounting the main unit on a wallM.M.M.M.M. BBBBBAAAAATTERTTERTTERTTERTTERY COMPY COMPY COMPY COMPY COMPARARARARARTMENTSTMENTSTMENTSTMENTSTMENTSAccommodates two UM-3 or “AA” size 1.5V batteriesN.N.N.N.N. TTTTTABLE STABLE STABLE STABLE STABLE STANDANDANDANDANDFor standing the main unit on a flat surfaceMAIN FEAMAIN FEAMAIN FEAMAIN FEAMAIN FEATURES:TURES:TURES:TURES:TURES: REMO REMO REMO REMO REMOTE UNITTE UNITTE UNITTE UNITTE UNITA.A.A.A.A. THREE-LINE DISPLATHREE-LINE DISPLATHREE-LINE DISPLATHREE-LINE DISPLATHREE-LINE DISPLAYYYYYFacilitates easy reading of remote and indoors temperaturesand humidities and calendar clock with moon phaseB.B.B.B.B. MODE BMODE BMODE BMODE BMODE BUTTUTTUTTUTTUTTONONONONONToggles the display modes and set the time for calendar clockC.C.C.C.C. MEM BMEM BMEM BMEM BMEM BUTTUTTUTTUTTUTTONONONONONRecalls the maximum or minimum temperature of individualchannelsD.D.D.D.D. CH BCH BCH BCH BCH BUTTUTTUTTUTTUTTONONONONONSelects among different channelsE.E.E.E.E. AL BAL BAL BAL BAL BUTTUTTUTTUTTUTTONONONONONSets and displays the time for the alarmsF.F.F.F.F. ALARM [AL ON/OFF] BALARM [AL ON/OFF] BALARM [AL ON/OFF] BALARM [AL ON/OFF] BALARM [AL ON/OFF] BUTTUTTUTTUTTUTTONONONONONEnables or disables the alarmsG.G.G.G.G. SNOOZE BSNOOZE BSNOOZE BSNOOZE BSNOOZE BUTTUTTUTTUTTUTTONONONONONActivates 8 minutes snooze function when alarm is soundingH.H.H.H.H. UP ( + ) BUP ( + ) BUP ( + ) BUP ( + ) BUP ( + ) BUTTUTTUTTUTTUTTONONONONONAdvances the value of a setting or scan the moonphase statusI.I.I.I.I. DODODODODOWN ( - ) BWN ( - ) BWN ( - ) BWN ( - ) BWN ( - ) BUTTUTTUTTUTTUTTONONONONONDecreases the value of a setting or scan the moonphase statusJ.J.J.J.J. °C/°F SLIDE SWITCH°C/°F SLIDE SWITCH°C/°F SLIDE SWITCH°C/°F SLIDE SWITCH°C/°F SLIDE SWITCHSelects between degree Centigrade (°C) and Fahrenheit (°F)RAR286HG-e.p65 2003/11/5, AM 10:502](https://usermanual.wiki/Jasco/HCHWS1/User-Guide-386373-Page-2.png)
![7GBCALENDCALENDCALENDCALENDCALENDAR CLOCK DISPLAAR CLOCK DISPLAAR CLOCK DISPLAAR CLOCK DISPLAAR CLOCK DISPLAY MODESY MODESY MODESY MODESY MODESEach press on the MODE MODE MODE MODE MODE button will toggle the display as below.MODE 1. Hour-Minute-Second | Month-DayMODE 2. Hour-Minute-Day of the Week | Month-DayHOHOHOHOHOW W W W W TTTTTO SET O SET O SET O SET O SET THE CLOCK MANUTHE CLOCK MANUTHE CLOCK MANUTHE CLOCK MANUTHE CLOCK MANUALLALLALLALLALLYYYYYTo set the clock manually, hold MODEMODEMODEMODEMODE for three seconds. Thehour digits will blink.Use or to select the hour. Keep pressing the button willincrease or decrease the value rapidly.Press MODEMODEMODEMODEMODE to confirm. The minute digits will blink. Repeat thesame procedure to set the minutes, then the year, month, day-of-month and display language for weekday.For display language, you can choose among English (E), Ger-man (D), French (F), Italian (I) and Spanish (S) - in that order.Day-of-week is the usual sequence of Monday through Sunday.If there is an item you do not wish to change, simply press MODEMODEMODEMODEMODEto bypass the item.When you are done, press MODEMODEMODEMODEMODE to exit. The display will returnto the mode last chosen.HOHOHOHOHOW W W W W TTTTTO SET O SET O SET O SET O SET AND AND AND AND AND ARM ARM ARM ARM ARM THE THE THE THE THE ALARMSALARMSALARMSALARMSALARMSThe GE5805WS6 has a single alarm.To set an alarm,1. Press [ [ [ [ [ AL ] AL ] AL ] AL ] AL ] once to display the alarm time.2. Press [ [ [ [ [ AL ] AL ] AL ] AL ] AL ] for three seconds. The hour digits will blink.3. Enter the hour using or .4. Press [ [ [ [ [ AL ]AL ]AL ]AL ]AL ]. The minute digits will blink.5. Enter the minutes using or .6. Press [ [ [ [ [ AL ] AL ] AL ] AL ] AL ] to exit.The alarm-on icon will be displayed indicating the alarm is nowarmed.You can also arm or disarm an alarm by pressing the[AL ON/OFF][AL ON/OFF][AL ON/OFF][AL ON/OFF][AL ON/OFF] button.RAR286HG-e.p65 2003/11/5, AM 10:517](https://usermanual.wiki/Jasco/HCHWS1/User-Guide-386373-Page-7.png)
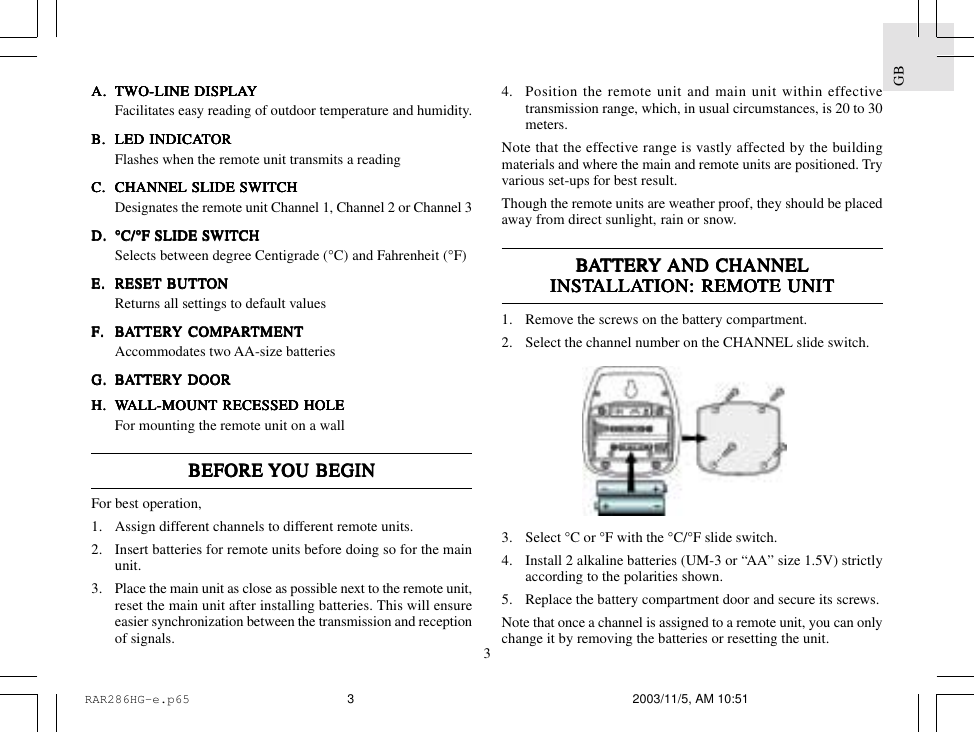
![GB8ALARM ALARM ALARM ALARM ALARM AND SNOOZE FUNCTIONAND SNOOZE FUNCTIONAND SNOOZE FUNCTIONAND SNOOZE FUNCTIONAND SNOOZE FUNCTIONWhen the alarm is set, it will activate at the set time with thealarm-on icon flashing. Without interruption, the alarm will ac-tivate for 2 minutes.To stop the alarm, press [ [ [ [ [ AL ] AL ] AL ] AL ] AL ] or [ [ [ [ [ AL ON/OFF ]AL ON/OFF ]AL ON/OFF ]AL ON/OFF ]AL ON/OFF ] key. If the[ SNOOZE ] [ SNOOZE ] [ SNOOZE ] [ SNOOZE ] [ SNOOZE ] button is pressed, the snooze function will betriggered. The alarm will stop for eight minutes before activatingagain.HOHOHOHOHOW W W W W TTTTTO USE O USE O USE O USE O USE AND SCANAND SCANAND SCANAND SCANAND SCANTHE MOON PHASETHE MOON PHASETHE MOON PHASETHE MOON PHASETHE MOON PHASEGE5805WS6 is equipped with a moon phase display. The moonphase of the current day is displayed in the clock or alarm timemode.The eight phased are:To check the moon phase for a particular day, press the UP UP UP UP UP orDODODODODOWNWNWNWNWN button once. The clock will enter moon phase scanningmode.Use the UP UP UP UP UP or DODODODODOWN WN WN WN WN button to locate the date you want to check.The calendar will be day-driven in this mode.You can go back in time or travel to the future, any day between2000 to 2099. The correcponding moon phase will appearimmediately on the screen.The unit will return to the last display mode when the UP UP UP UP UP andDODODODODOWNWNWNWNWN buttons are left idle for 10 seconds.PRECAPRECAPRECAPRECAPRECAUTIONSUTIONSUTIONSUTIONSUTIONSThis product is engineered to give you years of satisfactoryservice if you handle it carefully. Here are a few precautions:1. Do not immerse the unit in water.2. Do not clean the unit with abrasive or corrosive materials. Theymay scratch the plastic parts and corrode the electronic circuit.3. Do not subject the unit to excessive force, shock, dust,temperature or humidity, which may result in malfunction,shorter electronic life span, damaged battery and distorted parts.4. Do not tamper with the unit's internal components. Doing sowill invalidate the warranty on the unit and may causeunnecessary damage. The unit contains no user-serviceableparts.5. Only use fresh batteries as specified in the user's manual. Donot mix new and old batteries as the old ones may leak.6. Always read the user's manual thoroughly before operating theunit.New MoonWaxing CresentFirst QuarterWaxing GibbousFull MoonWaning GibbousLast QuarterWaning CrescentRAR286HG-e.p65 2003/11/5, AM 10:518](https://usermanual.wiki/Jasco/HCHWS1/User-Guide-386373-Page-8.png)