Jing Mold Electronic Technology JME8276R Wireless Keyboard User Manual KM810A 090608 final
Jing Mold Electronic Technology (Shen Zhen) Co., Ltd. Wireless Keyboard KM810A 090608 final
user manual
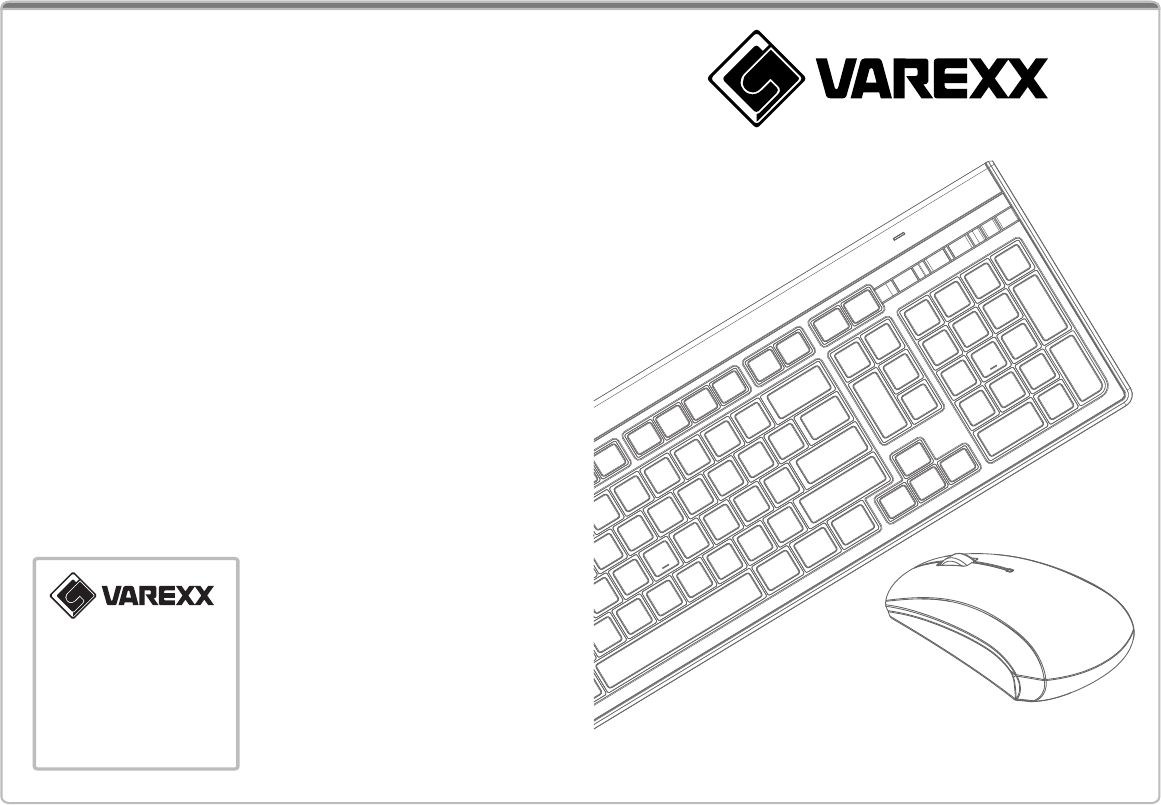
Elite 810A
Wireless Keyboard Mouse Set
USER MANUAL
American Sunrex Cor p
372 South lemon Ave, Wal nut, CA 91789.
TEL: 1-909-839 -19 85
Toll free:1-866-688-6881
FAX : 1-909-839- 025 4
Website: www.varexx.com
E-mail: sales@va rexx.c om
Table of Contents
Verifying System Requirements 1
Getting started 2
Hardware Installation 3
Operation Guide 5
Troubleshooting 7
Information 8

Important Ergonomic Information
Some experts believe that using any mouse or trackball may cause serious injury
to hands, wrists, arms, neck, or back. If you feel pain, numbness, or weakness in
these areas, promptly consult with a qualified doctor.
TO REDUCE THE RISK OF INJURY, FOLLOW THESE PRECAUTIONS:
Take frequent breaks, get up and walk around several times every hour
●
Vary your tasks throughout the day
●
Keep your shoulders relaxed with your elbows at your side
●
Place your keyboard and mouse in a comfortable position
●
Adjust your chair and keyboard and keyboard tray so your forearms and wrists
are in a neutral position, which is the most natural.
●
Avoid resting your wrists on sharp edges
●
System Requirement
Windows XP / Vista
●
Before you begin
Keep this installation guide for future reference! It contains important
troubleshooting information.
●
Keep your old PS/2 or USB mouse as back-up devices
●
Getting Started
By using the advanced RF technology, a 360° operation is possible and no
line-of-sight is required between the receiver and the mouse.
●
Battery and power consumption is always the key issue for a wireless product.
Elite 810A mouse is designed a power on/off slide switch in the mouse
bottom for saving more battery life. Low-power indicator LED’s on both the
keyboard and mouse will blink when batteries need replacing.
●
Package Contains
Your Elite 810A package includes the following:
●The wireless keyboard
●
The wireless laser mouse
●
●USB receiver
●
User’s manual
●
●4 AAA alkaline batteries for the mouse and keyboard
●
Note: If any part is missing or damaged, please contact your dealer for a replacement
immediately.
Precaution
The laser mouse can not work on a glass or mirror surface. Avoid operating this
mouse on a glossy surface. Otherwise, this mouse may not operate normally.
●
For optimal performance, mouse and keyboard should be no more than 7M
away from receiver.
●
For a better transmission distance, avoid using this device on a metal plate or
desktop because a large surface of iron, aluminum, copper and other metal will
act as a shield or ground to the RF antenna of the mouse and receiver. Operating
on a metal surface may shorten the transmission distance.
●
It is strongly recommended to operate a laser mouse on a bright surface with fine
texture to obtain lower power consumption. A very dark surface will cause higher
power consumption.
●
I 02 I 01
Hardware Installation
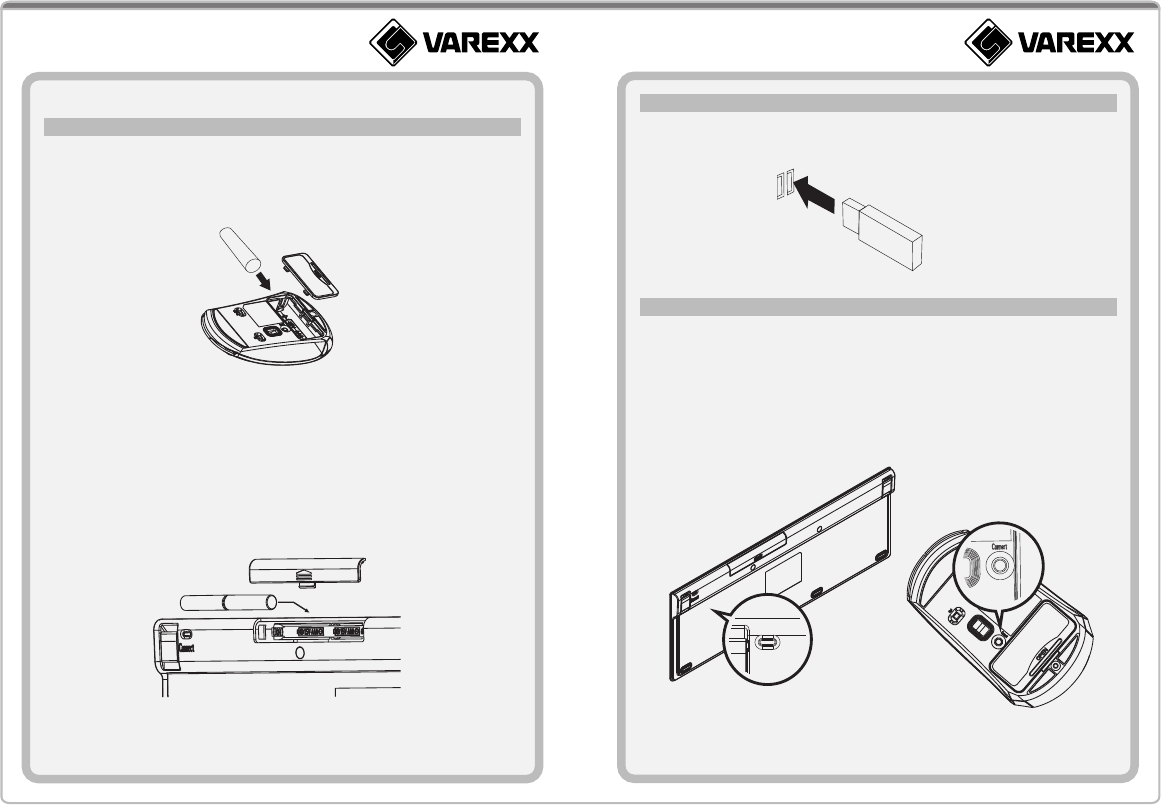
Battery installation
1.Remove the mouse battery compartment cover.
2.Install batteries with the positive (+) & negative (-) in the correct direction
indicated by the AAA battery compartment label.
3.Replace the battery compartment cover.
4.Remove the keyboard battery compartment cover.
5.Install batteries with the positive (+) & negative (-) in the correct direction
indicated by the AAA battery compartment label.
6.Replace the battery compartment cover.
Insert Batteries
I 04 I 03
Connect the receiver with computer
1. Plug the USB receiver into any available USB port or hub connected to your
computer. Windows will detect and install new hardware automatically.
Turning on the keyboard and mouse
1. Switch on the keyboard and mouse, the keyboard and mouse should be
functioning now.
2. The keyboard and mouse have already been synchronized. To reestablish
contact for the keyboard and mouse, press the connect button of the mouse for 5
seconds. When the receiver blinks, it means the mouse has been connected.
Then press the connect button of the keyboard for 5 seconds. When the receiver
blinks, the keyboard is connected.
Operation Guide
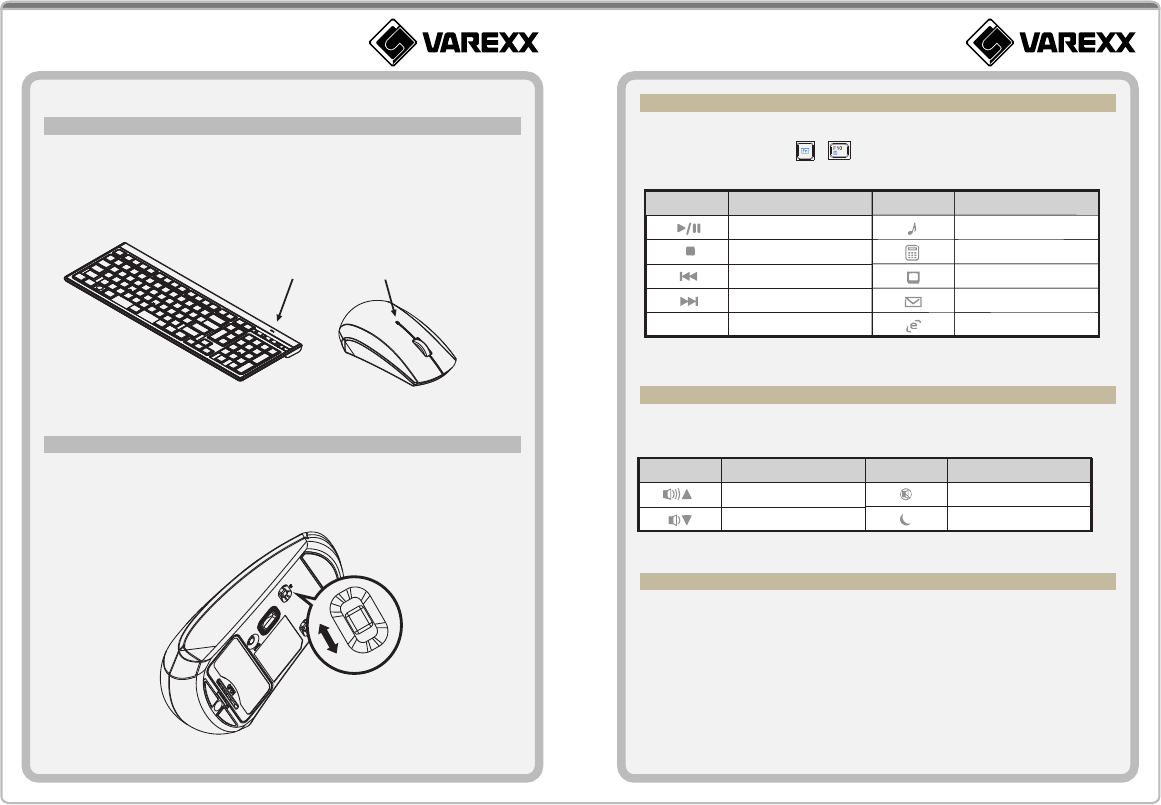
BATTERY LOW INDICATION
When the batteries become low, the LED battery indicator on the top of the mouse
or the keyboard will blink. The mouse or the keyboard can continue to operate for a
period of time depending on usage, but batteries should be replaced immediately.
DIP SWITCH INTRODUCTION
The button provides you the dpi switch function from 800dpi to 1200dpi.
The mouse is 800dpi (”L” side) as the default. If a better performance and faster
speed is necessary for the mouse, please switch it to 1200dpi by pushing the
button to ”H” side.
Low Bettery,LED Blinking
I 06 I 05
Operation of Easy key: +
Easy Key Definition
Hotkey Definition
OPERATIONS ON POWER SAVING MODE
In order to conserve battery power, the mouse and keyboard are designed to reduce
power consumption gradually from standby mode to sleep mode, if it is not being
used.
Hotkey panel is located above the ten key area.
Icon Description Icon Description
Stop
Play / Pause
Previous Track
Next Track
Calculator
My Computer
Media
E-Mail
Browser
Icon Description Icon Description
Volume Up
Volume Down
Mute
Sleeping Mode

Information
FCC Statement
This device complies with part 15 of the FCC Rules. Operation is subject to the
following two conditions,
1. this device may not cause harmful interference, and
2. this device must accept any interference received, including interference that
may cause undesired operation.
FCC RF Radiation Exposure Statement
1. This equipment complies with FCC RF radiation exposure limits set forth for
an uncontrolled environment.
2. This device and its antenna must not be co-located or operating in conjunction
with any other antenna or transmitter.
LED LASER FOR CLASS 1
NOTE:
This equipment has been tested and found to comply with the limits for a class B
digital device, pursuant to Part 15 the FCC Rules . These limits are designed to
provide reasonable protection against harmful interference in a residential
installation. This equipment generates, uses and can radiate radio frequency
energy and, if not installed and used in accordance with the instructions , may
cause harmful interference to radio communications. However, there is no
guarantee that interference will not occur in a particular installation. If this
equipment does cause harmful interference to radio or television reception ,
which can determined by turning the equipment off and on, the user is encouraged
to try to correct the interference by one or more of the following measures,
●Reorient or relocate the receiving antenna
●
Increase the separation between the equipment and receiver
●
●Connect the equipment into an outlet on a circuit different form that to which the
receiver is connected
●
Consult the dealer or an experienced radio/TV technician for help
●
Products with the CE Marking comply with the EMC Directive and the Low Voltage
Directive issued by the Commission of the European Community.
Troubleshooting
When the keyboard and mouse do not work properly, the common troubleshooting
steps.
4. Press the connect button on the back side of the mouse and keyboard for
5 seconds. While the receiver blinks, release the connect button.
1. Take the receiver out from your PC. After few seconds, plug the receiver into your
PC again.
2. Make sure if the batteries are positioned correctly and connected well.
3. Please check to make sure that the batteries are not dead.
I 08 I 07
Caution!
The manufacturer is not responsible for any radio or TV interference caused by
unauthorized modifications to this equipment. Such modifications could void the
user authority to operate the equipment.