Junlan Electronic CAB211A6 Dual Alarm Clock Radio with Bluetooth Wireless Technology User Manual CMB3228 cover E
Shenzhen Junlan Electronic Ltd Dual Alarm Clock Radio with Bluetooth Wireless Technology CMB3228 cover E
Exhibit 08 Users manual

Model: CMA3542
Dual Alarm Clock Radio with
Bluetooth Wireless Technology
1 2
FRONT VIEW
REAR VIEW
1 2
4
5
6
7 8
9
10
11
12
13 14 15
3
FM ANT
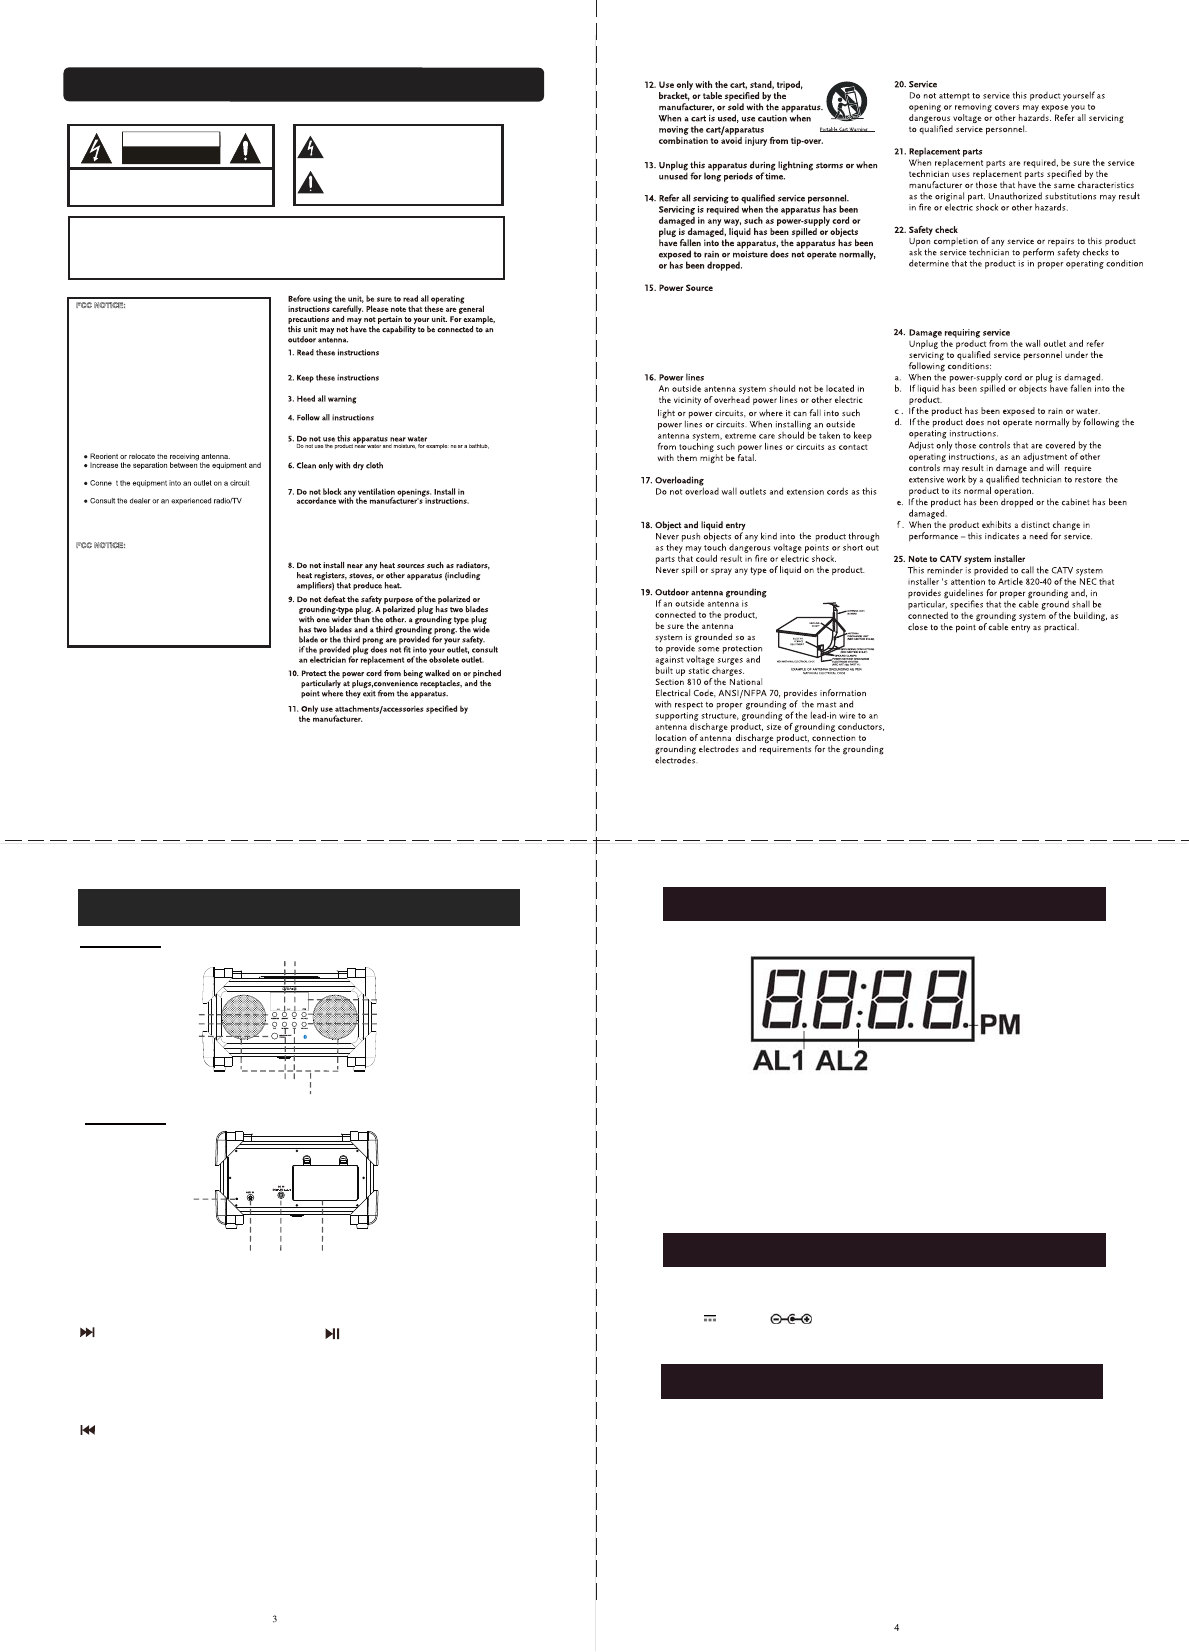
The lighting flash with arrowhead symbol, within an equilateral
triangle, is intended to alert user to the presence of uninsulated
“dangerous voltage” within the product’s enclosure, that may
be of sufficient magnitude to constitute a risk of electric.
The exclamation point within an equilateral triangle is intended
to a ler t the u ser t o the p res enc e of im por tan t ope rat ing
an d mai nte nan ce (s erv ici ng) i nst ruc tio n in th e lit era tur e
accompanying the appliance.
IMPORTANT SAFETY INSTRUCTIONS
FCC NOTICE:
This equipment has been tested and found to comply
with the limits for a Class B digital device, pursuant to
part 15 of the FCC Rules. These limits are designed to
provide residential protection against harmful
interference in a residential installation. This equipment
generates,uses and can radiate radio frequency energy
and,if not Installed and used in accordance with the
instructions,may cause harmful interference to radio
communications.
However,there is no guarantee that interference will not
occur in a particular installation. If this equipment does
cause harmfull interference to radio or television
reception. which can be determined by turning the
equipment off and on,the user is encouraged to try to
correct the interference by one or more of the following
measures:
receiver.
different from that to which the receiver is connected.
technician for help.
c
FCC NOTICE:
To assure continued compliance, follow the attached
installation instructions and use only shielded cables
when connecting to other devices. Changes or
modifications not expressly approved by the party
responsible for compliance could void the user's authority
to operate the equipment..
CAUTION: TO REDUCE THE RISK OF ELECTRIC SHOCK, DO NOT
REMOVE COVER (OR BACK). NO USER-SERVICEABLE
PARTS INSIDE. REFER SERVICING TO QUALIFIED
SERVICE PERSONNEL.
CAUTION
RISK OF ELECTRIC SHOCK
DO NOT OPEN
WARNING
USE UNDER SUPERVISION OF AN ADULT DUE TO LONG CORD
This unit has a long AC cord or other long cord that can easily be tripped on or pulled on, causing injury, Please make sure
it is arranged so it will not drape over a tabletop,etc. Where it can be pulled on by children or tripped over accidentally.
All the safety and operating instructions should be read before the product
is operated.
All warnings on the product and in the operating instructions should be adhered to.
All operating and use instructions should be followed.
washbowl, kitchen sink or laundry tub; in a wet basement; or near a swimming pool.
Unplug this product from the wall outlet before cleaning. Do not use liquid cleaners
or aerosol cleaners. Use a dry cloth for cleaning.
Slots and openings in the cabinet and in the back or bottom are provided for
ventilation, to ensure reliable operation of the product and to protect it from
overheating. These openings must not be blocked or covered. The openings
should never be blocked by placing the product on a bed, sofa, rug or other
similar surface. this product should never be placed near or over a radiator or
heat source. This product should not be placed in a built-in installation such as
a bookcase or rack unless proper ventilation is provided or the manufacturer's
instructions have been adhered to.
The safety and operating instructions should be retained for future reference.
Note:
Refer all servicing to qualified service personnel. Servicing
is required when the unit has been damaged in any way such
as the following: the power-supply cord or plug has been
damaged, liquid has been spilled into the unit, the unit has
been exposed to rain or moisture, the unit has been
dropped or the unit does not operate normally.
This product should be operated only from the type
of power source indicated on the marking label. If you
are not sure the power supply, consult your appliance
dealer or local power company. For products intended
to operate from battery, or other sources refer to the
operating instructions in this manual.
23. Wall or ceiling mounting
This product should be mounted to a wall or ceiling only as
recommended by the manufacturer.
can result in a risk of fire or electric shock.
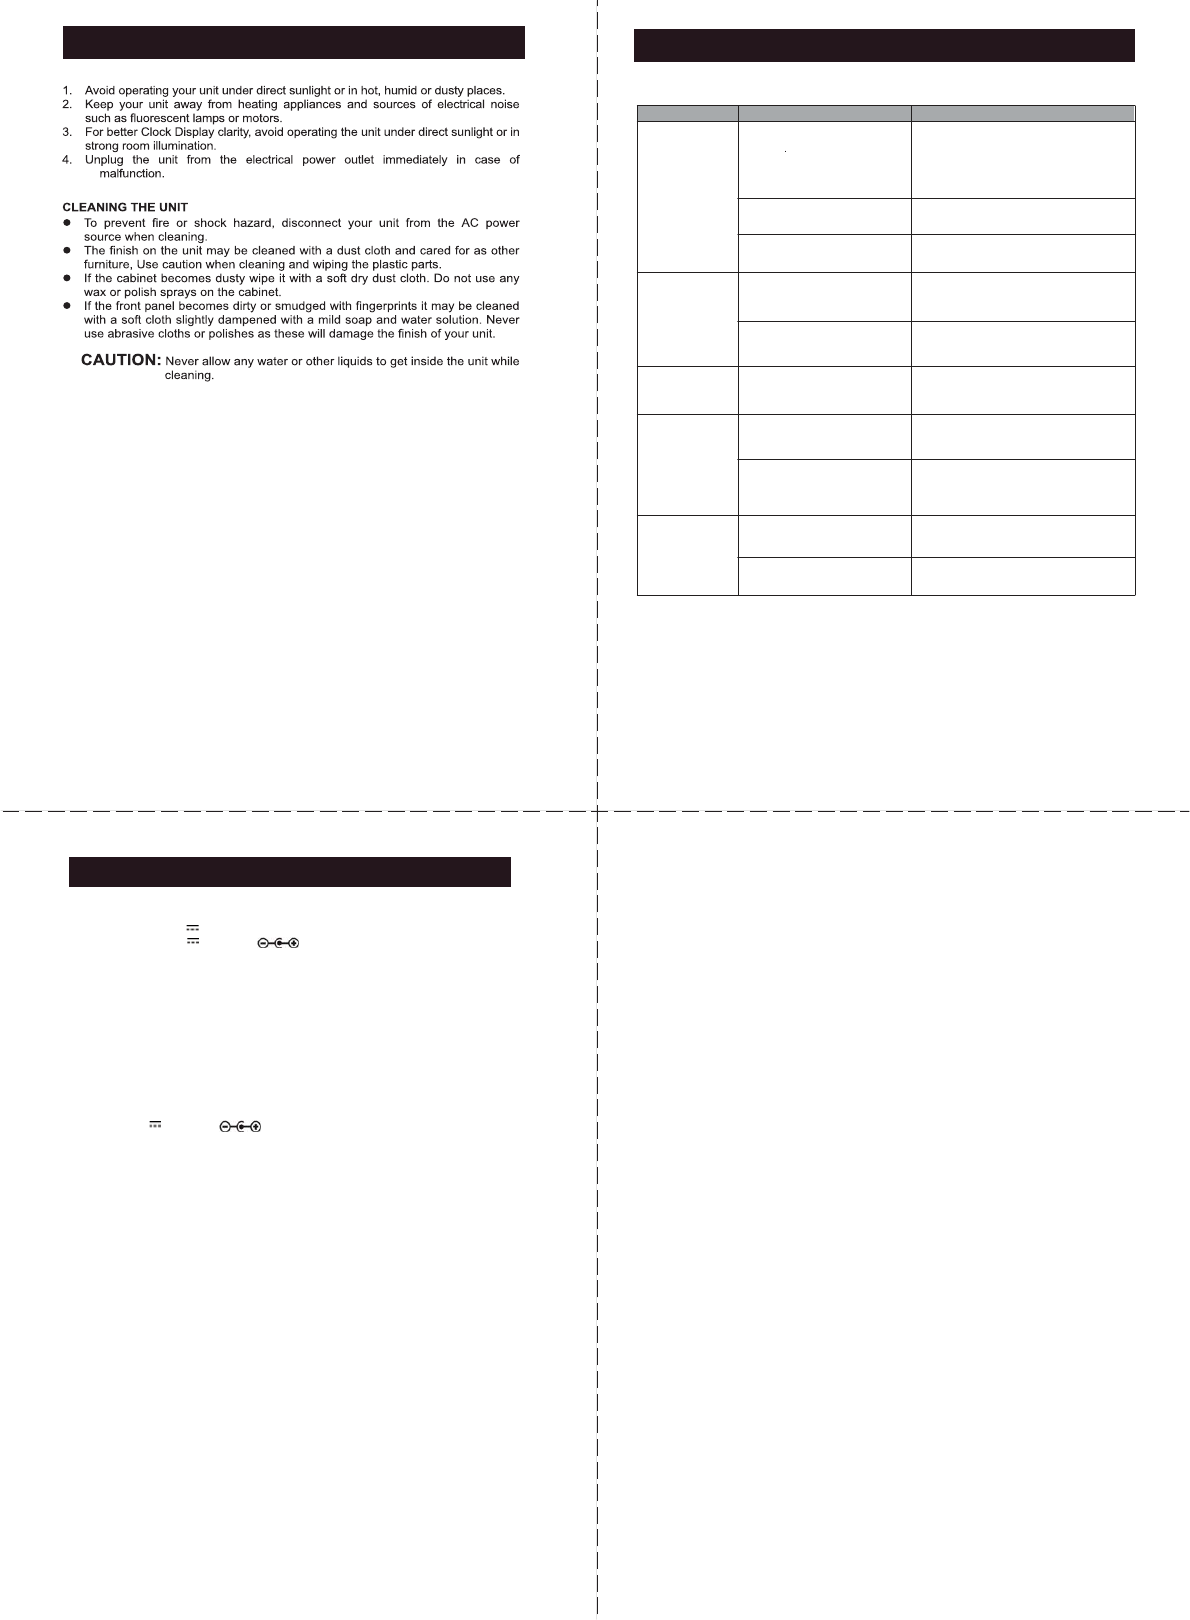
LOCATION OF CONTROLS
1. MEM/SET (Memory/Set) Button
2.
3.
4.
5.
6.
7.
8.
VOL +/AL 1 (Volume +/Alarm 1)
Button
VOL -/AL 2 (Volume -/Alarm 2)
LED Display
Speakers
CH MODE (Channel Mode) Button
Button
9.
10.
11.
12.
13.
14.
15.
(Play/Pause) Button
SNOOZE/SLEEP/DIMMER Button
FM ANT (Antenna)
Battery Compartment
AUX IN Jack
DC IN Jack
POWER/FUNC
(Power/Function Selection) Button
Note: To save the batteries power in battery operating mode.
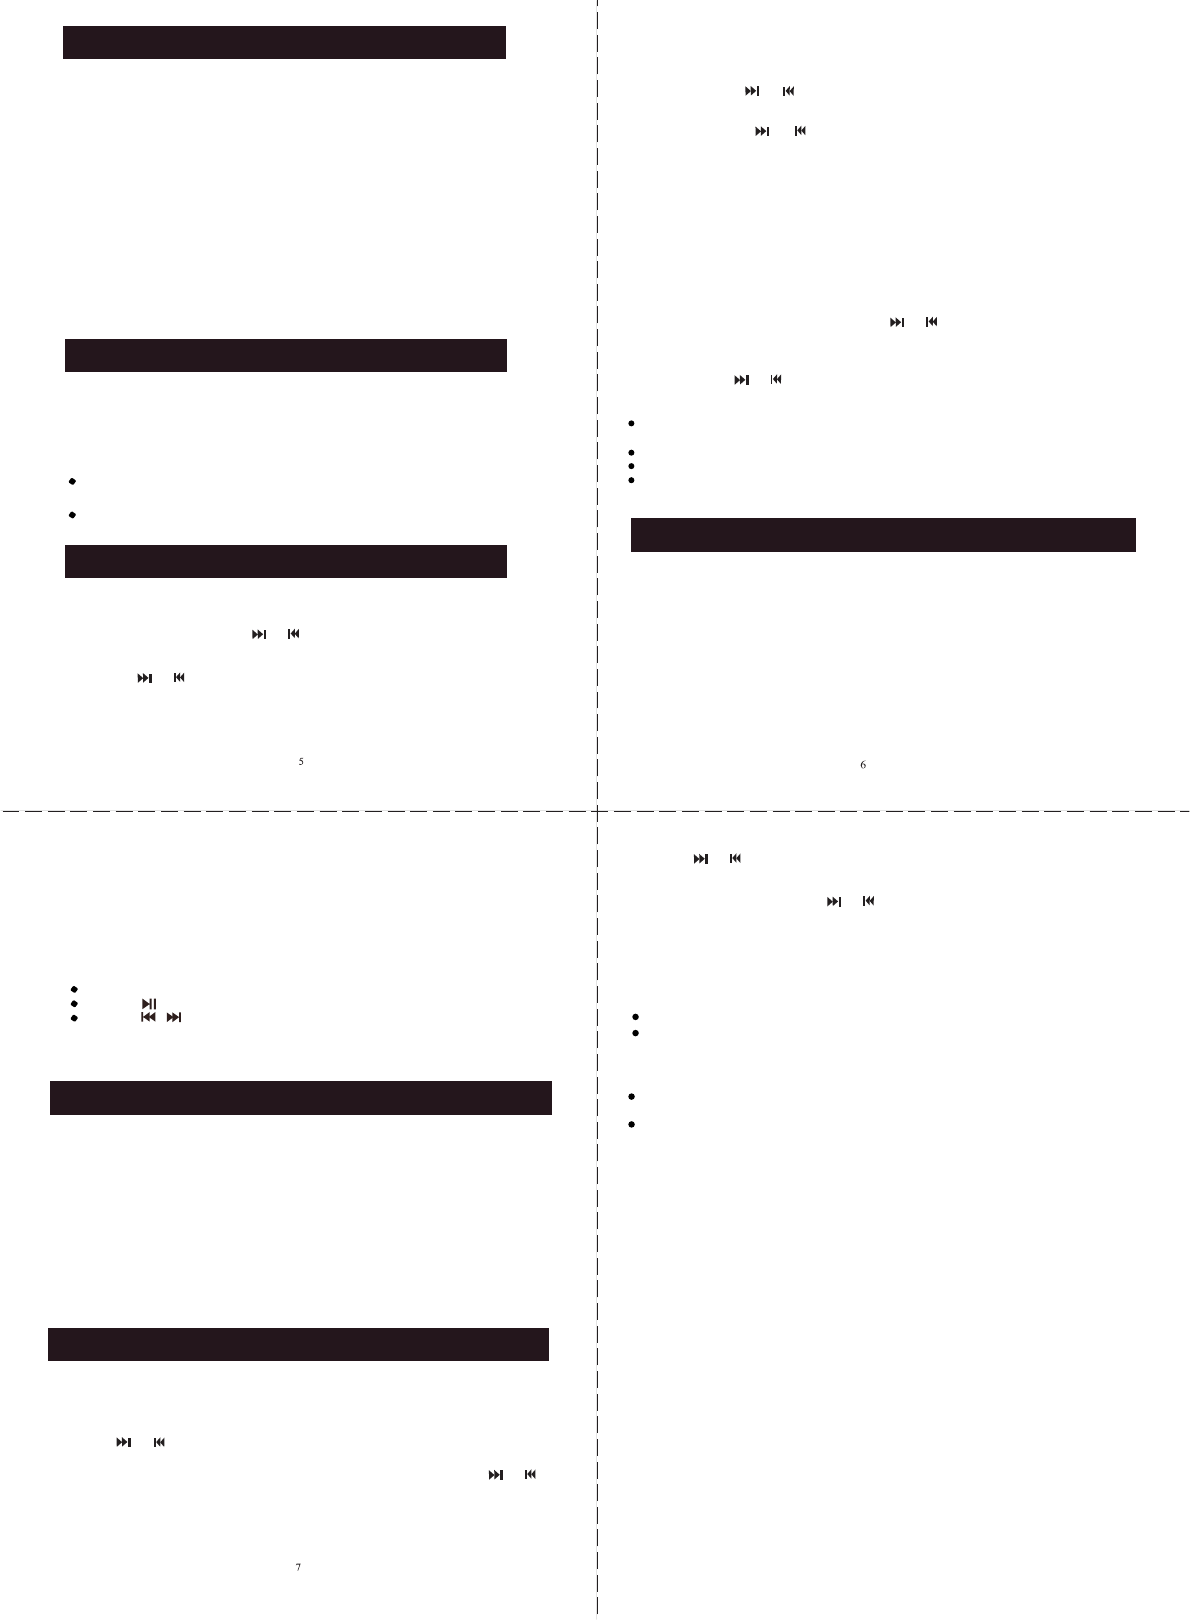
The display will turn off automatically after 5 minutes.
AL 1 Indicator: Light when Alarm 1 is on.
AL 2 Indicator: Light when Alarm 2 is on.
PM Indicator: Light when the current time is PM.
DISPLAY AND INDICATORS
POWER SOURCE
This unit can be powered by either four (6) “AA” size batteries (not included)
or DC 5V; 2A; through DC In Jack on the rear of unit.
Install or replace the batteries as below:
1. Press the tabs on the battery door then lifting it off.
3. Replace the battery door.
2. Insert six (6) “AA” size batteries (not included) according to the polarity diagram
inside the battery compartment. (Alkaline batteries are recommended for longer
playing time.)
BATTERY OPERATION
Button
Button
To turn it back, press and hold any button on the front of the
unit approx. 1 second.
Follow these precautions when using a battery in this device:
1. Use only the size and type of battery specified.
6. Do not dispose of battery in fire. Battery may explodes or leak.
7. Clean the battery contacts and also those of the device prior to battery installation.
2. Be sure to follow the correct polarity when installing the battery as indicated
in the battery compartment. A reversed battery may cause damage to the device.
4. If the batteries in the device are consumed or the device is not to be used
for a long period of time, remove the batteries to prevent damage or injury
from possible battery leakage.
3. Do not mix different types of batteries together (e.g. Alkaline and Carbon-zinc)
or old batteries with fresh ones.
5. Do not try to recharge the battery not intended to be recharged; it can overheat
and rupture. (Follow battery manufacturer’s instructions.)
BATTERY PRECAUTIONS
DC OPERATION
To operate the unit using AC power, connect the plug from the supplied AC/DC
Adaptor to the DC IN Jack on the rear of unit. Plug the AC/DC Adaptor to the AC
wall outlet having AC 100-240V~, 50/60 Hz.
To use battery power, make sure the plug was detached off from the DC IN Jack.
Note:
When the plug was inserted to the DC IN Jack, battery power will be cut off
automatically.
To set or reset the actual time:
1.Make sure the unit is in power off (standby) mode before setting.
2.Press and hold the MEM/SET Button on the front of unit until the digit of hour on
the display is blinking. Press the or Button to set the hour. (Make sure the
PM Indicator on the display is lit if the time is PM and not light if the time is AM).
3.Press the MEM/SET Button again; the digit of minute on the display will blink.
Press the or Button to set the Minute.
4.When finished, press the MEM/SET Button to save the settings and exit.
OPERATION
Radio reception
1.Press the POWER/FUNC Button to turn on the unit.
2.Press the POWER/FUNC Button repeatedly until Radio frequency appears on the display.
Wait a few seconds, you will hear sounds from speakers.
3.Press and hold the or Button until the displayed frequency starts running then release
4.Repeat procedure 3 until the desired radio station was found.
5.Adjust the volume to the desiredd level by pressing VOL+/AL 1 or VOL–/AL 2 Button.
6.To power off (Standby mode) the unit, press and hold the POWER/FUNC Button until "OFF"
appear on the display then release the button.
ANTENNA:
The Antenna wire on the rear cabinet is for radio reception. If reception is weak, unwind and
extend the wire or relocate the wire to improve the radio reception.
RADIO STATION PRESETTING
1.Received the desired radio station as the previous procedure.
2.Press the MEM/SET Button, "P XX" (XX is the last stored number of radio station) will appear on
the display and "XX" will be blinking. Press the or Button repeatedly to select the
desired location (P01 – P20) you want store to. Press the MEM/SET Button again to store.
3.Repeat the same procedure until all the desired radio stations were stored into the memory.
4.After settings, press the CH MODE Button to enter to Channel mode. "P XX" will appear on the
display. Press the or Buttons repeatedly to select the desired stored radio station.
Notes:
If AC/DC Adaptor has been unplugged from the wall outlet or
the preset radio stations will be deleted.
The stored radio station only can be deleted by storing another new radio station.
Total 20 radio stations can be stored in the memory list.
In first time use or re-pairing to new BT Device, pairing the unit to external
BT (BLUETOOTH) PAIRING AND OPERATION
BT Device as follows:
1. Press the POWER/FUNC Button to turn on the unit.
2. Press the POWER/FUNC Button repeatedly until “bt” appears on the display.
3. Power on the external BT Device and enter to search mode. Start pairing as
the on screen instructions on the external BT Device. (For details pairing
procedures, please refer to the user’s manual of your BT Device.)
4. When the external BT Device searched the unit, our model number
“CMA 3542” will appear on the display of external BT Device.
5. Pairing code “0000” may need to enter.
1. Turn on the BT function of the external BT Device.
2. Press the POWER/FUNC Button to turn on the unit.
4. Plays the music in the connected BT Device as usual.
5. During playback:
Press the VOL (Volume) + or – Buttons to adjust volume level.
Press the Button to pause; press again to resume normal playback.
Press the / Button to skip tracks.
3. Press the POWER/FUNC Button repeatedly until “bt” appears on the display.
Wait a few seconds until the unit paired to the external BT Device automatically.
(When paired, a melody will heard from speakers) .
6. To power off (Standby mode), press and hold the POWER/FUNC Button
until "OFF" appear on the display then release the button.
Normal operation after pairing
To listen to the music from the external audio device, iPhones, iPads or iPods as follows:
1.Connect the external audio device or iPods/iPhone by an audio connection cable with 3.5mm
stereo plug on both ends (Cable not included).
2.Insert one end to the AUX Jack on the rear of unit. Insert the other end to the Phones Jack;
Line Out Jack or AUX Out Jack on the external audio device or iPods.
3.Press the POWER/FUNC Button to turn on the unit.
4.Press the POWER/FUNC Button repeatedly until “AU” appears on the display.
5.Playback the music in the connected external audio device or iPods as usual.
6.Press VOL+ or VOL– Button on the unit (and the connected unit) to adjust volume level as
desired.
7.To power off (Standby mode) the unit, press and hold the POWER/FUNC Button until "OFF"
appear on the display, then release the button.
AUX IN
ALARM SETTING
Alarm 1 setting:
1.Make sure the unit is in power off (standby) mode before setting.
2.Press and hold the VOL +/AL 1 Button until AL 1 indicator lit
and Alarm 1 time appears on the display (The digit of hour will be blinking).
3.Press the or Buttons repeatedly to set the hour. (Make sure the PM Indicator on the
display is light if the alarm 1 time is PM and not light if it is AM).
4.Press the VOL +/AL 1 Button again, the digit of minute will be blinking. Press the or
Buttons repeatedly to set the minute.
5.Press the or Buttons repeatedly to set the wake up mode to buzz
Press the or Buttons to set the volume level as desired.
7.Press the VOL +/AL 1 Button to save the settings and exit.
Alarm 2 setting:
Same as Alarm 1 settings above. But, press the VOL -/AL 2 Button instead of press the VOL
+/AL 1 Button.
IMPORTANT NOTE:
Alarm will not operate when the unit is power on mode.
If "F" (radio) was selected, select the desired radio station as previous procedure before
activating alarm.
SHUT OFF ALARM:
When alarm goes off, press POWER/FUNC Button to turn it off. The alarm will rest for next
day.
To turn off the alarm completely (not reset for next day).
SNOOZE
The alarm can be temporarily turned off manually by pressing the
SNOOZE/SLEEP/DIMMER Button; the alarm will turn back on automatically nine (9)
minutes later. This feature can be repeated until POWER/FUNC Button was pressed.
SLEEP
In the power on mode, press the SLEEP Button to activate the sleep function, SLEEP time
will appears on the display. Press the SLEEP Button repeatedly to set the sleep timer to
10-90 minutes as desired.
To turn off the unit before sleep timer time up, press and hold the POWER/FUNC Button
until “OFF” appear on the display.
DIMMER
When the unit is in standby mode. Press the SNOOZE/SLEEP/DIMMER to adjust the LED
display brightness level to high or low level.
Protect Your Furniture:
This model is equipped with non-skid rubber ‘feet’ to prevent the product from moving when
you operate the controls. These ‘feet’ are made from non-migrating rubber material
specially formulated to avoid leaving any marks or stains on your furniture. However certain
types of oil based furniture polishes, wood preservatives, or cleaning sprays may cause the
rubber ‘feet’ to soften, and leave marks or a rubber residue on the furniture. To prevent any
damage to your furniture we strongly recommend that you purchase small self-adhesive felt
pads, available at hardware stores and home improvement centers everywhere, and apply
these pads to the bottom of the rubber ‘feet’ before you place the product on fine wooden
furniture.
8
uninstalled in battery operating mode),
To read the current radio frequency or channel number in radio mode, press the CH MODE Button
repeatedly.
"b" (Buzz) or "F" (Radio) as desired.
6.Press the VOL +/AL 1 Button again, the volume level (two digits) of wake up sound will
appears on the display.
After press the POWER/FUNC
Button to turn off alarm, press the VOL +/AL 1 Button once, the AL 1 Indicator will turn off.
(For Alarm 2, press the VOL -/AL Button).
the button to auto search the next (previous) available station. (When a radio station was been
found, the frequency on display will stop running and start to playback the searched station.)
Press and release the or repeatedly to fine tune if needed.
(or batteries was consumed or
Power Source: DC 9V, 6 x AA size batteries (Not Included), Or
DC 5V; 2A; through the DC IN jack
Radio Frequency: 87.5-108 MHz
Effective distance of BT: Approx. 32 Feet
1 x User’s Manual
Output: DC 5V; 2A, center Positive)
GENERAL SPECIFICATIONS
Accessories
SPECIFICATIONS ARE SUBJECT TO CHANGE WITHOUT NOTICE
2 x 2W
Audio output
1 x AC/DC Adaptor
(Input: AC 100-240V~, 50/60 Hz, 0.5A;
CARE AND MAINTENANCE
910
The external
audio device
The unit is set to
the wrong mode
Set the unit to AUX IN mode
Volume level set too high
The unit is set to
the wrong mode
Set the unit to Bluetooth mode
If you experience difficulties in the use of the unit, please check the followings:
AC/DC adaptor is not plugged
into the wall outlet or the
other end of the adaptor is
not plugged in the DC IN
Jack on the rear of the unit
to the DC IN Jack on the rear of the unit
does not respond
to the unit
reception
Weak FM FM antenna is not
fully extended
Fully extend and relocate the antenna
for best reception
Decrease the volume level
Sound is distorted
No sound from
Bluetooth source
Unit not work with
AC/DC Adaptor
Batteries were consumed
Unit not work with batteries Replace by new batteries
DC Plug form AC/DC Adaptor
was inserted into the DC IN Jack Unplug the DC Plug from the DC IN Jack
Symptom Possible Problem Solution
Sound output level of the
connected external device weak Increase the volume level
The audio level of the connect
external audio device too loud
or bass set to high
Reduce the volume level
Place the BT Device close to the unit
TROUBLE SHOOTING GUIDE
BT Device too far
from the unit
Plug the AC/DC adaptor into the
wall outlet and plug the other end