Junlan Electronic CAB36671 DUAL PORTABLE WIRELESS SPEAKERS User Manual
Shenzhen Junlan Electronic Ltd DUAL PORTABLE WIRELESS SPEAKERS
User manual
PLEASE READ CAREFULLY BEFORE OPERATING THIS EQUIPMENT
True Wireless Dual Bluetooth Speakers
MODEL:ISBW2116
MODEL No.: ISBW2116B
DUAL PORTABLE WIRELESS SPEAKERS
2
Important Safety Instructions
DANGEROUS VOLTAGE: The lighting flash with arrowhead symbol within an
equilateral triangle is intended to alert the user to the presence of uninsulated
“dangerous voltage” within the product’s enclosure that may be of sufficient
magnitude to constitute a risk of electric shock to persons.
ATTENTION: The exclamation point within an equilateral triangle is intended to
alert the user to the presence of important operating and maintenance (servicing)
instructions in the literature accompanying the appliance.
CAUTION: TO REDUCE THE ELECTRIC SHOCK, DO NOT REMOVE THE
COVER (OR BACK). NO USER SERVICEABLE PARTS INSIDE.REFER
SERVICING TO QUALIFIED SERVICE PERSONNEL.
CAUTION
RISK OF ELECTRIC SHOCK
DO NOT OPEN
WARNING:TO PREVENT FIRE OR SHOCK HAZARD, DO NOT EXPOSE THIS UNIT
TO RAIN OR MOISTURE.
WARNING: USE UNDER SUPERVISION OF AN ADULT DUE TO LONG CORD.This
unit has a long cord that can be easily tripped on or pulled on, causing injury. Please make
sure it is arranged so that it will not drape over a tabletop, etc., where it can be pulled on
by children or tripped over accidentally.
WARNING: To reduce the risk of fire or electric shock, do not
liquids, such as vases, shall not be placed on apparatus.
expose this apparatus to
rain or moisture. The apparatus shall not be exposed to dripping or splashing and that
objects filled with

3
Important Safety Instructions
Before using the unit, be sure to read all operating instructions carefully. Please note that
these are general precautions and may not pertain to your unit. For example, this unit may
not have the capability to be connected to an outdoor antenna.
1. Read these instructions – All the safety and operating instructions should be read
before the appliance is operated.
2. Keep these instructions – The safety and operating instructions should be kept for
future reference.
3. Heed all warnings – All warnings on the appliance and in the operating instructions
should be adhered to.
4. Follow all instructions – All operation and use instructions should be followed.
5. Do not use this apparatus near water – The appliance should not be used near water;
for example, near a bath tub, washbowl, kitchen sink, laundry tub, in a wet basement,
or near a swimming pool.
6. Clean only with dry cloth – The appliance should be cleaned only as recommended
by the manufacturer.
7. Do not block any ventilation openings. Install in accordance with the manufacturer’s
instructions. The appliance should be situated so that its location or position does not
interfere with its proper ventilation. For example, the appliance should not be
situated on a bed, sofa, rug, or similar surface that may block the ventilation
openings; or placed in a built-in installation, such as a bookcase or cabinet that may
impede the flow of air through the ventilation openings.
8. Do not install near any heat sources such as radiators, heat registers, stoves, or
other apparatus (including amplifiers) that produce heat.
9. Do not defeat the safety purpose of the polarized or grounding-type plug. A polarized
plug has two blades and a third grounding prong. The wide or the third prong are
provided for your safety. If the provided plug does not fit into your outlet, consult an
electrician for replacement of the obsolete outlet.
10. Protect the power cord from being walked on or pinched particularly at plugs,
convenience receptacles, and the point where they exit from the apparatus.
11. Only use attachments / accessories specified by the manufacturer.
12. Use only with a cart, stand, tripod, bracket, or table specified by the
manufacturer, or sold with the apparatus. When a cart is used, use
caution when moving the cart/apparatus combination to avoid injury
from tip-over.
13. Unplug this apparatus during lightning storms or when unused for long periods of
time.
14. Refer all servicing to qualified service personnel. Servicing is required when the
apparatus has been damaged in any way, such as power-supply cord or plug is
damaged, liquid has been spilled or objects have fallen into the apparatus, the
apparatus has been exposed to rain or moisture, does not operate normally, or has
been dropped.
15. This appliance should not be exposed to dripping or splashing water and no object
filled with liquids such as vases should be placed on the apparatus.
16. Power Sources – The appliance should be connected to a power supply only of the
type described in the operating instructions or as marked on the appliance. Do not
overload wall outlet.
17. Battery should not be exposed to excessive heat such as sunshine, fire, etc.
18. Replace remote control battery only with the same or equivalent type.
19. Do not attempt to dismantle, open or repair this product yourself. If a problem occurs,
seek advice from your local qualified service technician or contact the distributor at
the telephone number at the back of this instruction manual.
20. Caution marking and nameplate are located on back or bottom of product.
AUX /
VOLUME
CONNECT
SPEAKERS PAIR
AUX IN DC IN
POWER
ON OFF
AUX IN DC IN
POWER
ON OFF
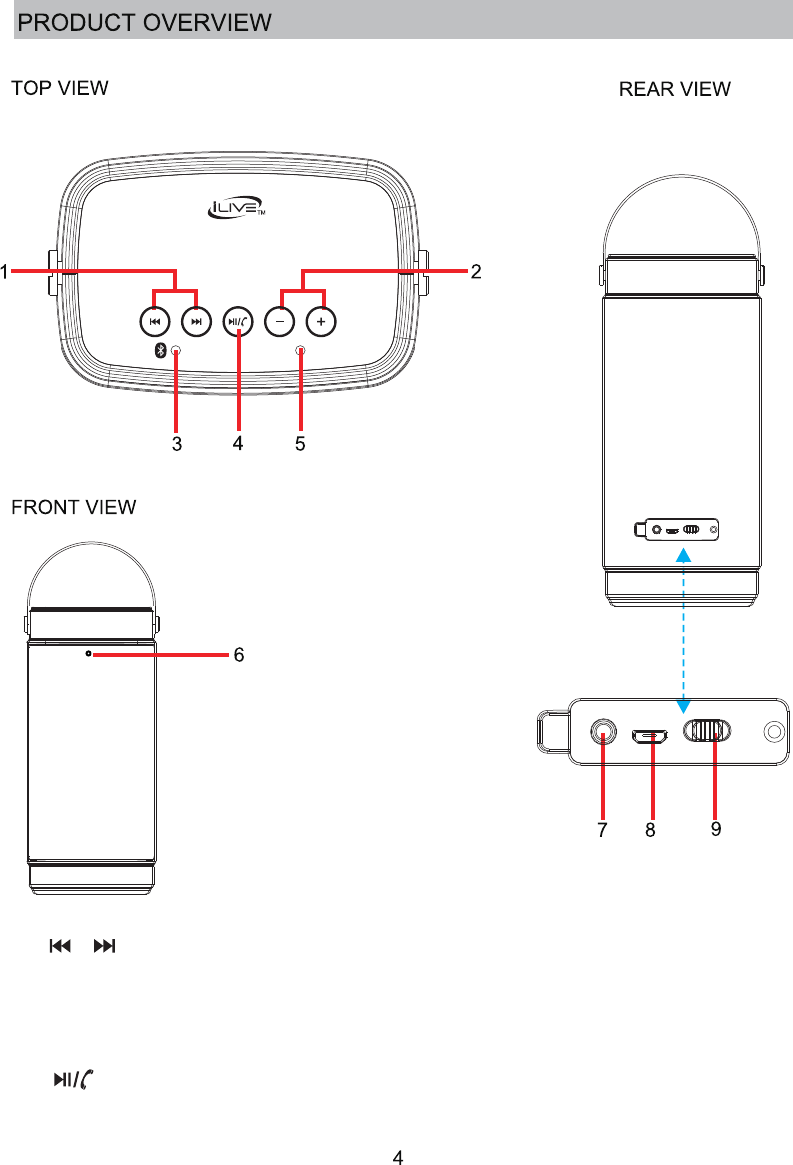
1. / (Previous/Next) Button
2. Volume Down/Volume Up Button
3. Bluetooth(Blue)/AUX IN(Green) Indicator
4. (Play/Pause/Handsfree/Pair) Button
6. Built-in Microphone
7. AUX IN Jack
8. DC IN Jack
9. Power On/Off Switch
5. Charging(RED)/Pairing(Yellow)
Indicator
AUX IN DC IN
POWER
ON OFF
5
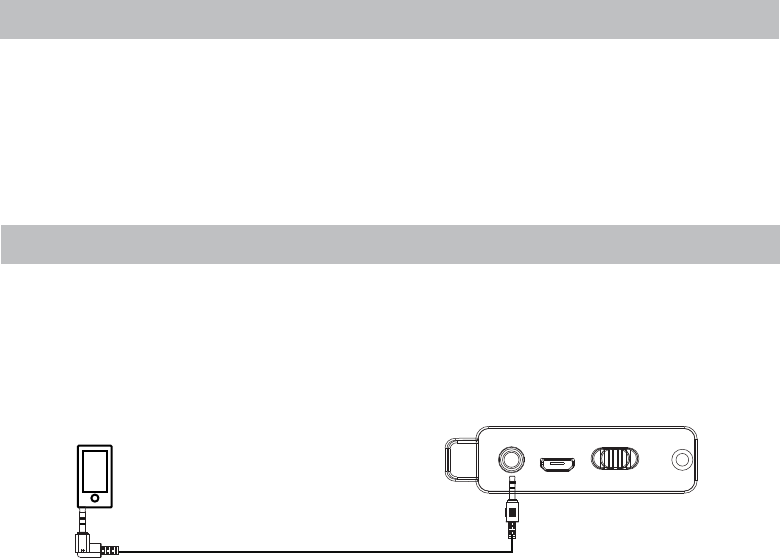
1. Connect the Headphone/Earphone; Aux
by the supplied Audio Connection Cable as the figure below:
Audio
Player
3. Power on the connected external player and start playback as usual.
out jack or Line out jack from the external audio
player
2. Push the power switch to "ON" position to power on the unit.
Rear View of the Unit
BATTERY CHARGING
1. Connect the micro-USB plug into the DC IN jack on the unit.
2. Connect the USB plug into a USB port on a computer or a DC 5V USB power supply device.
NOTE:
light will turn off.
AUX IN OPERATION
(such as MP3 player; Discman...etc)to the AUX IN jack on the rear panel of the unit
During charging, the indicator light on the unit will turn red. Once the unit is fully charged, the
indicator

6
BLUETOOTH PAIRING AND CONNECTION
FIRST TIME PAIRING
PAIRING AFTER FIRST TIME PAIRING
1. Switch on the two units.
3. Open the bluetooth on external bluetooth enabled device to search the two units,
2. Press the button on one unit, then press the button on another unit,
wait until they send a piece of chime, now the two units connect with each other.
NOTE: The unit on which the blue indicator stay lit is main unit, the unit on which
the blue indicator flash is deputy unit.
the pairing name "ISBW2116" will appear, select it and make connection. After
successful connection with one of the two units, the unit which send a sound will
be the main unit.
4. Play music on external bluetooth enabled device as usual.
If the two units were connected and paired before, the two units will connect and
pair with each other automatically.
NOTE:
Before pairing, make sure the AUX IN cable is not plugged into the AUX IN jack.
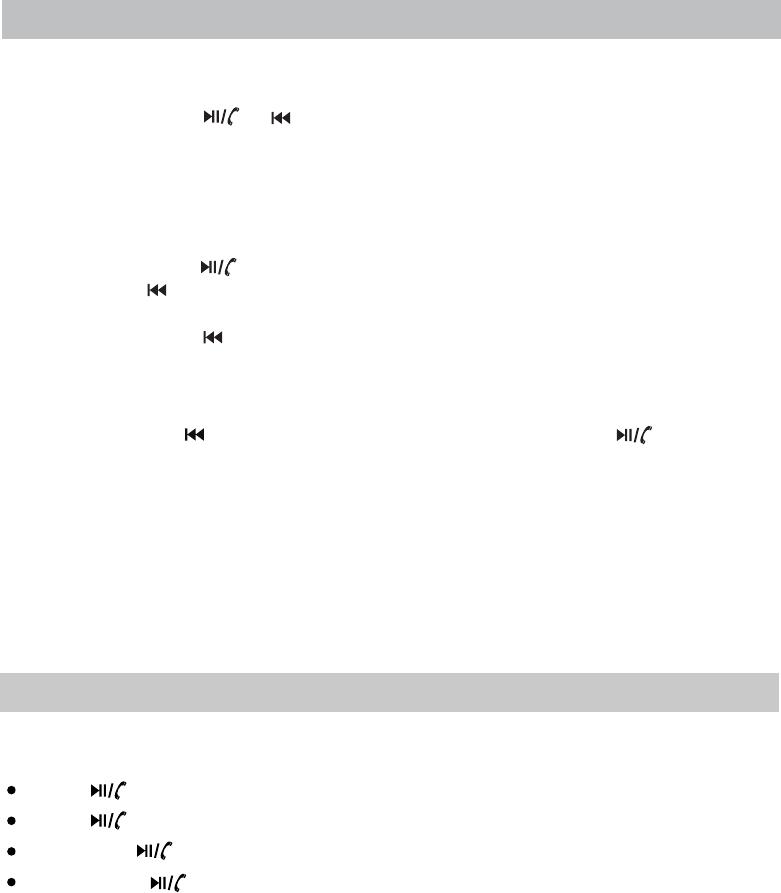
During playing:
A:Touch or button to skip to previous or next track.
B:Touch button to pause, touch again to resume playing.
C:Touch Volume + or - button to increase or decrease the volume.
The A, B, C operation above are simutaneous during playing.
For example, touch Volume + button on one of the two units, the volume on both
units will increase.
1. Switch on the two units, wait until the two will pair and connect with each other
automatically, they will send a piece of chime after successful connection.
2. Open the bluetooth on external bluetooth enabled device to search the two units,
the pairing name "ISBW2116" will appear, select it and make connection. After
successful connection with one of the two units, the unit on which blue indicator
stay lit will be the main unit.
3. Play music on external bluetooth enabled device as usual.
unit will disconnect with main unit. If AUX IN cable plugged out again, the
deputy unit will reconnect with main unit.
During playing, if AUX IN cable plugged into the main unit, the main unit will
disconnect with deputy unit and external bluetooth enabled device. If AUX IN
cable plugged out again, the main unit will reconnect with external device
and deputy unit.
Note:
During playing, if AUX IN cable plugged into the deputy unit, the deputy
NOTE:
Please restart two units and make connection again for operation.
BLUETOOTH PAIRING AND CONNECTION
SWITCHING MAIN UNIT
Press and hold the button on main unit, then press and hold the button on
deputy unit, wait until they reconnect again, the deputy unit will become the main
unit.
Press and hold the button on deputy unit to disconnect with main unit, press
and hold the button on deputy unit to reconnect with main unit.
*
Press and hold the button on deputy unit to disconnect with main unit, wait a
few seconds, the deputy unit will reconnect with main unit again.
*
Press and hold the or button on main unit to disconnect with both deputy
unit and the external bluetooth enabled device.
wait deputy unit automatically connect with the main unit.
*
If using same external bluetooth enabled device to pair with the main unit again,
select the "ISBW2116" of main unit again to connect with main unit again, then
DISCONNECTION / RE-CONNECTION
The two units will enter standby mode without any audio output or operation after
about 30 minutes.
7
Double press " " button on the main unit to redial the last called number.
Touch " " button on the main unit to answer the incoming call.
Touch " " button on the main unit again to end the call after conversation.
Holding the " "button on the main unit to refuse the call.
INCOMING CALLING DURING PLAYING IN BT MODE
An incoming call received during playback in bluetooth mode, works as follows:
NOTE:
Secondary unit will not function when in calling mode.

8
Check the followings before requesting service
SYMPTOM POSSIBLE CAUSE POSSIBLE SOULTION
No power
No sound
Sound distortion
Bluetooth
reception failure
Have not paired
The external device is far from
the unit
Volume level too high
The paired/connected device
is not in payback mode
Volume in minimum position Raise volume level by pressing the
(Volume) + button.
Play music/movie in the paired/connected
device as usual and make sure the
volume level of it is in high level.
(Volume ) - button.
Reduce the volume level by pressing
the
Put the external BT device close to the
unit.
The power is consumed
Reduce the volume level of the paired/
connected device.
Pair the unit with the BT Device as the
procedures stated in this manual.
Recharge the unit.
/rattle
TROUBLESHOOTING GUIDE

ACCESSORY
Speaker output power..............................................................................................2X3W
Playing time.................................................................around 5 hours (with 50% volume)
9
is a trademark on a registered trademark of Bluetooth
SIG Inc. All other trademarks and trade names are
those of their respective owners.
SPECIFICATION
Built-in battery............................................................................................3.7V,1000mAh
Charging power.........................................................................DC 5V 500mA
1 X Instruction manual
1 X Micro USB charging cable
1 X 3.5 mm AUX IN cable
Bluetooth working range........................................................approximately 33 feet (10m)

Warning
This device complies with Part 15 of the FCC Rules. Operation is subject to the following two
conditions: (1) this device may not cause harmful interference, and (2) this device must accept
any interference received, including interference that may cause undesired operation.
Changes or modifications not expressly approved by the party responsible for compliance
could void the user's authority to operate the equipment.
NOTE: This equipment has been tested and found to comply with the limits for a Class B
digital device, pursuant to Part 15 of the FCC Rules. These limits are designed to provide
reasonable protection against harmful interference in a residential installation. This equipment
generates, uses and can radiate radio frequency energy and, if not installed and used in
accordance with the instructions, may cause harmful interference to radio communications.
However, there is no guarantee that interference will not occur in a particular installation. If
this equipment does cause harmful interference to radio or television reception, which can be
determined by turning the equipment off and on, the user is encouraged to try to correct the
interference by one or more of the following measures:
-- Reorient or relocate the receiving antenna.
-- Increase the separation between the equipment and receiver.
-- Connect the equipment into an outlet on a circuit different from that to which the receiver is
connected.
-- Consult the dealer or an experienced radio/TV technician for help.
The device has been evaluated to meet general RF exposure requirement. The device can be
used in portable exposure condition without restriction.