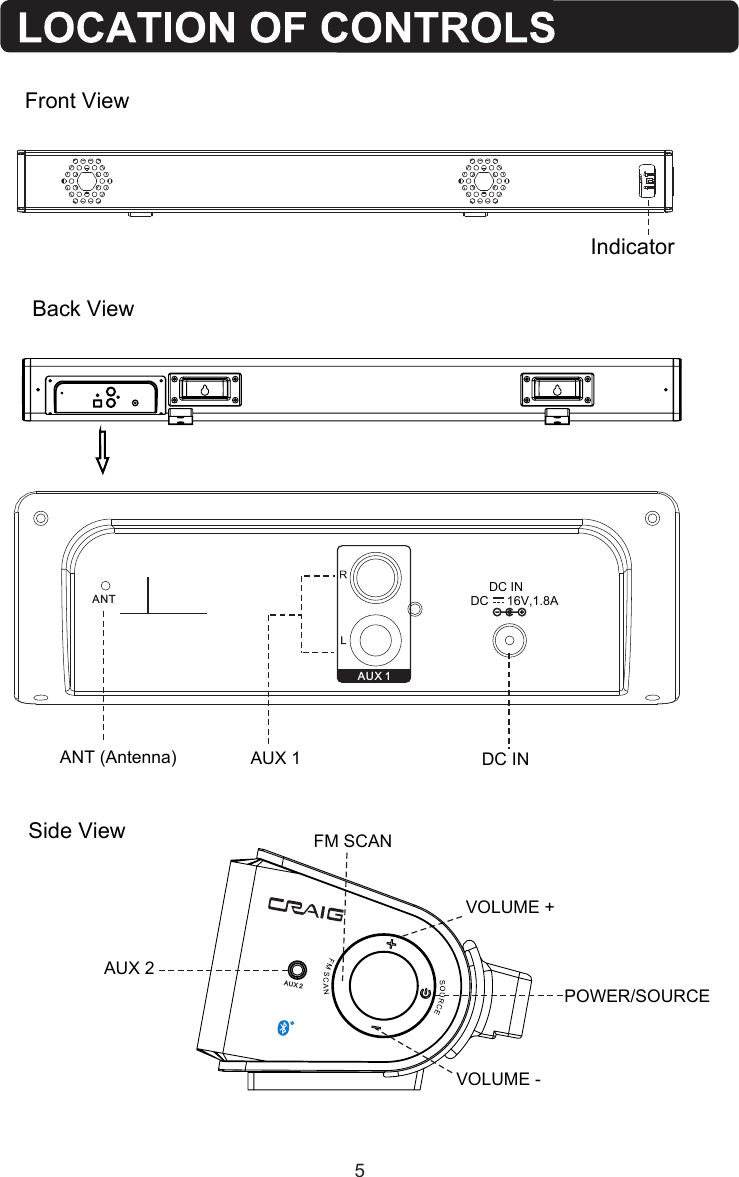
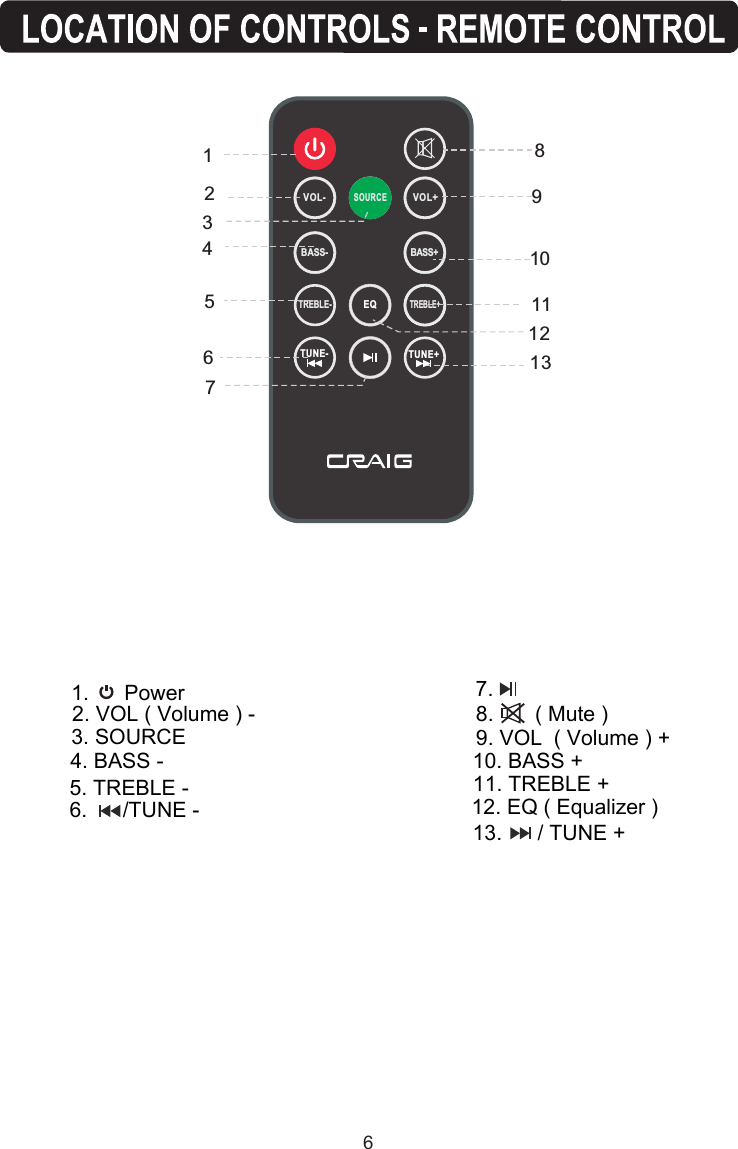
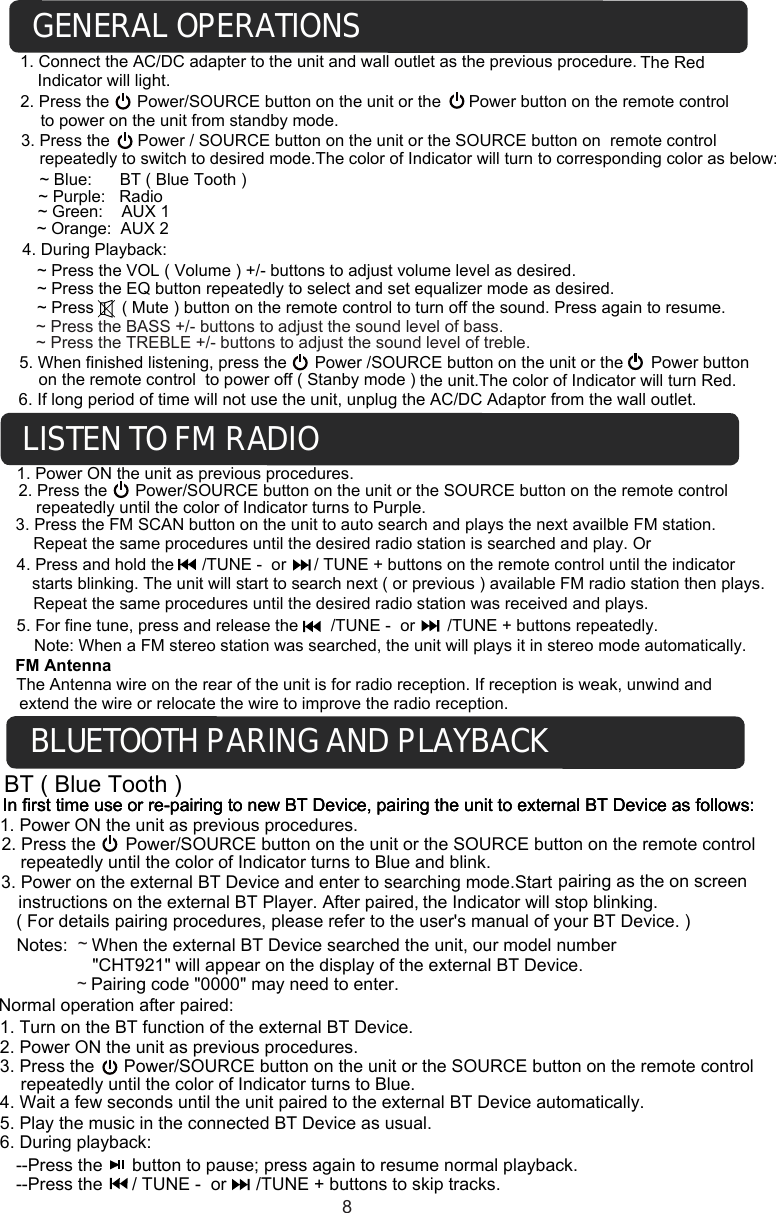
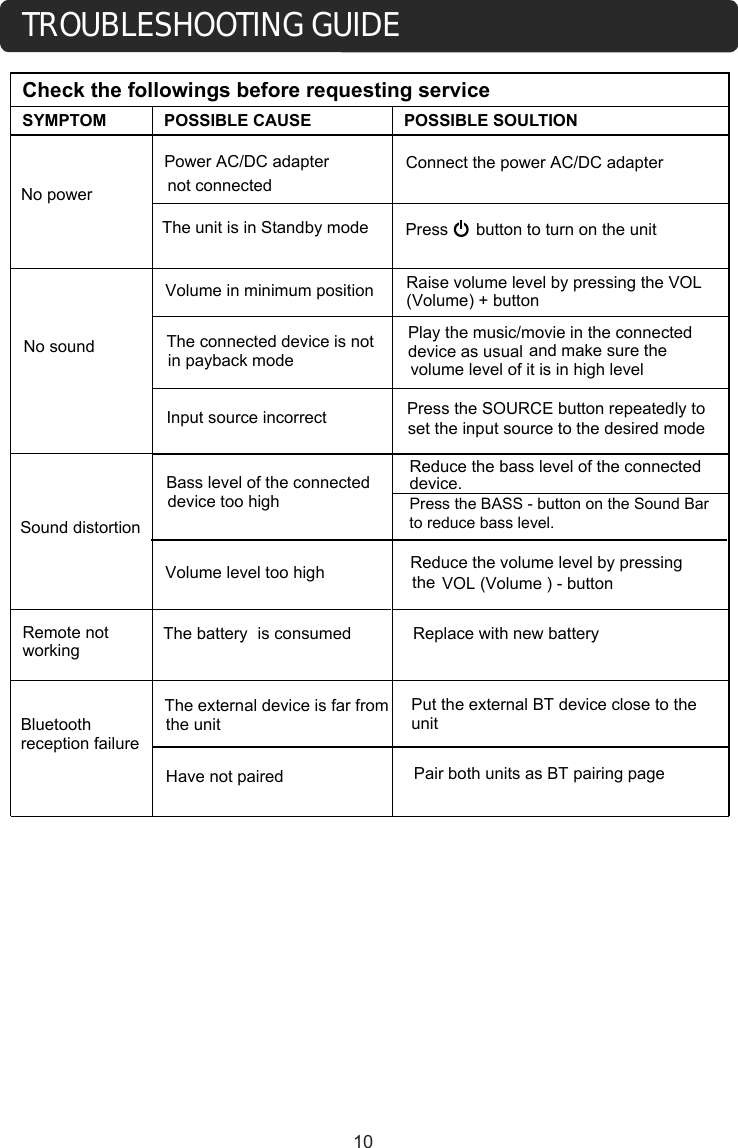
Junlan Electronic CHT921 Sound bar with FM/Bluetooth Music Player User Manual CHT917BT IB English
Shenzhen Junlan Electronic Ltd Sound bar with FM/Bluetooth Music Player CHT917BT IB English
UserManual.wiki
>
Junlan Electronic
>
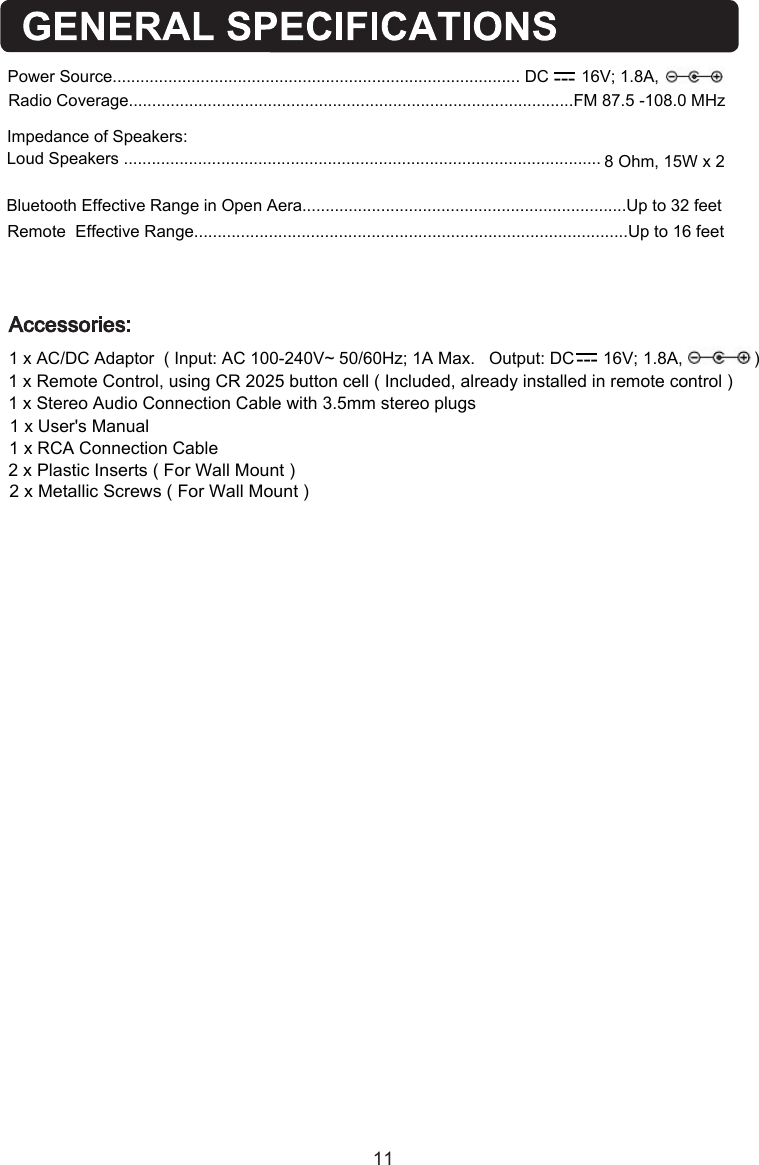
CHT921 User Manual
Exhibit 08 Users Manual
Navigation menu
Upload a User Manual
Namespaces
Wiki Guide
HTML
PDF
Info
Views
User Manual
Discussion / Help
Navigation