KBX GROUP 400QS 3G MOBILE PHONE User Manual
KBX GROUP 3G MOBILE PHONE Users Manual
Users Manual

User Manual

23
User Manual
Introduction
a. Package contents
b. Safety precautions
II. CHAPTER 2 • Before Use 3
1. Insert and Unload SIM Card 3
2. T-Flash Card 3
3. Install and Unload Battery 3
4. Charging 3
III. CHAPTER 3 • Quick User Guide 4
1. Power On/O 4
2. Turn On /O Screen 4
3. Lock and Unlock 4
4. Hot buttons 4
5. Desktop menu 4
6. Main menu 4
7. Move applications 4
8. Delete applications 5
9. Notication bar 5
10. Status bar 5
11. Bluetooth connection 5
12. WLAN connection 5
13. Description of keys 5
IV. CHAPTER 4 • Basic Functions 6
1. Phone 7
2. Contacts 7
3. Messaging 8
4. Browser 8
5. Calculator 8
6. Calendar 8
7. Camera 9
8. Clock 9
9. Downloads 9
10. Email 9
11. File Manager 10
12. FM Radio 10
13. Gallery 10
14. Gmail 11
15. Maps 11
16. Music Player 11
17. Play store 11-12
18. Settings 12
19. Sound Recorder 13
20. Video player 13
21. Search 13
22. Google Setting 13
23. SIM Toolkit 14
Appendix 1 Specications 14
Appendix 2 FCC statement 15
Thank you for choosing your mobile phone! These will lead
you into an entirely new and fascinating mobile internet world. This manual systemati-
cally introduces many functions of mobile phone,
tips and notes.
Please carefully read it before using . The illustrations in this
manual are only for reference, and their functions are based on the real product. The
company reserves the right of nal interpretation. Once your phone is up and running,
you can visit www.quomobility.com to nd out more about all the great features your
new device has and get the last software update.
a. Package contents
• with rechargeable lithium-ion battery
• AC charger/USB sync data cable
• Earbuds
• User manual
Note: If any of the listed items is missing, mismatched, damaged or broken, contact
your local dealer immediately for replacement.
b. Safety precautions
• Never expose your phone to direct sunlight or excessive heat.
Avoid leaving the product inside a car with the windows closed.
• Keep your phone in a dry place. Never expose this product to rain or water.
• Do not use or store your phone in dusty, dirty areas.
• Do not use harsh chemicals, soaps or detergents to clean your phone.
• Do not modify, disassemble, open, drop, crush, or puncture this product.
• Never disconnect your phone while a download or upload is in progress.
• Switch o the device in restricted areas or where the use of electronic devices is
prohibited.
• To protect your hearing, make sure the volume level is not set too high when
plugging the earbuds.
CHAPTER 2 Before Use
1. Install and Unload SIM Card
1.1 About SIM Card
Before using the phone, you must insert valid SIM (Subscriber Identity Module) card in
the phone. SIM card provided by network supplier. All the information related to network
connection are recorded in the chip of SIM card, also the names, telephone numbers and
SMS that storing in the name card holder of SIM card. You can take out SIM card from
your phone, and use it in any GSM mobile phone (new mobile phone can read SIM card
automatically). In order to avoid losing or damaging the information saves in SIM card,
please don’t touch the metal contact surface, and place SIM card in the place that away
from electricity and magnetic force. Once SIM card is damaged, you can’t use the phone
normally. Prompt: Please make sure to power o the phone before taking out SIM card. It is
absolutely forbidden to insert or take out SIM card with external power supply; otherwise it
may damage SIM card and the phone.
1.2. Insert and Unload SIM Card
Metal contact surface of SIM card is easily scratched. You must take out SIM card carefully
before the assembly. Power o the phone, remove the rear cover, battery or other
external power supply. Make the end of SIM card without cutting angle inside and aim at
the card slot of the phone and metal surface of SIM card face downward, then insert SIM
card to the card slot of the phone, the other SIM card is also inserted in this way. When
taking out SIM card, directly pull it outward and then can take out SIM card.
Prompt: Without special explanation inserting two SIM cards are defaulted in the manual.
If you just insert one SIM card, maybe some options of the menu will not be shown.
2. T-Flash Card
Aim at the T card slot and push the T card gently, and the card will be inserted correctly.
Prompt: If the memory card is failed, please check whether it is correctly placed and good
contact of metal point.
3. Install and Unload Battery
Take o the rear cover of the mobile. Make one end of battery with metal surface aim
at the battery connector. Then gently press the battery downward using the nger, and
then press the other end to install the battery.
Prompt: Please operate correctly to avoid damaging the battery connector.
4. Charging
4.1 Charger
Insert the charger on the charging interface at the top of the phone. After inserting
mobile phone,
mobile phone,
45
User Manual
1st-5th desktops.
Prompt: Before creating an application shortcut, you ensure that there is free space
to place this App. on this desktop.
8. Delete Applications
On the current desktop, long press an application shortcut, drag it onto the top dustbin,
you can delete this application shortcut from the current desktop.
9. Notification Bar
On any interface, drag the screen downward from the top, you can display Notication
bar; then drag the screen upward from the bottom, you can hide the notication bar.
You can operate the following on Notication bar:
9.1 SIM Card Info.
You can view the operator information of SIM 1 and SIM 2 on Notication bar.
9.2 Running App.
You can view the running applications on Notication bar.
Tips: In any interface, long press[Home],it displays the pop-up box of “Recent Apps and
Running Apps”. Touch the option of “Recent Apps” ,you can view the 8 recently running
applications, choose and click one, you can enter directly this application; Touch “Running
Apps” to view the currently running applications, click one to kill it from progress.
9.3 USB Status
You can view USB connection state.
9.4 View Notifications
After dragging downward Notication bar, you can view the notications of new SMS &
Call & Email, etc., touch an option to enter its view interface.
On notication interface, touch [Clear] button, you can clear the notications of SMS &
MMS & Email& Missed Calls & WLAN & Bluetooth. Tips: After touching [Clear] button, you
can’t clear the notications of the running applications.
10. Status Bar
On the LCD top of the idle interface, it is Status Bar. You can’t operate the status bar,
it displays some relevant information, including: WLAN, Bluetooth, Battery power,
System time, etc.
11. Bluetooth Connection
This device supports Bluetooth 2.1, you can listen to music with Bluetooth earphone.
About Bluetooth settings and operations, please refer to the section of Bluetooth in
System Settings.
Prompt: Bluetooth function and operations are based on the real product.
12. WLAN Connection
You can access to the local network through WiFi. About WiFi settings and operations,
please refer to the WiFi section in System Settings.
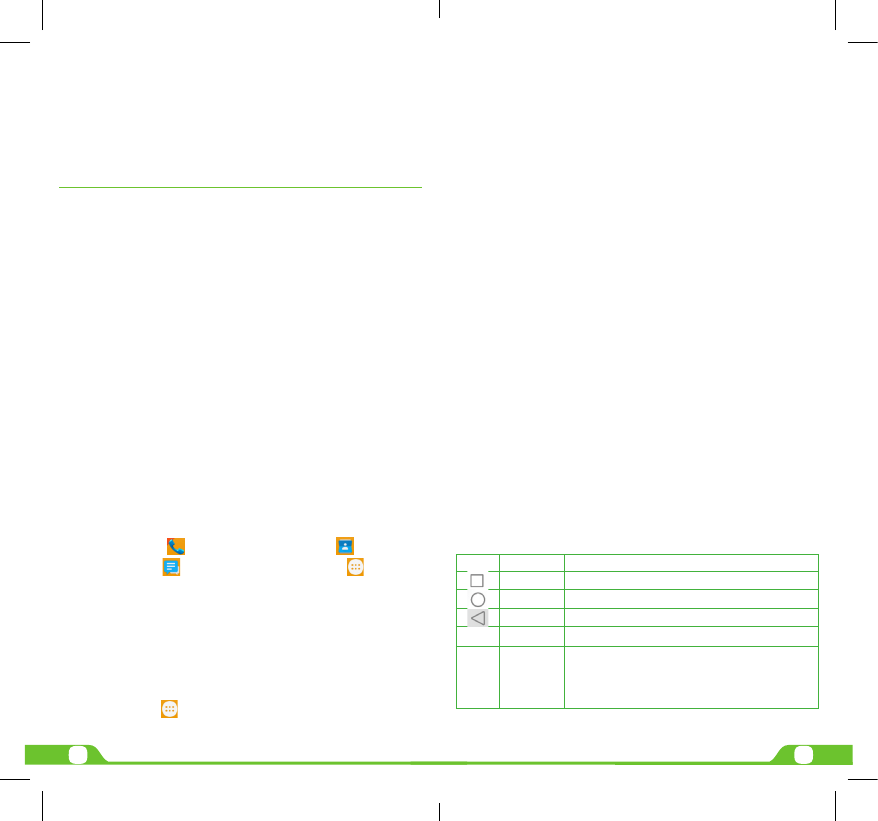
13. Description of Keys
Icon Name Description
[Menu] button Short press to display options box.
[Home] button Short press to return to the desktop. Long press to view the latest
task.
[Back] button Press to return to the upper layer
[Volume] key Press [Volume+] to turn the call voice louder; press [Volume-]
to turn lower.
[Power] key
- Long press [Power] key to power on or o mobile phone
- Short press [Power] key to turn o the screen when a call is
talking.
- Short press [Power] key to turn o & lock the screen in any
interface. Press again to lighten screen.
the charging plug, battery strength icon stripe at the top right corner of the screen is
scrolling, which means that the 6 charging is processing; when the stripe is full of the
whole icon and stop scrolling, which means that the battery charging is completed; when
the charging is completed, please pull out the plug. When electric quantity is not enough,
warning message will be sent; and electric quantity shows empty. When electric quantity
is too low, the phone will power o automatically. Please don’t make the battery in the
status of not enough electric quantity for a long time; otherwise it may damage the
battery quality and service life. Please don’t charge the battery for a long time.
Prompt: In order to ensure normal operation of the phone, please make sure to use
the designated charger.
CHAPTER 3 Quick User Guide
The phone has not only the basic functions of mobile phone, but also support rich,
practical and rapid feature functions, can be briey introduced as follows:
1. Power On/O
In the power-o mode, long press [Power] key, it will power on; otherwise. In the
power-on, long press [Power] key, and choose Power o, it will power o. If you set up
SIM lock or phone lock, please input the code according to the requirements.
In any other interface, short press this button to lock the screen.
Warning: As mobile phone can cause interference and dangerous where you are
prohibited to use mobile phone, please power o your mobile phone.
2. Turn On /O Screen
2.1 Turn O Screen
Please short press [Power] to turn o the screen to save power.
Prompt: To save power, you can also set screen timeout time in Display Settings,
when the timeout time is up, without any operation during the standby time, the screen
will shut o automatically.
2.2 Turn On Screen
When the screen is o, please short press [Power] to wake up the screen.
3. Lock and Unlock
3.1 Lock
Please press [Power] to lock the screen to prevent some unexpected operations.
Prompt: If screen timeout time is set in system settings, this computer will turn o and
lock its screen during the standby time if it is idle.
3.2 Unlock
After the screen is o, please press [Power] to wake up the screen, and then drag the
slider to the right to unlock the screen. Prompt: Drag the slider to the left is the camera.
Drag the slider upwards for the Google Search.
4. Hot Buttons
On the shortcut bar, touch button enters Dialer interface; touch button enters
Contacts interface; touch button enters Messages interface; touch button enters
Main Menu.
5. Desktop Menu
On the desktop, press [Menu] key, can display options, including: Wallpaper, desktop
settings, system settings and so on.
Touch and choose one, so you can operate the corresponding functions.
6. Main Menu
In Main Menu interface, you can slide the screen left and right to browse all the
applications. Touch and choose one, you can enter and run this application.
7. Move Applications
Choose a desktop, touch button to enter Main Menu, long press an application,
drag it onto the free area of the desktop, you can create this application shortcut on the
current desktop. In this way, you can create any favorite application shortcut onto the
67
User Manual
CHAPTER 4 Basic Functions
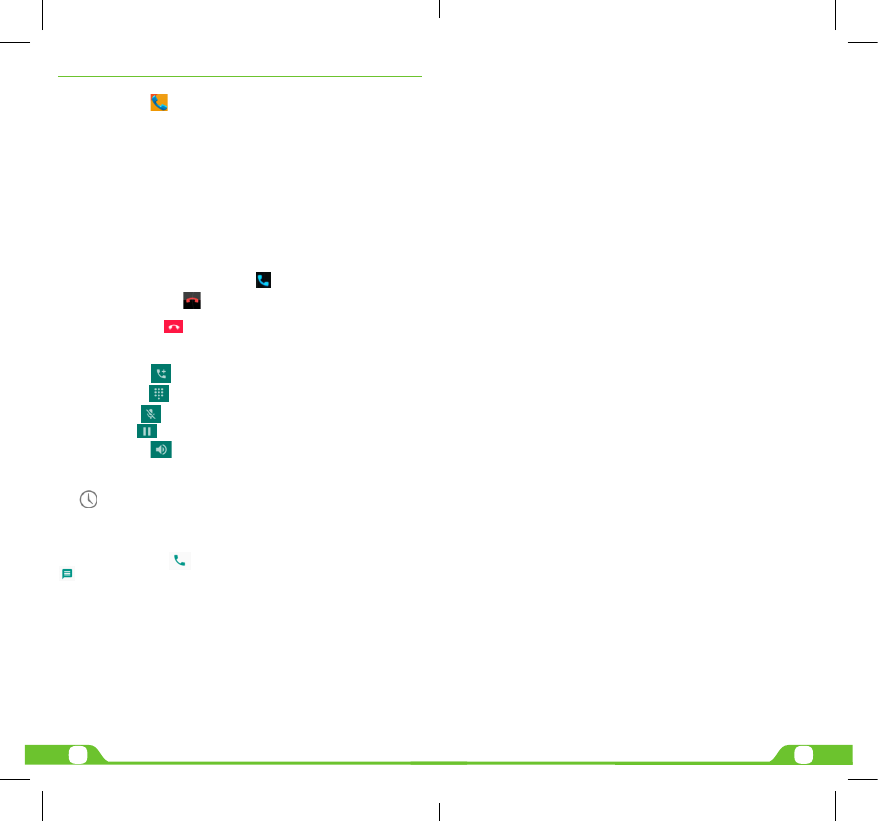
1. Phone
In the idle mode, click to enter Dialer interface.
1.1. Dial a Call
1.1.1. Domestic Call
Enter a phone number, choose SIM1 or SIM2 to make a call by SIM1 or SIM2. If you’re
making a long-distance call, please add the area code before the telephone number.
1.1.2. Dial Contacts Number
After entering Contacts list, choose a contact, choose SIM1 or SIM2 to make a call by
SIM1 or SIM2.
1.1.3. Dial Call-log Number
After entering Call Log, choose a call record, click dialer key, then choose SIM1 or SIM2
to make a call by SIM1 or SIM2.
1.2. Answer a Call
When an incoming call arrives, the phone will give out the corresponding prompt (such
as vibration, ringtone, and etc.); if network support, the phone screen will show the
name and telephone number of the caller, slide rightward, answer this call.
1.3. Refuse a Call
When a call is coming in, slide leftward, refuse this call.
1.4. End a Call
After nishing a call, click to end this call.
1.5. Call Operation
During a call, touch screen to operate the following:
• Add Call: Click , enter a phone number, add another call.
• Dialpad: Click to display Dialpad interface.
• Mute: Click to set this call mute.
• Hold: Click to hold a call.
• Speaker: Click , switch call voice to Speaker; click it again to switch call
voice to Receiver.
1.6. Call log
Click to enter Call log.
1.7. Call log list
After entering Call log, it displays all call records. Choose and touch one of call records,
enter its details.
1.8. Call log Details
On call record details, click to dial this call record number by SIM1 or SIM2. Click
, enter message to edit interface, input message content.
1.9. Call Classification
On Contacts interface, click “Call Log”, enter call records list. Click “All” or “Missed” or
“Outgoing” or “Incoming” to switch into the corresponding interface. Press [ Menu ] to
display options menu, operate the following:
1.9.1. Display Options
Set call log display options, including: SIM1, SIM2, All call logs.
1.9.2. Voicemail
In Voicemail, you can manage voicemail for SIM1 or SIM2.
• Voicemail Service: View voicemail service of SIM1 or SIM2.
• Voicemail Settings: Change voicemail number of SIM1 or SIM2.
• Call Forwarding: After call forwarding function is activated, according to
dierent forward conditions settings (Always forward, Forward when busy, Forward
when unanswered, Forward when unreachable), you can select to switch the incoming
call to voice inbox or other telephone numbers.
• Call barring settings.
Call barring settings include All outgoing, Outgoing international, Outgoing internation
roaming, All incoming, Icoming calls when roaming, Deactivate all, Change password.
• Additional Settings:
• Caller ID: Display my number in outgoing calls.
• Call Waiting: After call waiting function is activated, during a call, notify me of
incoming calls.
1.9.3. Other Settings
• Fixed Dialing Numbers
• Enable FDN: Fixed Dialing Numbers are disabled or activated.
• Change PIN2: Change PIN2.
• FDN List: Manage phone number list.
• Quick responses.
• Edit quick responses: Set Auto Replay Message.
2. Contact
This function could help you browse the name card holder, store, edit and delete the
names and
phone numbers in the phone and SIM card. In contacts list, click “People” or “Call log” or
“Favorites”or”Phone”, it switches among Contacts & Call log & Favorites & “Phone”.
2.1. Contacts List
In contacts list, press [Menu] button, perform the following functions:
2.1.1. Search
Search contacts by key words stored in phone and SIM cards.
2.1.2. New Contact
Create contacts in SIM1 & SIM2 & Phone.
2.1.3. Display Options
Set contact list display style.
• Only contacts with phones
Only display contacts that have phone numbers in contacts list.
• Sort list by
Set contact names to display.
• First Name: Sort contacts by their rst names.
• Last Name: Sort contacts as by their last names.
• View contact names as
Set view style of contact names.
• First Name First: Display contacts as their rst names rst.
• Last Name First: Display contacts as their last names rst.
• Choose contacts to display
Set classication of contacts to display in contacts list.
• Phone: Only display contacts in Phone.
• SIM1: Only display contacts in SIM1.
• SIM2: Only display contacts in SIM2.
2.1.4. Contacts Group
Set contact group, such as Student, Friend, Family, Colleague
2.1.5. Contacts Delete
Delete one or some or all contacts.
2.1.6. More
Accounts:
• Accounts & Sync Settings: Set the way of “background data” or Auto-Sync.
• Manage Accounts: Add or delete accounts from Corporate or BBM.
Import/Export:
• Import from SIM1: Import contacts from SIM1.
• Export to SIM1: Export contacts to SIM1.
• Import from SIM2: Import contacts from SIM2.
• Export to SIM2: Export contacts to SIM2.
• Import from SD card: Import contacts from SD card.
• Export to SD card: Export contacts to SD card.

89
User Manual
• Share visible contacts: By Bluetooth or Email or messaging
Black list:
• Add some phone numbers into black list, and intercept their call or SMS.
• Delete records from black list
2.2. Contacts View
On contacts view interface, press [Menu], perform the following functions: Edit contact,
Share, Options, Delete contact.
2.2.1. Dial Contact number
On contacts view interface, dial this contact phone number by SIM1 or SIM2.
2.2.2. Send Message
On contacts view interface, click , enter message edit interface, input message
content, send a message to this contact’s phone number by SIM1 or SIM2.
3. Messaging
On Main menu interface, enter “Messaging”.
3.1. Messages List
On messages list, touch “New Message” to enter message edit interface.
Touch a message to enter its view
3.1.1. Options menu
On messages list, press [ Menu ] to display options menu, operate the following:
• Compose: Enter message edit interface, enter the recipient’s number and
content, choose SIM1or SIM2, to send message by SIM1 or SIM2.
• Delete threads: Delete all messages.
• Search: Search message with key words.
• Settings: Set Messaging settings, include Storage settings, Text message(SMS)
settings, Multimedia message (MMS) settings, Notication settings, Forwarding
settings, Font setting.
3.1.2. Long Press Menu
Long press a message, display its long press Menu.
• View datails: View message details.
• Add to contacts: Add the contact.
• Delete thread: Delete message content.
3.2. Messages View
On message list, touch a message to enter its content interface. On message view, press
[ Menu ]to display options menu, operate the following: Call, Add subject, Attach, Insert
contacts, Insertsmiley, Delete thread, All threads and More.
4. Browser
On Main menu, enter and run Internet, access to the website.
Press [ Menu ] to display options menu, operate the following:
• New Window: Open a new window, and view the corresponding website.
• Bookmarks: Access bookmark page, add or delete bookmarks, browse “History”
or “Most Visited”.
• Windows: Access to the window page, add or delete a window.
• Refresh: Refresh webpage.
• Stop: Stop webpage.
• Close: Exit webpage.
• More: Include Forward, Save to bookmark, Goto homepage, Find on page,
Select text, Page info, Share page, Downloads, Save page, Full screen switcher,
Settings.
5. Calculator
On Main menu, enter Calculator. It supports four arithmetic operations such as “+”, “-”, “x”
and “/”.Slide the screen to switch into functional operation, e.g. Sin, Cos, Tan, Ln, Log, !,
π, e,^, etc.
6. Calendar
On Main menu, enter Calendar.
7. Camera
On Main menu, enter Camera.
7.1. Camera
On the view interface, Touch to take photos. Touch to change primary or
secondary camera. Touch to switch Video recorder, Touch to turn on/o ash,
Touch to display the parameters box. Include: location info, Exposure, Color eect,
Scen mode, White Balance, Anti-icker , Self timer, Continuous shot, Picture size,
Preview size.
7.2. Video Recorder
Touch settings icons to display the parameters box. Include: Microphone, Audio mode,
Time lapse interval and Video quality.
8. Clock
After entering Clock, touch to set Alarm; touch to access to timer; touch
to access to stopwatch; touch to slect cities.
9. Downloads
Check the downloaded content.
10. Email
On Main menu, enter Email. You can use (this device) it to receive or send your Email
anywhere or at any time.
Note: E-mail can be used normally when the wireless network is well connected.
10.1.Create Account
When entering Email for the rst time, it will directly enter new account edit interface,
input Email address, password, choose the corresponding parameters of POP3, IMAP
& Exchange Server, then touch [Next], through POP3 and SMTP server detection,
complete Email account creation.
10.2.Accounts List
After creating accounts, access to accounts list. Click “Combined Inbox”, view all the
mails of the accounts ; Click “Starred” , view all the starred mails; access to the Mailbox
list of the current account.
10.2.1. Options menu
On accounts list, press [ Menu ] to display options menu, operate the following:
• Refresh: Refresh and receive Emails.
• Compose: Enter mail edit interface, write mail content, and then send an email.
• Add Account: :(Create) add an Email account.
10.3.Inbox
On accounts list, click an account, and enter its inbox.
10.3.1. Options menu
On inbox interface, press [ Menu ] to display options menu, operate the following:
• Refresh: Refresh and receive Emails of the current account.
• Compose: Enter mail edit interface, write mail content, and then send an email.
• Folders: Access to Mailbox of the current account.
• Accounts: Access to accounts list.
• Account Settings: Access to account settings.
General Settings:
• Account Name: Edit account name.
• Your Name: Edit your name.
• Signature: Edit signature.
• Email Check Frequency: Set check frequency, e.g. Never, Every 5 minutes, Every
10 minutes, etc.
• Default Account: Set the current account as the default mail account.
Notication Settings:
• Email Notications: Activate or disable “Email Notications”.
• Select Ringtone: Set Email notication ringtone.
Server Settings:
• Incoming Settings: Edit the corresponding parameters of the incoming server.

10 11
User Manual
• Outgoing Settings: Edit the corresponding parameters of the outgoing server.
10.3.2. Long Press Menu
In the inbox list, long press an email, display options menu, operate the following:
• Open: Access to the current mail view.
• Delete: Delete the current mail.
• Mark as unread: Mark the current mail as unread.
10.4.View Email
In the inbox list, click an email, and enter its view interface.
On mail view interface, slide the screen up and down to view its content. Touch [Open]
button to play the attachment, touch [ Save ] button to save the attachment. Touch
[ Reply ] button to reply to the sender; touch [ Reply all ] button to reply to all the
recipients; touch [ Delete ] button to delete the mail.
On mail view interface, press [ Menu ] to display options menu, operate the following:
• Delete: Delete the current mail.
• Forward: Forward the current mail to others.
• Reply: Reply to the sender of the current mail.
• Reply all: Reply to all the recipients of the current mail.
• Mark as unread: Mark the current mail as unread.
10.5.Compose
In the accounts list or mails list, press [ Menu ], touch “Compose”, and enter mail edit
interface. Input recipient & Title & content, touch [ Send ] button to send this mail, or
touch [Save as draft ]to save it as a draft, touch [ Discard ] button to give up editing.
On mail edit interface, press [ Menu ] , display options menu, operate the following:
• Add Cc/Bcc: Add Cc/Bcc of email.
• Send: Send email.
• Save as draft: Save it as a draft.
• Discard: Give up editing.
• Add le: Add attachment for this mail.
Prompt: The capacity of attachement should be less than 5M
11. File Manager
On Main menu, enter File Manager.
11.1. Files / Folders List
On le explorer interface; touch to search audio or video or picture or other les;
11.2.Option Menu
On les or folders directory interface, press [ Menu ] to display option menu, perform
the following:
• Operations: Display operations menu, including: Cut, Copy, Rename, Delete,
Select All, Set As Home, Properties.
• New: Display options menu of New, including: File, Folder, Search.
• Manager: Display options menu of Manager, including: Task Manager, App
Manager, Security Manager, Bookmark Manager, SD Card Analyst.
11.3.Long Press Options
On les or folders directory interface, choose and long press a le or folder to display
its options menu.
11.4.Open / Play
If there are some pictures & audio & video & other le formats in a folder. Choose and
touch one of them.
12. FM Radio
On Main menu, enter FM Radio interface, insert headset then you can listen to FM radio.
Prompt: When the battery of your cell is insucient, you may not run FM Radio.
13. Gallery
On Main menu, enter Gallery. Touch to switch into Camera interface.
Press [ Menu] , operate the following:
• Share: Share picture folder(s) by Messaging or Bluetooth or Email.
• Delete: Delete the chosen folder(s).
• More:
• Details: View the details of the chosen folder.
13.1. Photos
In the folders list, choose and touch a photo folder to enter, slide from left to right to
view pictures list. Touch a picture or photo to enter its view.
13.1.1. Picture View
In the pictures list, choose and touch a picture to enter its view. Touch to shrink or
enlarge this picture.
Press [ Menu] , operate the following: Delete, Slideshow, Edit, Rotate left, Rotate right,
Crop, Set picture as, Details.
14. Gmail
Gmail is congured when you rst set up your phone. Depending on your
synchronization settings, Gmail on your phone is automatically synchronized with your
google account on the web. The inboxconversations list is your default gmail view.
Touch the Menu key, then touch Refresh to send or receive new emails and to
synchronise your emails with your google account on the web. With menu key, you can
compose an email, add accounts,go to labels, search and so on.
15. Maps
Google map is the company to provide electronic map service, including the local
detailed satellite images. This service can provide contain administrative zones and
transportation, and business information of vector maps, satellite images of dierent
resolution, and can be used to display the terrain and terrain contour view. Are applied
in all kinds of platform, operation simple and convenient.
16. Music Player
Music player supports various audio formats, including: Midi, MP3, amr and wav, etc.
17. Play store
Play Store lets you download useful application and games, if you install applications
and games from play store, they appear in the menu.
Frist, set up a google account.enter your name and password.
After signing in, you can download useful application and games.
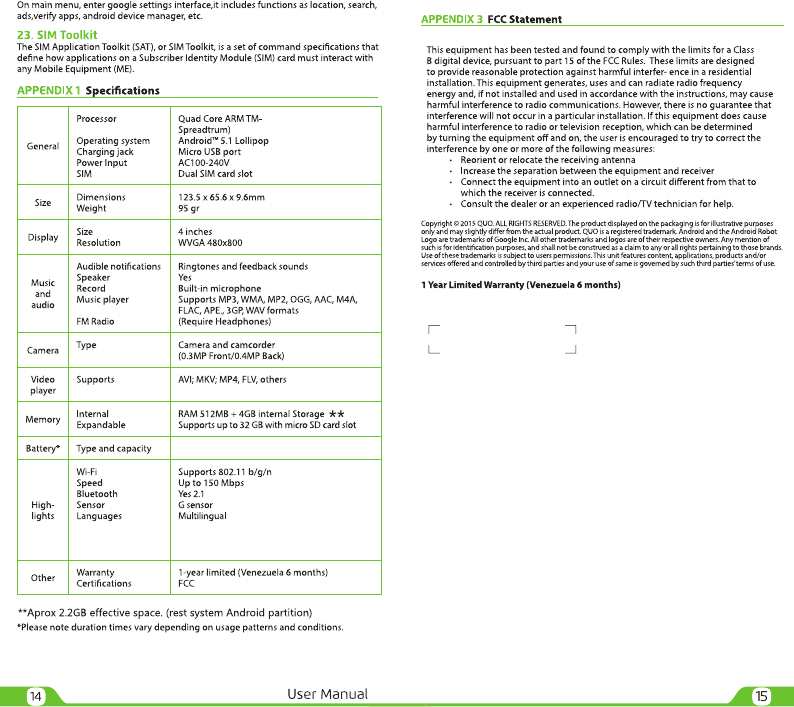
18. Settings
In settings, you can perform: Wireless controls, Sound settings, Display settings, Security
& location, Applications, SD Card and Local disk, Date and time, Accessibility, Speech
synthesis, About phone, etc.
18.1. SIM management:
• Standby SIM Card Setting: Set SIM1 or SIM2 or SIM1+SIM2 standby.
• Data connection Setting: Set data connection of SIM1 or SIM2.
• Voice settings: Set voice settings for SIM1 or SIM2 or Always Ask.
• Messaging settings: Set message settings for SIM1 or SIM2 or Always Ask.
18.2.Wireless & networks
In wireless network control, you can set WiFi, Bluetooth, Networks, VPN settings,
Airplane mode, etc.
18.2.1. Wifi On/O
Touch “WiFi” to switch between “On” and “O”.
Note: Please turn o WiFi to save power when not using.
18.2.2. Bluetooth On/O
Touch “Bluetooth” to switch between “On” and “O”.
Note: To save power, please turn o Bluetooth when not using.
18.2.3. Bluetooth settings
You can set Bluetooth On or o, Device name, Discoverable, Scan for devices and list
the scanned devices.
18.2.4. Airplane mode
Touch “Airplane Mode” to switch between “On” and “O”. If Airplane mode is On, all the
wireless networks will be disconnected automatically in this mode.

12 13
User Manual
18.10. Language & input
18.10.1. Select Language
You can select language, the default language is English.
18.10.2.Personal dictionary
Press [ Menu ] to add words to User Dictionary or delete words.
18.10.3.Keyboard settings
• Android keyboard settings: Include Vibrate On Keypress, Sound on keypress,
Popup on keypress, Touch to correct words, Auto-capitalization, Show settings key,
Input languages, Quick xes, Show suggestions, Auto-complete.
18.11. Backup&reset
It inculdes back up my data, backup account, Automatic restore, DRM reset, Factory
data reset.
18.12. Accounts
You can perform adding accounts and Sync settings.
18.12.1.Manage Accounts
You can add or delete sync accounts.
18.13. Date & Time
18.13.1.Automatic
Touch this item to switch between “On” and “O”. If it is set as “On”, it updates the date
and time automatically. This function is based on the services provided by the network.
Note: When this item is initiated, “Set Date”, “Select Time Zone” and “Set Time” are
not available.
18.13.2.Set date
With time updating “O”, touch it to display the dialog box of Date Setting.
Note: The date scope is from Jan. 1, 1970 to Dec. 31, 2037.
18.13.3.Select time zone
Touch this item to enter “Select Time Zone”, touch and select any one of world cities,
and set it as system time zone. The default time is Beijing time.
18.13.4.Set time
With time updating “O”, touch it to display the dialog box of Time Setting, and set
system time.
18.13.5.Use 24-hour format
Touch this item to switch between “On” and “O”. If it is “On”, system time is in 24-
hour format, otherwise, it is in 12-hour format.
18.13.6.Choose date format
Select one item to set date format.
18.14. Timer Switch Machine
Set automatic switch machine on or o.
19. Sound Recorder
On Main menu, enter Sound Recorder. The format of recording les is *.3gpp, the
recording length depends on the size of T-Flash card. Touch to record, touch
to stop recording, touch to play the recording le in the list. Choose and long
press a recording le to delete.
20. Video player
Enter video player, in the folders list, choose and touch a video folder to enter, slide
from left to right to view videos list. Touch a video and choose a kind of play way, it
starts to play this video. Touch to play; touch to pause. Drag the slider from
left to right to fast-forward or rewind.
21. Search
We can search informations with this APP.
22. Google Settings
18.2.5. Warning
Even if airplane mode is activated, it is forbidden to use (on) in plane or in some
special labs or under hospital equipments, other special environments, etc., so as to
prevent the intervention of electronic equipments to the communication or this device,
you are advised to power o this device in such environments.
18.2.6. Tethering & portable hotspot
Share your phone’s mobile data connection via USB or as a portable Wi-Fi hotspot.
18.2.7. VPN Settings
In VPN settings, you can add a new VPN, set VPN server, enable Encryption, DNS
search domains, etc. After adding a new VPN, touch it in the VPNs list, and you can
connect it to network.
18.2.8. Mobile Networks
In Mobile Networks, you can set Data enabled or Data Roaming or Access Point
Names or Network Operators.
• Data Enabled: Activate or disable data access over Mobile network.
• Data Roaming: Set data roaming on or o.
• Access Point Names: Choose Access Point Names.
• Network Operators: Search networks by hand or automatically.
18.3.Audio profiles
In sound settings, you can set Silent Mode, Ringer Volume, Media Volume, Notication
Ringtone, Audible Touch Tones, Audible Selection, Haptic Feedback, SD Card
Notications, etc.
18.4.Display Settings
In display settings, you can perform such operations as “Brightness”, “Auto-rotate,
Screen”, “Wallpaper”, “Sleep”, etc.
18.5.Storage
18.5.1. SD Card
• Total Space: View the capacity of SD card when SD card is inserted.
• Available Space: View the available space of SD card.
• Unmount SD Card: You can unmount SD Card for safe removal.
• Erase SD Card: Erase all data on the phone’s sd card,such as music and photo.
Note: If you format SD card, it will erase all the data in SD card, please be prudential to
use this feature.
18.5.2. Internal Storage
• Available Space: View the capacity of RAM.
Note: If you format Local disk, it will erase all the data in Local disk, please be prudential
to use this feature.
18.6.Battery
Check the electricity consumed by each application.
18.7.Apps
18.7.1. Manage Applications
User can manage and remove the installed applications.
18.7.2. Running services
User can view and control currently running services.
18.7.3. Storage use
View storage user by applications.
18.8.Location
You can set My Location
18.9.Security
18.9.1. Screen lock
You can set Set up screen lock.
• None: Disable screen unlock security.
• Slide: Slide to unlock screen.
• Pattern: Draw pattern to unlock screen.
• PIN: Enter a numeric PIN to unlock screen.
• Password: Enter a password to unlock screen.
1500mAh
A7 (SC7731
FCC Warning:
Any Changes or modifications not expressly approved by the party responsible for compliance
could void the user’s authority to operate the equipment.
This device complies with part 15 of the FCC Rules. Operation is subject to the following two
conditions: (1) This device may not cause harmful interference, and (2) this device must
accept any interference received, including interference that may cause undesired operation.
Specific Absorption Rate (SAR) information
SAR tests are conducted using standard operating positions accepted by the FCC with the
phone transmitting at its highest certified power level in all tested frequency bands. Before a
new model phone is available for sale to the public, it must be tested and certified to
the FCC that it does not exceed the exposure limit established by the FCC, Tests for each
phone are performed in positions and locations (e.g. at the ear and worn on the body)as
required by the FCC.
For body worn operation, this model phone has been tested and meets the FCC RF exposure
guidelines when used with an accessory designated for this product or when used with an accessory that
Contains no metal and that positions the handset a minimum of 1.0 cm from the body. Non compliance
with the above restrictions may result in violation of RF exposure guidelines.