KEEN HIGH HOLDING MT8010 Mobile Internet Device User Manual MT8010 Ver1
KEEN HIGH HOLDING(HK) LIMITED Mobile Internet Device MT8010 Ver1
User Manual
Mobile Internet Device
MT8010
User’s Manual

i
TABLE OF CONTENTS
Introduction.............................................................................................................................................................................................1
Regulatory Information: FCC Part 15 ...................................................................................................................................................2
Important Safety Precautions................................................................................................................................................................3
Controls and Connections ....................................................................................................................................................................4
Main Features .........................................................................................................................................................................................5
Basic operation.......................................................................................................................................................................................5
Charging...............................................................................................................................................................................................5
Turning on/off the tablet........................................................................................................................................................................6
Unlock (enter) / Lock (standby) the tablet ............................................................................................................................................6
Transferring and managing files...........................................................................................................................................................6
Conserve Internal Memory ...................................................................................................................................................................6
Inserting Micro SD card........................................................................................................................................................................7
Unmount & remove the Micro SD card.................................................................................................................................................7
Connecting the device to a computer...................................................................................................................................................7
Home screen...........................................................................................................................................................................................8
Applications screen ..............................................................................................................................................................................9
Recent screen ....................................................................................................................................................................................10
Changing the wallpaper......................................................................................................................................................................10
Creating and using folders .................................................................................................................................................................11
Using widgets .....................................................................................................................................................................................11
Notifications........................................................................................................................................................................................12
Using the On-screen Keyboard...........................................................................................................................................................12
Connecting to Wi-Fi..............................................................................................................................................................................13
Setting up Wi-Fi..................................................................................................................................................................................13
Browsing ...............................................................................................................................................................................................14

ii
Email......................................................................................................................................................................................................15
Camera ..................................................................................................................................................................................................15
Taking Photos and Recording Videos ................................................................................................................................................16
Gallery ...................................................................................................................................................................................................17
Viewing pictures .................................................................................................................................................................................17
Share pictures to Email ......................................................................................................................................................................18
Watching videos .................................................................................................................................................................................18
Slideshow ...........................................................................................................................................................................................18
Music .....................................................................................................................................................................................................19
Movie Player..........................................................................................................................................................................................20
File Browser..........................................................................................................................................................................................21
AppInstaller...........................................................................................................................................................................................22
Downloads ............................................................................................................................................................................................22
Calendar ................................................................................................................................................................................................23
Clock......................................................................................................................................................................................................24
Calculator..............................................................................................................................................................................................25
Settings .................................................................................................................................................................................................26
Resetting ...............................................................................................................................................................................................27
Restore ..................................................................................................................................................................................................28
Frequently Asked Questions...............................................................................................................................................................28
Specification .........................................................................................................................................................................................30

1
Introduction
Thank you for purchasing this device.
This device enables you to surf the internet via wireless connection with multimedia playback.
This manual contains important safety information and operation instructions, so please read all the instructions carefully before using the device
and keeps it for future reference.
We have done our best to produce a complete and accurate manual; however, we cannot ensure there are no errors
or omissions. We also have no responsibility for damages or loss of data caused by improper operation.
The instruction manual is subject to change for improvement without notice.
Trademarks and trade names used in this user’s manual are owned by their respective companies or organizations.

2
Regulatory Information: FCC Part 15
This device complies with part 15 of the FCC rules. Operation is subject to the following two conditions:
(1) this device may not cause harmful interference,and
(2) this device must accept any interference received, including interference that may cause undesired operation.
Note:
This equipment has been tested and found to comply with the limits for a Class B digital device, pursuant to part 15 of the FCC Rules. These
limits are designed to provide reasonable protection against harmful interference in a residential installation.
This equipment generates, uses and can radiate radio frequency energy and, if not installed and used in accordance with the instructions, may
cause harmful interference to radio communications. However, there is no guarantee that interference will not occur in a particular installation. If
this equipment does cause harmful interference to radio or television reception, which can be determined by turning the equipment off and on, the
user is encouraged to try to correct the interference by one or more of the following measures:
y Reorient or relocate the receiving antenna.
y Increase the separation between the equipment and receiver.
y Connect the equipment into an outlet on a circuit different from that to which the receiver is connected.
y Consult the dealer or an experienced radio/TV technician for help.
WARNING: THE MANUFACTURER IS NOT RESPONSIBLE FOR ANY RADIO OR TV INTERFERENCE CAUSED BY UNAUTHORIZED
MODIFICATIONS TO THE DEVICE. ANY SUCH MODIFICATIONS COULD VOID THE USER'S AUTHORITY TO OPERATE THE EQUIPMENT.
Contact:
Chuck zhu
Nextar, Inc., 1661 Fairplex Dr., La Verne, CA 91750
Tel: (909) 392-8282
Fax: (909) 392-8283
www.nextar.com
E-mail: chuck.zhu@nextar.com
FCC RF warning statement: The device has been evaluated to meet general RF exposure requirement.The device can be used in porta
exposure condition without restriction.

3
Important Safety Precautions
Always follow these basic safety precautions when using your device. This will reduce the risk of fire, electric shock, product damage and
personal injury.
y Warning: Do not remove the cover or back to reduce the risk of electric shock. There are no user-serviceable parts inside. Refer
servicing to qualified personnel.
y Warning: Do not expose the device to rain or moisture to prevent fire or electric shock hazard.
y Do not use the earphone at a high volume to prevent hearing damages.
y Do not expose the device to water (dripping or splashing) and no objects filled with liquids, such as vases, should be placed on the unit.
y Keep the device away from direct sunlight and heat source such as radiators or stoves.
y Do not place the device on unstable cart, stand, tripod, bracket or table. The unit may fall, resulting in possible damage or injury.
y Never place heavy or sharp objects on the LCD panel or devie.
y Only use the AC adapter included with device. Using any other adapter will void your warranty.
y Protect the power cord from being walked on or pinched particularly at plugs, receptacles and the point where the cord attached to the
device.
y Unplug the power from the outlet when the unit is not in use.
y Warning: Changes or modifications to this unit not expressly approved by the party responsible for compliance could void the user’s
authority to operate the equipment.
Cleaning
y Before cleaning the device make sure it is turned off.
y Never spray or pour liquid directly onto the screen or plastic casing.
y To clean the LCD screen, wipe the screen with a clean, soft, lint-free cloth. This removes dust and other particles. If it is still not clean,
apply a small amount of non-ammonia, non-alcohol based glass cleaner on a clean, soft, lint-free cloth to clean the screen.
y To clean the plastic casing, use a soft, dry cloth. If it is still not clean, apply a small amount of non-ammonia, non-alcohol based, mildly
4
non-abrasive detergent on a clean, soft, lint-free cloth to clean the surface.
y To clean the device, use a soft, dry cloth.
Disclaimer: Authorized Dealer does not recommend the use of any ammonia or alcohol-based cleaners on the LCD screen or plastic casing.
Some chemical cleaners have been reported to damage the screen and/or display case. Authorized Dealer will not be liable for damage resulting
from the use of any ammonia or alcohol-based cleaners.
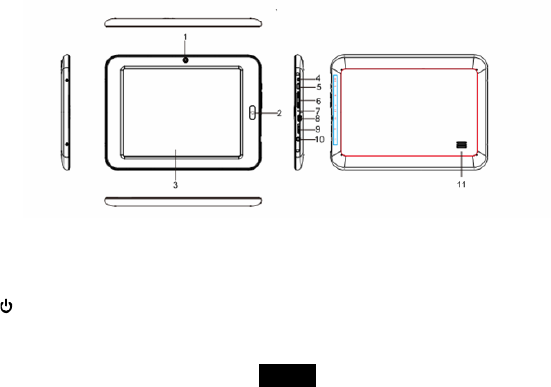
Controls and Connections
1. Front camera
2. Home button
3. Dispay screen
4. Dc input socket
5. Power/Lock button
6. Volume key +/-
7. Microphone
8. Mini USB port
9. Micro SD card slot
10. Earphone jack
11. Speaker

5
Mai Features
y 8’’ capacitive touch screen,800*600 4:3
y Decorative appearance, good quality
y Android 4.0operating system
y Internet via WiFi connection
y Super internet appliances and multimedia player
y Download, install and use Android applications.
y Use built-in camera to take photos or record videos.
y 4 way screen auto rotation
Basic operation
Charging
Your device comes with a Lithium polymer integrated rechargeable battery.
New batteries are not charged when shipped. Before you start using your device, you need to charge the battery.
Follow the steps below to connect your device to the power outlet and charge the battery.
y Plug one end of the included AC power adaptor into the power jack on your device.
y Plug the other end into a power outlet.
Battery tips
y
Turn off Wi-Fi when it’s not in use.
y
Lock the tablet (the display is off) to shorten charging time.
y
To optimize battery time and performance, adjust the "Brightness" and "Screen timeout" options in the Settings app.
6
NOTE
y The mini USB cable connected to PC could not charge the device, only for transferring files and OTG function.
y If not use this device for a long time, in order to avoid damage caused by battery excessive consumption, please be sure to make a
battery charge and discharge once within one month to prevent battery from running down.
y With built in Lithium polymer batteries, it has to be charged regularly. The battery damage caused by excessive consumption of polymer
battery will not be covered by guarantee. If use the charger which is not exclusively equipped for this machine, the problem caused by it
also not be covered by guarantee.
Turning on/off the tablet
y Press and hold the Power button until the startup screen appears.
y Press and hold the button until the Power off dialog appears.
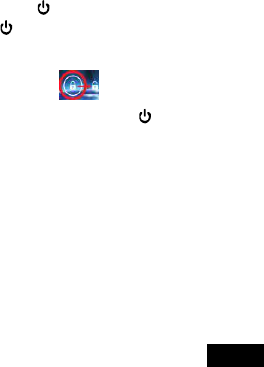
Unlock (enter) / Lock (standby) the tablet
y Slide the”Lock icon” to the right .
y To lock or unlock the device, briefly press the button (Lock the device to conserve the battery)
Transferring and managing files
It is possible to manage and transfer media files to the tablet by connecting it to your computer.
Conserve Internal Memory
It is strongly recommended to purchase and install a Micro SD card before transferring or downloading media files.
Tips: Transfer and store media files such as music, pictures and video on to a Micro SD card and avoid placing these types of files in the internal
memory of the device - this will conserve the internal memory, and allow you to download more apps.

7
Inserting Micro SD card
The device supports Micro SD cards up to 32GB (not included).
1. Insert the card face up into the card slot until it clicks and locks into place.
2. Once the card is mounted, the card icon appears on the Status Bar.
3. To access the Micro SD card, select "File Manager" from the Applications screen.
Unmount & remove the Micro SD card
1. Open “Settings”
2. Select “Storage”
3. Select “Unmount Micro SD card”
4. It is now safe to remove the card from the device.
5. To remove the card, gently push it in until it pops out.
Note:
y Do not use any force while inserting a memory card.
y Make sure to unmount the card before taking it out of the device.
y When no micro SD card inserted, your device will read the internal memory.
Connecting the device to a computer
1. Connect the included USB cable to the "mini USB port" of the device and USB port of the computer.
2. The "USB connected" screen appears, select “Turn on USB storage”, then select “OK”.
Note: While connected to the computer, you can also access the “USB connected” screen from the Status Bar.
3. The "Autoplay" window appears on your computer's display, select “INTERNAL” to view and manage files on the device, or if a Micro SD
card is inserted, select “Removable Disk” to manage files on the card.
4. Copy media files from your computer to the Micro SD card.
8
5. Select "Turn off USB storage" on the device to disconnect it from the computer.
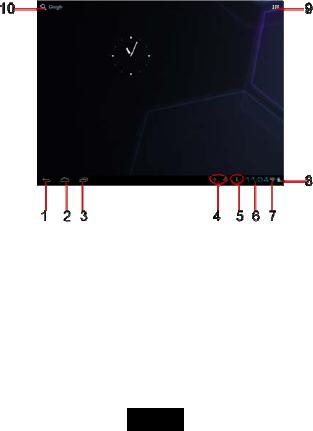
Home screen
On the Home screen, swipe left or right to access the extended Home screens.
1. Back: Tap to return to Previous screen
2. Home: Tap to enter Home screen
3. Recent: Tap to open a list of thumbnail images of applications you’ve worked with recently
4. USB or SD card if it’s connected
5. Notification area: Information of email,downloading, update and so on.
6. Clock display
9
7. Wi-Fi connected
8. Battery status
9. Applications icon: Tap to enter applications screen
10. Tap to enter Google search
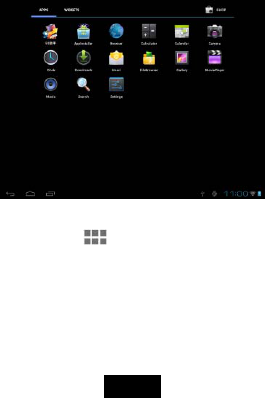
Applications screen
The Applications screen contains all of the apps and widgets you have installed on device. If you would like to add an app or widget to the home
screen from the Applications screen, tap the Applications Icon , tap and hold the application or widget you would like to move, then drop it on
any open spot or folder on the home screen.
10
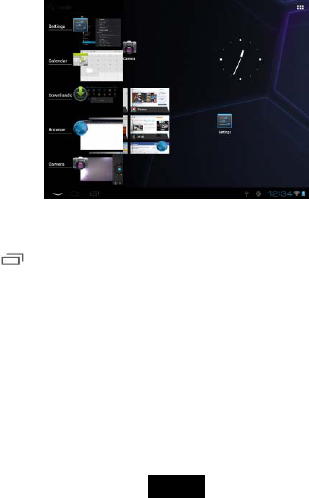
Recent screen
The Recents screen provides a way to easily switch between your recently used applications. This provides a quicker, more efficient way of
switching between applications
y When you tap the Recents Key , the most recently used applications will appear on a vertical screen.
y You can swipe up and down on this screen to see your recently used apps.
y To switch to an application, simply tap it.
y To remove an application from the Recents screen, swipe left or right on the app.
Changing the wallpaper
To change the wallpaper, tap and hold any open spot on the screen. A window will pop up. Choose the wallpaper source from the following
options:
• Gallery: Choose from photos that you have taken with the Camera or saved in the Gallery.
• Live Wallpapers: Choose from a list of animated wallpapers.

11
• Wallpapers: Choose from several default wallpaper images.
You can also change the wallpaper by tapping Applications Icon > Settings Icon > Display > Wallpaper.
Creating and using folders
Folders are a great way to organize apps on the home screen. You can group several apps together in one folder by simply dragging and
dropping one app icon onto another.
y Create a folder: On the home screen, tap and hold an app you want to group, then drag it to an app that you would like to group it with and
drop it on top of that app. A folder will be created automatically. You can add additional apps to a folder by repeating the same steps.
y Rename a folder: Tap and open the folder you want to rename. On the bottom of the open folder, tap Unnamed Folder and enter your
preferred name for that folder.
y Edit a folder: To remove apps from a folder, tap the folder to open it. Tap and hold the app you want to remove, and drag it to any open
spot on the home screen or to a different folder. Remove all apps in a folder to delete that folder.
y Reorganize folders: Tap and hold the folder you would like to move, drag it to any open spot on the home screen and drop it.
Using widgets
Widgets are shortcuts to applications that bring your favorite apps and content right to the home screen, without having to launch apps. Widgets
are moveable and some are resizable.
y To add widgets to your home screen,tap Applications Icon > Widgets. Tap and hold the widget you would like to add, then drag the
widget to any open spot on the home screen and drop it.
y To reorganize your widgets, tap and hold the widget you would like to move, then drag the widget to any open spot on the home screen
and drop it.
y To remove widgets from your home screen, tap and hold the widget you would like to remove, then drag the widget to Remove .
You can expand some widgets to show more content or shrink them to save space. To resize a widget, tap and hold the widget, release the widget
then drag the corners left and right or up and down to expand or shrink the widget.
12
Notifications
Notifications are short messages that you can access from the Status Bar. They provide updates and reminders without interrupting you. You can
open notifications by swiping up on the Status Bar. If you tap a notification, the associated app will open.
Using the On-screen Keyboard
The device allows you to enter text using an on-screen keyboard. Some apps may open the keyboard automatically. In other apps, you may need
to tap a text field in order to access the keyboard.
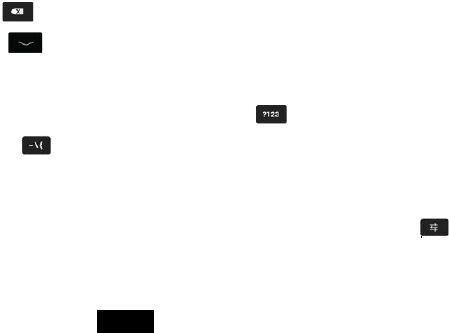
Typing Basics
y Tap the keys on the keyboard to start typing. The characters you type will appear in the text field above the keyboard.
y To erase characters, use the Delete Key .
y To close the keyboard, tap the Back Key located on the bottom left in the navigation menu.
y To edit text, tap and hold the text you want to edit. Use the menu commands from the pop-up window to cut, copy and paste text.
Numbers, Symbols and Other Characters
y To switch to the numbers, symbols and other characters keyboard, tap the Symbols Key .
y To view additional symbols, tap the Alt Key on the symbols keyboard; tap it again to switch back.
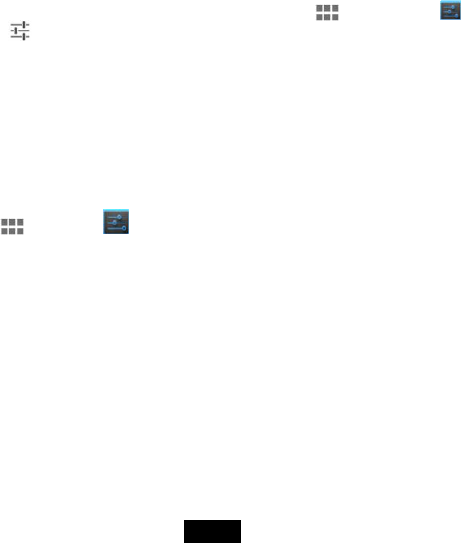
Adjusting Keyboard Sound
You can turn on/off the keyboard sound in the keyboard settings. The keyboard sound is on by default. To turn off the sound, launch the keyboard
by opening an app that requires using the keyboard. On the lower right side of the keyboard, tap Keyboard Settings Icon > Android
keyboard settings, then uncheck the box next to Sound on keypress.
13
You can also turn on/off the keyboard sound in Settings by tapping Applications Icon > Settings Icon > Language & input >
Android Keyboard Settings Icon . Uncheck the box next to Sound on keypress to turn off the sound; check the box to turn it on.
Connecting to Wi-Fi
Before you can surf the Internet, send and receive emails, download content and applications etc,you must join a Wi-Fi network that is
connected to the Internet.
For Wi-Fi networks that are not secured, you can easily connect to them and access the Internet freely. However, for Wi-Fi networks
that are secured with password, you need to have the password to access the Internet.
Setting up Wi-Fi
y Tap Applications Icon > Settings Icon > Wi-Fi
y If Wi-Fi is not on, tap and slide the switch to On and wait for device to detect nearby networks
y Tap the name of the network you want to be connected.
y If required, enter the correct password and select “Connect”.
y If you have a closed network, simply tap Add Network to add your Wi-Fi network.
y When the deivice is connected to a network, the Wi-Fi icon will appear on the Status Bar and “Connected” will appear under the selected
network.
Note: To conserve battery life, turn off Wi-Fi when not connected to a network.

14
Browsing
The device is equipped with a full HTML Browser, which allows you to enter the internet.
y On Applications screen, tap Browse to enter the default webpage.
y Tap the input field and enter the web address in the URL field using the onscreen keyboard and tap to open.
y On the opening webpage, tap to open the menu options and make desired settings.
Note: You must join a Wi-Fi network before accessing the web via the browser application.
15
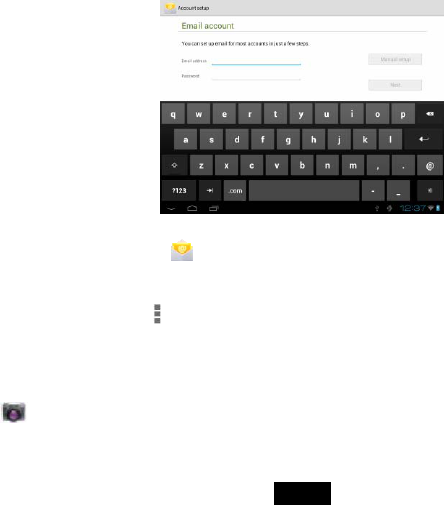
Email
Use Email to view and manage all your email accounts in one application.
y From Applications screen, select Email .
y Input your Email address and password and tap Next.
y Then follow the instructions to set up your email account on the device.
y Enter emailbox interface, tap Menu to show the menu options and make email settings.
Note: You must join a Wi-Fi network before accessing or setting up email accounts.
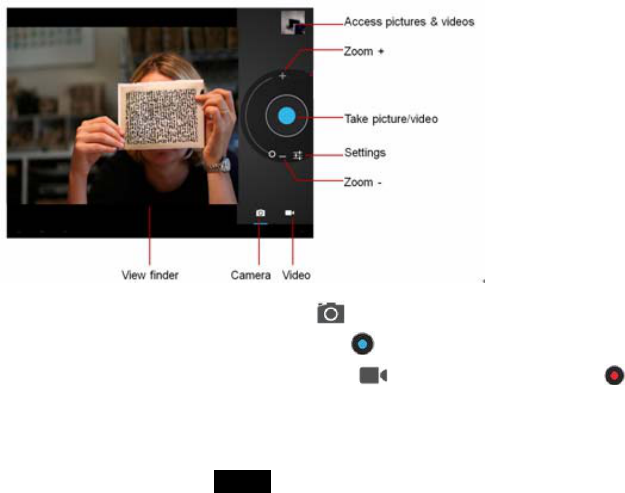
Camera
Select Camera on the applications screen to go to camera mode. It is possibile to take pictures or videos with the built-in camera.
16
Taking Photos and Recording Videos
y To take photos, make sure the mode is set to Camera by tapping the Camera on the bottom of the screen. Using the display as a
viewfinder, compose your photo by aiming the lens at the subject. Then tap Capture to take a photo.
y To record a video, make sure the mode is set to Video by tapping the Video Camera on the bottom of the screen. Tap Record
to start and stop recording.
17
y To adjust the camera settings, tap Camera Settings . To zoom in or out, swipe your finger around the Zoom Circle . To zoom in,
swipe toward . To zoom out, swipe toward .
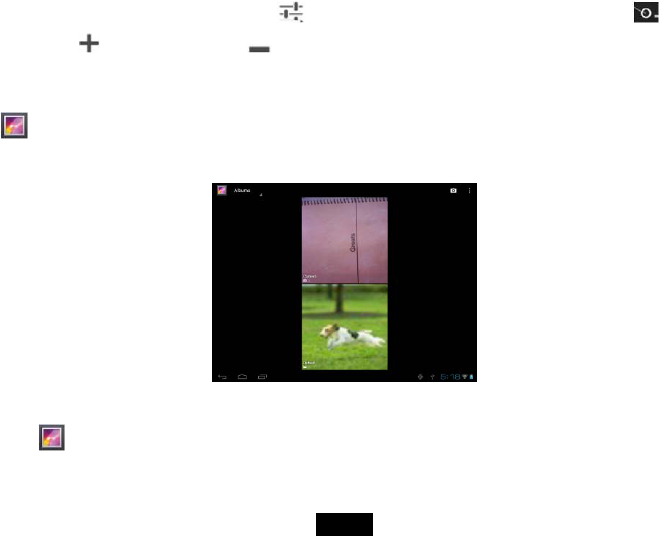
Gallery
Select to view and organize photos and videos taken with the Camera. Gallery will also show video files and photos transferred to the
device.
Viewing pictures
Select Gallery on Applications screen. Select a category and tap a picture to view. Pinch to enlarge and swipe left or right to go to previous or
next pictures.

18
Share pictures to Email
To utilize this feature, an Email account must be set up for this option to appear.
Share: Share the selected picture through Email.
Trash: Delete the selected picture
Menu: Slideshow, Edit, Rotate left, Rotate right, Crop, Set picture as and Details.
Watching videos
Select Gallery on Applications screen. Select a category and tap a video to view. While playing a video, tap the display to access the video
controller, tap the display again to hide the controller.
Slideshow
Slideshow allows you to view your photos in an animated setting. On photo thumbnail list screen,tap to start slideshow of your photos in the
Gallery.
19
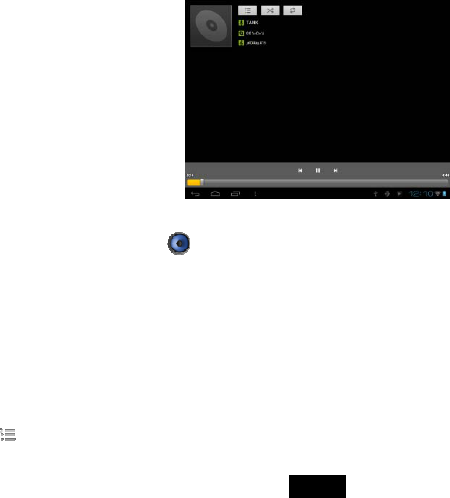
Music
The Music application lets you play digital audio files stored in the internal memory or memory card.
y From Application screen, tap Music to enter music library.
y The music is displayed as different categories such as Artists, Albums, Songs and Playlists.
y Select a category and tap a song to start playback.
On music library inteface, select a song and hold to pop up a window, then you can
y Play the selected song
y Add to playlist
y Delete the song
y Search song from music library or internet.
While listening to a song,
y Tap to select songs from the list.
20
y Tap to turn shuffle on or off.
y Tap to cycle through the repeat modes: Repeat all songs, Repeat current song, Repeat is off.
y Tap or to pause or resume the song playback.
y Tap or to go to previous or next song.
y Drag the progressive bar to the desired playing point.
On playing interface, tap , then there will pop up a menu bar.
y Tap Library to go to music library
y Tap Party shuffle to make Part shuffle on or Party shuffle off.
y Tap Add to playlist to add a playlist.
y Tap Delete to delete the song.
Movie Player
The Movie Player application lets you play video files stored in the internal memory or memory card.
y From Applications screen, tap Movie Player
y Select video file from the right source.
y Tap a desired video to start playback
y On playing interface, tap the related icon to make playing options.
21
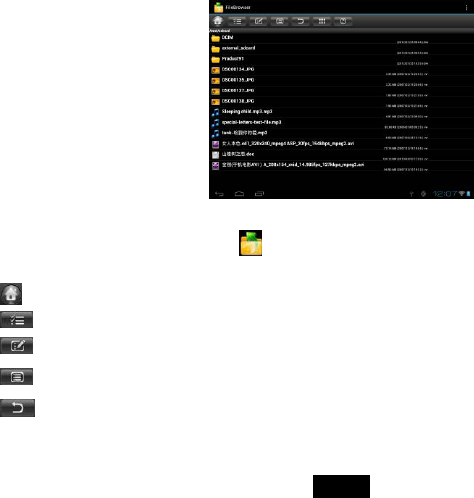
File Browser
The File Browser application lets you manage all the files.
y From Applications screen, tap File Browser to enter the file browser interface
y Select the desired file, and then tap the related icon to manage
Show home page:Display device list
Select/open mode:Select a folder or multiple files to manage, ✓indicates the file selected,tap again to cancel the selection.
Show edit menu: Cut, Copy, Paste, Delete
Show sort menu: Sort by Name, Sort by Date, Sort by Size
Back to previous directory
22
View by thumbnail
Help
AppInstaller
y From Applications screen, tap AppInstaller to enter applications management.
y Select the memory source, and then enter the applications list
y Tap an application, and then you can install or uninstall the application, then tap OK to confirm.
y Or on the applications list, mark to select the desired application, tap to open the menu options: Install/Uninstall, Select all, Unselect all,
Refresh, About.
Note: Applications downloaded from the web can be from unknown sources. To protect your device and personal data, download applications
only from trusted sources. Also download and install the application matches to your device with Android 4.0 operating system.
Downloads
The Download application let you view, reopen, or delete what you’ve downloaded.
y From Applications screen, tap Downloads
y Tap an item to open it.
y Tap headings for earlier downloads to view them.
y Check items you want to share. Then tap the share icon and choose a sharing method from the list.
y Check items you want to delete. Then tap the Trash icon .

23
y At the bottom of the screen, tap Sort by size or Sort by date to switch back and forth.
Files available in the download app can also be viewed in the download directory that’s visible when your device is connected to a computer. You
can view and copy files from this directory.
Note: Movies and some other content can be downloaded to your device but won’t show up in the Downloads application.
Calendar
The Calendar application lets you view and edit your schedule. To open it, tap the Calendar icon on Applications screen.
To change the Calendar view, choose Day, Week, Month, or Agenda from the top left of the screen. Swipe to scroll vertically or horizontally. In the
Day or Week views, spread your fingers apart or pinch them together to zoom in or out.
24
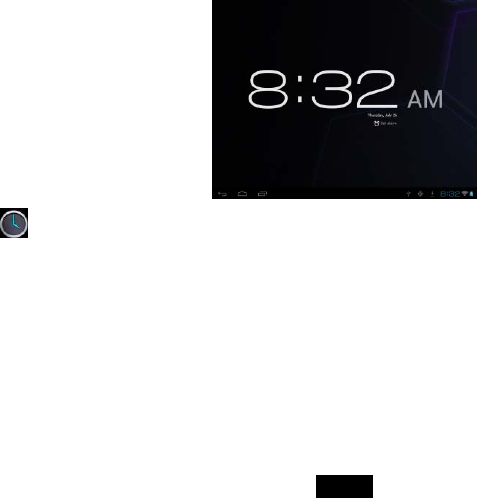
Clock
Select on the Applications screen, the Clock application display the date and time, also you can set an alarm clock.
25
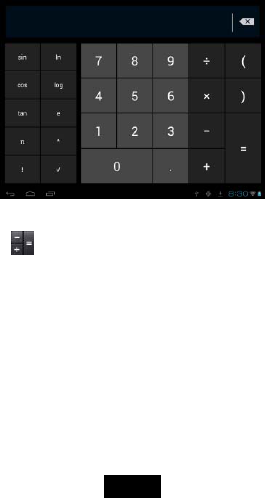
Calculator
You can use the Calculator to perform simply and advanced arithmetical calculations.
y From Applications screen, tap Calculator to enter.
y Tap on the numbers and mathematical operators to perform simple calculations.
26
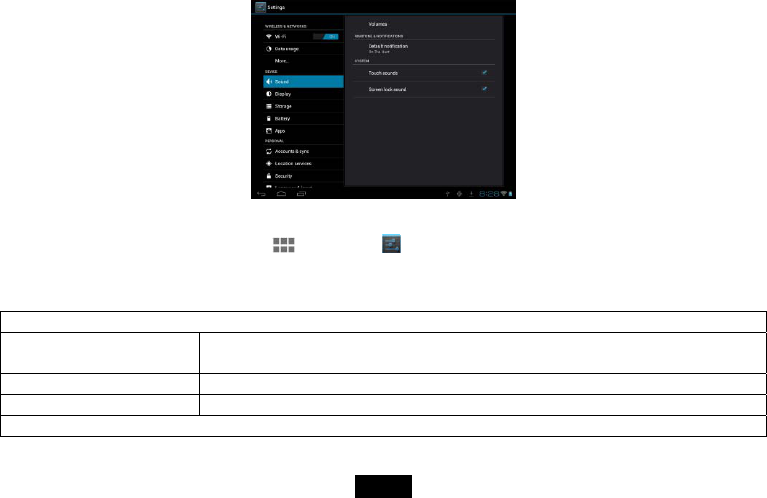
Settings
Settings allow you to customize and manage Wi-Fi, Sound, Display, Applications and more.
y To access Settings, tap Applications Icon > Settings Icon . You can also access Settings by swiping up on the Status Bar and
tapping the Settings Icon .
y Tap the setting items to make the desired configuration, ✓indicates that the option is activated
WIRELESS & NETWORKS
Wi-Fi Enable device to connect to the Internet. Set up and manage Wi-Fi networks to turn Wi-Fi on or off. Tap
to set up and manage wireless access points.
Data Usage Displays how much data is being used by each application. Tap to see the data usage cycle.
More Tap to set up VPN (virtual private network), Portable hotspot or Proxy settings.
DEVICE

27
Sound Tap to set the volume and sound level for media, notifications and alarms.
Display Tap to adjust the brightness, wallpaper, screen orientation, sleep timer and font size. Tap to perform an
Accelerometer calibration.
Storage Tap to view the amount of internal storage being used and the total space available.
Battery Tap to view battery life and percentage.
Apps Tap to manage and uninstall applications.
PERSONAL
Accounts & sync Tap to set up an email account or to sync Skype and other social media accounts.
Location services Using wireless networks to see location in applications
Security Tap to adjust screen security.
Language & input Tap to set spelling to auto-correct and to set keyboard.
Backup & reset Tap to perform factory data reset.
SYSTEM
Date & time Tap to set date and time automatically or manually.
Accessibility Tap to adjust text display.
Developer options Set options for development.
About tablet Tap to view software version and if there is a software update available.
Resetting
In the event that the tablet freezes or does not function properly, try correcting the problem by RESET function.
Press and hold the button, while the Power off dialog appears, skip it and hold the power button continually until the device turned off.
Data stored on the device will not be affected by using the RESET function.

28
Restore
Note: If the problem persists it may be necessary to restorethe tablet to the factory default settings:
1. Select "Settings" from the Applications screen.
2. Select "Backup & reset".
3. Select "Factory data reset" (this will erase data stored on the device so make sure to back up your data prior to using this option).
Frequently Asked Questions
1. My device does not turn on.
y Make sure the battery is not used up
y Make sure that the power adapter is securely connected
y Make sure that you are using the power adapter that was included with your device.
y Make sure that the device is turned on.
2. The display freezes or does not respond
y Tap and hold the power button to turn device off and turn it on again.
y Use a clip or a pin to insert the RESETt hole on the rear, and then turn on the device again.
3. My device does not recognize the memory card.
y Make sure that you have inserted a certified memory card.
y Make sure that you have inserted the memory card correctly.
y With your memory card inserted, power off and reset the device.
4. My device shows a low-battery warning
y The device is low on power and needs to be charged before you can use it.
5. I cannot access the web

29
y Check the wireless signal indicator in the status bar at the top of the screen. If there is no signal, you are not connected.
y Make sure the device’s wireless communication function is set to on.If problem persist, contact your Wi-Fi administrator.
y Make sure to select the right network and input the right password.
7. There is no sound coming from the device
y Unplug and reconnect the headset. Make sure that the connector is pushed in all the way.
y The volume may be deactivated or set too low.
y Check the software volume settings.
8. The actual storage memory is less than memeory capacity in specification
y As the device needs to take some space to hold system applications and data files, so the actual storage is less than the memeory
capacity in specification.
30
Specification
Display
Digital LCD, TFT, Capacitive Touch screen
Panel size: 8 inches
Screen aspect ratio: 4:3
Resolution: 800*600 pixels
Power supply
AC adpater 5V/2A
Battery
3.7V@3500mAH
O/S
Android 4.0
Processor ARM CORTEX-A9, 1GHz
RAM 512MB
USB
port
Mini USB port
Wireless
802.11 b/g/n
Camera 0.3M
Support card
Micro SD
Card, max to 32GB
Size L*W*H : (mm)
220.07*162.69*11.3
Weight (g)
445