KING PROFIT 326 MP3/CD Bass Reflex Boombox & PA System with Bluetooth User Manual STEREO RADIO
KING PROFIT TRADING LTD. MP3/CD Bass Reflex Boombox & PA System with Bluetooth STEREO RADIO
UserManual.wiki
>
KING PROFIT
>
326 User Manual
User Manual
Navigation menu
Upload a User Manual
Namespaces
Wiki Guide
HTML
PDF
Info
Views
User Manual
Discussion / Help
Navigation
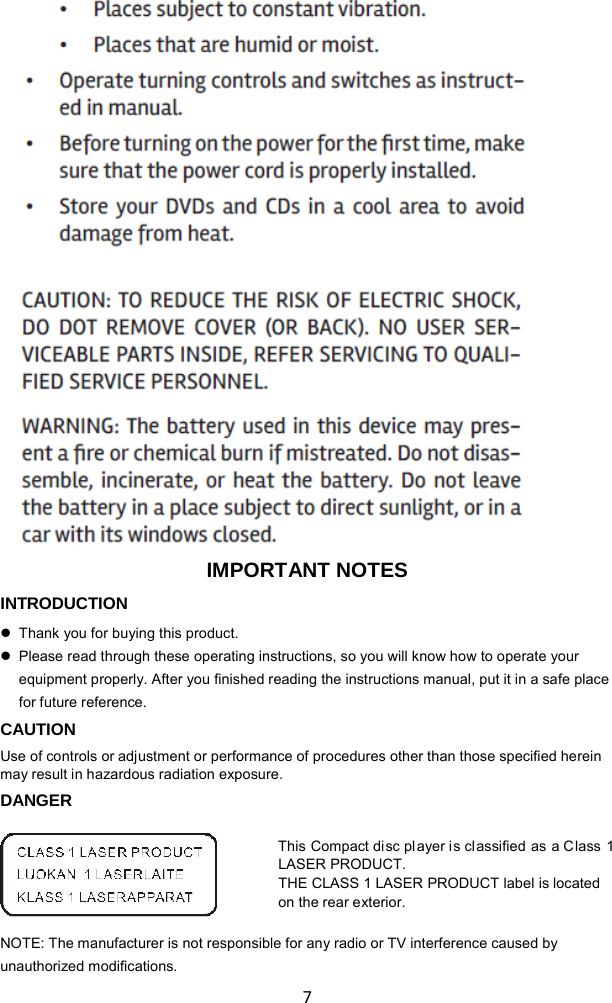
![4 Note: Please remove the plastic protector from the battery compartment before using for the first time. REMOTE CONTROL OPERATION To operate the unit with the remote control, point the remote transmitter [17] of the remote control at the IR sensor on the front display panel of the unit. Press the buttons on the remote control to use it. The remote works best at a distance of no further than 20 to 23 feet and within 30 degrees to either side of the sensor. Bright sunlight or other lighting conditions in the room can interfere with the remote control. If remote operation is unsatisfactory or stops working entirely, try using a new battery in the remote or try darkening the room. REPLACING THE REMOTE CONTROL BATTERY The remote control includes one CR2025 (3V) lithium battery. Remove t he plastic protector f rom t he ba ttery co mpartment before using the remote for the first time. To replace the battery, gently push the clasp to the right and then slide the battery compartment tray out. Remove the old battery and install a new lithium battery (type CR-2025) in the tray. The positive side of the REMOTE HANDSET 1. FUNCTION 2. MUTE 3. MEMORY 4. EQUALIZER 5. DIRECTORY/MEMORY/10 UP & DOWN 6. PREVIOUS/REVERSE and TUNING– 7. PLAY/PAUSE 8. P-MODE (Play mode) 9. STOP 10. PAIR 11. NEXT/FORWARD and TUNING+ 12. ID3 (show MP3 info tags) 13. VOLUME UP & DOWN 14. LIGHT 15. PROGRAM 16. STANDBY (POWER) 17. Remote transmitter 18. Battery compartment](https://usermanual.wiki/KING-PROFIT/326/User-Guide-2979830-Page-11.png)
![5 battery should face up. Slide the tray back into the compartment until the clasp clicks into place. POWER SOURCE This unit is designed to operate on or AC/DC electrical systems. AC OPERATION Plug one end of the power cord into the AC power input on the unit; plug the other end into a household AC outlet. (Battery operation will be disabled automatically when AC power is used). DC OPERATION Open the battery compartment door [30]. Load 10 pieces of UM-1/D size batteries (not included) into the compartment, taking care to match the +/– polarities marked inside the compartment. CAUTION: Remove batteries if they are empty or not being used for a long period of time. Batteries contain chemical substances and should be disposed of properly. Check your local regulations before throwing batteries in the trash.](https://usermanual.wiki/KING-PROFIT/326/User-Guide-2979830-Page-12.png)
![7 BASIC FUNCTIONS TURNING THE UNIT ON/OFF Press the POWER button [28] to turn the unit on or off. Adaptor with ferrite must be used with this equipment to ensure compliance with the Class B FCC limits. SETTING THE FUNCTION MODE There are 5 function modes; press the FUNCTION button [27] to change modes. The 5 modes are: • FM: Listen to FM radio broadcasts. (This is the default mode when you turn the unit on.) • AM: Listen to AM radio broadcasts. • CD: Play compact discs (CD-audio or CD-MP3). • USB: Play MP3s from USB memory sticks. • BLUETOOTH: Stream audio from wireless players with Bluetooth®The current function mode will be shown on the display [1] when you turn on the boombox. NOTE: The unit will automatically switch to AUX mode when a 3.5mm AUX cable is connected to the AUX input jack [8]. Disconnect the cable to exit AUX mode. . ADJUSTING THE VOLUME Turn the VOLUME dial [20] on the unit to increase or decrease volume. You may also use the remote control to adjust the system volume. EQUALIZER (EQ) FUNCTION Press the EQ button [25] during playback to change equalizer presets. The presets are: FLAT, CLASSIC, ROCK, POP, JAZZ, and 3D.](https://usermanual.wiki/KING-PROFIT/326/User-Guide-2979830-Page-14.png)
![8 Choose a preset that best matches the style of music that is playing; the presets have been calibrated to enhance your audio enjoyment. ID3 (show tag) System Some MP3 files are encoded with information such as the name of the song, the artist, and the album. Together, this information is called an "ID3 tag". Press the ID3 button [23] to cycle through which information to display when playing an MP3 file, or choose not to show any ID3 information at all. HEADPHONE JACK To use headphones with your Boombox, lower the volume before connecting them to the 3.5mm Headphone jack [17]. Once connected, slowly adjust the volume to a comfortable level. The speakers will be disabled when headphones are connected. CAUTION: LISTENING WITH HEADPHONES AT HIGH VOLUME LEVELS MAY CAUSE PERMANENT HEARING LOSS. PARTY LIGHT To change the party light effects, press the LIGHT button [26]. You can choose from five different preset modes. To disable the party light, press the LIGHT button [26] until the lights turn off and the display [1] reads “LIGHT OFF”. FM & AM TUNING MODES (Radio) Listen to FM or AM radio broadcasts. Press the FUNCTION button [27] until the display [1] reads FM or AM, respectively. • To optimize reception when listening to stations on the FM band, extend the telescopic antenna to its full length. To optimize reception for AM band stations, gently move the unit around, or position the unit in an open place. TUNING TO A RADIO STATION If you know the station frequency that you want to tune to directly: • Tune to a station by turning the TUNING dial [21]. The station frequency is shown on the display [1]. To tune to a preset station: • To tune to the next preset station, press the DIR/MEM/10+ button [4]. • To tune to the previous preset, press the DIR/MEM/10– button [5]. AUTO PRESET MEMORY / SCAN To scan for stations within reception range and save them to preset memory automatically, press the PLAY/PAUSE/PAIR button [14]. After the unit is finished scanning, the unit will automatically tune to preset number 1 (P01).](https://usermanual.wiki/KING-PROFIT/326/User-Guide-2979830-Page-15.png)
![9 MANUAL PRESET MEMORY Choose which stations to save in preset memory instead of scanning automatically. 1. Turn the TUNING dial [21] to tune to the station that you want to save as a preset (e.g., 93.10). 2. Press the PROG/P-MODE button [6]. “P01” will flash on the display to indicate that you are saving the station as Preset Memory 01. (To change the preset memory number, press the DIR/MEM/10+ [4] or DIR/MEM/10– [5] buttons.) 3. Press the PROG/P-MODE button [6] to finish saving the station (e.g., P01 is now set to 93.10). 4. To save another station, repeat steps 1 to 3. You may save up to 30 FM stations and 10 AM stations. CD MODE (CD and MP3 Discs) Play CDs with audio or MP3 files. Press the FUNCTION button [27] to select “CD” mode. SUPPORTED DISC FORMATS This unit can play all digital audio CD/MP3, finalized digital audio CD-Recordable (CD-R) discs, finalized digital audio CD-Rewritable (CD-RW) discs, and CD-DA formatted digital audio CD/CD-R/CD-RW discs. LOADING A DISC 1. Press PUSH TO OPEN on the CD door to open it; the display [1] will read “OPEN”. 2. Place the compact disc into the tray with the label side facing up. 3. Close the CD door; the display will flash “TOC READ”, and then show the total number of playable tracks on the disc. Playback will start automatically. 4. To remove the CD, press the STOP button [22] to stop playback. Wait for the CD to stop spinning completely! Press PUSH TO OPEN on the CD door to open it. Remove the CD carefully taking care to handle it by its sides. Notes: 1. Make sure the disc is completely stopped before opening the CD door. 2. To ensure good system performance, wait until the unit reads the disc completely before doing anything else. 3. If the disc is unreadable or if no disc is loaded in the tray, the display will read “NO DISC”. PLAYING A DISC Playback starts automatically from Track 1 after a compact disc has been loaded and read by the boombox. • To pause playback, press the PLAY/PAUSE/PAIR button [14]. The current track time will flash on the display. • To resume playback, press the PLAY/PAUSE/PAIR button [14] again. • To stop playback, press the STOP button [22]. To skip tracks Press the NEXT [13] or PREV [19] buttons to skip to the next or previous track, respectively. Track numbers are shown on the display.](https://usermanual.wiki/KING-PROFIT/326/User-Guide-2979830-Page-16.png)
![10 To scan quickly to a point in a track Press and hold the NEXT [13] or PREV [19] buttons to quickly scan forward or in reverse through a track. The track time is shown on the display. To skip tracks quickly (for MP3 discs, only) To skip 10 tracks at a time, press the DIR/MEM/10+ button [4] to skip forward 10 tracks. Press the DIR/MEM/10– button [5] to skip backwards 10 tracks. To select a desired folder (for MP3 discs, only) To select a track in a folder, press and hold the DIR/MEM/10+ [4] button each time to skip forward a folder, then press the NEXT [13] to select desired track. PROGRAMING TRACKS You can create a custom play list from your disc when playback is stopped. You can program up to 20 tracks for a CD disc and 99 tracks for an MP3 disc 1. While play is stopped, press the PROG/P-MODE button [6]. The display will flash PROG and show “P01”. 2. Use the NEXT [13]/PREV [19] buttons to select the first track to be saved to the program list, then press the PROG/P-MODE button [6] to save. The display will now show the next program number (e.g., “P02”). 3. Repeat step 2 to save more tracks to the program list until all tracks have been programmed. 4. Press the PLAY/PAUSE/PAIR button [14] to start playing the program list from the beginning. The display will show which track is currently playing. 5. Press the STOP button [22] on unit to stop program playback. To clear the program, open the CD compartment lid, making sure that the disc has stopped spinning completely before you do so. REPEAT/RANDOM/INTRO PLAY MODE (P-MODE) To change the playback mode, press the PROG/P-MODE button [6] during playback; the display will show the current P-MODE. Modes include repeat, random, and intro. • : Repeat the current track. • DIR: Repeat all of the tracks in the current directory/folder (MP3 playback only). • ALL: Repeat all tracks. • RAN: Play tracks in random order. • INTRO: Play the first 10 seconds of each track. To return to normal playback, press the PROG/P-MODE button [6] until there are no P-MODE indicators on the display. P-MODE is also canceled when you stop playback. USB MODE Play MP3 files from USB memory sticks. Press the FUNCTION button [27] to select “USB” mode. PLAYING MP3s FROM USB MEMORY](https://usermanual.wiki/KING-PROFIT/326/User-Guide-2979830-Page-17.png)
![11 1. Connect the USB memory stick to the USB port [2] found on the front of the unit. The display will show the total number of playable tracks on the USB device. Playback will start automatically from Track 1. 2. To pause playback, press the PLAY/PAUSE/PAIR button [14]. The current track time will flash on the display. To resume playback, press the PLAY/PAUSE/PAIR button [14] again. 3. To stop playback, press the STOP button [22]. To learn more about programming playlists and repeat/random/intro playback modes, please refer to the CD/MP3 OPERATION section of this manual. NOTICE: To prevent harmful interference, always connect USB devices directly to the unit. Do not use a USB extension cable to connect USB devices to the unit. Bluetooth®CONNECTING A DEVICE FOR THE FIRST TIME (PAIRING) MODE Stream audio wirelessly from players with Bluetooth. Press the FUNCTION button [27] to select "BLUETOOTH" mode. Wireless players with Bluetooth may include laptops, tablets, smartphones, and more. Make sure that your player has its Bluetooth radio enabled and that it is set to be discoverable. Before using a wireless device with Bluetooth, you will need to establish a connection between it and the Boombox. This process is called "pairing" and you will only have to do it once. Once two devices are paired, they will automatically connect when they detect each other. 1. When you set the Boombox to Bluetooth mode and it does not detect a paired device, it will automatically switch to pairing mode. (The display will flash "Bluetooth" and the blue "PAIR" indicator will blink when the Boombox is in pairing mode.) 2. On your wireless device, go to its Bluetooth settings menu. 3. Have your wireless device "search for devices". Select the boombox (NPB-262) when it is found. 4. When pairing is complete, the Boombox will emit a soft tone, the display will stop flashing, and the blue "PAIR" indicator will light a steady blue. The boombox will automatically connect to your wireless device next time as long as it has Bluetooth enabled, is within range, and is set to be visible to paired devices. Note: There are many different Bluetooth enabled devices out there; we cannot provide instructions for all of them. Please refer to your device manufacturer's instructions or website to learn more about connecting with Bluetooth. PLAYING CONNECTED DEVICES Control playback from your wireless device. The volume level may be controlled by the wireless device or by turning the VOLUME dial [20]. Basic playback (such as play/pause, next, previous) may also be controlled by the boombox and its remote control if your wireless device supports it.](https://usermanual.wiki/KING-PROFIT/326/User-Guide-2979830-Page-18.png)
![12 AUX MODE Play audio from devices connected to the AUX IN jack [8]. Connect a 3.5mm AUX cable to the AUX IN jack [8] found on the front of the Boombox and it will switch to AUX mode automatically. To exit AUX mode, disconnect the cable from the AUX IN jack [8]. 1. Connect your audio device to the 3.5mm AUX IN jack [8] found on the front of the unit with a 3.5mm AUX cable. 2. Set the volume level of the connected audio device to approximately 80%. Make additional adjustments to the volume level by turning the VOLUME dial [20] of the unit. 3. Control playback with your audio device. MIC JACK OPERATION Microphone input is available in all modes. You can speak over playback in any mode, or simply stop playback to use the microphone by itself. 1. Connect your microphone to the 6.3mm MIC input jack [7] found on the front of the unit. 2. Press the M.VOL + button [9] or the M.VOL - button [10] to increase or decrease the microphone input level. GUITAR JACK OPERATION Guitar input is available in all modes. You can play over music as a backing track, or simply play while music playback is stopped. 1. Connect your guitar to the 6.3mm Guitar input jack [18] found on the front of the unit. 2. Press the G.VOL + button [15] or the G.VOL - button [16] to increase or decrease the Guitar input level.](https://usermanual.wiki/KING-PROFIT/326/User-Guide-2979830-Page-19.png)