KING PROFIT 626 PORTABLE SOUND SYSTEM User Manual STEREO RADIO
KING PROFIT TRADING LTD. PORTABLE SOUND SYSTEM STEREO RADIO
15_KP626BT UserMan
PORTABLE SOUND SYSTEM
INSTRUCTION MANUAL
Model:KP626BT
TY-ASC40
IMPORTANT: Please read before using and keep for future reference.
2
IMPORTANT NOTES
INTRODUCTION
Thank you for buying this product.
Please read through these operating instructions, so you will know how to operate your
equipment properly. After you finished reading the instructions manual, put it in a safe place
for future reference.
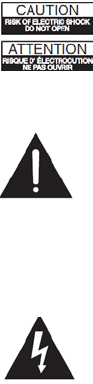
CAUTION
TO REDUCE THE RISK OF ELECTRIC SHOCK, DO DOT REMOVE THE COVER (OR BACK).
DO NOT OPEN THE UNIT. FOR SERVICE, PLEASE REFER TO QUALIFIED SERVICE
PERSONNEL.
• The apparatus shall not be exposed to dripping or splashing and that no objects filled with
liquids, such as vases, shall be placed on the apparatus.
• Minimum distances 30 cm around the apparatus for sufficient ventilation.
• The ventilation should not be impeded by covering the ventilation openings with items, such as
newspapers, table-cloths, curtains, etc.
• No naked flame sources, such as lighted candles, should be placed on the apparatus.
• When the mains plug or an appliance coupler is used as the disconnect device, the disconnect
device shall remain readily operable. To be completely disconnected the power input, the
mains plug of apparatus shall be disconnected from the mains completely.
• The main plug of apparatus should not be obstructed or should be easily accessed during
intended use.
FCC Warnings
Warning: Changes or modifications to this unit not expressly approved by the party responsible
for compliance could void the user’s authority to operate the equipment.
NOTE: This equipment has been tested and found to comply with the limits for a Class b digital
device, pursuant to Part 15 of the FCC rules. These limits are designed to provide reasonable
protection against harmful interference in a residential installation. This equipment generates,
uses, and can radiate radio
may cause harmful interference to radio communications. HOWEVER, there is no guarantee
that interference will not occur in a particular installation. If this equipment does cause harmful
interference to radio or television reception, which can be determined by turning the equipment
off and on, the user is encouraged to try to correct the interference by one or more of the
following measures:
• reorient or relocate the receiving antenna.
• Increase the separation between the equipment and receiver.
3
• Connect the equipment into an outlet on a circuit different from that to which the receiver is
connected.
• Consult the dealer or an experienced radio/TV technician for help.
additional Warnings and Precautions
• CAUTON: To PREVENT ELECTRIC SHOCK, MATCH WIDE NLADE OF PLUG TO WIDE
SLOT, FULLY INSERT.
• mains plug is used as disconnect device and it should remain readily operable during intended
use. In order to disconnect the apparatus from the mains completely, the mains plug should be
disconnected from the mains socket outlet completely.
• Warning: shock hazard - Do not open.
• Warning: To reduce the risk of fire or electric shock, do not expose this apparatus to rain,
moisture, dripping, or splashing.
• Objects filled with liquids, such as vases, shall not be placed on the apparatus.
• CAUTION: use of controls or adjustments or performance of procedures other than those
specified may result in hazardous radiation exposure.
• Warning: Changes or modifications to this unit not expressly approved by the party
responsible for compliance could void the user’s authority to operate the equipment.
• Warning: Do not place this unit directly onto furniture surfaces with any type of soft, porous, or
sensitive finish. As with any rubber compound made with oils, the feet could cause marks or
staining where the feet reside. We recommend using a protective barrier such as a cloth or a
piece of glass between the unit and the surface to reduce the risk of damage and/or staining.
•Caution: Danger of explosion if battery is incorrectly replaced. Replace only with the same or
equivalent type.
• Warning: There is a danger of explosion if you attempt to charge standard alkaline batteries in
the unit. only use rechargeable NIMH batteries.
• Battery shall not be exposed to excessive heat such as sunshine, fire or the like.
• Caution marking is located at the rear or bottom of the apparatus.
• The marking information is located at the rear or bottom of the apparatus.
4
• Keep new and used batteries away from children. If the battery compartment does not close
securely, stop using the product and keep it away from children.
• If you think batteries might have been swallowed or placed inside any part of the body, seek
immediate medical attention.
• Do not mix old and new batteries.
• Completely replace all old batteries with new ones.
• Do not mix alkaline, standard (carbon-zinc), or rechargeable (ni-cad, ni-mh, etc) batteries.
•Batteries should be recycled or disposed of per state and local guidelines.
• WARNING: This product may contain chemicals known to the state of California to cause birth
defects, or other reproductive harm (California Prop 65). Wash hands after handling.
• This product meets and complies with all Federal regulations.
Warning: Do NOT INGEST BSTTERY,
Warning: To reduce the risk of electric shock, do not remove cover (or back). NO
user-serviceable parts inside. Refer RISK servicing to qualified service personnel
The exclamation point within an equilateral triangle is intended to alert the user to
the presence of important operating and maintenance (servicing) instructions in the literature
accompanying the appliance.
The lightning flash with arrowhead symbol, within an equilateral triangle, is
intended to alert the user to the presence of uninsulated “dangerous voltage” within the
5
product’s enclosure that may be of sufficient magnitude to constitute a risk of electric shock to
persons.
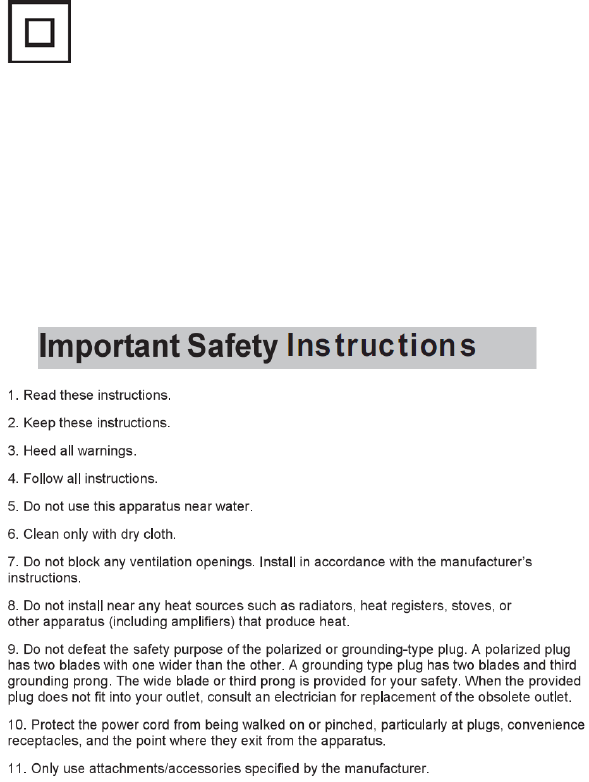
This symbol indicates that this product incorporates double insulation between
hazardous mains voltage and user accessible parts.
WARNING:
- Remove batteries if exhausted or if they will not be used for a long period.
- The incorrect use of batteries can cause electrolyte leakage and will corrode the
compartment or cause the batteries to burst. Therefore:
- Do not mix battery types, e.g. alkaline with zinc carbonate.
- When inserting new batteries, replace all batteries at the same time.
6
7
IC Notice:
This device complies with Canada Industry licence-exempt RSS standard(s). Operation is
subject to the following two conditions: (1) this device may not cause interference. and (2) this
device must accept any interference. Including interference that may cause undesired operation
of the device.
CAN ICES-3 (B)
Le présent appareil est conforme aux CNR d'industrie Canada applicables aux appareils radio
exem pts de licence L'exploitation est autorisée aux deux conditions suivantes:
1) I'appareil ne doit pas produire de brouillage, et
2) I'utillsateur de I'appareil doit accepterbrouillage radioélectrique subi meme si le brouillage est
susceptible d'encompromettre le fonctionnement. mauvais fonctionnement de I'appareil.
NMB-3 (B)
8
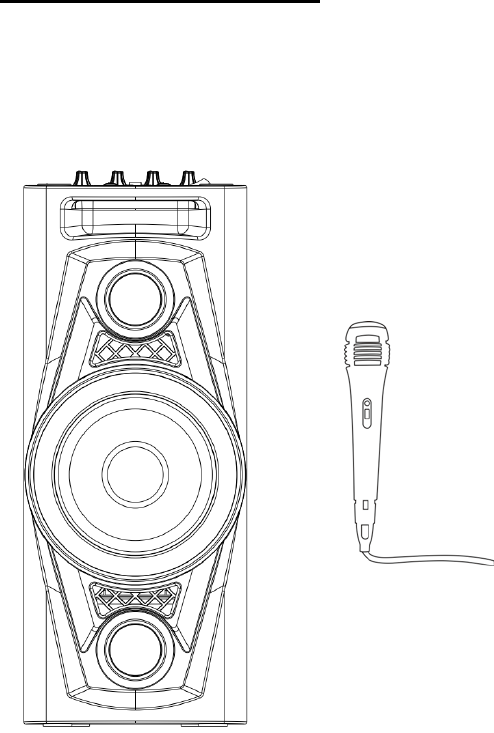
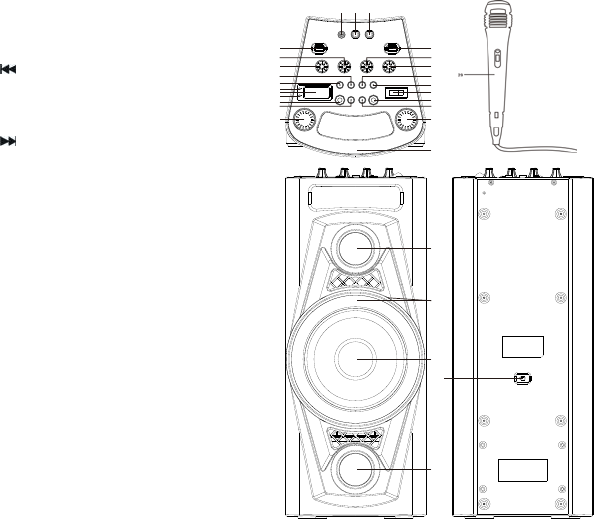
NAMES OF CONTROLS LOCATION OF CONTROLS
1. DISPLAY
2. PAIR INDICATOR
3. CHARE INDICATOR
4. P-MODE/MEM BUTTON
5. /TUN.- BUTTON
6. LIGHT BUTTON
7. FOLDER/10/M. - BUTTON
8. PLAY/PAUSE/PAIR/SCAN BUTTON
9. /TUN.+ BUTTON
10. POWER SWITCH
11. FUNCTION BUTTON
12. FOLDER/10/M. + BUTTON
13. VOLUME KNOB
14. GUITAR VOLUME KNOB
15. TREBLE KNOB
16. BASS KNOB
17. MIC ECHO KNOB
18. MIC VOLUME KNOB
19. USB PORT2
20. 6.3MM MIC JACK
21. 6.3MM GUITAR JACK
22. 3.5MM AUX IN JACK
23. USB PORT1
24. HANDLE
25. TWEETER
26. FLASHING LIGHT
27. SPEAKER
28. AC SOCKET
29. WIRED MICROPHONE
POWER SOURCE
This unit works with rechargeable lead-acid battery. Fully charge the unit before using the
product for the first time. Unplug the AC Power cord from the AC socket to work on the battery
pack after fully charged. Plugging the AC Power cord while the battery pack is attached initiates
the charging of this battery, the charge LED indicator lights red during charging, when the
battery is fully charged the indicator will turn to green. When the unit is with low battery, the LED
indicator will flash in red.
BASIC FUNCTION
TURNING THE UNIT ON/OFF
Press the power ON/OFF button to switch the unit on/off.
SETTING THE FUNCTION MODE
To change the function modes, press the FUNCTION button to choose
USB1/USB2/BLUETOOTH/AUX/RADIO function.
1
2
3
4
5
6
7
8
9
10
11
12
13
14
15
16 17
18
19
202122
23
24
25
26
27
28
25

9
ADJUSTING THE VOLUME
1. Rotate the VOLUME knob on the unit to increase or decrease the music volume.
2. Rotate the GUITAR VOL. knob on the unit to increase or decrease the guitar volume.
3. Rotate the MIC VOL. knob on the unit to increase or decrease the microphone volume.
BASS ADJUSTMENT
Rotate the BASS knob on unit to increase or decrease the bass effect that best matches the
music style.
TREBLE ADJUSTMENT
Rotate the TREBLE knob on unit to increase or decrease the treble effect that best matches the
music style.
MICROPHONE ECHO ADJUSTMENT
Rotate the ECHO knob on unit to increase or decrease the microphone echo effect that best
matches the style.
FLASHING LIGHT
To change the flashing light effects, press the LIGHT button on unit. You can choose from five
different flashing modes.
To disable the disco light, press the LIGHT button on unit until the display shows “OFF”.
RADIO OPERATION
Listen to FM radio broadcasts. Press the FUNCTION button until the display reads FM and the
radio frequency.
TUNING TO A RADIO STATION
If you know the station frequency that you want to tune to directly:
• Tune to a station by press the /TUN.+ or /TUN.- button. The station frequency is
shown on the display.
To tune to a preset station:
• To tune to the next preset station, press the FOLDER/10/M. + button.
• To tune to the previous preset, press the FOLDER/10/M. - button.
AUTO PRESET MEMORY / SCAN
To scan for stations within reception range and save them to preset memory automatically,
press and hold the PLAY/PAUSE/PAIR/SCAN button. After the unit is finished scanning, the
unit will automatically tune to preset number 1 (P01).
MANUAL PRESET MEMORY OPERATION
Choose which stations to save in preset memory instead of scanning automatically.
1. Use the /TUN.+ or /TUN.- button to tune to the station that you want to
save as a preset (e.g., 93.1).
10
2. Press the P-MODE/M. button. “P01 ” will flash on the display to indicate that you
are saving the station as Preset Memory 01. (To change the preset memory
number, press the FOLDER/10/M. + or FOLDER/10/M. - buttons.)
3. Press the P-MODE/M. button to finish saving the station (e.g., P01 is now set to
93.1).
4. To save another station, repeat steps 1 to 3. You may save up to 30 FM stations
USB OPERATION
This unit provides two USB port for music playback.
1. Press the FUNCTION button on unit to select “USB1” or “USB2” mode.
2. Connect the USB memory stick to the USB port found on the front of the unit. Playback will
start automatically from Track 1.
3. To pause playback, press the PLAY/PAUSE/PAIR/SCAN button on unit. The current track
No. and P will show on the display.
4. To resume playback, press the PLAY/PAUSE/PAIR/SCAN button again.
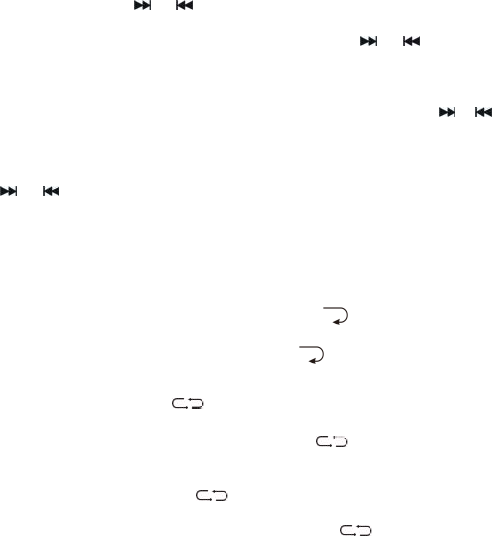
5. To select a desired track, press the or button respectively during playing until the
desired track appears on the display. The unit will start play automatically.
6. To search for a particular passage during playback, press and hold the or button to
scan the current playing track at high speed until desired point (passage) appears, then
release the button for normal playback mode.
7. To select a song which track number exceeds 10, press the FOLDER/10/M. + button or
FOLDER/10/M. - button each time to skip forward/backward 10 tracks, then press the or
button to select desired track.
8. To select a desired folder (if the USB contains more than one folder), press and hold the
FOLDER/10/M. + or FOLDER/10/M. - button each time to skip forward/backward a folder,
then press the or button to select desired track.
Important: The USB port is intended for data transfer only, other devices cannot be used
with this USB connection. The use of USB extension cords is not recommended.
REPEAT PLAY
You can play one track or all tracks on the USB repeatedly.
To Repeat a Single Track
1. Press P-MODE/M. button on unit during play, the display will show “ ” and the current
track will be played over an over again.
2. To cancel repeat play, press P-MODE/M. button on unit until “ ” disappears from the
display.
To repeat all the Tracks
1. Press P-MODE/M. button on unit until the “ ” shows steadily on the display, all tracks on
the USB will be played over and over again.
2. To cancel repeat play, press the P-MODE/M. button on unit until “ ” disappears from the
display.
To repeat the folder (only for USB which contains more than one folder)
1. Press the P-MODE/M. button on unit until “ FOLDER ” show steadily on the display,
the current folder will be repeated over and over again.
2. To cancel repeat play, press the P-MODE/M. button on unit until “ FOLDER”
disappears from the display.
RANDOM PLAY
11
Press the P-MODE/M. button on unit in play mode till the “RAND” shows steadily on the display,
the random play will start from next track automatically. Press the P-MODE/M. button on unit
again until the “RAND” disappears from the display to cancel.
BLUETOOTH OPERATION
1. Press the FUNCTION button on unit to switch to BLUETOOTH function, the LCD will
display “bt” and the pair indicator will flash at high speed.
2. Turn on the Bluetooth function on the device, scan the unit TY-ASC40 and connect, then
input the password 0000 if required, the pair indicator keep light up to indicate connection
done, and the display will show “bt”. Press Play to start playback.
3. Rotate the VOLUME knob on the unit or adjust the volume on the external device to
increase or decrease the music volume to your desired level.
4. Press and hold the PLAY/PAUSE/PAIR/SCAN button to disconnect Bluetooth.
Note: The Bluetooth works best within 10 meters.
AUX-IN OPERATION
1. Press the FUNCTION button on unit to select “AUX” mode.
2. Connect your audio device to the AUX IN jack found on the front of the unit with an AUX IN
cable.
3. Rotate the VOLUME knob on the unit or adjust the volume on the external device to increase
or decrease the music volume to your desired level.
4. Control playback with your audio device.
MIC JACK OPERATION
Microphone input is available in all modes.
1. Connect your microphone to the 6.3mm MIC JACK found on the front of the unit.
2. Rotate the MIC VOL. knob on the unit to increase or decrease the microphone volume.
GUITAR JACK OPERATION
Guitar input is available in all modes.
1. Connect your guitar to the 6.3mm Guitar JACK found on the front of the unit.
2. Rotate the GUITAR VOL. knob on the unit to increase or decrease the guitar volume.
12
SPECIFICATIONS
GENERAL
Power Requirement ........................................... AC100-240V 60/50Hz
Power consumption ....................................................................... 30 W
Weight-------------------------------------------------------------------------5.1kg
Dimensions ............................................ 202(L) x 201(D) x 490 (H) mm
Operation temperature ............................................ + 5°C – + 35° C
AUDIO SECTION
Power output ......................................................................... Total 40W
ACCESSORIES
Instruction Booklet ................................................................................ 1
AC Cord ................................................................................................ 1
Wired Microphone ................................................................................ 1
Note: Specifications are subject to change for continuous improvement without prior notice.