KTC Technology 00006 8 inch PAD User Manual
Shenzhen KTC Technology Co., Ltd. 8 inch PAD
UserManual.wiki
>
KTC Technology
>
00006 User Manual
User Manual
Navigation menu
Upload a User Manual
Namespaces
Wiki Guide
HTML
PDF
Info
Views
User Manual
Discussion / Help
Navigation

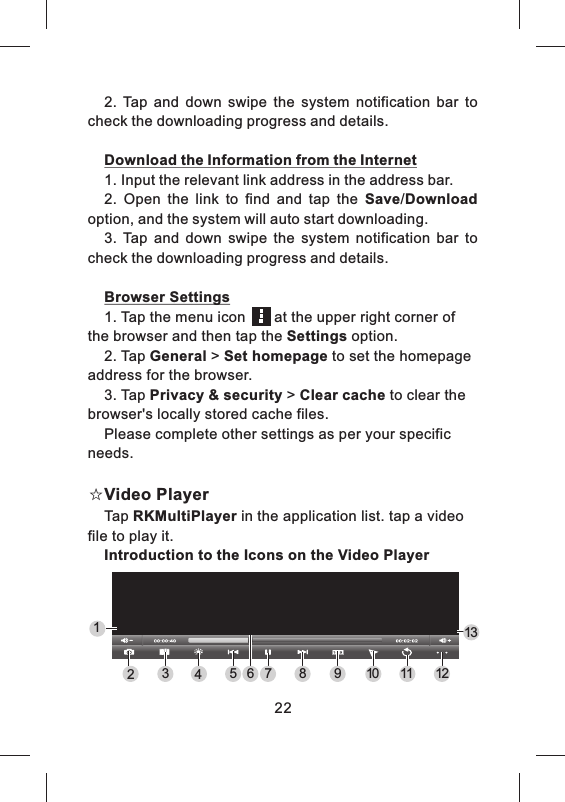
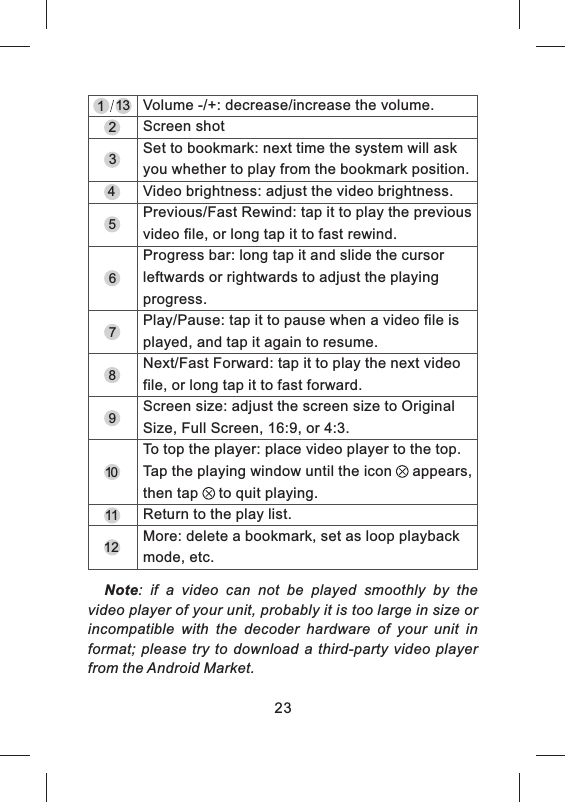
![Basic Operations for BrowserVisit WebsitesBefore visiting websites, please connect your device to the Internet via Wi-Fi, mobile Internet or Ethernet (refer to "System Settings" for specific settings).1. Tap the address bar in the browser, and you will see a virtual keyboard.2. Tap the virtual keyboard to input the correct address and then tap the [Go] key at the virtual keyboard to visit the relevant website.Note: the virtual keyboard may be slightly different, please consider the real display as standard.11109Input URL optionBrowser Menu optionView Bookmark option19](https://usermanual.wiki/KTC-Technology/00006/User-Guide-2232558-Page-22.png)