KUMYOUNG KHM500 WIRELESS MICROPHONE User Manual duostar manual
KUMYOUNG. Co., Ltd. WIRELESS MICROPHONE duostar manual
KUMYOUNG >
USERS MANUAL
www.kumyoung.com
Kumyoung co.,Ltd
User Guide

G
{GGGGGkGOrot\WWPGGU
~GGGGGGGGGGGU
iGGGGGGSGGGGG
GGUGG
wGGGGGGUGGGG
G
2
Introduction

3
Table of Contents
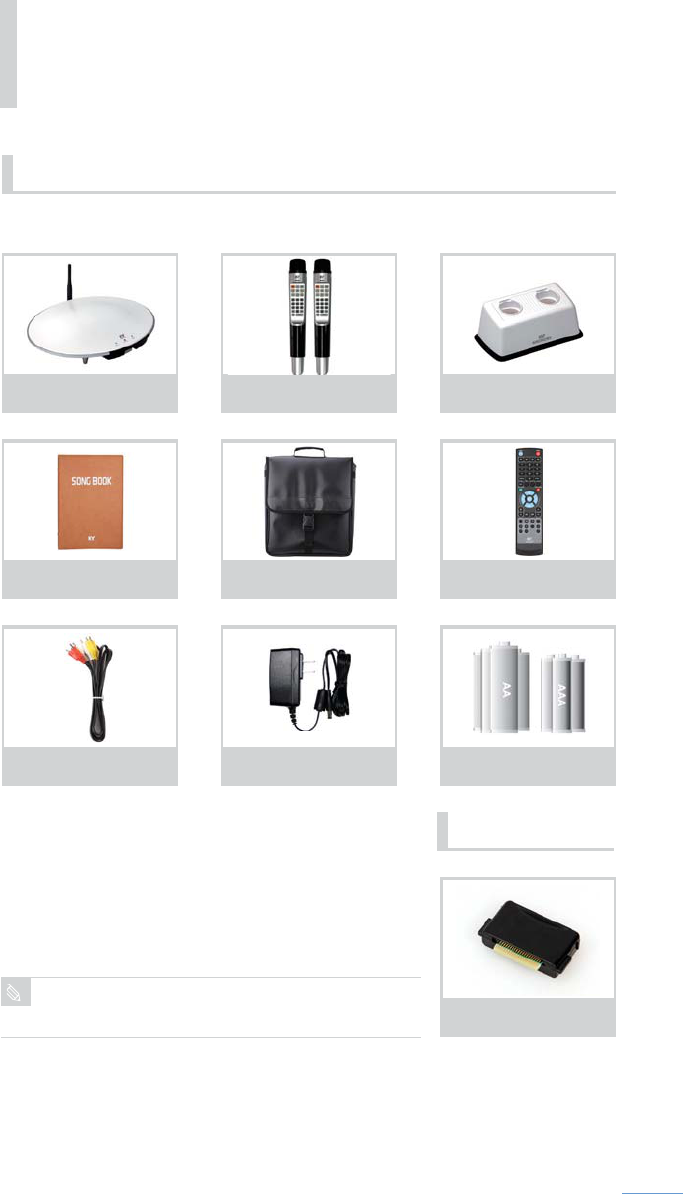
1. Item Checklist
Basic Items 5
Optional Items 5
2. Safety and Maintenance
2-1 Safety Symbols 6
2-2 Notes for Assembly 7
2-3 Safety Use 8
2-4 Using Batteries 11
2-5 System Maintenance 12
3. Introduction and Setup
3-1 System Overview
KHM500 14
Wireless Microphone 16
Remote Control 17
3-2 Setup 18
3-3 Using the Remote Control 20
3-4 Connecting the Microphone 20
4. KHM500 Functions
4-1 Karaoke Mode
4-1-1 Basic Functions 22
4-1-2 Karaoke Functions 24
4-1-3 Special Karaoke Functions 33

4
4-2 Multimedia
4-2-1 Mode Select 35
4-2-2 MP3 Mode 35
4-2-3 Video Mode 39
4-2-4 Image Mode 42
4-2-5 Multimedia Mode Setup Menu 44
5. Miscellaneous
5-1 System Update 45
5-2 Installing Song Packs 46
5-3 Converting to HDMI or CVA Mode 47
6. Bundle Software
6-1 KHM500 Multimedia converter 48
6-2 Image Background 48
6-3 Video Background 50
7. Quick Troubleshooting 52
53
9. Product Warranty 54
GwGGGGGGG
Basic Items
Optional
5
1. Item Checklist
zGG
|GnGMGzGs
yjhGhG}Gj
tGz
yGj
[GhhGVGYGhhhGi
zGw
{G~Gt
jGi
hjGh
the images.
6
2. Safety and Maintenance
Ignoring the symbols below could lead to serious injury if the
equipment is handled incorrectly.
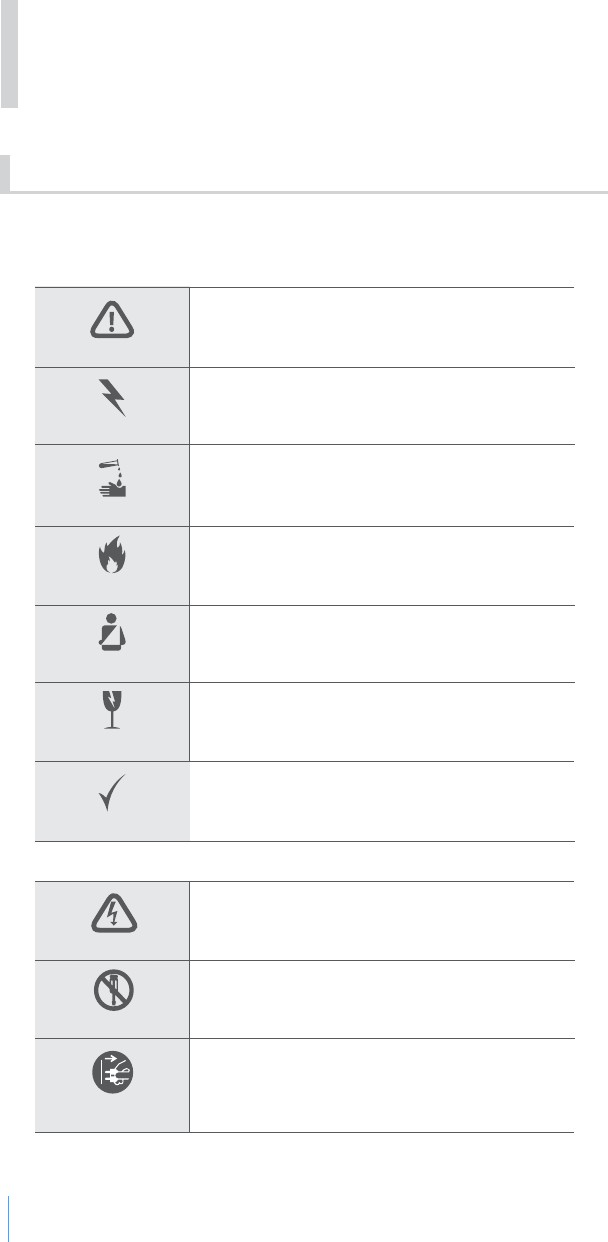
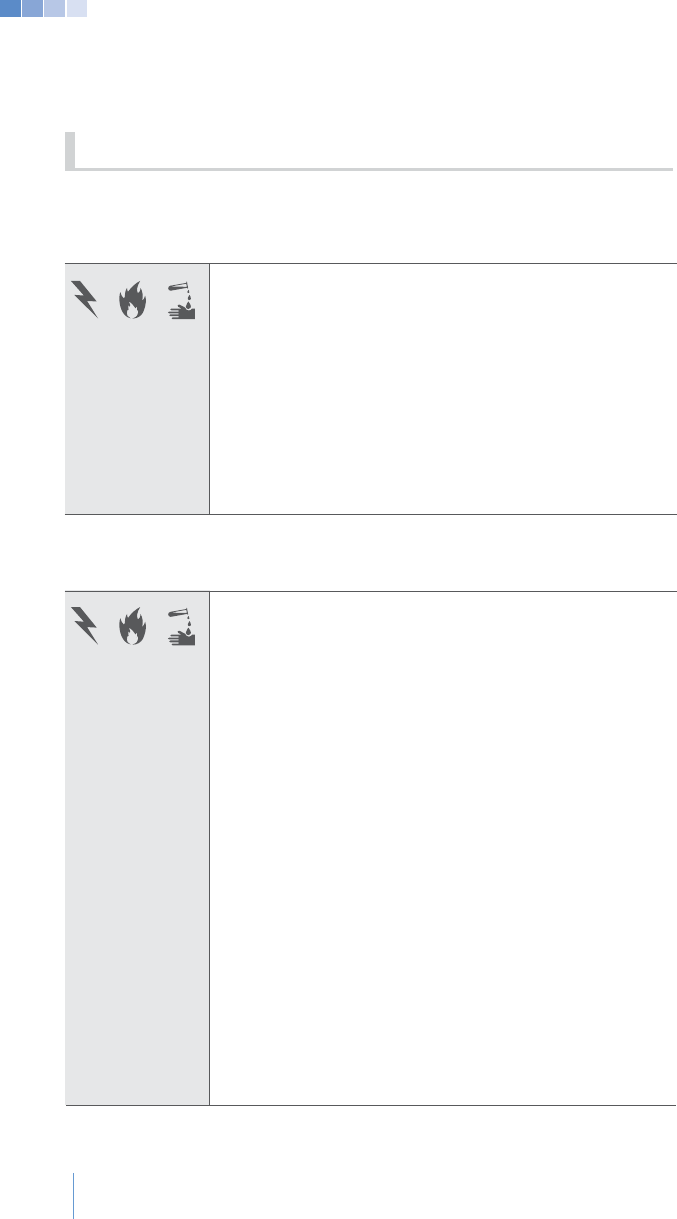
2-1 Safety Symbols
Electric Shock Caution
Attention
Fire Hazard
Disassembly
the power cord
Leak
System Damage
Disassembly
Electric Shock
User Injury
Do not disassemble
Actions can Electric Shock
Actions can cause injury to the user
Electrical shock can occur
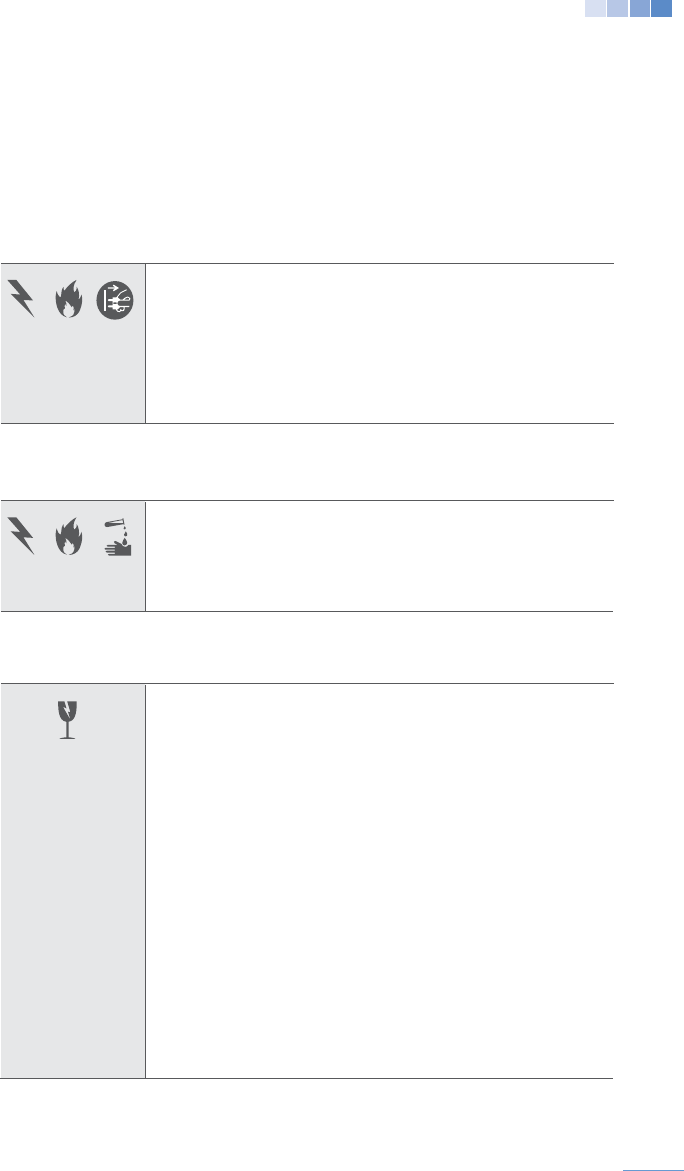
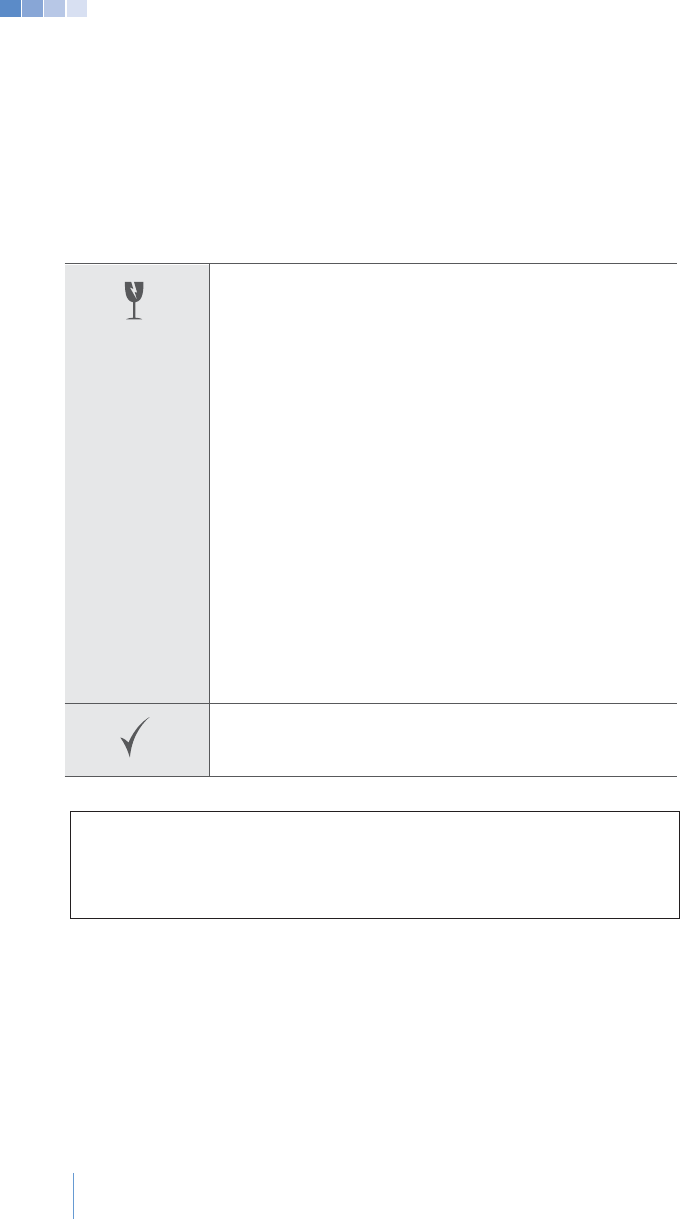
Warning Danger, or Caution
Mandatory disassemble (disconnecting the
power plug with mandatory operation)
Actions can cause Electrical or Battery Leak
Actions can cause damage to the system
Good
Accepted Actions
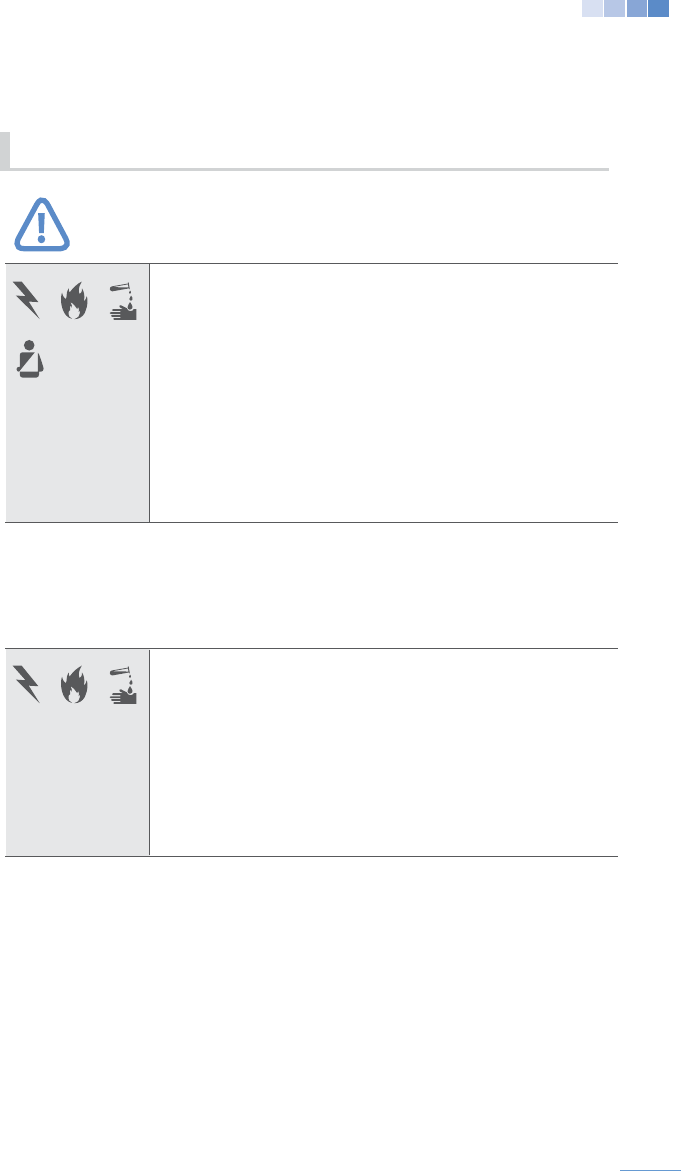
7
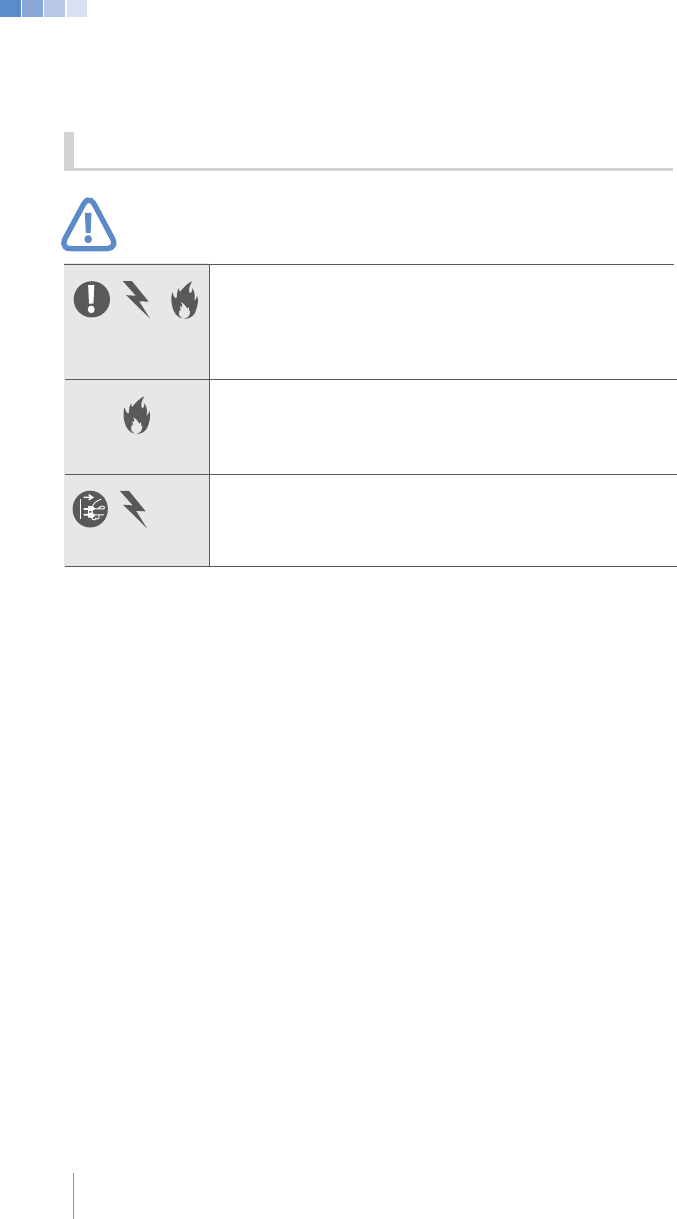
Caution
Ventilation
manual of the other devices being connected to the
player before installation. Improper use may cause a
Using the wrong power adaptor may cause electric
abrupt high or an uncomfortable volume level can cause
permanent hearing loss.
For optimal use, keep a 2 inch gap between the
player and other devices, and a 4 inch gap from walls.
should not be placed in a partitioned space that will
heat.
2-2 Notes for Assembly
8
Power Cord/Voltage
Temperature / Heat
the device below the permitted voltage.
malfunctions.
at the same time. If several plugs are being used
please maintain the total power consumption below
200W. Do not plug this system with a heat source,
shock. If the power cord is damaged (outing of internal
line, disconnection etc), contact the store where you
purchased it from.
drawing, or heating the power cord.
damage to it.
thunder or lightening storm.
equipment distortion, or discoloration.
a radiator, heat registers, stoves or other devices
or electric shock, place the power-supply cord away
from heat sources.
often occur.
2-3 Safety Use
9
Water/Moisture
Handling
off the power. Please use a pair of thick gloves for
protection, disconnect the power plug from the outlet
and call the service center.
used for a long period of time.
It can cause a short circuit
the player. It can cause electrical malfunctions.
surfaces. Installing on unstable surfaces may cause
the player to fall and cause damages.
stepped or tripped on.
the power plug from the electric outlet, and inform
a local repair center. If you use it without any
may cause damage to the player.
Do not climb on the player or cling to the attached devices
.
source of damage or injury.
10
Handling
causes malfunction or deterioration of its capacity.
pitch beep sound.
songbook, microphone, etc.) at other people.
thermoplastic materials inside the system will cause
electrical problems.
and disconnect the power cord from the electrical
other equipment.
damages are caused by the user.
use at home and can be used in all regions.

11
It can cause a short circuit.
user.
environmental pollution.
pen, hairpin, coin, etc.) When the battery runs out, it
doctor.
not be used for a long period of time to prevent
possible battery leakage.
to prevent environment pollution.
Warning
2-4 Using Batteries
12
Caution
gasoline, or any type of solvent, such as thinner and
benzene, they will cause damage to the player.
once a year. When dirty, or consumption by rodents or
plug from the electrical outlet. Failure to this may cause
electric shock.
FCC Information to User
FCC Part 15.105
limits are designed to provide reasonable protection against harmful
and can radiate radio frequency energy and, if not installed and used in
accordance with the instruction manual, may cause harmful interference
to radio communications. However, there is no guarantee that
intereference will not occur in a particular installation. If this equipment
does cause harmful interference to radio or television reception, which
can be determined by turning the equipment off and on, the user is
encouraged to try to correct the interference by one of the following
- Reorient of relocate the receiving antenna.
- Increase the separation between the equipment and receiver.
- Connect the equipment into an outlet on a circuit different from that to
which the receiver in connected.
2-5 System Maintenance
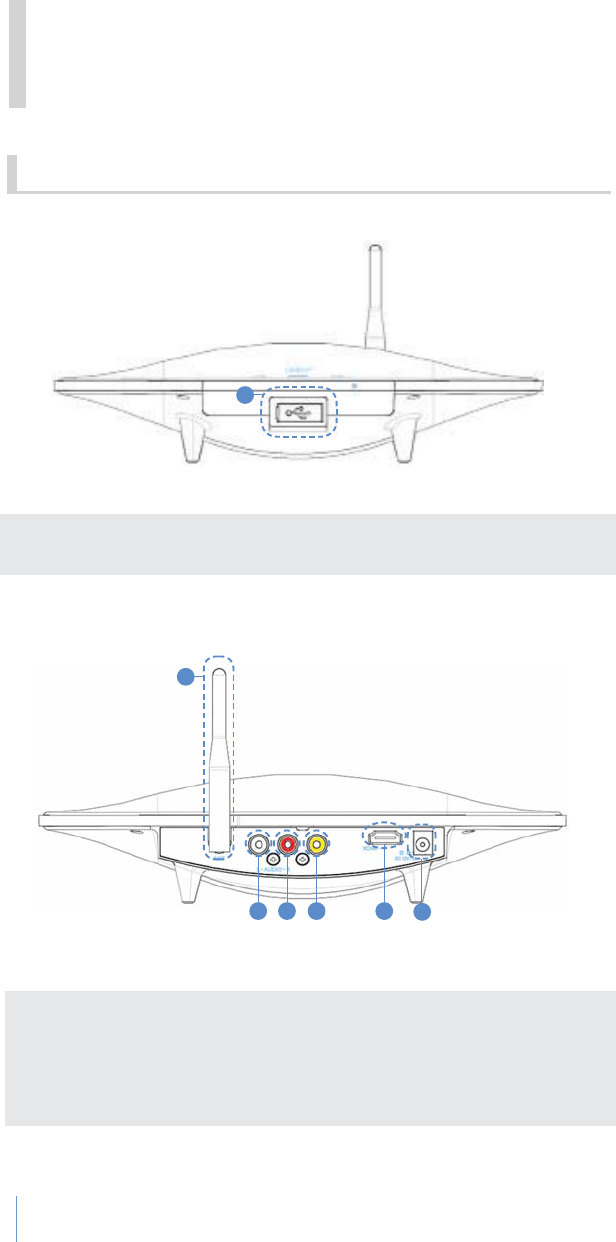
1. USB Port
Remove rubber cover to connect the USB cord.
14
3-1 System overview
m
i
1
1
2 3 4 5 6
1.Antenna
Wireless receiver for microphones
Alternative to RCA input.
6.DC IN
Connection for power adaptor
KHM 500
3. Introduction and Set-up
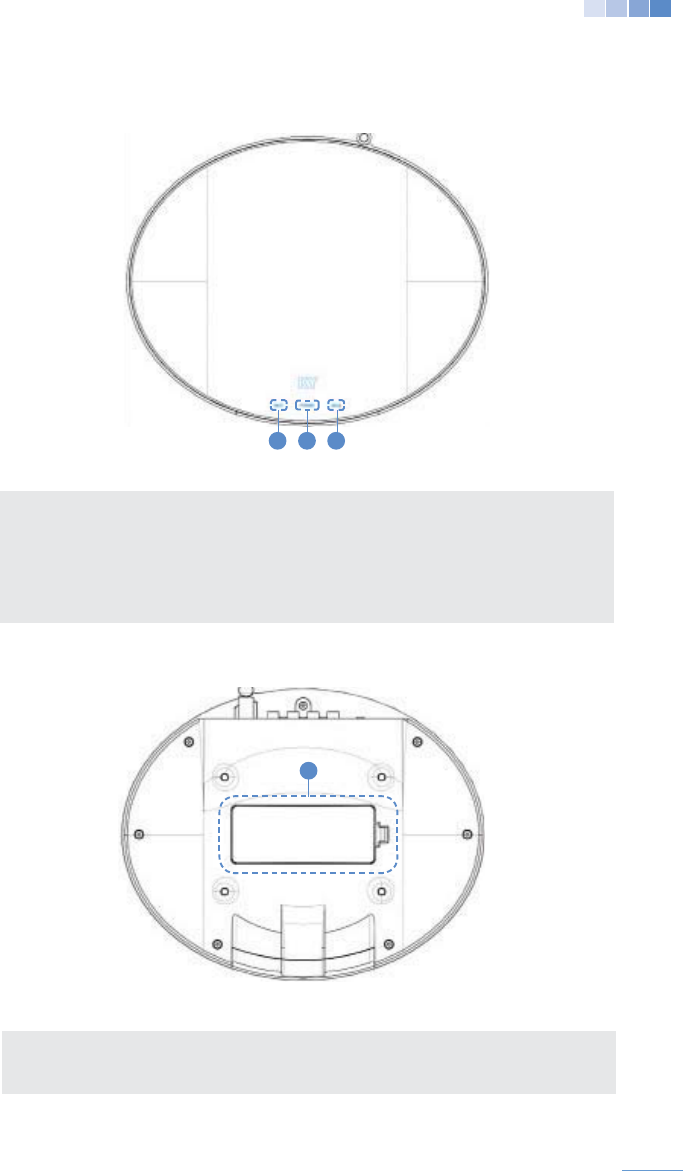
1. Song Pack Cover
Open to insert more song packs to add songs.
1. Wireless Microphone 1 Indicator
Lights up when MIC 1 is connected
2. Power Indicator
Lights up when the KHM500 is in
power standby mode.
3. Wireless Microphone 2 Indicator
Lights up when MIC 2 is connected.
15
1
1
2 3
{
i
BUTTON FUNCTION
POWER
Press to enter the “Setup” Menu
the “Mode Selection” menu.
ARROWS
through song list or to move other menus
While a song is being played in karaoke mode,
While a song is being played in karaoke mode,
OK
Press to play selected songs or to save adjusted
setting level.
VOLUME
0-9
Use to enter song numbers or time
Play or Pause a song
RESERVE
Reserve a song for karaoke mode
RESERVE CANCEL
Cancels reserved songs
16
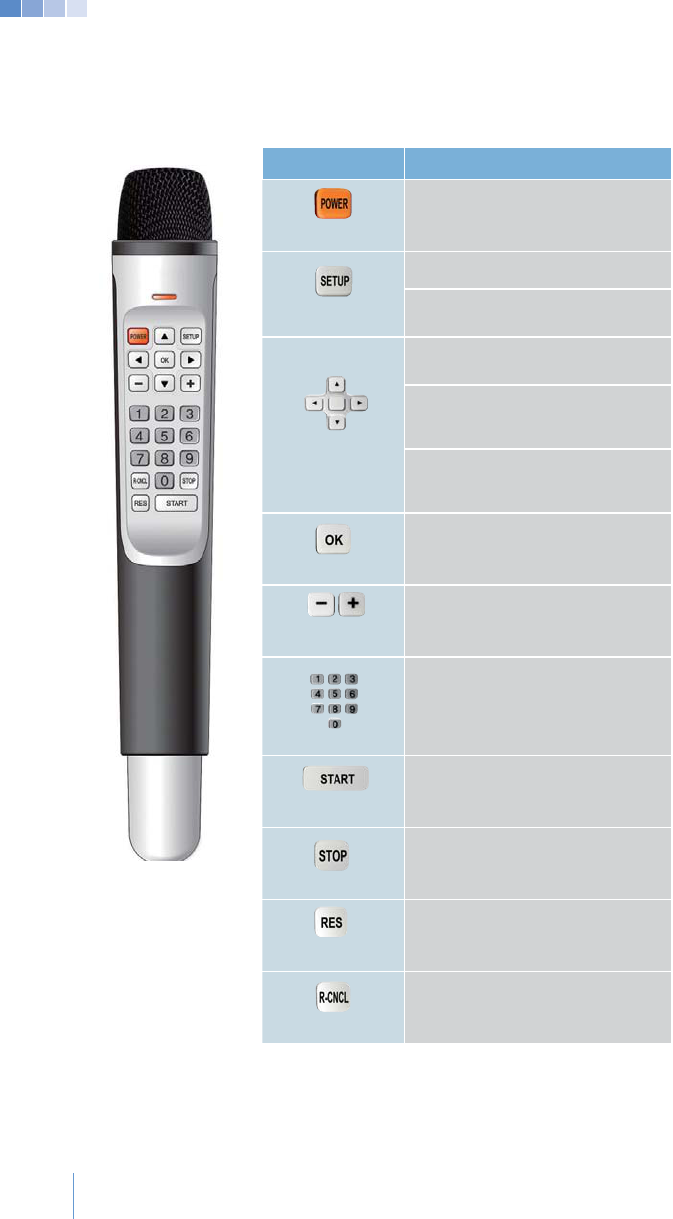
Wireless Microphone
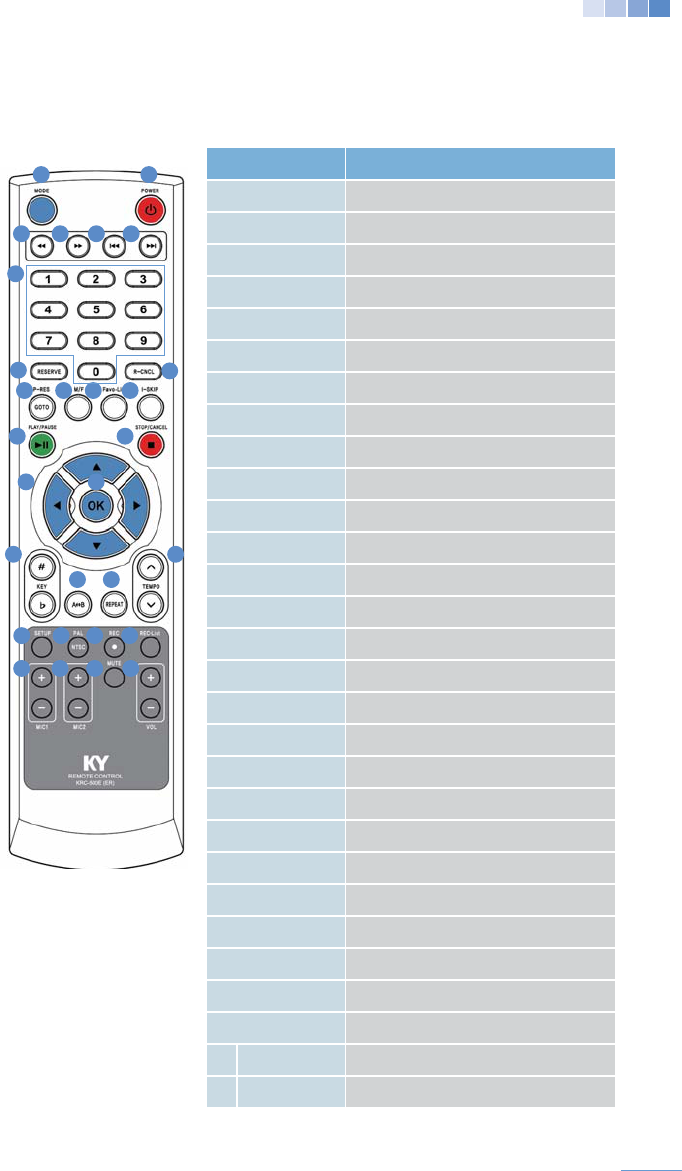
BUTTON FUNCTION
1. POWER
2. MODE
3. REWIND Rewind through a track
4. Fast Forward through a track
5. PREVIOUS Move to the previous track
6.
7. 0-9 Number Selection
8. RESERVE Reserve songs (pg. 27)
9. R-CNCL Cancels reserved songs (pg. 28)
10. P-RES
11.
12. Add a favorite song or view saved favorite songs
13. I-SKIP Skips the interlude and prelude
14. Press to Play, Stop, or Pause a song
15.
16. OK Play selected song or save an adjusted
17. ARROWS Navigate through song list or move to other
18.
19. A<->B Section repeat
20. Repeat mode
21.
22. Select “Karaoke” or “Multimedia” mode
23.
24. REC Records your voice with songs
25. Shows a list recorded songs
26. MIC 1 Adjusts Music Volume
27. MIC2
28. Mutes all sound
29. VOL Adjusts music volume
17
Remote Control
13
9
121110
14
17
18
19
20
21
22
26 27 28 29
23 24 25
16
15
8
7
3
2 1
4 5 6
18
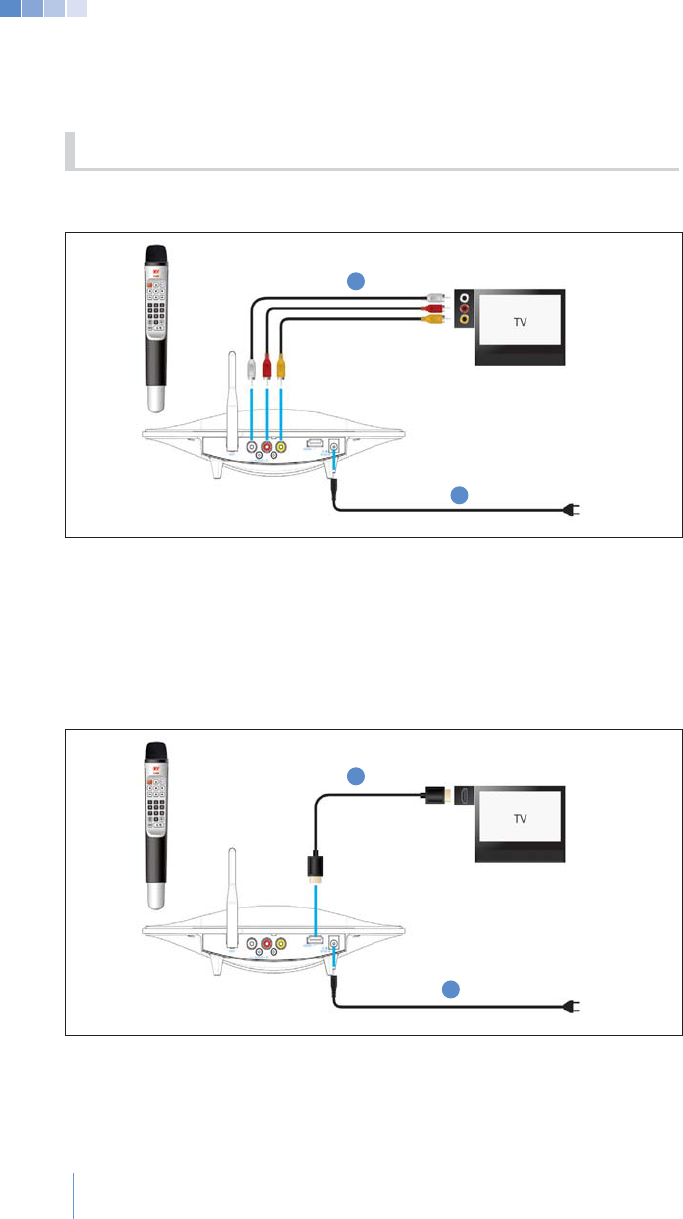
3-2 Setup
Connecting with RCA
matching the terminal colors.
2. Connect the power adaptor to the station.
Connecting with HDMI
2. Connect the power adaptor to the KHM500.
2
2
1
1
19
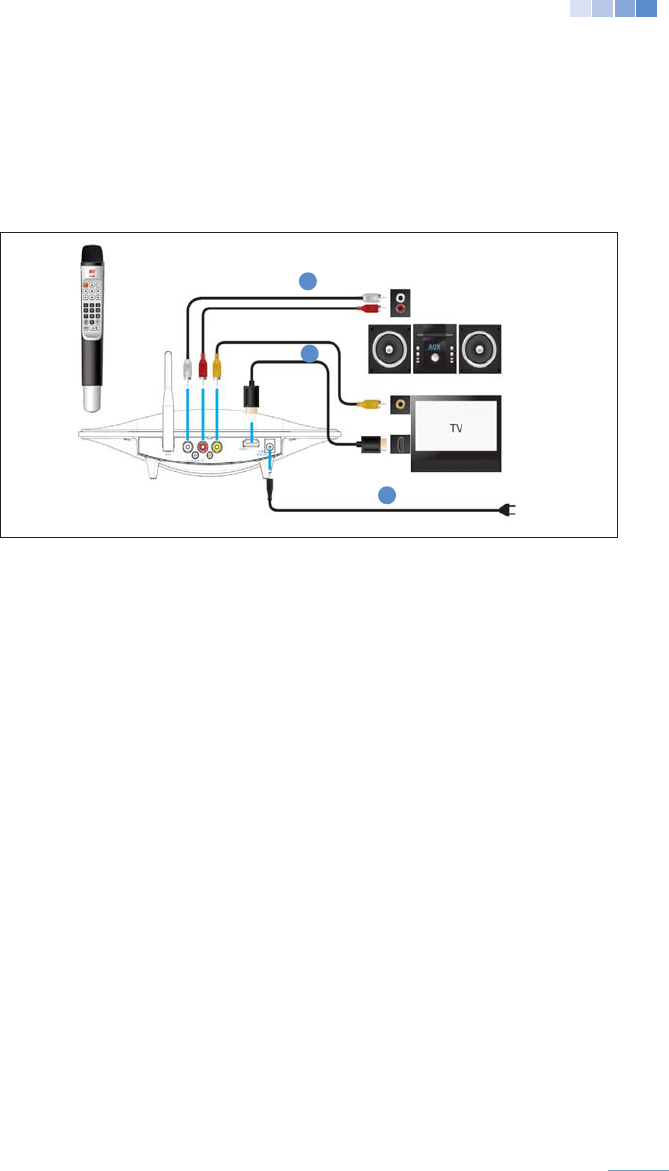
Connecting with Audio Systems
1. With the KHM500 off connect the RCA audio cables (red and white) to the station
and then to the audio system matching the terminal colors.
3. Connect the power adaptor to the station.
> If the volume level is not satisfactory, please check and turn off the “Automatic Volume Leveling”
> Using the HDMI connection may cause sound delay. In this case, please connect the RCA audio
2
3
1
3-4 Connecting the Microphone
1. When a MIC is powered on it automatically connects to the KHM500.
battery consumption.
Reference
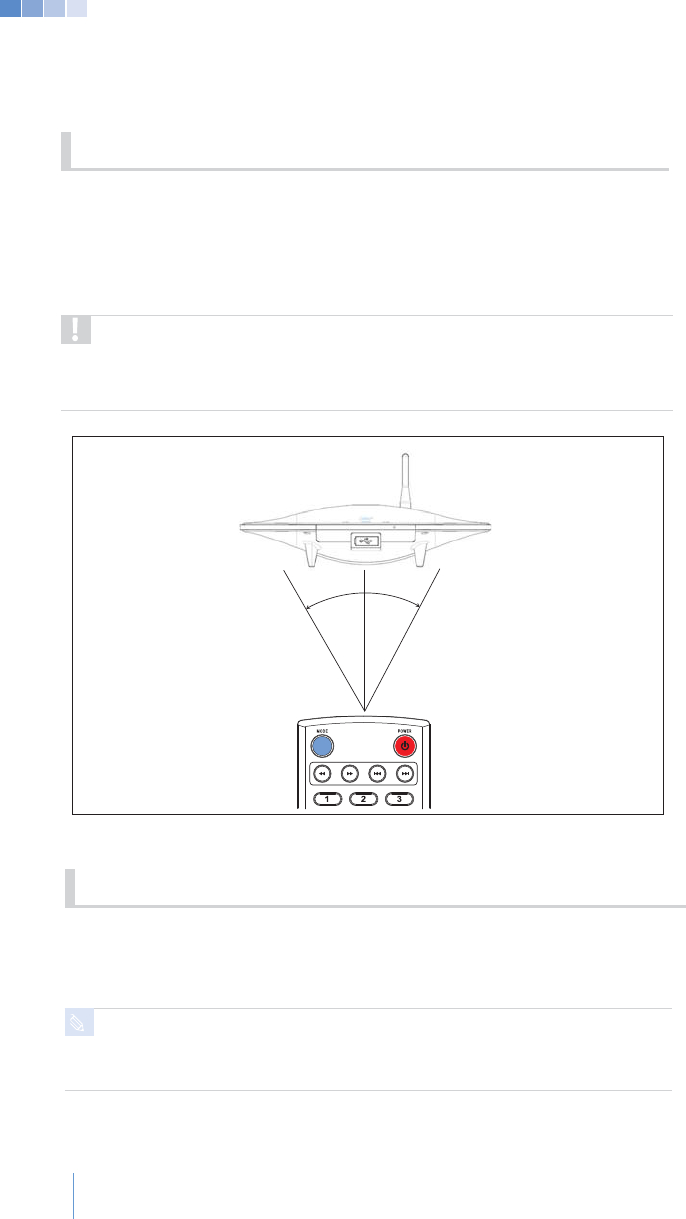
3-3 Using the Remote Control
G
(7 m) from the remote control sensor, and the transmission range is within
15 degrees to both sides on the front side of the KHM500.
Operation range may differ upon the lighting level of the room.
1. Do not shine a bright light on the remote control sensor.
2. Do not place any objects between the remote control and the remote control
sensor.
3. Do not use the remote control while using a remote control from another device.
Caution
15˚ 15˚
20

KMH-500
Functions
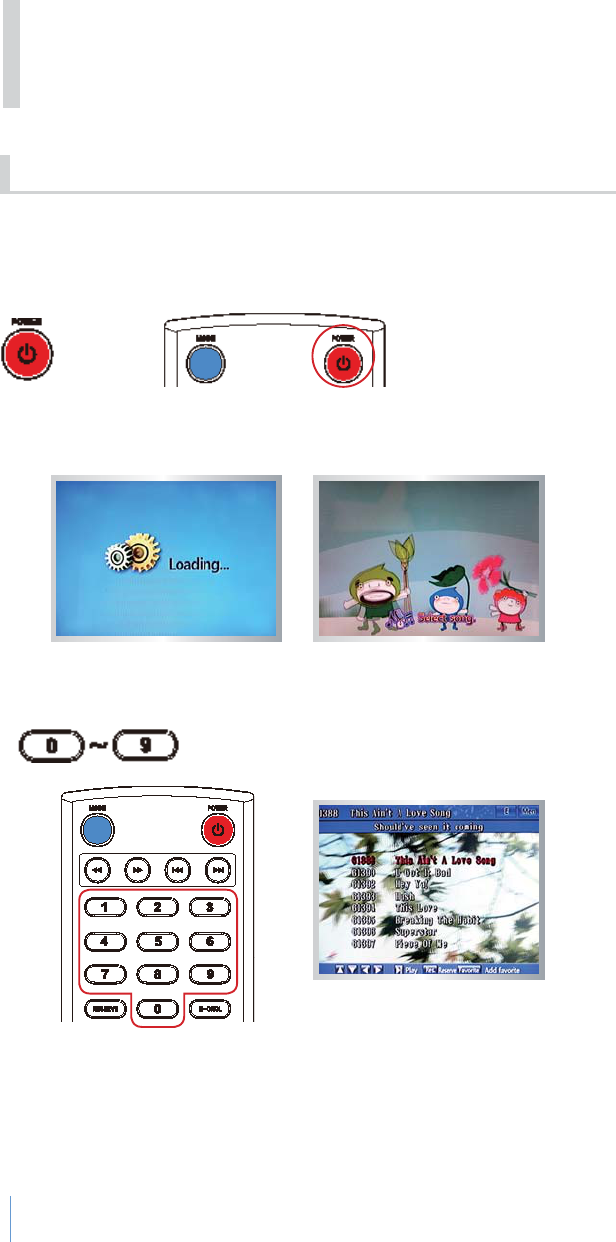
4-1-1 Basic Functions
GPress [POWER] to turn on the system and wait for 10 seconds.
GOnce loading is completed the system will enter karaoke standby mode.
2) Selecting Songs
GEnter a song number to select a song.
22
4-1 Karaoke Mode
4. KHM500 Functions
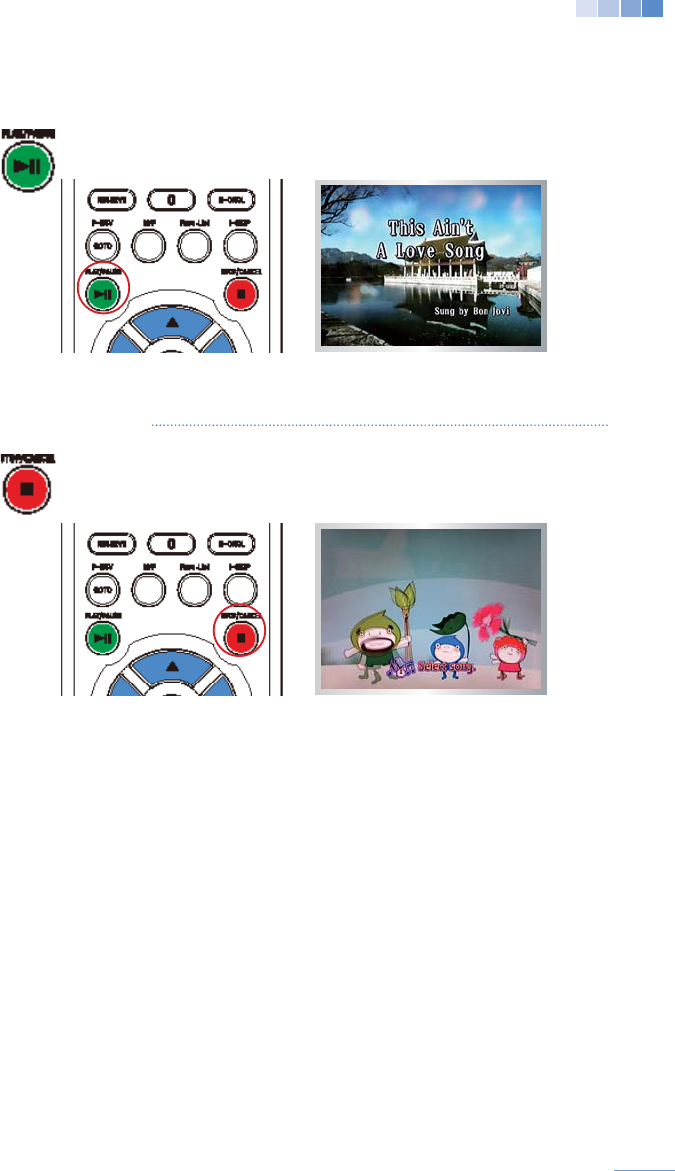
23
Press [PLAY/PAUSE
GIf the wrong song number was selected, press [STOP/CANCEL]
to return to the karaoke standby mode.
Press [STOP/ CANCEL] to stop and cancel a playing song.
24
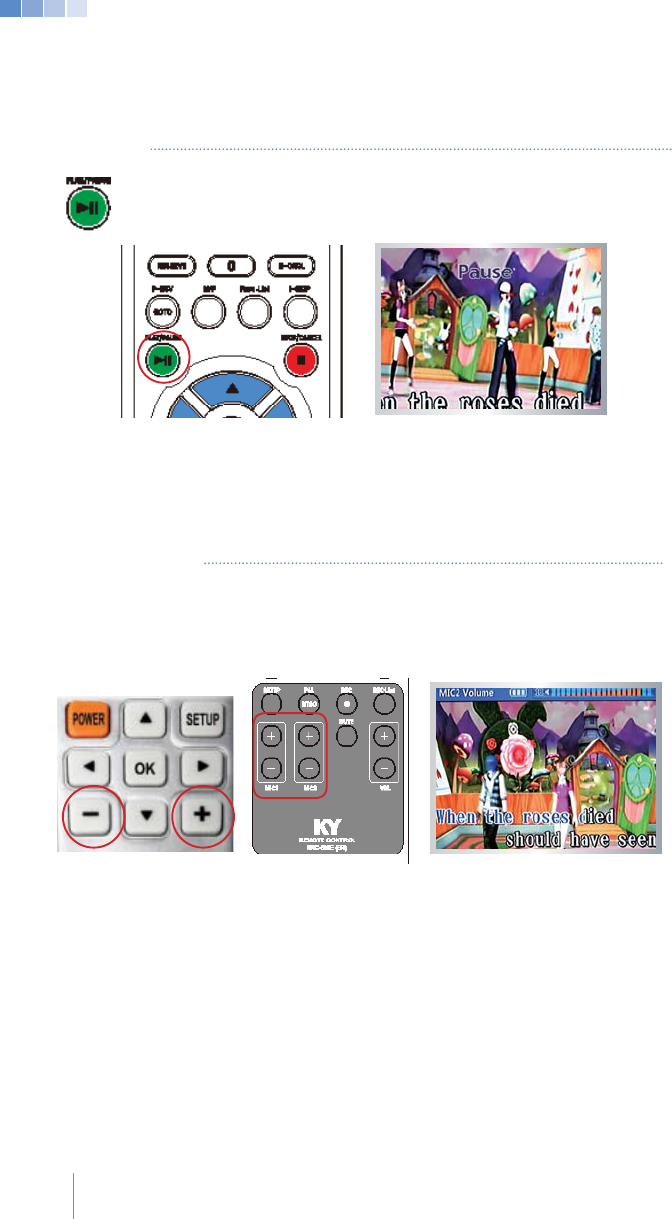
3) Pause
Press [PLAY/PAUSE] to pause a playing song.
Press [PLAY/PAUSE] once again to resume the song.
4-1-2 Karaoke Functions
1) MIC Volume
[+] to
increase or [-]
[+] and [-].

25
2) Key G
G Press [#]
Press [b]
(Changed key levels will only apply to the song currently being
played, and returns to its original key when a new song is played.)
Press [+]
Press [-]
(Changed tempo levels will only apply to the current song being.
played, and returns to its original key when a new song is played.)
26
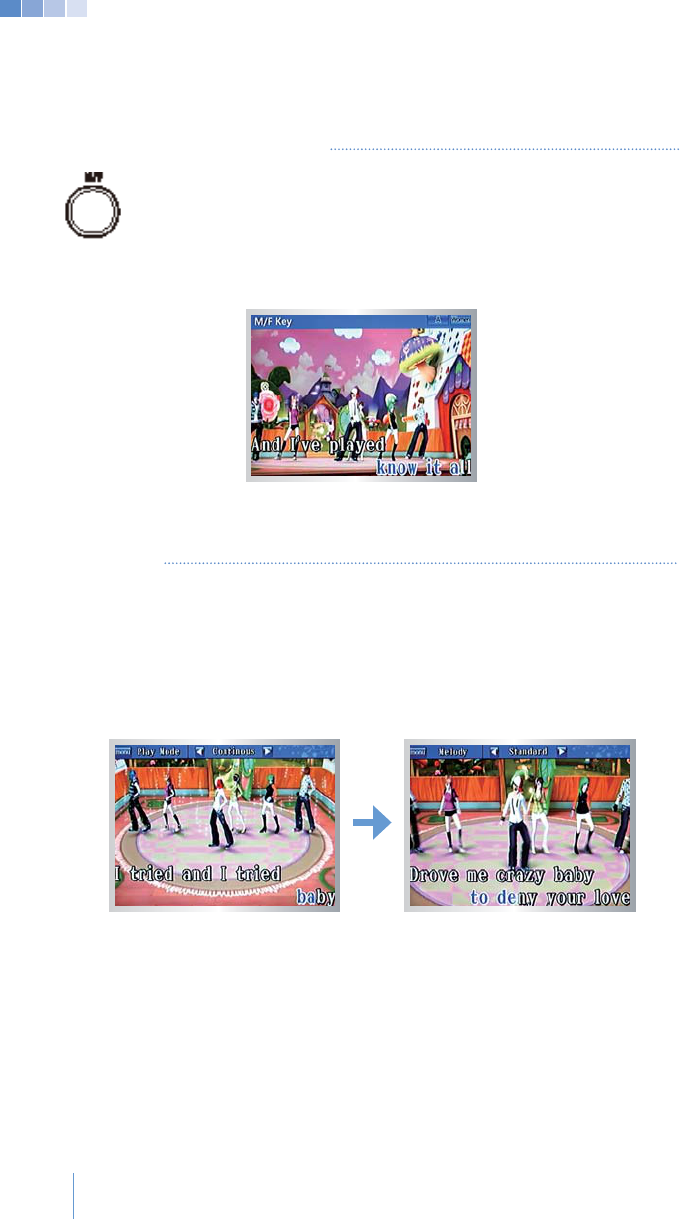
GG
Press [M/F] to lower the voice pitch when a male sings a female
a new song is played.)
5) Melody
press [SET UP] while a song is playing.
“Play mode” will display at the top of the menu screen.
and returns to the melody when a new song is played.)
27
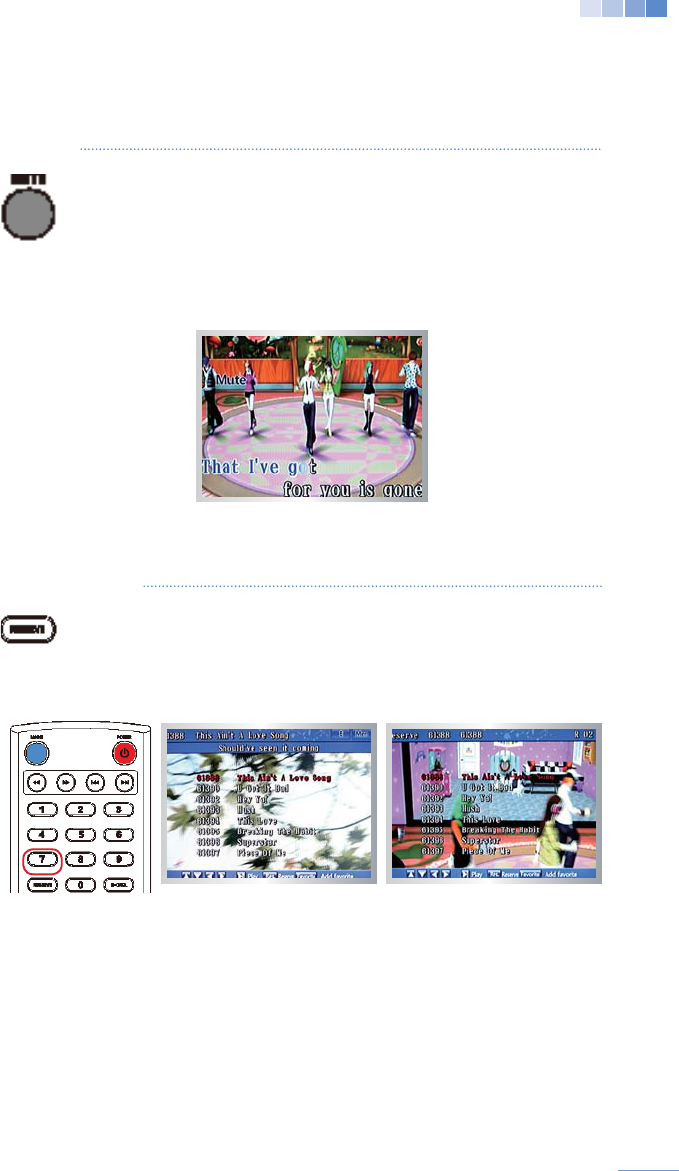
6) Mute
Press [MUTE]
screen.
Press [MUTE]
disappear.
(Mute will only apply to the song current song being played, and
the sound returns when a new song is played.)
7) Reservation
Select or Enter a song number.
Press [RESERVE] to reserve the song.
(Once the song is reserved it will be displayed in the list of
8) Cancel Reservation
Enter the song number of the song you wish to cancel.
Press [R-CNCL] to cancel the selected song.
Press
[R-CNCL]
without selecting a song number to cancel the
very
last reserved song.
9) Pre-Reservation
Pre-Reservation adds a song to the top of the reserve list.
Enter a song number.
Press [P-RES].
28
29
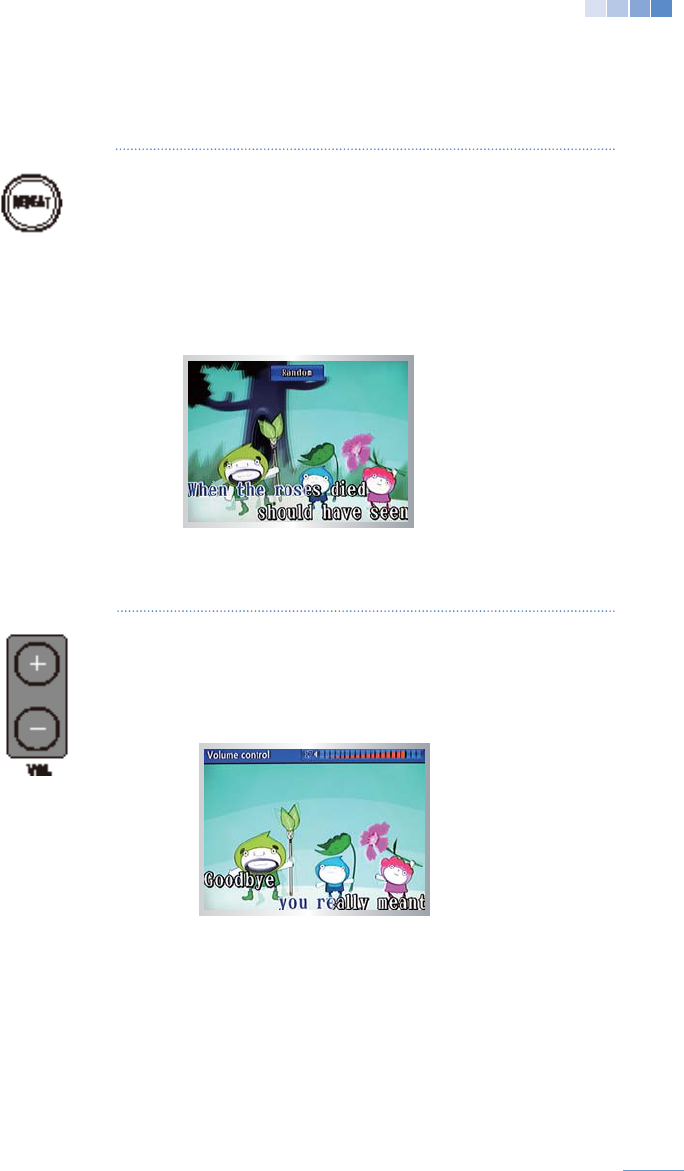
10) Repeat
Press [REPEAT] to select the playback mode.
Repeat: Repeat selected song.
Continuous: Play songs in sequential order after playing all
reserved songs.
Normal:
Return to Karaoke standby after playing all reserved songs.
Random: Play songs randomly after playing all reserved songs.
1-Phrase:
11) Volume
Press [+] or [-] to adjust music volume. (levels 0-20)
Press [+ [-] to deactivate the mute.
to adjust music volume.)
30
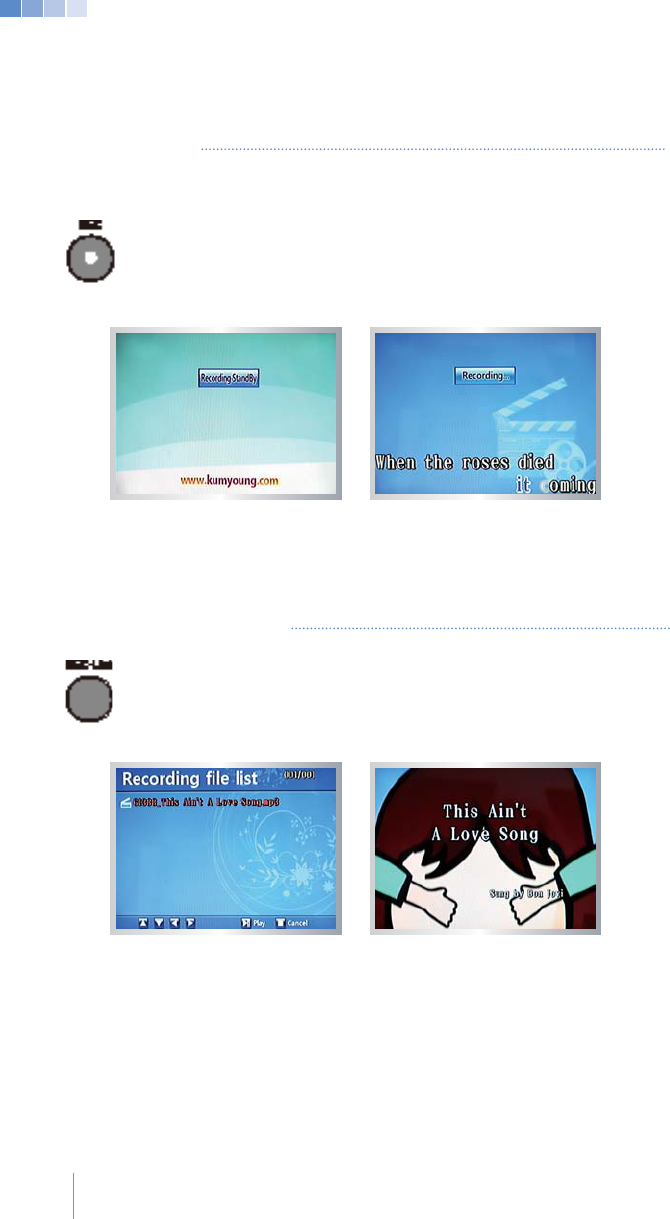
12) Recording
Press [REC] to enter recording standby mode.
Select and play a song to start recording.
Press [Stop/Cancel] button to stop recording.
recording.)
13) Playing Recorded Songs
Press [REC-List] to display the list of recorded songs.
Press [PLAY/PAUSE] to play the recorded songs.
Press [STOP/CANCEL] to stop and return to the list of recorded songs
.
songs are being played.)
31
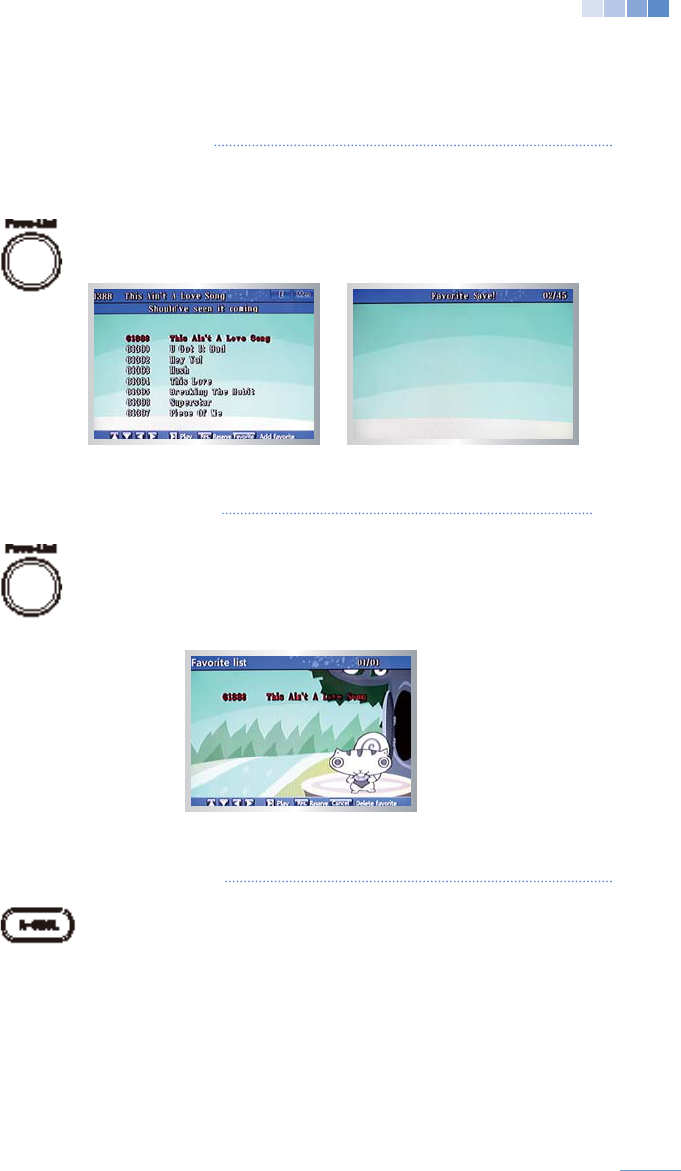
14) Saving Favorite Songs
Save up to 45 of the songs you like to sing the most for faster searches.
Select or enter the song number of your favorite song.
Press [FAVO-LIST] to add song to the favorite song list.
15) Viewing Favorite Songs
Press [FAVO-LIST] while in karaoke standby to list the
favorite songs.
Press [PLAY/PAUSE] to play your favorite songs.
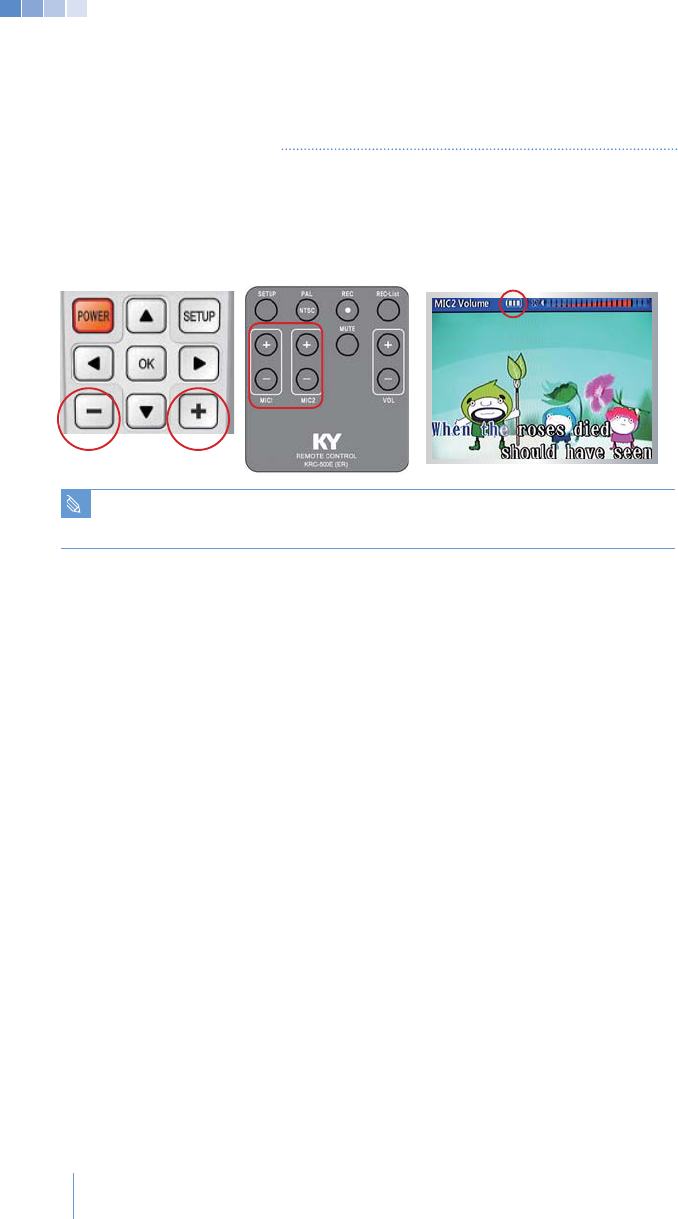
16) Deleting Favorite Songs
Press [Favo-List] while in karaoke standby to list the
favorite songs.
Press [R-CNCL] to delete the selected favorite song.
32
17) MIC Battery Display
A battery status icon will appear on-screen indicating the battery life of the
microphones.
Press [+] or [-] on the remote control or MIC
please insert new batteries.
Caution
33
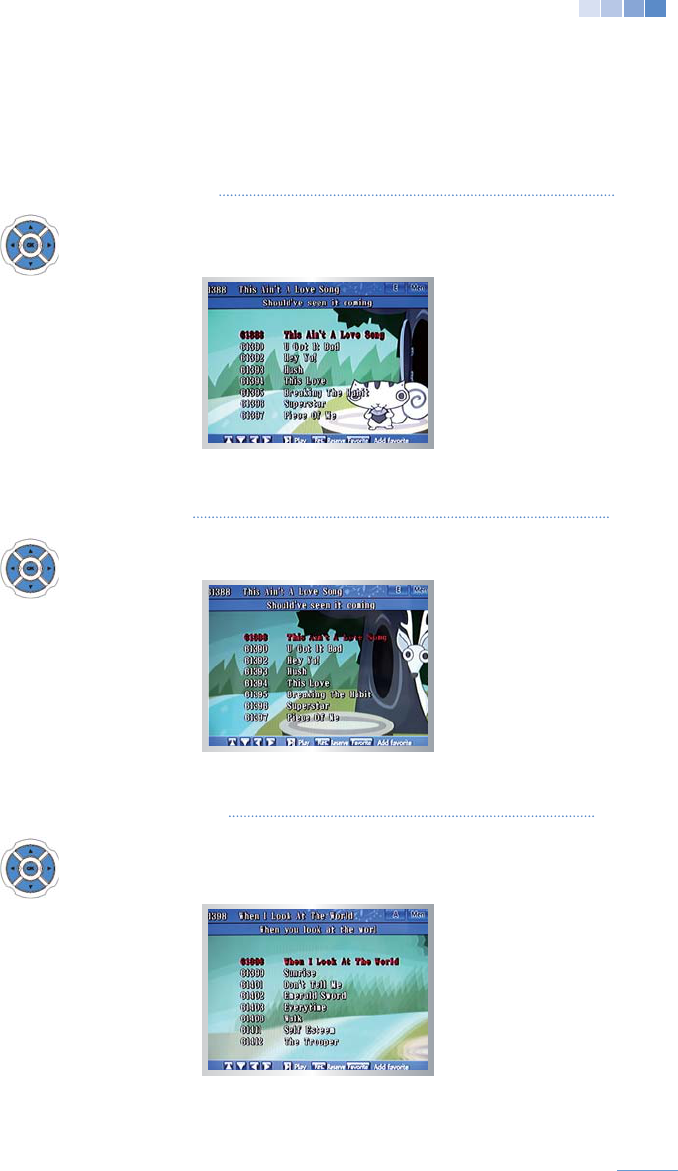
4-1-3 Special Karaoke functions
1) Last Song Searched
last searched song.
2) Last Song Played
Press [OK] while in karaoke standby to display the last song played.
3) Song search by Page
on each page)

34
4) Set up Mode
Press [SET UP] while in karaoke standby to enter the “Set up
Press [OK] to save a changed value.
Press [STOP/CANCEL] or [SET UP]
Background
Select Image or Video for the karaoke mode background.
Lyric
.
Echo Level
.
Min Disp. Score Minimum score to display at the end of songs
.
Display scores in real time
.
.
video may not display properly
.
)
Language Language for system messages
.
Default Mode Restore system to factory settings
.
Updates system software
.
eGhGGGGGGGGGGGGU
35
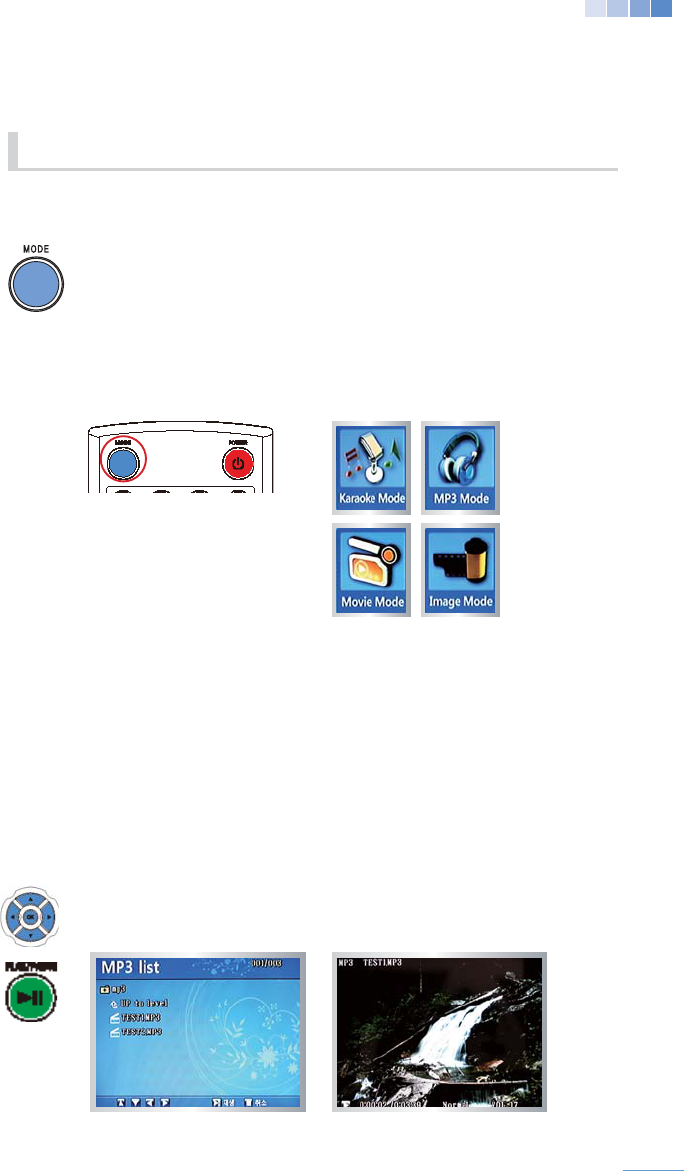
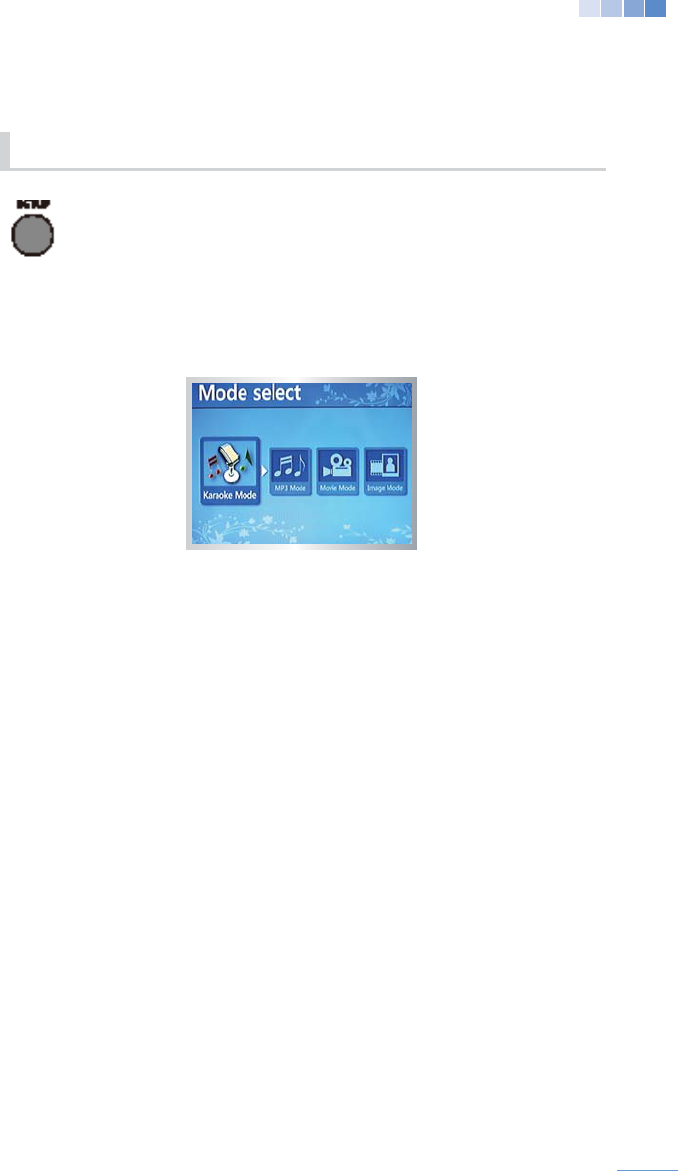
4-2-1 Modes
Karaoke:
Sing karaoke songs from the system memory or song packs
.
MP3:
Movie:
Image:
In karaoke standby mode press [MODE] to enter the “Multimedia” menu.
Select a mode then press [OK].
4-2-2 MP3 Mode
“MP3” folder.
be listed.
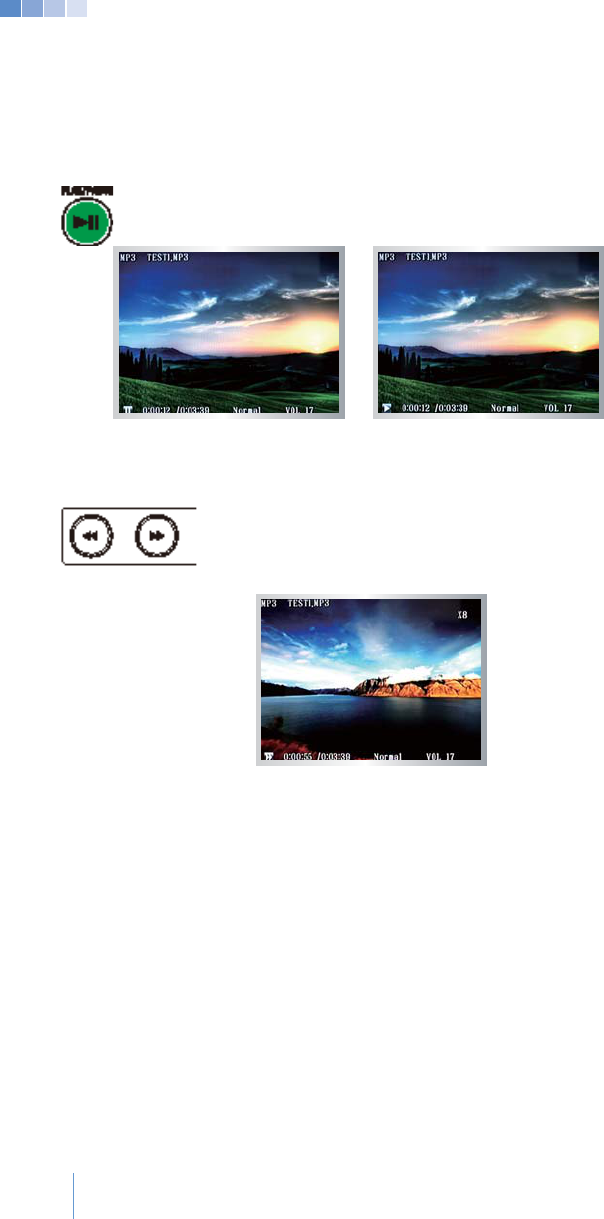
1) Playing MP3s
Press [PLAY/PAUSE
4-2 Multimedia
36
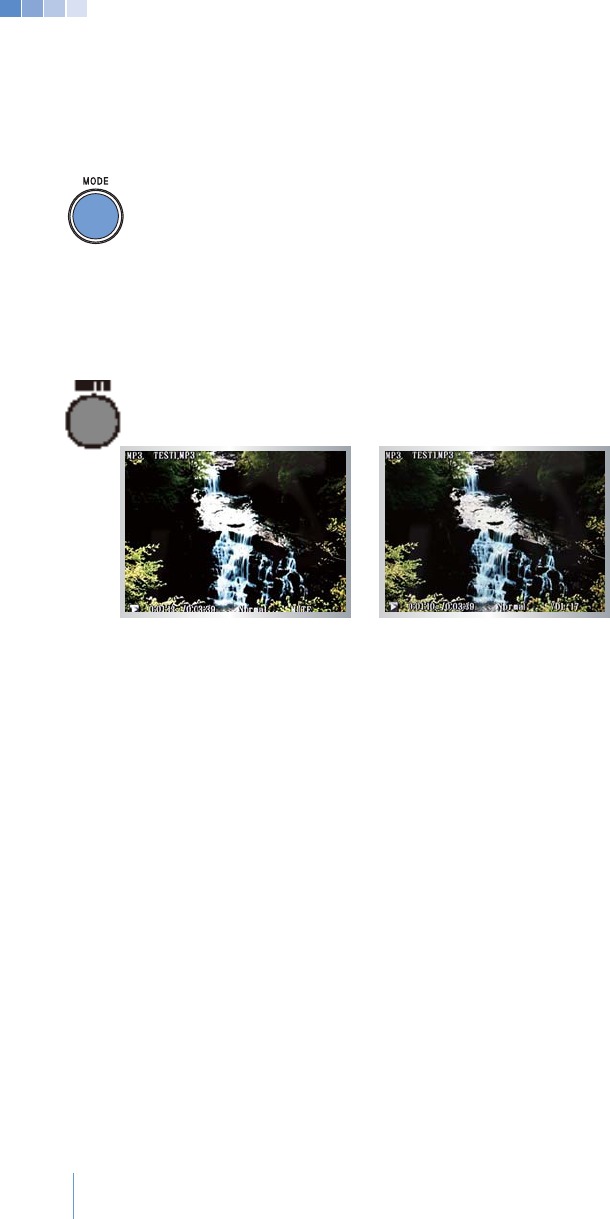
2) Pause
Press [PLAY/PAUSE] to pause a playing song.
Press [PLAY/PAUSE] once again to resume the song.
3) Rewind and Fast Forward
.
.
(Rewind and fast forward up to 8 speeds.)
37
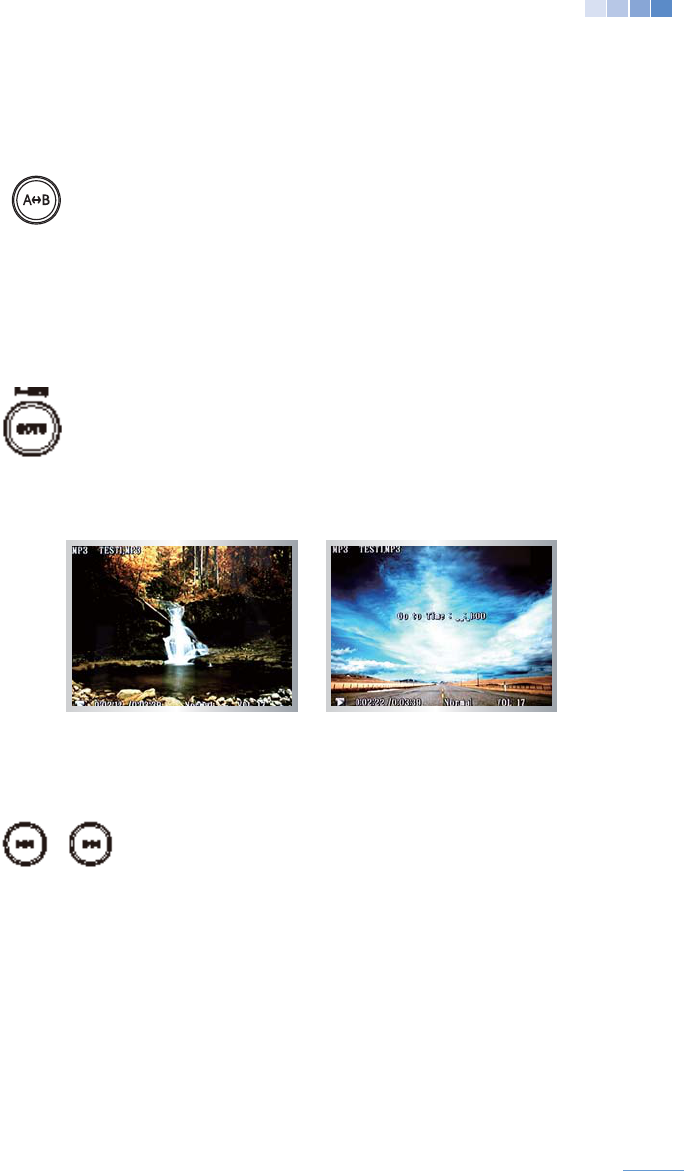
4) A-B Section Repeat
While an MP3 is playing press [A<->B]
to repeat, “A-” will display on the screen.
Press [A<->B] once again at the end of the section you wish to
repeat, “A-B” will display on the screen and the selection will repeat.
[A<->B] again.
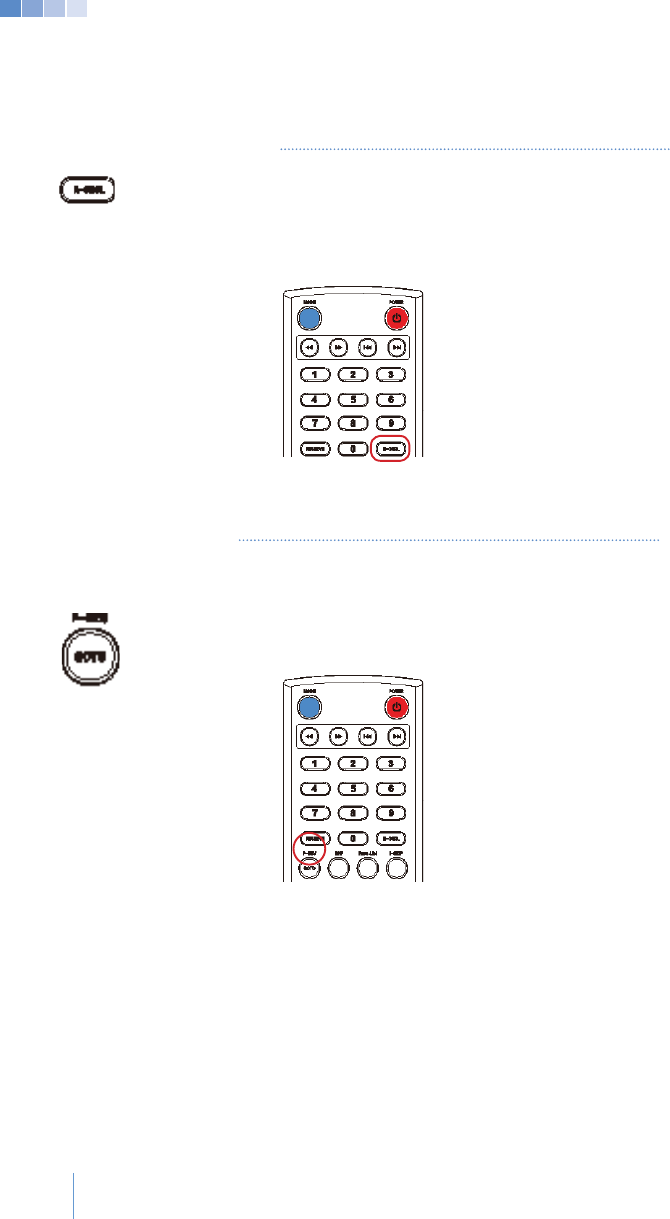
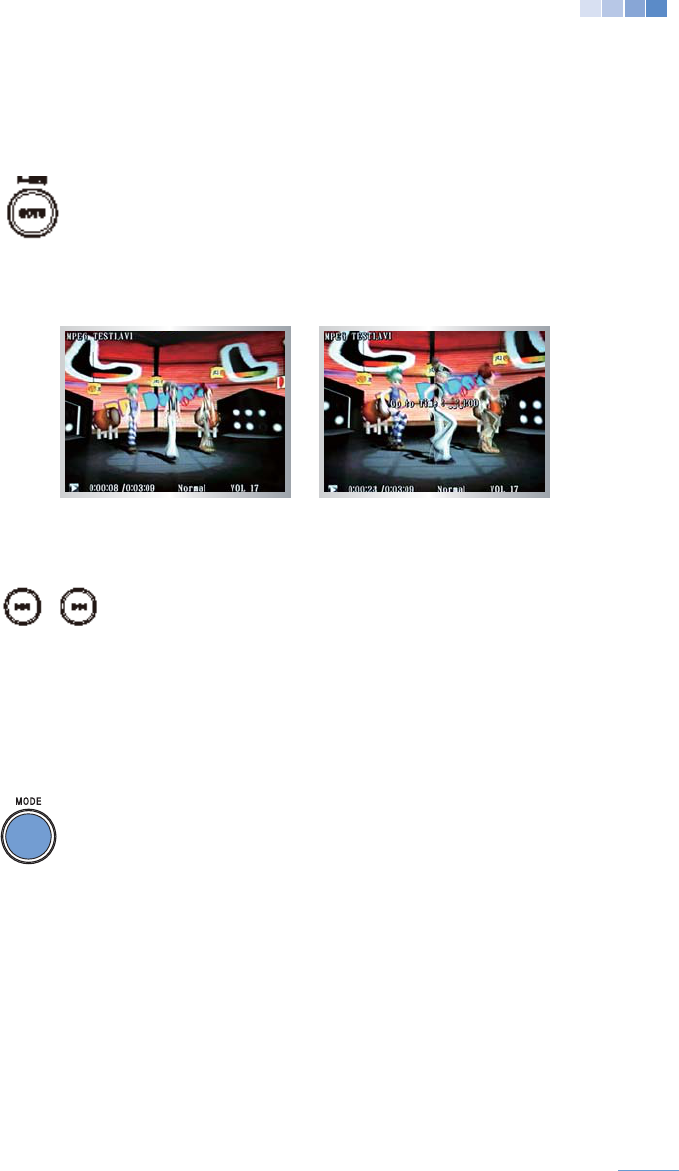
Press [GOTO]
[0]-[9] buttons.
Press [OK] to play the song from the entered time.
[STOP/CANCEL].
(If there is no input within 5 seconds of pressing [GOTO],
the function will automatically cancel.)
the previous song will be played.
will restart the current song.
38
7) Saving Song Location
Press [MODE] while an MP3 is playing to stop “MP3” mode.
In the “Multimedia” menu select “MP3” and the song will play from
where it was stopped.
system, the saved song location will be erased.)
8) Mute
Press [MUTE] during MP3 play to mute all sound.
Adjust the volume to cancel “Mute”.
39
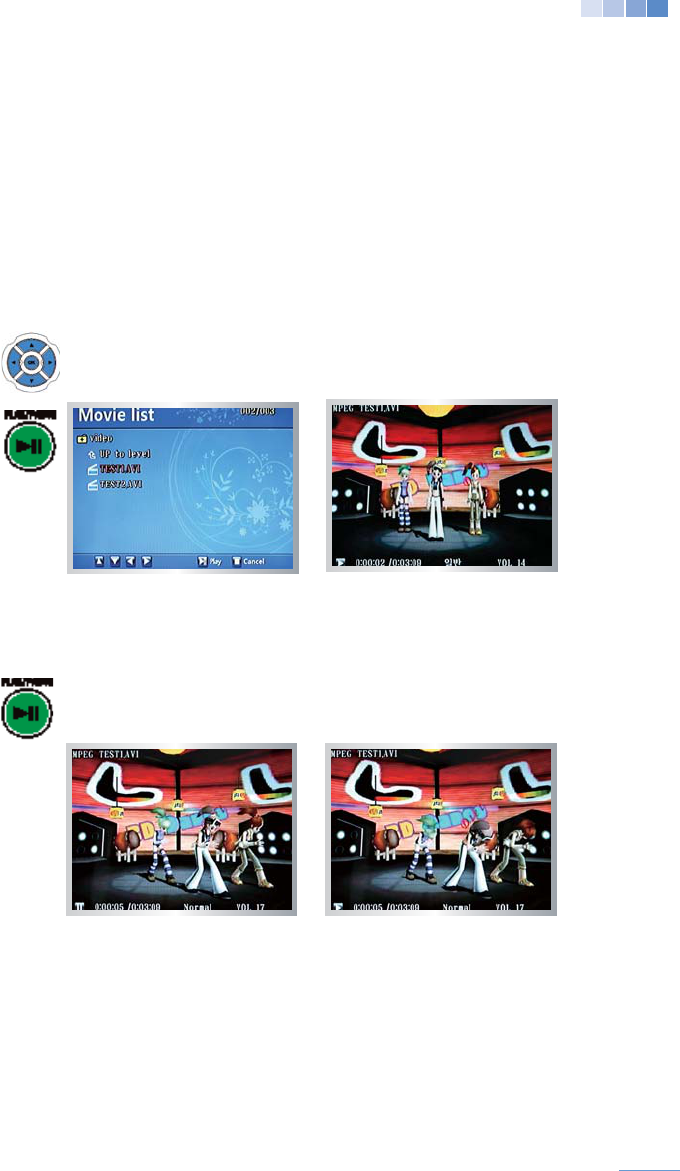
4-2-3 Video Mode
“Video” folder.
will be listed.
1) Playing Videos
Press [PLAY/PAUSE] to play a video.
2) Pause
Press [PLAY/PAUSE] while a video is playing to pause.
Press [PLAY/PAUSE] once again to resume the video.

40
3) Rewind and Fast Forward
(Rewind and fast forward up to 32 speeds.)
4) Repeat Section
While a video is playing press [A<->B]
to repeat, “A-” will display on the screen.
Press [A<->B] once again at the end of the section you wish to
repeat, “A-B” will display on the screen and the selection will repeat.
[A<->B] again.
41
Press [GOTO]
[0]-[9] buttons.
Press [OK] to play the song.
[STOP/CANCEL].
(If there is no input within 5 seconds of pressing [GOTO], the
function will automatically cancel.)
the previous video will be played.
restart the current video.
7) Saving location of Video play
Press [MODE] while a video is playing to stop “Video” mode.
In the “Multimedia” menu select “Video” and the video will play
from where it was stopped.
system, the saved video location will be erased.)
42
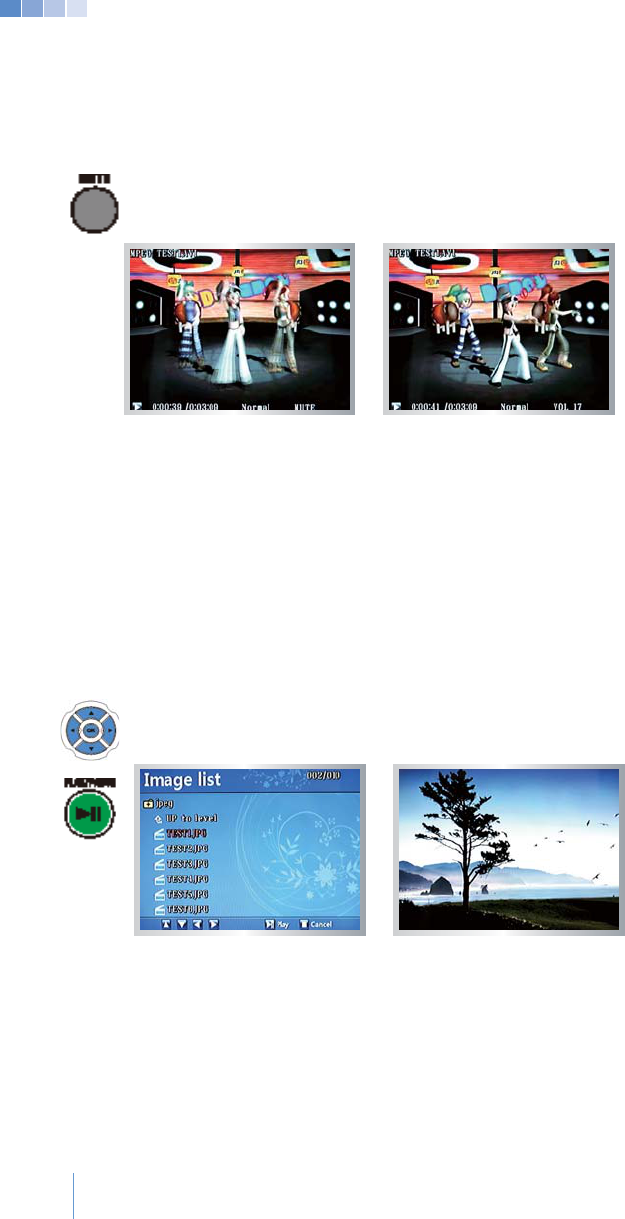
8) Mute
Press [MUTE] while a video is playing to mute all sound
Adjust the volume to cancel “Mute”.
4-2-4 Image Mode
“jpeg” folder.
will be listed.
1) Viewing Images
Press [PLAY/PAUSE] to view the image.

43
2) Pause
Press [PLAY/PAUSE] to pause a slideshow.
Press [PLAY/PAUSE] once again to resume the slideshow.

44
4-2-5 Multimedia Mode Setup Menu
Press [SET UP] in “MP3” “Video” or “Image” mode for the
“Set Up” menu.
Press [OK] to save a changed value.
Setup Menu Options
Play Playback mode. (Normal, Repeat 1,or DIR Repeat.)
Message display duration during “MP3” and “Video” mode.
(Continue, 3 sec, 5 sec, 10 sec, or 30 sec.)
Slide Slideshow or static image. (Enable or Disable.)
>All system settings are saved only when the system is shut down properly.
45
www.kumyoung.net
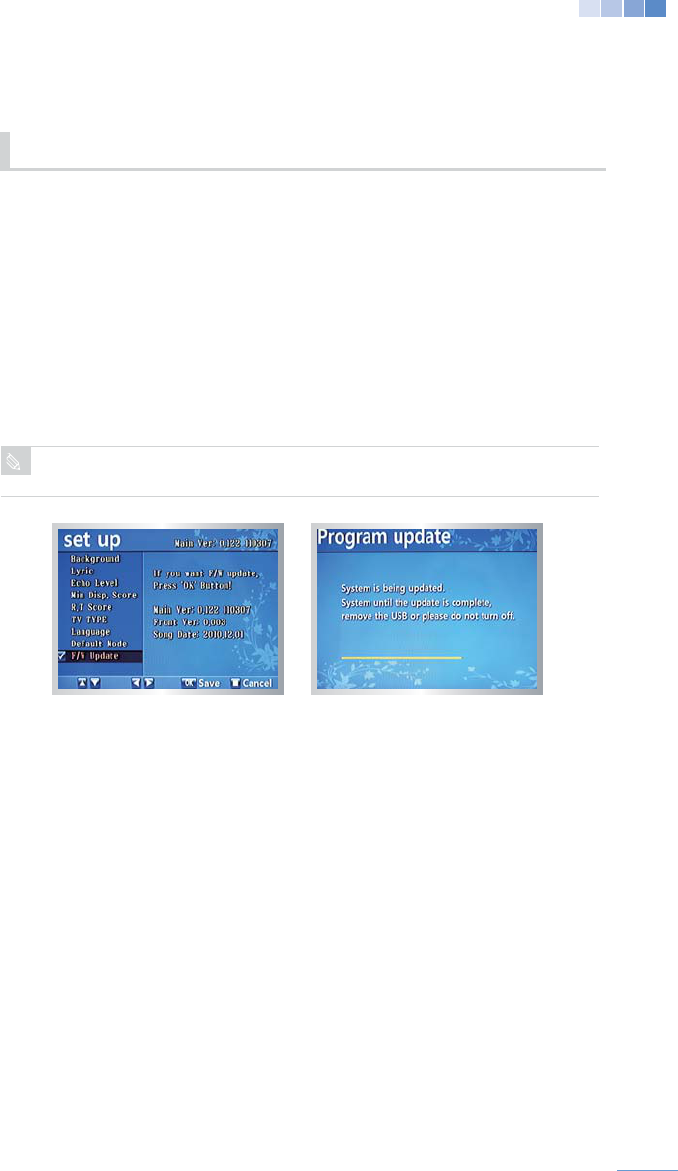
Press [OK] to update the system software.
When the update is complete the KHM500 will automatically reboo.
All system settings are saved only when the system is shut down properly.
5-1 System Update
5. Miscellaneous
CAUTION
46
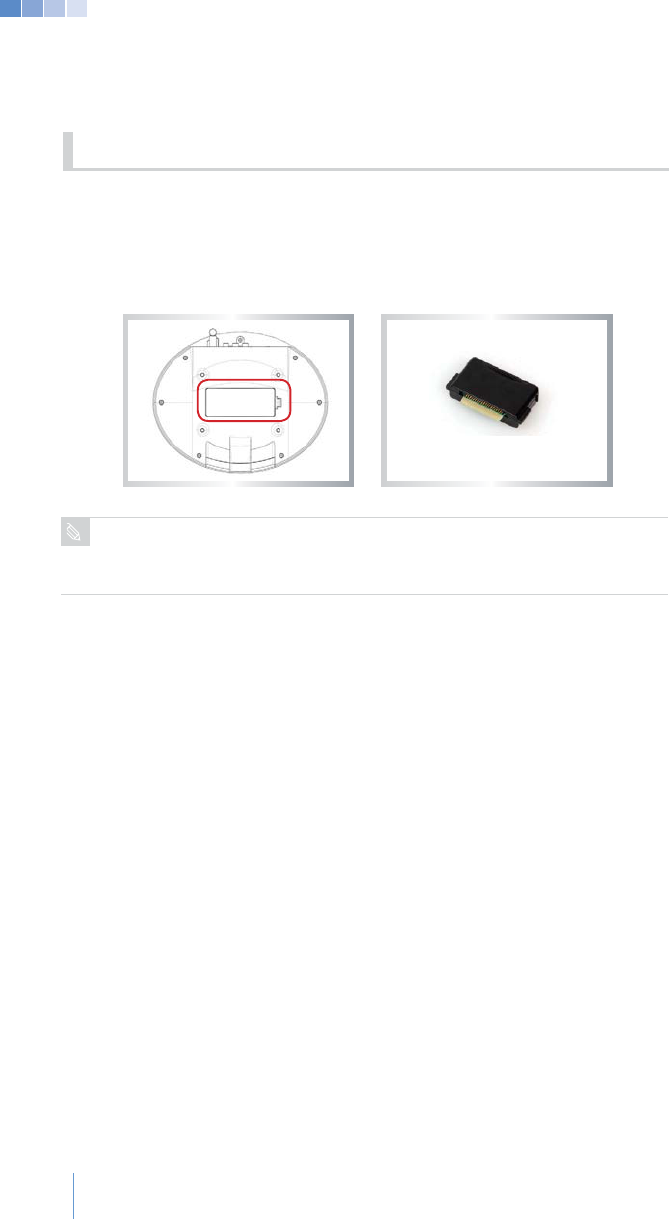
2. Open the song pack cover. (located on the bottom of the KHM500.)
3. Insert a song pack into an empty slot.
4. After closing the song pack cover turn on the system.
5-2 Installing Song Packs
(If a song pack is inserted while the KHM500 is powered on it may cause damage
to the system.)
CAUTION
Song Pack
47
1. Go to the “Mode Selection” menu.
(please see section 3-2 on how to setup the system with
RCA or HDMI.)
4. Press
[SET UP] to convert between HDMI and CVA.
5-3 Converting to HDMI or
CVA Mode
48
videos as background for “Karaoke” and “MP3” modes.
1) Visit www.kumyoung.net and download the “KHM500 Multimedia Converter”
1)
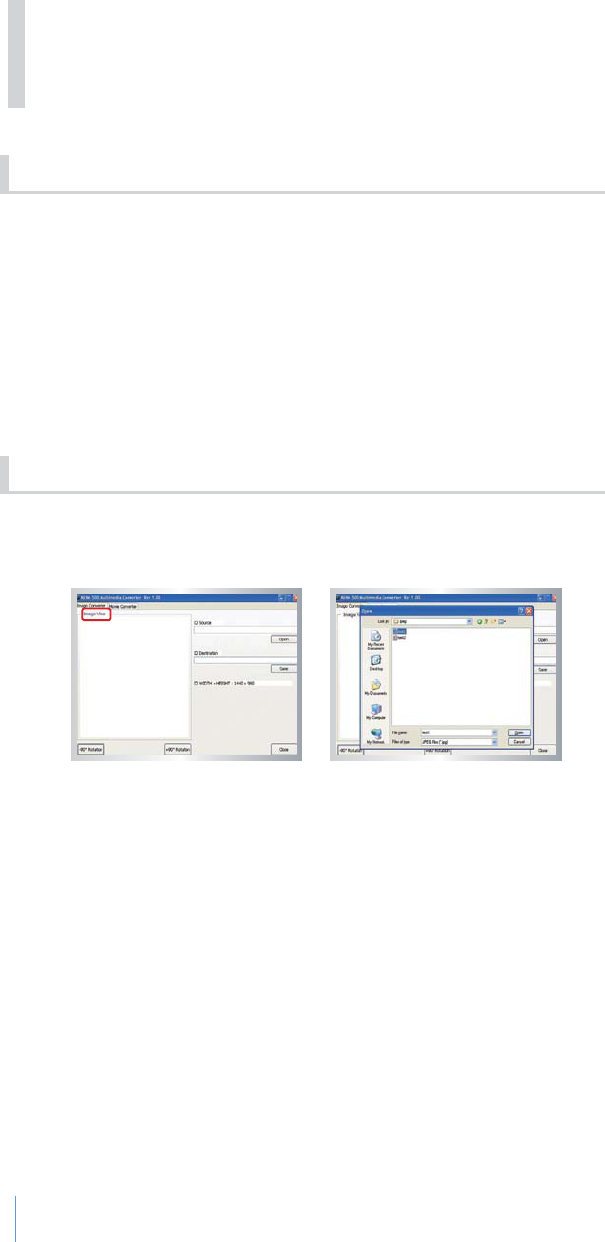
Open the “KHM500 Multimedia Converter” program and select “Image converter”.
2) Click the “Open” button to select the image you wish to use as a background.
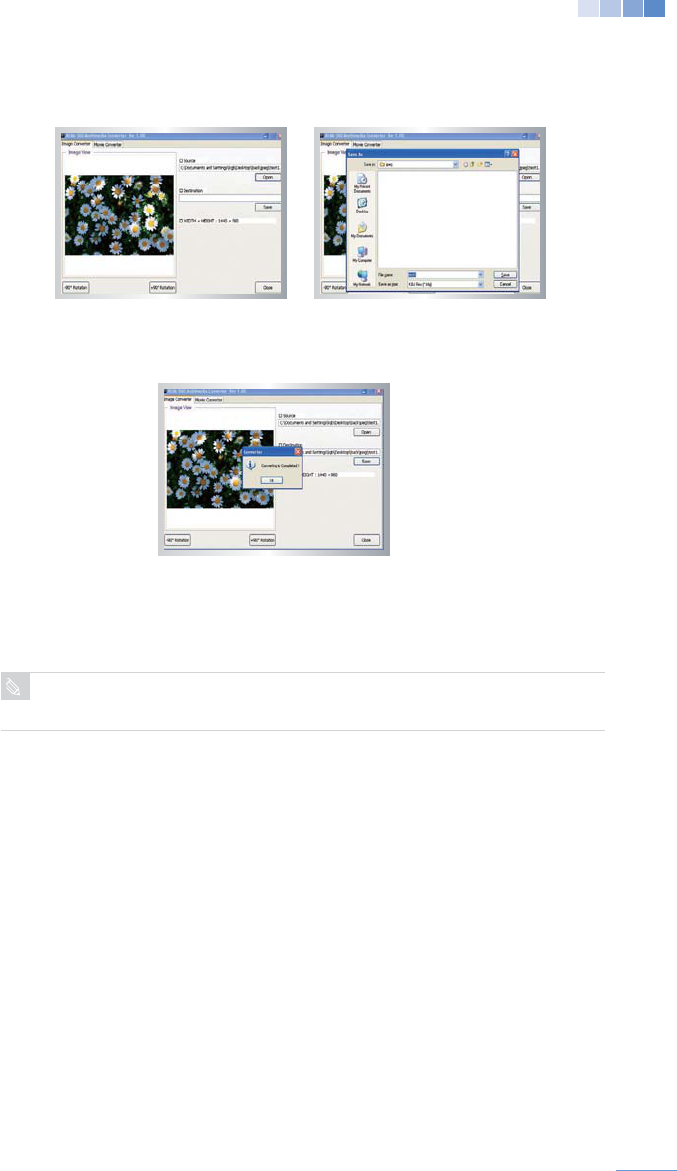
3) Once an image is selected click the “Open” button and the selected image
will be displayed on the left window pane.
by the system. E.G. (image-name.kbj)
6. Bundle Software
6-1 KHM500 Multimedia
6-2 Image Background
49
on the background.
the default images loaded in KHM500 will be displayed.
overwritten.
WARNING
50
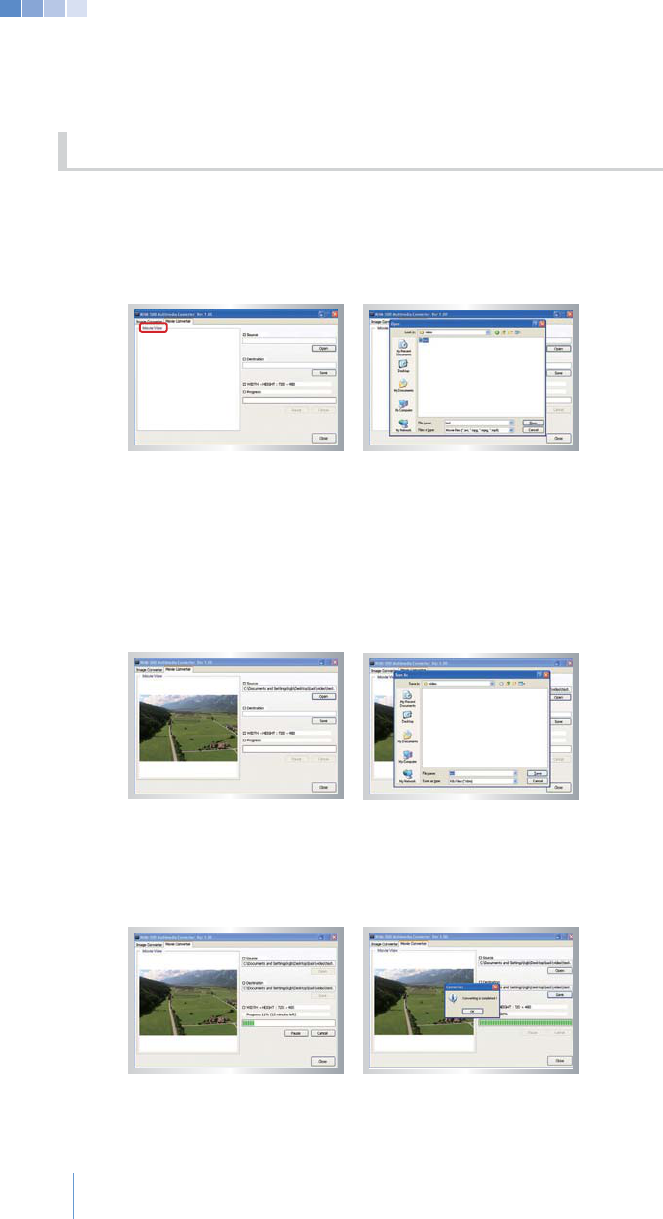
1) Open the “KHM500 Multimedia Converter” program and select
“Image converter”.
2) Click the “Open” button to select the image you wish to use as a
background.
3) Once a video is selected click the “Open” button and the selected image
will be displayed on the left window pane.
recognized by the system E.G. (video-name.kbm)
> If the “Pause” button is clicked while the video is converting, the converting
process is paused. Clicking the “Resume” button continues conversion.
> If “Cancel” is clicked during converting, the converting is cancelled and the
6-3 Video Background

51
display on the background.
the default videos loaded in KHM500 will be displayed.
overwritten.
WARNING

52
Symptoms (Troubles) Troubleshooting Solution
No power Gˍ Connect the power adaptor
No video
Gˍ Reconnect the RCA video or HDMI cable to the
Gˍ Check the video input channel
Gˍ
No Audio
Gˍ
audio system
Gˍ
Gˍ
Remote control is not working
Gˍ Reinsert batteries to align with battery slot poles
Gˍ Check battery life or change the batteries
Gˍ Move any objects between the KHM500 and remote
Gˍ Point the remote directly at the KHM500 sensor and
operate within 22 feet(7m)
Wireless microphone
is not working
Gˍ Reinsert batteries to align with battery slot poles
Gˍ Check battery life or change the batteries
Gˍ
Gˍ
Screen is frozen
Restart the system:
Gˍ
Gˍ Reboot the system
troubleshooting steps below before contacting a service center.
7. Quick Troubleshooting

General
Model Station KHM500R
Microphone
Karaoke Type Wireless Karaoke, Multimedia Player
Dimemsions Station
Microphone
Weight Station 1 lb.(435g)
Microphone 0.6 lb (265g) without batteries
Wireless Range 22 ft. (7m)
Multimedia Support
MP3 Below 320 Kbps
Video
on its format)
Image
Storage/Memory
Built in songs
Song Chip Slots 6
Recording up to 1,000 Minutes (USB Flash Drive)
USB
USB 2.0 High Speed (Host)
Video
Output
HDMI HDMI 1.3
Audio
Output 2 Channel
Power
Adaptor Rated voltage
Power Consumption 5W
Battery
53

54
system and accessories provided with your karaoke system (hereinafter refered to as
general industry standards from the date of purchase by a customer and for a period of one (1)
year for labor and parts. If warranty service is needed for your Product, please contact the
more information.
If, while under warranty, this Product does not operate normally due to defects in materials
where the product was purchased, will, at their option, repair the Product at no charge, using
new or refurbished replacement parts in accordance with the terms and conditions set forth
herein.
and its service partners reserves the right to charge a handling fee if a returned Product
is found not to be under warranty according the conditions below. Replacement parts are
warranted for the balance of the original applicable warranty period.
prevented by applicable law, other regulation or technical restrictions from making a backup
replacement.
information has been removed or altered after the original purchase of the Product from
the dealer. Notice of the alleged defects must be promptly given upon discovery.
components such as adaptors, cables provided during installation.
apply.
4. All returned products must be properly packaged and it is recommended that they be sent
via a method that provides for tracking of the package. It is recommended that shipments
is lost or damaged in transit.
a. Damage resulting from customer or 3rd party, intentional or accidental, negligence
(operation, installation), tampering or failure of the purchaser to follow normal operating
9. Product Warranty

55
affect the performance of the product.
are due to normal customer use.
goods received.
e. Product which has its serial number removed or altered or made illegible.
f.
Warranty cards which have been altered, defaced or erased in any manner whatsoever.
g. Any service charges that are not covered by this warranty will be billed to customer at
time of repair.
i. Our decision on all questions with respect to complaints as a result of defects, either
materials or workmanship, shall be conclusive.
j.
Warranty cards which have been altered, defaced or erased in any manner whatsoever.
6. Any service charges that are not covered by this warranty will be billed to customer at
time of repair.
8. Our decision on all questions with respect to complaints as a result of defects, either
materials or workmanship, shall be conclusive.

56
Warranty Card
quality assurance testing. If a manufacturing defect occurs within the one (1)
year warranty period, the store or agency the product was purchased from will
repair it. Please contact the dealer it was purchased from.
Customer Information
Full Name
Address
City
Email
Product Infromation
Purchased From
Date of Sale
Product Name
Model No. KHM500
Manufactuing No.
# Prior problems must be entered prior to selling the product.

Customer Service and Sales