KYE SYSTEMS GMZJ6 WIRELESS MOUSE User Manual M508W E manual for PC ENG
KYE Systems Corp WIRELESS MOUSE M508W E manual for PC ENG
UserManual.wiki
>
KYE SYSTEMS
>
GMZJ6 User Manual
Users Manual
Navigation menu
Upload a User Manual
Namespaces
Wiki Guide
HTML
PDF
Info
Views
User Manual
Discussion / Help
Navigation
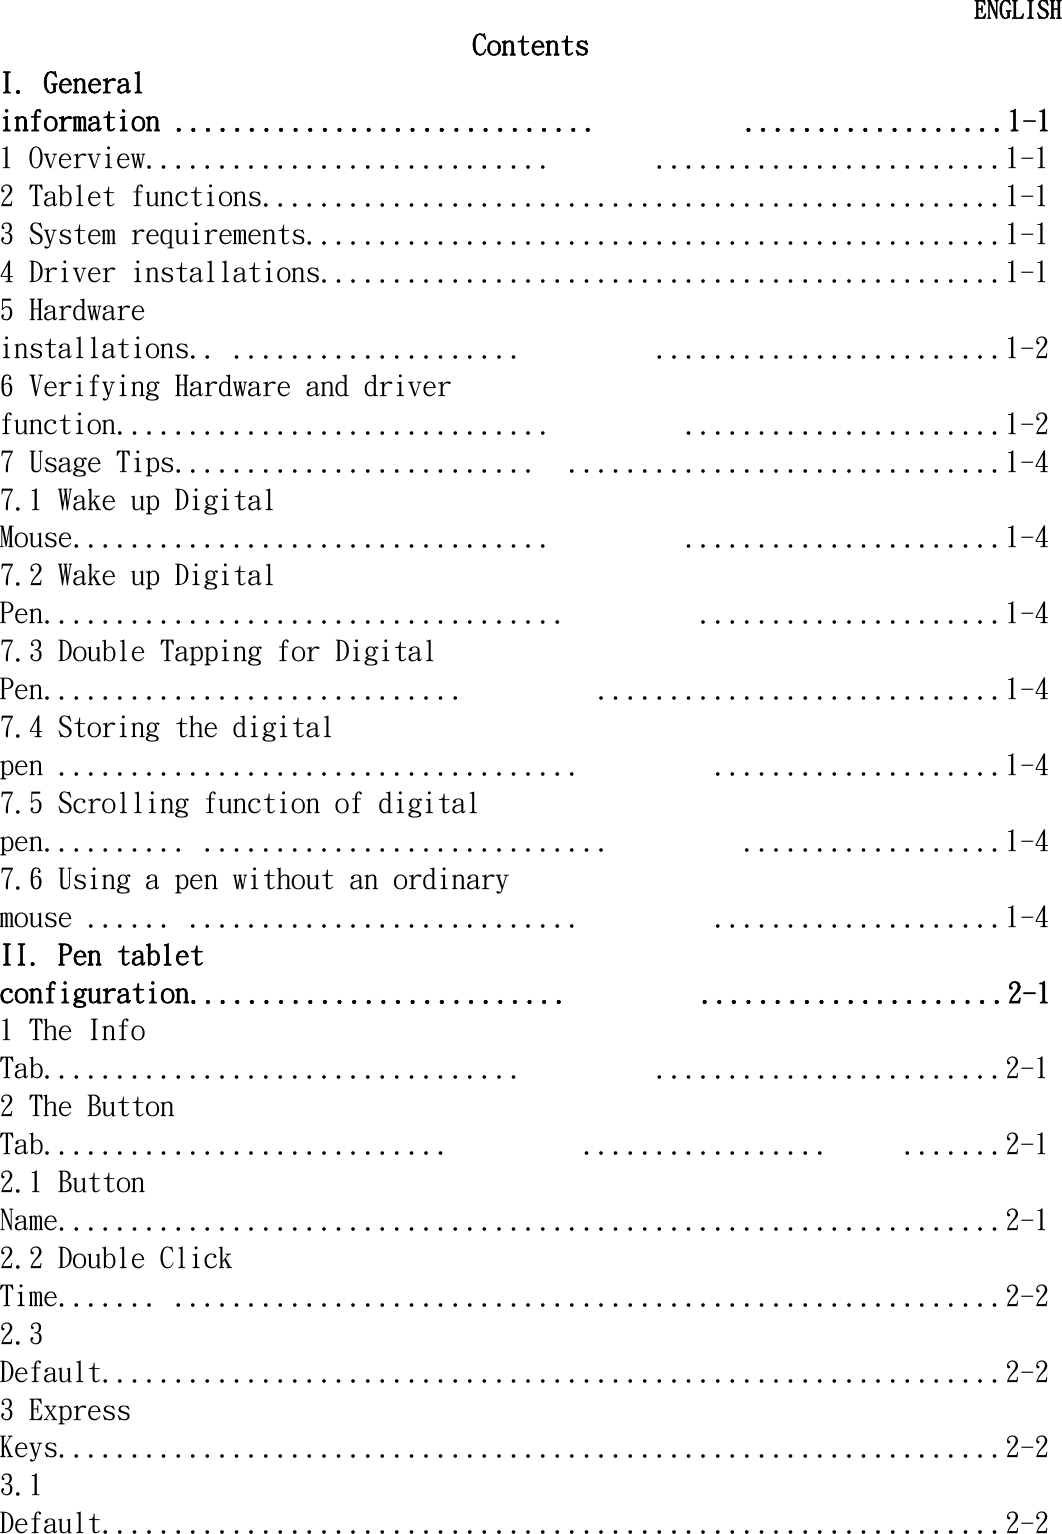
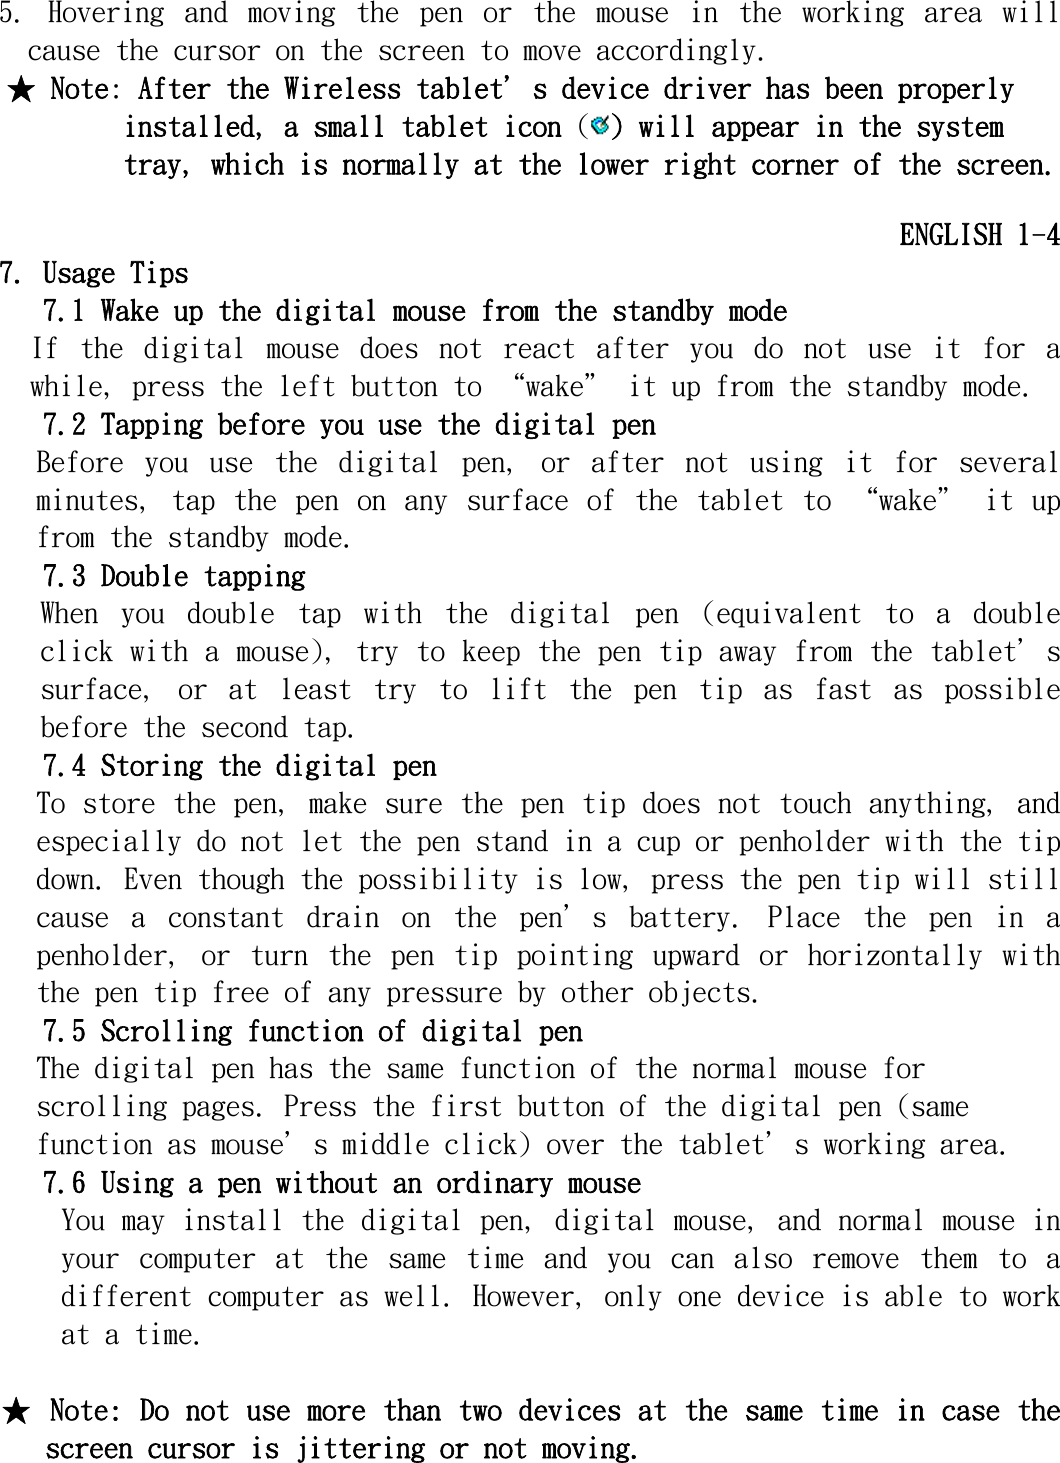
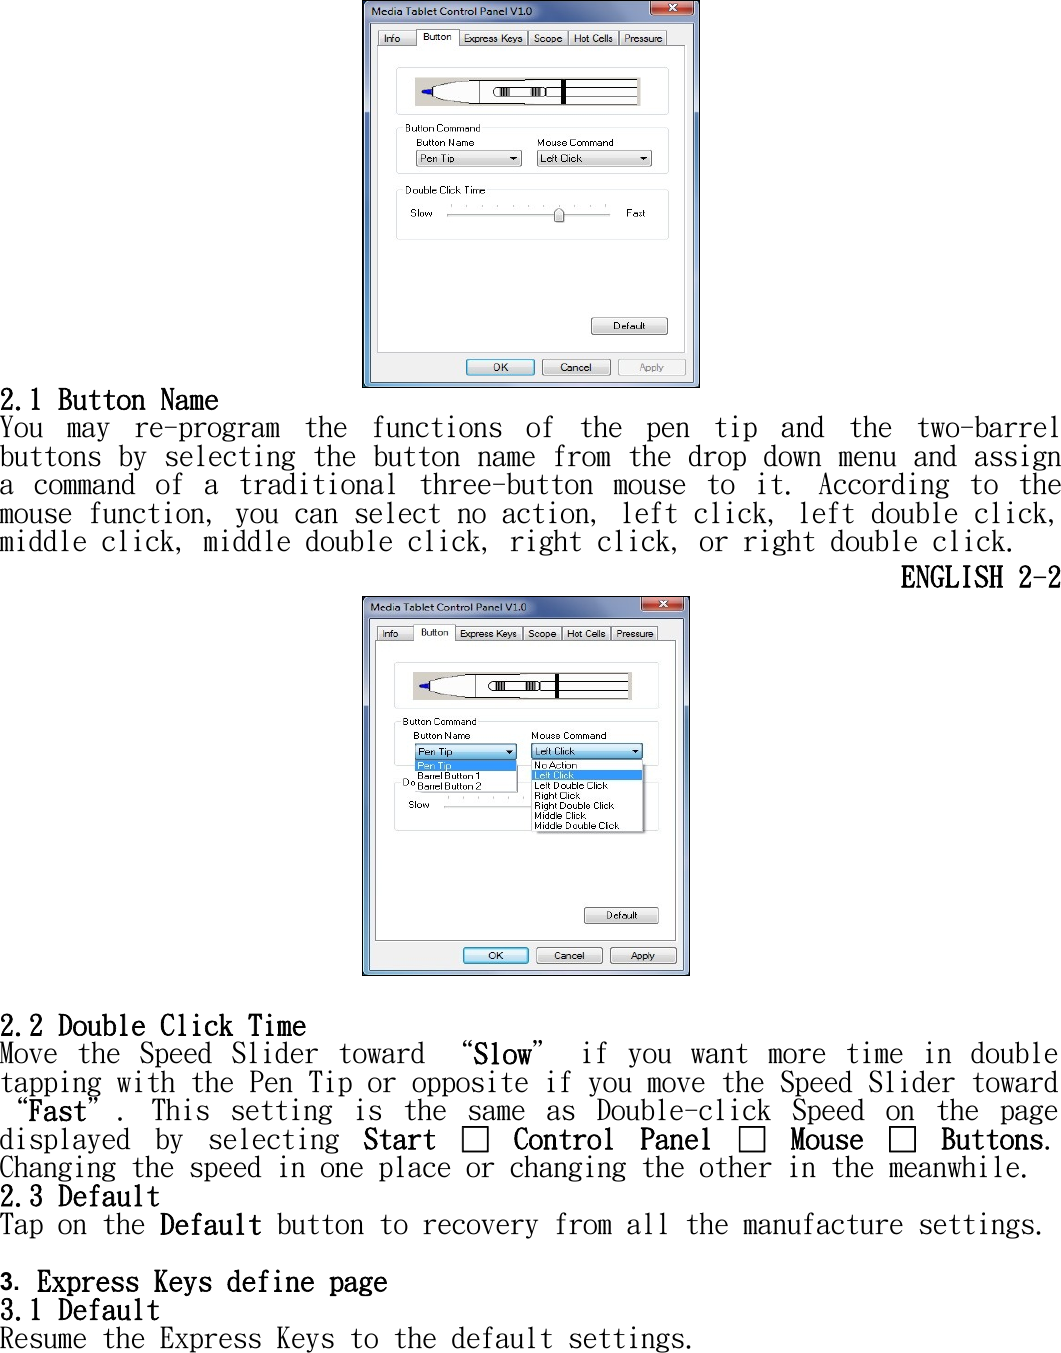
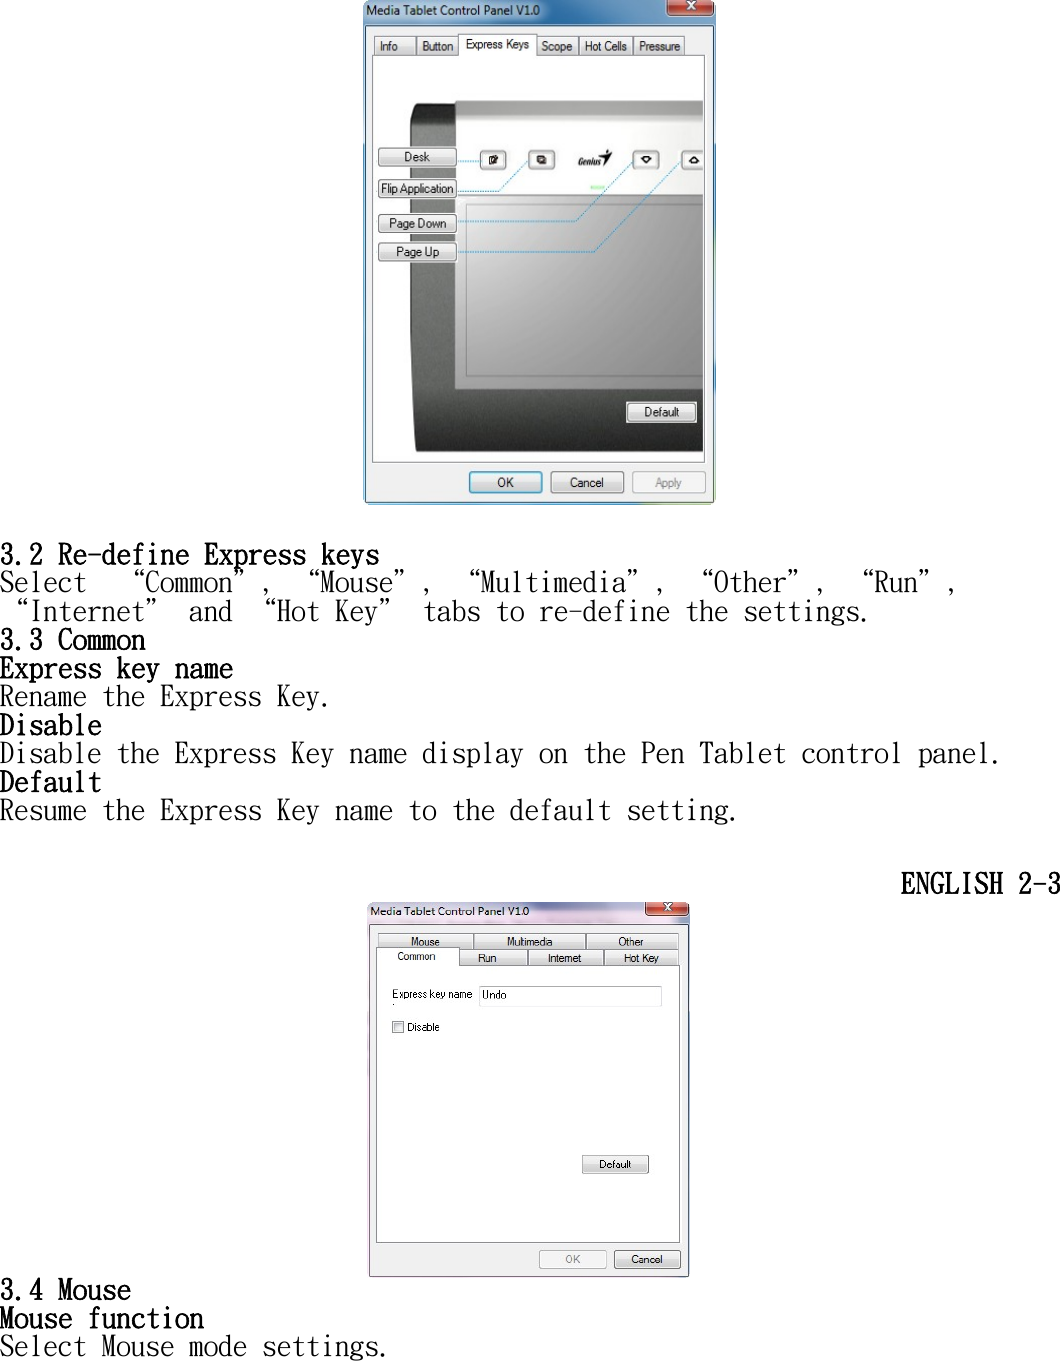
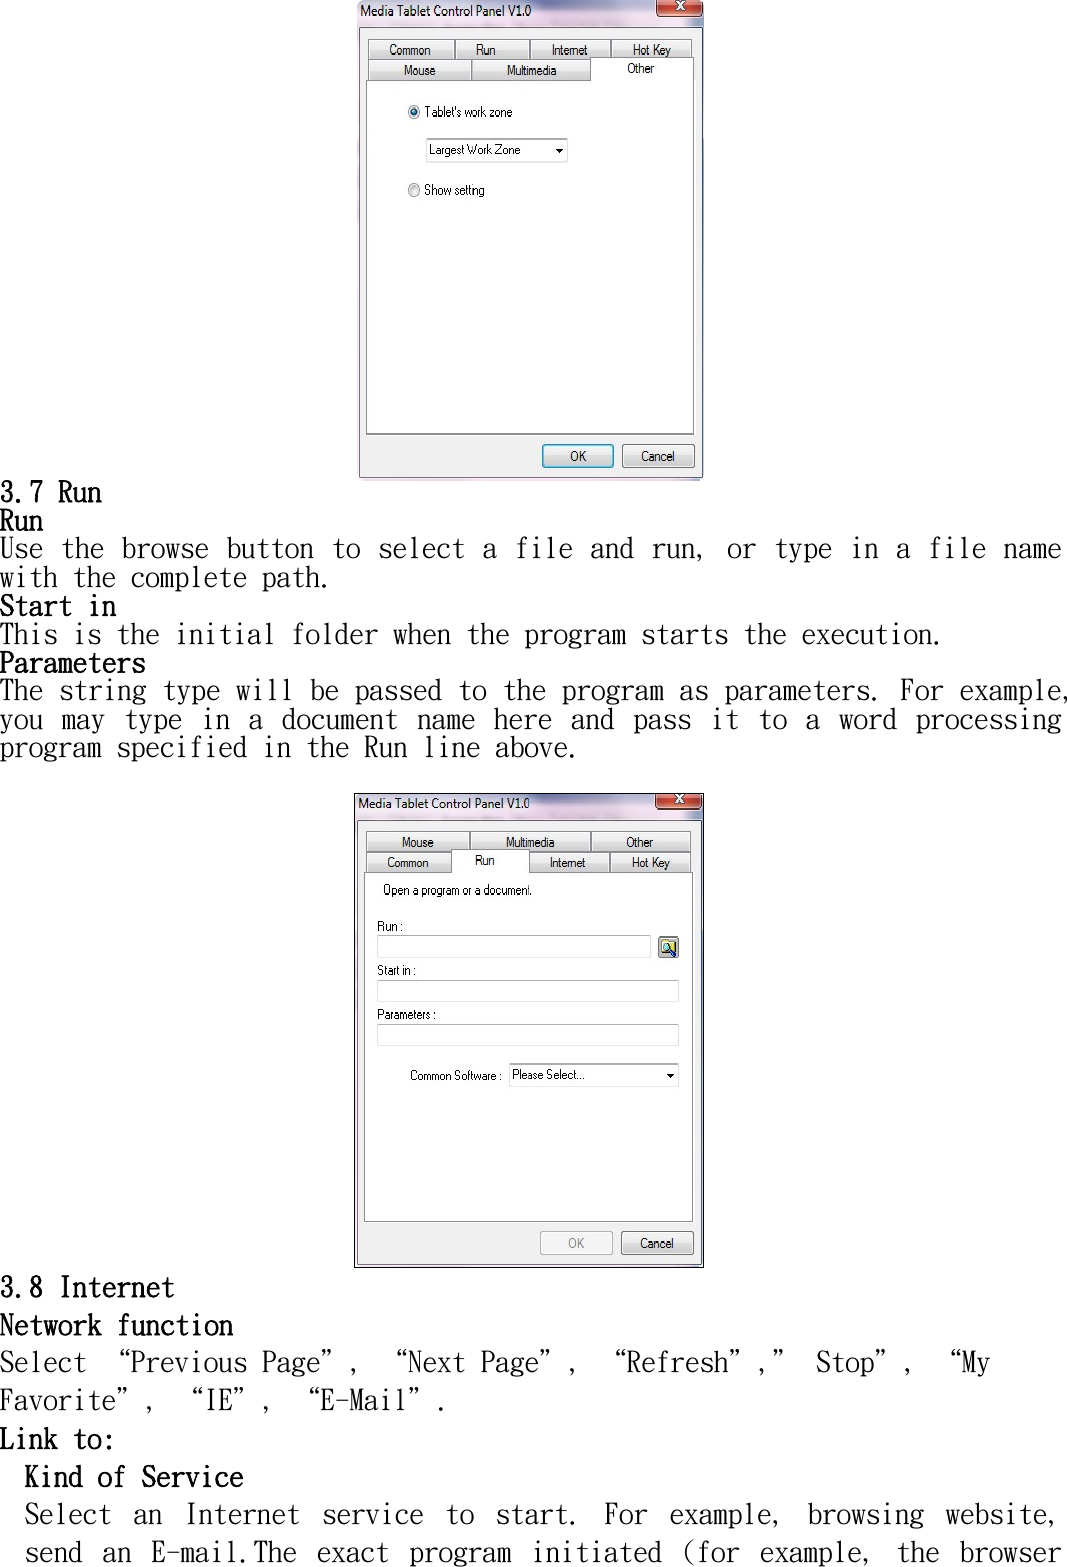
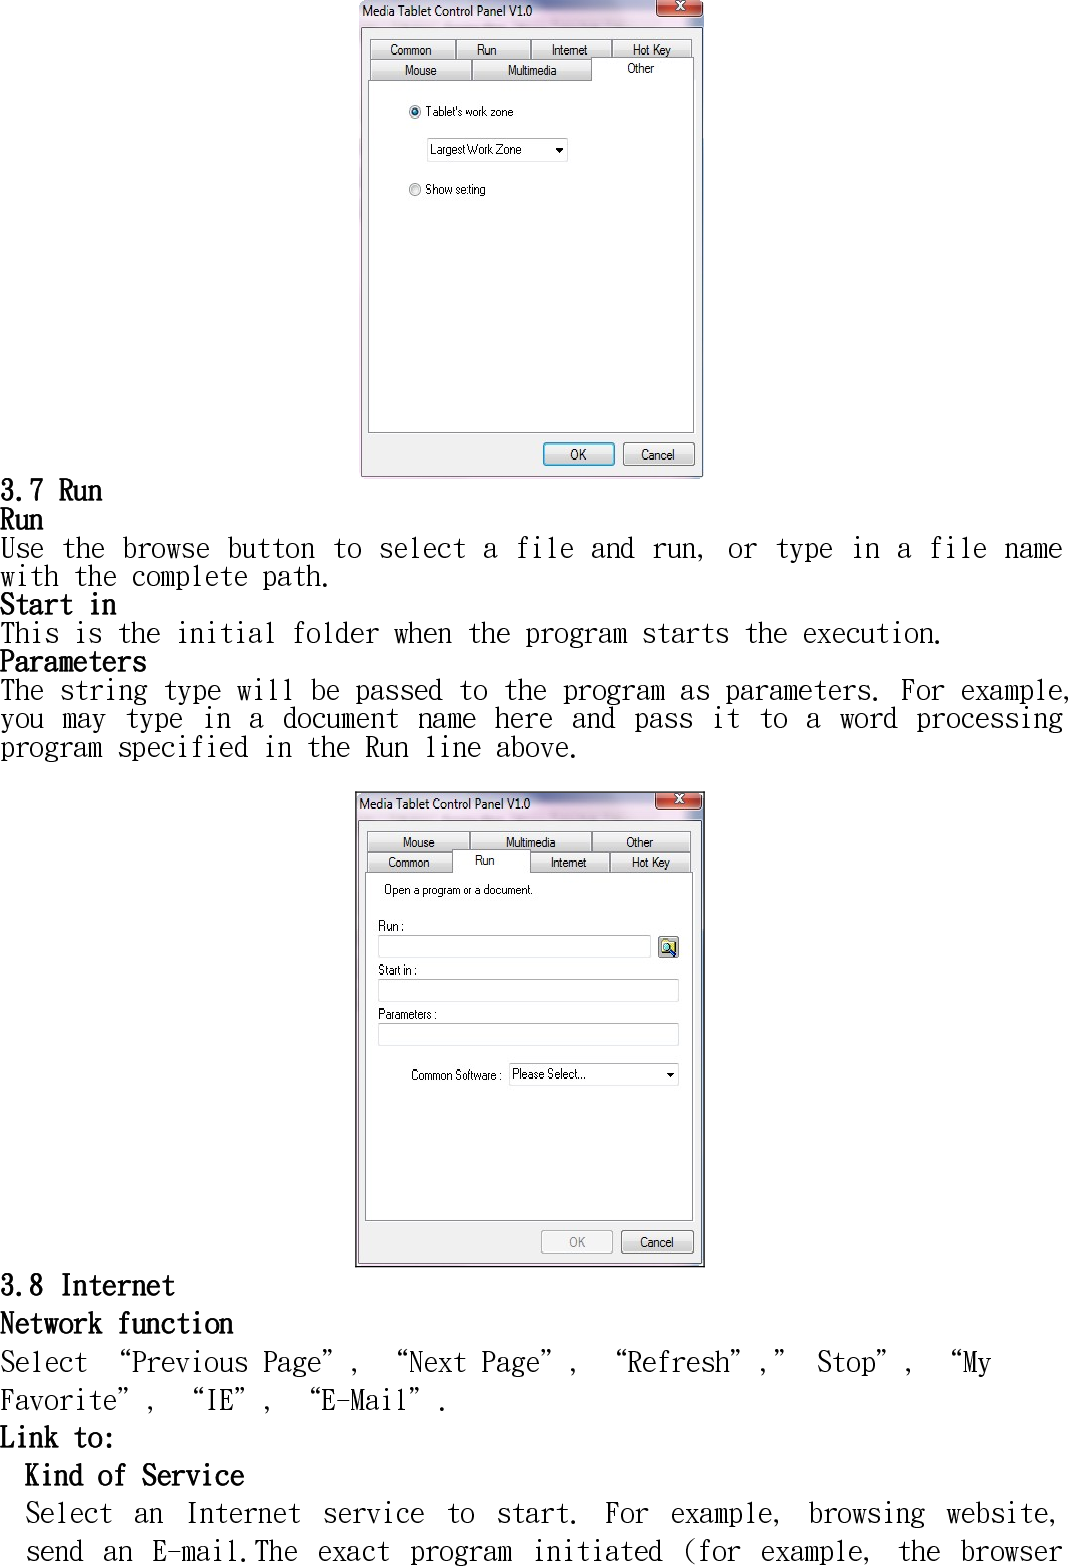
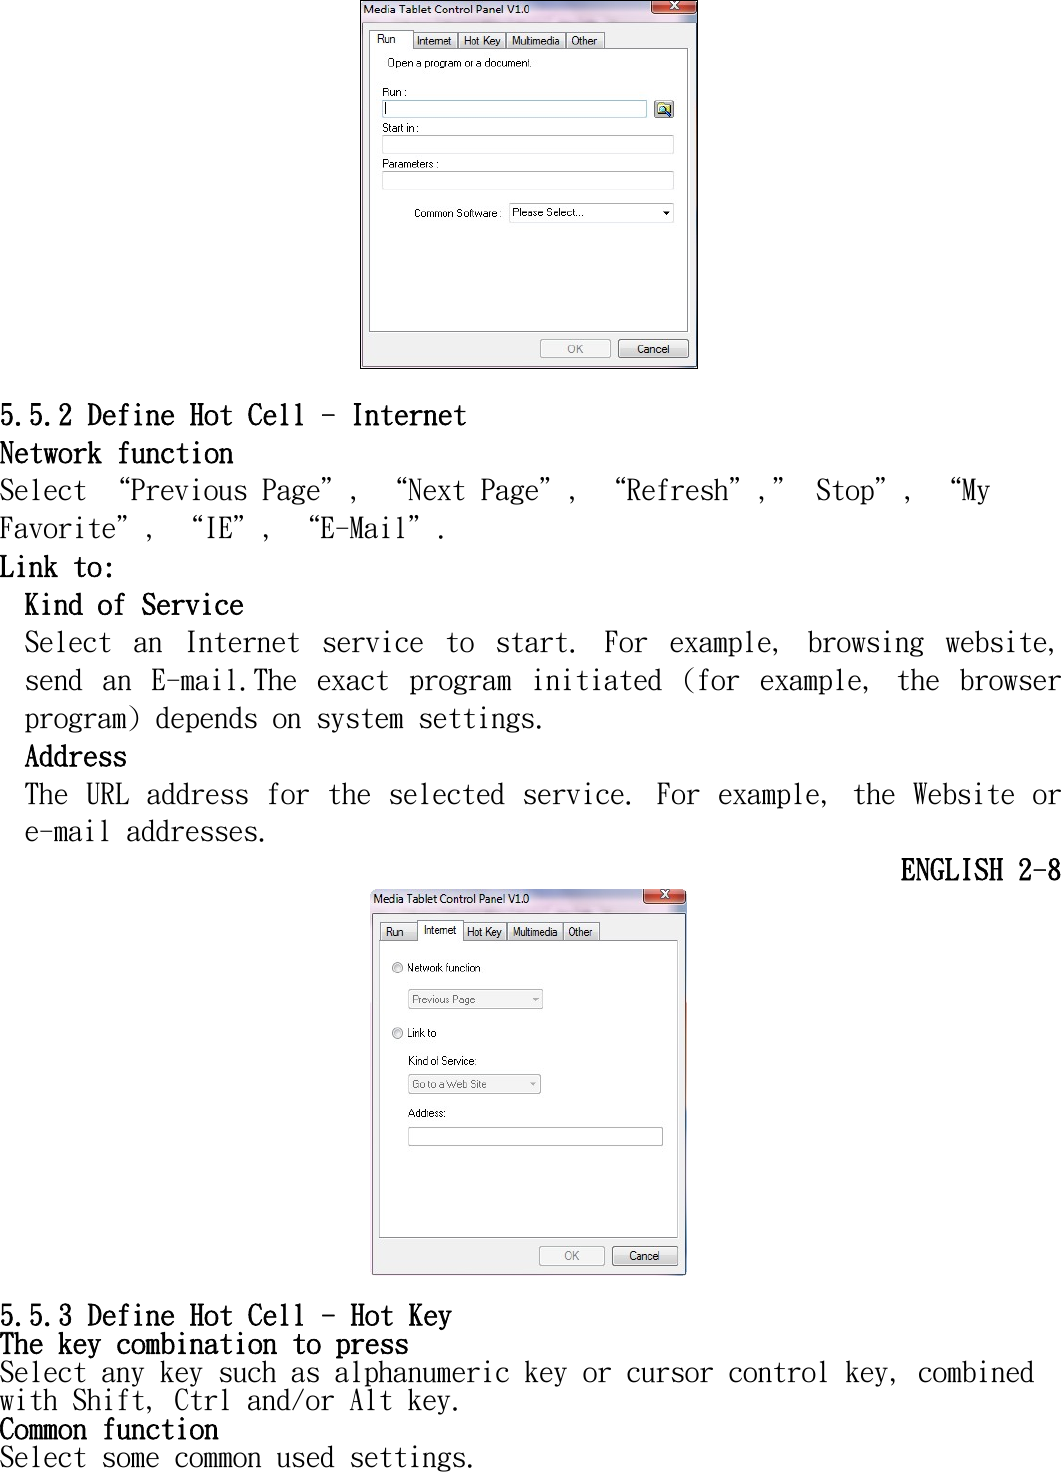
![ENGLISH 2-1 II. Pen tablet configuration You may configure the pen tablet by modifying the functions of the pen tip and the two barrel buttons, tap [Start] > [Settings] > [Control Panel], and double-tap the [Tablet Setting ] icon, or tap on the tablet icon ( ) in the system tray, usually located at the lower right corner of the screen. You may also adjust the pressure sensitivity of the digital pen by determining the scope of the tablet's working area, or (re-) program the hot-cells of your pen tablet by modifying device driver. 1. The Info Tab : The Info tab displays the version number of the driver and Tablet PC function. (1) Show Icon in System Tray You can choose it if you want to show the tablet icon ( ) in the system tray. (2) Support Tablet PC Feature You can select the Tablet PC function of pressure sensitive by tick the box of Support Tablet PC Feature. ● After the tablet driver is installed in Windows, the Tablet PC function setting will support pressure in MS Journal, OneNote (2003 - 007), etc. ● If the Tablet PC setting is disabled, most of the art software's pen pressure (Photoshop, Illustrator, Corel Painter) are still working, but the pen pressure will not be available in MS Journal, OneNote (2003 - 2007), etc. 2. The Button Tab](https://usermanual.wiki/KYE-SYSTEMS/GMZJ6/User-Guide-1244968-Page-9.png)


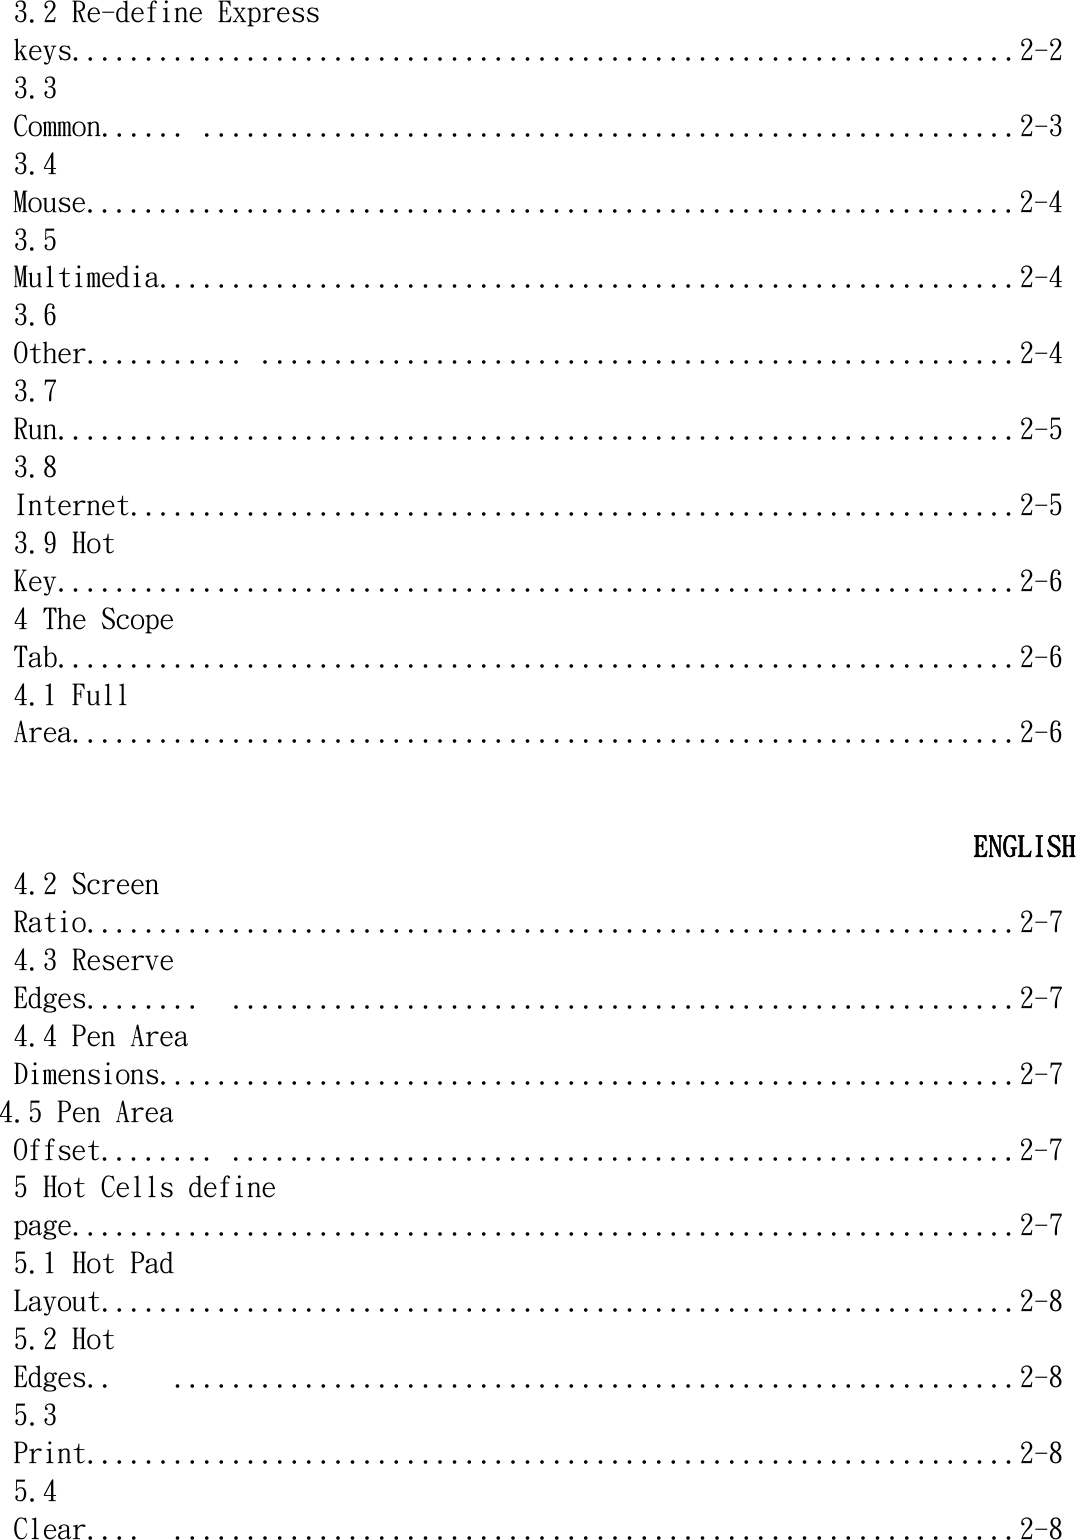
![Changing the pen battery Changing the wireless stylus pen tip A: Pull out the pen tip from the digital pen by using the Refill tweezers. B: Push the pen tip into the digital pen. ENGLISH 4-1 IV. Question & Answer Question 1: How can I get the latest update or uninstall the software? Answer: You can download the new driver from our website. 1. Uninstall your old driver: Click [Start] □ [All Programs] □ [TABLET] □ [Uninstall]. 2. Download the latest version of driver in the download section and save it into your hard disk.](https://usermanual.wiki/KYE-SYSTEMS/GMZJ6/User-Guide-1244968-Page-21.png)
![3. Unzip the file in a folder on your hard disk (with Windows built-in unzip utility or a program like Winzip for instance). 4. Double-click the Setup.exe in the folder where you unzipped the file. Question 2: The tablet cannot work. What can I do? Answer: Check if the following is okay. 1. Remove the tablet's USB plug from the computer. 2. Uninstall the Tablet driver from the system. 3. Re-connect the Tablet's USB to the computer. 3.1 Check whether the tablet's LED is blinking or not? If the LED is unlit, that means your tablet is at fault. 3.2 Test your wireless stylus pen in the tablet working area, if it can work as a mouse, which means the hardware is OK. If it doesn't work, please change the battery with a new one. 3.3 After you changed a new battery for the pen, and it is still not working, that means the hardware is at fault. 4. You can download for free the latest version of driver directly from our website www.geniusnet.com. 5. Setup the new version of driver; and you need to restart your computer. 6. After you restart your computer, on bottom right of the screen, you can find the tablet icon ( ). 6.1 If you can't find the tablet icon ( ) on the bottom right of the screen, it means the driver failed in startup, and there could be an incompatible issue. 6.2 Check [My Computer] □ [Properties] □ [Hardware] □ [Device Manager], if you see an exclamation mark, it means the installed driver of the tablet is incompatible with the Windows system. 7. By clicking the tablet icon ( ) on the bottom right of the screen, you can test the pressure sensitivity to see whether the pen pressure function works or not. (Check the Pen tablet configuration section for more details). ☆ If you do not have pen pressure, it means the pen might be faulty. Question 3︰The LED of tablet is blinking continuously? Answer: It means that the USB port of your PC has a bad connection or power is not stable. Please re-plug in your USB/dongle again. If still not working, please change to another USB port. Question 4︰Why the RED LED of Wireless Tablet LED is blinking? Answer: It is a low battery reminder, please change the new battery in time.](https://usermanual.wiki/KYE-SYSTEMS/GMZJ6/User-Guide-1244968-Page-22.png)