Karcher 15 C 1 008 037 0 Quick Start Guide OBJ_DOKU 101493 001
2014-07-06
: Karcher Karcher-15-C-1-008-037-0-Quick-Start-Guide karcher-15-c-1-008-037-0-quick-start-guide karcher pdf
Open the PDF directly: View PDF ![]() .
.
Page Count: 3
QUICKSTART
5.964-051.0 09/12
Warning
These are only brief instructions! Please read and comply with these instructions prior to using or servicing your
appliance.
The non-compliance of the operating and safety instructions may lead to damages of the appliance and to dangers
for the operator and other persons.
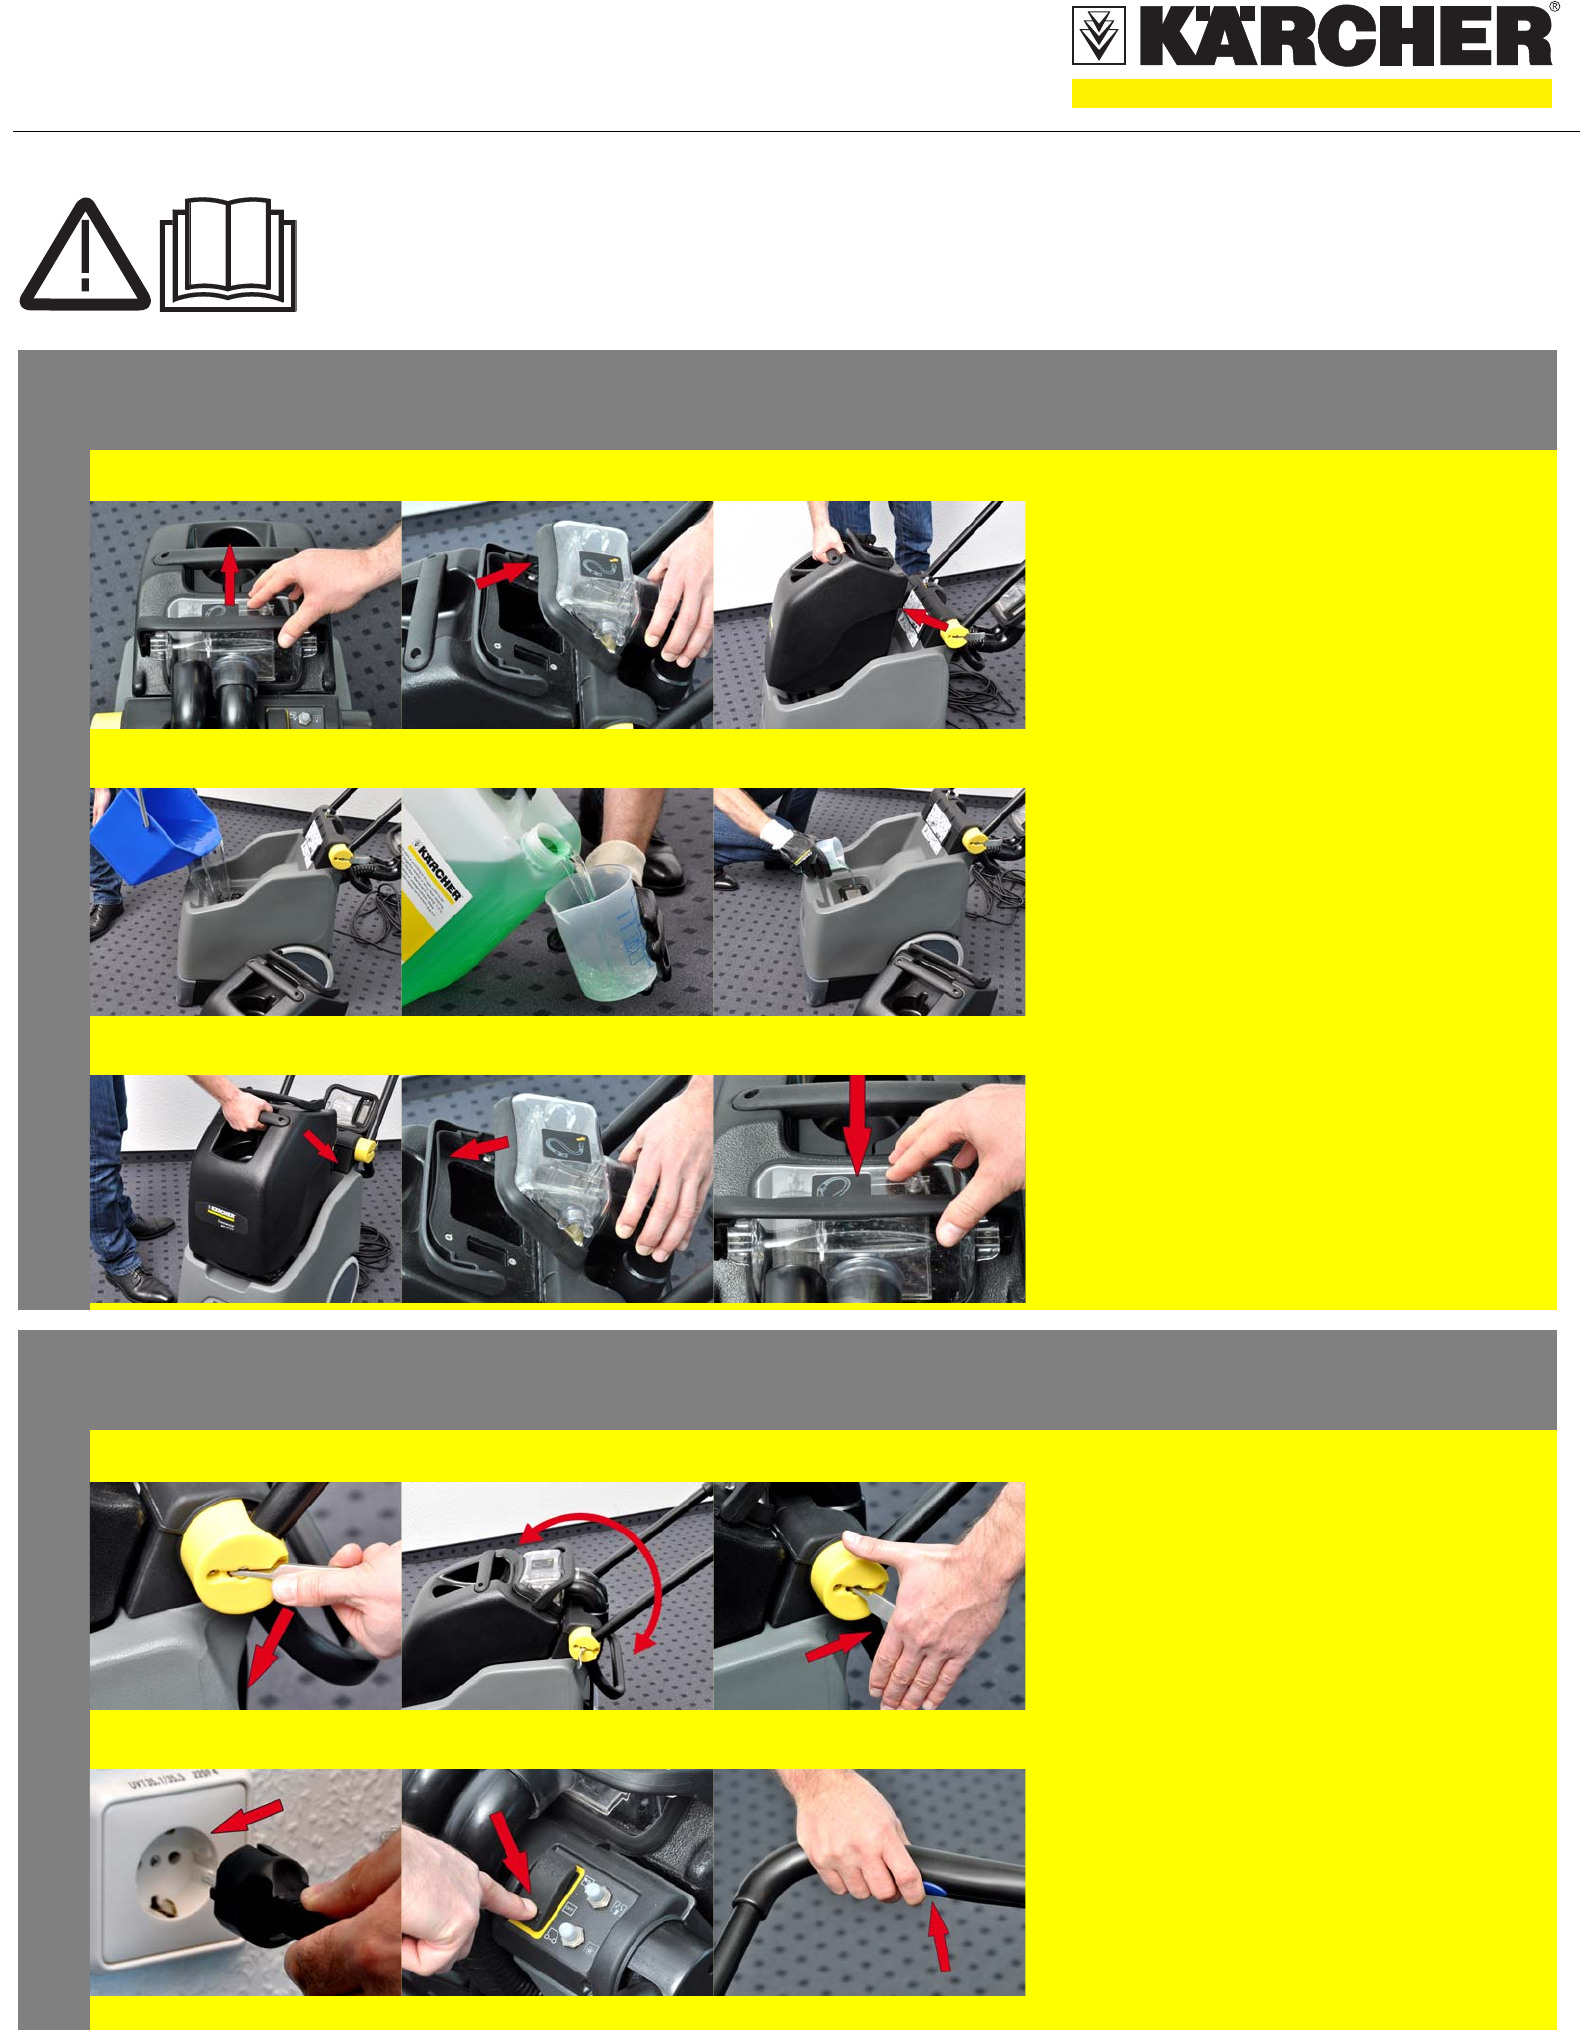
Start up
1ABCA Swivel the dome lock to the rear.
B Tilt the dome backwards.
C Lift out the waste water reservoir and
put it aside.
2ABCA Fill the fresh water tank with clear water.
For improved cleaning
hot water (max. 60°C) can be filled in
the tank.
B Dosing of detergent.
C Pour in detergent.
3ABCA Insert the waste water container back onto
the appliance.
B Replace the lid of the waste water reservoir
and align it.
Note
C Dome lock.
Ensure that the dome is seated correctly
and the flap is tightly closed! The opening
mustn't leak!
Operation
1ABCA Swivel the push handle lock outwards.
B Adjust the desired push handle height.
C Reclose the lock.
2ABCA Plug in the main plug.
B Set the appliance switch to normal operation
- start the suction turbine and the brush drive.
C Use the cleaning solution key on the handle
to spray on the cleaning solution.
BRC 30/15 C
QUICKSTART
5.964-051.0 09/12
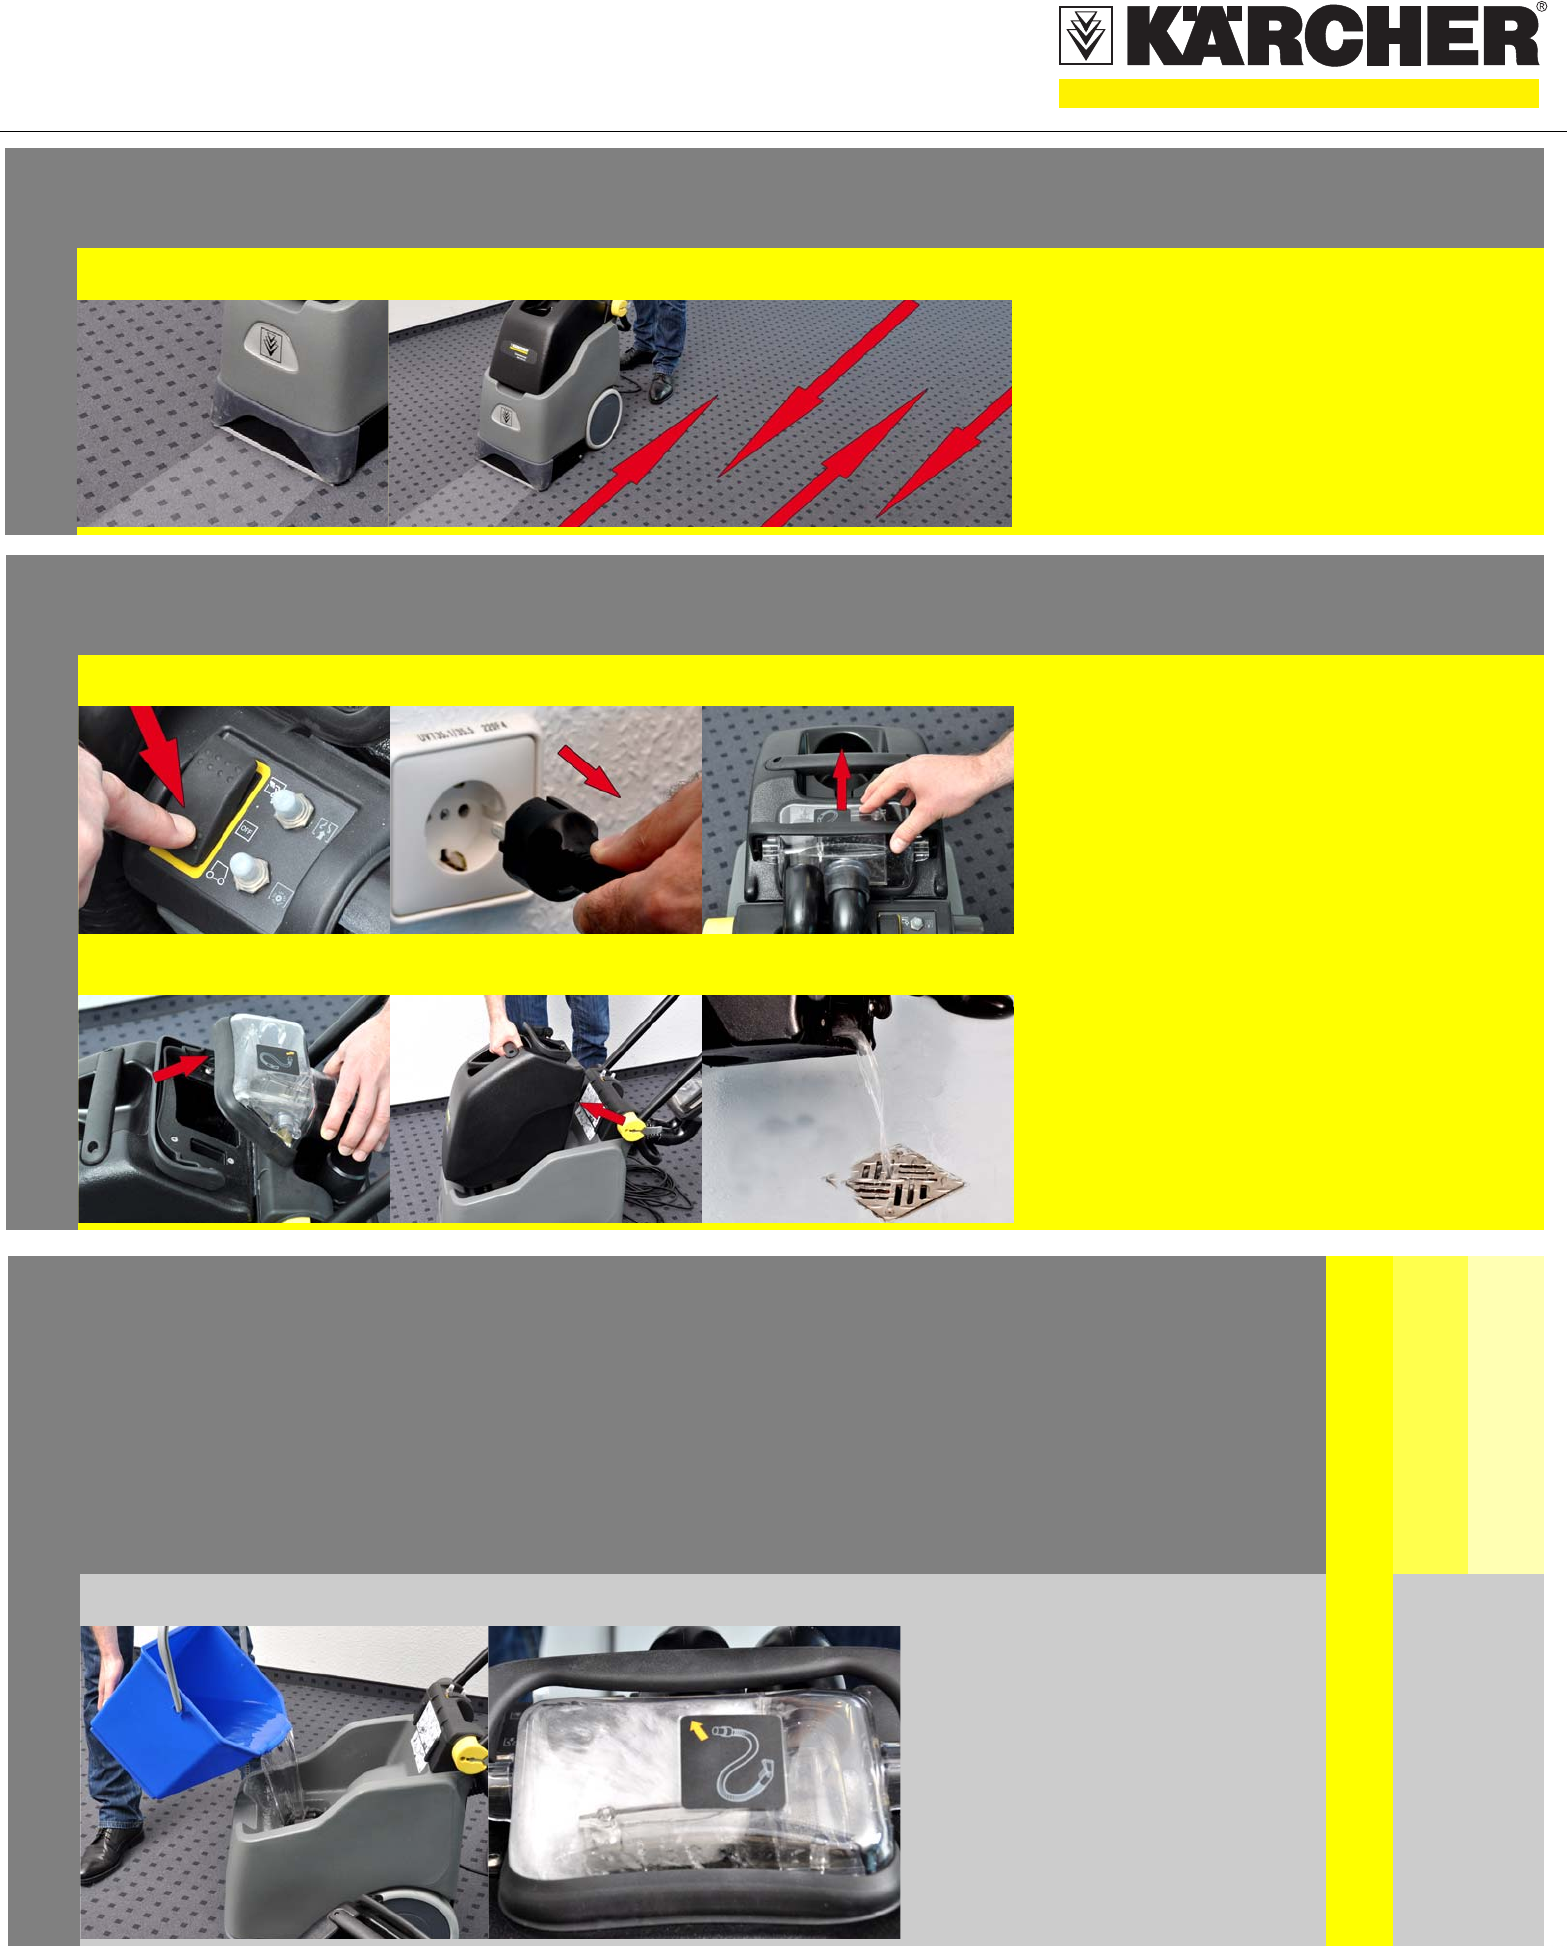
3ACleaning
A Run across the surface to be cleaned in
overlapping paths. Pull the appliance
backwards during this procedure
(do not push).
Finish operation
1A
GB
B
E
CA Set the appliance switch to "OFF".
B Disconnect the mains plug from the mains
power.
C Swivel the domelock to the front.
D Tilt the dome backwards.
E Take the wastewater reservoir and empty it.
Maintenance and care
daily
monthly
Kärcher Customer Service
1AA Thoroughly rinse the fresh water
tank and the spray nozzle with
approx. 2 litres of fresh water.
Operation
QUICKSTART
5.964-051.0 09/12
2A B A Remove drain hose.
B Let the remaining water drain out of
the appliance.
3AA Clean the sieves below the fresh
water tank and inside the dome.
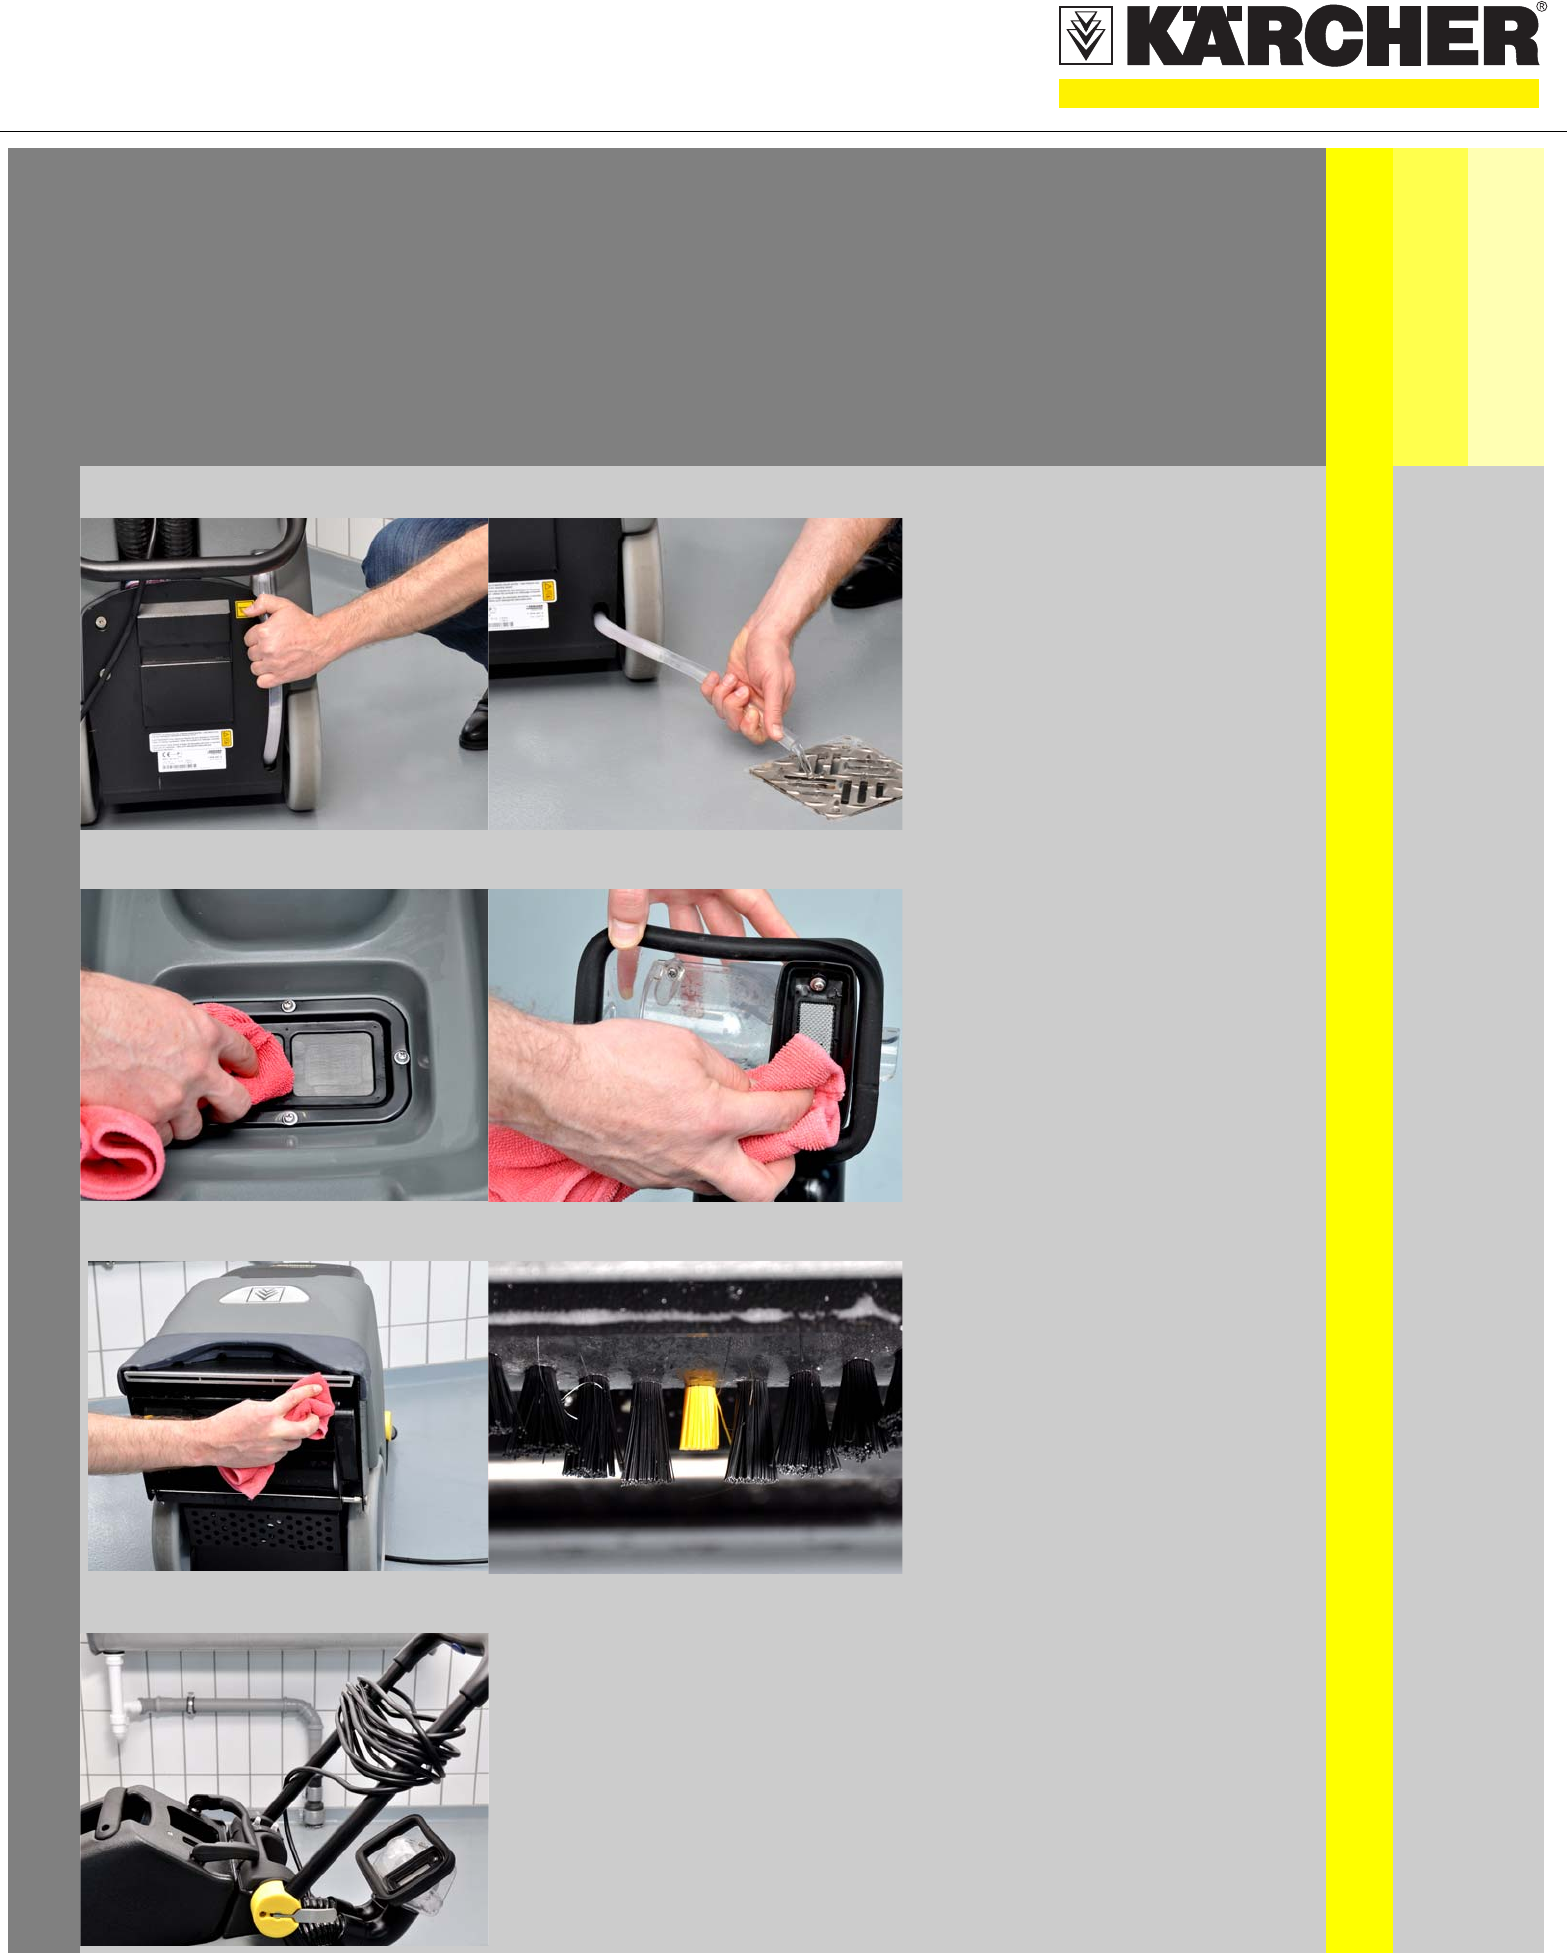
4A B A Tilt the appliance backwards and
clean the cleaning head and the
vacuum bar.
B Clean brushes and check for wear
and tear.
5AA Parking position
Note
Leave the dome open when in parking
position so that the moisture can dry.
Maintenance and care
daily
monthly
Kärcher Customer Service
