Kawai Ca 111 Users Manual CA111_cover_EN
CA 111 to the manual e614fe41-8f61-4122-a6ea-bd4b65386aa6
2015-02-09
: Kawai Kawai-Ca-111-Users-Manual-567786 kawai-ca-111-users-manual-567786 kawai pdf
Open the PDF directly: View PDF ![]() .
.
Page Count: 50
1
PART NAMES
& FUNCTIONS
2
BASIC
OPERATION
3
INTERNAL
SOUNDS
4
METRONOME
5
RECORDER
6
DEMO MODE
7
MENU
FUNCTIONS
8
USB USAGE
9
APPENDIX
Owner’s Manual
CA111_cover_EN.indd 1 2008/04/12 0:57:19
CA111_cover_EN.indd 2 2008/04/12 0:57:34

Page
3
1
PART NAMES
& FUNCTIONS
2
BASIC
OPERATION
3
INTERNAL
SOUNDS
4
METRONOME
5
RECORDER
6
DEMO MODE
7
MENU
FUNCTIONS
8
USB USAGE
9
APPENDIX
Thank you for purchasing a KAWAI CA111 digital piano!
The CA111 digital piano is a revolutionary new instrument that combines the latest digital technology with traditional piano
craftsmanship inherited from KAWAI’s many years of experience in building fi ne acoustic pianos. Its AWA Grand PRO
II wooden key action provides the touch response and full dynamic range required for a superb performance of piano,
harpsichord, organ, and other instruments, while the authentic piano tone has been created through the stereo-sampling
of concert grand pianos, and is reproduced using KAWAI’s unique Harmonic Imaging™ sound technology.
The CA111 is also equipped with a revolutionary Soundboard Speaker System, channelling sound energy onto a spruce
soundboard to faithfully reproduce the unmistakable warmth and ambience of an acoustic piano, for an even more realistic
playing experience. Additional reverb and digital effects processors provide a deeper, richer sound, while industry standard
MIDI (Musical Instrument Digital Interface) jacks and a USB interface are also available, allowing the playback and connection
of other electronic instruments and personal computers.
This owner’s manual contains valuable information that will help you to make full use of the CA111’s capabilities. Please
read all sections carefully and keep this manual handy for future reference.
TABLE OF CONTENTS
IMPORTANT SAFETY INSTRUCTIONS .............. 4
1. PART NAMES & FUNCTIONS .......................... 8
CONTROL BOX .............................................................8
2. BASIC OPERATION ........................................ 10
PERFORMING WITH HEADPHONES .........................11
3. INTERNAL SOUNDS ...................................... 12
1) SINGLE SOUND MODE ...................................................12
2) DUAL MODE ....................................................................13
3) REVERB ...........................................................................14
4) EQ ....................................................................................15
4. METRONOME ................................................. 16
ACTIVATING THE METRONOME ................................16
ADJUSTING THE METRONOME TEMPO ...................16
CHANGING THE METRONOME TIME SIGNATURE ..17
ADJUSTING THE METRONOME VOLUME ................17
DEACTIVATING THE METRONOME ...........................17
5. RECORDER .................................................... 18
1) RECORDING A SONG .....................................................18
2) PLAYING BACK A SONG .................................................20
3) DELETING A SONG.........................................................21
6. DEMO MODE .................................................. 22
LIST OF DEMONSTRATION PIECES .........................22
LISTENING TO DEMONSTRATION PIECES ..............23
7. MENU FUNCTIONS ........................................ 24
MENU FUNCTION LIST ...............................................24
0) DUAL BALANCE ..............................................................25
1) VOICING ...........................................................................26
2) DAMPER RESONANCE ..................................................27
3) STRING RESONANCE ....................................................28
4) KEY OFF EFFECT ...........................................................30
5) TOUCH .............................................................................31
6) TEMPERAMENT ..............................................................32
7) KEY OF TEMPERAMENT ................................................34
8) TUNING ............................................................................35
9) STRETCH TUNING ..........................................................36
10) TRANSPOSE..................................................................37
11) MIDI CHANNEL ..............................................................38
MIDI OVERVIEW ..........................................................38
12) LOCAL CONTROL .........................................................41
13) METRONOME VOLUME ................................................42
14) USER MEMORY.............................................................43
15) FACTORY RESET ..........................................................44
8. USB USAGE ................................................... 45
ABOUT THE USB CONNECTOR.................................45
ABOUT THE USB DRIVER ..........................................45
NOTES ON USB USAGE .............................................46
9. APPENDIX ...................................................... 47
SPECIFICATIONS ........................................................47
MIDI IMPLEMENTATION CHART ................................48
CA111_EN.indd 3 2008/04/12 0:58:18
Page
4
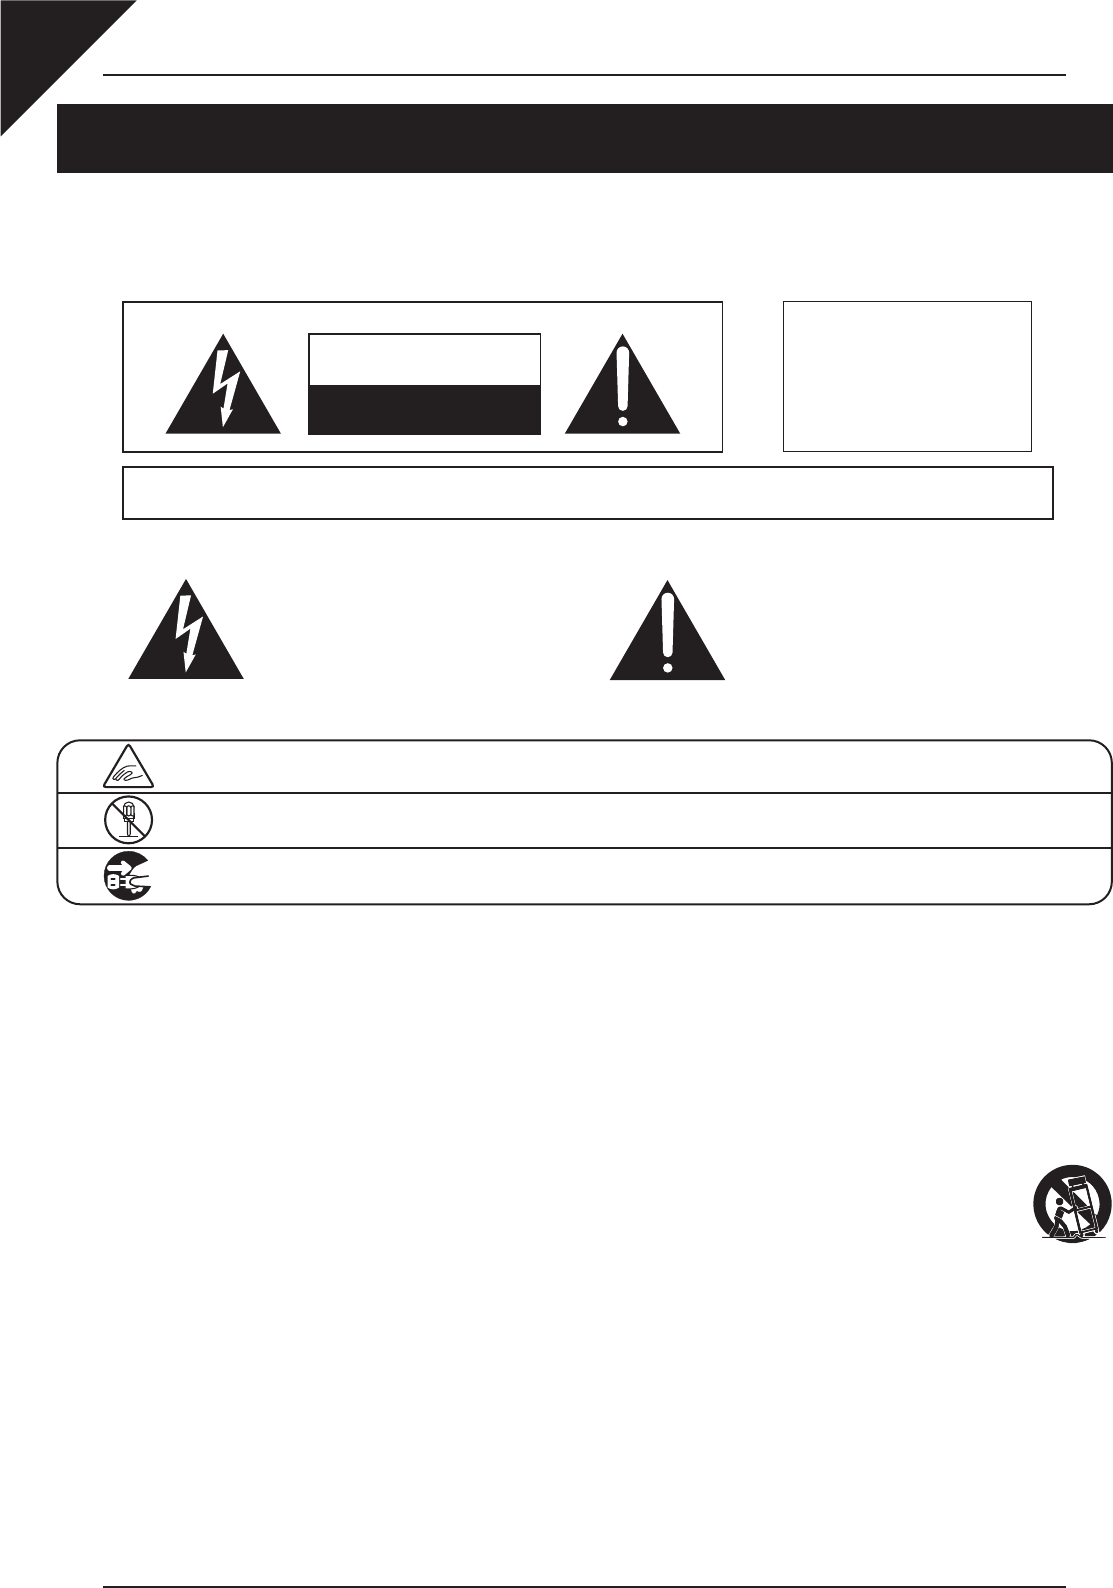
IMPORTANT SAFETY INSTRUCTIONS
denotes that care should be taken.
The example instructs the user to take care not to allow fingers to be trapped.
denotes a prohibited operation.
The example instructs that disassembly of the product is prohibited.
denotes an operation that should be carried out.
The example instructs the user to remove the power cord plug from the AC outlet.
Examples of Picture Symbols
Read all the instructions before using the product.
CAUTION
RISK OF ELECTRIC SHOCK
DO NOT OPEN
AVIS : RISQUE DE CHOC ELECTRIQUE - NE PAS OUVRIR.
TO REDUCE THE RISK OF ELECTRIC SHOCK, DO NOT REMOVE COVER (OR BACK).
NO USER-SERVICEABLE PARTS INSIDE. REFER SERVICING TO QUALIFIED SERVICE PERSONNEL.
The lighting flash with arrowhead symbol, within an
equilateral triangle, is intended to alert the user to
the presence of uninsulated “dangerous voltage”
within the product’s enclosure that may be of
sufficient magnitude to constitute a risk of electric
shock to persons.
The exclamation point within an equilateral triangle
is intended to alert the user to the presence of
important operating and maintenance (servicing)
instructions in the literature accompanying the
product.
WARNING
TO REDUCE THE RISK OF
FIRE OR ELECTRIC
SHOCK, DO NOT EXPOSE
THIS PRODUCT TO RAIN
OR MOISTURE.
INSTRUCTIONS PERTAINING TO A RISK OF FIRE, ELECTRIC SHOCK, OR INJURY TO PERSONS
SAVE THESE INSTRUCTIONS
1) Read these instructions.
2) Keep these instructions.
3) Heed all warnings.
4) Follow all instructions.
5) Do not use this apparatus near water.
6) Clean only with dry cloth.
7) Do not block any ventilation openings. Install in
accordance with the manufacturer’s
instructions.
8) Do not install near any heat sources such as
radiators, heat registers, stoves, or other
apparatus (including amplifiers) that produce
heat.
9) Do not defeat the safety purpose of the
polarized or grounding-type plug. A polarized
plug has two blades with one wider than the
other. A grounding type plug has two blades
and a third grounding prong. The wide blade or
the third prongs are provided for your safety.
If the provided plug does not fit into your outlet,
consult an electrician for replacement of the
obsolete outlet.
10) Protect the power cord from being walked on
or pinched particularly at plugs, convenience
receptacles, and the point where they exit from
the apparatus.
11) Only use attachments/accessories specified by
the manufacturer.
12) Use only with the cart, stand, tripod, bracket, or
table specified by the manufacturer, or
sold with the apparatus. When a cart is used,
use caution when moving the cart/apparatus
combination to avoid injury from tip-over.
13) Unplug this apparatus during lightning storms
or when unused for long periods of time.
14) Refer all servicing to qualified service
personnel. Servicing is required when the
apparatus has been damaged in any way,
such as power-supply cord or plug is
damaged, liquid has been spilled or objects
have fallen into the apparatus, the apparatus
has been exposed to rain or moisture, does not
operate normally, or has been dropped.
CA111_EN.indd 4 2008/04/12 0:58:24
Page
5
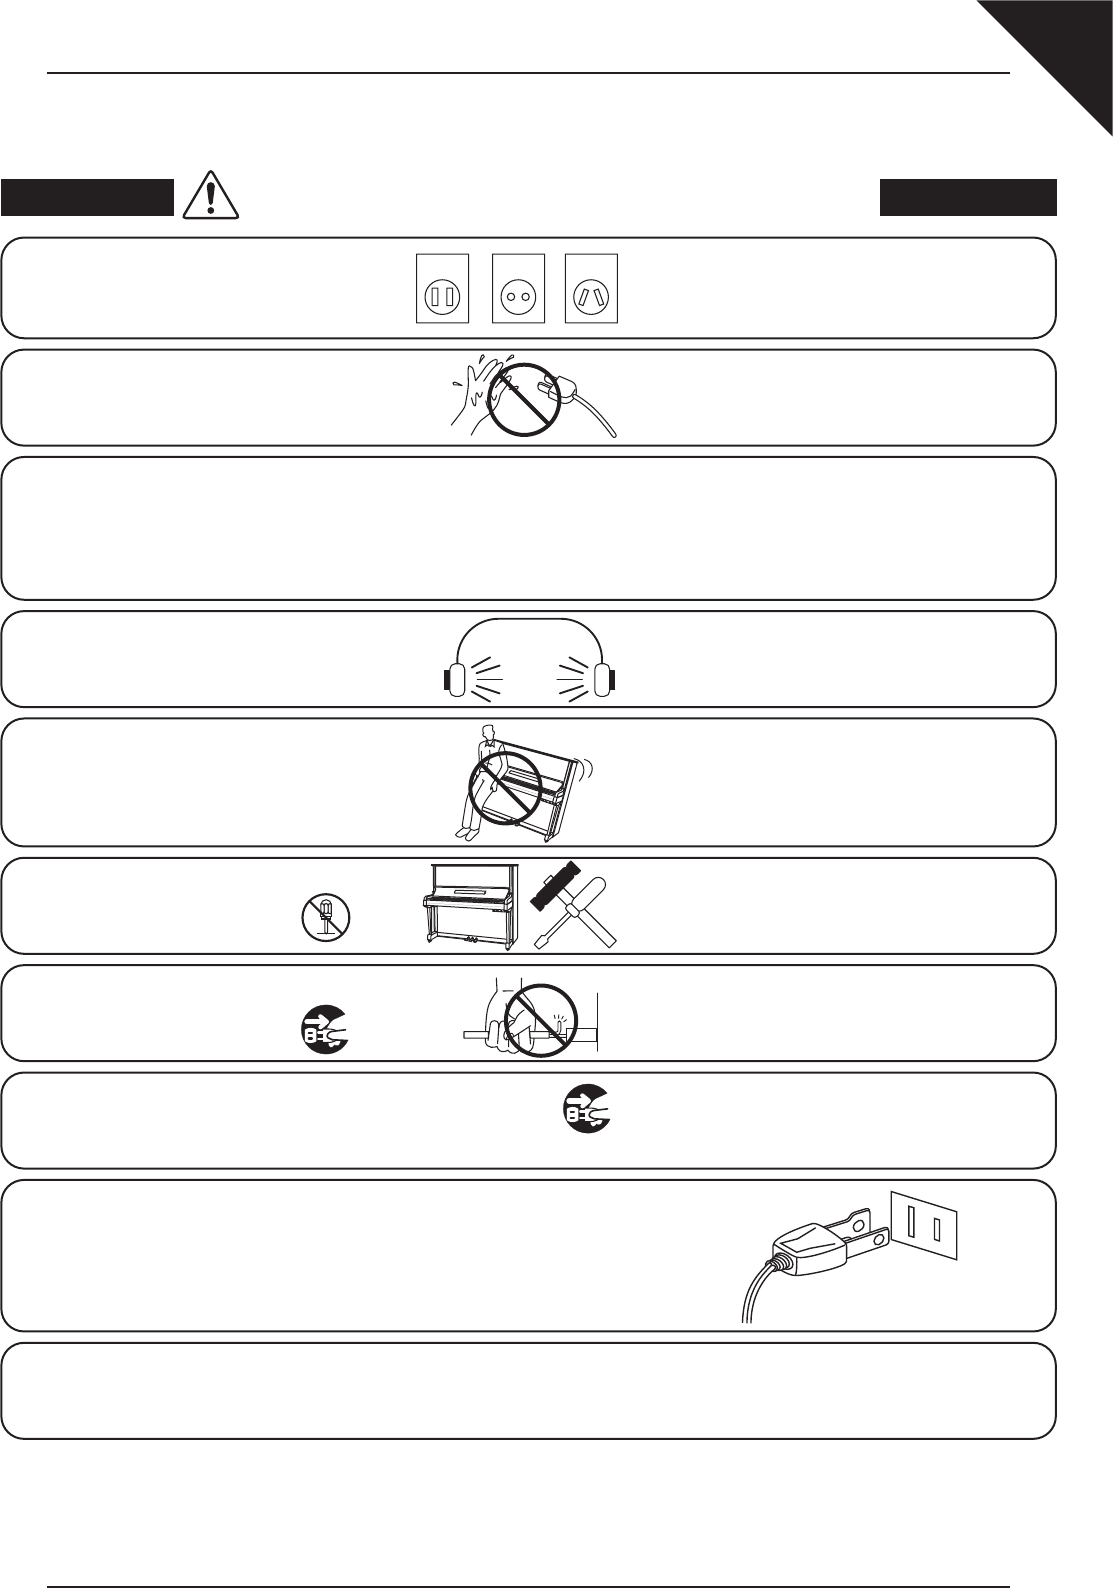
WARNING
The product should be connected to
an AC outlet of the specified voltage.
● If you are going to use an AC power cord,
make sure that it has the correct plug shape
and conforms to the specified power voltage.
● Failure to do so may result in fire.
120V 240V230V
Indicates a potential hazard that could result in death
or serious injury if the product is handled incorrectly.
WARNING - When using electric products, basic precautions should always be followed,
including the following.
The product is not completely disconnected from the
power supply even when the power switch is turned
off. If the product will not be used for a long time,
unplug the AC power cord from the AC outlet.
● Failure to do so may cause fire in case of
lightning.
● Failure to do so may over-heat the product,
resulting in fire.
This product may be equipped with a polarised line plug (one blade
wider than the other). This is a safety feature.
If you are unable to insert the plug into the outlet, contact an
electrician to replace your obsolete outlet.
Do not defeat the safety purpose of the plug.
When disconnecting the AC power cord’s
plug, always hold the plug
and pull it to remove it.
● Pulling the AC power cord itself may damage
the cord, causing a fire, electric shock or
short-circuit.
Doing so may cause the product to fall over,
resulting in injury.
Do not lean against the keyboard.
When using the headphones, do not
listen for long periods of
time at high volume levels.
Doing so may result in hearing problems.
It is a good practice to place the instrument near the AC outlet and to place the power cord plug in a
position that allows the plug to be disconnected easily in the event of an emergency. Electricity is always
charging while the plug is in the AC outlet even when the power switch is in the ‘OFF’ position.
The chair must be used properly (it must be
used only when playing the product).
● Do not play with it or stand on it.
● Only one person is allowed to sit on it.
● Do not sit on it when opening the lid.
● Re-tighten the bolts occasionally.
Doing so may cause the chair to fall over or your
fingers to be trapped, resulting in injury.
Do not insert or disconnect the power
cord plug with wet hands. Doing so may cause electric shock.
Do not disassemble, repair or modify
the product. Doing so may result in product breakdown, electric
shock or short-circuit.
CA111_EN.indd 5 2008/04/12 0:58:25
Page
6
● Doing so may cause the product to become
deformed or fall over, resulting in breakdown
or injury.
Do not stand on the product or exert
excessive force.
● Doing so may result in discoloration or deformation
of the product.
● When cleaning the product, put a soft cloth in
lukewarm water, squeeze it well, then wipe the
product.
Do not wipe the product with benzene
or thinner.
Failure to do so may damage them, resulting in
fire, electric shock or short-circuit.
When connecting the AC power cord
and other cords, take care
not to entangle them.
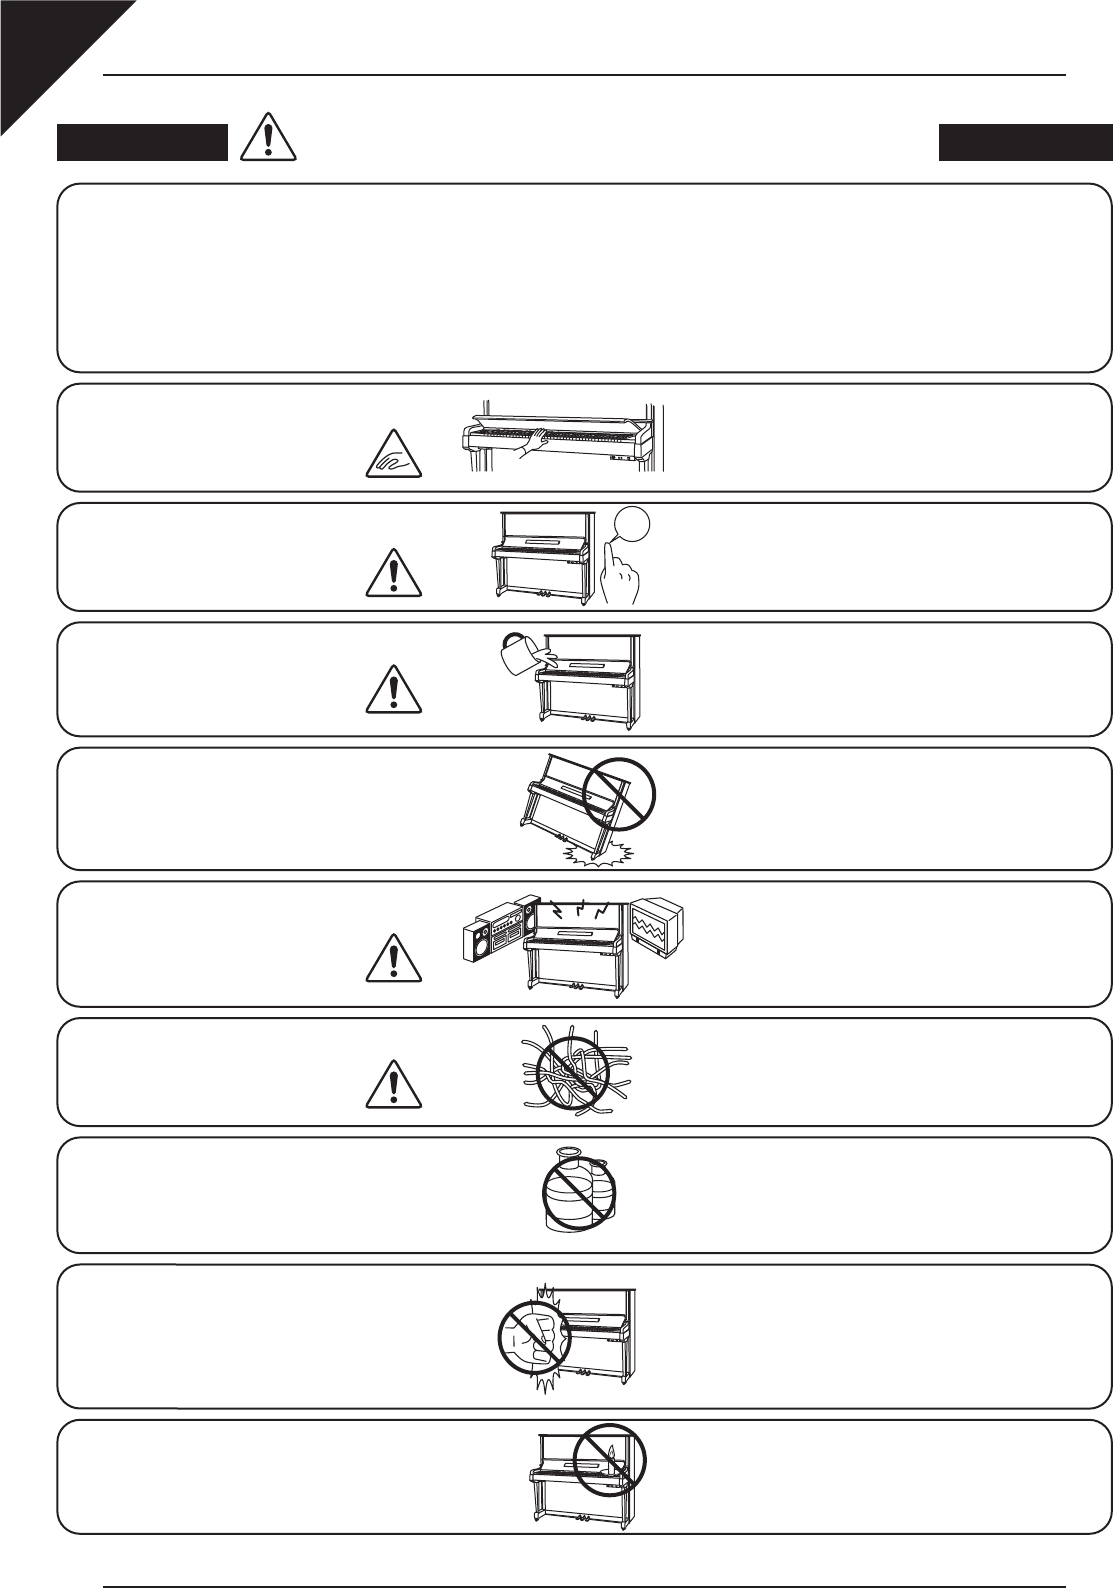
CAUTION Indicates a potential hazard that could result in injury
or damage to the product or other property if the
product is handled incorrectly.
Using the product in such areas may result in
product breakdown.
Use the product only in moderate climates (not
in tropical climates).
Do not use the product in the following areas.
● Areas, such as those near windows, where the product is
exposed to direct sunlight
● Extremely hot areas, such as near a heater
● Extremely cold areas, such as outside
● Extremely humid areas
● Areas where a large amount of sand or dust is present
● Areas where the product is exposed to excessive
vibrations
Entry of water, needles or hair pins may result
in breakdown or short-circuit.
The product should not be exposed to dripping or
splashing. No objects filled with liquids, such as
vases, should be placed on the product.
Take care not to allow any foreign
matter to enter the product.
● Doing so may cause the product to generate
noise.
● If the product generates noise, move the
product sufficiently away from the electrical
appliance or connect it to another AC outlet.
Do not place the product near electrical
appliances such as TVs and
radios.
Closing it roughly may trap your fingers,
resulting in injury.
When closing the fallboard, close
it gently.
Failure to do so may cause breakdown of this
product and other devices.
Before connecting cords, make sure
that the power to this product
and other devices is turned
OFF.
OFF
Please lift up the product when moving it.
Please note that the product is heavy and must
be carried by more than two persons.
Dropping the product may result in breakdown.
Do not drag the product on the floor.
Take care not to drop the product.
Doing so may cause the illumination to fall over,
resulting in fire.
Do not place naked flame, such as lighted
candles on the product.
CA111_EN.indd 6 2008/04/12 0:58:26
Page
7
Notes on Repair
Should an abnormality occur in the product, immediately turn the power OFF, disconnect the
power cord plug, and then contact the shop from which the product was purchased.
CAUTION:
To prevent electric shock, match the wide blade of the plug with the wide socket slot and insert fully.
ATTENTION:
Pour éviter les chocs électriques, introduire la lame la plus large de la fiche dans la borne
correspondante de la prise et pousser jusqu’au fond.
Instruction for AC power cord (U.K.)
Do not plug either terminal of the power cord to the ground of the AC outlet on the wall.
FCC Information
This equipment has been tested and found to comply with the limits for a Class B digital device,
pursuant to Part 15 of the FCC Rules. These limits are designed to provide reasonable
protection against harmful interference in a residential installation. This equipment generates,
uses and can radiate radio frequency energy and, if not installed and used in accordance with
the instructions, may cause harmful interference to radio communications.
If this equipment does cause harmful interference to radio or television reception, which can be
determined by turning the equipment off and on, the user is encouraged to try to correct the
interference by one or more of the following measures:
• Reorient or relocate the receiving antenna.
• Increase the separation between the equipment and receiver.
• Connect the equipment into an outlet on a different electrical circuit from the receiver.
• Consult the dealer or an experienced radio/TV technician for help.
Canadian Radio Interference Regulations
This instrument complies with the limits for a class B digital apparatus, pursuant to the Radio
Interference Regulations, C.R.C., c. 1374.
The product should be serviced by qualified service personnel when:
● The power supply cord or the plug has been damaged.
● Objects have fallen, or liquid has been spilled into the product.
● The product has been exposed to rain.
● The product does not appear to operate normally or exhibits a marked change in
performance.
● The product has been dropped, or the enclosure damaged.
The product should be located so that its location or position does not interfere with its proper
ventilation. Ensure a minimum distance of 5cm around the product for sufficient ventilation.
Failure to do so may over-heat the product,
resulting in fire.
Ensure that the ventilation is not
impeded by covering the ventilation
openings with items, such as newspaper,
table-cloths, curtains, etc.
An information on Disposal for users
If your product is marked with this recycling symbol it means that, at the end of its
life, you must dispose of it separately by taking it to an appropriate collection point.
You should not mix it with general household waste. Disposing of this product correctly
will prevent potential negative effects on the environment and human health which
could otherwise arise due to inappropriate waste handling.
For further details, please contact your local authority.
(European Union only)
CA111_EN.indd 7 2008/04/12 0:58:28
Page
8
1
PART NAMES
& FUNCTIONS
1.
PART NAMES & FUNCTIONS
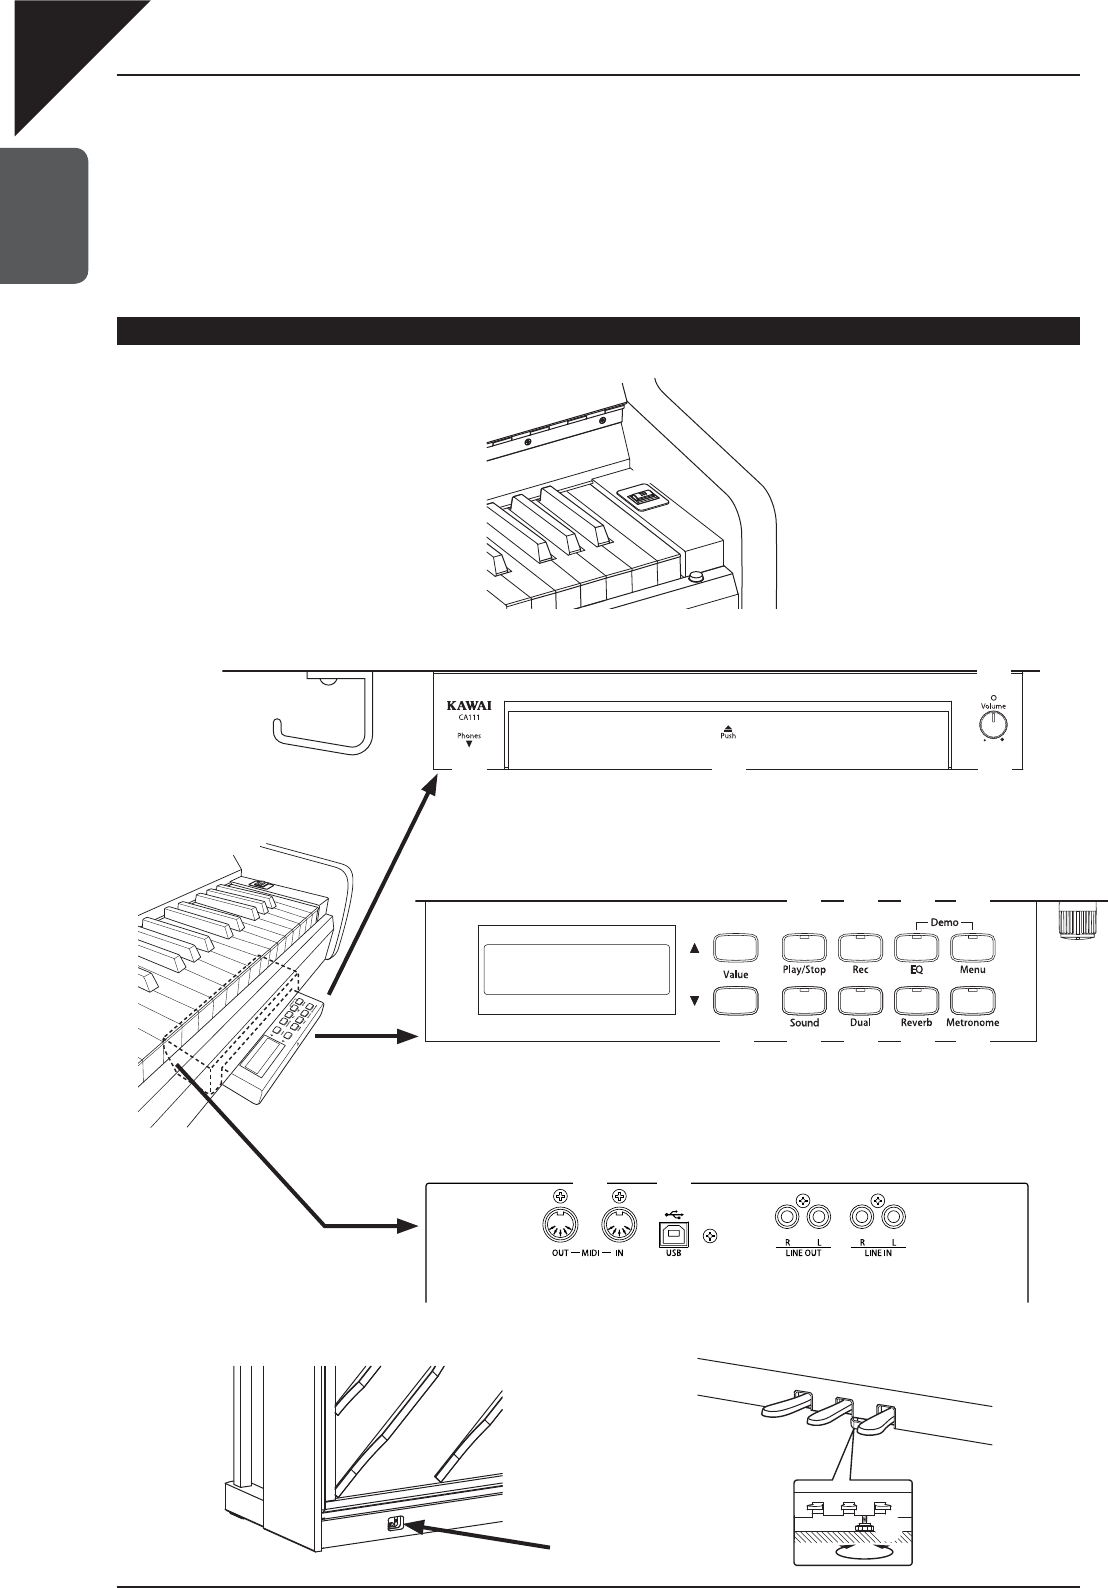
This section explains the location and function of the control panel and connectors.
CONTROL BOX
z Control panel visible
z Front view: Control box
Ú Please do not place any objects on the control panel.
z Control Panel
z Rear view: MIDI, USB, LINE IN/OUT connectors
f
e d b
c
g
h i j k l
m n p
s t
r
z Pedalsz Rear (AC IN connector)
u
q
z Power Switch
o
a
xvw
yz Pedal Adjuster
CA111_EN.indd 8 2008/04/12 0:58:29

Page
9
1
PART NAMES
& FUNCTIONS
a Power Switch
Press the power switch to turn the power on / off.
Turn the power off after use.
b Volume
Used to adjust the volume. Turn the knob clockwise
to increase the volume.
c Power Indicator
Used to indicate that the control panel is turned
on.
d Control Panel
Used to select various functions. Press the area
marked ‘Push’ to reveal the control panel.
e Phones
Used to connect up to two pairs of headphones
simultaneously.
f Headphone Hook
Used to conveniently hang the headphones when
not in use.
g LCD Display
Used to display information such as the currently
selected sound type and various other functions
and values.
* Please remove the protective plastic fi lm from the
display before use.
h Value
Used to change the value for various functions.
i Sound
Used to select the sound.
j Dual
Used to layer two sounds together. (See page 13)
k Reverb
Used to add reverberation to the sound, simulating
the acoustic environment of a recital room, live stage
or concert hall. (See page 14)
l Metronome
Used to activate/deactivate the metronome.
m Play/Stop
Used to start/stop playback of recorded songs.
n Rec
Used to record songs. (See page 18)
o EQ
Used to select built-in EQ.
p
Menu
Used to access menu functions that control
advanced features such as tuning. (See page 24)
o and p Demo
Used to start / stop playback of demonstration
pieces. (See page 23)
q LINE IN Jacks
Used to connect the stereo output from other
electronic instruments or audio equipment such as
a CD player.
r LINE OUT Jacks
Used to connect audio signal to an external amplifi er,
speakers, or recording device such as a computer.
s MIDI IN/OUT Connectors
Used to connect the CA111 piano to external MIDI
devices such as other electronic instruments or
computers.
t USB Connector
Used to connect the CA111 piano with a personal
computer to exchange MIDI data.
u AC IN Connector
Used to connect the AC cord.
v Sustain Pedal
Sustains the sound after hands are lifted from the
keyboard - greatly enriching the piano sound, while
also assisting smooth ‘legato’ passages. The sustain
pedal is capable of responding to half pedaling.
w Sostenuto Pedal
Depressing this pedal after playing the keyborad
and before releasing the keys sustains the sound
of only the keys just played.
x Soft Pedal
Depressing this pedal softens the sound and
reduces its volume. When the rotary speaker effect
is active, the soft pedal is used to alternate the
speed of the rotary simulation between ‘Slow’ and
‘Fast’ effect modes.
y Pedal Adjuster Bolt
Used to provide greater support and stability to the
pedals.
* Please ensure that the pedal adjuster bolt fi rmly
touches the fl oor, supporting the pedal board and
preventing damage.
When moving the CA111, loosen the adjustor bold
and readjust after moving has been completed.
CA111_EN.indd 9 2008/04/12 0:58:30
Page
10
2
BASIC
OPERATION
2. BASIC OPERATION
This section provides the basic procedures for turning the power on, and performing with headphones.
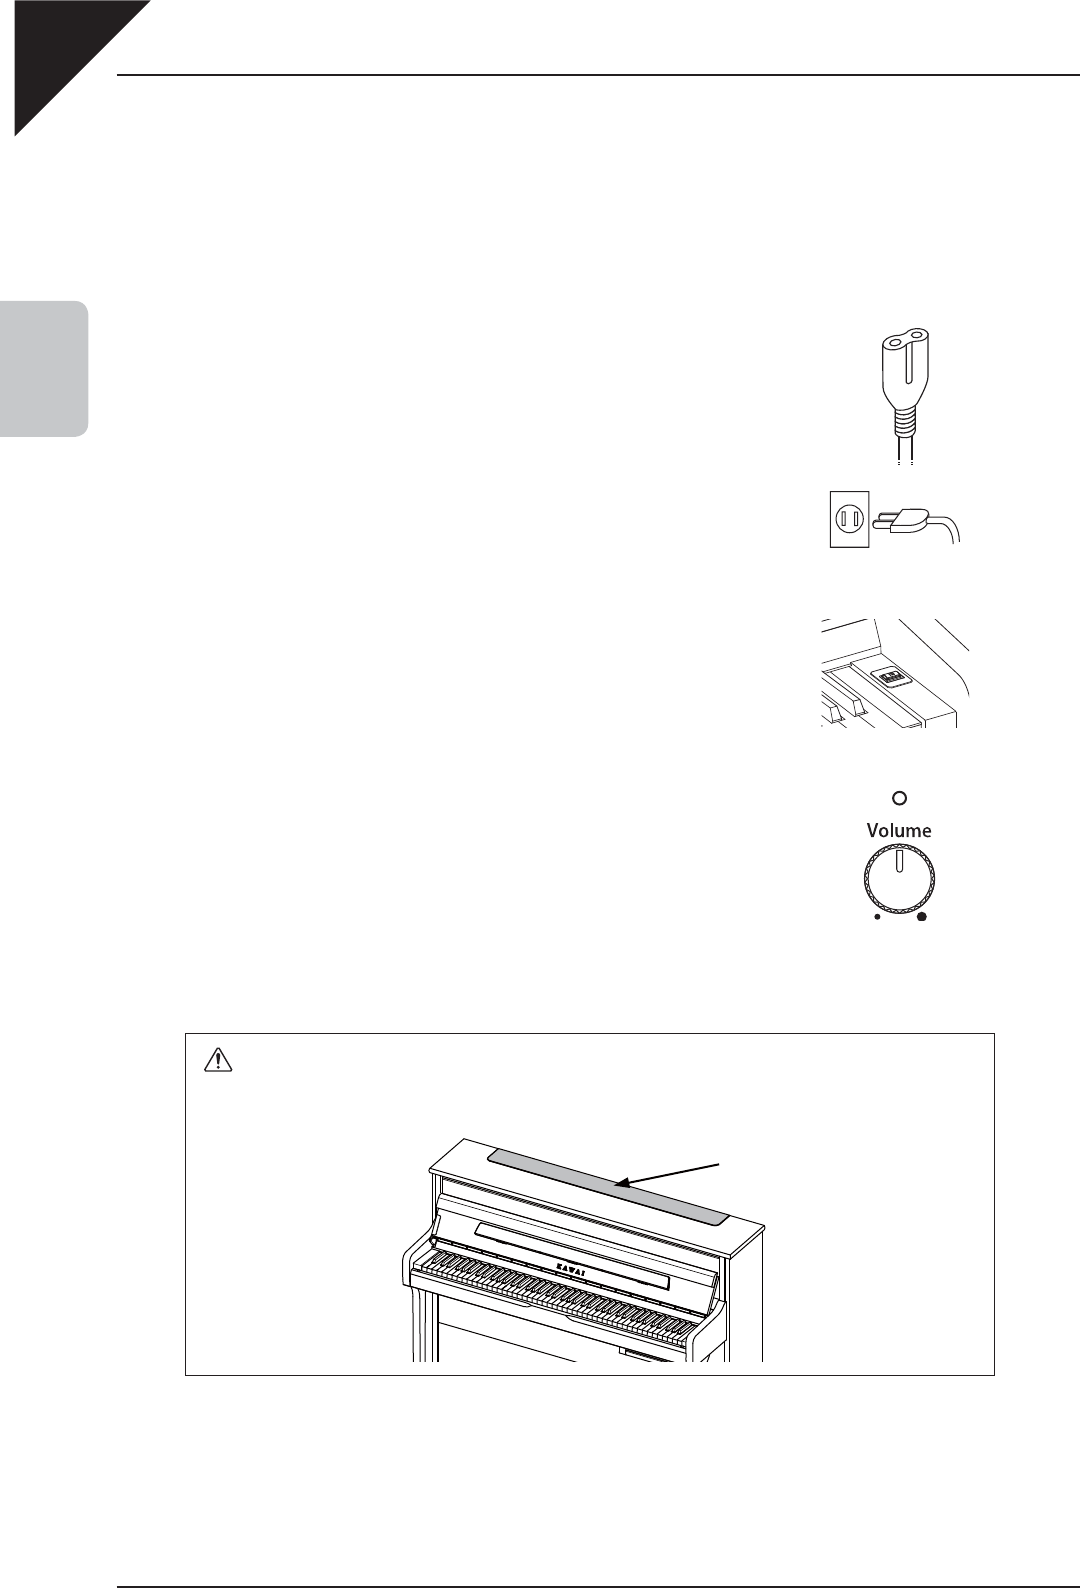
Step 1
Plug the AC cord into the AC IN connector located at the rear of the
instrument.
Step 2
Plug the CA111 power plug into the electric wall outlet.
Step 3
Push the Power switch located on the right of the cheek block.
The LED above the control panel Volume knob will light up to indicate that the
CA111 piano is turned on.
Step 4
Use the Volume knob to set the volume to a comfortable listening level.
The volume knob controls the volume level of the speakers and the headphones.
Setting the volume knob to the half-way position is a good starting point.
y The CA111 piano is equipped with top speakers on the left and right sides of the
unit, behind the top board. To avoid damage to these speakers or other parts of the
CA111, do not place liquids such as water or coffee on or near these speakers.
Caution
Top speakers
CA111_EN.indd 10 2008/04/12 0:58:31

Page
11
2
BASIC
OPERATION
PERFORMING WITH HEADPHONES
Step 5
Connect a pair of headphones to one of the Phones jacks located on the underside of the control box.
Two pairs of headphones can be connected simultaneously, allowing two people to listen to the CA111 piano at
the same time.
Play the piano.
The sound of a Concert Grand piano will be played.
CA111_EN.indd 11 2008/04/12 0:58:34
Page
12
3
INTERNAL
SOUNDS
3. INTERNAL SOUNDS
The CA111 piano features 22 realistic sounds suitable for various musical styles. Sounds can be played individually,
or layered together, with additional reverberation effects simulating the acoustic environment of a recital room, live
stage or concert hall.
Sound Name Description
Concert Grand The sound of a KAWAI concert grand piano.
Concert Grand 2
Studio Grand The sound of a brightly strung grand piano.
Studio Grand 2
Mellow Grand The sound of a softly strung grand piano.
Mellow Grand 2
Modern Piano The sound of a modern grand piano.
Rock Piano The sound of a rock piano, brighter than that of Modern Piano.
Classic E.Piano The sound of a classic electric piano.
Modern E.P. The sound of a modern electric piano.
Slow Strings
The sound of an ensemble of strings.String Pad
String Ensemble
Choir The sound of an ensemble of singers.
Harpsichord The sound of a Baroque period plucked string instrument.
Harpsichord Oct.
Vibraphone The sound of a percussive, tuned instrument played using mallets.
Church Organ The sound a pipe organ, suitable for Church music etc.
Diapason
Jazz Organ The sound of an electronic organ.
NOTE: When either organ sound is selected, the soft pedal is used to alter the speed of the
rotary speaker simulation between ‘Slow’ and ‘Fast’ effect modes.
Drawbar Organ
New Age Pad The sound of a synthesized science fi ction atmosphere.
Preparation
1. Turn on the CA111 piano using the Power switch located on the right of the cheek block.
2. Push the front of the control box to reveal the control panel.
Concert Grand will be shown in the LCD display. The LED
indicators for the Sound and Reverb buttons will also turn on.
1) SINGLE SOUND MODE
Step 1
Press the S or T Value buttons or Sound button to select the desired sound.
Step 2
Play the piano.
The selected sound will be heard as the keys are pressed.
Use the Volume knob to adjust the volume if necessary.
The CA111 piano is capable of playing up to 192 notes simultaneously
(192-note polyphony).
Concert Grand
CA111_EN.indd 12 2008/04/12 0:58:34
Page
13
3
INTERNAL
SOUNDS
2) DUAL MODE
The DUAL function allows two sounds to be layered together, creating a more complex sound. For example, a
piano can be layered with strings, or a church organ with a choir sound.
Step 1
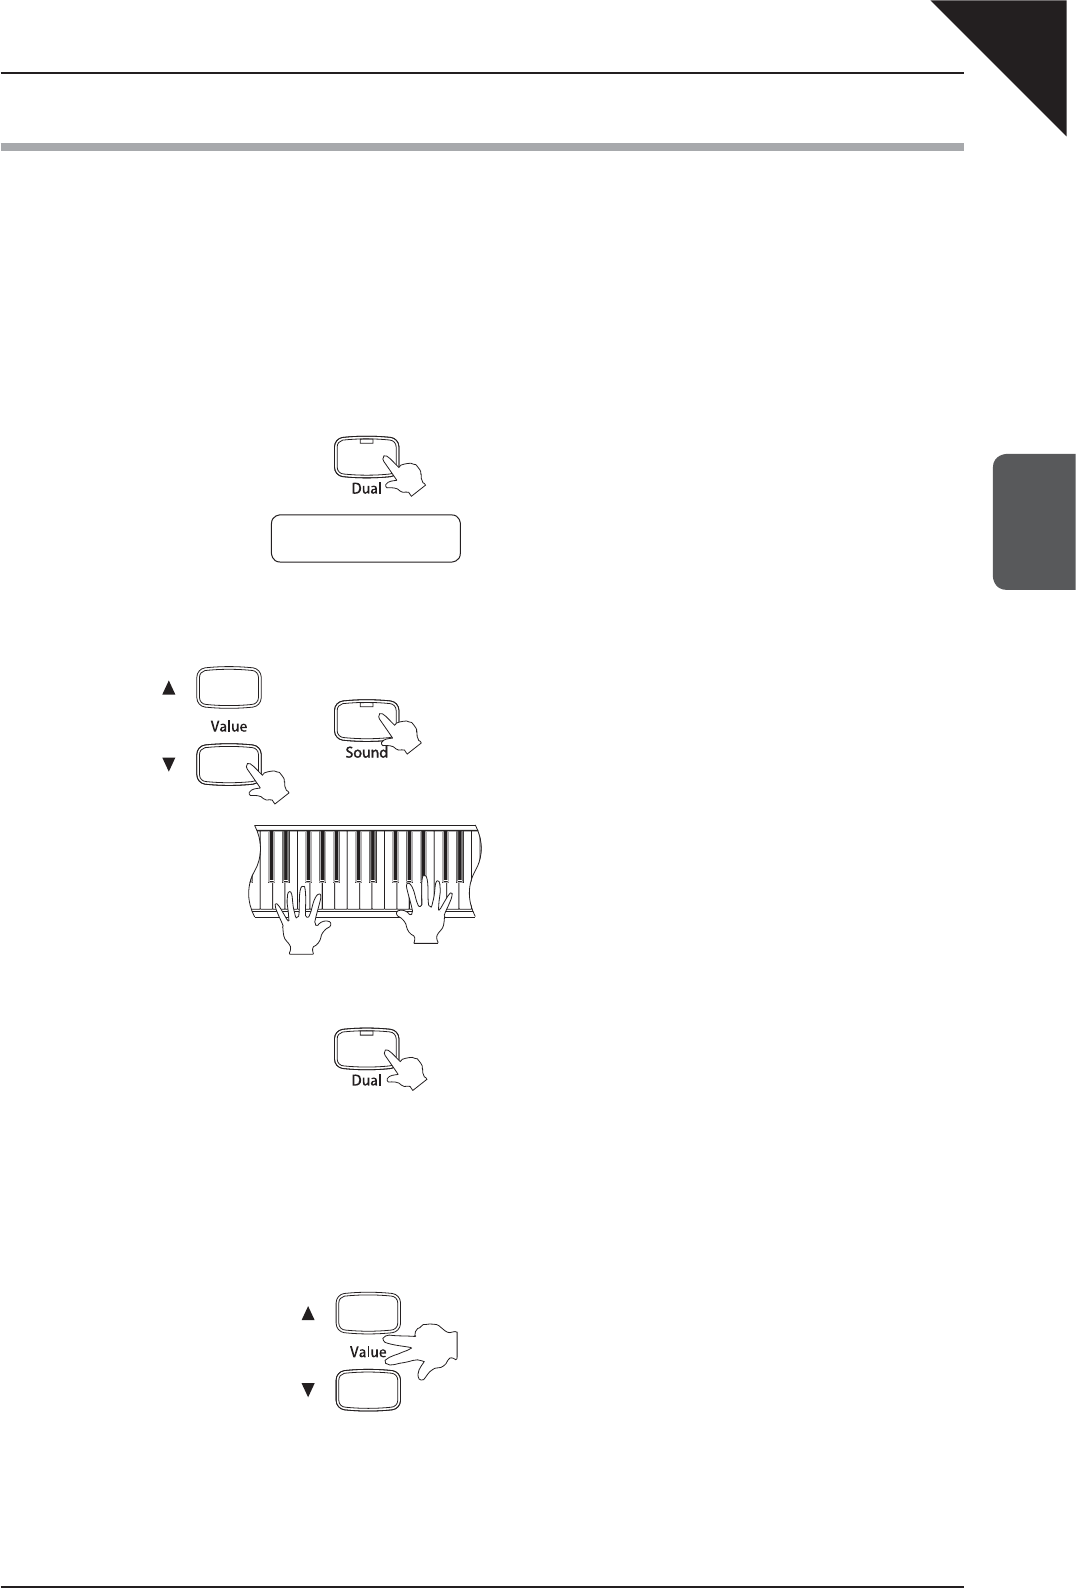
Press the S or T Value buttons or Sound button to select the desired primary sound.
Step 2
Press the Dual button to activate Dual mode.
The LED indicator for the Dual button will turn on.
The primary sound will be shown on the upper line of the
LCD display, while the secondary sound will be shown on
the lower line.
Step 3
Press the S or T Value buttons or Sound button to select the desired secondary sound.
Step 4
Play the piano.
The two different sounds will be heard simultaneously.
Step 5
Press the Dual button again to deactivate Dual mode.
The LED indicator for the Dual button will turn off.
The secondary sound shown on the lower line of the LCD
display will disappear, leaving the primary sound shown
on the upper line.
Pressing the Dual button once again will reactivate Dual
mode, recalling the previously selected primary and
secondary sounds.
Alternatively, press the S and T Value buttons simultaneously to deactivate Dual mode and select the
default Concert Grand sound.
To change the primary sound while Dual mode is activated, fi rst press the Dual button to deactivate Dual mode, then
press the S or T Value buttons to select the new primary sound. Finally, press the Dual button once again to reactive
Dual mode.
To adjust the volume balance between the primary and secondary sounds, please refer to the instructions on page 25
- 0) DUAL BALANCE.
Concert Grand
Slow Strings
OR
CA111_EN.indd 13 2008/04/12 0:58:35
Page
14
3
INTERNAL
SOUNDS
3) REVERB
Reverb adds reverberation to the sound, simulating the acoustic environment of a recital room, stage, or concert
hall.
There are fi ve types of reverb available:
¡ Room 1, 2 : Simulates the sound of a small room, adding a soft reverberation.
¡ Stage : Simulates the sound of playing on a live stage.
¡ Hall 1, 2 : Simulates the deep reverberation of a larger concert hall.
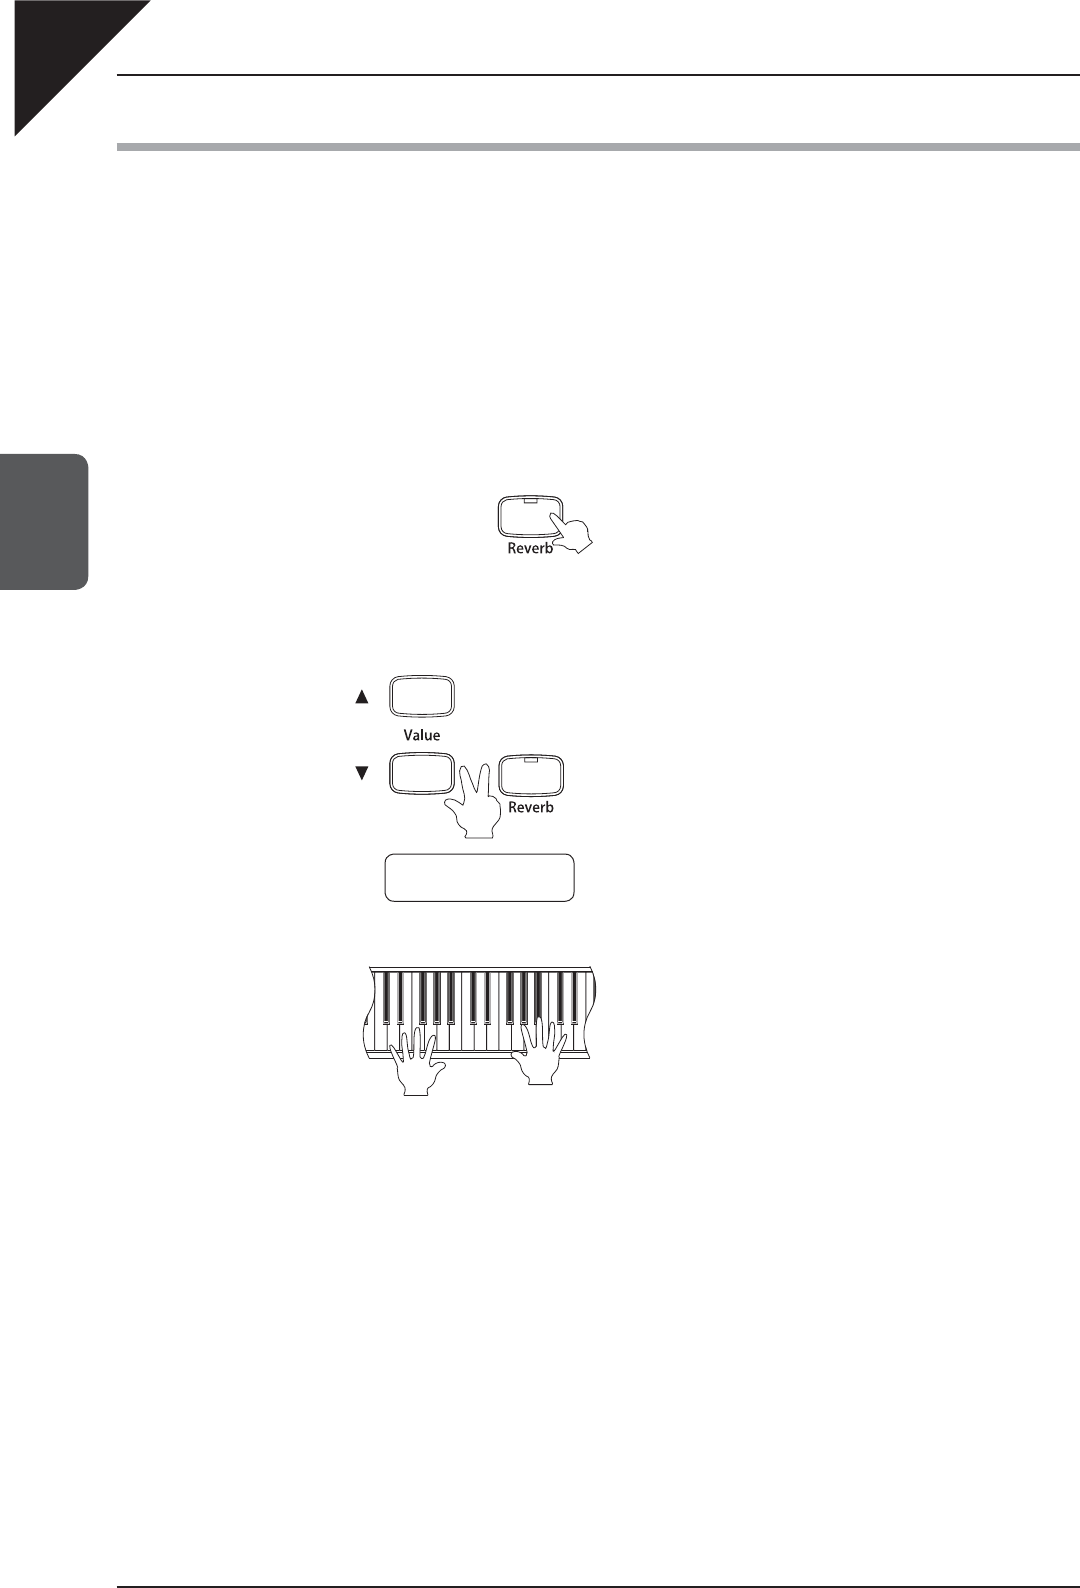
Step 1
Press the Reverb button to activate the reverb simulation.
The LED indicator for the Reverb button will turn on,
indicating that the reverb simulation has been activated.
Step 2
Press and hold the Reverb button, then press the S or T Value buttons to select the desired reverb type.
The currently selected reverb type will be shown on the
second line of the LCD display.
Step 3
Play the piano.
The selected reverb type will be applied to the sound.
Step 4
Press the Reverb button once again to deactivate the reverb simulation.
The LED indicator for the Reverb button will turn off, indicating that the reverb simulation has been deactivated.
¡ If the Reverb button is pressed once again, the reverb simulation will be reactivated with the previously selected
type.
Reverb Type
= Room 2
CA111_EN.indd 14 2008/04/12 0:58:36
Page
15
3
INTERNAL
SOUNDS
4) EQ
EQ allows the tonal character of the CA111 piano to be adjusted and optimised, providing the best sound quality
within the area that the instrument is located.
There are fi ve EQ settings:
¡ Wall Mode EQ : Optimises the sound of the CA111 piano when placed against a wall.
¡ Loudness : Retains the normal sound character of the CA111 piano when playing at lower volume levels.
¡ Bass Reduce : Reduces low-range frequencies, providing a clearer sound in certain conditions.
¡ Treble Boost : Emphasises treble frequencies.
¡ Mid Reduce : Reduces mid-range frequencies, providing a clearer sound in certain conditions.
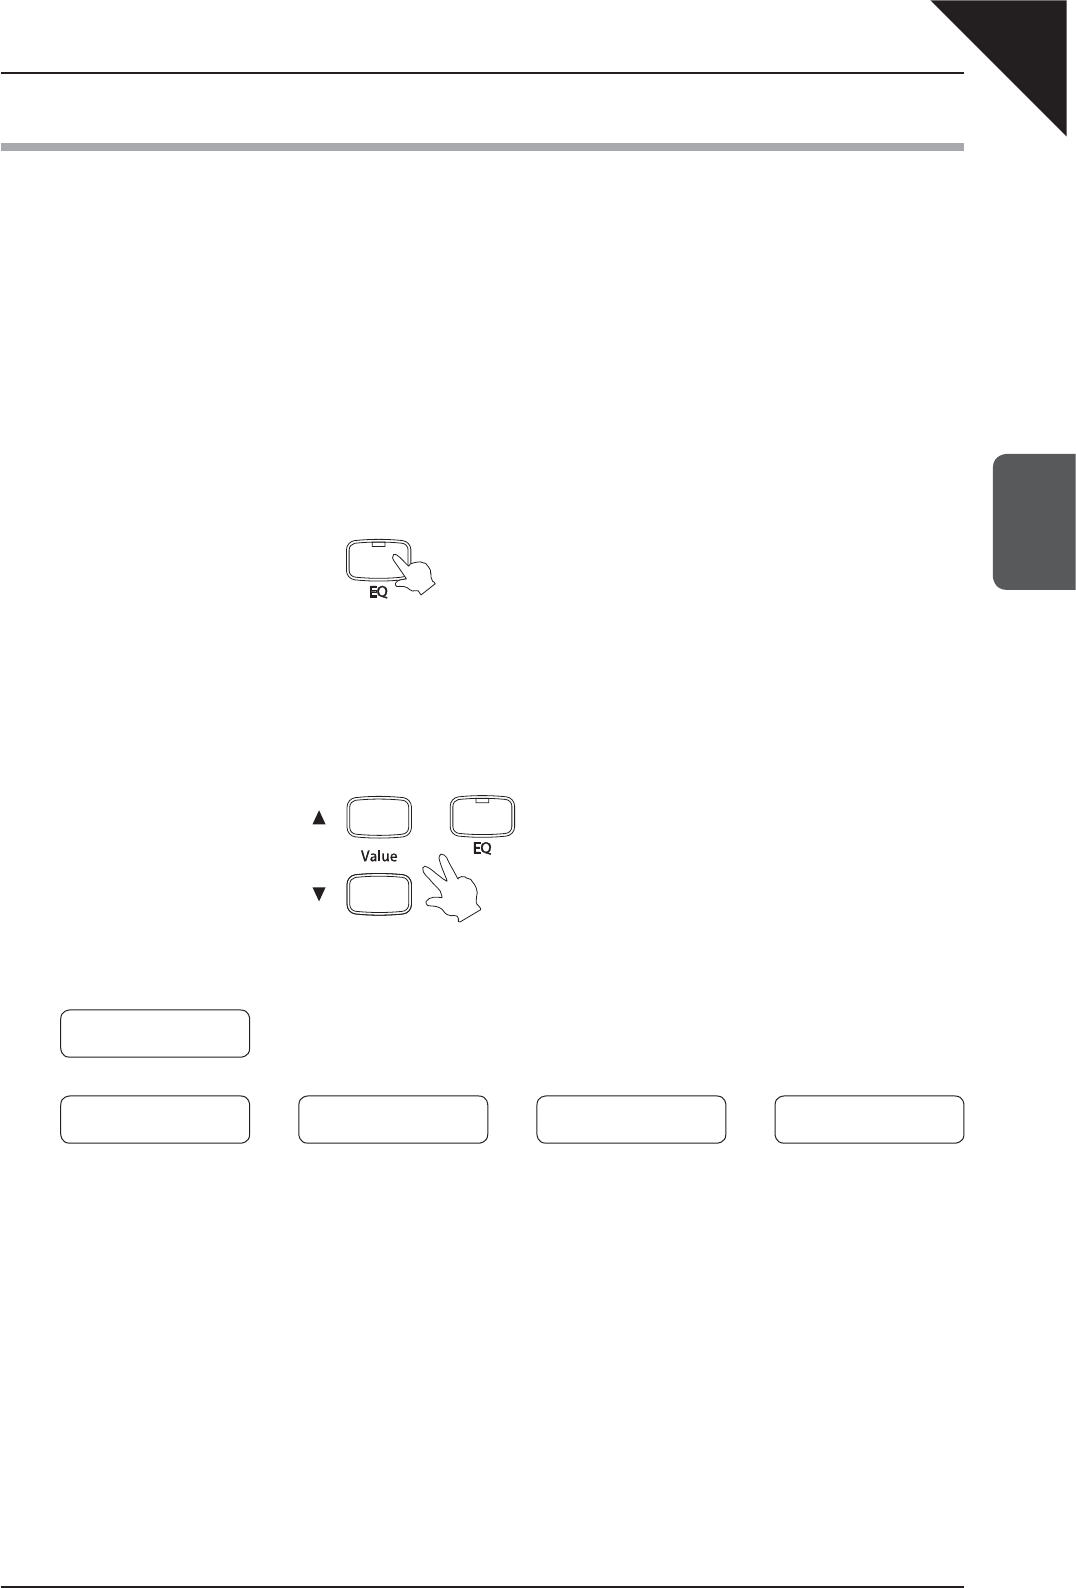
Step 1
Press the EQ button to activate the EQ mode.
The LED indicator for the EQ button will turn on, indicating that EQ has been activated.
Step 2
Press and hold the EQ button, then press the S or T Value buttons to select the desired EQ type.
The currently selected EQ type will be shown on the second line of the LCD display, while the EQ button is held.
Step 3
Press the EQ button once again to deactivate the EQ.
The LED indicator for the EQ button will turn off, indicating that the EQ has been deactivated.
¡ If the EQ button is pressed once again, the EQ will be reactivated with the previously selected type.
ÇÈ
EQ
= Wall Mode EQ
Æ
Å
EQ
= Mid Reduce
EQ
= Loudness
EQ
= Bass Reduce
EQ
= Treble Boost
Æ
Å
Æ
Å
CA111_EN.indd 15 2008/04/12 0:58:37
Page
16
4
METRONOME
4. METRONOME
Rhythm is one of the most important elements when learning music. It is important to practice playing the piano at
the correct tempo and with a steady rhythm. The metronome function helps learners to achieve this by providing
a steady beat to perform to.
ACTIVATING THE METRONOME
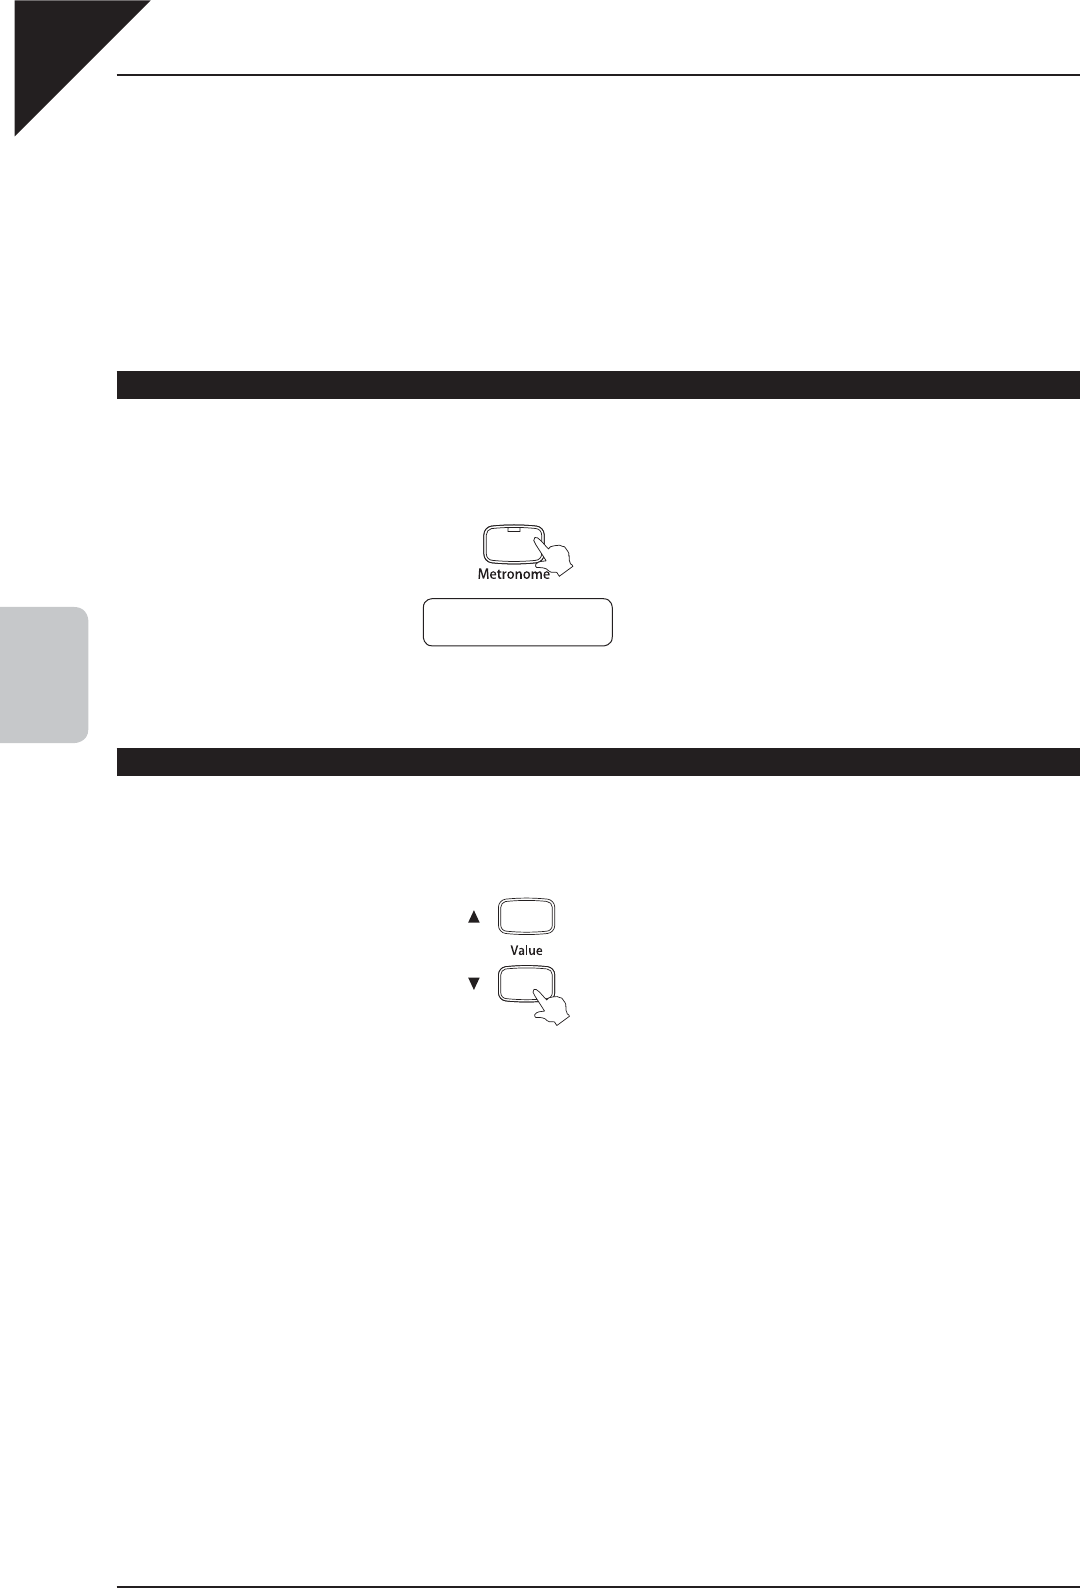
Step 1
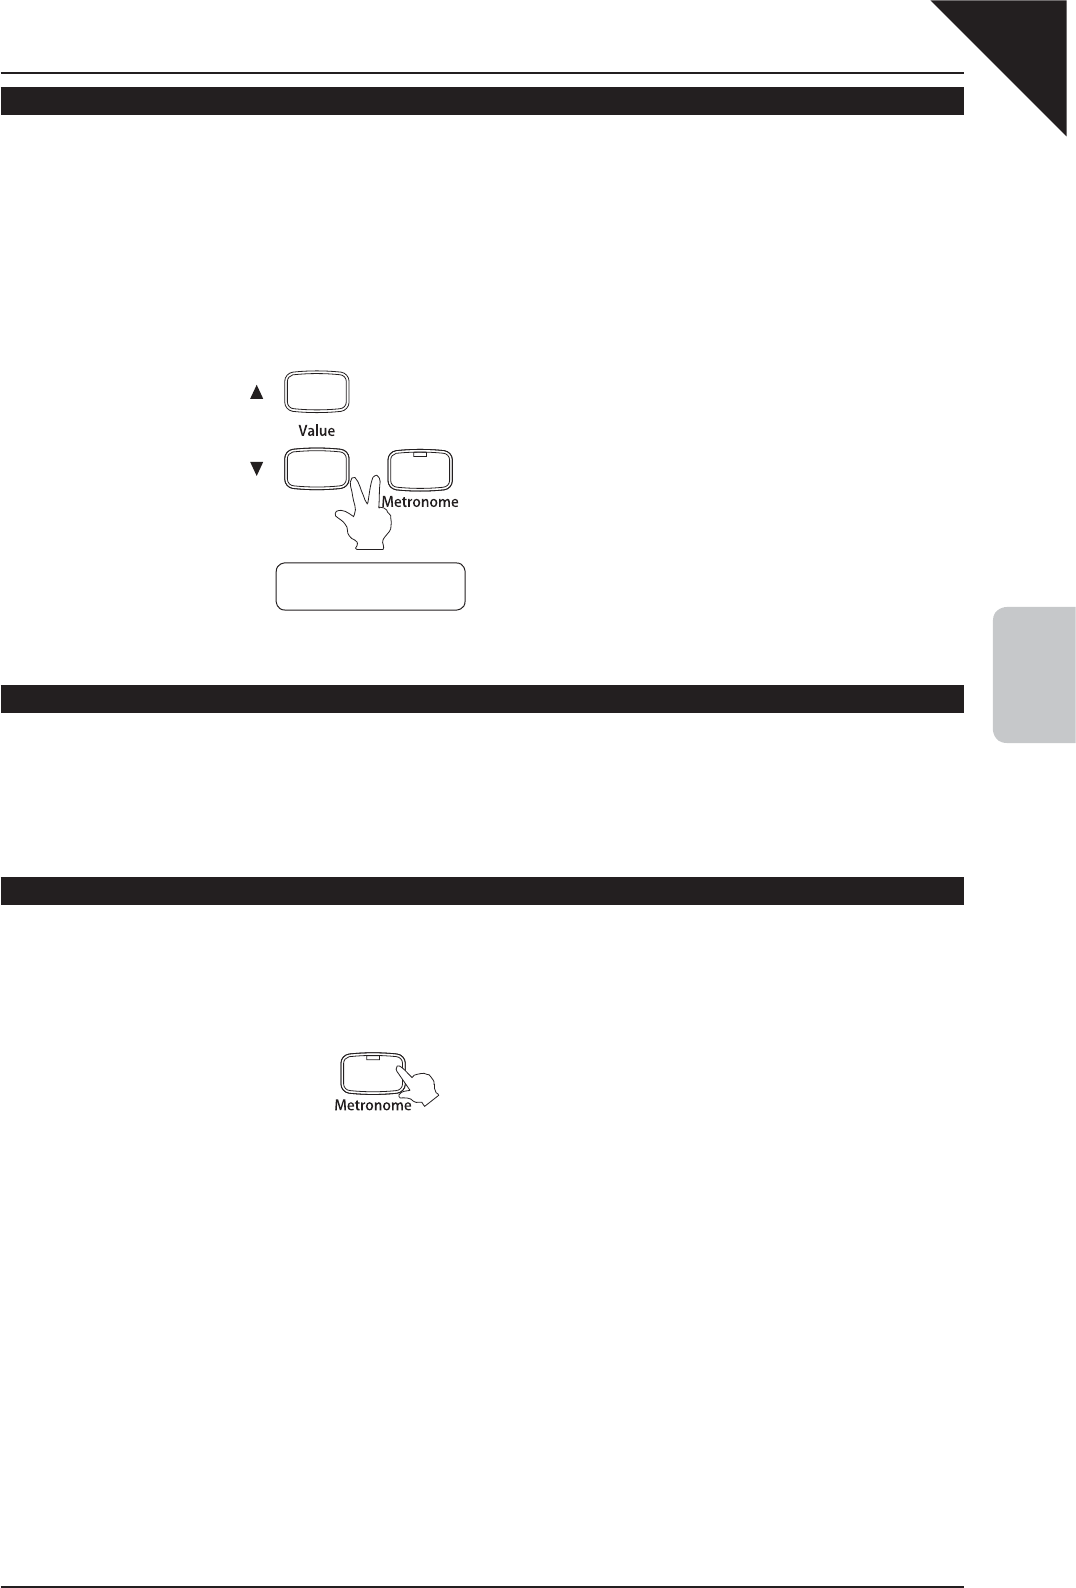
Press the Metronome button to activate the metronome.
The LED indicator for the Metronome button will turn on,
indicating that the metronome has been activated.
The current metronome tempo will be shown in the LCD
display for a brief period, before returning to show the
selected sound.
ADJUSTING THE METRONOME TEMPO
Step 2
While the tempo of the metronome is shown in the LCD display, press the S or T Value buttons to adjust
the tempo to the desired value.
The metronome tempo will begin to increase and decrease
as the value is adjusted.
¡ The metronome tempo can be adjusted within the range of 10-400 beats per minute.
Tempo Œ= 120
|
CA111_EN.indd 16 2008/04/12 0:58:38
Page
17
4
METRONOME
CHANGING THE METRONOME TIME SIGNATURE
Step 3
By default, the metronome will produce a clicking sound at a constant volume - this is a 1-beat or 1/4 time signature.
It is also possible to select alternative time signatures when appropriate. There are ten different types of metronome
time signature available: 1/4, 2/4, 3/4, 4/4, 5/4, 3/8, 6/8, 7/8, 9/8 and 12/8. When selecting a time signature other
than 1/4, a bell sound will be heard indicating the fi rst beat of the bar.
Press and hold the Metronome button, then press the S or T Value buttons to select the desired metronome
time signature.
The current metronome time signature will be shown in the
LCD display until the Metronome button is released.
ADJUSTING THE METRONOME VOLUME
To adjust the volume of the metronome, please refer to the instructions on page 42 - 13) METRONOME
VOLUME - for more information.
DEACTIVATING THE METRONOME
Step 4
When metronome information is shown in the LCD display, press the Metronome button once again to
deactivate the metronome.
The LED indicator for the Metronome button will turn off,
indicating that the metronome has been deactivated.
If the metronome has been activated, but the selected sound is shown in the LCD display, fi rst press the Metronome button
to recall the metronome information, before pressing the Metronome button once again to deactivate the metronome.
If, after the metronome has been deactivated, the Metronome button is pressed once again, the metronome will be
reactivated with the previously selected tempo and time signature.
Metro.Beat = 1/4
|
CA111_EN.indd 17 2008/04/12 0:58:39
Page
18
5
RECORDER
5. RECORDER
The RECORDER function records performances in a similar way to that of an audio tape recorder. However, the
CA111 piano records songs as digital data, instead of audio data - storing the music inside the instrument.
With a maximum of ten song memories, the recorder function provides a useful tool for both practicing and playing
the piano.
It is also possible to activate the metronome, providing a steady beat in which to perform to. Note that the metronome
will not be audible when the recorded performance is played back.
1) RECORDING A SONG
Step 1
Select the desired sound for the performance.
Step 2
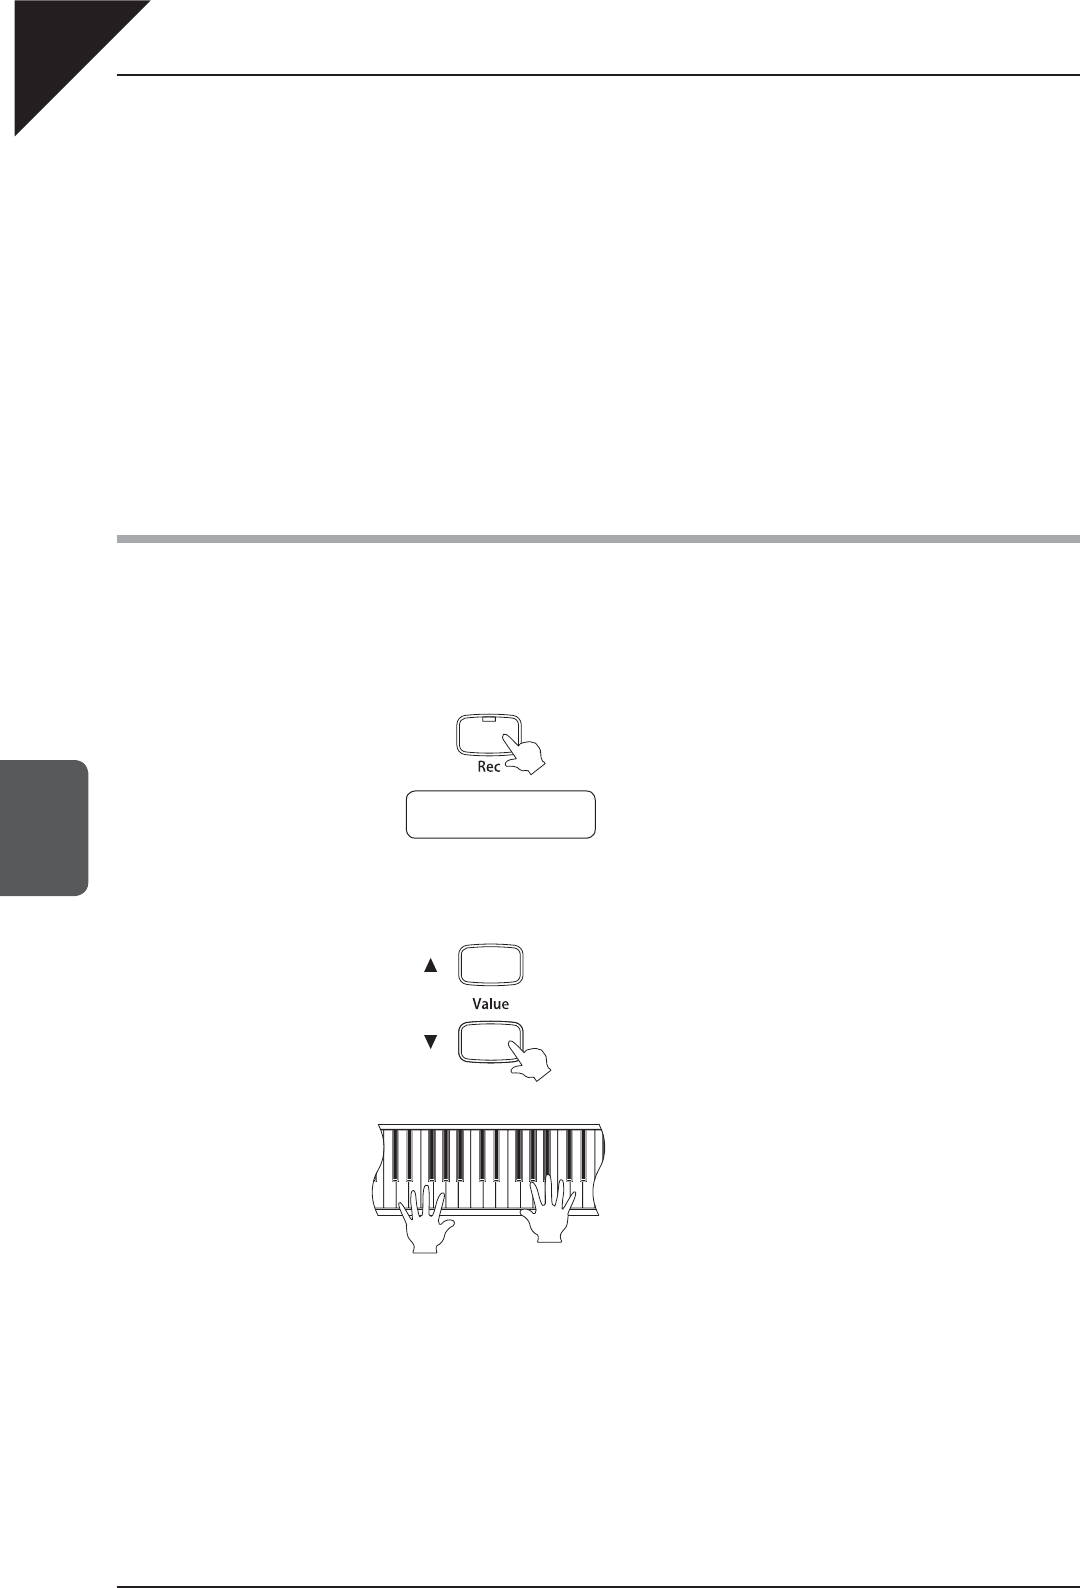
Press the Rec button to activate the recorder.
The LED indicator for the Rec button will start to fl ash,
indicating that the recorder has been activated.
The selected recorder song (SONG1-SONG10) will be
shown on the second line of the LCD display.
Step 3
Press the S or T Value buttons to select the desired recorder song.
Step 4
Play the piano.
The recorder will automatically start recording with the
fi rst note played.
The LED indicators for the Rec and Play/Stop buttons will
turn on.
Alternatively, the recording can also be started by pressing the Play/Stop button instead of pressing a key,
to allow the recording of songs that begin on an ‘up’ beat.
Record
SONG 1
CA111_EN.indd 18 2008/04/12 0:58:40

Page
19
5
RECORDER
Step 5
Press the Play/Stop button to stop recording.
The LED indicators for the Rec and Play/Stop buttons will
turn off.
The recorder will automatically switch to playback mode.
The total recording capacity of the CA111 piano is approximately 90,000 notes for the entire ten song memory. When
the maximum capacity is reached, recording will stop, the LED indicators for the Rec and Play/Stop buttons will turn off,
and all music recorded up until that point will be stored in memory automatically.
Any changes made to the sound while recording will also be recorded. Adjusting the tempo, however, will not be
recorded.
Recorded songs stored inside the memory of the CA111 piano will remain even after turning off the power.
v
Record stopping
SONG 1*
Play
SONG 1*
CA111_EN.indd 19 2008/04/12 0:58:41
Page
20
5
RECORDER
2) PLAYING BACK A SONG
The Play/Stop button is used to start and stop playback of the recorded song, and to also select which song is
played.
Step 1
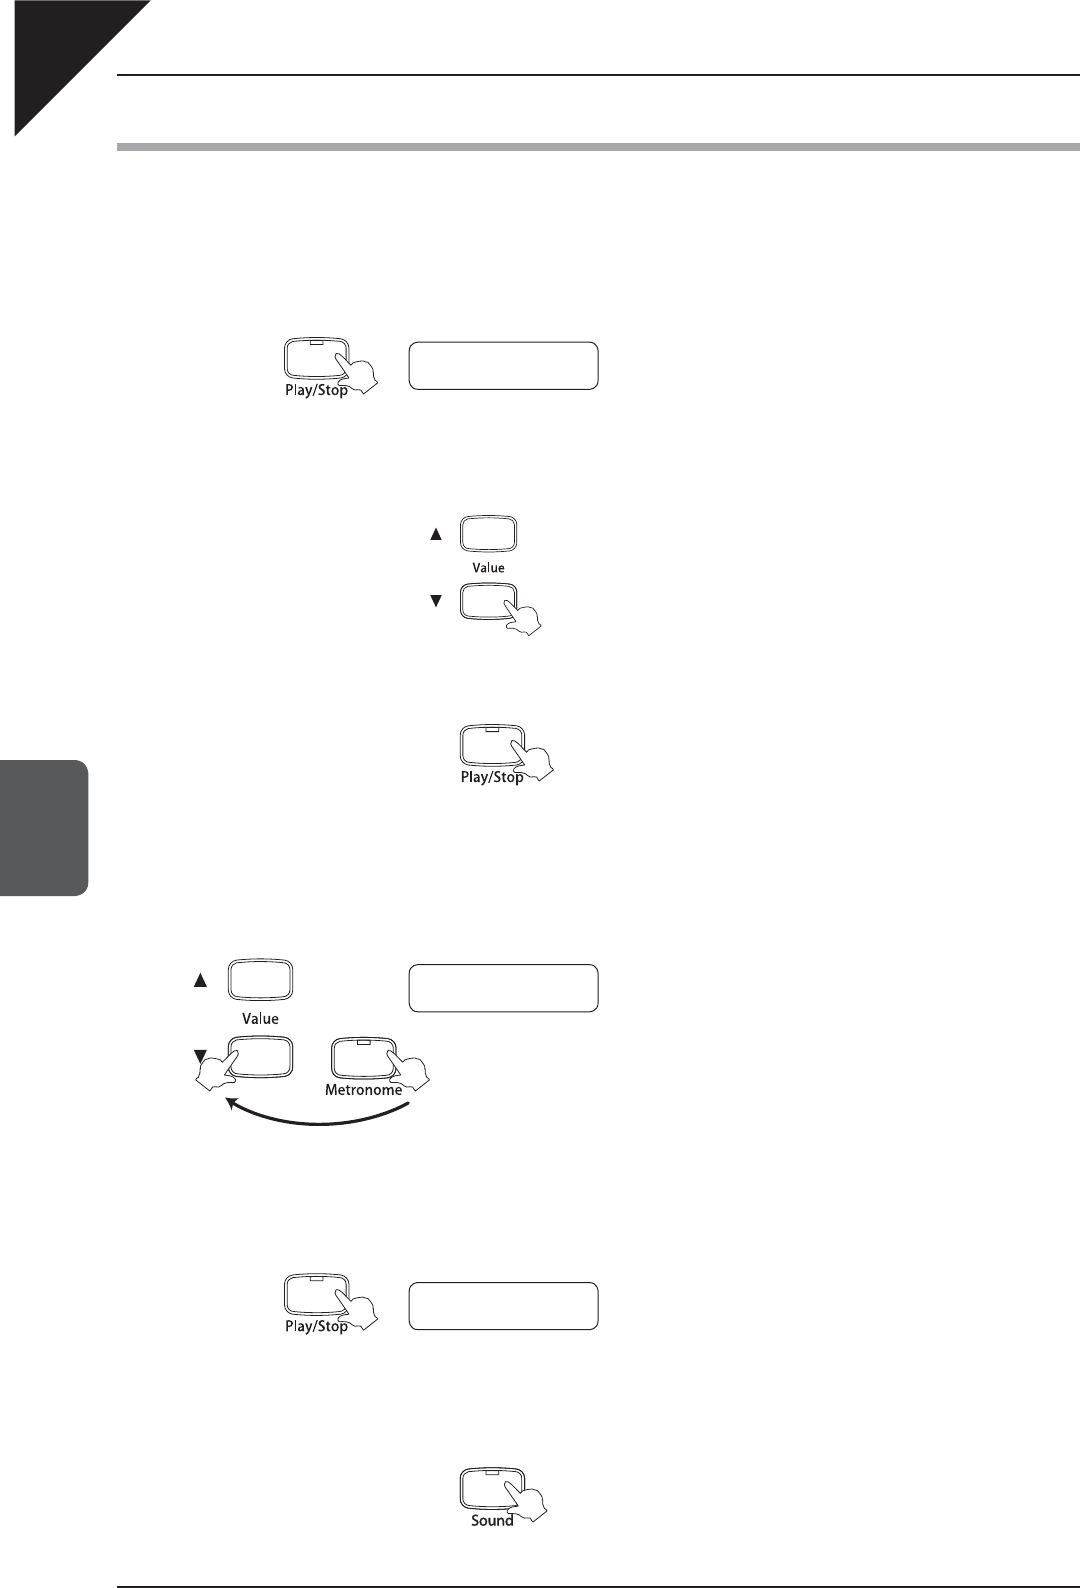
Press the Play/Stop button to activate playback mode.
The selected recorder song (SONG1-SONG10) will be
shown on the second line of the LCD display.
Step 2
Press the S or T Value buttons to select the desired song for playback.
Note the asterisk (*) to the right of the song name, indicating
a previously recorded performance.
Step 3
Press the Play/Stop button once again to start playback of the selected song.
The LED indicator for the Play/Stop button will turn on
during playback.
Step 4
To adjust the tempo of the recorded song during playback, fi rst press the Metronome button, then press
the S or T Value buttons.
The current metronome tempo will be shown in the LCD
display.
The metronome will be audible. Press the Metronome
button once again to deactivate the metronome.
Step 5
Press the Play/Stop button once again to stop playback.
The LED indicator for the Play/Stop button will turn off.
The selected recorder song (SONG1-SONG10) will once
again be shown on the second line of the LCD display.
Step 6
Press the Sound button to deactivate playback mode.
The selected sound will be shown in the LCD display.
Play
SONG 1*
Tempo Œ= 120
|
Play
SONG 1*
CA111_EN.indd 20 2008/04/12 0:58:42
Page
21
5
RECORDER
3) DELETING A SONG
This function allows recorded songs that are no longer required, to be deleted.
Step 1
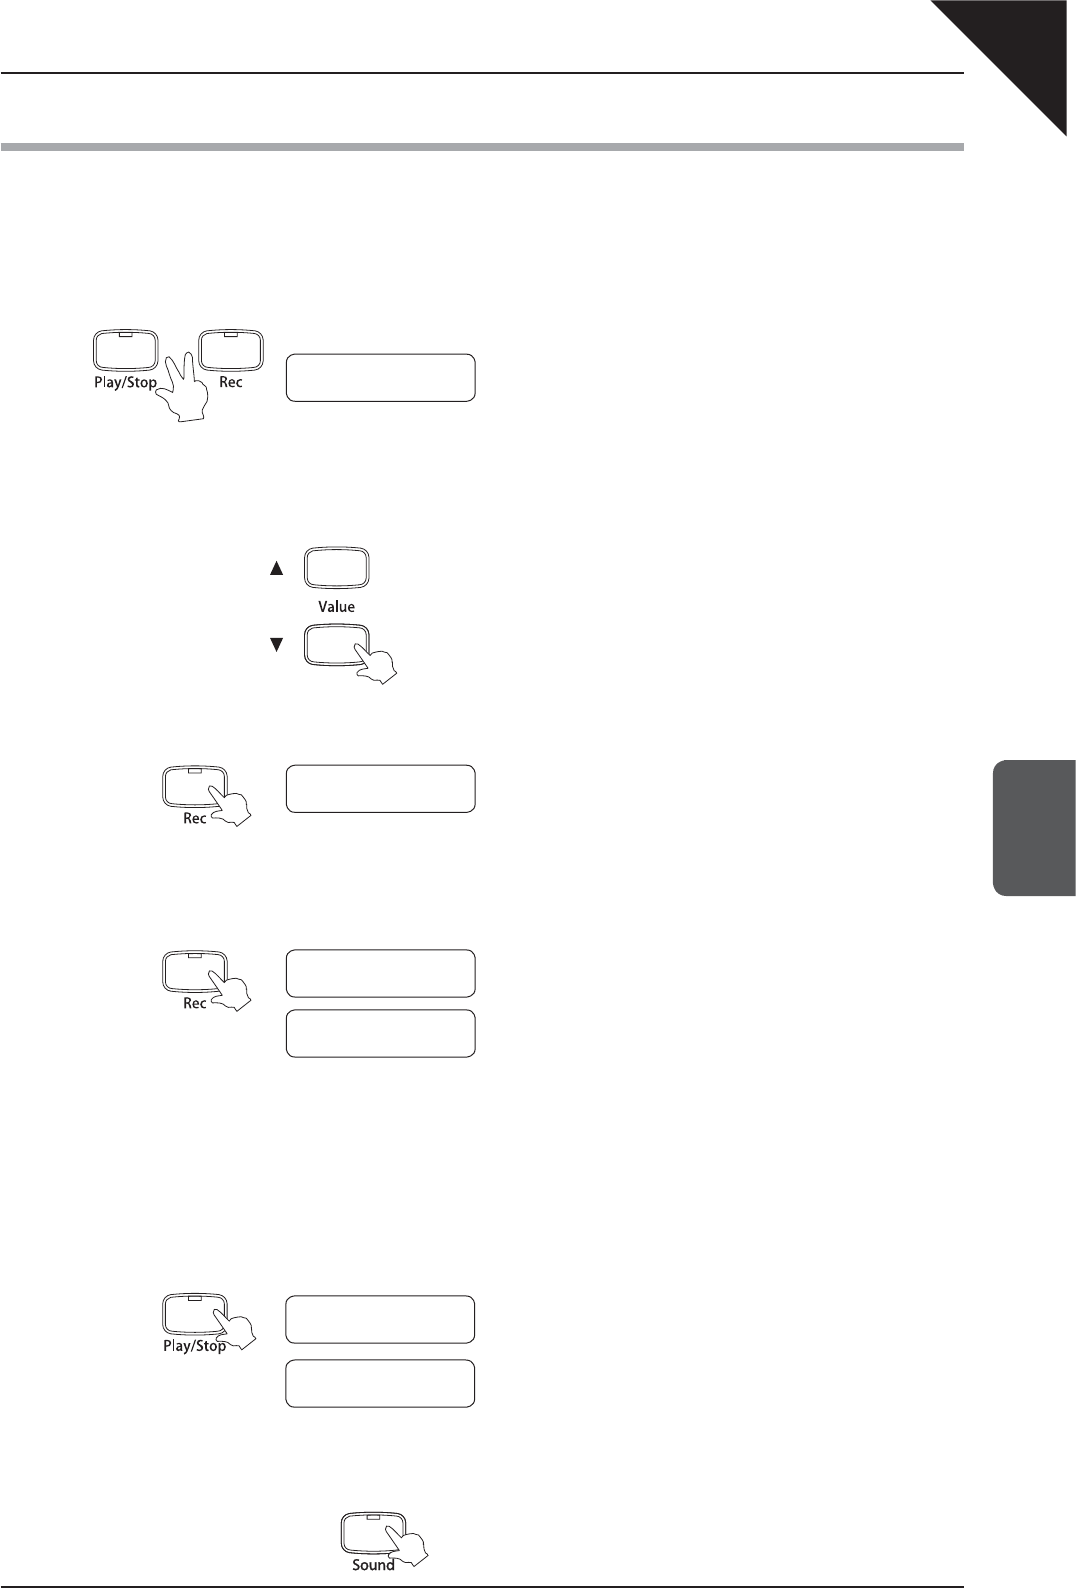
Press the Play/Stop and Rec buttons simultaneously.
The LED indicators for the Play/Stop and Rec buttons will
start to fl ash.
The selected recorder song (SONG1-SONG10) will be
shown on the second line of the LCD display.
Step 2
Press the S or T Value buttons to select the song to be deleted.
Step 3
Press the Rec button to delete the selected song.
A confirmation message will be shown in the LCD
display.
Step 4-1: Confi rm Delete
Press the Rec button once again to confi rm deleting of the selected song.
‘Completed’ will be shown in the LCD display, before
returning to the song playback mode.
Repeat the steps above in order to delete recorded songs individually.
To delete all recorded songs from memory at once, fi rst turn off the power and then turn it on again, holding down both
the Rec button and the Play/Stop button.
Step 4-2: Cancel Delete
To cancel the delete operation in Step 3, press the Play/Stop button.
‘Canceled’ will be shown in the LCD display, before
returning to song delete mode.
Step 5
Press the Sound button to deactivate delete mode.
The selected sound will be shown in the LCD display.
To Del Press REC
SONG 1*
Sure? Press REC
SONG 1*
Delete completed
SONG 1
Play
SONG 1
To Del Press REC
SONG 1*
Delete canceled
SONG 1*
CA111_EN.indd 21 2008/04/12 0:58:43
Page
22
6
DEMO MODE
6. DEMO MODE
The CA111 piano features a selection of classical demonstration pieces, including works by Handel, Bach,
Beethoven and Chopin.
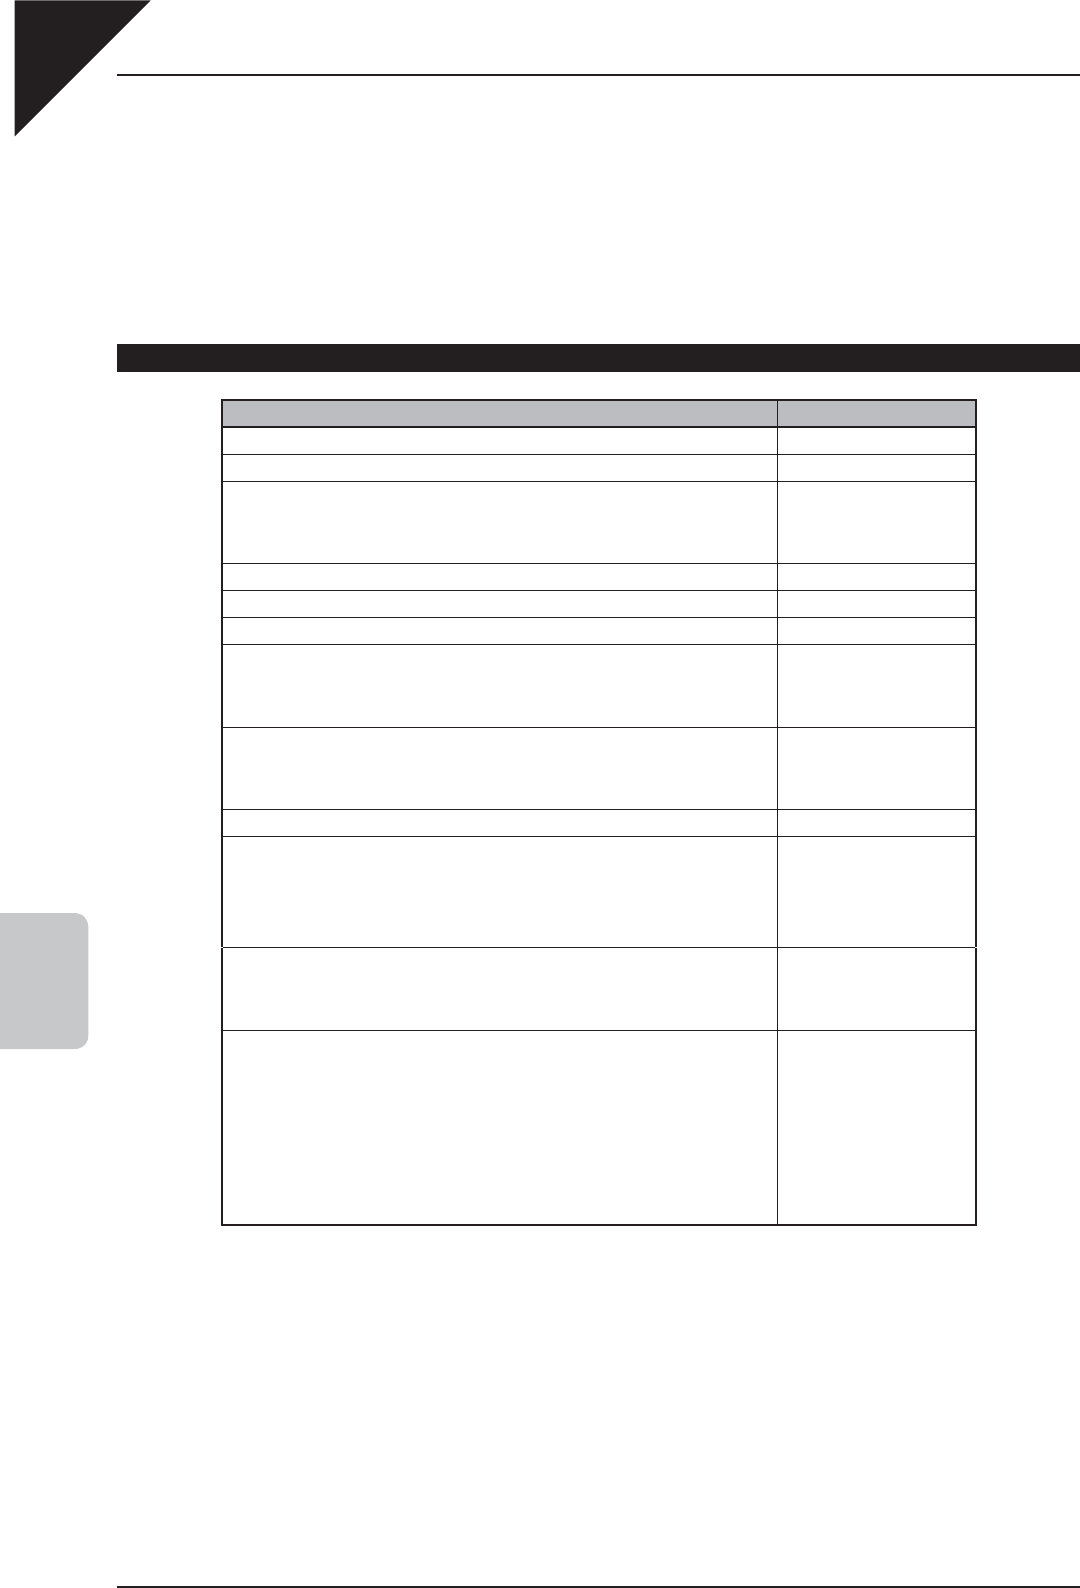
LIST OF DEMONSTRATION PIECES
Piece Name Composer
a Tambourin J.P. Rameau
b The Harmonious Blacksmith G.F. Händel
c Menuett BWV. Anh.114
d Menuett BWV. Anh.115
e Menuett BWV. Anh.116
J.S. Bach
f Le Coucou L.C. Daquin
g Gavotte F.J. Gossec
h Menuett L. Boccherini
i Thema und Variationen (Sonate für Klavier No.11 K.331(300i))
j
T
ü
rkischer Marsch (Sonate für Klavier No.11 K.331(300i))
k Menuett
W.A. Mozart
l Sonate für Klavier No.14 “Mondschein”
m Sonate für Klavier No.8 “Pathétique”
n Für Elise
L.v. Beethoven
o Rondo favori J.N. Hummel
p Impromptu op.90-4
q Moments musicaux op.94-3
r Entr’acte
s Impromptu op.142-3
F.P. Schubert
t Auf Flügeln des Gesanges
u Frühlingslied
v Rondo Capriccioso
F. Mendelssohn
w Chanson de l’adieu
x Raindrop
y Petit chien
z Nocturne No.2
A Fantaisie-Impromptu
B Polonaise No.3 “Militaire”
C Polonaise No.6 “Héroïque”
F.F. Chopin
CA111_EN.indd 22 2008/04/12 0:58:44
Page
23
6
DEMO MODE
LISTENING TO DEMONSTRATION PIECES
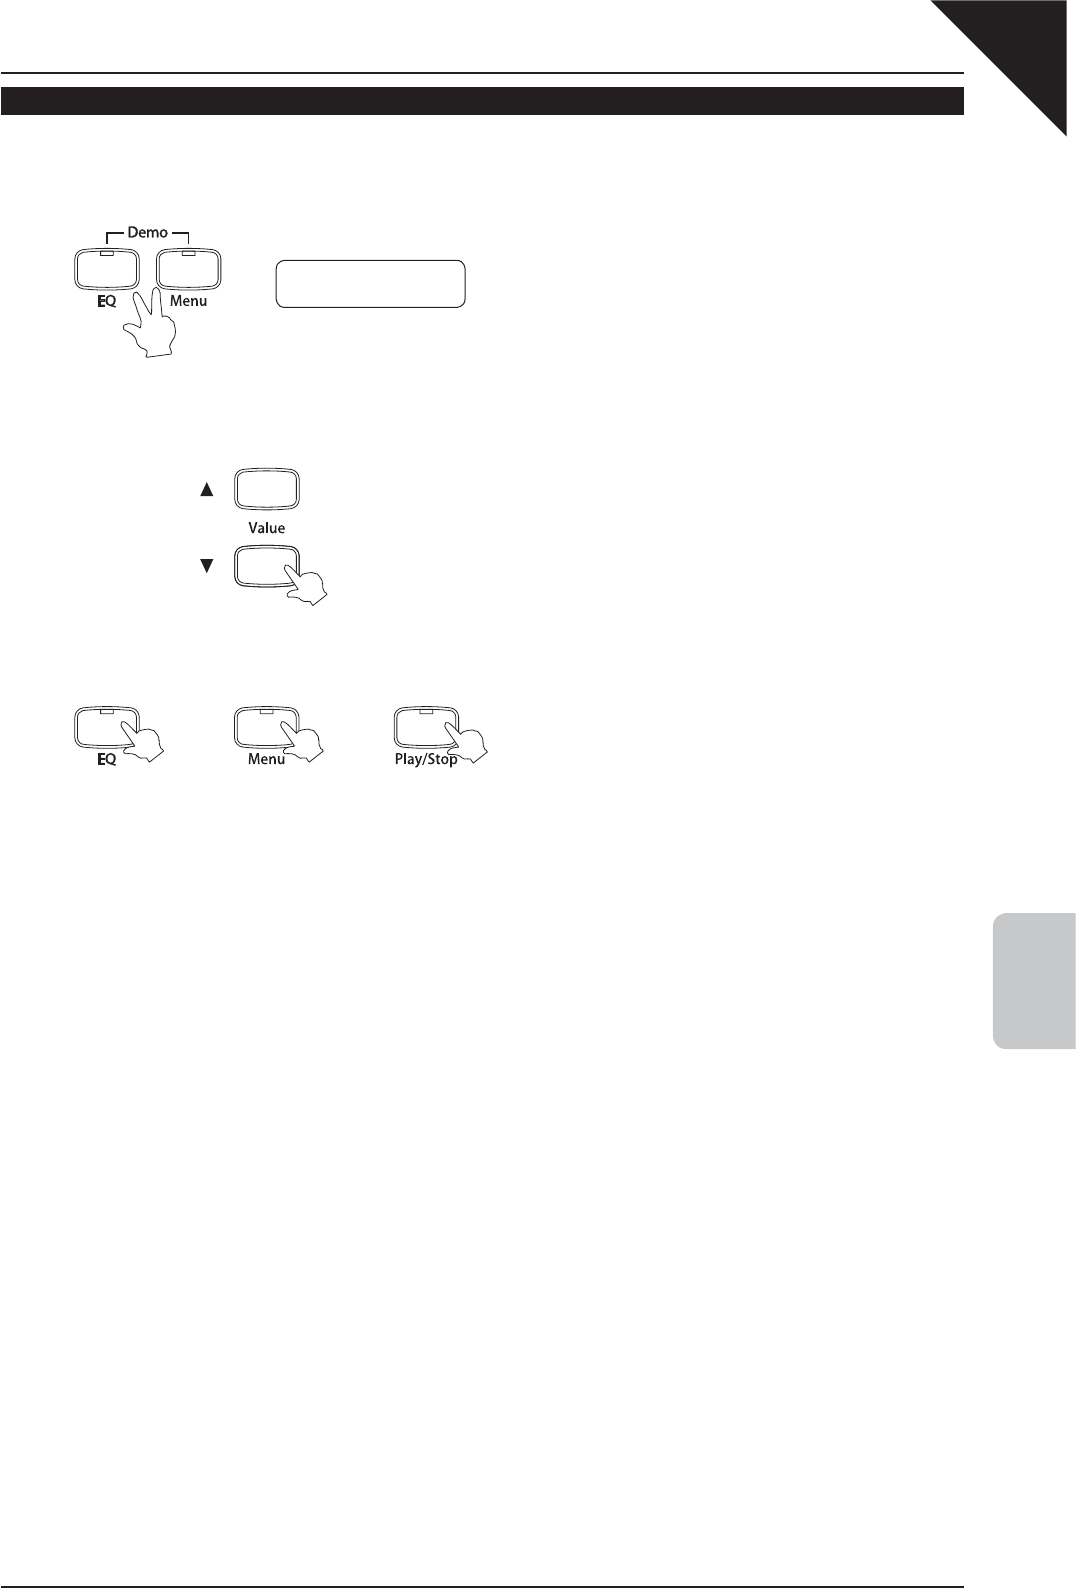
Step 1
Press the EQ and Menu buttons simultaneously.
A demonstration piece will start to play.
The piece name and composer will be shown on the fi rst
and second lines of the LCD display.
The LED indicator for the EQ, and Menu button will fl ash.
Step 2
Press the S or T Value buttons to select the desired demonstration piece.
Step 3
Press either the EQ, Menu or Play/Stop buttons to stop the demonstration performance.
The LED indicator for the EQ, and Menu button will turn
off.
Selecting different sounds is not possible during playback of the demonstration pieces.
The selected sound will automatically return to the Concert Grand sound after stopping the demonstration pieces.
If left uninterrupted, the CA111 piano will play each demonstration piece sequentially.
Heroique
Chopin
OR OR
CA111_EN.indd 23 2008/04/12 0:58:45

Page
24
7
MENU
FUNCTIONS
7. MENU FUNCTIONS
The Menu functions allow various parameters of the CA111 piano to be adjusted. If necessary, these settings can
be stored in the User Memory and conveniently recalled when turning on the CA111 piano.
MENU FUNCTION LIST
There are 16 menu functions in total, with items 1-9 responsible for controlling the Virtual Technician functions of
the CA111 piano.
Virtual Technician
1) Voicing
2) Damper Resonance
3) String Resonance
4) Key Off Effect
5) Touch
6) Temperament
7) Key of Temperament
8) Tuning
9) Stretch Tuning
0) Dual Balance
10) Transpose
11) MIDI Channel
12) Local Control
13) Metronome Volume
14) User Memory
15) Factory Reset
Virtual Technician
An experienced piano technician is essential to fully realise the potential of an acoustic piano. As well as meticulously
tuning each note, the technician performs regulation and voicing adjustments that allow a fi ne instrument to truly
sing.
Virtual Technician functions simulate such refi nements digitally. The Voicing feature shapes tonal characteristics,
while the Touch function allows the performer to select the level of touch sensitivity suitable for his/her playing
style.
The String Resonance feature causes held notes to resonate ‘sympathetically’ with other notes of the same harmonic
series, while Damper Resonance recreates a similar phenomenon, whereby sympathetic and adjacent notes
resonate while the damper pedal is depressed. Finally, the Key Off Effect recreates the sound of bass hammers
returning to their strings following a rapid note release.
CA111_EN.indd 24 2008/04/12 0:58:46
Page
25
7
MENU
FUNCTIONS
0) DUAL BALANCE
This function allows the volume balance between primary and secondary sounds in Dual Mode to be adjusted,
and will only be available if Dual mode is activated.
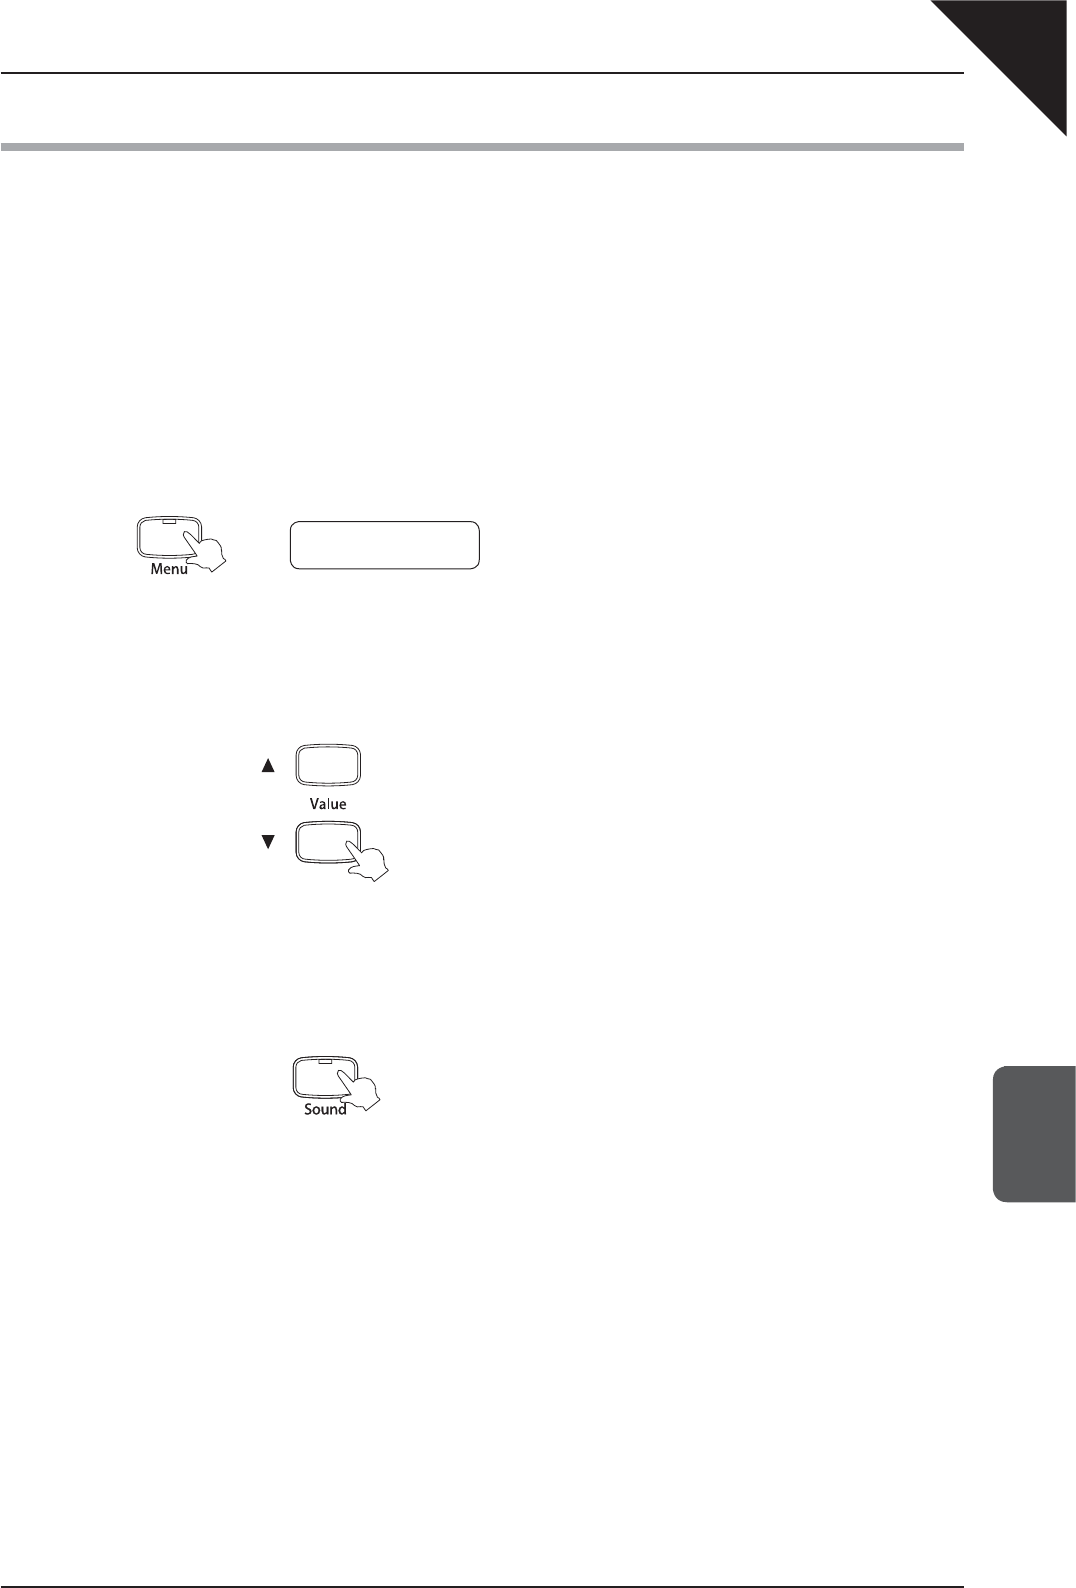
Step 1
Press the Dual button to activate Dual mode.
Step 2
Press the Menu button to select the Dual Balance function.
The LED indicator for the Menu button will turn on.
The Dual Balance menu function will be shown in the LCD
display.
The primary sound volume is represented by the number on
the left, while the secondary sound volume is represented
by the number on the right.
Step 3
Press the S or T Value buttons to select the desired volume balance.
¡ The sum of the primary and secondary sound volume balances will always total 10 (e.g. ‘1-9’, ‘5-5’, ‘9-1’, etc.),
with larger values producing greater volume.
Step 4
Press the Sound button to exit the Dual Balance menu.
The LED indicator for the Menu button will turn off.
The selected sound will be shown in the LCD display.
Alternatively, press the Menu button again to select other menu functions.
The Dual Balance function will return to the default setting of ‘5-5’ when the S and T Value buttons are pressed
simultaneously, or when the power is turned off.
The User Memory function can be used to store the desired Dual Balance setting, allowing the preferred Dual Balance
setting to remain selected even after the power is turned off. Please refer to the instructions on page 43 - 14) USER
MEMORY - for more information.
0.Dual Balance
= 5 - 5
CA111_EN.indd 25 2008/04/12 0:58:46
Page
26
7
MENU
FUNCTIONS
1) VOICING
Voicing is a technique used by piano technicians to mould the character of a piano’s sound. This function allows
the tonal quality of the CA111 piano to be set to one of six types of voicing.
Step 1
Press the Menu button repeatedly, or press and hold the Menu button then press the S or T Value buttons,
until the Voicing function is selected.
The LED indicator for the Menu button will turn on.
The Voicing menu function will be shown in the LCD
display.
The voicing type will be shown on the second line of the
LCD display.
Step 2
Press the S or T Value buttons to select the desired voicing type.
Normal : The normal sound character of an acoustic piano throughout the entire dynamic range. This is
the default voicing setting.
Mellow 1, 2 :
A softer mellow sound character throughout the entire dynamic range. Mellow 2 is softer than Mellow 1.
Dynamic : The sound character will change dramatically from mellow to bright depending on how soft or
hard the piano is played.
Bright 1, 2 :
A brighter sound character throughout the entire dynamic range. Bright 2 is brighter than Bright 1.
Step 3
Play the piano.
The voicing type selected in Step 2 will be applied to the
sound.
Step 4
Press the Sound button to exit the Voicing menu.
The LED indicator for the Menu button will turn off.
The selected sound will be shown in the LCD display.
Alternatively, press the Menu button again to select other menu functions.
The Voicing function will return to the default setting of ‘Normal’ when the S and T Value buttons are pressed
simultaneously, or when the power is turned off.
The User Memory function can be used to store the desired Voicing setting, allowing the preferred Voicing setting to
remain selected even after the power is turned off. Please refer to the instructions on page 43 - 14) USER MEMORY
- for more information.
OR
1.Voicing
= Normal
CA111_EN.indd 26 2008/04/12 0:58:47
Page
27
7
MENU
FUNCTIONS
2) DAMPER RESONANCE
When the damper pedal is depressed on an acoustic piano, all dampers are lifted up, allowing the strings to vibrate
freely. When a note or chord is played on the piano with the damper pedal depressed, not only will the strings
of the notes played vibrate, but also the strings of other notes, vibrating in sympathetic resonance. The Damper
Resonance function of the CA111 piano attempts to simulate this phenomenon.
Step 1
Press the Menu button repeatedly, or press and hold the Menu button then press the S or T Value buttons,
until the Damper Resonance function is selected.
The LED indicator for the Menu button will turn on.
The Damper Resonance menu function will be shown in
the LCD display.
The level of resonance will be shown on the second line
of the LCD display.
Step 2
Press the S or T Value buttons to select the desired damper resonance level.
¡ A damper resonance level of ‘1’ produces a very subtle effect, while the maximum level of ‘10’ creates a stronger,
more pronounced resonance. Setting the damper resonance to ‘Off’ will disable the function entirely.
Step 3
Play the piano while using the damper pedal.
The degree of resonance will vary, depending on the value
specifi ed in Step 2.
Step 4
Press the Sound button to exit the Damper Resonance menu.
The LED indicator for the Menu button will turn off.
The selected sound will be shown in the LCD display.
Alternatively, press the Menu button again to select other menu functions.
The Damper Resonance function will only be applied to the Concert Grand, Concert Grand 2, Studio Grand, Studio
Grand 2, Mellow Grand, and Mellow Grand 2 piano sounds.
The Damper Resonance function will return to the default setting of ‘5’ when the S and T Value buttons are pressed
simultaneously, or when the power is turned off.
The User Memory function can be used to store the desired Damper Resonance setting, allowing the preferred Damper
Resonance setting to remain selected even after the power is turned off. Please refer to the instructions on page 43
- 14) USER MEMORY - for more information.
OR
2.Damper Reso.
= 5
CA111_EN.indd 27 2008/04/12 0:58:49

Page
28
7
MENU
FUNCTIONS
3) STRING RESONANCE
String Resonance refers to a phenomenon present among acoustic pianos, whereby the strings of held notes
resonate ‘sympathetically’ with other notes of the same harmonic series. The String Resonance function of the
CA111 piano attempts to simulate this phenomenon.
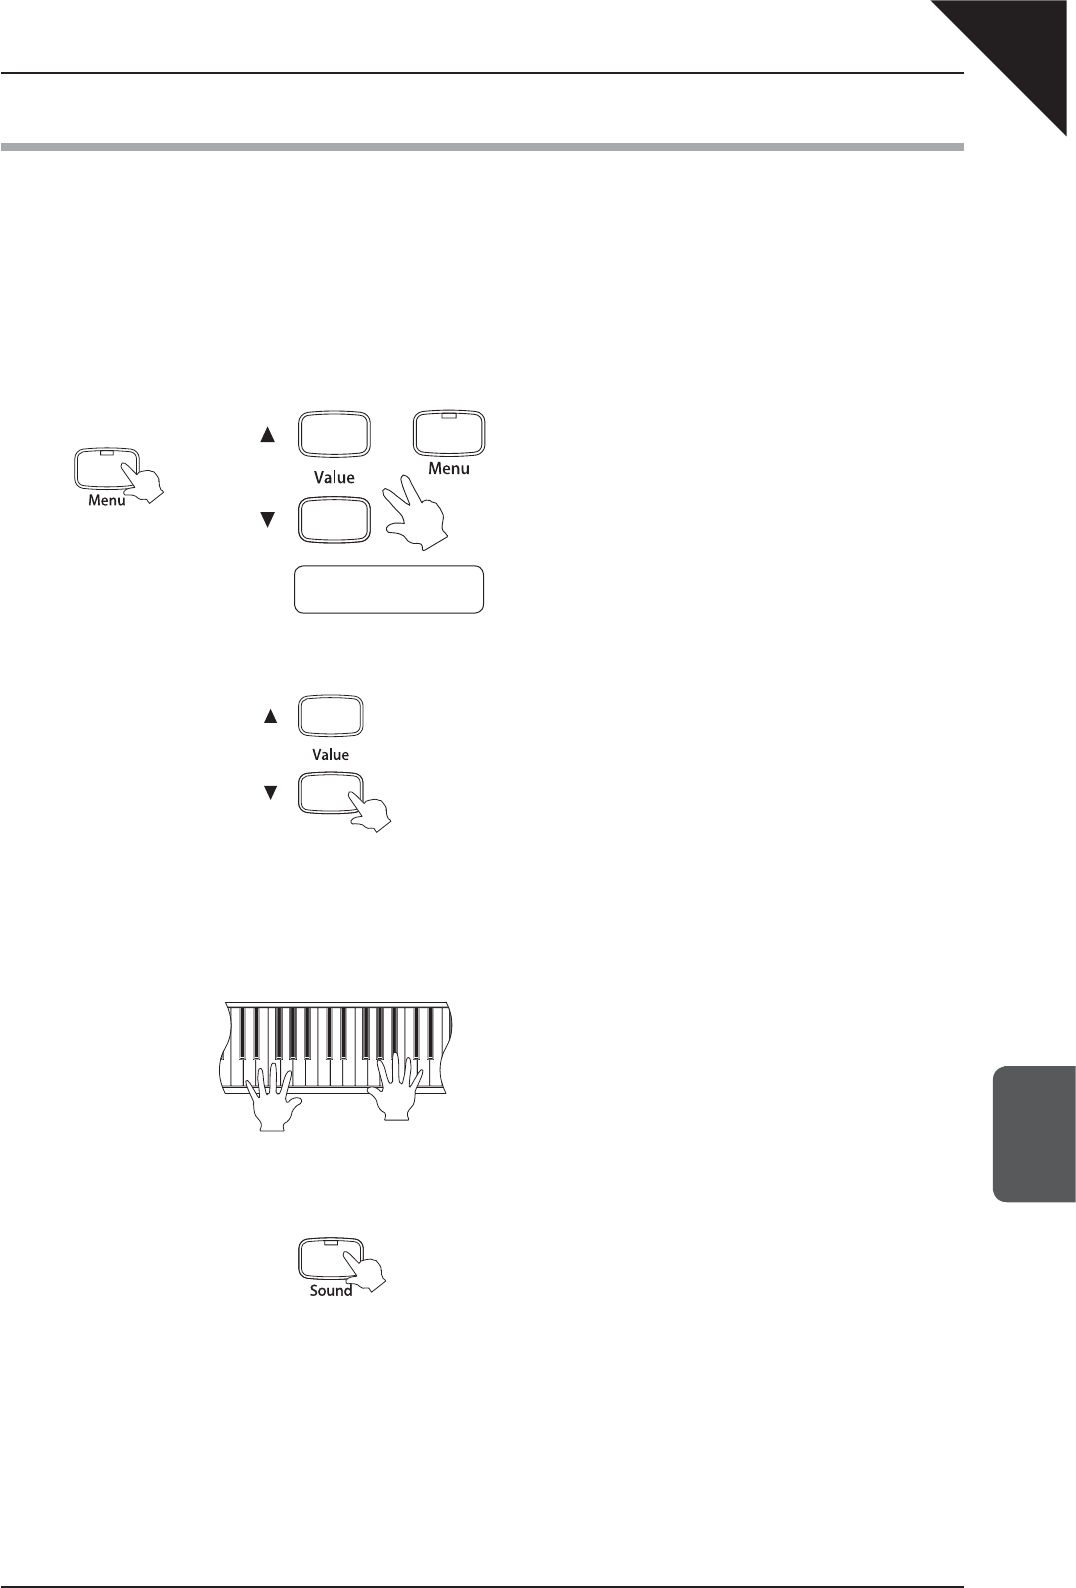
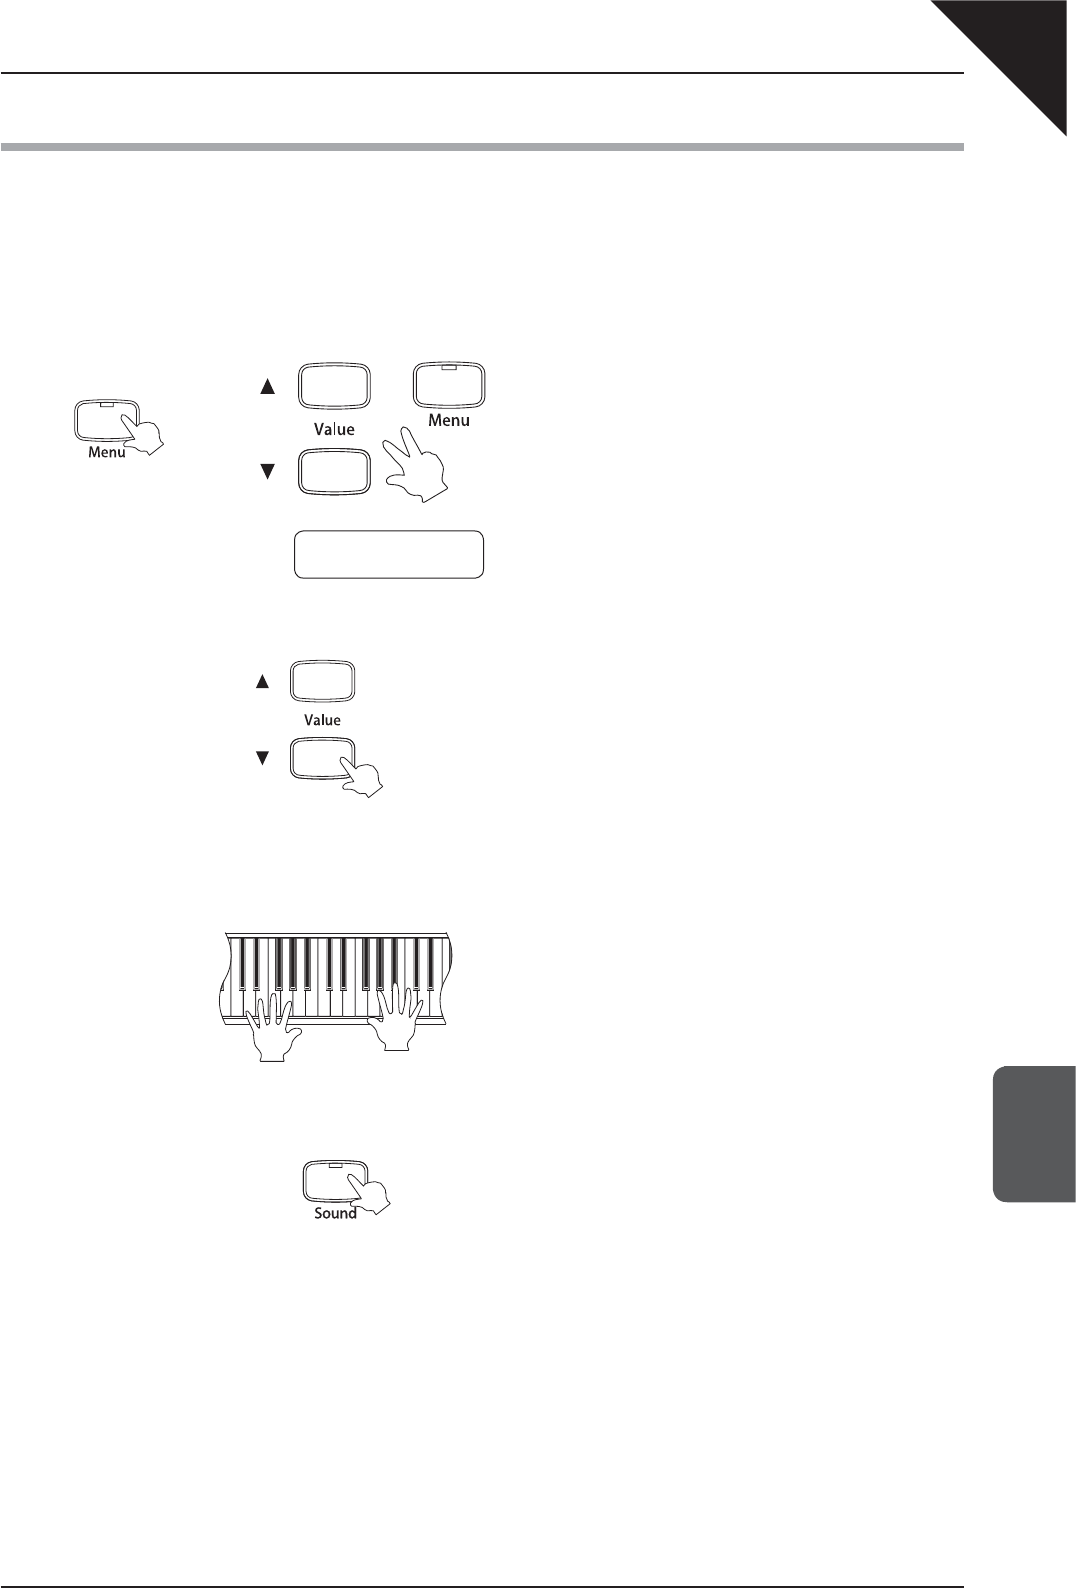
Step 1
Press the Menu button repeatedly, or press and hold the Menu button then press the S or T Value buttons,
until the String Resonance function is selected.
The LED indicator for the Menu button will turn on.
The String Resonance menu function will be shown in the
LCD display.
The level of resonance will be shown on the second line
of the LCD display.
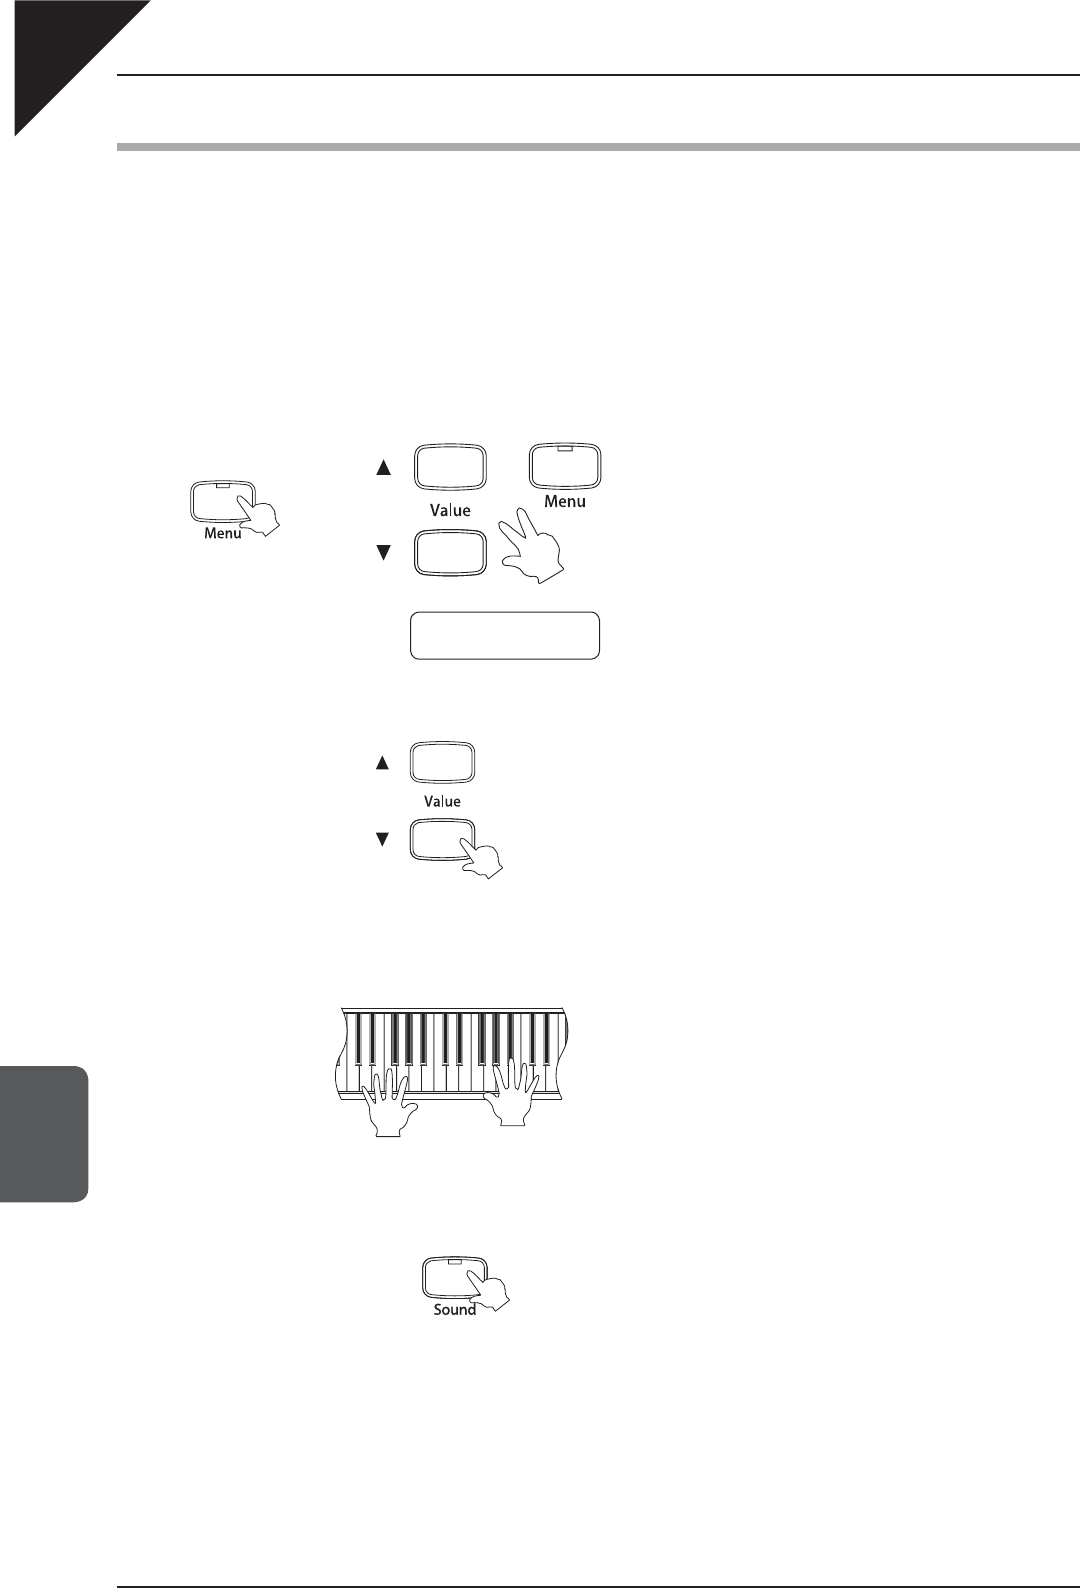
Step 2
Press the S or T Value buttons to select the desired string resonance level.
¡ A string resonance level of ‘1’ produces a very subtle effect, while the maximum level of ‘10’ creates a strong,
more pronounced resonance. Setting the string resonance to ‘Off’ will disable the function entirely.
Step 3
Play the piano, holding down one key while playing other keys of the keyboard.
The degree of resonance will vary, depending on the value
specifi ed in Step 2.
Step 4
Press the Sound button to exit the String Resonance menu.
The LED indicator for the Menu button will turn off.
The selected sound will be shown in the LCD display.
Alternatively, press the Menu button again to select other menu functions.
OR
3.String Reso.
= 5
CA111_EN.indd 28 2008/04/12 0:58:50
Page
29
7
MENU
FUNCTIONS
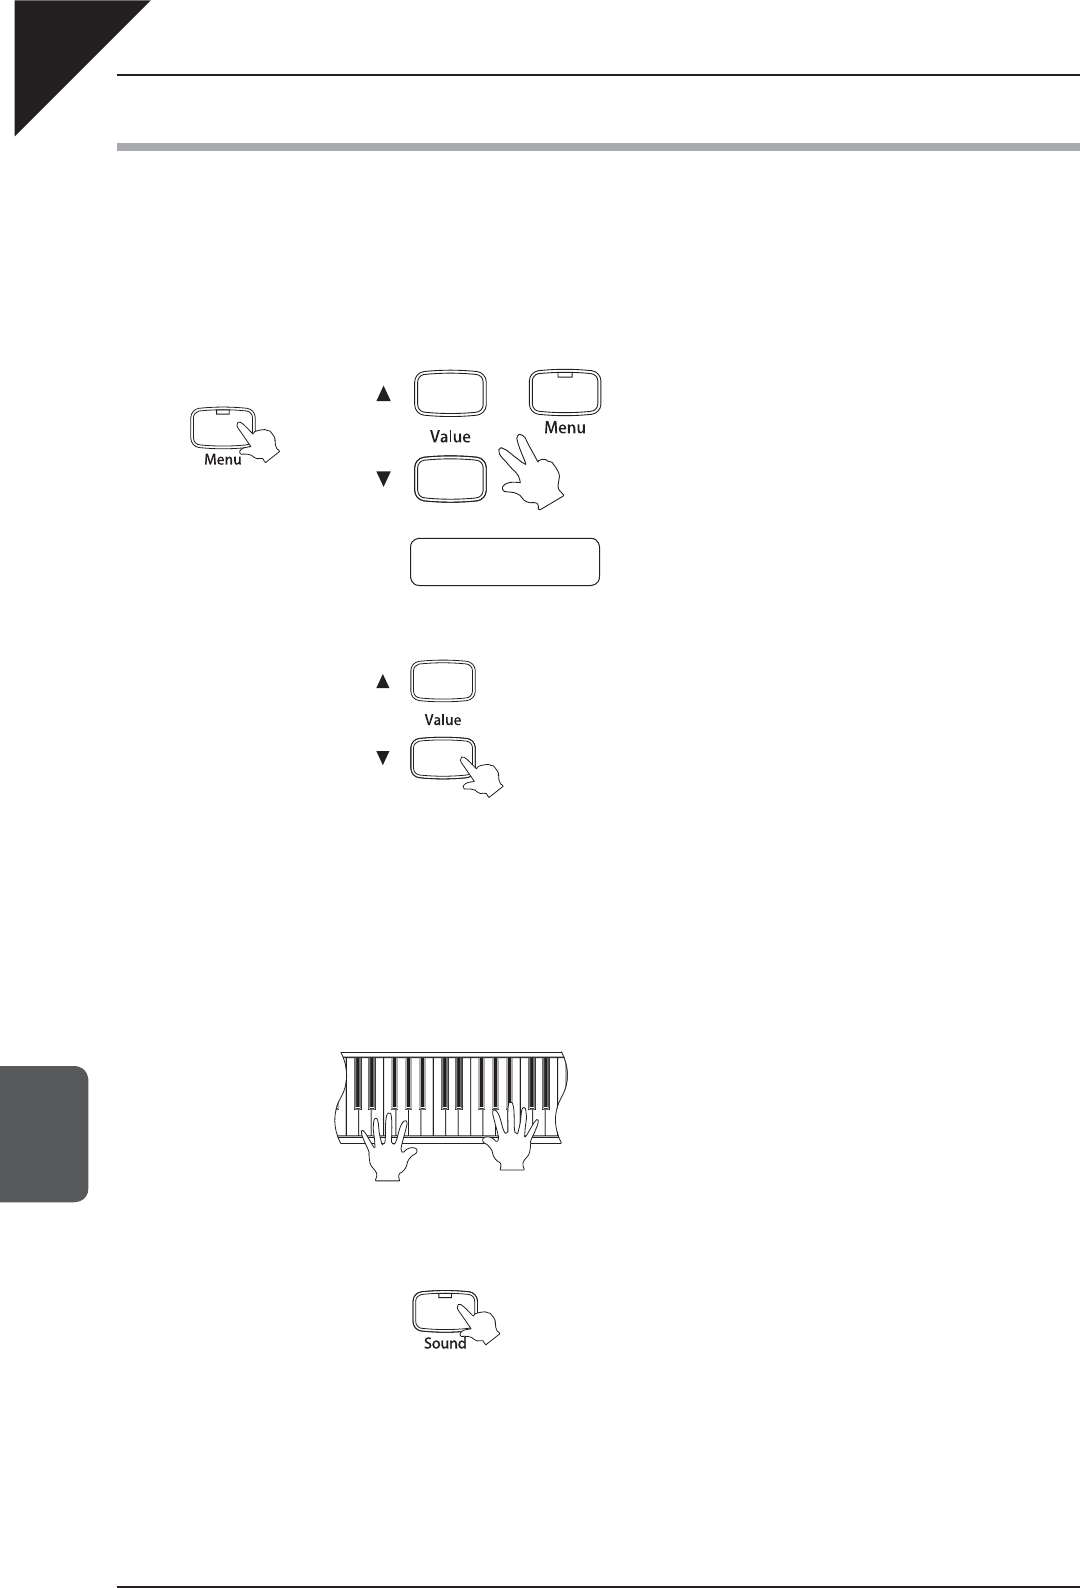
About String Resonance
Even when the damper pedal is not depressed on an acoustic piano, the strings for any notes held will be un-dampened
and will resonate freely in sympathy with the strings of other notes that you play if they are part of the same harmonic
series. In addition, adjacent notes will also resonate.
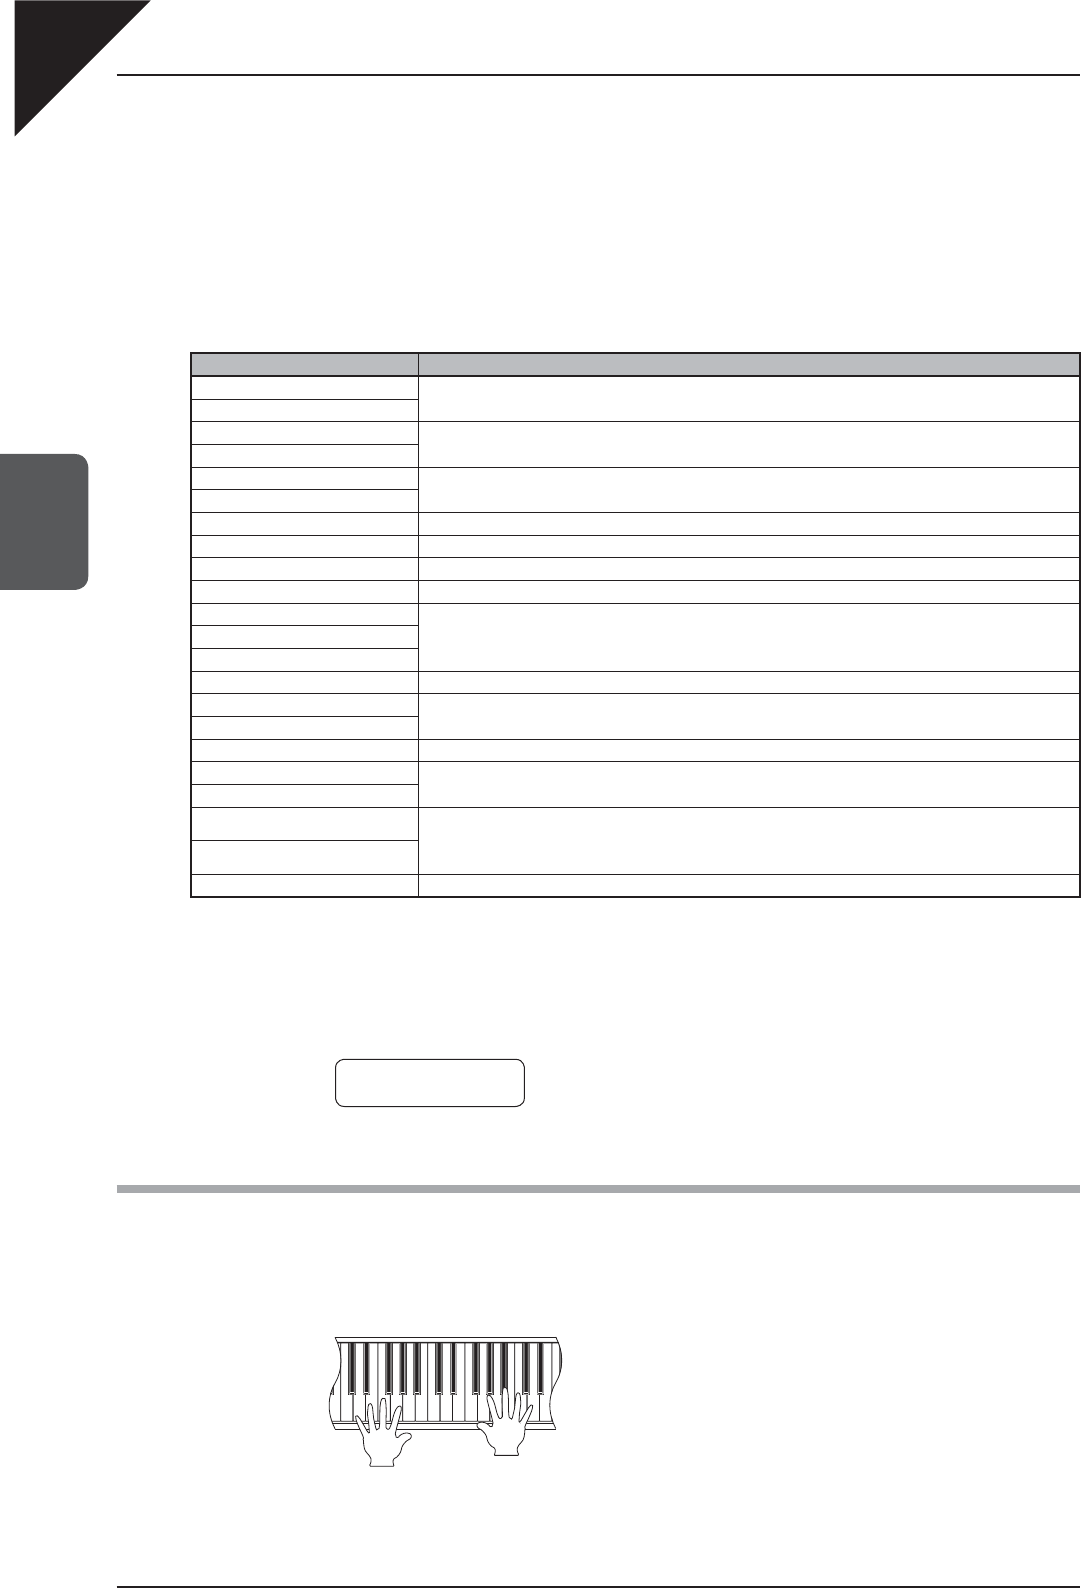
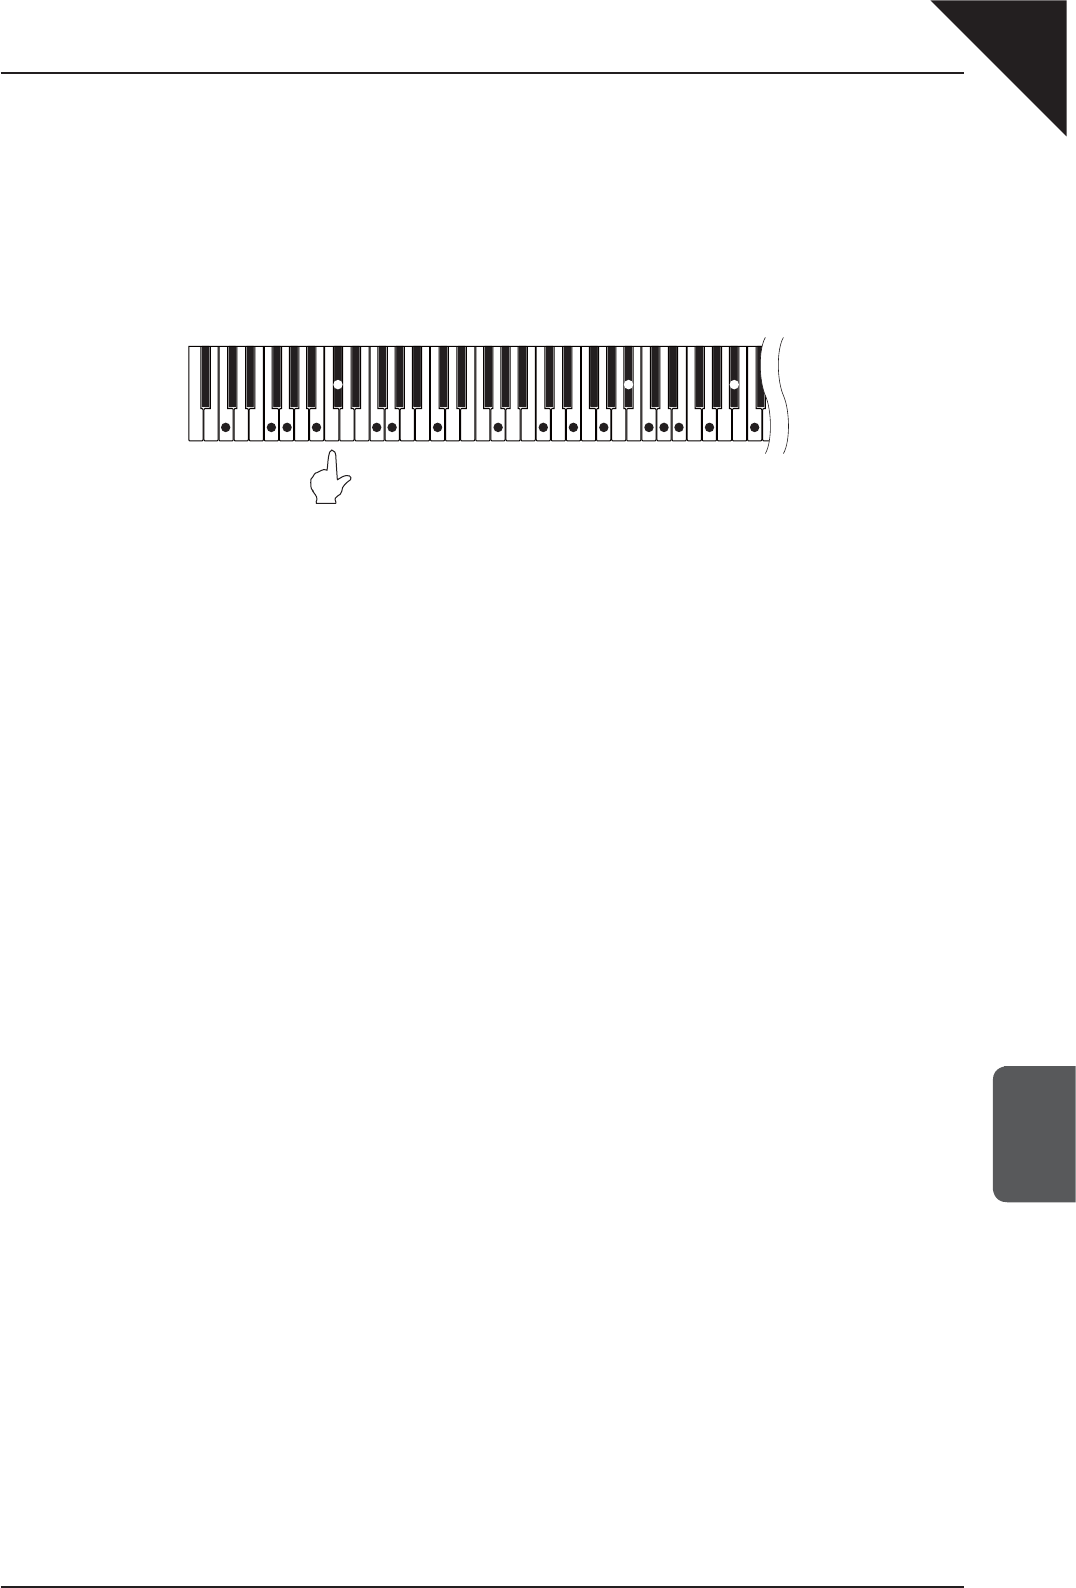
For example, when playing the keys shown below while holding down the ‘C’ key, the string of the ‘C’ key resonates and
produces a sound.
Quietly press and hold down the ‘C’ key, and then quickly tap each of the keys shown below. Depending on the value
specifi ed in Step 2, it should be possible to clearly hear the String Resonance simulation.
The String Resonance function will only be applied to the Concert Grand, Concert Grand 2, Studio Grand, Studio Grand
2, Mellow Grand, Mellow Grand 2, Modern Piano and Rock Piano piano sounds.
The String Resonance function will not be applied while the damper pedal is depressed.
The String Resonance function will return to the default setting of ‘5’ when the S and T Value buttons are pressed
simultaneously, or when the power is turned off.
The User Memory function can be used to store the desired String Resonance setting, allowing the preferred String
Resonance setting to remain selected even after the power is turned off. Please refer to the instructions on page 43
- 14) USER MEMORY - for more information.
CCFG FG C E DEGCGCGB
D
B
B
Play and hold a ‘C’ note.
CA111_EN.indd 29 2008/04/12 0:58:51
Page
30
7
MENU
FUNCTIONS
4) KEY OFF EFFECT
Especially for low-pitched sounds, when a key is played strongly and released quickly, the sound of the damper
touching the strings can often be heard immediately before the sound stops. The Key Off Effect function of the
CA111 piano attempts to simulate this phenomenon.
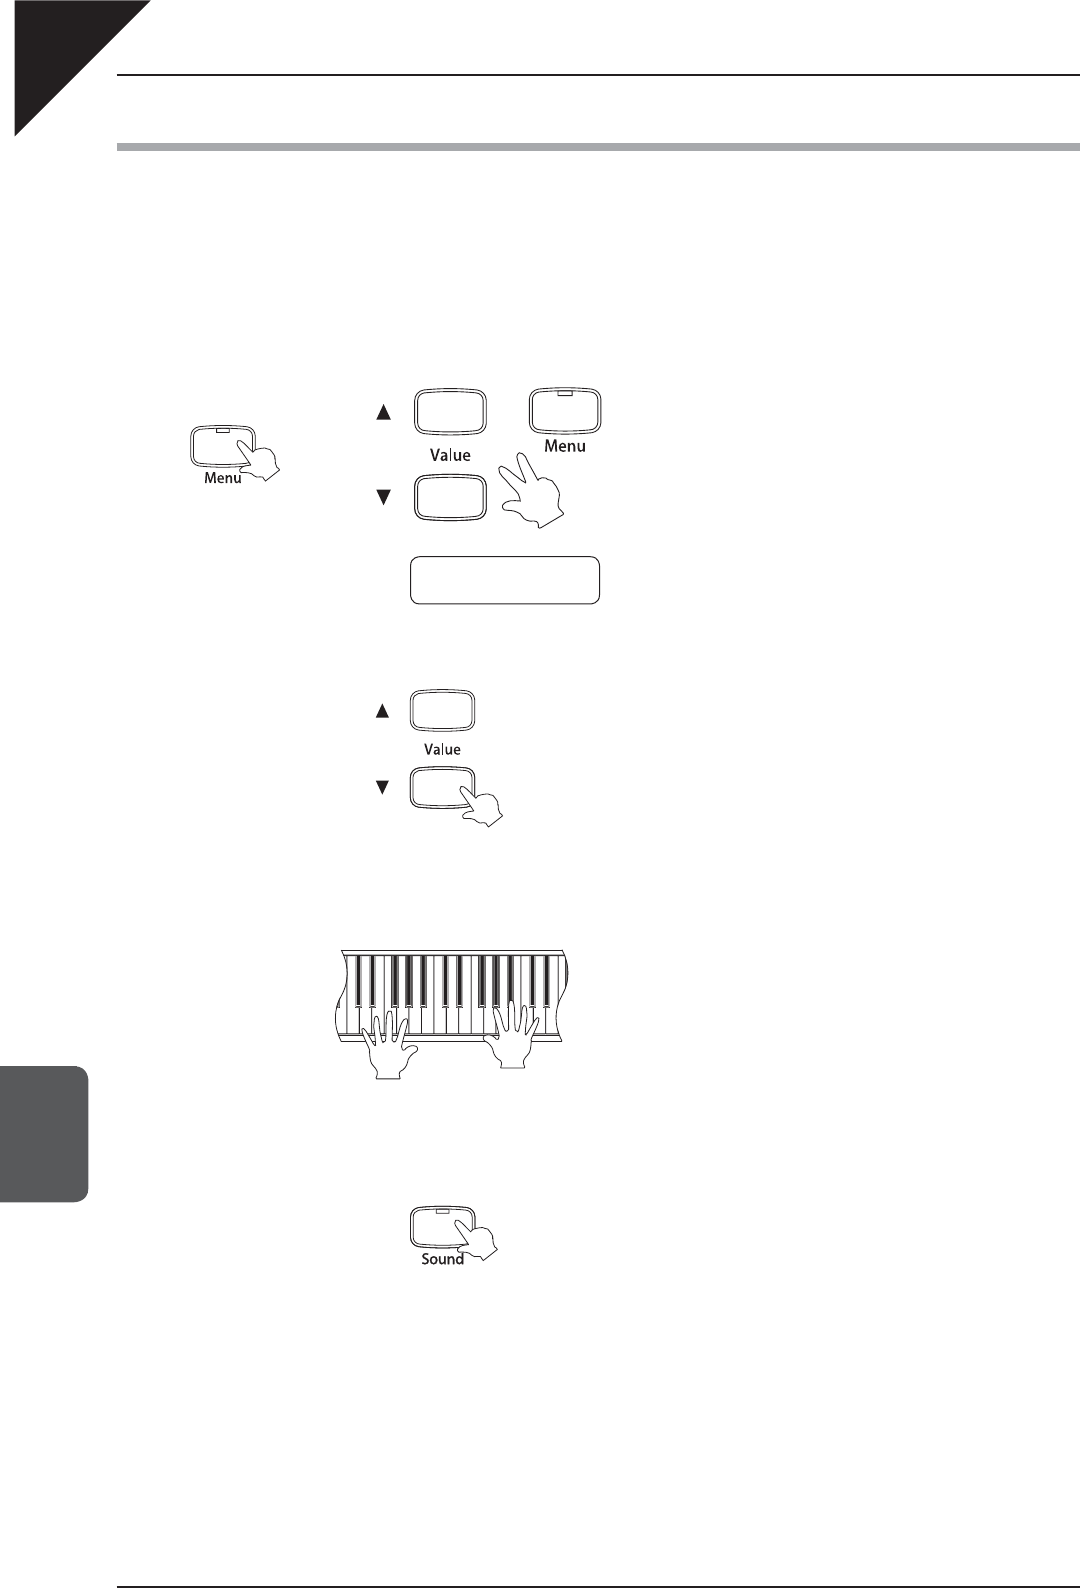
Step 1
Press the Menu button repeatedly, or press and hold the Menu button then press the S or T Value buttons,
until the Key Off Effect function is selected.
The LED indicator for the Menu button will turn on.
The Key Off Effect menu function will be shown in the
LCD display.
The key off effect level will be shown on the second line
of the LCD display.
Step 2
Press the S or T Value buttons to select the desired key off effect level.
¡ A key off effect level of ‘1’ produces a very subtle effect, while the maximum level of ‘10’ creates a strong, more
pronounced key off sound. Setting the key off effect to ‘Off’ will disable the function entirely.
Step 3
Play the piano.
The strength of the key off effect will vary, depending on
the value specifi ed in Step 2.
Step 4
Press the Sound button to exit the Key Off Effect menu.
The LED indicator for the Menu button will turn off.
The selected sound will be shown in the LCD display.
Alternatively, press the Menu button again to select other menu functions.
The Key Off Effect will only be applied to the Concert Grand, Concert Grand 2, Studio Grand, Studio Grand 2, Mellow
Grand, Mellow Grand 2, Modern Piano and Rock Piano piano sounds.
The Key Off Effect function will return to the default setting of ‘5’ when the S and T Value buttons are pressed
simultaneously, or when the power is turned off.
The User Memory function can be used to store the desired Key Off Effect setting, allowing the preferred Key Off Effect
setting to remain selected even after the power is turned off. Please refer to the instructions on page 43 - 14) USER
MEMORY - for more information.
OR
4.KeyOff Effect
= 5
CA111_EN.indd 30 2008/04/12 0:58:52
Page
31
7
MENU
FUNCTIONS
5) TOUCH
The Touch function allows different touch sensitivities for the keyboard to be selected, other than the standard touch of an
acoustic piano. The sensitivity can be changed to one of six different settings: Light, Light +, Normal, Heavy, Heavy +, or Off.
aLight + : For players with a delicate touch. Requires less striking force
to achieve a forte note.
bLight : For those still developing fi nger strength. A louder volume is
produced even when playing with a soft touch.
cNormal : Reproduces the standard touch sensitivity of an acoustic
piano throughout the entire dynamic range.
dHeavy : For those with strong fi ngers. Requires a heavier touch to
produce a loud volume.
eHeavy + :
Requires even greater striking force to achieve a loud volume.
fOff : A constant volume is produced regardless of how hard the
keys are struck. This setting is suitable for sounds that have
a fi xed dynamic range such as Organ and Harpsichord.
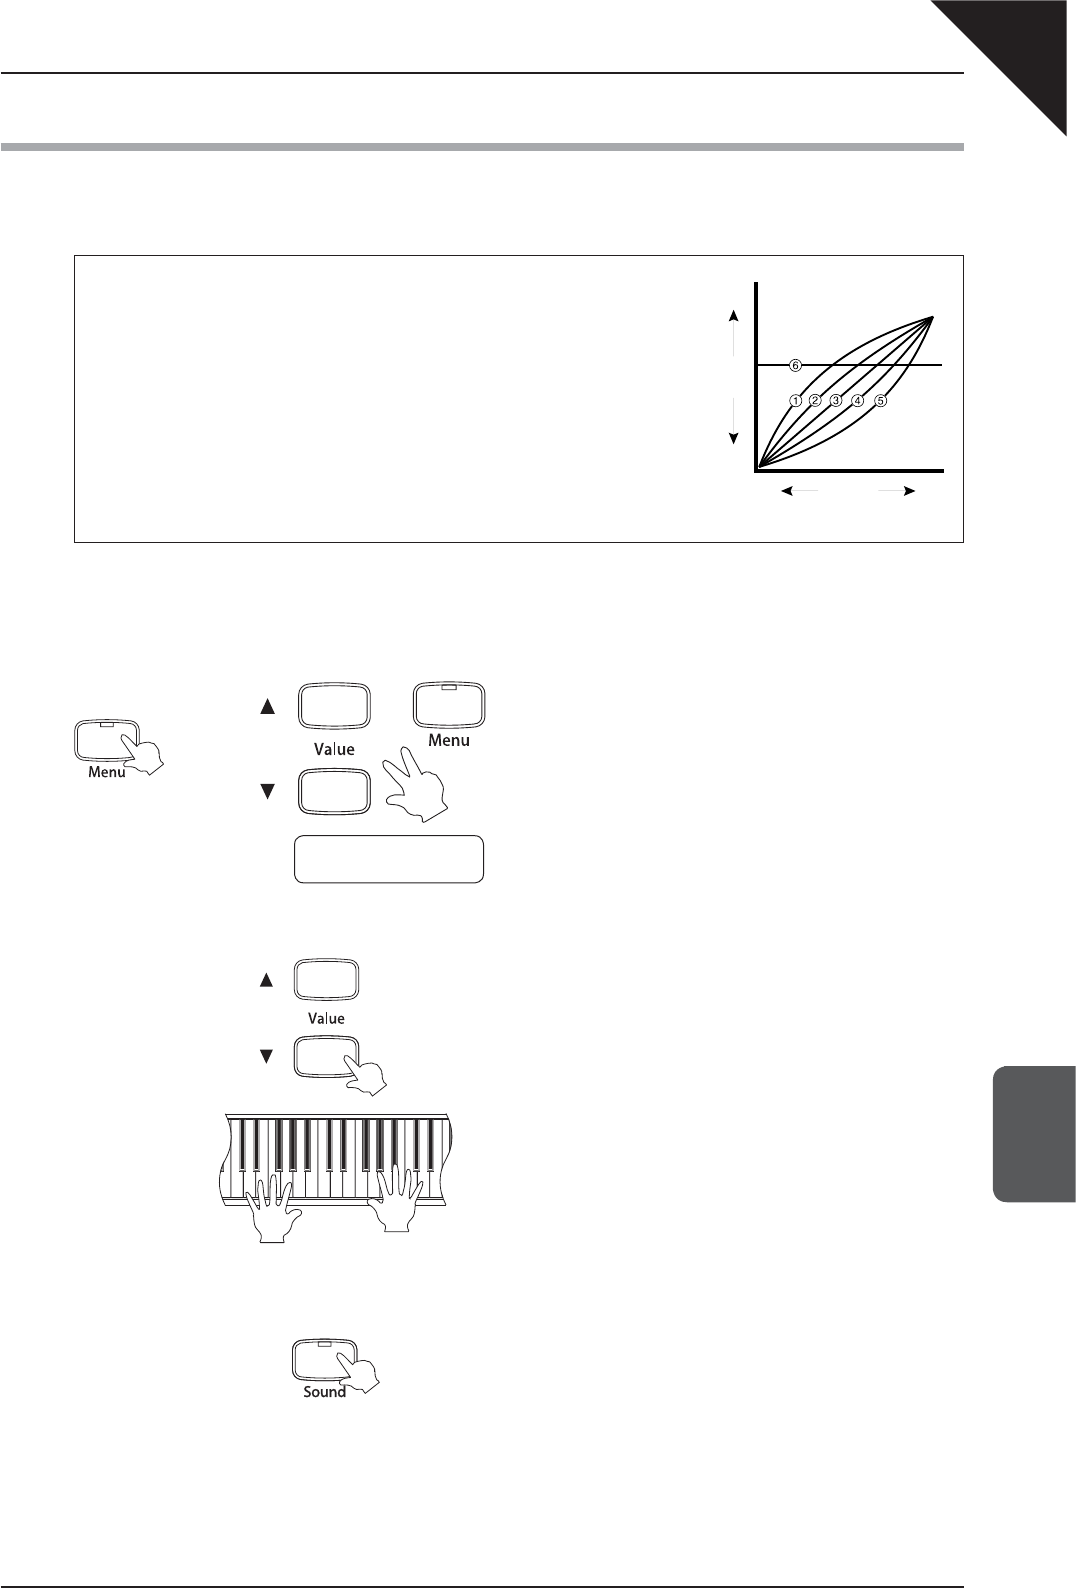
Step 1
Press the Menu button repeatedly, or press and hold the Menu button then press the S or T Value buttons,
until the Touch function is selected.
The LED indicator for the Menu button will turn on.
The Touch menu function will be shown in the LCD display.
The touch type will be shown on the second line of the
LCD display.
Step 2
Press the S or T Value buttons to select the desired touch setting.
Step 3
Play the piano.
The touch responsiveness of the keyboard will vary,
depending on the setting selected in Step 2.
Step 4
Press the Sound button to exit the Touch menu.
The LED indicator for the Menu button will turn off.
The selected sound will be shown in the LCD display.
Alternatively, press the Menu button again to select other menu functions.
The Touch function will return to the default setting of ‘Normal’ when the S and T Value buttons are pressed simultaneously,
or when the power is turned off.
The User Memory function can be used to store the desired Touch setting, allowing the preferred Touch setting to remain selected
even after the power is turned off. Please refer to the instructions on page 43 - 14) USER MEMORY - for more information.
StrongGentle
Soft
Loud
Sound
volume
Force
applied to
the keys
OR
5.Touch
= Normal
CA111_EN.indd 31 2008/04/12 0:58:53
Page
32
7
MENU
FUNCTIONS
6) TEMPERAMENT
The CA111 piano offers immediate access to a variety of musical temperaments popular during the Renaissance
and Baroque periods. It may prove interesting and educational to experiment with different temperaments, other
than the modern ‘equal temperament’ standard that is dominant in music today.
The following temperaments are available:
¡ Equal Temperament (piano)
(Equal P. only)
This is the default temperament. If a piano sound is selected the tuning is stretched
like an acoustic piano (Equal Temperament). If any other type of sound is selected
the tuning will be Equal (fl at). An explanation of Equal Temperament and Equal
Temperament (fl at) is provided later in this section.
If a piano sound is used in a layer with any other sound, then both sounds will use
the Equal Temperament (stretched) tuning.
¡ Pure Temperament (major)
(Pure major)
¡ Pure Temperament (minor)
(Pure minor)
This temperament, which eliminates dissonances for thirds and fi fths, is still popular
for choral music because of its perfect harmony.
Performers must be aware which key they are playing in when using this
temperament.
Any key modulation will result in dissonances. When playing music in a particular key,
the key of the temperament must also be correctly matched.
When playing in a major key select Pure (major) and when playing in a minor key
select Pure (minor).
¡ Pythagorean Temperament
(Pythagorean)
This temperament, which uses mathematical ratios to eliminate dissonance for fi fths,
is very limited for use with chords, but it produces very characteristic melodic lines.
¡ Meantone Temperament
(Meantone)
This temperament, which uses a mean between a major and minor whole tone to
eliminate dissonance for thirds, was devised to eliminate the lack of consonances
experienced with certain fi fths for the Mersenne Pure Temperament. It produces
chords that are more beautiful than those with the Equal Temperament.
¡ Werckmeister III Temperament
(Werckmeister)
¡ Kirnberger III Temperament
(Kirnberger)
These two temperaments are placed in between Meantone and Pythagorean.
For music with few accidentals, this temperament produces the beautiful chords
of the mean tone, but as accidentals increase, the temperament produces the
characteristic melodies of the Pythagorean Temperament. It is used primarily for
classical music written in the Baroque era to revive the original characteristics.
¡ Equal Temperament (fl at)
(Equal Flat)
This is an ‘unstretched’ Equal Temperament that divides the scale into twelve equal
semitones. This produces the same chordal intervals in all twelve keys, and has
the advantage of limitless modulation of the key. However the tonality of each key
becomes less characteristic and no chord is in pure consonance.
¡ Equal Temperament
(stretched)
This is the most popular piano temperament. The hearing ability of a human is
uneven and is not as accurate with high frequency and low frequency as it is with
the middle range. This temperament’s tuning is stretched to compensate for this so
the sound will be heard naturally to the ears. This ‘stretched’ Equal Temperament is
a practical variation of the ‘unstretched’ Equal Temperament which was invented on
a mathematical basis.
CA111_EN.indd 32 2008/04/12 0:58:55

Page
33
7
MENU
FUNCTIONS
Step 1
Press the Menu button repeatedly, or press and hold the Menu button then press the S or T Value buttons,
until the Temperament function is selected.
The LED indicator for the Menu button will turn on.
The Temperament menu function will be shown in the
LCD display.
The temperament type will be shown on the second line
of the LCD display.
Step 2
Press the S or T Value buttons to select the desired temperament type.
After selecting the desired temperament type, please refer to the instructions on page 34 - 7) KEY OF TEMPERAMENT
- for information regarding the key signature of the selected temperament.
Step 3
Play the piano.
The temperament selected in Step 2 will be utilised for
the sound.
Step 4
Press the Sound button to exit the Temperament menu.
The LED indicator for the Menu button will turn off.
The selected sound will be shown in the LCD display.
Alternatively, press the Menu button again to select other menu functions.
The Temperament function will return to the default setting of ‘Equal Temperament (piano)’ when the S and T Value
buttons are pressed simultaneously, or when the power is turned off.
The User Memory function can be used to store the desired Temperament setting, allowing the preferred Temperament
setting to remain selected even after the power is turned off. Please refer to the instructions on page 43 - 14) USER
MEMORY - for more information.
Equal Temperament (piano)
ÇÈ
Pure Temperament (major)
Pure Temperament (minor)
Pythagorean Temperament
Meantone Temperament
Æ
Å
Equal Temperament (stretched)
Equal Temperament (fl at)
Kirnberger III Temperament
Werckmeister III Temperament
ÇÈ
S T Value button
6.Temperament
= Equal(P.only)
6.Temperament
= Pure(minor)
6.Temperament
= Pythagorean
6.Temperament
= Meantone
6.Temperament
= Equal
6.Temperament
= Equal(f at)
6.Temperament
= Kirnberger
6.Temperament
= Werkmeister
6.Temperament
= Pure(major)
Æ
Å
Æ
Å
Æ
Å
Æ
Å
Æ
Å
OR
6.Temperament
= Equal(P.only)
CA111_EN.indd 33 2008/04/12 0:58:55

Page
34
7
MENU
FUNCTIONS
7) KEY OF TEMPERAMENT
Limitless modulation of the key only became available after the invention of Equal Temperament. When using
a temperament other than Equal Temperament, care must be taken to choose the correct key signature. For
example, if the song to be played is written in D major, ‘D’ would be chosen as the temperament key. The Key of
Temperament function allows the desired key signature for the selected temperament to be selected. Please note
that the Key of Temperament function will not be available if Equal Temperament is selected.
Step 1
Press the Menu button repeatedly, or press and hold the Menu button then press the S or T Value buttons,
until the Key of Temperament function is selected.
The LED indicator for the Menu button will turn on.
The Key of Temperament menu function will be shown in
the LCD display.
The key of temperament will be shown on the second line
of the LCD display.
Step 2
Press the S or T Value buttons to select the desired key of temperament setting.
¡ The key of temperament can be set between the range of ‘C’ to ‘B’.
Step 3
Play the piano.
The key of temperament selected in Step 2 will be utilised
for the sound.
Step 4
Press the Sound button to exit the Key of Temperament menu.
The LED indicator for the Menu button will turn off.
The selected sound will be shown in the LCD display.
Alternatively, press the Menu button again to select other menu functions.
The Key of Temperament function cannot be altered when Equal Temperament is selected.
The Key of Temperament function will return to the default setting of ‘C’ when the S and T Value buttons are pressed
simultaneously, or when the power is turned off.
The User Memory function can be used to store the desired Key of Temperament setting, allowing the preferred Key of
Temperament setting to remain selected even after the power is turned off. Please refer to the instructions on page 43
- 14) USER MEMORY - for more information.
OR
7.Key of Temper
= C
CA111_EN.indd 34 2008/04/12 0:58:57
Page
35
7
MENU
FUNCTIONS
8) TUNING
This function allows the pitch of the CA111 piano to be fi nely adjusted, and may prove useful when playing with
other instruments.
Step 1
Press the Menu button repeatedly, or press and hold the Menu button then press the S or T Value buttons,
until the Tuning function is selected.
The LED indicator for the Menu button will turn on.
The Tuning menu function will be shown in the LCD
display.
The current tuning setting will be shown on the second line
of the LCD display.
Step 2
Press the S or T Value buttons to set the desired tuning value.
¡ The tuning value can be set within the range of 427.0 to 453.0 (Hz).
¡ The pitch will be changed by 0.5 Hz increments each time one of the Value buttons is pressed.
Step 3
Play the piano.
The tuning value set in Step 2 will be utilised for the
sound.
Step 4
Press the Sound button to exit the Tuning menu.
The LED indicator for the Menu button will turn off.
The selected sound will be shown in the LCD display.
Alternatively, press the Menu button again to select other menu functions.
The Tuning function will return to the default setting of ‘440.0 Hz’ when the S and T Value buttons are pressed
simultaneously, or when the power is turned off.
The User Memory function can be used to store the desired Tuning setting, allowing the preferred Tuning setting to remain
selected even after the power is turned off. Please refer to the instructions on page 43 - 14) USER MEMORY - for more
information.
OR
8.Tuning
= 440.0
CA111_EN.indd 35 2008/04/12 0:58:58
Page
36
7
MENU
FUNCTIONS
9) STRETCH TUNING
Stretch tuning is a piano-specifi c tuning method in which the tuning for the lower notes is slightly lower and the
tuning for the higher notes is slightly higher than the settings made in the Equal Temperament. The Stretch Tuning
function determines the level of stretch tuning. There are two type of stretch tuning available, Normal and Wide.
Please note that the Stretch Tuning function will only be available if either Equal Temperament (piano) or Equal
Temperament is selected.
Step 1
Press the Menu button repeatedly, or press and hold the Menu button then press the S or T Value buttons,
until the Stretch Tuning function is selected.
The LED indicator for the Menu button will turn on.
The Stretch Tuning menu function will be shown in the
LCD display.
The stretch tuning type will be shown on the second line
of the LCD display.
Step 2
Press the S or T Value buttons to select the desired stretch tuning type.
¡ The stretch tuning function can be set to either ‘Normal’ or ‘Wide’, which - as the name would suggest - creates
a more pronounced tuning adjustment for the lower and higher notes.
Step 3
Play the piano.
The type of stretch tuning selected in Step 2 will be utilised
for the sound.
Step 4
Press the Sound button to exit the Stretch Tuning menu.
The LED indicator for the Menu button will turn off.
The selected sound will be shown in the LCD display.
Alternatively, press the Menu button again to select other menu functions.
The Stretch Tuning function can only be altered if Equal Temperament (piano) or Equal Temperament is selected.
The Stretch Tuning function will return to the default setting of ‘Normal’ when the S and T Value buttons are pressed
simultaneously, or when the power is turned off.
The User Memory function can be used to store the desired Stretch Tuning setting, allowing the preferred Stretch Tuning
setting to remain selected even after the power is turned off. Please refer to the instructions on page 43 - 14) USER
MEMORY - for more information.
OR
9.StretchTuning
= Normal
CA111_EN.indd 36 2008/04/12 0:59:00
Page
37
7
MENU
FUNCTIONS
10) TRANSPOSE
The transpose function allows the key of the CA111 piano to be raised or lowered in half steps. This is particularly
useful when accompanying instruments with different sounds, or when a song learned in one key must be played
in another key.
Step 1
Press the Menu button repeatedly, or press and hold the Menu button then press the S or T Value buttons,
until the Transpose function is selected.
The LED indicator for the Menu button will turn on.
The Transpose menu function will be shown in the LCD
display.
The current transpose setting will be shown on the second
line of the LCD display.
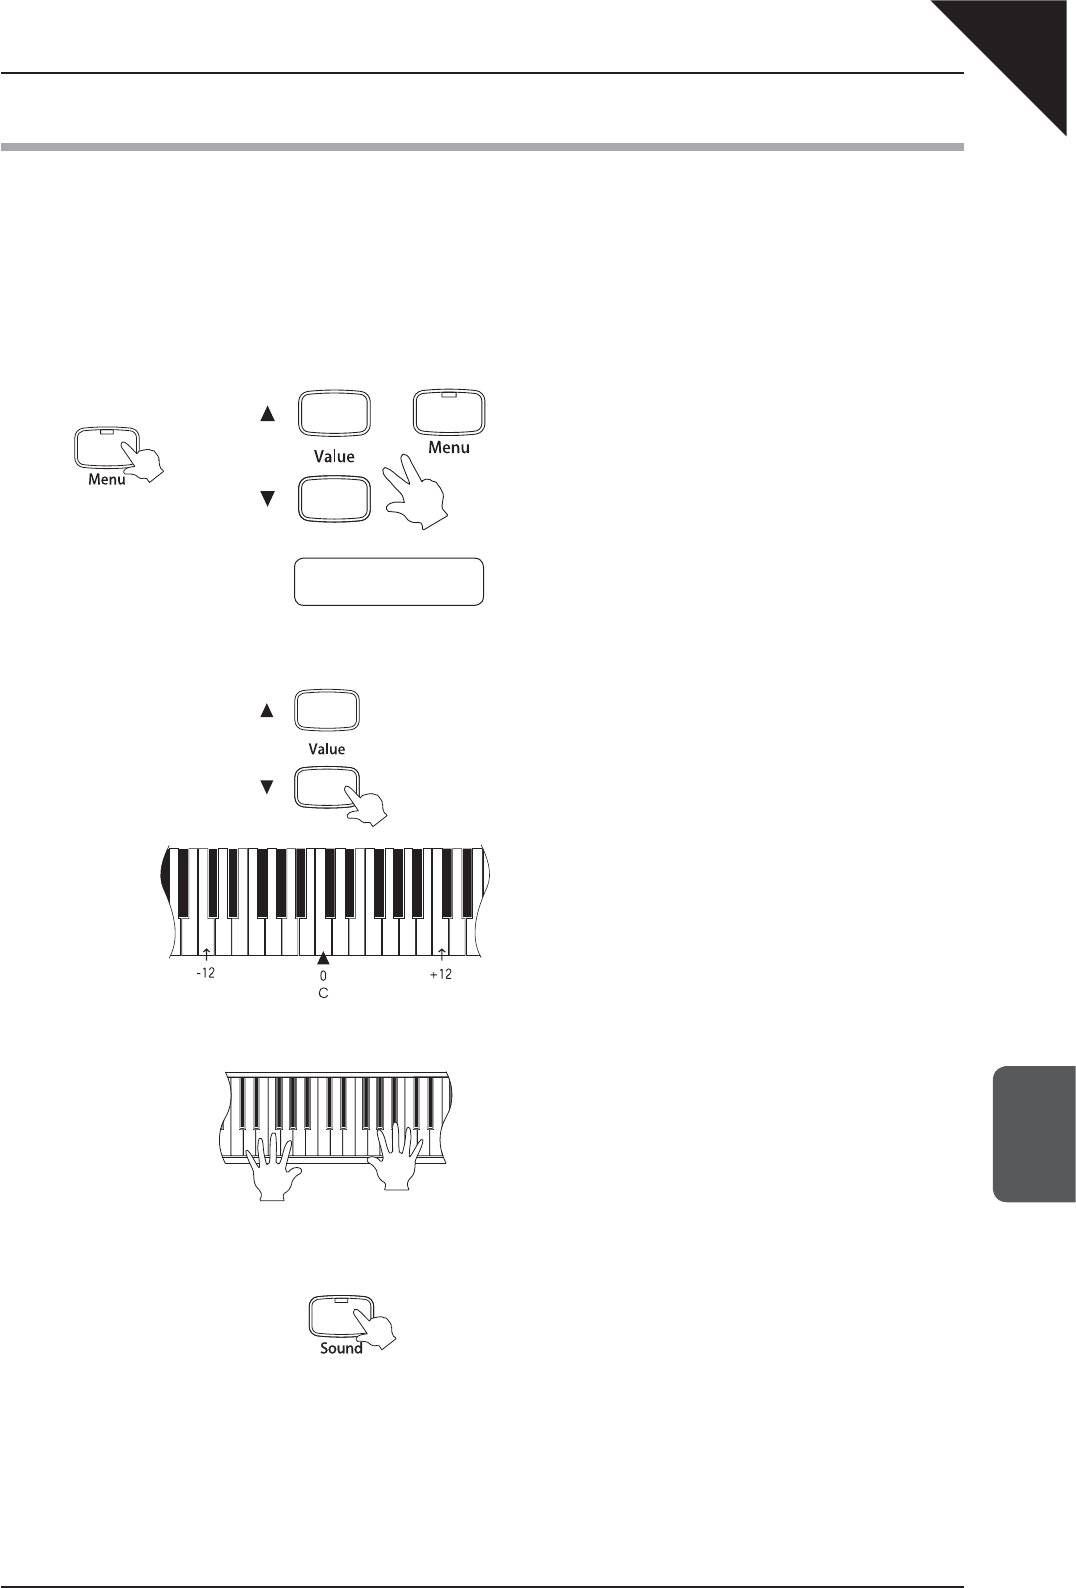
Step 2
Press the S or T Value buttons to set the desired transpose value.
The ‘C’ key in the centre of the piano keyboard corresponds
to the value ‘0’.
The piano pitch can be transposed by up to 12 halftones
higher or 12 halftones lower.
Step 3
Play the piano.
The transpose value set in Step 2 will be applied to the
sound.
Step 4
Press the Sound button to exit the Transpose menu.
The LED indicator for the Menu button will turn off.
The selected sound will be shown in the LCD display.
Alternatively, press the Menu button again to select other menu functions.
The Transpose function will return to the default setting of ‘0’ when the S and T Value buttons are pressed simultaneously,
or when the power is turned off.
The User Memory function can be used to store the desired Transpose setting, allowing the preferred Transpose setting
to remain selected even after the power is turned off. Please refer to the instructions on page 43 - 14) USER MEMORY
- for more information.
OR
10.Transpose
= 0
CA111_EN.indd 37 2008/04/12 0:59:01
Page
38
7
MENU
FUNCTIONS
11) MIDI CHANNEL
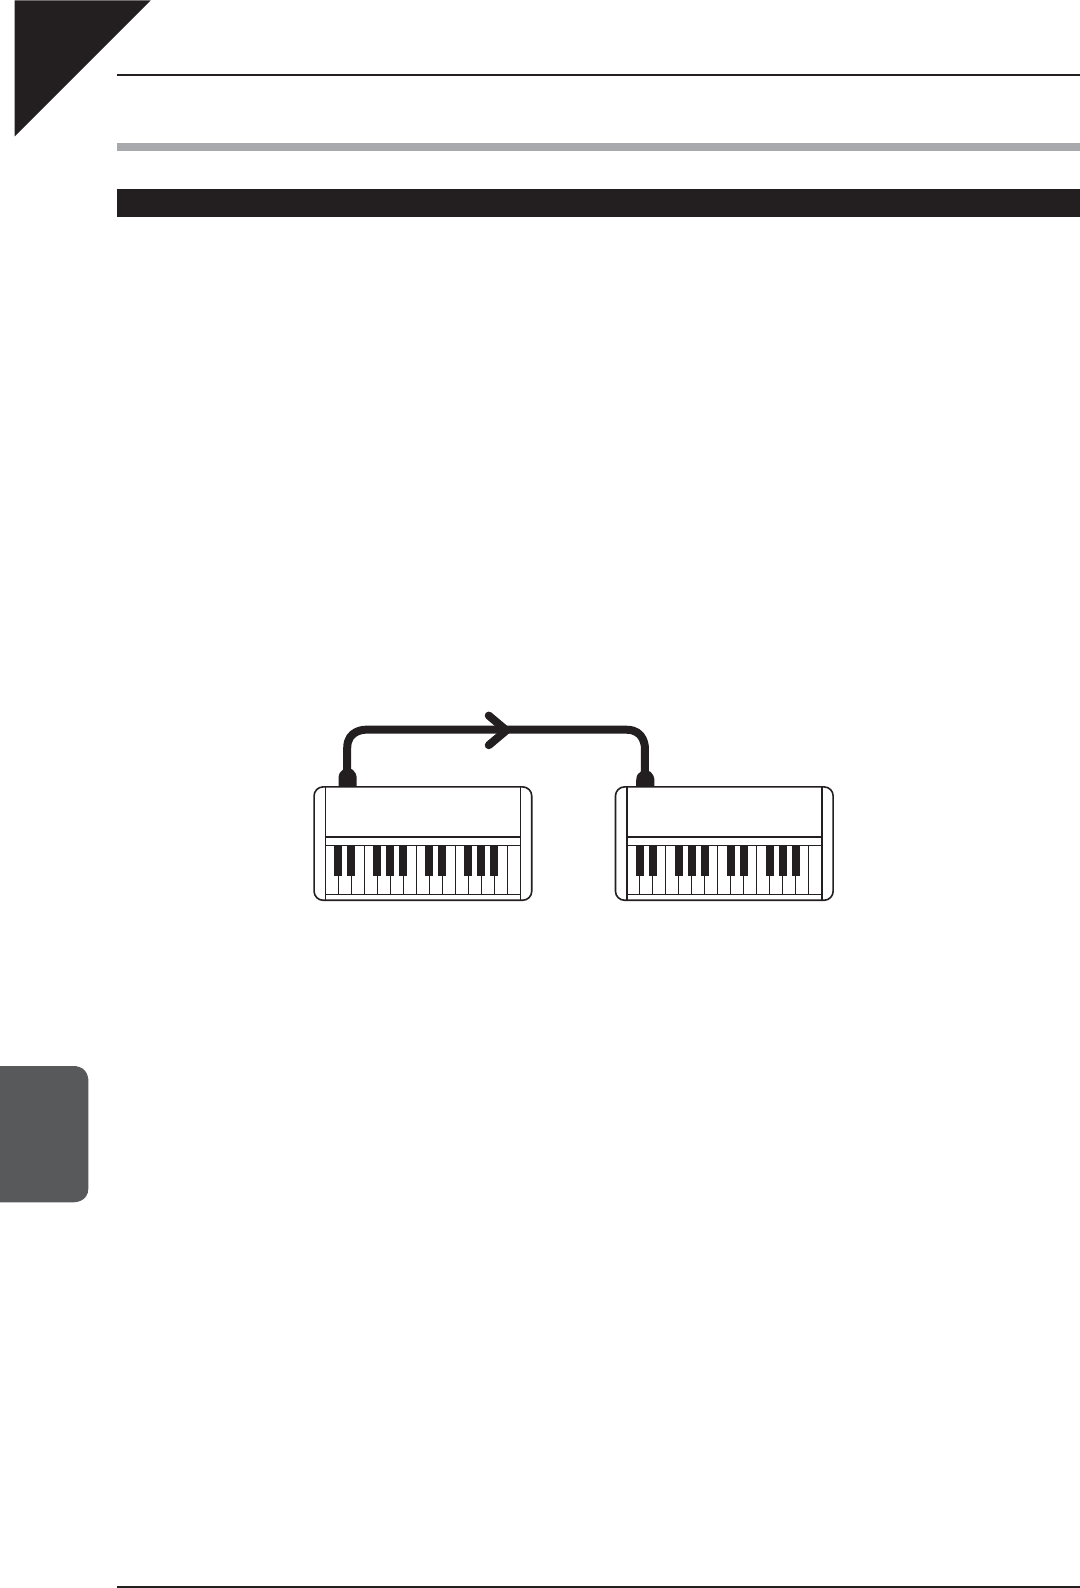
MIDI OVERVIEW
The term MIDI is an acronym for Musical Instrument Digital Interface, an international standard for connecting
synthesizers, sequencers (MIDI recorders) and other electronic instruments in order to exchange performance
data.
The CA111 piano is equipped with two MIDI jacks for exchanging data: MIDI IN and MIDI OUT. Each uses a special
cable with a DIN connector.
MIDI IN : For receiving note, program change and other data.
MIDI OUT : For sending note, program change and other data.
MIDI uses channels to exchange data back and forth between MIDI devices. There are receive (MIDI IN) and
transmit (MIDI OUT) channels. Most musical instruments or devices with MIDI functions are equipped with both
MIDI IN and MIDI OUT jacks and are capable of transmitting and receiving data via MIDI.
The receive channels are used to receive data from another MIDI device and the transmit channels are used to
transmit data to another MIDI device.
MIDI connection example:
When connected as shown in the illustration above, MIDI data sent from a will be also played on b if both
channels match.
MIDI instruments have 16 channels for sending and receiving MIDI data.
IN
OUT
Sending Instrument aReceiving Instrument b
CA111_EN.indd 38 2008/04/12 0:59:02
Page
39
7
MENU
FUNCTIONS
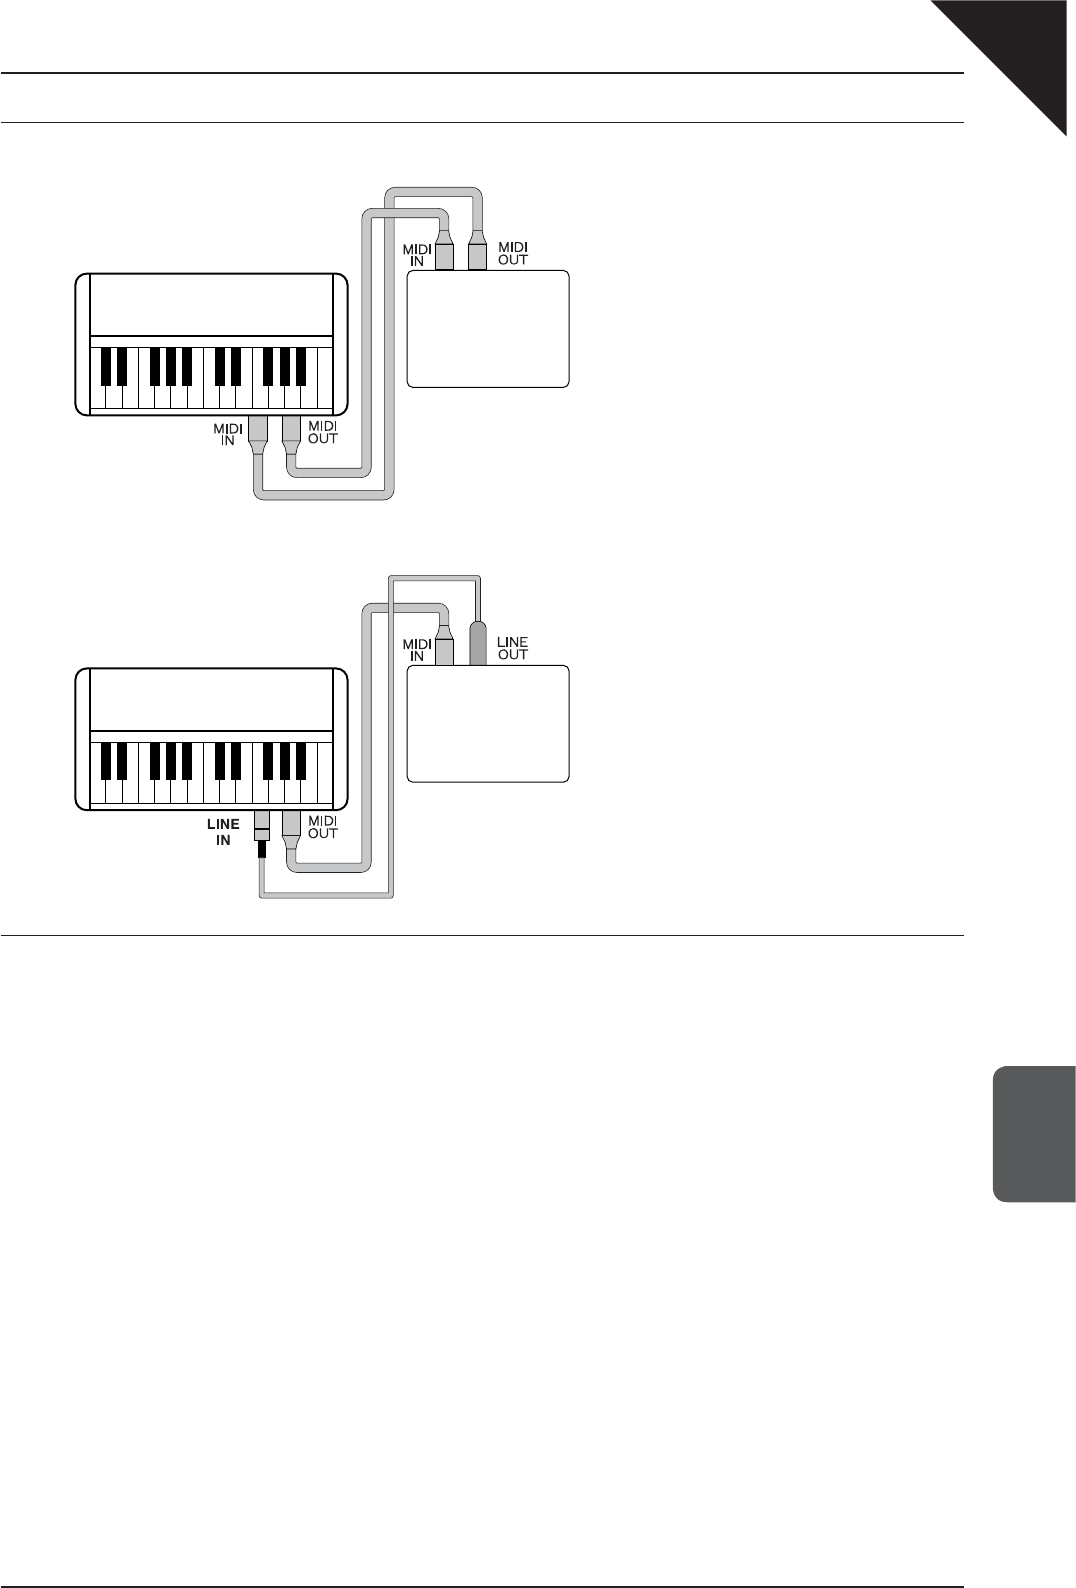
¡ MIDI Examples
¡ Connection to a sequencer:
When connected as shown in this illustration,
songs played on the CA111 piano can be
recorded with a sequencer, and then played
back at any time.
¡ Connection to another MIDI compatible keyboard or module:
When connected as shown in this illustration,
MIDI data sent from the CA111 piano can also
be played on a separate synthesizer. Moreover,
the audio output from the synthesizer can also
be connected directly to the CA111 piano.
Such a combination, for example, would allow
the CA111 piano sound to be combined with that
of a String sound from a separate synthesizer.
¡ MIDI Functions
The CA111 piano is capable of the following MIDI functions:
¡ Sending/Receiving keyboard note information (i.e. which keys are pressed).
¡ Sending/Receiving pedal information (i.e. ON/OFF data for the damper, soft and sostenuto pedals).
¡ Receiving volume data (i.e. adjusting the volume of the CA111 piano using a separate MIDI instrument).
¡ Sending/Receiving exclusive data.
¡ Sending recorded playback data (i.e. allowing recorded performances to be played using a separate MIDI device
or saved using an external sequencer).
Please refer to the complete listing on page 48 - MIDI Implementation Chart - for more information regarding MIDI
functionality.
Sequencer
Synthesizer
CA111_EN.indd 39 2008/04/12 0:59:03
Page
40
7
MENU
FUNCTIONS
MIDI Program Change numbers
Sound Name Program Number
Concert Grand 1
Concert Grand 2 2
Studio Grand 3
Studio Grand 2 4
Mellow Grand 5
Mellow Grand 2 6
Modern Piano 7
Rock Piano 8
Classic E.Piano 9
Modern E.P. 10
Slow Strings 11
Sound Name Program Number
String Pad 12
String Ensemble 13
Choir 14
Harpsichord 15
Harpsichord Oct. 16
Vibraphone 17
Church Organ 18
Diapason 19
Jazz Organ 20
Drawbar Organ 21
New Age Pad 22
The MIDI Channel function is used to determine on which MIDI channel the CA111 piano will exchange MIDI
information with external MIDI devices and instruments.
The selected channel will function as both the Transmit and Receive channel.
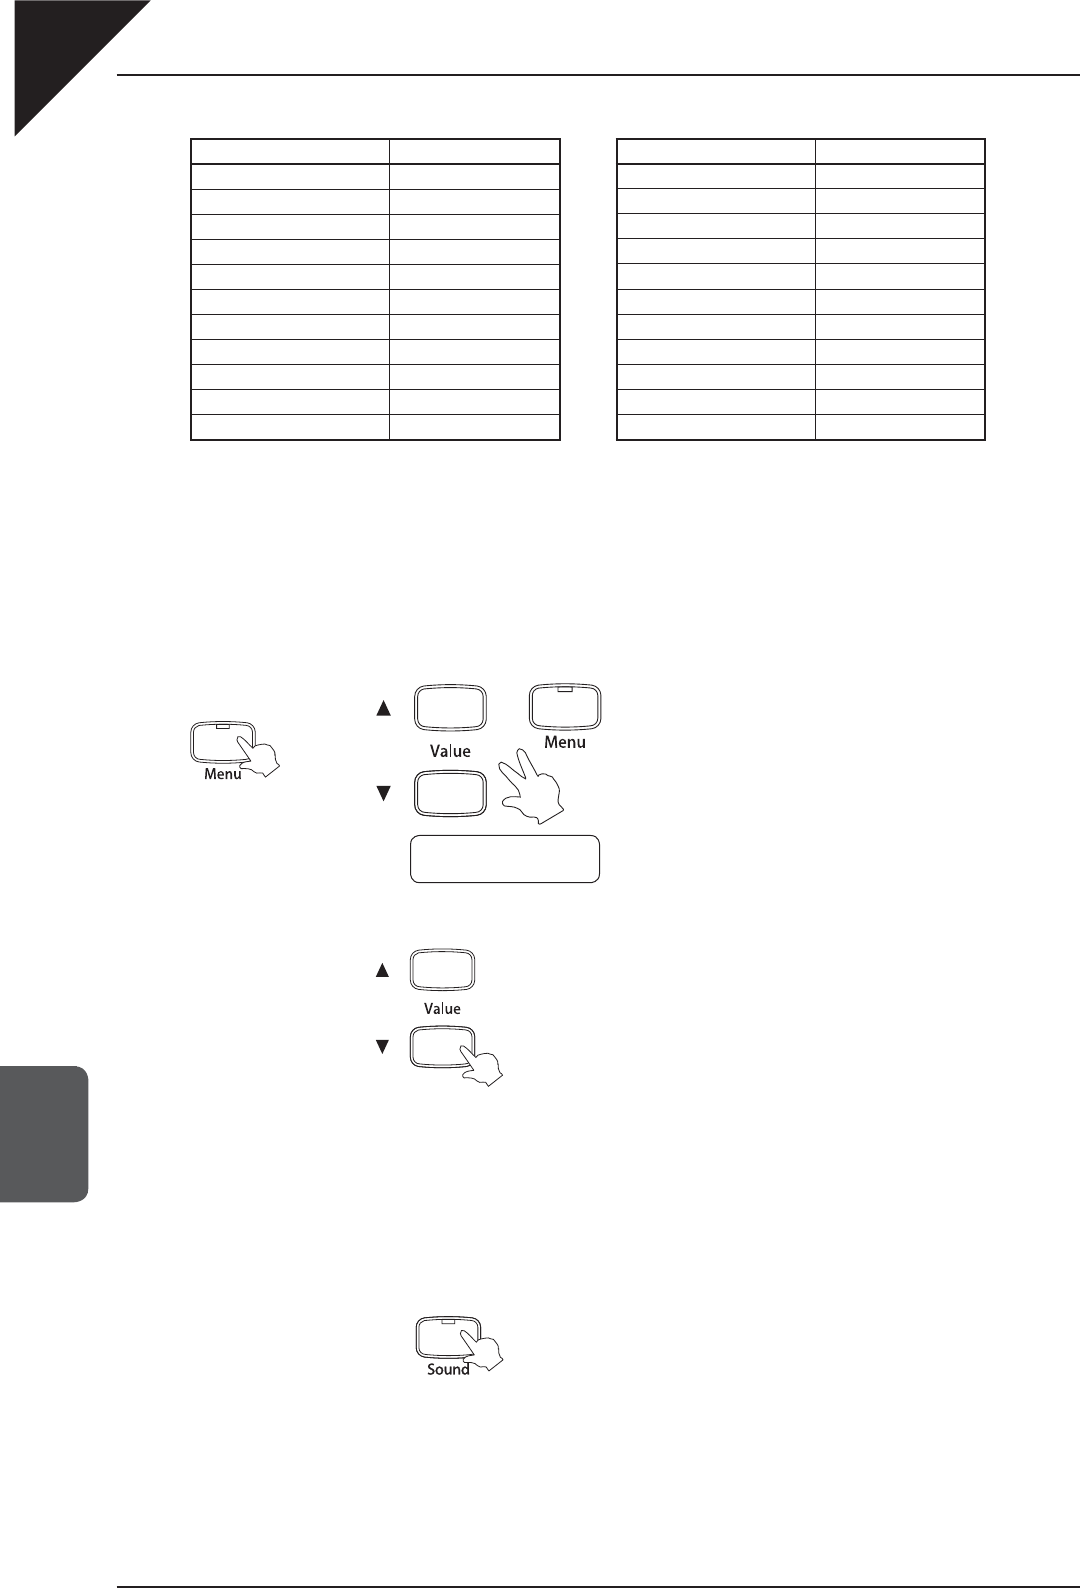
Step 1
Press the Menu button repeatedly, or press and hold the Menu button then press the S or T Value buttons,
until the MIDI Channel function is selected.
The LED indicator for the Menu button will turn on.
The MIDI Channel menu function will be shown in the
LCD display.
The MIDI channel number will be shown on the second
line of the LCD display.
Step 2
Press the S or T Value buttons to select the desired MIDI channel.
The MIDI Channel can be set to 1* or can be set to a specifi c channel within the range of 1 to 16.
The default CA111 piano MIDI Channel setting is set to receive MIDI channel information from all channels, 1 to 16. This
is often referred to as ‘OMNI ON’.
If, however, a specifi c MIDI Channel is selected, the CA111 piano will be set to ‘OMNI OFF’ and data will only be received
on that specifi ed channel.
Step 3
Press the Sound button to exit the MIDI Channel menu.
The LED indicator for the Menu button will turn off.
The selected sound will be shown in the LCD display.
Alternatively, press the Menu button again to select other menu functions.
The MIDI Channel function will return to the default setting of ‘1*’ (‘OMNI ON’) when the S and T Value buttons are
pressed simultaneously, or when the power is turned off.
The User Memory function can be used to store the desired MIDI Channel setting, allowing the preferred MIDI Channel
setting to remain selected even after the power is turned off. Please refer to the instructions on page 43 - 14) USER
MEMORY - for more information.
OR
11.MIDI Channel
= 1* (TRS/RCV)
CA111_EN.indd 40 2008/04/12 0:59:04

Page
41
7
MENU
FUNCTIONS
12) LOCAL CONTROL
This function determines whether the CA111 piano will play a sound when the keyboard is played.
With Local Control set to ‘On’, the CA111 piano will play a sound when the keyboard is played. However, even with
Local Control set to ‘Off’, the CA111 piano keyboard will continue to transmit data on the selected MIDI channel
to an external MIDI device or personal computer.
Step 1
Press the Menu button repeatedly, or press and hold the Menu button then press the S or T Value buttons,
until the Local Control function is selected.
The LED indicator for the Menu button will turn on.
The Local Control menu function will be shown in the LCD
display.
The local control setting will be shown on the second line
of the LCD display.
Step 2
Press the S or T Value buttons to enable or disable the local control setting.
Step 3
Press the Sound button to exit the Local Control menu.
The LED indicator for the Menu button will turn off.
The selected sound will be shown in the LCD display.
Alternatively, press the Menu button again to select other menu functions.
The Local Control function will return to the default setting of ‘On’ when the S and T Value buttons are
pressed simultaneously, or when the power is turned off.
The User Memory function can be used to store the desired Local Control setting, allowing the preferred
Local Control setting to remain selected even after the power is turned off. Please refer to the instructions
on page 43 - 14) USER MEMORY - for more information.
OR
12.Local Control
= On
CA111_EN.indd 41 2008/04/12 0:59:05

Page
42
7
MENU
FUNCTIONS
13) METRONOME VOLUME
The function allows the default metronome volume to be changed.
Step 1
Press the Menu button repeatedly, or press and hold the Menu button then press the S or T Value buttons,
until the Metronome Volume function is selected.
The LED indicator for the Menu button will turn on.
The Metronome Volume menu function will be shown in
the LCD display.
The current metronome volume level will be shown on the
second line of the LCD display.
Step 2
Press the S or T Value buttons to select the desired default metronome volume.
¡ The metronome volume level can be set within the range of 1 to 10.
Step 3
Press the Sound button to exit the Metronome Volume function menu.
The LED indicator for the Menu button will turn off.
The selected sound will be shown in the LCD display.
Alternatively, press the Menu button again to select other menu functions.
The Metronome Volume function will return to the default setting of ‘5’ when the S and T Value buttons are pressed
simultaneously, or when the power is turned off.
The User Memory function can be used to store the desired Metronome Volume setting, allowing the preferred Metronome
Volume setting to remain selected even after the power is turned off. Please refer to the instructions on page 43 - 14)
USER MEMORY - for more information.
OR
13.Metro.Volume
= 5
CA111_EN.indd 42 2008/04/12 0:59:06
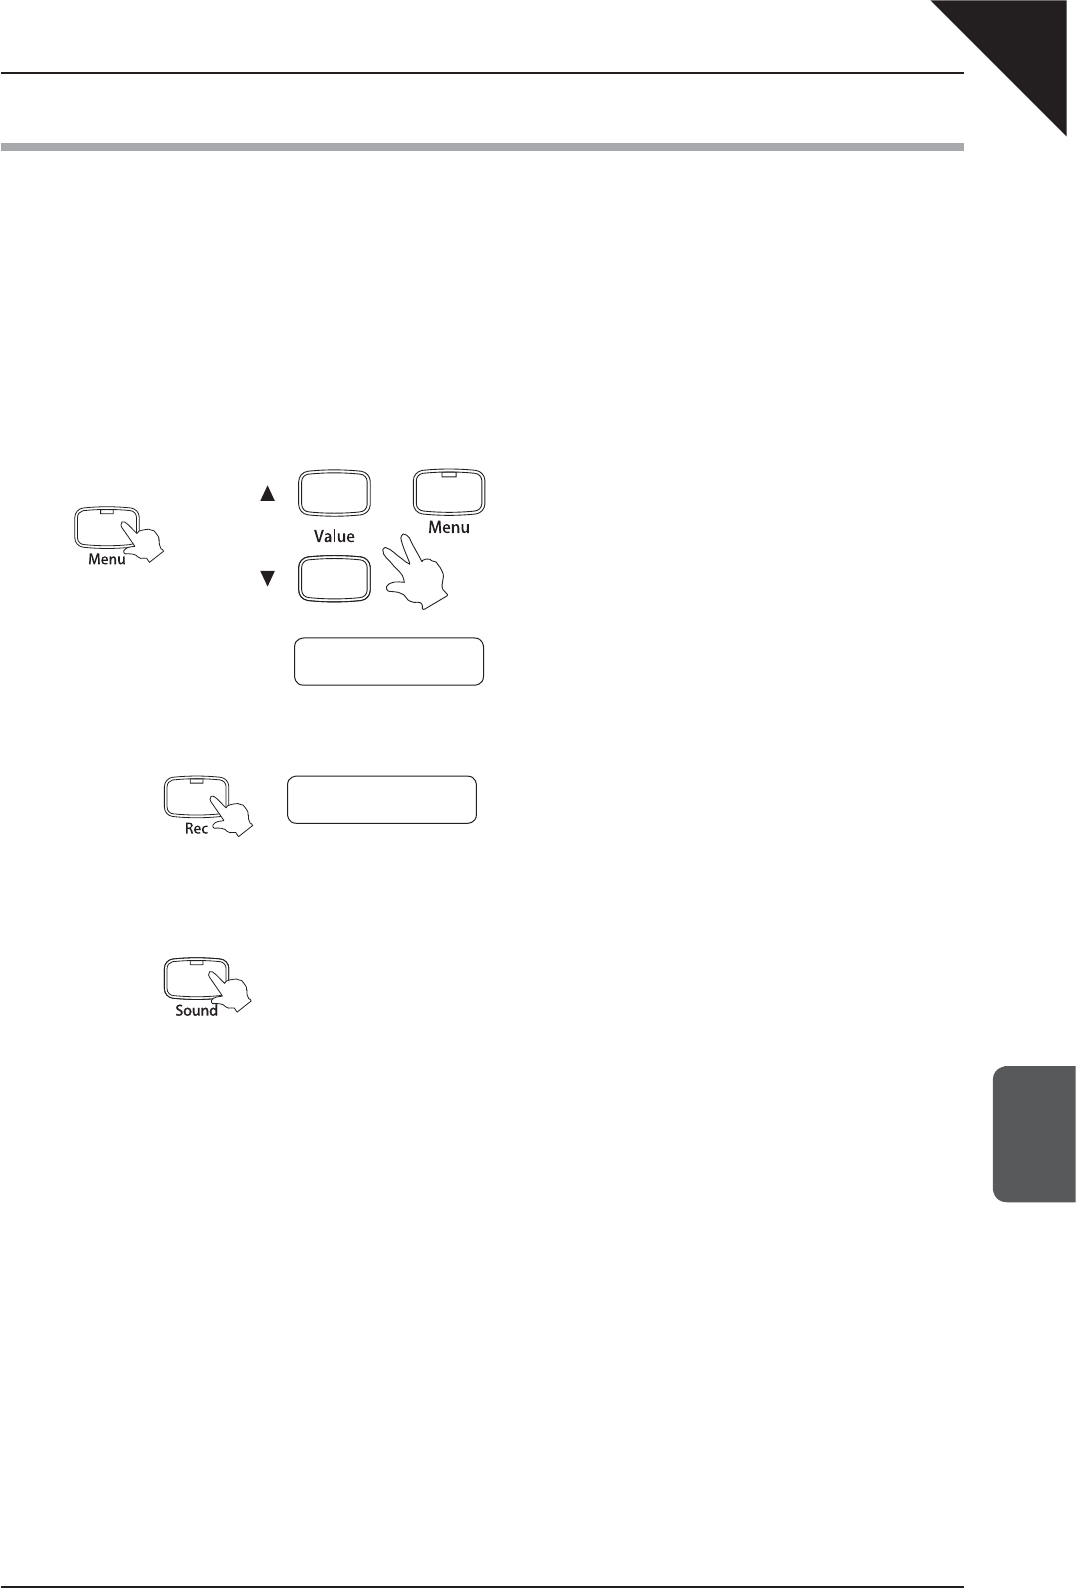
Page
43
7
MENU
FUNCTIONS
14) USER MEMORY
This function can be used to store user-defi nable settings, allowing the preferred settings to remain selected even
after the power is turned off.
The user memory will store the following settings:
¡ Initially selected sound
¡ Menu Function settings 0-13
Step 1
Press the Menu button repeatedly, or press and hold the Menu button then press the S or T Value buttons,
until the User Memory function is selected.
The LED indicator for the Menu button will turn on.
The User Memory menu function will be shown in the
LCD display.
Step 2
Press the Rec button to confi rm saving of the user memory.
‘Save completed’ will be shown in the LCD display.
Step 3
Press the Sound button to exit the User Memory function menu.
The LED indicator for the Menu button will turn off.
The selected sound will be shown in the LCD display.
Alternatively, press the Menu button again to select other menu functions.
14.User Memory
Save completed
OR
14.User Memory
Save ≥Press Rec
CA111_EN.indd 43 2008/04/12 0:59:07
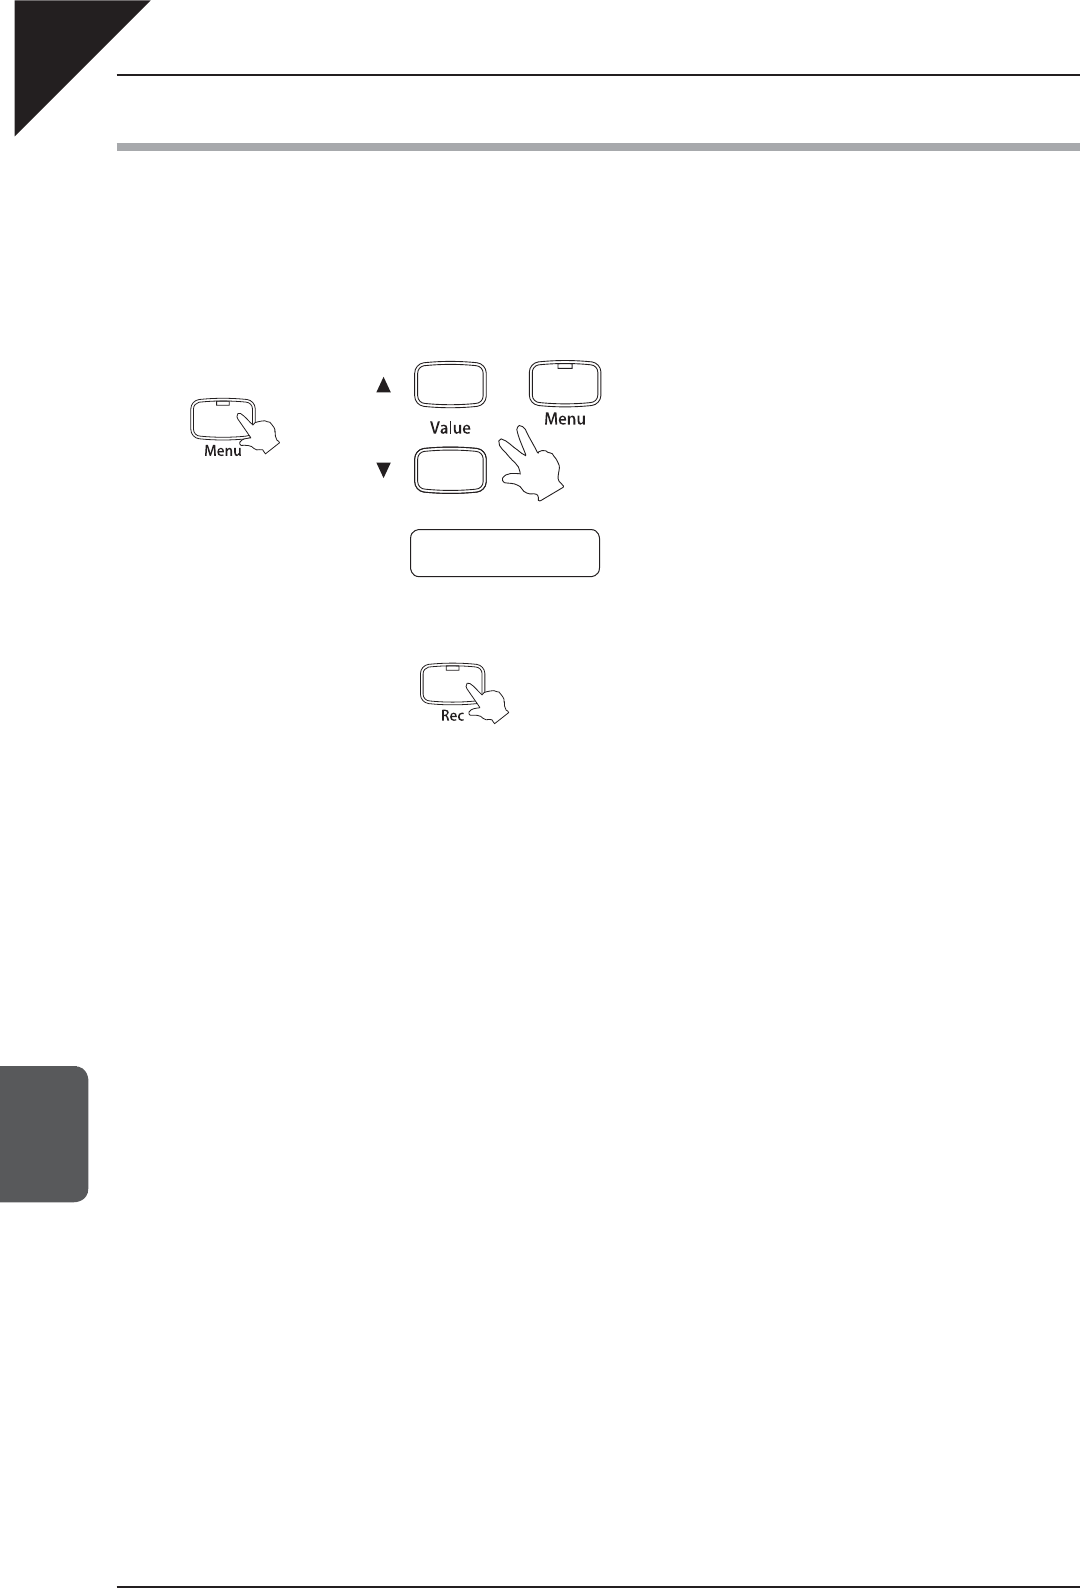
Page
44
7
MENU
FUNCTIONS
15) FACTORY RESET
This function will reset the CA111 piano to the default factory settings, and is displayed only if the User Memory
function has been used. All parameters saved in the User Memory will be reset to the factory preset values.
Step 1
Press the Menu button repeatedly, or press and hold the Menu button then press the S or T Value buttons,
until the Factory Reset function is selected.
The LED indicator for the Menu button will turn on.
The Factory Reset menu function will be shown in the
LCD display.
Step 2
Press the Rec button to restore the default factory settings.
The LED indicator for the Menu button will turn off.
OR
15.Factory Reset
Reset≥Press Rec
CA111_EN.indd 44 2008/04/12 0:59:08

Page
45
8
USB USAGE
8. USB USAGE
ABOUT THE USB CONNECTOR
yWhen the CA111 piano is connected to a computer via a commercially available USB cable, the CA111 piano
will be recognised as a standard MIDI device, allowing the instrument to send and receive MIDI messages just
as with a regular MIDI interface.
yConnect a ‘B’ type USB connector to the CA111 piano and an ‘A’ type USB connector to the computer.
ABOUT THE USB DRIVER
Additional driver software may be required in order to send and receive data between a computer and the
CA111 piano using a USB connection.
Please read the following instructions carefully for each computer/operating system type.
Windows XP/Me users:
The standard USB-MIDI driver installed by Windows XP/Me will be used automatically - additional driver software
should not be required.
To establish MIDI communications with the CA111 piano, ensure that the MIDI device is defi ned as ‘USB audio
device’ within the MIDI application.
Windows Vista/2000/98SE users:
Additional USB-MIDI driver software will be required. Please download the special USB driver software from
the KAWAI website at the following URL:
http://www.kawai.co.jp/english/Download1.html
To establish MIDI communications with the CA111 piano, ensure that the MIDI IN device is defi ned as ‘KAWAI USB
MIDI IN’ and that the MIDI OUT device is defi ned as ‘KAWAI USB MIDI OUT’ within the MIDI application.
Macintosh OS X users:
The standard USB-MIDI driver will be installed automatically by Macintosh OS X - additional driver software
should not be required.
To establish MIDI communications with the CA111 piano, ensure that the MIDI device is defi ned as ‘USB MIDI’
within the MIDI application.
Macintosh OS9 (or earlier) users:
The CA111 piano does not support USB MIDI under Macintosh OS9 (or earlier) systems.
Please utilise a standard, commercially available MIDI interface in order to establish a MIDI connection with the
CA111 piano.
CA111_EN.indd 45 2008/04/12 0:59:09
Page
46
8
USB USAGE
NOTES ON USB USAGE
yWhen both MIDI jacks and the USB port are connected simultaneously, the USB port has priority.
yWhen connecting a USB cable to the CA111 piano, first connect the USB cable and then turn the CA111
piano power on.
yWhen connecting the CA111 piano to a computer via the USB port, there may be a short delay before MIDI
communications begin.
yIf the CA111 piano is connected to the computer via a USB hub and the USB communication becomes
unreliable/unstable, please connect the USB cable directly to the USB port of the computer.
yTurning on/off the power of the CA111 piano while connected via USB, or disconnecting the USB cable
suddenly, may cause computer instability in the following situations:
while installing the USB driver
while starting up the computer
while MIDI applications are performing tasks
while the CA111 piano is communicating with the computer
while the computer is in energy saver mode
yIf there are any further problems experienced with USB communication while the CA111 piano is connected,
please consult the instruction manual of your computer and double-check all connections and relevant
settings.
The USB-MIDI conversion board TID10000934 utilised in the CA111 piano is approved to
show the USB logo.
The USB logo can be used only for products approved by the USB-IF (USB Implements
Forum Inc.) test.
Ú“MIDI” is a registered trademark of the Association of Manufacturers of Electronic Instruments (AMEI).
Ú“Windows” is registered trademark of Microsoft Corporation.
Ú“Macintosh” is registered trademark of Apple Computer, Inc.
ÚOther company names and product names mentioned referenced herein may be registered trademarks or
trademarks of respective owners.
CA111_EN.indd 46 2008/04/12 0:59:09
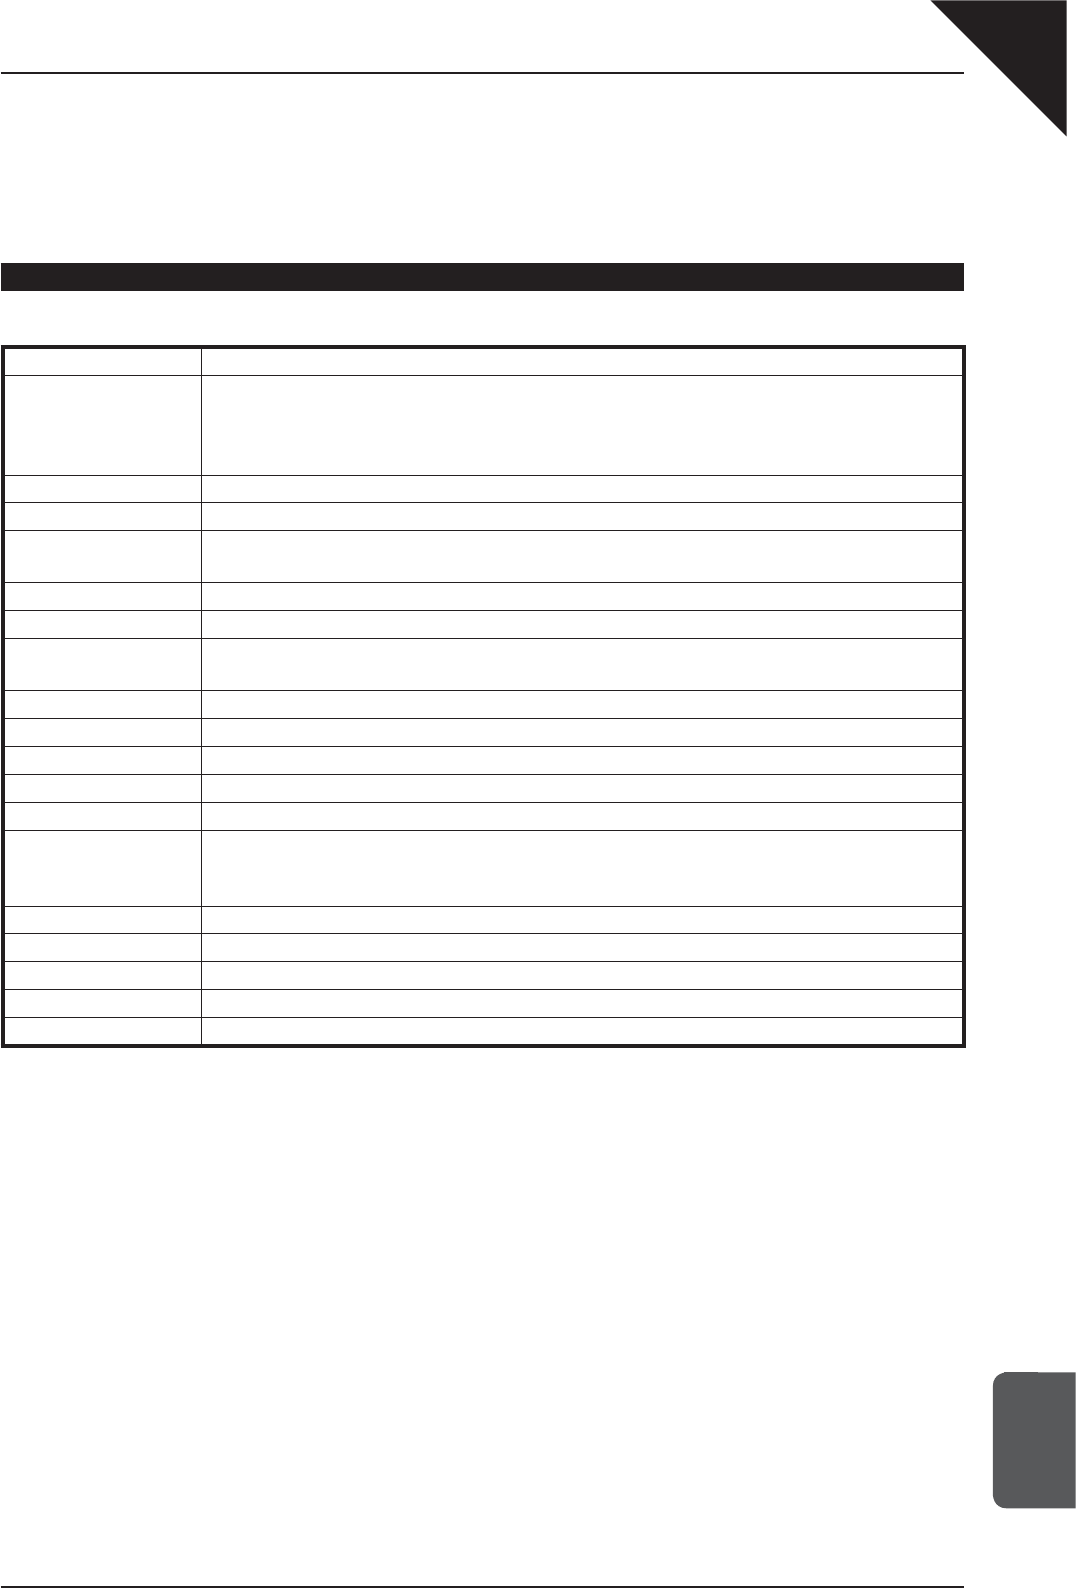
Page
47
9
APPENDIX
9. APPENDIX
SPECIFICATIONS
Polyphony Maximum 192 notes
Sounds Concert Grand, Concert Grand 2, Studio Grand, Studio Grand 2, Mellow Grand, Mellow Grand 2,
Modern Piano, Rock Piano, Classic E.Piano, Modern E.P., Slow Strings, String Pad, String Ensemble,
Choir, Harpsichord, Harpsichord Oct., Vibraphone, Church Organ, Diapason, Jazz Organ,
Drawbar Organ, New Age Pad
Display 16 characters x 2 lines, LCD
Reverb Room 1, Room 2, Stage, Hall 1, Hall 2
Metronome Time signatures: 1/4, 2/4, 3/4, 4/4, 5/4, 3/8, 6/8, 7/8, 9/8, 12/8
Tempo: 10-400 BPM
Recorder 10 songs (total memory capacity approximately 90,000 notes)
Demonstration 29 songs
Virtual Technician Voicing (6 types), Damper Resonance, String Resonance, Key Off Effect, Touch Curve (6 types),
Temperament (9 types), Tuning, Stretch Tuning (2 types)
Transpose From -12 to +12 halftones
Other Functions Dual, Dual Balance, EQ, User Memory, Factory Reset
Pedals Damper (8 levels), Soft, Sostenuto
Jacks Headphones x 2, MIDI (IN, OUT), LINE OUT (L, R), LINE IN (L, R), USB (to Host), DC IN
Output power 40W + 40W + 30W
Speakers 7 cm x 4 (top speakers)
1.9 cm x 2 (dome tweeters)
Soundboard speaker
Power Consumption 115W
Finish Ebony polish
Dimensions (WxDxH) 1420 x 541 x 1048 (mm)
Weight 97.0 kg
Accessories Owner’s Manual, ‘Classical Piano Collection’ song book
CA111_EN.indd 47 2008/04/12 0:59:10
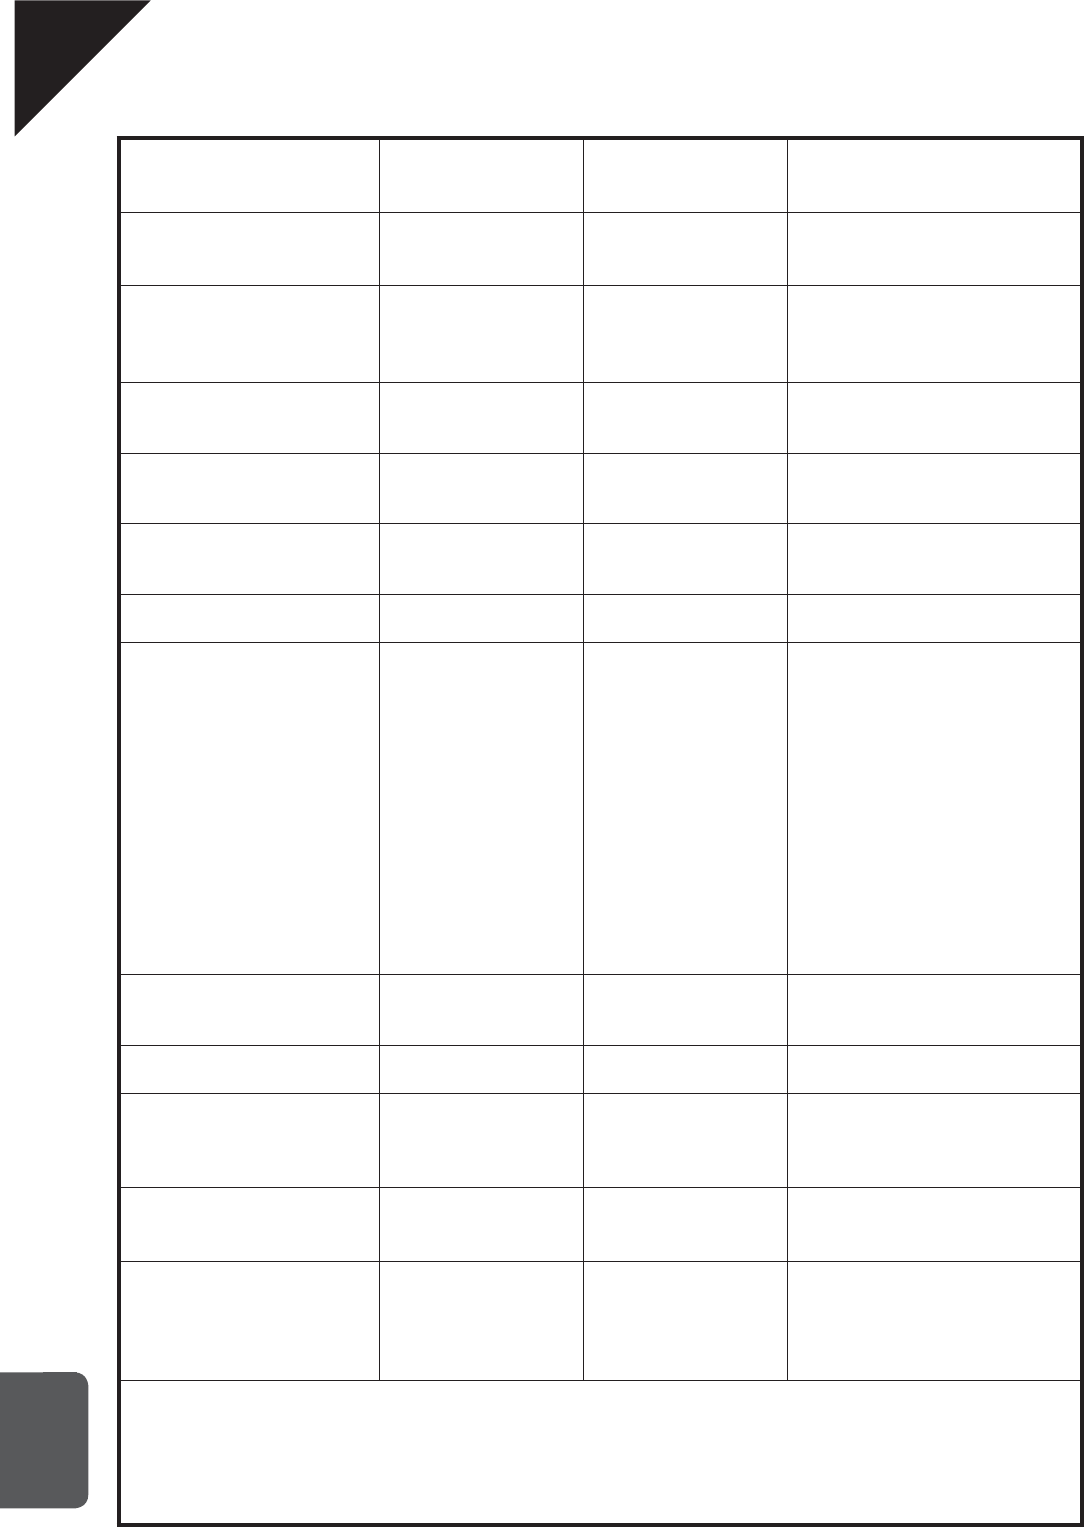
Page
48
9
APPENDIX
KAWAI Model CA111 MIDI Implementation Chart Date : OCT 2007
Version : 1.0
Mode 1: OMNI ON, POLY Mode 2: OMNI ON, MONO
Mode 3: OMNI OFF, POLY Mode 4: OMNI OFF, MONO
{: Yes
°: No
Function... Transmitted Recognised Remarks
Basic
Channel
Default
Changed
1
1 - 16
1
1 - 16
Mode
Default
Messages
Altered
Mode 3
°
ÄÄÄÄÄÄÄÄÄ
Mode 1
Mode 1, 3**
°
** Set to OMNI ON in the initial
setting.
Set to OMNI OFF by MIDI channel.
Note
Number : True voice
21 - 108*
ÄÄÄÄÄÄÄÄÄ
0 - 127
0 - 127 * 9 - 120 including transpose
Velocity Note ON
Note OFF
{ 9nH v=1-127
° 9nH v=0
{
°
After
Touch
Key’s
Ch’s
°
°
°
°
Pitch Bend °°
Control
Change
7
64
66
67
°
{ (right pedal)
{ (left pedal)
{ (left pedal)
{
{
{
{
Volume
Damper Pedal
Sostenuto Pedal
Soft Pedal
Prog
Change : True #
{ (0 - 21)
ÄÄÄÄÄÄÄÄÄ
{
0 - 21
System Exclusive {{
Common
: Song Pos.
: Song Sel.
: Tune
°
°
°
°
°
°
System
Real time
: Clock
: Commands
°
°
°
°
Aux
Mes-
sages
: Local ON/OFF
: All Notes OFF
: Active Sense
: Reset
°
°
{
°
{
{ (123 - 127)
{
°
CA111_EN.indd 48 2008/04/12 0:59:10
CA111_cover_EN.indd 3 2008/04/12 0:57:35

CA111 Owner’s Manual
KPSZ-0234 : 816238
OM1015E-S0804
Version.1
Printed in Japan
Copyright © 2008 KAWAI Musical Instruments Mfg. Co.,Ltd. All Rights Reserved.
CA111_cover_EN.indd 4 2008/04/12 0:57:35
