Kenmore 11026152500 User Manual WASHER COMMERCIAL Manuals And Guides L0523237
KENMORE Commercial Washers Manual L0523237 KENMORE Commercial Washers Owner's Manual, KENMORE Commercial Washers installation guides
User Manual: Kenmore 11026152500 11026152500 KENMORE WASHER COMMERCIAL - Manuals and Guides View the owners manual for your KENMORE WASHER COMMERCIAL #11026152500. Home:Laundry & Garment Care Parts:Kenmore Parts:Kenmore WASHER COMMERCIAL Manual
Open the PDF directly: View PDF ![]() .
.
Page Count: 12
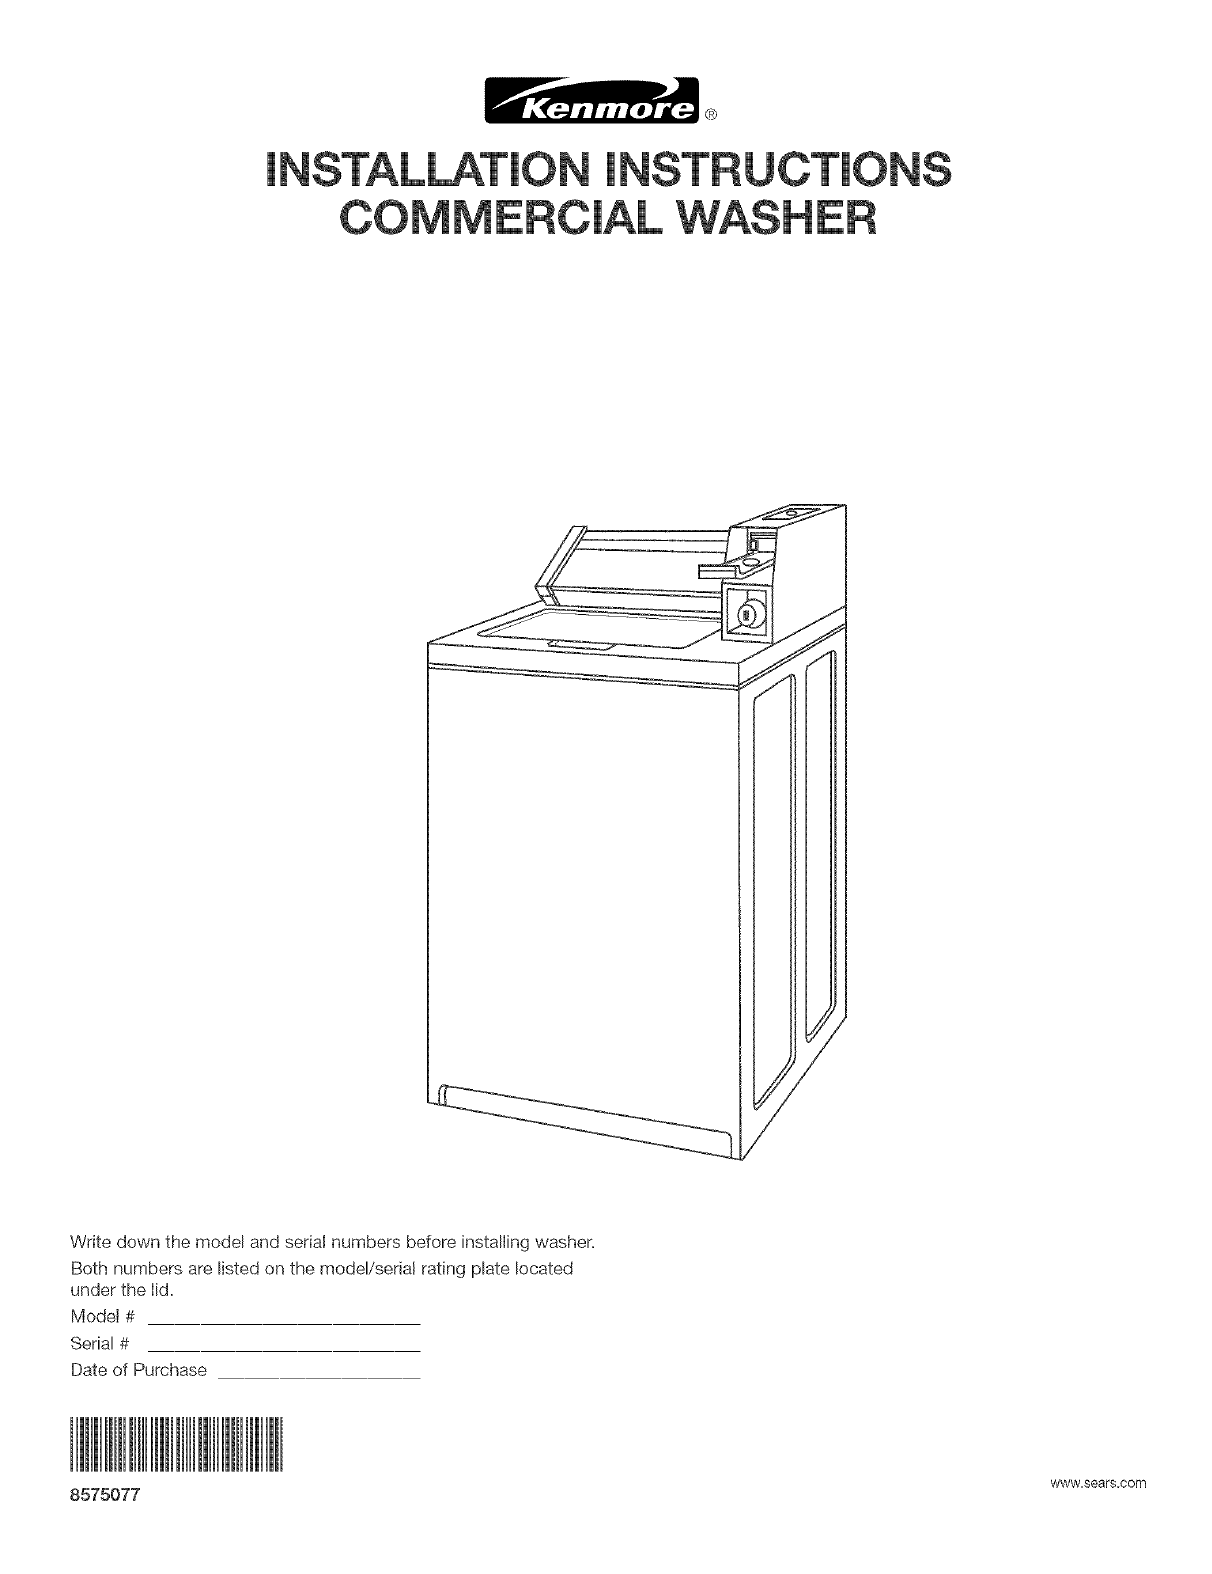
®
JNSTALLA ON JN_
COMMERCIAL WASHER
Write down the model and serial numbers before installing washer,
Both numbers are listed on the modeVseriat rating plate located
under the lid,
Model #
Serial #
Date of Purchase
www_sears_oom
8575077
Table of Contents
WASHER SAFETY ........................................................................ 2
iNSTALLATiON REQUIREMENTS .............................................. 3
Tools and Parts .......................................................................... 3
Location Requirements .............................................................. 3
Drain System .............................................................................. 4
Electrical Requirements ............................................................ 5
INSTALLATION INSTRUCTIONS ............................................ 6
Before You Start ........................................................................ 6
Remove Shipping Strap ............................................................ 6
Connect the Hoses .................................................................... 6
Level the VVasher ...................................................................... 7
Install Coin Slide and Coin Box .................................................. 8
Complete InstaUation ................................................................ 8
Adjust Timer Clutch .................................................................. 9
Changing Vend Price (for Coin Slide Mechanism
Provided with Washer) .............................................................. 9
Additional Features .................................................................. 10
WASHERSAFETY
Your safety and the safety of others are very important.
We have provided many important safety messages in this manual and on your appliance. Always read and obey all safety
messages.
This is the safety alert symbol.
This symbol alerts you to potential hazards that can kill or hurt you and others.
All safety messages will follow the safety alert symbol and either the word "DANGER" or "WARNING."
These words mean:
You can be killed or seriously injured if you don't immediately
follow instructions.
You can be killed or seriously injured if you don't follow
instructions.
All safety messages will tell you what the potential hazard is, tell you how to reduce the chance of injury, and tell you what can
happen if the instructions are not followed.
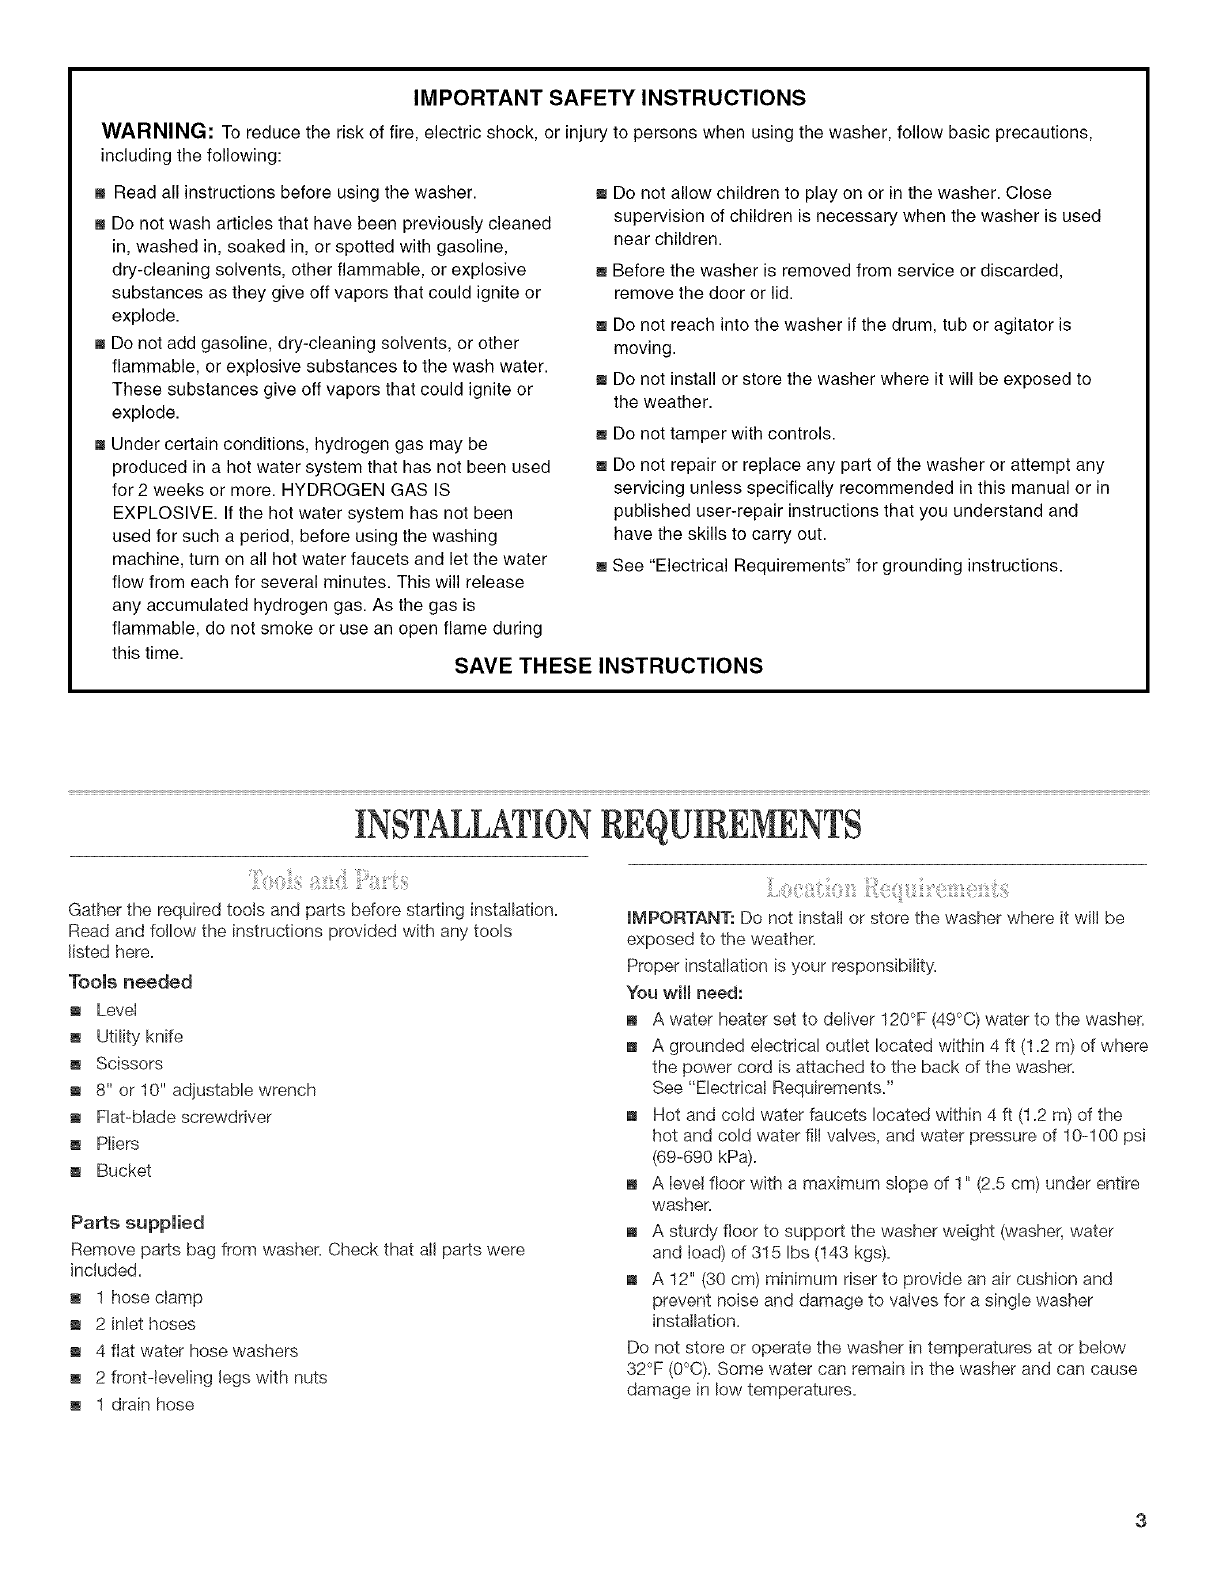
IMPORTANT SAFETY INSTRUCTIONS
WARNING: To reduce the risk of fire, electric shock, or injury to persons when using the washer, follow basic precautions,
including the following:
_, Read all instructions before using the washer.
_, Do not wash articles that have been previously cleaned
in, washed in, soaked in, or spotted with gasoline,
dry-cleaning solvents, other flammable, or explosive
substances as they give off vapors that could ignite or
explode.
_, Do not add gasoline, dry-cleaning solvents, or other
flammable, or explosive substances to the wash water.
These substances give off vapors that could ignite or
explode.
_, Under certain conditions, hydrogen gas may be
produced in a hot water system that has not been used
for 2 weeks or more. HYDROGEN GAS IS
EXPLOSIVE. If the hot water system has not been
used for such a period, before using the washing
machine, turn on all hot water faucets and let the water
flow from each for several minutes. This will release
any accumulated hydrogen gas. As the gas is
flammable, do not smoke or use an open flame during
m Do not allow children to play on or in the washer. Close
supervision of children is necessary when the washer is used
near children.
m Before the washer is removed from service or discarded,
remove the door or lid.
m Do not reach into the washer if the drum, tub or agitator is
moving.
m Do not install or store the washer where it will be exposed to
the weather.
m Do not tamper with controls.
m Do not repair or replace any part of the washer or attempt any
servicing unless specifically recommended in this manual or in
published user-repair instructions that you understand and
have the skills to carry out.
m See "Electrical Requirements" for grounding instructions.
this time. SAVE THESE INSTRUCTIONS
INSTALLATIONREQUIREMENTS
Gather the required tools and parts before starting installation.
Read and follow the instructions provided with any tools
listed here=
Tools needed
m LeveI
m Utility knife
m Scissors
m 8" or 10" adjustable wrench
m Flat-blade screwdriver
m Pliers
m Bucket
Parts supplied
Remove parts bag from washer. Check that all parts were
included.
m 1 hose clamp
m 2 inlet hoses
m 4 flat water hose washers
m 2 front-leveling legs with nuts
m 1 drain hose
IMPORTANT: Do not install or store the washer where it will be
exposed to the weather.
Proper installation is your responsibility.
You will need:
_, A water heater set to deliver 120°F (49°C) water to the washer.
_, A grounded electrical outlet located within 4 ft (1=2m) of where
the power cord is attached to the back of the washer.
See "Electrical Requirements."
_, Hot and cold water faucets located within 4 ft (1.2 m) of the
hot and cold water fill valves, and water pressure of 10-100 psi
(69-690 kPa).
_, A Ievel floor with a maximum slope of 1" (2=5cm) under entire
washer.
_, A sturdy floor to support the washer weight (washer, water
and load) of 315 Ibs (143 kgs)=
_, A 12" (30 cm) minimum riser to provide an air cushion and
prevent noise and damage to valves for a single washer
installation.
Do not store or operate the washer in temperatures at or below
32°F (0°C). Some water can remain in the washer and can cause
damage in low temperatures.
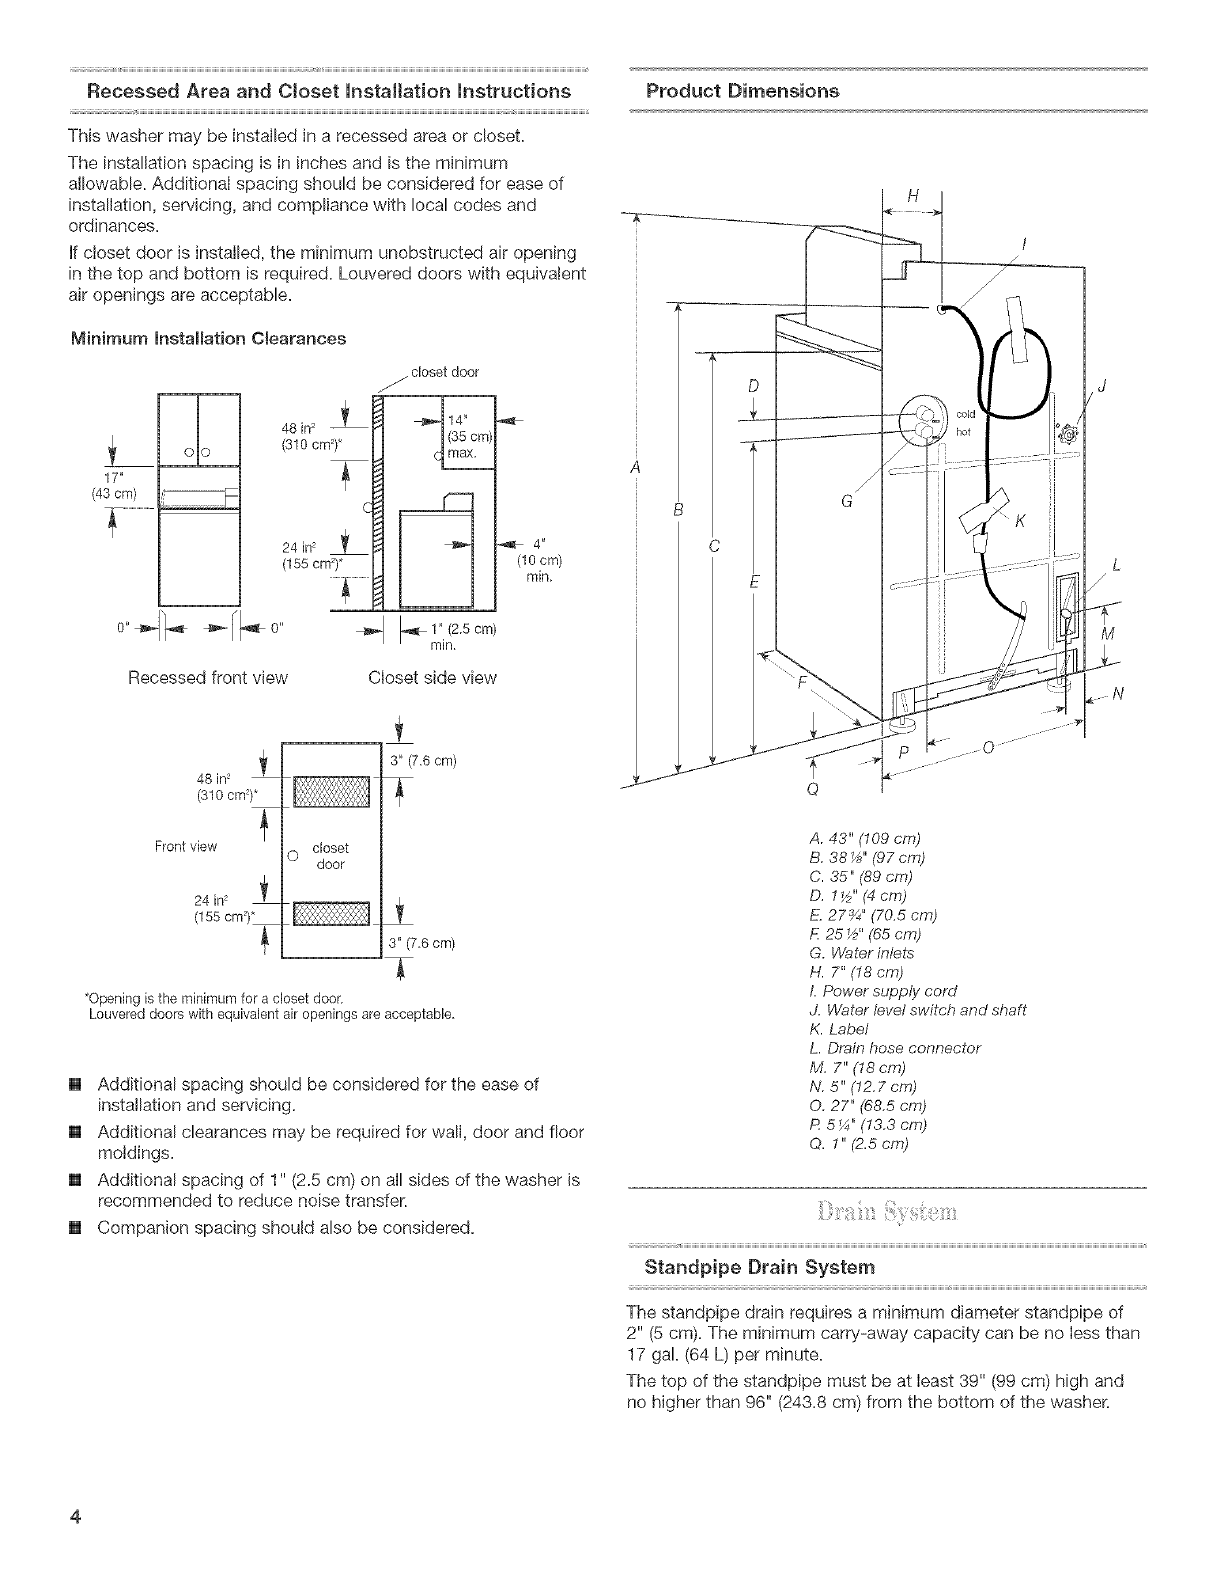
RecessedAreaa_dCloset_staHatio__structio_s
ThiswashermaybeinstalledinarecessedareaordoseL
Theinstallationspacingisininchesandistheminimum
allowable.Additionalspacingshouldbeconsideredforeaseof
installation,servicing,andcompliancewithlocalcodesand
ordinances.
Ifclosetdoorisinstalled,theminimumunobstructedairopening
inthetopandbottomisrequired.Louvereddoorswithequivalent
airopeningsareacceptable.
MinimumInstallationC_earances
__ omo
17"
(43 cm)
j closet door
481n 2 __
,3100m2, U
t"/2.6om,
rain.
Recessed front view Closet side view
4 _
(10cm)
min.
48in_
(310 cm2)"
Front view
24 in_
(155 cm_)_
3" (7.6cm)
closet
©door
3" (7.6 cm)
*Opening is the minimum for a closet door,
Louvered doors with equivalent air openings are acceptable,
[] Additional spacing should be considered for the ease of
installation and servicing.
[] Additional clearances may be required for wall, door and floor
moldings.
[] Additional spacing of 1" (2.5 cm) on all sides of the washer is
recommended to reduce noise transfer.
[] Companion spacing should also be considered.
Product Dimensions
A
B
L
M
A. 43" (109 crn)
B. 38_" (97cm)
C. 35" (89 crr_)
D. 1½" (4 crn)
E. 27¾" (70.5 cm)
E25 ½" (65 cm)
G. Water inlets
H. 7" (18 cm)
I. Power supply cord
J. Water level switch and shaft
K. Label
L. Drain hose connector
M. 7" (18 cm)
N. 5" (12.7 cm)
O. 27" (68.5 cm)
P. 5 ¼" (13.3 cm)
O. 1" (2.5 cm)
Standpipe Drain System
The standpipe drain requires a minimum diameter standpipe of
2" (5 cm). The minimum carry-away capacity can be no Iess than
17 gaL (64 L) per minute.
The top of the standpipe must be at least 39" (99 cm) high and
no higher than 96" (243.8 cm) from the bottom of the washer.
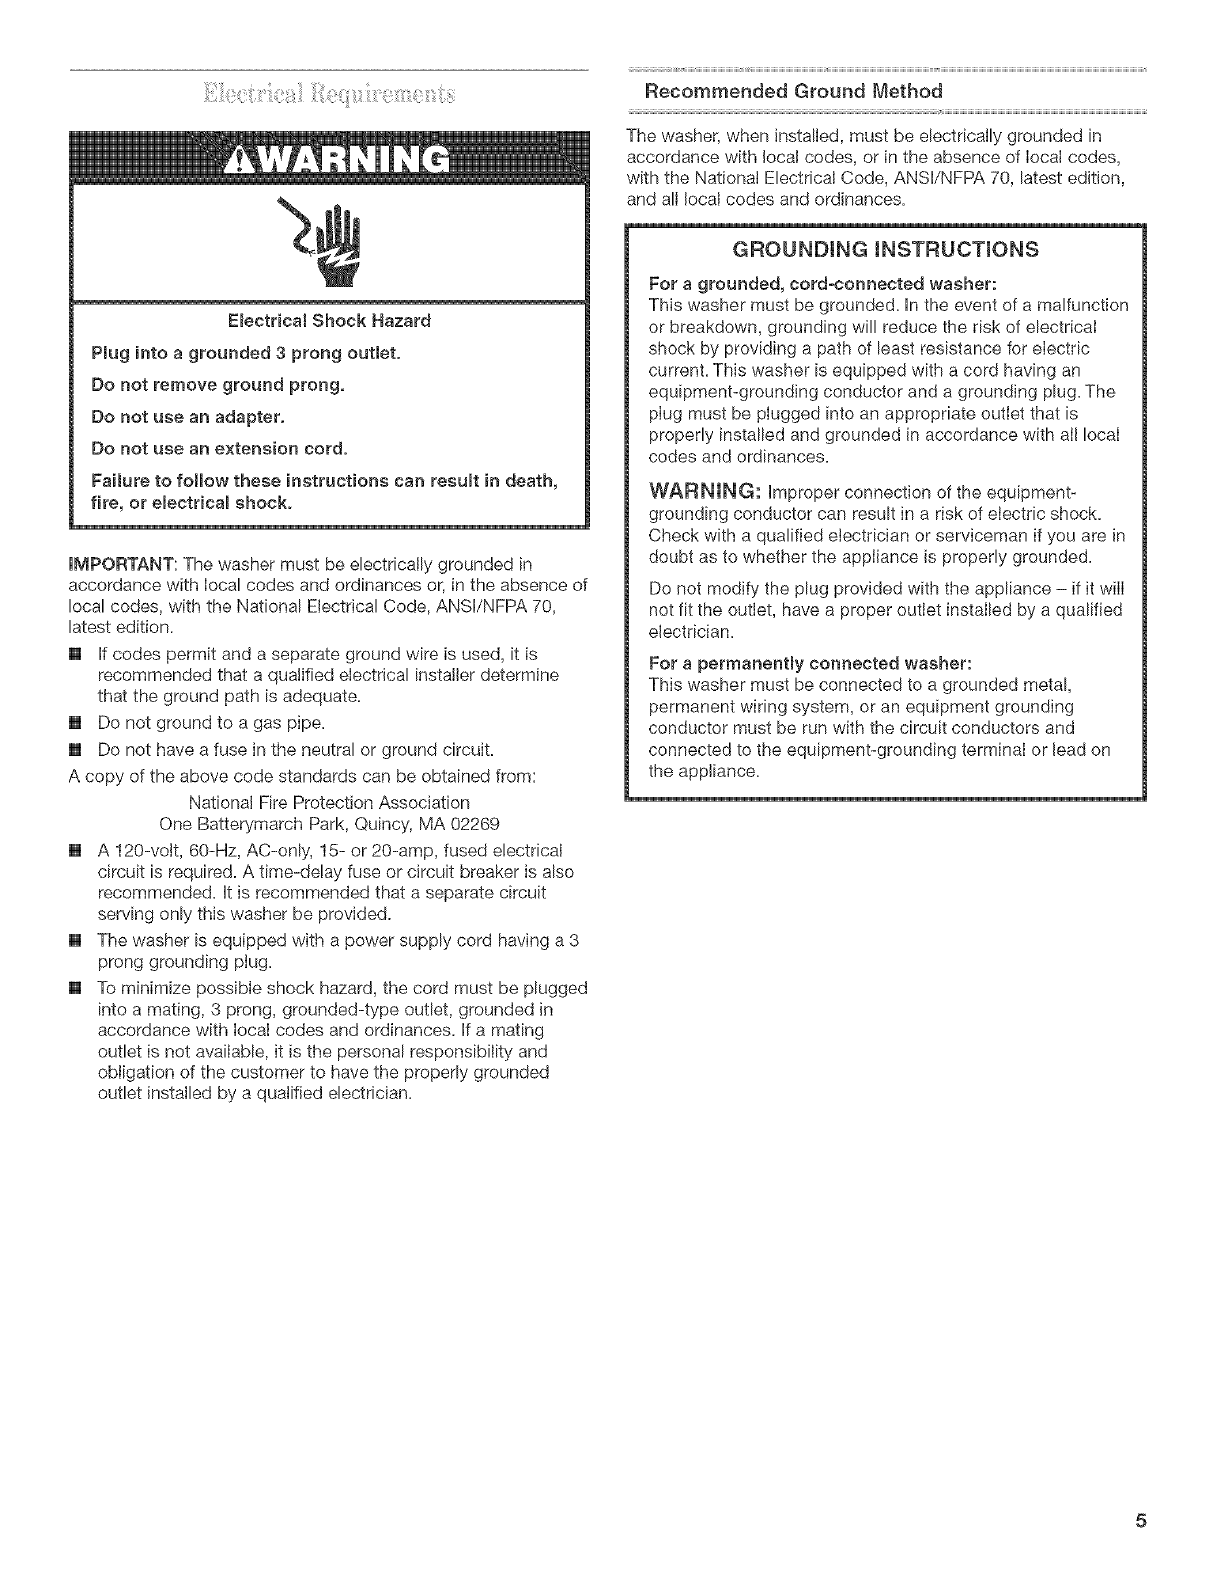
ElectricalShockHazard
Plugintoagrounded3 prongoutlet.
Donotremovegroundprong,
Donotuseanadapter,
Donotuse an extension cord.
FaiJure to follow these instructions can result in death,
fire, or electrical shock.
IMPORTANT: The washer must be electrically grounded in
accordance with local codes and ordinances or, in the absence of
local cedes, with the National Electrical Code, ANSI/NFPA 70,
latest edition.
[] if codes permit and a separate ground wire is used, it is
recommended that a qualified electrical installer determine
that the ground path is adequate.
[] Do not ground to a gas pipe.
[] Do not have a fuse in the neutral or ground circuit.
A copy of the above code standards can be obtained from:
National Fire Protection Association
One Batterymarch Park, Quincy, MA 02269
[] A 120-volt, 60-Hz, AC-only, 15- or 20-amp, fused electrical
circuit is required. A time-delay fuse or circuit breaker is also
recommended. It is recommended that a separate circuit
serving only this washer be provided.
[] The washer is equipped with a power supply cord having a 3
prong grounding plug.
[] To minimize possible shock hazard, the cord must be plugged
into a mating, 3 prong, grounded-type outlet, grounded in
accordance with local codes and ordinances, if a mating
outlet is not available, it is the personal responsibility and
obligation of the customer to have the properly grounded
outlet installed by a quatified electrician.
Recommended Ground Method
The washer, when installed, must be electrically grounded in
accordance with local codes, or in the absence of Iocai codes,
with the National Electrical Code, ANSI/NFPA 70, latest edition,
and all local codes and ordinances.
GROUNDING INSTRUCTIONS
For a grounded, cord-connected washer:
This washer must be grounded, in the event of a malfunction
or breakdown, grounding will reduce the risk of electrical
shock by providing a path of least resistance for electric
current. This washer is equipped with a cord having an
equipment-grounding conductor and a grounding plug. The
plug must be plugged into an appropriate outlet that is
properly installed and grounded in accordance with all local
codes and ordinances.
WARNING: improper connection of the equipment-
grounding conductor can result in a risk of electric shock.
Check with a qualified electrician or serviceman if you are in
doubt as to whether the appliance is properly grounded.
Do not modify the plug provided with the appliance - if it will
not fit the outlet, have a proper outlet installed by a qualified
electrician.
For a permanently connected washer:
This washer must be connected to a grounded metal,
permanent wiring system, or an equipment grounding
conductor must be run with the circuit conductors and
connected to the equipment-grounding terminal or lead on
the appliance.

iNSTALLATiONiNSTRUCTiONS
NOTE: To prevent floor damage, set the washer onto cardboard
before moving across floor.
Remove tape that covers shipping strap. Pull to completeSy
remove the shipping strap with 2 cotter pins from the inside of
the washer.
[]
[]
Use new hoses and washers that came with your washer.
Replace inlet hoses after 5 years of use to reduce the risk of
hose failure. Inspect and replace inlet hoses if bulges, kinks,
cuts, wear, or leaks are found. When replacing your inset
hoses, mark the date of replacement on the Sabelwith a
permanent marker.
Connect the inlet hoses to the washer
1. Insert a fiat washer into each end of the inset hoses. Check
that washers are firmly seated in coupSings.
AB
A. Coupling
B. Washer
Attach a hose to the hot water inlet valve. Tighten the
coupling by hand.
2,
A, Shipping tape
B, Shipping strap
Pull firmSy to remove the end of shipping strap from the back
of the washer. The shipping strap piug must be completely
removed from the washer for the self-leveling legs to be
released.
Save the shipping strap for later use.
A. Cold water inlet valve
B. Hot water inlet valve
3. Attach the other hose to cold water inlet valve. Tighten the
coupling by hand.
4. Use pliers to make an additional two-thirds turn.
NOTE: Inlets valve threads are plastic. Do not strip or cross-
thread.
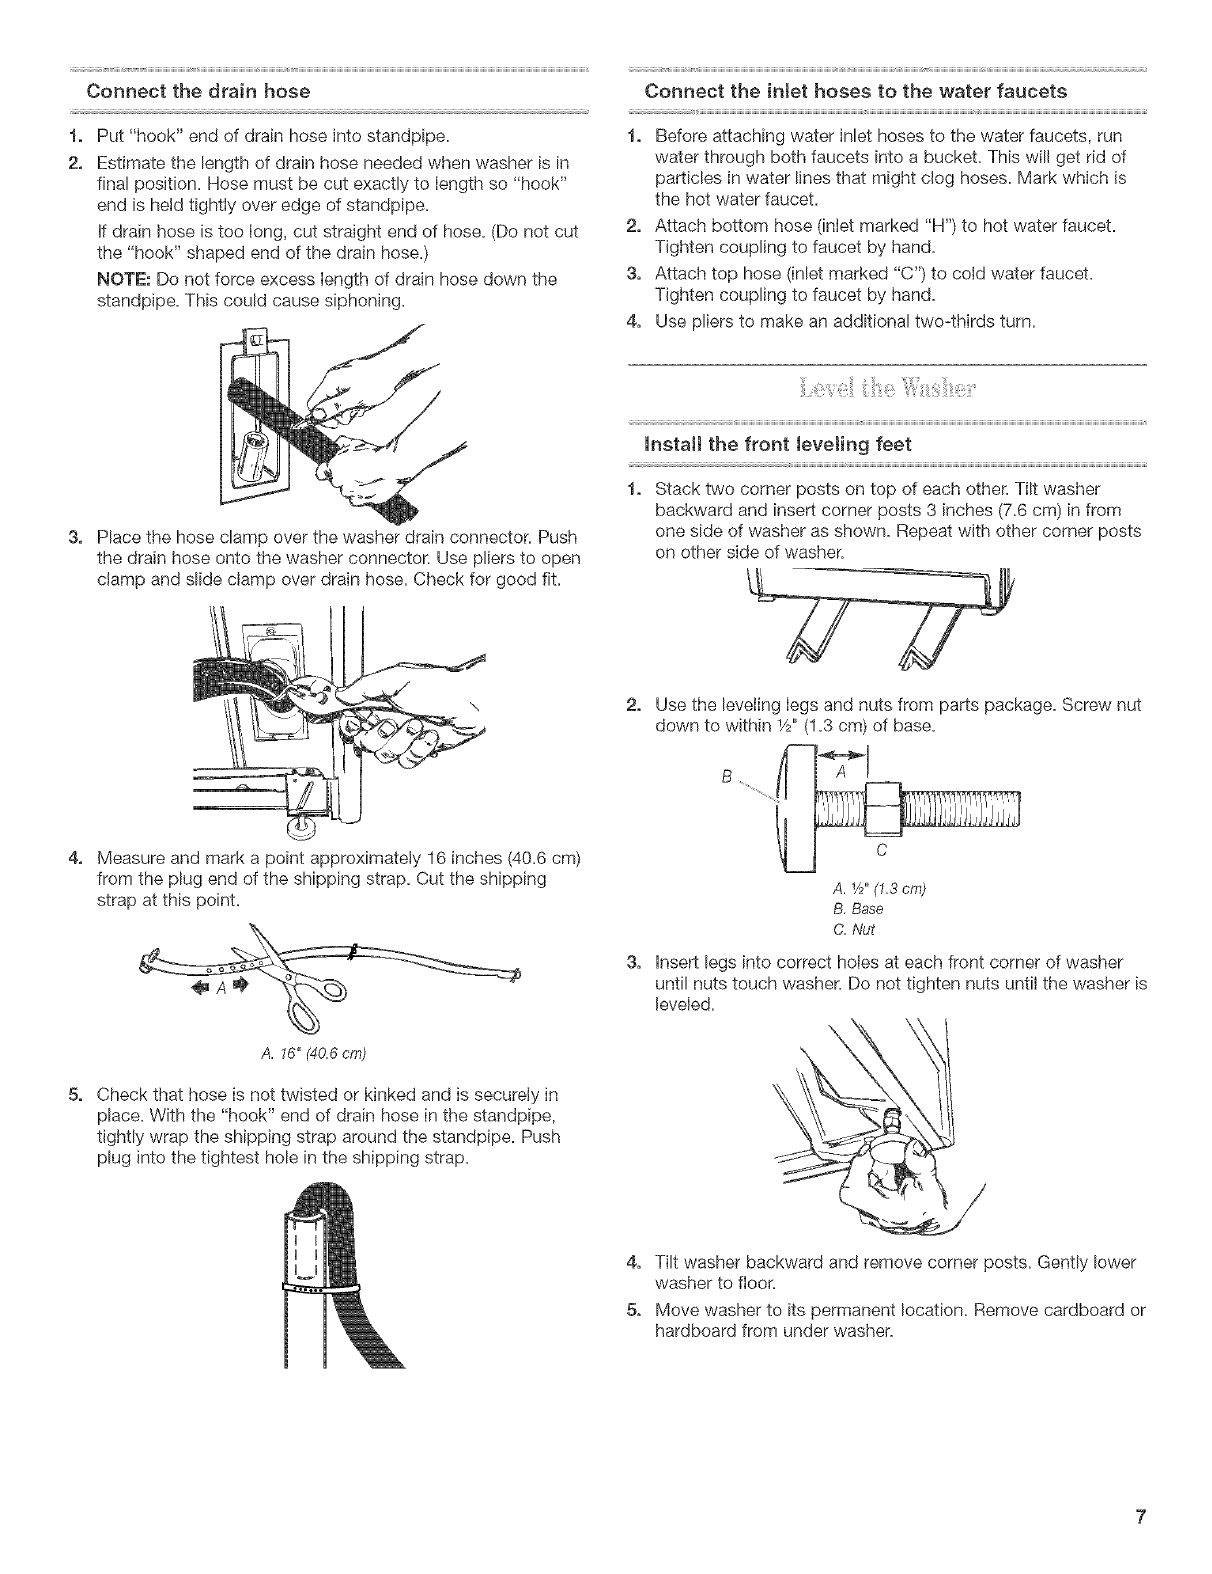
Connectthedrainhose
2,
3,
Put "hook" end of drain hose into standpipe.
Estimate the length of drain hose needed when washer is in
final position. Hose must be cut exactly to length so "hook"
end is held tightly over edge of standpipe.
If drain hose is too long, cut straight end of hose. (Do not cut
the "hook" shaped end of the drain hose.)
NOTE: Do not force excess length of drain hose down the
standpipe. This could cause siphoning.
i1
Place the hose clamp over the washer drain connector. Push
the drain hose onto the washer connector. Use pliers to open
clamp and slide clamp over drain hose. Check for good fit
Connect the intet hoses to the water faucets
1, Before attaching water inlet hoses to the water faucets, run
water through both faucets into a bucket. This will get rid of
particles in water lines that might clog hoses. Mark which is
the hot water faucet.
2, Attach bottom hose (inlet marked "H') to hot water faucet.
Tighten coupling to faucet by hand.
3, Attach top hose (inlet marked "C") to cold water faucet.
Tighten coupling to faucet by hand.
4, Use pliers to make an additional two-thirds turn.
Install the front _eveting feet
Stack two corner posts on top of each other. Tilt washer
backward and insert corner posts 3 inches (7.6 cm) in from
one side of washer as shown. Repeat with other corner posts
on other side of washer.
2, Use the leveling Iegs and nuts from parts package. Screw nut
down to within 1/2"(1.3 cm) of base.
4,
5,
Measure and mark a point approximately 16 inches (40.6 cm)
from the plug end of the shipping strap. Cut the shipping
strap at this point.
A. 16" (40.6 era)
Check that hose is not twisted or kinked and is securely in
place. With the "hook" end of drain hose in the standpipe,
tightly wrap the shipping strap around the standpipe. Push
plug into the tightest hole in the shipping strap.
A. _/2"(I.3 cm)
B. Base
C. Nut
Insert legs into correct holes at each front corner of washer
until nuts touch washer. Do not tighten nuts until the washer is
leveled.
\
4, Tilt washer backward and remove corner posts. Gently lower
washer to floor.
5, Move washer to its permanent location. Remove cardboard or
hardboard from under washer.
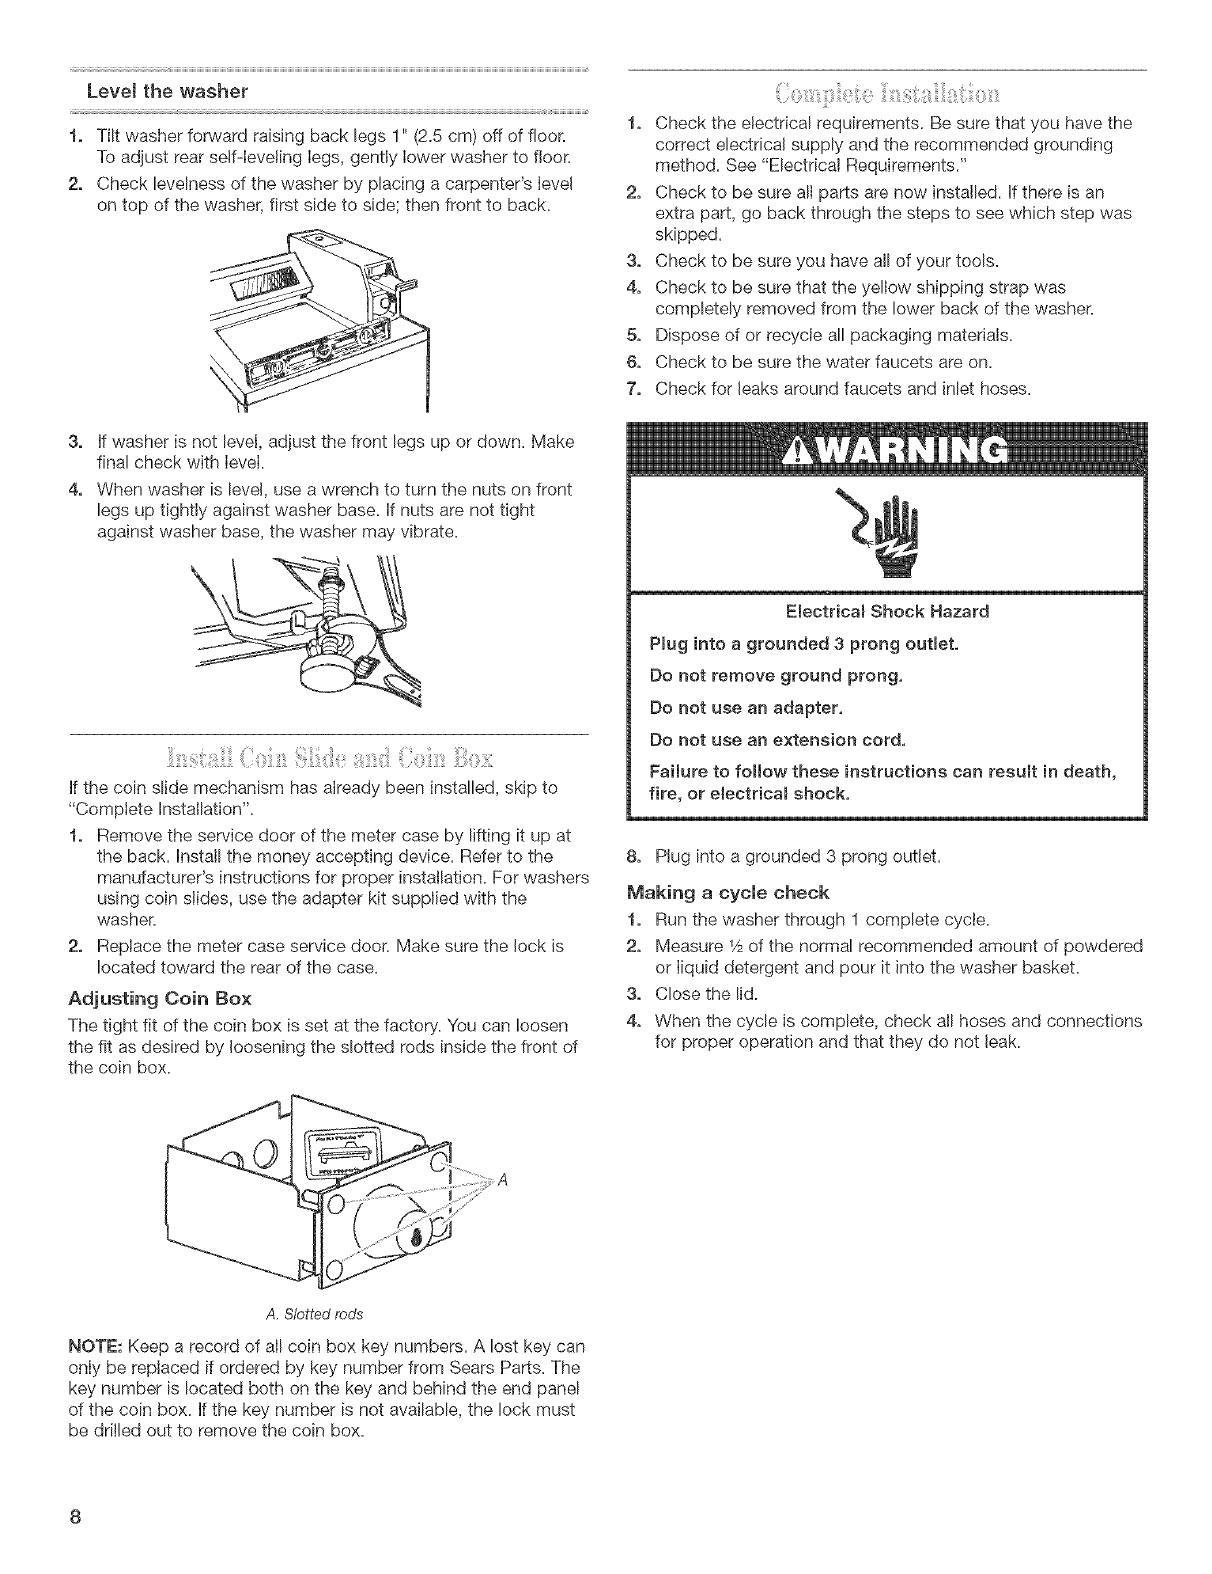
3. Ifwasherisnotlevel,adjustthefrontlegsupordown.Make
finalcheckwithlevel.
4. Whenwasherislevel,useawrenchtoturnthenutsonfront
legsuptightlyagainstwasherbase.Ifnutsarenottight
againstwasherbase,thewashermayvibrate.
Ifthecoinslidemeclqanismhasalreadybeeninstalled,skipto
"CompleteInstallation".
1. Removetheservicedoorofthemetercasebyliftingitupat
theback.Installthemoneyacceptingdevice.Refertothe
manufacturer'sinstructionsforproperinstallation.Forwashers
usingcoinslides,usetheadapterkitsuppliedwiththe
washer.
2. Replacethemetercaseservicedoor.Makesurethelockis
locatedtowardtherearofthecase.
AdjustingCoinBox
Thetightfitofthecoinboxissetatthefactory..Youcan!oosen
thefitasdesiredbylooseningtheslottedrodsinsidethefrontof
thecoinbox.
1. Checktheelectricalrequirements.Besurethatyouhavethe
correctelectricalsupplyandtherecommendedgrounding
method.See"ElectricalRequirements."
2. Checktobesureallpartsarenowinstalled.Ifthereisan
extrapart,gobackthroughthestepstoseewhichstepwas
skipped.
3. Checktobesureyouhaveallofyourtools.
4. Checktobesurethattheyellowshippingstrapwas
completelyremovedfromthelowerbackofthewasher.
5. Disposeoforrecycleallpackagingmaterials.
6. Checktobesurethewaterfaucetsareon.
7. Check for leaks around faucets and inlet hoses.
Electdca_ Shock Hazard
P_ug into a grounded 3prong out_et,
Do not remove ground prong,
Do not use an adapter,
Do not use an extension cord,
Failure to follow these instructions can result in death,
fire, or e_ectdca_ shock,
8. Plug into a grounded 3 prong outlet.
Making a cycle check
1. Run the washer through 1 complete cycle=
2. Measure _Aof the normal recommended amount of powdered
or liquid detergent and pour it into the washer basket.
3. Close the lid.
4. When the cycle is complete, check all hoses and connections
for proper operation and that they do not leak.
_A
A, Slotted rods
NOTE: Keep a record of all coin box key numbers. A lost key can
only be replaced if ordered by key number from Sears Parts. The
key number is located both on the key and behind the end panel
of the coin box. If the key number is not available, the lock must
be drilled out to remove the coin box.
.,_i_i:!i i:_il_!!ii__i::ifl_ii!il¸'ii¸'i_i_!fli_i:!_ii__,_iiilliiii,_:_ili::_i"!l_
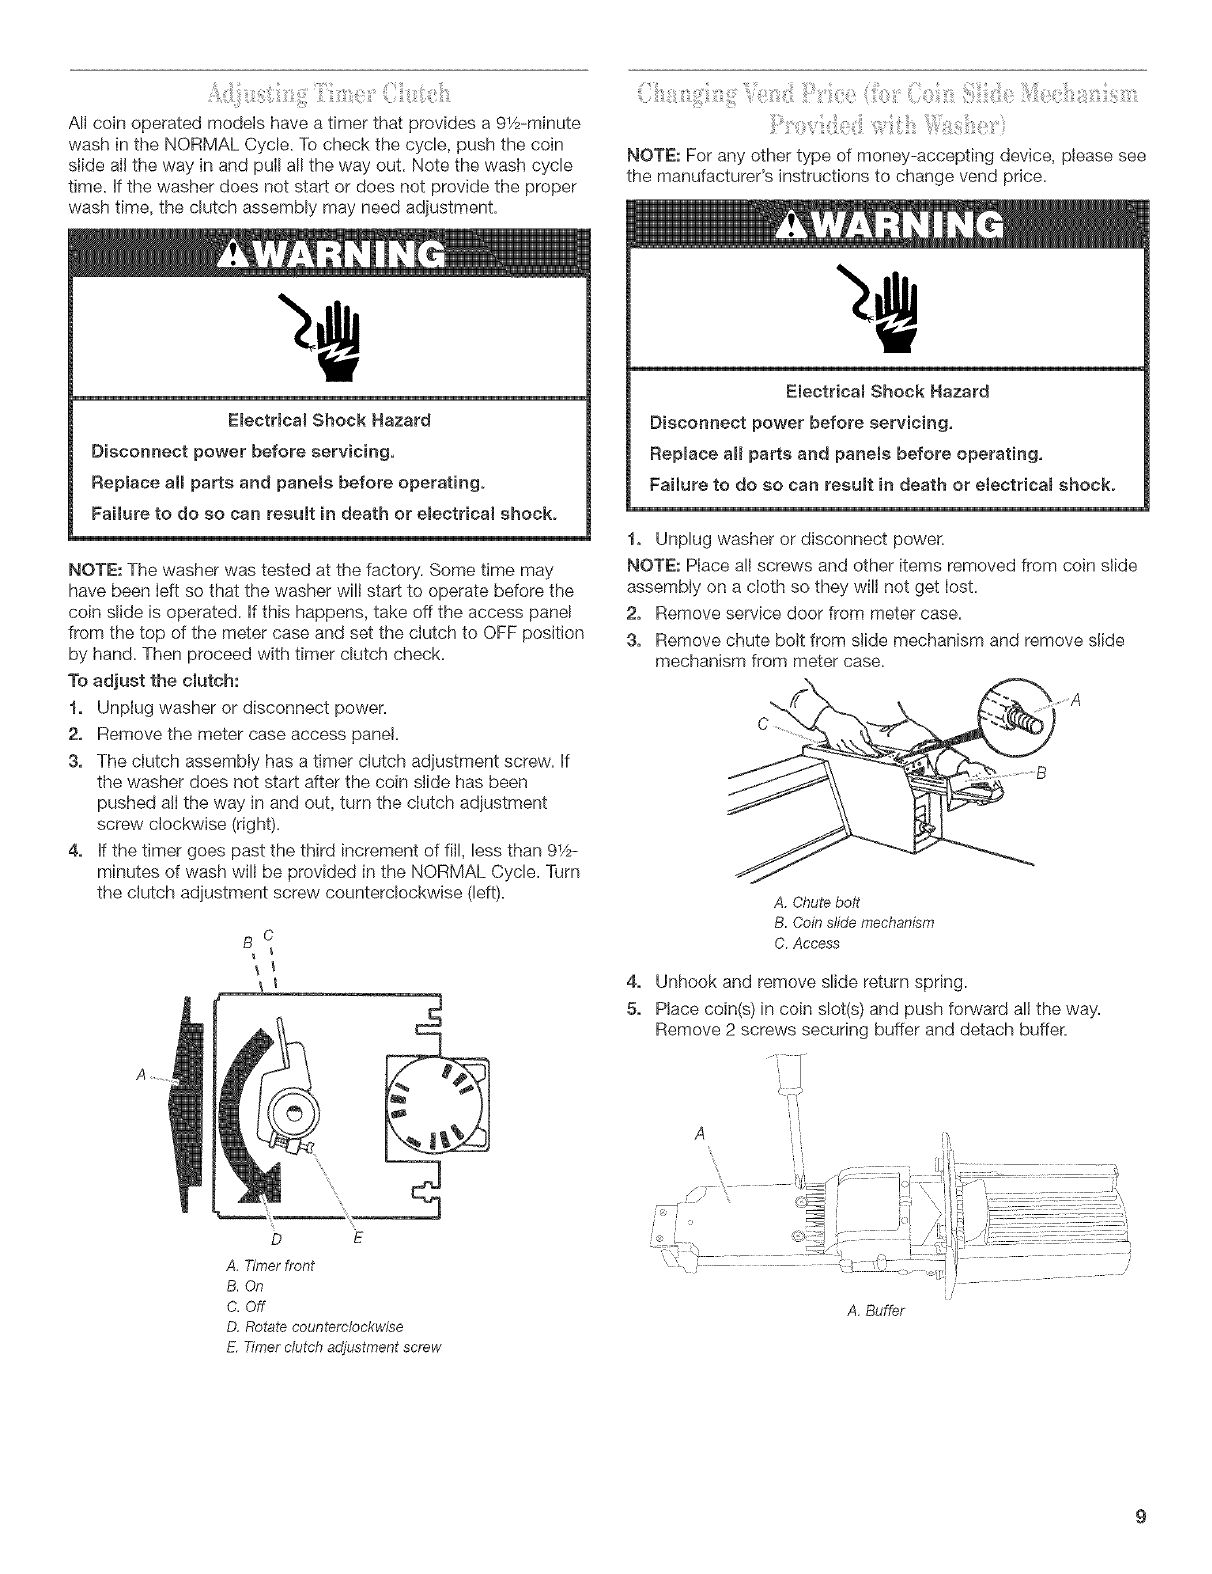
All coin operated models have a timer that provides a 9!/2-minute
wash in the NORMAL Cycle, To check the cycle, push the coin
slide all the was' in and pulI all the way out. Note the wash cycle
time, if the washer does not start or does not provide the proper
wash time, the clutch assembly may need adjustment.
Emectcical Shock Hazard
Disconnect power before servicing,
Replace aH parts and panels before operating.
Failuce to do so can result in death or emectrical shock.
NOTE: The washer was tested at the factory. Some time may
have been Ieft so that the washer will start to operate before the
coin slide is operated. If this happens, take off the access panel
from the top of the meter case and set the clutch to OFF position
by hand. Then proceed with timer clutch check.
To adjust the clutch:
f, Unplug washer or disconnect power.
2, Remove the meter case access panel,
3, The clutch assembly has a timer clutch adjustment screw. If
the washer does not start after the coin slide has been
pushed a!I the way in and out, turn the clutch adiustment
screw clockwise (right).
4, If the timer goes past the third increment of fill, less than 91A-
minutes of wash will be provided in the NORMAL Cycle. Turn
the clutch adjustment screw counterclockwise (left).
B C
\
A........
D
A, Timerfront
B. On
C.Off
D.Rotatecounterclockwise
E. Tirnerclutchacl/ustmentscrew
fi: (,
w
NOTE: For any other type of money-accepting device, please see
the manufacturer's instructions to change vend price.
Electdcam Shock Hazard
Disconnect power before serv{cing,
Repmace aH parts and panels before operating,
Failure to do so can resumt in death or electdcam shock.
f° Unplug washer or disconnect power,
NOTE: PIace all screws and other items removed from coin slide
assembIy on a cloth so they will not get Iost.
2, Remove service door from meter case,
3, Remove chute bott from slide mechanism and remove slide
mechanism from meter case.
A, Chute bolt
B. Coin slide mechanism
C. Access
4, Unhook and remove slide return spring.
5, Place coin(s) in coin slot(s) and push forward all the way,
Remove 2 screws securing buffer and detach buffer,
A
A. Buffer
:_::: , ....
,/
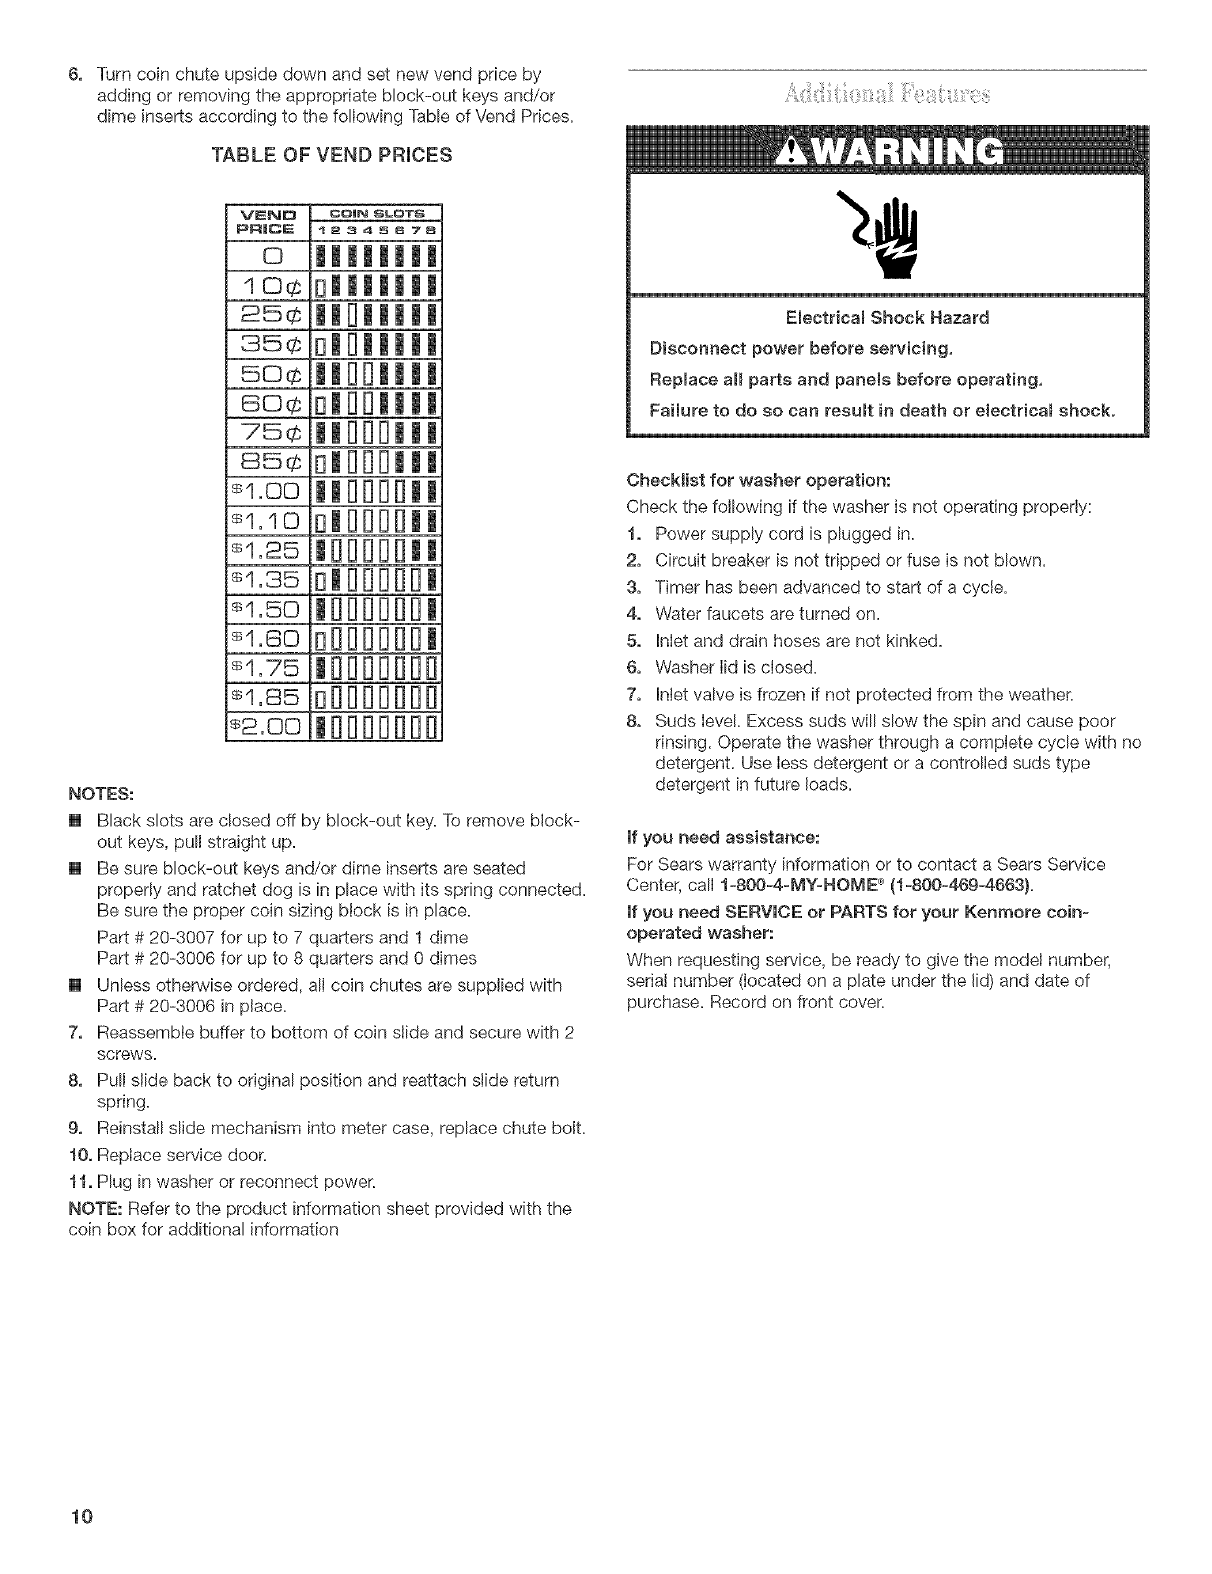
Turn coin chute upside down and set new vend price by
adding or removing the appropriate block-out keys and/or
dime inserts according to the following Table of Vend Prices.
TABLE OF VEND PRICES
VEND coi_ SLOTS
P_|CE I _ 3 4 _ 6 7 8
o ||||||||
lo¢o|||||||
25¢ ||D|||||
35¢ B|B|||||
5o¢ ||BB||||
_a¢ olDDIIII
7_¢ IIDDDIII
85¢ olDDDIII
_1.oo IIDDDDII
_1._o olDDDDII
÷1.25 IBDBDBII
• 1.35 olDBDBDI
•1.5o |BOBOBO|
•1.soo808080|
÷1.75 18080808
•1.85 o8080808
÷a.oo 18080808
NOTES:
[] Black slots are closed off by block-out key. To remove block-
out keys, pull straight up.
[] Be sure block-out keys and/or dime inserts are seated
properly and ratchet dog is in place with its spring connected.
Be sure the proper coin sizing block is in place.
Part # 20-3007 for up to 7 quarters and 1 dime
Part # 20-3006 for up to 8 quarters and 0 dimes
[] Unless otherwise ordered, all coin chutes are supplied with
Part # 20-3006 in place.
7, Reassemble buffer to bottom of coin slide and secure with 2
screws.
8, Pull slide back to original position and reattach slide return
spring,
9, Reinstall slide mechanism into meter case, replace chute bolt,
10, Replace service door,
11, Plug in washer or reconnect power,
NOTE: Refer to the product information sheet provided with the
coin box for additional information
Electdcam Shock Hazard
Disconnect power before servicing.
Replace all parts and panels before operating,
Failure to do so can result in death or electrical shock.
Checklist for washer operation:
Check the following if the washer is not operating properly:
1, Power supply cord is plugged in,
2, Circuit breaker is not tripped or fuse is not blown,
3, Timer has been advanced to start of a cycle,
4, Water faucets are turned on.
5, Inlet and drain hoses are not kinked,
6, Washer lid is closed,
"Z, Inlet valve is frozen if not protected from the weather,
8, Suds level Excess suds will slow the spin and cause poor
rinsing, Operate the washer through a complete cycle with no
detergent, Use less detergent or a controlled suds type
detergent in future loads.
If you need assistance:
For Sears warranty information or to contact a Sears Service
Center, call f=800=4-MY=HOME ® (1=800=469-4663}.
If you need SERVICE or PARTS for your Kenmore coin-
operated washer:
When requesting service, be ready to give the model number,
serial number (located on a plate under the lid) and date of
purchase. Record on front cover.
10

Typical fummmoad sizes Operating tips
Load type Loading suggestion
Mixed Load 3 double sheets
4 pillowcases
6 pair shorts
8 T-shirts
2 shirts
2 blouses
8 handkerchiefs
Permanent Press 2 double or 1 king-size sheet
1 tablec!oth
1 dress
1 blouse
2 slacks
3 shirts
2 pillowcases
Heavy Work Clothes 3 pair of pants
3 shirts
1 coverall
4 pair of jeans
1 overall
Knits 3 blouses
4 slacks
6 shirts
4 tops
4 dresses
Fire Hazard
Never place items in the washer that are dampened
with gasoline or other flammable fluids°
No washer can completely remove oil
Do not dry anything that has ever had any type of oH on
it (including cooking oils).
Doing so can result in death, explosion, or fire.
It is recommended that fiberglass items not be washed in coin-
operated washers. If these items are washed in the washer, run
the washer through a complete cycle to rinse any residue away
that might be left in the washer.
SEARS COMMERCIAL WASHER WARRANTY
Model 26152
Limited 2=Year Warranty on Mechanical and l=lectrical Parts
For two years from the date of purchase, when the washer is
installed and operated in accordance with the instructions in the
Installation Instructions, Sears will furnish replacement parts for
all defective mechanical or electrical parts, including coin box
and chute assembIies= You wilI be charged for labor=
Warranty Service
Warranty service is available by contacting the nearest Sears
Service Center in the United States=
This warranty applies only while this product is used in the United
States=
This warranty gives you specific Iegal rights, and you may have
other rights which vary from state to state=
Use the space below to record the model number, serial number
and purchase date of your new Sears Commercial washer.
Model number
Serial number
Date of Purchase
NOTE: Keep this warranty and your Sears salescheck (receipt)
for future reference.
Sears, Roebuck and Co., Dept. 817WA,
Hoffman Estates, IL 60179
For Sears warranty information or to contact a Sears Service
Center, call 1-800-4-MY-HOME ®(1-800-469-4663).
11
Your Home
For repair-in your home-of aJJmajor brand appliances
lawn and garden equipment, or heating and cooling systems,
no matter who made it, no matter who scud it!
For,the replacement parts accessories and
owner s manuals that you need to do-R-yourself.
For Sears professional installation of home appliances
and items like garage door openers and water heaters.
loS00o4oMY-HOME ® (1o800o489o4683)
Call anytime, day or night (U.S.A. and Canada)
www.sears°com www.sears°ca
Our Home
For repair of carry-in items like vacuums lawn equipment
and electronics, call or go on-line for the location of your nearest
• Re c oto .
1 800 488 1222
Call anytime, day or night (U.S.A. onmy)
www.sears.com
To purchase a protection agreement (U.S.A0
or 1maintenance80082788559greement(u.S.A,)(Canada)on aproduct1800361ten'iced6865(Canada)bYSears:
Parapedirse_vioiode_eparaci6n AoCanadapoors÷rviceenfran_ais:
a domicilio, y para ordenar piezas: 1 800 LE FOYER MC
1-888-SU-HOGAR sM 1 800 533 6937
(1-888-784-6427) www.sears.ca
:¢¢¢¢¢¢¢¢¢¢¢¢¢¢¢¢¢¢¢¢¢¢
® Registered Trademark /TM Trademark /SM Service Mark of Sears, Roebuck and Co,,
used under licensee by Sears Canada.
@Marca Registrada /TM Marca de comercio /sN Marca de Servicio de Sears, Roebuck and Co.,
usada bale licencia de Sears Canada,
8575077 ® Marque d@osee /[M Marque de commerce /SM Marque de service de Sears, Roebuck and Co,, 05/2005
© Sears, Roebuck and Co, en vertu diun porteur de licence par Sears Canada. Printed in U,S.A.
