Kenmore 15283250 User Manual AIR CLEANER Manuals And Guides L0801124
KENMORE Air Cleaner Manual L0801124 KENMORE Air Cleaner Owner's Manual, KENMORE Air Cleaner installation guides
User Manual: Kenmore 15283250 15283250 KENMORE AIR CLEANER - Manuals and Guides View the owners manual for your KENMORE AIR CLEANER #15283250. Home:Heating & Cooling Parts:Kenmore Parts:Kenmore AIR CLEANER Manual
Open the PDF directly: View PDF ![]() .
.
Page Count: 14
®
OWNER'SMANUAL FOR
KENMOREHEPAAIR CLEANERMODELS
152.83250AND 152.83254
INFO-LINE:
After reading tiffs manual, ff you have any questions or comments on
your Kenmore Air Cleaner, call: 1-888-277-2810
•Safety • Wawanty
•Operation •Parts
Sears, Roebuck and Co., Hoffman Estates, IL 60179 U.S.A.
IMPORTANT SAFETYINSTRUCTIONS
Please read all instructions before using this product. Save these instructions for
easy reference.When using electrical appliances, basic precautions should always
be followed to reduce breakage, risk of fire, electric shock and injm T to persons
including the following:
• Read all instructions before operating the air cleaner°
•Place air cleaner where it is not easily knocked over by persons in the house-
hold.
•Always unplug air cleaner when not in use_
•Do not use any product with a damaged cord or phlg or ff product
malfunctions, is dropped or damaged in any manner.
.Keep the power cord away from heated surfaces.
° Do not use air cleaner outdoors°
•Never use air cleaner unless it is fully assembled.
•Do not run power cord under carpets, and do not cover with throw rugs.
Arrange cord such that it will not be tripped over.
°Do not use air cleaner where combustible gases or vapors are present_
•Do not expose the air cleaner to rain, or use near water, in a bathroom, laundry
area or other damp location.
•To disconnect the air cleaner, first mm speed control to OFF position and
remove plug from the outlet.
•Do not allow foreign objects to enter ventilation or exhaust opening as this
may cause electric shock or damage to the air cleaner. Do not block air outlets
or intakes.
° Locate air cleaner near power outlet and avoid using an extension cord.
•The air cleaner has a polarized plug (one blade is wider than the other)°
To reduce risk of shock, fills plug is intended to fit in a polarized outlet only
one way. If the plug does not fit fully in the outlet, reverse the plug. DO NOT
attempt to defeat this safety feature.
°A loose fit between the plug mid the AC outlet (receptacle) may cause overheat-
ing and a distortion of the plug. Contact a qualified electrician to replace loose
or worn receptacles.
°Do not sit, stmld or place heavy objects on the air cleaner.
•Disconnect power supply before servicing.
°WARNING:To reduce risk of fire or electric shock, do not use this product
with any solid-state speed control device.
FULLONEYEARWARRANTY
If this Air Cleaner fails due to a defect in material or worlmaanship within one
(1) year from the date of purchase, Sears wi_ repair or replace it free of charge.
This warranty applies only while this product is in use in the United States or
Canada.
This wanxnty gives you specific legal rights and you may also have other fights
whicah may vary from state to state.
_s warranty DOES NOTcover the replacement of the HEPA filter or pre-filter.
Sears Roebuck and Co., D/817WA, Hoffman Estates, IL 60179
INTRODUCTION
Congrataflations on your choice of the Kenmore HEPA Air Cleaner.We higtfly
recommend that you operate the Air Cleaner 24 hours a day, because indoor air
can be quickly contaminated by activity or objects in a room and infiltration of
outside air. Portable air cleaners are much more effective in rooms where all
doors and windows are closed.
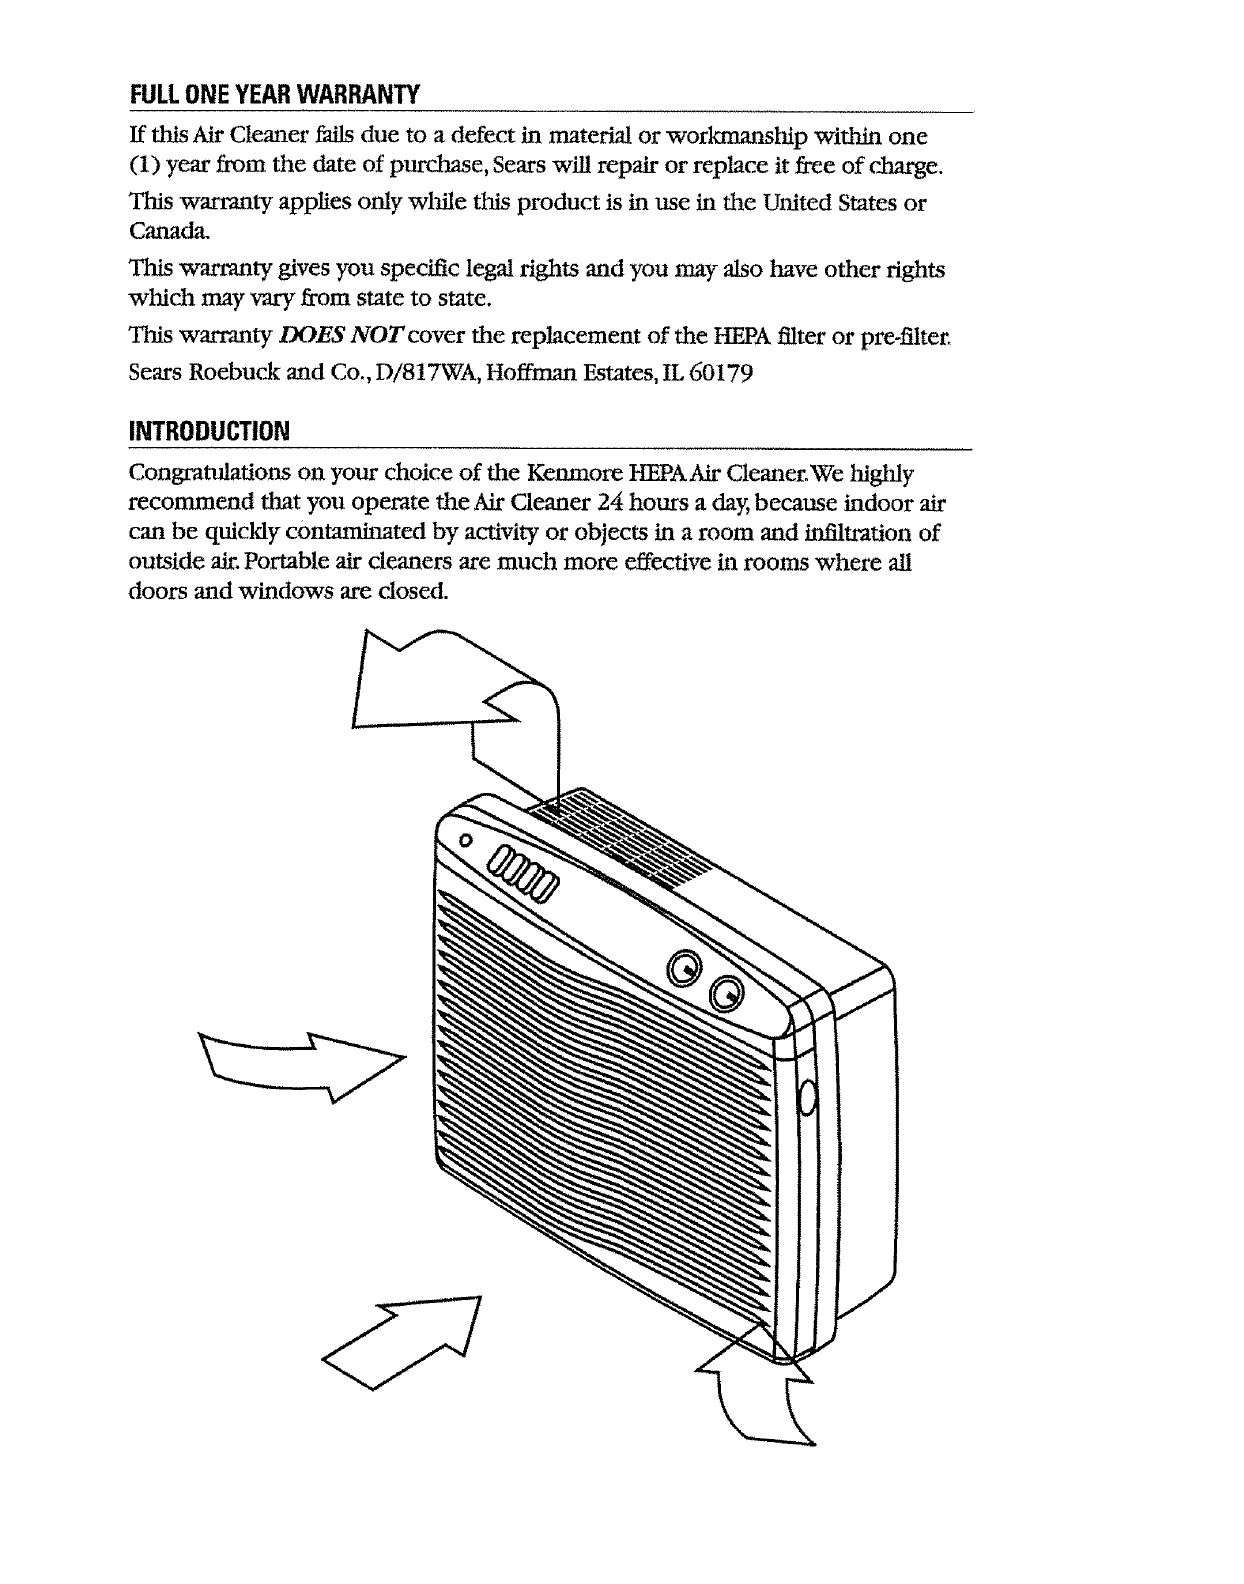
HOWITWORKS
The air cleaner has a two-stage filtering System,The first stage is a charcoal
pre-filter.The second stage is the HEPA(High Efficiency ParticulateArrestor) filter,
Room air is drawn into the Air Cleaner through the Air Intake Grille and passes
through the filters.The filtered air is released from the top of the unit and is
dispersed upwards into the room.
Your Air Cleaner has a convenient Carrying Handle to enable easy relocation,
Two Filter Change Calendar Wheels are provided on the Air Cleaner control panel
to serve as a convenient reminder when to change the filters°
SETUP
Your Air Cleaner was thoroughly inspected and tested at the factory prior to
packaging.Visually inspect it upon removal from its box° Remove and discard
any packaging material_ Return the unit if it shows any signs of damage or
mishandling.
Upon s_g yourAir Cleaner, set the Pre-filter Change CalendarWheel ahead 3
months and the HEPA Filter Change CalendarWheel ahead 12 months to remind
you when the next filter replacement is needed,Wheels turn clockwise.
ELECTRICALHOOKUP
Plug theAir Cleaner into a polarized 120VoltAC wall outlet.
WARNING: To avoid fire or shock hazard, the Air Cleaner should ONLY be
plugged into a polarized 120VoltAC outlet.
OPERATION
CAUTION: Never operate the Air Cleaner without the HF_A filter properly
installed. Permanent motor damage could result.
Each time you operate the Air Cleaner, it is a good idea to run it at HI speed for
a few seconds for fast init_ cleaning.Then set to MED or LO as desired.
•HI Maximum Operation Fast initial cleaning
•MED Daytime Operation Fast fan speed
•LO Nighttime Operation Quieter operation
FILTERCHANGESCHEDULE
•Pre-Filter:The preofilter should be changed every three (3) months or sooner
depending upon the level of the room's air contaminants and the frequency
of use.
•HEPA Filter:The usable lifetime of the HEPA filter is 1-3 years depending upon
the level of air contaminants in the room and the frequency of use.The air
volume output will begin to decrease dramatically when the filter needs to
be changed.You should have a spare filter available for later replacement.
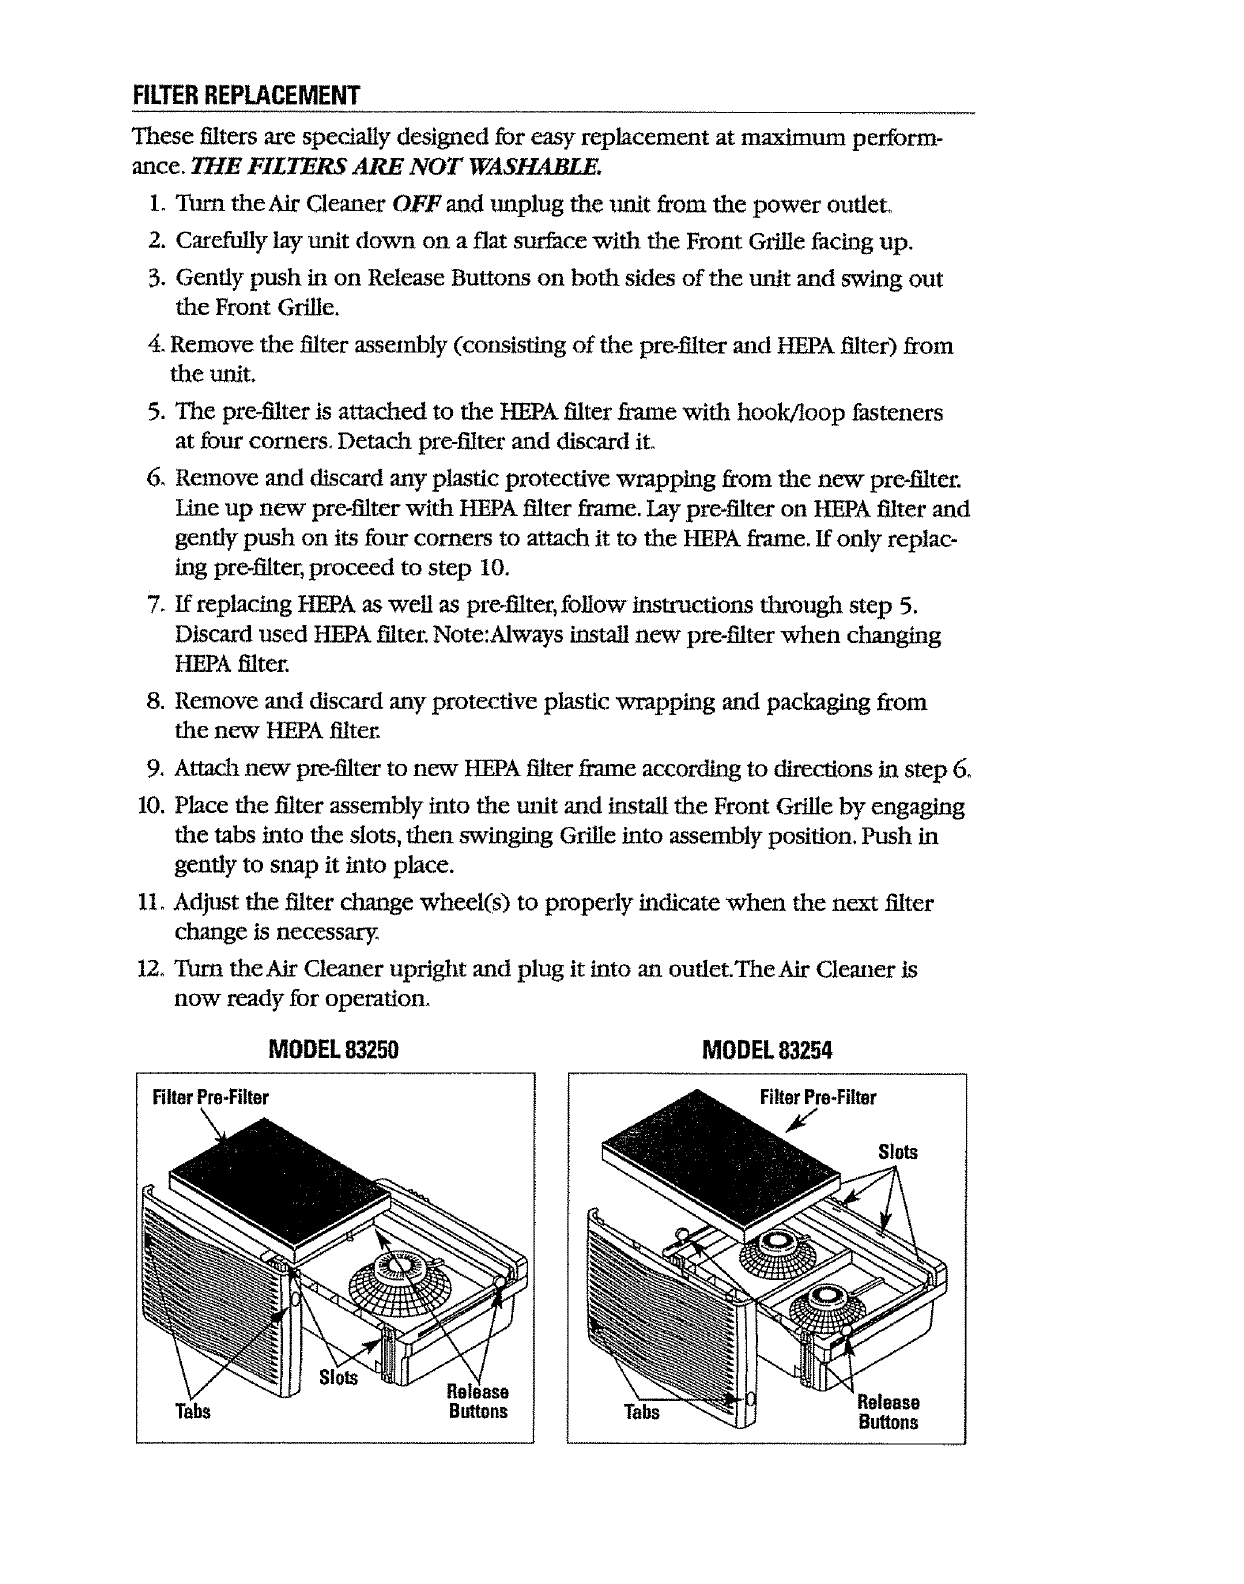
FILTERREPLACEMENT
These filters are specially designed for easy replacement at maximum perform-
ance. THE FILTERS ARE NOT WASHABLE.
1. Ttaaa the Air Cleaner OFF and unplug the lmit from the power outlet°
2. Carefiflly lay unit down on a flat surface with ttae Front Grille facing up,
3. Gently push in on Release Buttons on both sides of the unit and swing out
the Front Grille.
4. Remove the filter assembly (consisting of the pre-fiter and HEPA filter) from
the unit.
5. The pre-filter is attached to the HEPA filter frame with hook/loop fasteners
at four comers. Detach pre-fiter and discard it.
6. Remove mad discard any plastic protective wrapping from the new pre-fiter.
Line up new pre-fiter with HEPA filter frame. Lay pre-fiter on HEPA filter and
gently push on its four comers to attach it to the HEPA fr',une. If only replac-
ir',g pre-filter, proceed to step 10.
7. If replacing HEPA as well as pre-_ter, follow instructions through step 5.
Discard used HEPA filter. Note:Always install new pre-fiter when changing
HEPA filter.
8. Remove mad discard may protective plastic wrapping and packaging from
the new HEPA filter.
9. Attach new pre-fiter to new HEPA filter frame according to directions in step &
10. Place the Falter assembly into the mlit and install the Front Grille by engaging
the tabs into the slots, then swinging Grille into assembly position. Push in
gently to snap it into place.
11_ Adjust the filter change wheel(s) to properly indicate when the next filter
change is necessary.
12. "Darn the Air Cleaner upright and plug it into an outlet.The Air Cleatmr is
now ready for opemtion.
MODEL 83250 MODEL 83254
FilterPre-Filter
\
Tabs Buttons
FilterPre-Filter
Slots
Release
Tabs Buttons
CLEANINGTHE UNIT
WARNING: To avoid serious injury from electric shock, the Air CAeaner must
be turned OFF and unplugged from the power outlet prior to any cleaning
operation.
1. TumAir Cleaner OFF and unplug from power outlet.
2. Clean unit with amoistened soft cloth only. DO NOTpour or splash water
on the lmit or use any abrasive type cleaner on it_Clean all ex'temal surfaces,
especially the air intake grilles and air outlet.
3. DO NOT attempt to clean the pre-filter or HEPA filter; they are NOT
washable and washing will damage them.
4. RepositionAir Cleaner, plug into power outlet and turn ON.
STORAGE
If you store yourAir Cleaner for more than 30 days, you should:
1. Remove both the HEPA filter and the charcoal pre-filter from the unit.
2. Discard the pre-filter.
3. Wrap the HEPA filter in an air-tight plastic bag or plastic wrap. Be sure that
the filter is totally sealed to protect it from its storage environment.
4. DO NOTput the plastic-wrapped HEPA filter back in tile air cleaner
To restore the Air Cleaner to service:
1, Unwrap the HEPA filter.
2. Install a new charcoal pre-filter
3. Install filter assembly in the air cleaner. See "Filter Replacement" section for
proper installation.
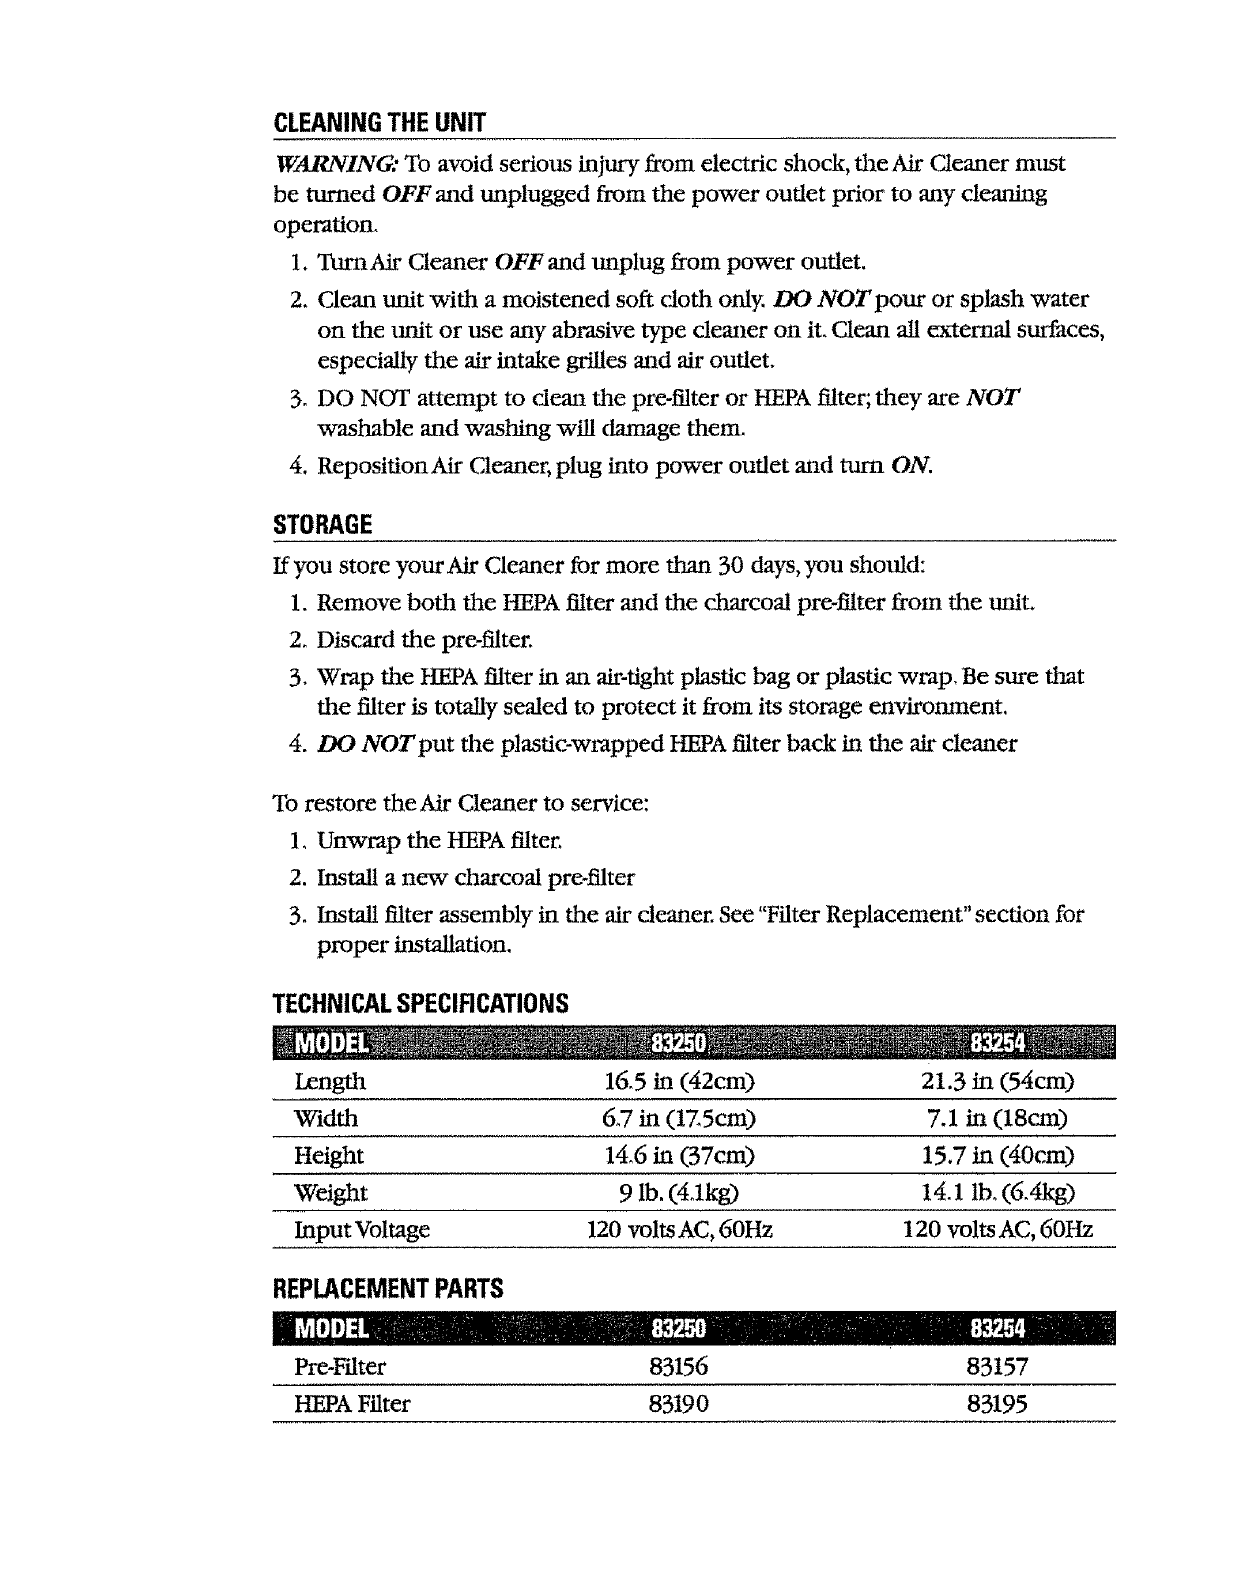
TECHNICALSPECIFICATIONS
Length
Width
Height
Weight
Input Voltage
16.5 in (42cm)
6.7 in (1Z5cm)
14.6 in (37cm)
915.(4ak
120 volts AC, 60Hz
21.3 in (54cm)
7.1 in (18cm)
15.7 in (40cm)
14.1 ib_ (6.4l_
120 volts AC, 60Hz
REPLACEMENTPARTS
Pre-Filter 83156 83157
HEPA Filter 83190 83195
CUSTOMERASSISTANCELINE
If you experience a problem, please see the warranty for information, Please DO
NOTattempt to repair this twdt yourself. Doing so will void your warranty and
could cause damage to the air cleaner or personal injury to yourself. If you have
any questions concernLng this appliance, please call toll flee: 1-888-277-2810
Monday -Friday 8:00 a,m, to 10:00 p.m. EST
Saturday - Sunday 8:30 a,m_ to 5:00 p.mo EST
HOW TO ORDER REPLACEMENT PARTS
To order replacement parts by phone, call toll free: 1-800-366-7278
7a.m. - 7 p.m. 7 days a week
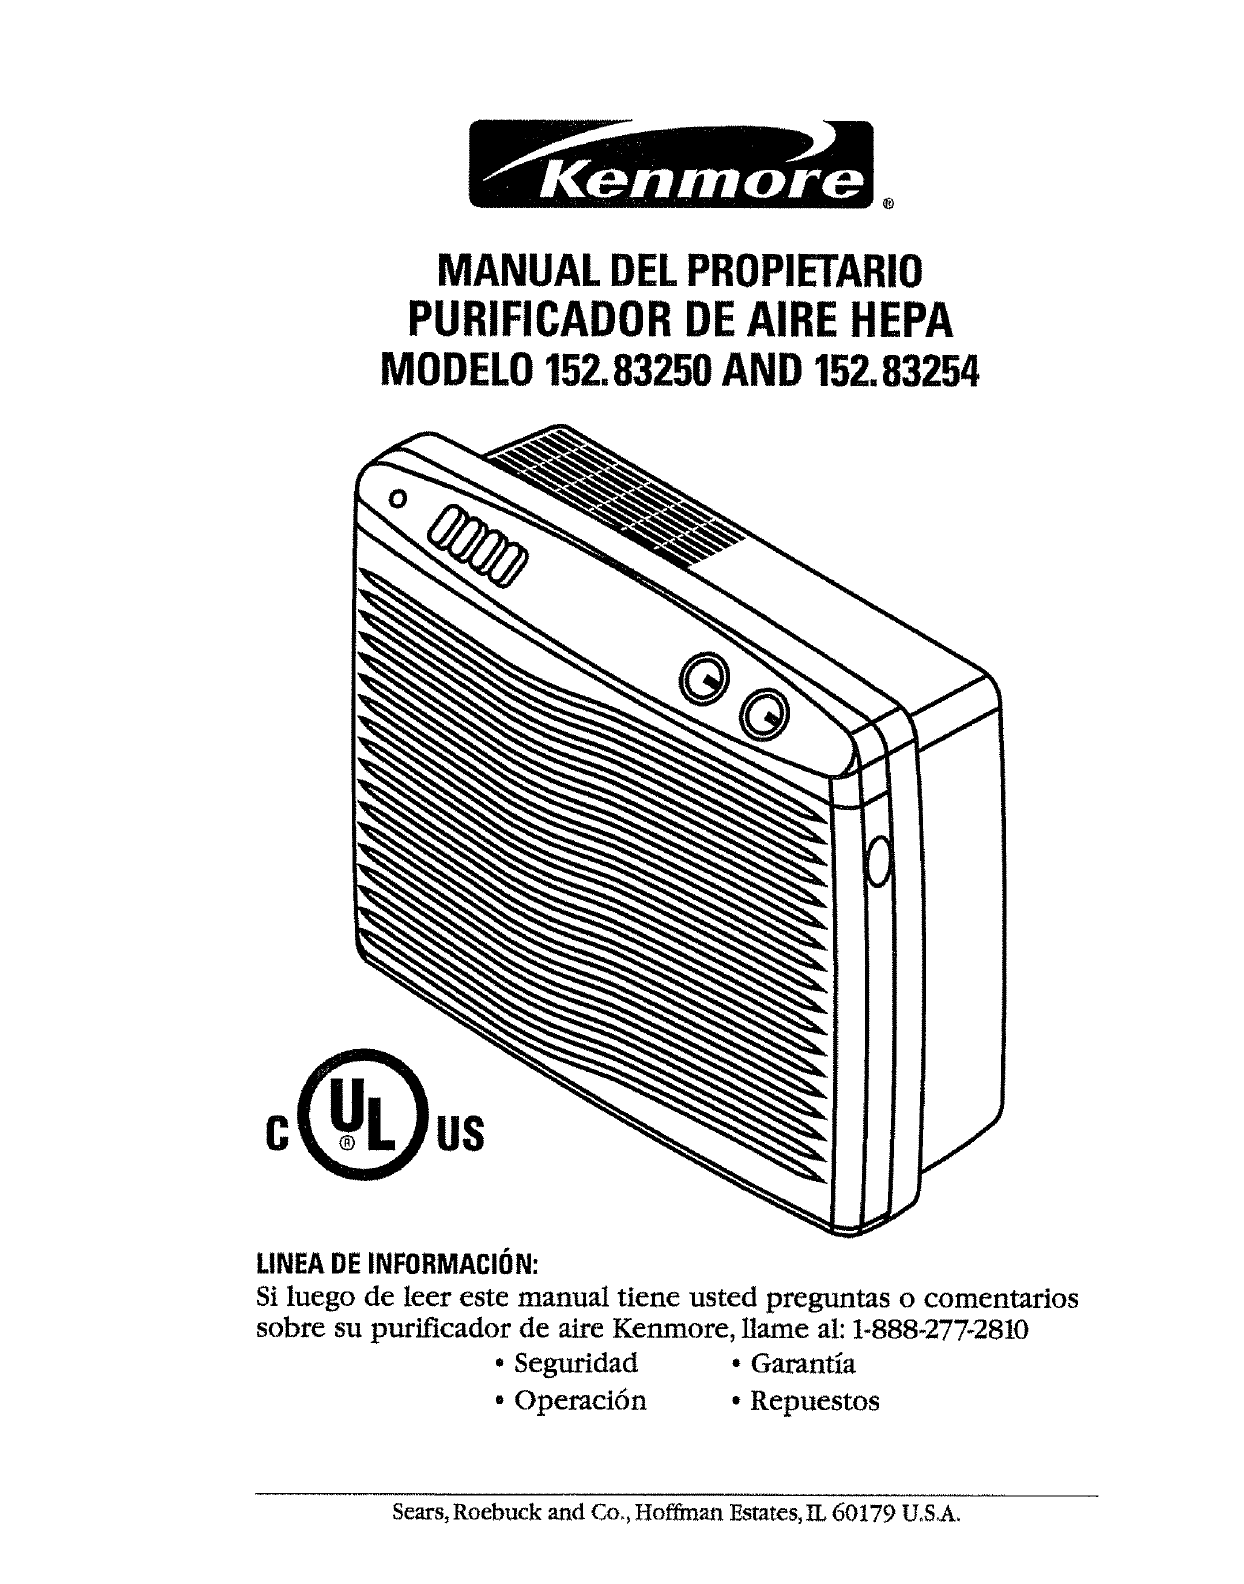
MANUAL DELPROPIETARIO
PURIFICADORDEAIREHEPA
MODELO152.83250AND 152.83254
a
LINEADE INFORMACION:
Si luego de leer este manual tiene usted preguntas o comentarios
sobre su purificador de aire Kenmore, Ilame al: 1-888-277-2810
•Seguridad •Gamntia
•Operaci6n •Repuestos
Sears, Roebuck and Co., Hoffman Estates, IL 60179 UoSA.
IMPORTANTES INSTRUCCIONESDE SEGURIDAD
Por favor lea todas las instrucciones antes de usar este producto. Guarde estas
instrucciones para futtwa referencia.A! usar aparatos el6ctricos, deben obser-
varse precauciones b_sicas para reducir riesgos de rotura, fuego, choques
el6ctricos y heridas personales, incluyendo lo siguiente:
•Lea todas las instrucciones antes de operar e! purkficador de aire.
•Coloque el purJficador en una zona de la casa donde no pueda set volcado pot
las personas.
•Mantenga el puflficador desconectado cuando no est_ en uso.
•No use ningtha aparato clue tenga el cord6n o el enchufe dafiados, o si no ha
funcionado bidn, se ha c,_do o estfi dafiado en una forma uotra.
•Mantenga el cord6n de alimentaci6n alejado de superficies calientes.
•No utilice el purificador en exteriores.
•Nunca use el purificador a n_lenos clue est_ totalmente ensamblado.
•No coloque el cord6n de alimentaci6n debajo de las alfombras y no Io cubra
con ninga'm objeto. Posidone el cord6n de manera tal que no sea objeto de
tropezones y caidas.
°No use el purificador donde puedan estar presentes gases o vapores
combustibles.
•No exponga el plwificador a la lluvia, no lo use cerca del agua, en un bafio,
lavadero o zonas h&nedas.
•Para desconectar el purificador, prhnero gire el control de velocidad a la
pocisi6n "OFF" (apagado) y desconecte la ficha del recept_culo.
° E1purificador debe ser usado en posici6n vertical.
°No permita que objetos foraneos entren en el purificador, _stos pueden causar
choques el_ctricos o dafios al put_cador. No bloqlme las entmdas o salidas de
aire del purificador.
•Posicione el purificador cerca de un tomacorriente y evite usar cordones de
extensi6n.
°El purificador cuenta con una ficha polarizada (un contacto es mas anc,ho clue
el otro)o Para reducir el riesgo de cahoque, esta ficha es_ supuesta a calzar en un
recept_culo polarizado solamente de lma manera. Si la ficha no penetra comple-
tamente en el recept_culo, intente nuevamente giI_ndola al revds. NO I_
vencer este dispositivo de seguridad.
°Una conexi6n floja entre la ficha y el recept_culo (tomacorriente) puede causar
sobrecalentamiento y contorsi6n de la ficha. Contacte a un electricista cualifica-
do pa_ra reemplazar los recept_culos flojos o gastados.
•No se siente, no se pare o no ponga objetos pesados sobre el purkqcador.
°Desconecte el sumJnistro el_ctrico antes de proveer servicio a la untdad_
°ATENCION: _ reducir el riesgo de incendio o choque eMctrico, no use este
producto en conjunto con ningtm control de velocidad electr6nico (solid-state)
GARANT[ATOTALPORUNANO
Si este purificador de aire malfunciona debido a defectos materiales o de mano
de obra dentro del afio de la fecha de compra, Sears lo repara_ o reemplazar_
sin cargo.
Esta garantia es aplicable solamente mientras este producto est6 en uso en los
Estados Unidos o en Canada.
Esta garantla le provee especificos derechos legales y usted puede tambi6n tenet
otros derechos, los cuales pueden variar de Estado a Estado.
Esta garantLa NO CUBRE el reemplazo del _tro HEPA odel pre-filtro.
Sears Roebu¢& and Co, D/817WA, Hoffman Estates, EL60179
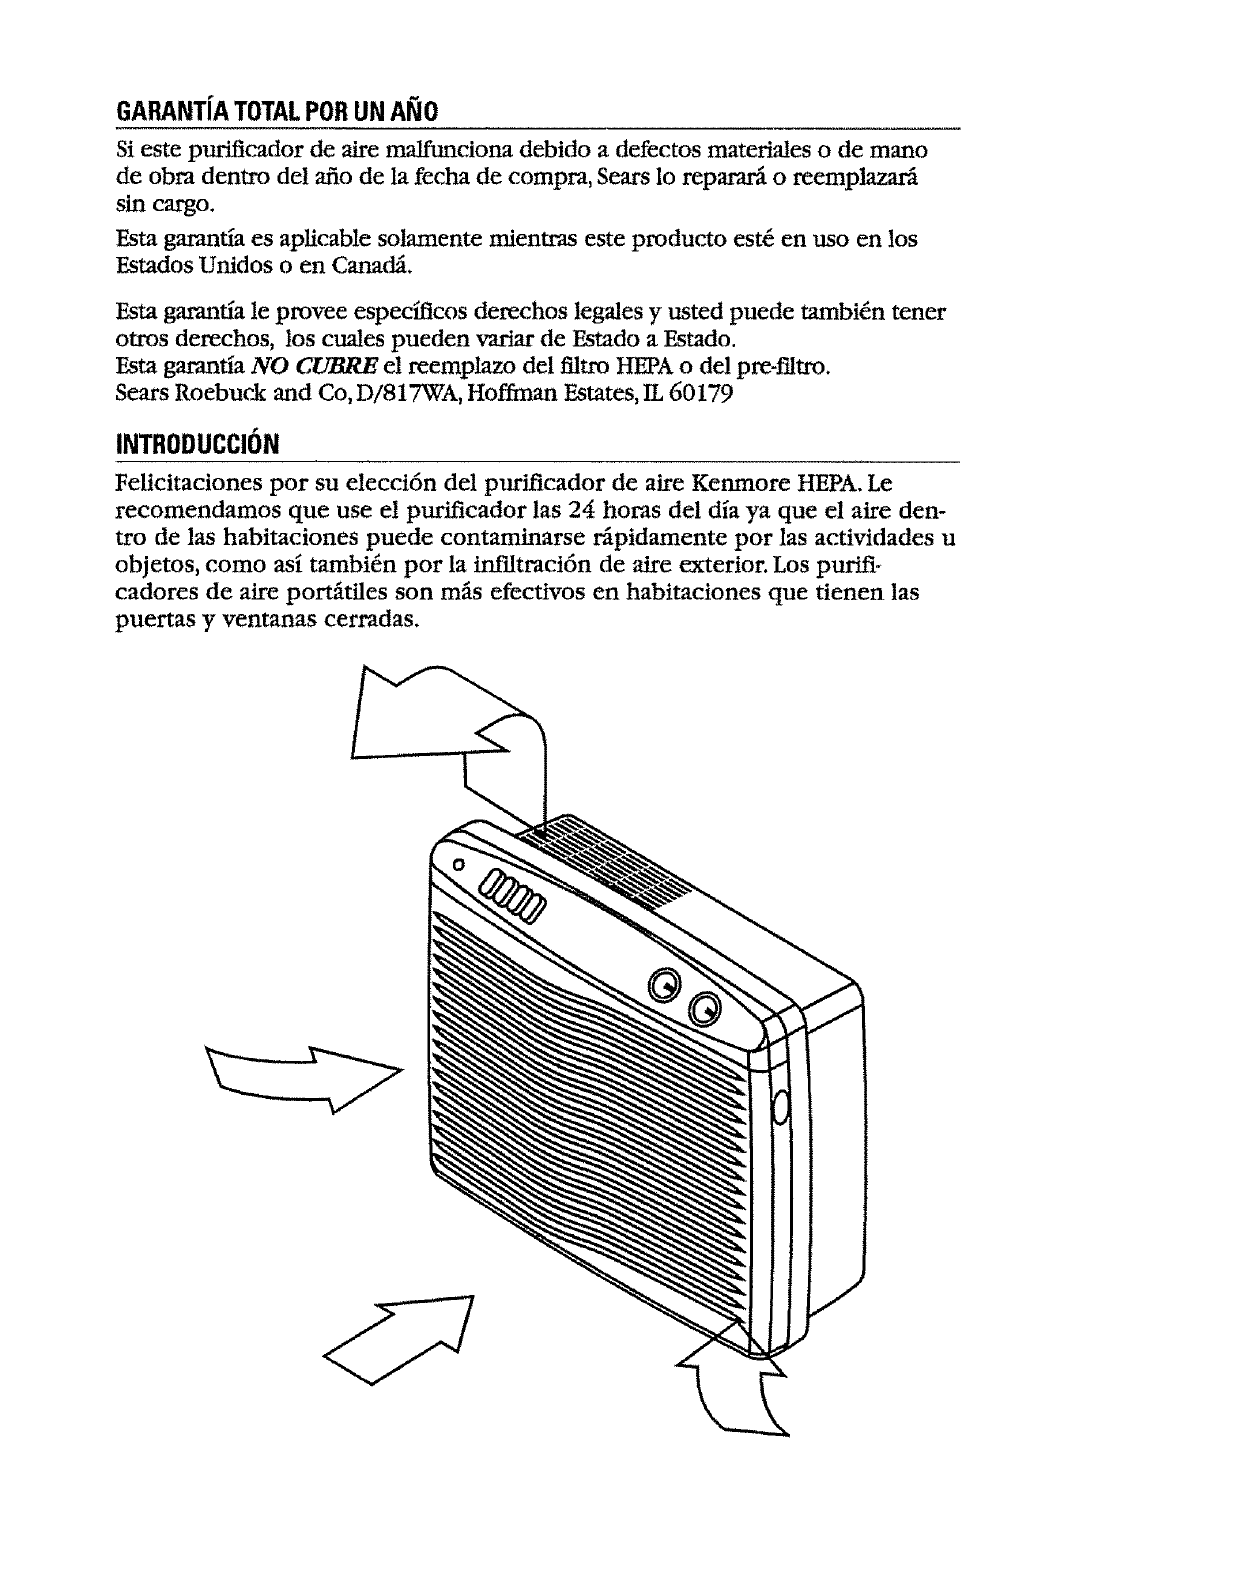
INTRODUCCION
Felicitaciones pot su elecci6n del purificador de aire Kenmore HEPA. Le
recomendamos que use el pufificador las 24 horas del dia ya que el aire den-
tro de las habitaciones puede contaminarse rfipidamente por las actividades u
objetos, como asi tambi_n pot la inffltraci6n de aire exterior. Los purifi-
cadores de aire port,tiles son m_s efectivos en habitaciones que tienen las
puertas y ventanas cerradas.

COMOFUNCIONA
El purificador de aire tiene un sistema de filtraci6n de dos etapas. La primera
etapa es un pre-Ffltro de carb6n. La Segunda etapa es un ffltro HEPA (Arrestador
de partlculas de alta eficacia) o High Efficiency Particulate Arrestor. El aire de la
habitaci6n es atraido dentro del purificador a trav6s de la parriUa de entrada de
aire y pasa a tmv6s de los Flltros. El aire F_trado es liberado pot la parte superior
de la unidad yes dispersado hacia arriba dentro de la habitaci6n.
Su purificador de aire posee una conveniente agarradera, para facilitar su trans-
porte y reubicaci6n_
Dos diales de informaci6n de cambio de filtros son provistos en el panel de
control, a forma de recordatorios de cuando cambiar los ffltros de la unidado
PREPARACION
Su purificador de aire fu6 extensamente inspeccionado yprobado en la f_brica
antes de set empacado. Inspecci6nelo visualmente luego de sacarlo de su caja.
Remueva y descarte todo el material de empaque° Retorne la unidad si observa
cualquier signo de dafio o maltratoo
Luego de encender su pur_cador de aire, fije una fecha tres meses hacia ade-
lante en el dial rotatorio del pre-fittro y 12 meses hacia adelante en el diaI rota-
torio del filtro HEPA, a forma de recordatorio de cuando cambiar estos ffltros.
Los dimes giran hacia la derecha (en el sentido de las agujas del reloj).
CONEXIONE_CTRICA
Conecte el purificador de aire a un receptficulo potarizado de pared de 120 voltios.
ADVERTENCL_' Para evitar peligro de incendio o choque, el purificador de
aire solo debe set conectado a tm recept_culo polarizado de 120 voltios de
corriente alterna.
OPERACION
CUIDADO: Nunca opere el purificador sin el filtro HEPA propiamente
instalado. Dafio permanente al motor podria ocurrir!
Es una buena idea que cada vez que se encienda el purtficador, sea operado a
su mayor velocidad pot unos segundos, proveyendo asl una i_pida limpieza
inicial. Luego p6nga!o en MED o LOW (bajo), como desee.
.HI (Alto)
• MED (Mediano)
•LO (Bajo)
Operaci6n mfixima
Operaci6n diurna
Operaci6n nocturna
l_Apida limpieza inicia!
Rfipida velocidad de ventilador
Operaci6n silenciosa
PLANDECAMBiODEFILTROS
PRE-FILTRO: E1 pre-filtro deberfa ser cambiado cada tres (3) meses omenos
dependiendo del nivel de contaminantes en el aire de la habitaci6n y de la
frecuencia de uso.
HEPA FILTER: E1 promedio de vida del f'tltro HEPA es de I a 3 afios dependi-
endo del nivel de contaminantes en el aLre de la habitaci6n yde la frecuencia
de uso. El volfimen de aire provisto comenza_ a mermar notablemente cuando
el filtro necesita ser cambiado. Usted deberfa tener un £dtro de repuesto
disponible para cuando sea necesario.
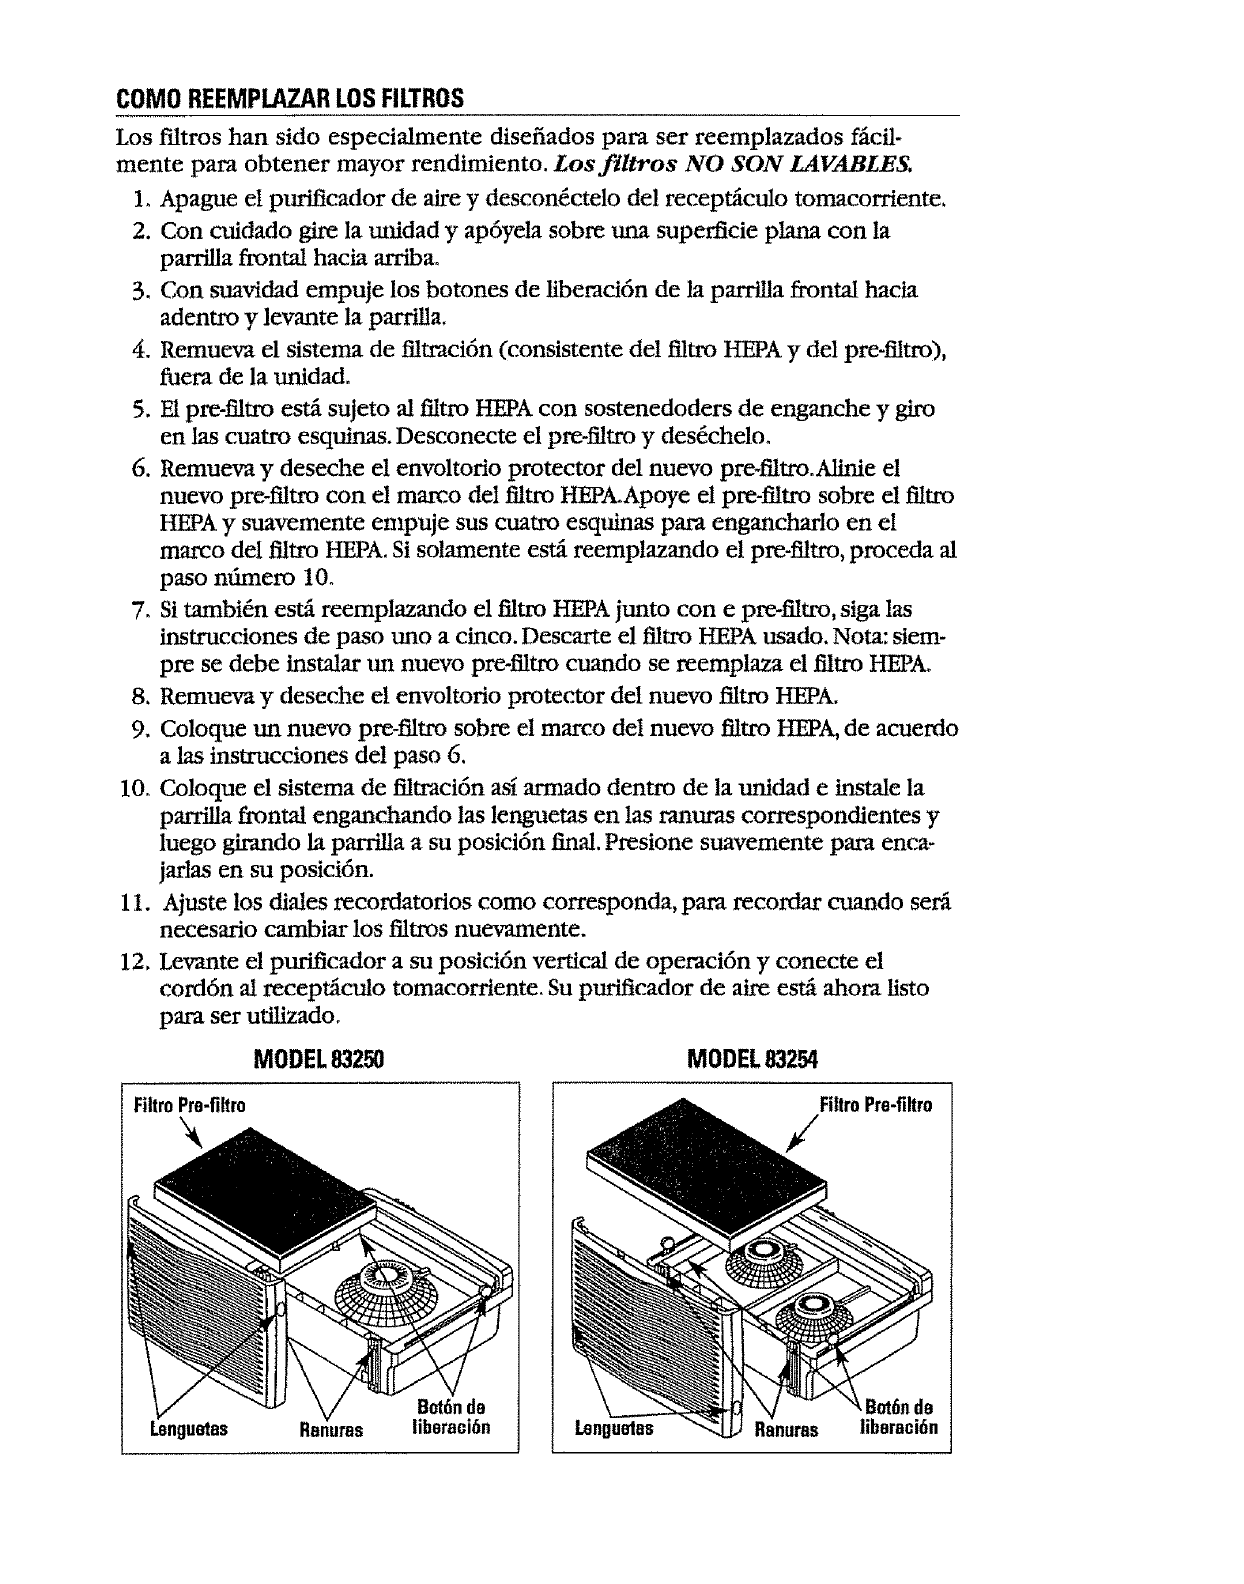
COMO REEMPLAZARLOSFILTROS
Los f'dtros han sido especialmente disefiados para ser reemplazados f_cil-
mente pare obtener mayor rendimiento. Losftltros NO SON LAVABLE$.
1. Apague d purificador de aire ydescon6ctelo del recept_culo tomacorriente.
2. Con oaidado gire la unidad y ap6yela sobre una superficie plana con ia
parrilla frontal hacia arriba°
3. Con suavidad empuje los botones de liberad6n de la pardUa frontal hacia
adentro y levante la parritla.
4. Remueva el sistema de filtraci6n (consistente de1 filtro HEPA y del pre-filtro),
fuera de la unidad.
5. E1pre-filtro estfi sujeto al filtro HEPA con sostenedoders de enganche ygiro
en las cuatro esquirds. Desconecte el pre-filtro y des6cheloo
6. Remueva y deseche el envoltorio protector del nuevo pre-_tro..Minie el
nuevo pre-filtro con el marco del filcro HEPAoApoye el pre-_tro sobre el ftltro
HEPA ysuavemente empuje sus cuatro esqtfinas para engancharlo en el
marco del flltro HF.PA. Si solamente estfi reemplazando el pre-filtro, proceda al
paso nfimero 10.
7. Si tambi6n estfi reemplazando el filtro HEPA junto con e pre-filtro, siga las
instrucciones de paso uno a cinco. Descarte el filtro HEPA usado. Nora: siem-
pre se debe instalar mz nuevo pre-tiltro cuando se reemplaza el filtro HEPA°
8. Remueva y deseche e! envoltorio protector del nuevo filtro HEPA.
9. Coloque un nuevo pre-filtro sobre el marco del nuevo t_tro HEPA, de acuerdo
a Ms instrucciones de! paso 6.
10_ Coloque e! sistema de ftltraci6n asl armado dentro de la unidad e instale la
pa_ed!la frontal enganchando las lenguetas en las ranuras correspondientes y
luego girando la parriUa a su posici6n final. Presione suavemente para enca-
jarlas en su posici6n.
11. Ajuste los diales recordatorios como corresponda, para recordar cuando serfi
necesario cambiar los tiltros nuevamente.
12. Levante el purificador a su posici6n vertical de operaci6n y conecte el
cord6n al receptficulo tomacorriente. Su pufificador de aire est_ alaora listo
para ser ufilizadoo
MODEL83250
Filtr0 Pra-iiltr0
Lenguetas Ranums
Bot6nde
liberaci6n
1
Lenguelas
MODEL 83254
FiltroPre-filtro
/
Botfnde
Ranums liberacifn
LIMPIEZADE LAUNIDAD
ADVERTENCIAx Para evitar heridas causadas por choque el6ctrico, apague y
desconecte el cord6n del receptfict_o tomacorriente previo a efectuar
cualquter operaci6n de limpieza de la unidad.
1. Apague el purificador de aire y desconecte del recept_culo tomacorriente.
2. Limpie la unMad con un trapo htimedo y suave solamente. No vierta o
salptque agua sobre la untdad y no utilice limpiadores abrasivos sobre ella.
Limpie todas las superficies extemas, especialmente las parrillas de entrada y
salida de aim.
3. No intente limpiar el pre-ffltro o el filtro HEPA. No son lavables y lavarlos los
dafiar_.
4. Reconecte el purificador al receptficulo tomacorriente yencieda la unidad.
ALMACENAJE
Si usted va a almacenar el purficador por rn_s de 30 dlas, usted deberia:
1. Remover de la uoAdad los dos filtros, el HEPA y el pre-t_tro de carb6n.
2. Desechar el pre-filtro.
3. Colocar el fiitro HEPA en una bolsa plfistica herm&ica o envolverlo en materi-
al plfisficooAseglirese de que el Edtro est_ herm6ticamente envuelto para pro-
tegerlo del ambiente donde estfi almacenado.
retornar el purificador de aire al servicio:
1. Desenvuelva el filtro HEPA.
2. Instale u.rl nuevo pre-filtro de carb6n.
3, Instale el sistema de fittros en el puriticador de aire.Vea la secci6n"Como
reemplazar los filtros" para una correcta instalaci6n.
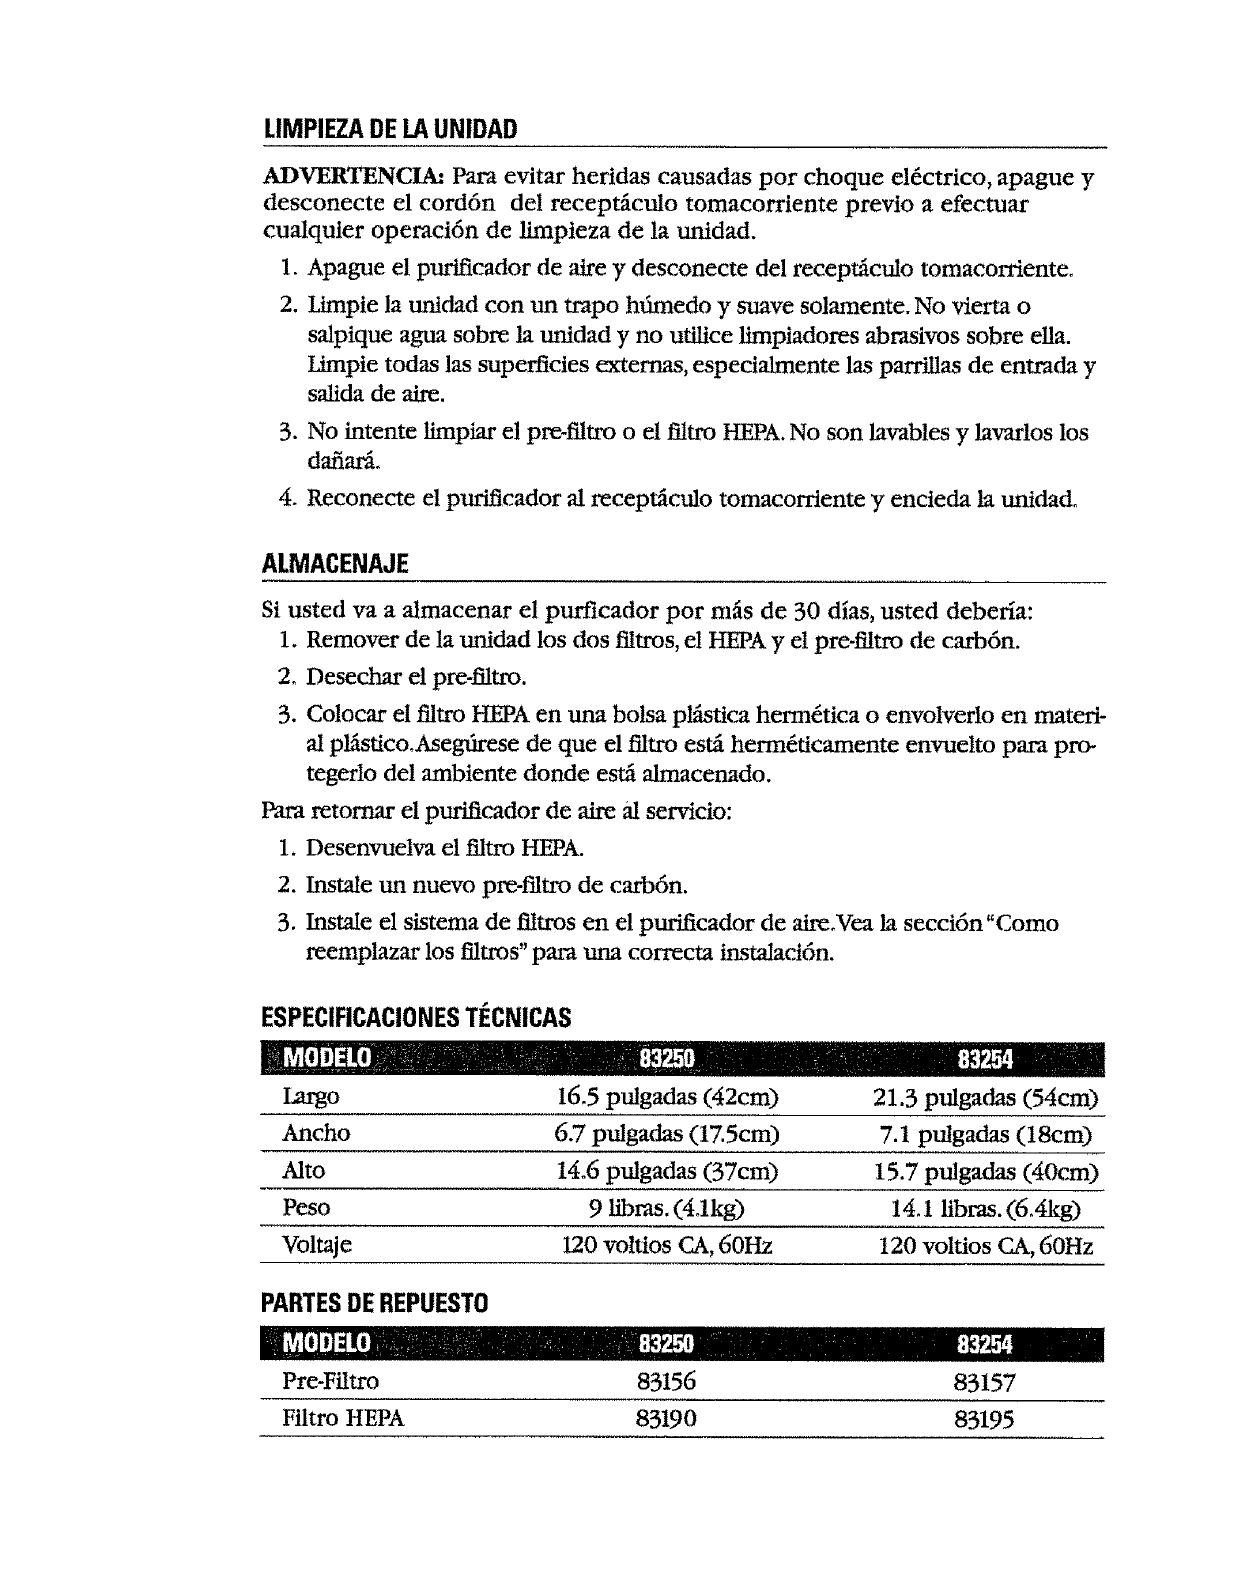
ESPECIFICACIONESTI_CNICAS
I_go
Ancho
Alto
Peso
Voltaje
I6.5 pulgadas (42cm)
6.7 pulgadas (17.5cm)
14.6 pulgadas (37cm)
9 tibras.(4.11_)
I20 voltios CA, 60Hz
21.3 pulgadas (54cm)
7.1 pulgadas (18cm)
15.7 pulgadas (40cm)
14.1 libras. (6.4kg)
120 voltios CA, 60Hz
PARTESDE REPUESTO
Pre-Filtro 83156 83157
Filtro HEPA 83190 83195
LINEATELEFONICADEASISTENCIAAL CLIENTE
Si usted experimenta algfin problema, pot favor refi6rase a la garantia para
mayor informaci6n. Pot favor NO INTENTE reparar la unidad usted mismo.
Hacer esto anutar_ la garantia y tambi_n podria causar dafios al purificador o
hefidas a usted mismo. Si tiene usted preguntas referentes a este aparato, por
favor flame sin cargo a: 1-888-277-2810
De Lunes aViernes: 8 de la mafiana al0 de la noche (horatio del Este)
Sfibado y Domingo: 8:30 de la mafiana a 5 de la tarde 0!orario del Este)
COM0 PEDIR PIEZAS DE REPUEST0
Para pedir piezas de repuesto por tel_fono, name sin cargo a: 1-888-366-7278
De las 7 de la mafiana a las 7 de la noche, siete dias a la semana.
