Kintech PC1008 tablet pc User Manual KW GPS 4301
Kintech Co. Ltd tablet pc KW GPS 4301
UserManual.wiki
>
Kintech
>
PC1008 User Manual
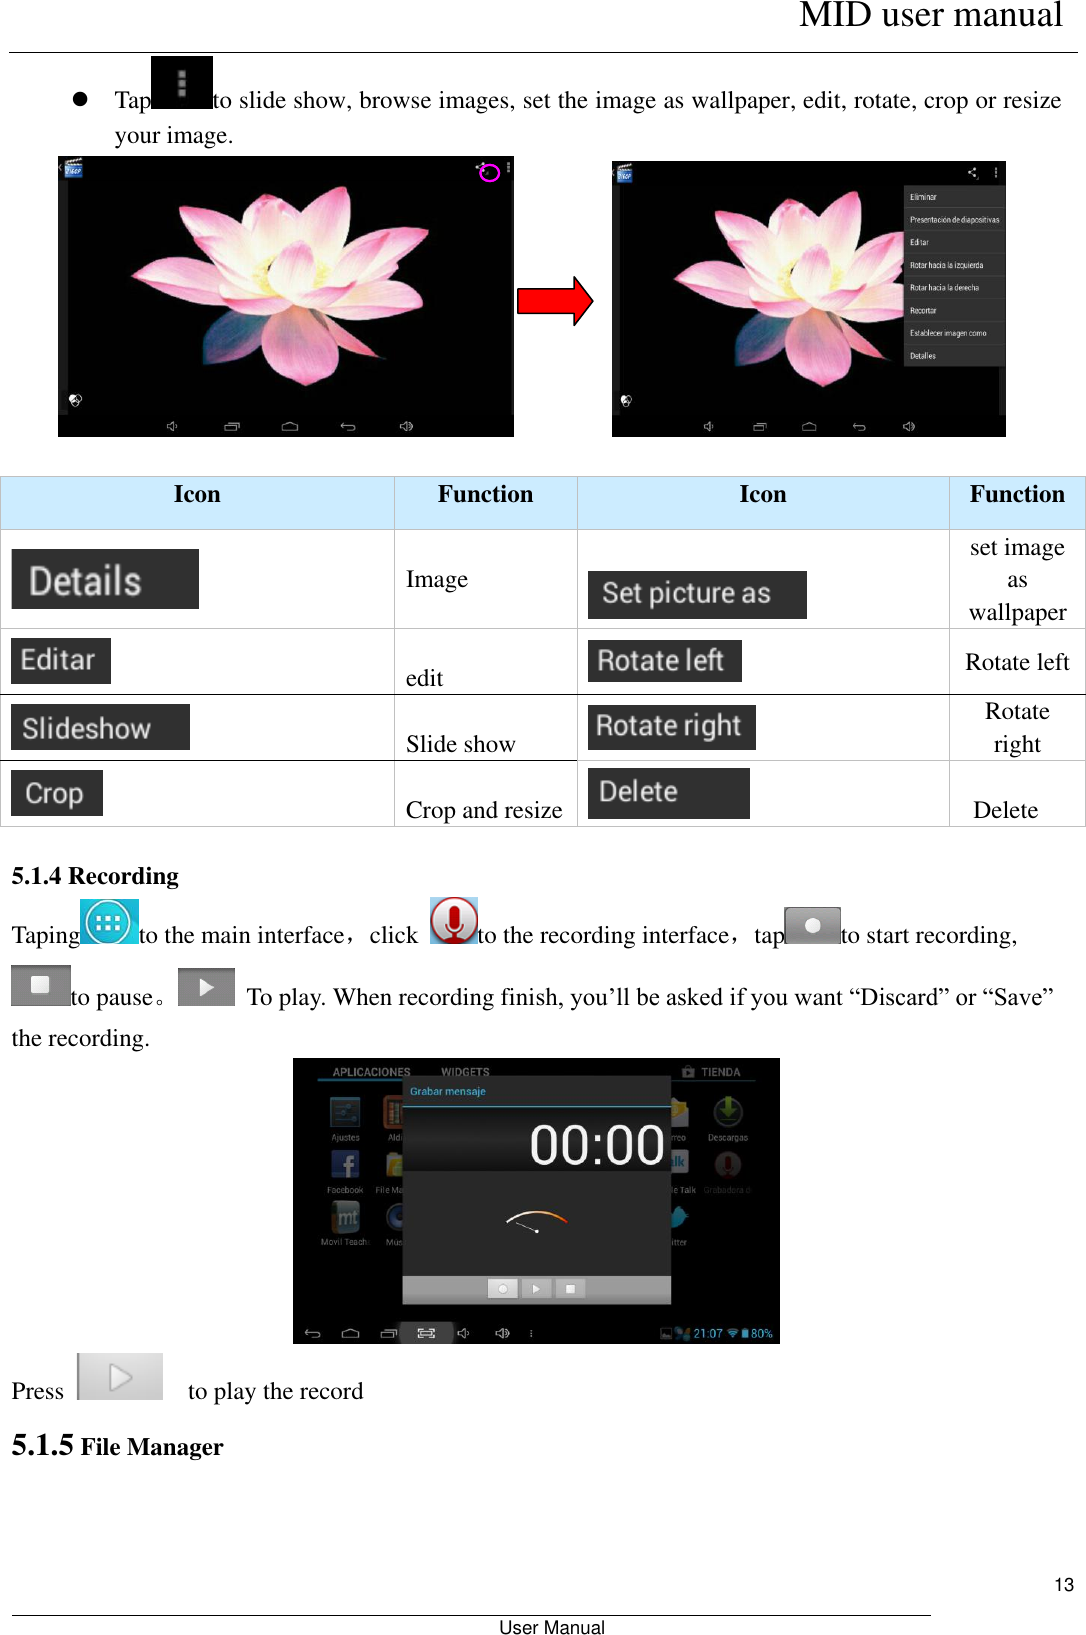
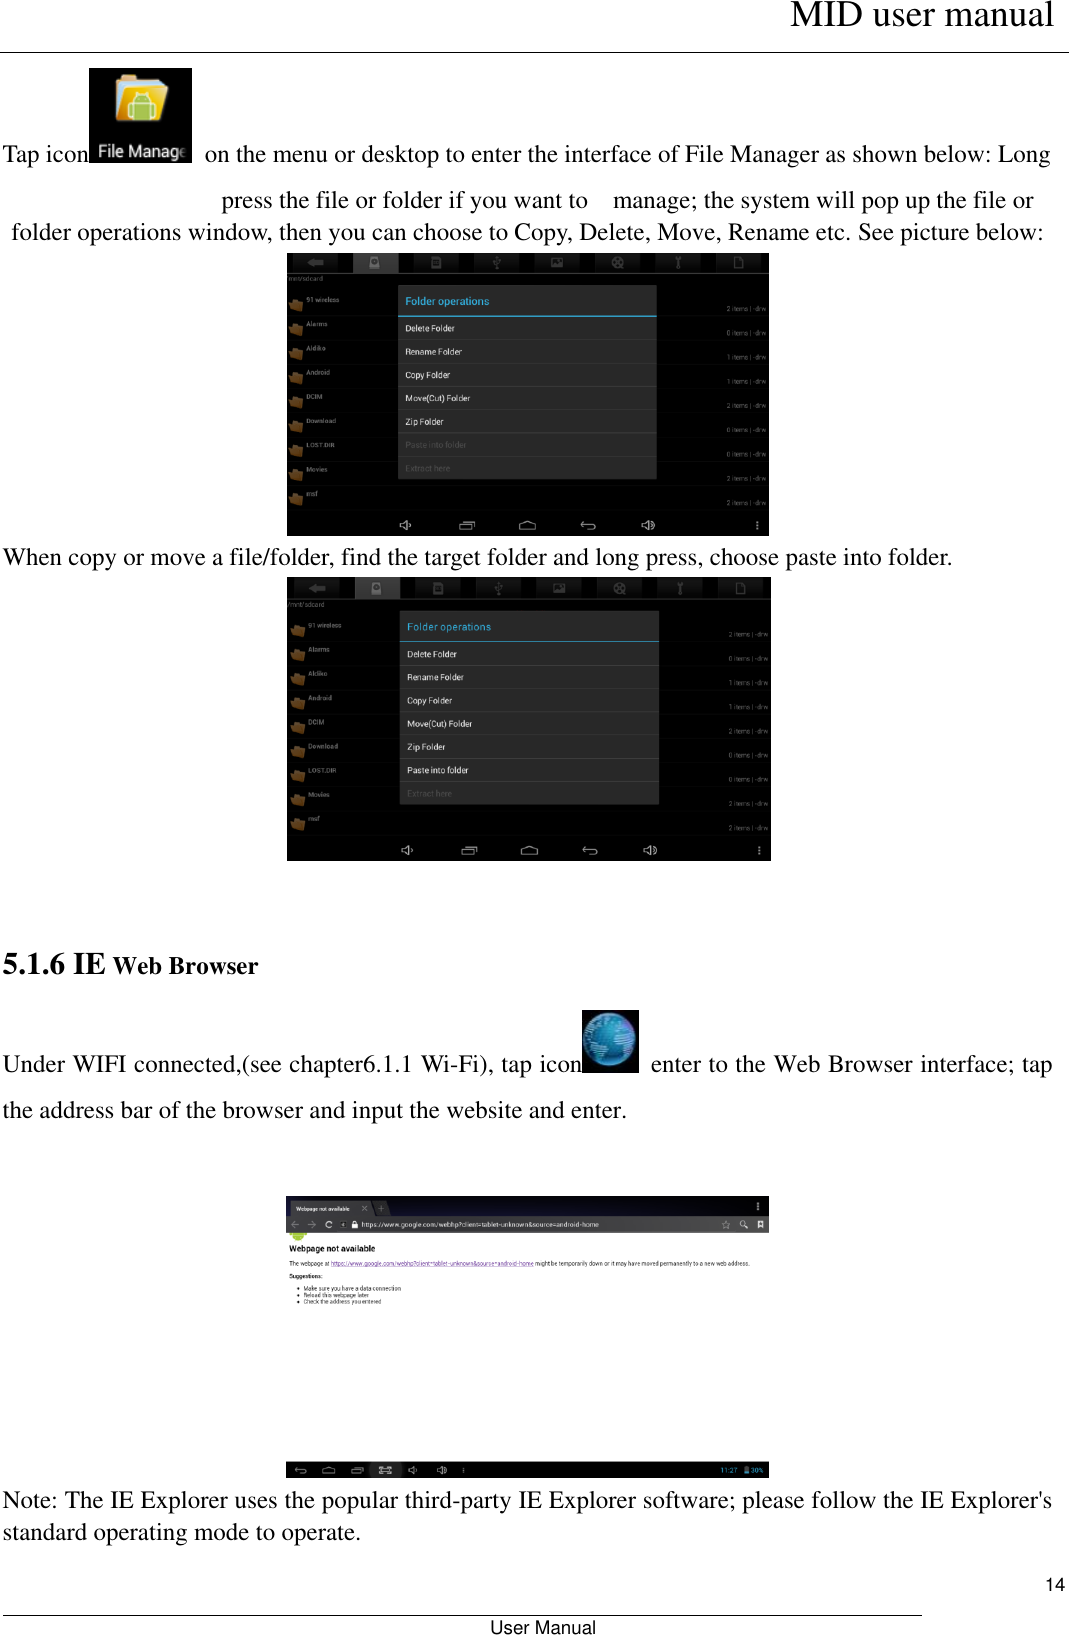
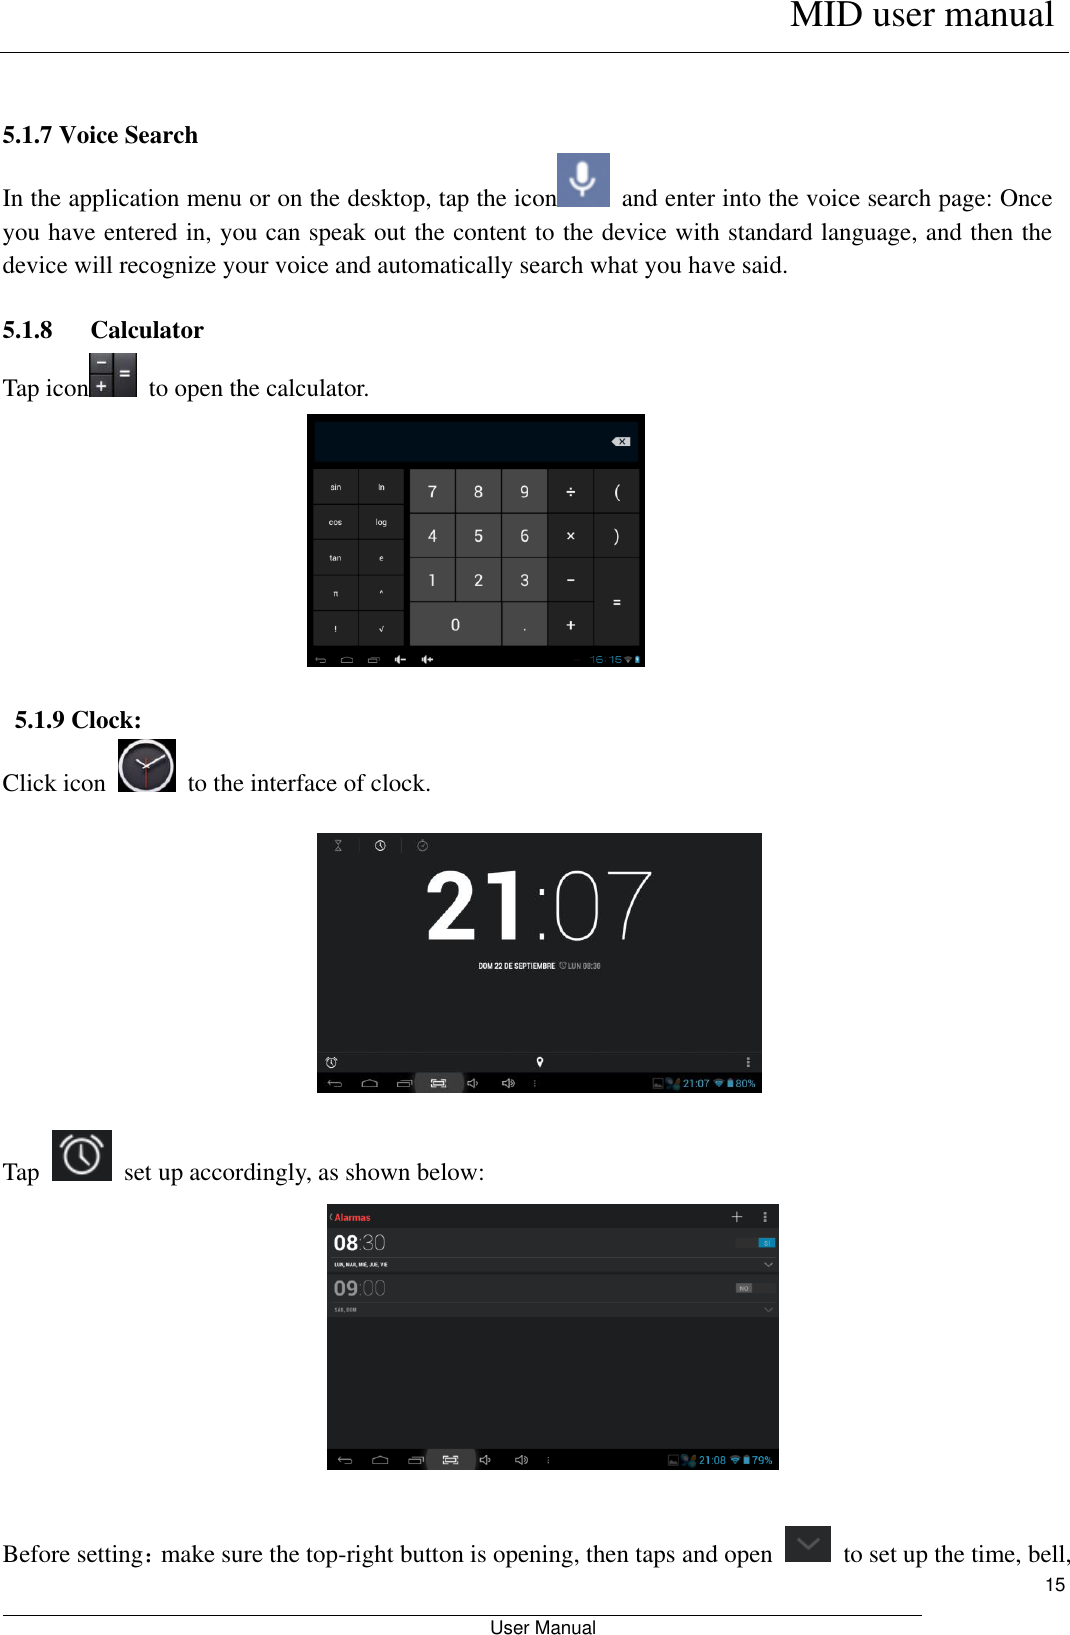
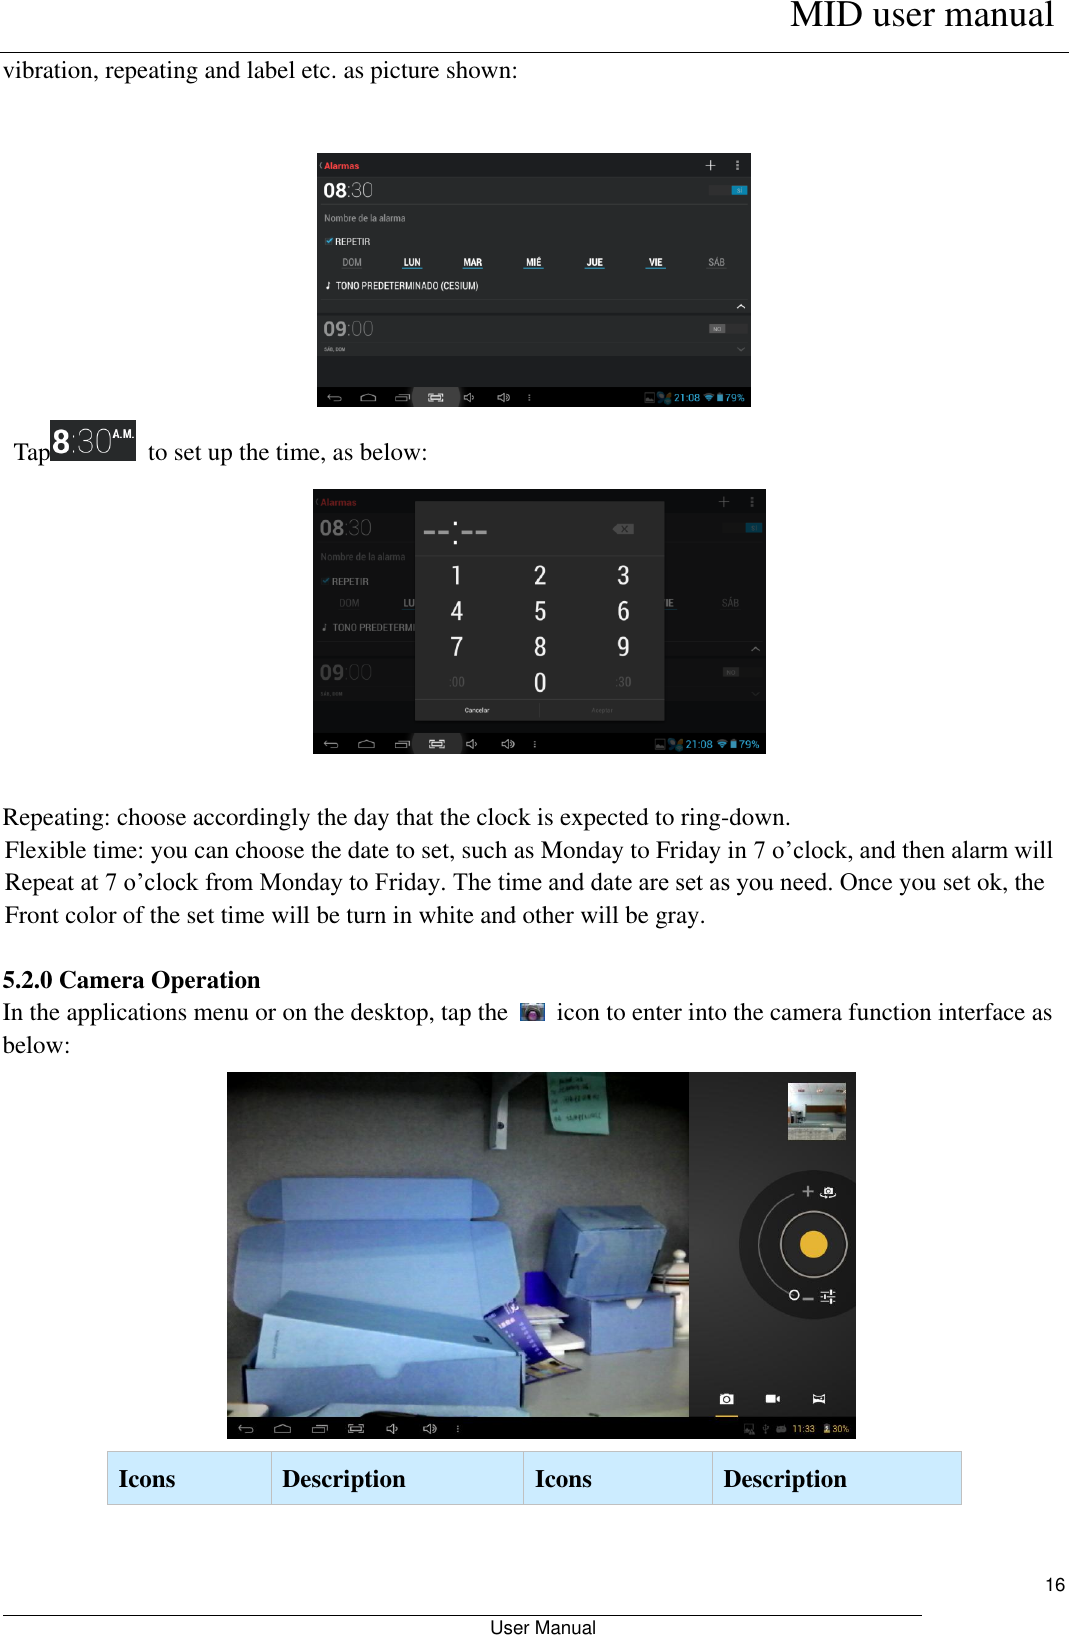
User manual
Navigation menu
Upload a User Manual
Namespaces
Wiki Guide
HTML
PDF
Info
Views
User Manual
Discussion / Help
Navigation

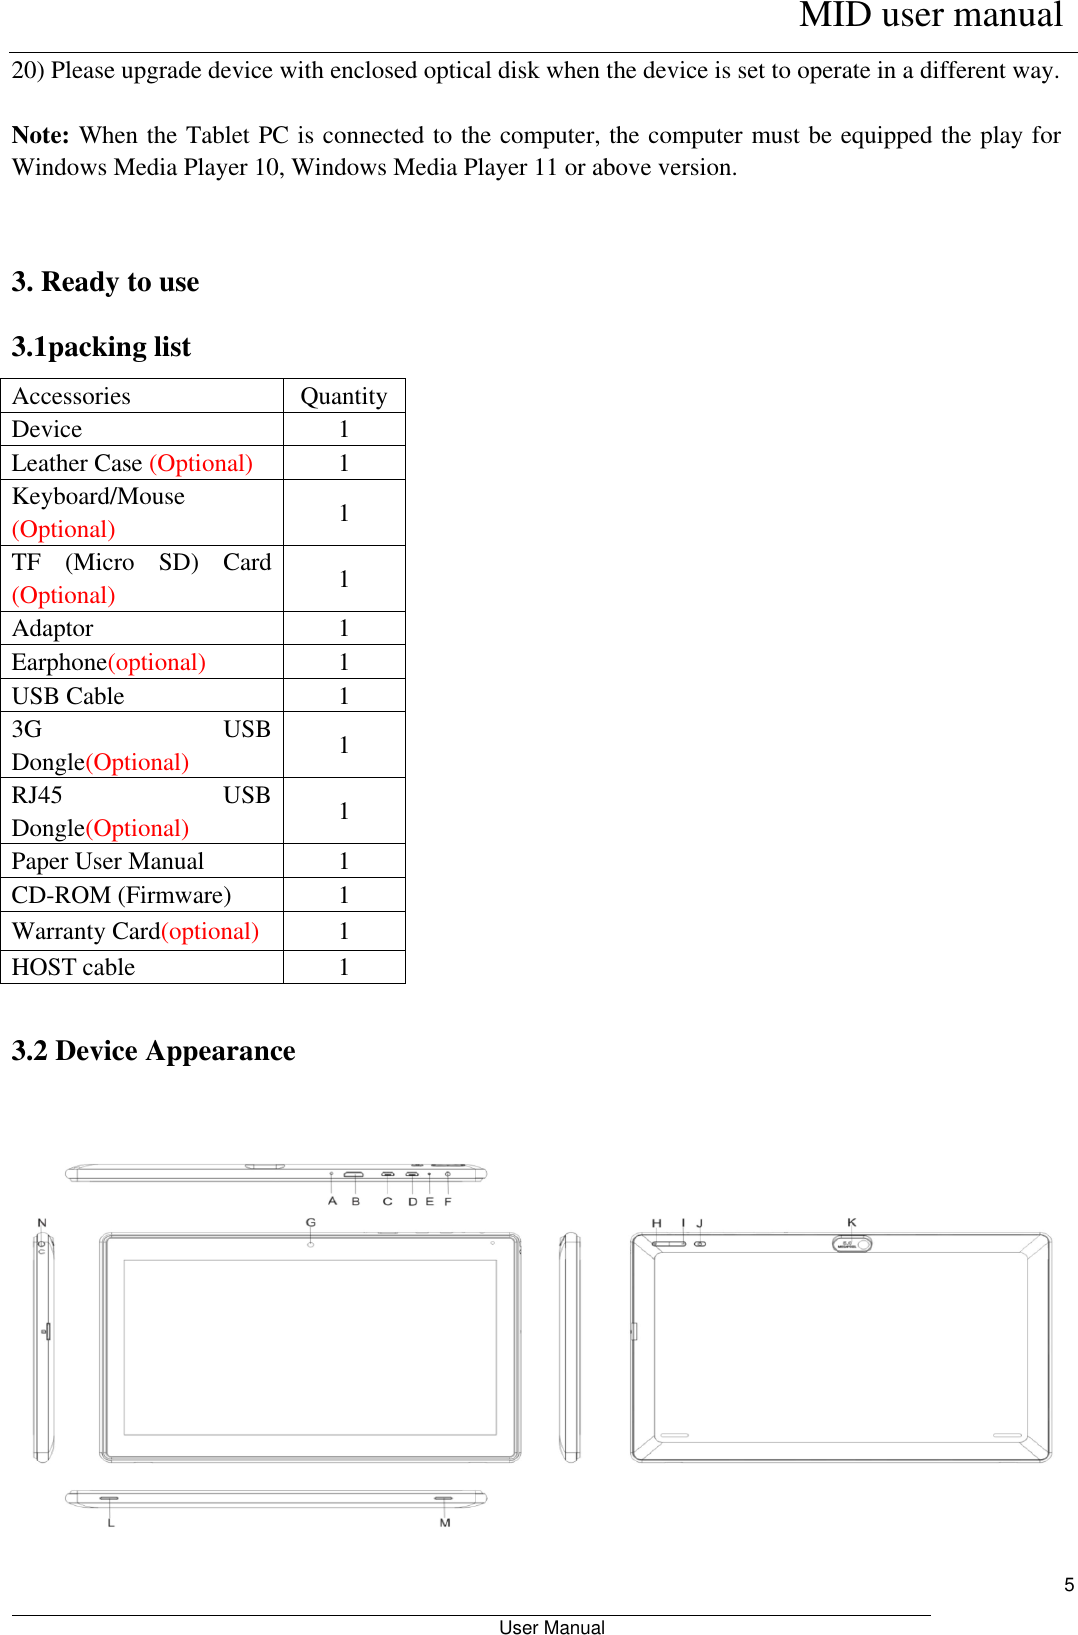
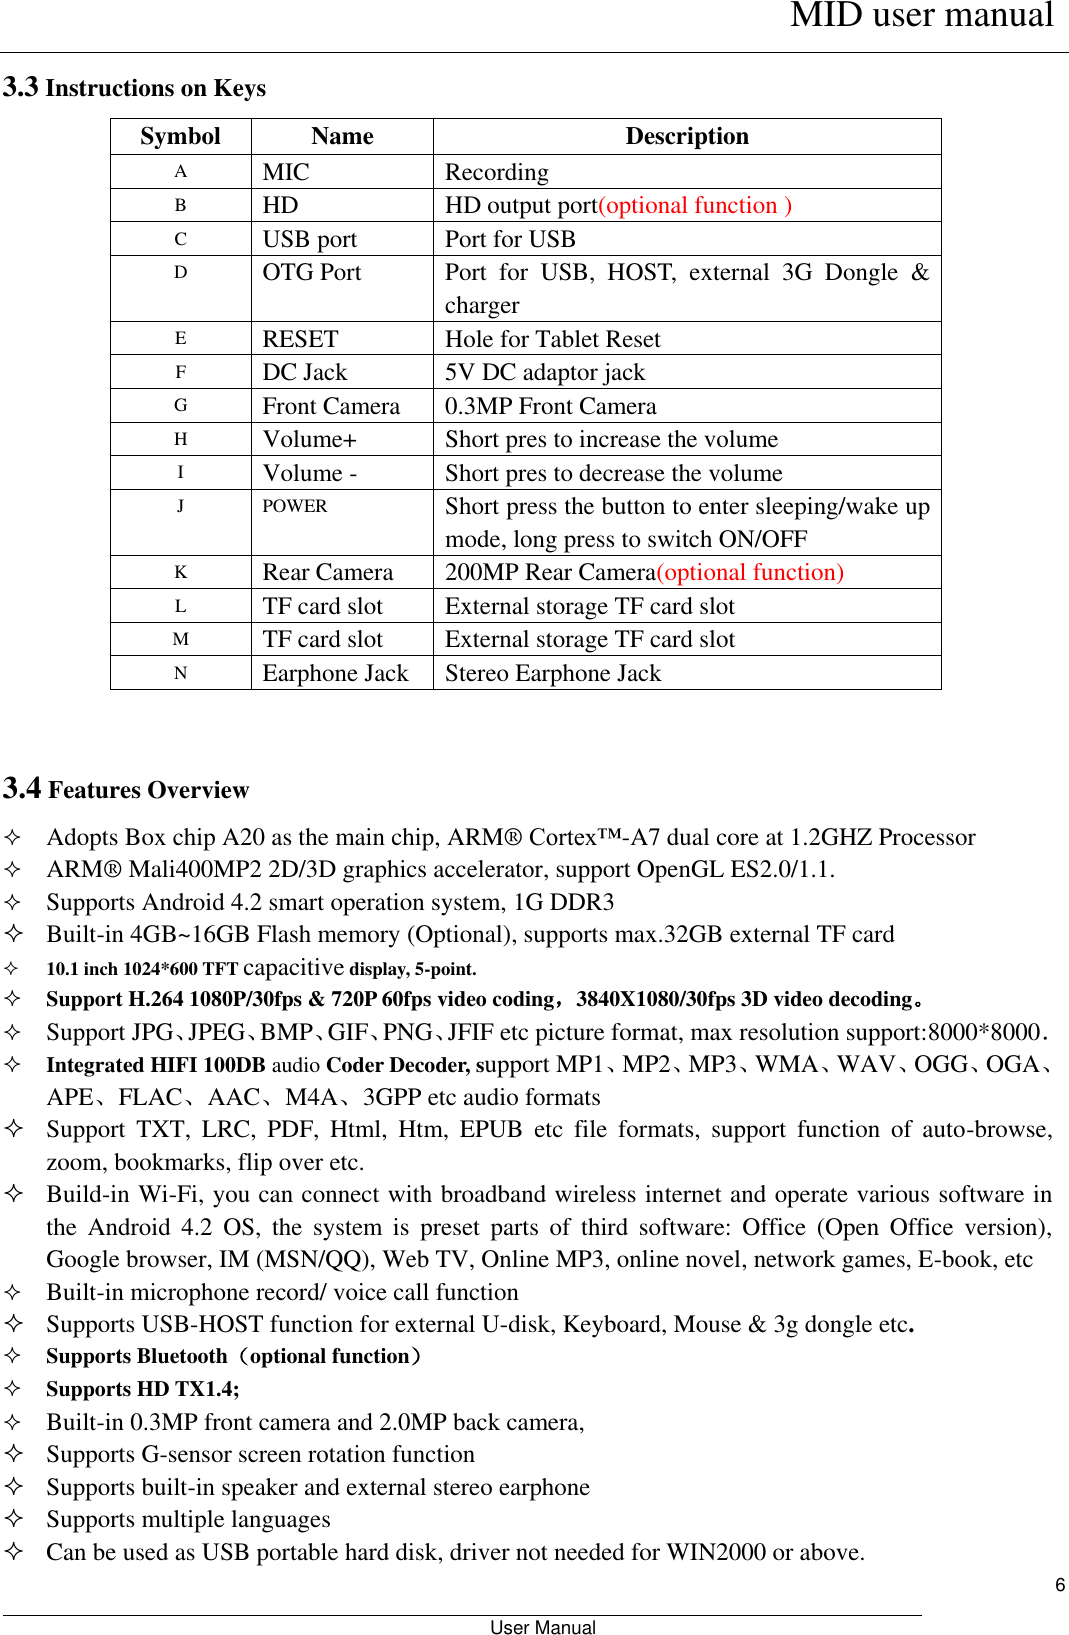
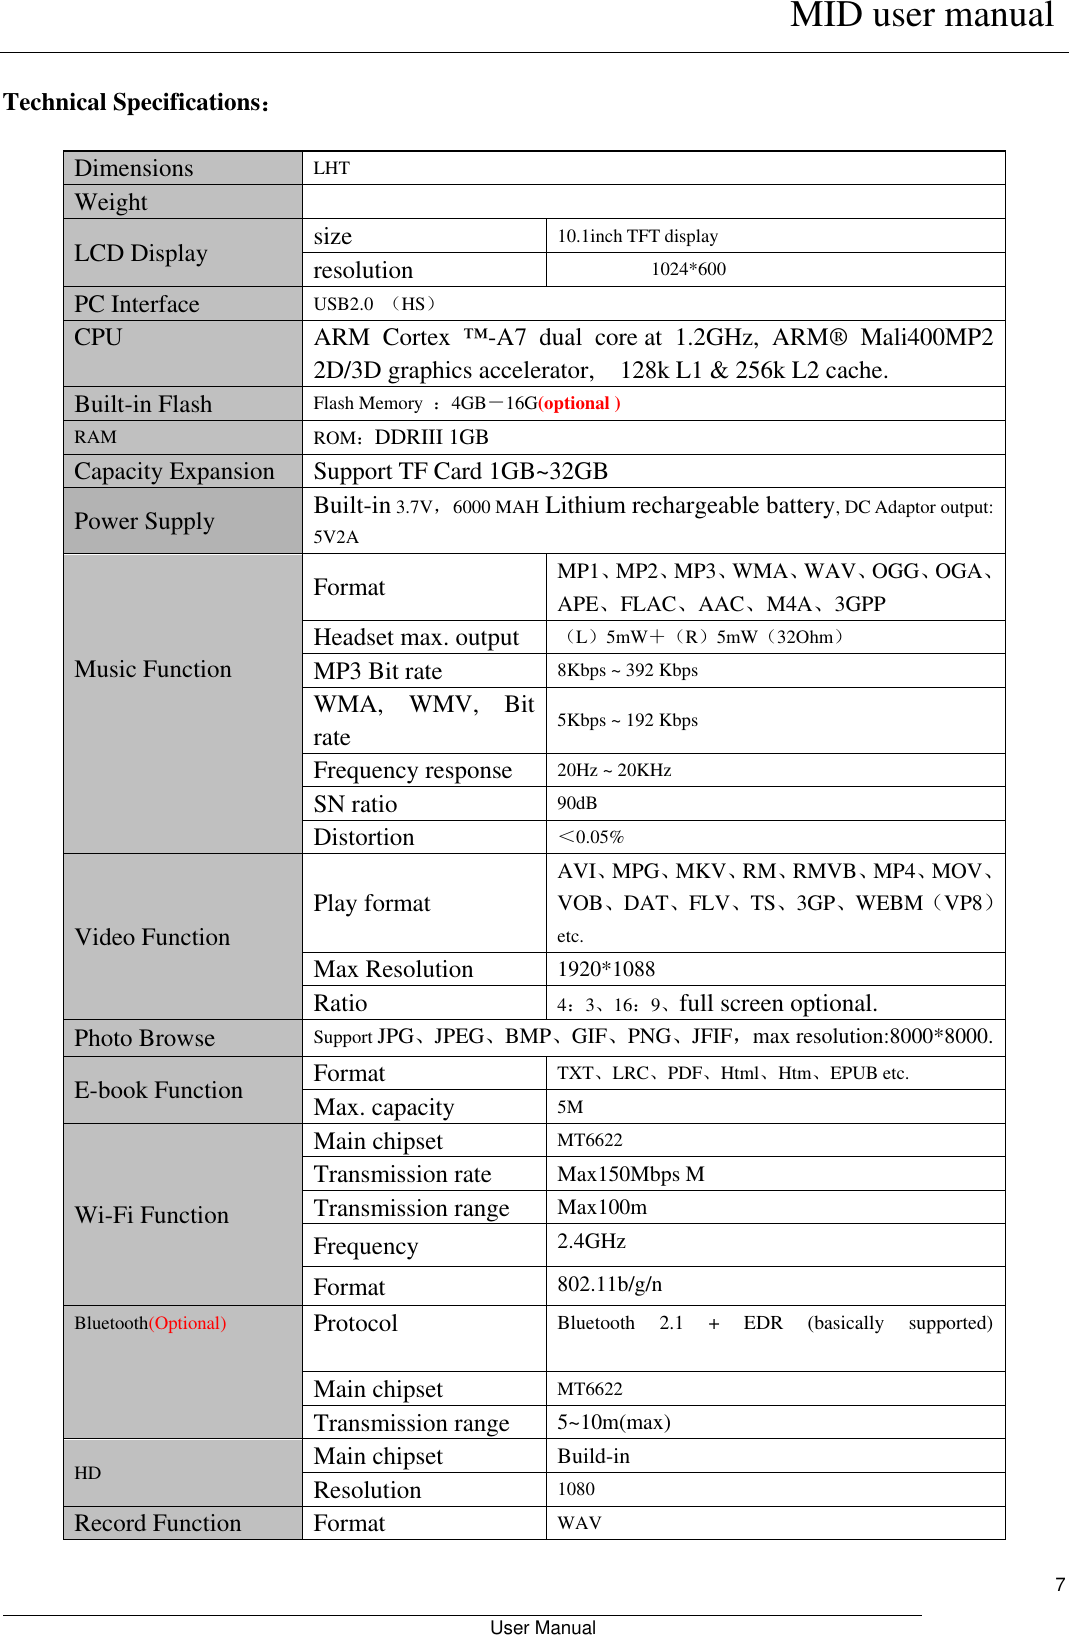
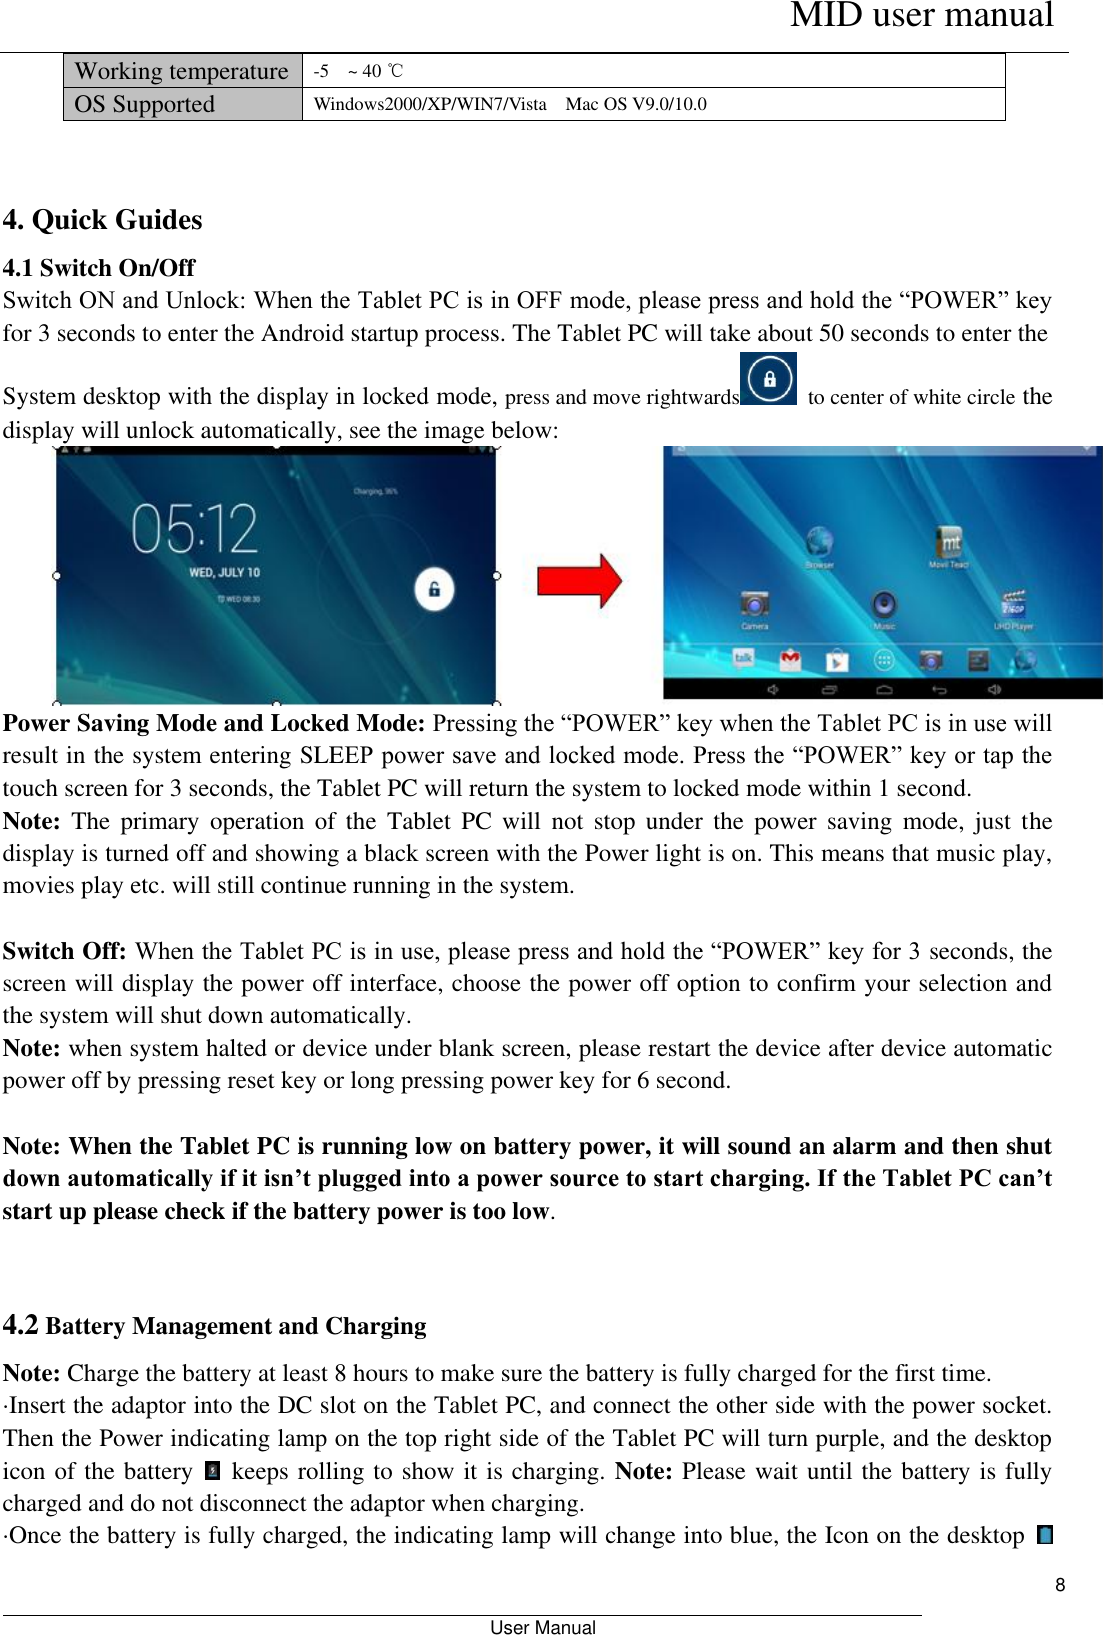
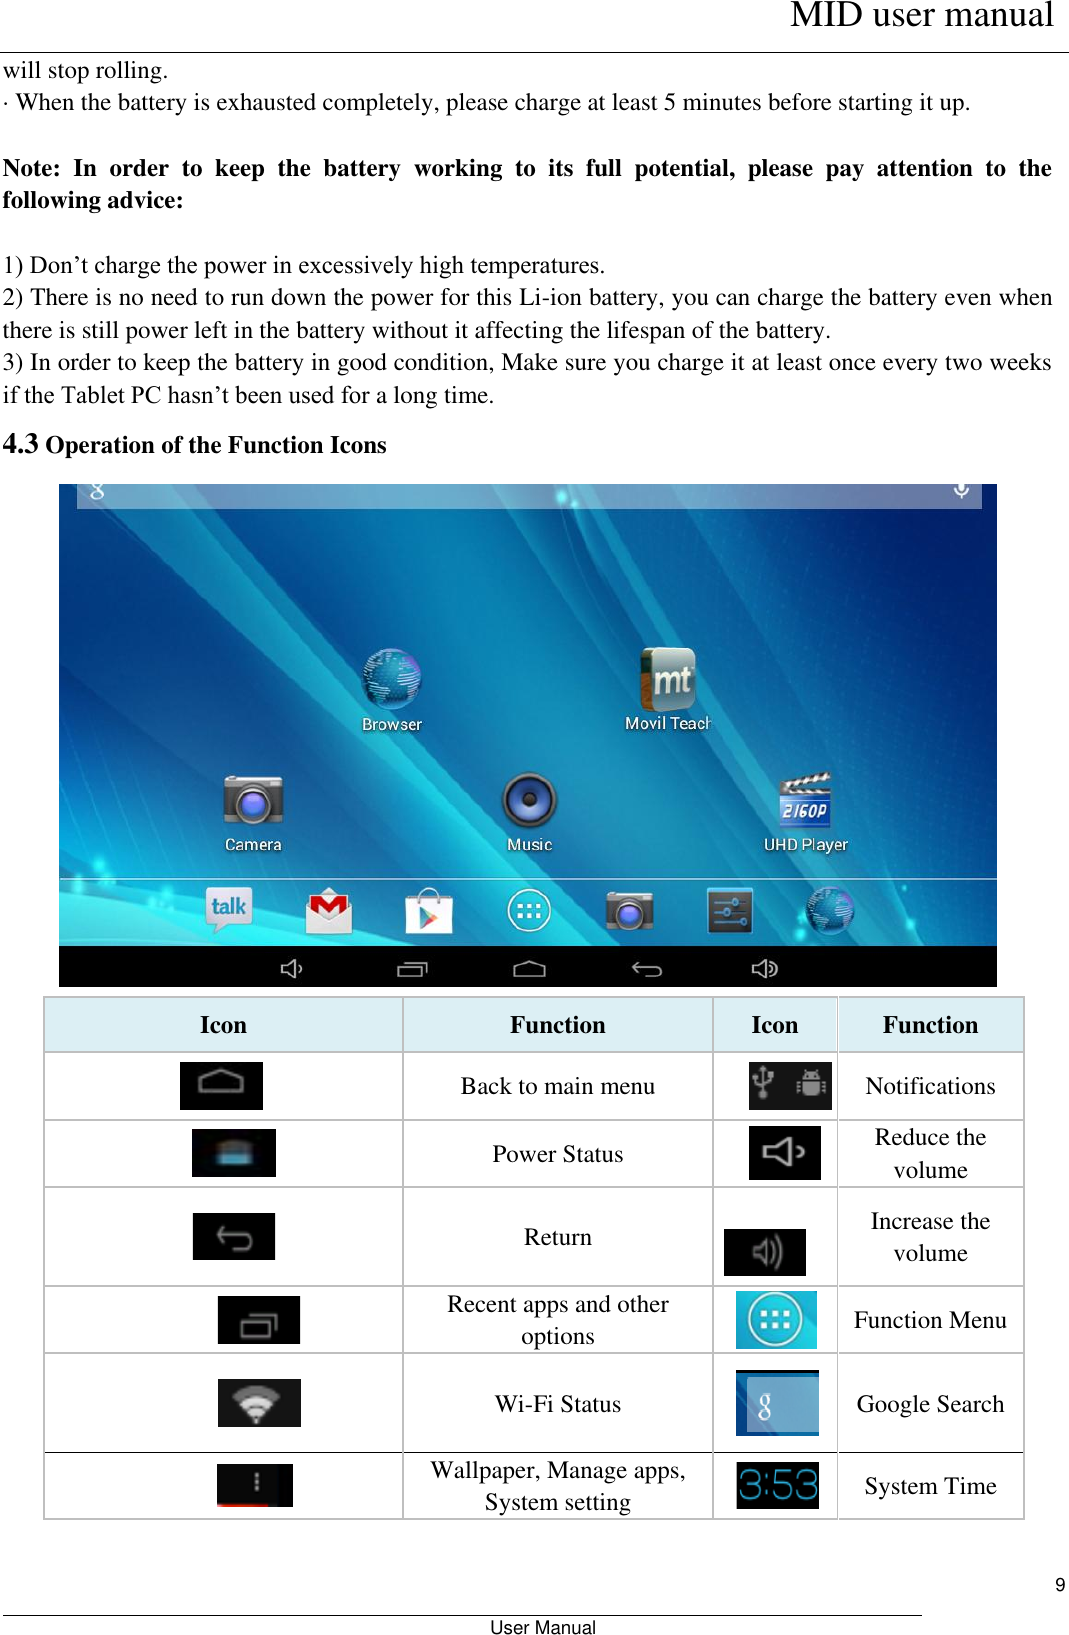
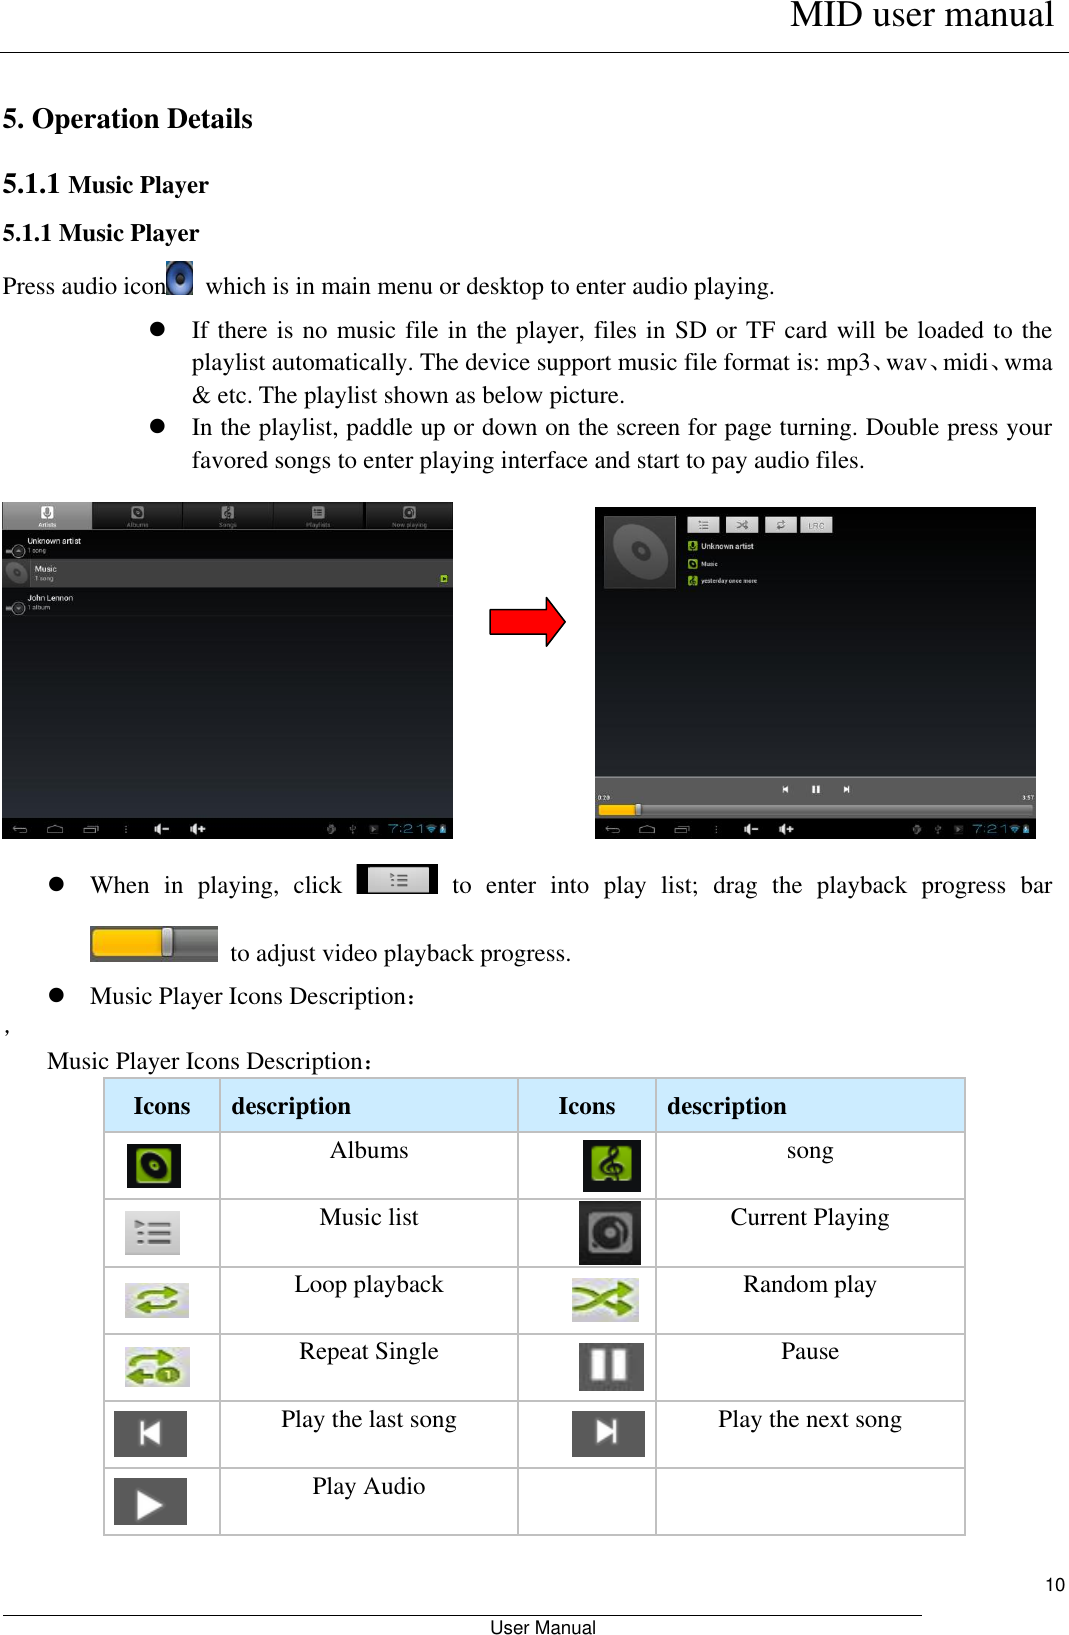
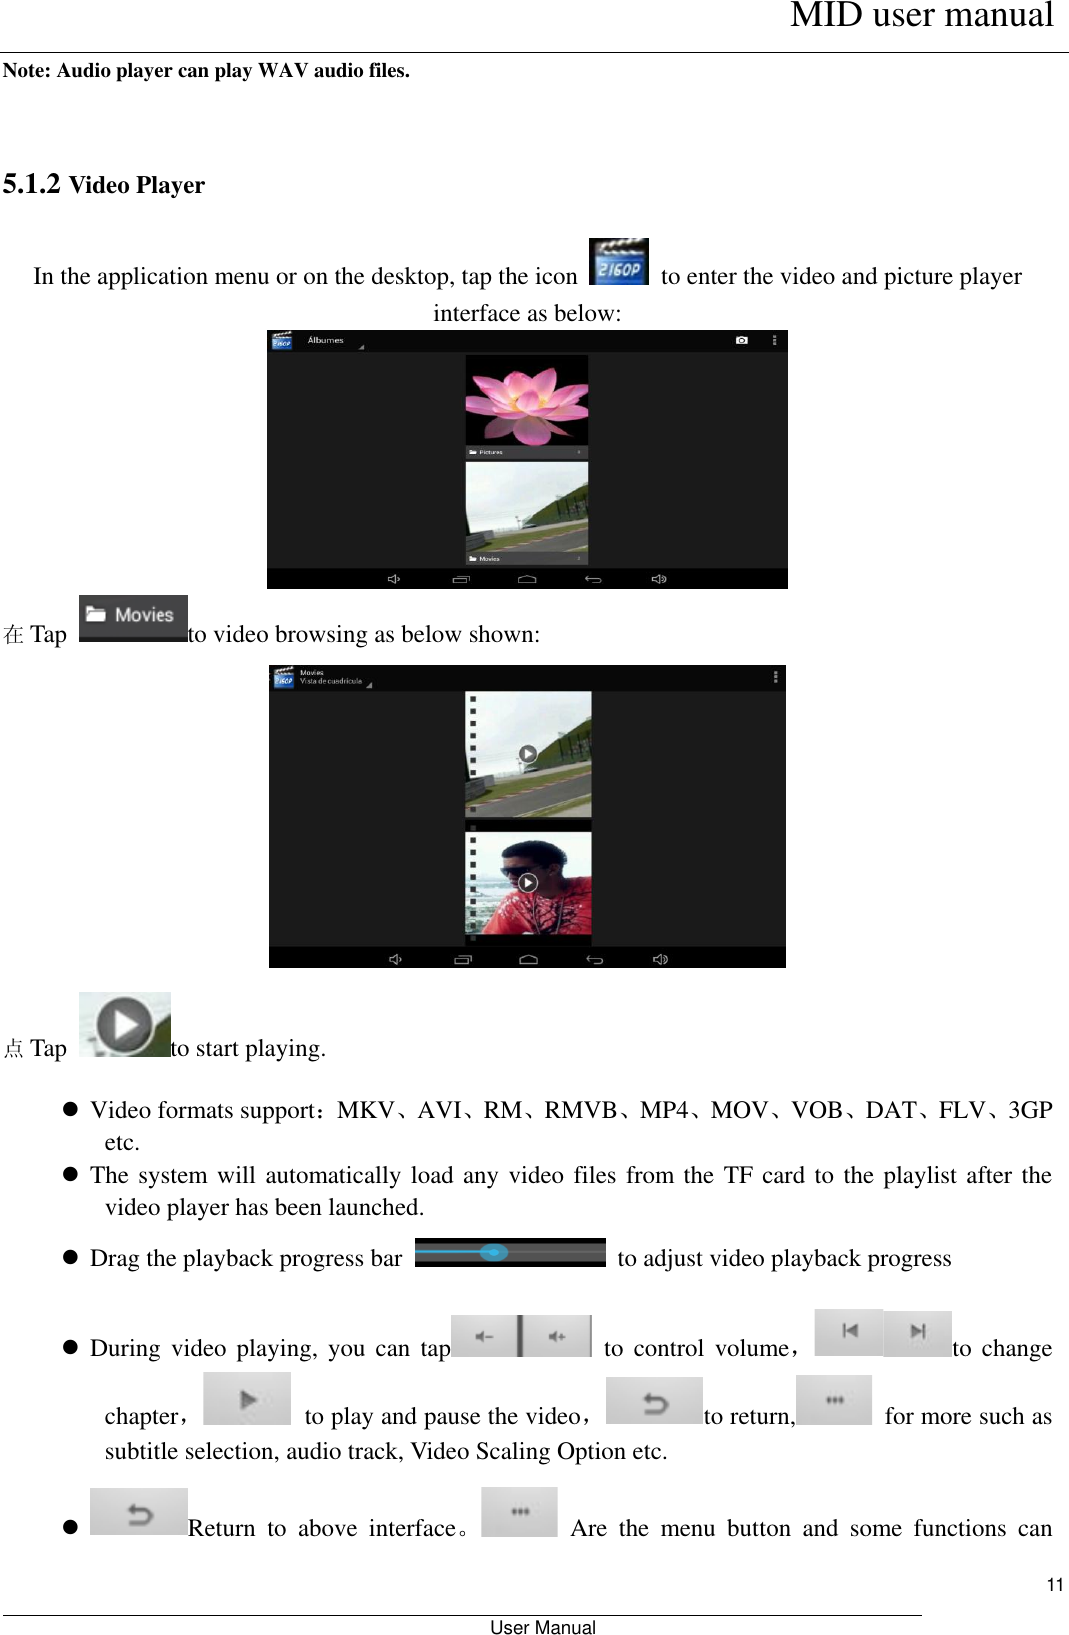
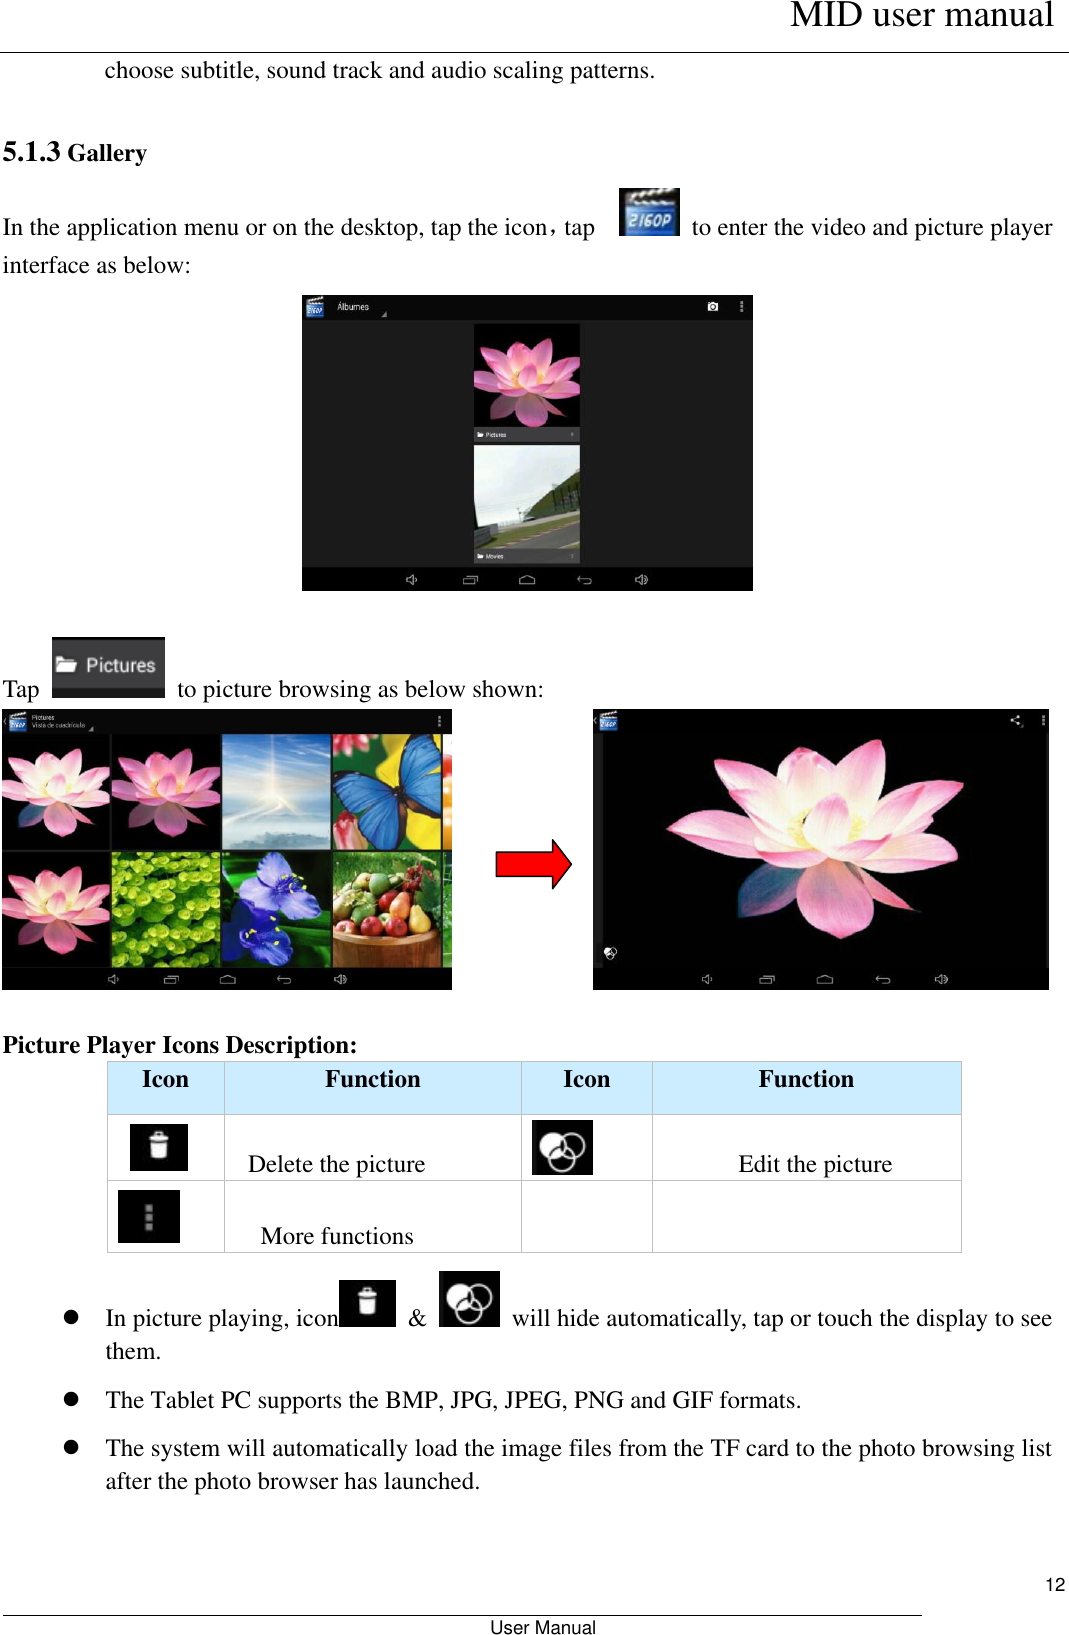
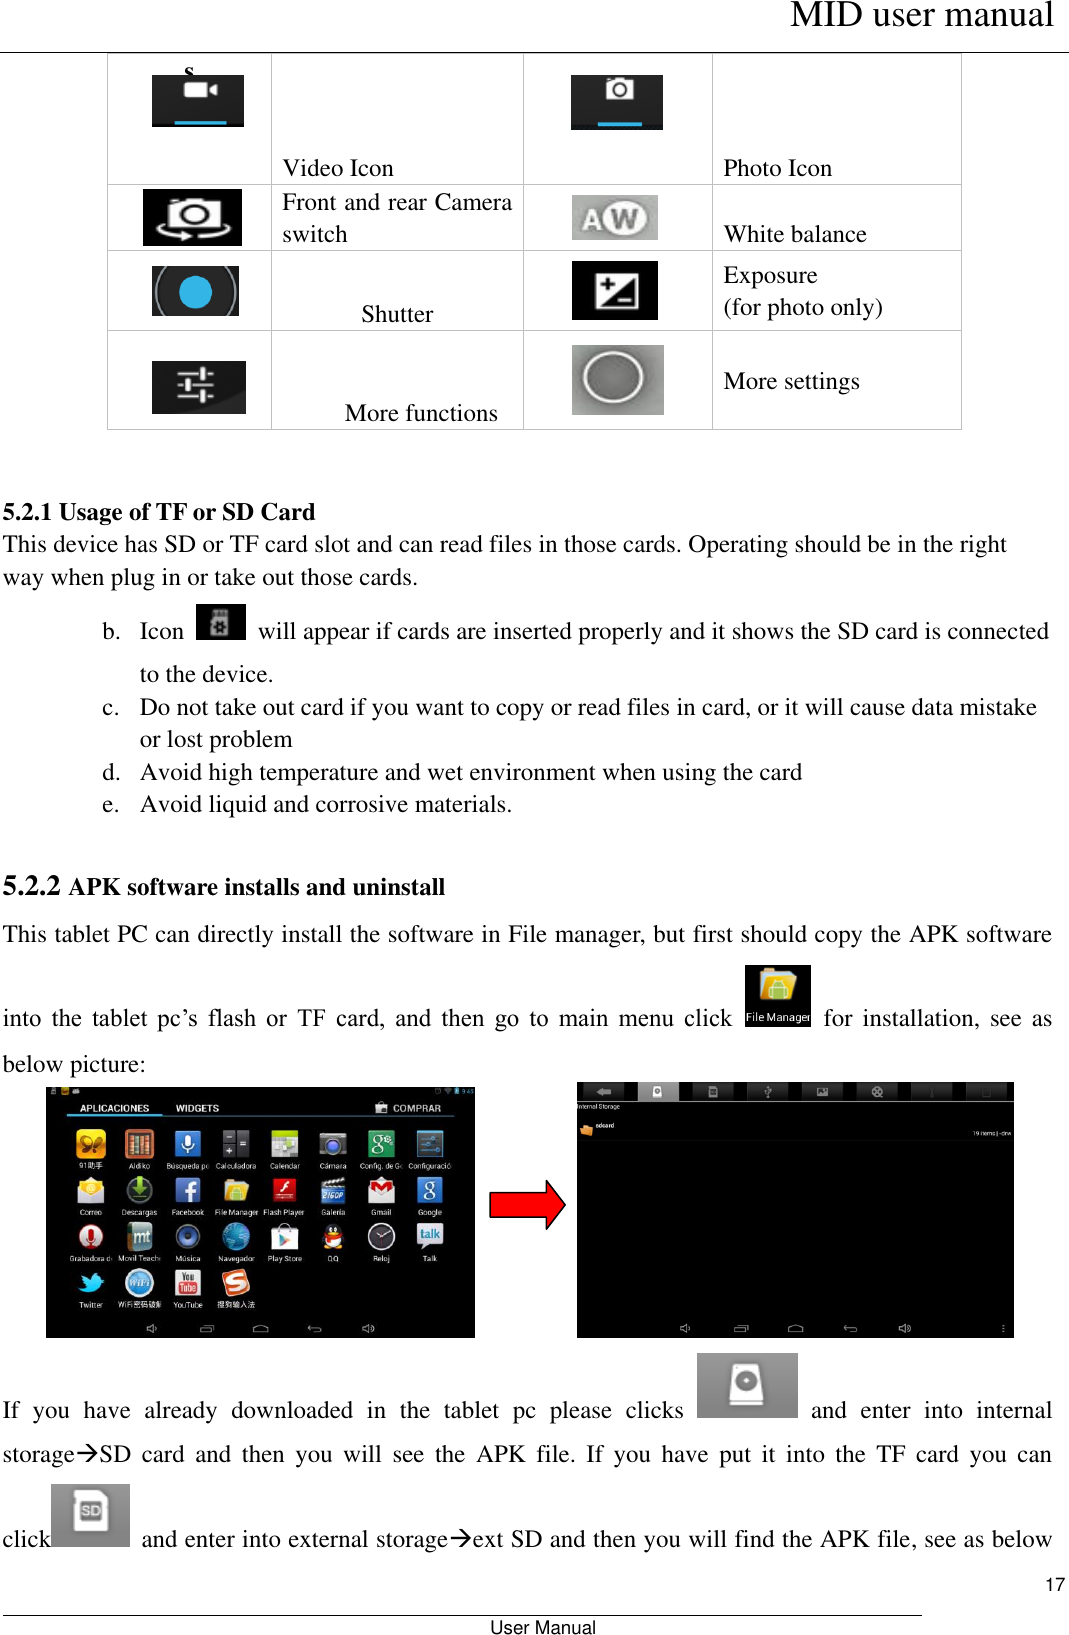
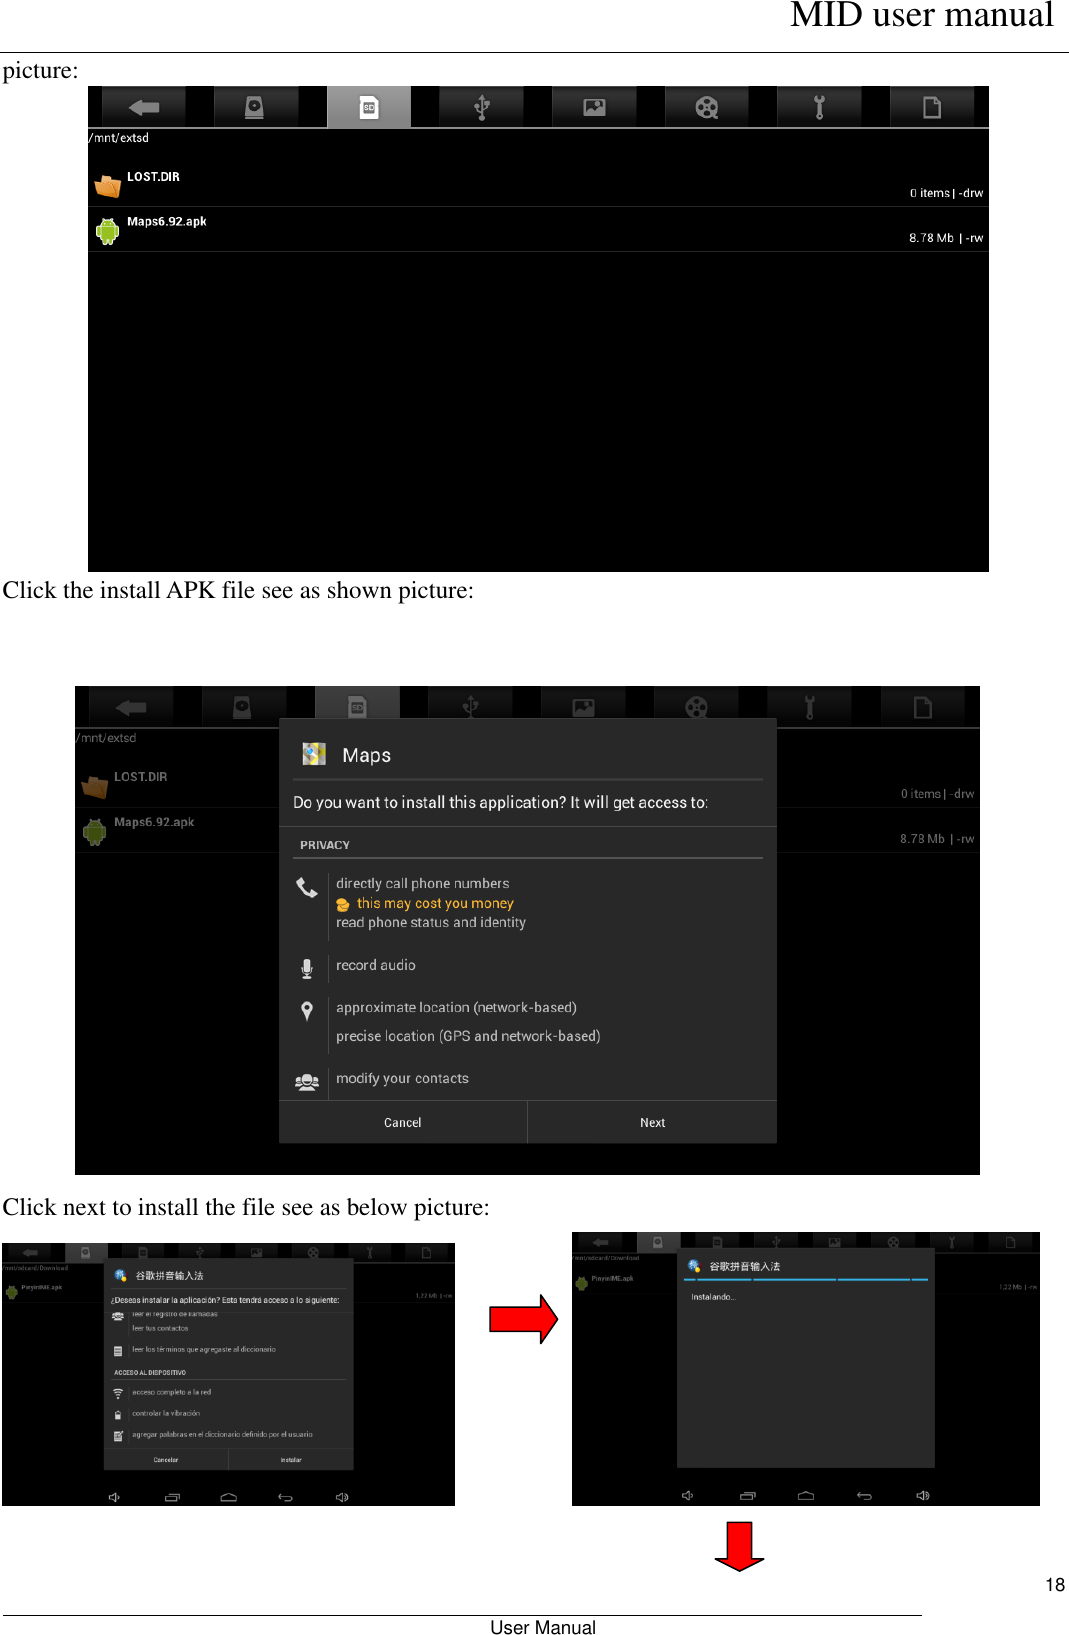
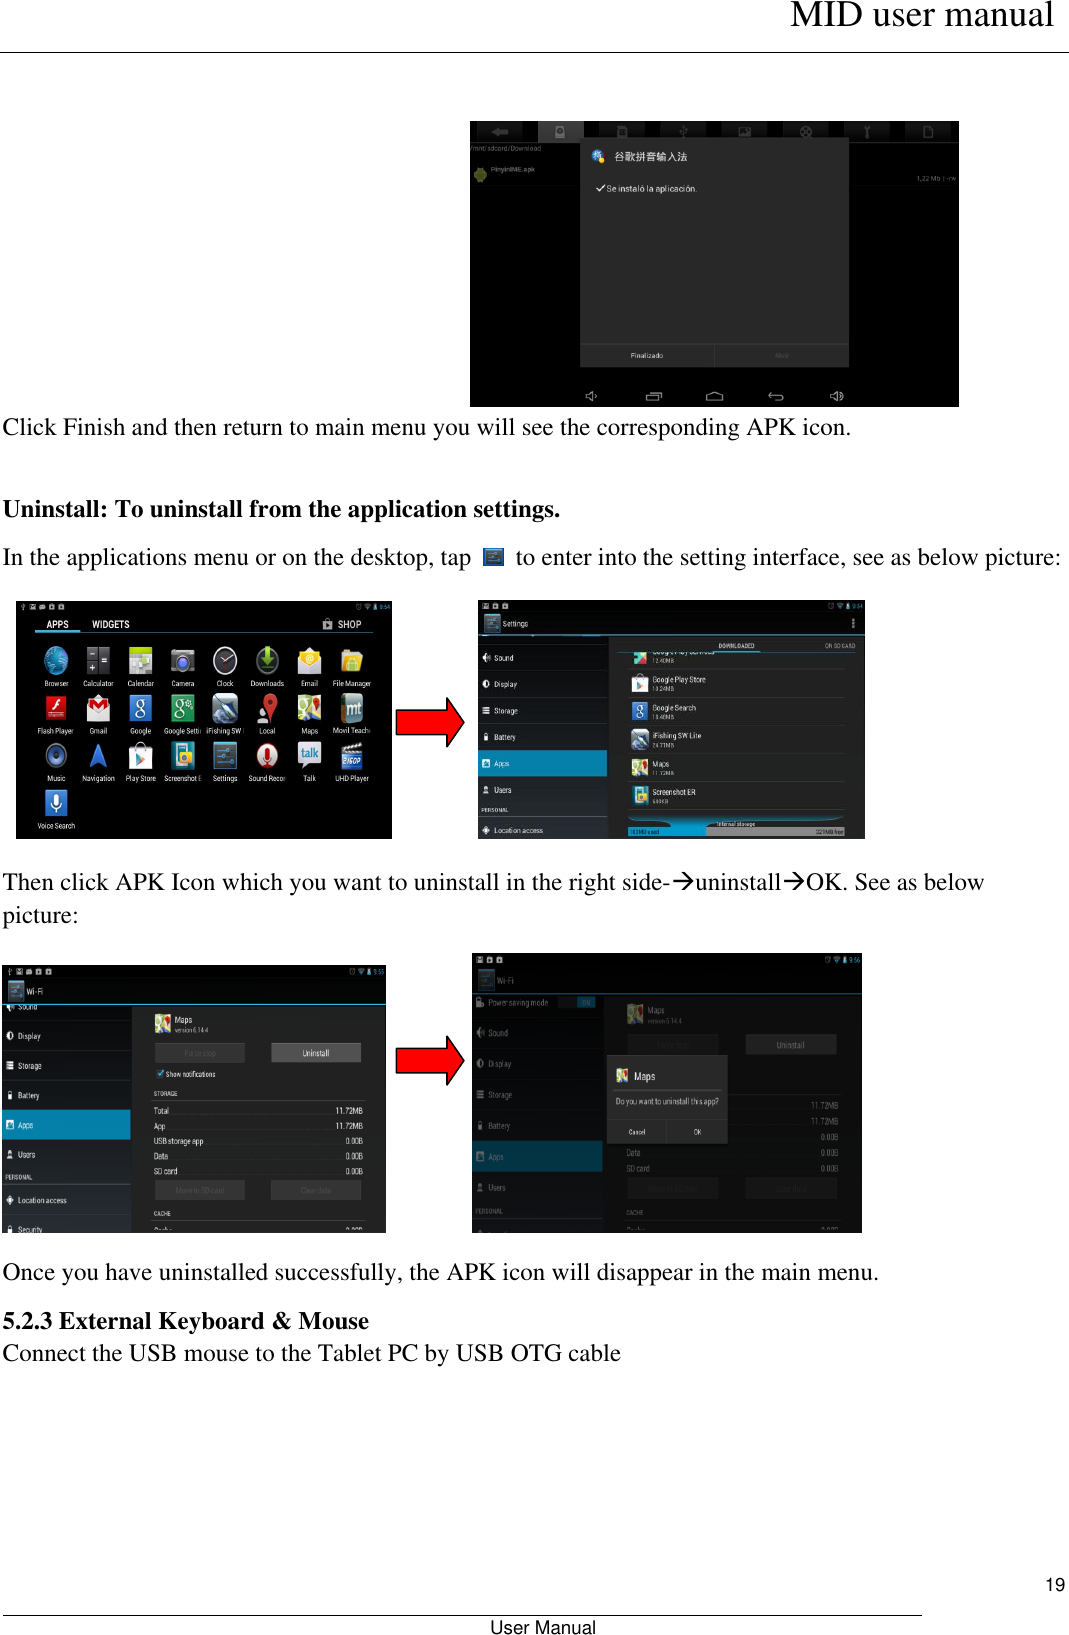
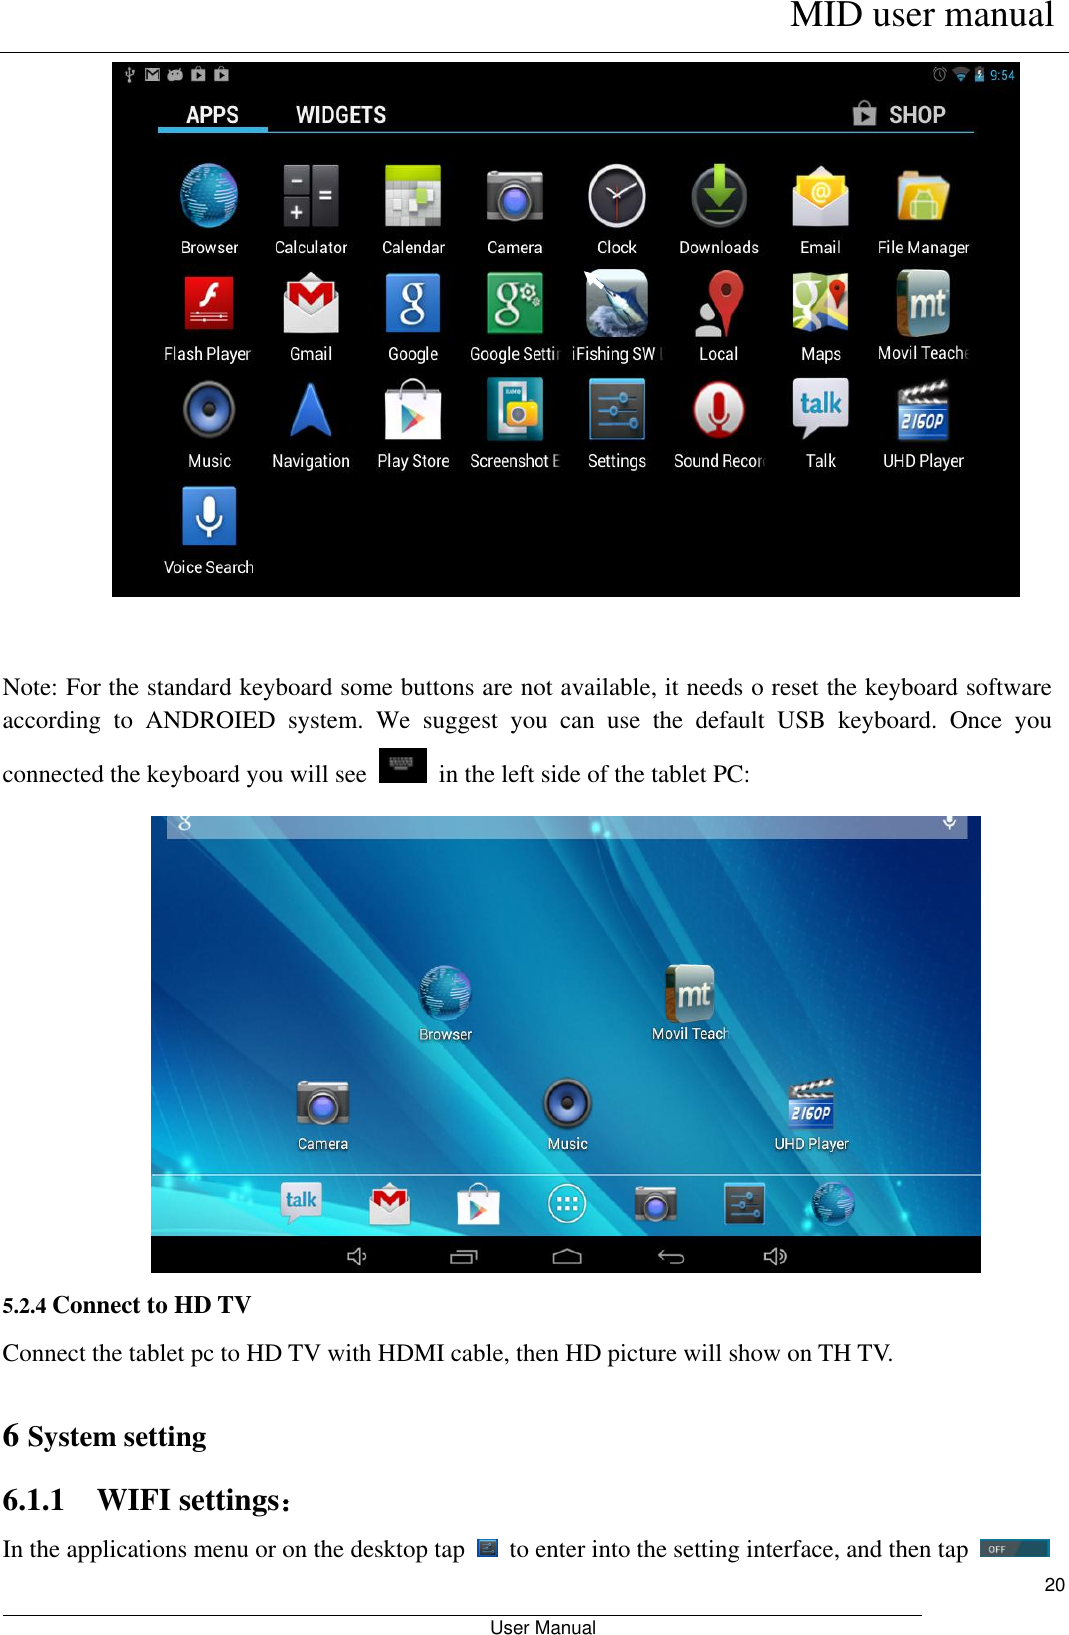
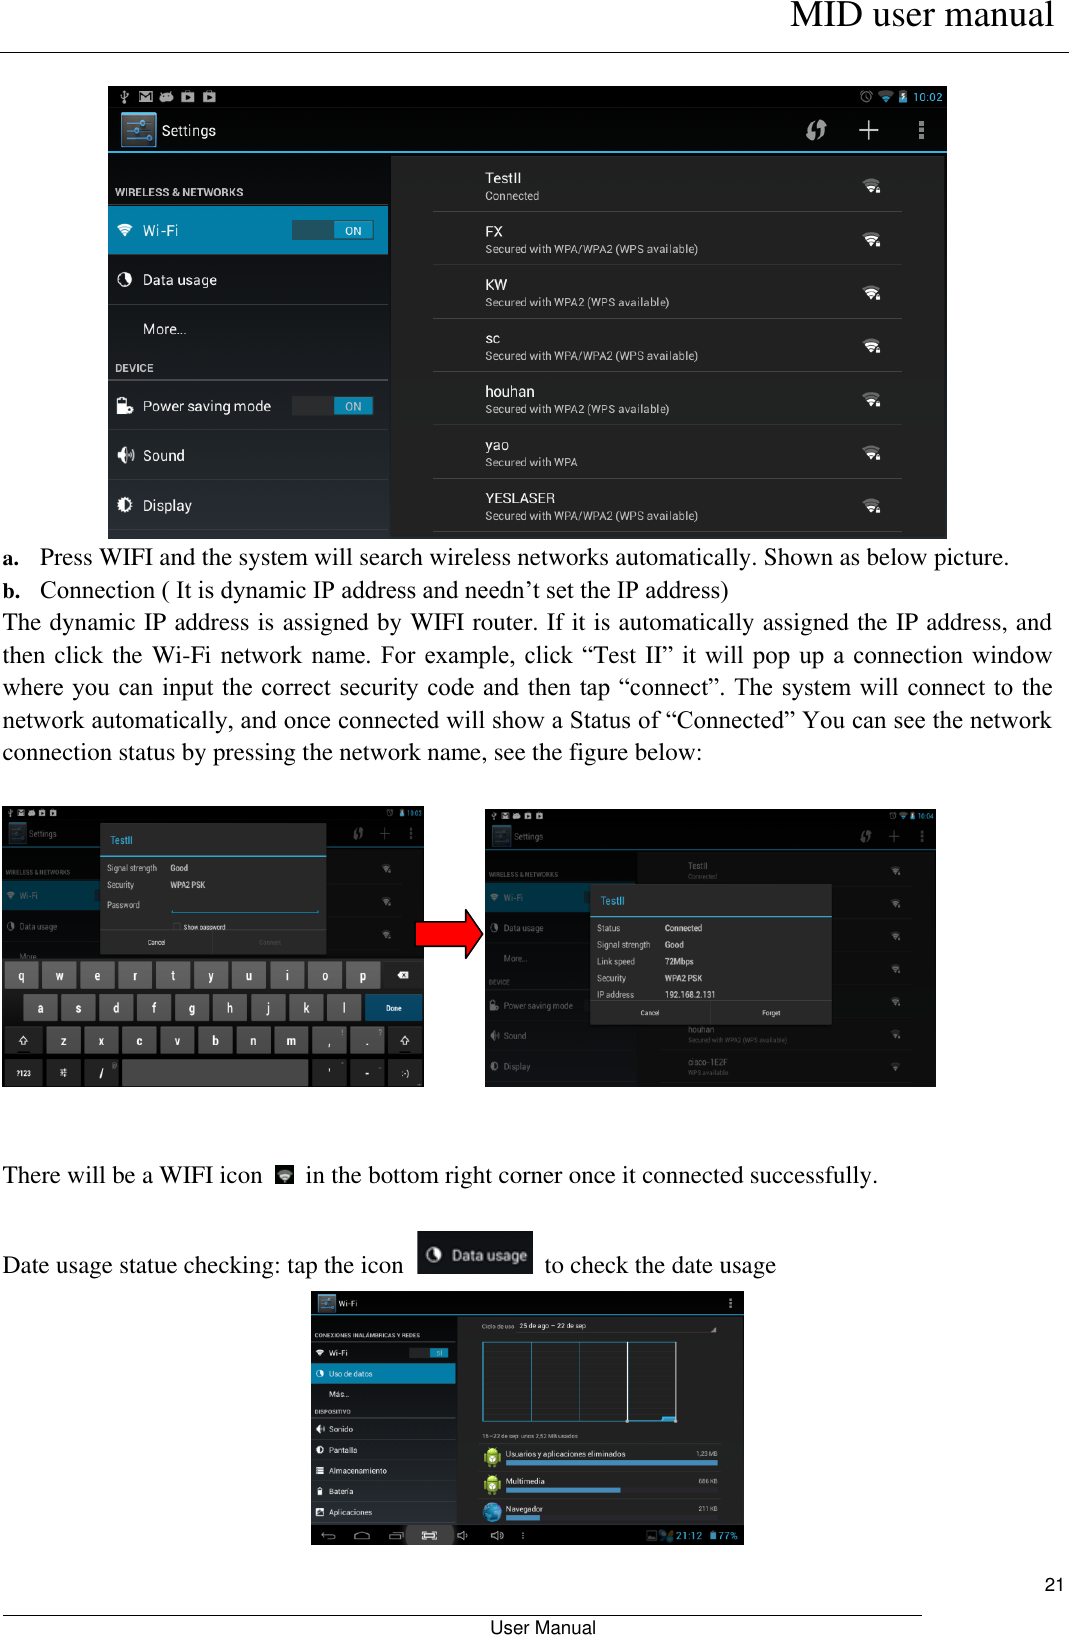
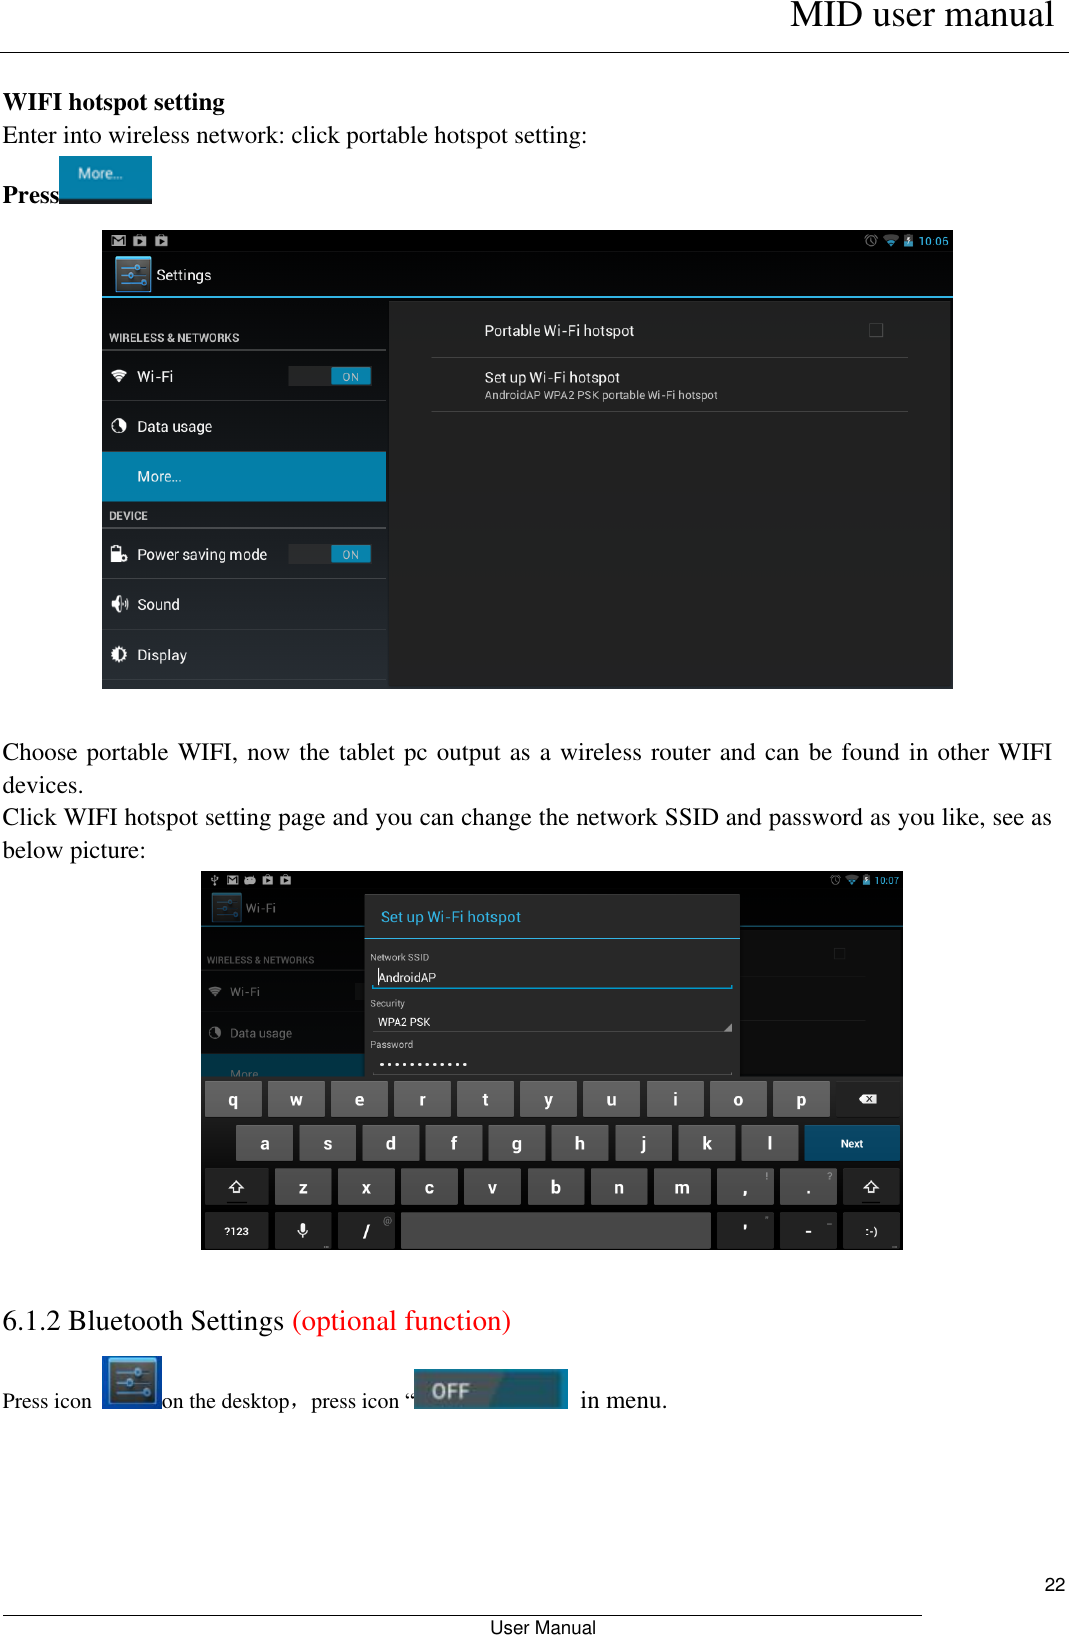
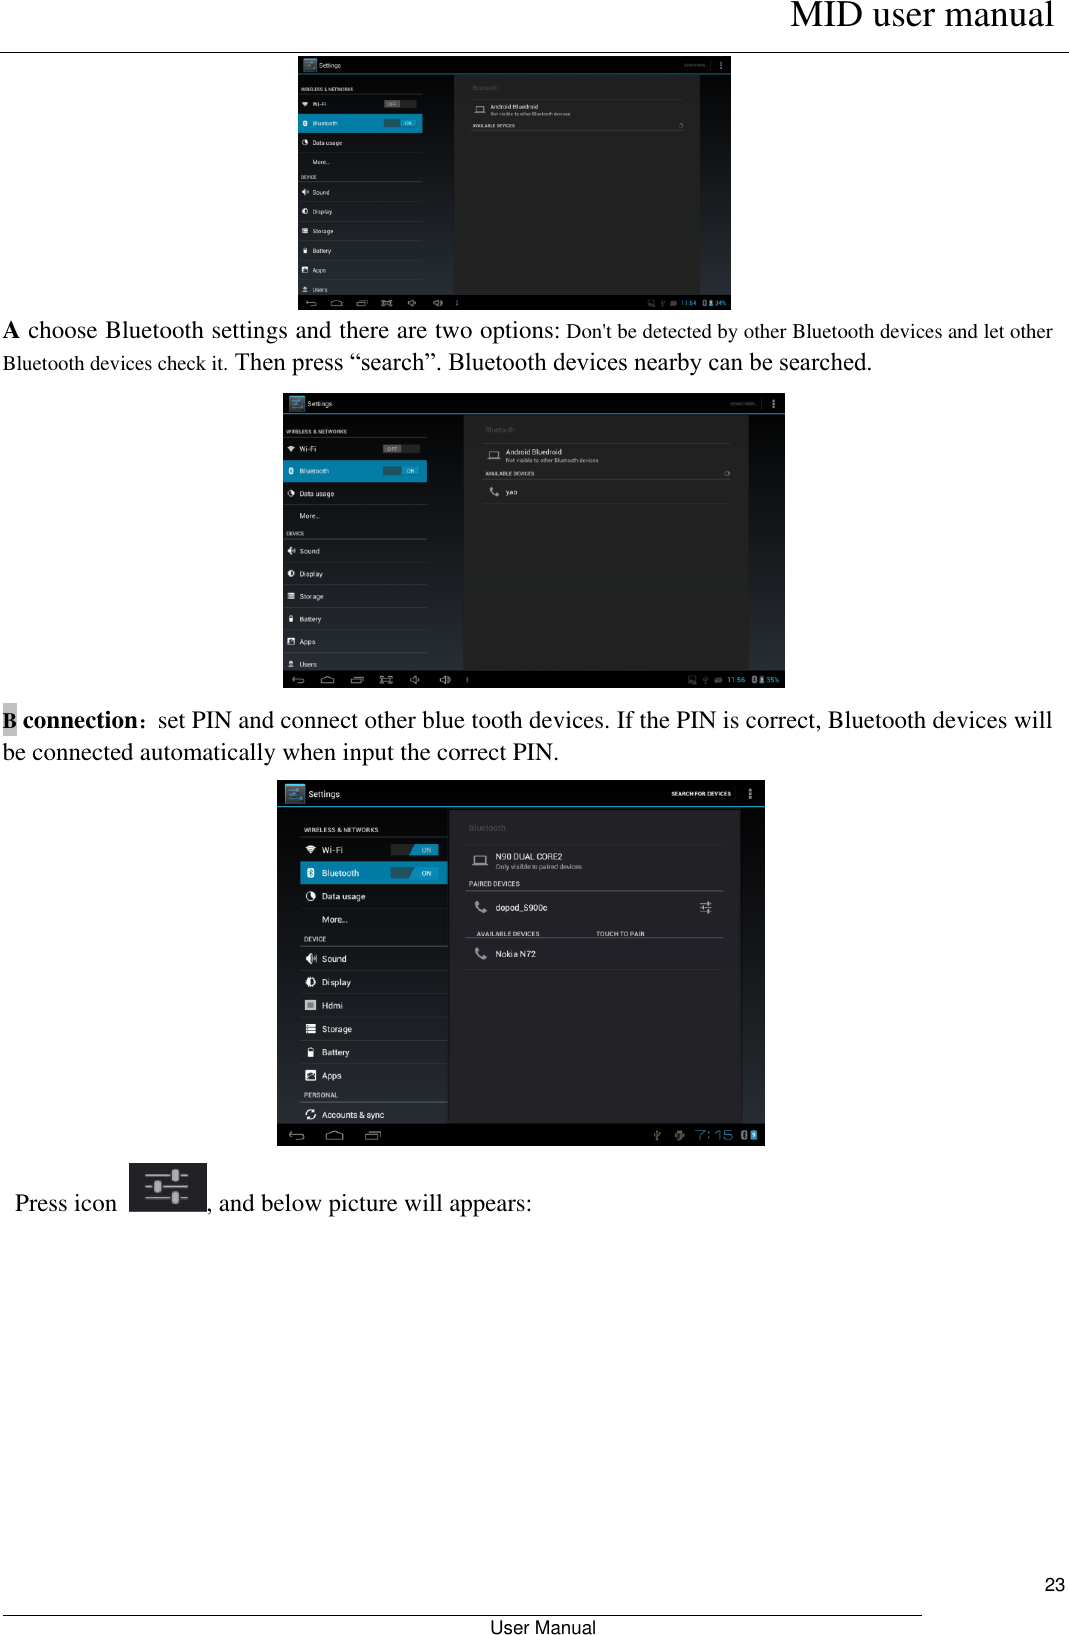
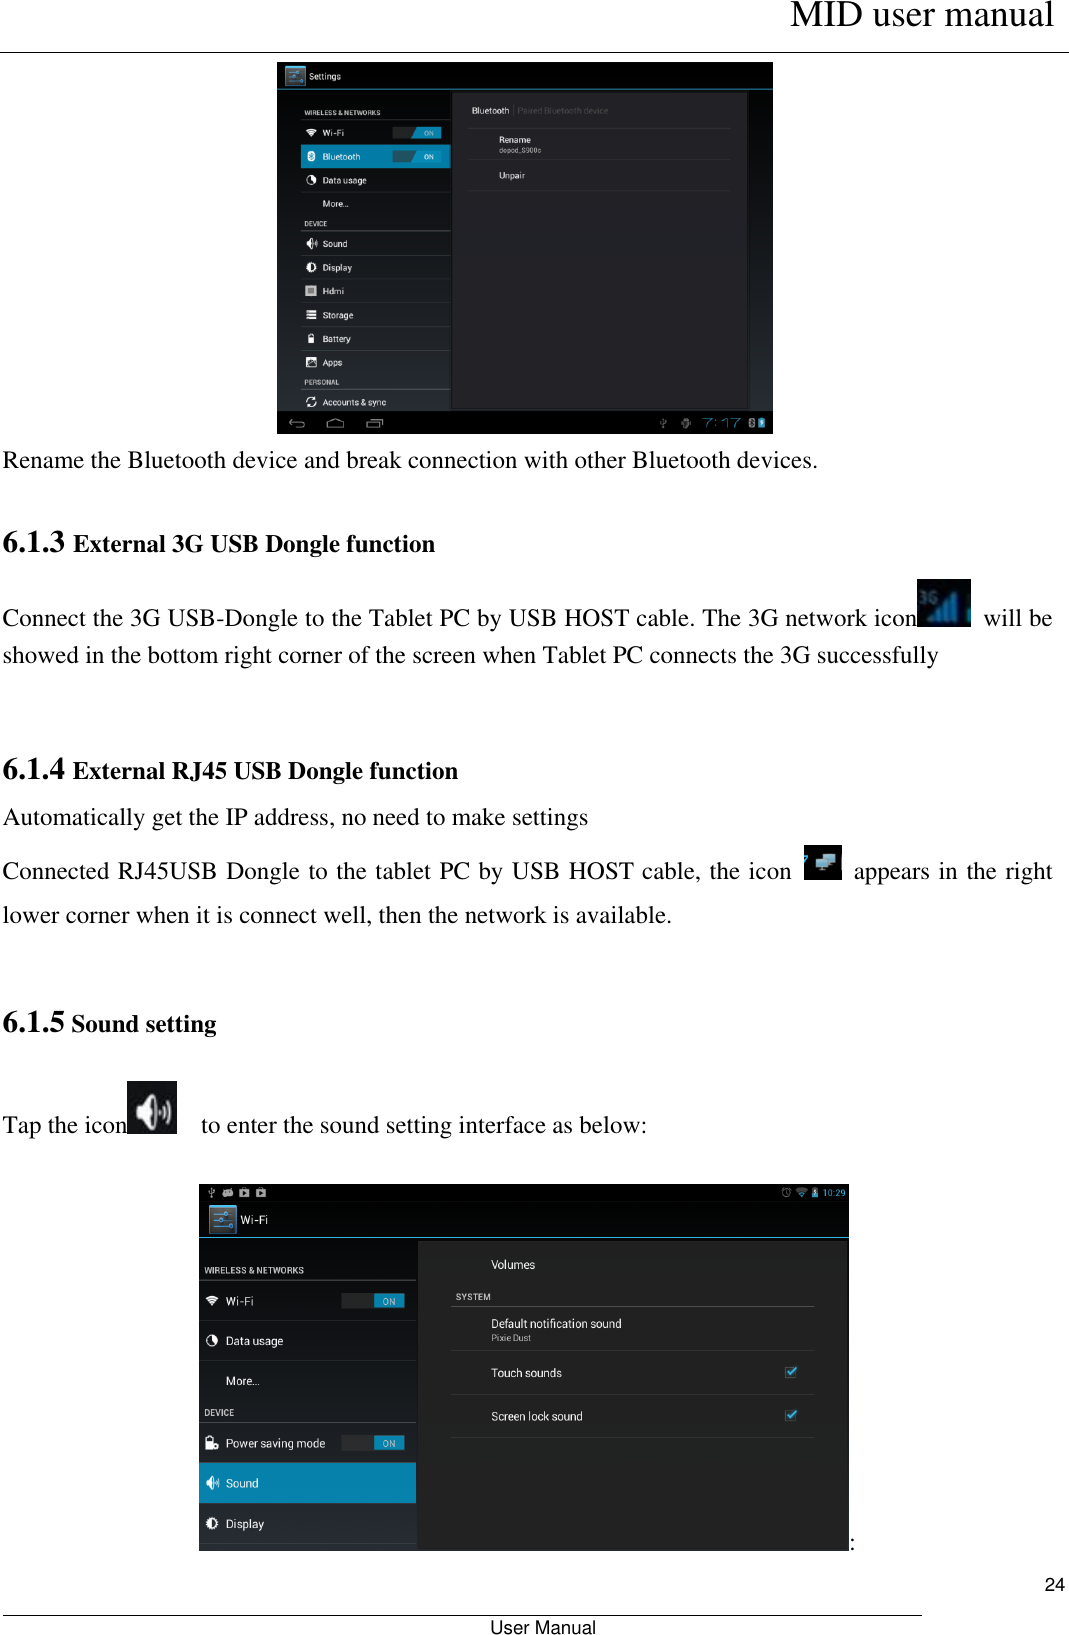
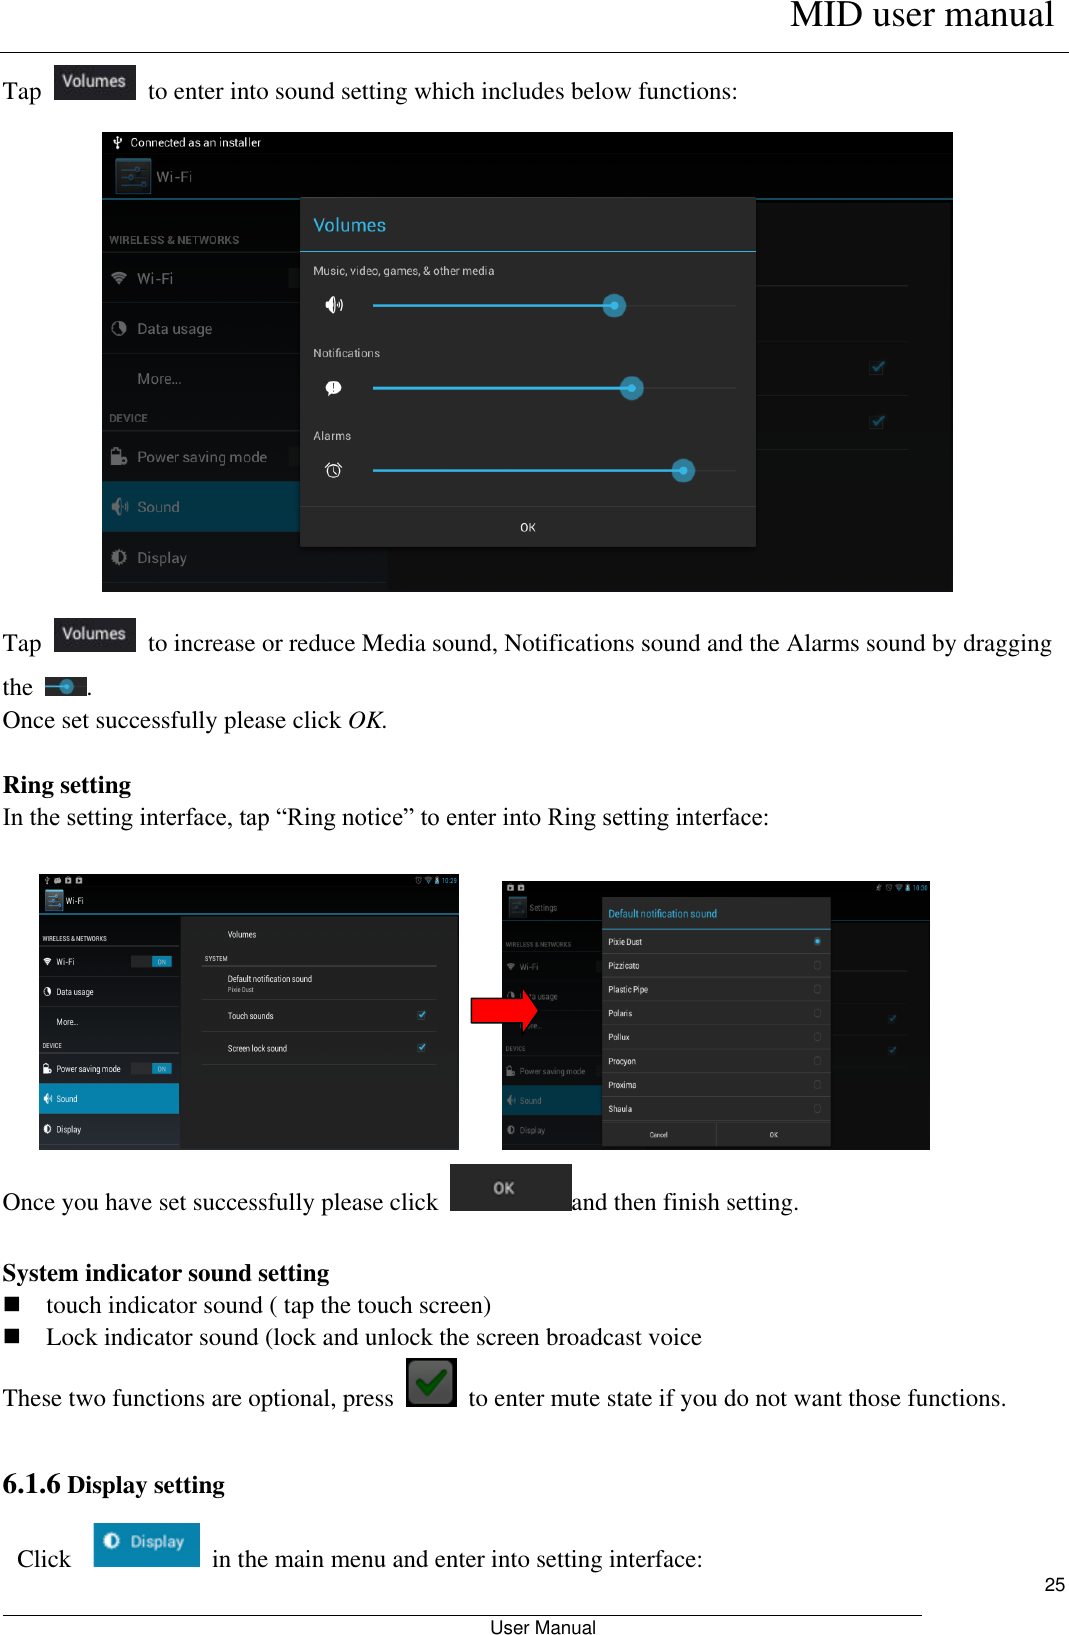
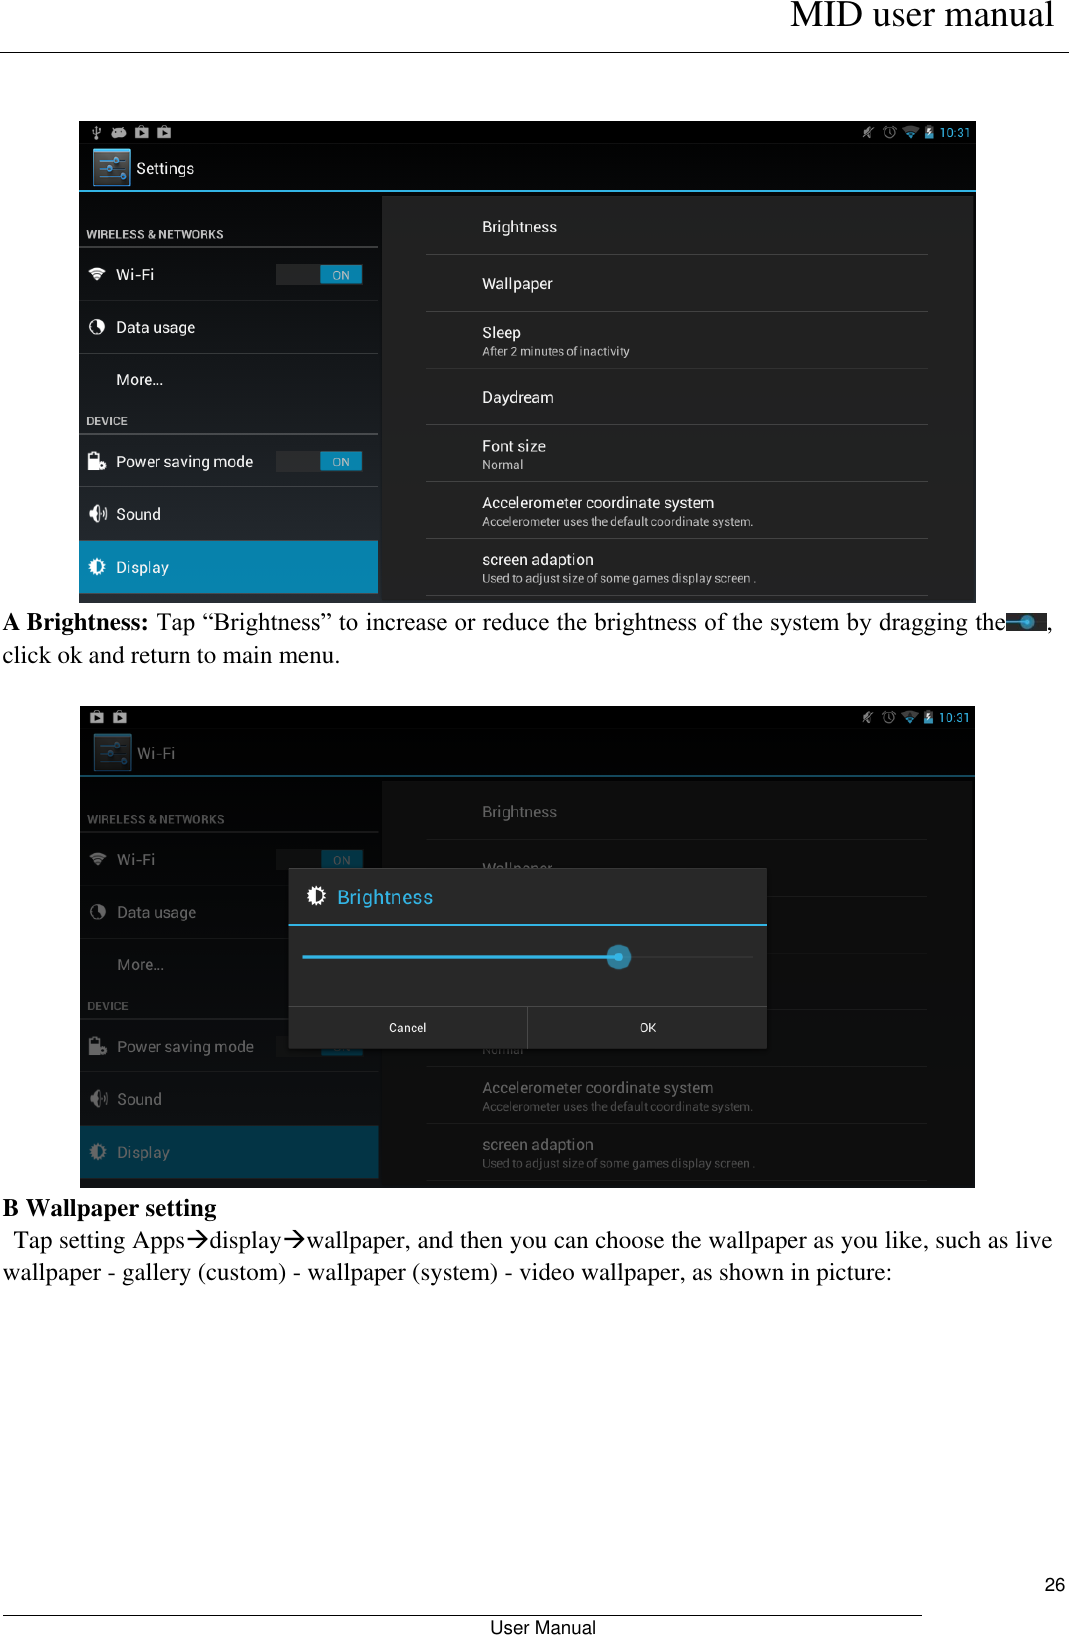
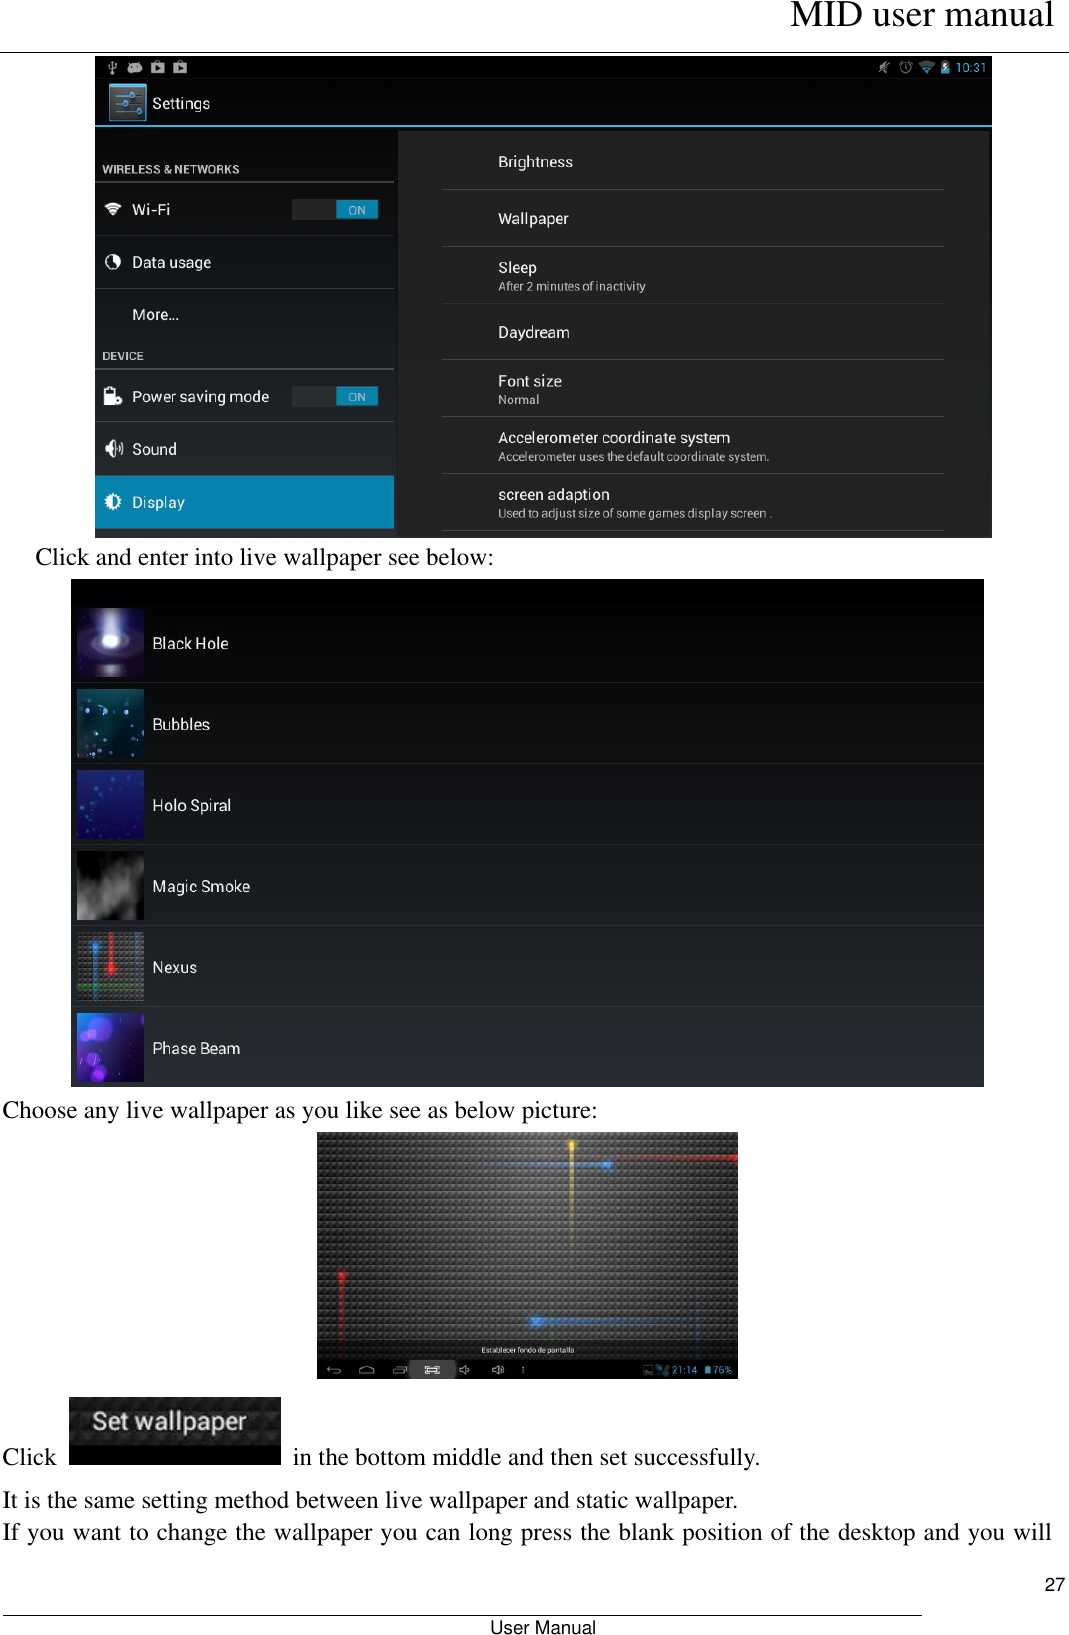
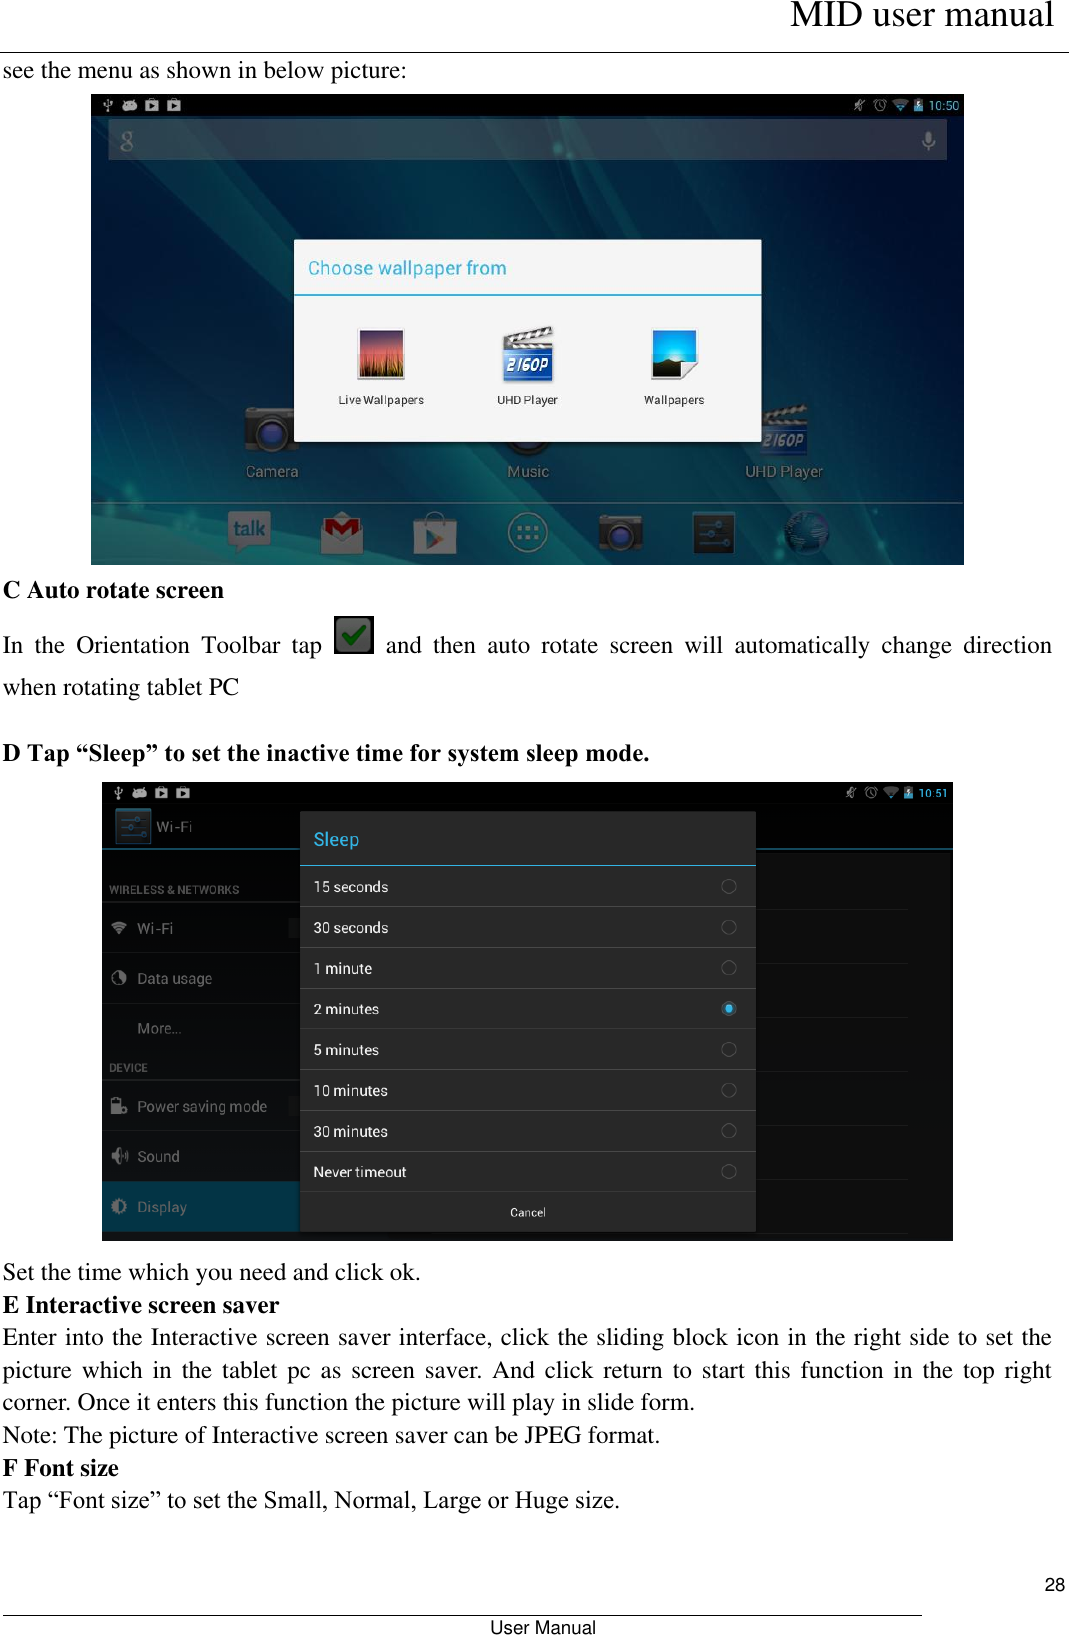
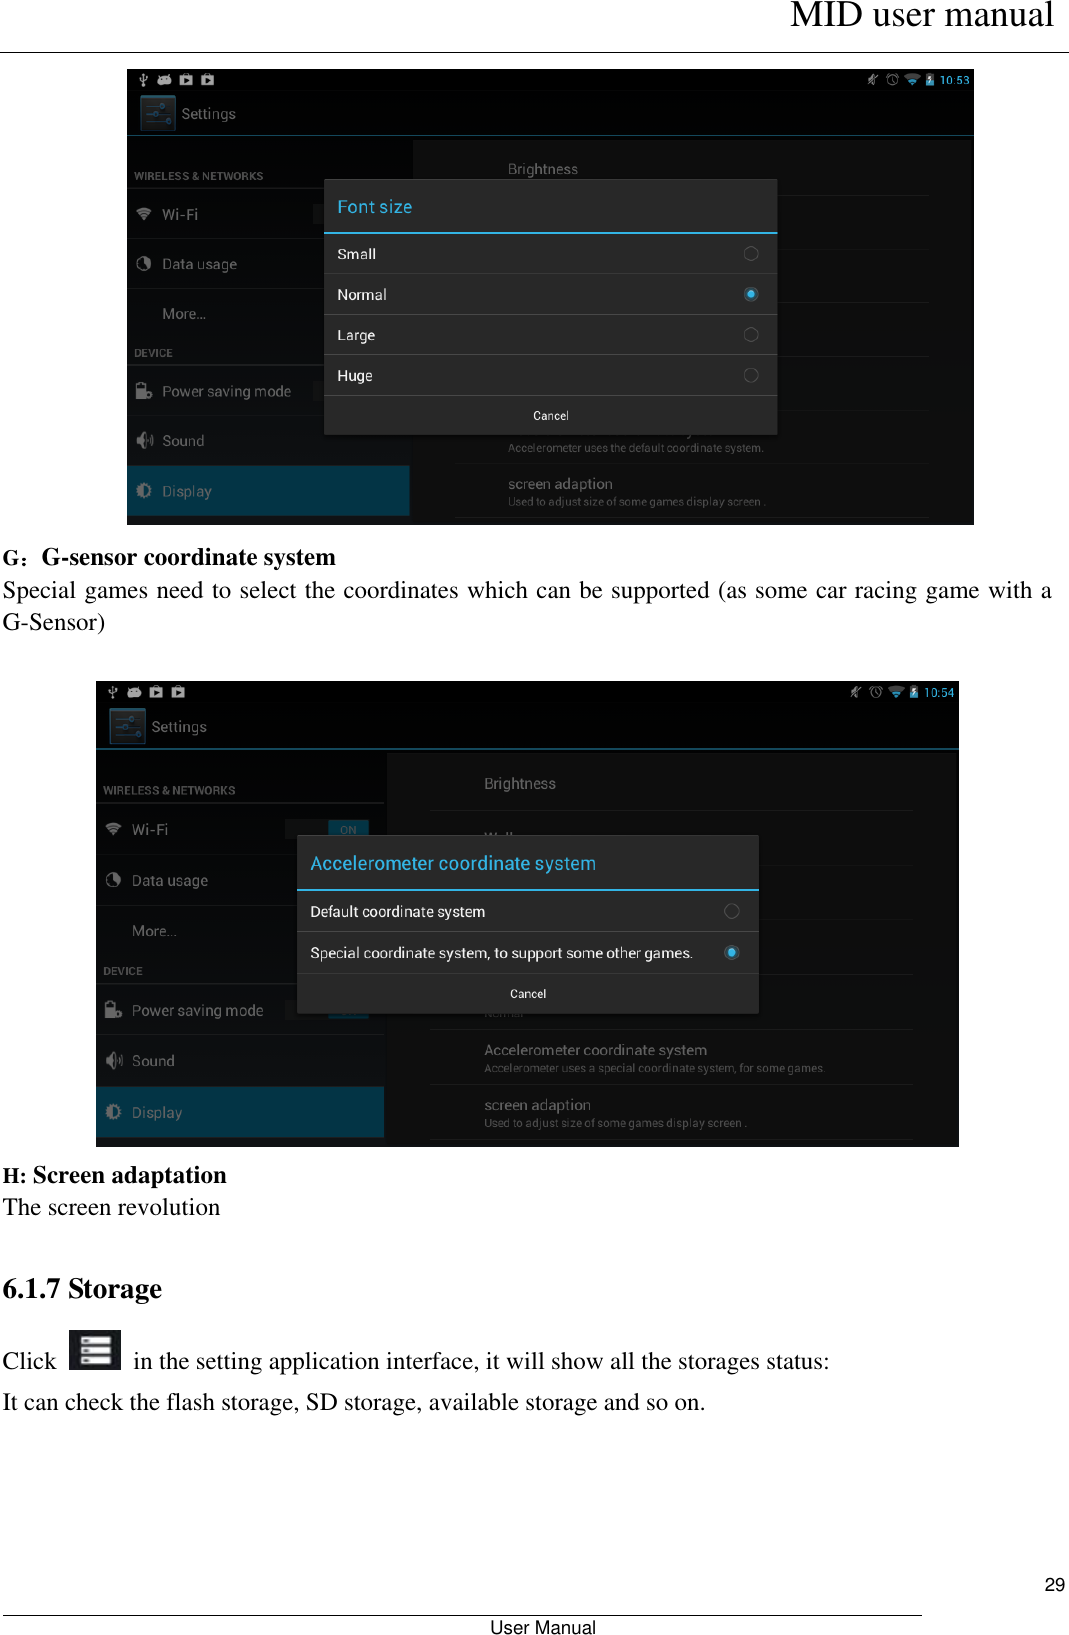
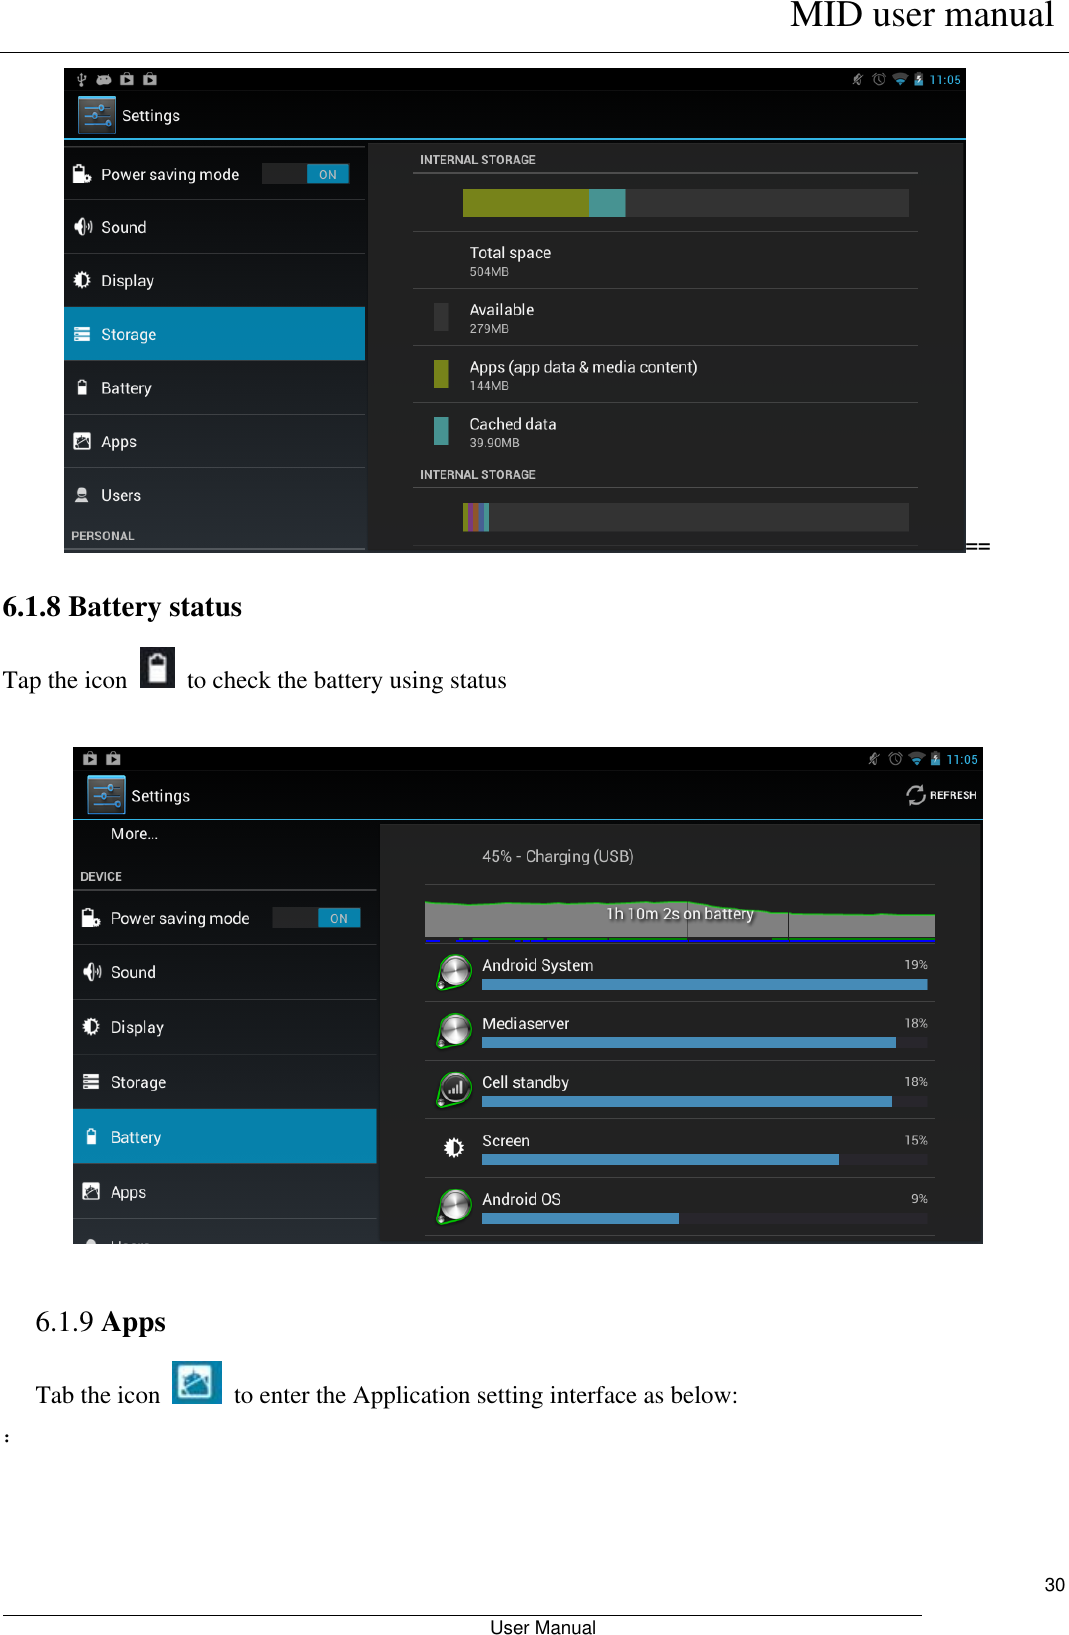
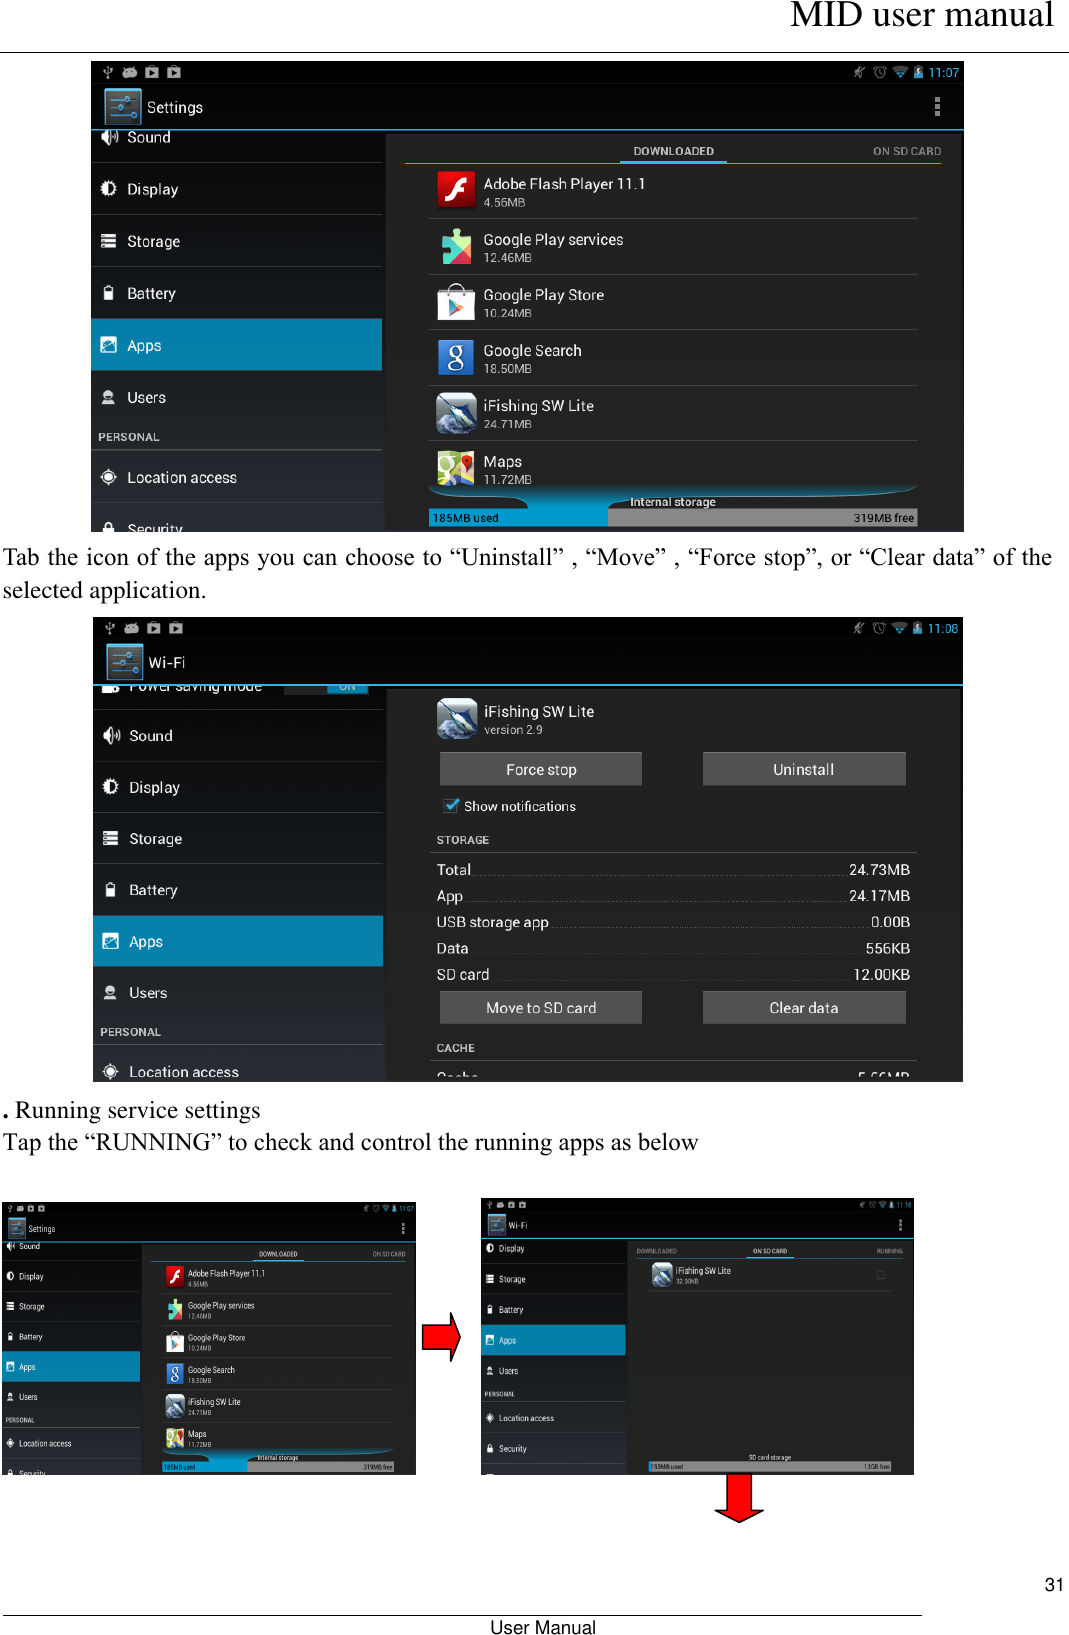
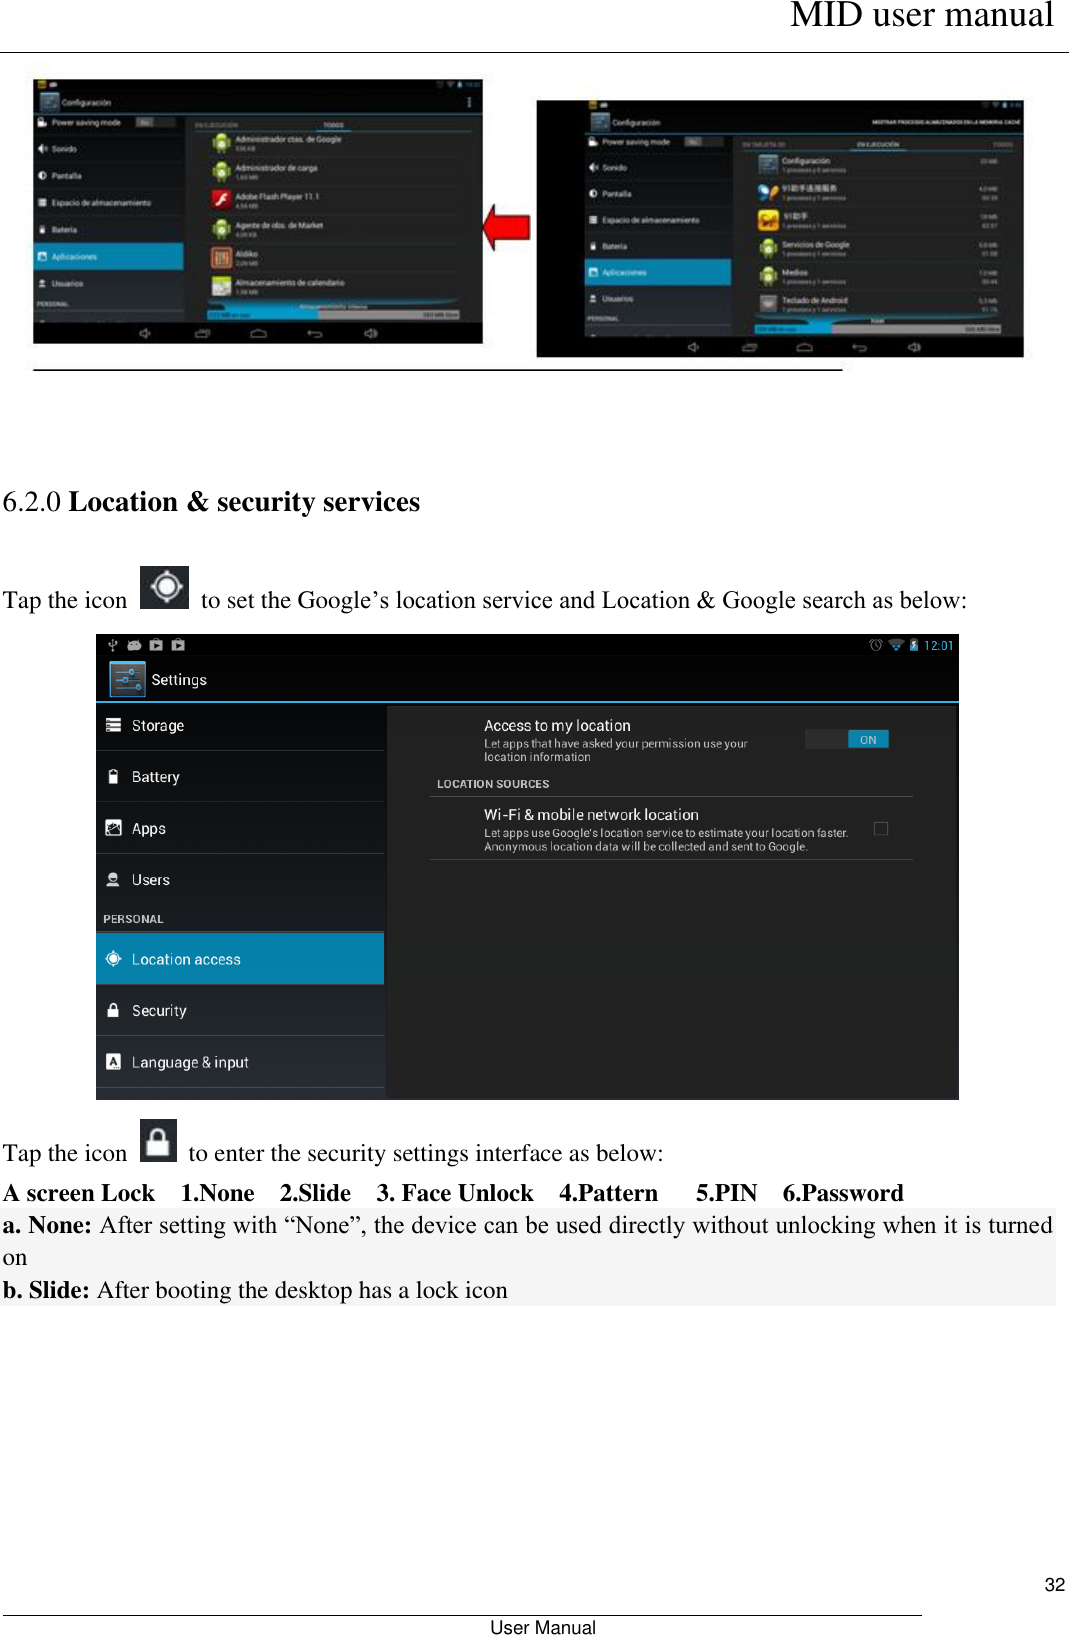
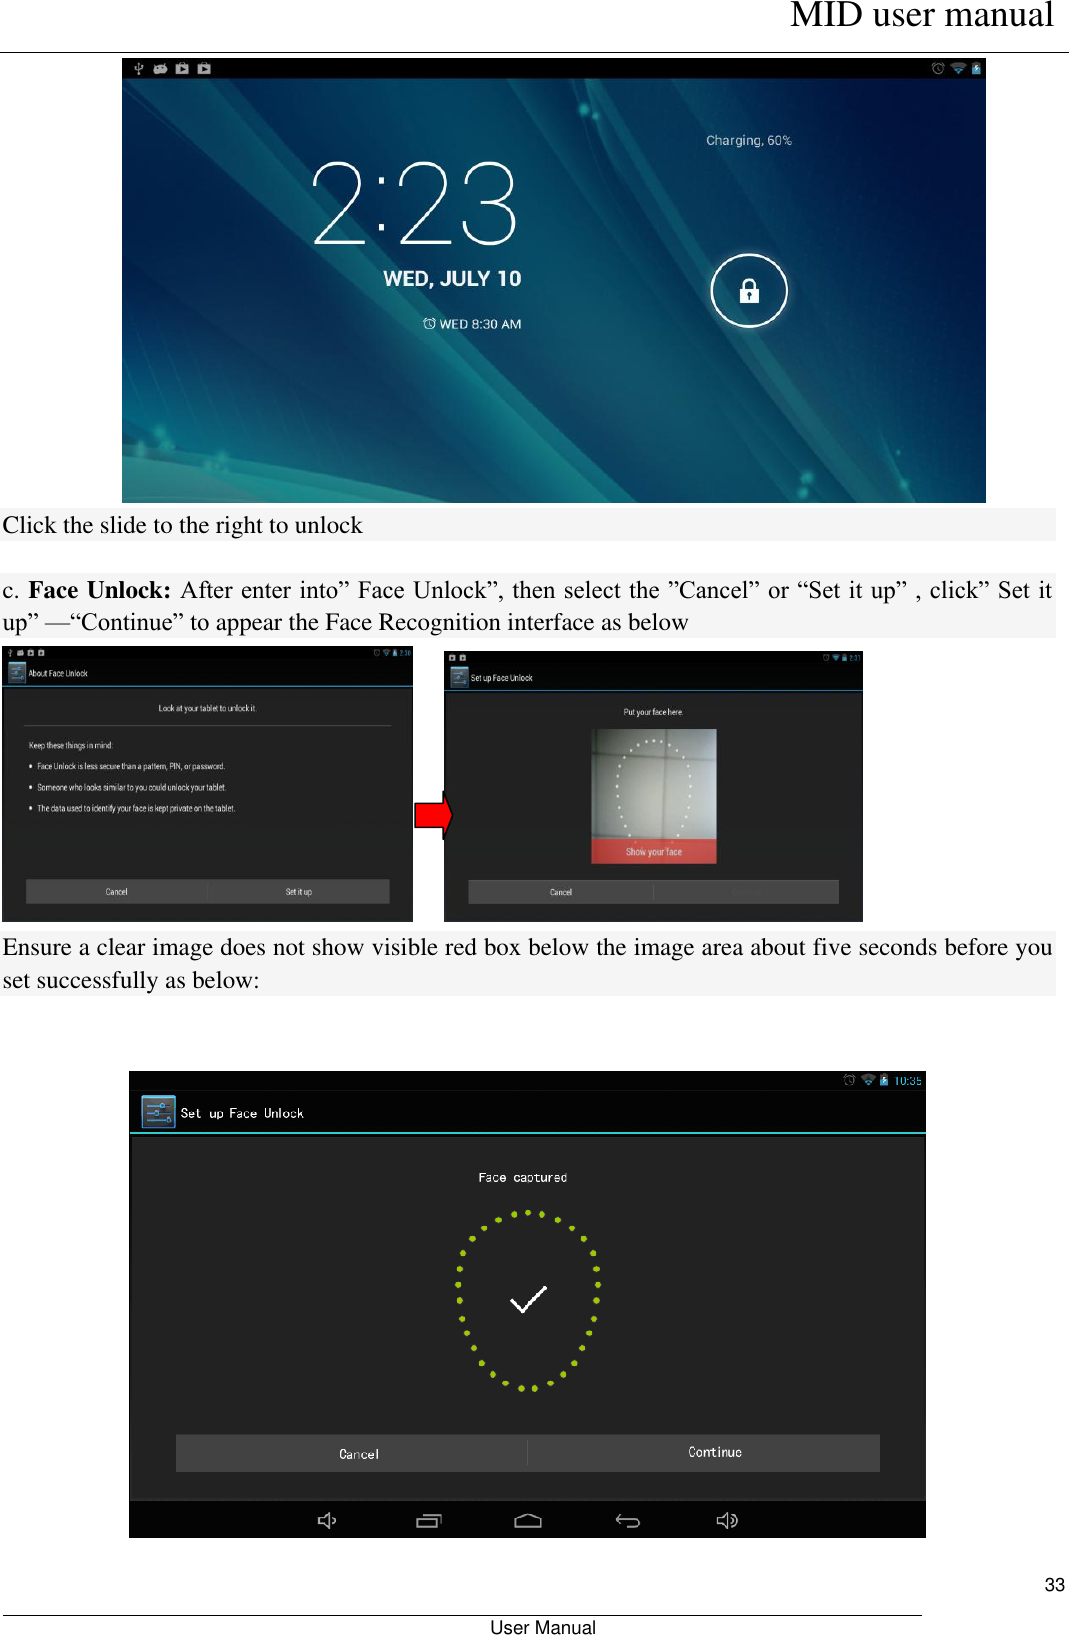
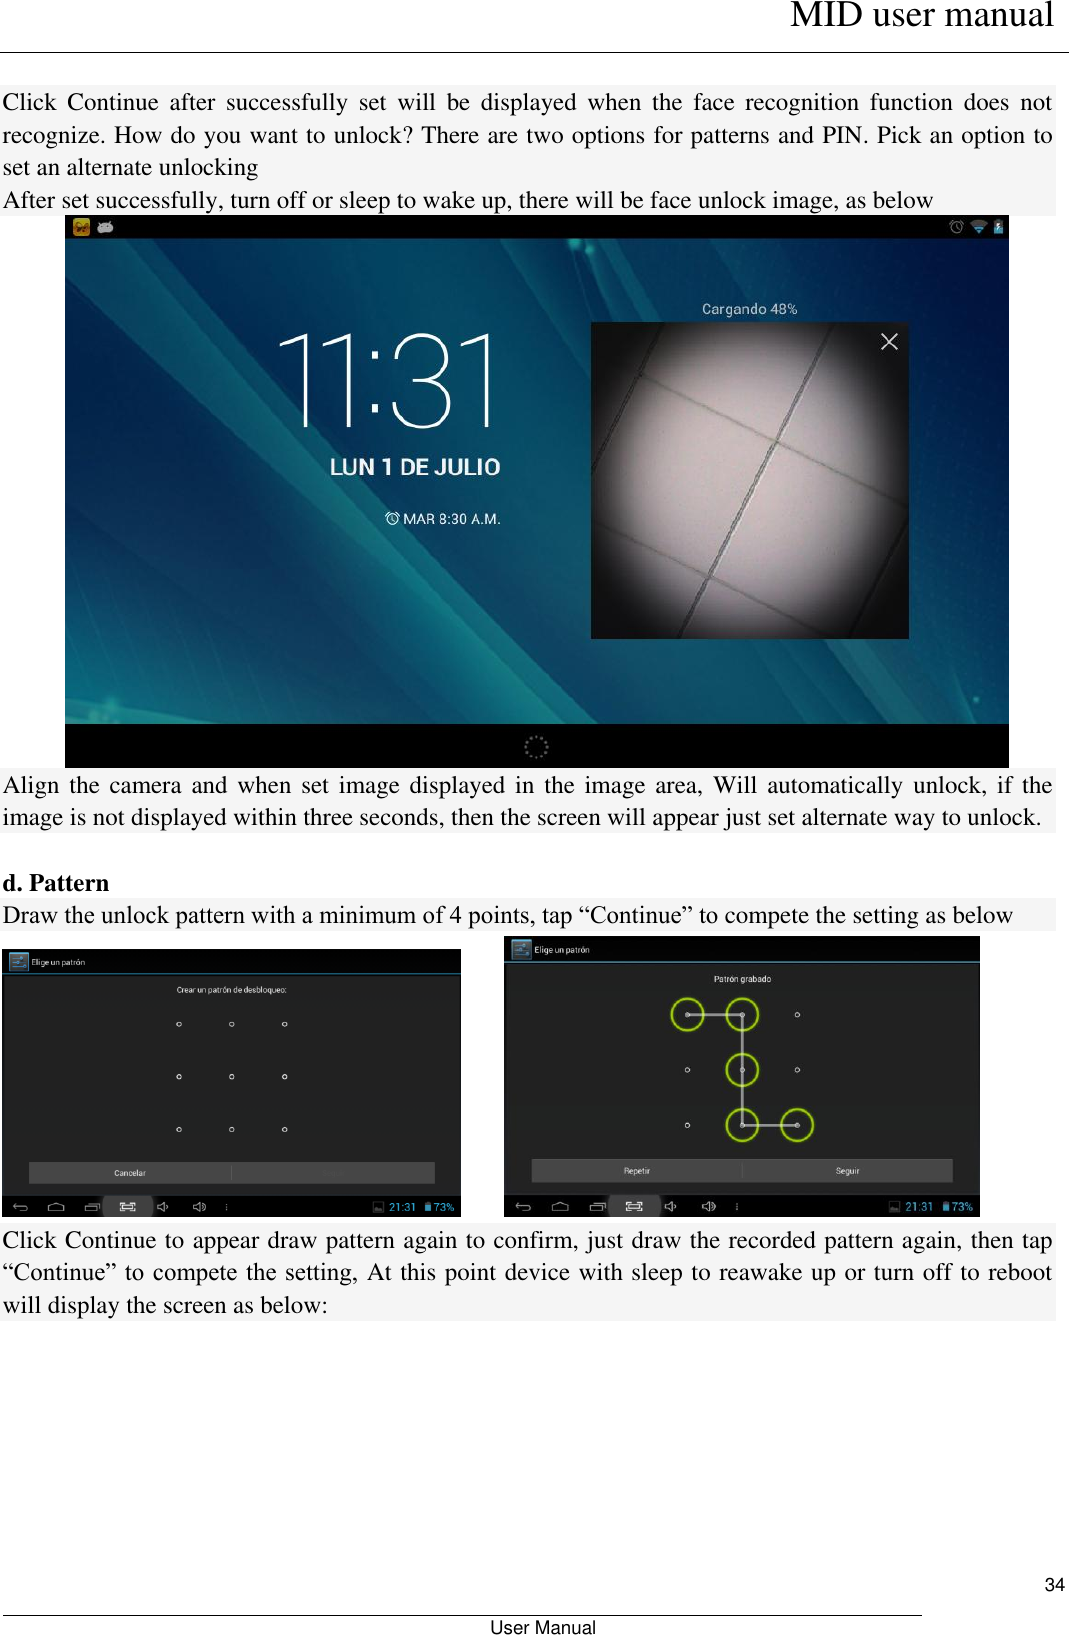
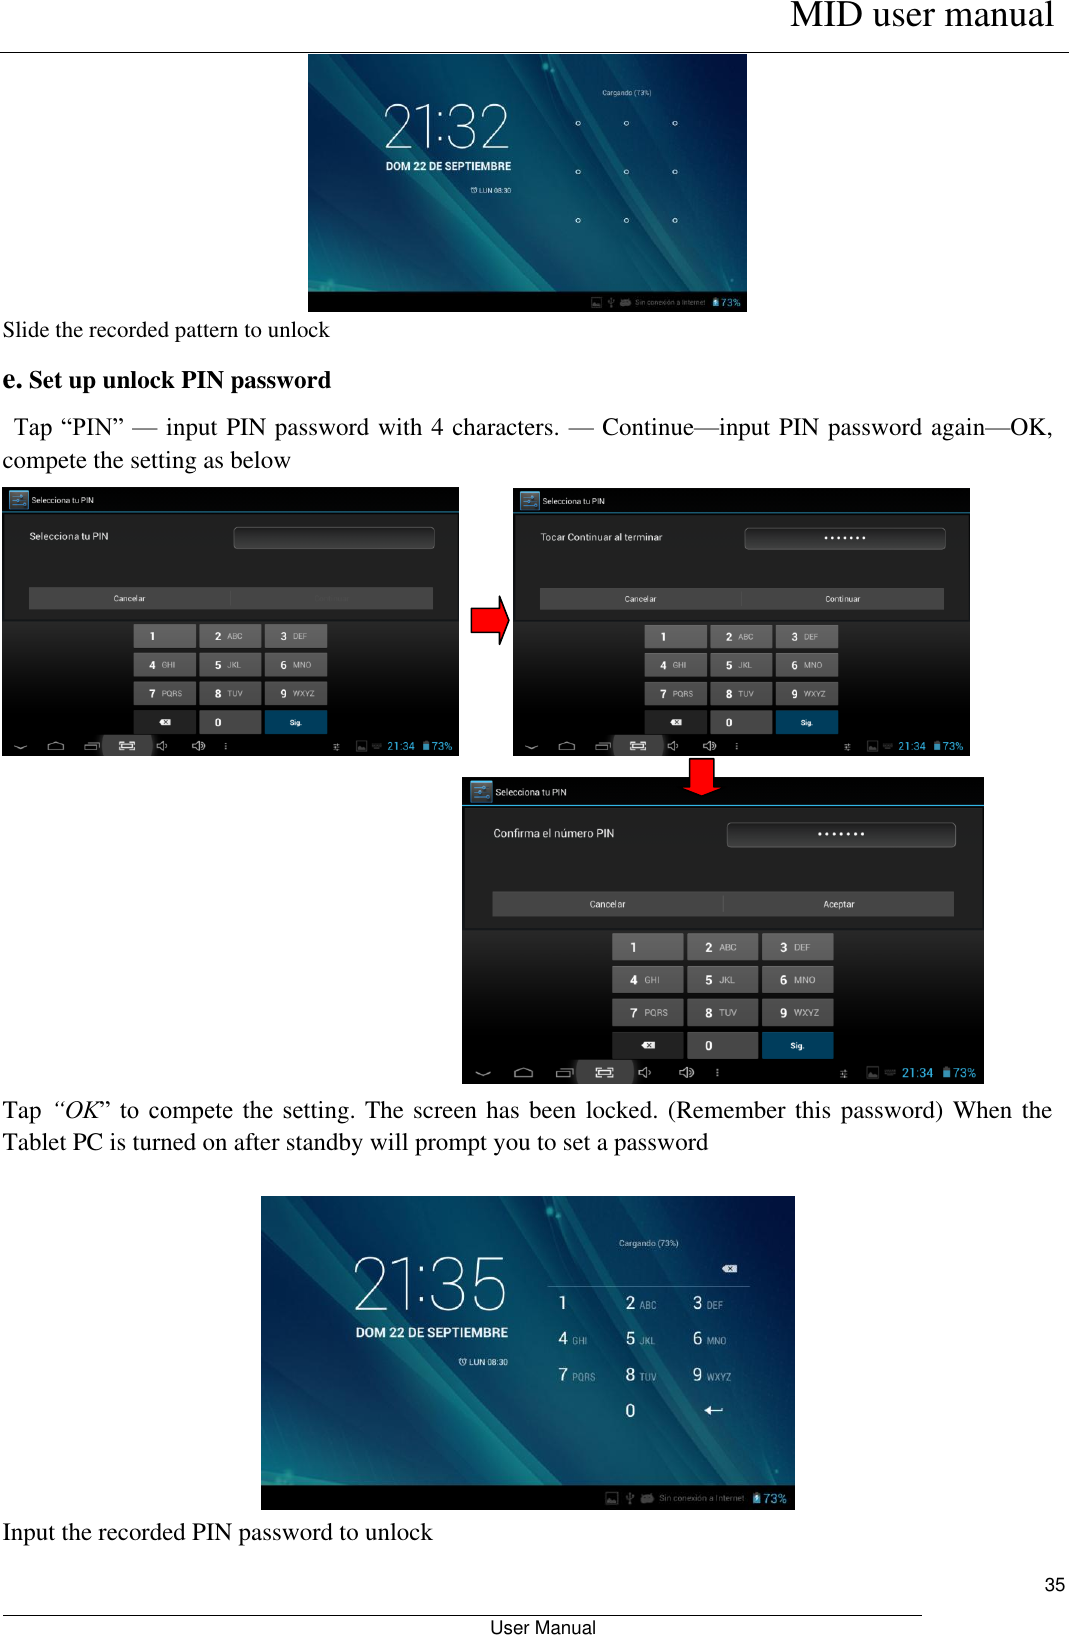
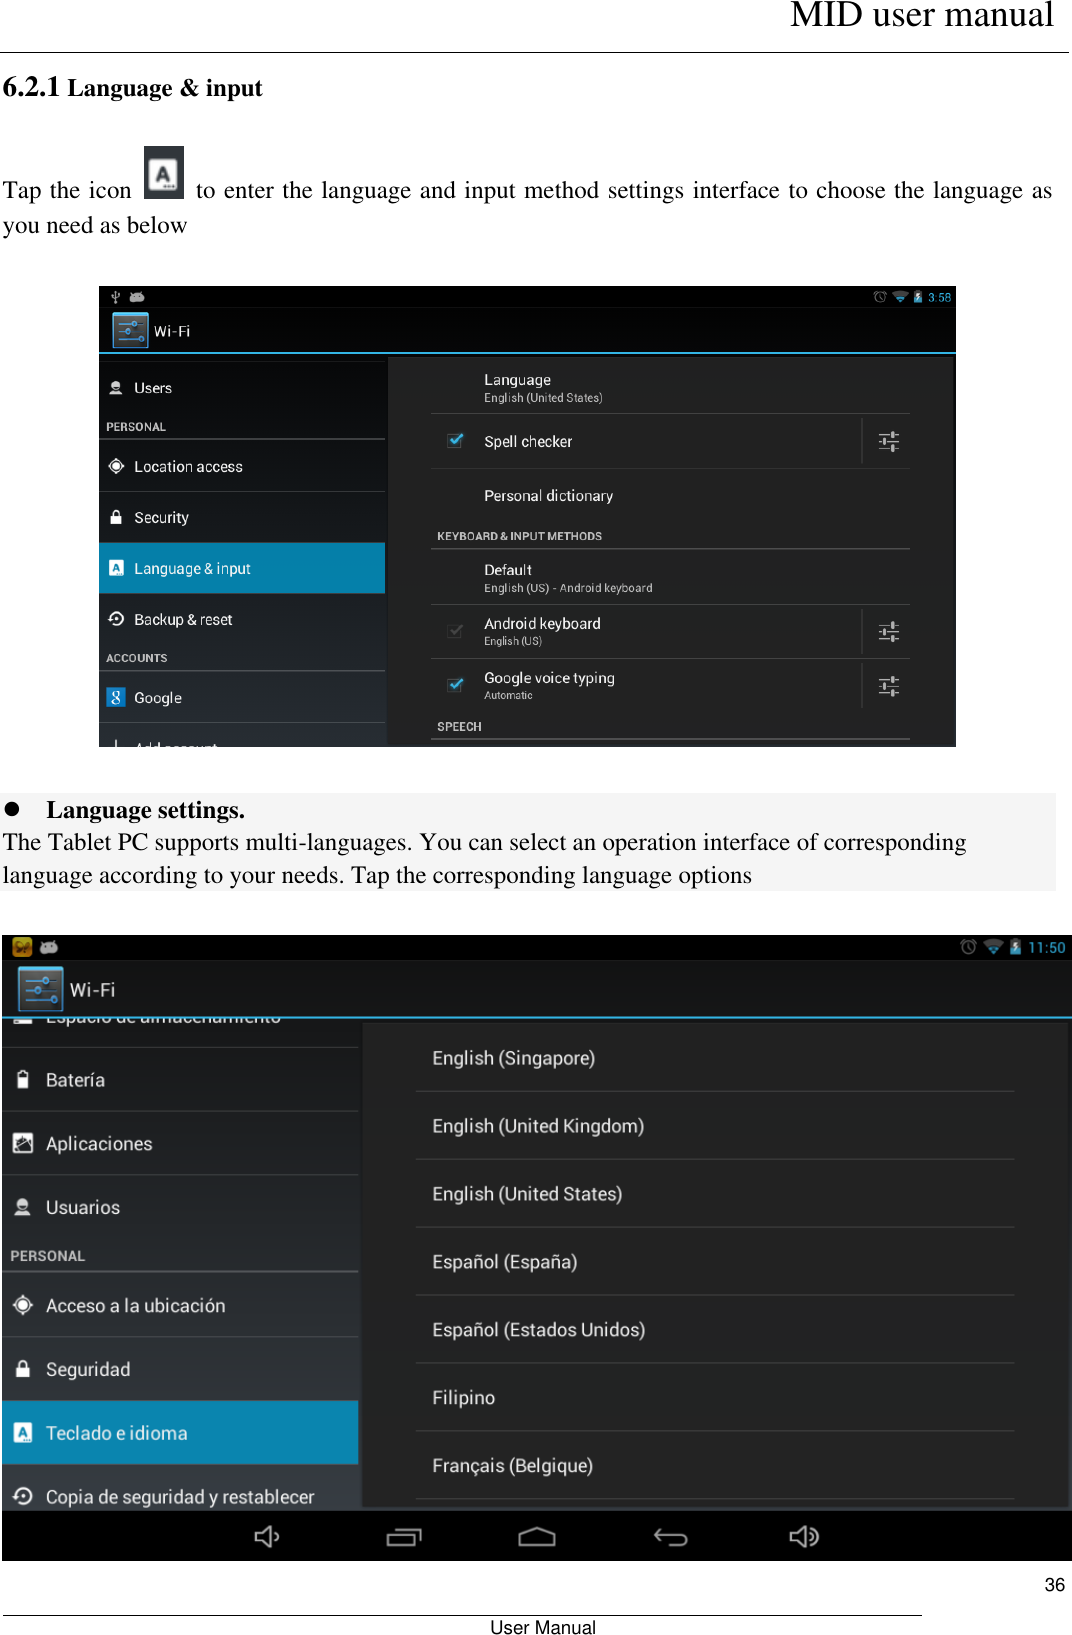
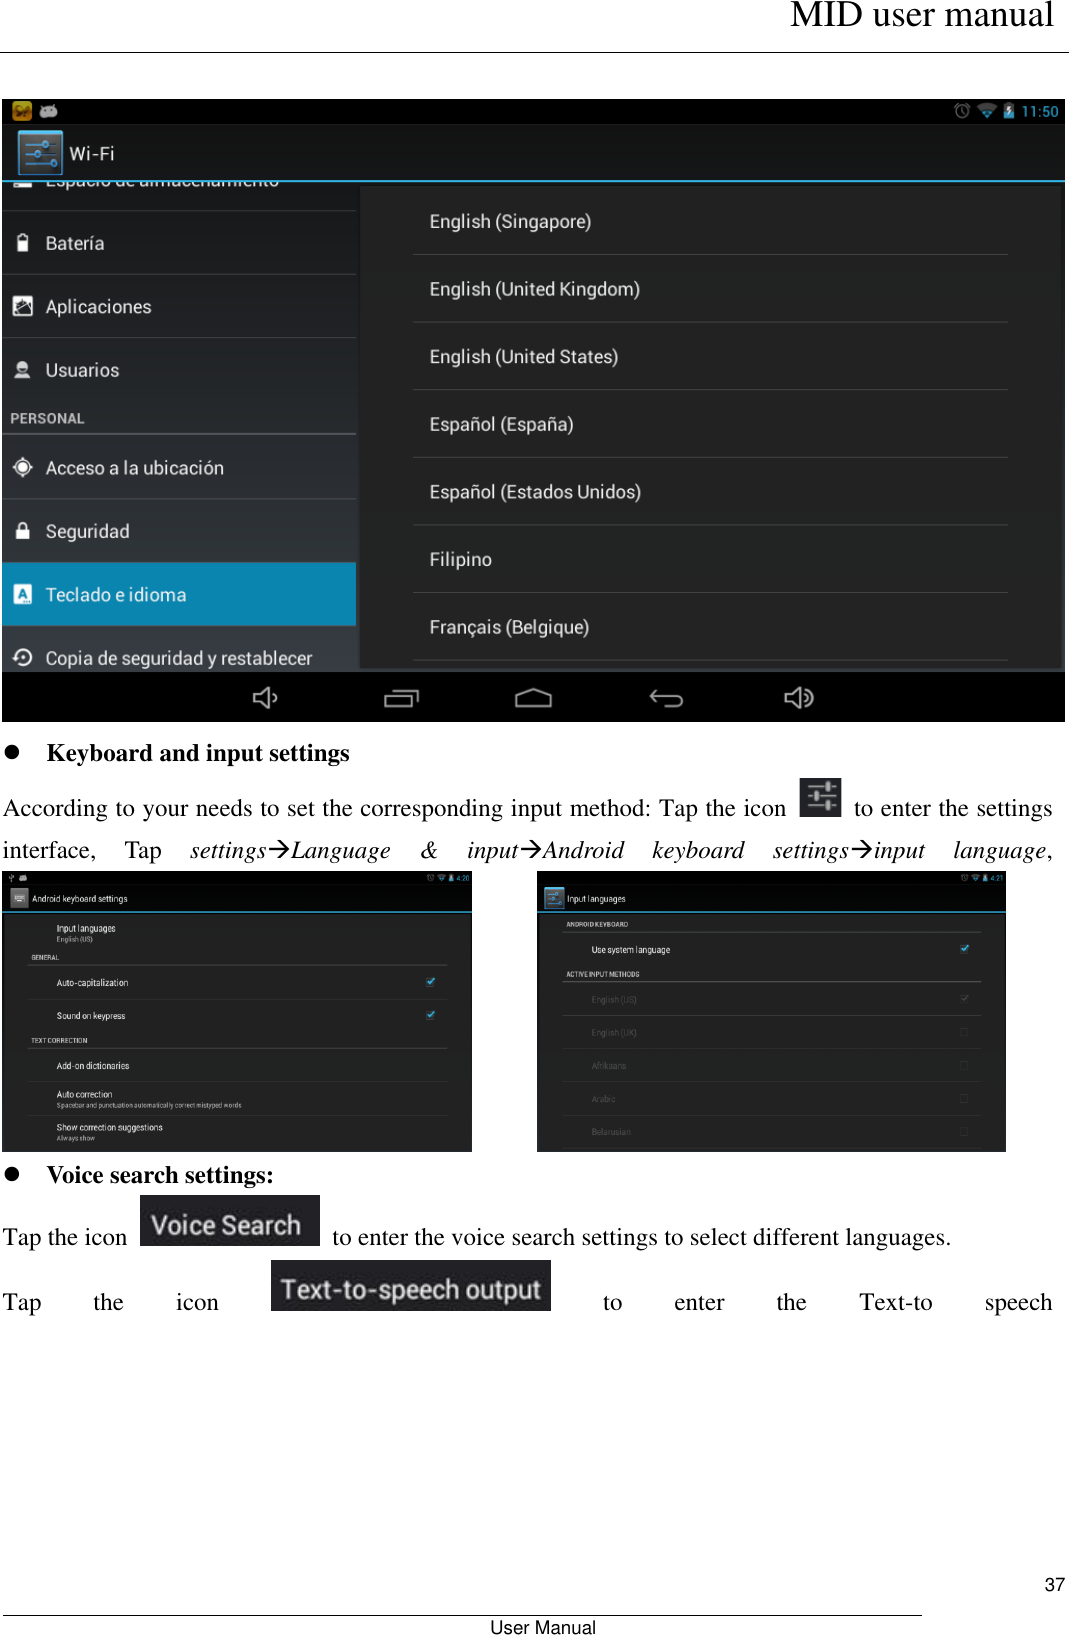
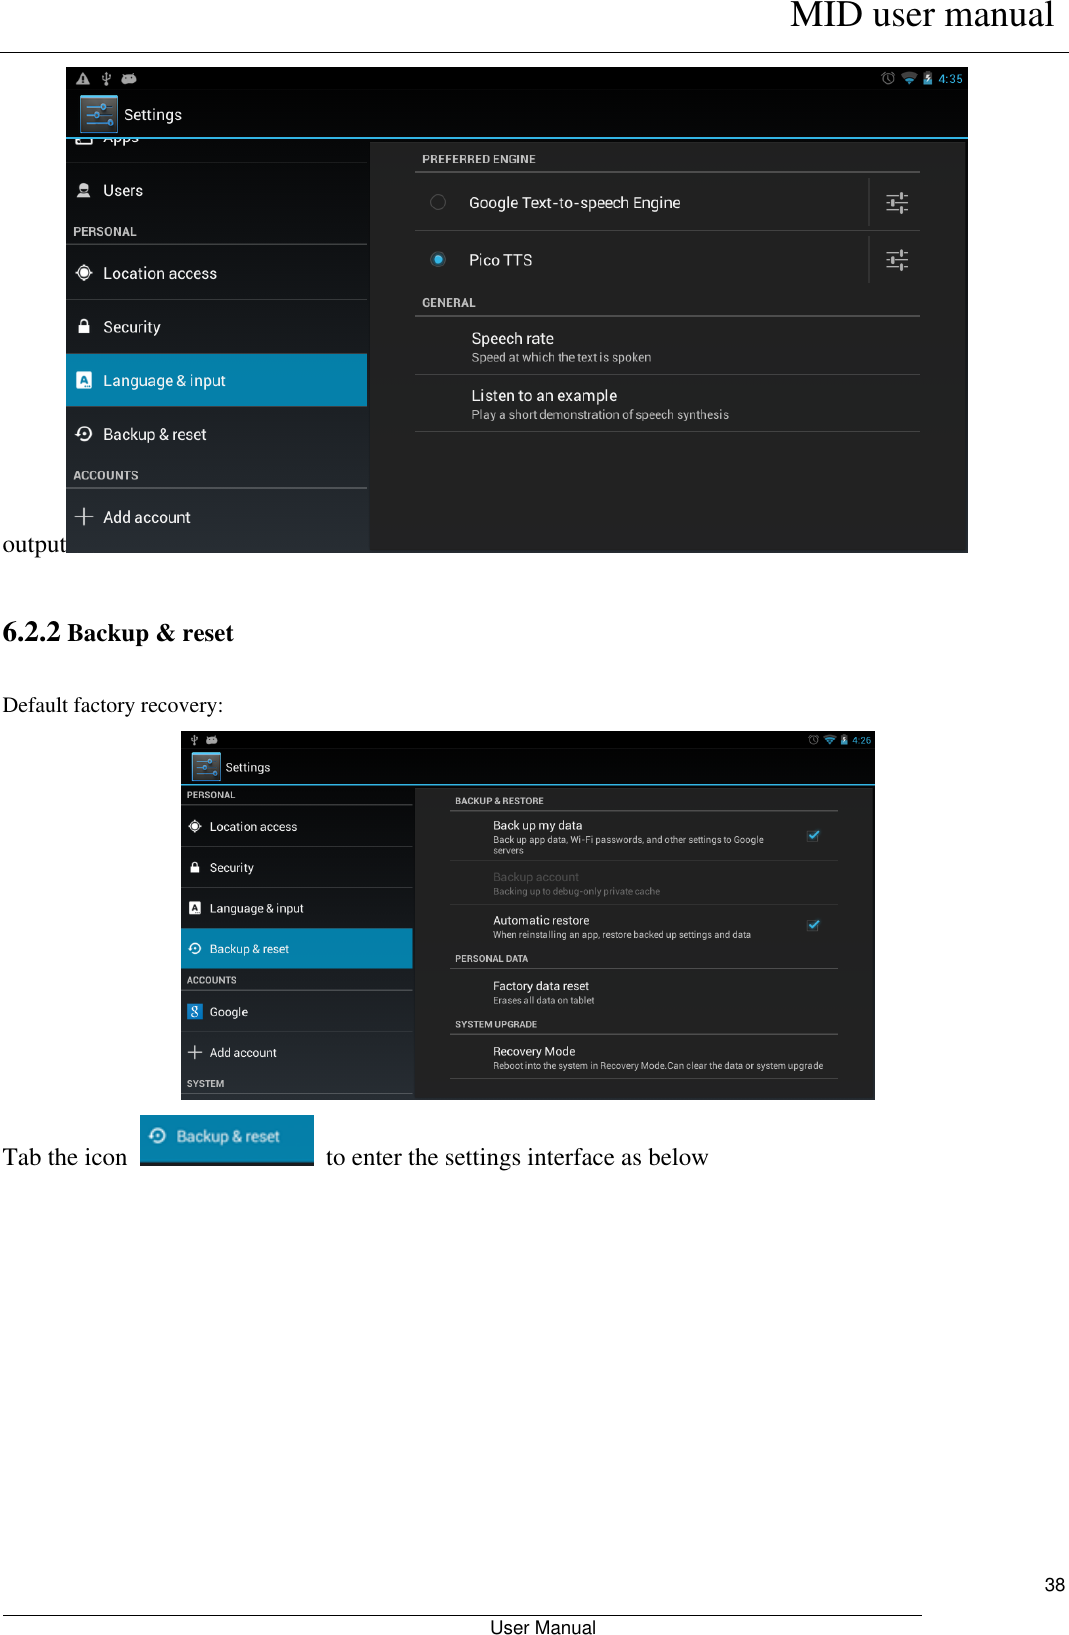
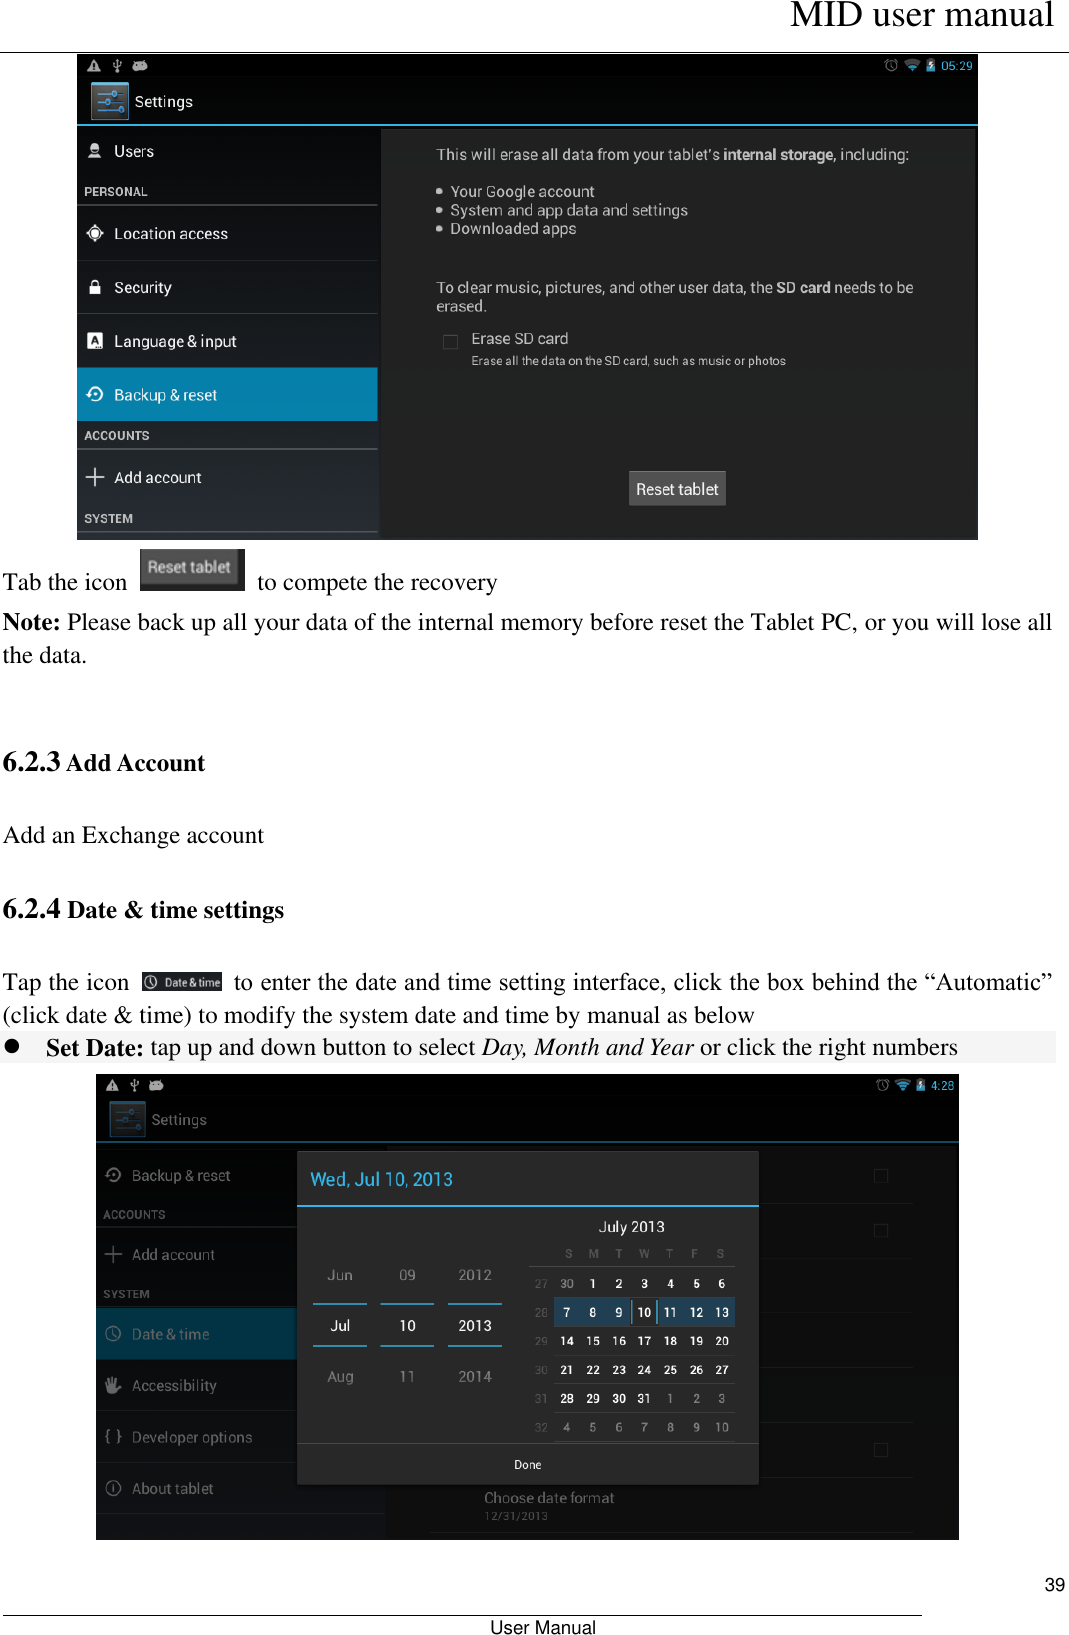
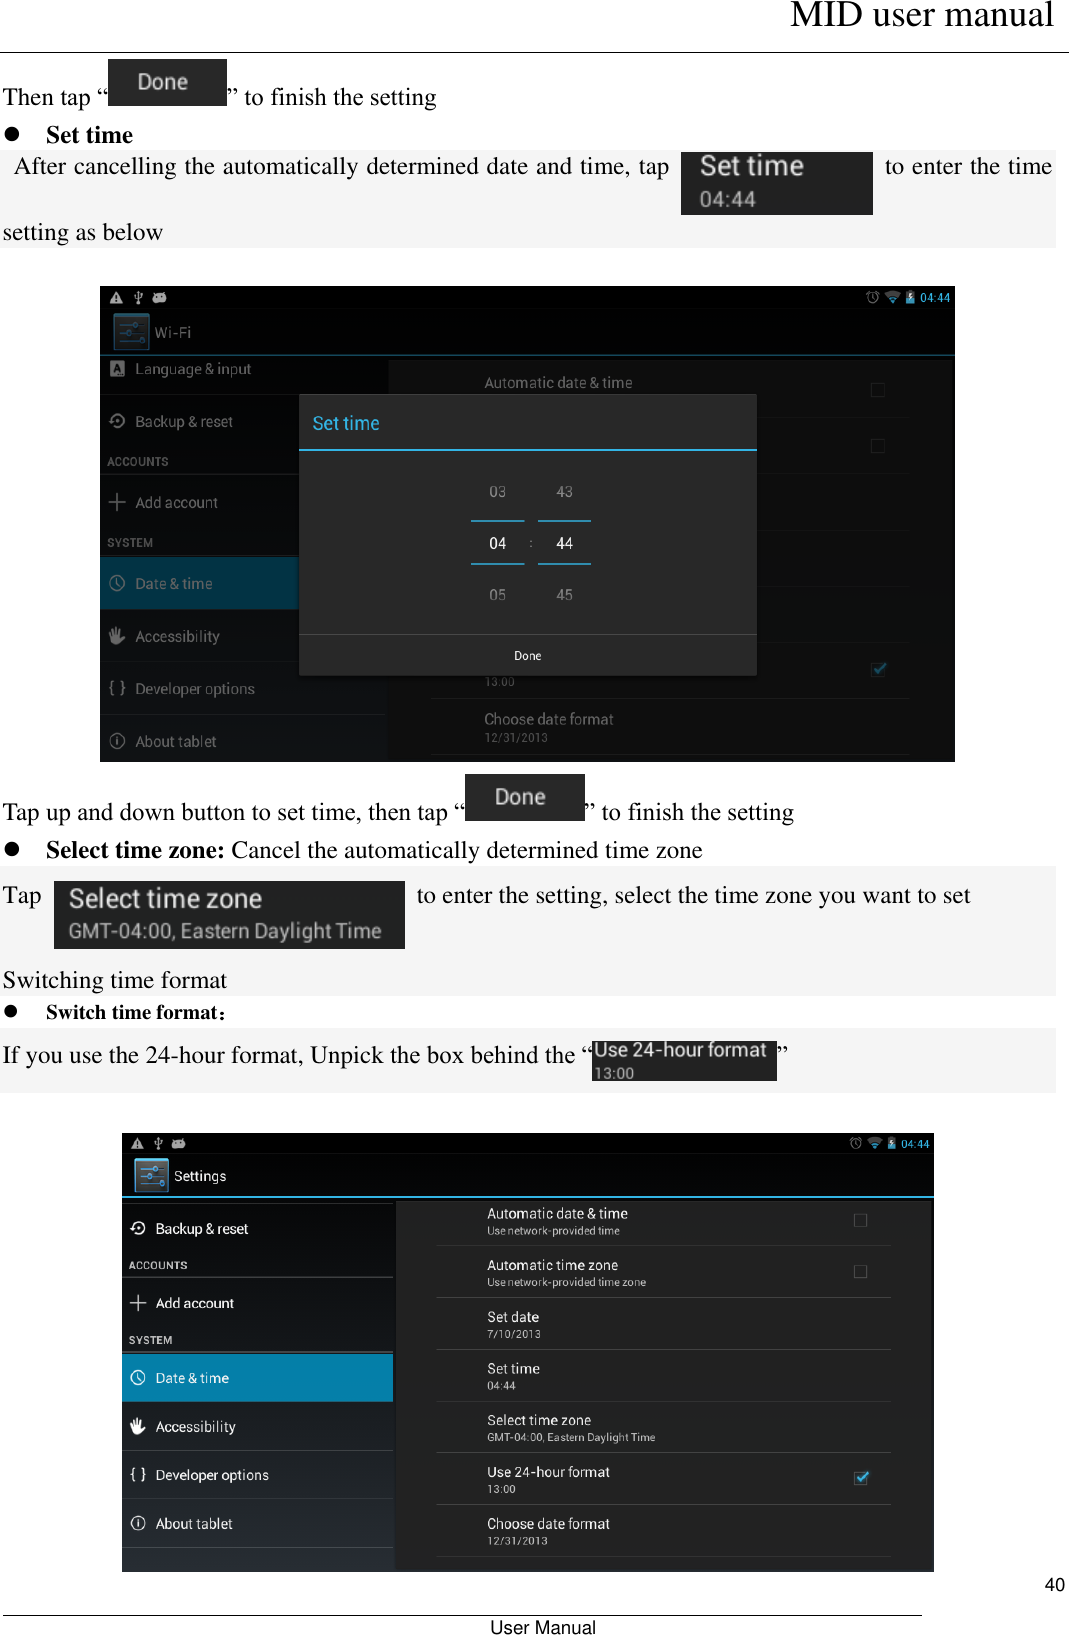
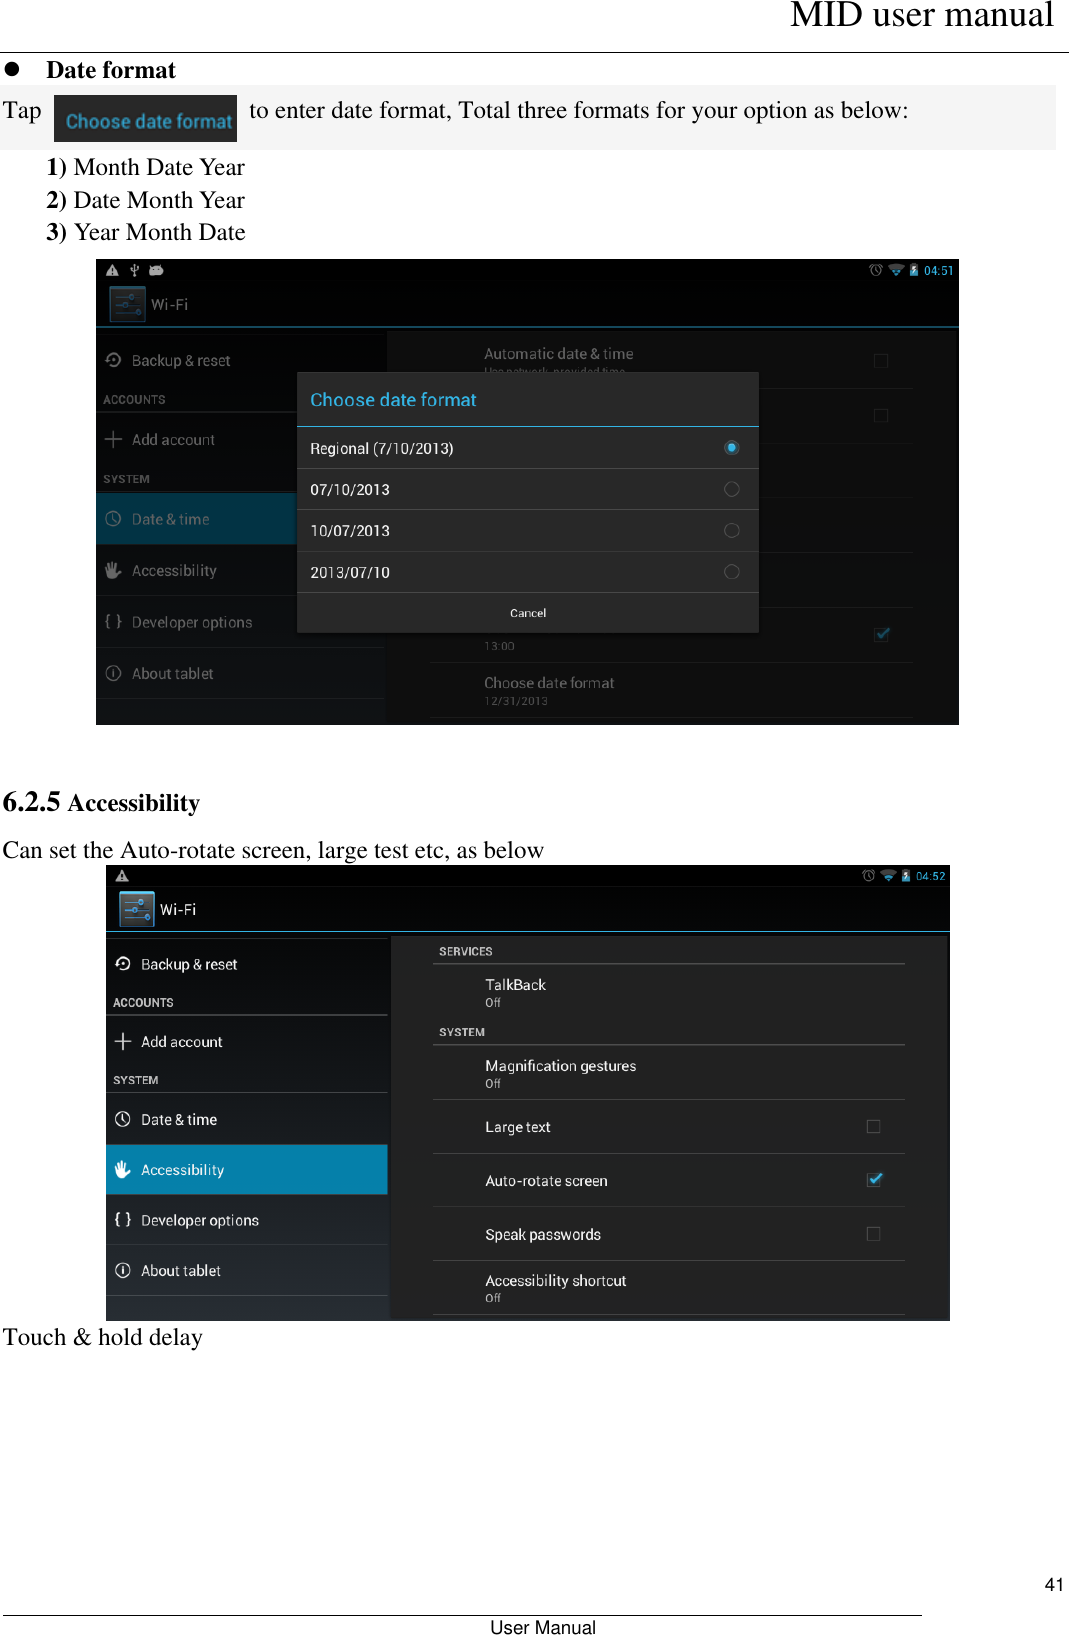

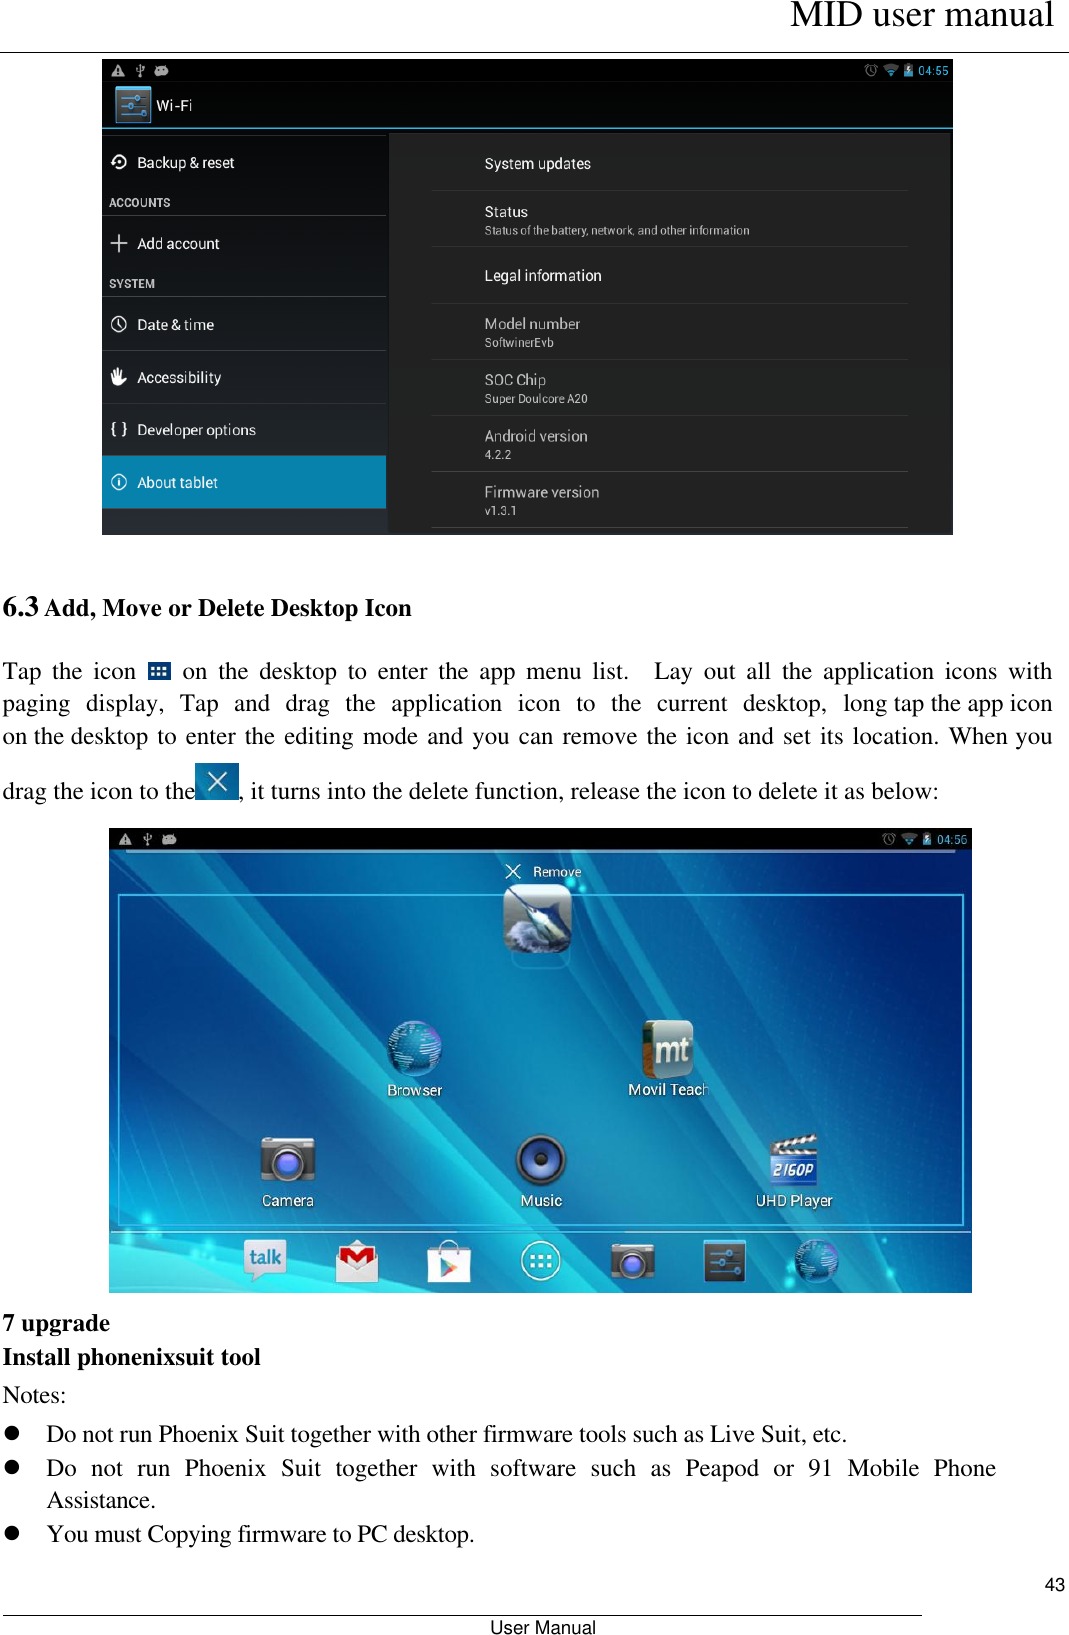


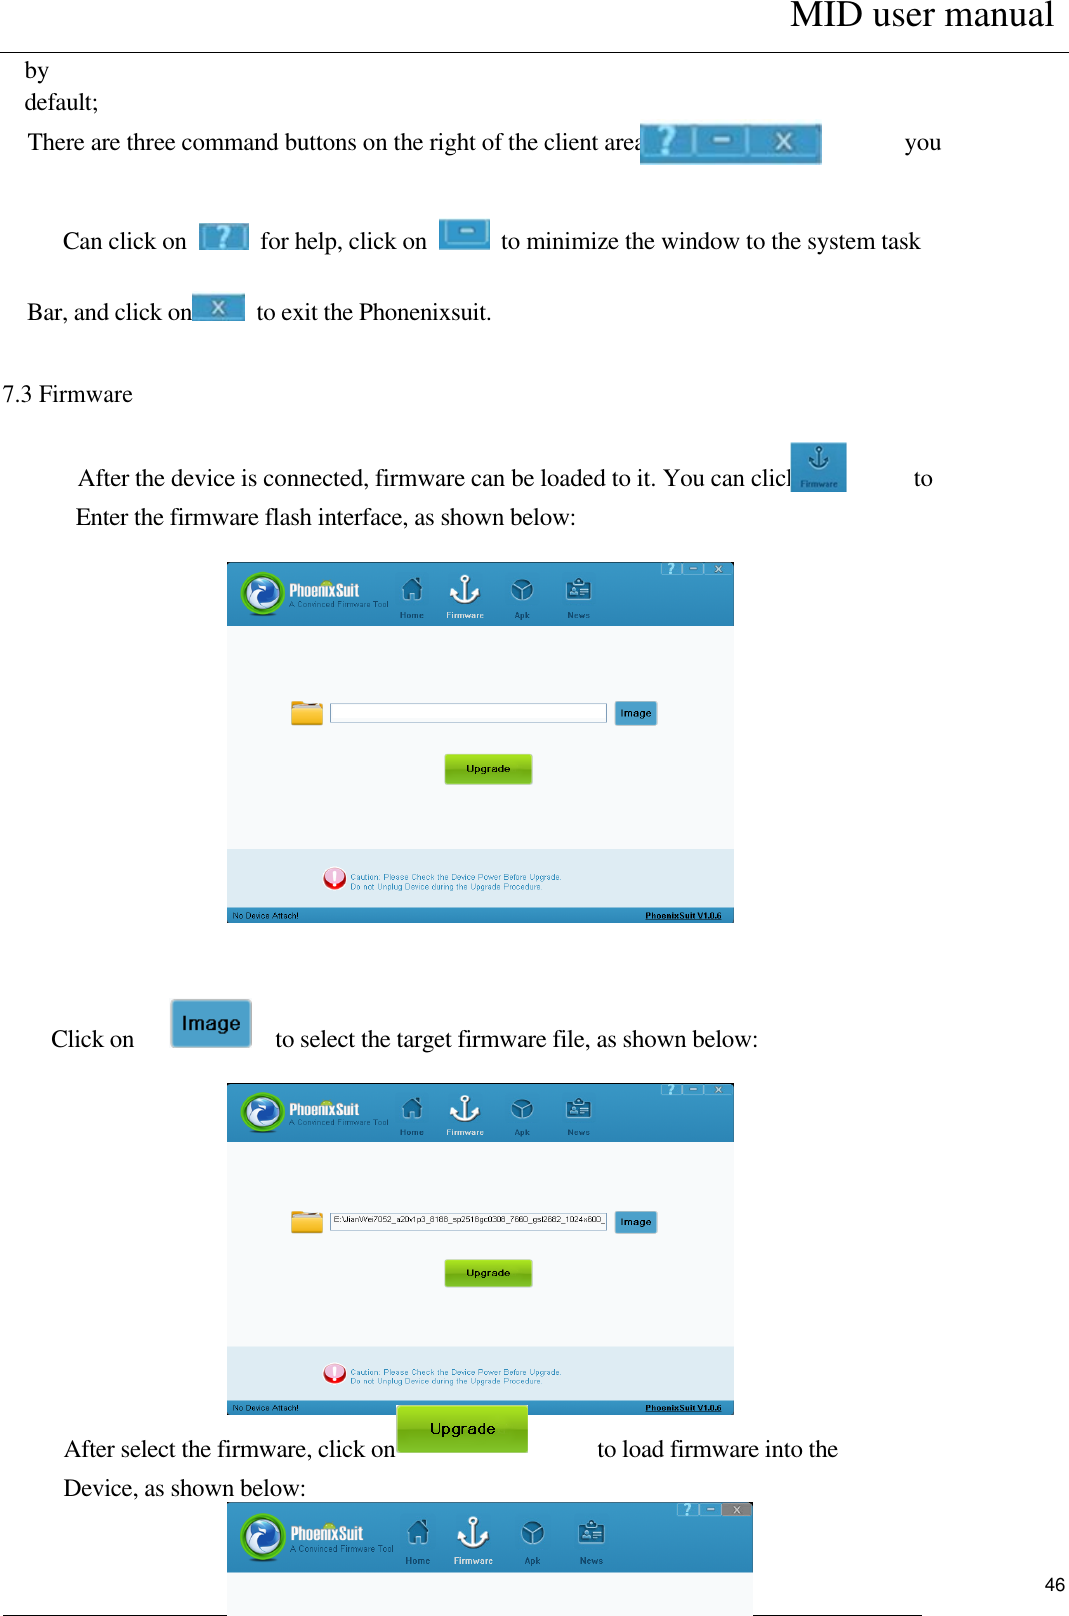
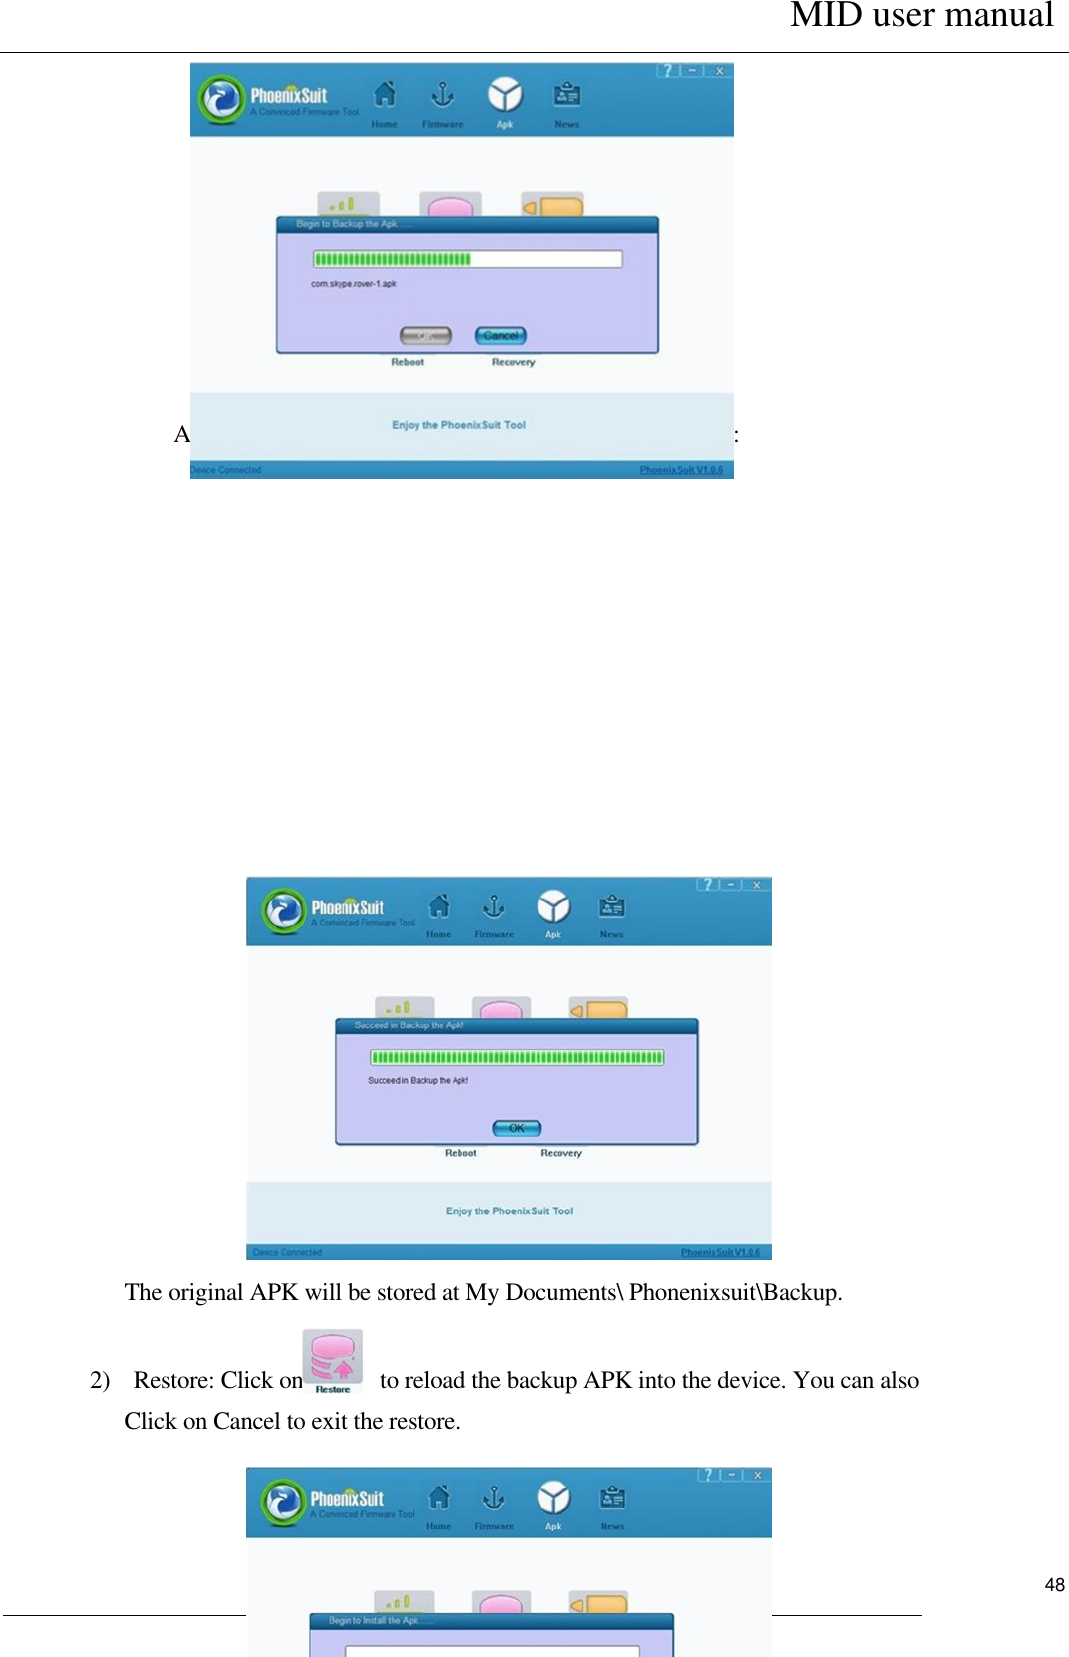
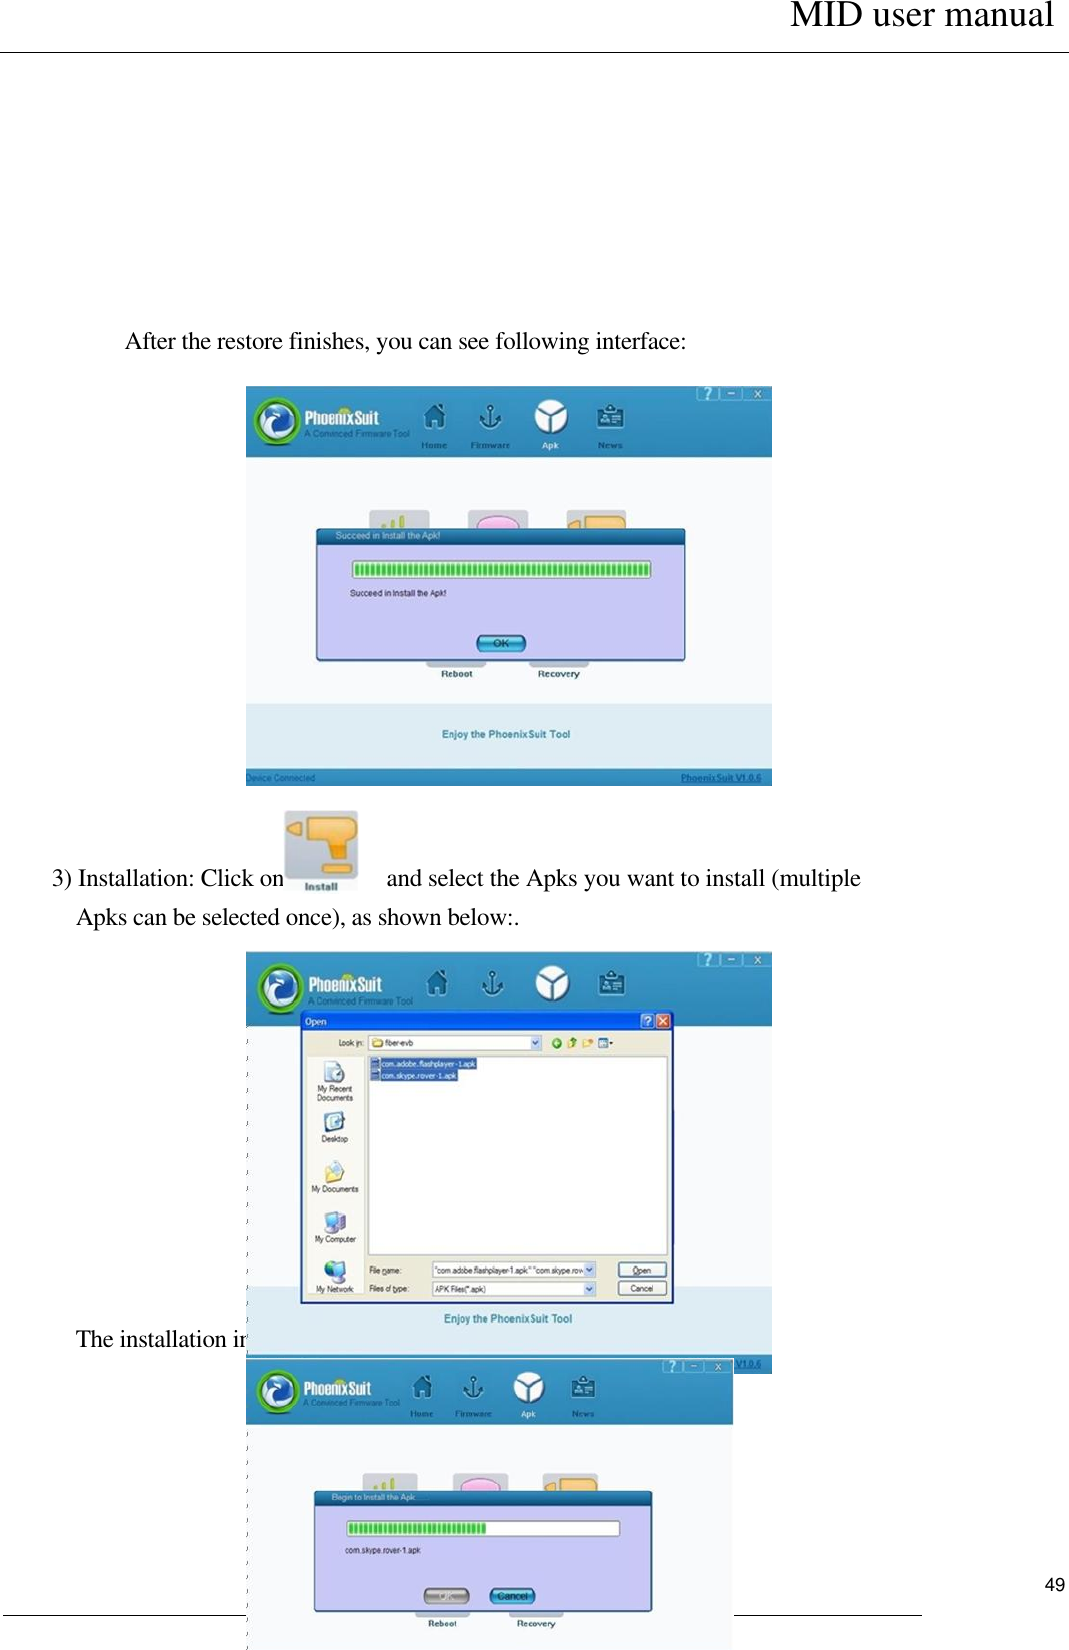
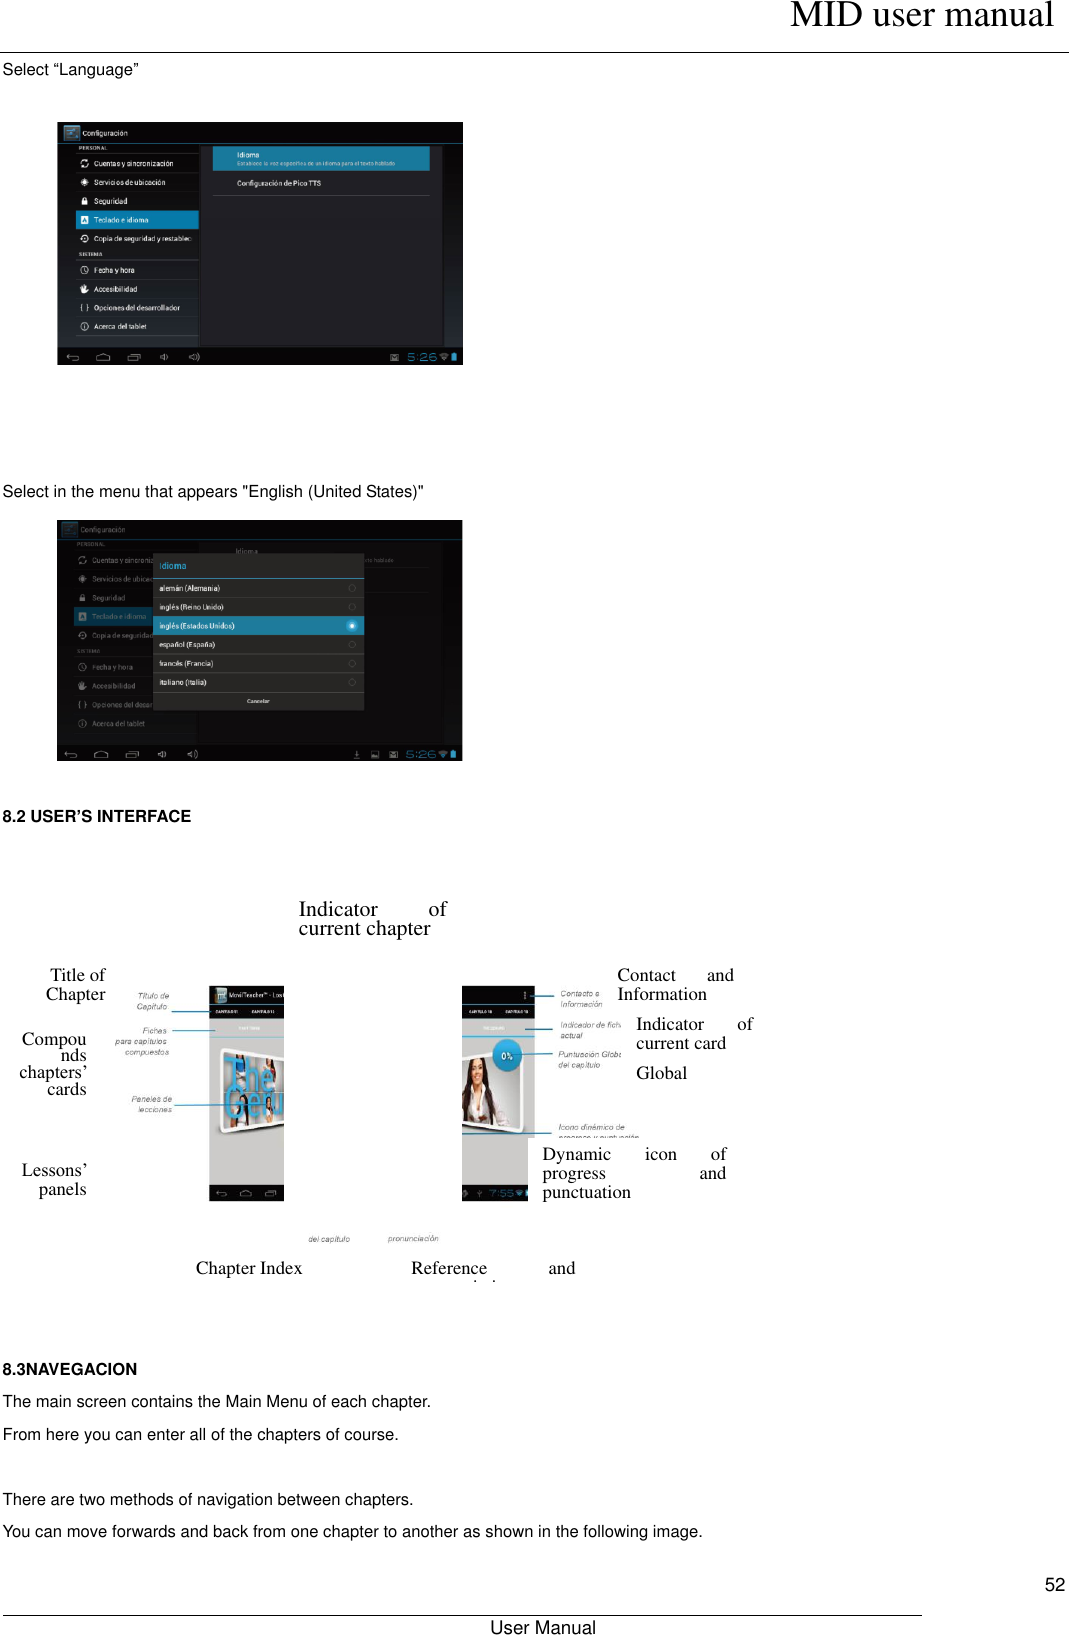
![MID user manual User Manual 47 ] Notes 1)does not disconnect the device during the firmware loading; 2) If the firmware fails to be loaded to the device, following steps can be taken to make it: Select the target firmware; Press and hold the power key for above 10 seconds to power the device off, then release the power key; Press and hold any key (except the power key), connect the device to PC, and press and release the power key for five to ten times, and then release all keys, you will find that the device automatically enters the upgrade mode; If it doesn’t work, repeat Step a to c again; 7.4 APK The Phonenixsuit supports APK backup, restore, installation, device reboot and recovery. Click on to enter the APK interface, as shown below: 1) Backup: click on for APK backup, and you can also click on Cancel To exit the backup.](https://usermanual.wiki/Kintech/PC1008/User-Guide-2113315-Page-47.png)