Kintech PC1011 Tablet User Manual Content
Kintech Co. Ltd Tablet Content
UserManual.wiki
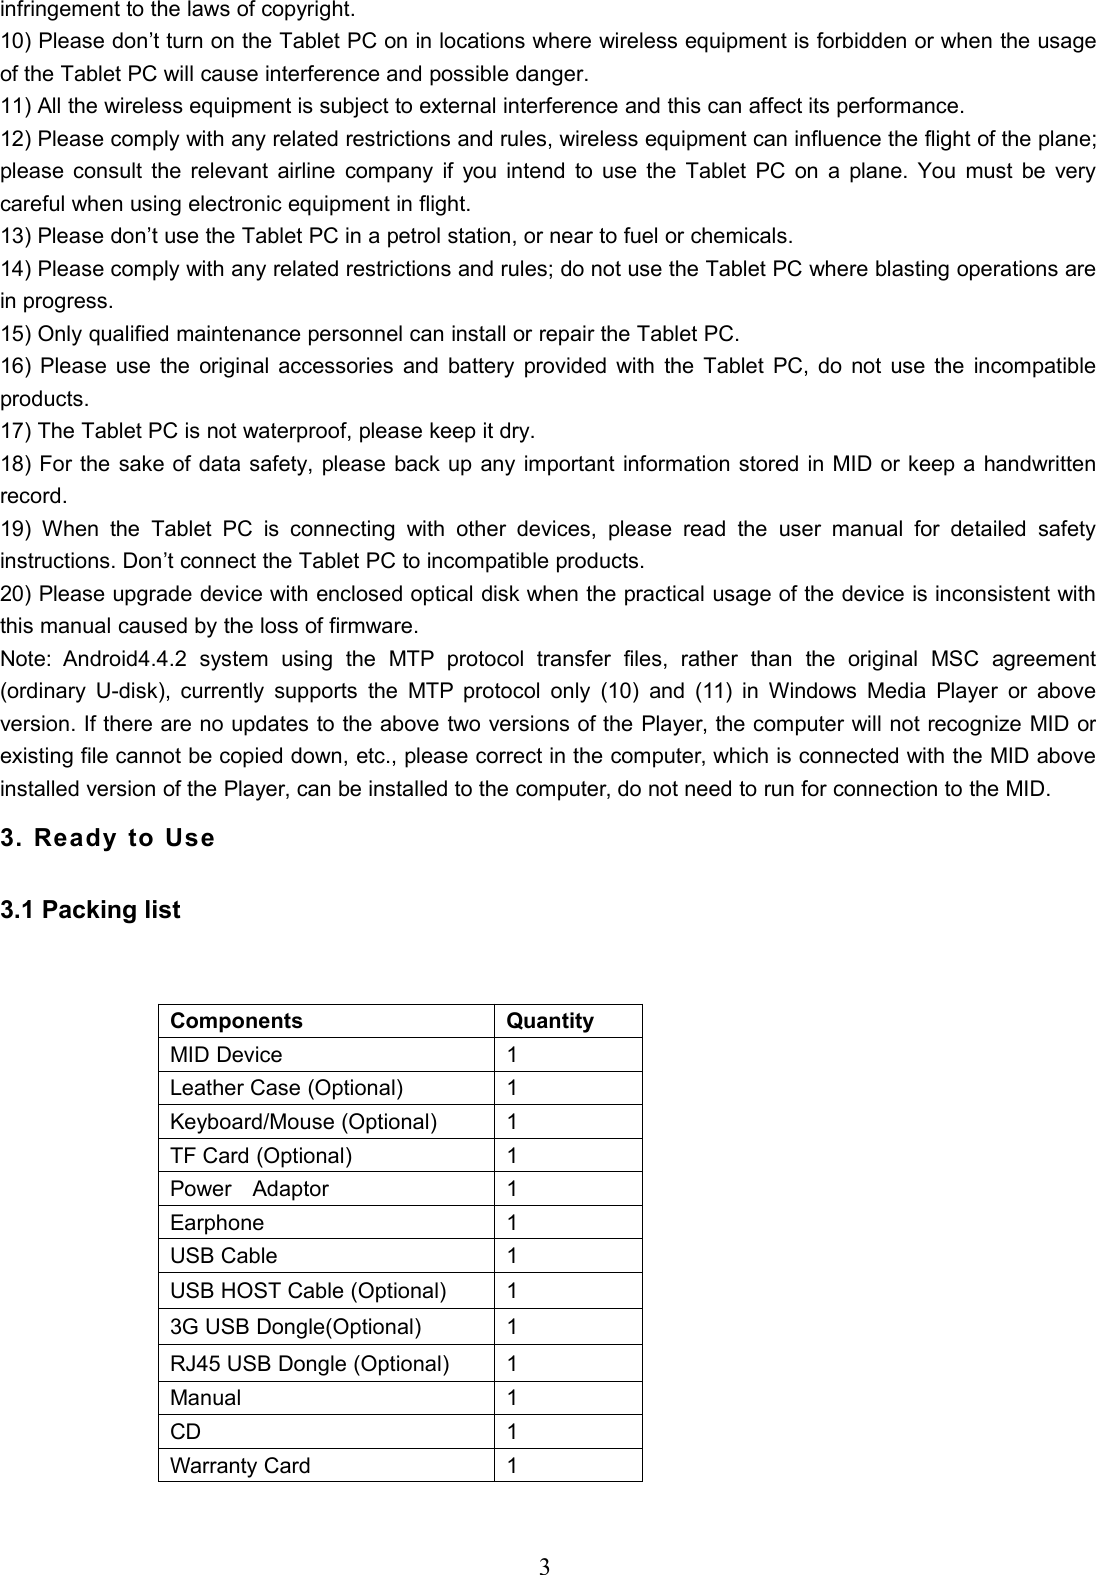
>
Kintech
>
PC1011 User Manual
user manual
Navigation menu
Upload a User Manual
Namespaces
Wiki Guide
HTML
PDF
Info
Views
User Manual
Discussion / Help
Navigation
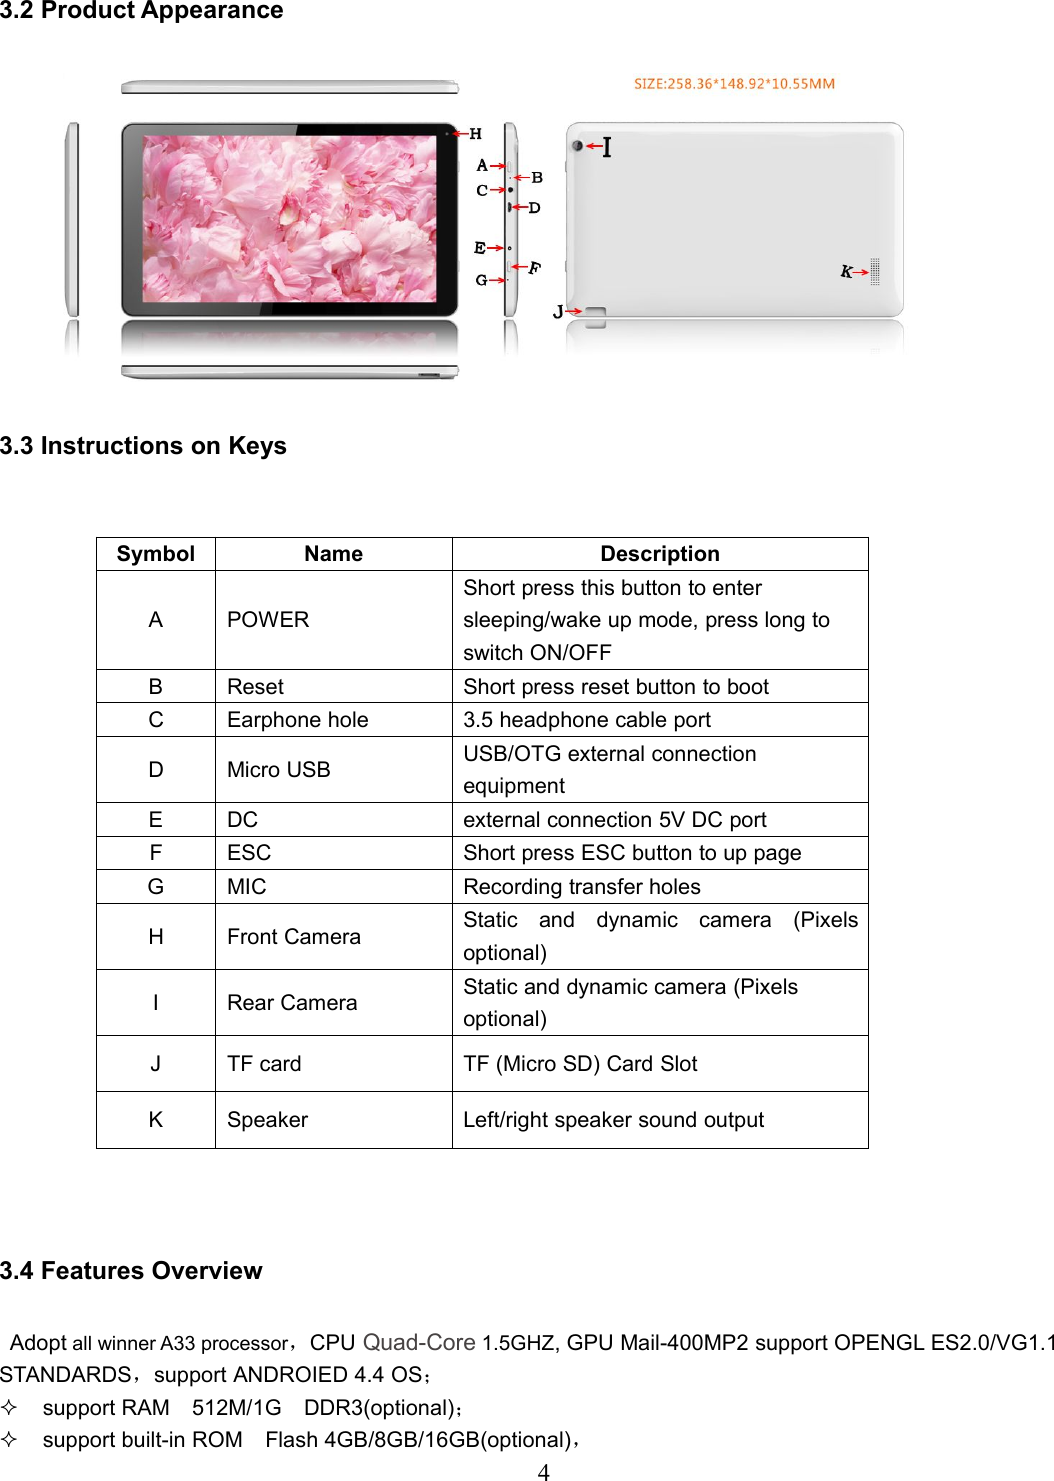
![7Sleep mode and lock screen:After the device turns on, press and hold the POWER key shortly to enter into the SLEEP power-saving mode.The screen comes into black and locks at the same time. Press the POWER key again to wake up the screen.The system will restore bright screen within 1S and then drag up to unlock.Note: under the sleep mode, the operation of the original function will not be interrupted, it will continue to work.At this time only close the screen with the black screen state. For example: play the music, movies, etc.Switch off:When the device is in use, press and hold the POWER key for 3 seconds, the screen will display the power offinterface; choose the power off option to confirm your selection and the system will shut down automatically.Note: If the device is in crash or blank screen, please press and hold the POWER key for 6 seconds to let thesystem power off automatically, and then turn it on.[Note]: When the device is running low on battery power, it will sound an alarm and then shut downautomatically if it isn’t plugged into a power source to start charging. If the device cannot start up please check ifthe battery power is too low by charging the device.4.2 Battery management and charginga. Charge the battery about 8-12 hours to make sure the battery is fully charged for the first time.Insert the adaptor into the DC slot on the Tablet PC, and connect the other side with the power socket.The desktop icon of the battery keeps rolling to show it is charging, please wait until the battery is fullycharged.b. When the battery is exhausted completely, please charge at least one minute before starting it up.Note: In order to keep the battery working to its full potential, please pay attention to the following advice:Don’t charge the power in excessively high temperatures.There is no need to run down the power for this Li-ion battery, you can charge the battery even when there isstill power left in the battery without it affecting the lifespan of the battery.In order to keep the battery in good condition, Make sure you charge it at least once every two weeks if theTablet PC hasn’t been used for a long time](https://usermanual.wiki/Kintech/PC1011/User-Guide-2451059-Page-8.png)


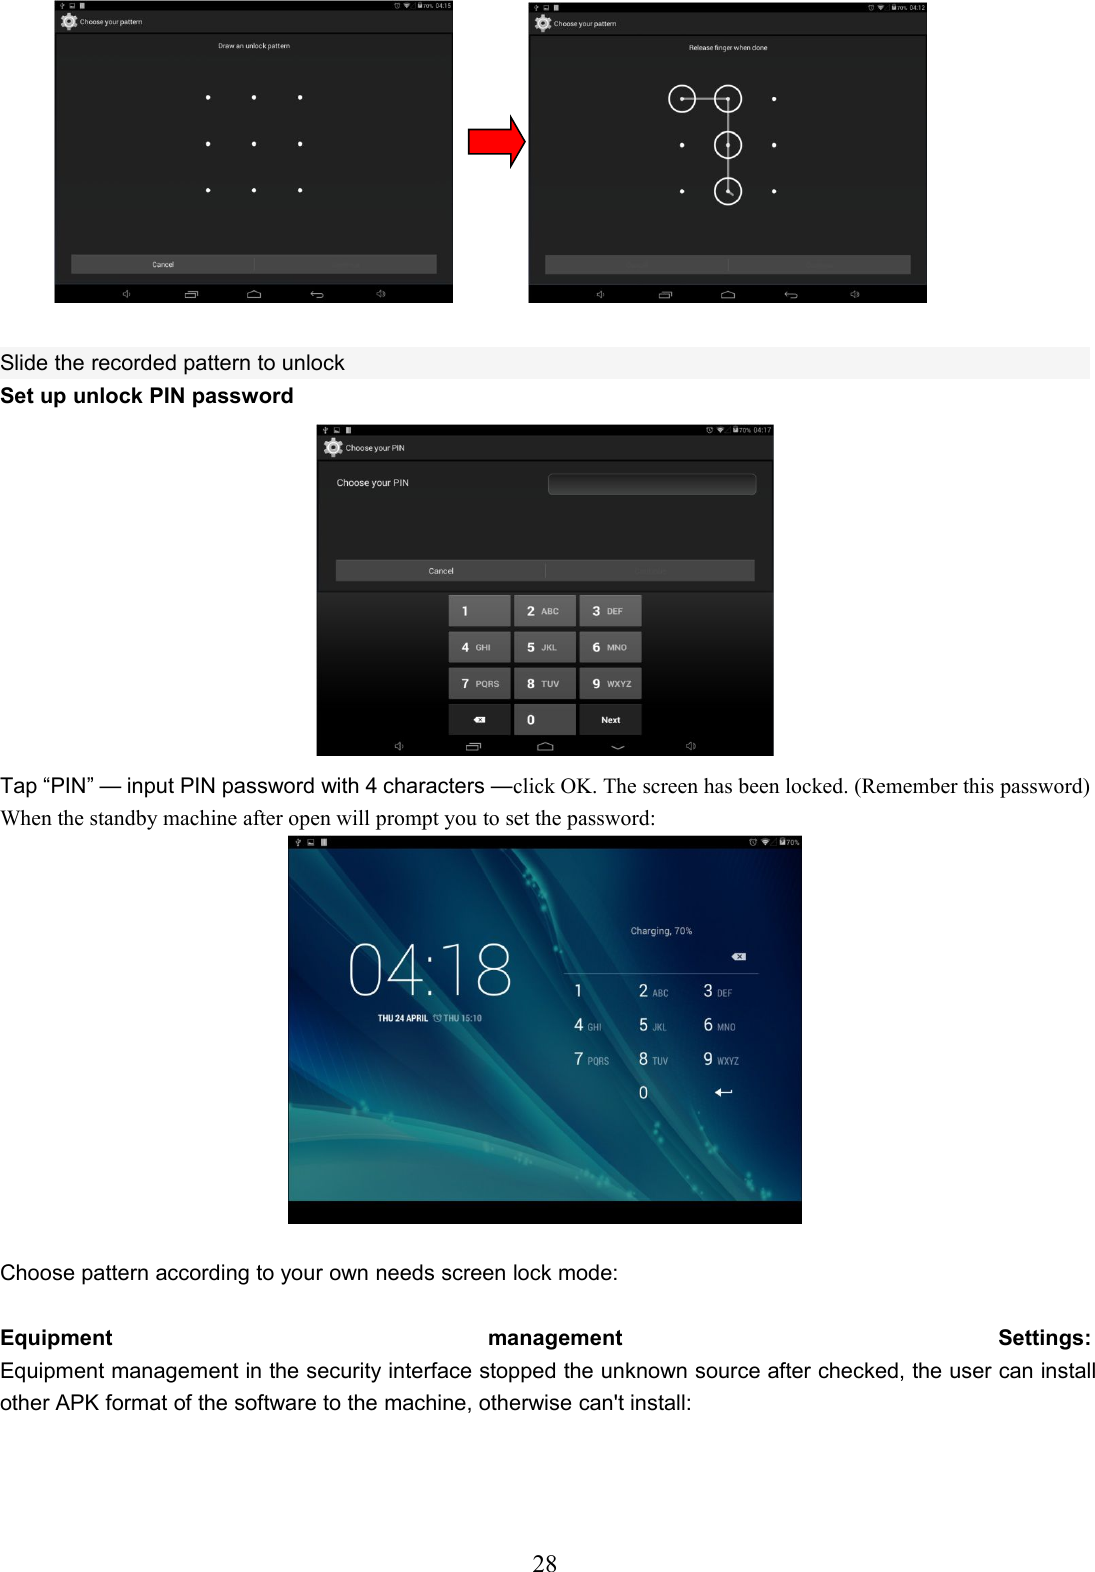
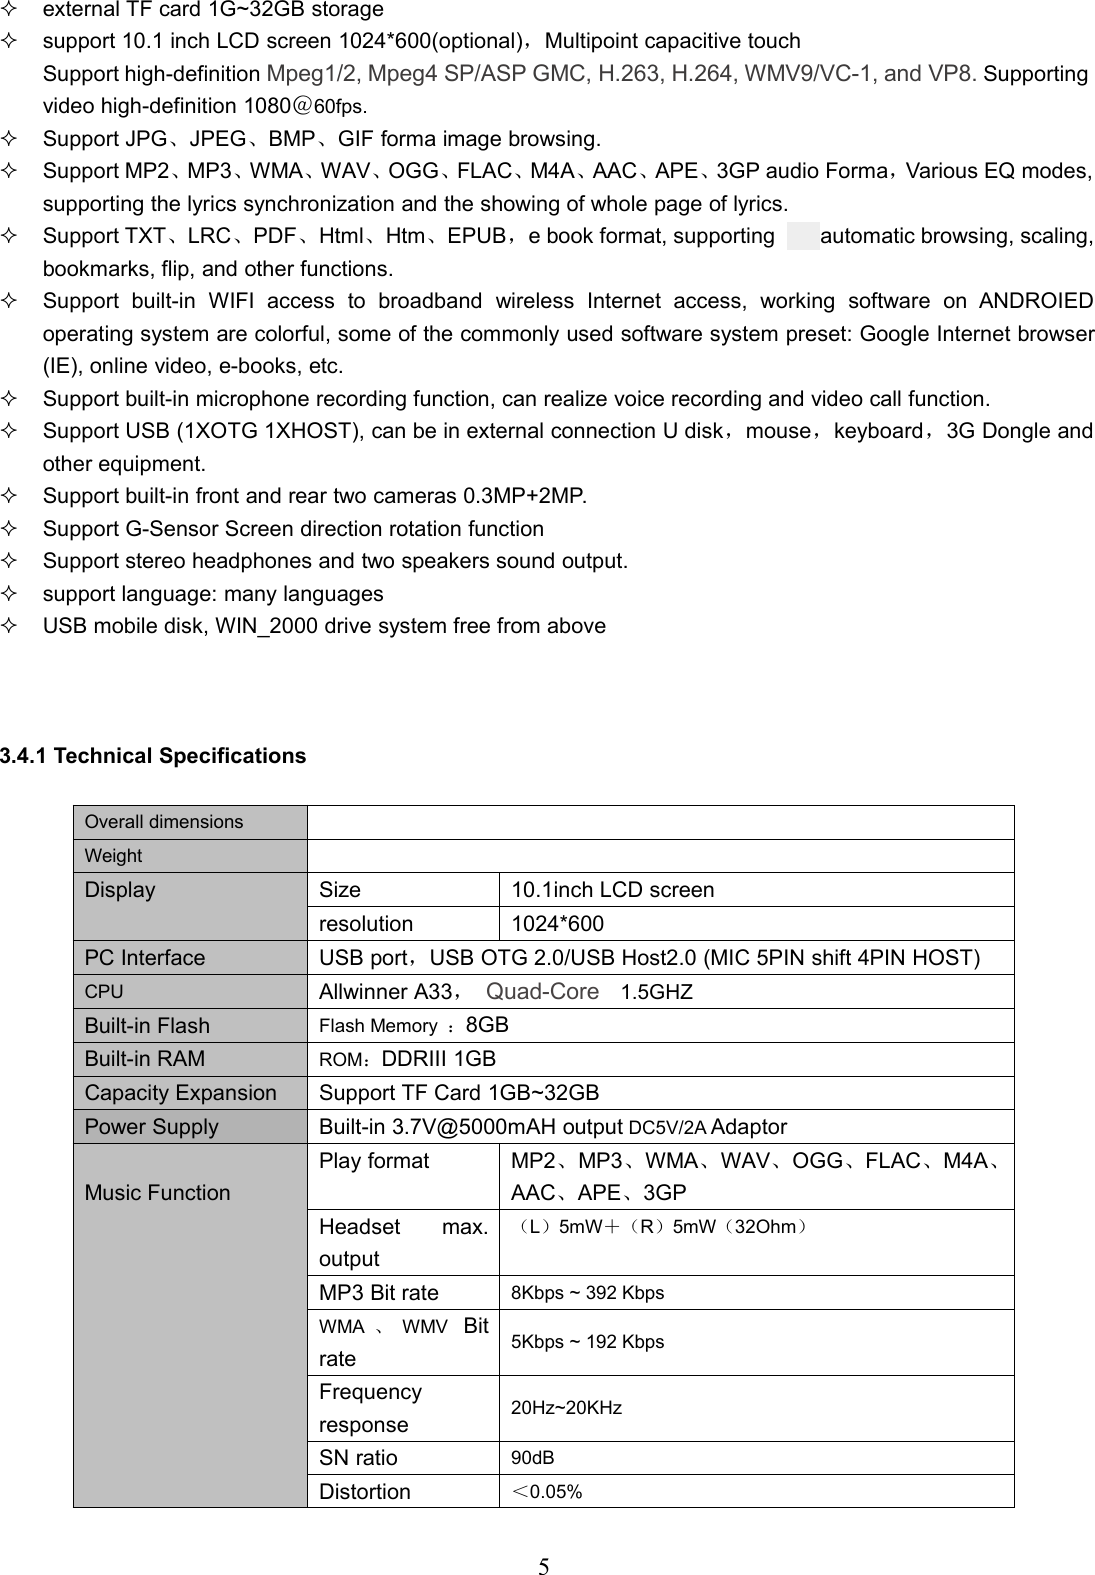
![27Tap the icon to enter the security settings interface as below:Screen Lock 1. Slide 2. Face Unlock 3.Pattern 4.PIN 5.Password【Setting unlock pattern】unlock pattern for the screen password. Enter setup interface of the safety lock screenclick [pattern] according to prompt setting as below:](https://usermanual.wiki/Kintech/PC1011/User-Guide-2451059-Page-28.png)