Kirisun Communication PT620001 FM Handheld Transceiver User Manual PT6200 New
Kirisun Communications Co., Ltd FM Handheld Transceiver PT6200 New
Contents
- 1. Users Manual Part 1
- 2. Users Manual Part 2
Users Manual Part 2

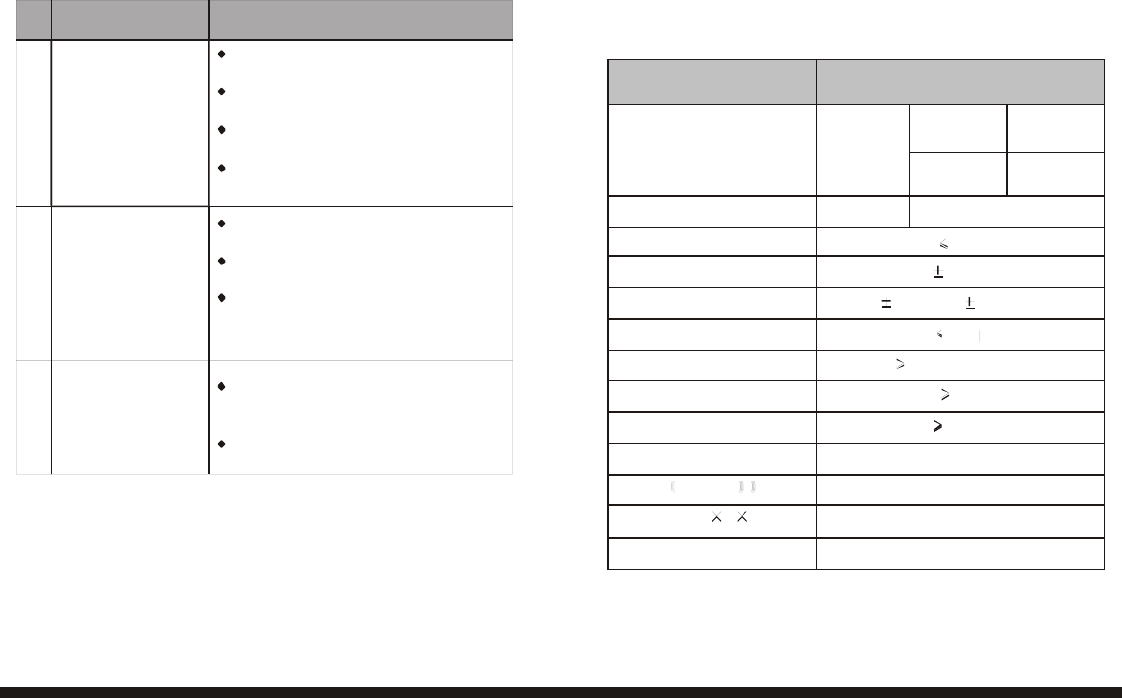
Transmitting
Lights red
Receiving Lights green when Carrier wave is present
Scanning Flashes green. (Once per second.)
Read/Write frequency
Read frequency: flashes red; Write frequency:
flashes green.
Transmit code (DTMF
/2-Tone/5-Tone)
Flashes orange after transmission.
(Once pe
r
second.)
Decode (DTMF/KDC
1200/2-Tone/5-Tone)
Flashes orange within the effective time
after receiving the correct code.
Low battery warming
Flashes red. (Once per second.)
Alerts once every 30 seconds.
Wireless clone Turn on the transceiver with PTT and side
button 2 pressed, and lights orange.
While in cloning the host transceiver flashes
Red and the sub one lights green.
3.5 Installing the Optional Speaker/
Microphone
Insert the
Speaker/Microphone plug into
the jacks of
the versatile connector, and
fix it with the supplied snail
screw.
Notes:
1) Only use the KIRISUN
Speaker/ Microphone.
2) KME-62A Speaker/Microphone is
supplied for option.
3) The Speaker/Microphone is
for option only. If you
want to purchase one,
please contact the local
KIRISUN dealer.
4 GETTING ACQUAINTED
4.1 Transceiver Overview
3
4
8
1
2
3 Channel Selector
Rotate to select channel 1-16.
4 Power/Volume Switch
Turn clockwise to switch on the transceiver.
Turn counterclockwise till a click is heard to switch off the
1 Antenna
2 LED
Indicator
5
6
9
7
transceiver.
Rotate to adjust the volume after turning on the transceiver.
5 Side Button 1
Programmable function button: Press it to activate the programm
-

7 8

6 PTT (Push-to-talk)
To make a call, press and hold the PTT button, then speak into
the microphone with normal voice.
Release the PTT button to receive.
7 Side Button 2
Programmable function button: Press it to activate the program-
mable auxiliary function. Its default setting is squelch off
Momentary.
8 Emergency Button
Press and hold it longer than the preset time to activate
emergency alert function.
9 Microphone/Speaker Jacks
For connecting external Microphone/Speaker.
4.2 Programmable Auxiliary Functions
The dealer can program the Side Button 1 and Side Button 2
as one of the following auxiliary functions.
None (No Function)
Key Lock
Key Lock with Backup
Monitor
Monitor Momentary
Scan
Scan + Temporarily Delete
Squelch Off
Squelch Momentary
Temporarily Delete
CALL 1
CALL 2
Scrambler
5 Basic Operation
Switch On
Switch on the transceiver by turning the Power/Volume switch
clockwise till a click is heard, then the transceiver will be in
the state of stand by and you will hear a beep if the dealer
has set it. If voice annunciation has been set, the
current channel number will sound.
Turn the Power/Volume switch counterclockwise to switch off
the transceiver.
Adjust Volume
Rotate the Power/Volume switch to adjust volume.
Turn clockwise to increase the volume and counterclockwise
to decrease the volume.
Note: If the dealer has set the function of the side buttons as
Squelch Off or Squelch Off Momentary , press
the side button to listen to the background noise and rotate
the
Power/Volume switch to adjust volume.
Select a Channel
Rotate the channel selector to select a channel. Clockwise to
increase the channel number; counterclockwise to decrease.
If voice annunciation has been set, the current
channel number will sound.
Note: If a channel has not been opened by programming you
cannot use it. If you selected a channel not opened LED will
lights red and flashes green, and warning tone sounds.
Make a Call
To make a call, press PTT, and speak in normal
voice and please keep your mouth 1~2 inches
away from the microphone to get the best voice quality.
Release the PTT button to receive a call.
Receive a Call
Your dealer can set CTCSS, DCS, DTMF, KDC1200, 2-Tone
and 5-Tone signaling on your radio channels by PC software.
If you select a channel that has been preset with
the tone signaling, you will not hear any other calls except
those from your own system.
If the channel you select hasn't been in any of these signaling
types, you can hear any call (not limit to the members in your
system.)
6 Advanced Operations
6.1 Key Lock (Backup)
1) Press and hold the side button set as key lock for 1 second
to activate or inactivate key lock. When Key Lock is active, the
following keys are locked:
Channel Selector, Scan Button, Scan + Temporarily
Delete
Button, Temporarily Delete Button and Scrambler button.
2) If the side button has been set as Backup, Key
Lock will remain active even after the transceiver is turned
on again. If Backup function has not been set, Key Lock will
b
e
canceled
after turning on the transceiver again.
6.2 Monitor/ Squelch Off
Monitor, Monitor Momentary, Squelch Off, and
Squelch Off Momentary functions can enable you to
listen to the signals unable be heard while in normal
operations, or can be used to adjust the selected channel's
volume.
Monitor: Press the monitor button once to inactivate CTCSS,
DCS, DTMF, KDC1200, 2-Tone and 5-Tone signaling,
and press it again to return to normal operation.
Monitor Momentary: Press and hold the monitor
button to inactivate CTCSS, DCS, DTMF, KDC1200,
2-Tone and 5- Tone signaling, and release it to return to
normal operation. Squelch Off : Press the button once to
listen to background noise, and press it again to return to
normal operation.
Squelch Off Momentary : Press and hold the button to listen
to background noise, and release it to return
to normal operation.
6.3 Scan
While in scanning, the transceiver checks every channel and
stops on the channel on which a signal is detected until that
signal disappears. If the delay tim
e
between signal disappearing and continuing scanning
has been preset, the transceiver will remain on that
channel in the delay time if a signals received .
Only when there are two channels added in the scan list and

11 12

the scan function has been activated, the transceiver can start
scanning.
1) Press the button set as Scan or Scan + Temporarily
Delete to start scanning.
2) The transceiver will start scanning from the
current channel and scan channels one by one in the
consequence of channel No. and the LED flashes green.
3) When a signal is detected on a channel ,
scanning pauses and LED lights green.
4) You can select a channel to make a call by pressing
the
PTT button during anytime of scanning.
5) Press again the button set as Scan or
Scan + Temporarily Delete to end scanning.
Priority Scan
During scanning, if the priority channel has been set
on the transceiver, when the priority channel receives
a signal the transceiver will automatically switch to
the priority channel even the normal channel is receiving
signals at that time. And the transceiver will stay on the
priority channel till that signal disappears. The dealer can set
the delay time between signal disappearing and continuing
scanning.
Temporarily Delete
When scanning pauses on a channel, press and
hold the button programmed as
Temporarily Delete or Scan
+ Temporarily Delete for 1 second to delete
this channel temporarily from the scanning list.
Note:
of scanning channels is less than 2, you cannot
delete any channel, either.
After exiting scanning mode and entering it
again, the temporarily deleted channel will be added in the
scanning list again.
6.4 CALL 1/CALL 2
If the dealer has programmed DTMF, KDC1200, 2-
Tone or
5Tone signaling on the current channel
,
press the programmable side button (CALL 1 or
CALL 2) to send the stored DTMF, KDC1200, 2-Tone or
5-Tone code.
While in transmitting LED lights red; and after
transmission except KDC1200 LED flashes orange till
the effective time expire, within which you can
receive calls from other transceivers.
6.5 Scrambler (Backup)
Scrambler offers voice security. This function set
on both communication parties can avoid other transceivers
using the same frequency to acquire your private information.
When pressing the side button programmed as
Scrambler, the third party is unable to listen to your talking
voice clearly.
If Scrambler Backup option is not activated, the
transceiver will not be in Scrambler state after it is
switched on once again, whereas the Scrambler state will
be stored.
6.6 VOX

without manual operations. This function can only be set by the
13 14
dealer, and you have to be equipped with the
specified headset earphones.
Before using VOX, you must set VOX gain level. Such setting
enables the transceiver to identify the voice volume.
If the microphone is too sensitive, the background noise will
trigger the transceiver to transmit. If the microphone is not
sensitive enough, it cannot receive your voice when you
speak. Make sure to adjust VOX gain level to proper
sensitivity.
1) Connect the headset earphones with the transceiver.
2) Turn off the transceiver, and then turn it on
again and press Side Button 1 at the same time.
3) Hold Side Button 1 till a beep sounds and
LED lights orange, then release Side Button 1, and
the transceiver will announce VOX gain level.
4) Press Side Button 1 to increase VOX gain level;
press
Side Button 2 to decrease it.
VOX gain level can be adjusted between level 1 ~10 and OFF.
When adjusting gain level, the transceiver will announce VOX
gain level. If OFF is selected, beep tone will sound.
5) Press PTT to store the setting. After a
beep, the transceiver announces new VOX gain level.
6) Turn off the transceiver, and turn it on again,
and then
VOX function is activated.
6.7 Wireless Clone
The dealer can enable or disable this
function by programming.
Yo
u
ca
n
clon
e
programmin
g
dat
a
t
o
o
r
fro
m
Button 2 for 2

seconds, and turn on the transceiver at the
same time entering Clone Mode.
1) When the clone slave
,
s entering clone mode, LED lights
orange and you will hear voice annunciation
Clone .
When release buttons, voice annunciation Channel 1
sounds.
2) When the Clone master entering clone mode, LED lights
orange and you will hear voice annunciation
Clone .
When release buttons, voice annunciation Channel 1
sounds.
3) Select on the Clone master the channel number identical
with that on the Clone slave
,
s. You can select clone channel
by pressing Side Button 1 or Side Button 2.
4) Press the PTT button on the Clone master to
transmit data and LED flashes red.
The Clone Slave
,
s begins to receive cloning data and
LED
lights green.
When the data transfer is completed, the Clone
master sounds confirming beep.
5) After the data transfer the Clone master cannot be set as
Clone Slave to receive data form other transceivers.
6) The cloning rate has been automatically set at
a low value 1200bps.
6.8 Emergency Alert
If Emergency Alert has been set on the
transceiver by programming, you can make emergency calls.
1) Press and hold the emergency alert button.
According to the delay time preset on the
transceiver, the
15 16
time required for holding the button may be different.
When the transceiver enters emergency call mode,
it will switch to the emergency channel automatically,
and starts transmitting according to the dealer's setting.
Transmitting and receiving recycle can be set by your local
dealer.
2) To exit the emergency call mode, press again
and hold the emergency call button.
If the repeating times of emergency call has
expired, the transceiver exits emergency call mode
automatically and returns to normal operation mode.
7 Auxiliary Functions
7.1 Time-out Timer (TOT)
Time-out timer can prevent any caller from
occupying one certain channel for an extended period of the
time.
If the transceiver is continuously transmitting longer than the
time preset by the dealer, the transceiver will stop transmitting
and warning tone sounds, and please release the PTT button.
The dealer can program the warning alarm before TOT action.
7.2 Battery Saving
The dealer can activate or inactivate this
function by programming.
If the battery saving function is active, 10 seconds
after the transceiver doesn't receive any signals or
no operation is being conducted, the transceiver enters
battery saving mode. When a signal is received or any
operation occurs, it exits battery saving mode
automatically.
power

consumption.
7.3 Low Battery Warning
Low battery warning tone sounds and LED flashes red when
the battery power goes below a certain value, and you need
to recharge or change the battery. In low
battery status transmission is prohibited.
7.4 Voice Annunciation of Channel Number
The dealer can activate or inactivate this
function by programming.
While switching to another channel, you can hear the
voice annunciation of the current channel
number. Four combinations are available: Chinese
Male, English Male, Chinese Female and English Female.
7.5 Busy Channel Lockout (BCL)
Busy Channel Lockout can prevent you from interfering other
transceivers that using the same channel.
If you press the PTT button when the channel is
busy, the transceiver with BCL function active will ma ke
warning sound and transmission is prohibited. To stop
the warning sound, please release the PTT button and the
transceiver returns to receiving mode.
1) Carrier wave: When the channel you select is
busy, the transceiver is unable to transmit.
2) CTCSS/DCS: When the channel you select is
busy and programmed CTCSS/DCS signal is
not detected, the transceiver is unable to transmit.
17 18

3) Option signaling: When the channel you select
is busy before valid option signaling matches, or
when the channel you select is busy and programmed
CTCSS/DCS signal is not detected before valid
option signaling matches, the transceiver is unable
to transmit.
7.6 Clear Tail Tone
When using the channel set with CTCSS/DCS,
the after sound in talking ending can be eliminated.
7.7 Remote Kill
The dealer can activate or inactivate this
function by programming.
When the transceiver receives the call of remote killing code,
it enters remote killed mode, in which it cannot
transmit, or cannot transmit and receive unless it receives
remote reviving order or is programmed by PC software.
7.8 CTCSS/DCS
The dealer can set CTCSS/DCS tones on radio
channels, which enable you to ignore (not hear)
calls from other irrelevant parties who are using the same
channel.
When you receive a signal that has a tone different from the
one set on your transceiver, you will not hear
the signal. Likewise, signals that you transmit will
only be received by parties whose CTCSS/DCS tones are
the same as yours.
Note: Using a CTCSS/DCS channel doesn't mean your calls
are
private.
If
other
parties'
CTCSS/DCS
tones
are
7.9 DTMF
The dealer can activate or inactivate this
function by programming.
1) Receiving Signals
Only when the transceiver receives programmed DTMF code
(3~10 digits), the squelch will be activated.
Usually every transceiver has a unique code. Calls
from the transceivers whose codes are not programmed
will not be heard.
The dealer can also program group code on the transceiver.
When receiving the signal with proper DTMF code,
squelch will be activated, and call can be received and LED
flashes orange.
To manually deactivate the squelch, press monitor key or the
side button set as instantaneous monitor.
The dealer can program that squelch turns off after a certain
time and LED turns dim.
If DTMF auto Transpond has been programmed, the
calling transceiver will receive confirming signal.
If DTMF signal Call Alert has been programmed, it rings when
receiving the proper code.
2) Transmitting Signals
You can transmit the preset DTMF PTT ID code by pressing
PTT button. Or you can also transmit DTMF code by pressing
the side button CALL1 or CALL2 if DTMF signal
has been programmed on the channel.
If the selective signaling on the channel is
programmed as
DTMF, and the loudspeaker is not mute and Carrier Wave
+
Selective
Signaling
has
been
activated,
press
PTT

19 20

2
1
22
transmit. After releasing PTT button indicator flashes orange
and then you can talk to other transceivers until the effective
time expires when the indicator turns dim.
7.10 KDC 1200
The dealer can activate or inactivate this
function by programming.
1) Receiving Signals:
When receiving the signal consisting of your ID and fleet code,
squelch will be activated, and call can be received and LED
flashes orange.
To manually deactivate the squelch, press monitor key or the
side button set as instantaneous monitor.
2) Transmitting Signals:
If the PTT ID or Call1/Call2 on the channel you
select has been set with KDC1200, KDC1200 signal will be
transmitted when making a call.
7.11 2-Tone
The dealer can activate or inactivate this
function by programming.
1) Receiving Signals:
When receiving proper 2-Tone, squelch will be activated, and
call can be received and LED flashes orange.
To manually deactivate the squelch, press monitor key or the
side button set as instantaneous monitor.
The dealer can program that squelch turns half active some
time after the signal disappears.
If auto Transpond has been set, the calling
transceiver will receive confirming signal.
If signal Call Alert has been set, it rings when receiving the
proper 2-Tone code.
2) Transmitting Signals:
If 2-Tone has been set on the channel you can transmit
2- Tone by pressing the side button CALL1 or
CALL2. The dealer can set it.
After transmitting the signal, indicator flashes orange and you
can talk to other transceivers until the effective time expires
when the indicator turns dim.
7.12 5-Tone
The dealer can activate or inactivate this
function by programming.
5 Tone has 7 coding formats: CCIR, ZVEI1, ZVEI2, DZVEI,
EEA, PZVEI, and EIA.
1) Receiving Signal
When receiving proper 5 tone signal, squelch will be activated,
and call can be received and LED lights orange.
To manually deactivate the squelch, press monitor key or the
side button set as instantaneous monitor.
The dealer can program that squelch turns half active some
time after the signal disappears.
If auto transpond has been set, the calling
transceiver will receive confirming signal.
If call alert has been set, it rings when receiving the proper 5
Tone signal.
2
1
22

2) Transmitting Signal:
If the PTT ID on the channel you select has been set with 5
8 TROUBLESHOOTING
Tome, 5 Tone signal will be transmitted when making a call. No. PROBLEM
SOLUTION
Or transmit 5 Tone signal by pressing CALL1 or
CALL2
button, which can be set by the dealer.
7.13 Transmitting Beginning/Ending Signaling
1) Transmitting Beginning/Ending signaling is used to
join in or disconnect from some repeaters and telephone.
2) Transmitting Beginning signaling is used to join
in the conventional repeater and its relevant auxiliary
equipments. If the ID being transmitted matches with the
repeater's ID, it can use the repeater and its auxiliary
equipments.
3) Transmitting Ending signaling is used to
disconnect with the conventional repeater and
its relevant auxiliary equipments. If the ID being
transmitted matches with the repeater's ID, it can
disconnect from the repeater and its auxiliary
equipments.
The transceiver
cannot be switched
1 on or no display
after switched on.
The battery power
2 consume quickly
after charging.
3 Cannot talk to or
hear other members
in your group.
Other voices from
4 non-group members
are heard on the
channel.
Battery pack may not be installed
properly. Remove the battery pack
and install it again.
Battery power may be insufficient.
Recharge or replace the battery pack.
The battery life is finished, please
replace it with a new battery pack.
The frequency or CTCSS/DCS
signaling is not identical and please
reset it.
Not receive the correct DTMF, KDC
1200,2-Tone and 5-Tone signaling or
the effective time expires.
Beyond the transceiver efficient com-
munication range.
Change the CTCSS/DCS tone, and
make sure change the tone on all
transceivers in your group.
Please set DTMF, KDC1200, 2-Tone
or 5-Tone selective signaling on the
channel.
2
3
24
SPECIFICATIONS
PT6200
(2)
430~470
(4)
470~512
Frequency
(MHz)
(1)
136~174
(3)
400~440
(5)
350~390
RF
power
5W/1W
4W/1W
Spurious
and
harmonics
-70dB
Frequency
stability
2.5ppm
Maximum
frequency
deviation
5KHz(W)/
2.5KHz(N)
Receiver
sensitivity
0.25uV
Adjacent
channel
selectivity
70dB(W)/60dB(N)
Intermodulation
reject
ratio
65dB
Maximum
AF
output
power
500mW
Number
of
channels
16
Battery
Standard
DC
7.2V
Dimension
(W
H
D)
56mmx120mmx35mm
Weight
332g(With
battery
and
antenna)
No.
PROBLEM
SOLUTION
9 Technical Specifications
5 Communication
range is too short.
6
Unable to
transmit.
7
Noise is too loud.
Make sure the antenna is well
connected.
Make sure the antenna is the original
supplied one.
Check if the battery power is in the
normal state.
Ask your local dealer to adjust the
squelch level.
Make sure the PTT button has been
pressed completely.
Battery power may be insufficient.
Recharge or replace the battery pack.
Transmitting frequency has not been
set on the channel and the transceiver
has been remote killed.
Battery power may be insufficient.
Recharge or replace the battery pack.
Beyond the efficient communication
range.
2
5
26
Channel
Tx
Fre
Rx
Fre
CTCSS/DCS
Decode
CTCSS/DCS
Encode
Band
Opt
Signal
SPK
1
2
3
4
5
6
7
8
9
10
11
12
13
14
15
16
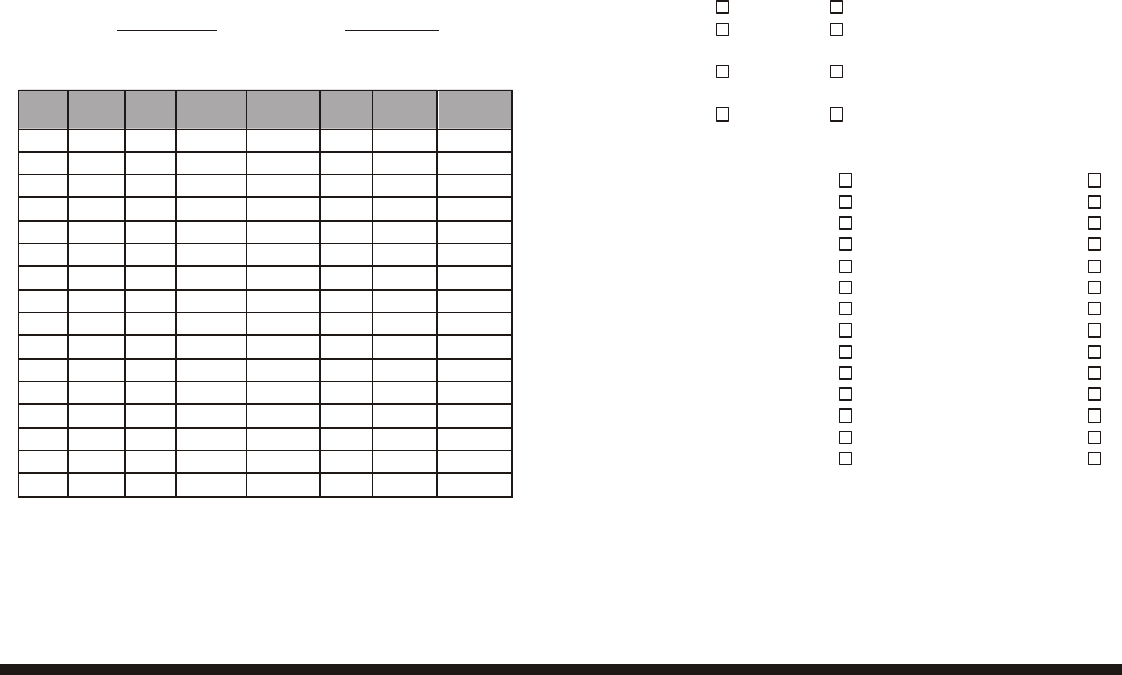
10 Settings (by the Dealer)
Model: Serial No.:
1) Channels List
Unmute
Voice Annunciation
Chinese English
Male Female
Battery Saving
Open Close
Beep
Open Close
3) Auxiliary Function Button Settings
Side Button 1 Side Button 2
None (No function)
None (No function)
Key Lock Key Lock
Key Lock and Backup Key Lock and Backup
Monitor Monitor
Instantaneously Monitor Instantaneously Monitor
Scan Scan
Scan + Temporarily Delete Scan + Temporarily Delete
Cancel Squelch Cancel Squelch
Instantaneously Cancel Squelch Instantaneously Cancel Squelch
Temporarily Delete Temporarily Delete
CALL 1 CALL 1
CALL 2 CALL 2
Scrambler Scrambler
2) Optional Functions
Time-out Time (TOT)
15-600s
Squelch Level
1-9
2
7
28
CE Versions of the PT6200 whic h
display the "CE" symbol on the serial
number seal, comply with the essential
requirements of
t h e E u r o p e a n R a d i o a n d
Telecommunication Terminal
Directiv e
1999/5/EC.
This warning symbol indicates that
this equipment operates in non-
harmonised frequenc y bands and/or may
be subjec t to licensing condition in the
country of use. Be sure to chec k that you
hav e the correct version of this
radio or the correct programming
of this radio to comply with national
licensing requirement.
DECLARATION
OF
CONFORMITY
0
6
7
8
We, Kirisun Electronics(Shenzhen) Co., Ltd.
6/F, Bldg. H-2, East Industrial Zone Of Overseas
Chinese Town, Shenzhen 518053, China
Declare on our sole responsibility that this equipment complies with
the essential requirements of the Radio and Telecommunication
Terminal Equipment Directive,1999/5/EC,and that any applicable
Essential Test Suits measurement has been performed.
Description of equipment: FM Handheld Transceiver
Model No.: PT6200
This compliance is based on conformity with the following
harmonised standards or documents:
(1). EN 60950
(2). EN 301 489-1/ -5
(3). EN 300 086-1/ -2
Shenzhen, 28 Feb
2006
Place and date of issue
WenLiang, Fu
General Manager
Signature
Kirisun Electronics(shenzhen) Co., Ltd
2
9
30