Kodak Alaris D4600-PRINTER Digital Photo Printer User Manual urg 01436
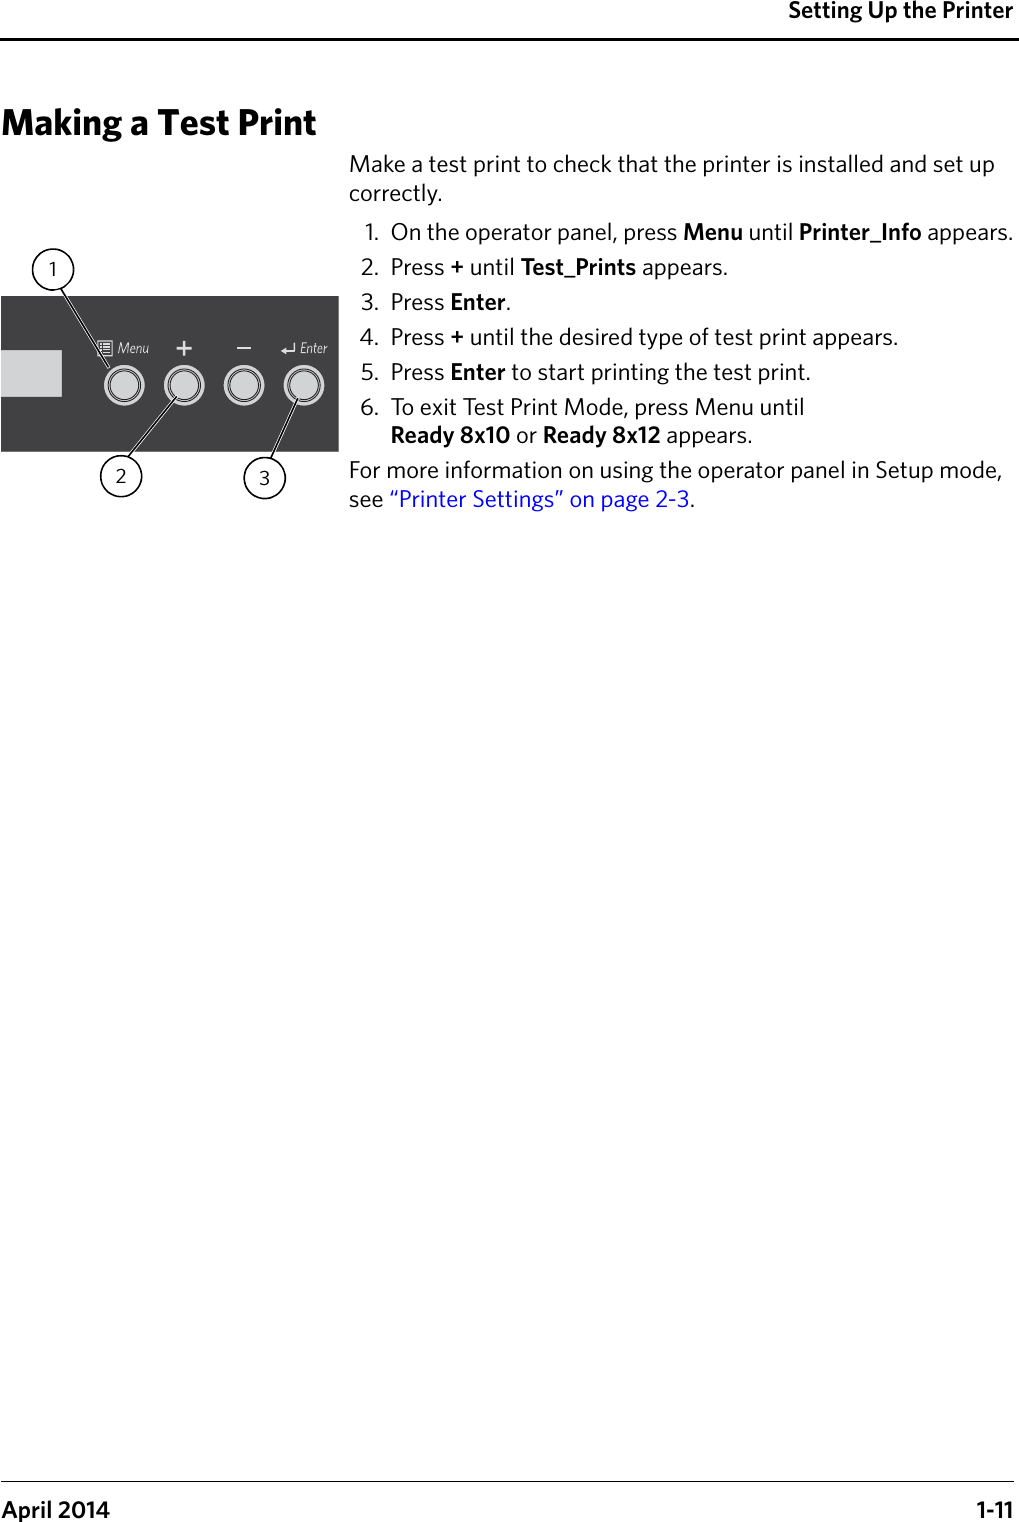
Kodak Alaris Digital Photo Printer urg 01436
UserManual.wiki
>
Kodak Alaris
>
D4600 PRINTER User Manual
05 (Short-Term Confidential) User Manual
Navigation menu
Upload a User Manual
Namespaces
Wiki Guide
HTML
PDF
Info
Views
User Manual
Discussion / Help
Navigation
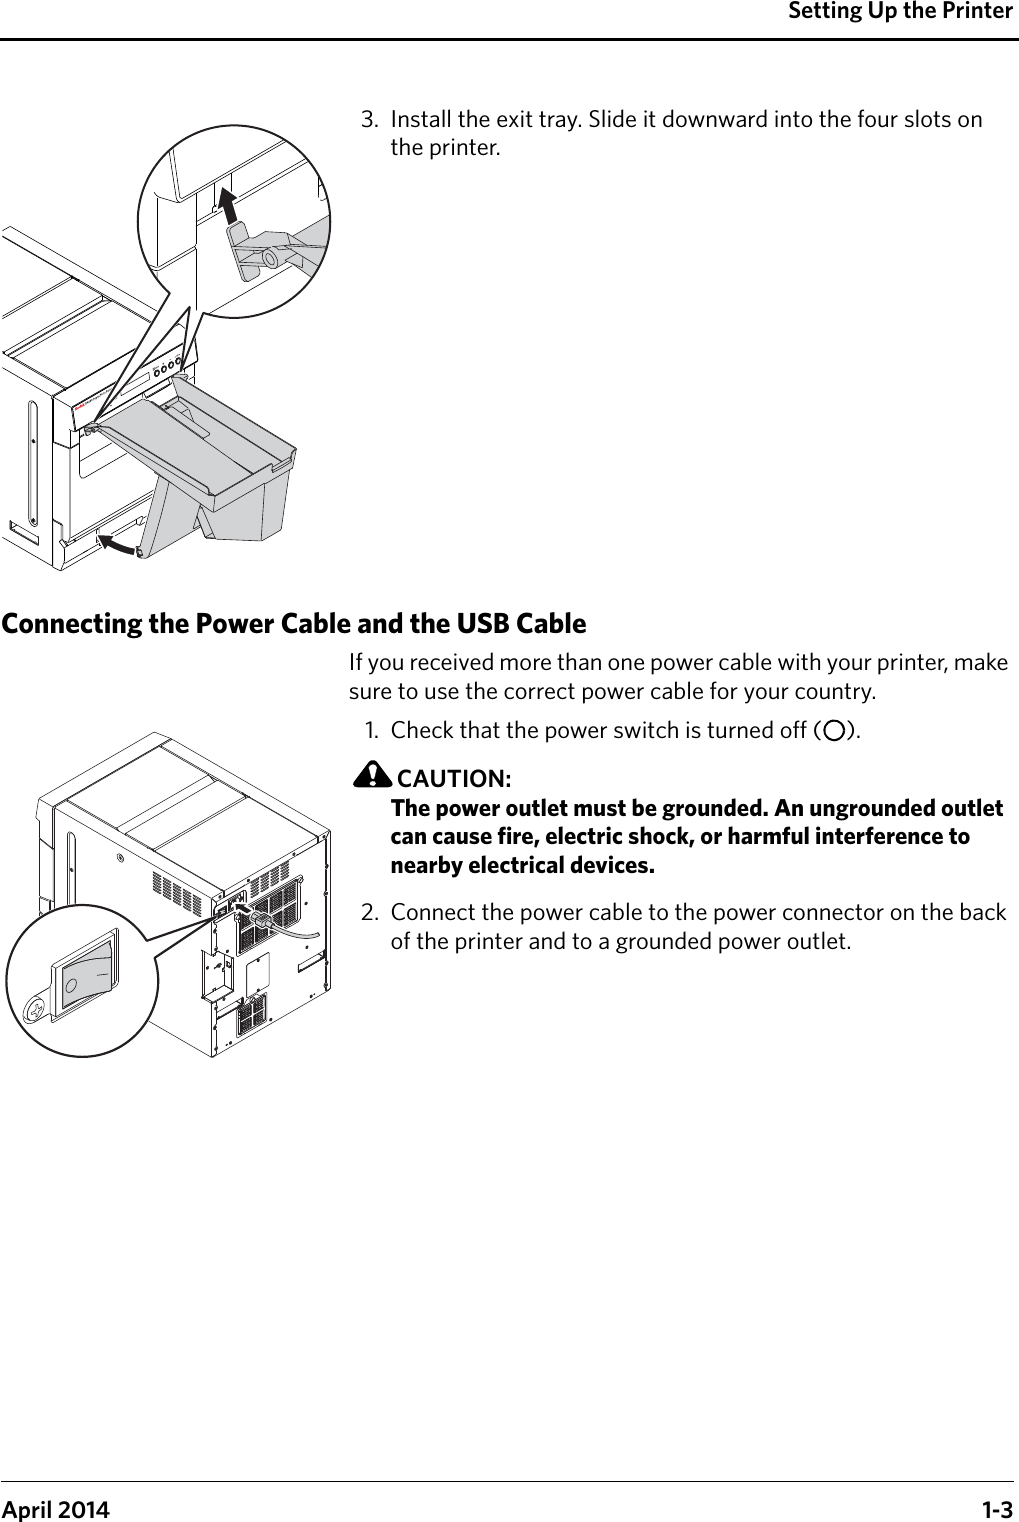
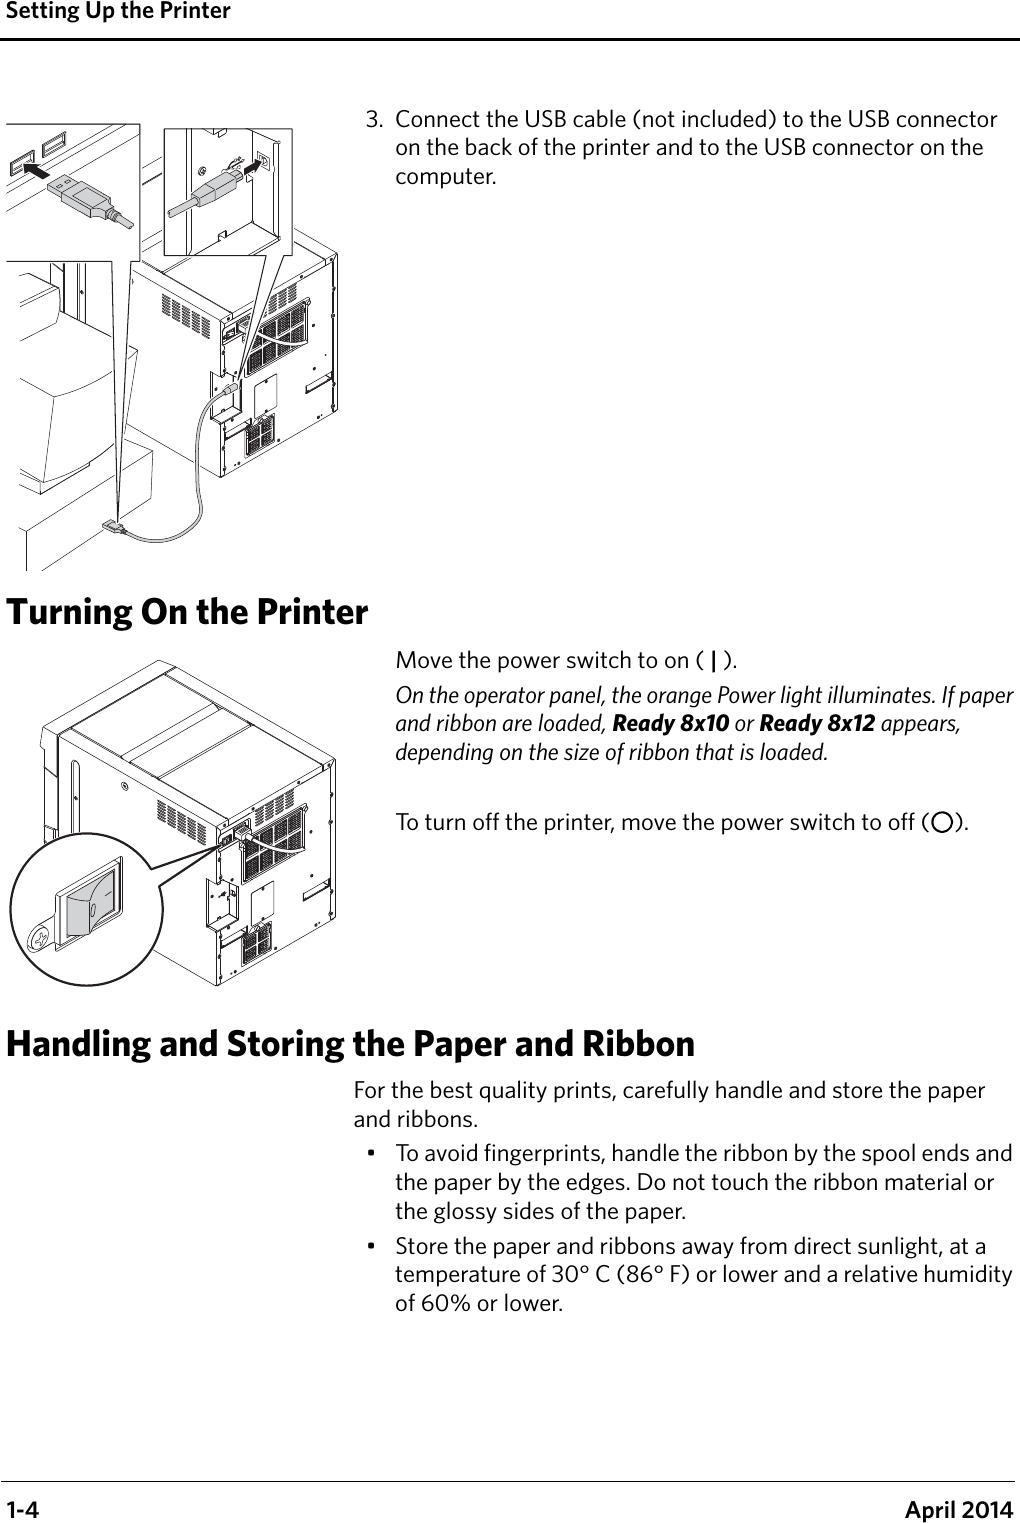
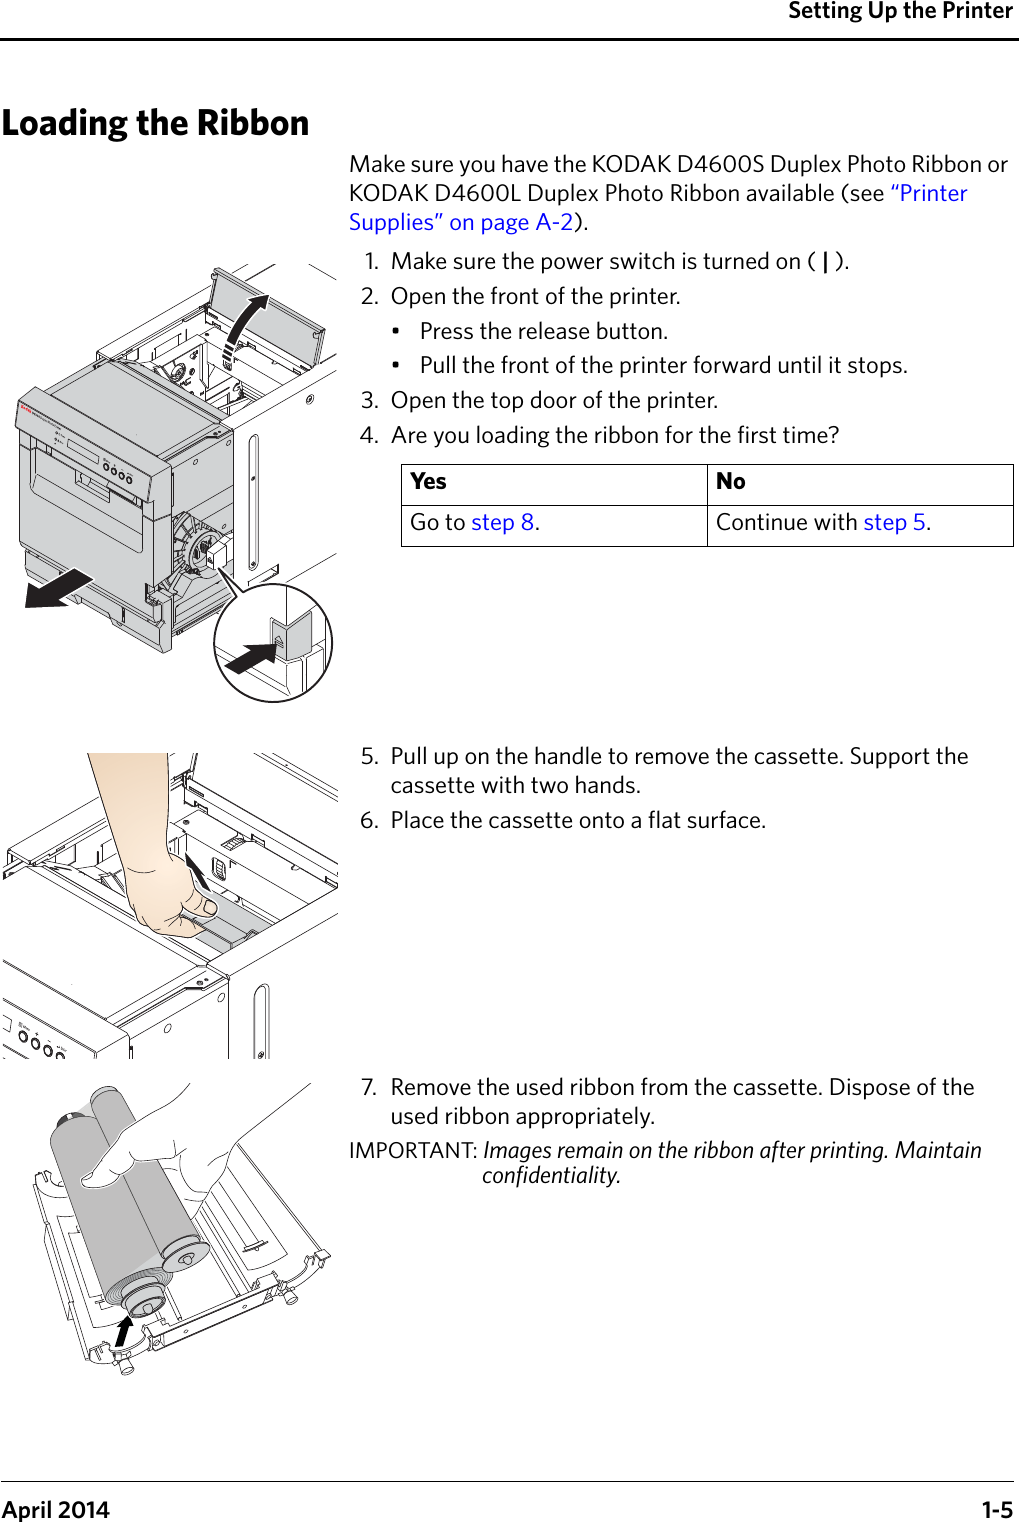
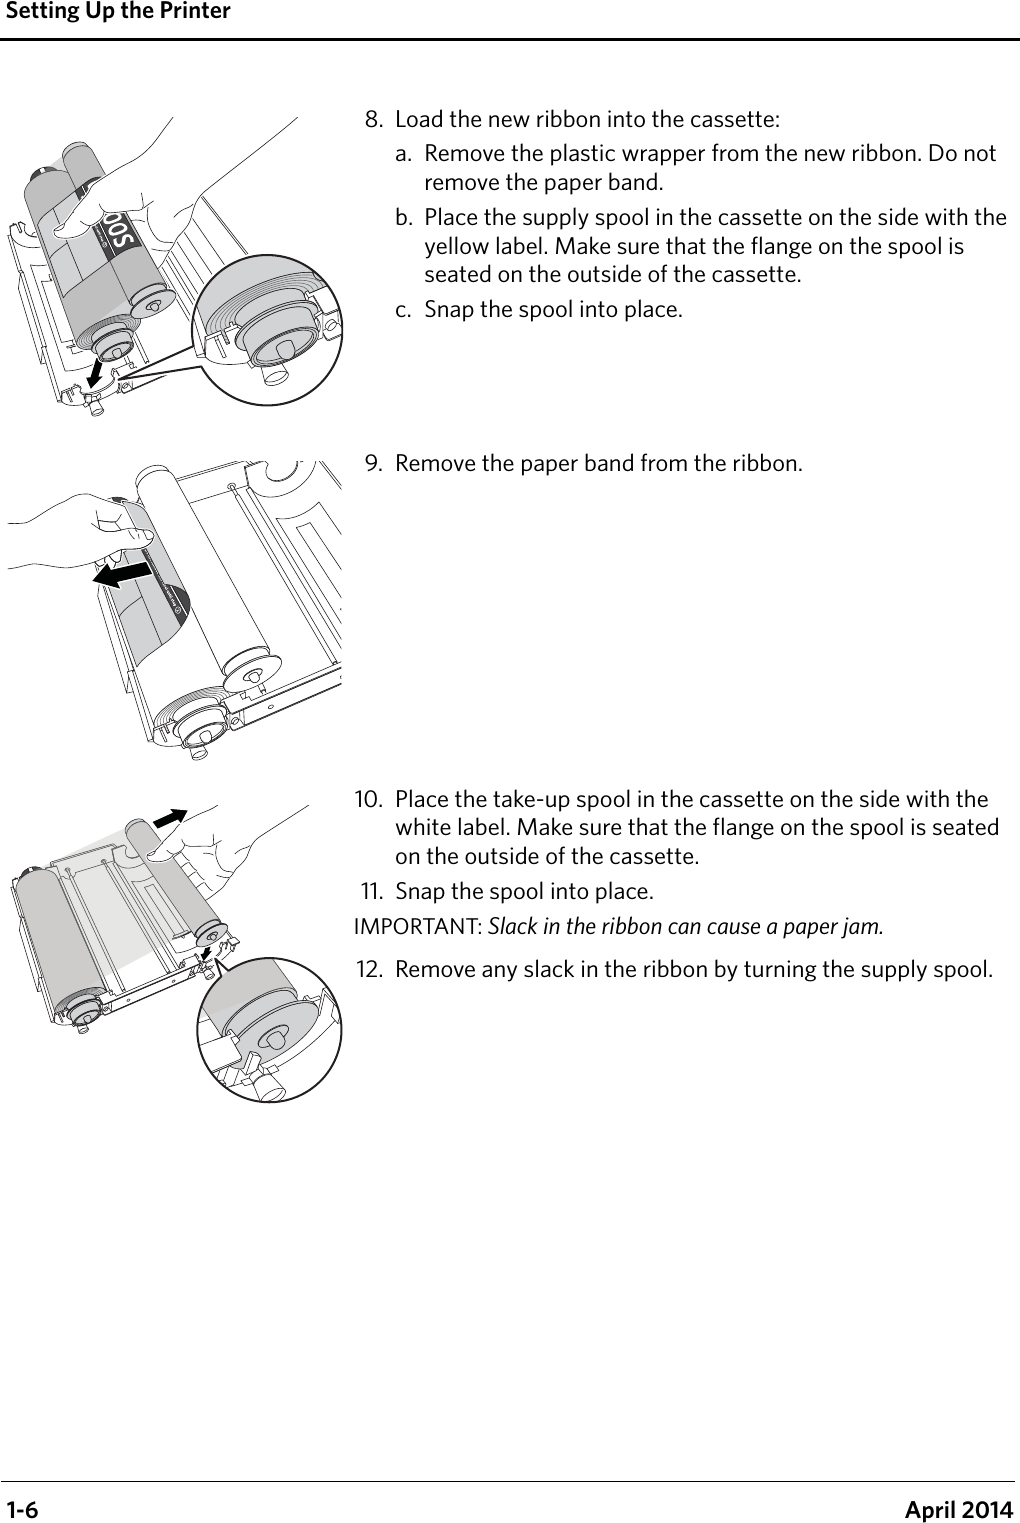
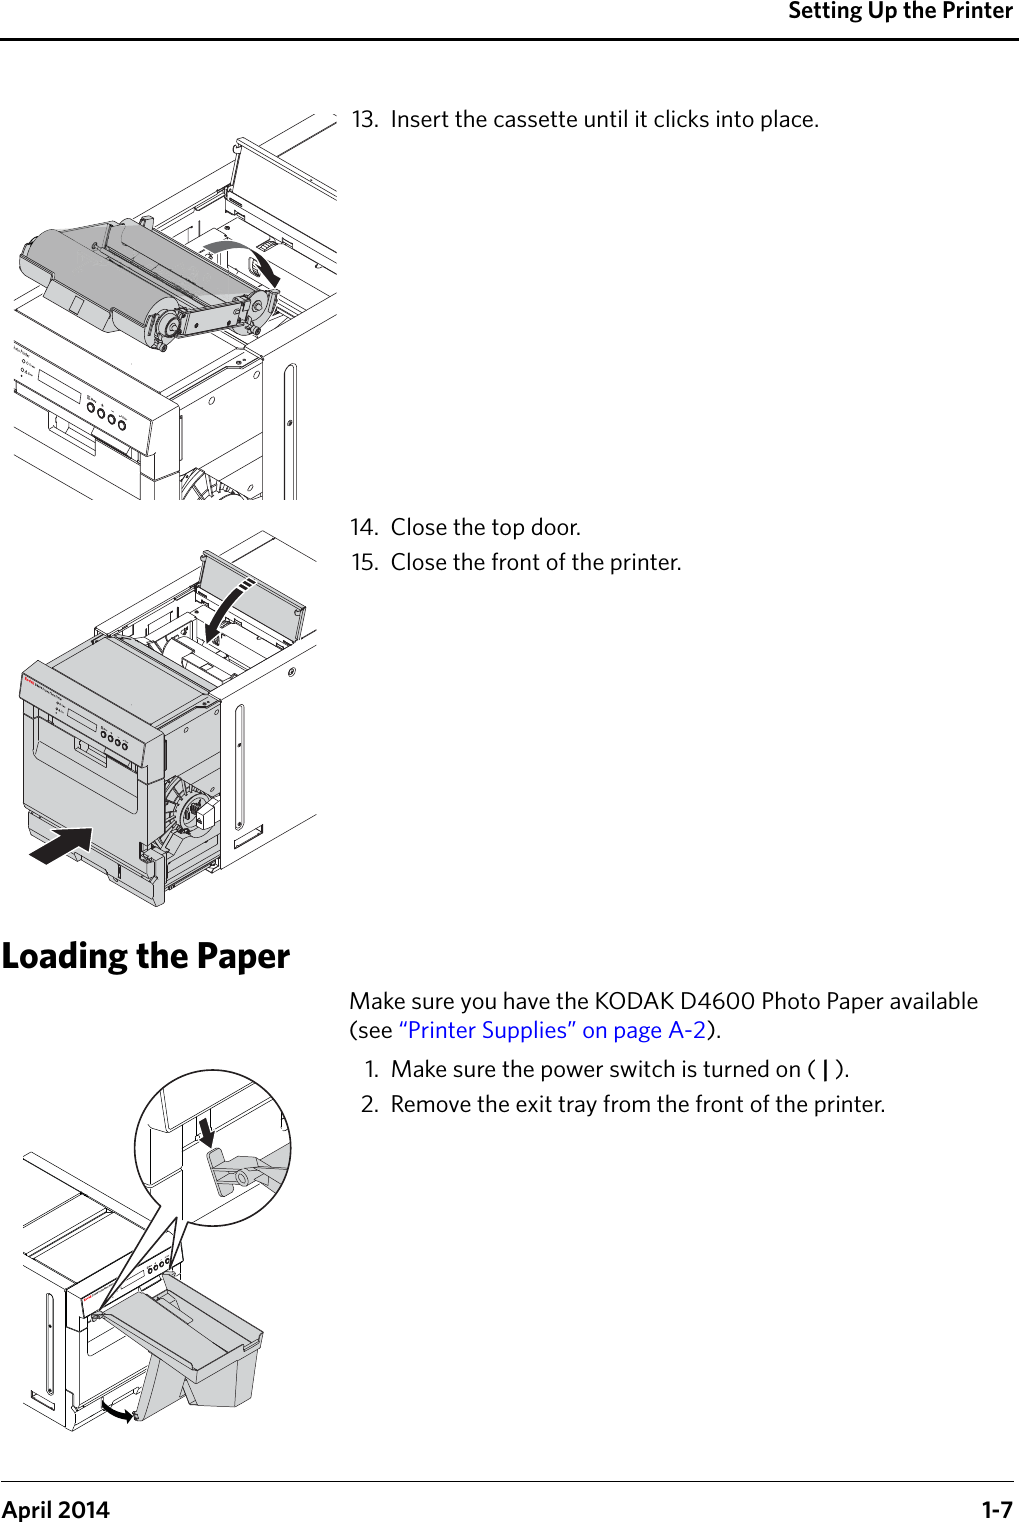
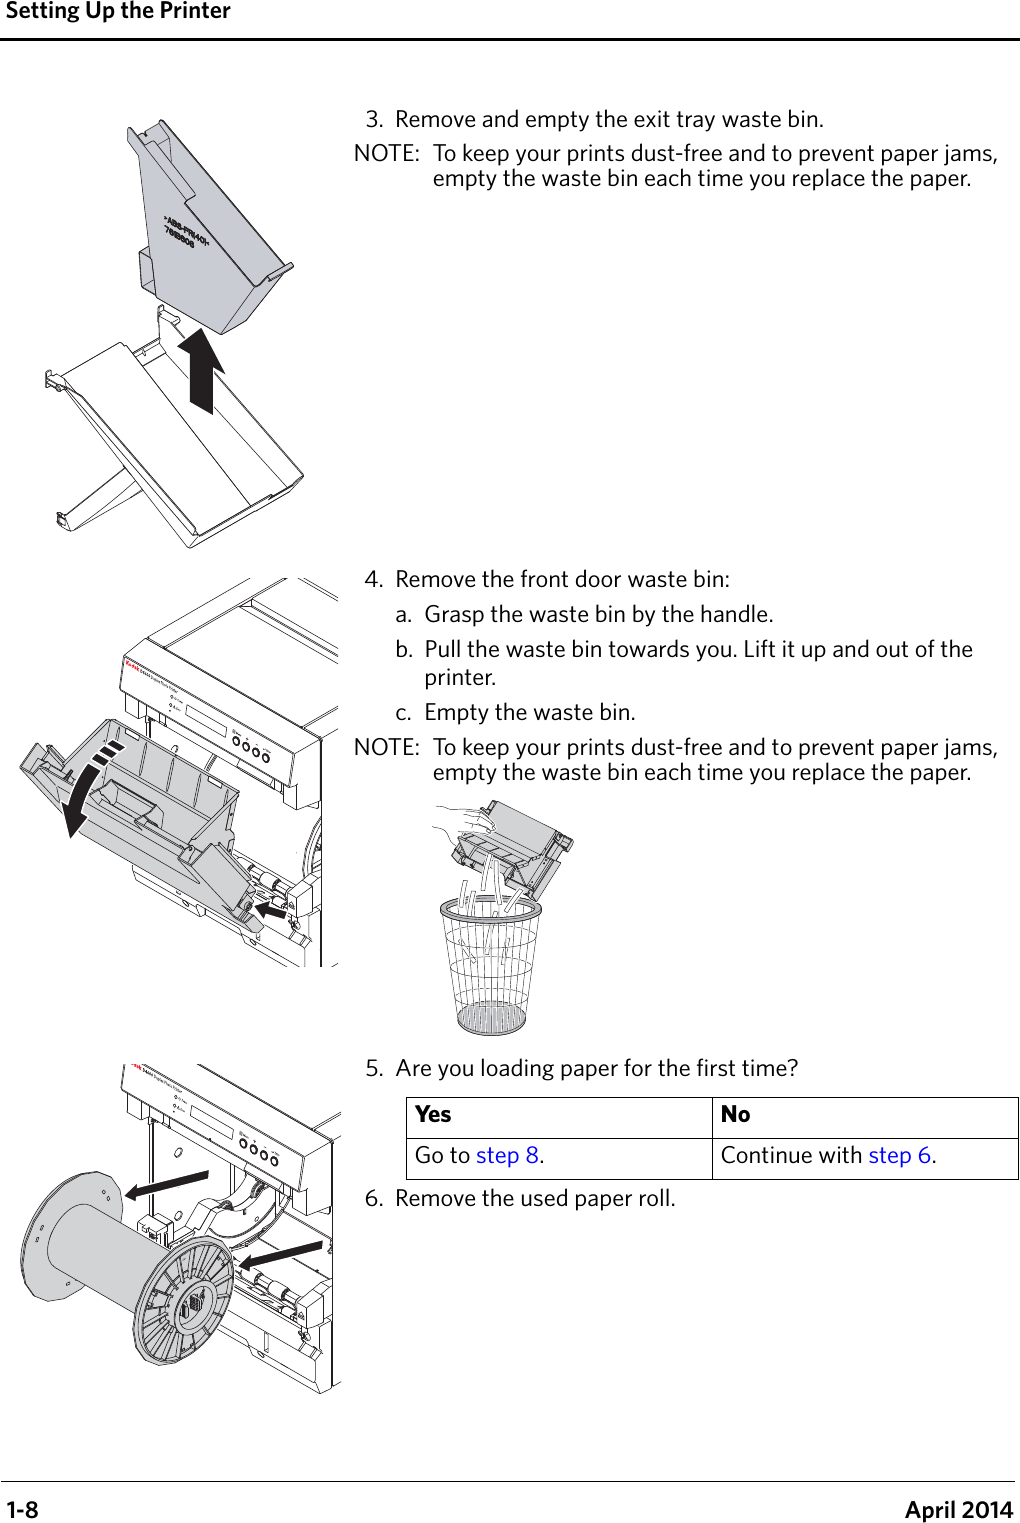
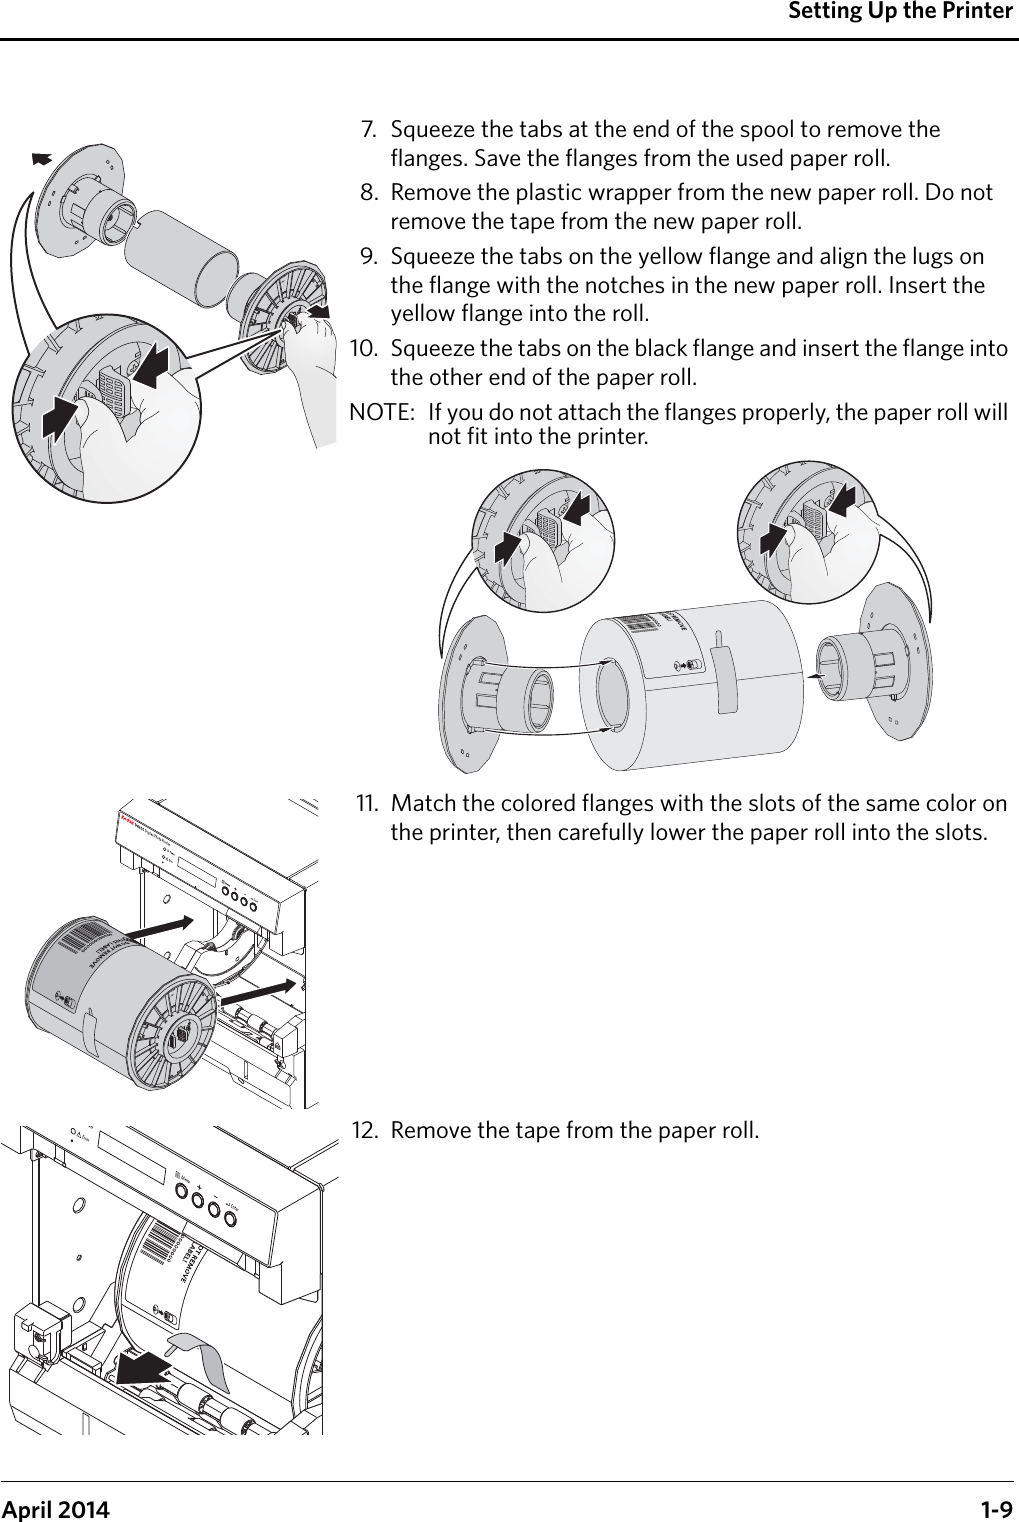
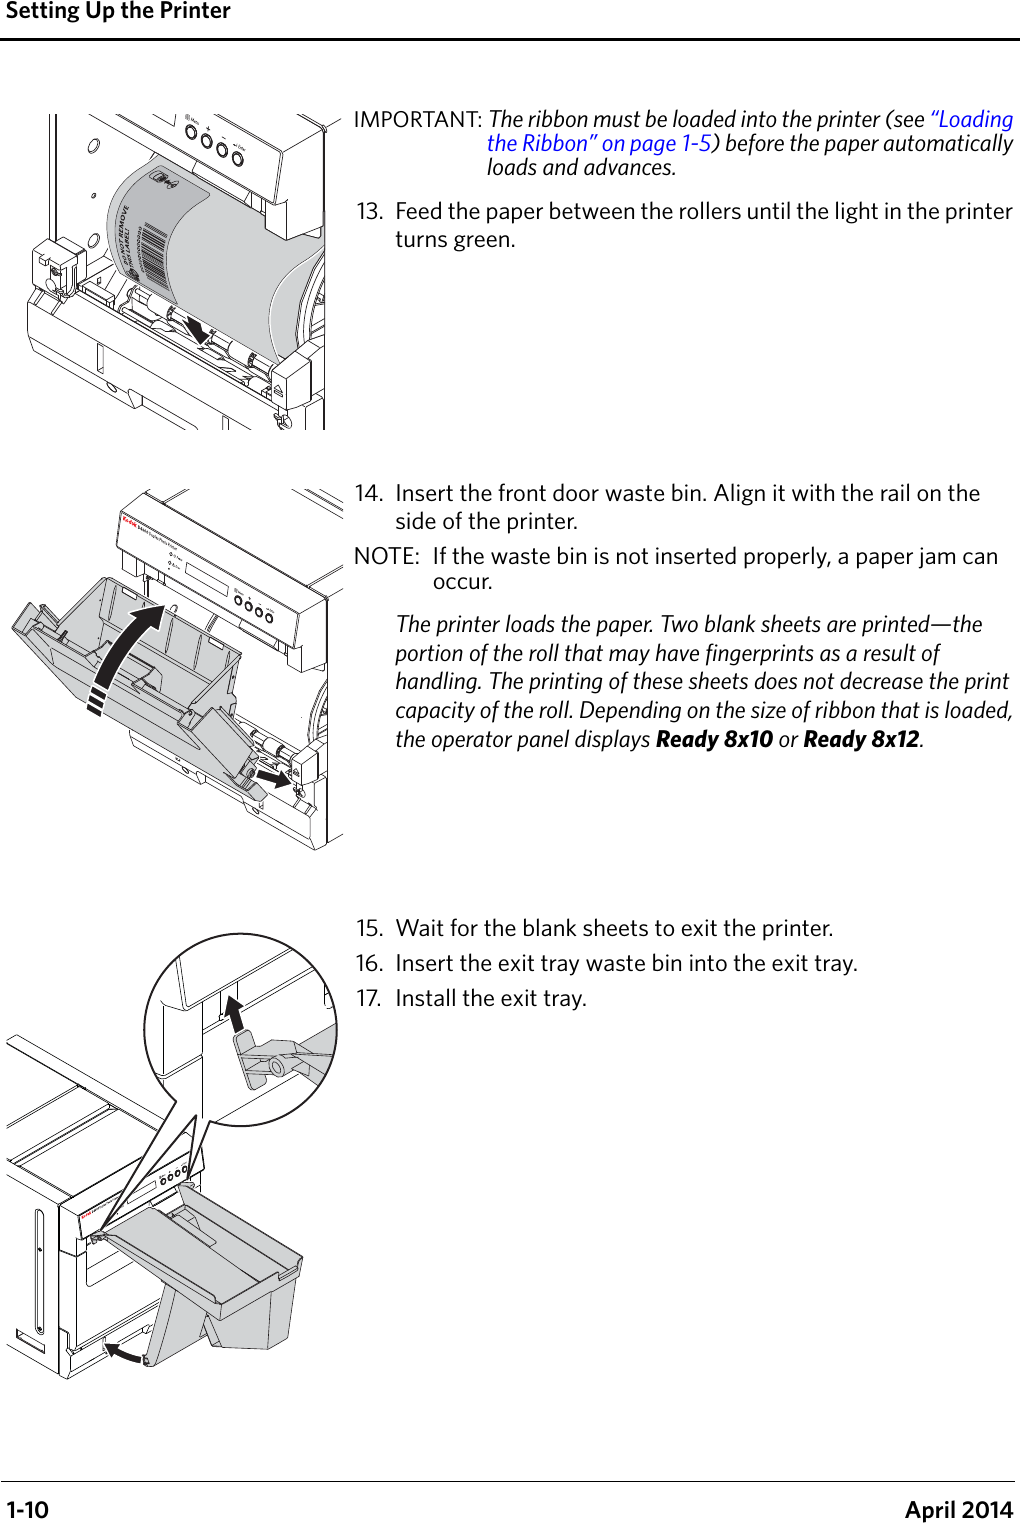
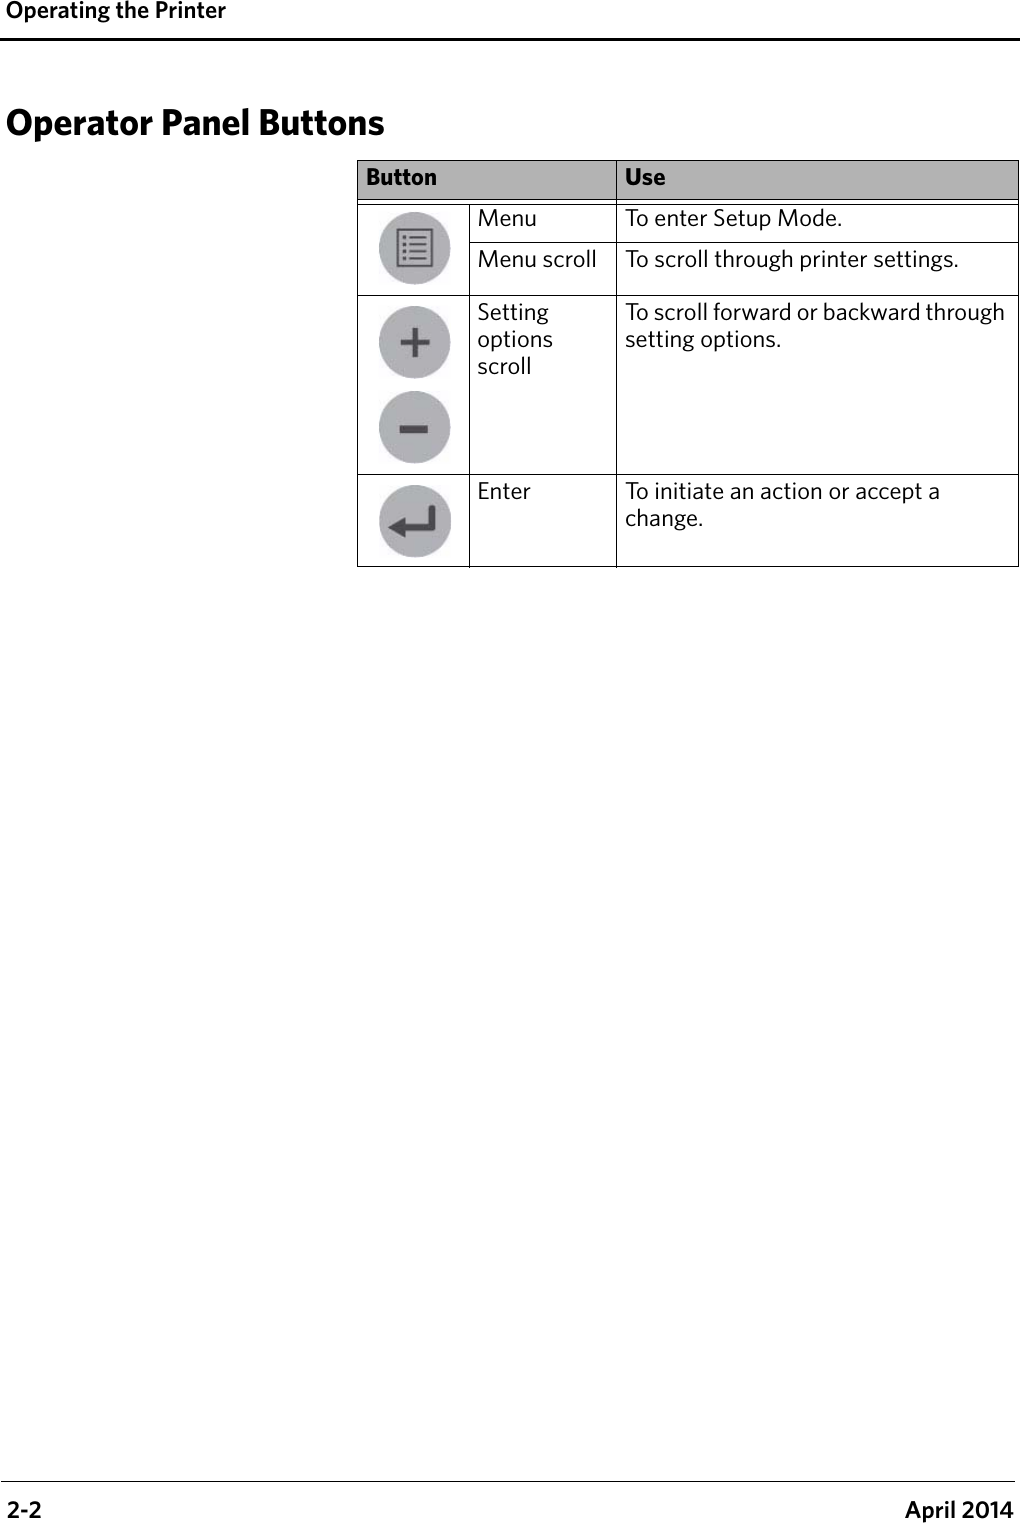
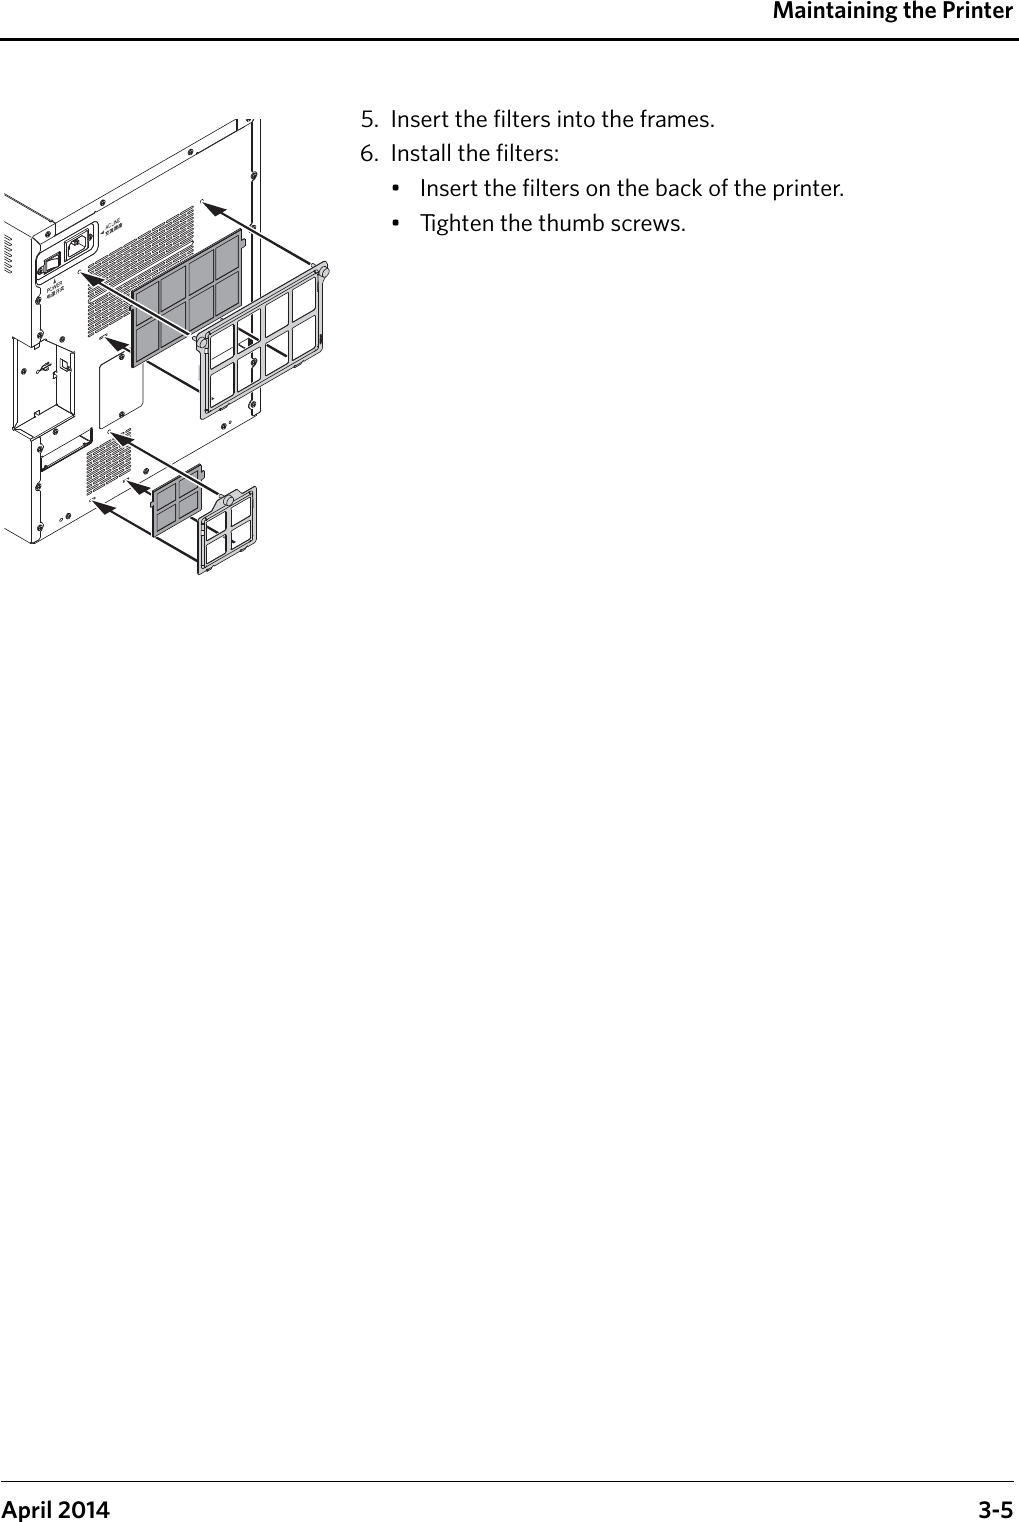
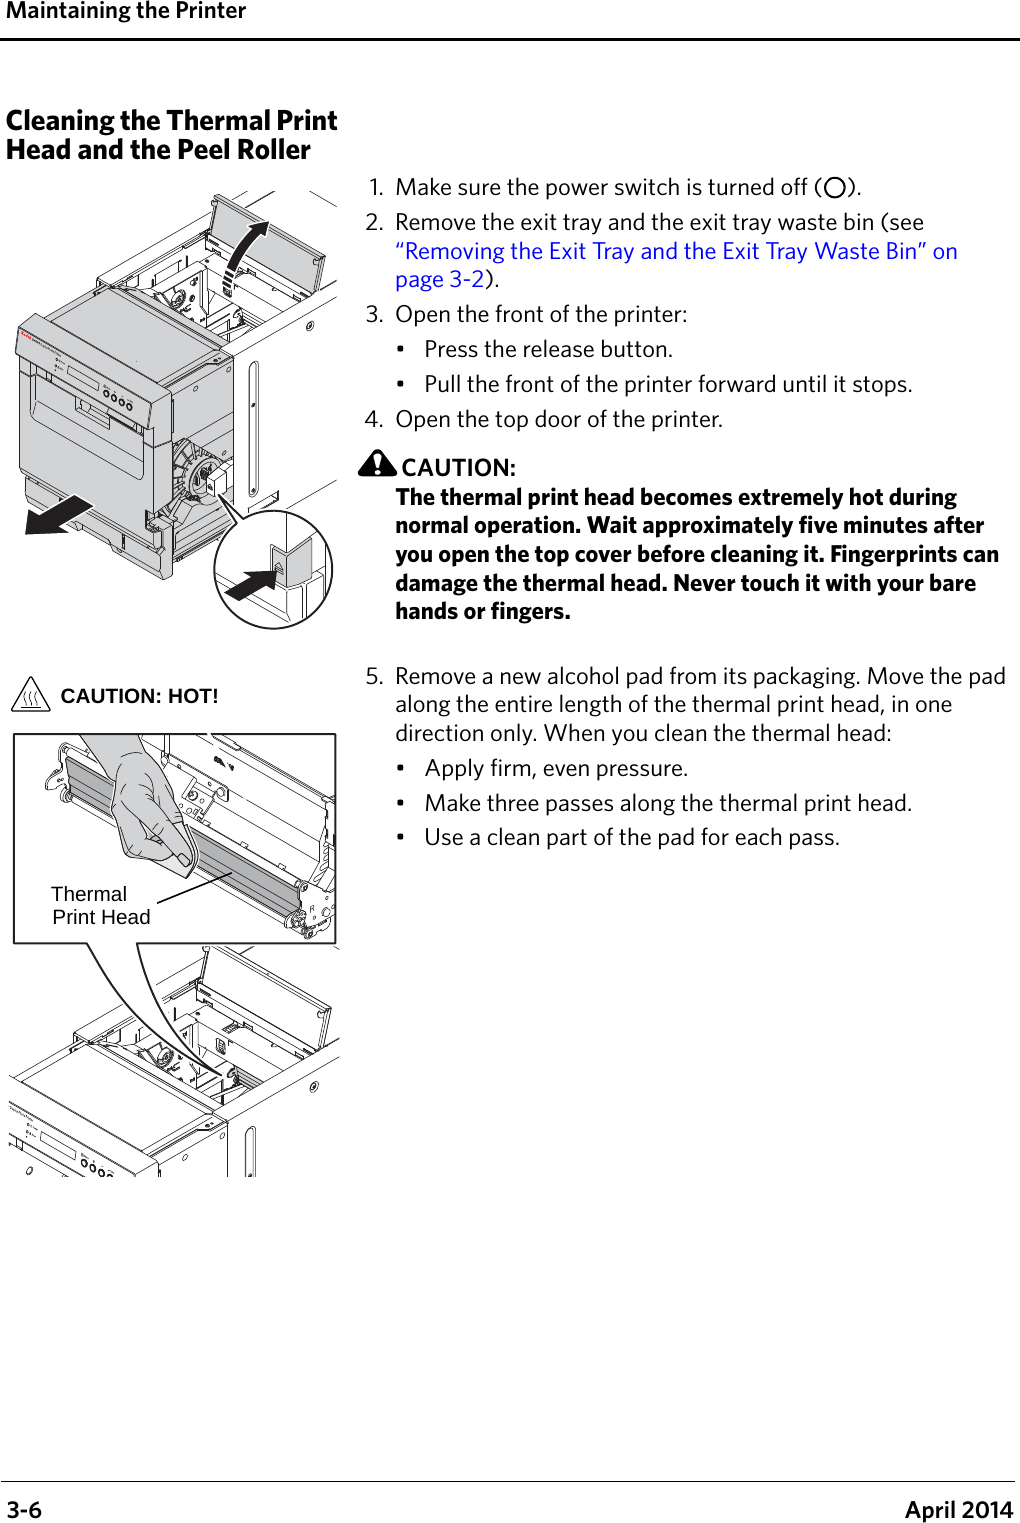
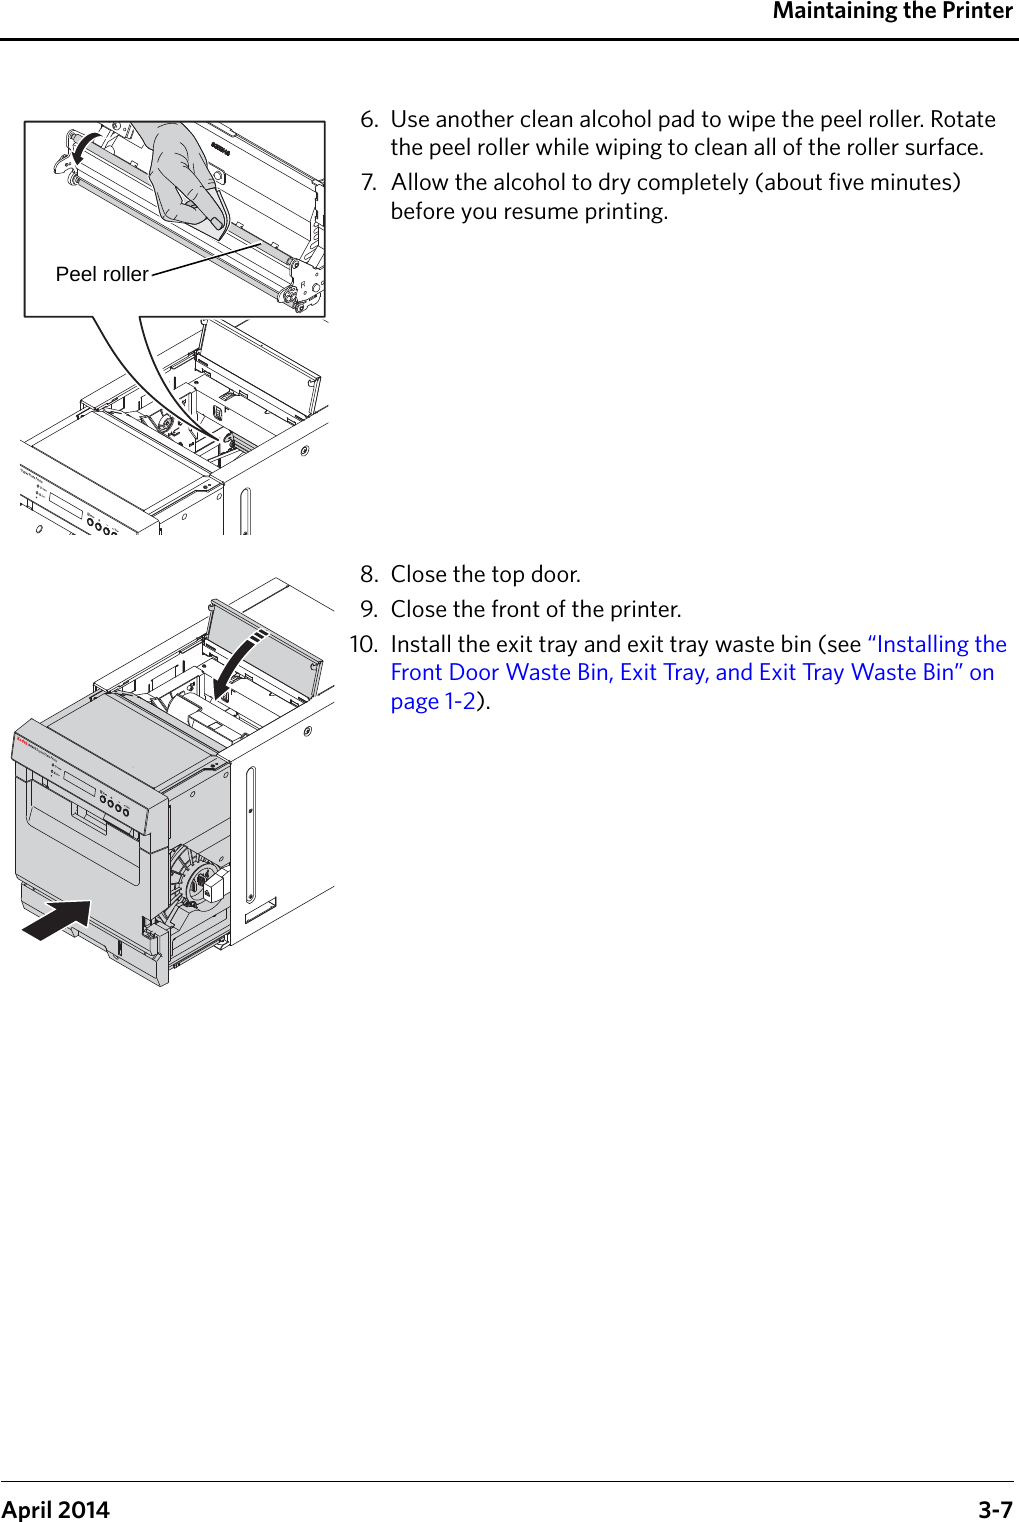
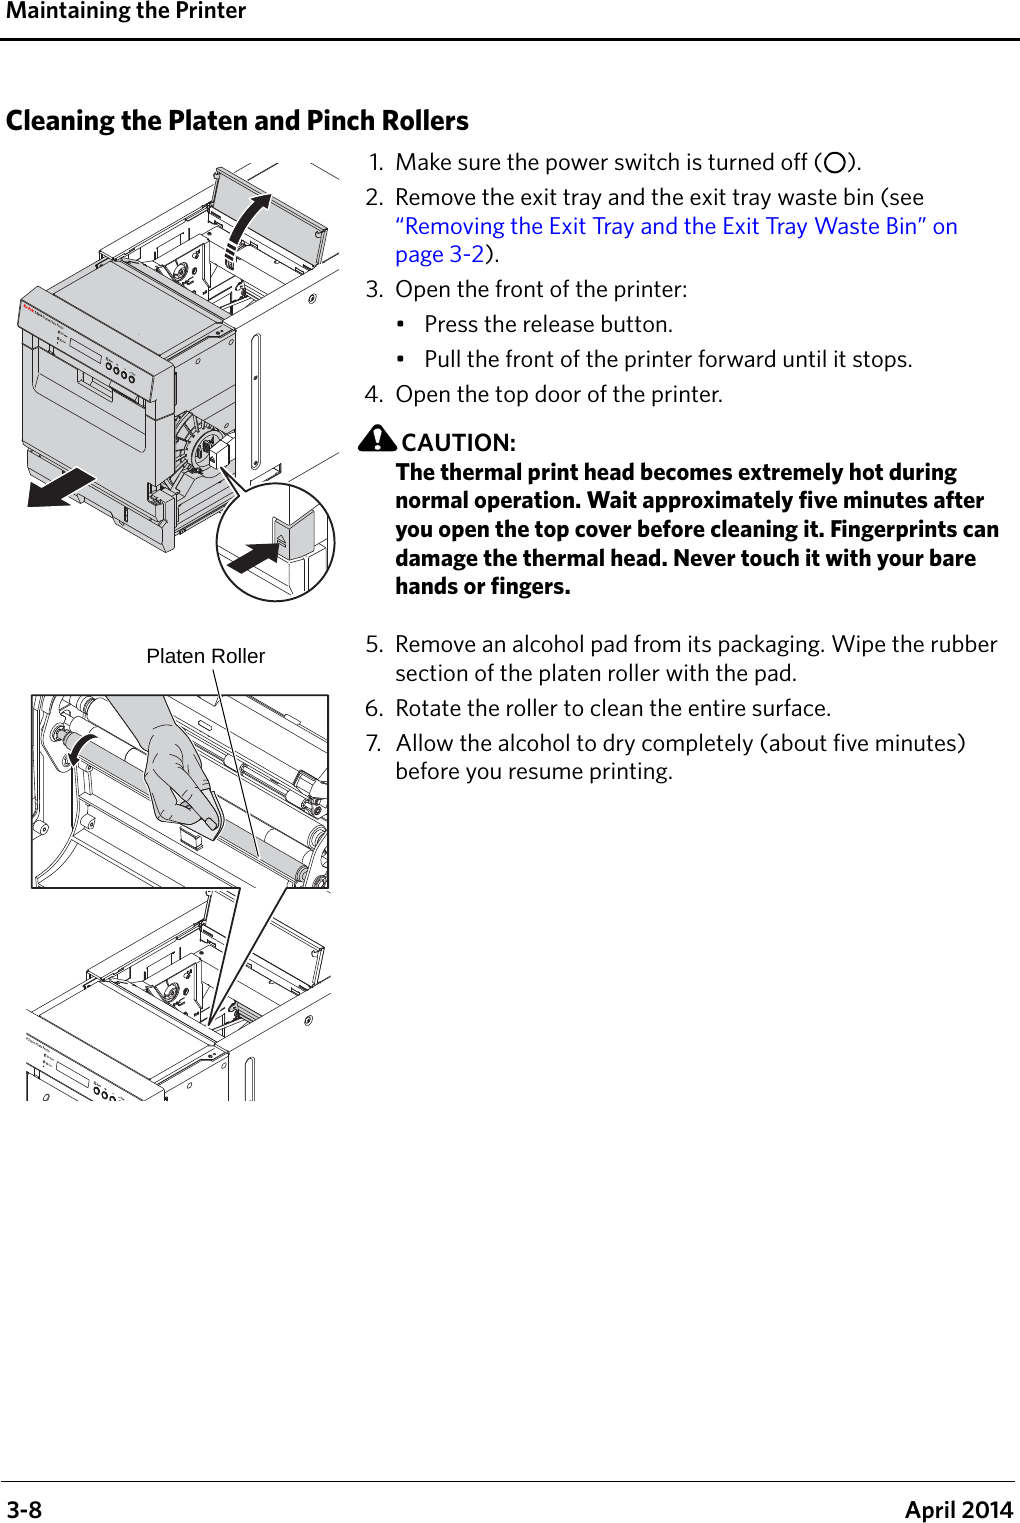
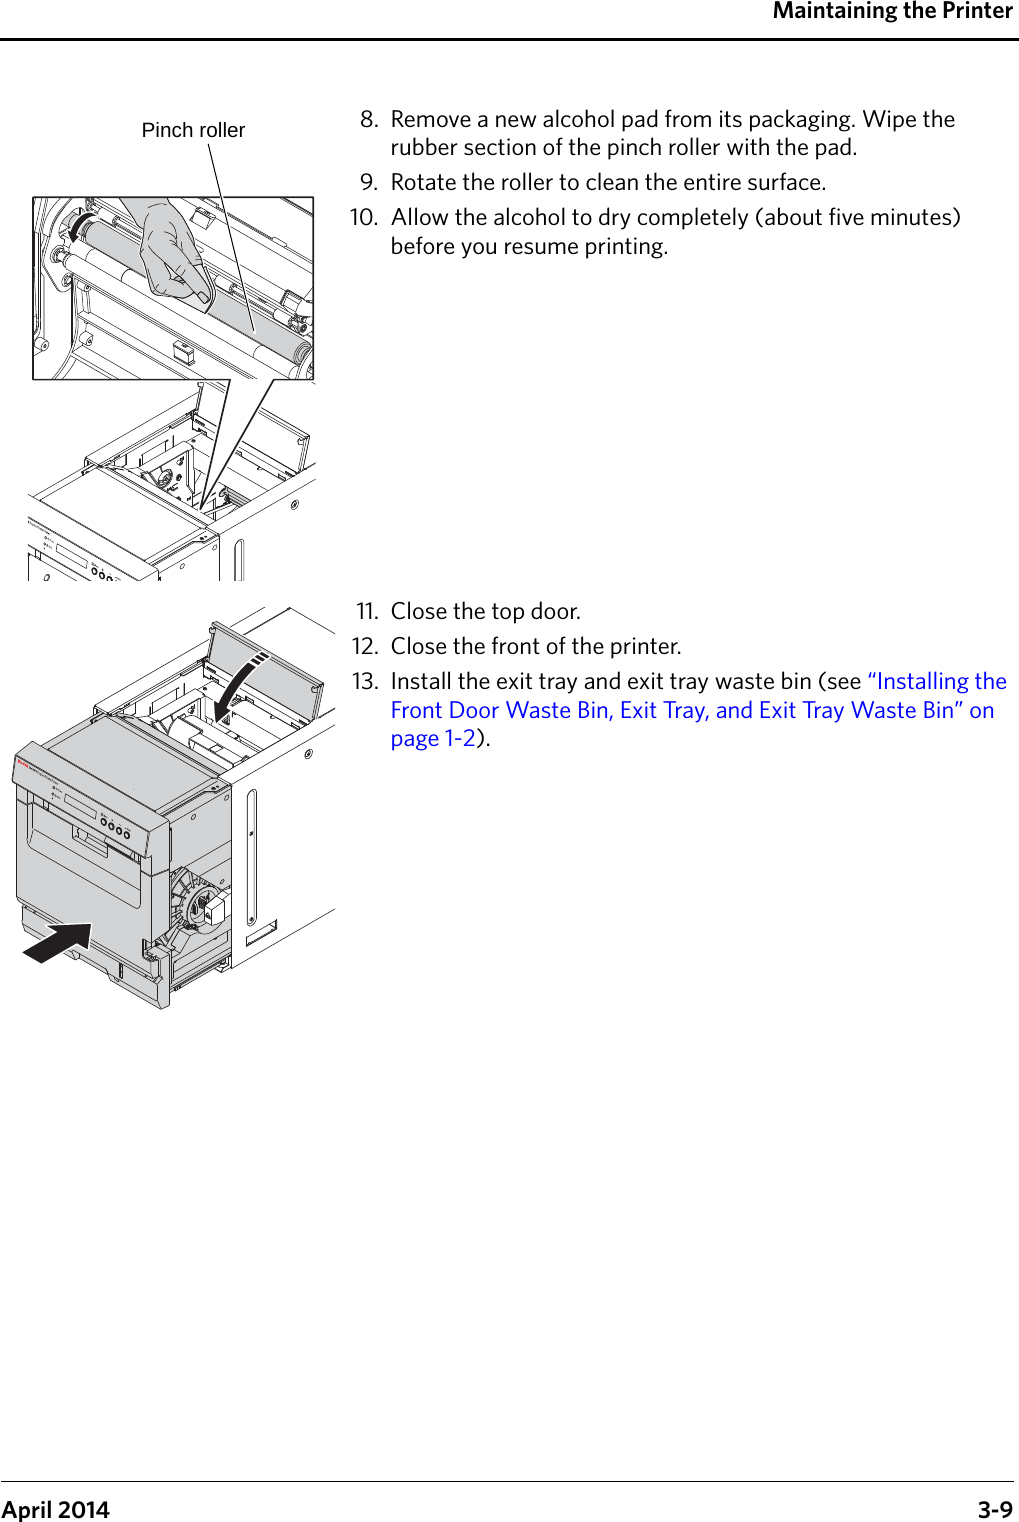
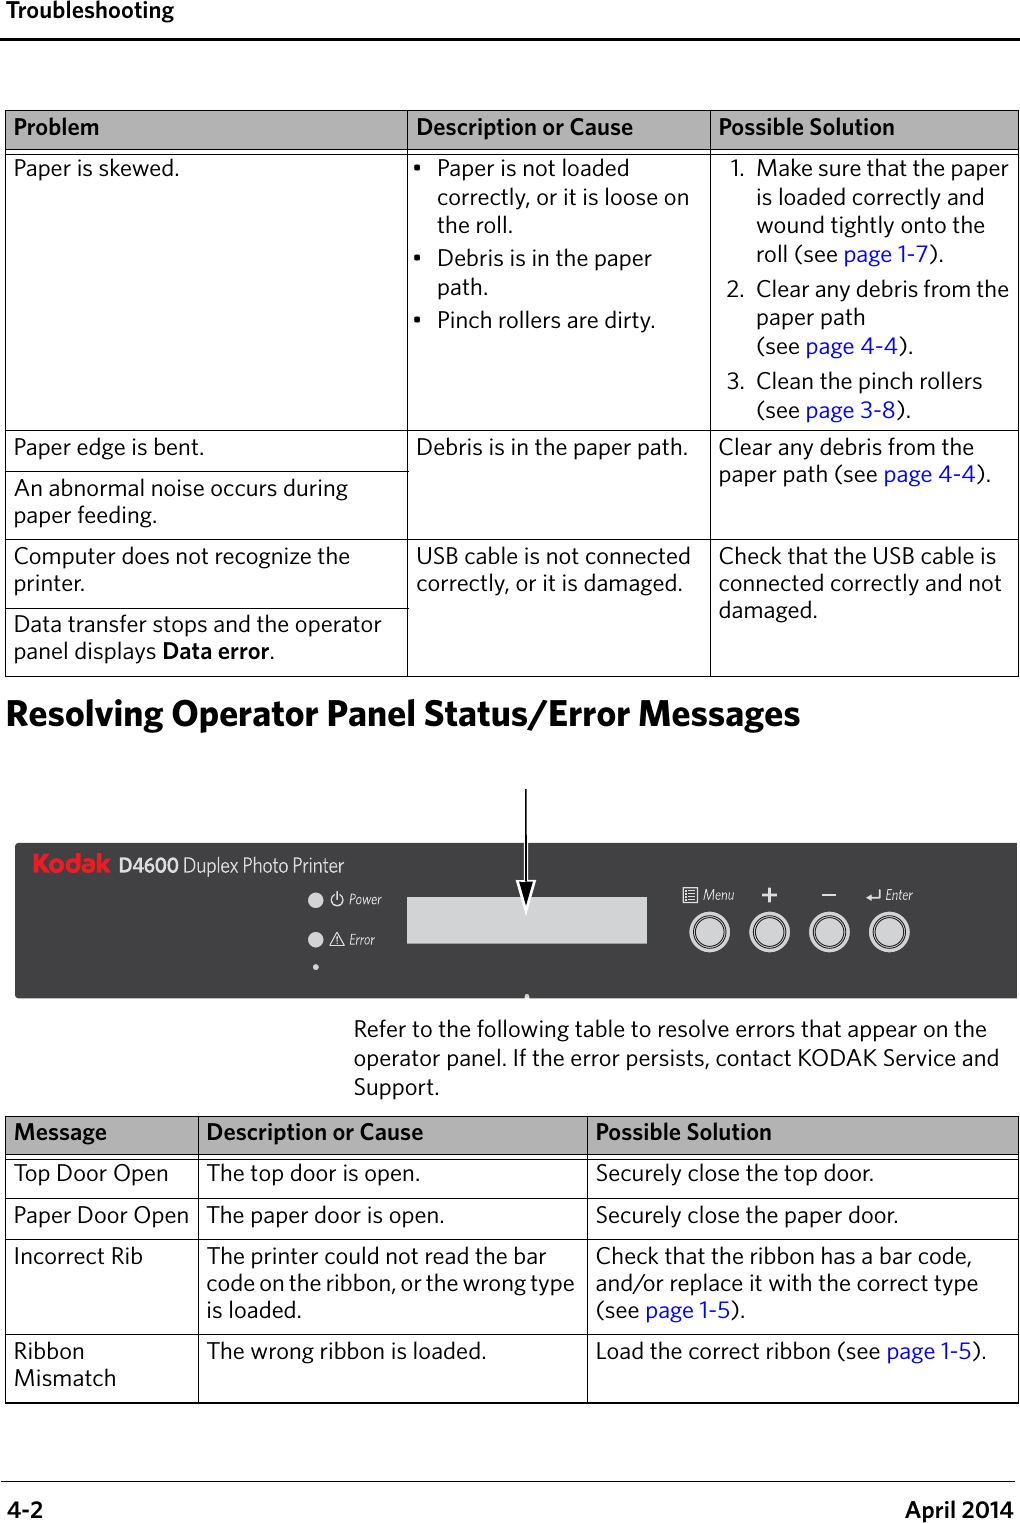
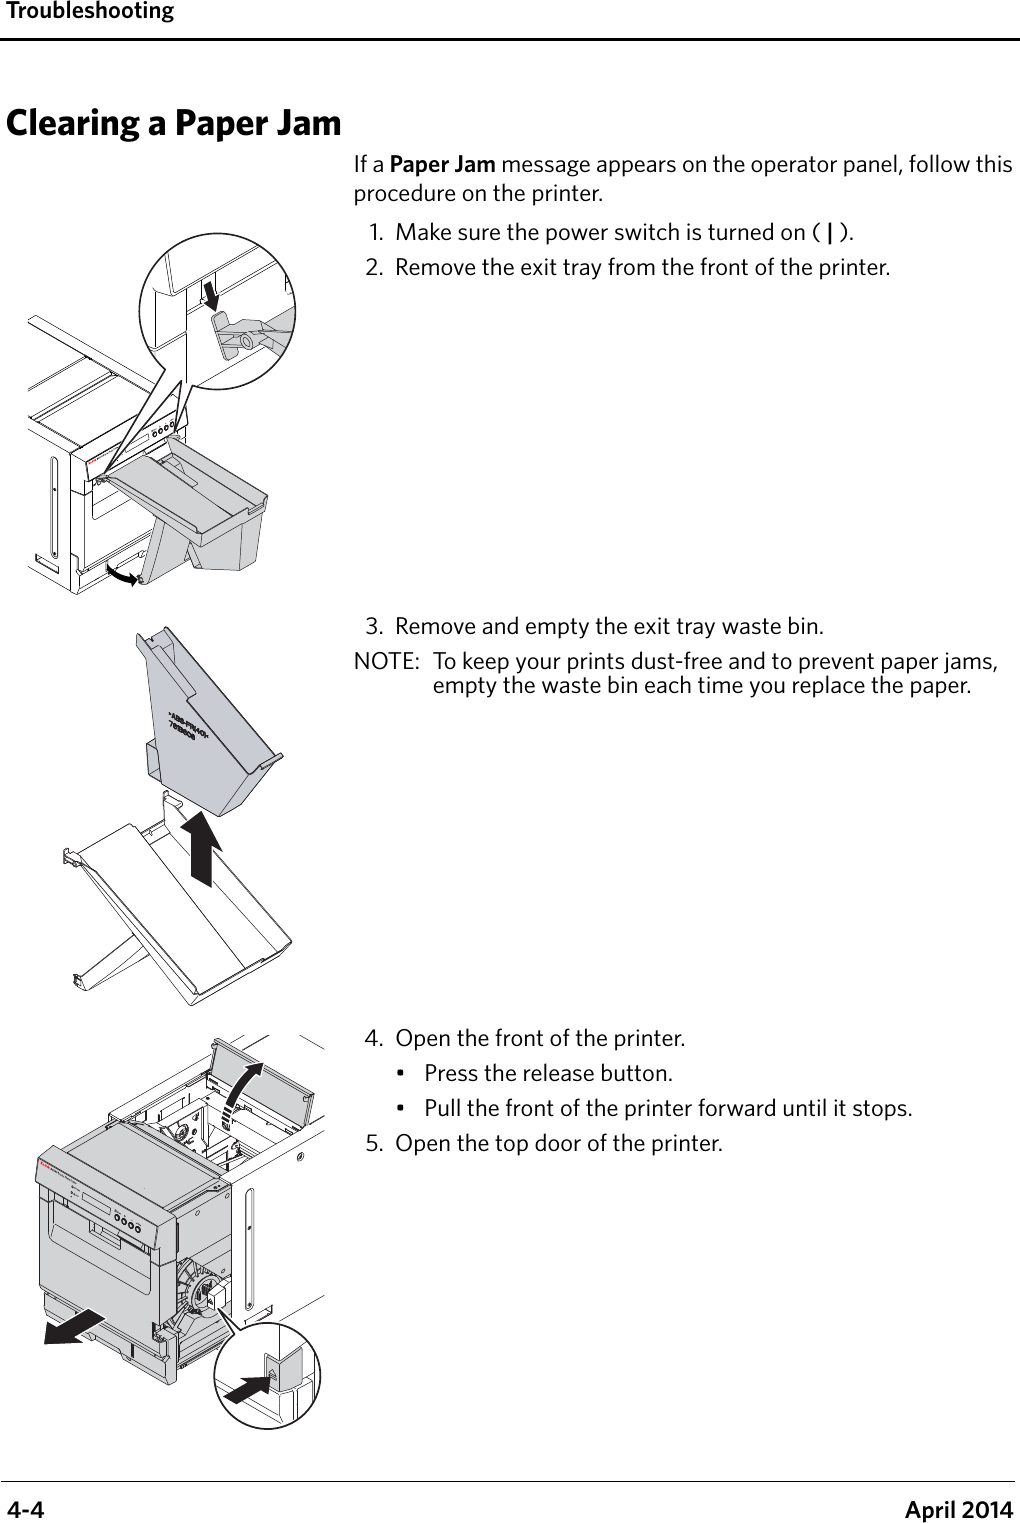
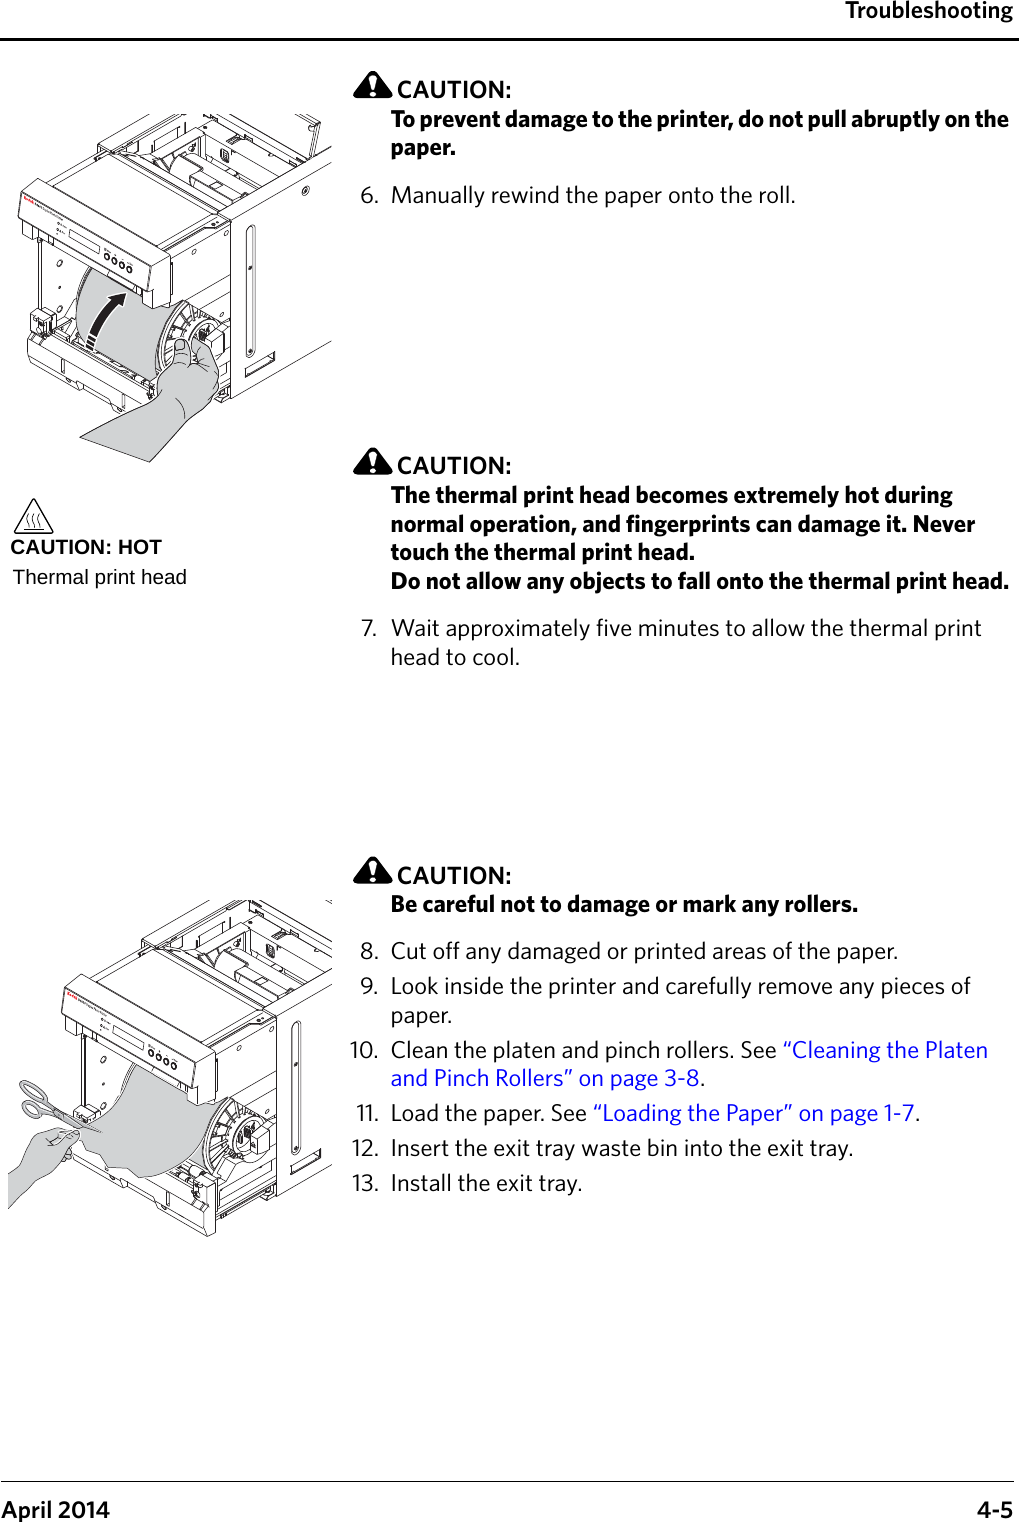
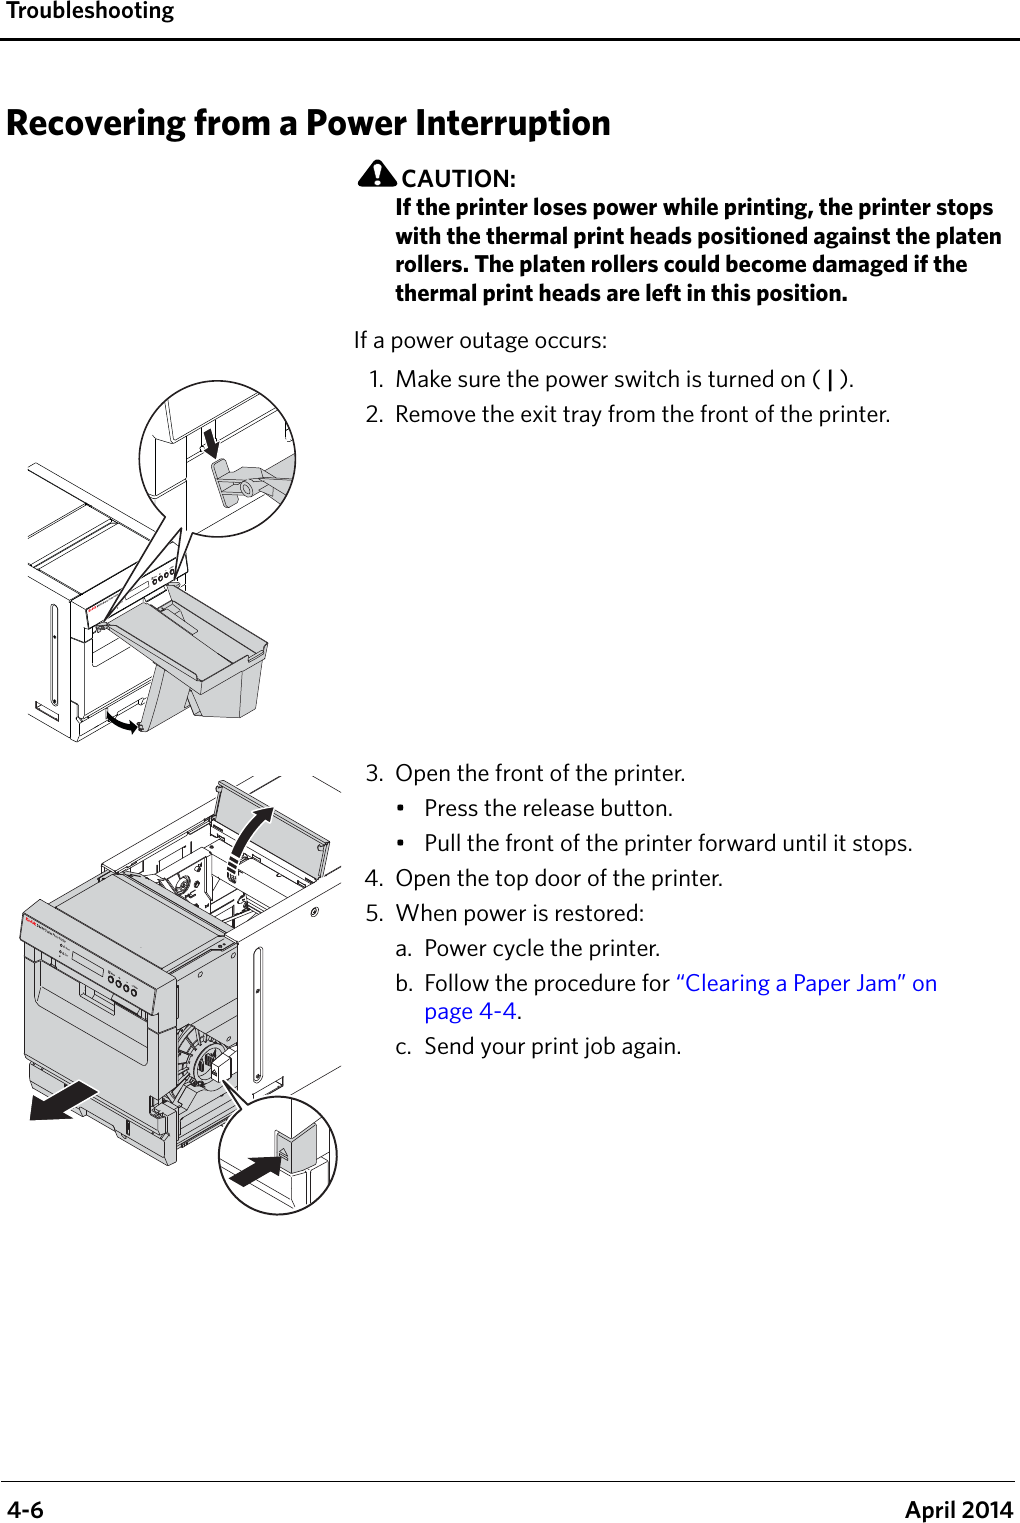
![Operating the PrinterApril 2014 2-3Printer SettingsUse the operator panel buttons to review and change printer settings.1. Press Menu to enter Setup Mode.2. Press +/- to scroll through selections.3. Press Enter to initiate an action or accept a change.4. Press Menu to exit Setup Mode.Printer settings aredisplayed here1,432Display DescriptionReady 8x10Ready 8x12The printer is on and ready to make prints. 8x10 or 8x12 represents the size of ribbon that is loaded.Test Print Mode When selected, press Enter to make a test print (see “Making a Test Print” on page 1-11).Remain = XXX/YYY XXX represents how many remaining prints you can make with the current paper roll. YYY represents the total number of prints on a paper roll. Printed = XXXXXX XXXXXX represents the total number of prints made since the printer was manufactured. This counter cannot be reset.Donor = XXX[%] XXX[%] represents the percentage of the ribbon that is available for making prints.MAIN Firm = XX.YY XX.YY represents the version number of the printer control firmware. DSP Firm = XX.YY XX.YY represents the version number of the image processing firmware.TABLE = XX.YY XX.YY represents the version number of the print parameter table.](https://usermanual.wiki/Kodak-Alaris/D4600-PRINTER/User-Guide-2251382-Page-19.png)