Kohler KOHLER019 REMOTE CONTROL User Manual No Job Name
Kohler Co. REMOTE CONTROL No Job Name
UserManual.wiki
>
Kohler
>
KOHLER019 User Manual
User Manual
Navigation menu
Upload a User Manual
Namespaces
Wiki Guide
HTML
PDF
Info
Views
User Manual
Discussion / Help
Navigation
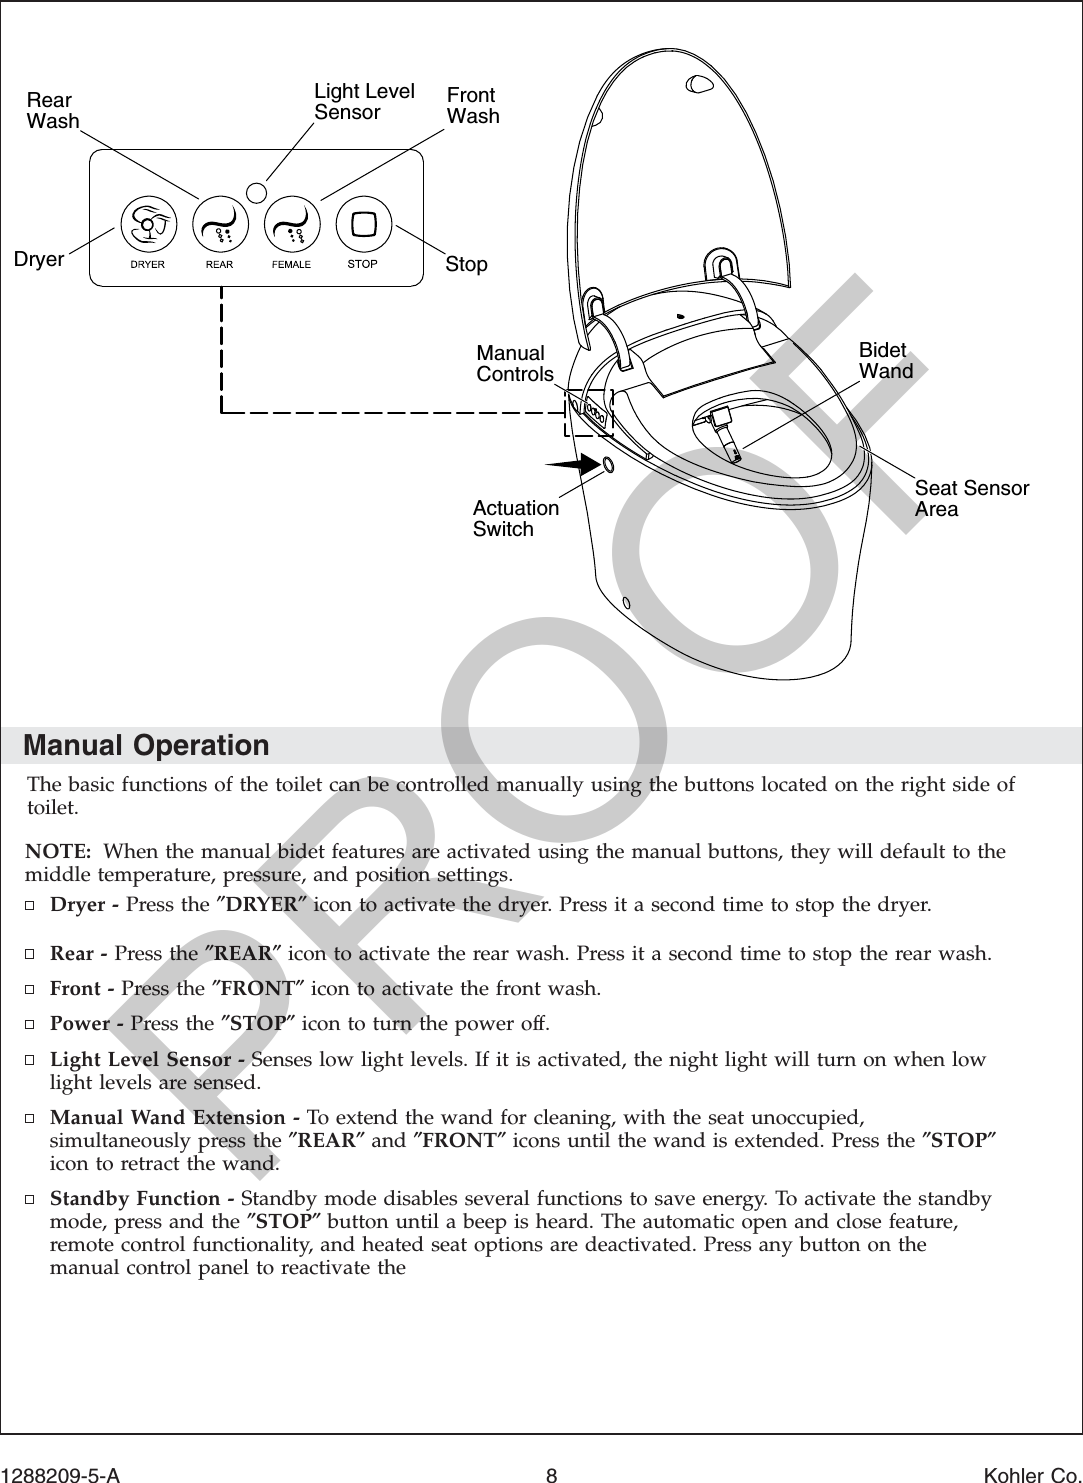
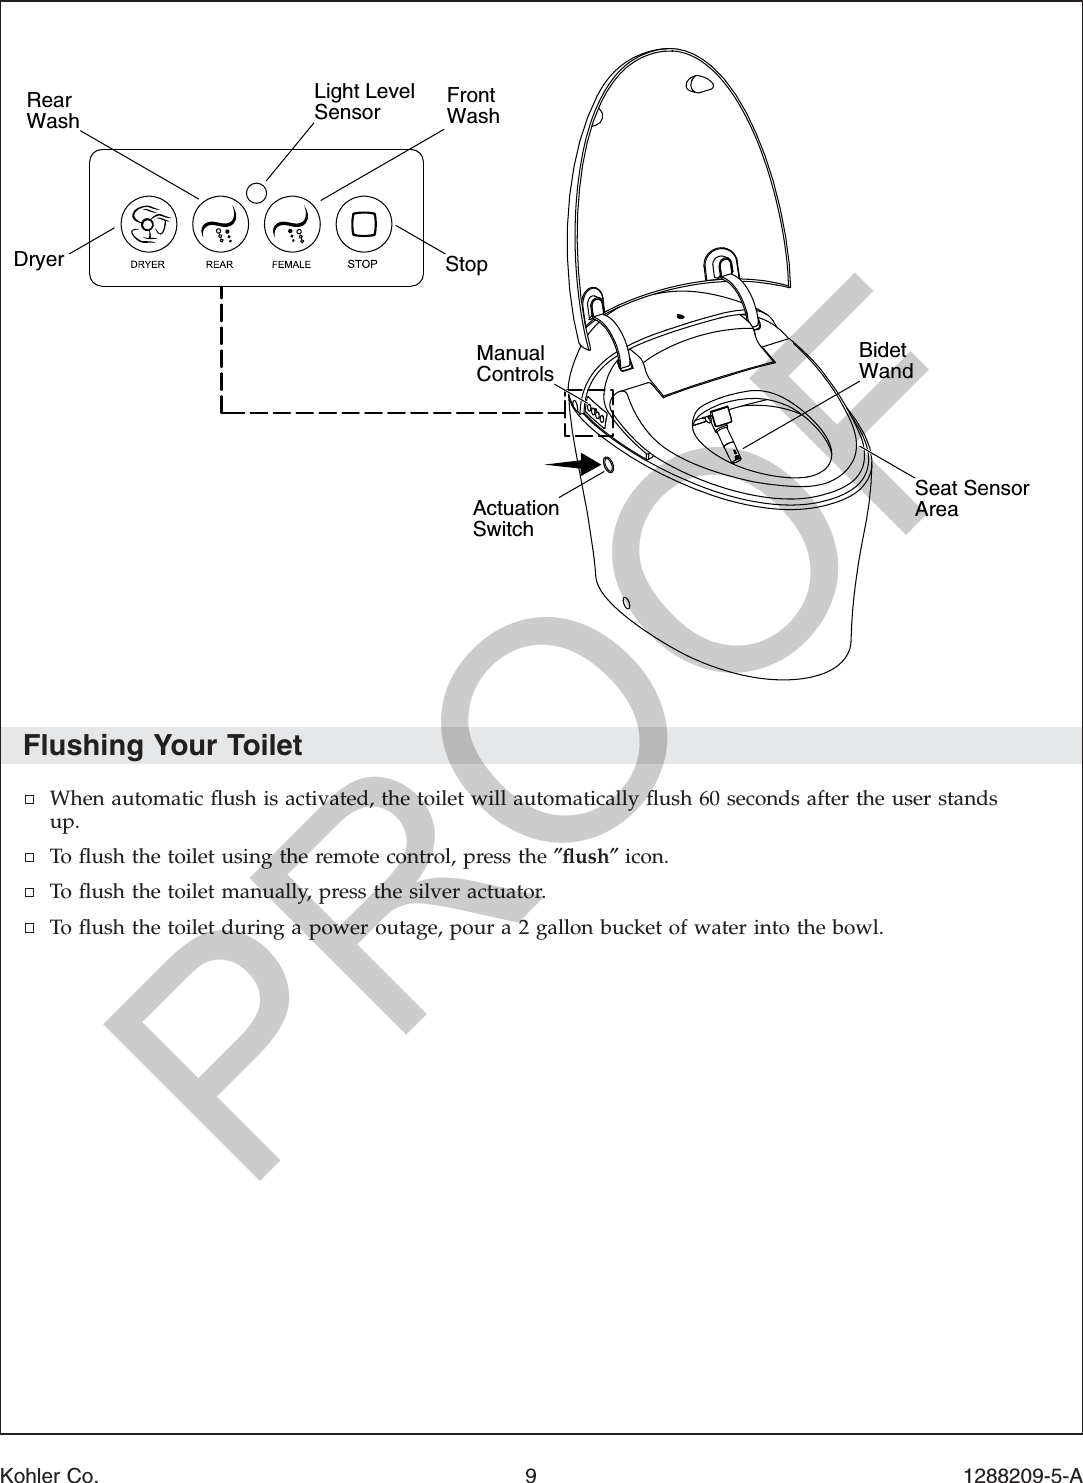
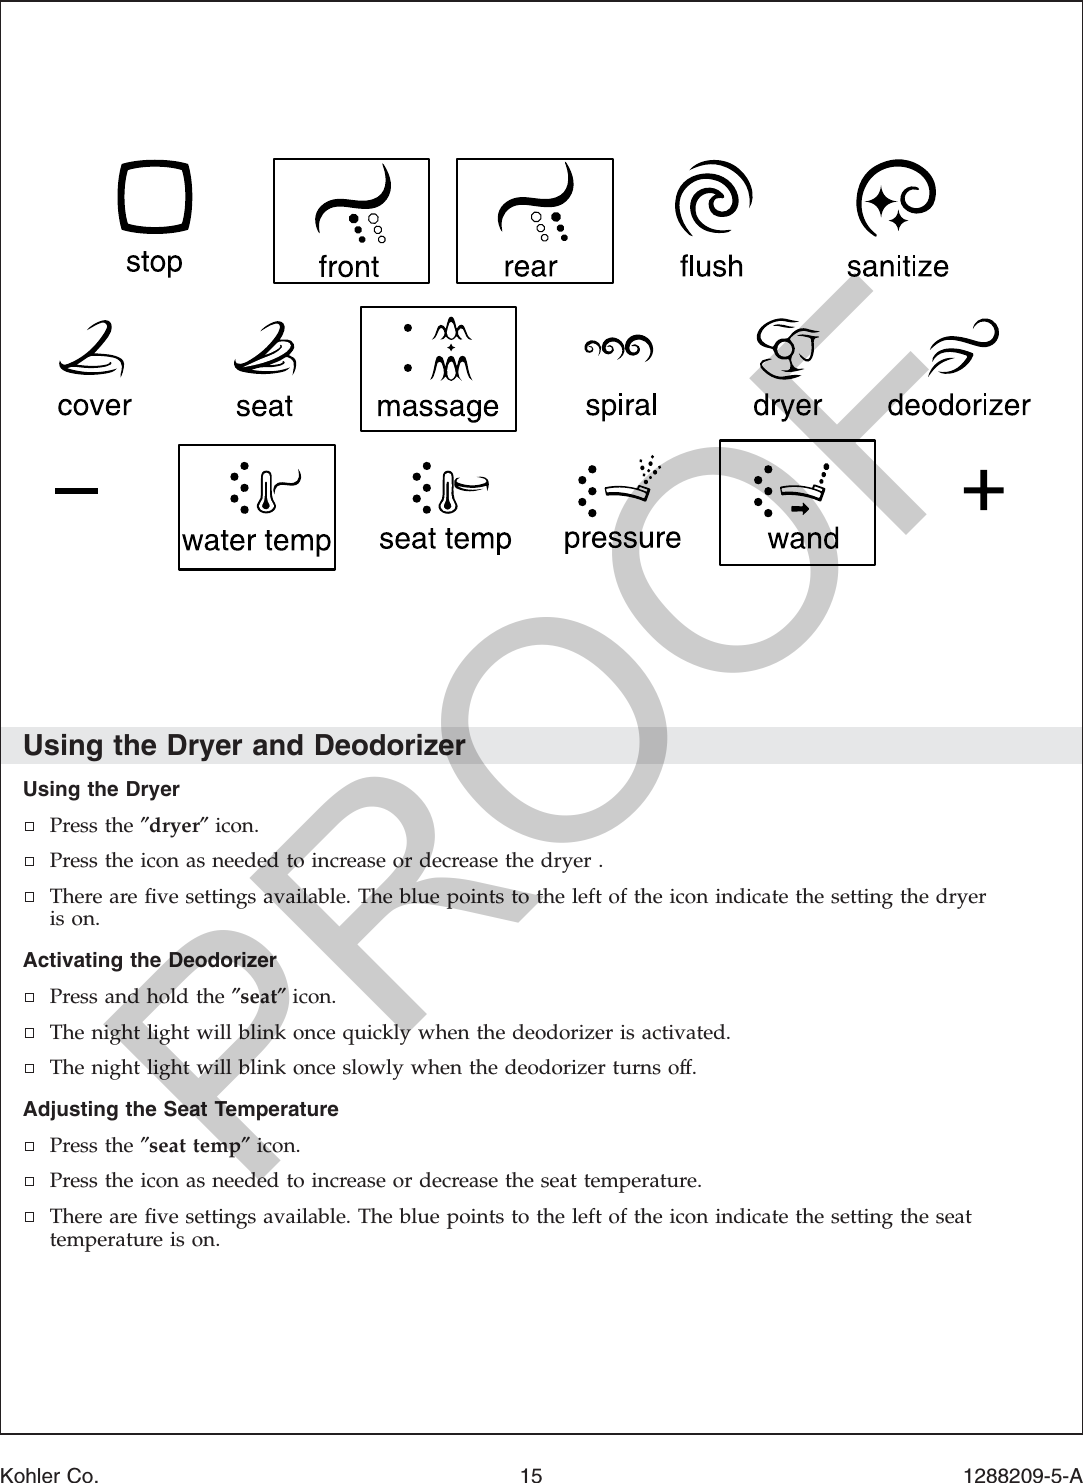
![Using the Bidet Wash FunctionsNOTE: The bidet function will automatically stop after 5 minutes.Using the Front WashPress the [On/Off] button.Press the ″front″icon.Press the ″stop″icon to end.Using the Rear Bidet WashPress the [On/Off] button.Press the ″rear″icon.Adjusting the Water PressureNOTE: Adjust the water pressure while the rear or front wash are in use.Press the ″pressure″icon.Press the icon as needed to increase or decrease the water pressure.There are five settings available. The blue points to the left of the icon indicate the setting the waterpressure is on.Adjusting the Water TemperatureNOTE: Adjust the water temperature while the rear or front wash are in use.Press the ″water temp″icon.1288209-5-A 10 Kohler Co.PROOF](https://usermanual.wiki/Kohler/KOHLER019/User-Guide-3158593-Page-10.png)