Kyocera C5170 Single Band CDMA Cellular Phone with BT + WiFi User Manual hydro
Kyocera Corporation Single Band CDMA Cellular Phone with BT + WiFi hydro
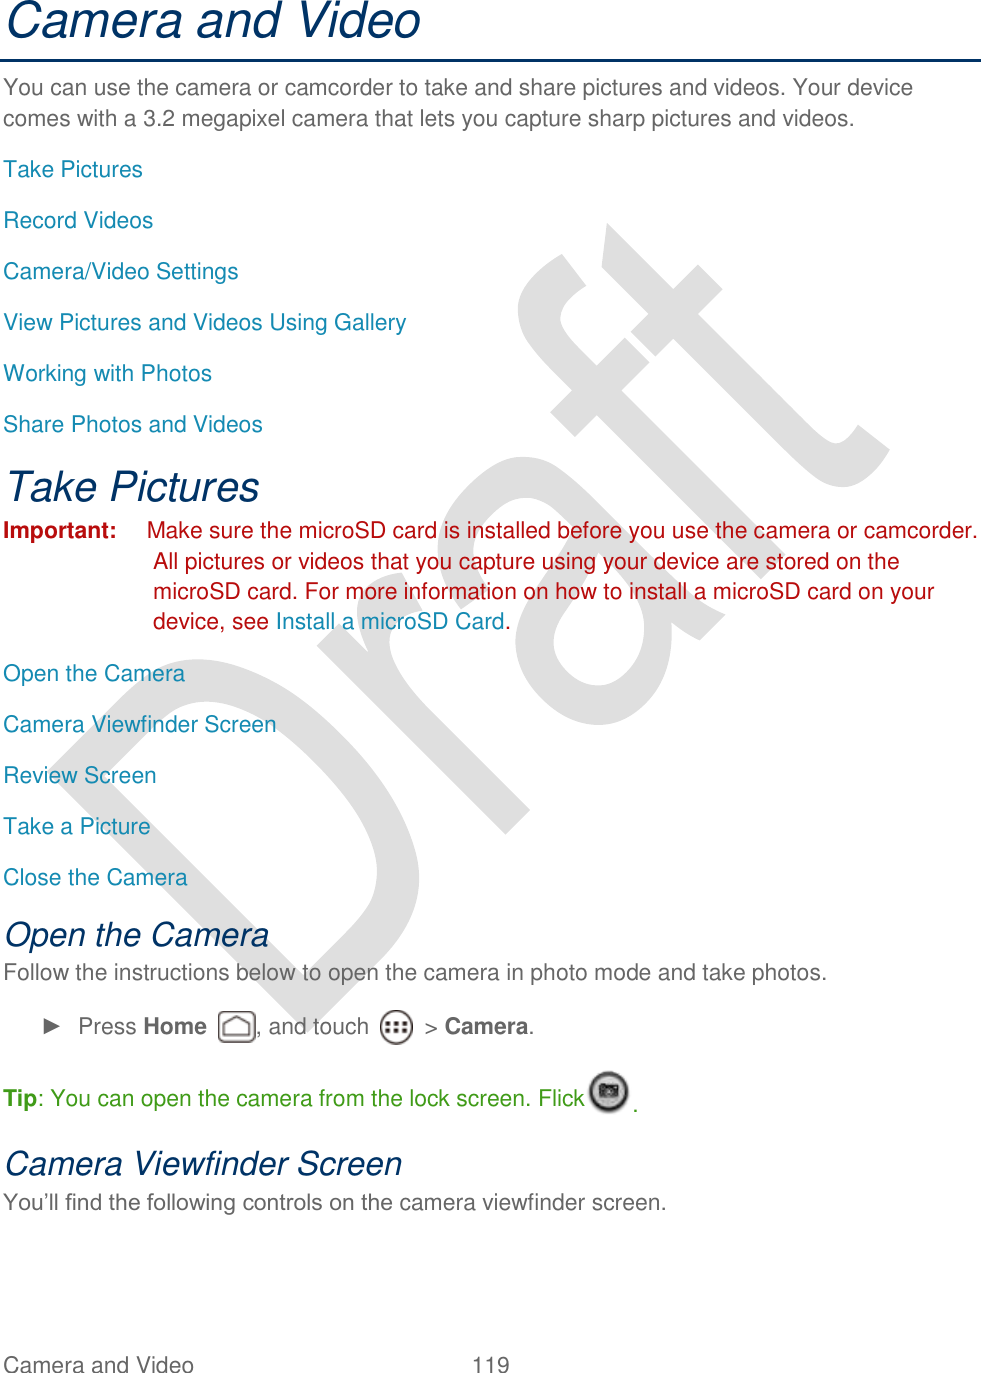
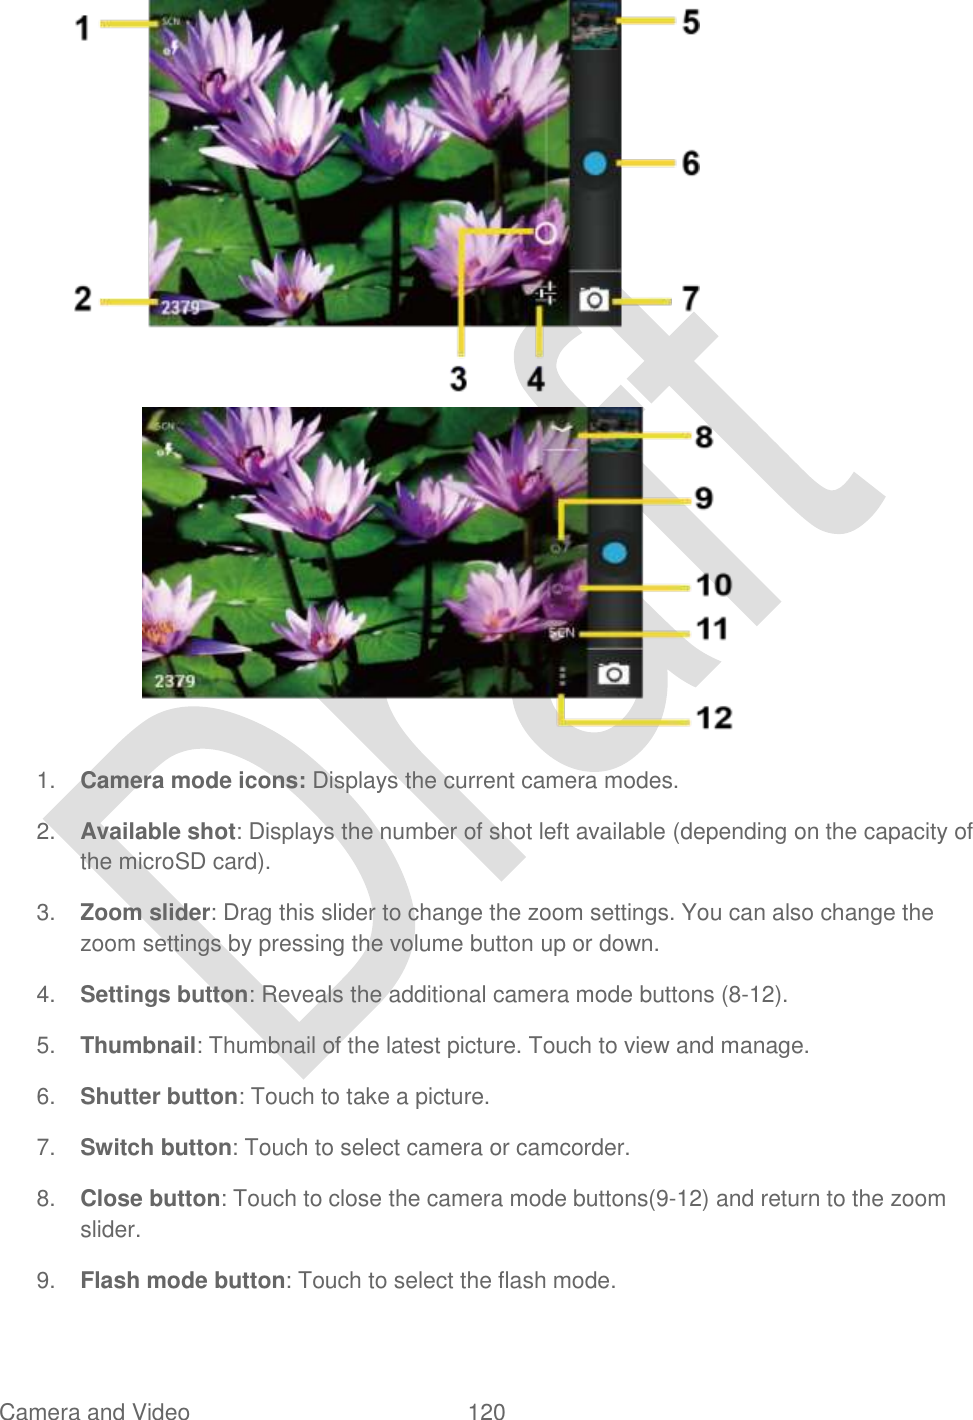
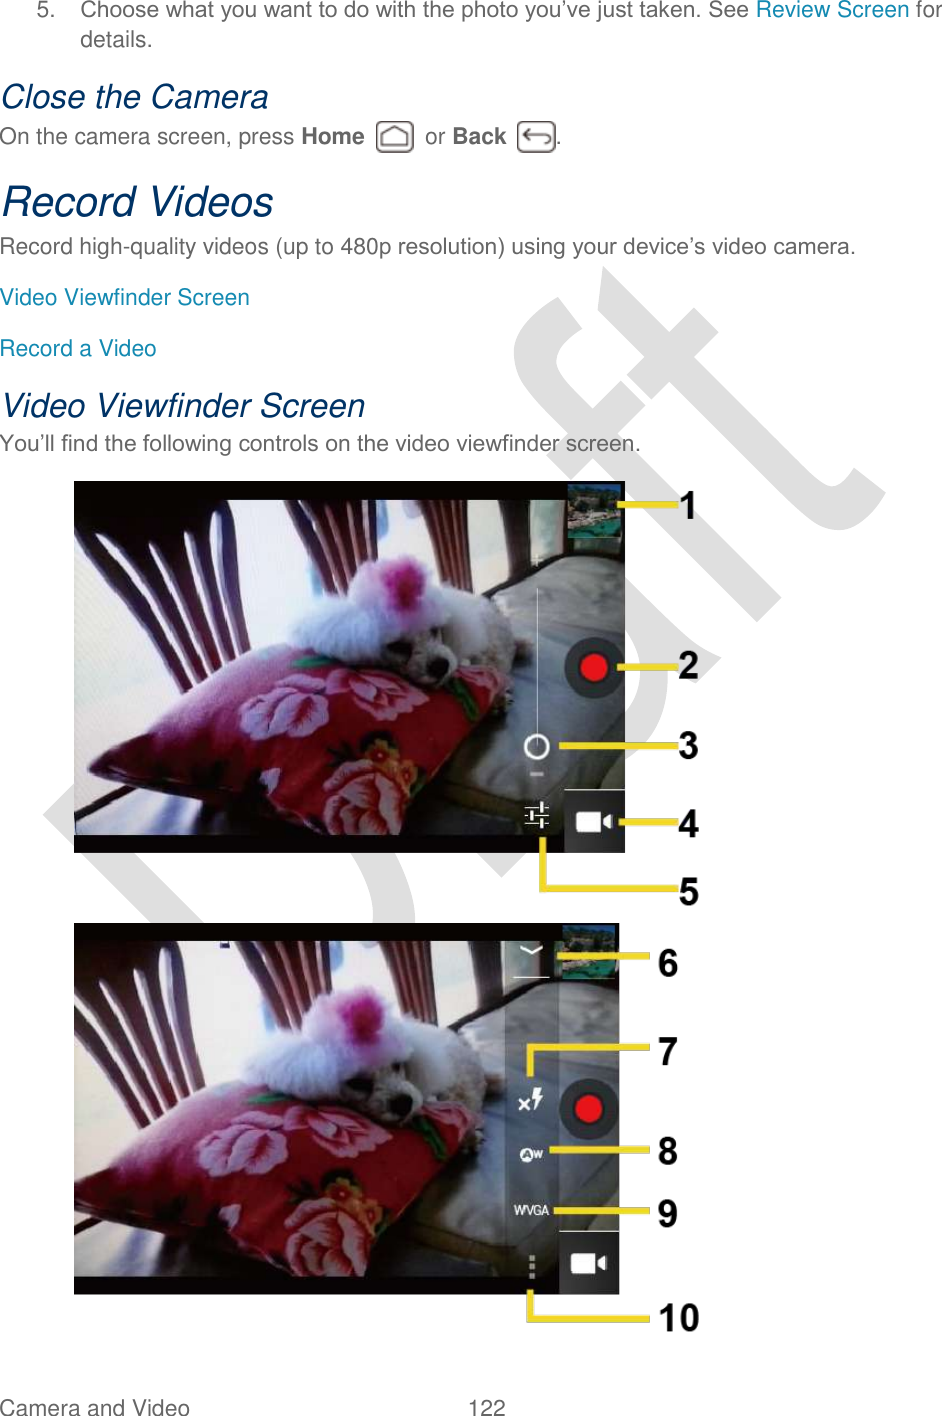
Kyocera >
Contents
- 1. user manual
- 2. user manual hydro
- 3. user manual safety
- 4. users guide hydro
- 5. User manual Hydro
user manual hydro
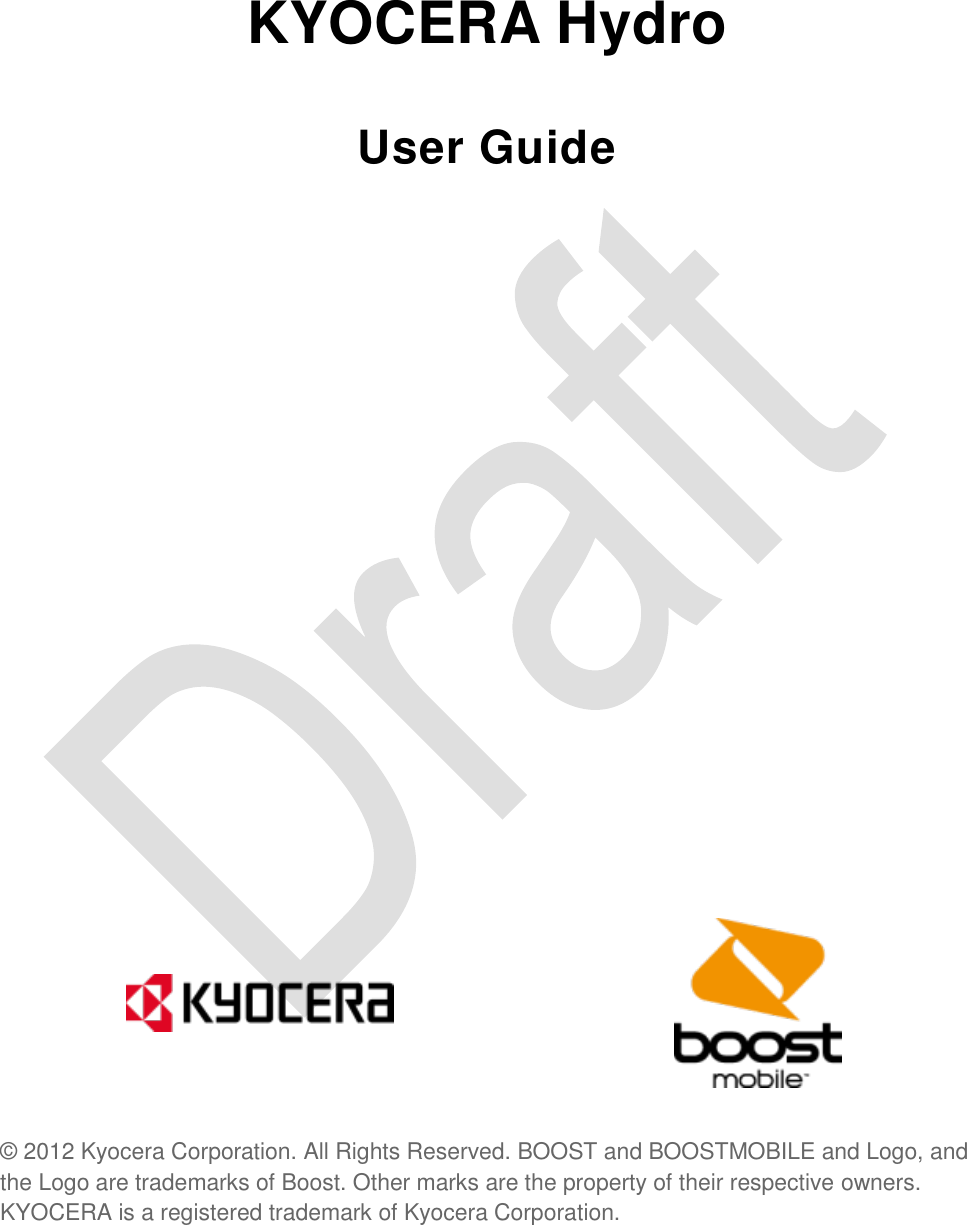
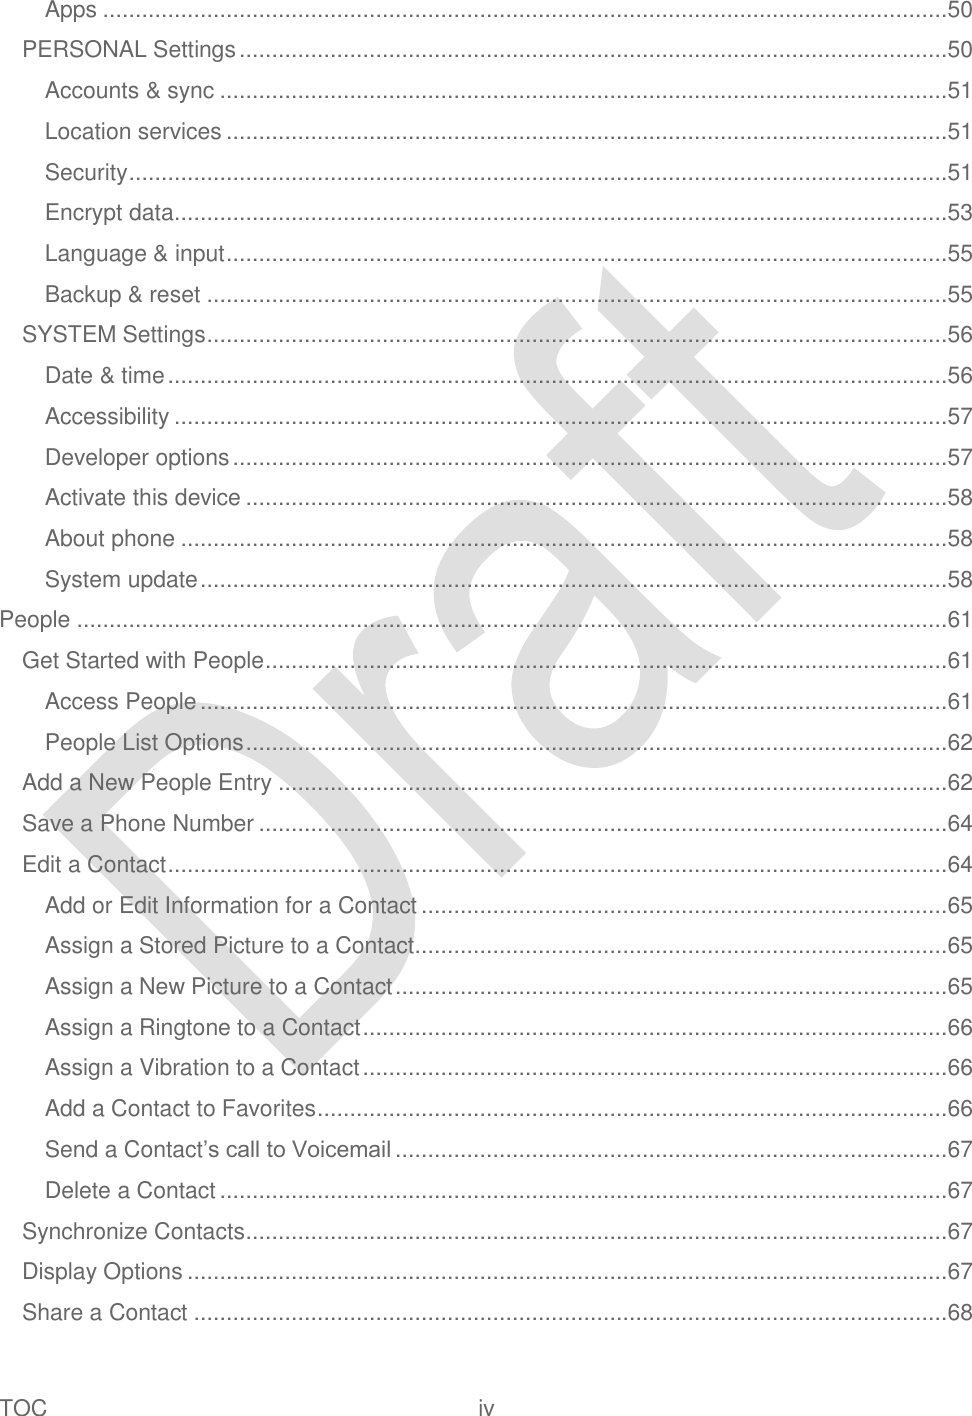

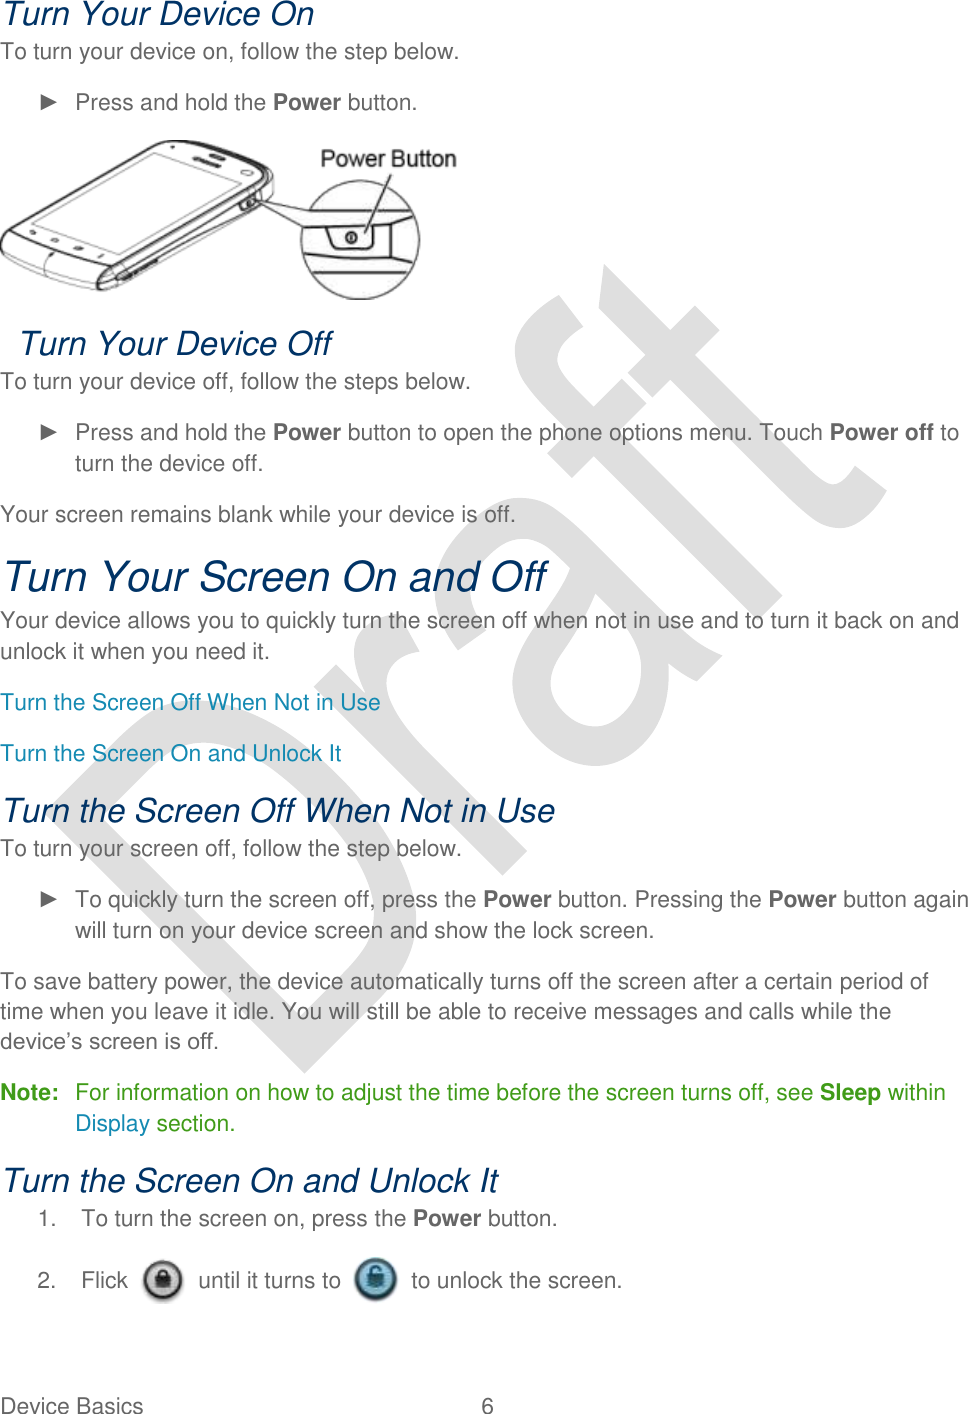
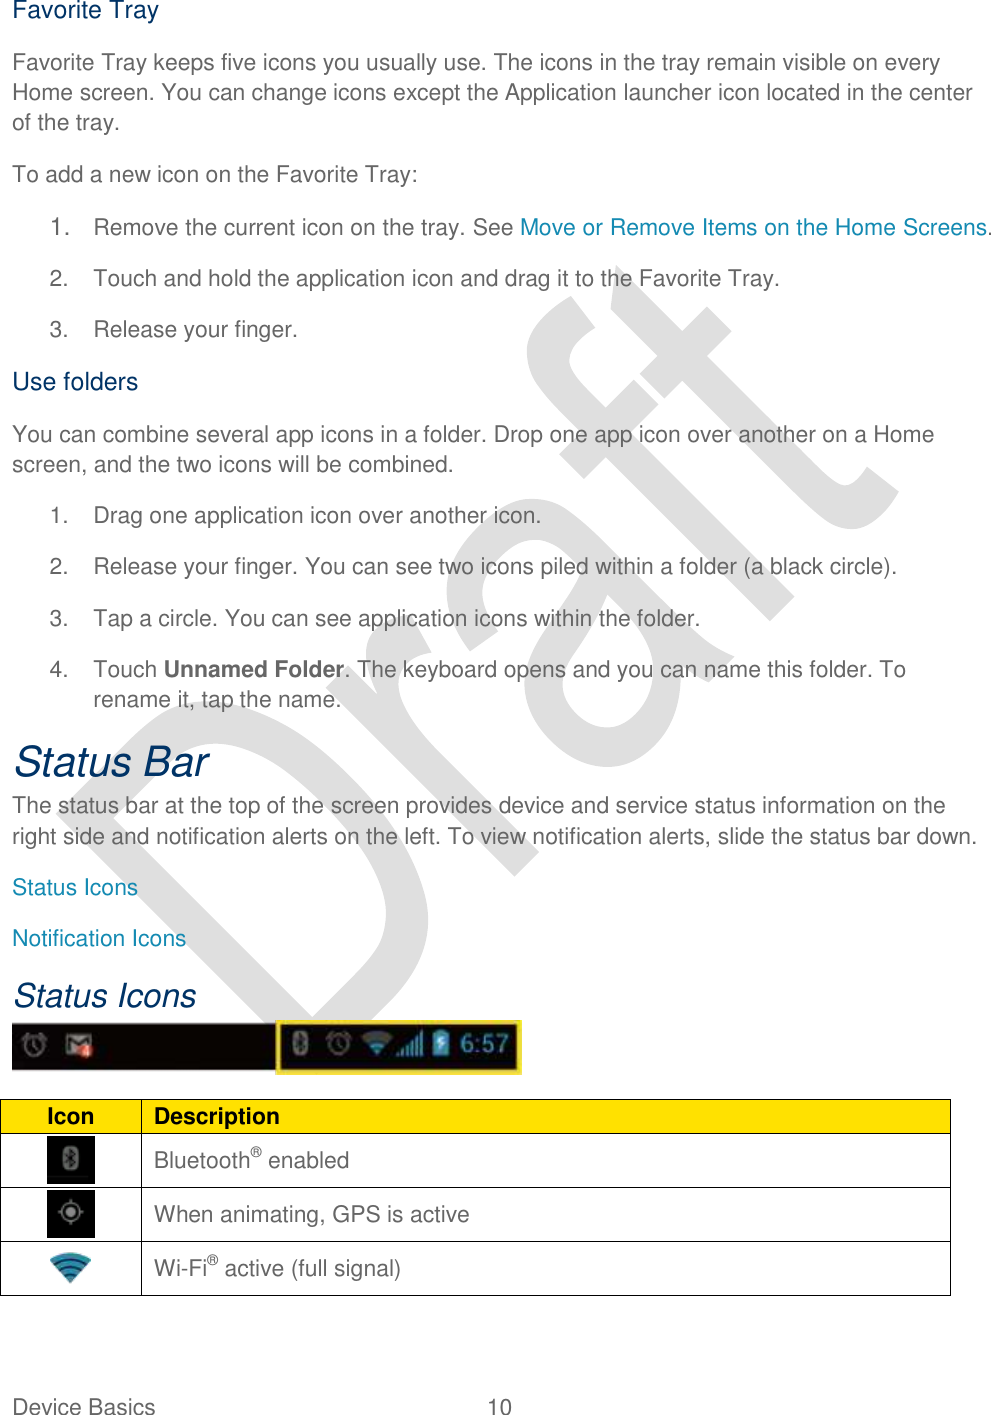
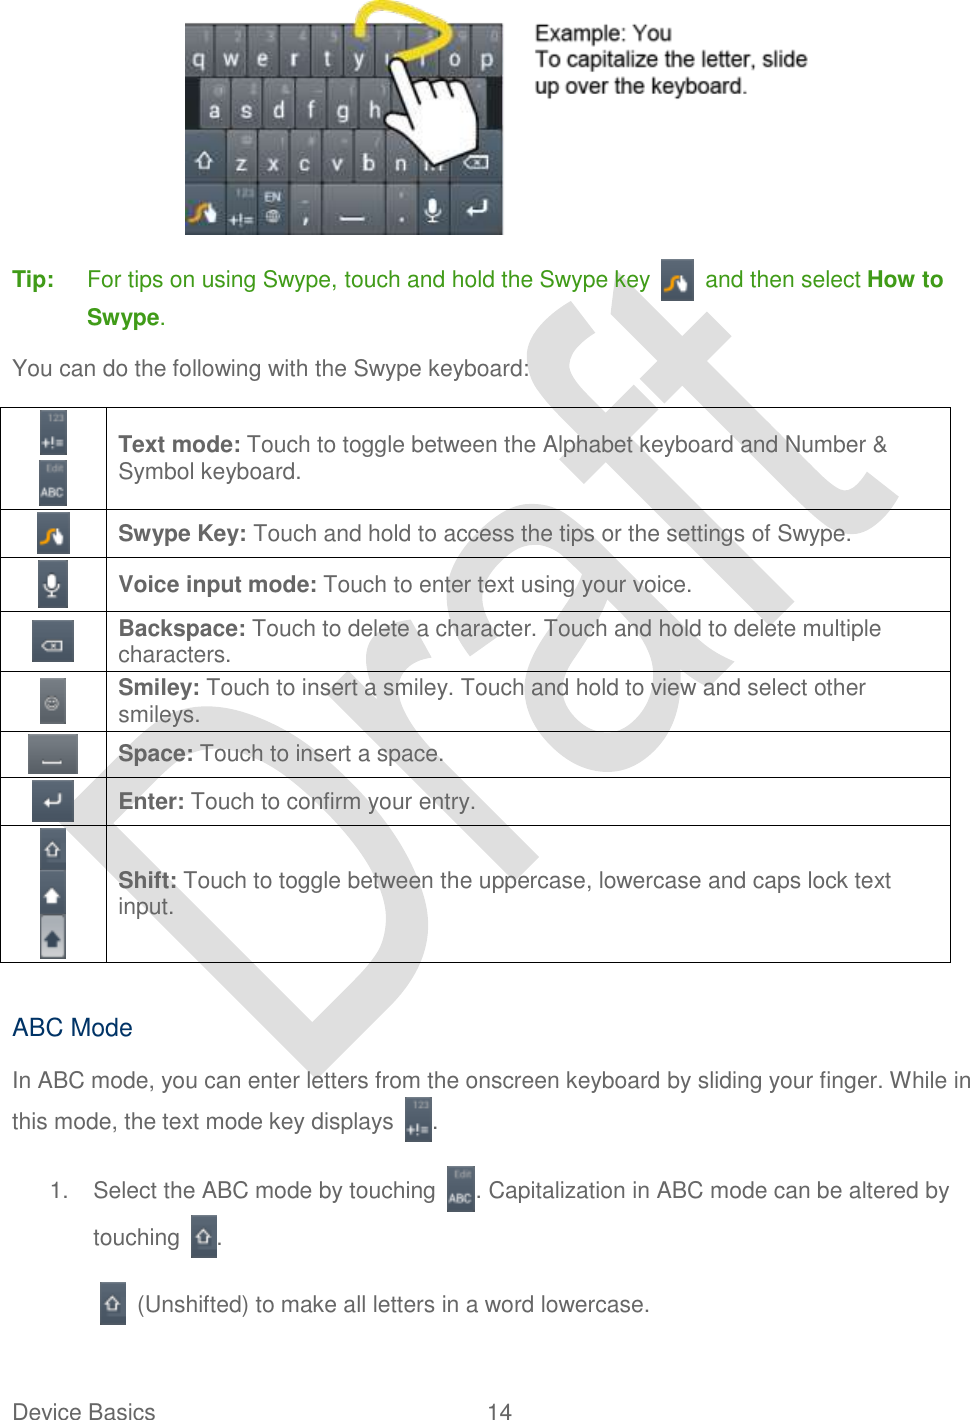
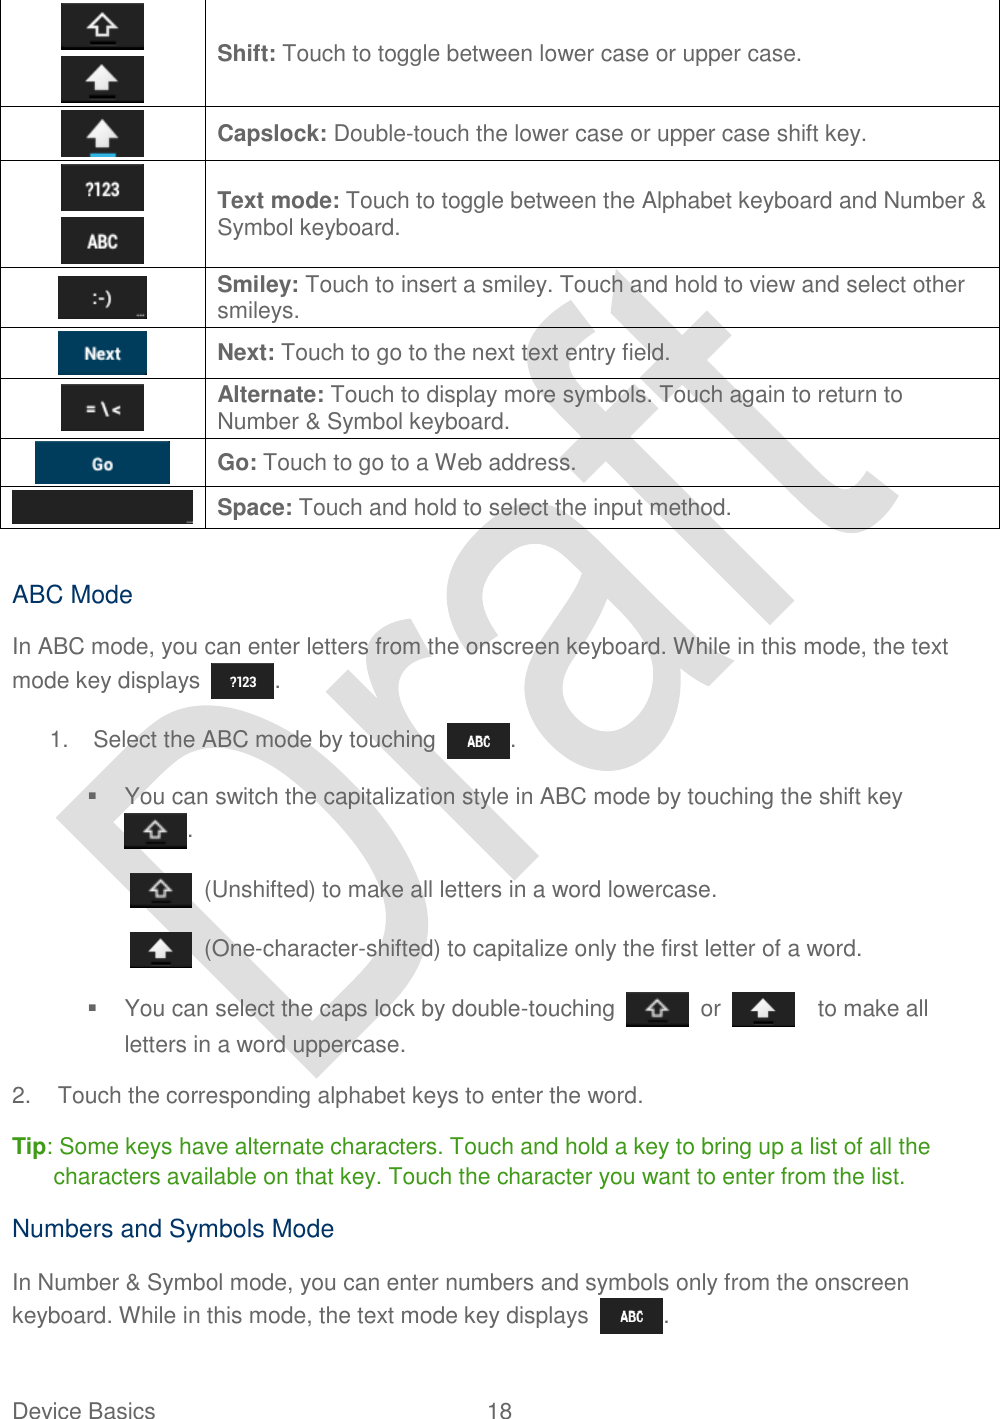
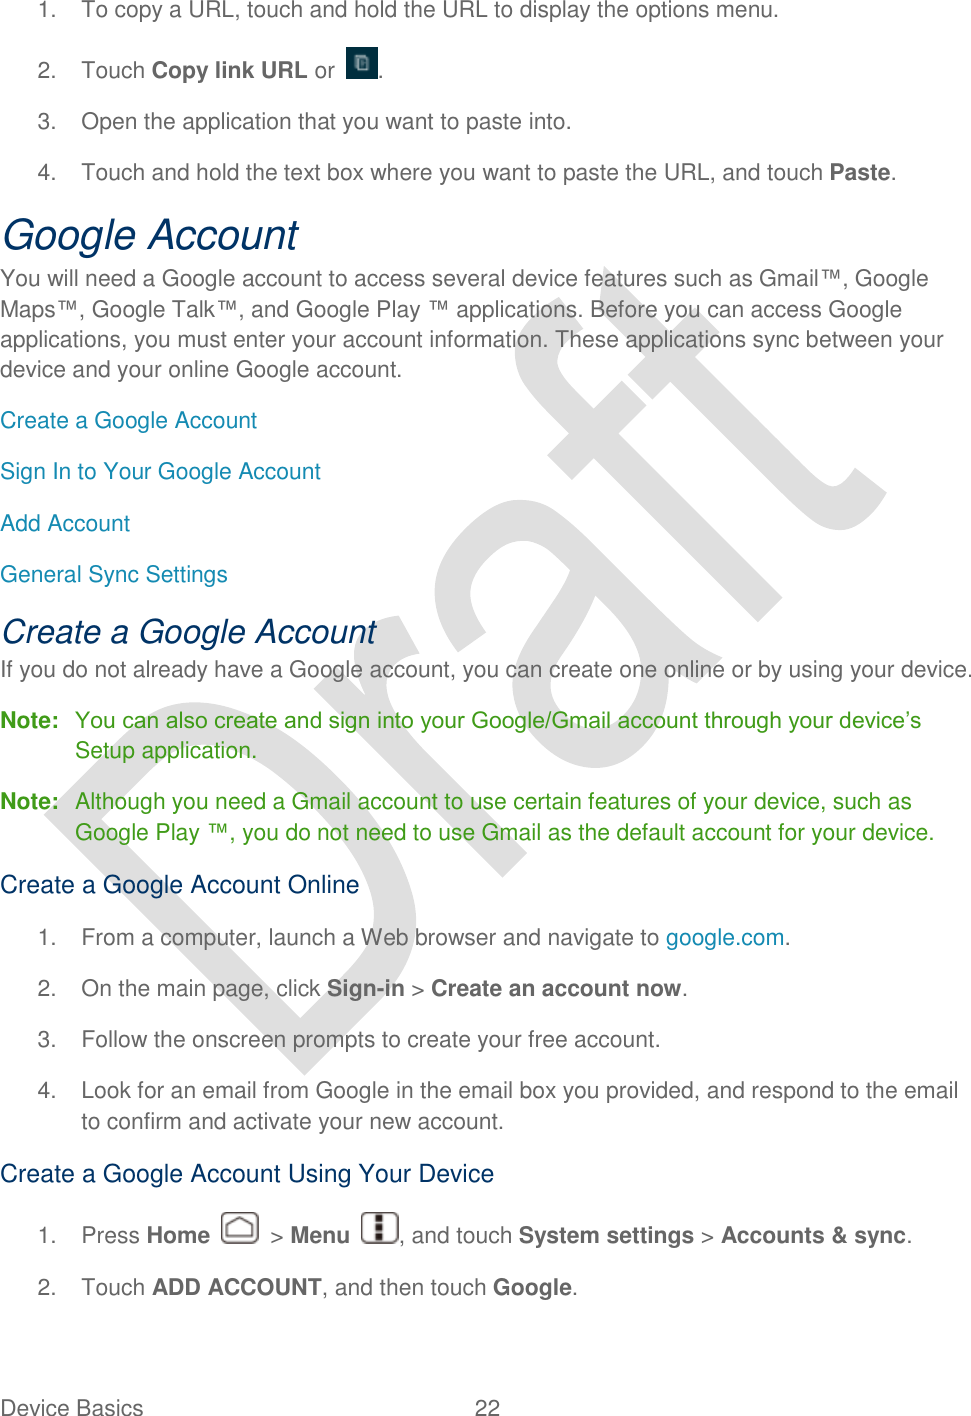
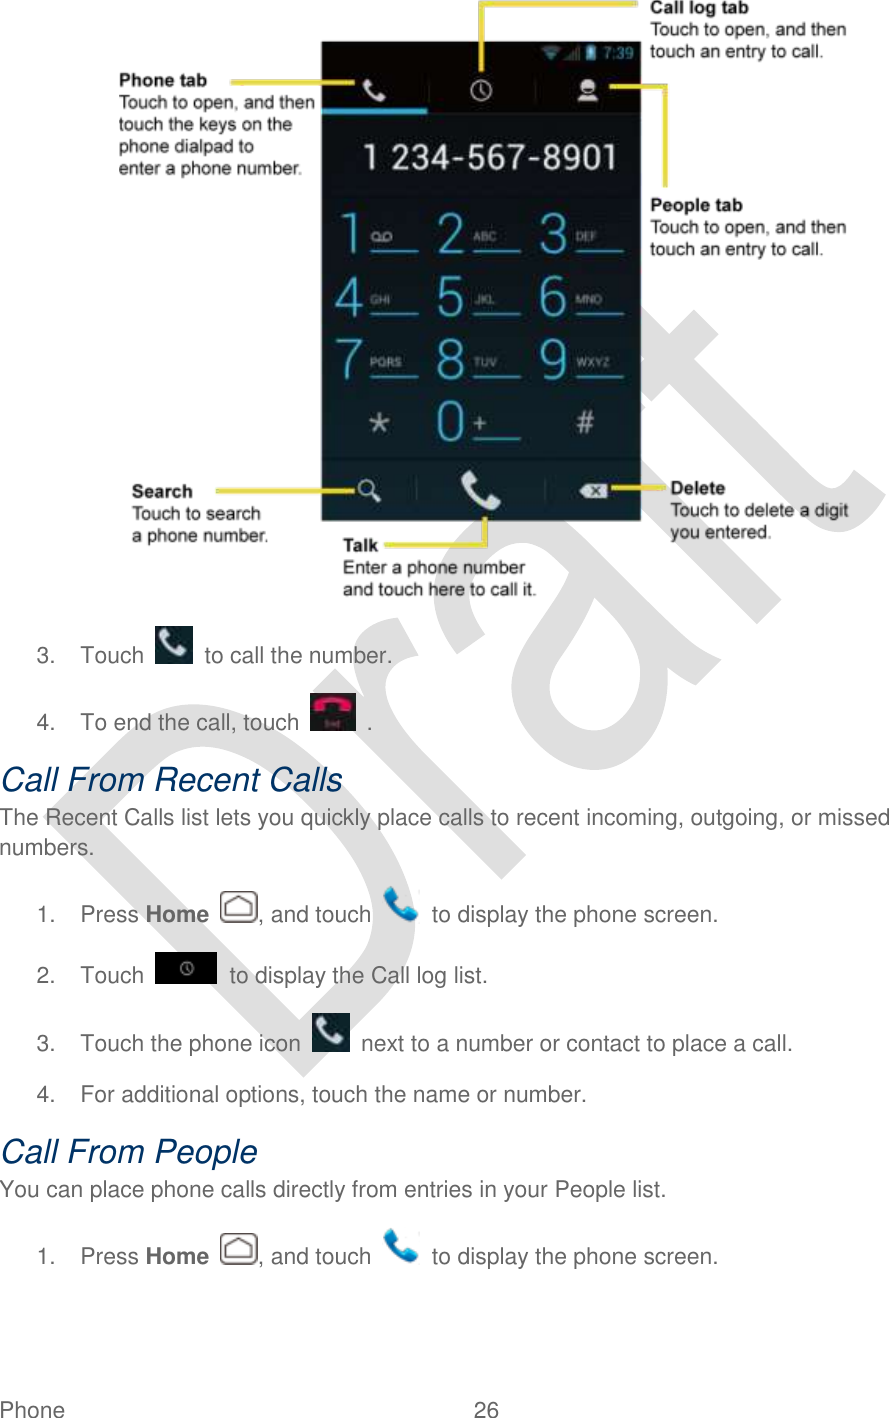
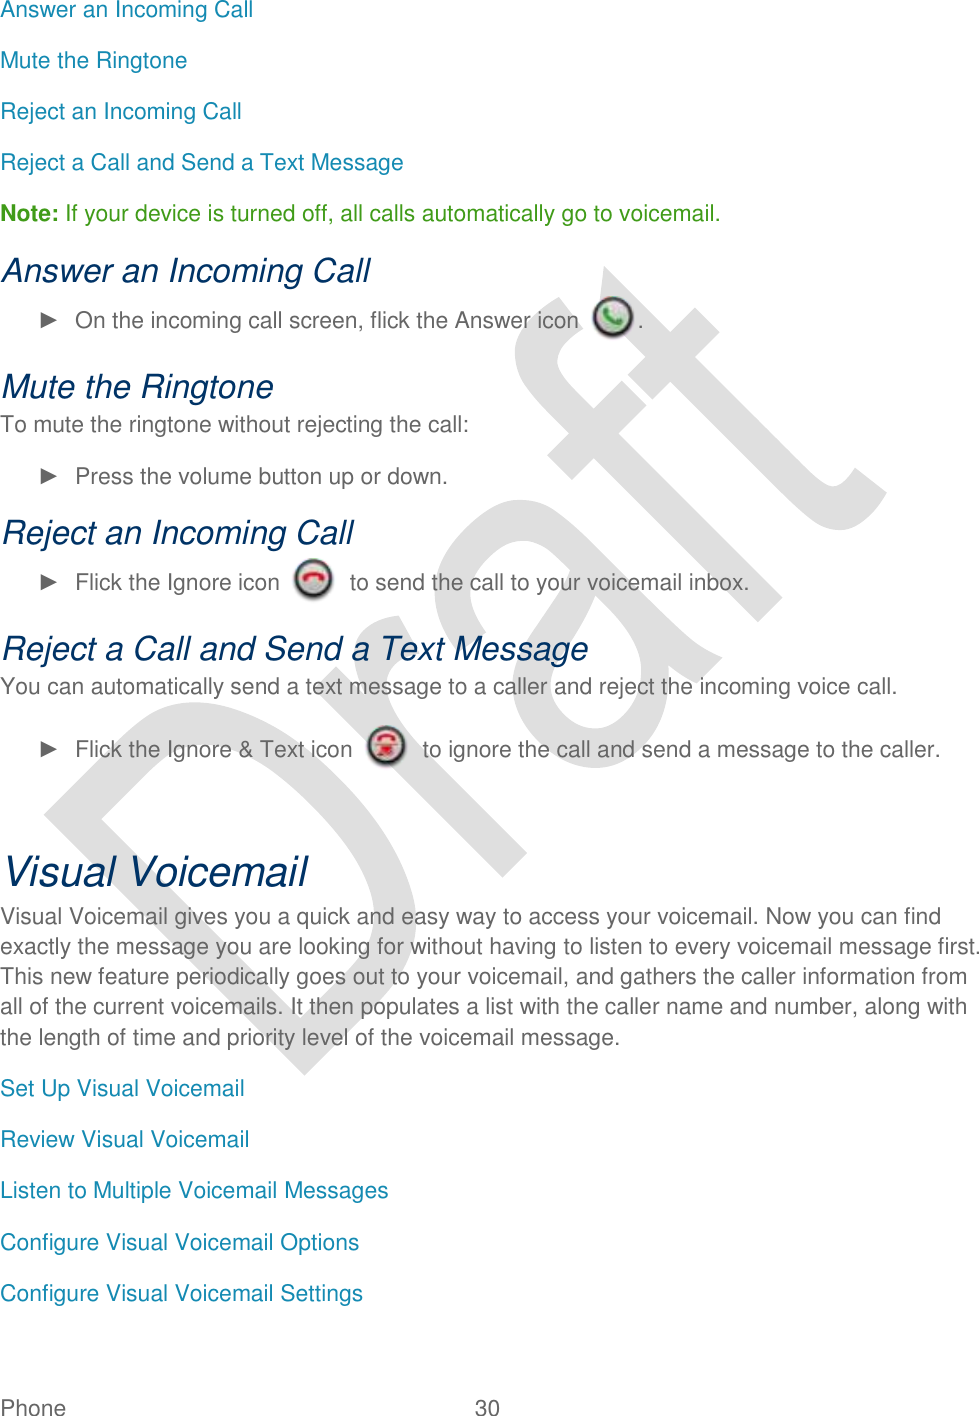
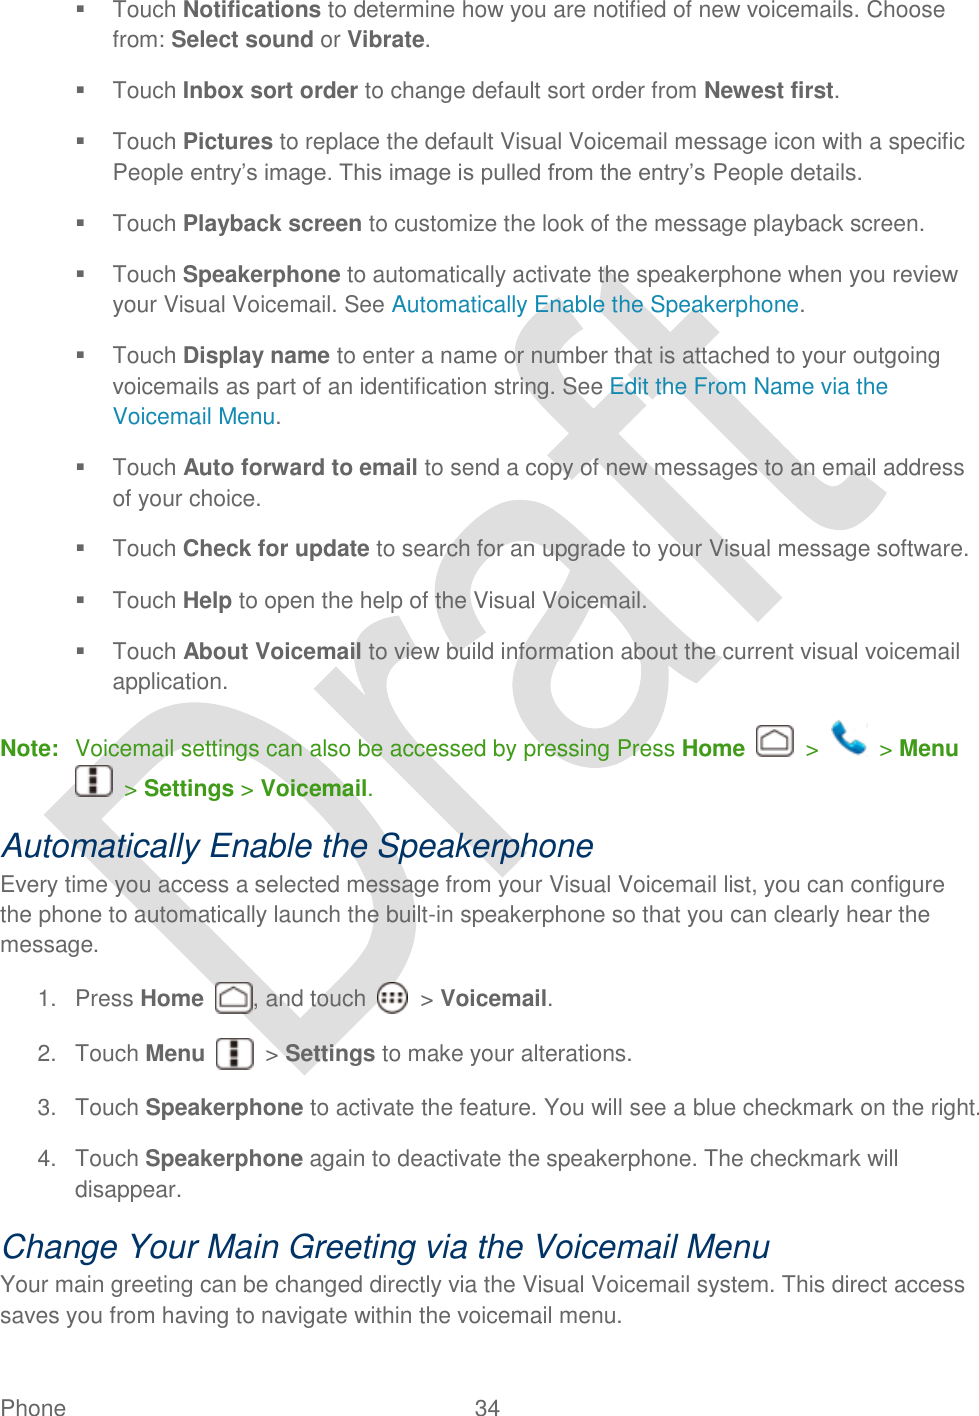
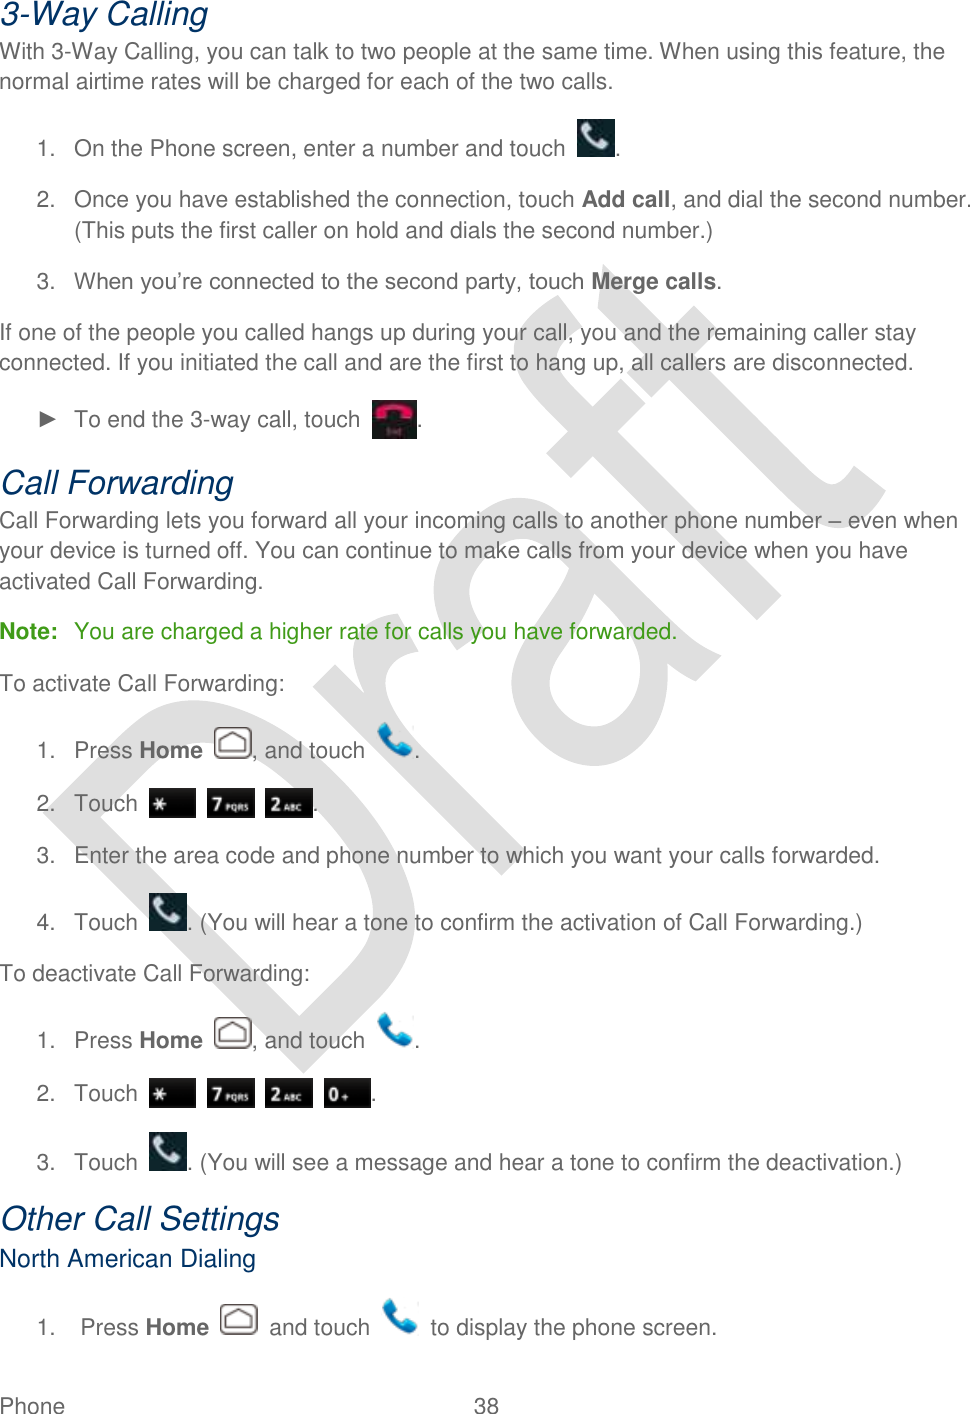

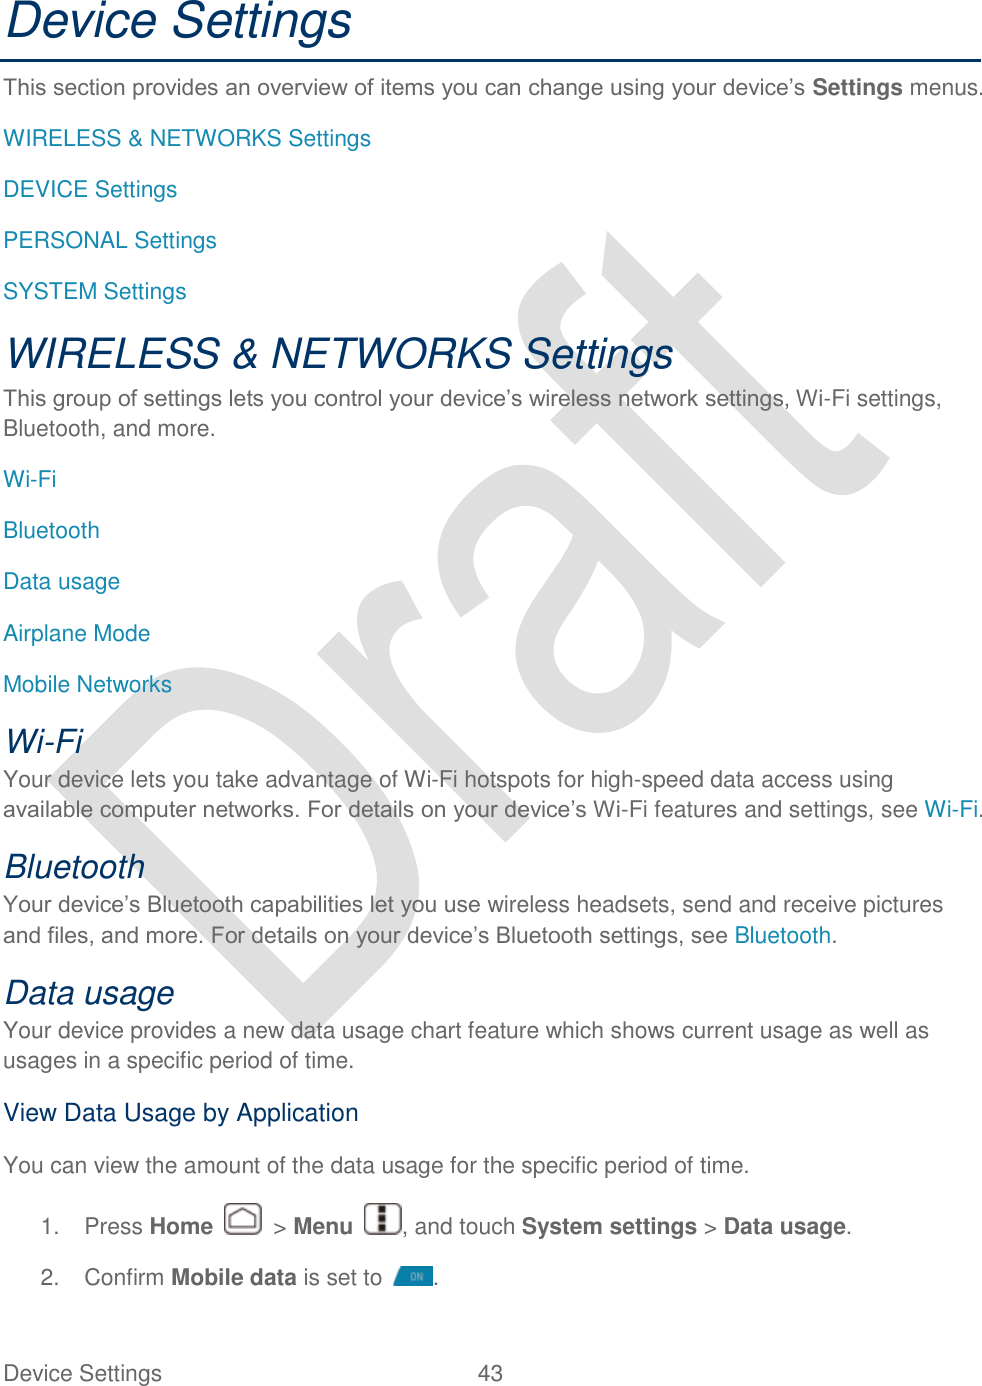
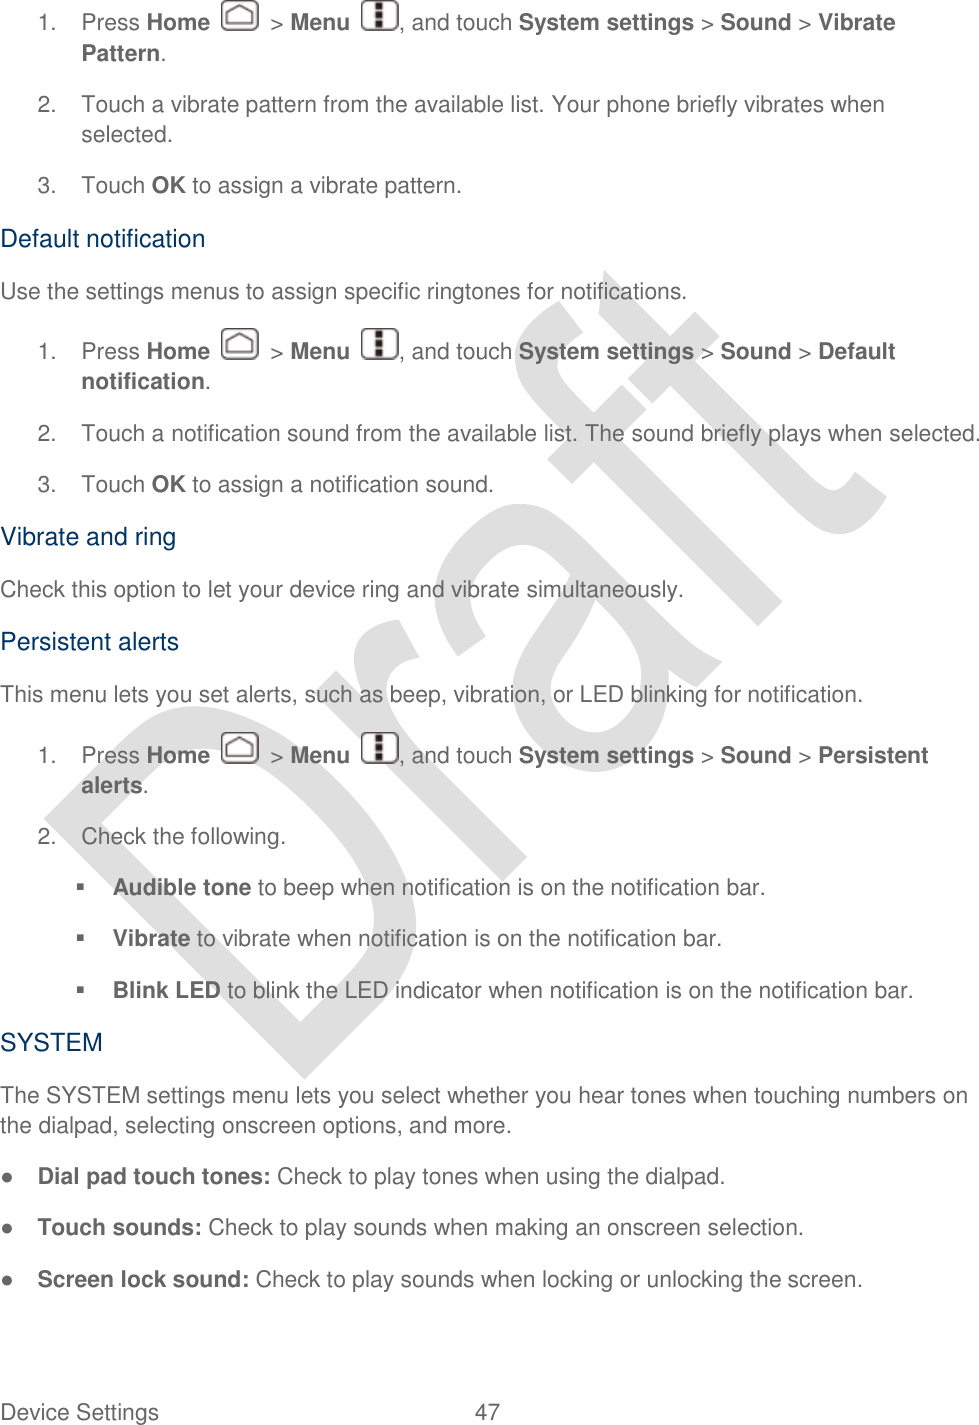
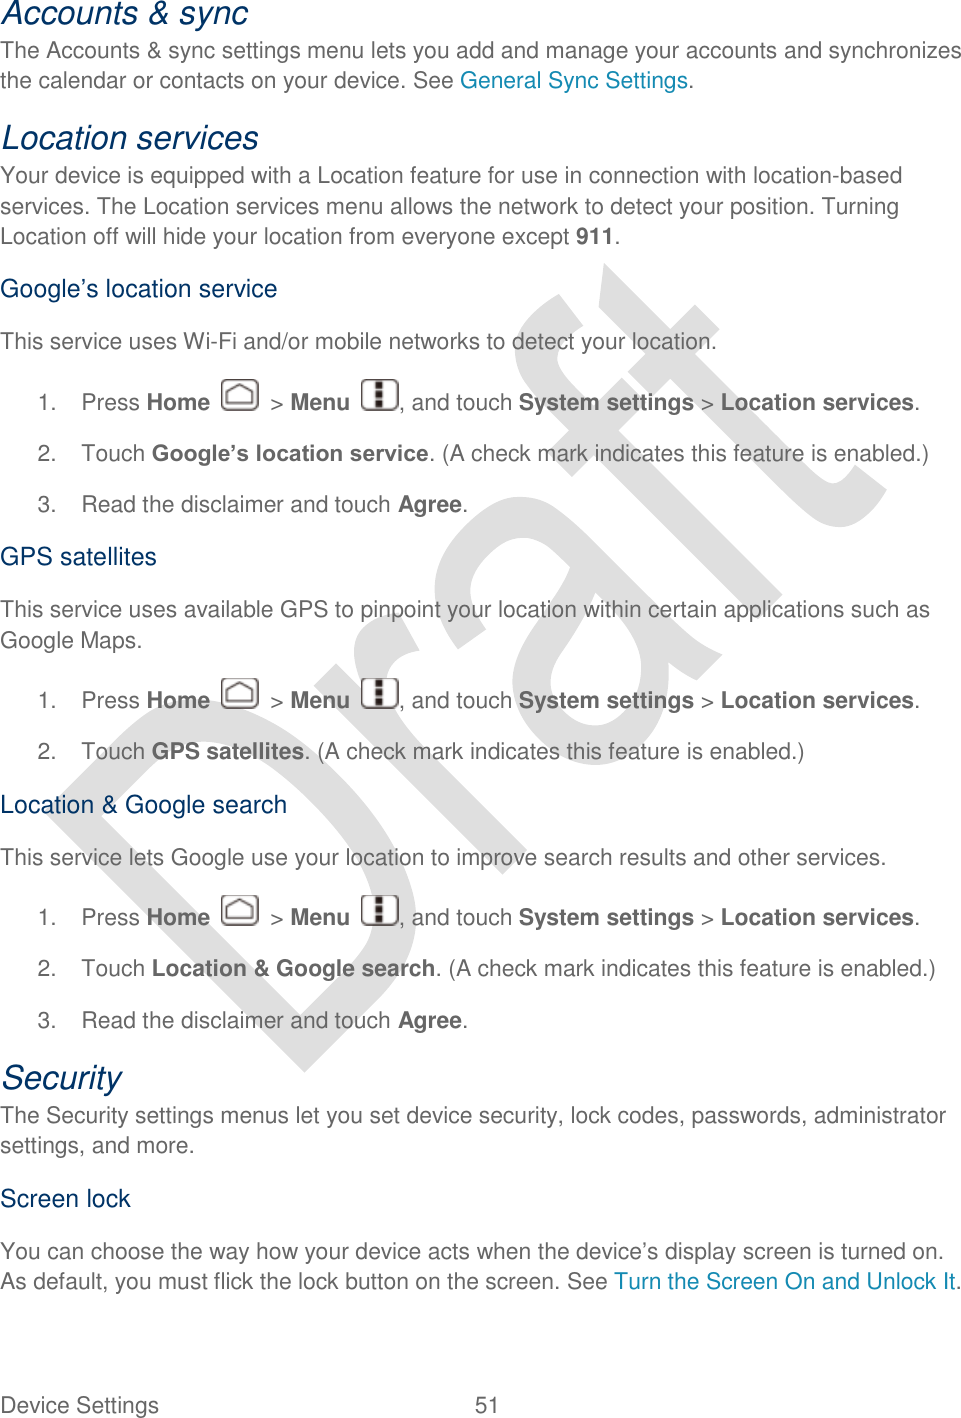
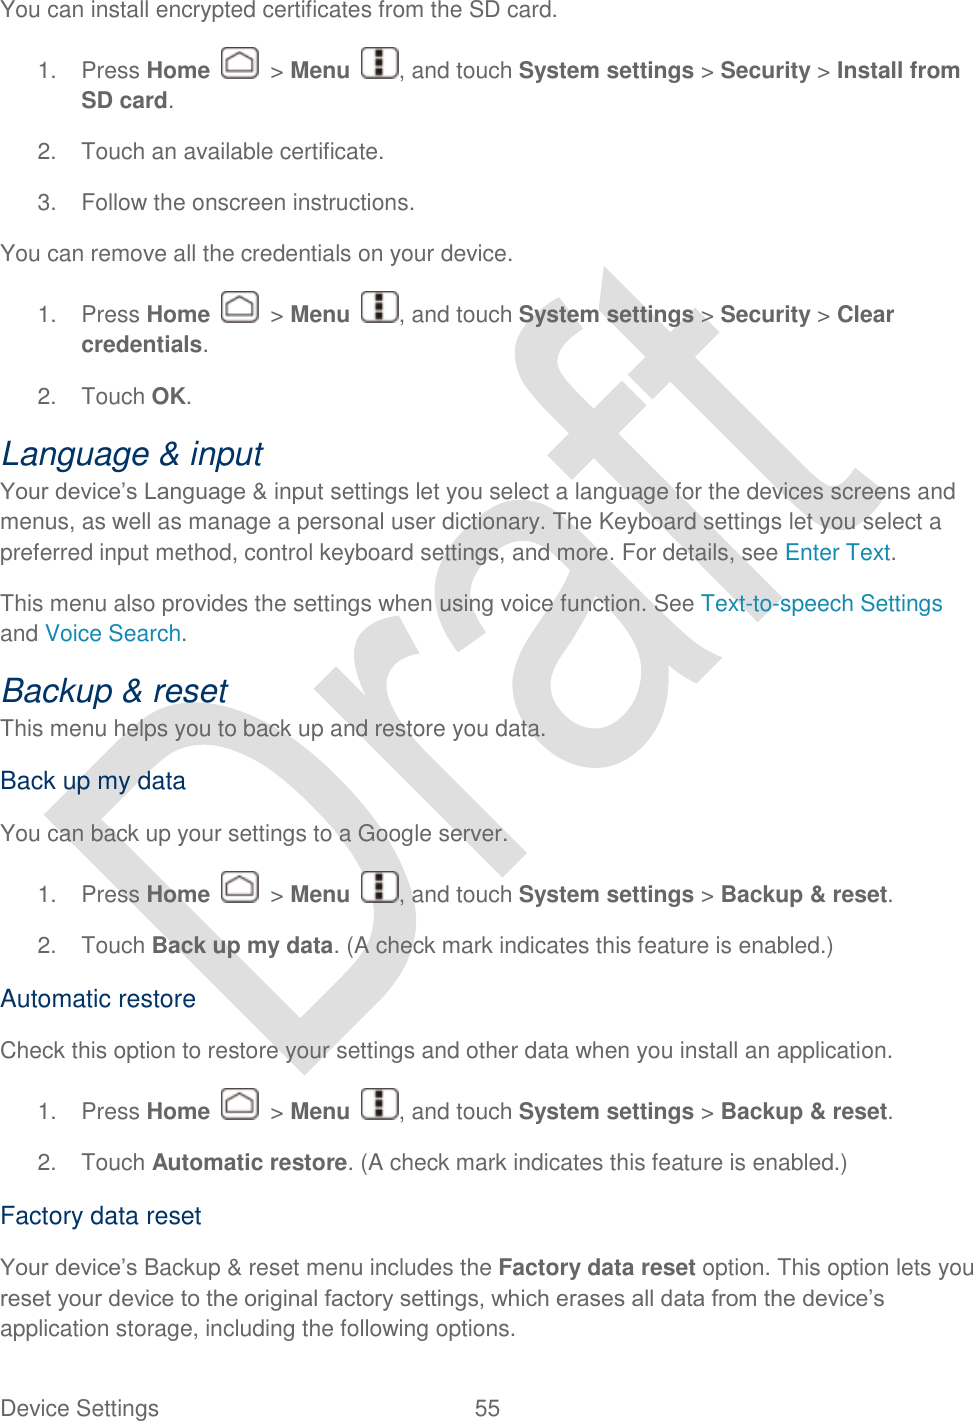
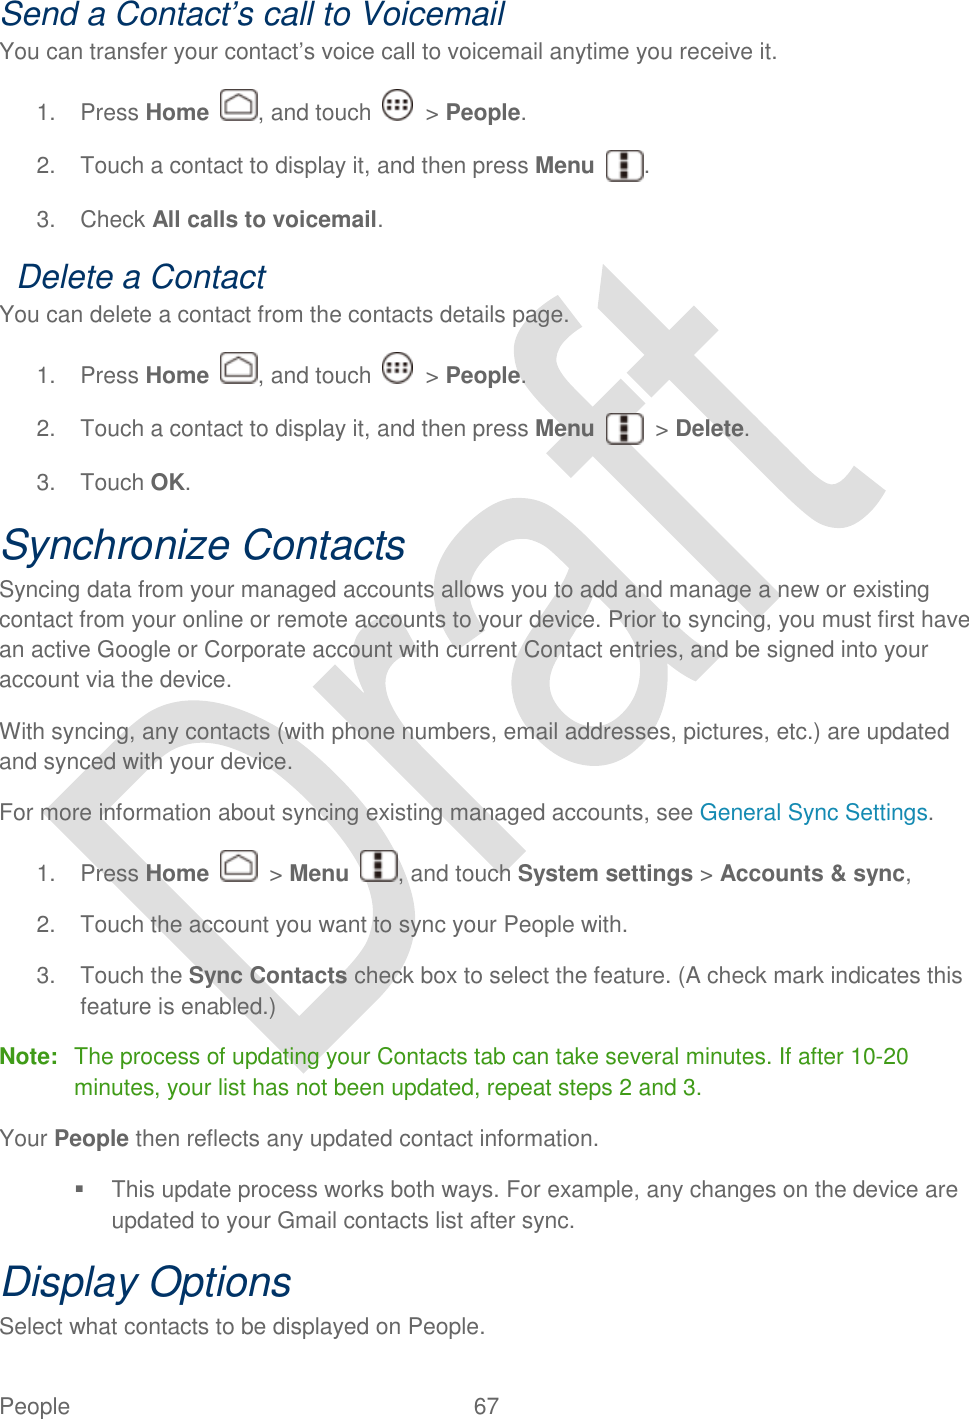
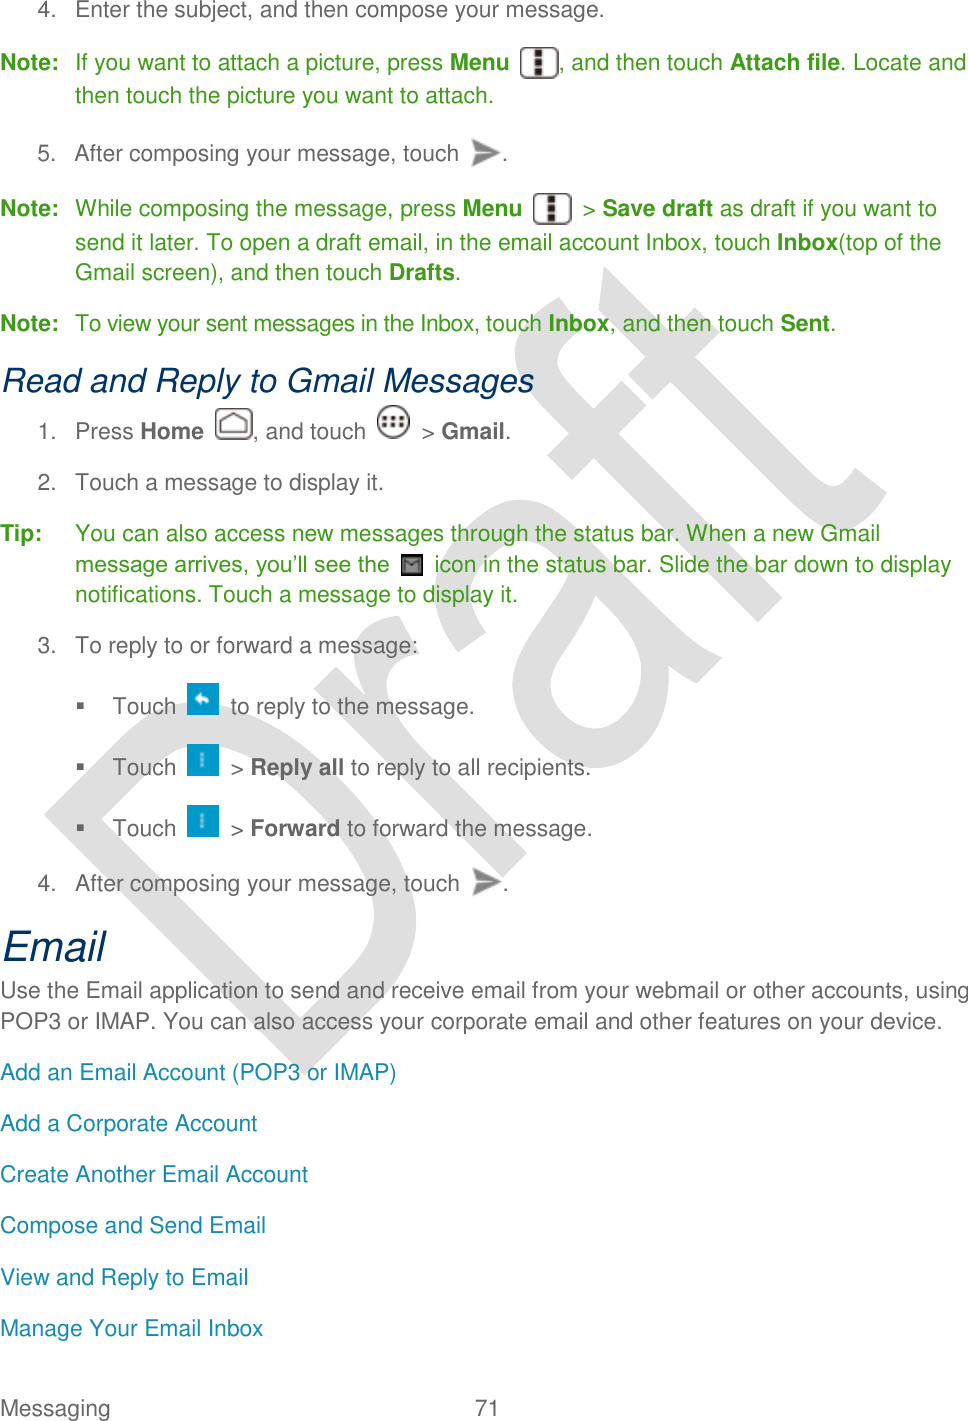
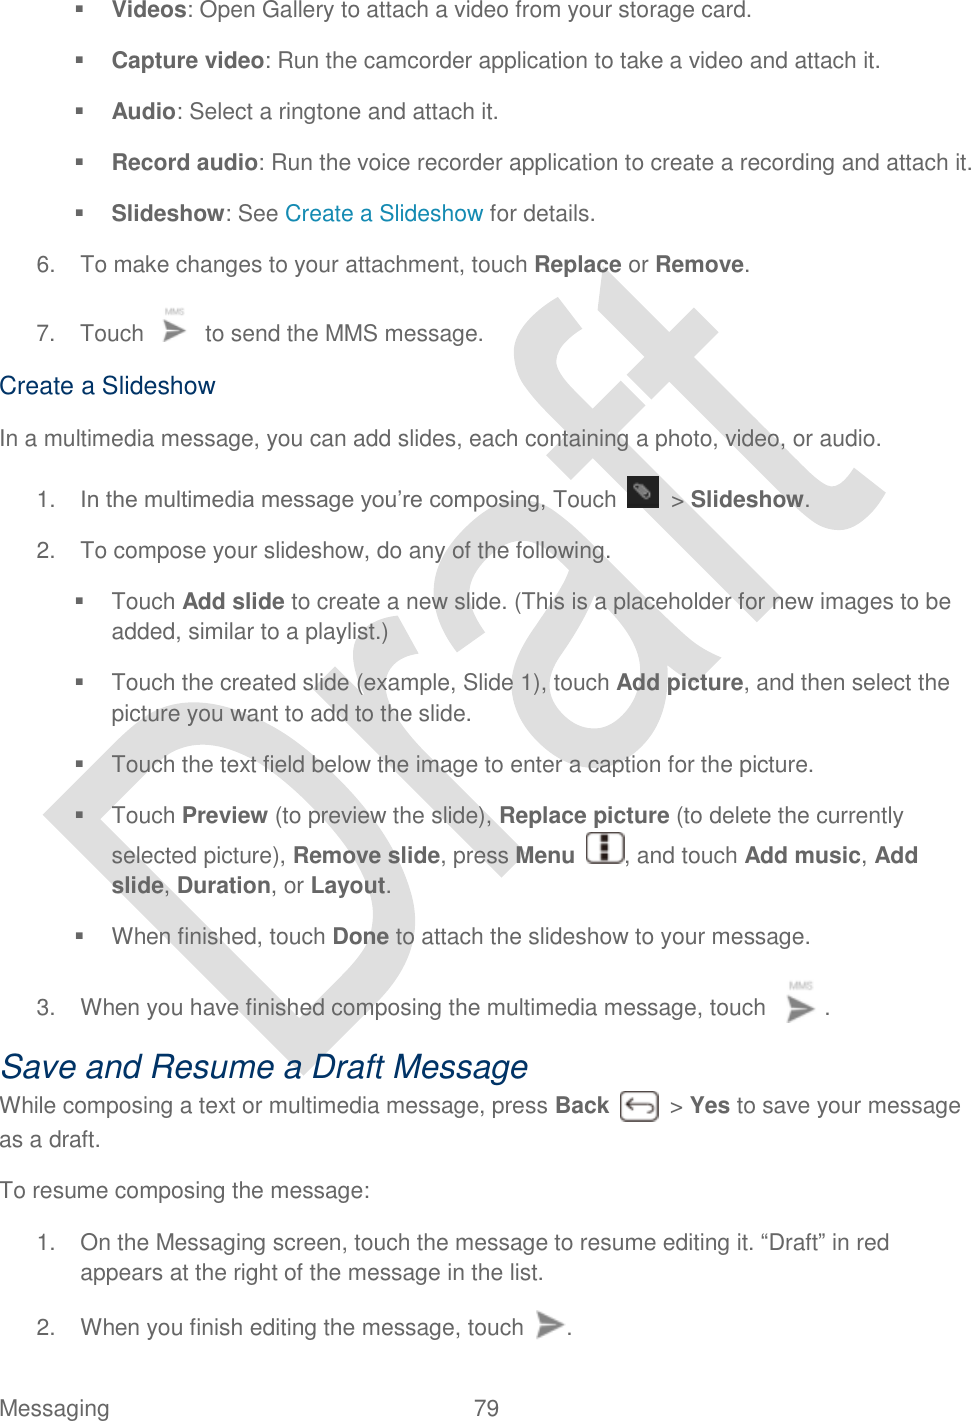
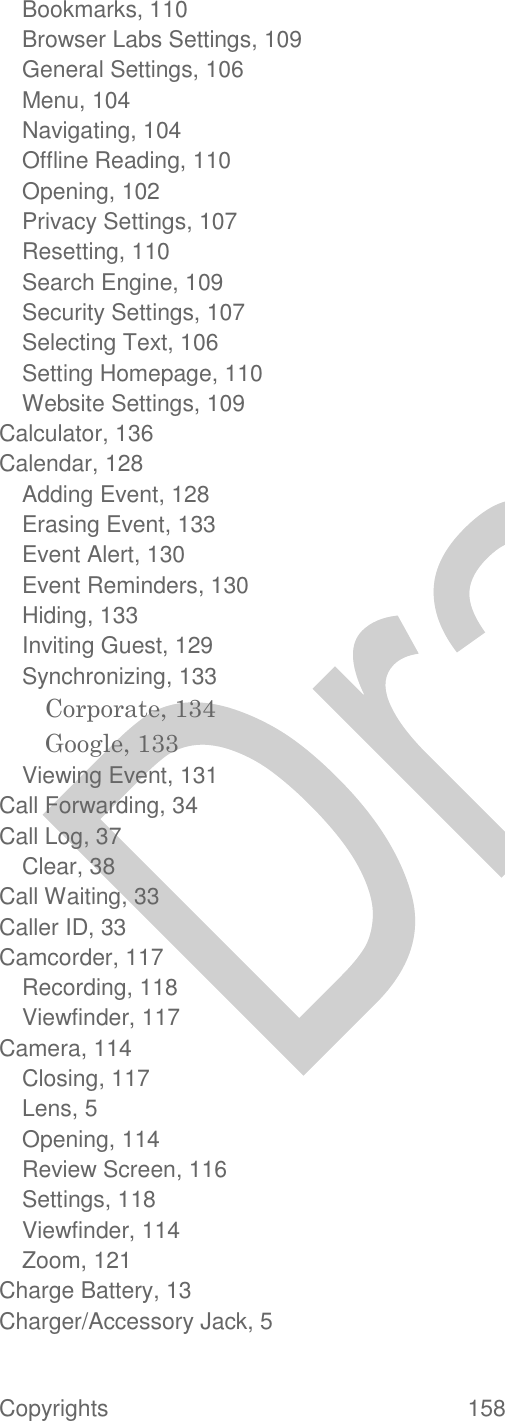
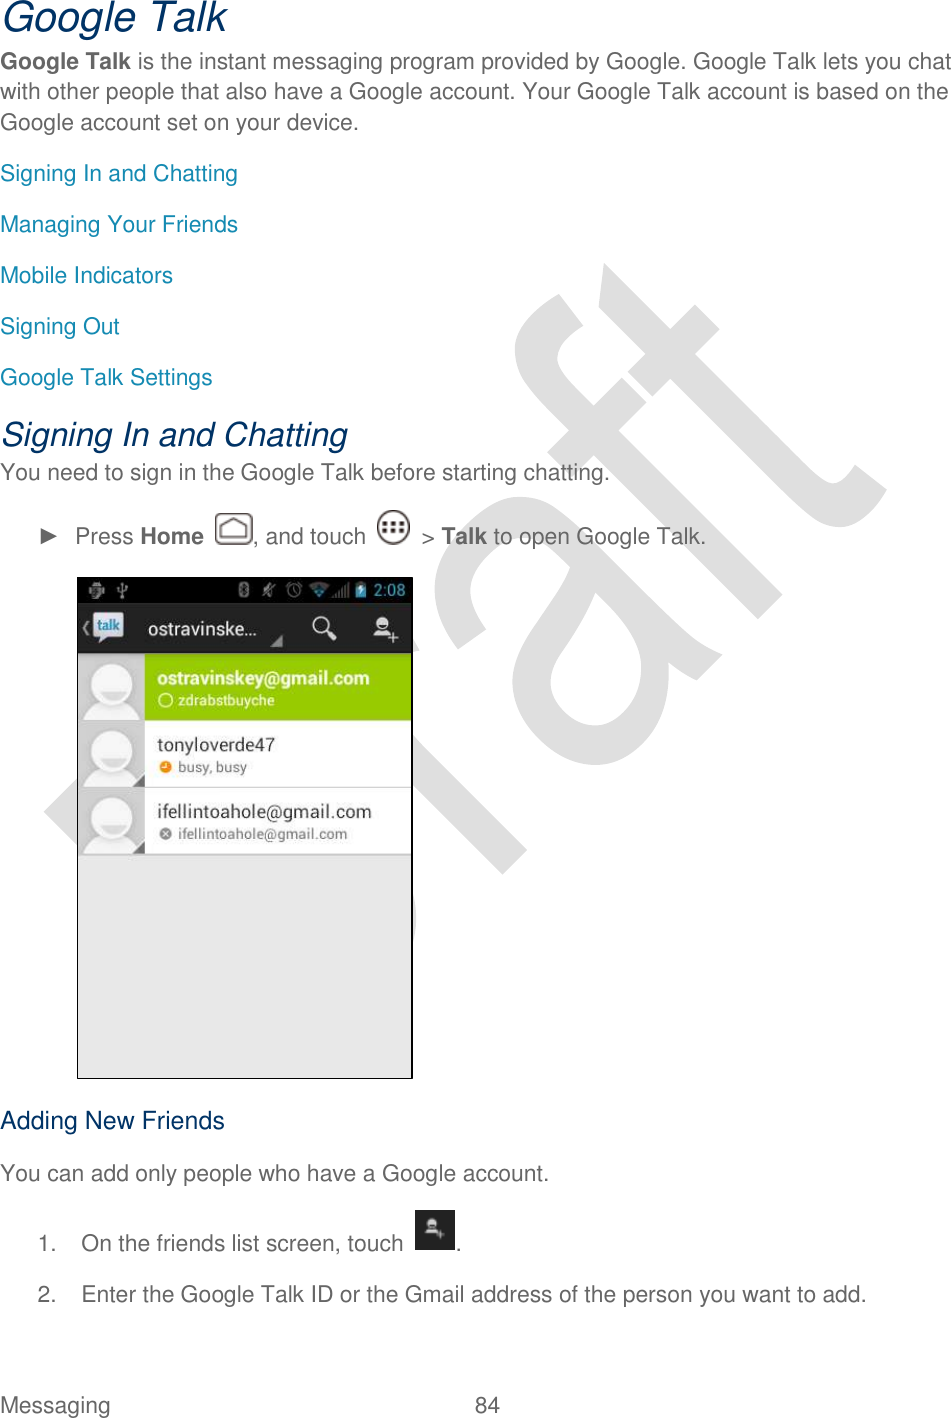
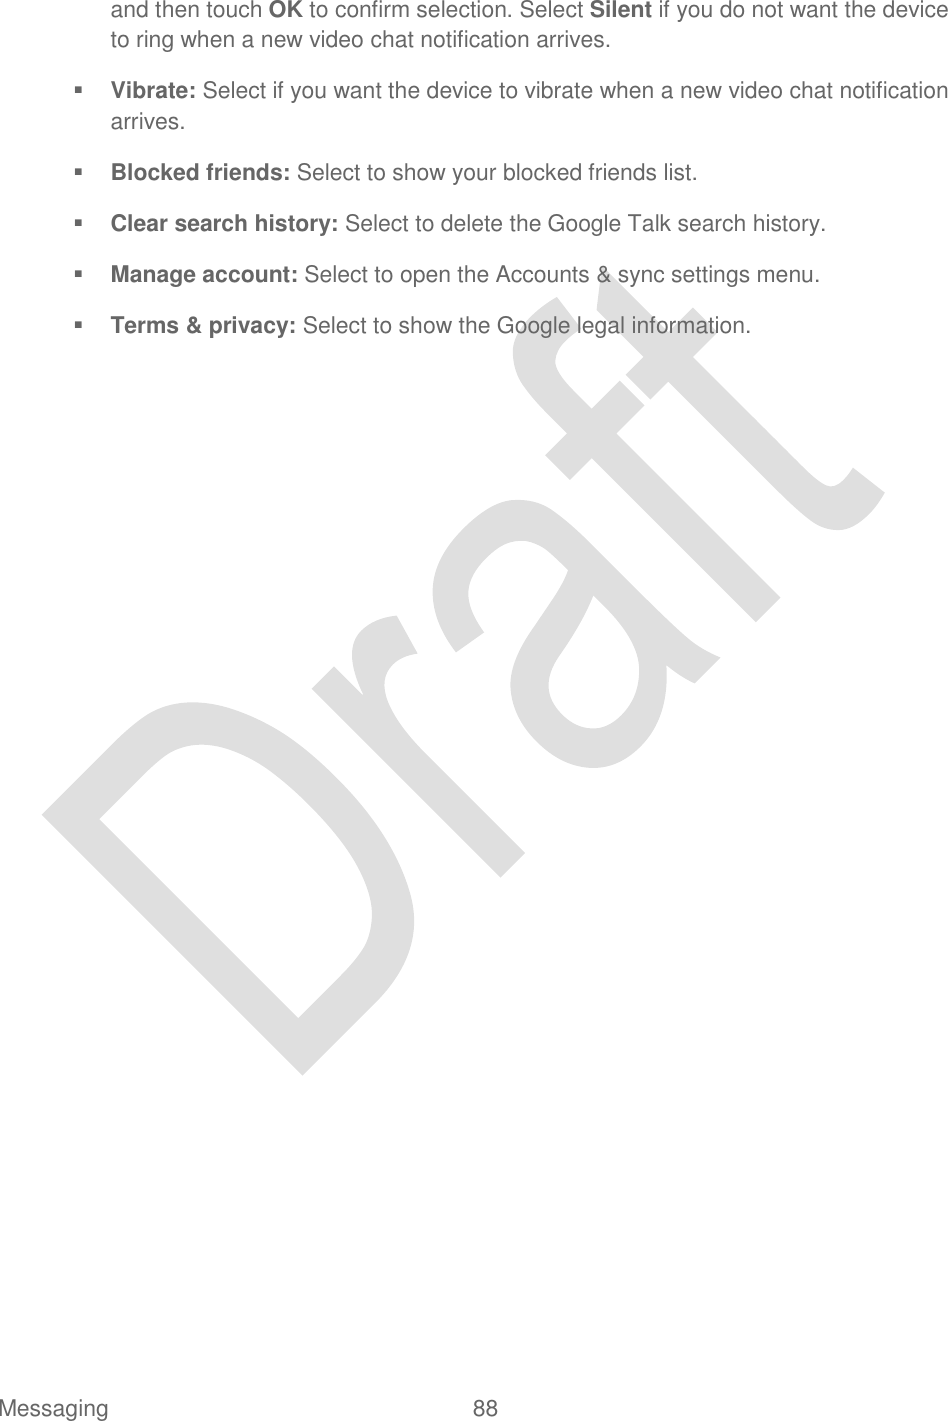
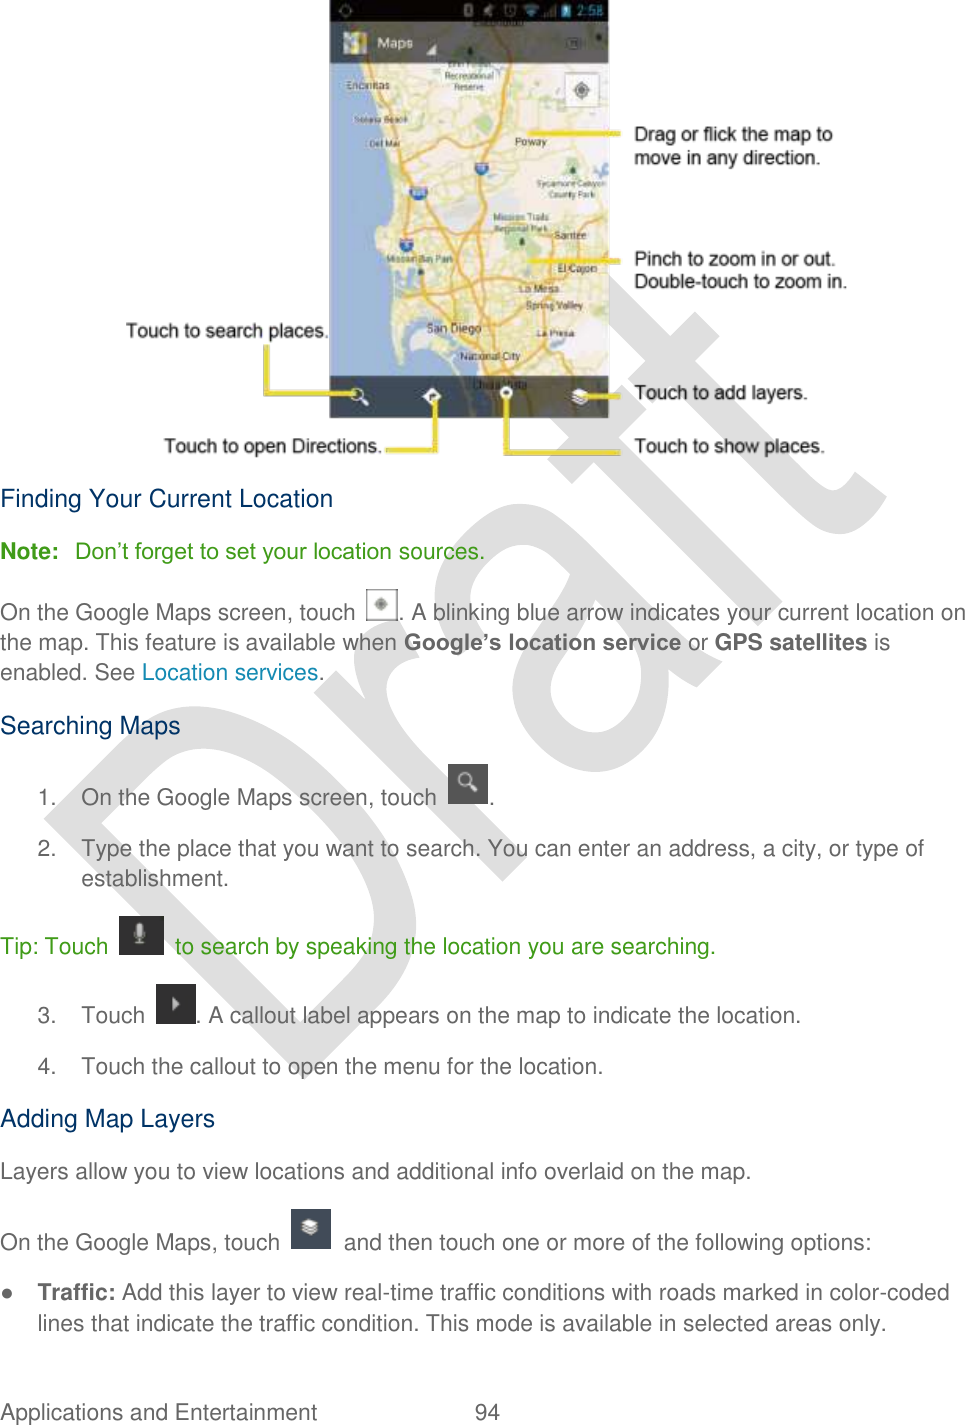
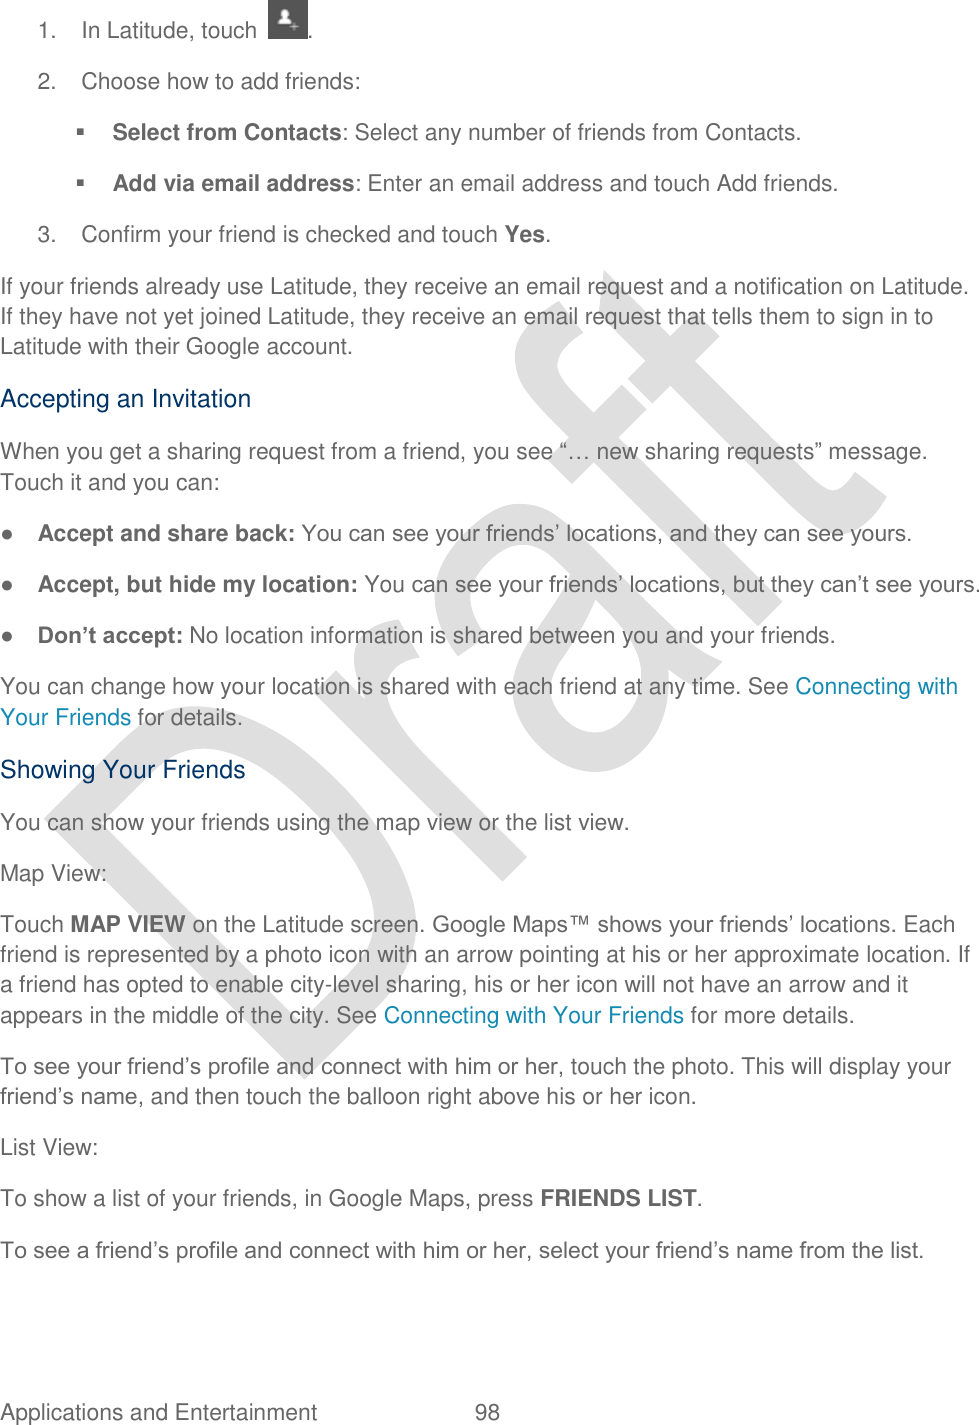
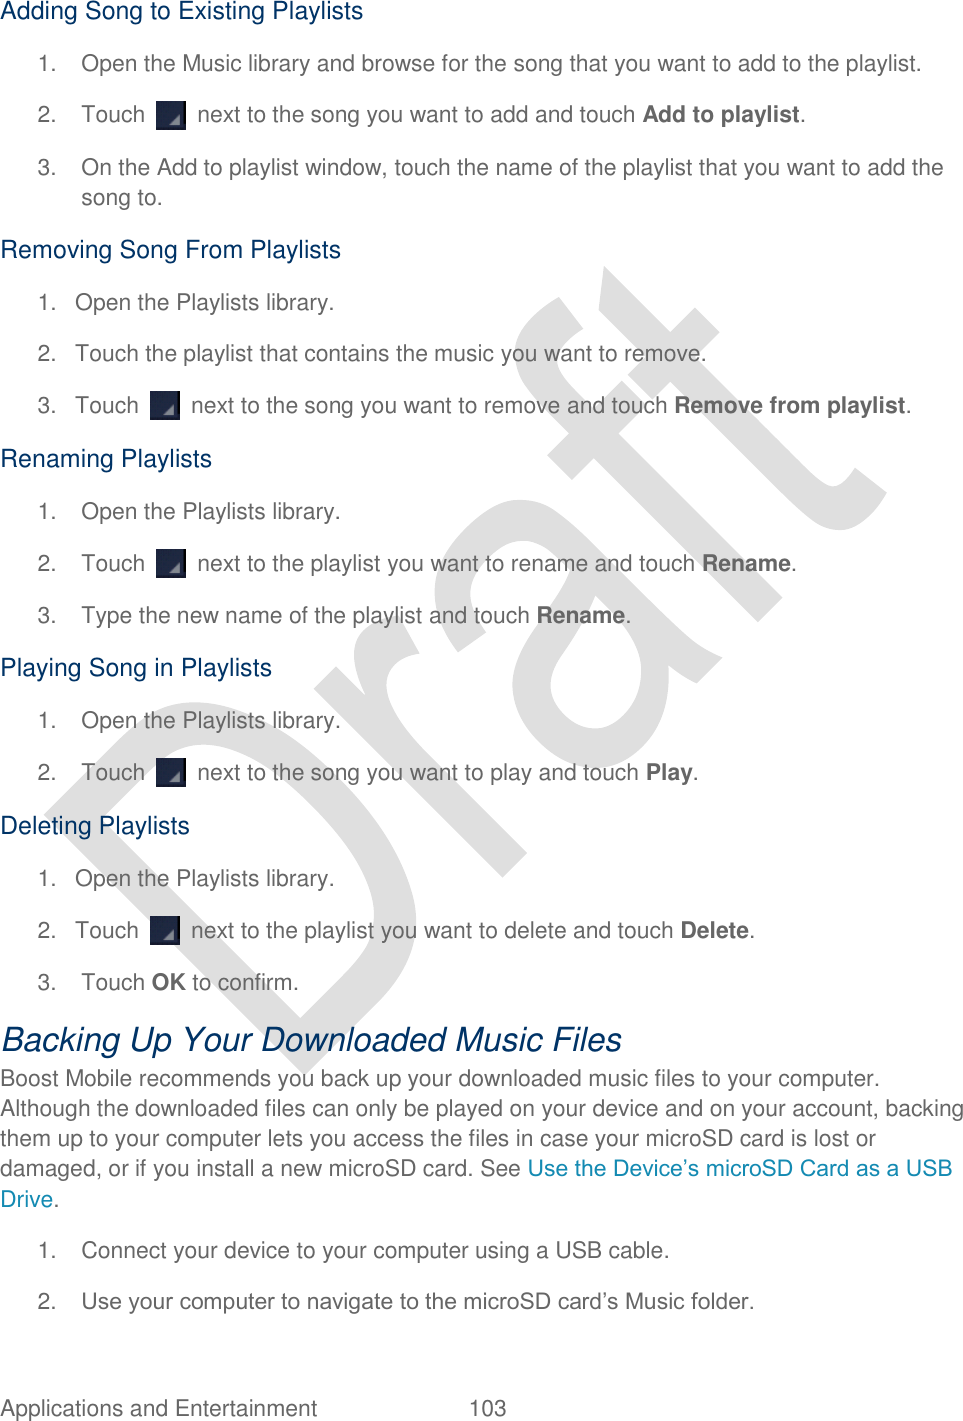
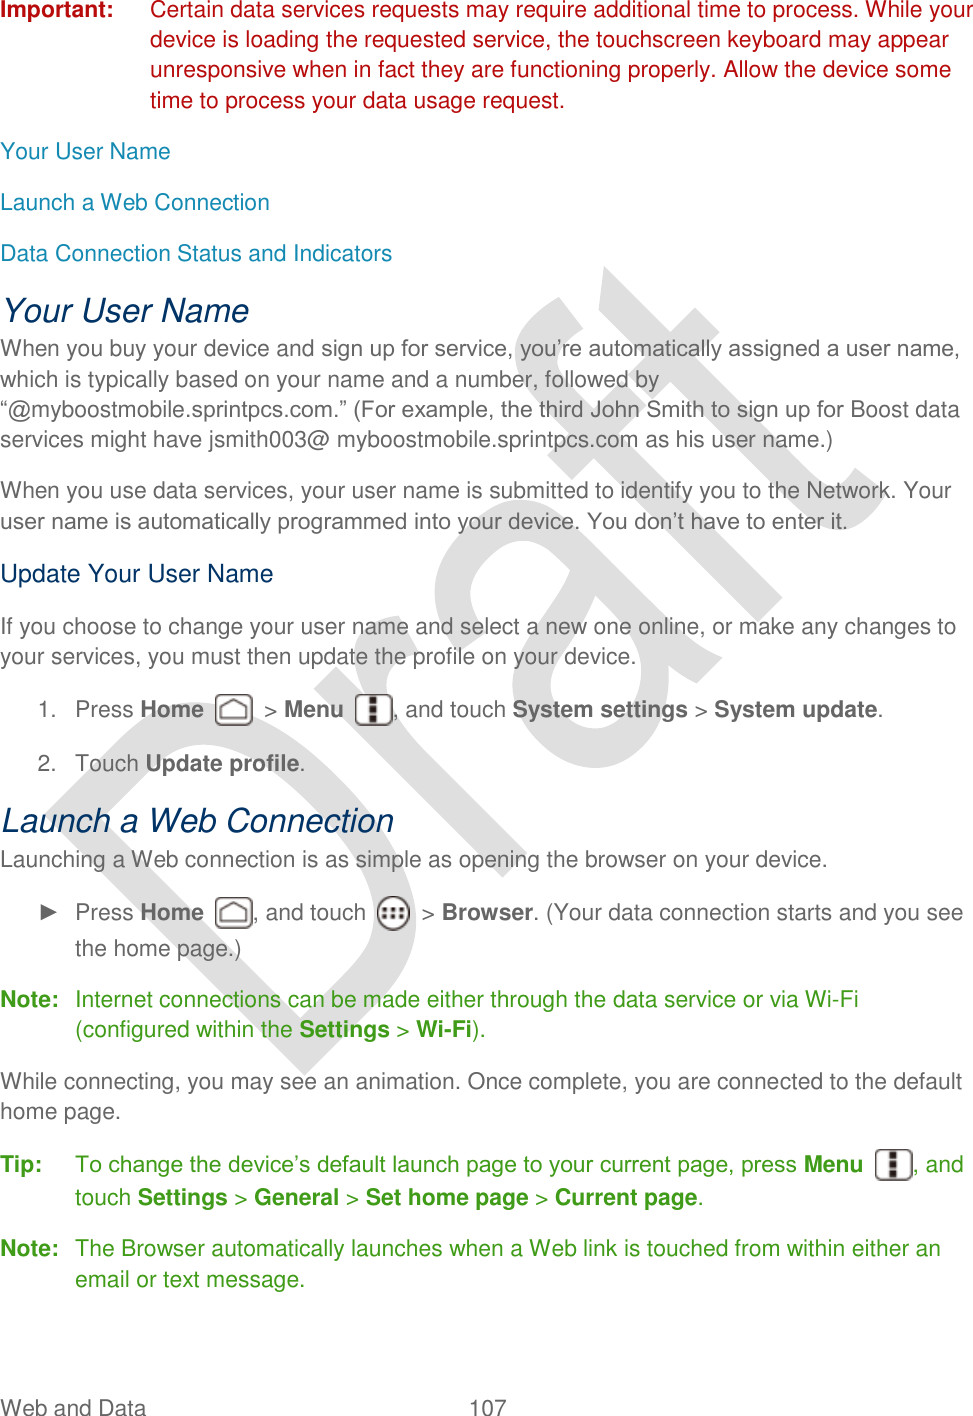
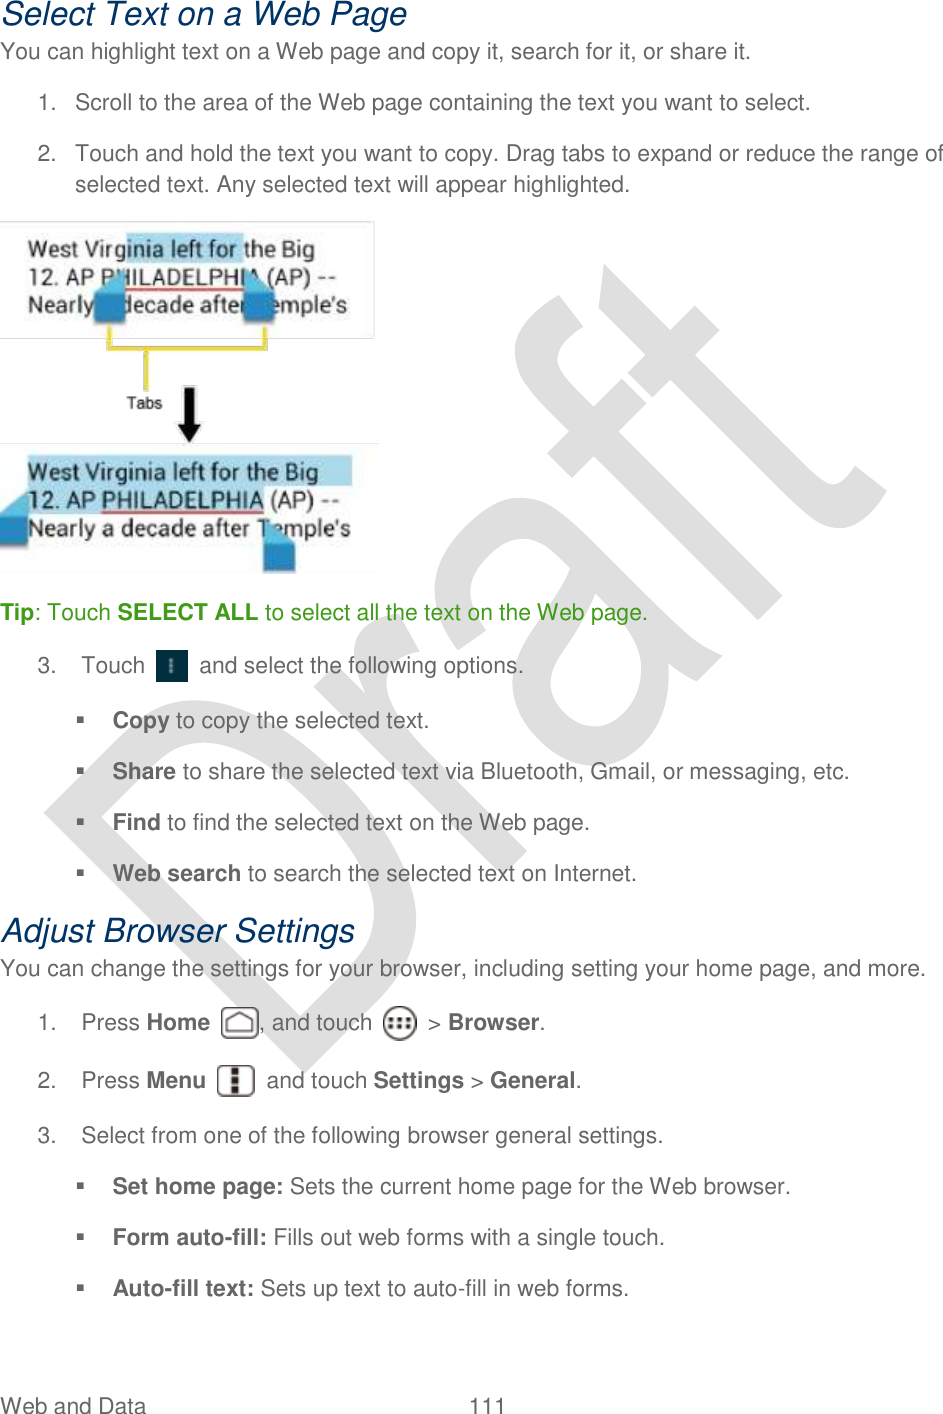
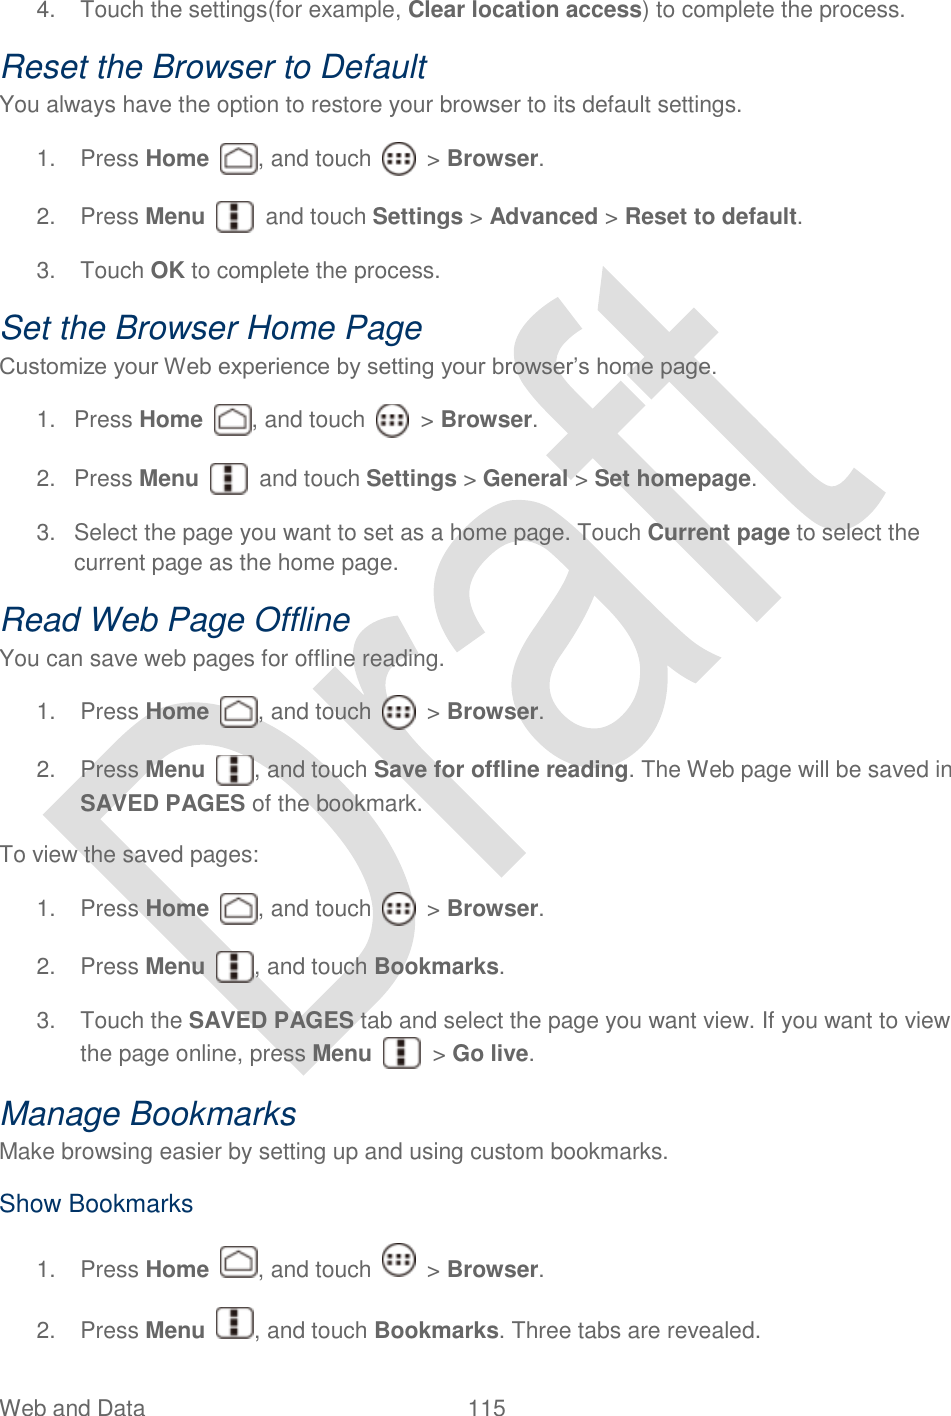
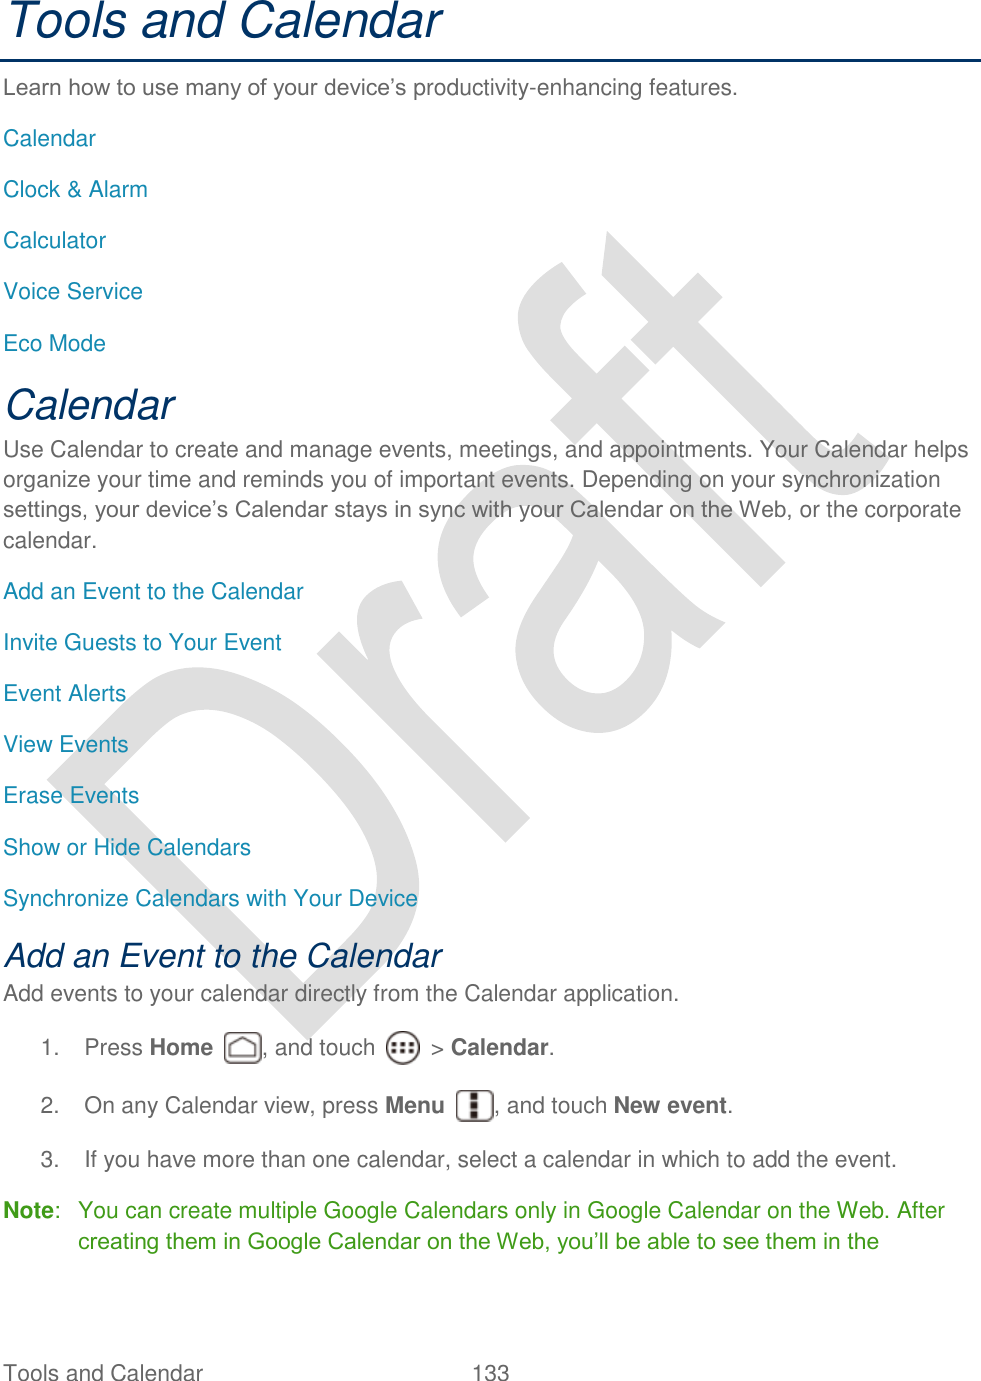
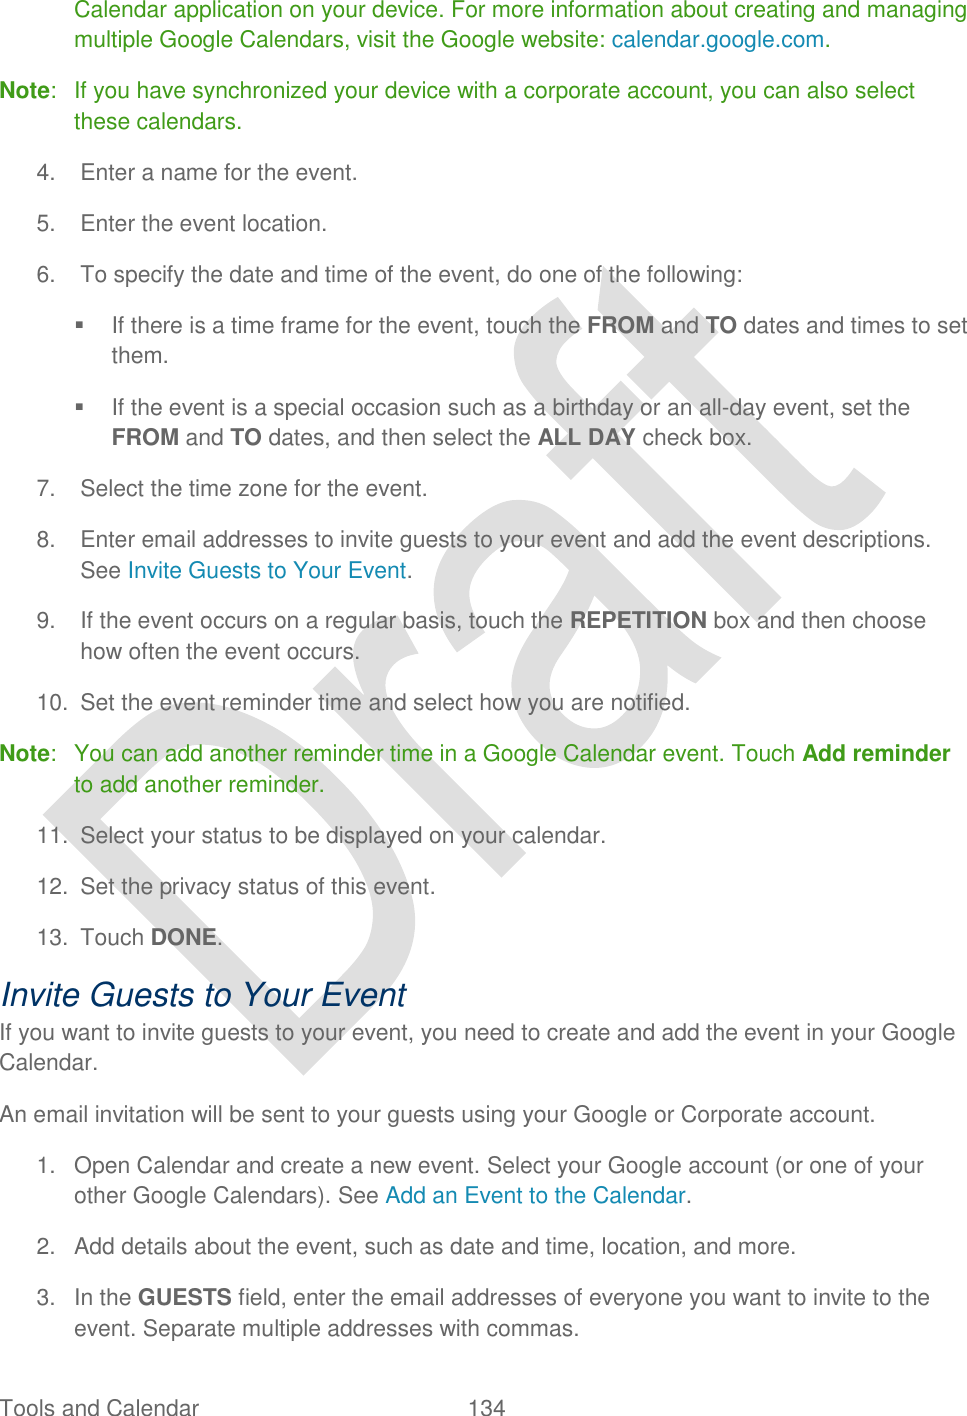
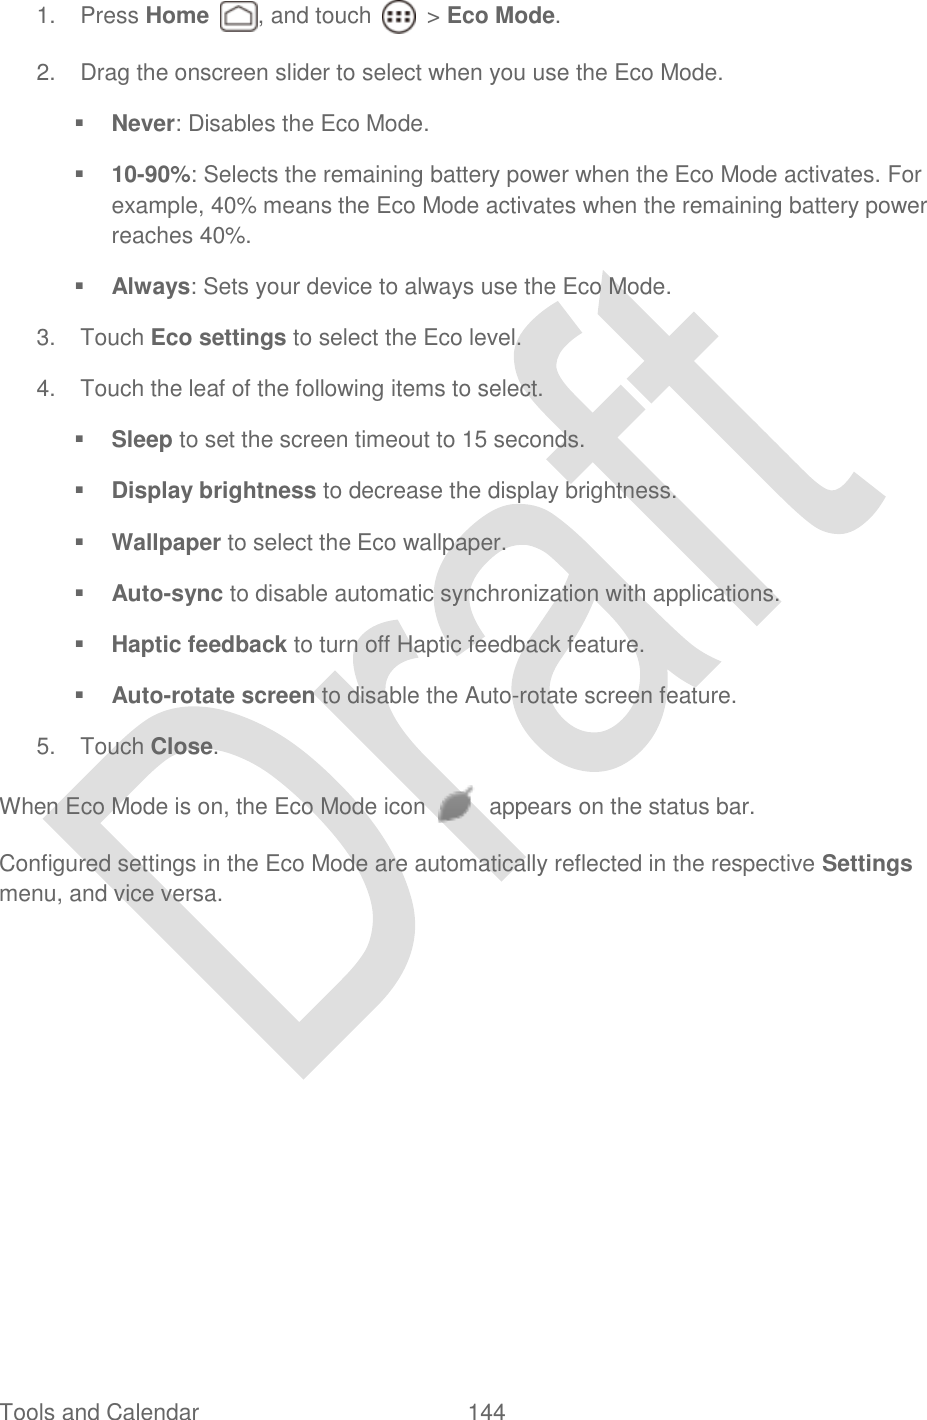
![Messaging 82 Text and MMS Options The messages settings menu lets you control options for your text and MMS messages including message limits, size settings, and notifications. 1. Press Home , and touch > Messaging. 2. Press Menu , and then touch Settings. You can set the following options. STORAGE Settings ● Delete old messages: Automatically delete older messages, when the set limits are reached. ● Text message limit: Choose the maximum number of text messages to store in each conversation thread. ● Multimedia message limit: Choose the maximum number of MMS messages to store in each conversation thread. TEXT (SMS) MESSAGES Settings ● Emergency Alerts: Sets the federally supervised cell phone alert services to send out broadcast SMS messages for public warning. Presidential: Receives an emergency presidential alert. (Presidential is always grayed out [not selectable] and cannot be excluded.) Imminent Threat - Extreme: Select this option if you want to receive emergency alerts in an extreme emergency situation (an extraordinary threat to life or property). Imminent Threat - Severe: Select this option if you want to receive emergency alerts in a severe emergency situation (a significant threat to life or property). Amber: Select this option if you want to receive alerts related to missing or endangered children. Emergency Alerts Test: Select this option if you want to receive a test message to make sure that the alert messages can be successfully received. Help: Displays the help information for Emergency Alerts. MULTIMEDIA (MMS) MESSAGES Settings ● Auto-retrieve: Select this option to automatically retrieve all your multimedia messages completely. When selected, the multimedia message header plus the message body and attachments will automatically download to your device. If you clear this check box, only the multimedia message header will be retrieved and shown in your Messaging screen.](https://usermanual.wiki/Kyocera/C5170.user-manual-hydro/User-Guide-1700942-Page-98.png)
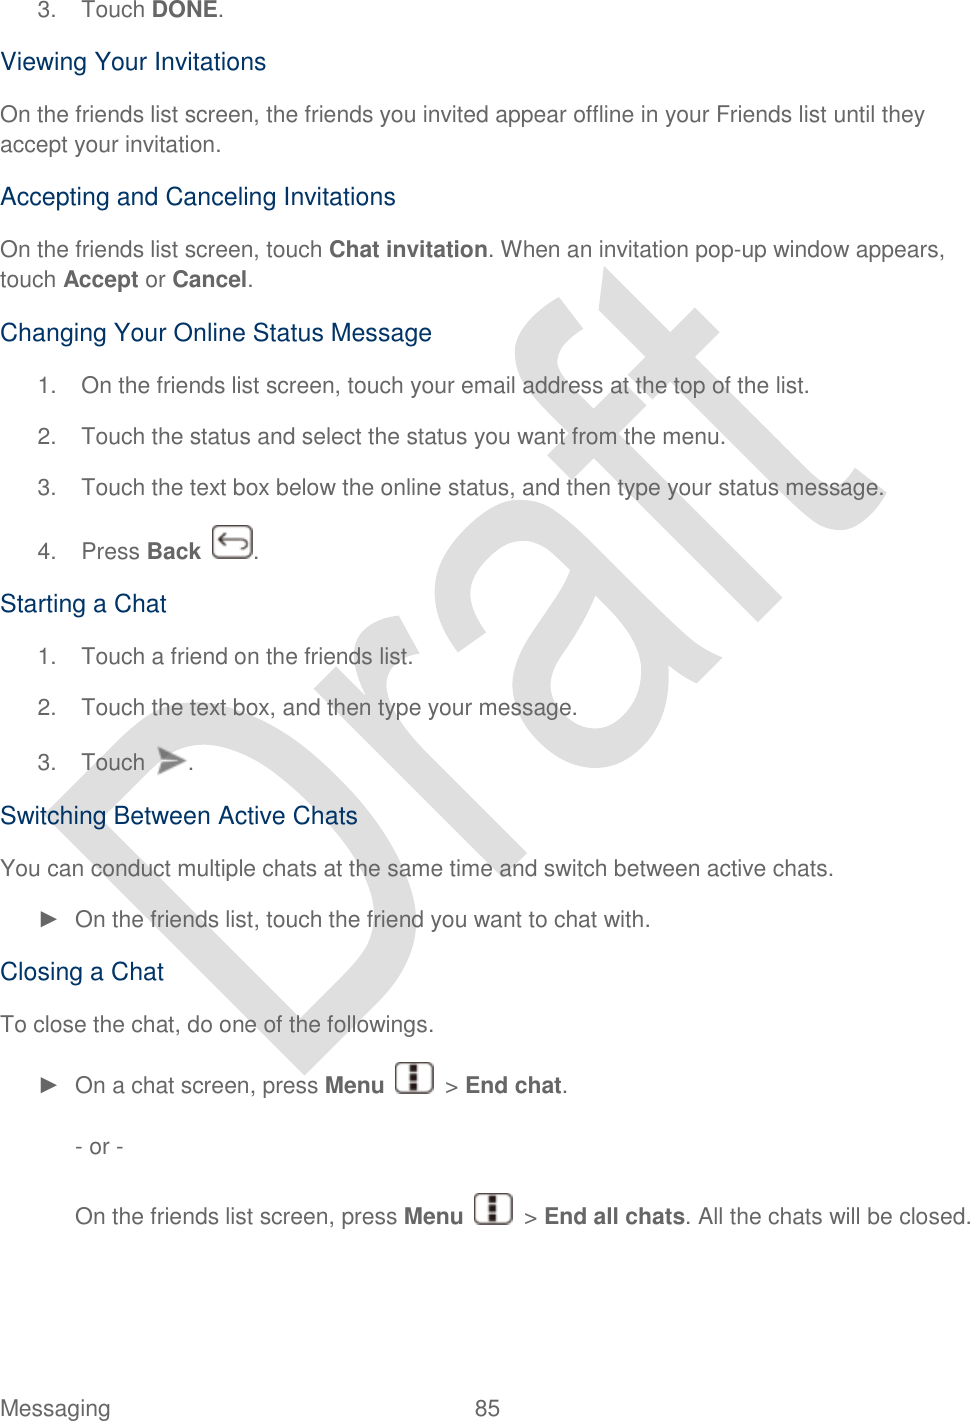
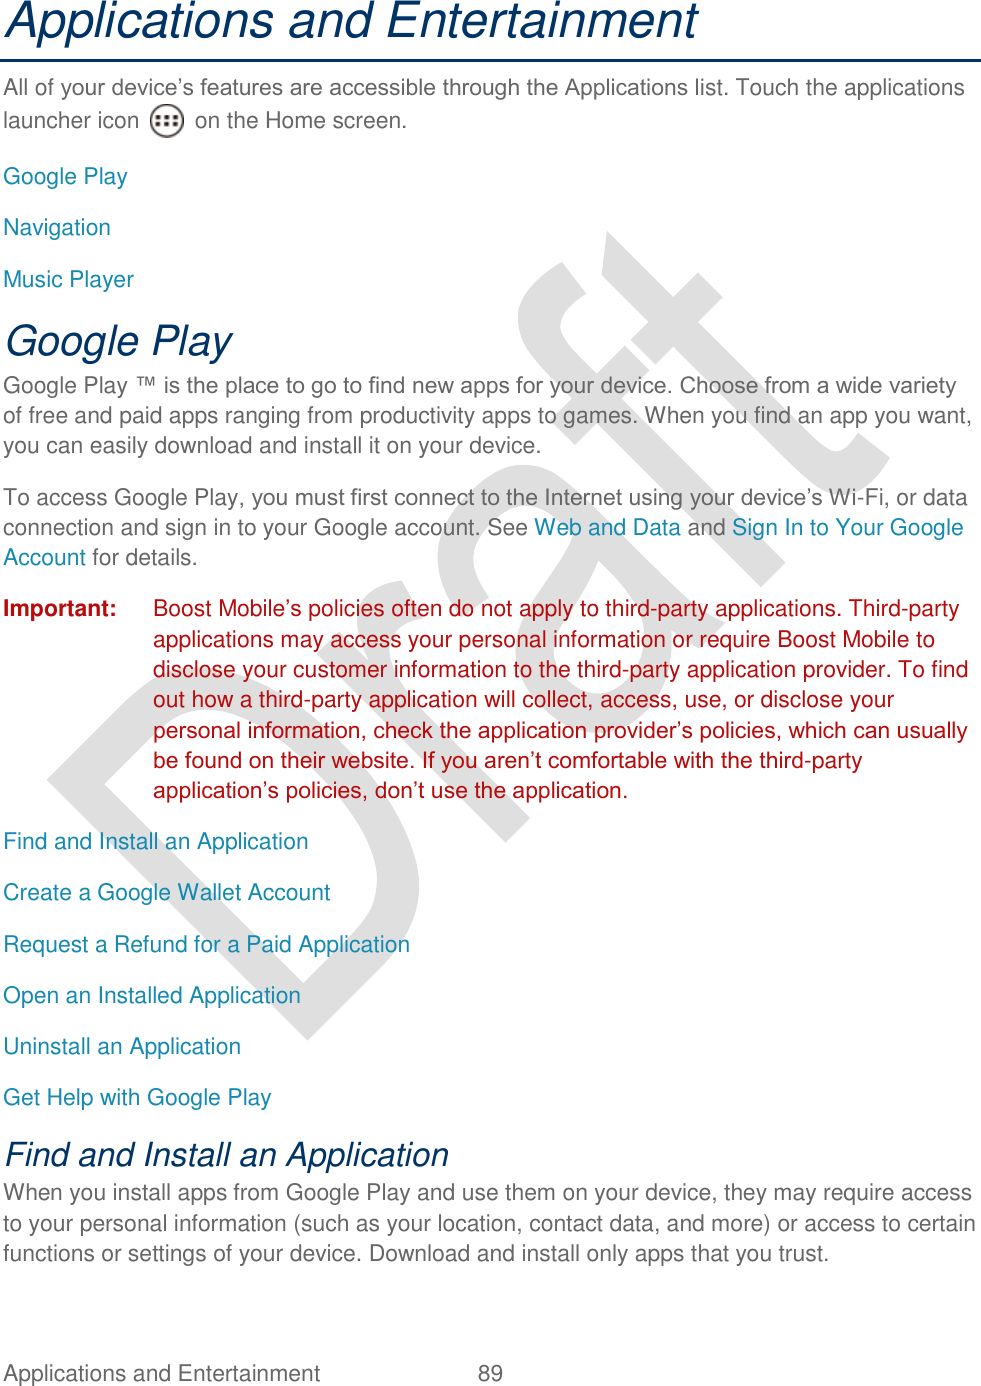


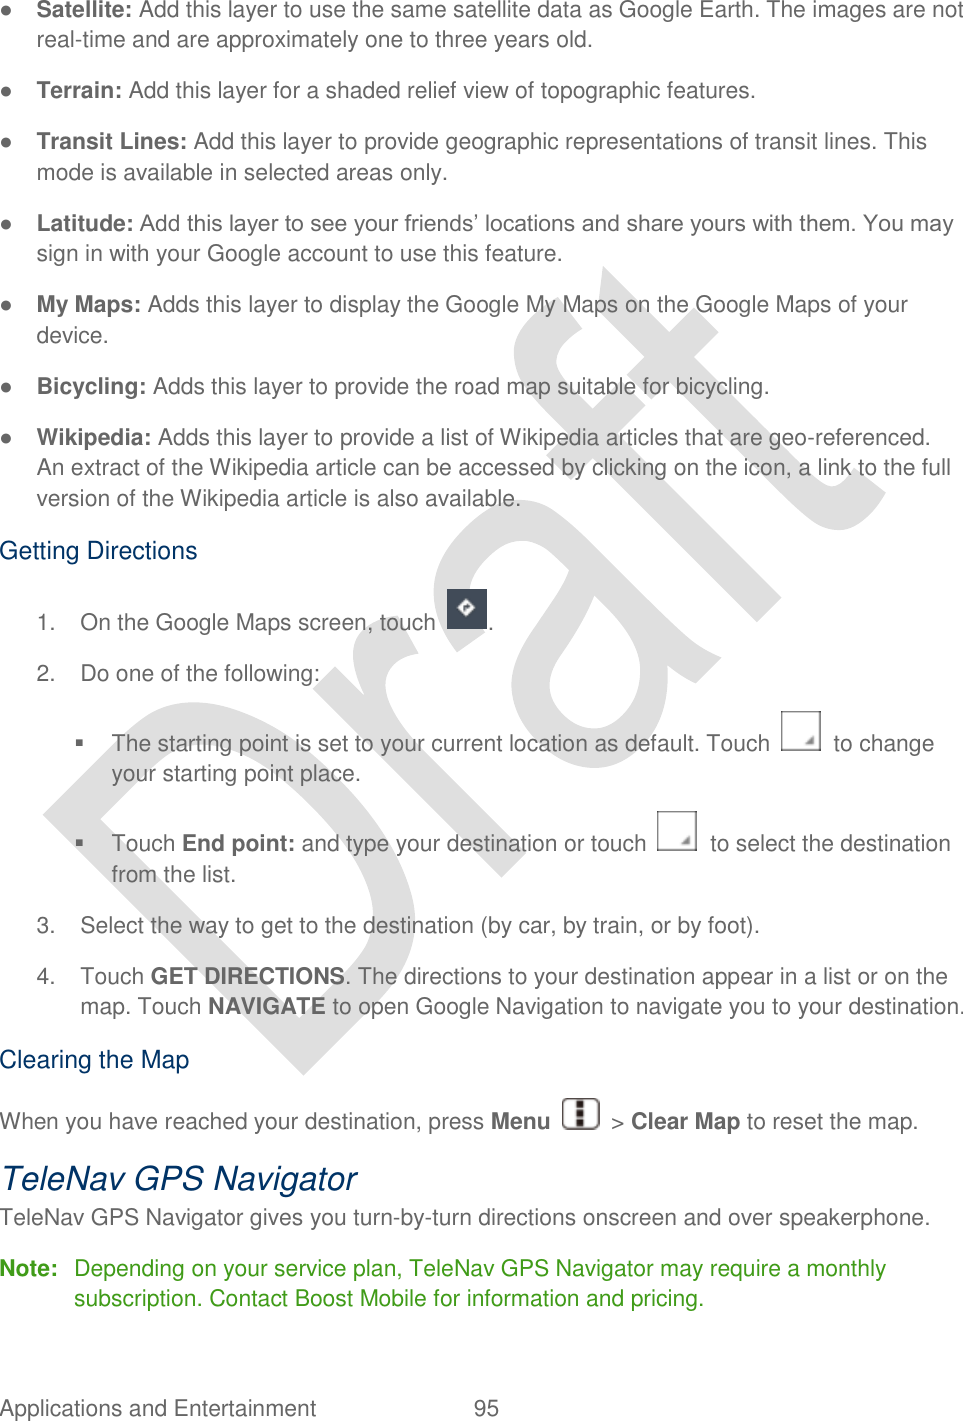

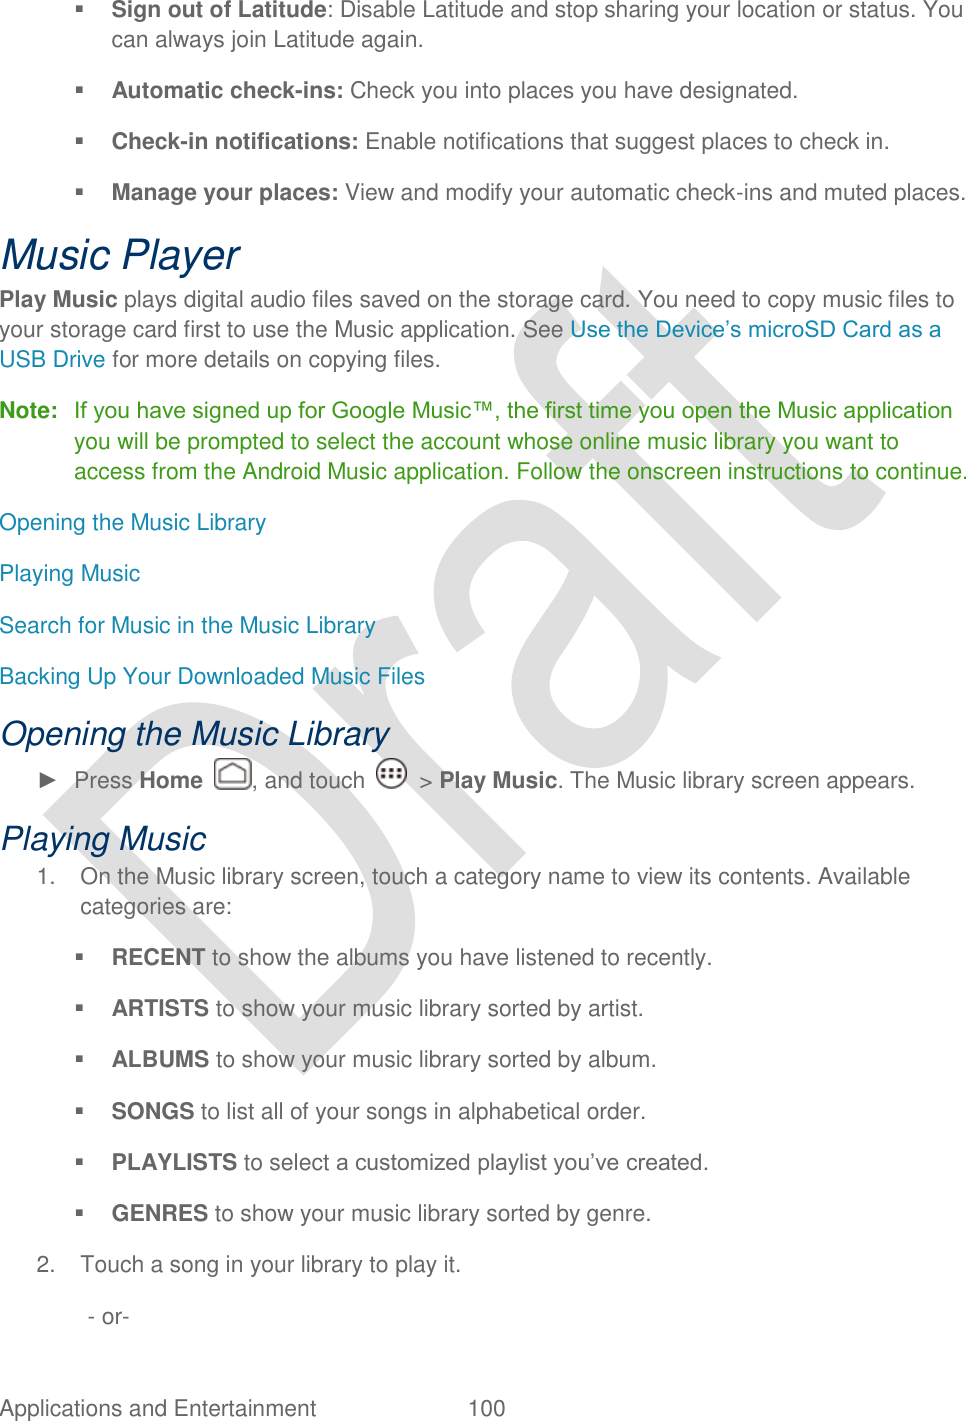
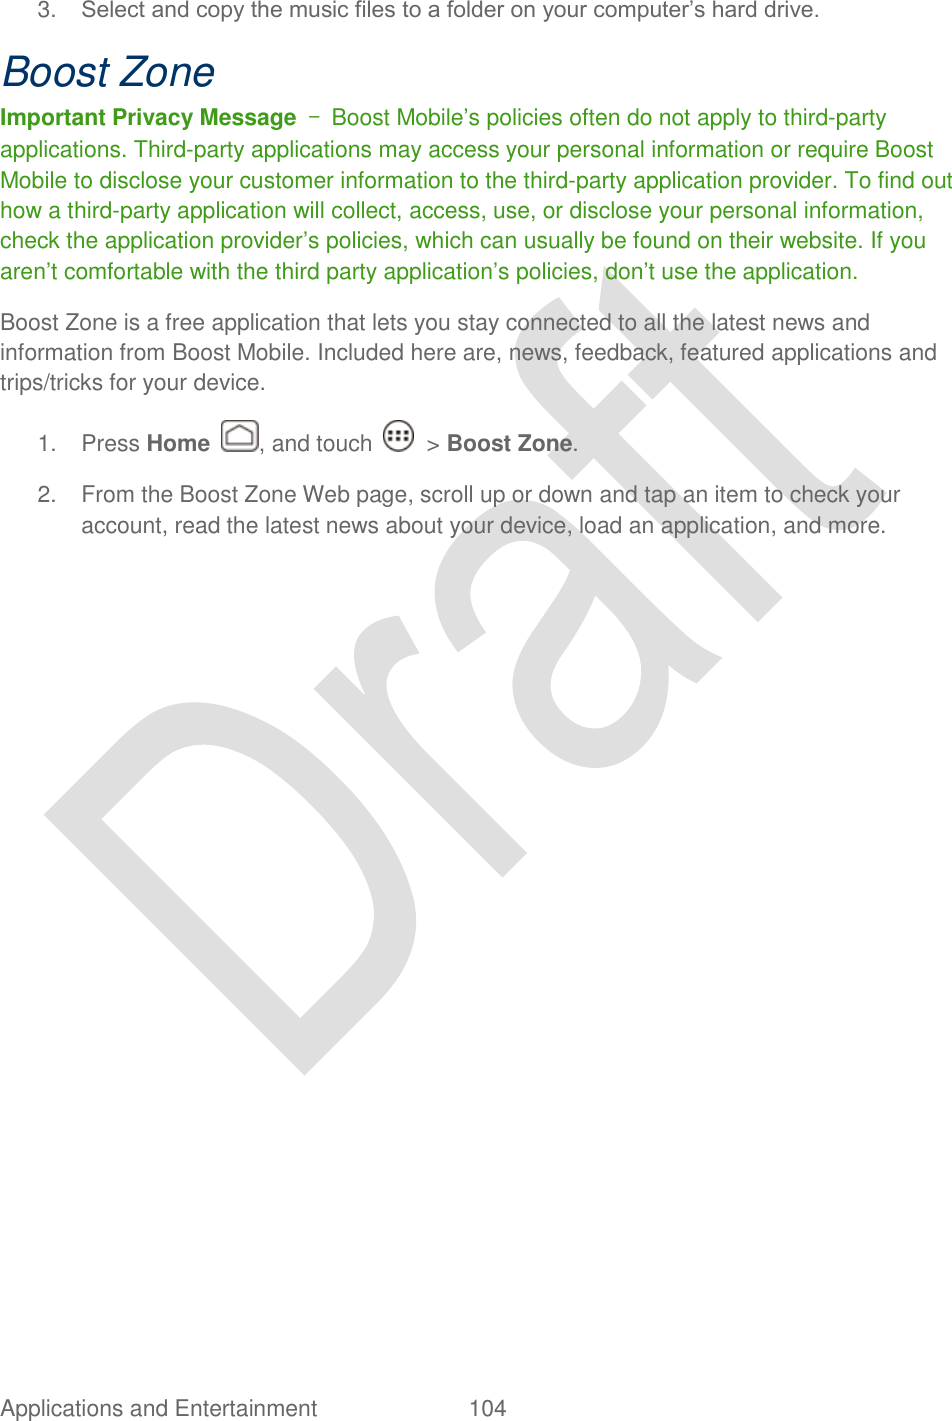
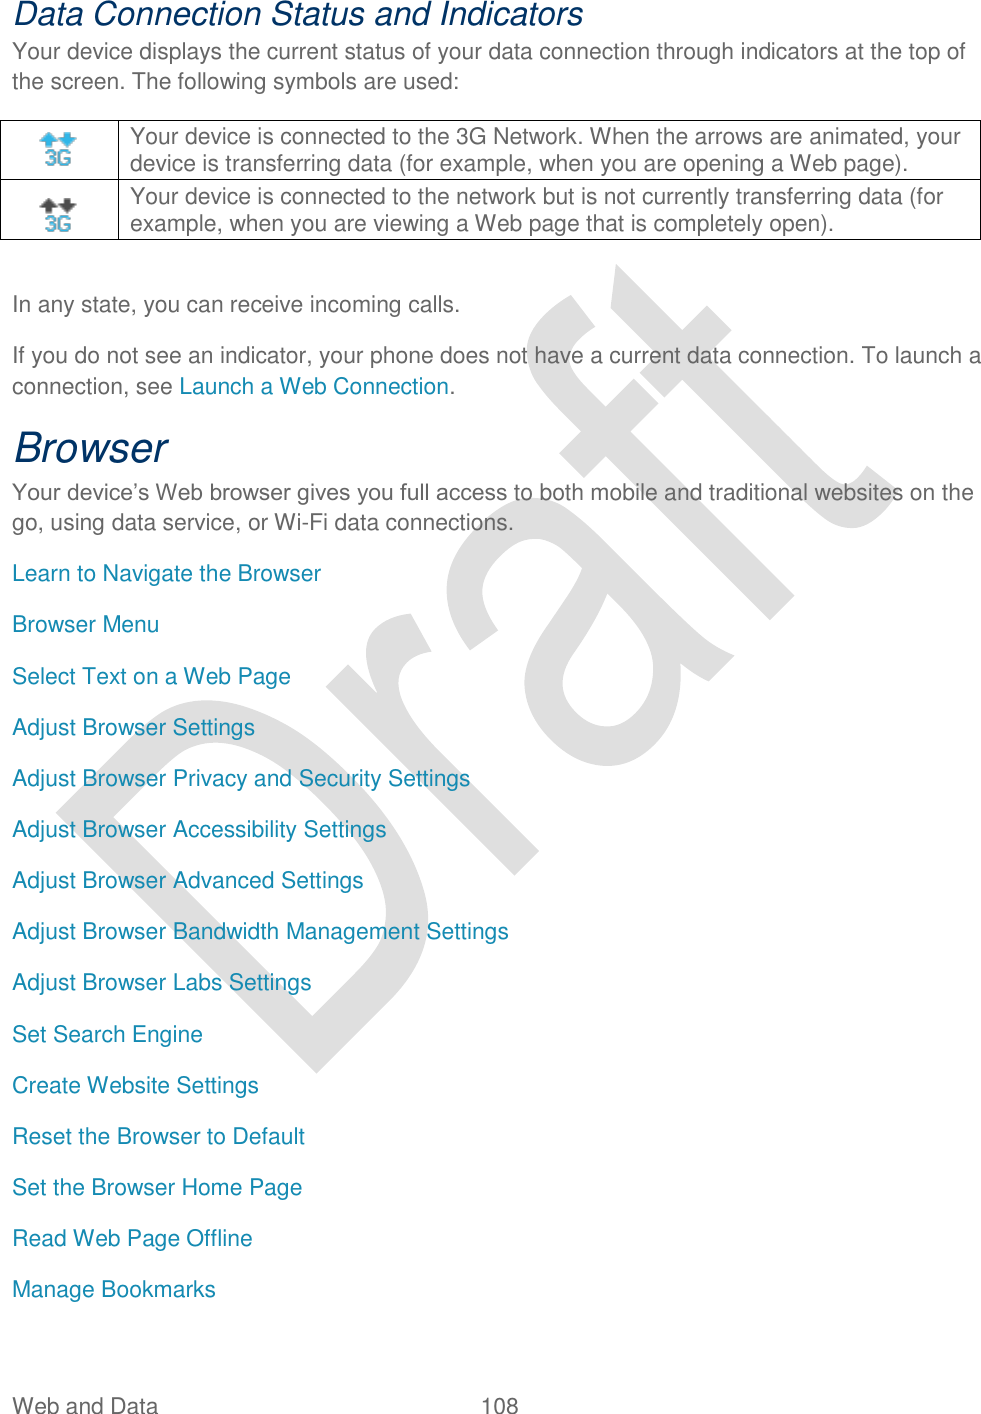
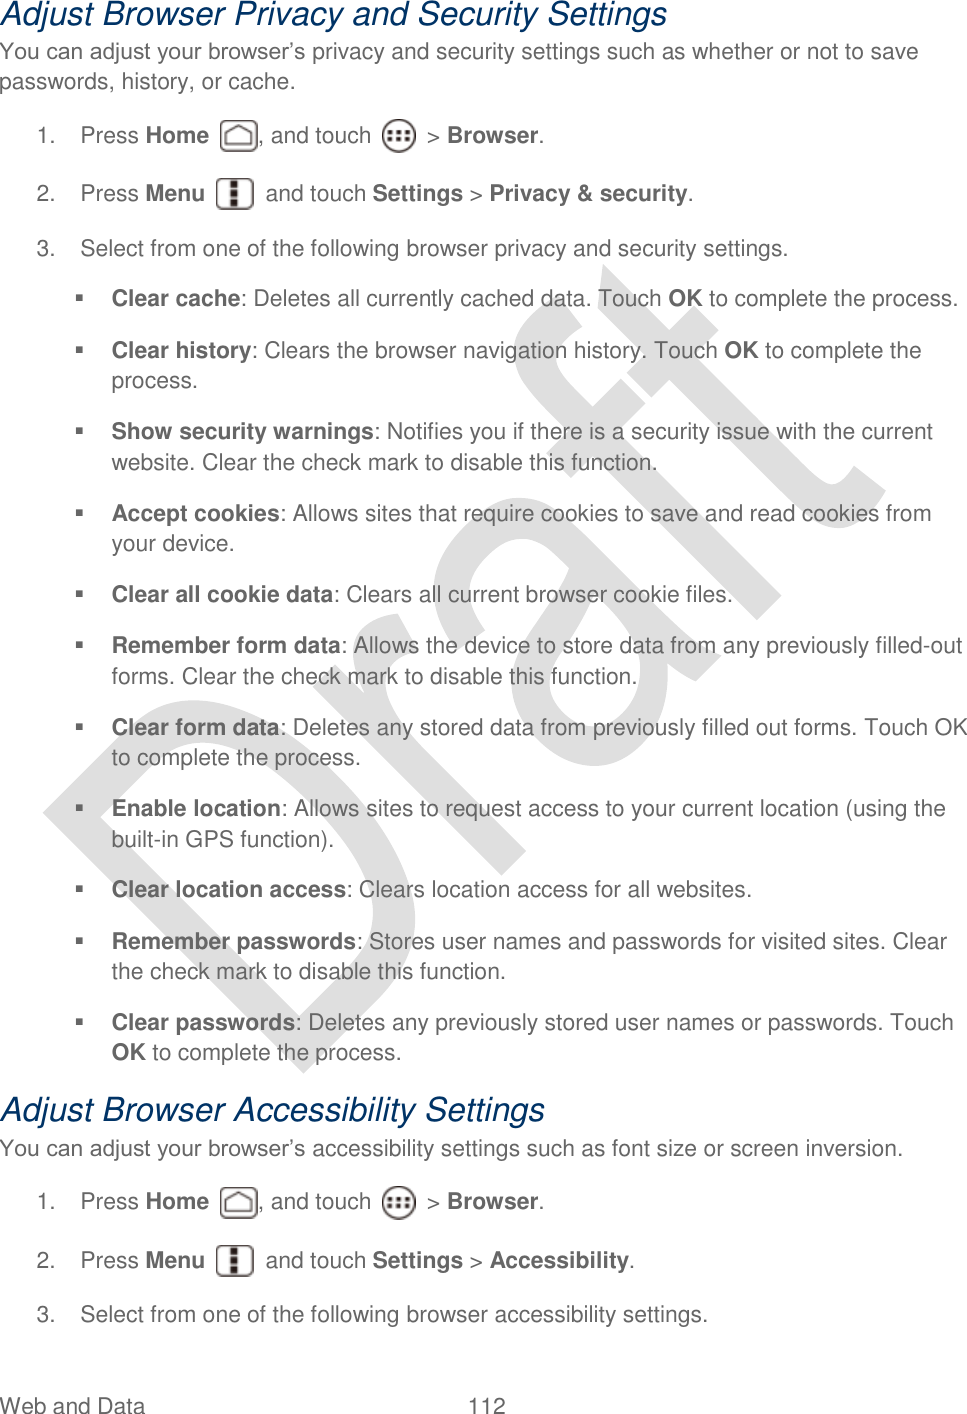
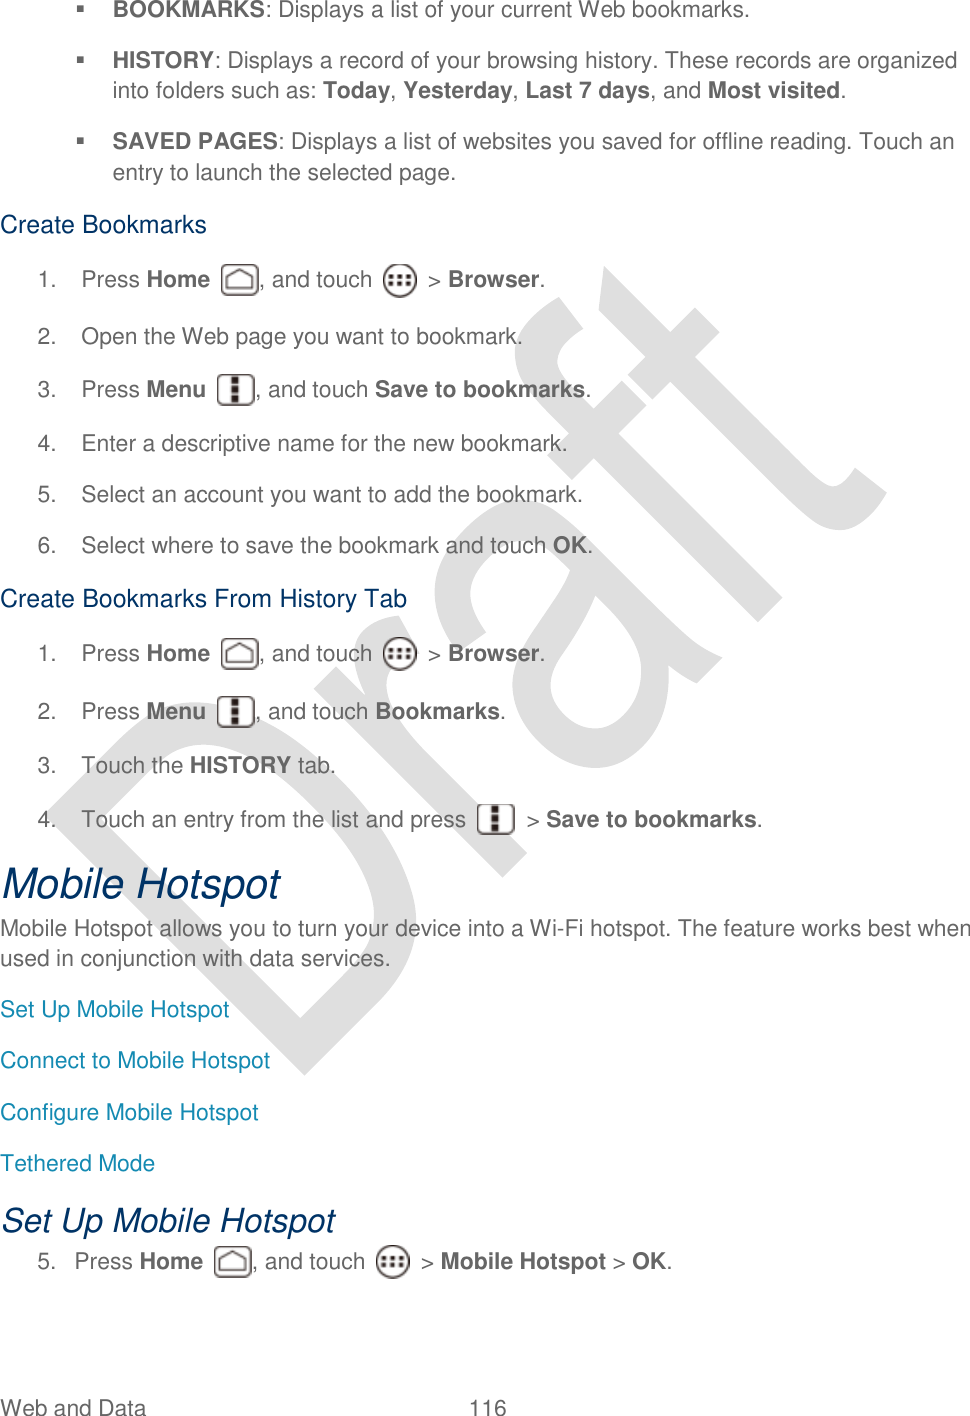
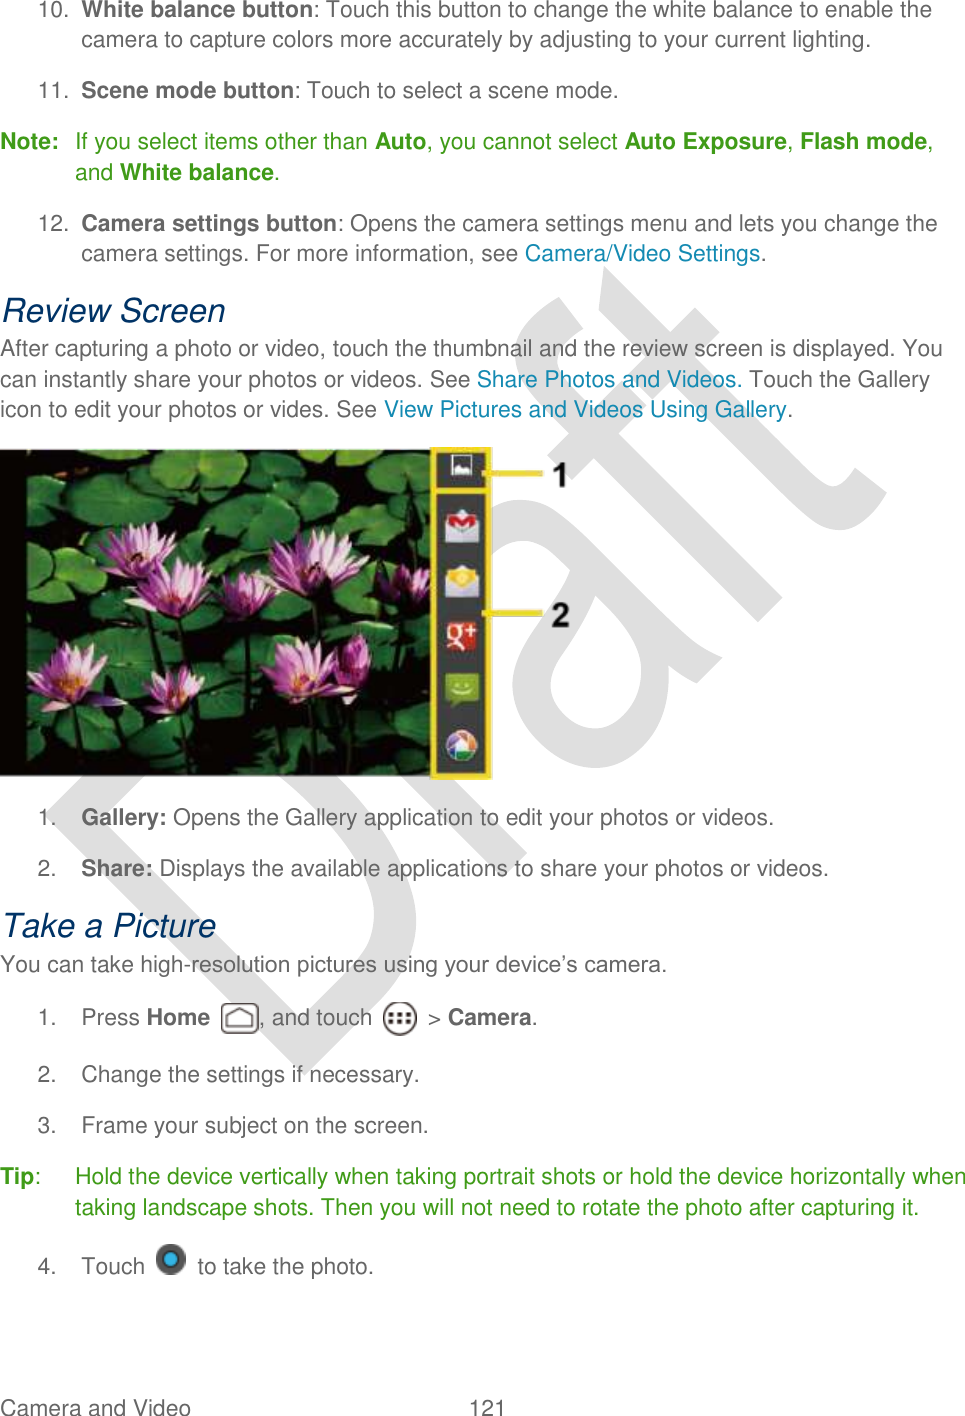


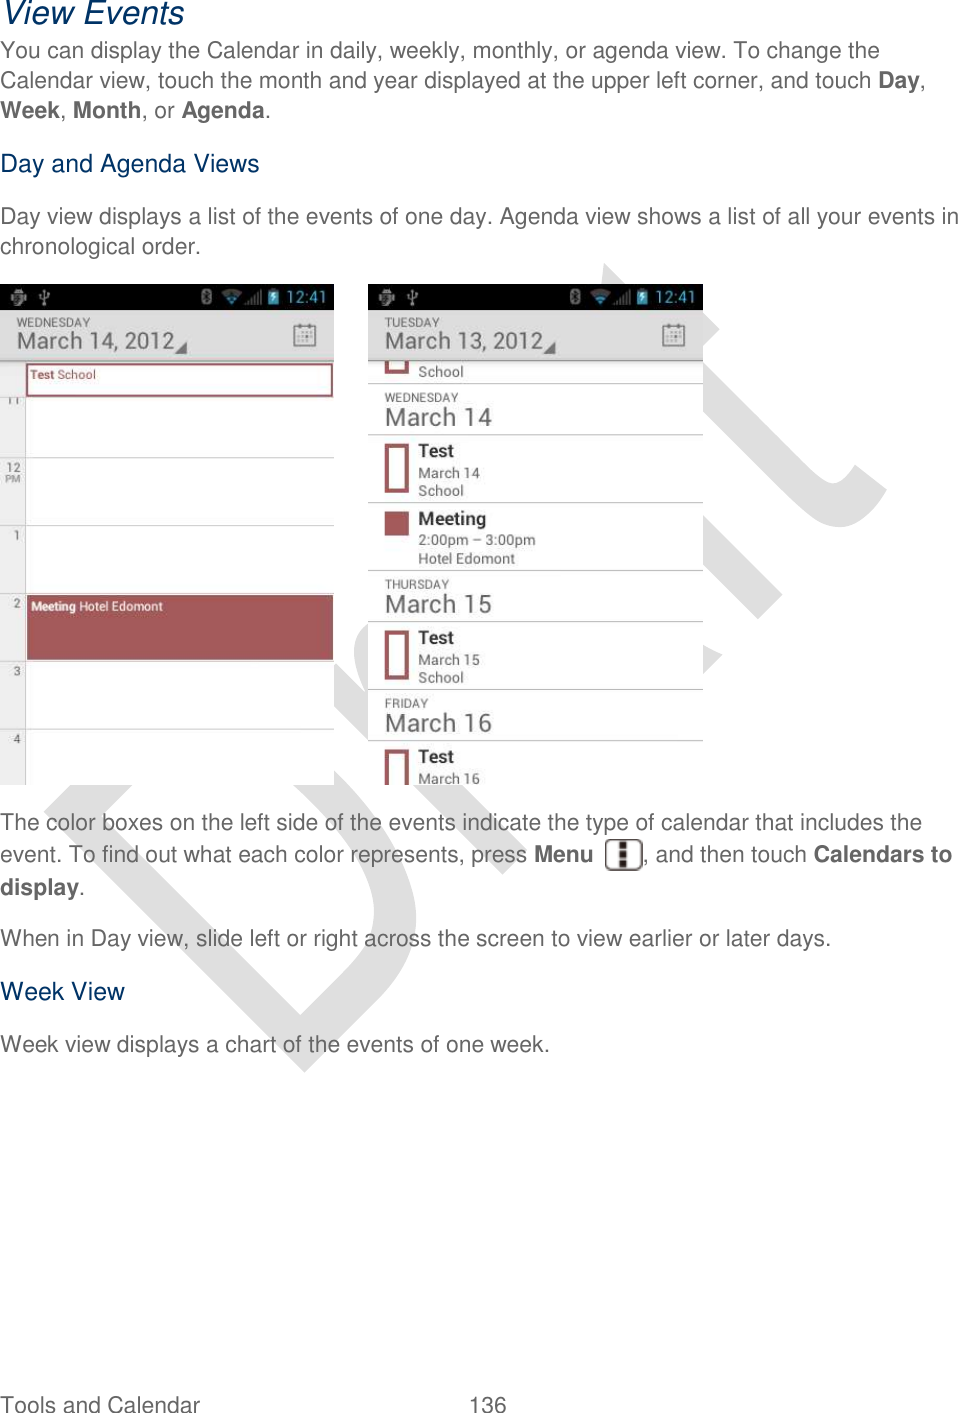
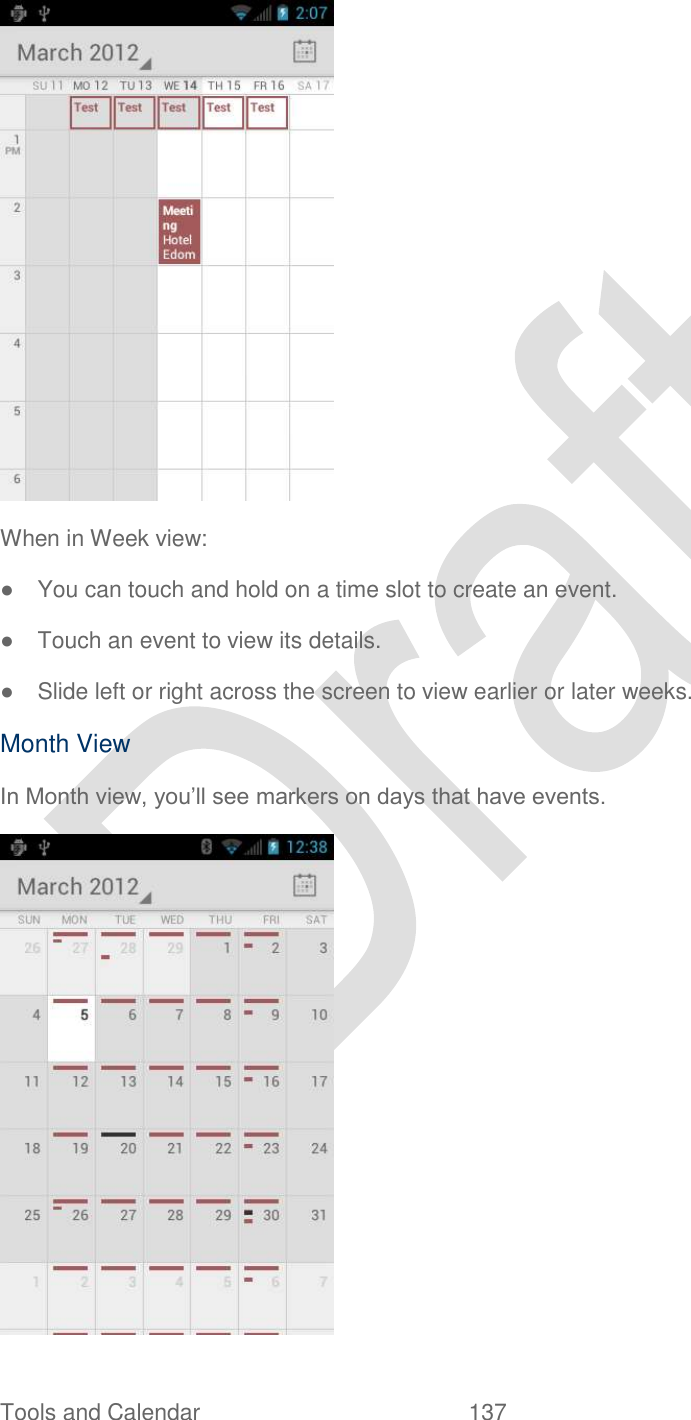
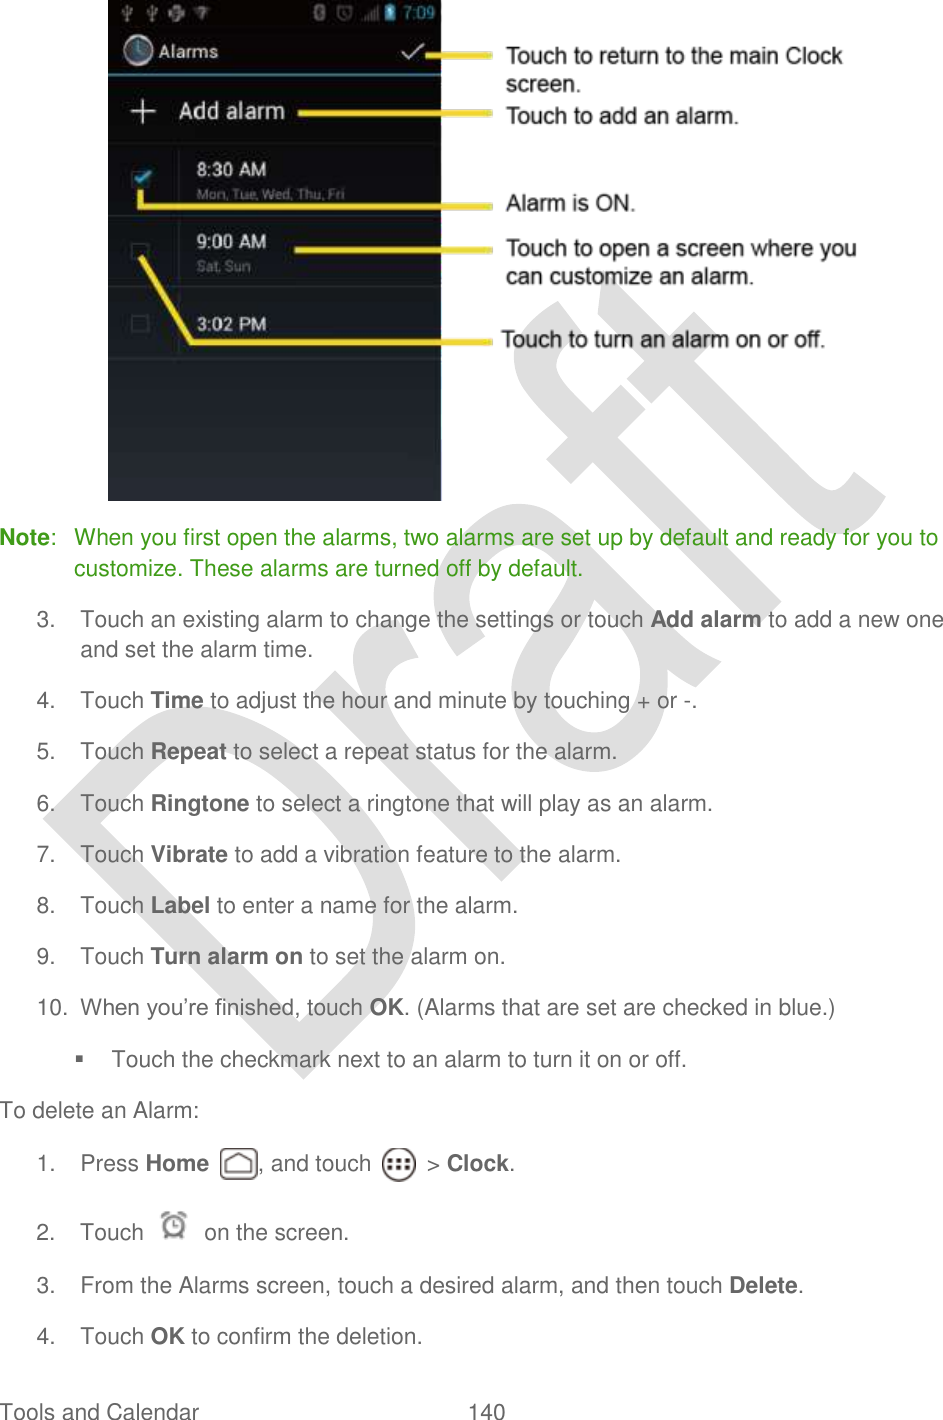
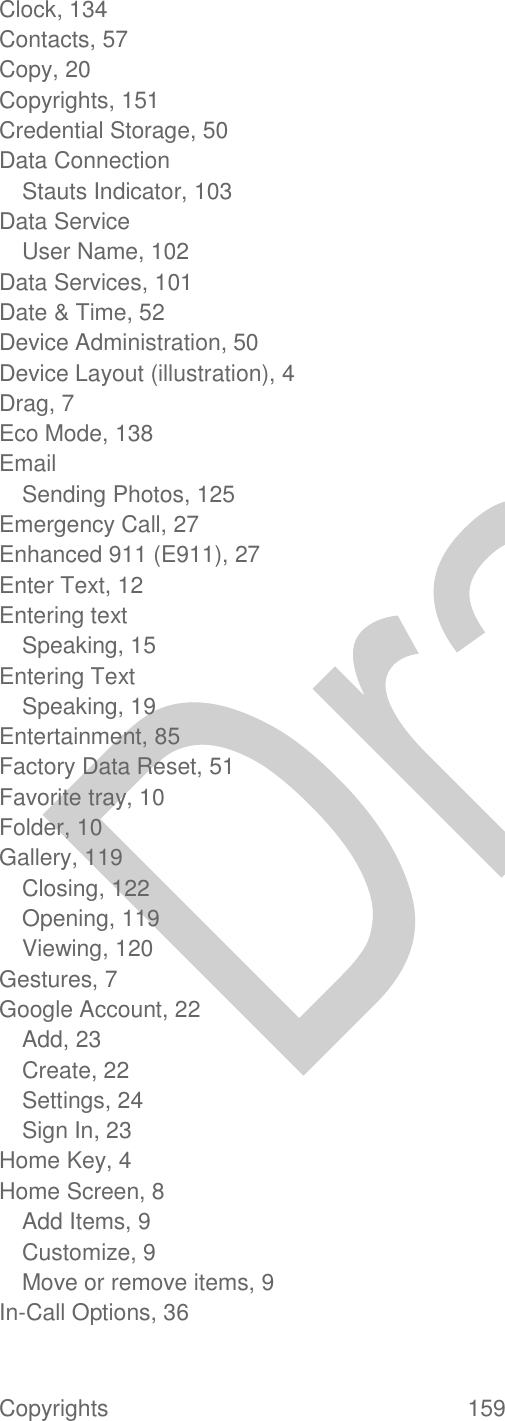
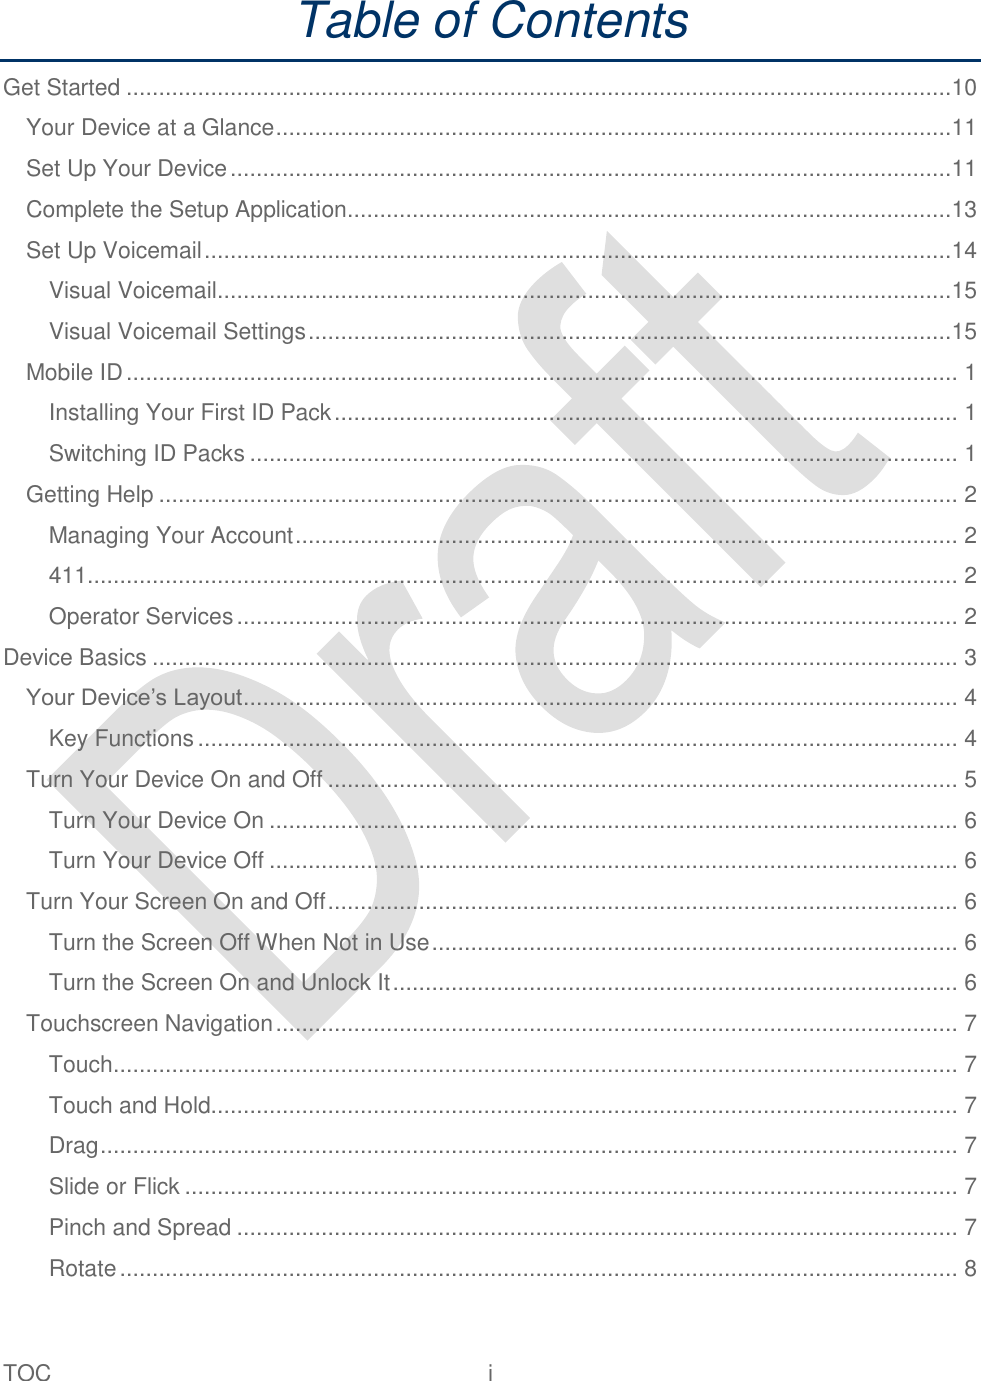
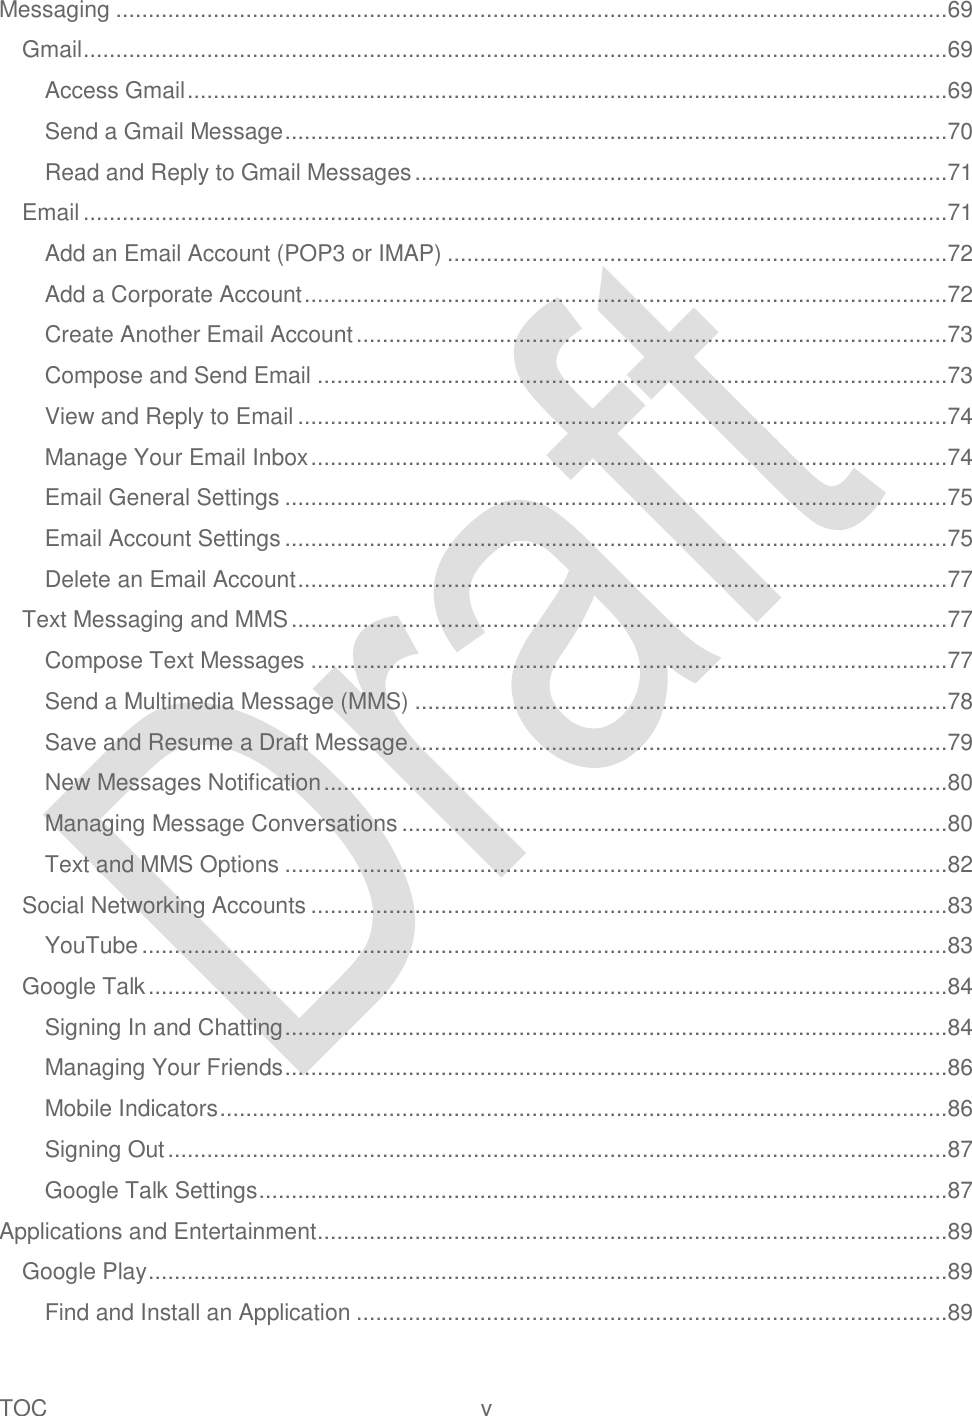
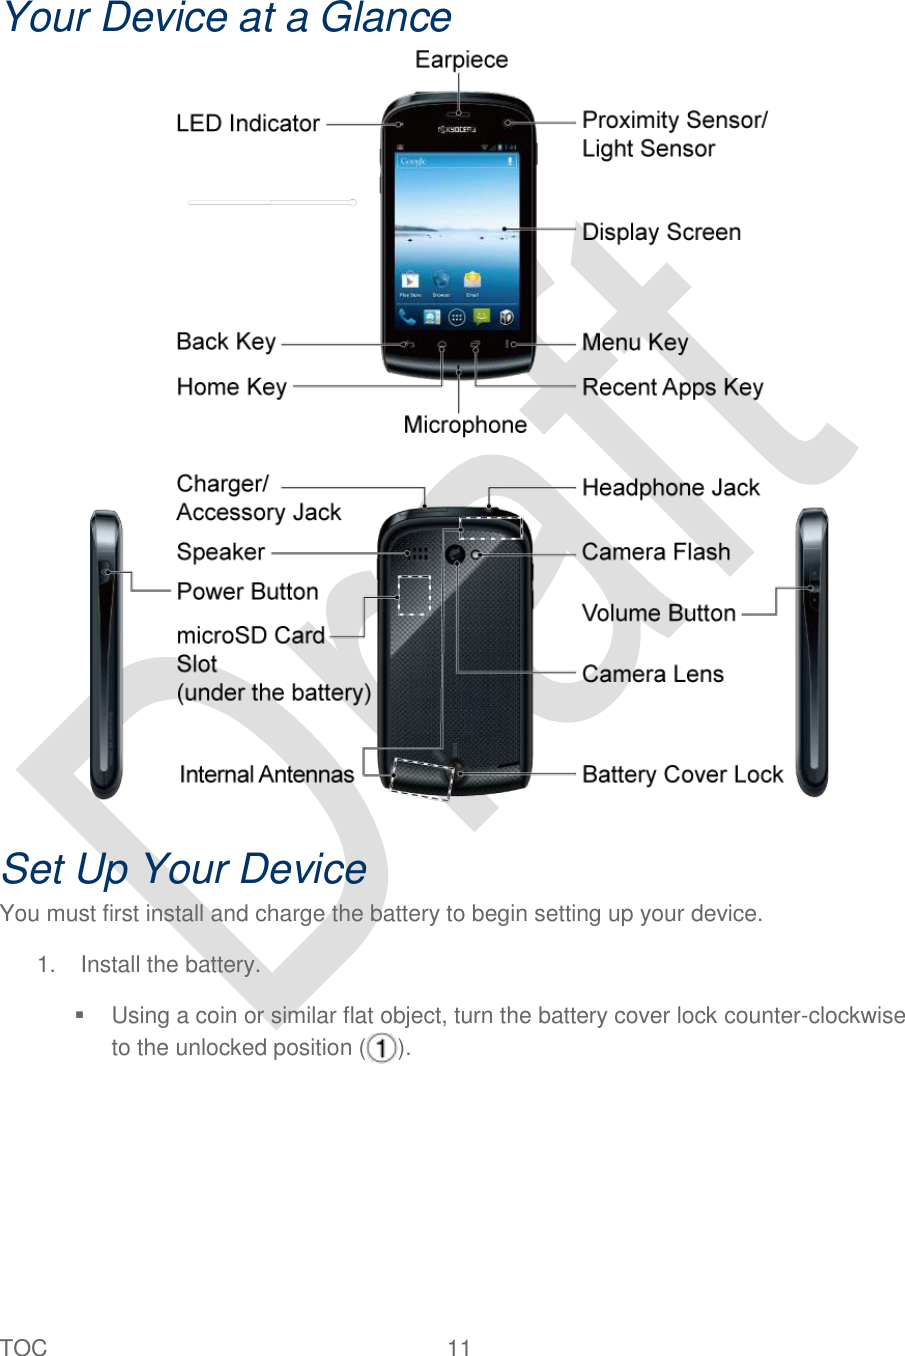
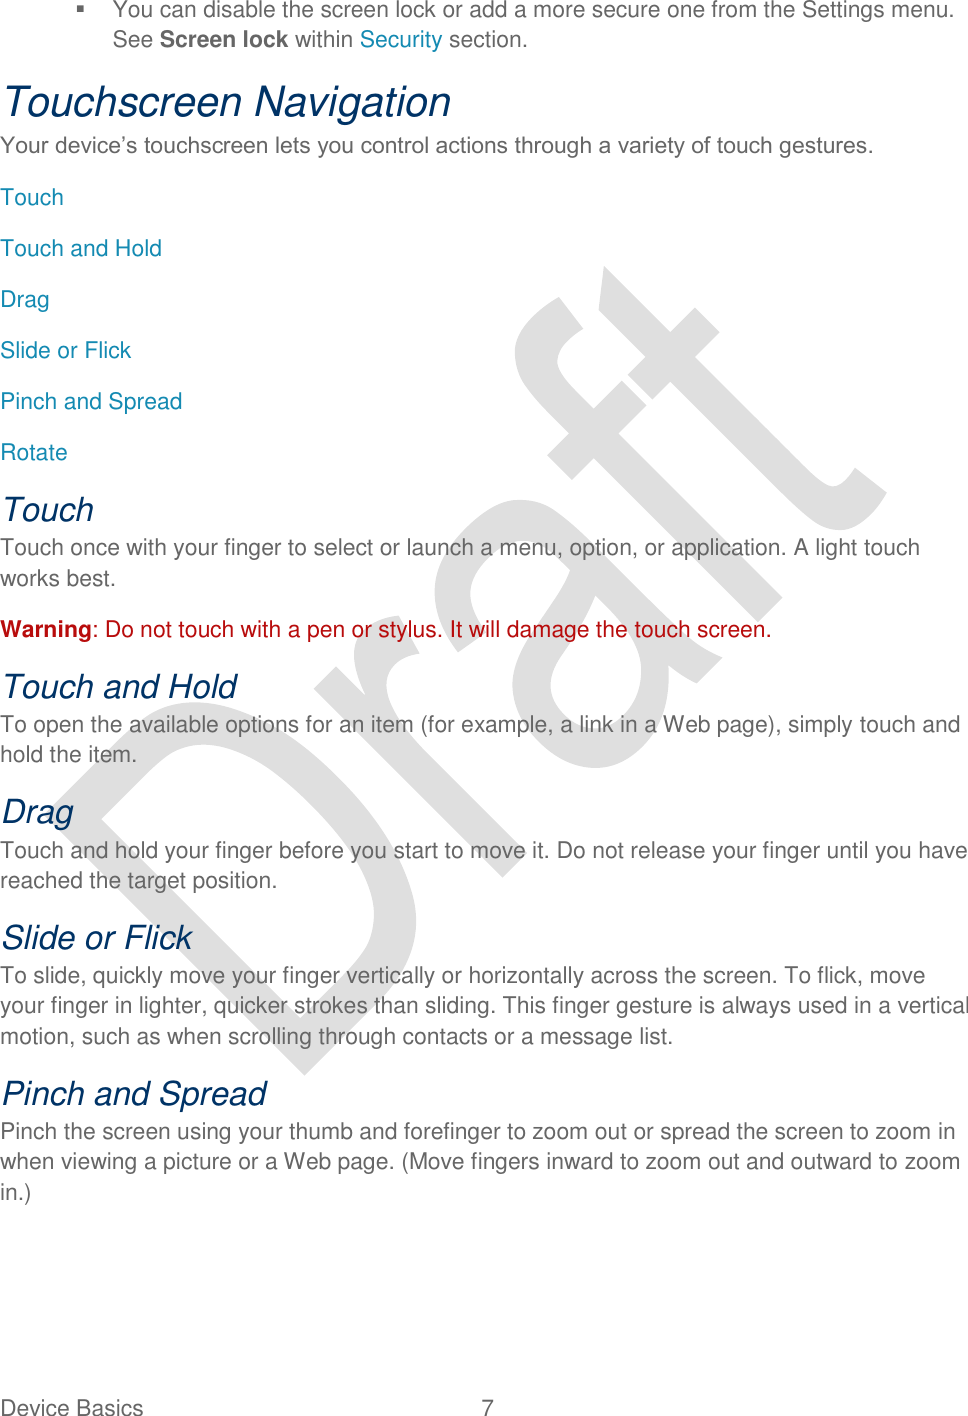
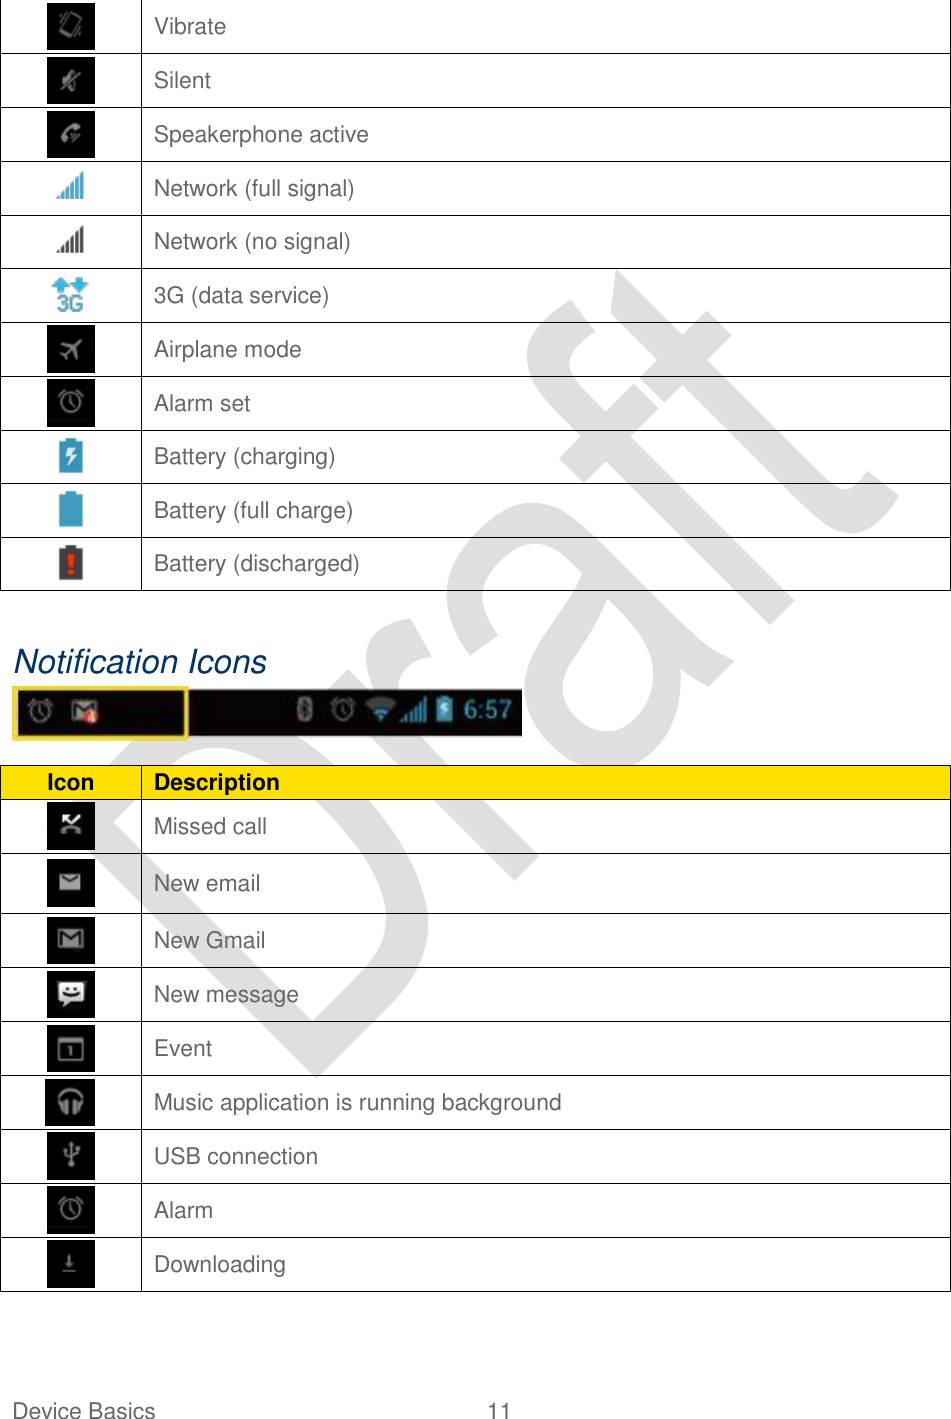
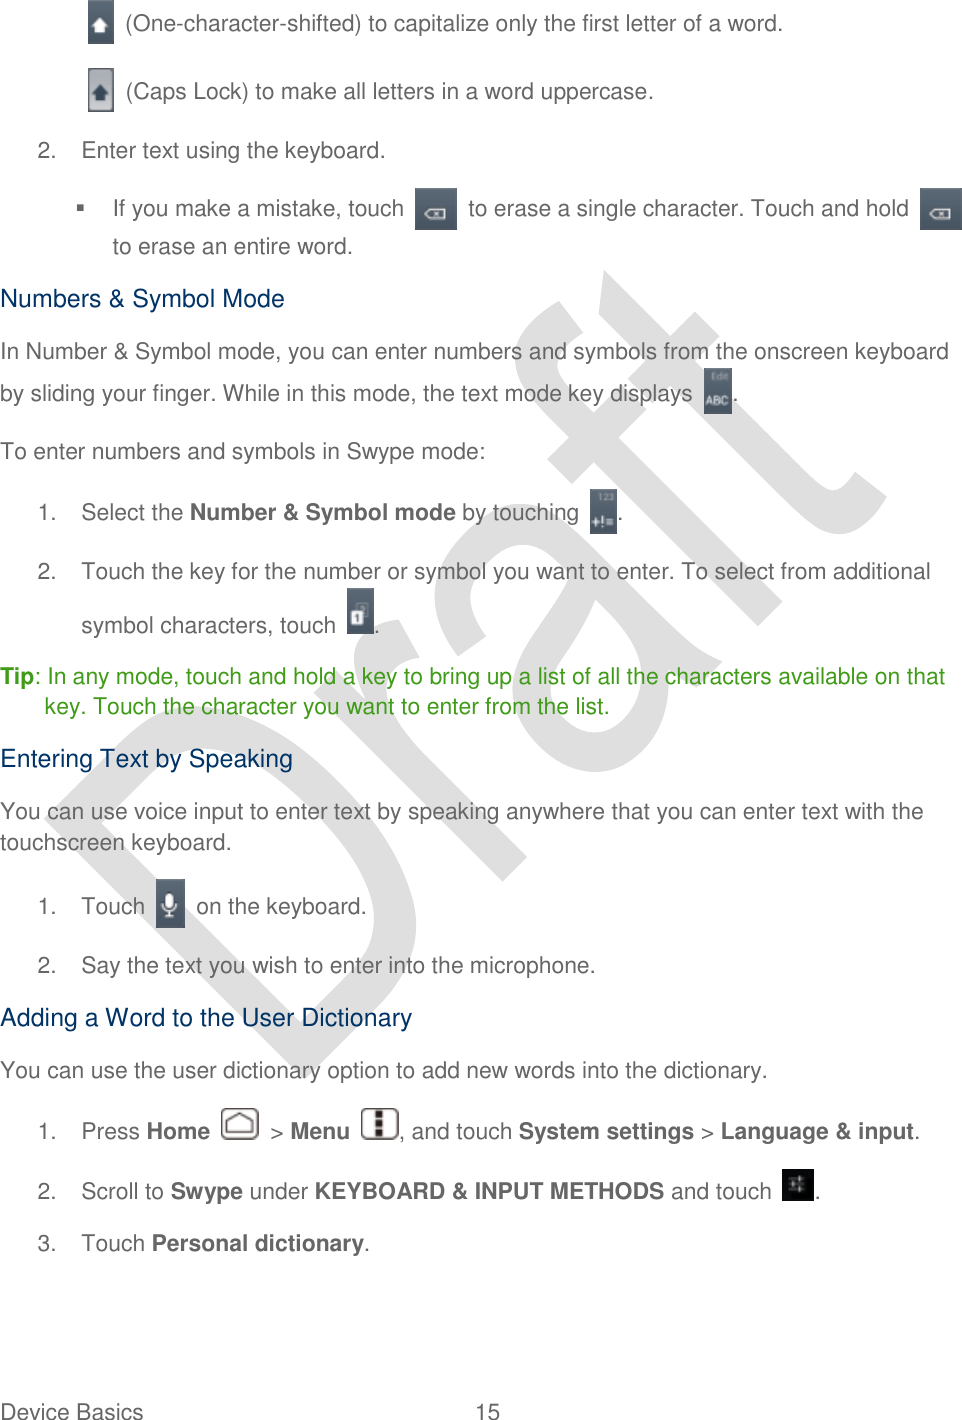
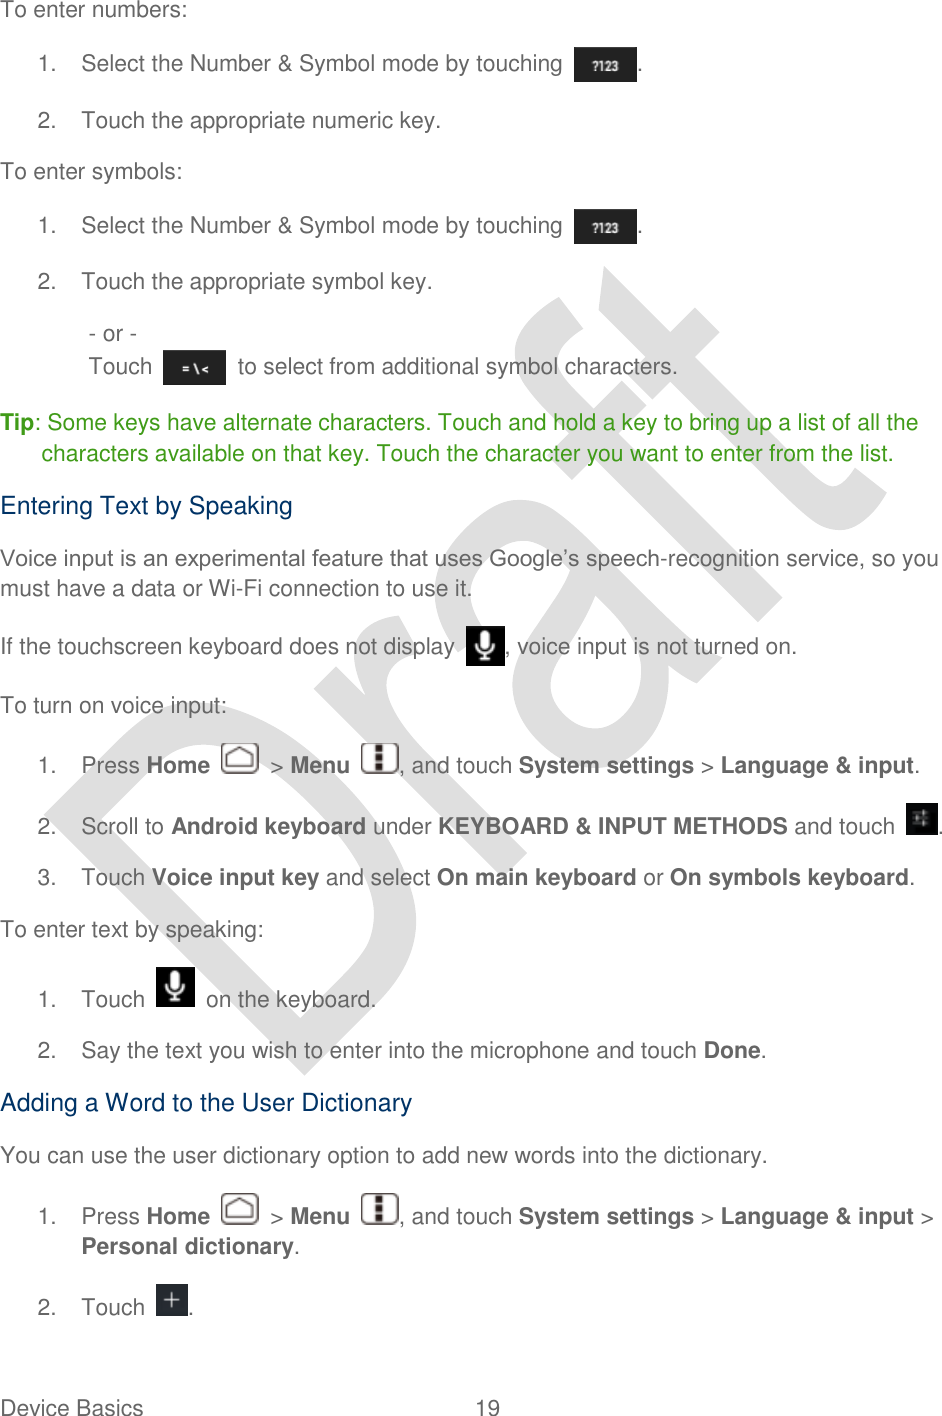
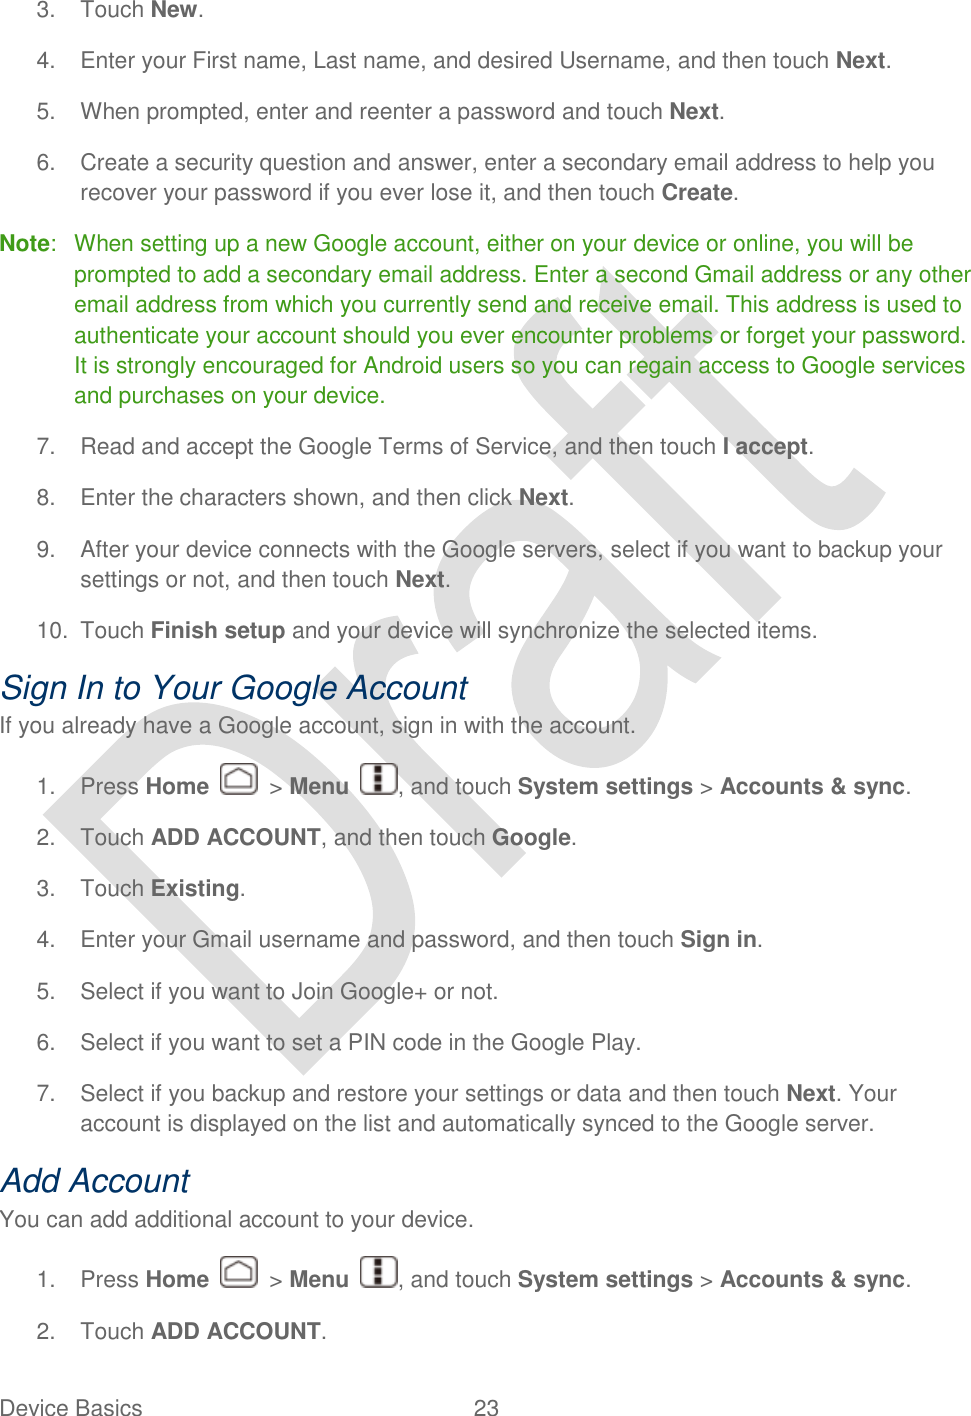
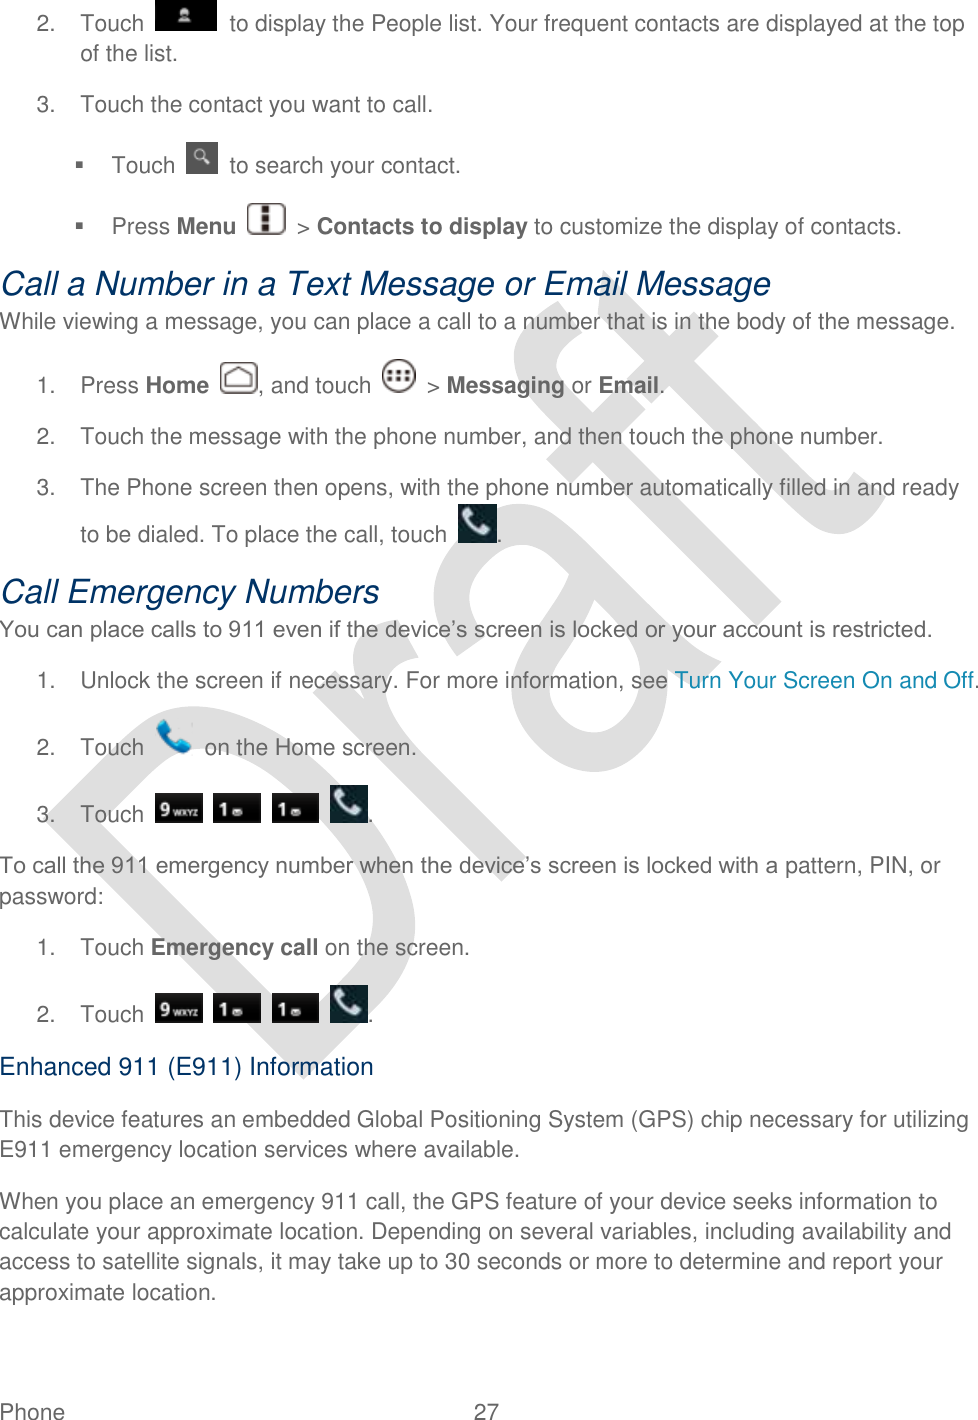
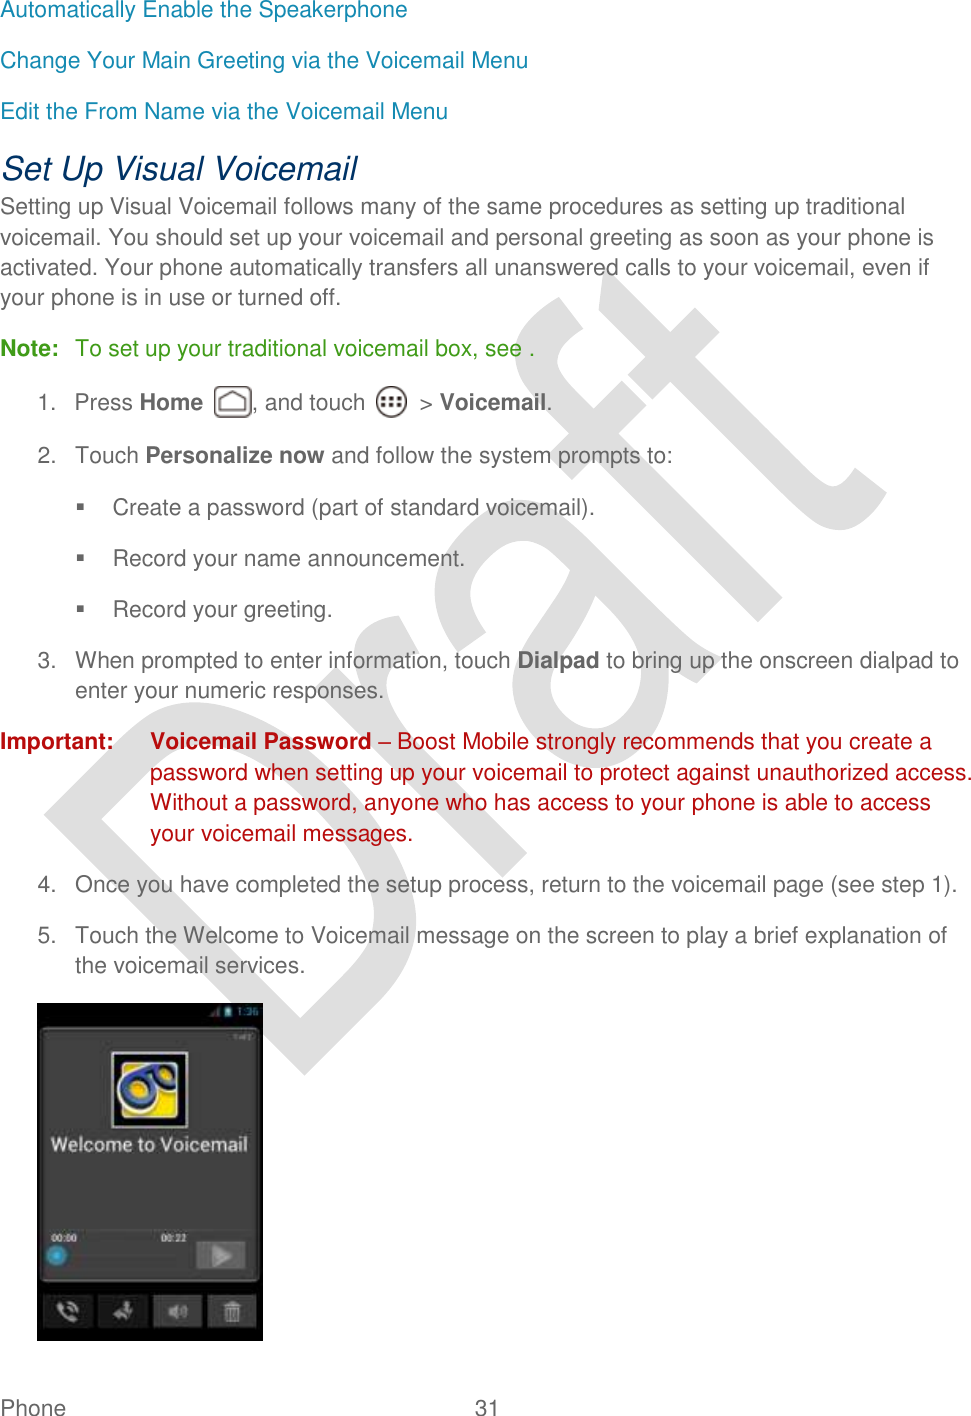
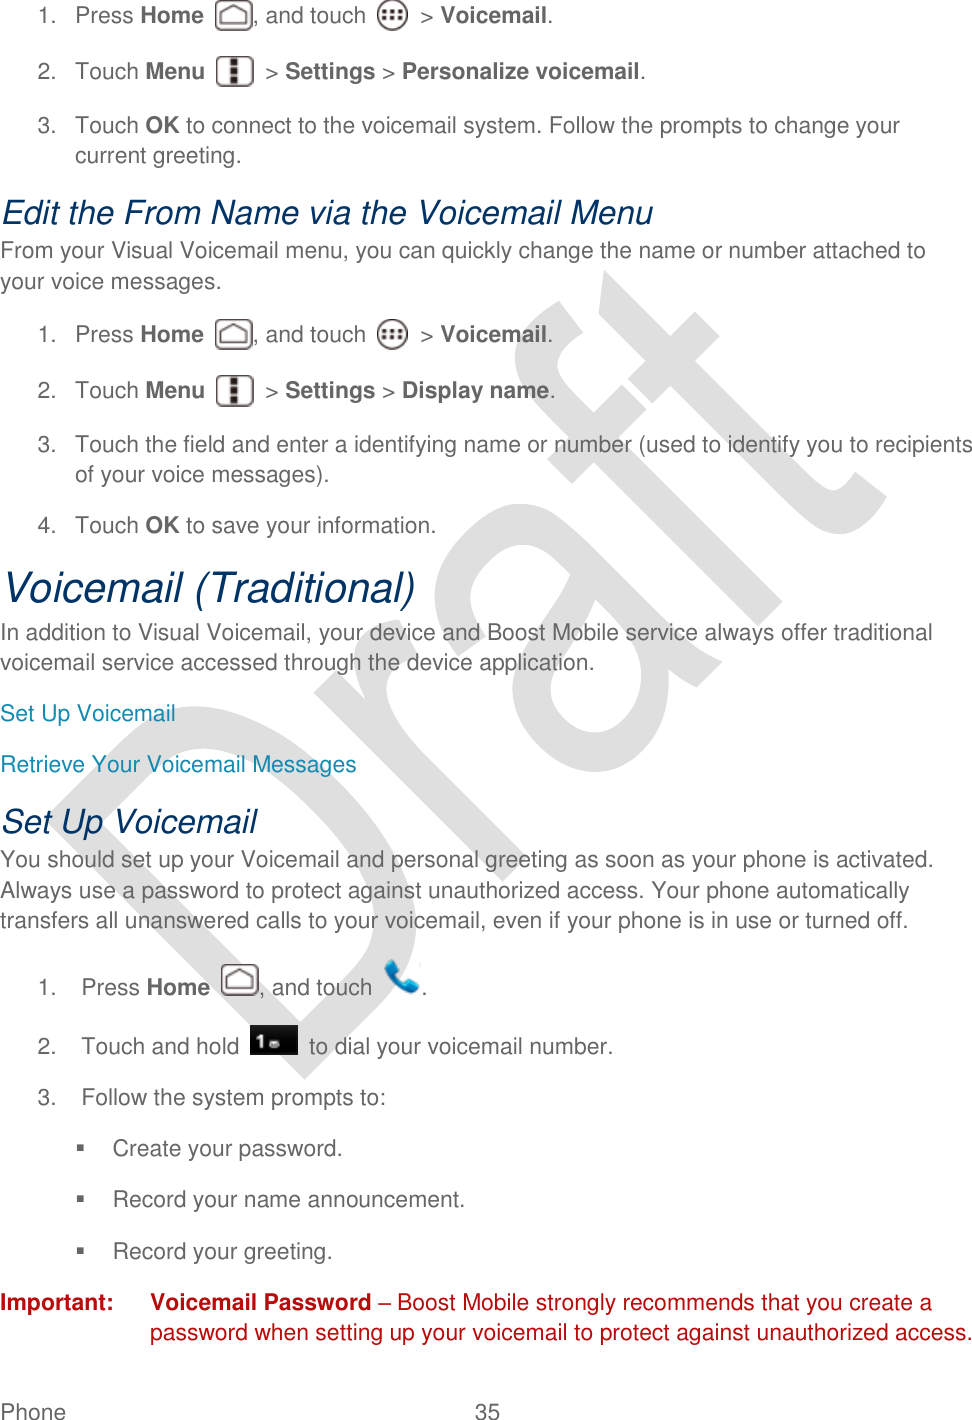
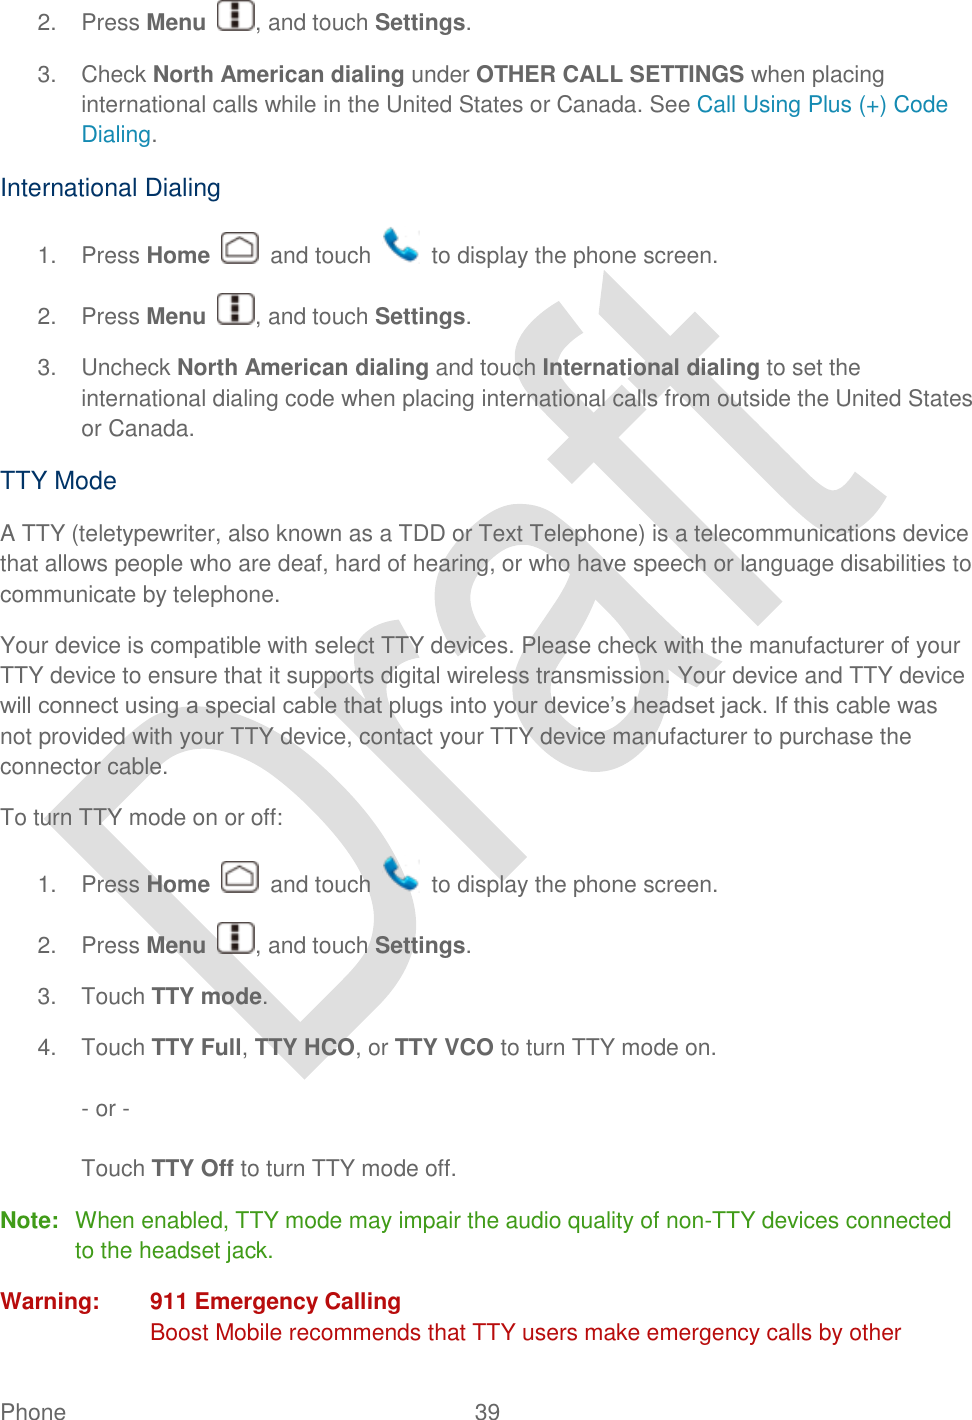
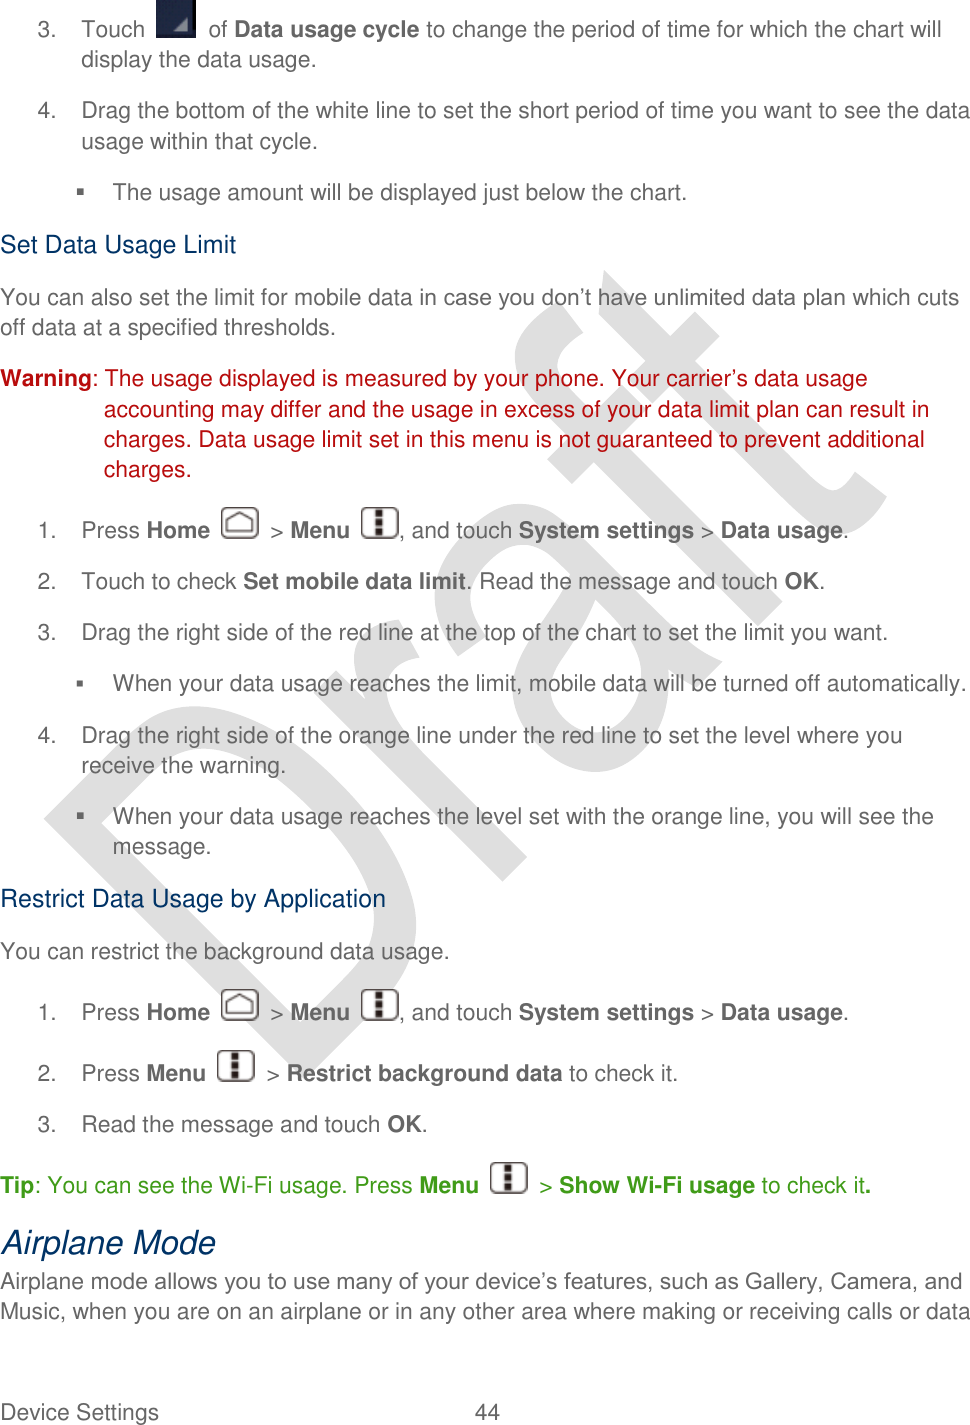
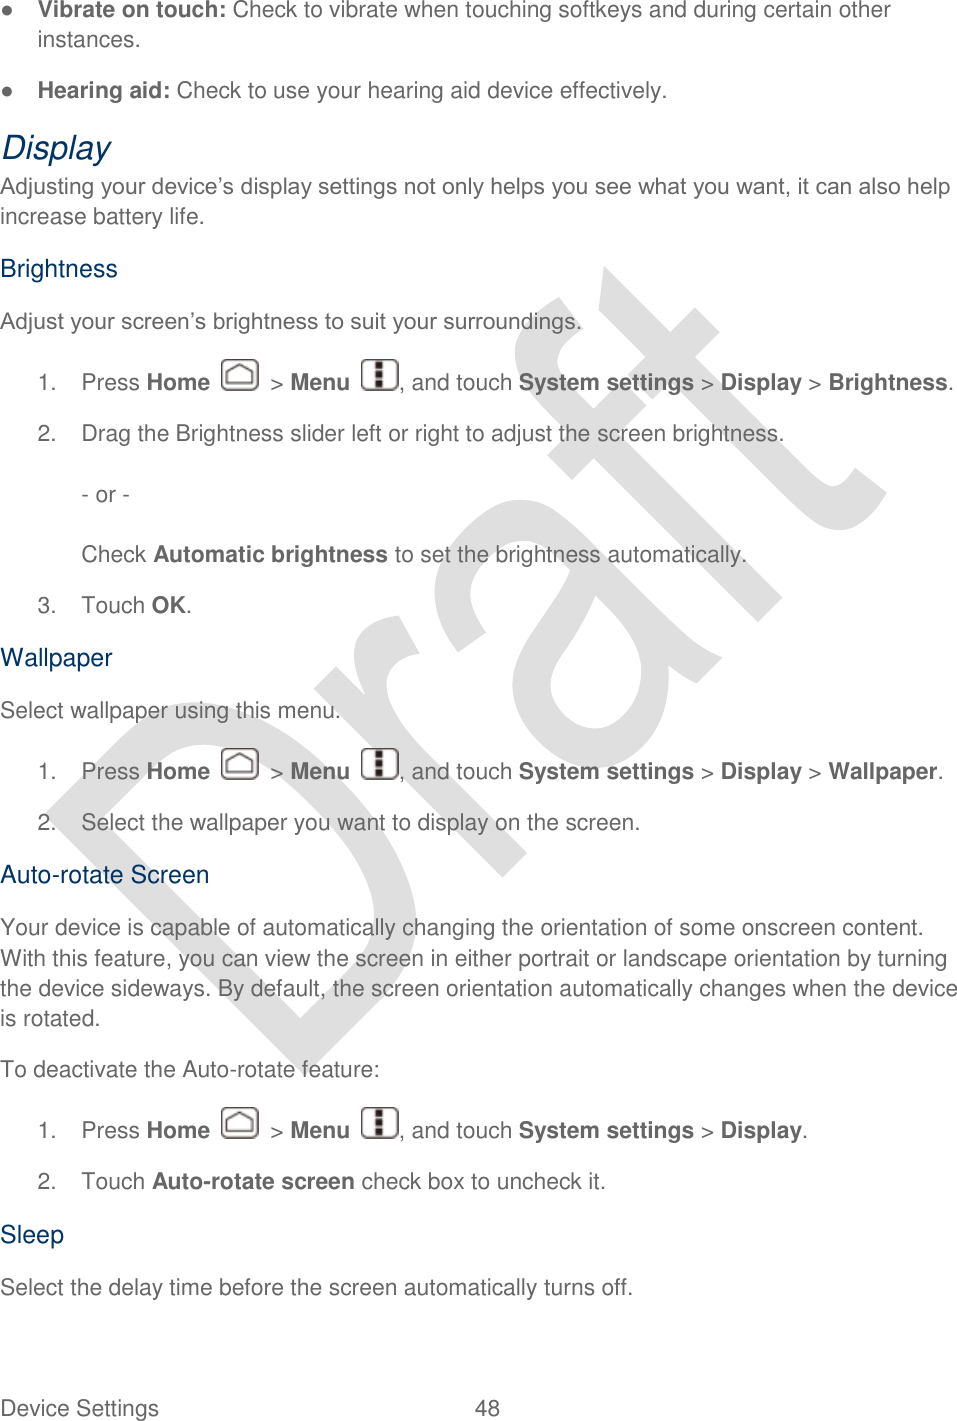
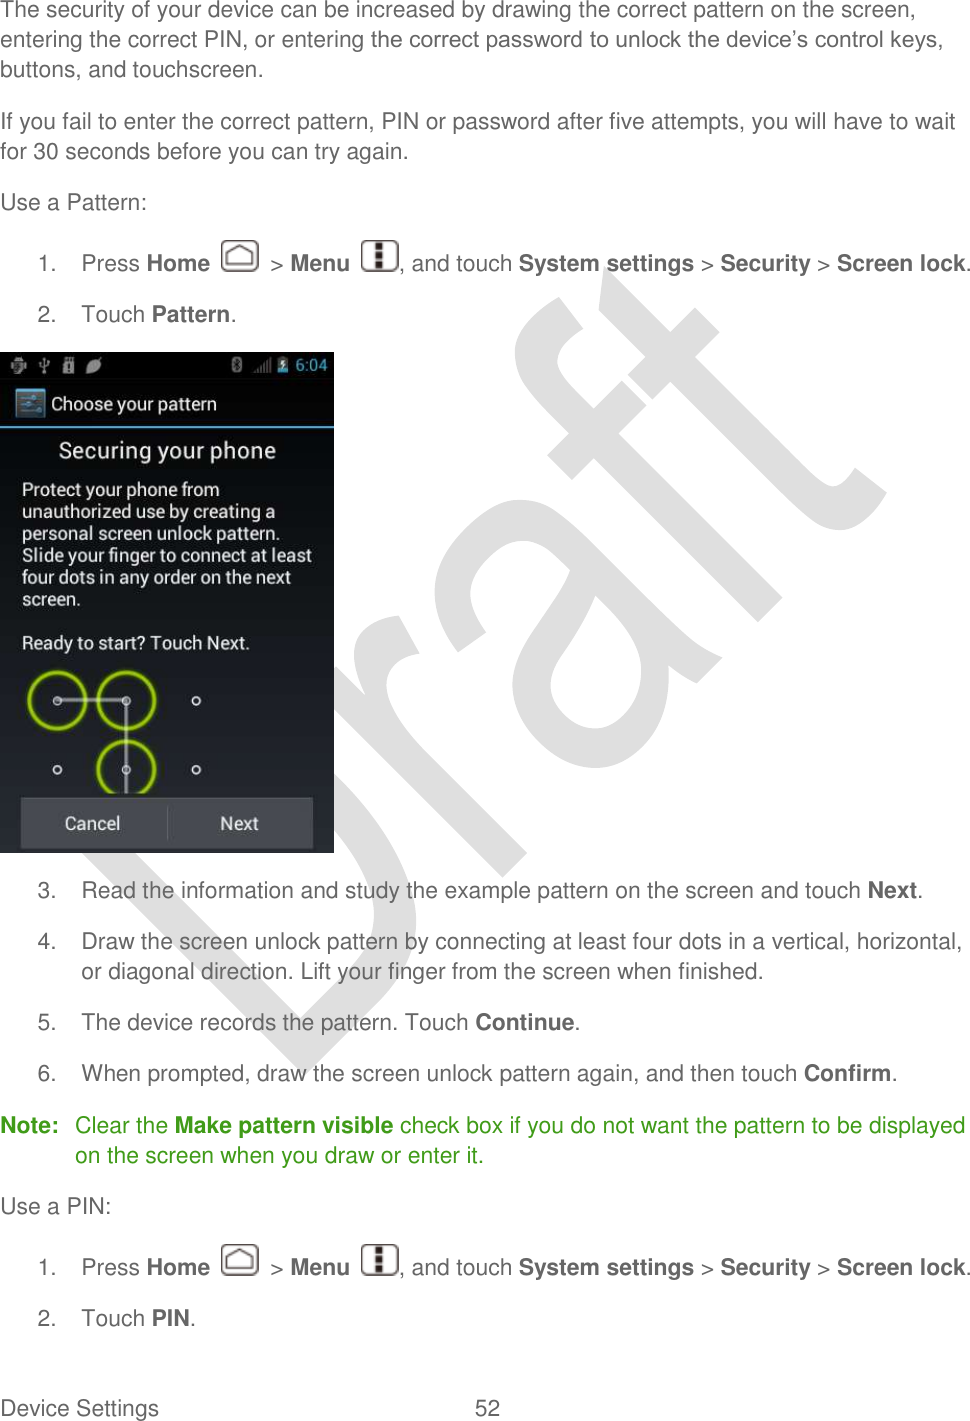
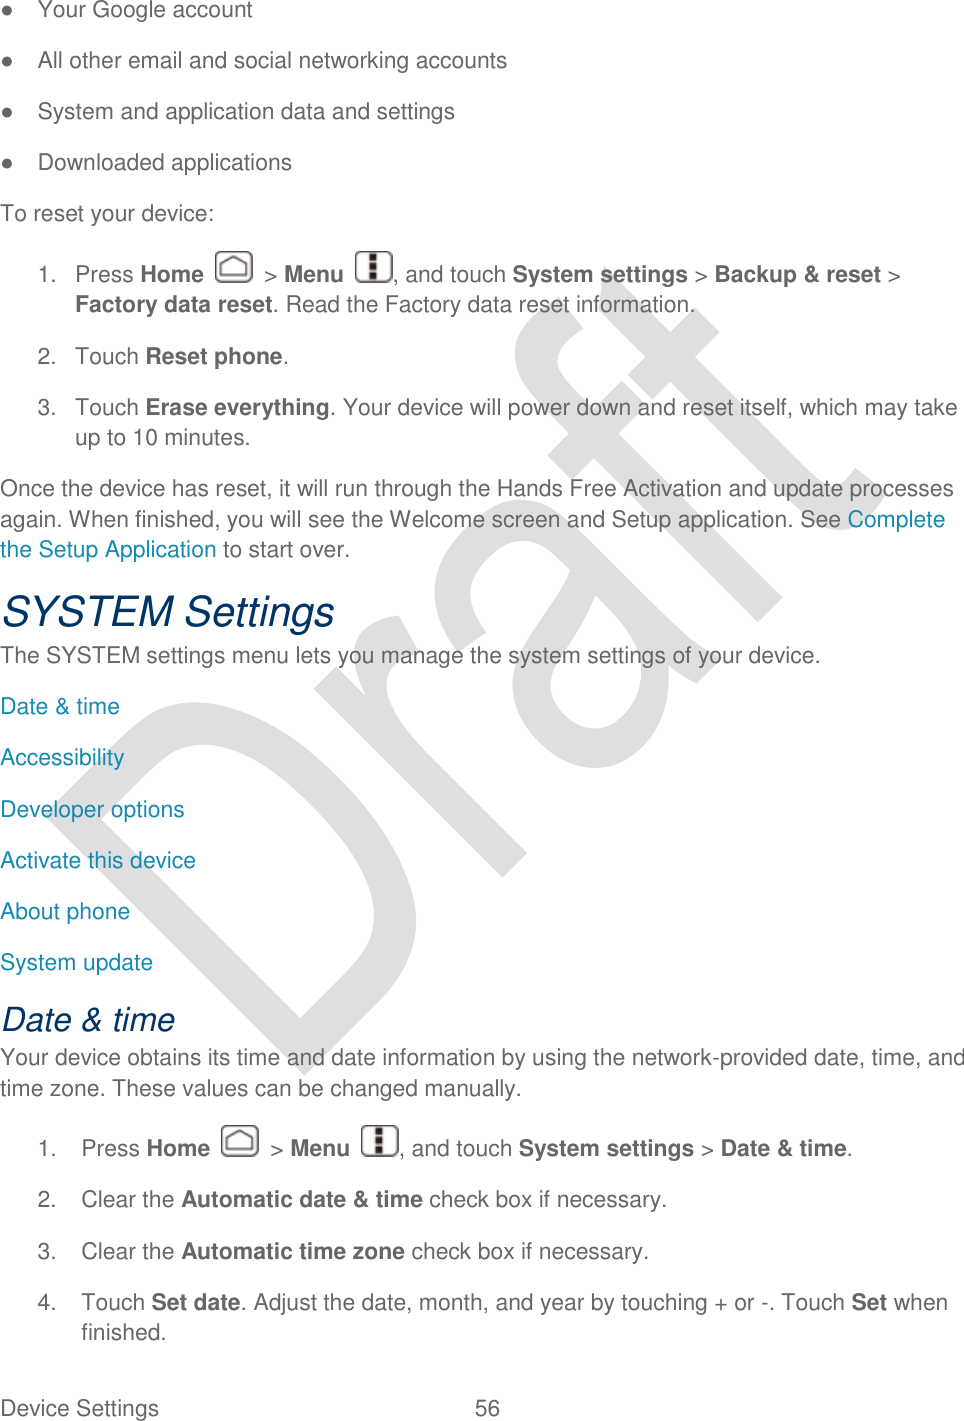
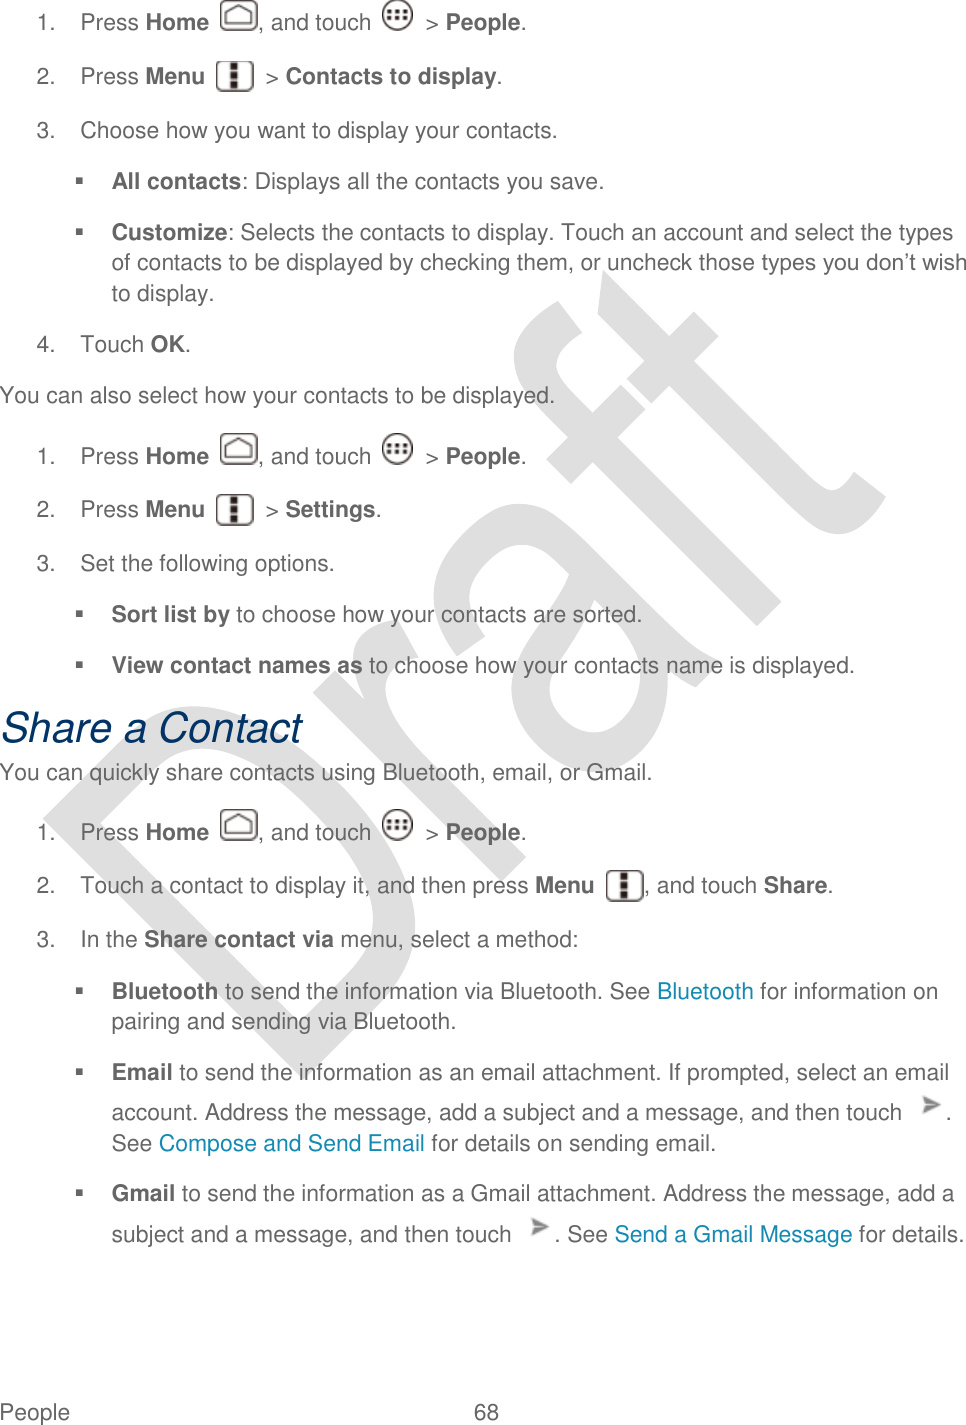
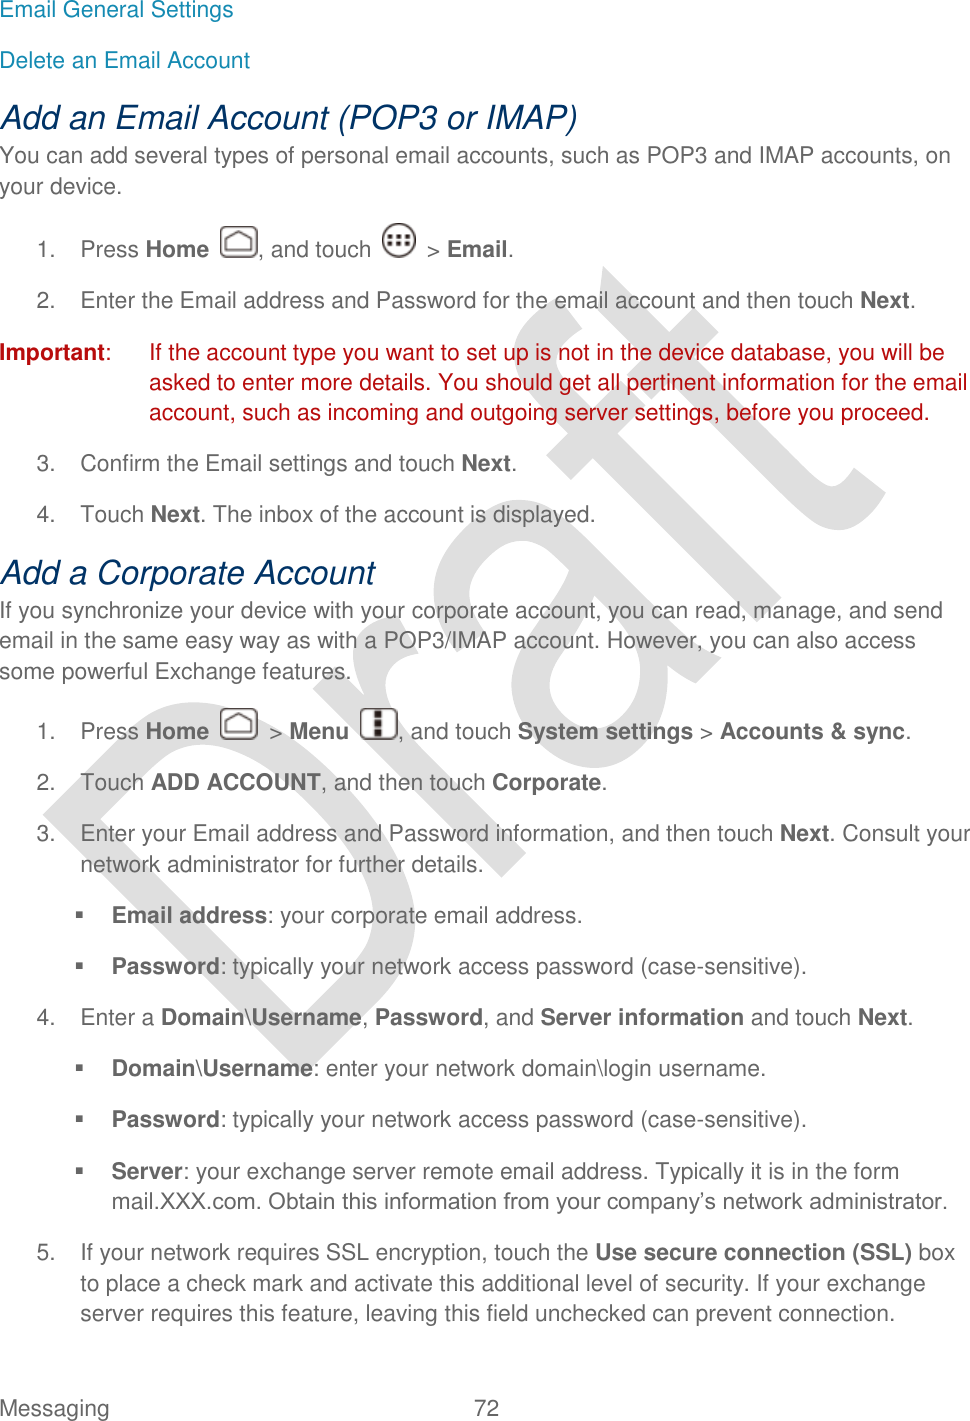
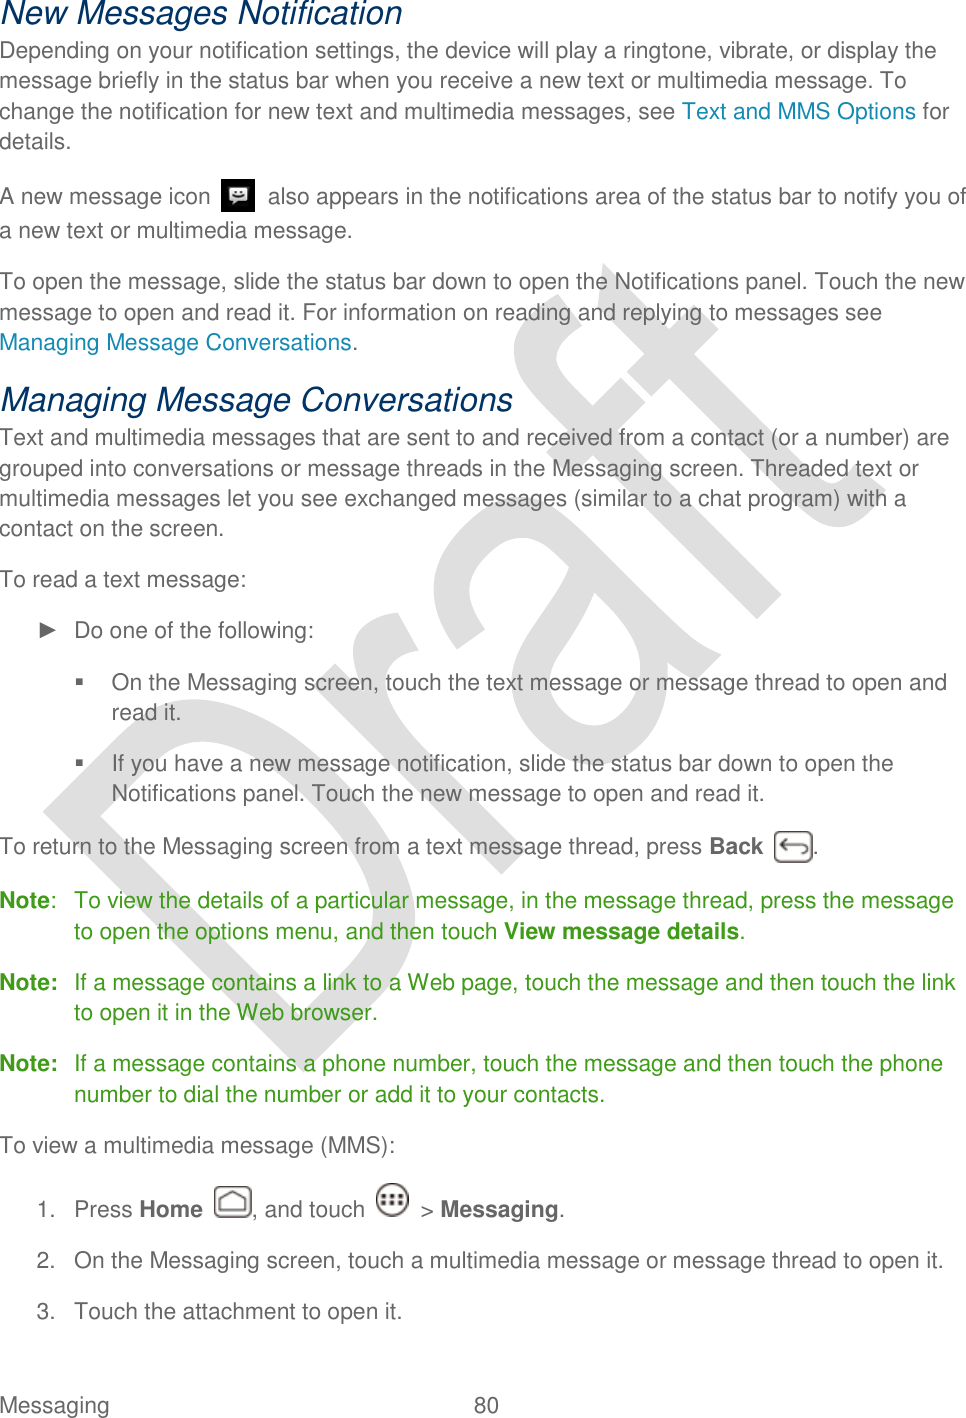
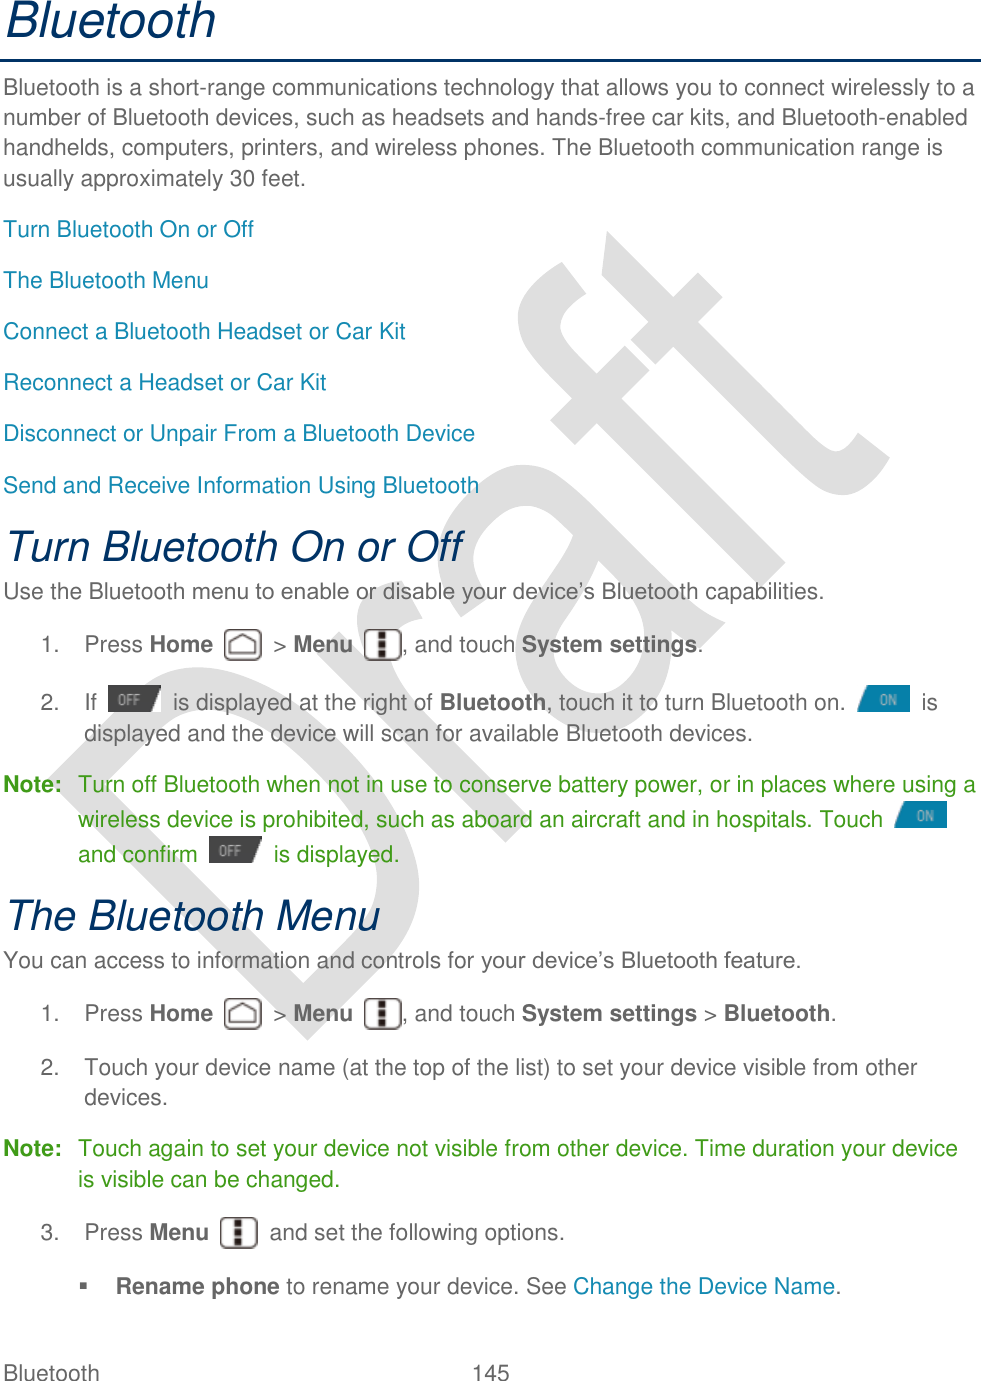
![Tools and Calendar 142 Automatic Speech Recognition (ASR) You can use your device‟s built-in automatic speech recognition (ASR) software (Voice Dialer) to dial a phone number in your People or to launch device functions. All you have to do is talk into the device, and ASR will recognize your voice and complete tasks by itself. Activating the Voice Dialer ► Press Home , and touch > Voice Dialer. The device prompts you to say a command from the list displayed on the screen. To complete your task, simply follow the onscreen prompts or touch an onscreen option. If the application does not recognize the number, name, or application name, it will find the most likely matches and display a list. Touch a selection or touch Cancel to exit the Voice Dialer. Tip: Use ASR in a quiet environment so it can accurately recognize your commands. Making a Voice Call with the Voice Dialer 1. Press Home , and touch > Voice Dialer. 2. When prompted to speak, say “Call [contact]” or “Dial [number].” 3. For example, say “Call John Smith on mobile,” to call John Smith‟s mobile phone. Your device dials the number stored for the contact “John Smith” with the label “Mobile.” Opening an Application with the Voice Dialer 1. Press Home , and touch > Voice Dialer. 2. When prompted to speak, say “Open [application name].” For example, say “Open Calendar,” to open the Calendar. The application screen is displayed. Opening a Settings Menu with the Voice Dialer 1. Press Home , and touch > Voice Dialer. 2. When prompted to speak, say “Open [settings menu name].” 3. For example, say “Open sound settings.” The Sound settings menu screen is displayed. Text-to-speech Settings Your device can convert text into speech in some downloaded applications. You may select the language you hear or adjust its speed.](https://usermanual.wiki/Kyocera/C5170.user-manual-hydro/User-Guide-1700942-Page-158.png)
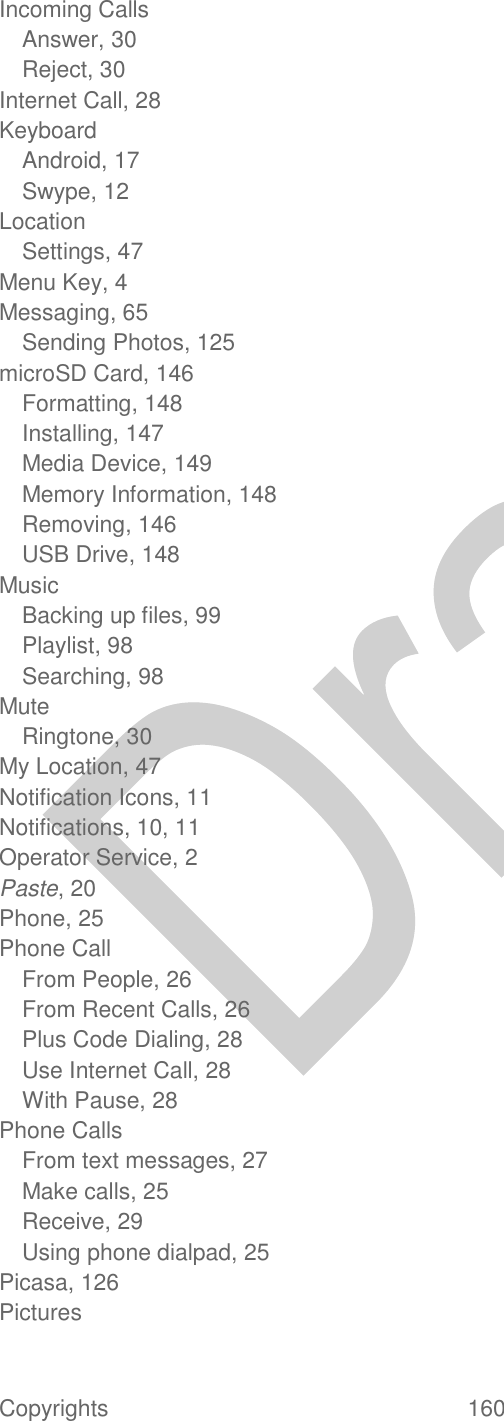
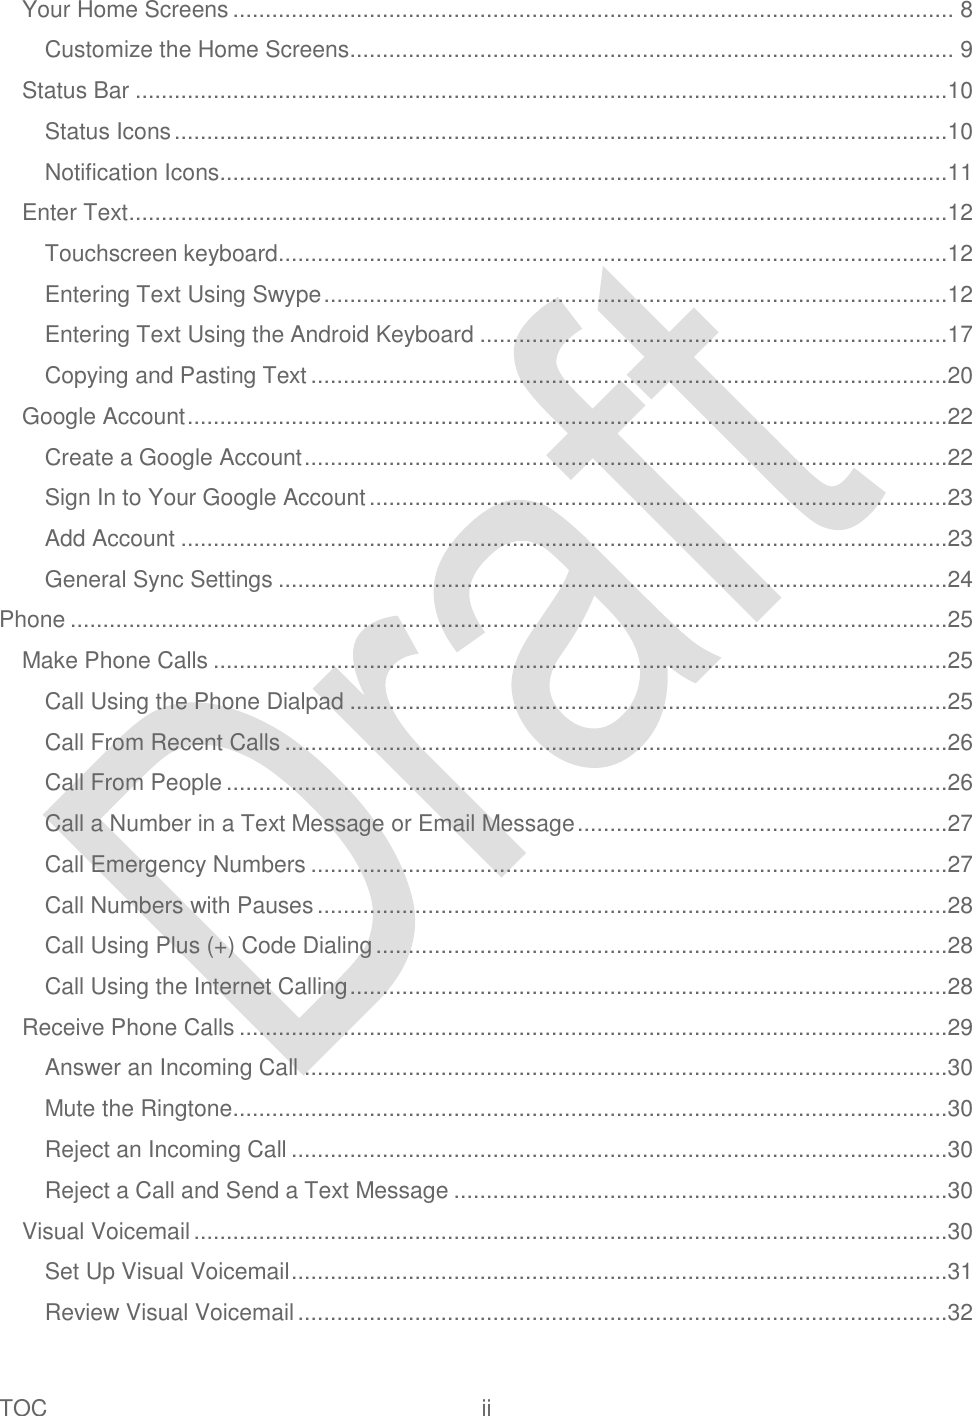
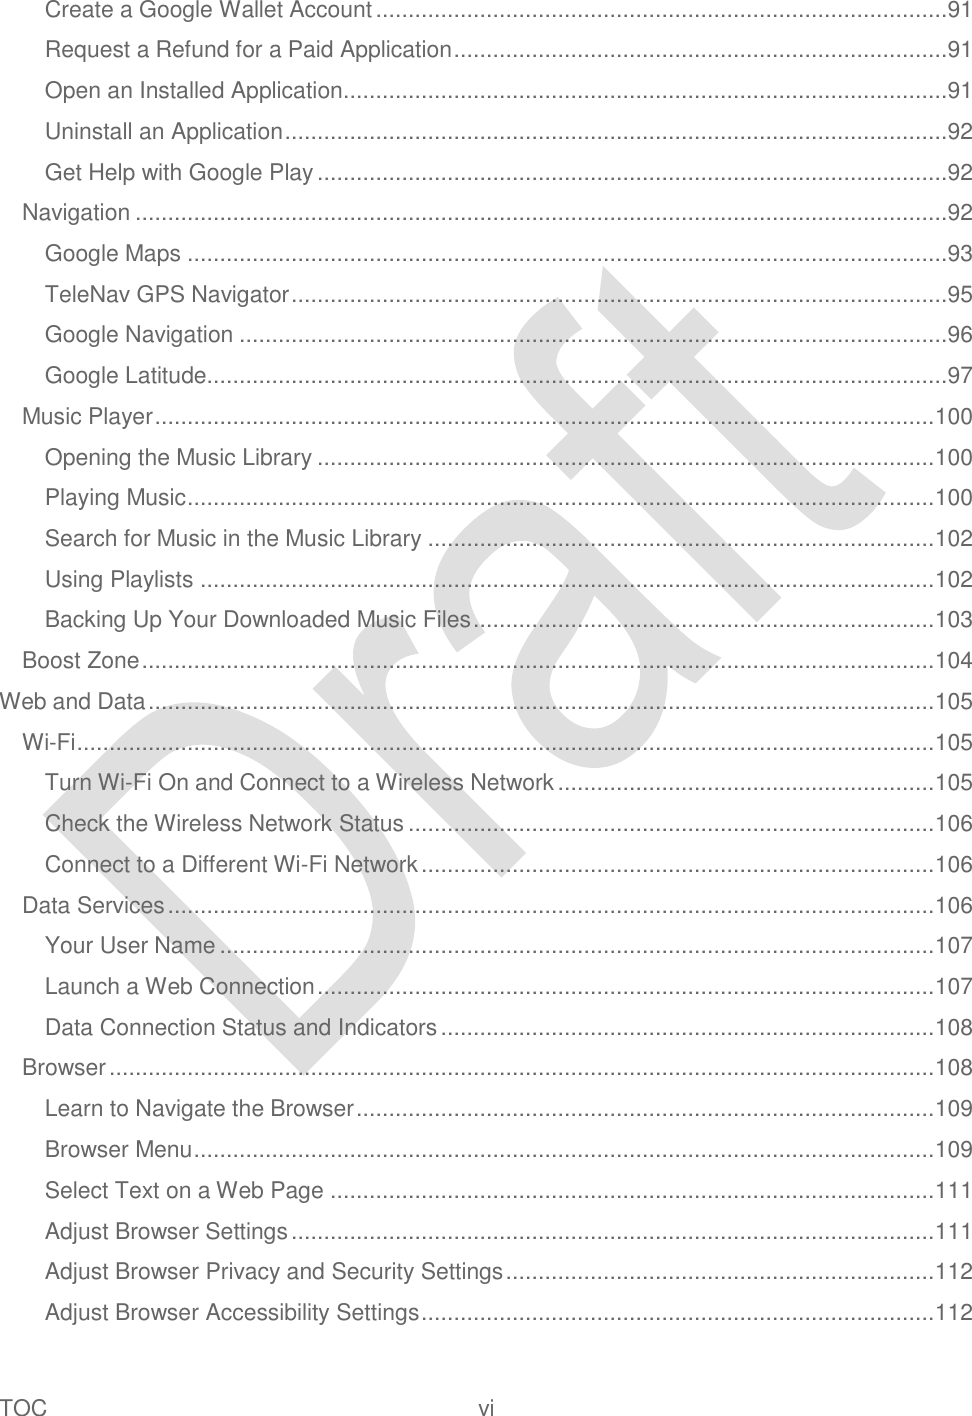
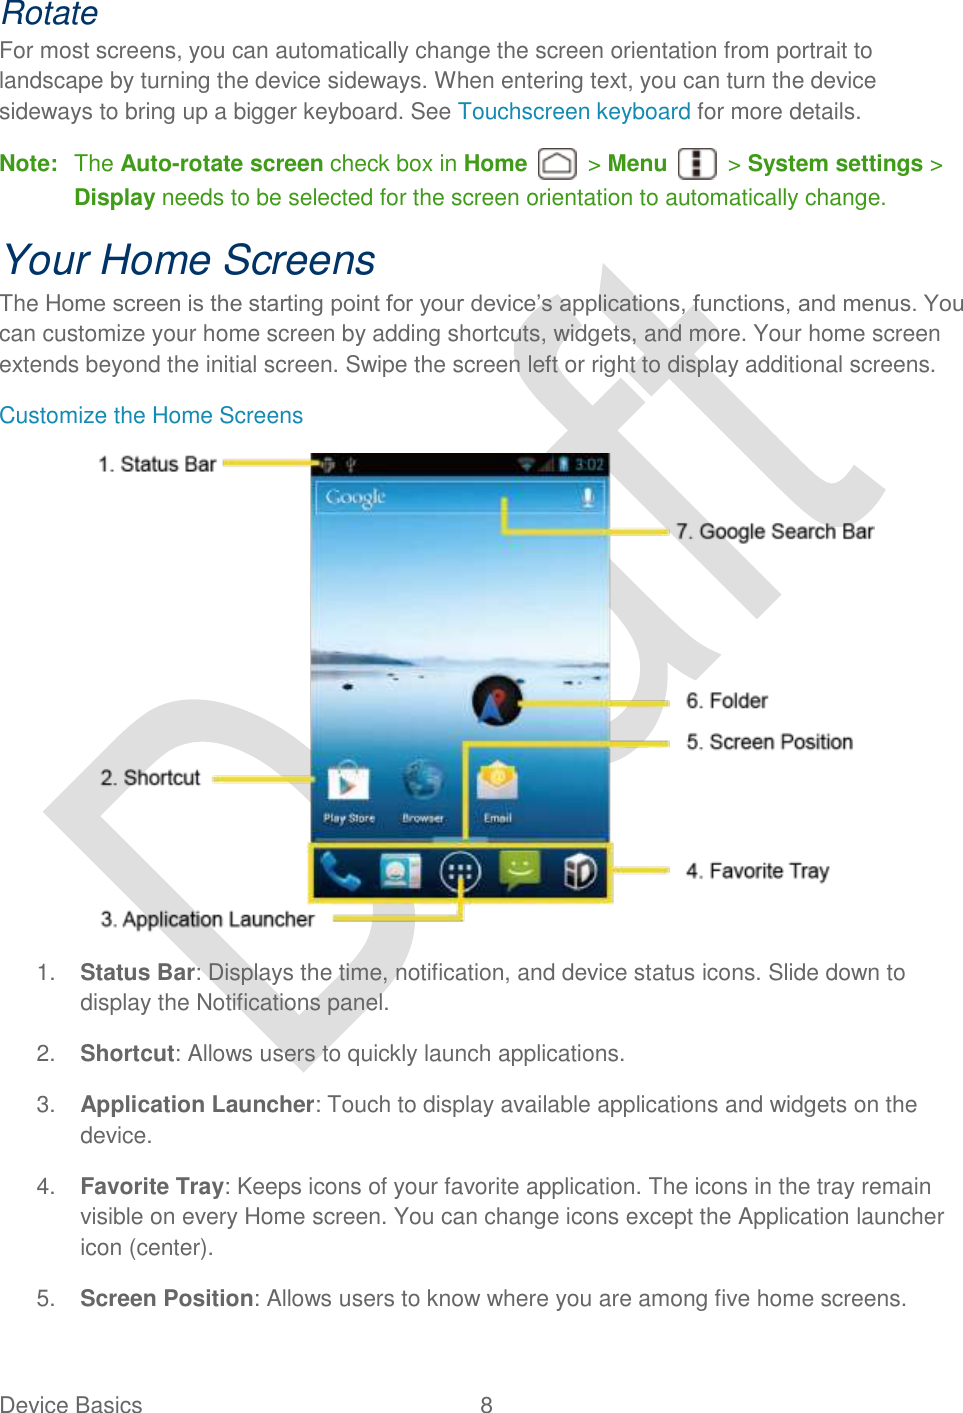
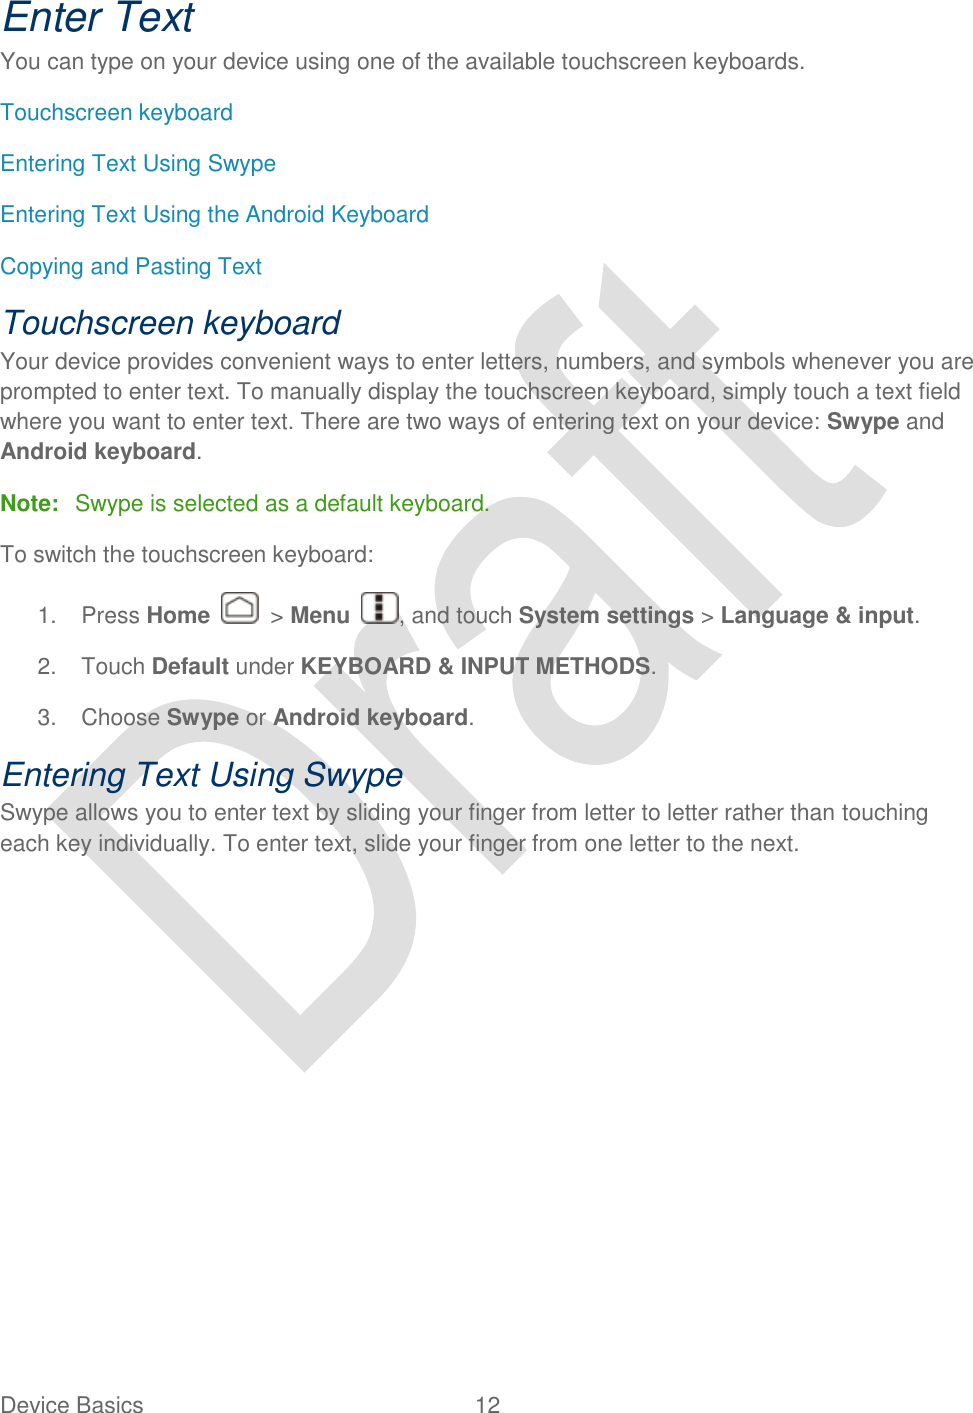
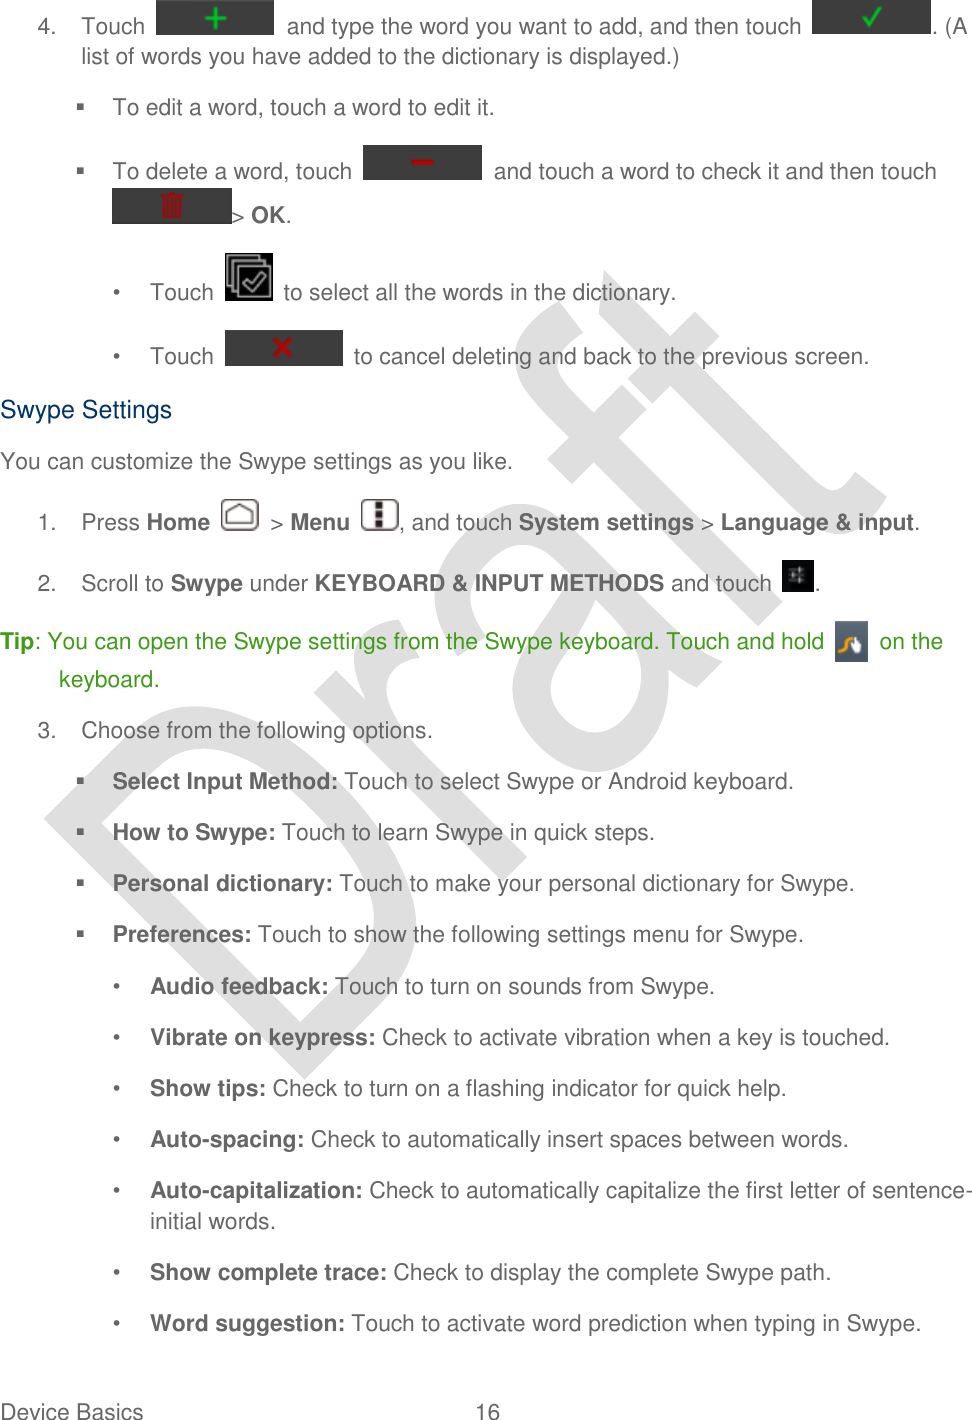
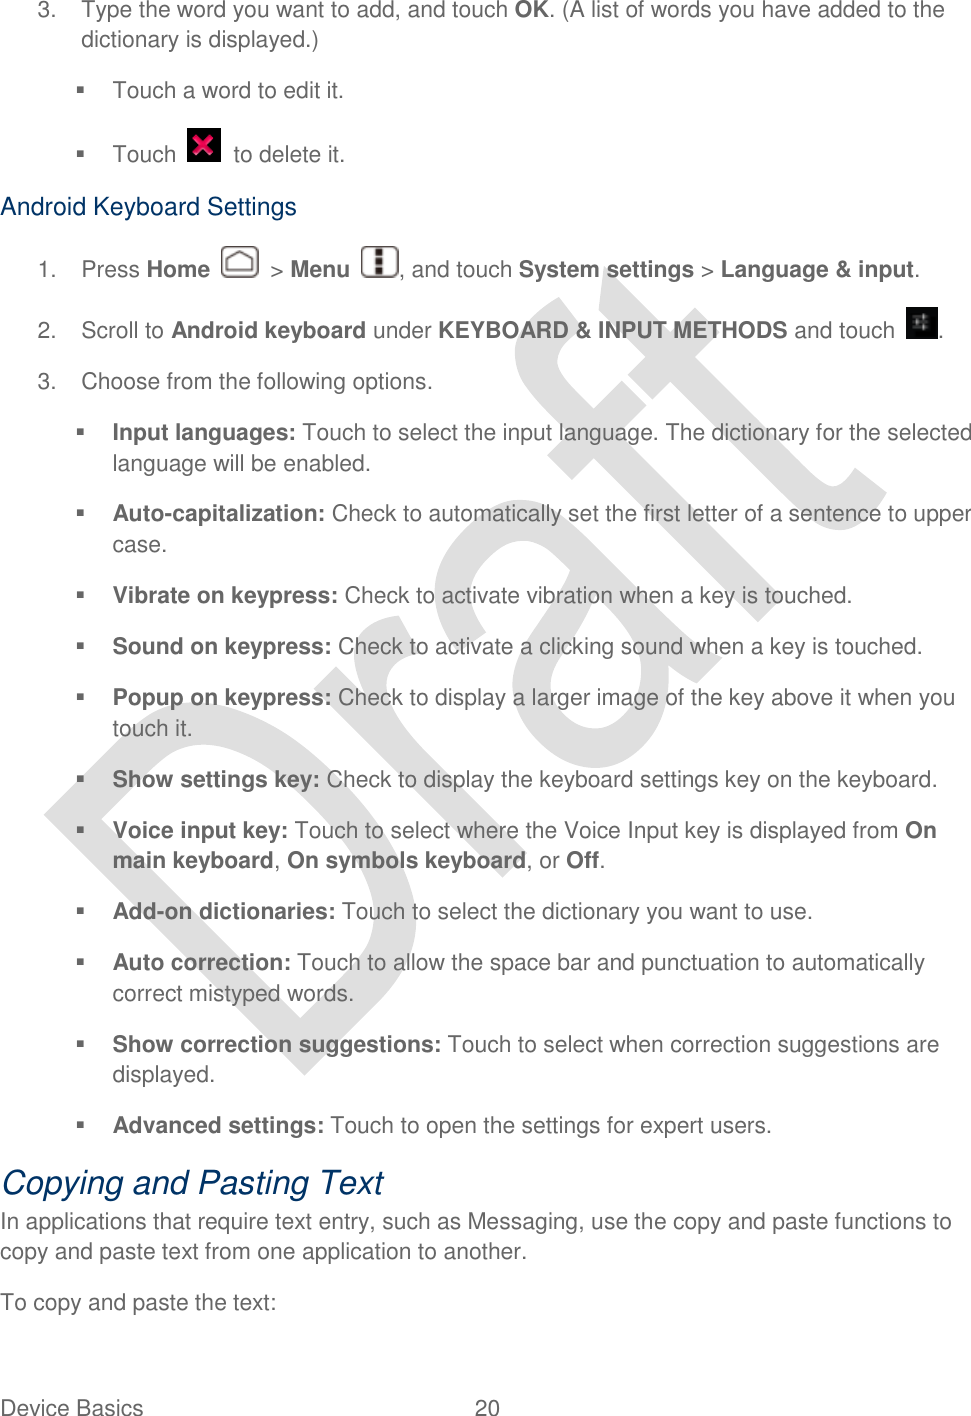
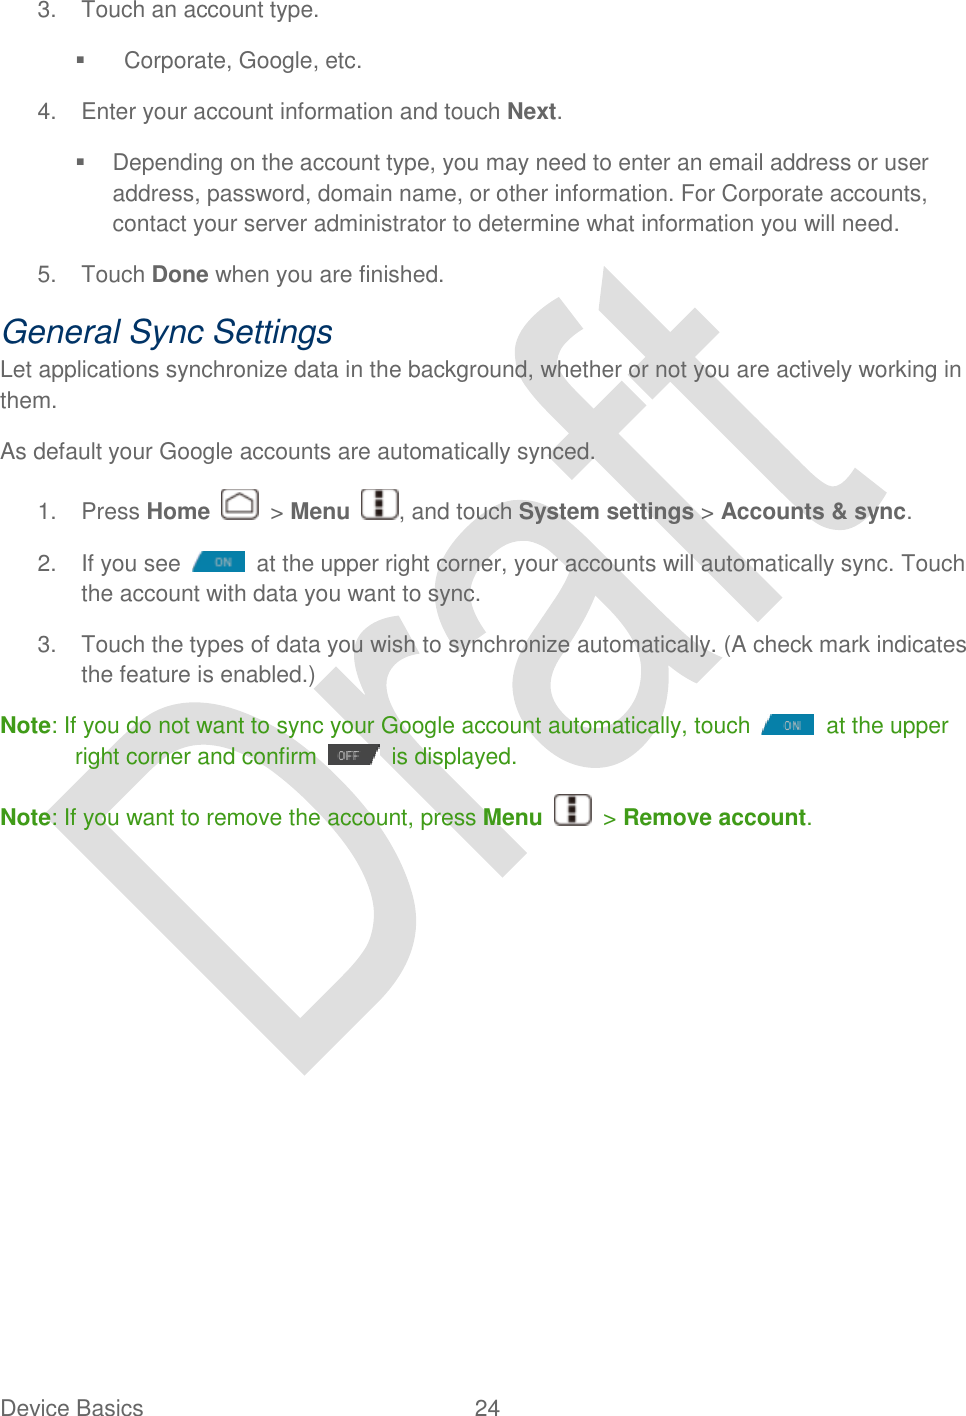
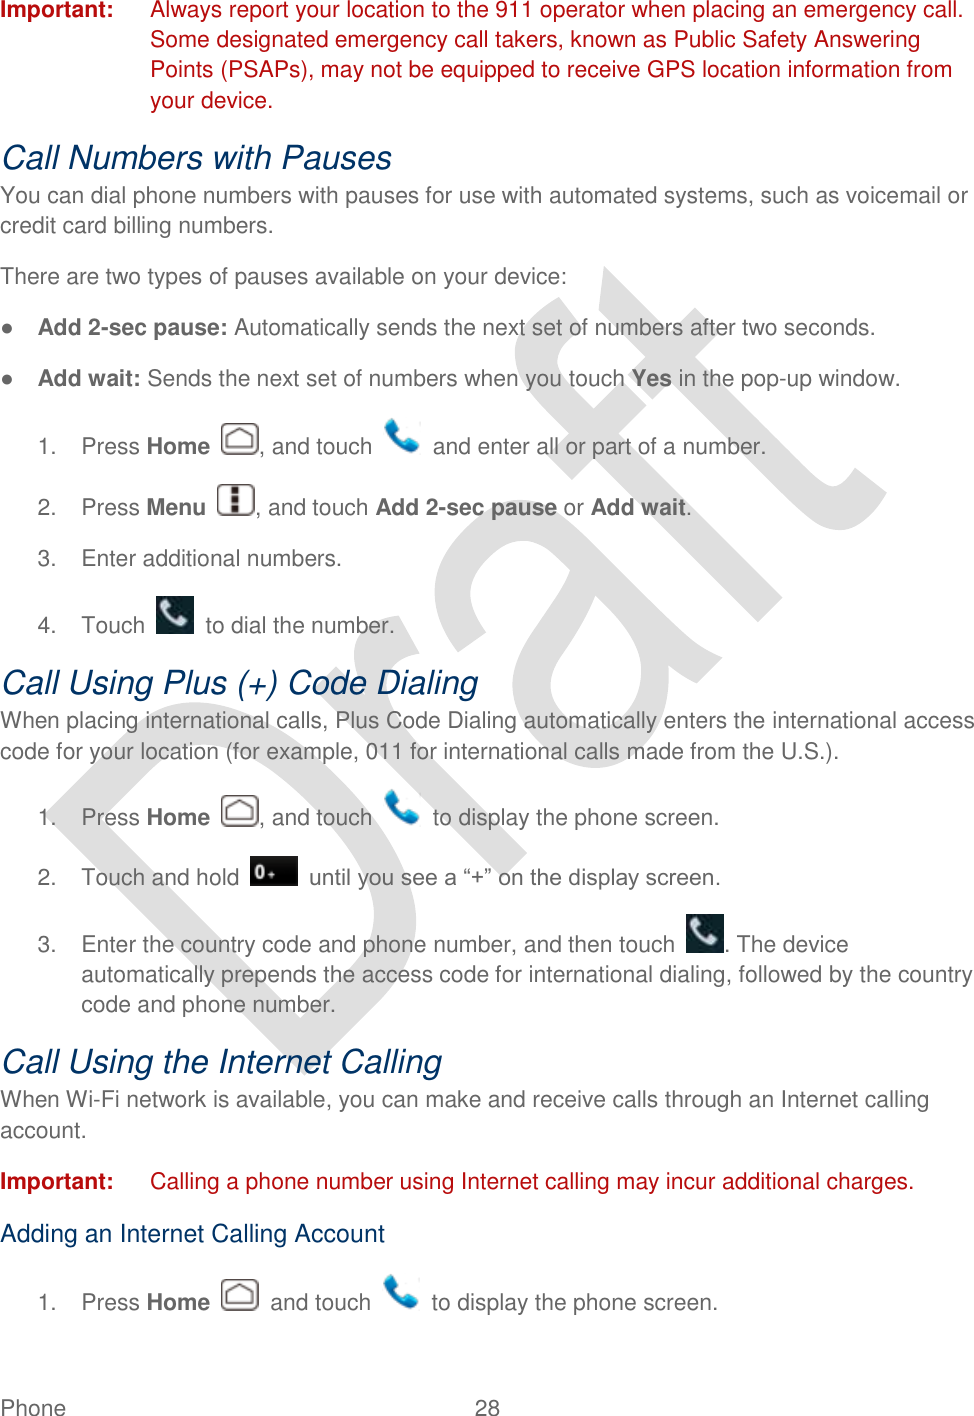
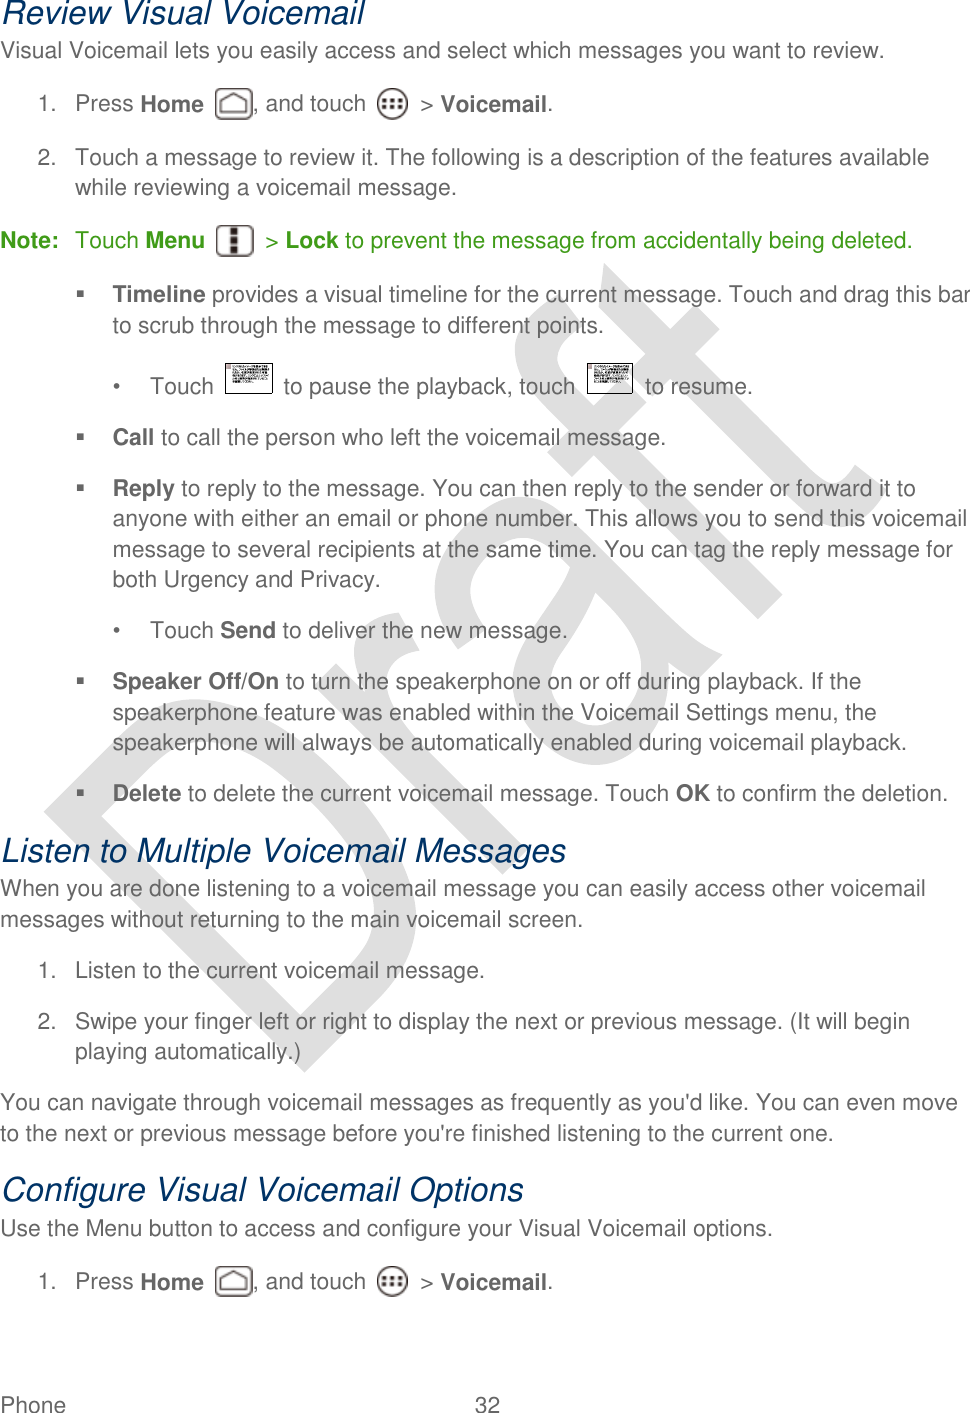
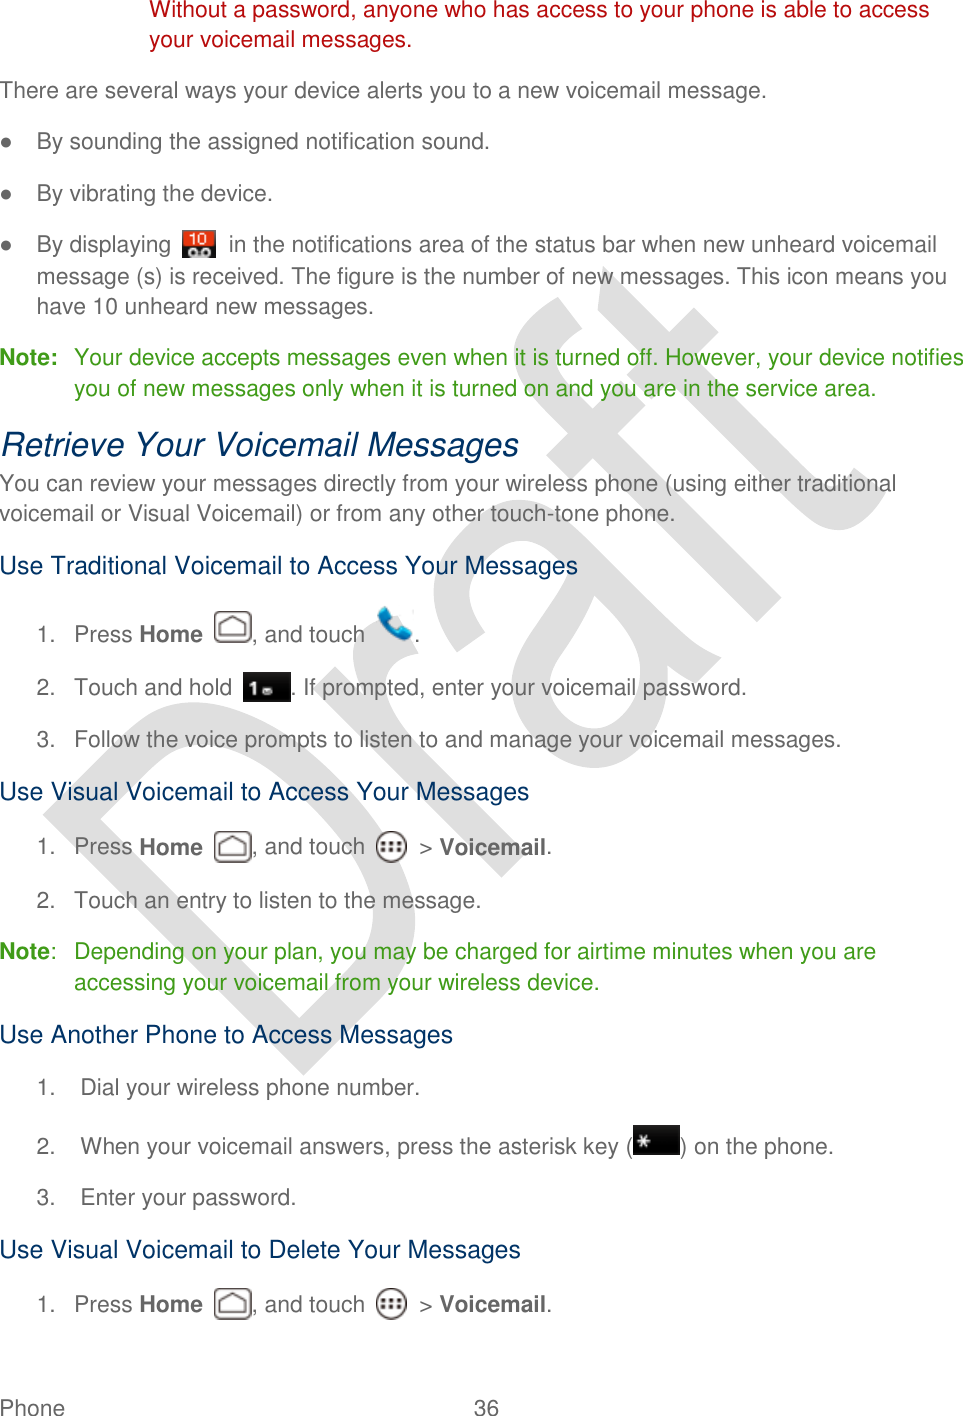
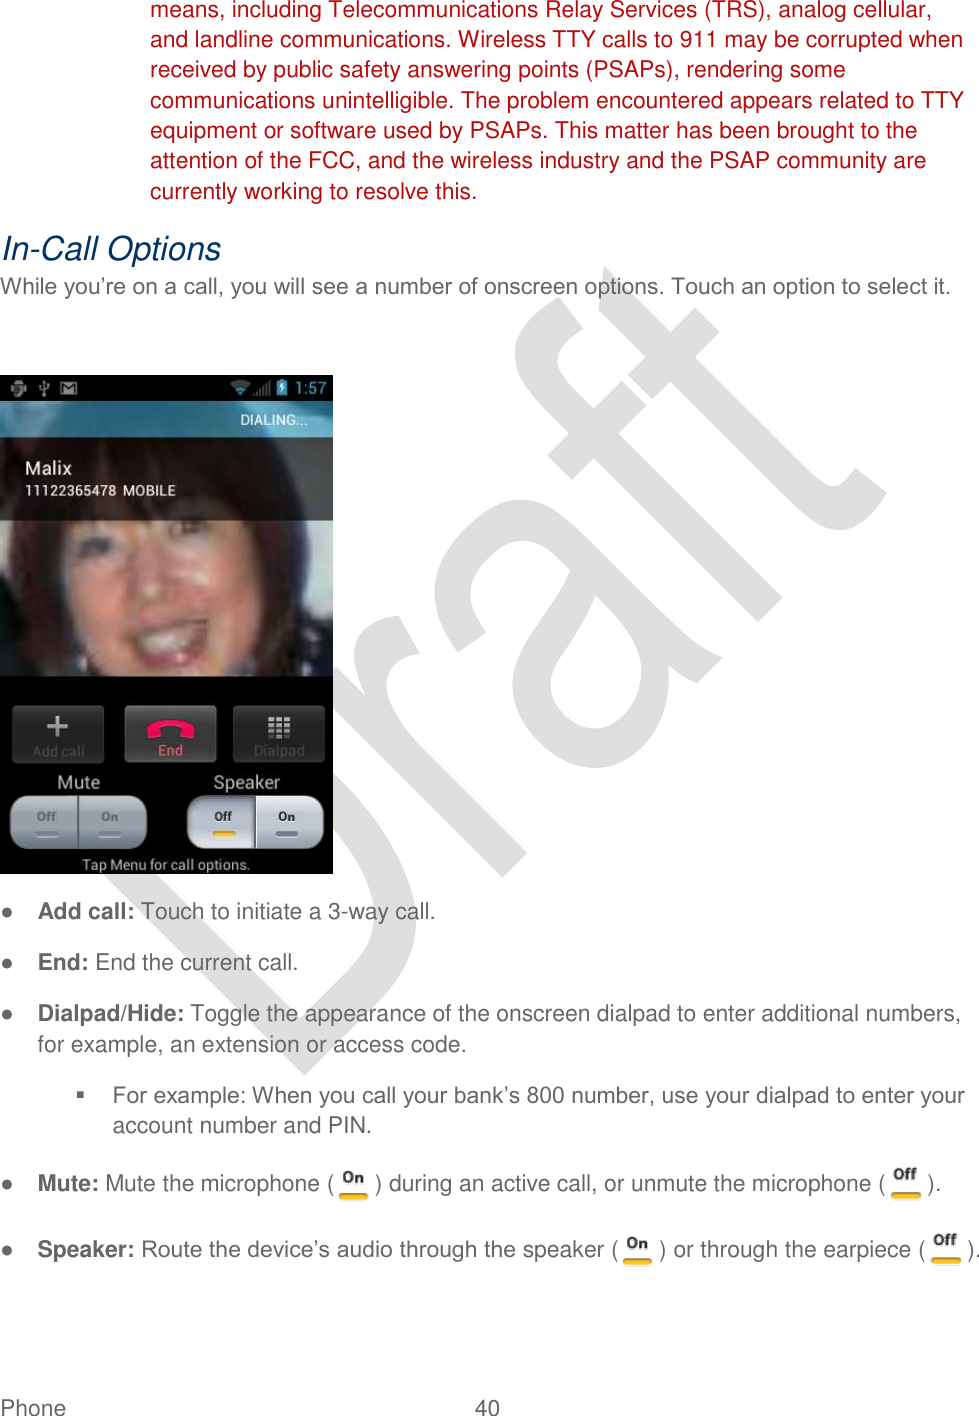
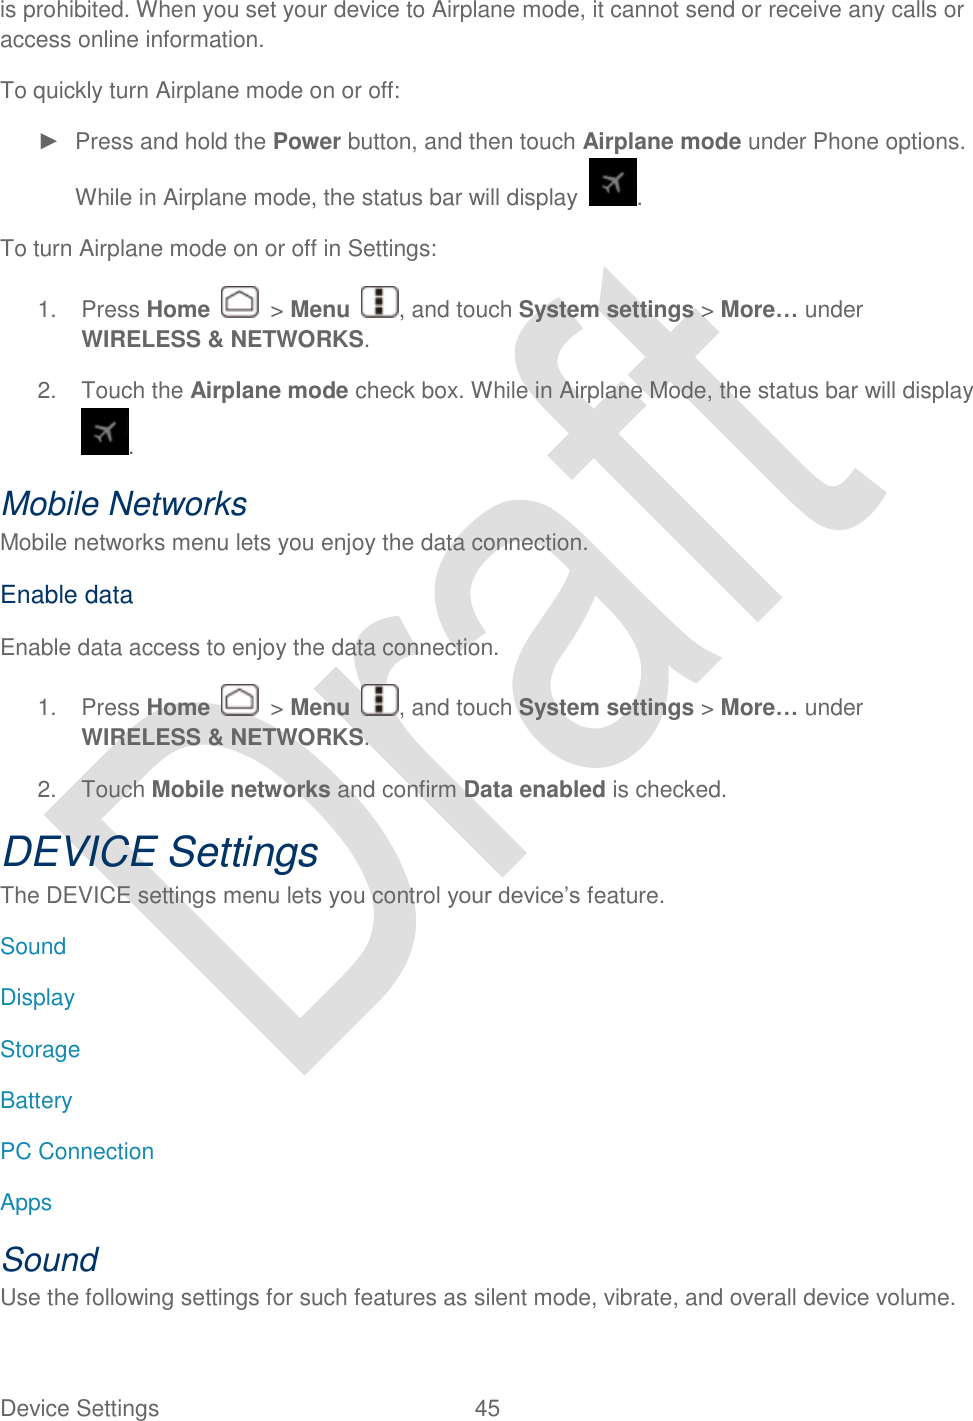
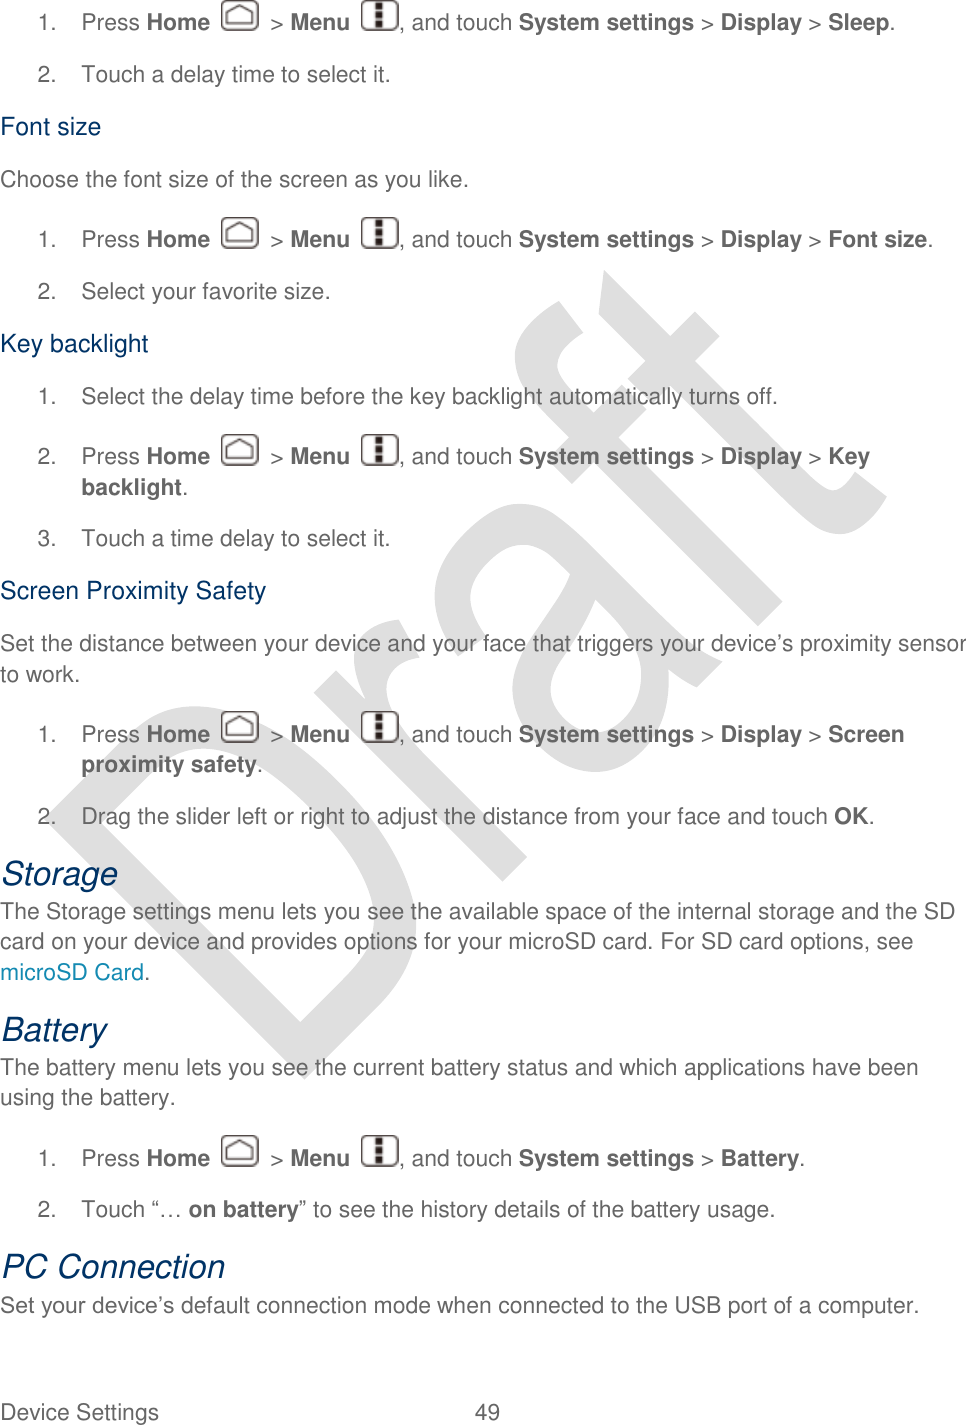
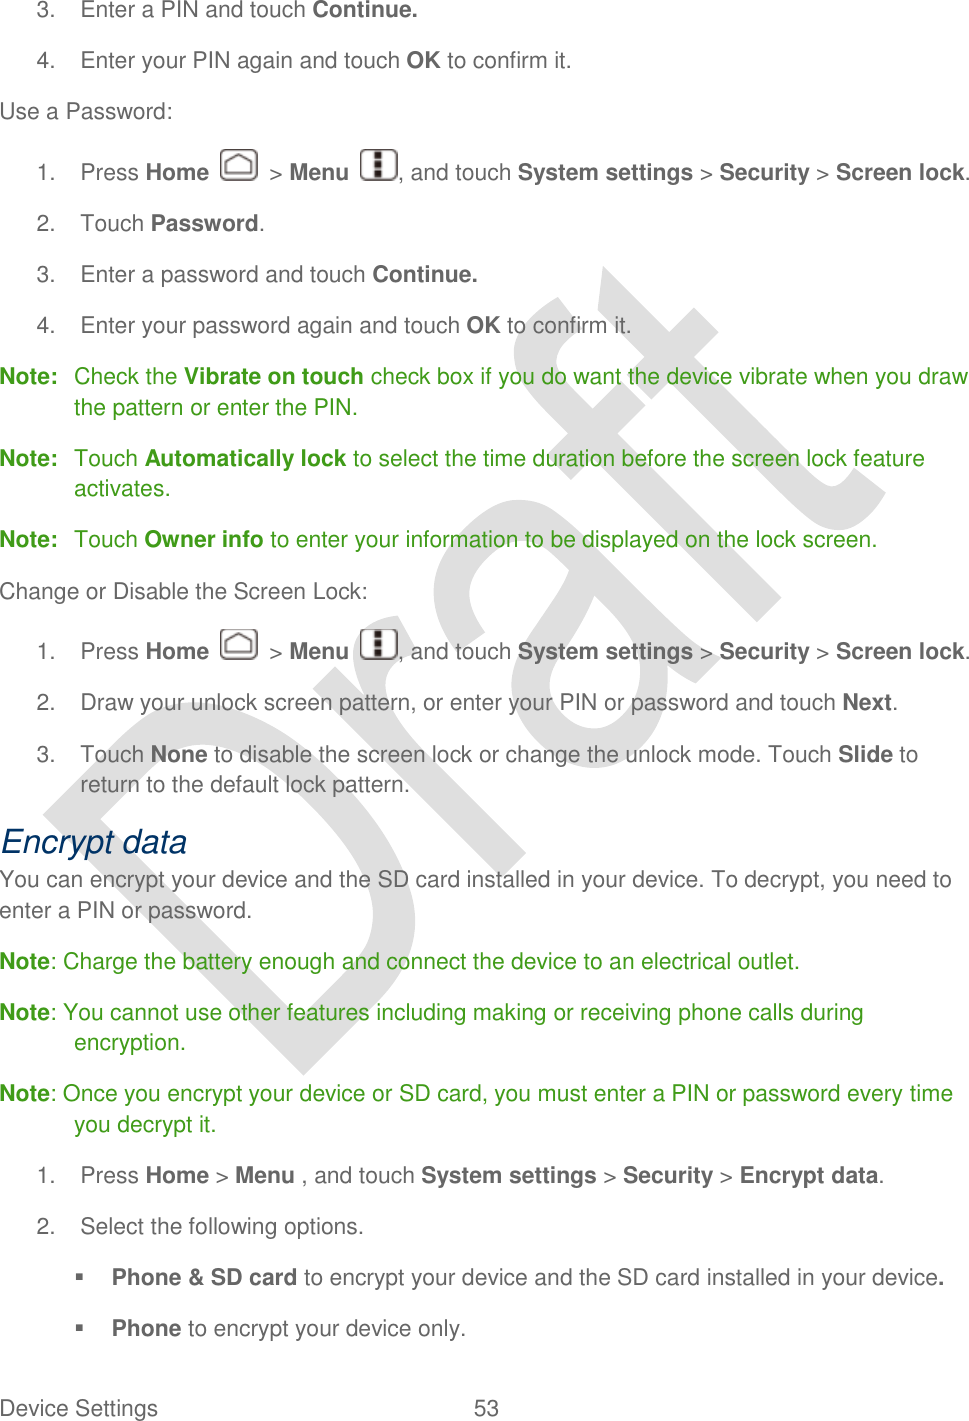
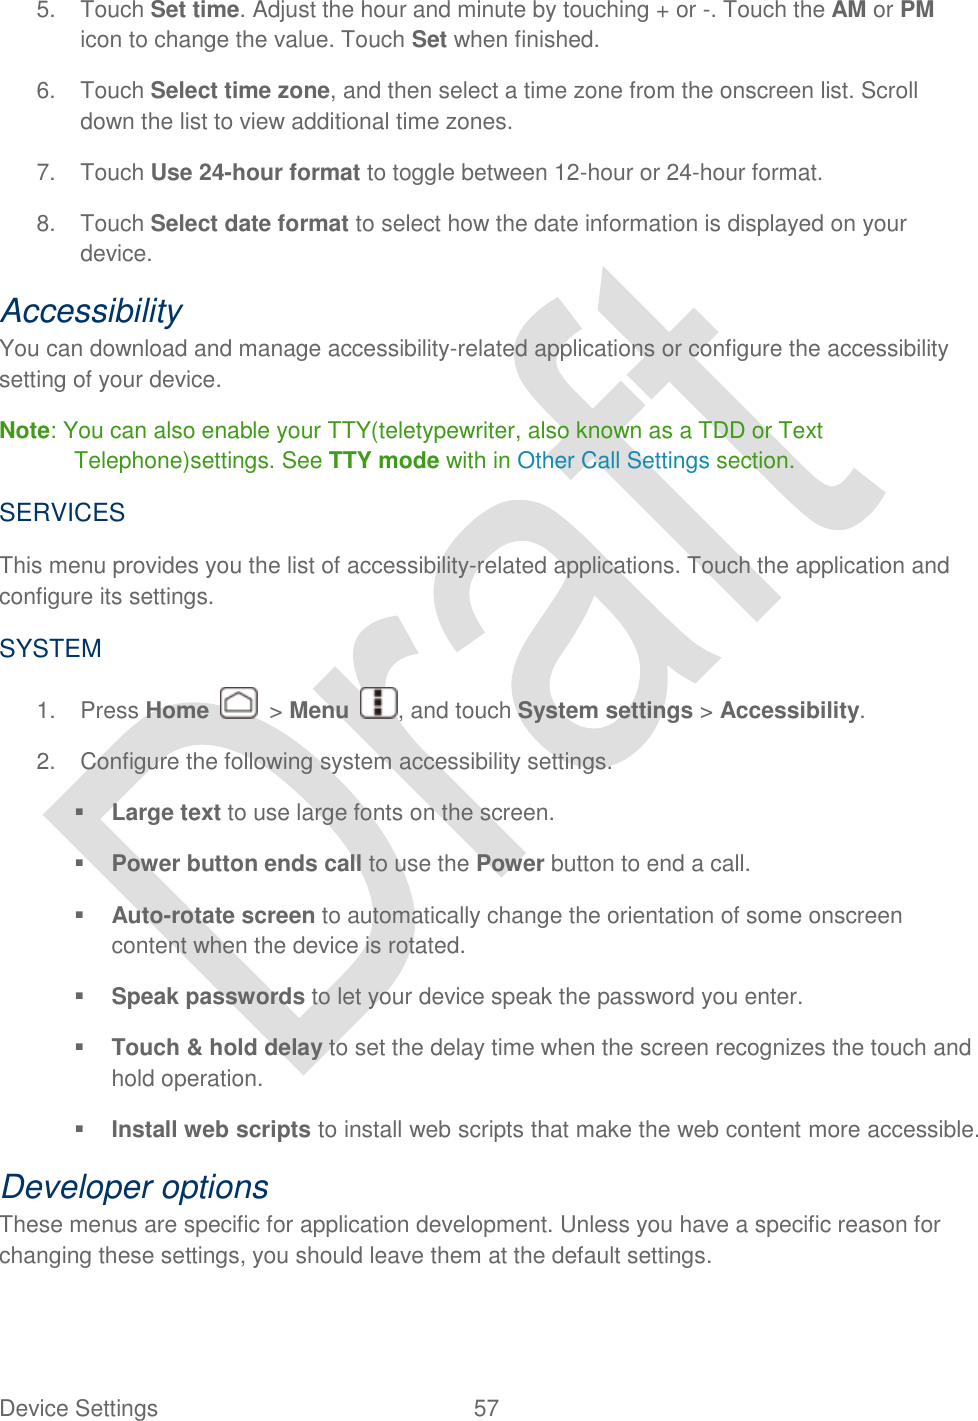
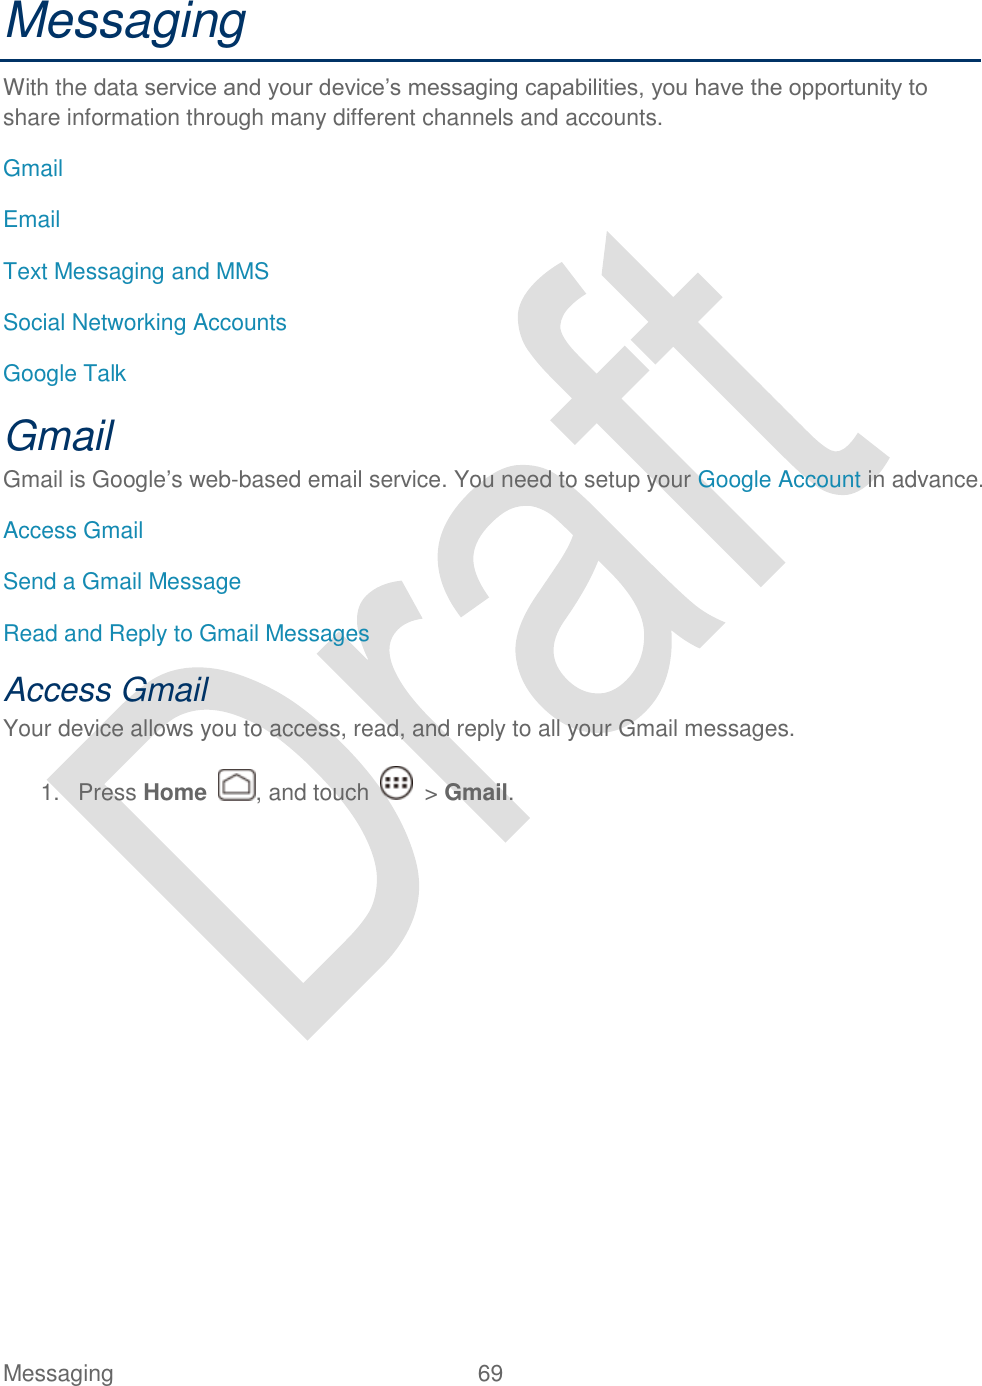
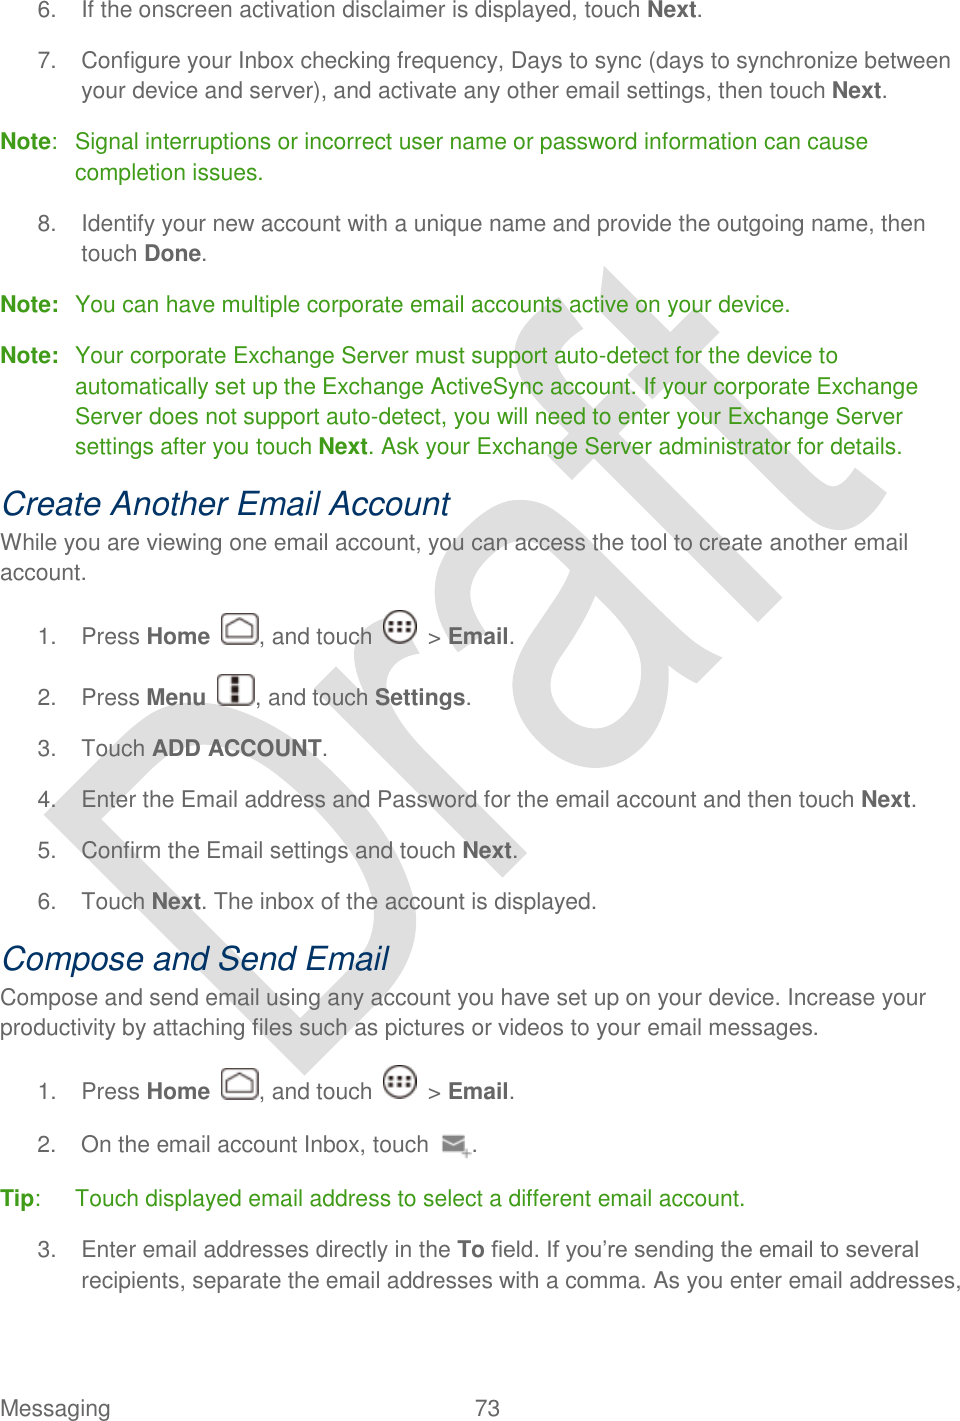
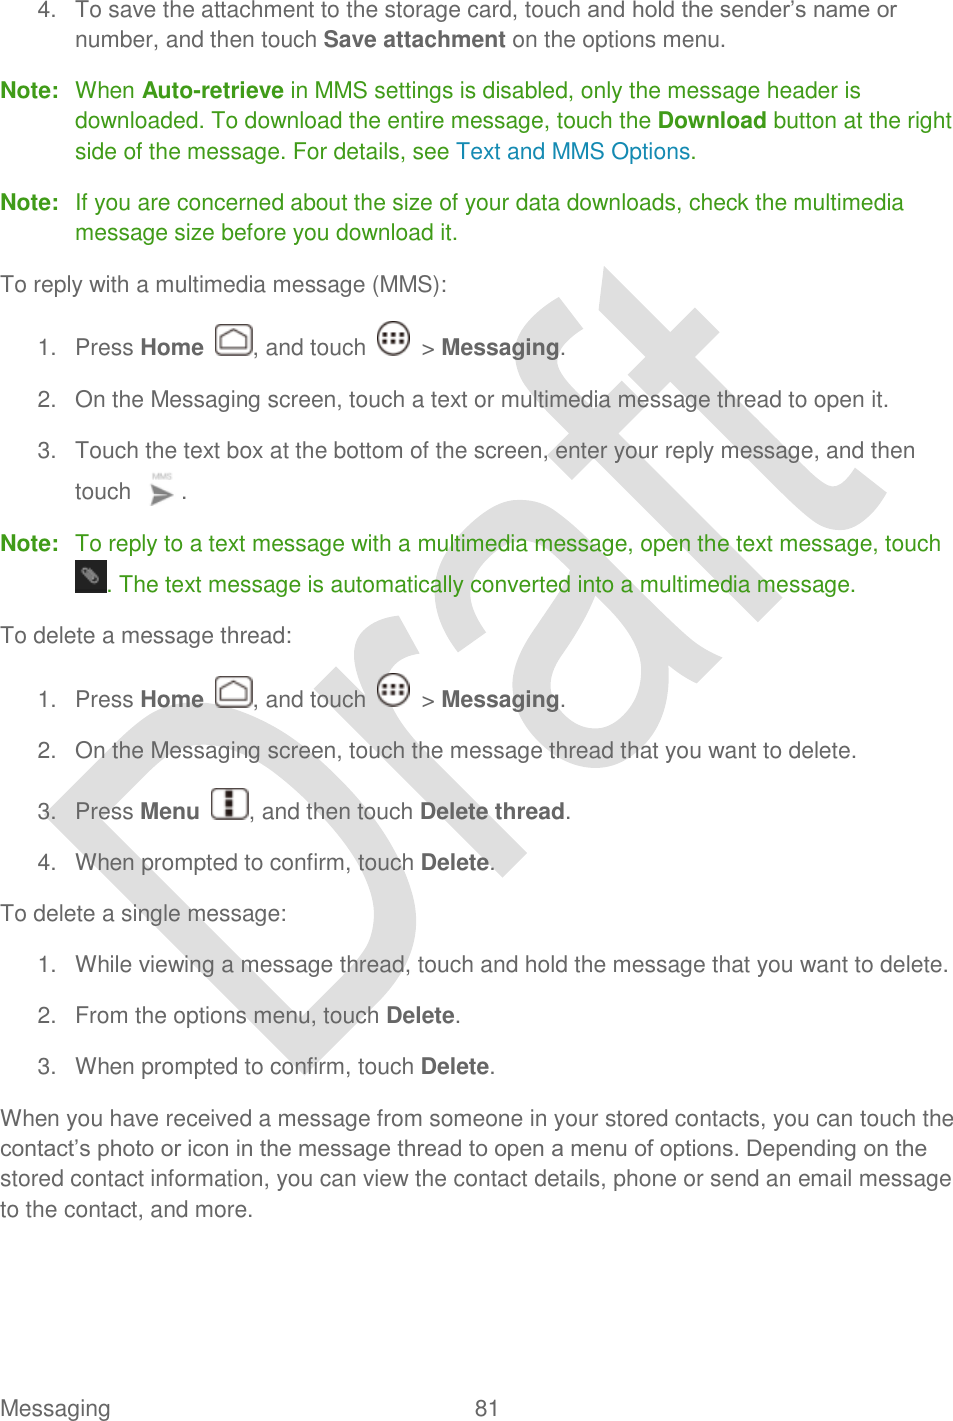
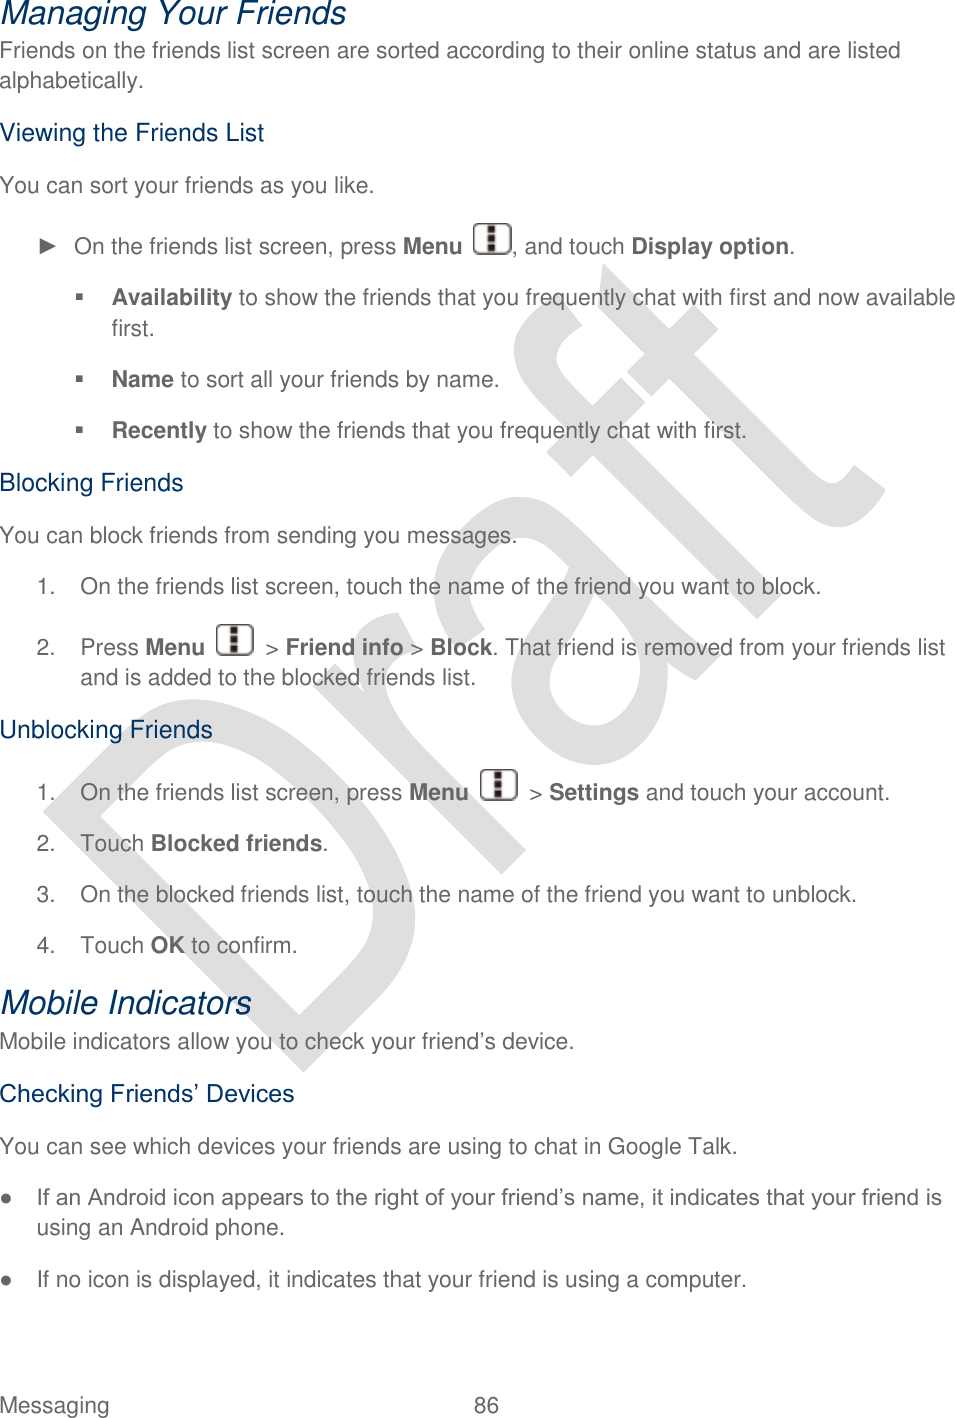
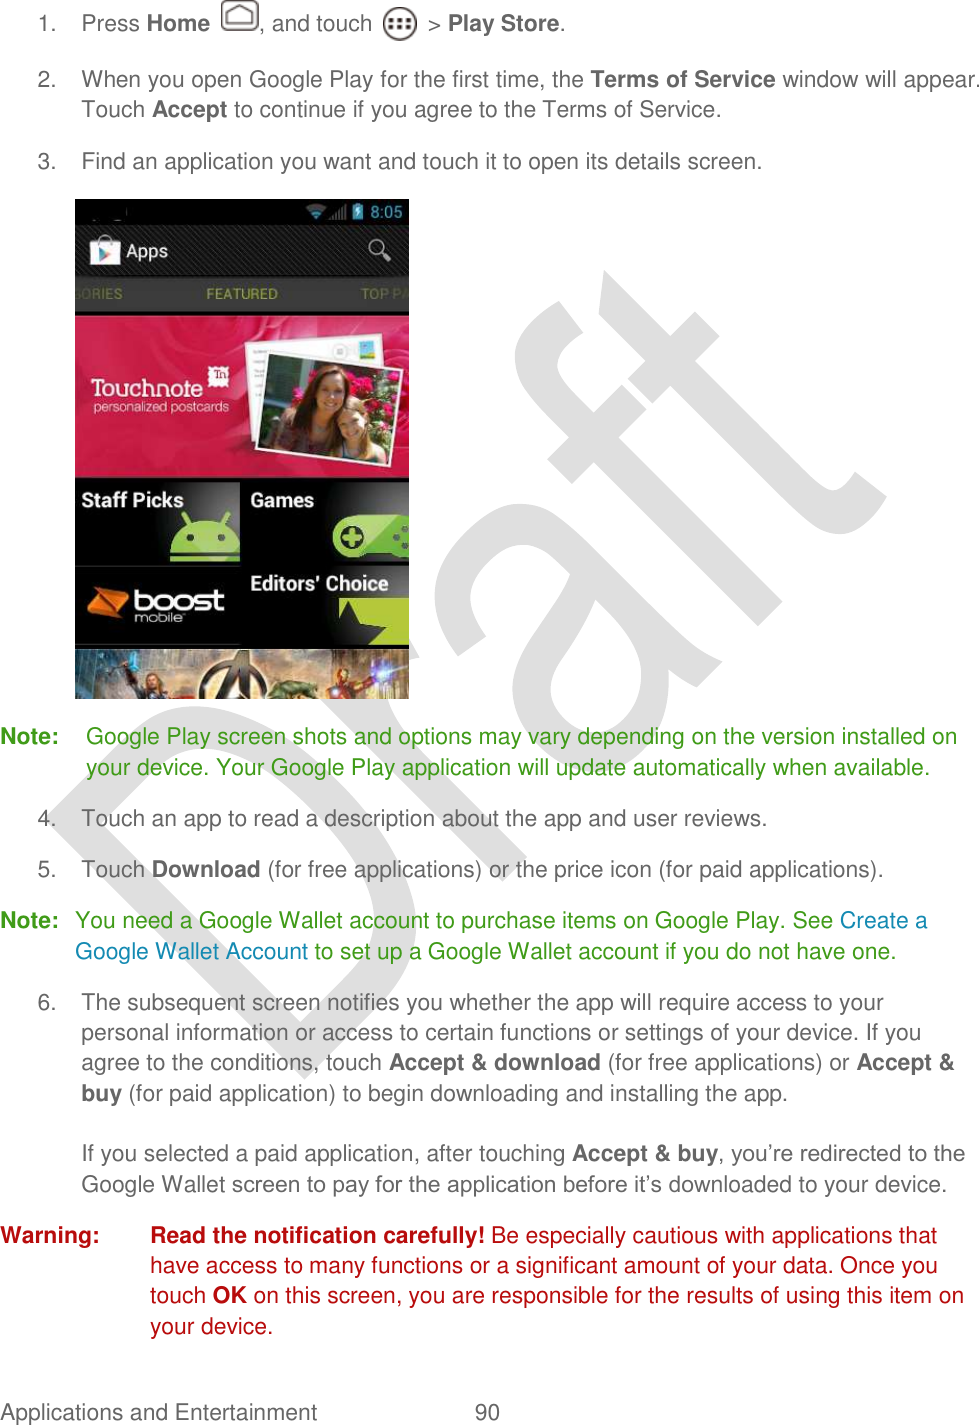
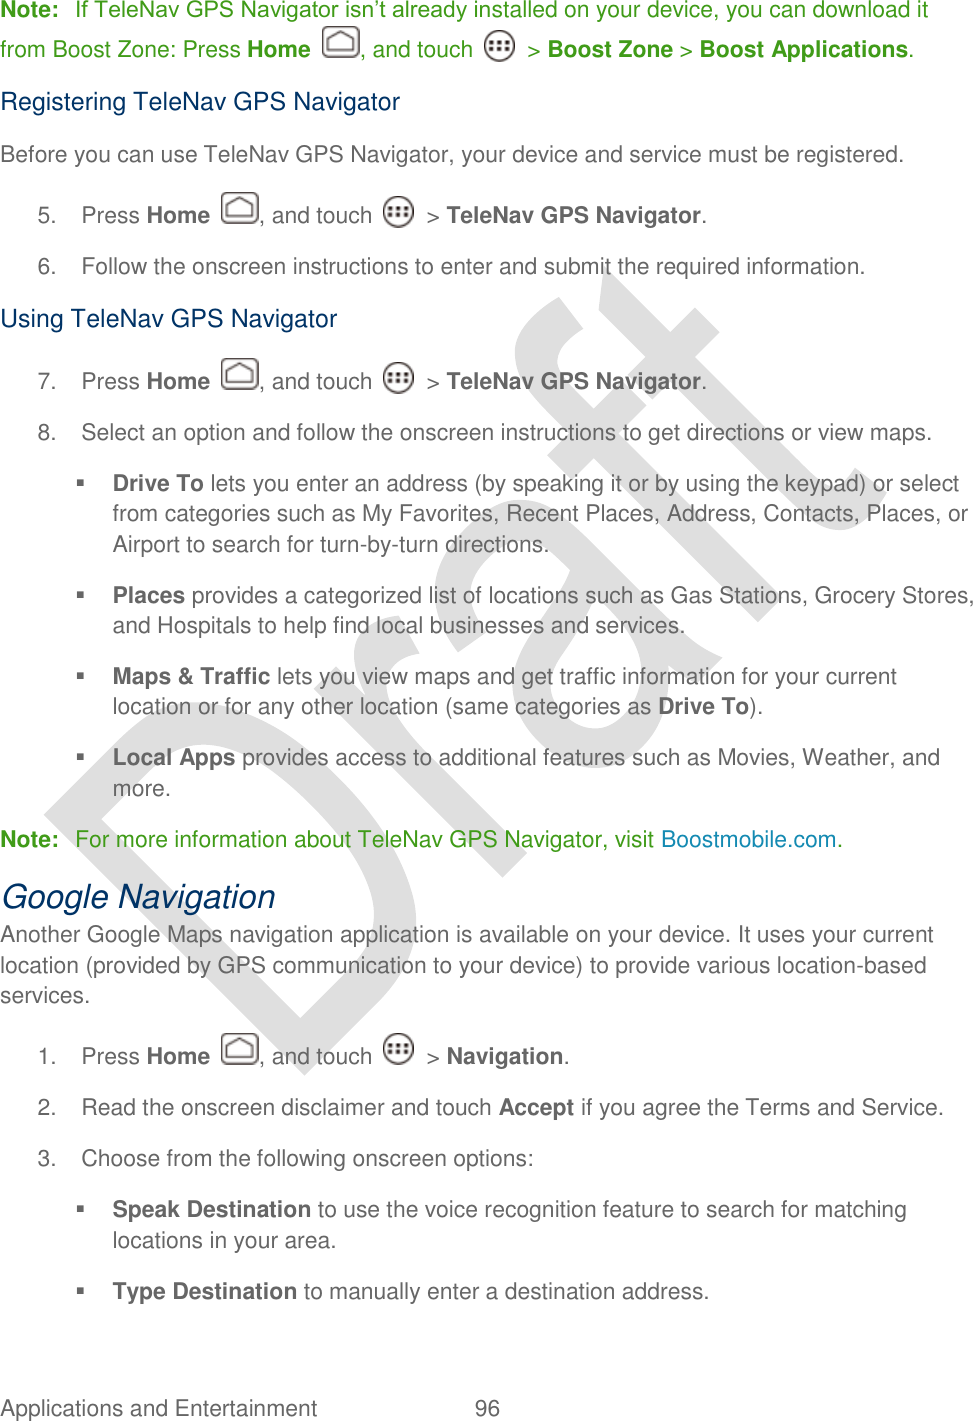
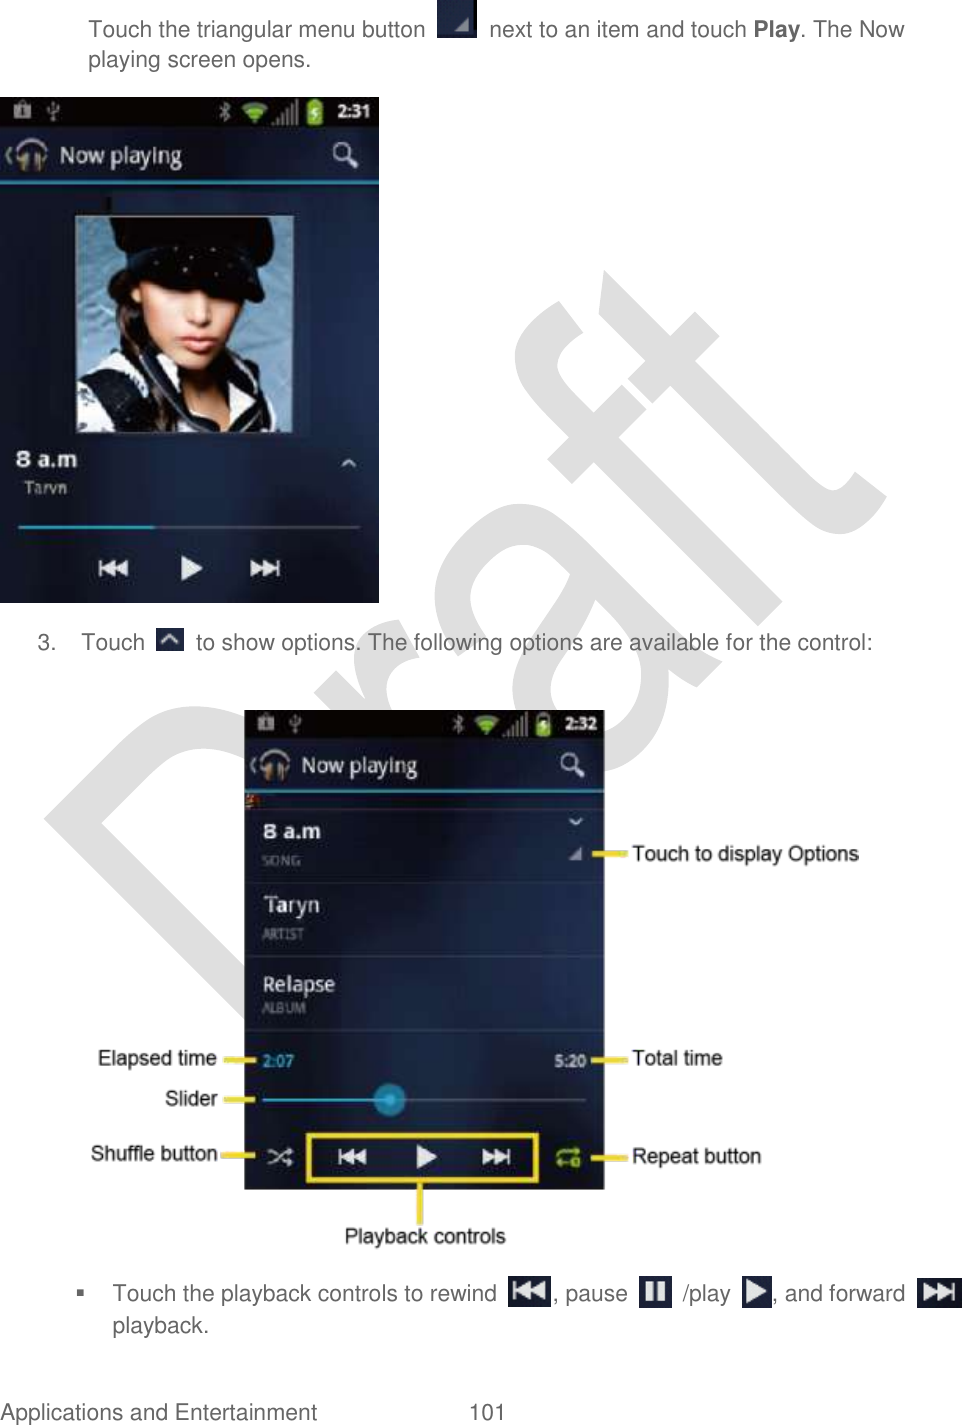
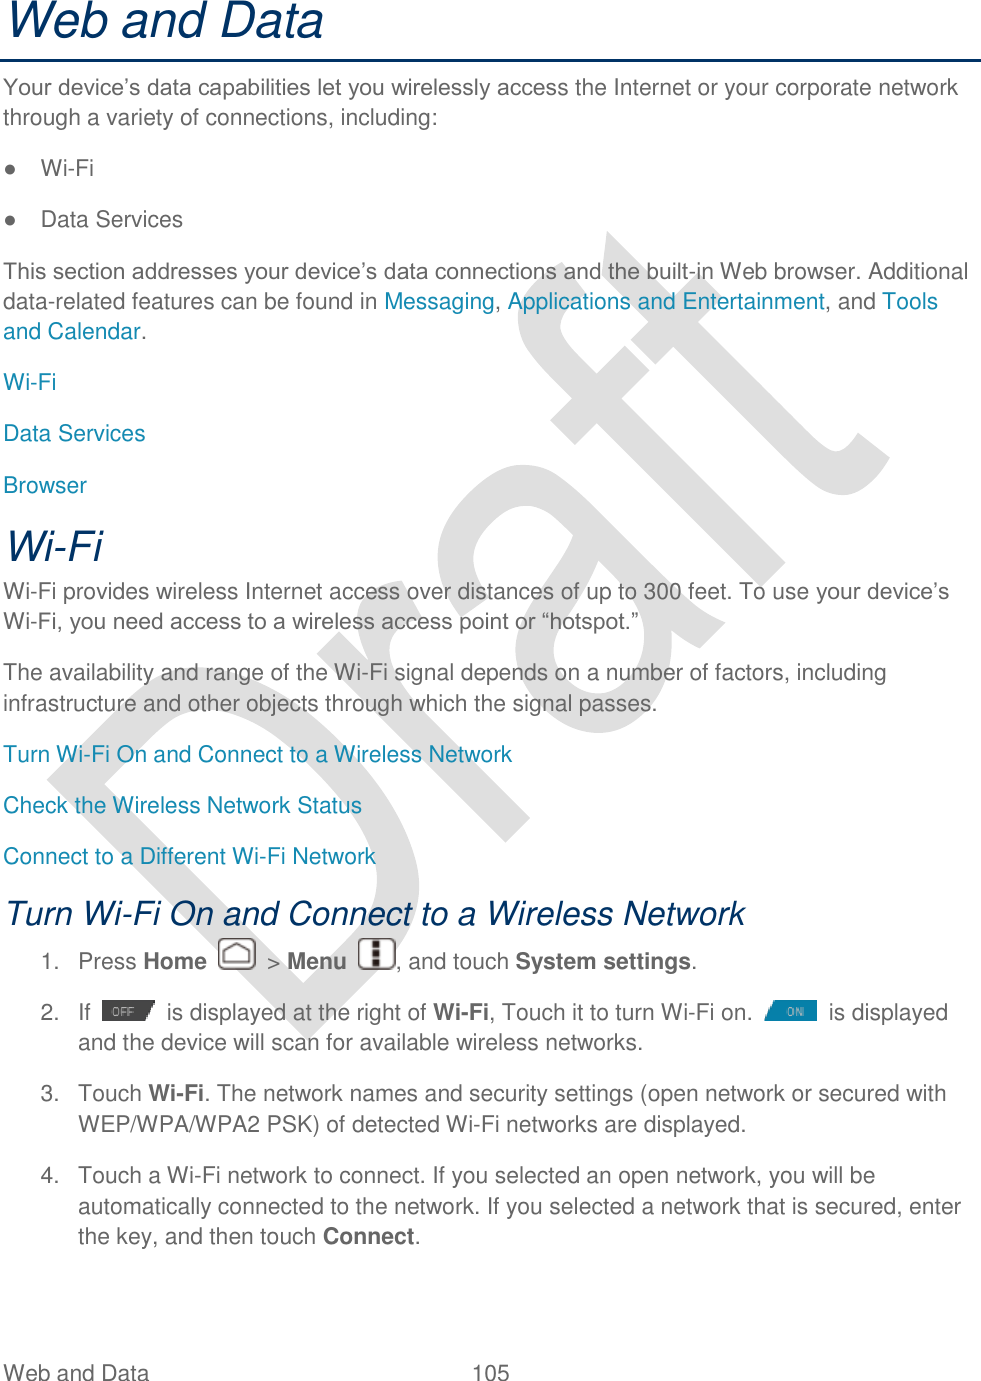
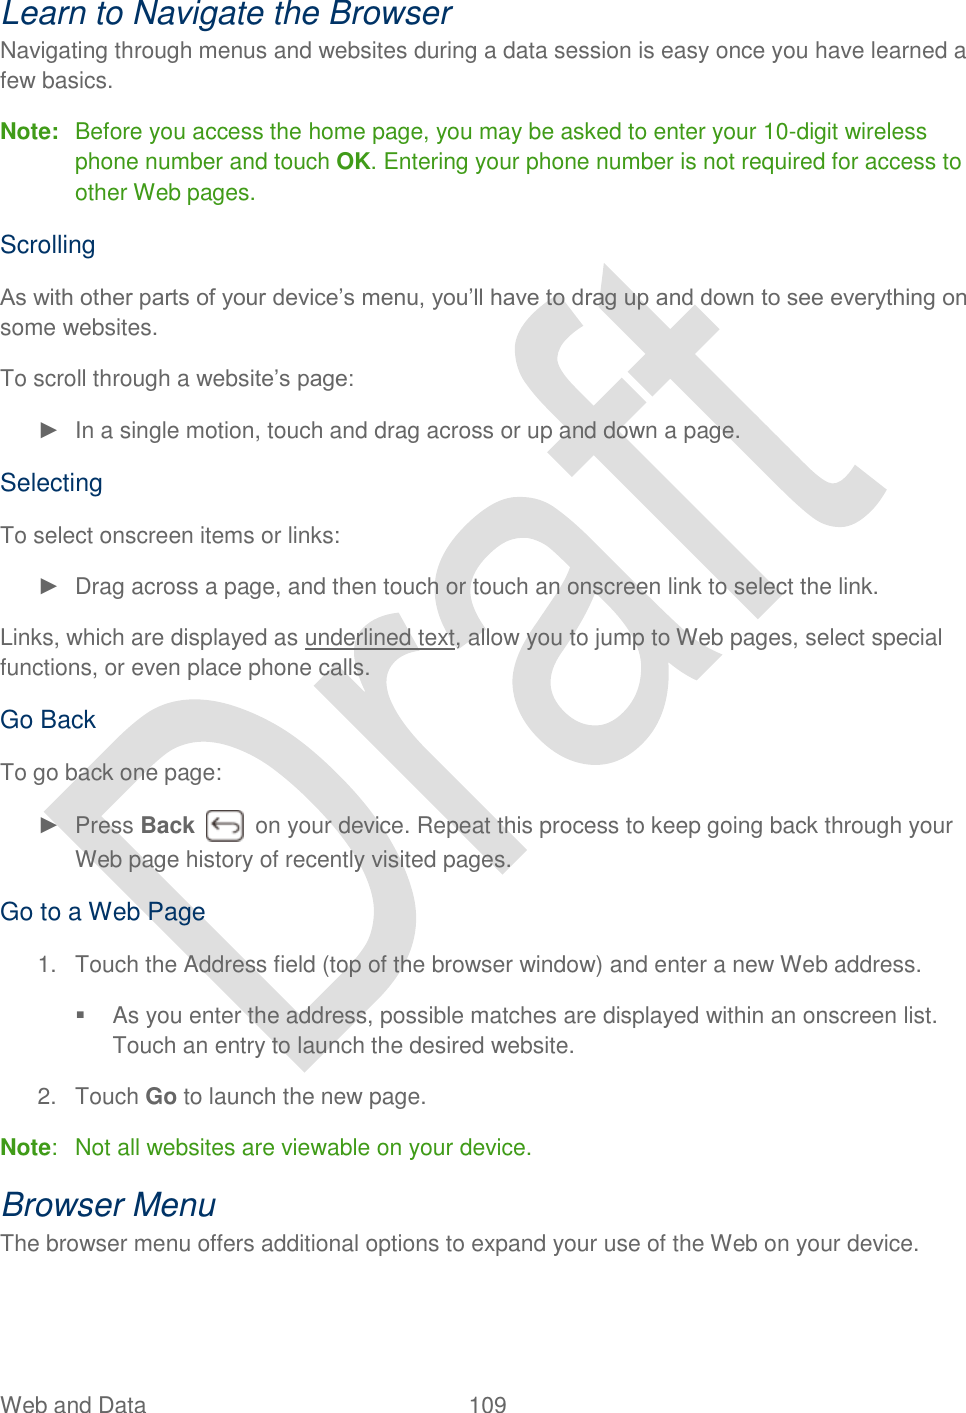
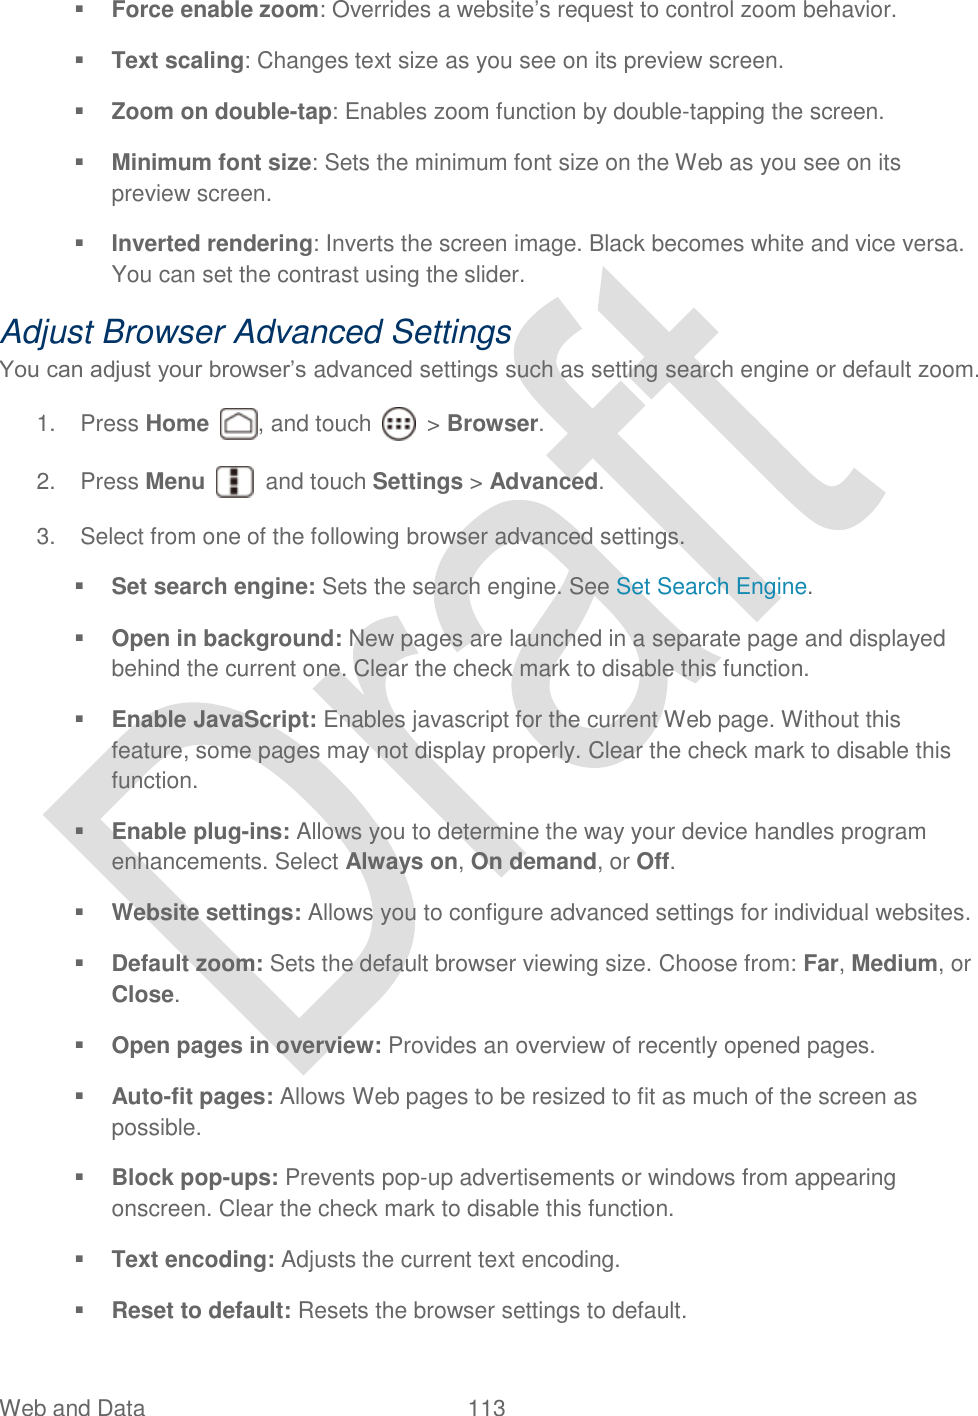
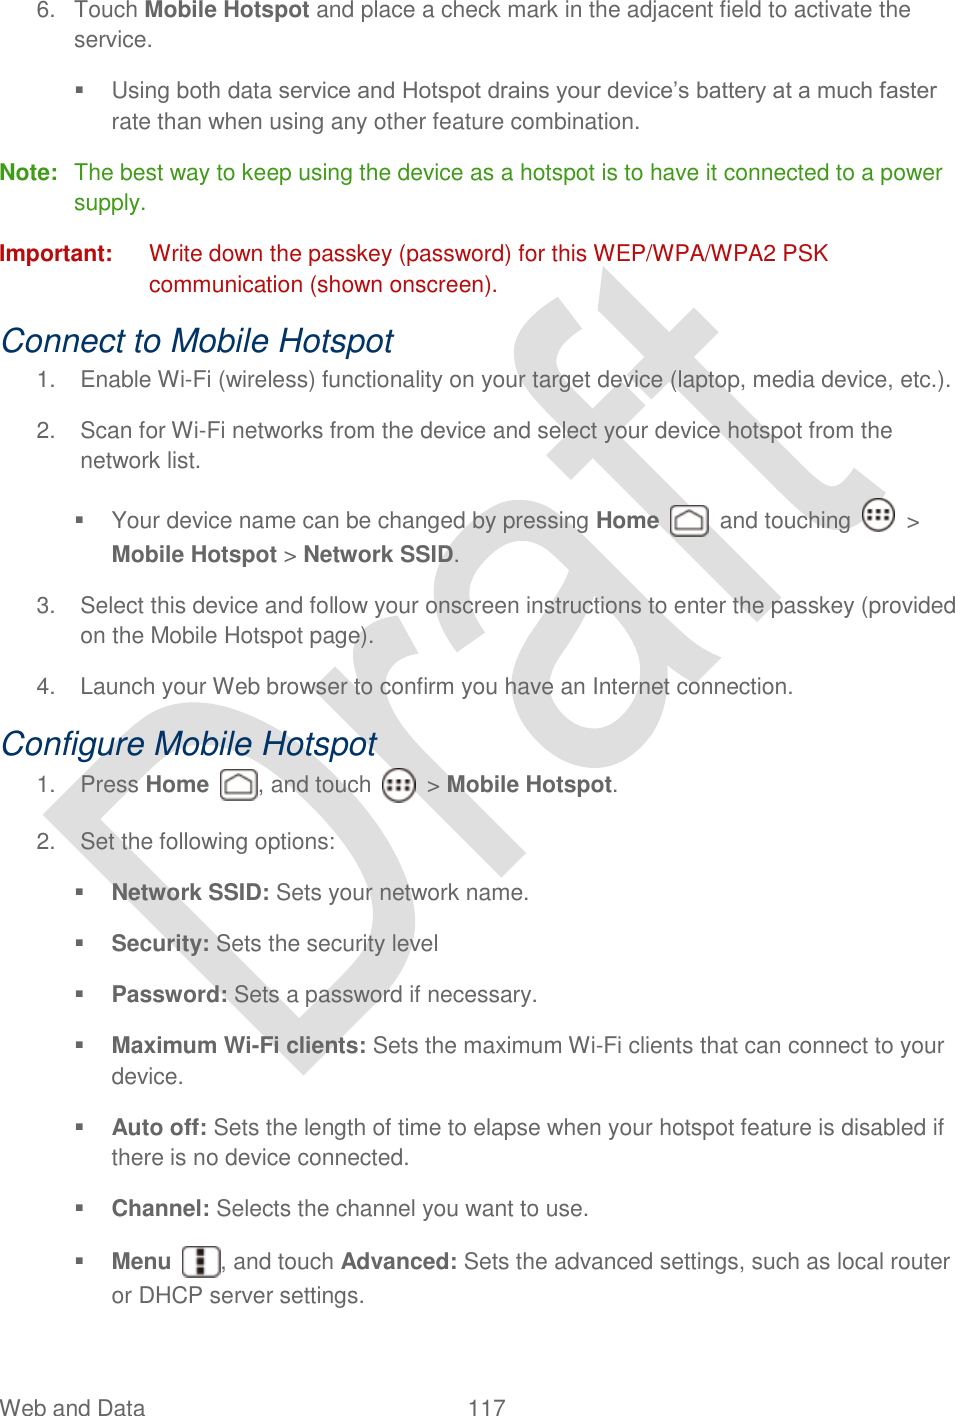
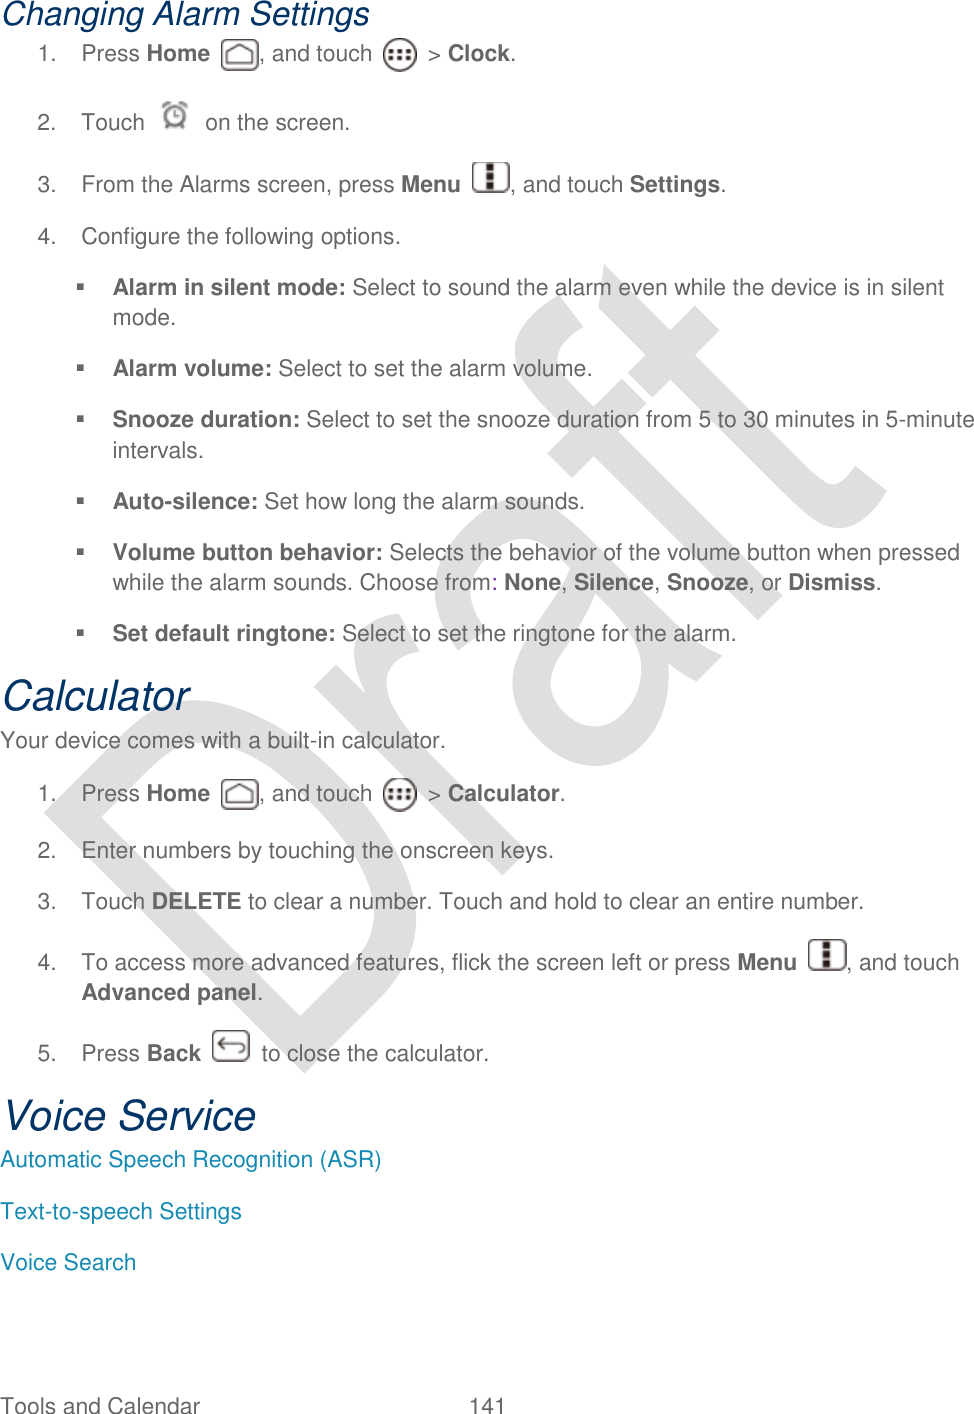
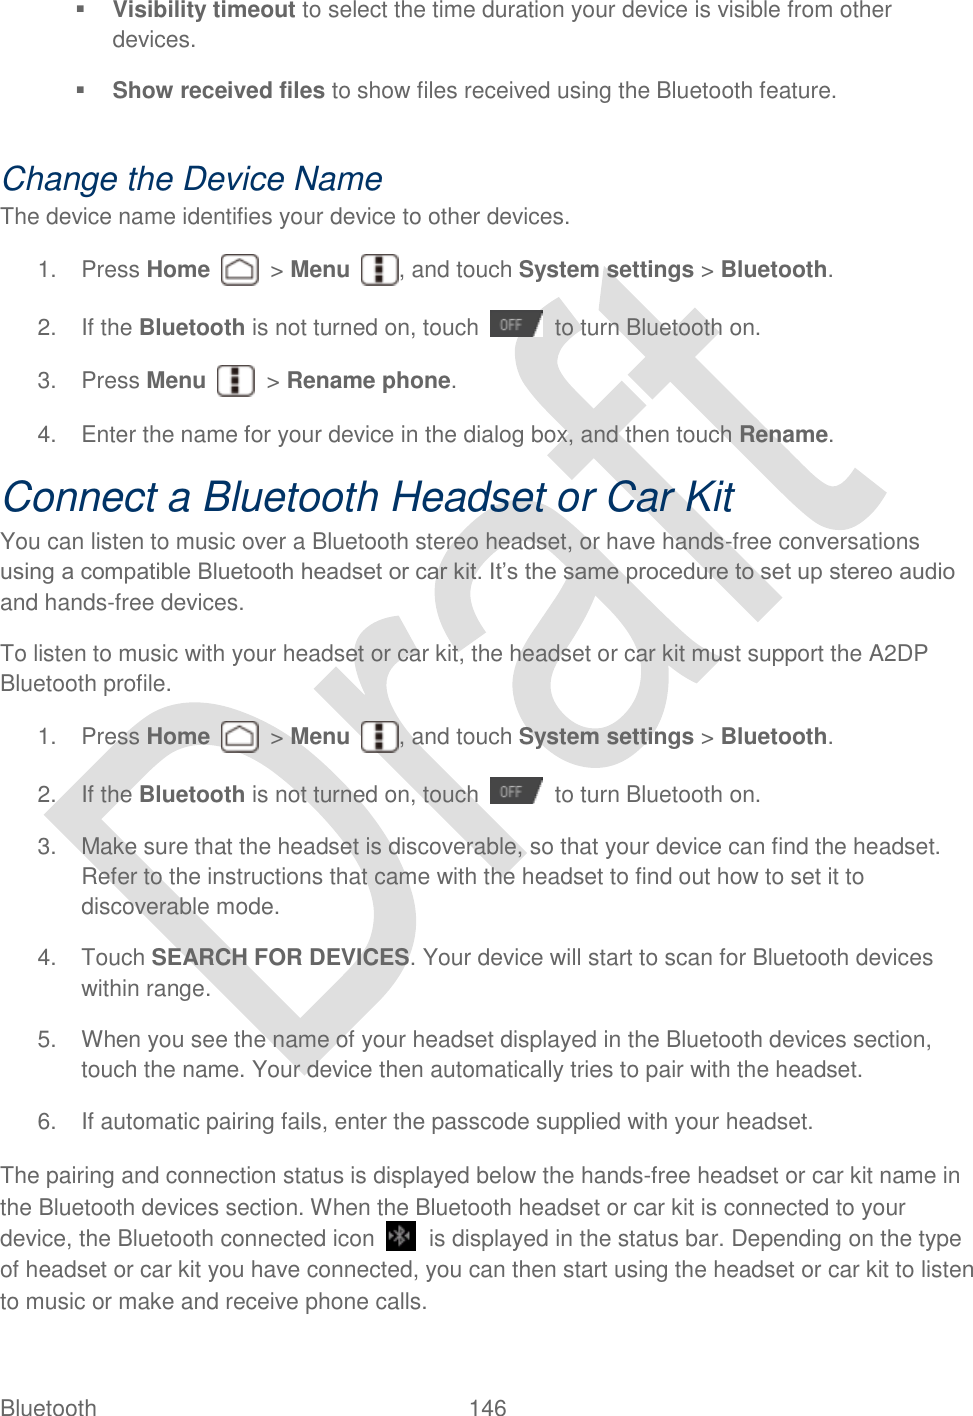
![Tools and Calendar 143 1. Press Home > Menu , and touch System settings > Language & input. 2. Touch Text-to-speech output under SPEECH. 3. Select your engine. Touch to configure the settings of the selected engine. 4. Touch Speech rate and select a speed. 5. Touch Listen to an example to play a short demonstration of the set speech synthesis. Voice Search Voice Search allows you to find information on the web as well as items and information on your device by speaking your search terms. 1. Touch on the Google Search Bar. - or - Press Home , and touch > Search > . 2. Speak clearly into the device‟s microphone. If an error occurs, touch Speak again. 3. Touch a matching item from the onscreen list. Voice Search Settings You can configure the settings of the voice search feature. 1. Press Home > Menu , and touch System settings > Language & input. 2. Touch Voice Search under SPEECH. Language to set the language used when entering text by speaking. SafeSearch to filter explicit text and images from the search results. Select from Off, Moderate, or Strict. Block offensive words to replace recognized offensive words in transcriptions with [#] when entering text by speaking. Personalized recognition to improve speech recognition accuracy. Google Account dashboard to manage your collected data. Eco Mode The Eco Mode allows you to save battery life while using your device.](https://usermanual.wiki/Kyocera/C5170.user-manual-hydro/User-Guide-1700942-Page-159.png)
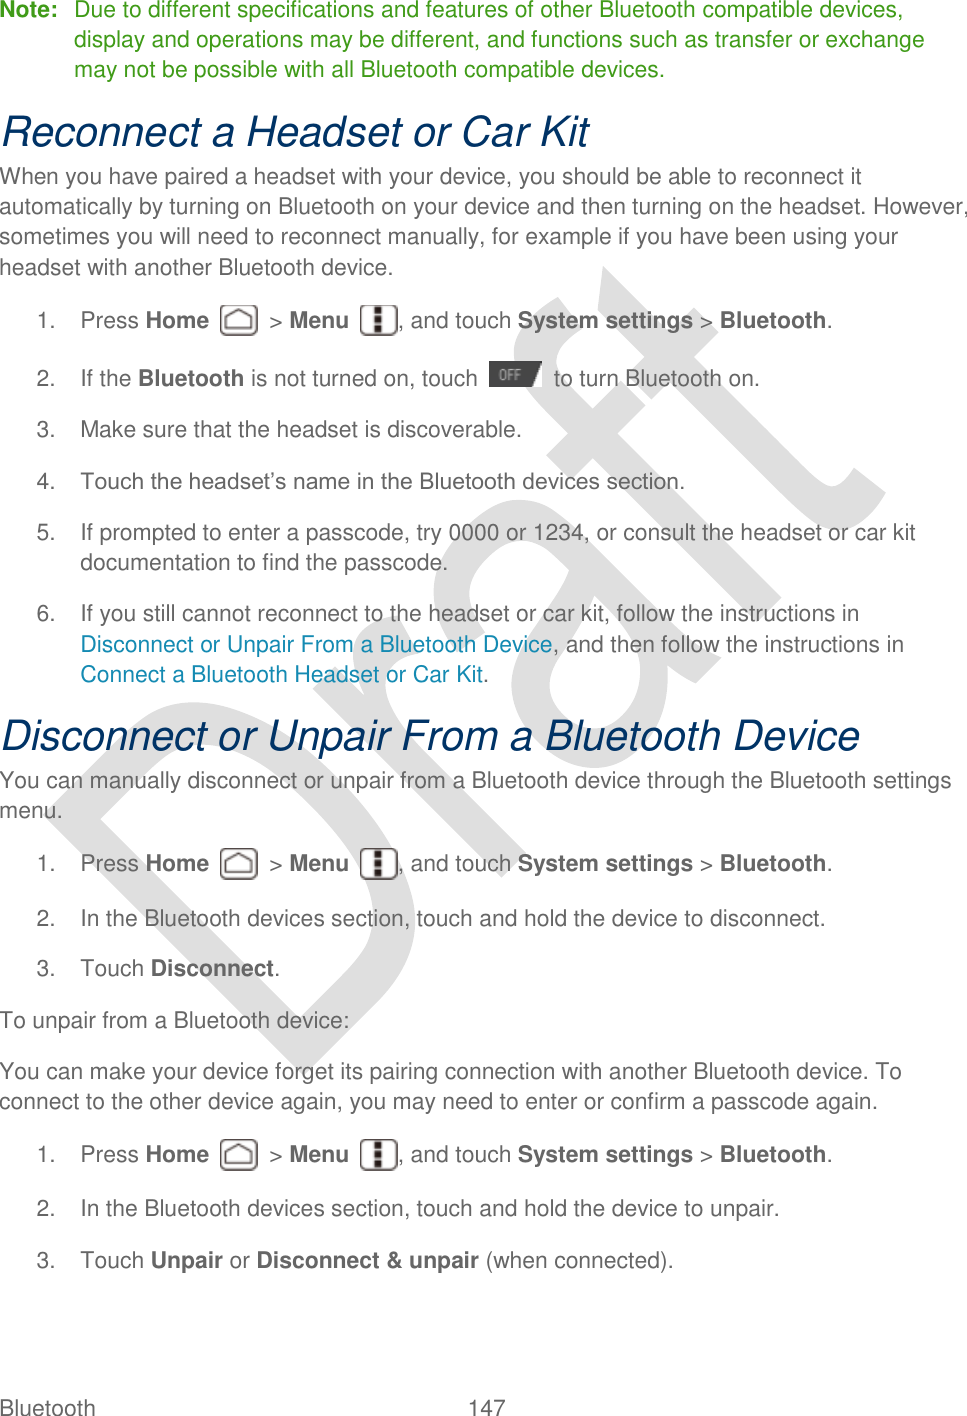
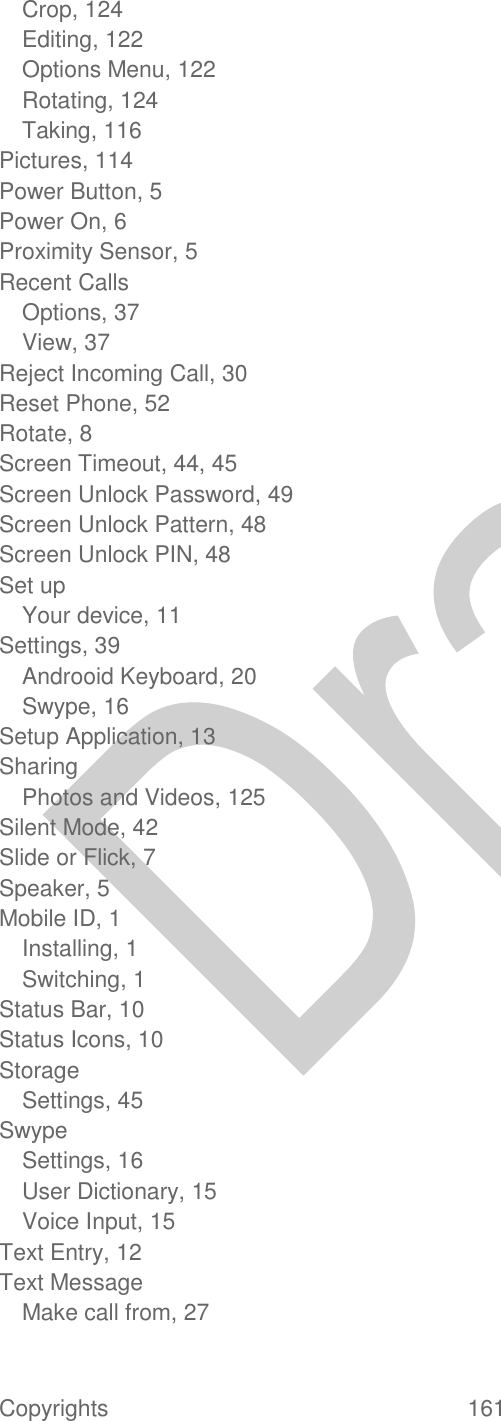
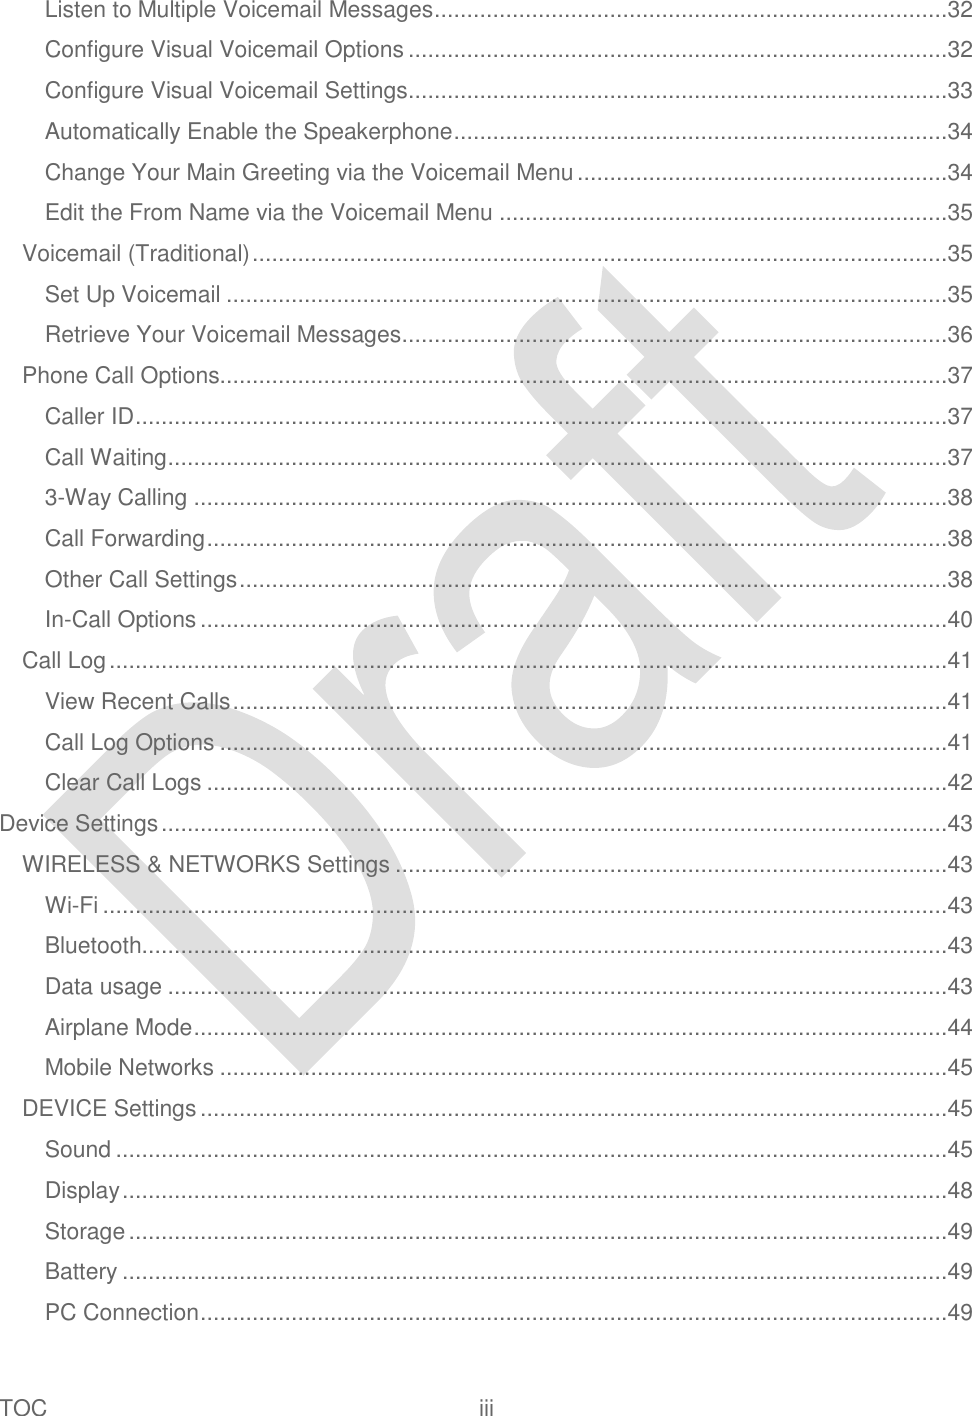
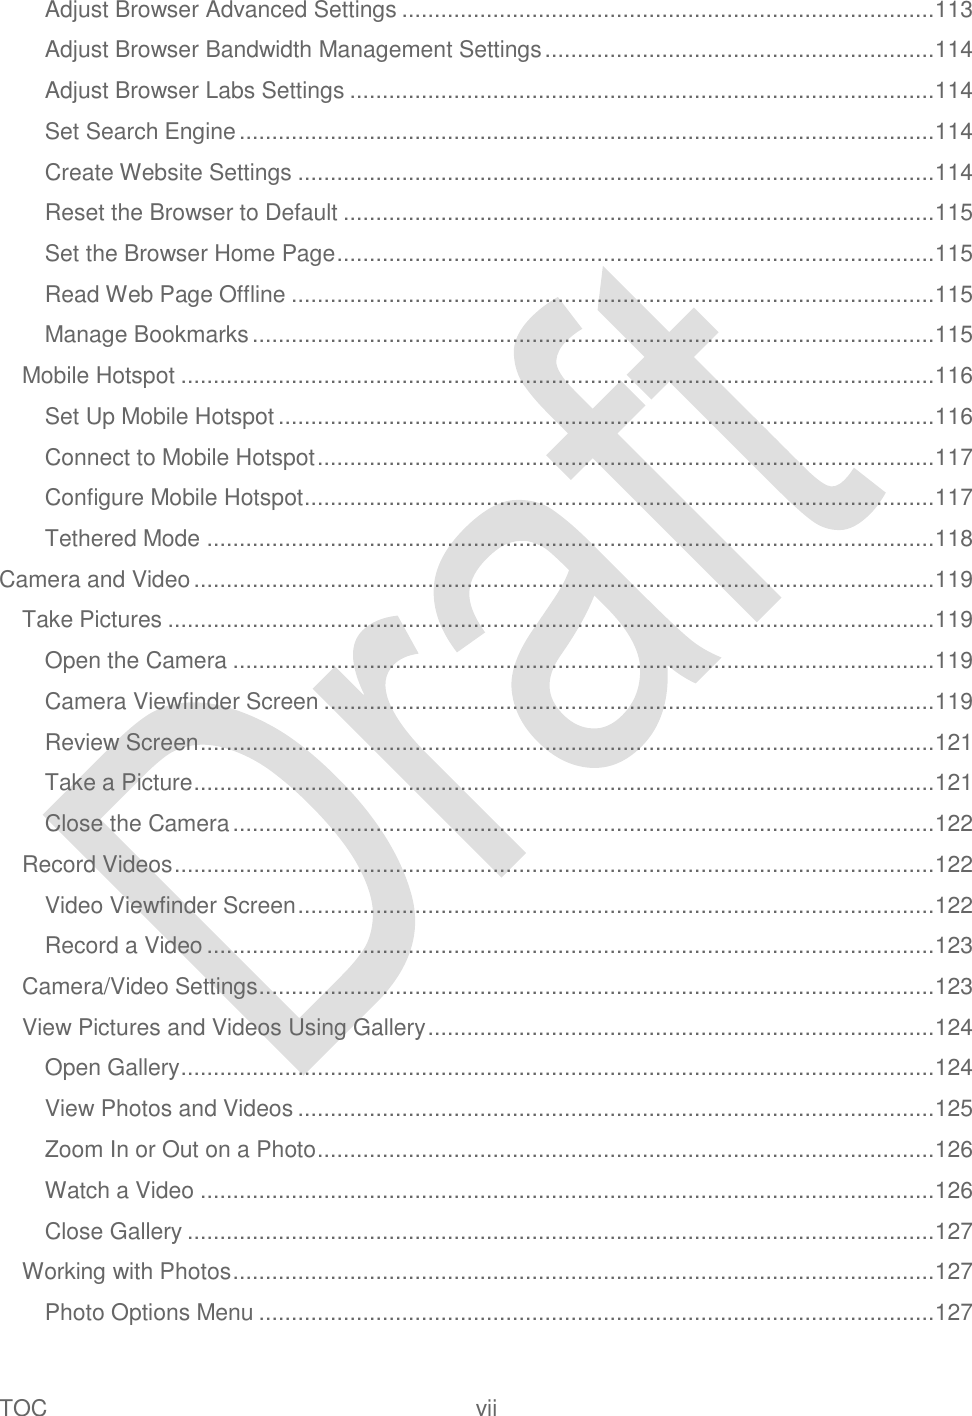
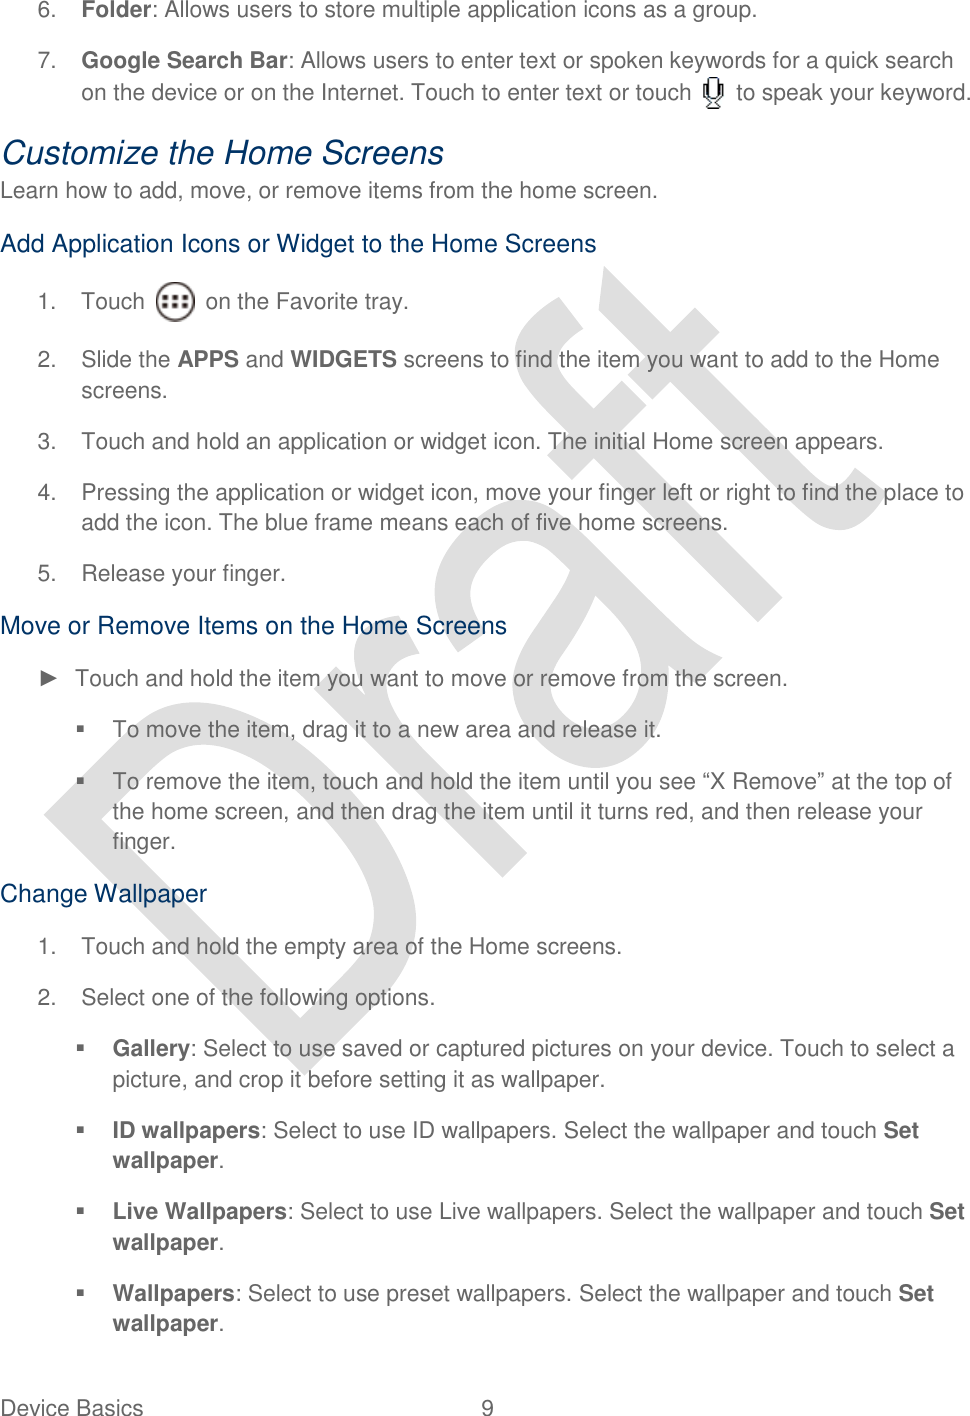
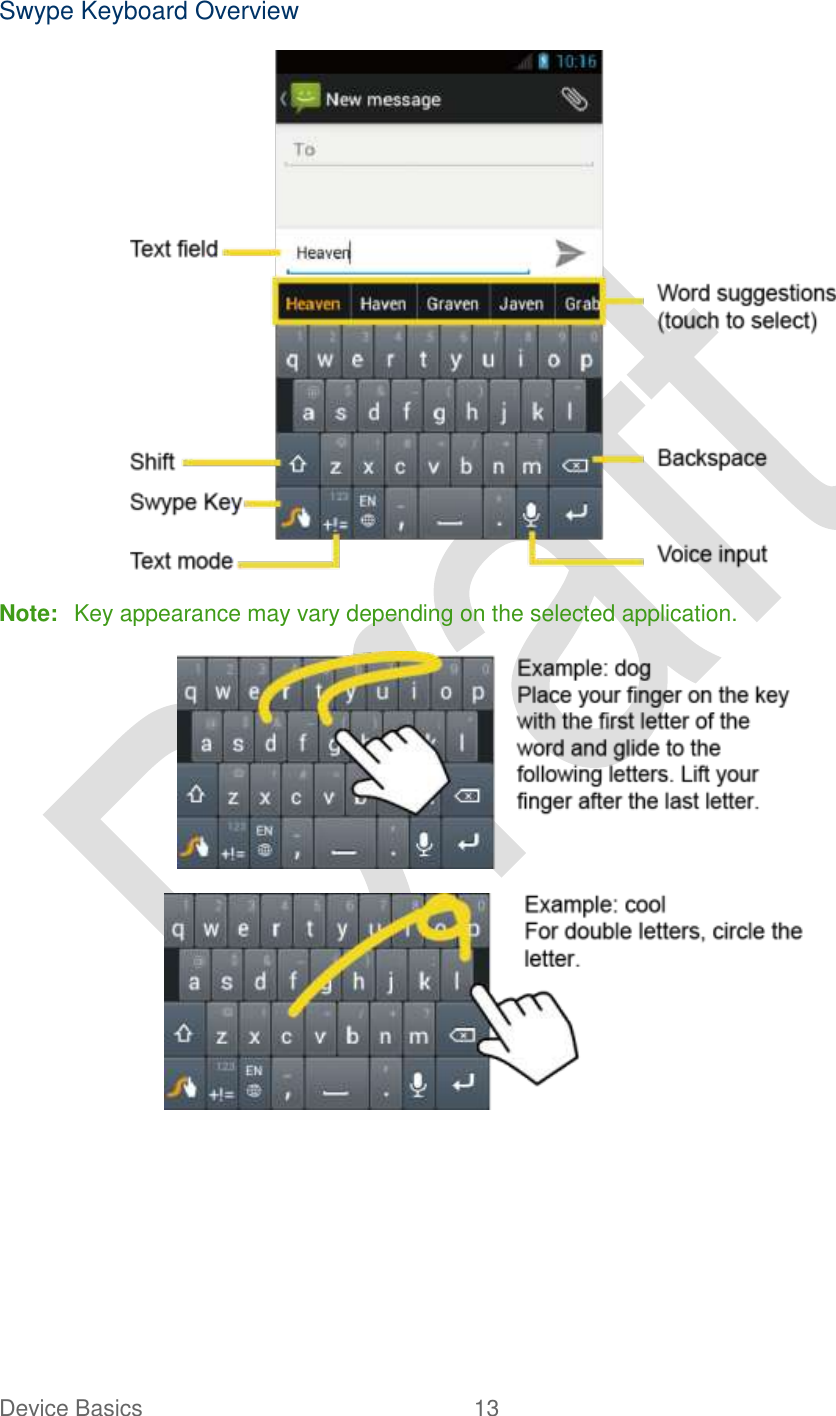
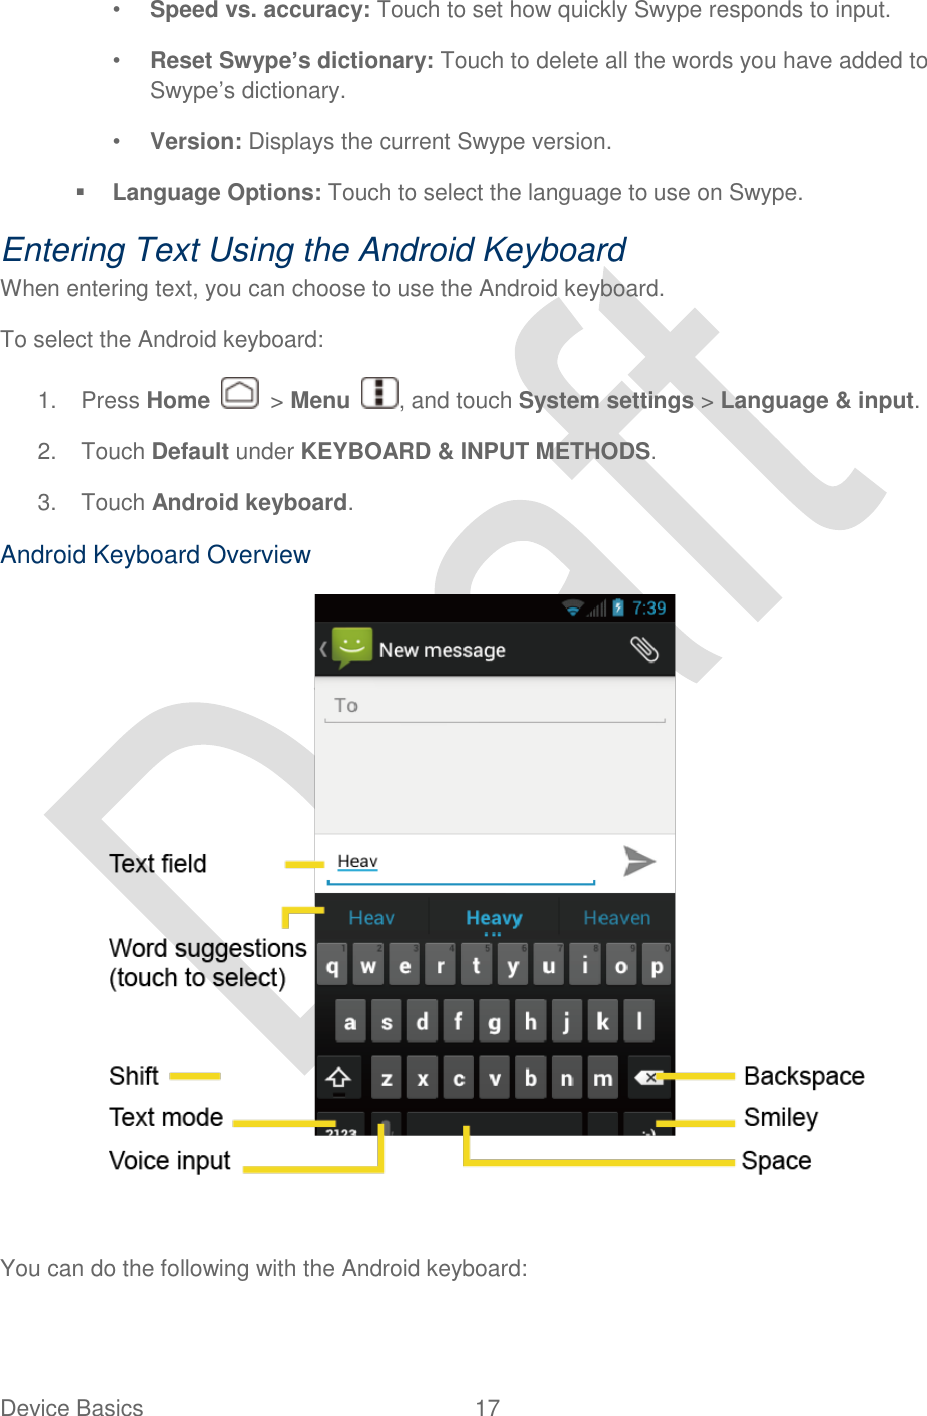
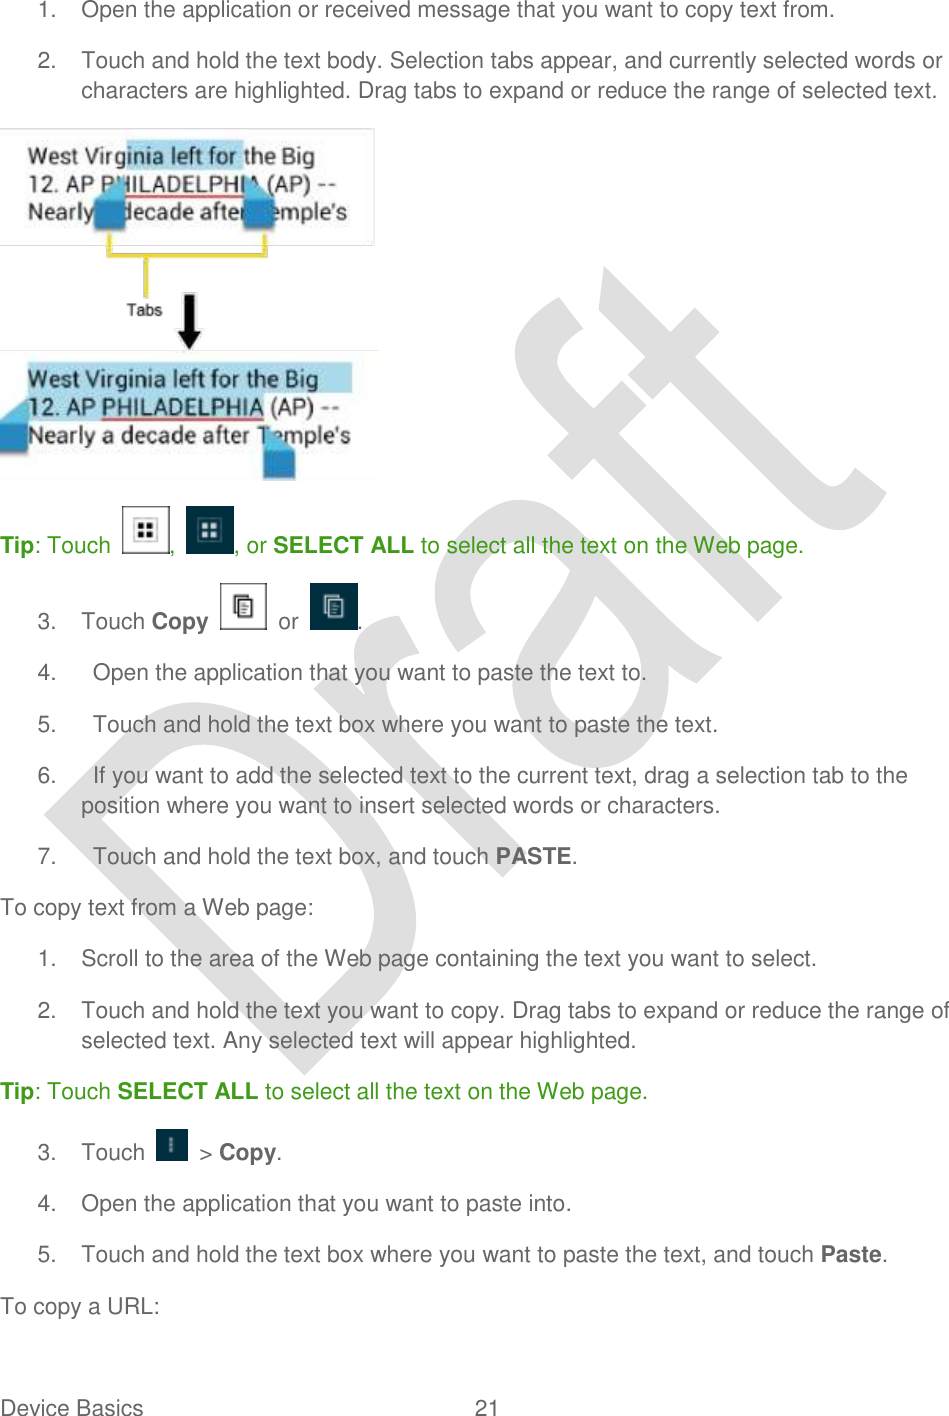
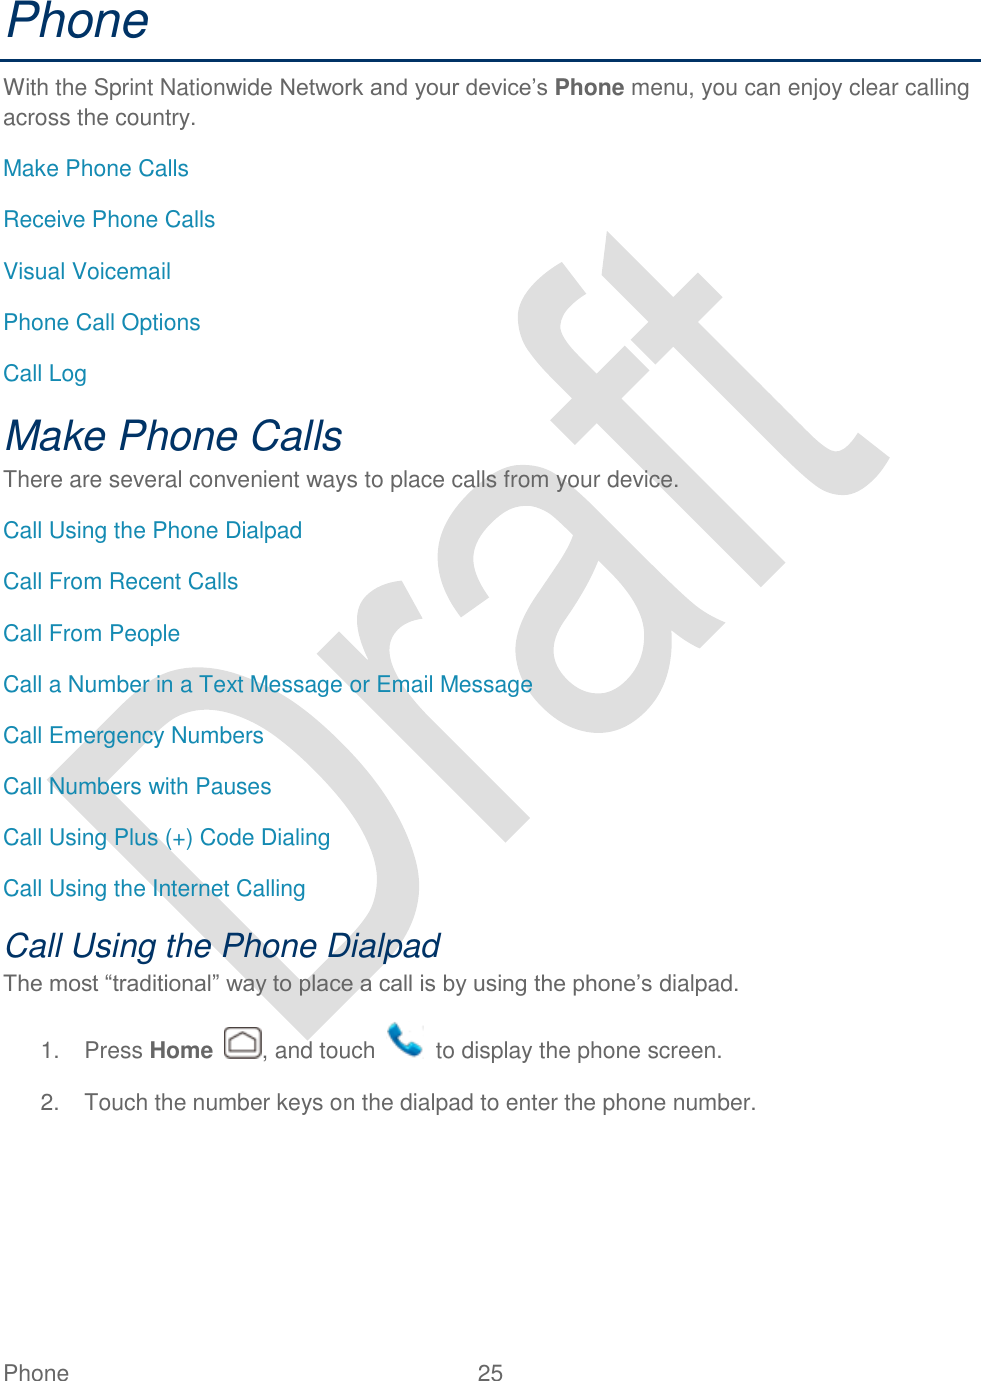
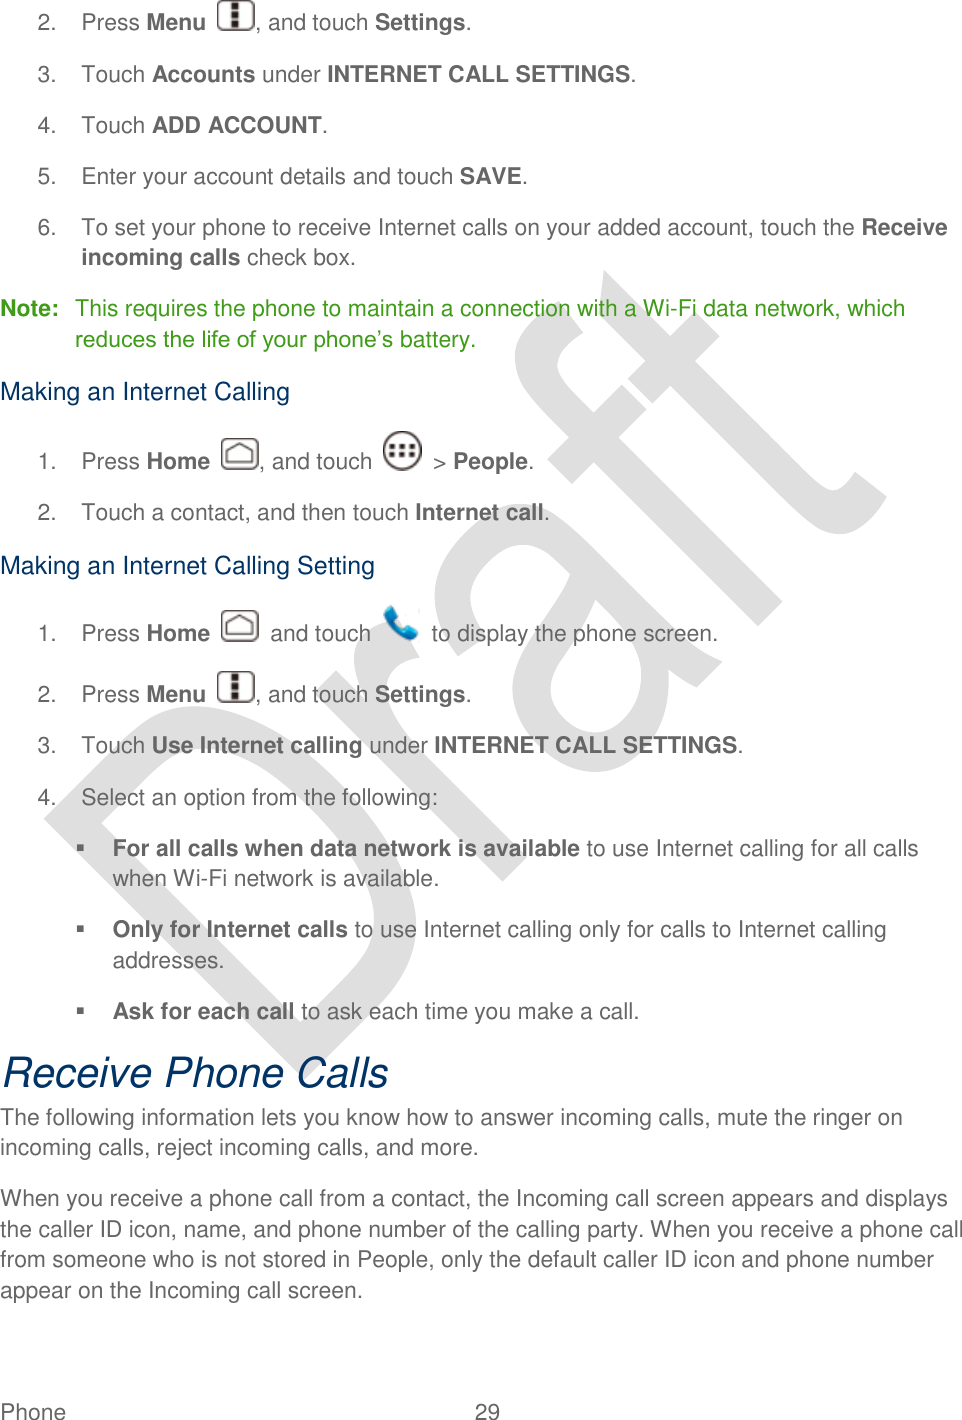
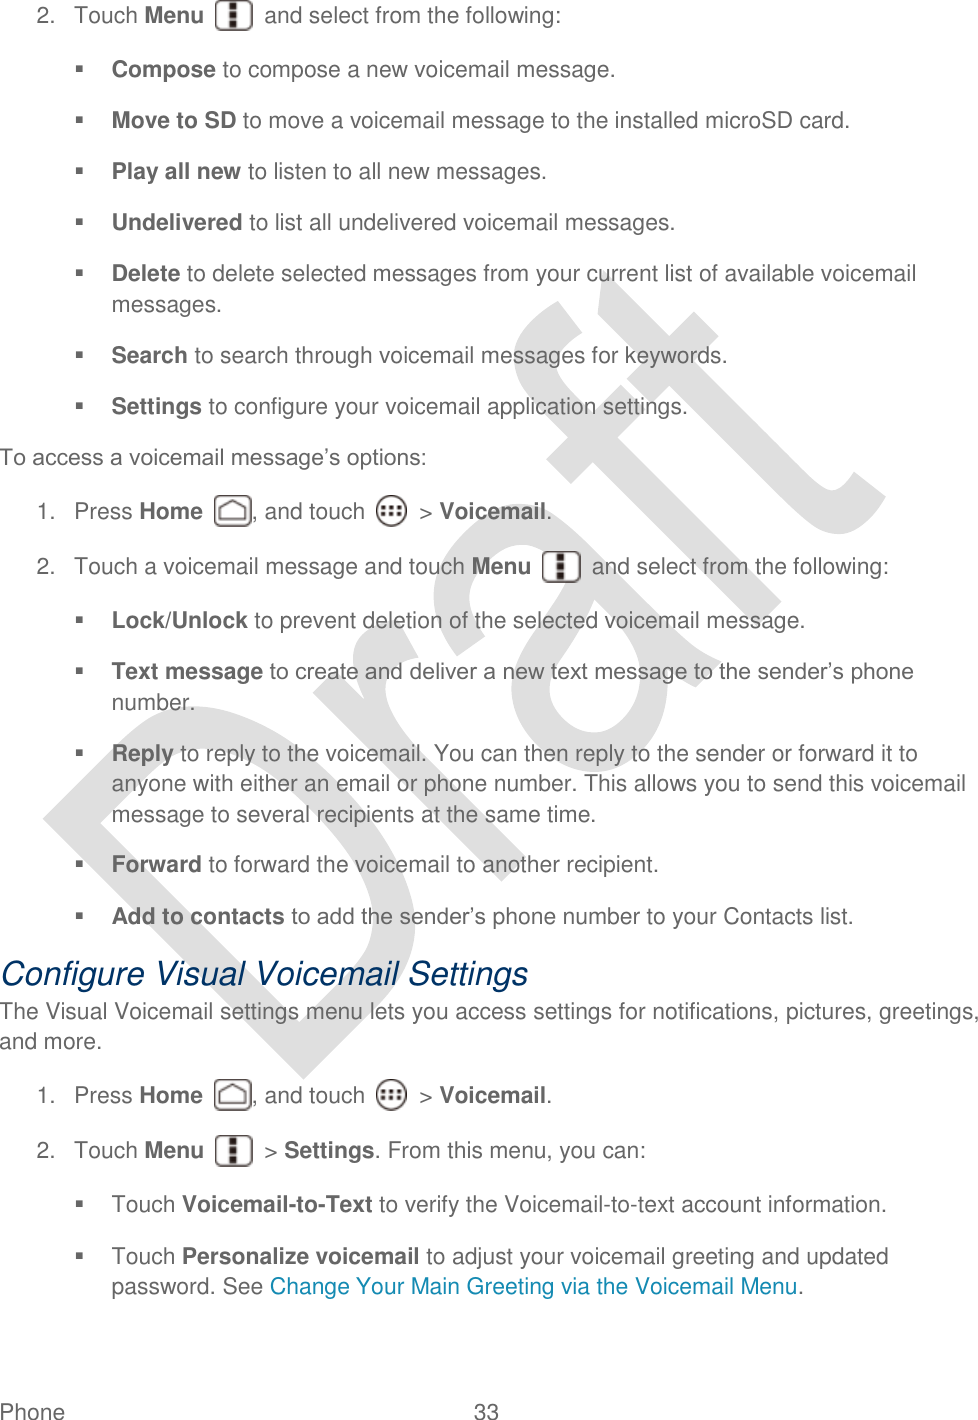
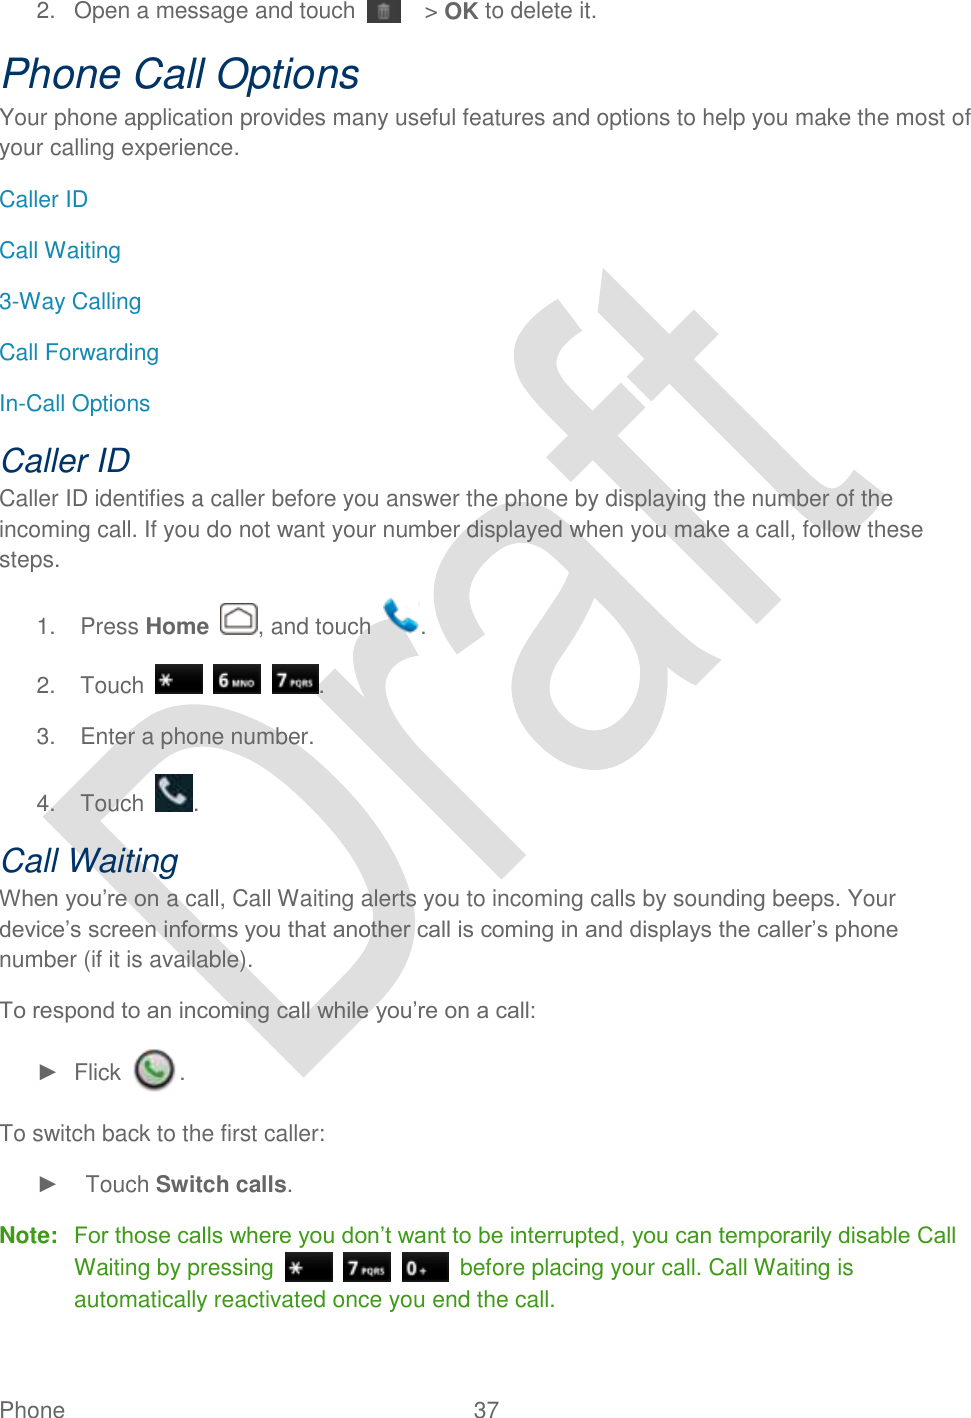
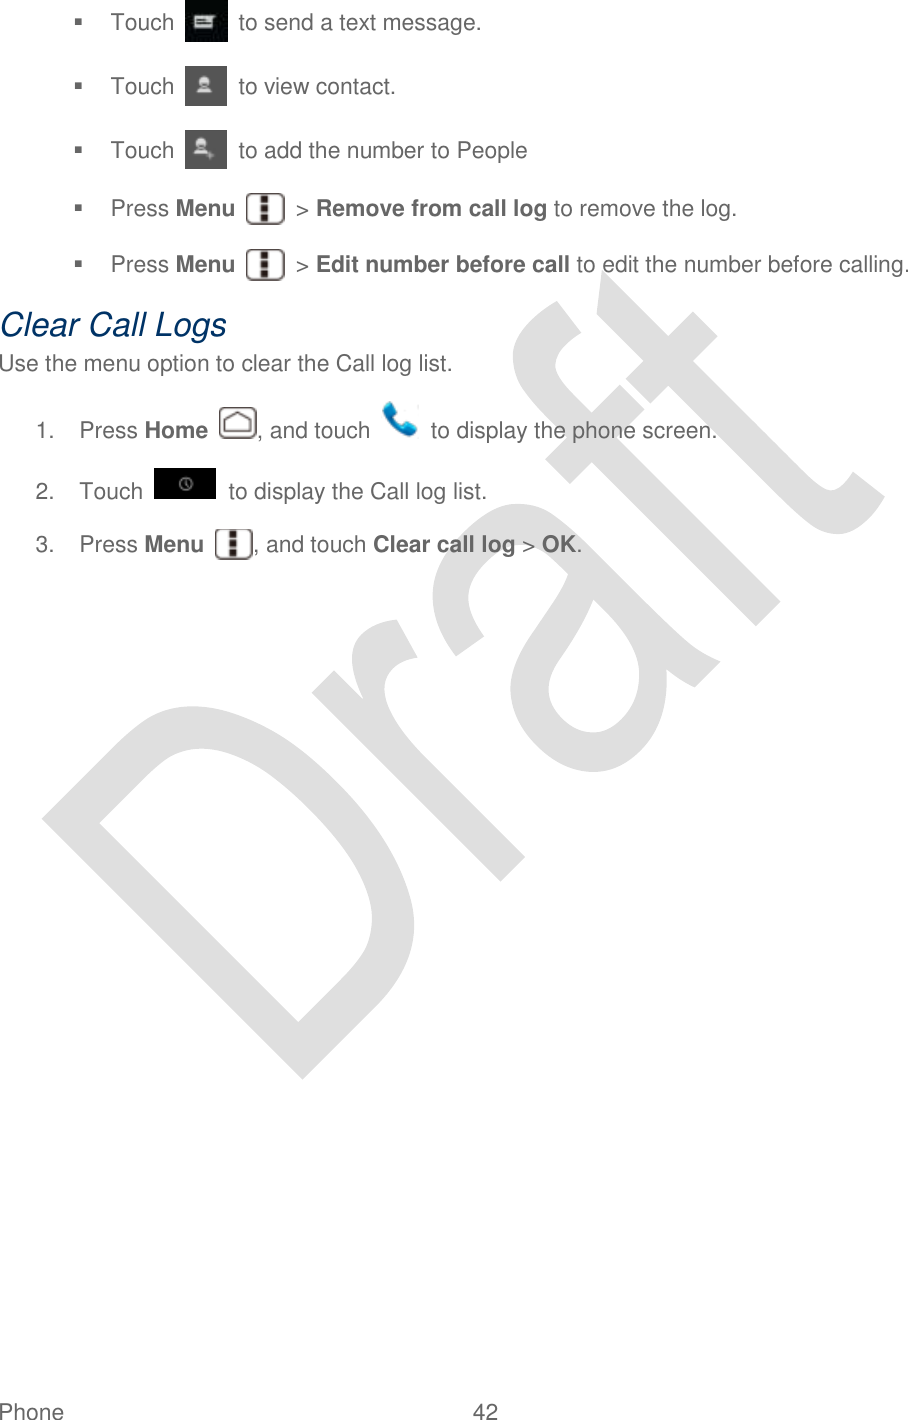
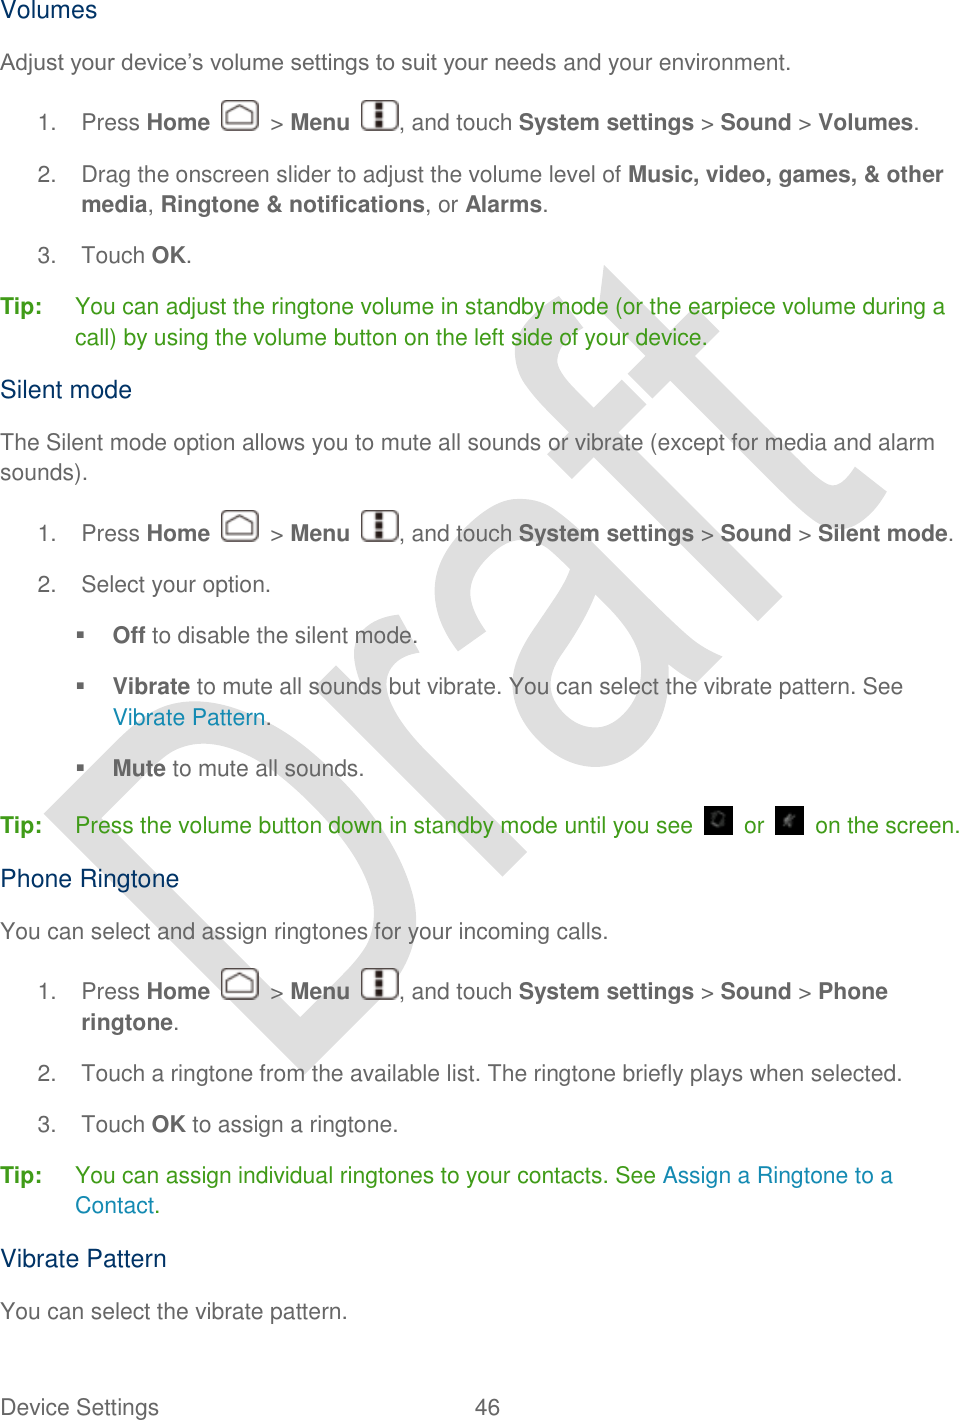
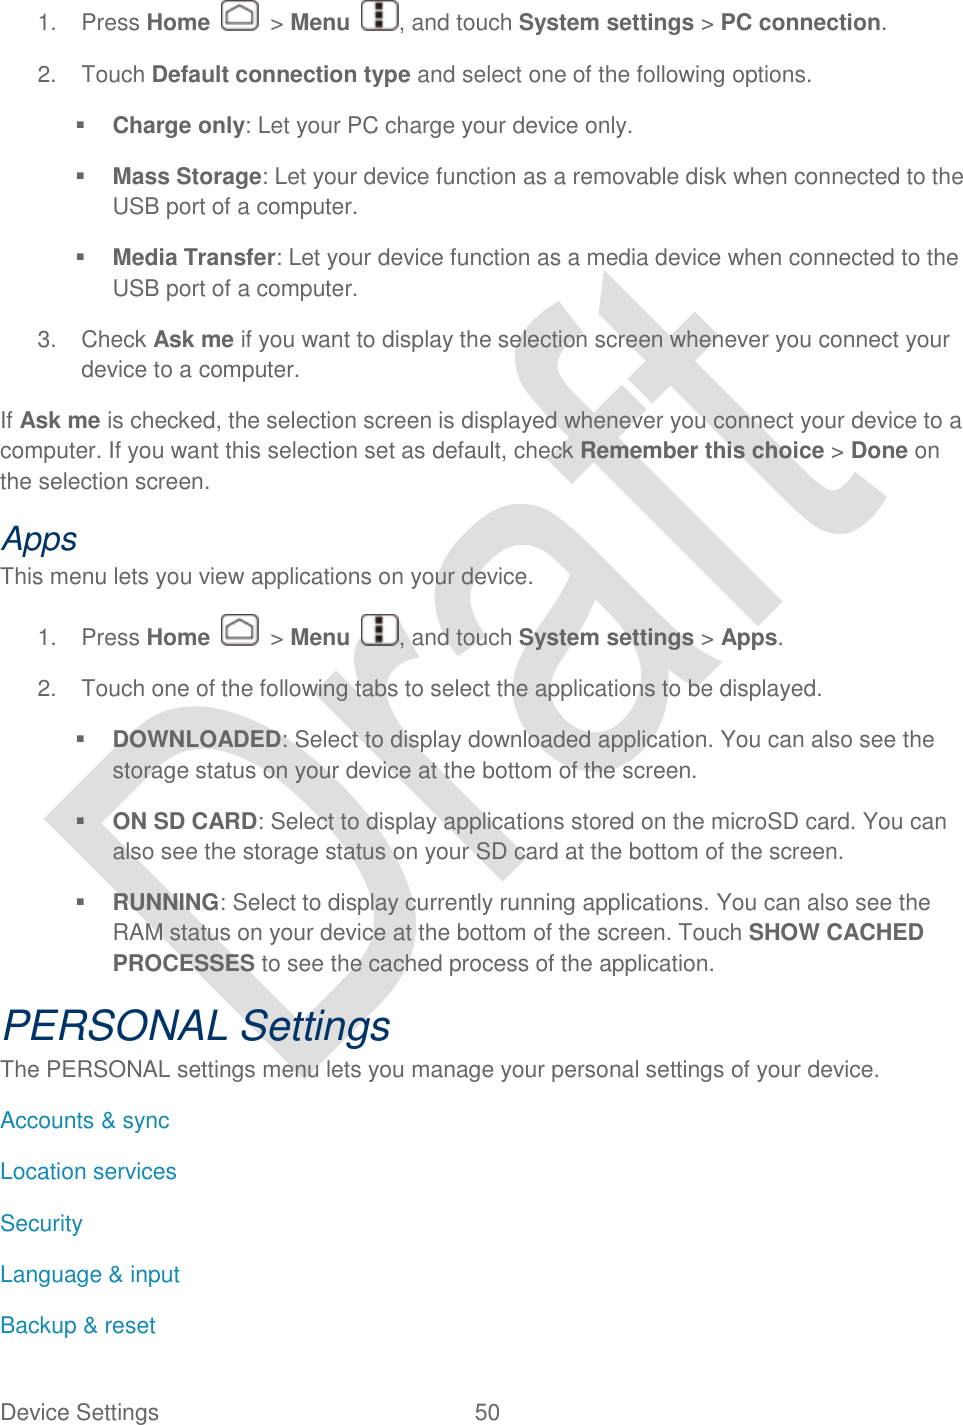
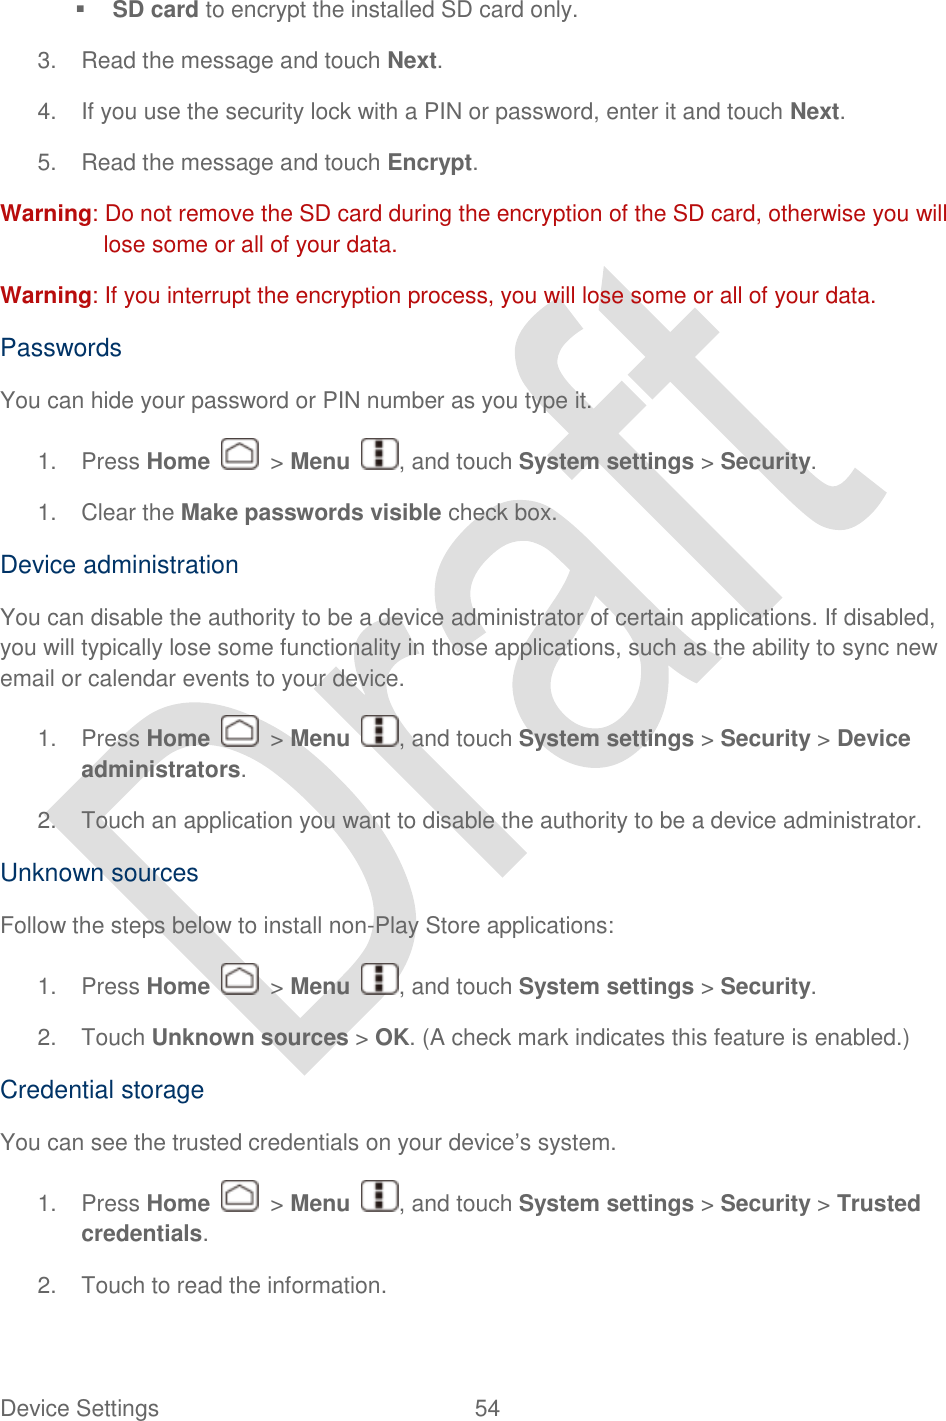
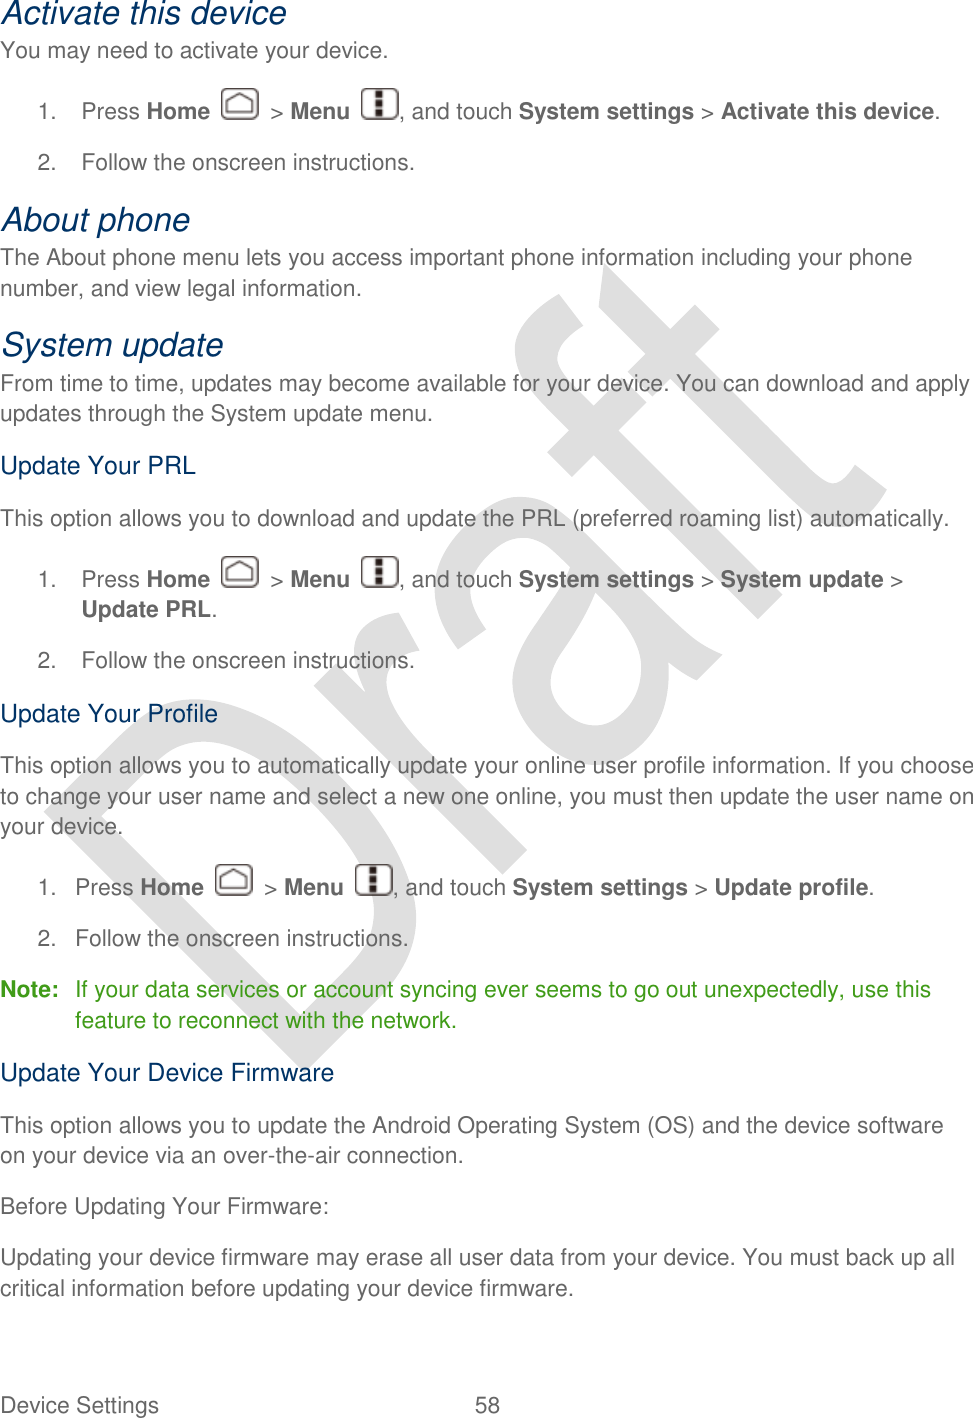
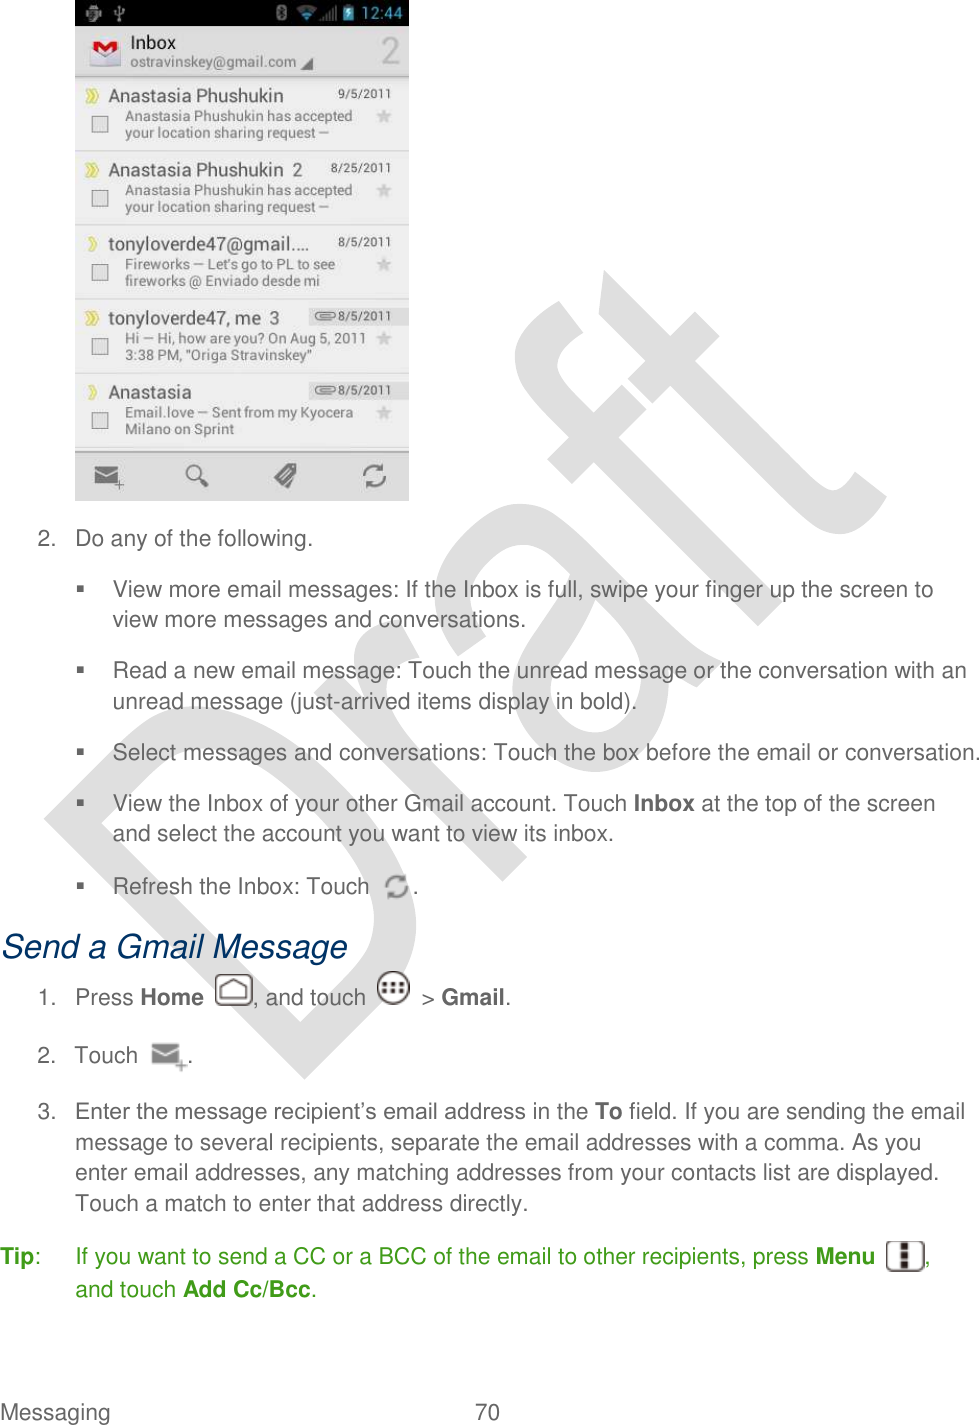
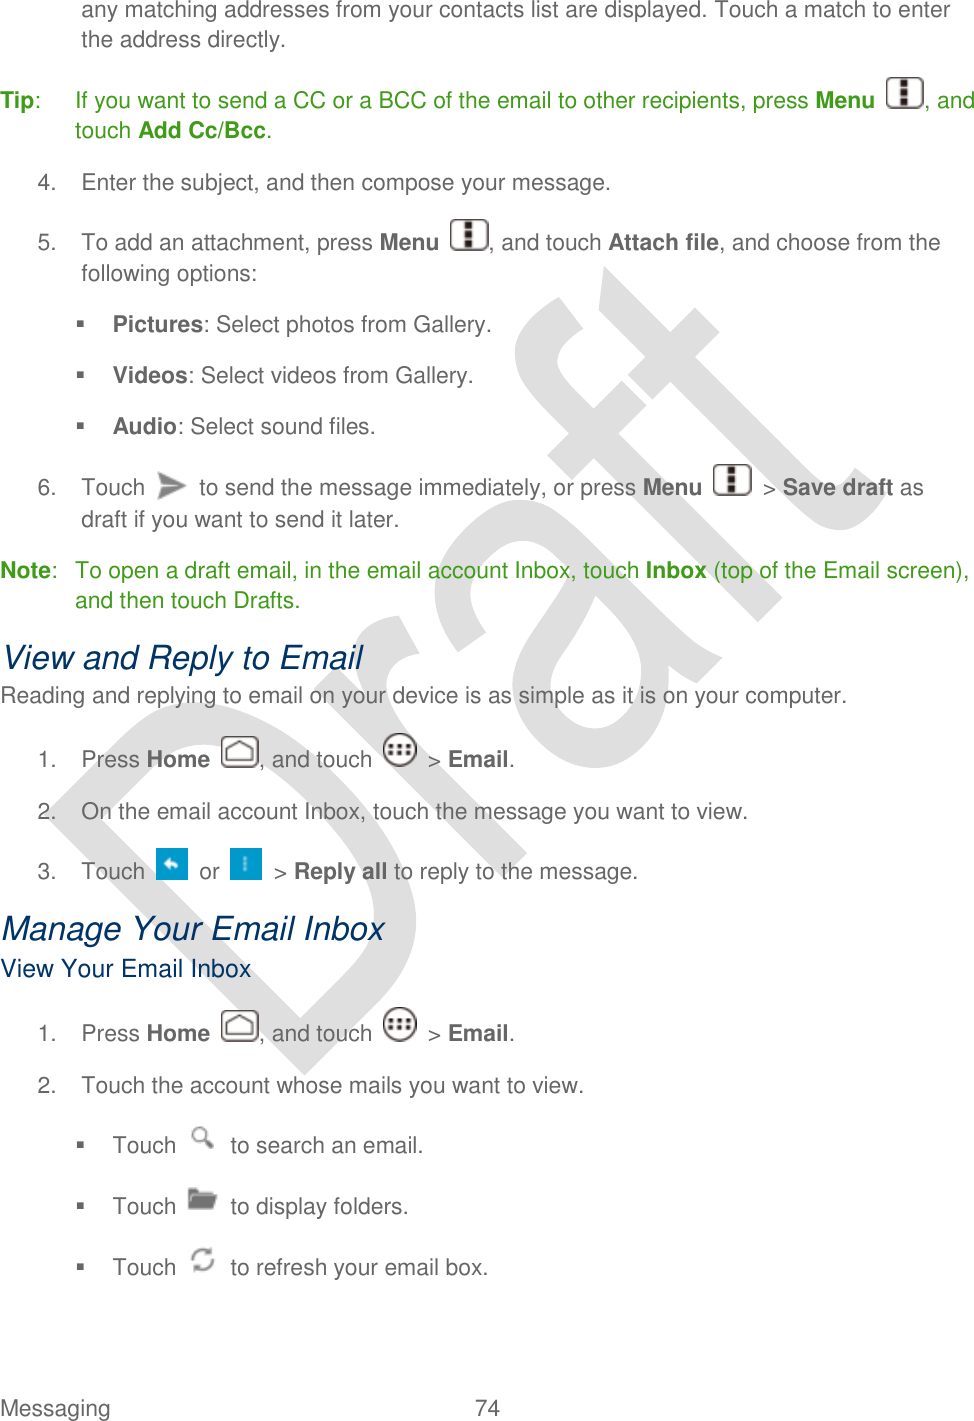
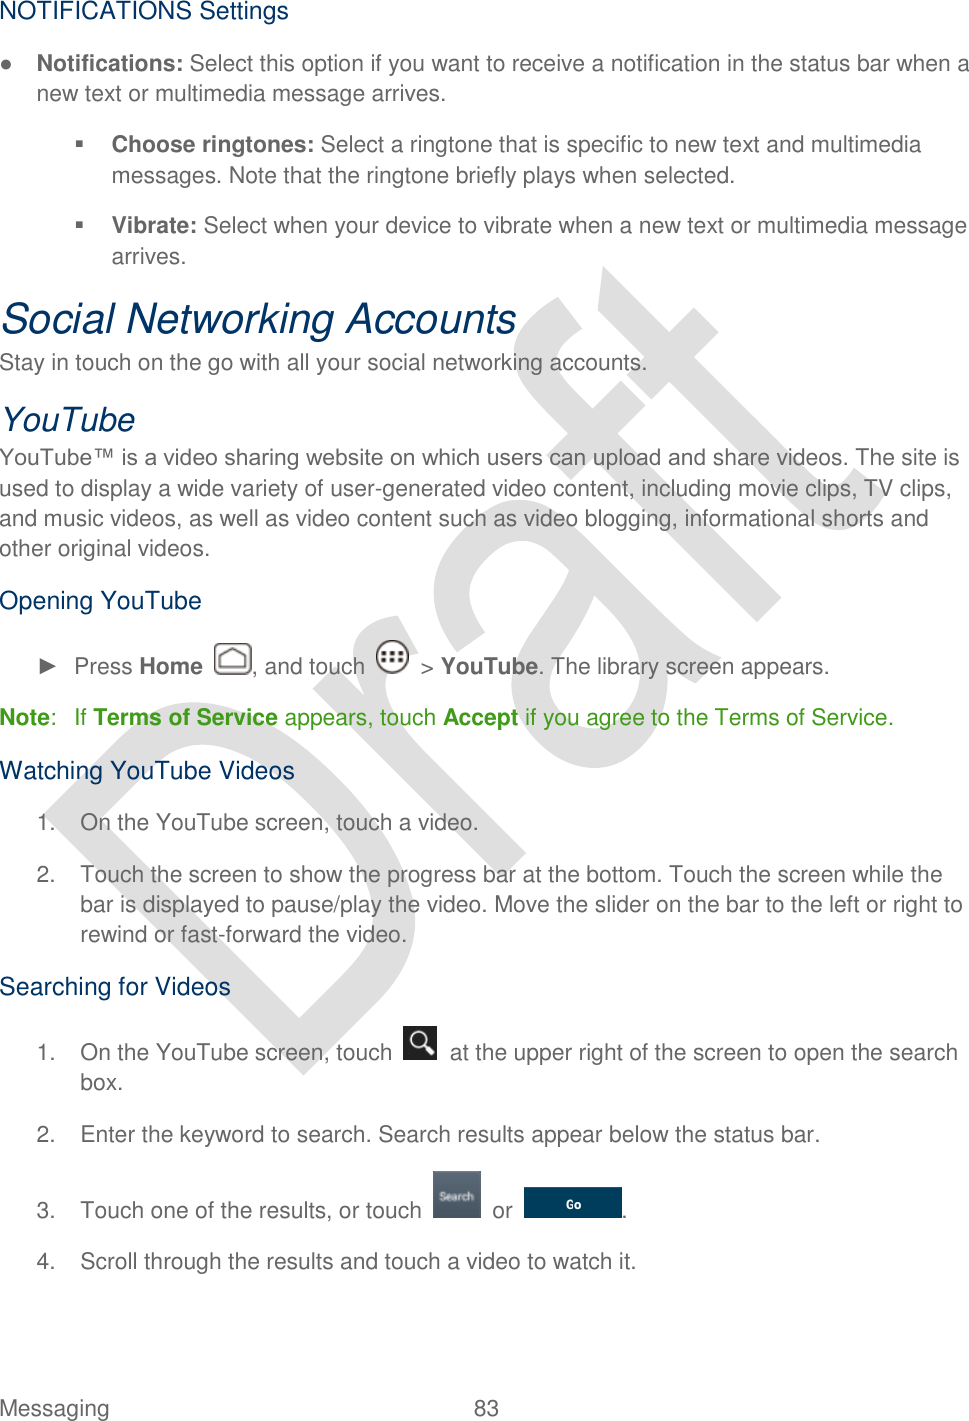
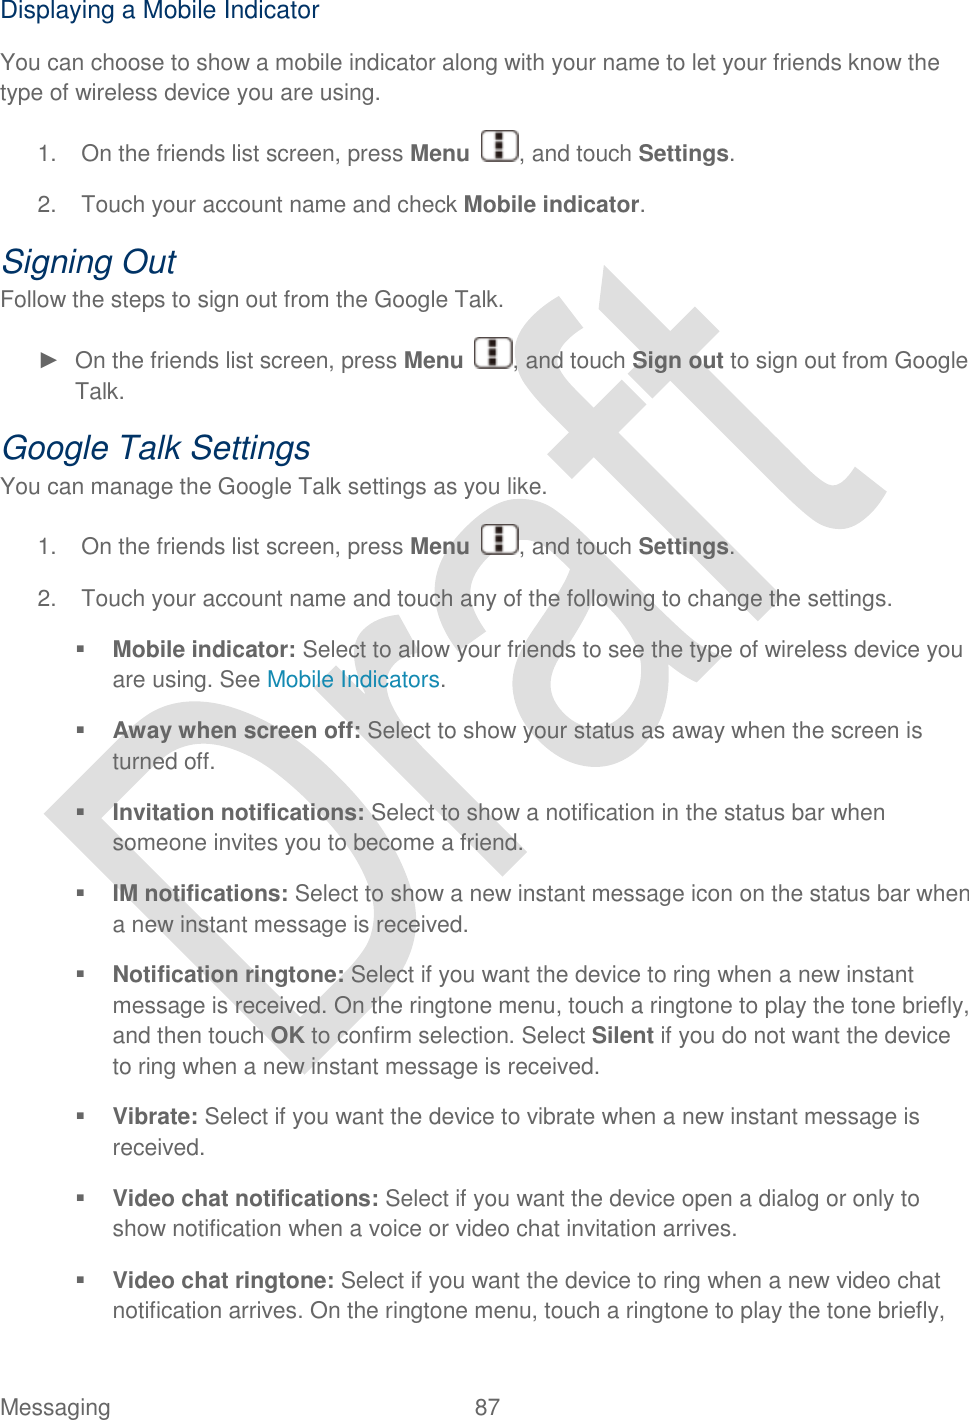
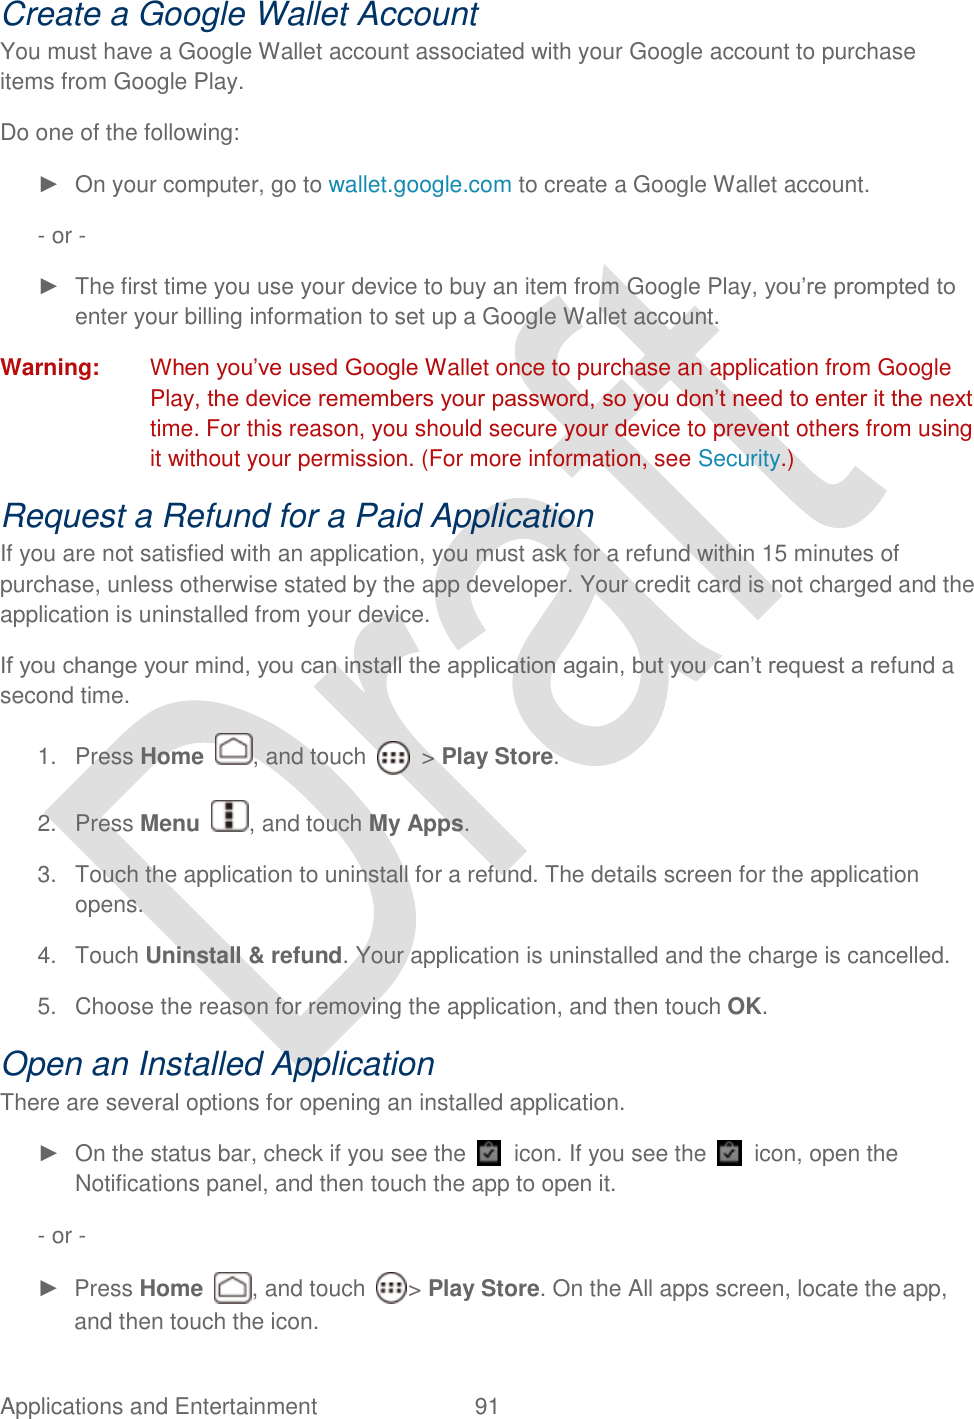
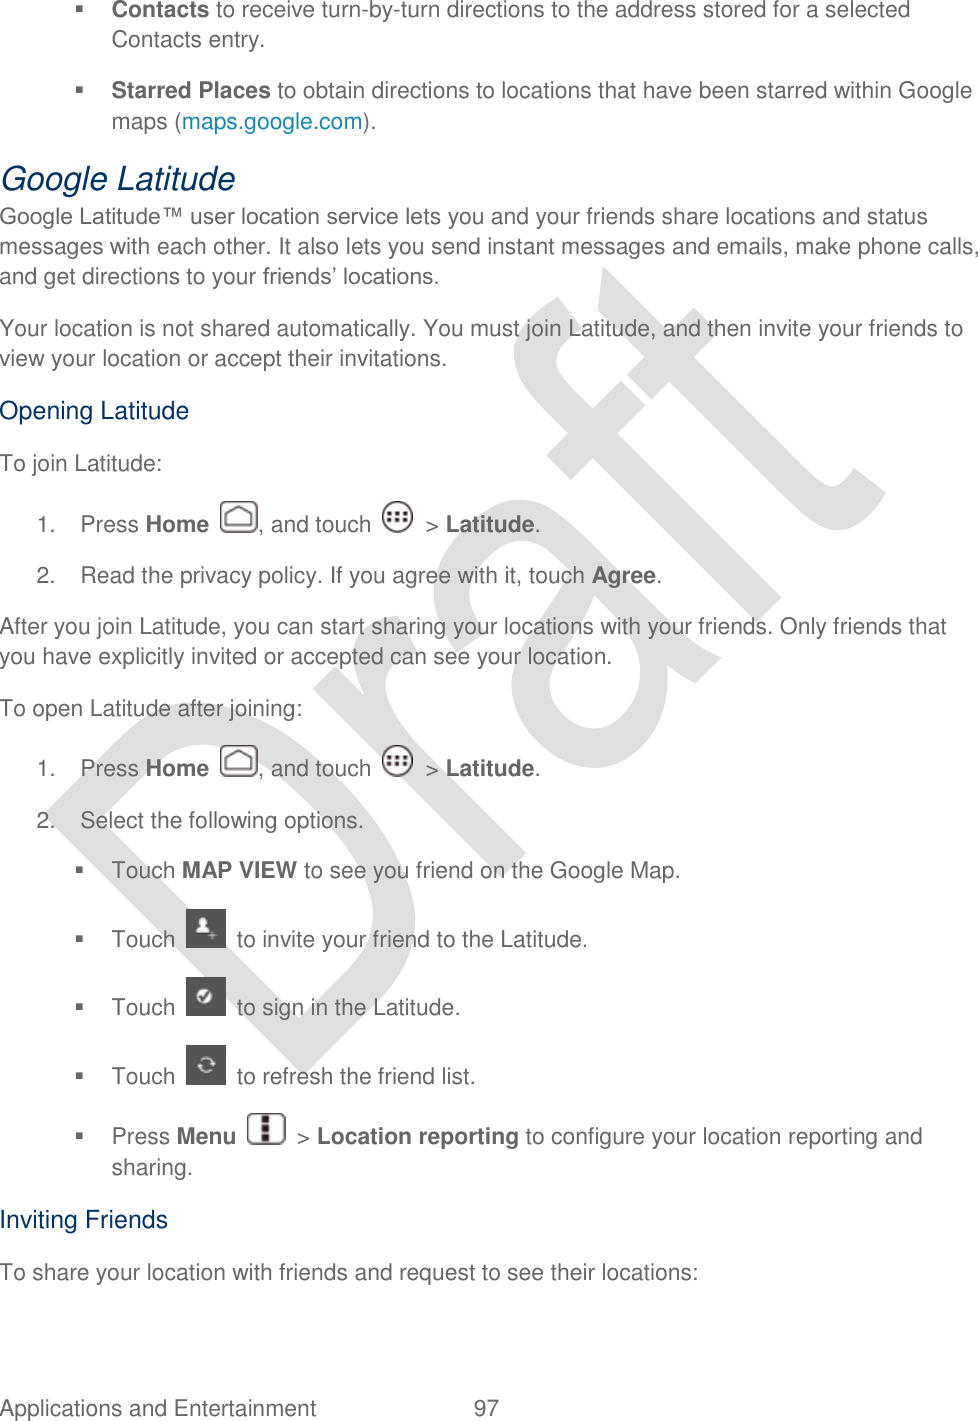
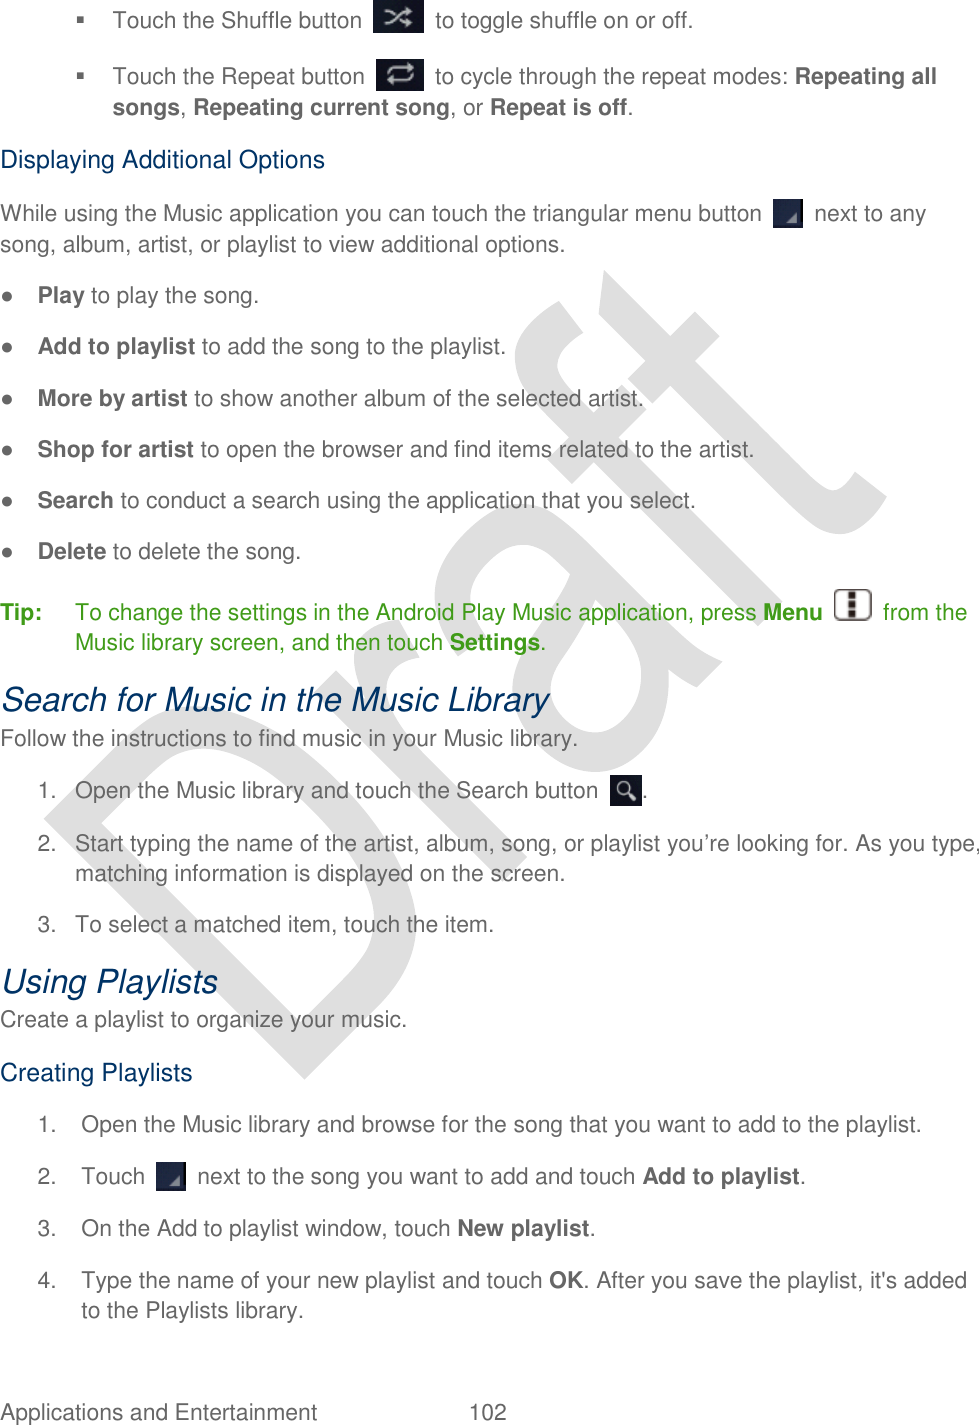
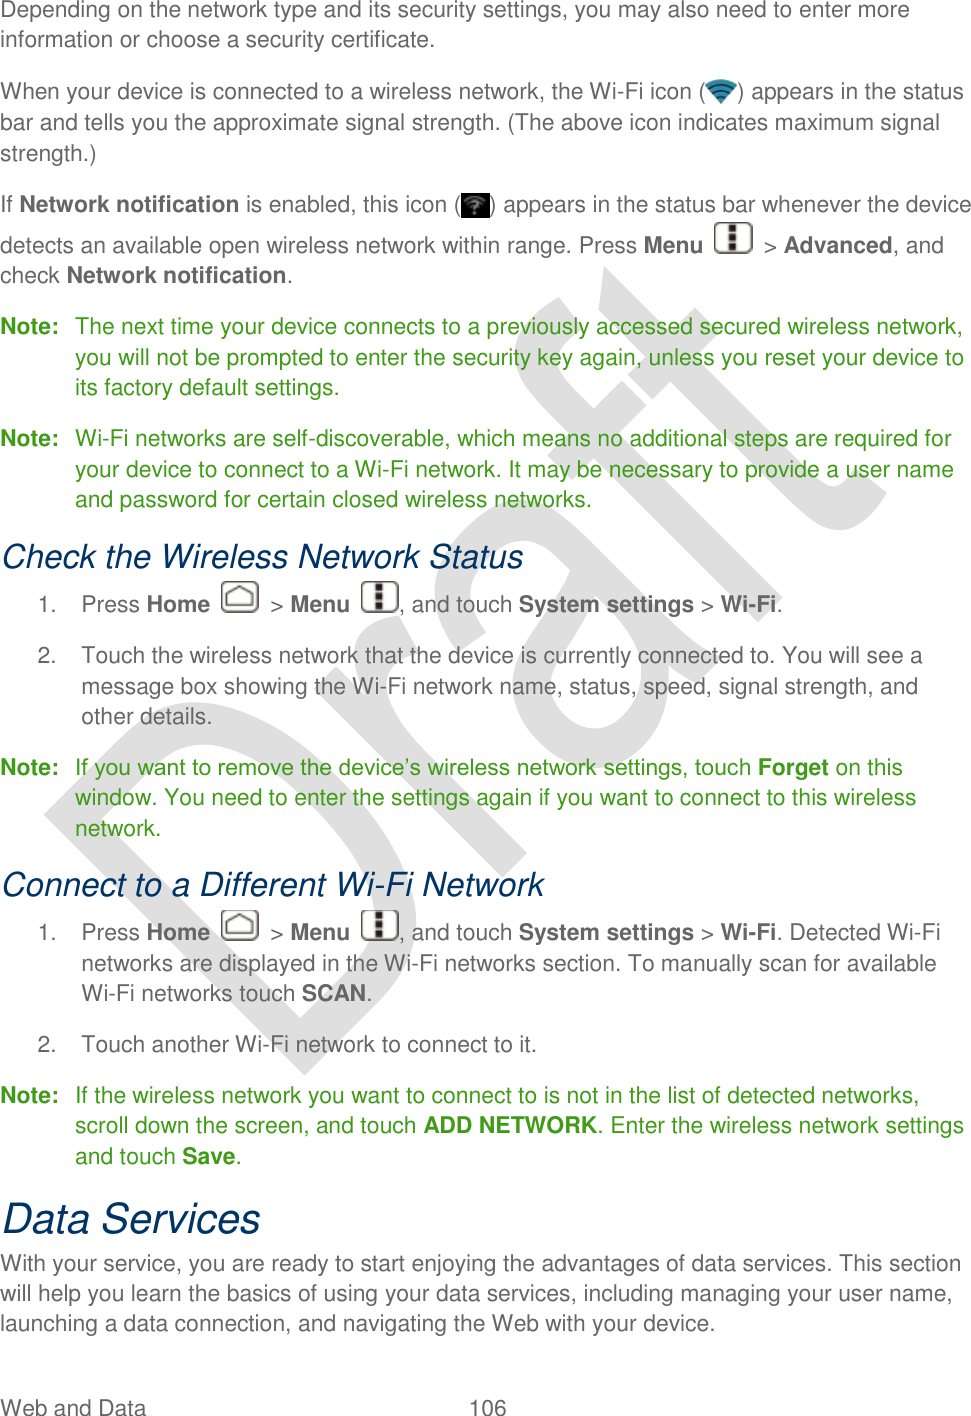
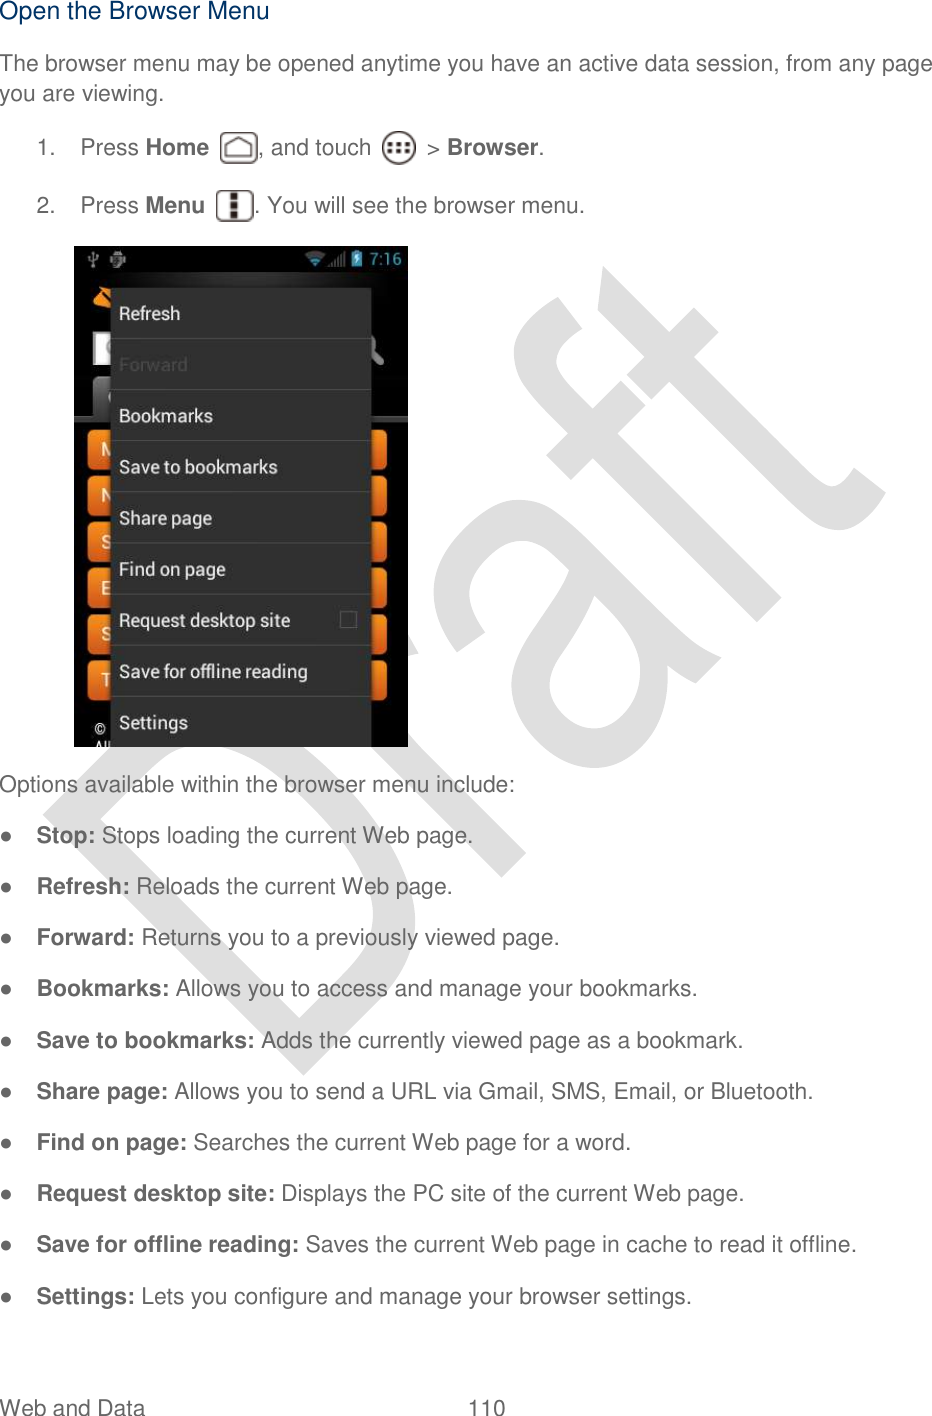
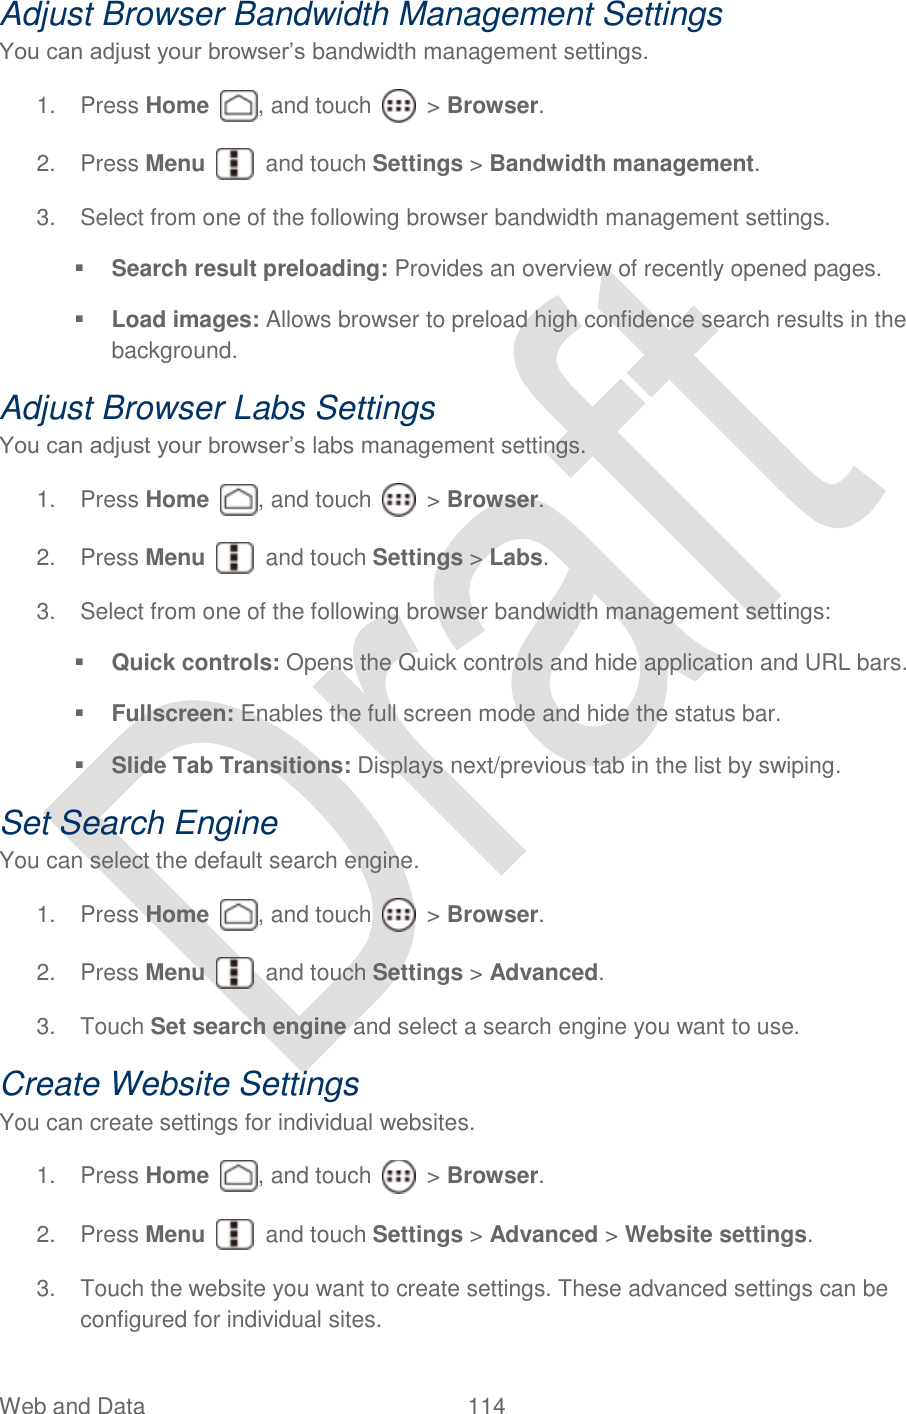
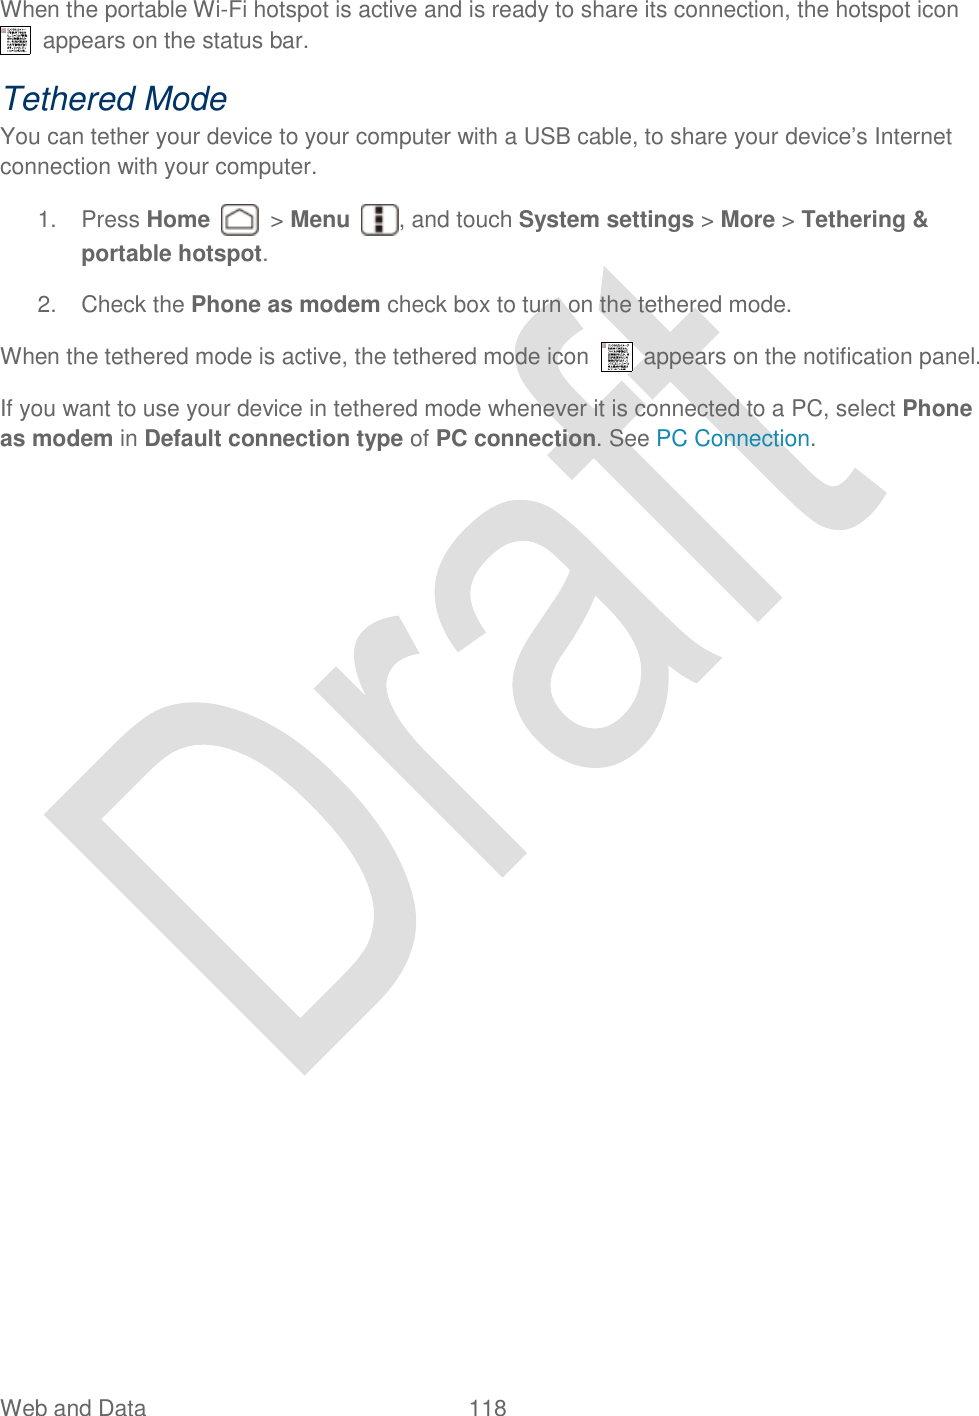
![Bluetooth 149 The location where the information is saved depends on the type of information and the receiving device: ● If you send a contact, it is normally added directly to the contact application on the receiving device. ● If you send another file type to a Windows computer, it is normally saved in the Bluetooth Exchange folder within your personal document folders. On Windows XP, the path may be: C:\Documents and Settings\[your username]\ My Documents\Bluetooth Exchange. On Windows Vista, the path may be: C:\Users\[your username]\Documents. ● If you send a file to another device, the saved location may depend on the file type. For example, if you send an image file to another wireless phone, it may be saved in a folder named “Images.” Receive Information From Another Device Your device is capable of receiving a wide variety of file types with Bluetooth, including photos, videos, or contacts. To receive files from another device, you need to have a microSD card installed in your device. 1. Press Home > Menu , and touch System settings > Bluetooth. 2. If the Bluetooth is not turned on, touch to turn Bluetooth on. 3. Touch your device name to set it visible from other devices. 4. Press Menu > Visibility timeout. 5. Select the time duration your device is visible to others. 6. On the sending device, send one or more files to your device. Refer to the device‟s documentation for instructions on sending information over Bluetooth. 7. If prompted, enter the same passcode on both your device and the other device, or confirm the auto-generated passcode. A Bluetooth authorization request is displayed on your device. 8. Touch OK. 9. When your device receives a file transfer request notification, slide down the notifications panel, and then touch Accept. 10. When a file is transferred, a notification is displayed. To open the file immediately, slide down the notifications panel, and then touch the relevant notification.](https://usermanual.wiki/Kyocera/C5170.user-manual-hydro/User-Guide-1700942-Page-165.png)