Kyocera E6820 PDA Phone User Manual
Kyocera Corporation PDA Phone
UserManual.wiki
>
Kyocera
>
E6820 User Manual
>
User Manual
Contents
1.
User Manual
2.
User manual statement
User Manual
Navigation menu
Upload a User Manual
Namespaces
Wiki Guide
HTML
PDF
Info
Views
User Manual
Discussion / Help
Navigation
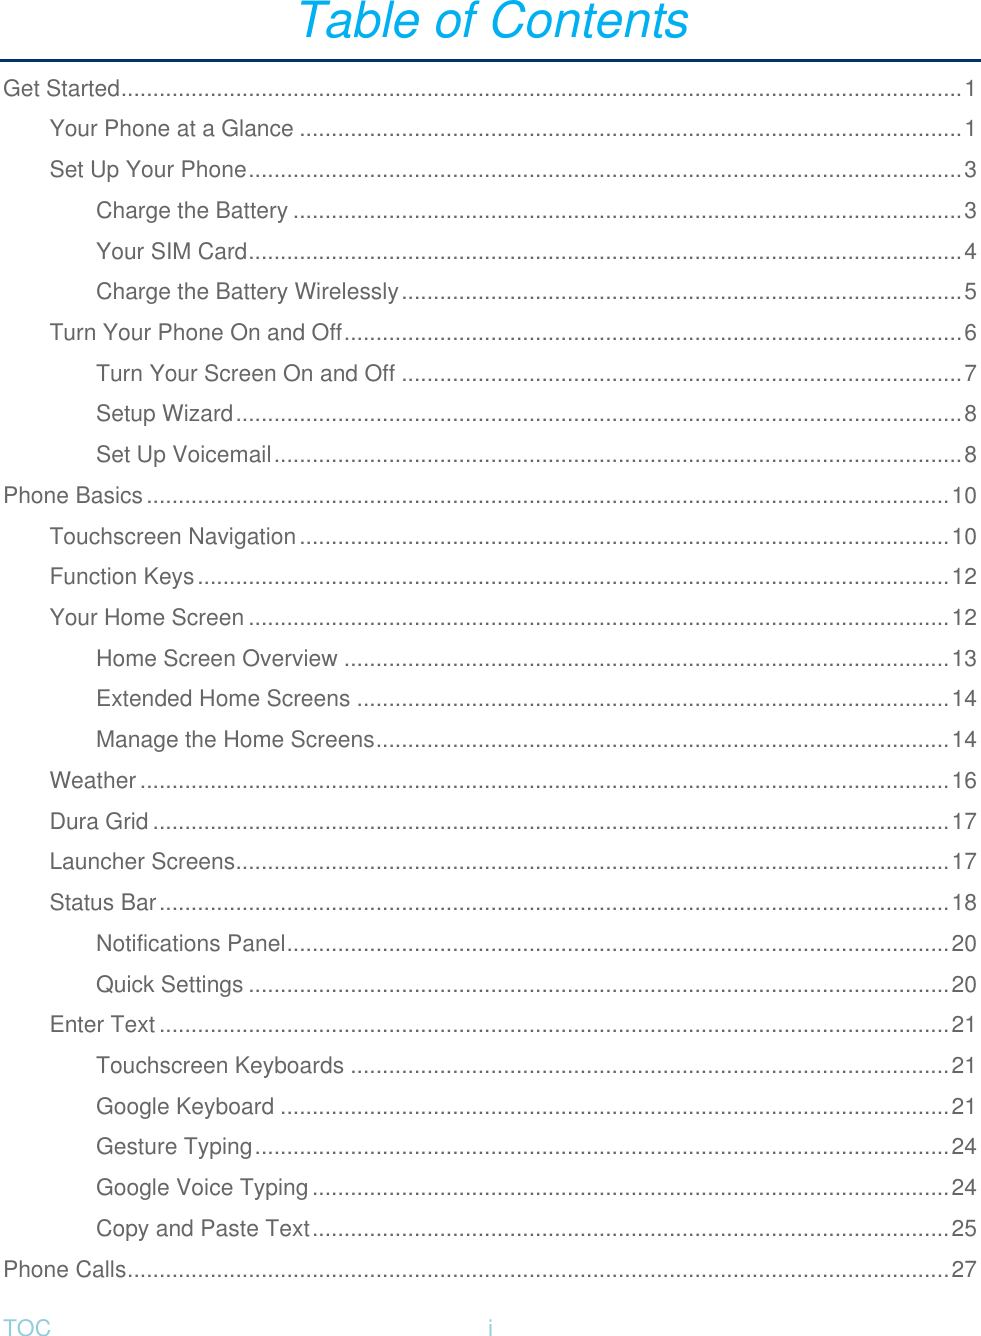

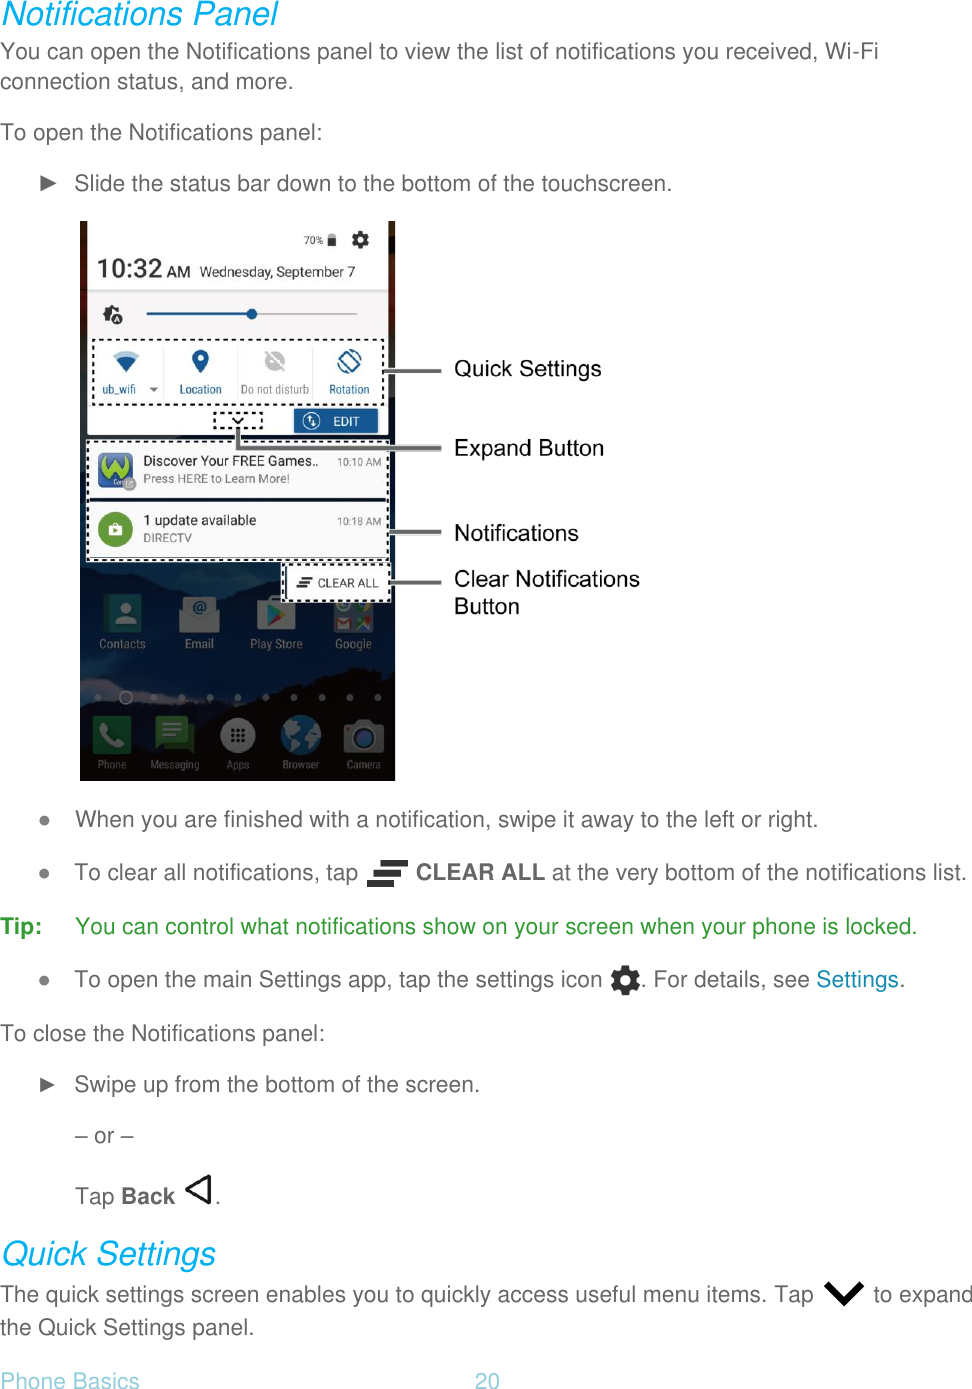
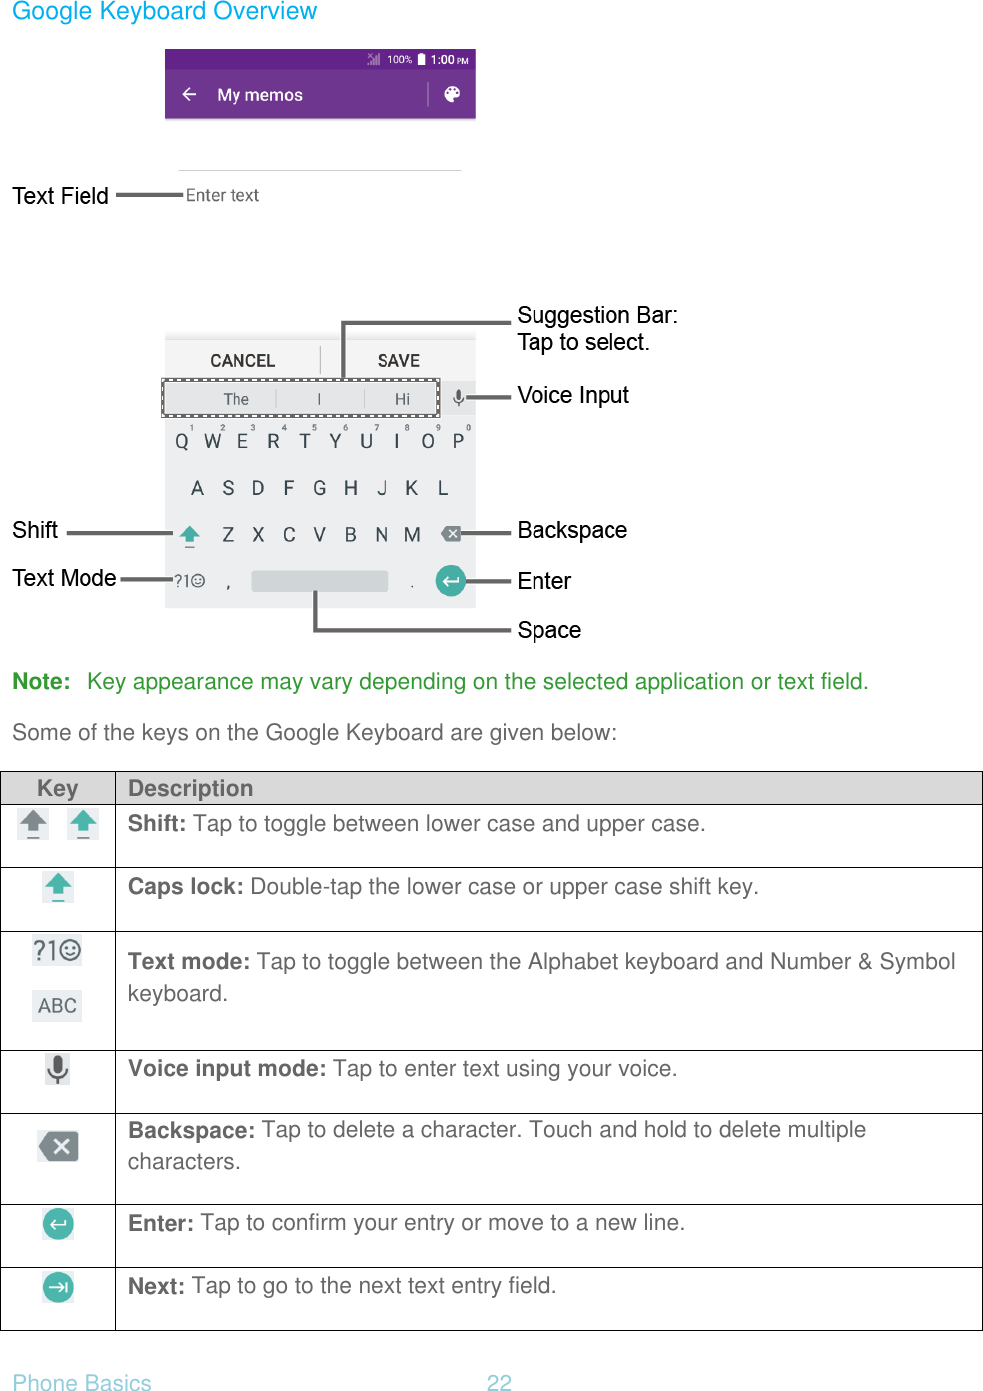
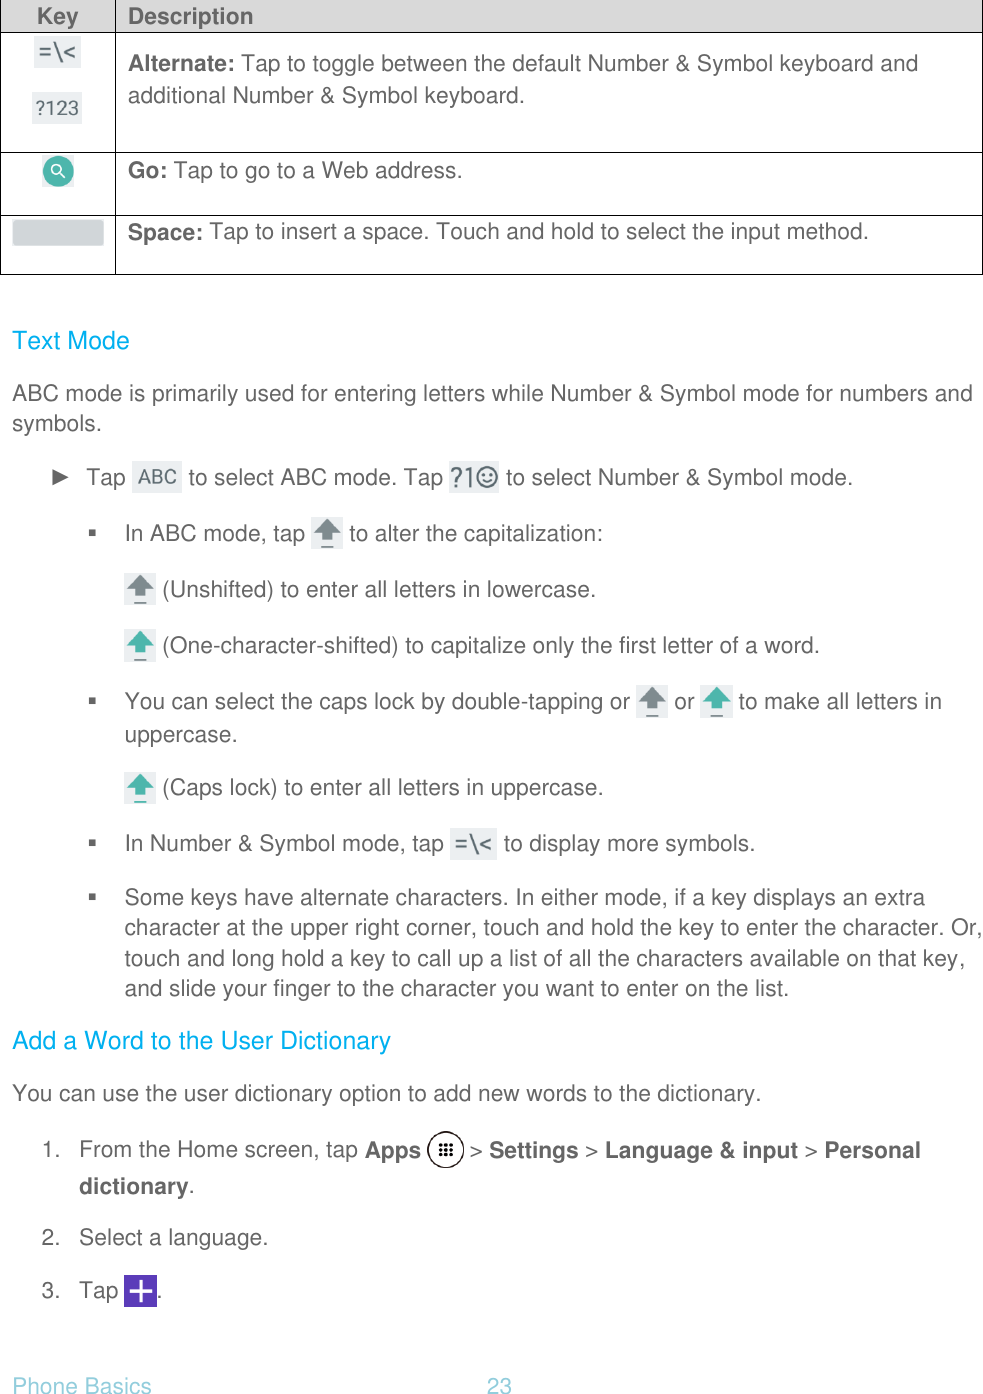
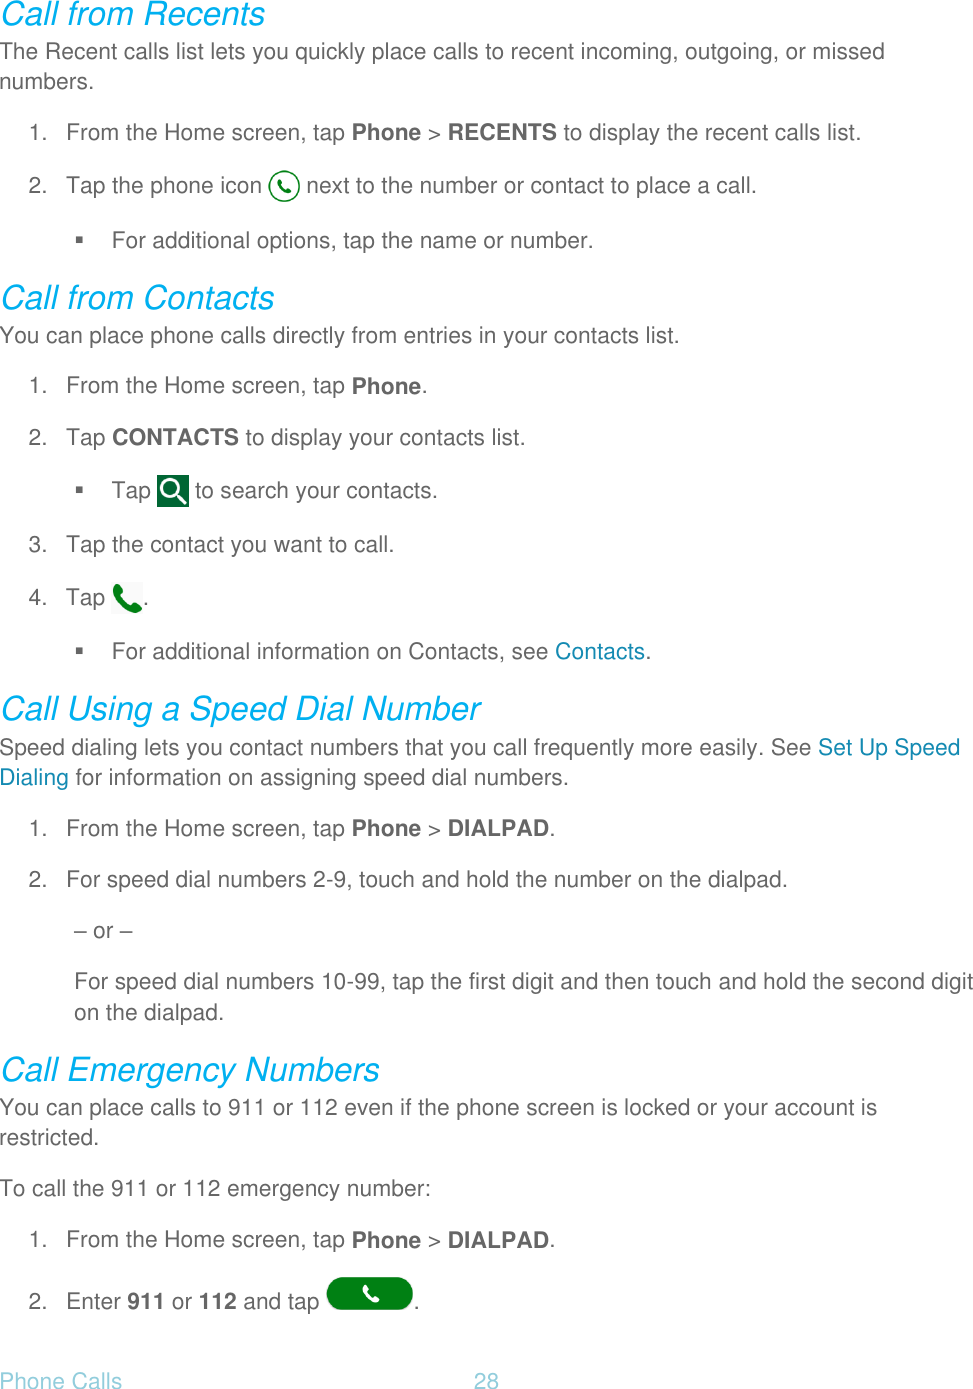
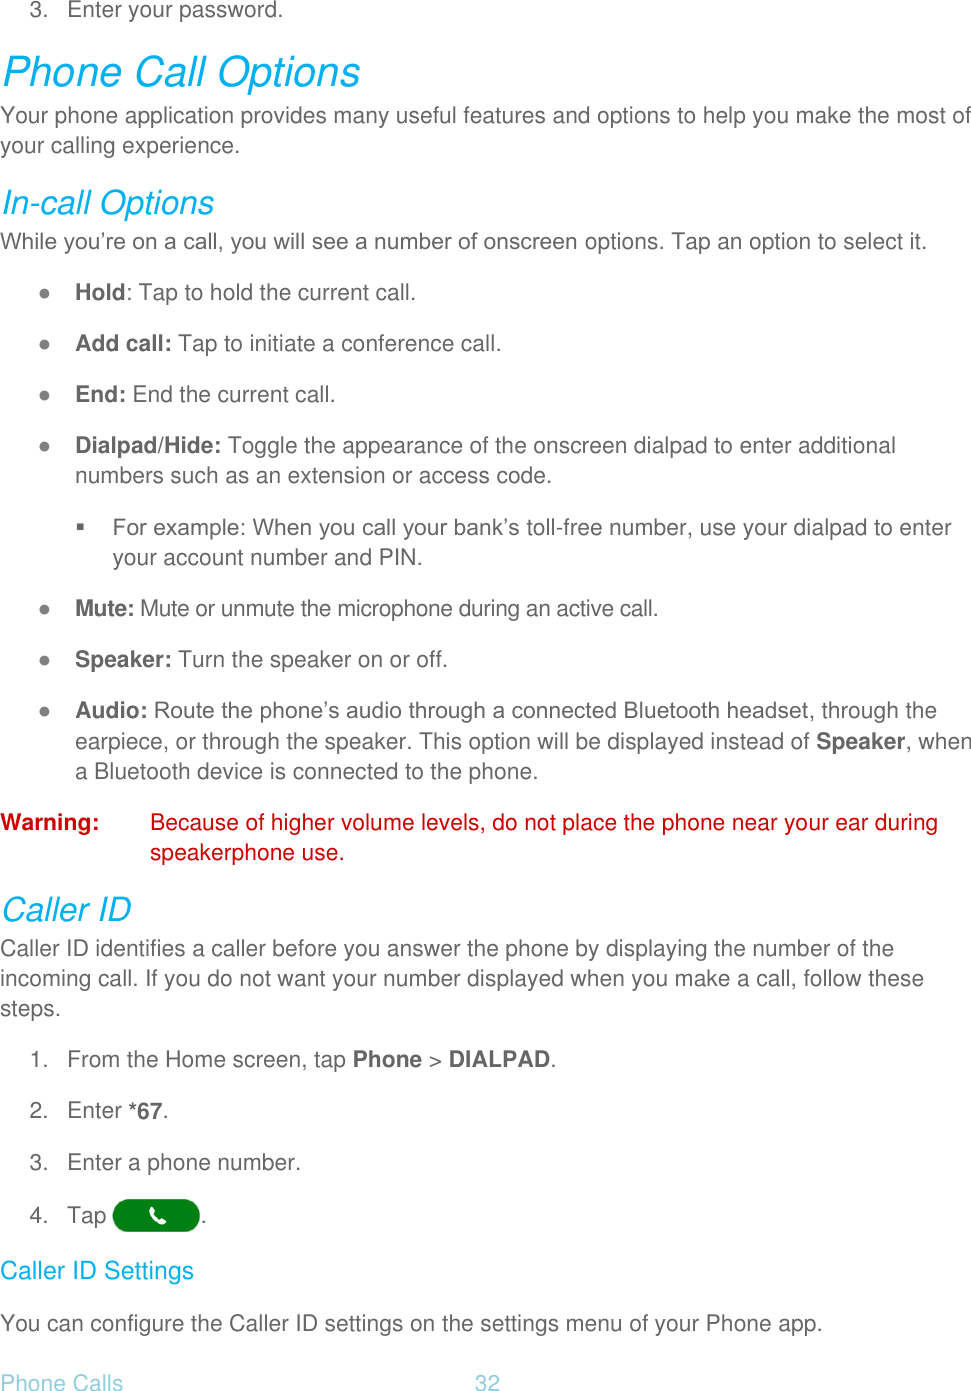
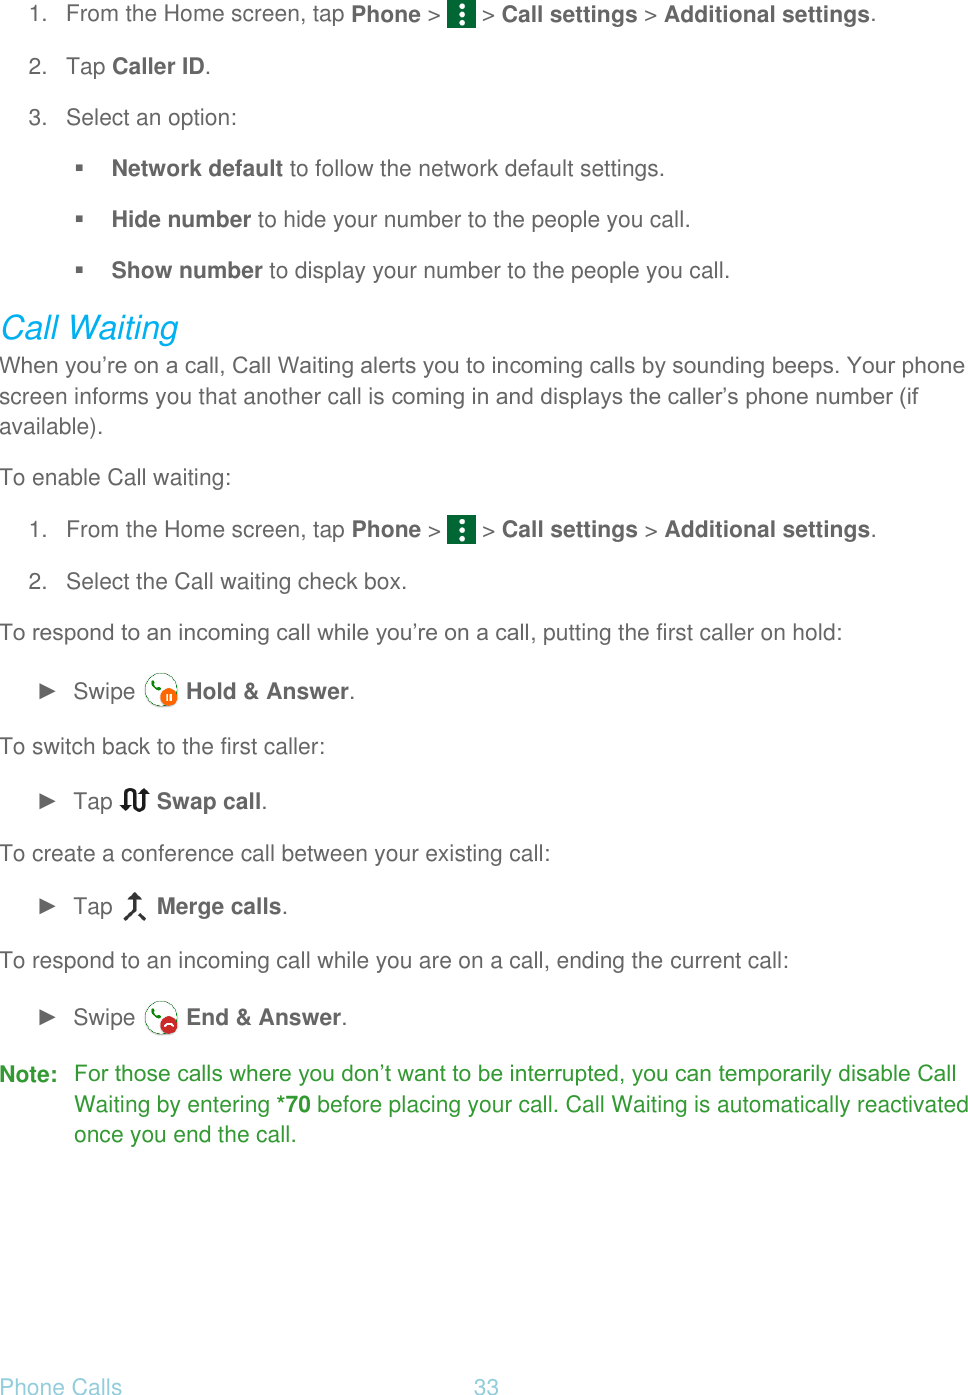

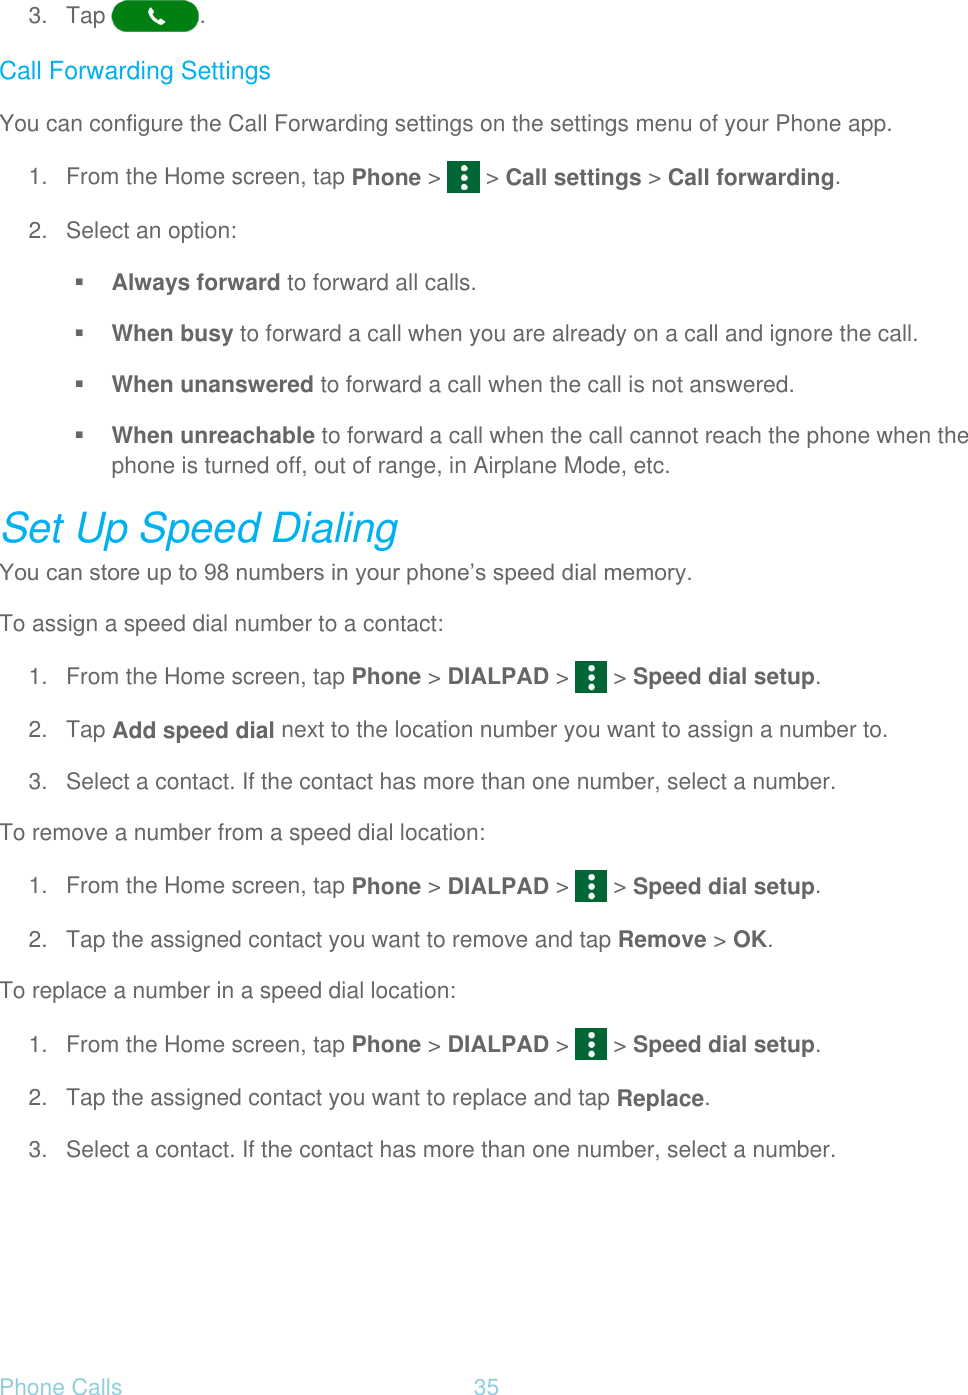
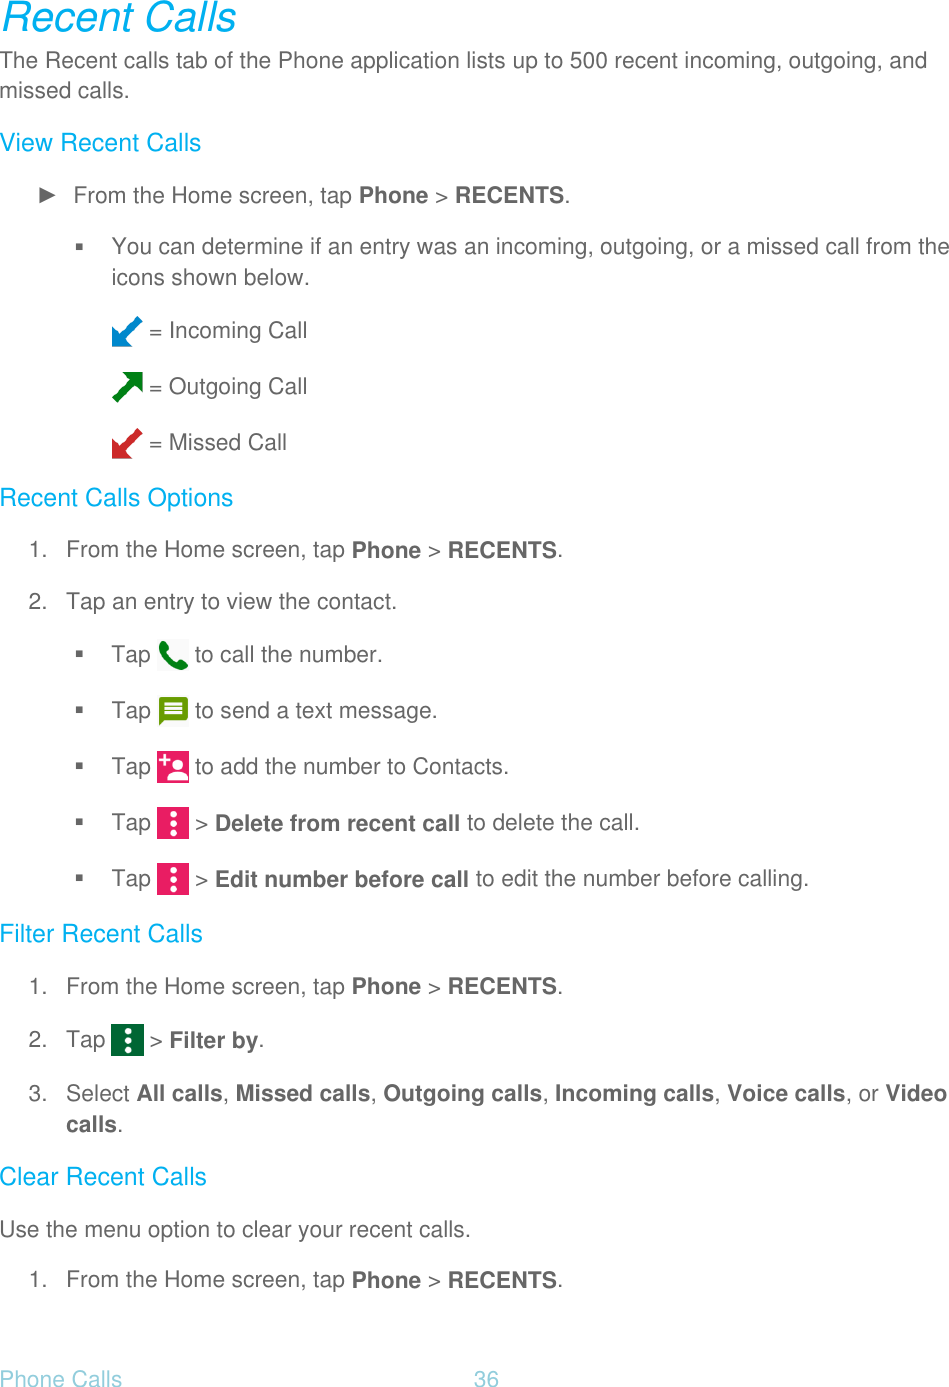


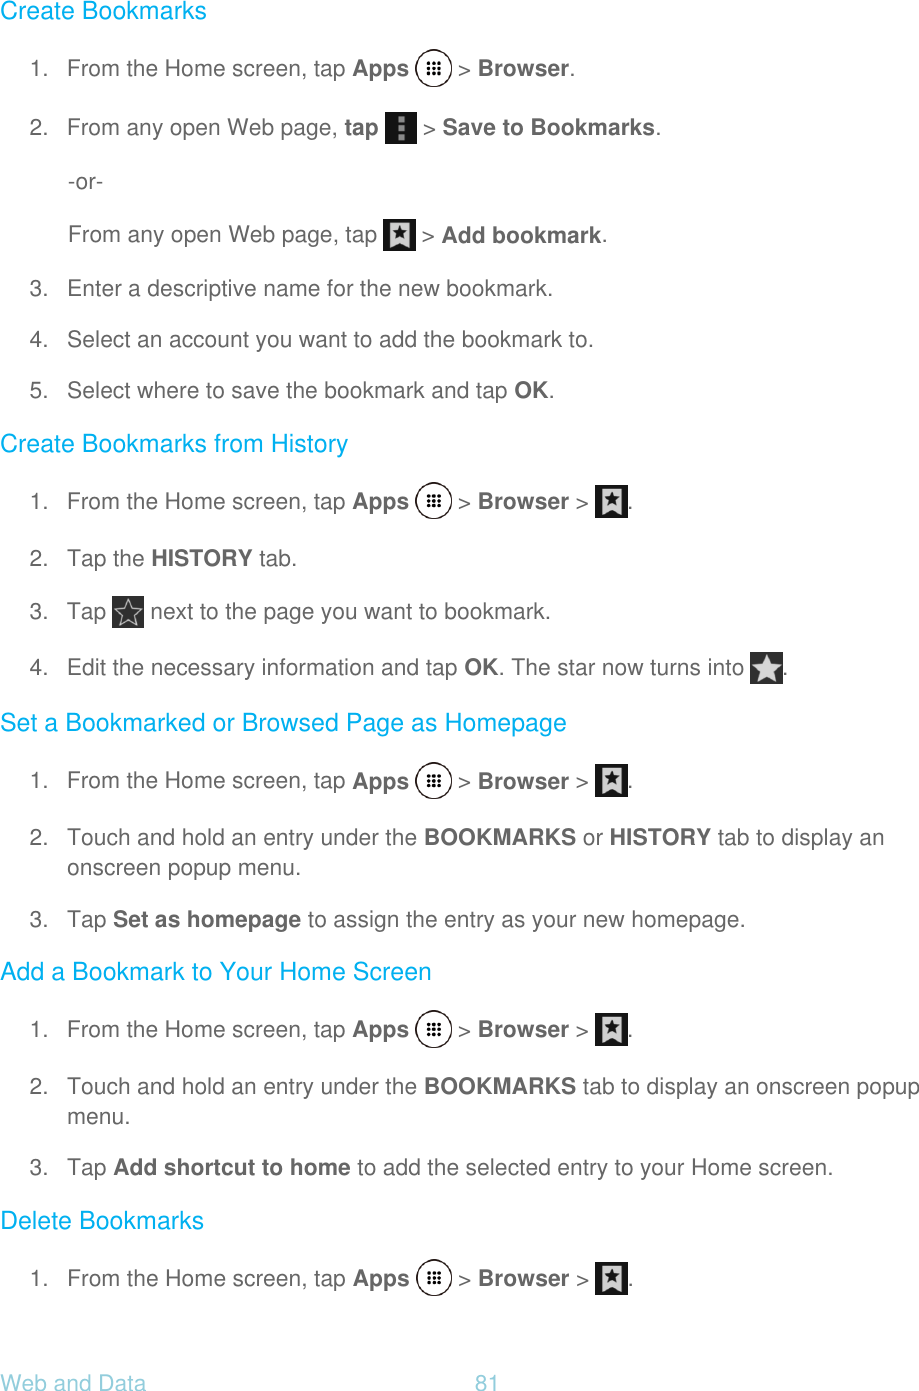
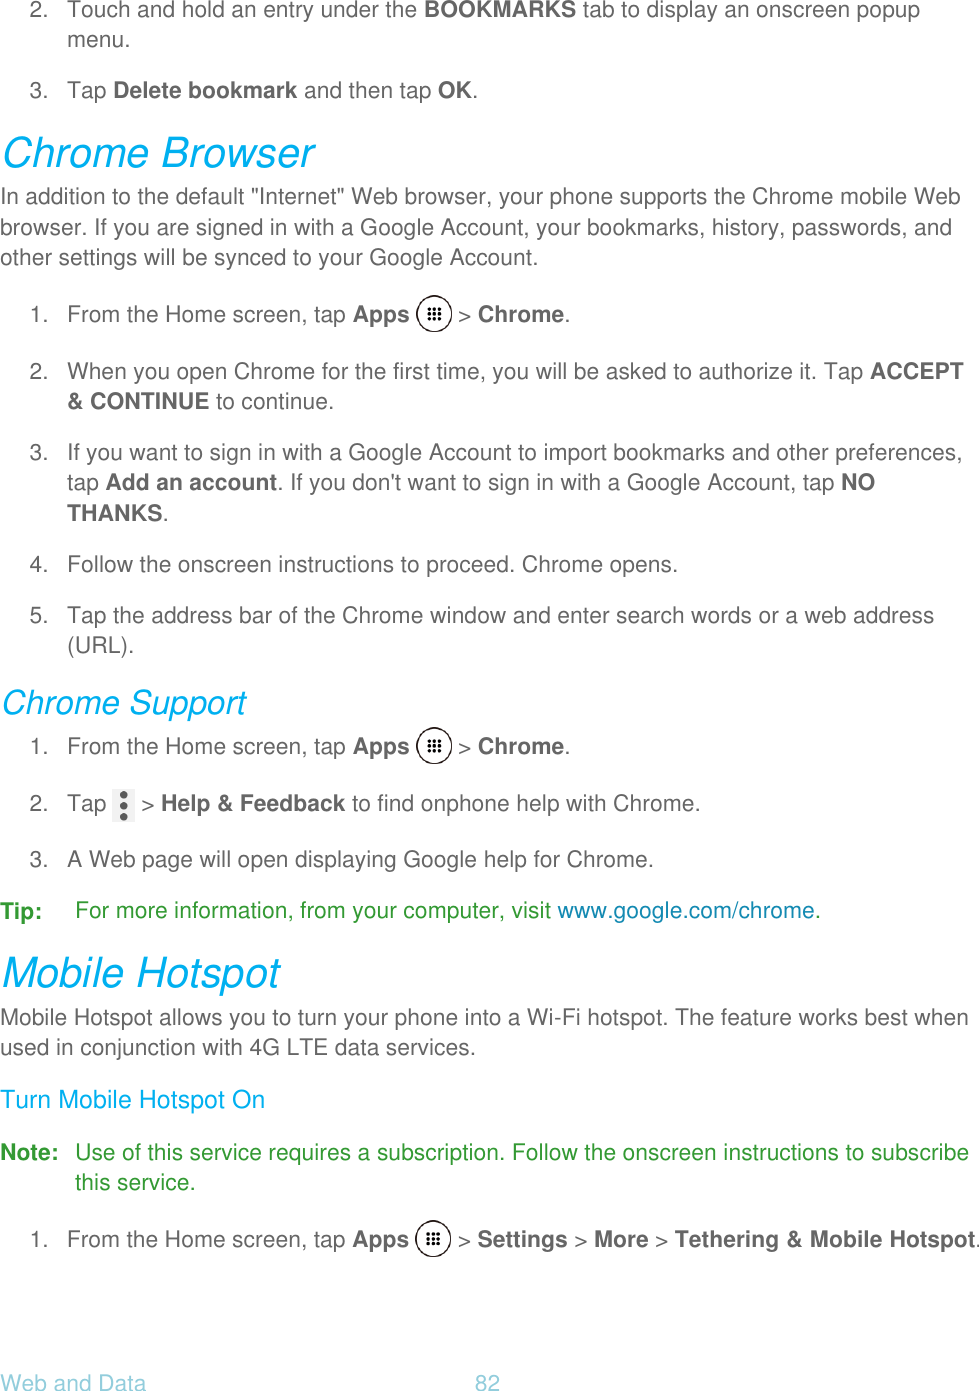


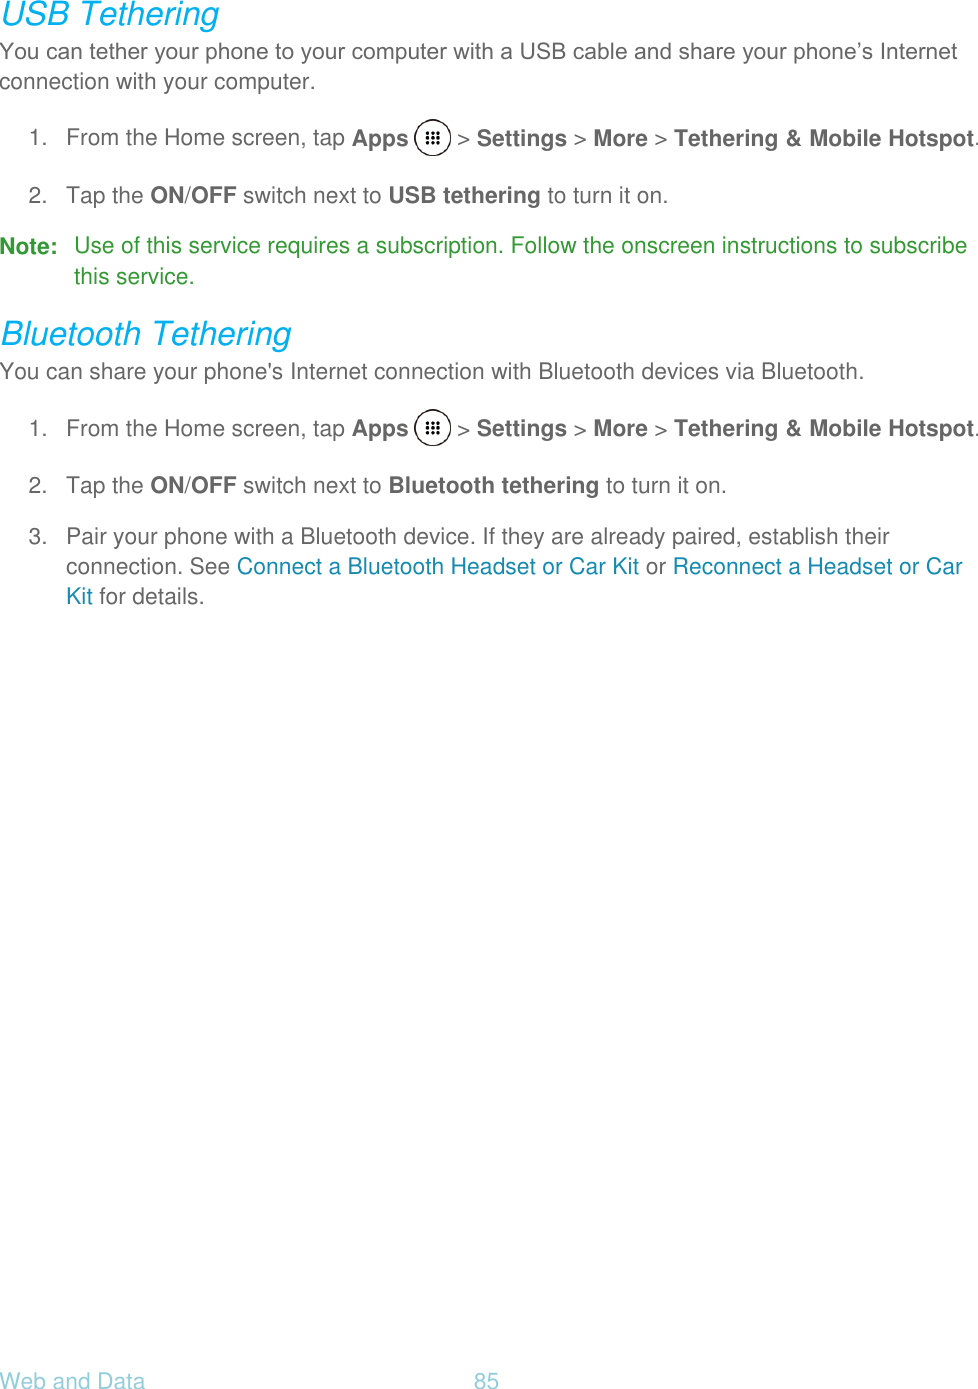


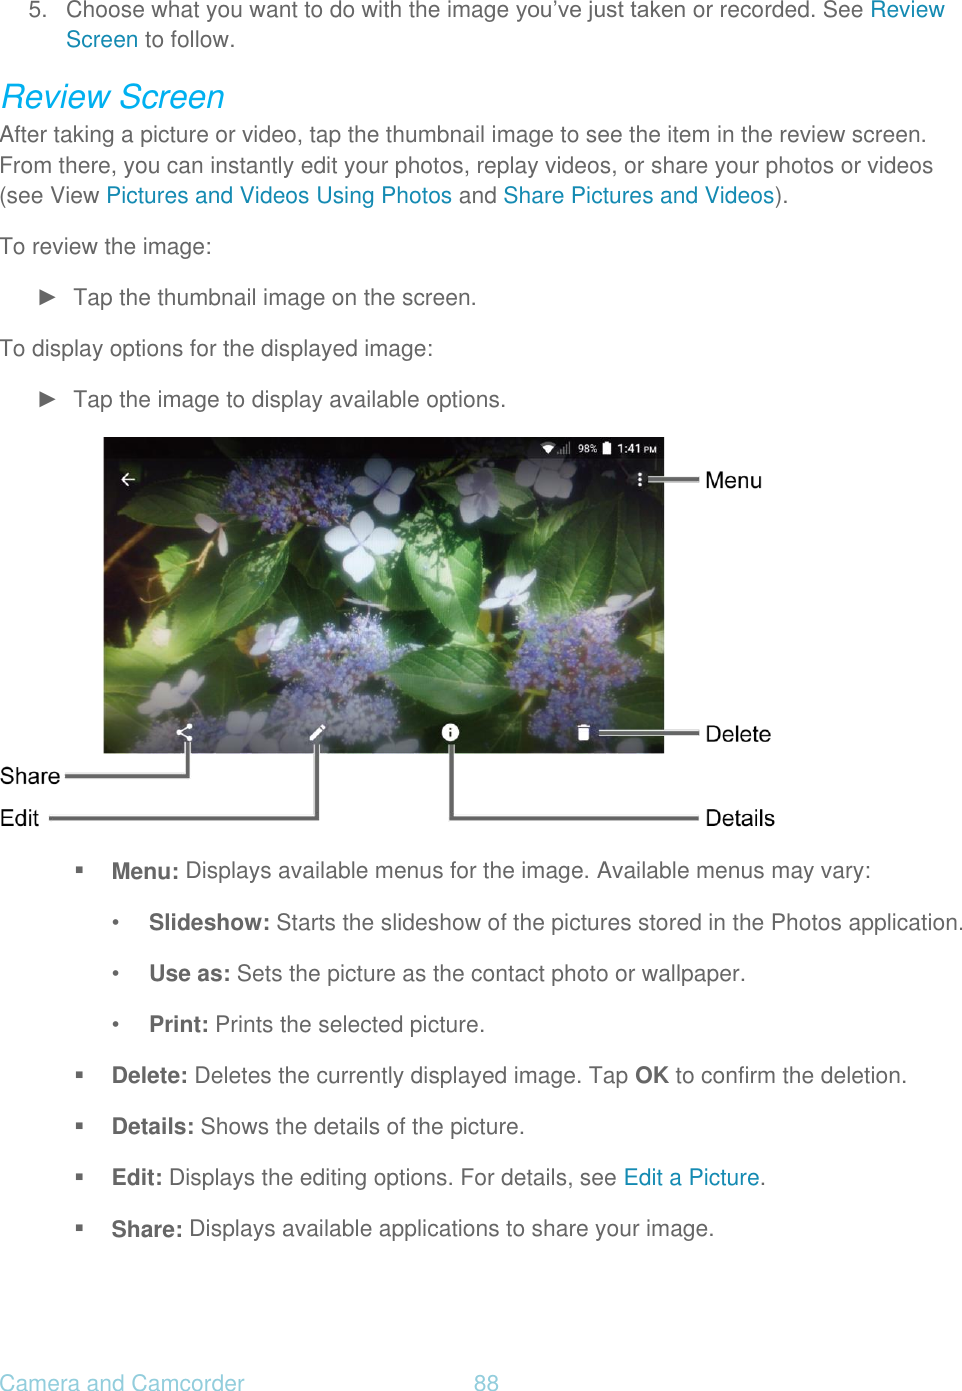

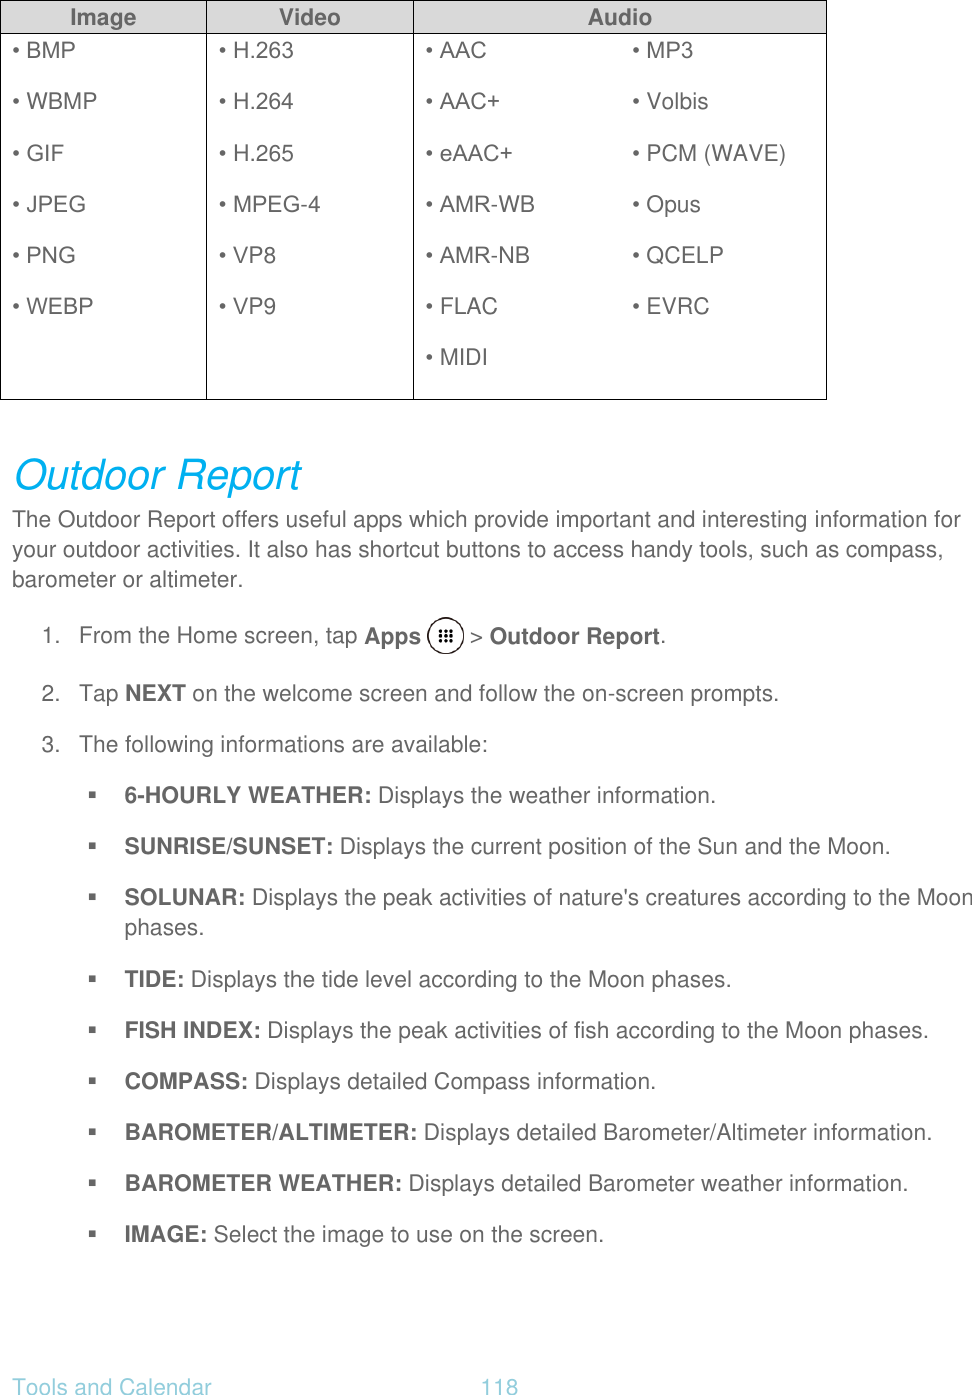

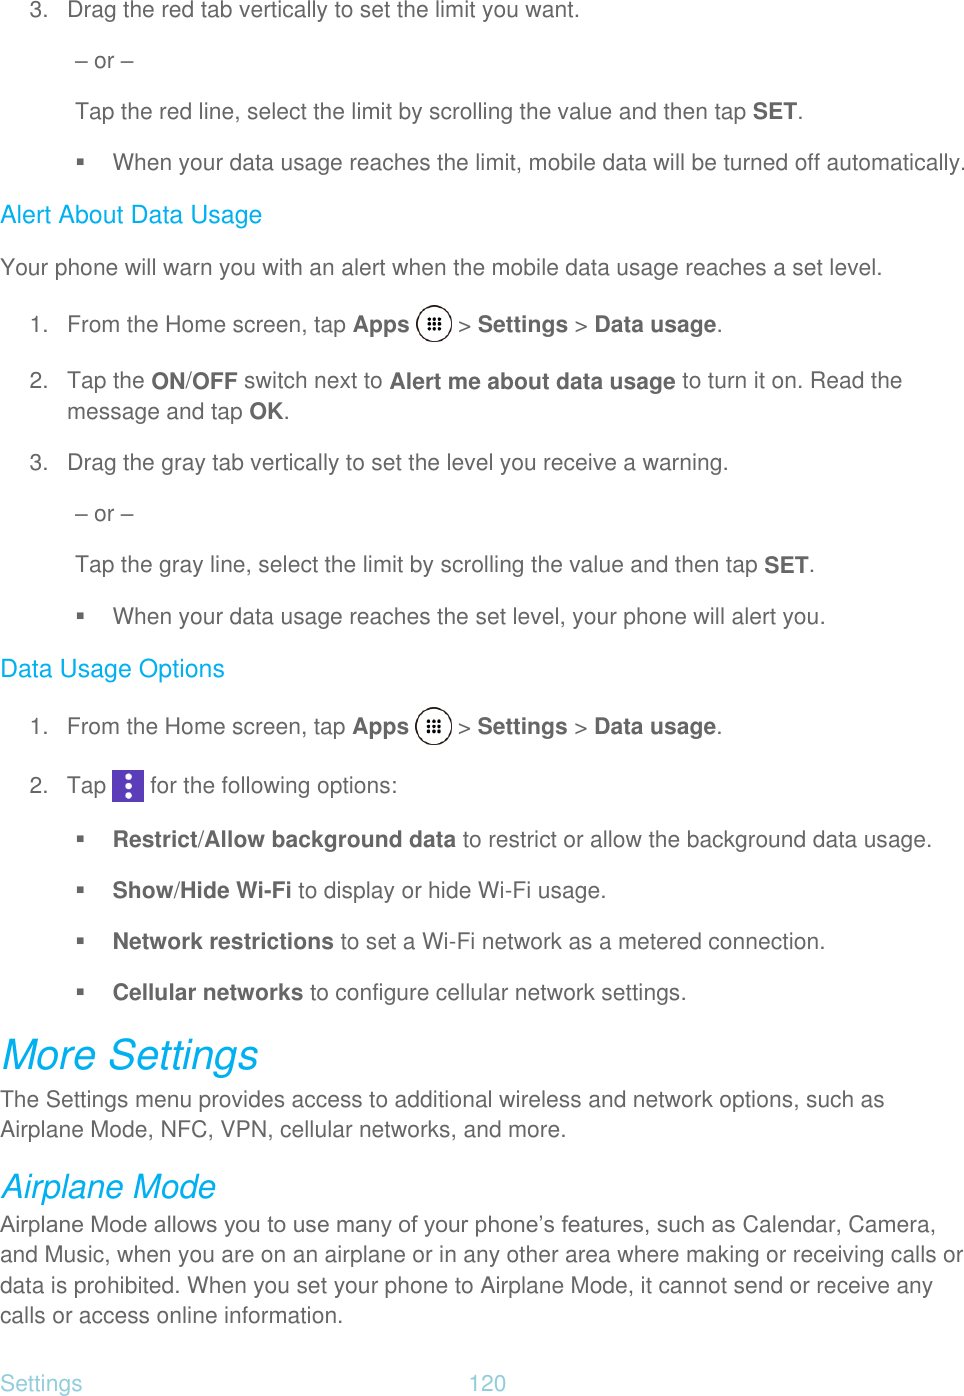
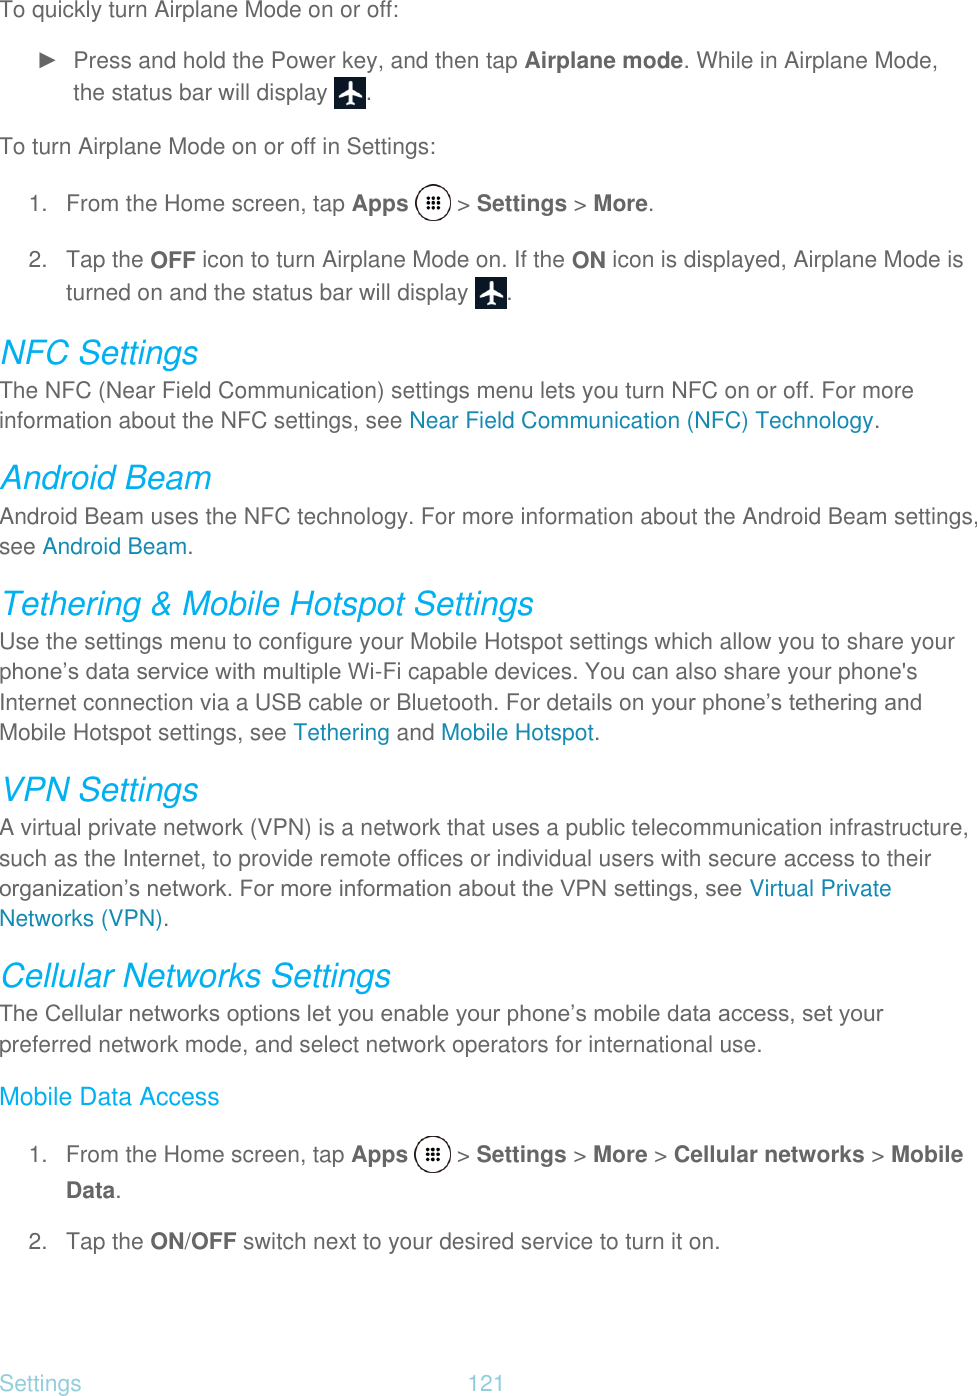
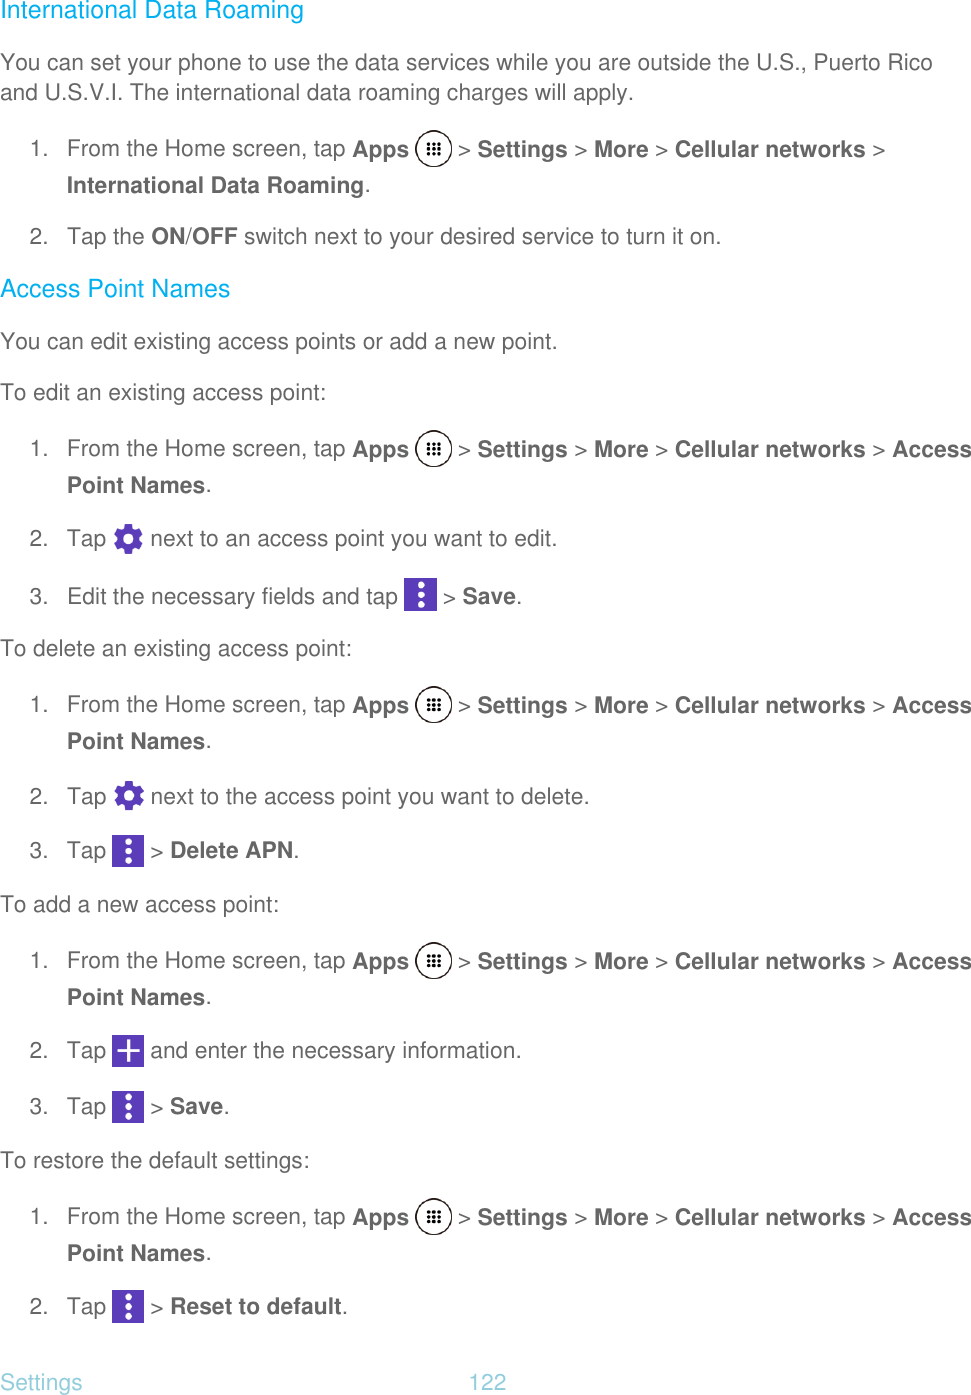
![Settings 123 Network Operators You may select a network operator. 1. From the Home screen, tap Apps > Settings > More > Cellular networks > Network operators. 2. Select an option: SEARCH NETWORKS: Searches available networks. Select the network you want to use from the available network list. Choose automatically: Selects a preferred network automatically. Note: This menu may not be available on your device. Emergency Alerts Your phone is compatible with the federally supervised cell phone alert services to send out broadcast SMS messages for public warning: To display the Emergency Alerts: ► From the Home screen, tap Apps > Settings > More > Emergency Alerts. To configure the Emergency Alerts settings: 1. From the Home screen, tap Apps > Settings > More > Emergency Alerts > > Settings. 2. Following options are available: Presidential: Receives an emergency presidential alert. (Presidential is always grayed out [not selectable] and cannot be excluded.) Extreme Alert: Receives emergency alerts in an extreme emergency situation (an extraordinary threat to life or property). Severe Alert: Receives emergency alerts in a severe emergency situation (a significant threat to life or property). Amber: Receives alerts related to missing or endangered children. Spanish Alert: Receives emergency alerts also in Spanish when Spanish alert is issued. Help: Displays the help information for Emergency Alerts. Notifications: Receives notifications when you receive an emergency alert.](https://usermanual.wiki/Kyocera/E6820.User-Manual/User-Guide-3069250-Page-134.png)