Kyocera KWC-KX18 Dual-Mode Dual-Band AMPS/CDMA Cellular Phone User Manual 82 N8537 1EN
Kyocera Communications, Inc Dual-Mode Dual-Band AMPS/CDMA Cellular Phone 82 N8537 1EN
UserManual.wiki
>
Kyocera
>
KWC KX18 User Manual
User Manual
Navigation menu
Upload a User Manual
Namespaces
Wiki Guide
HTML
PDF
Info
Views
User Manual
Discussion / Help
Navigation

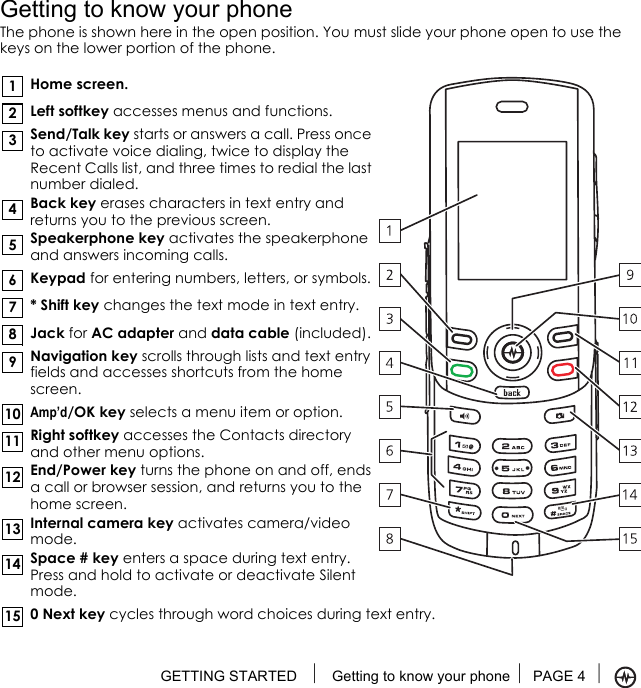

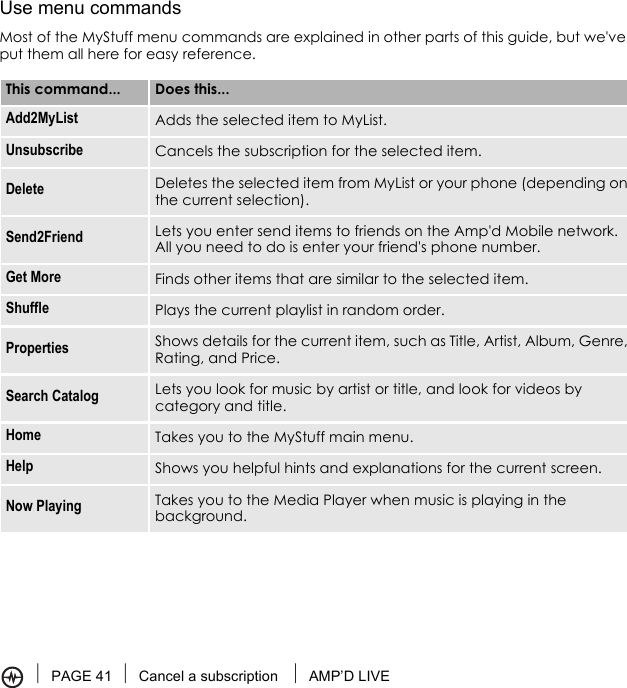
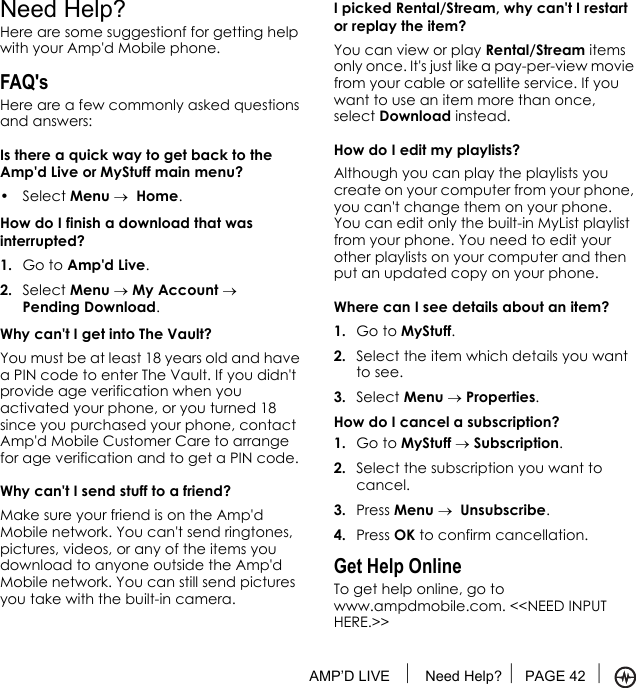
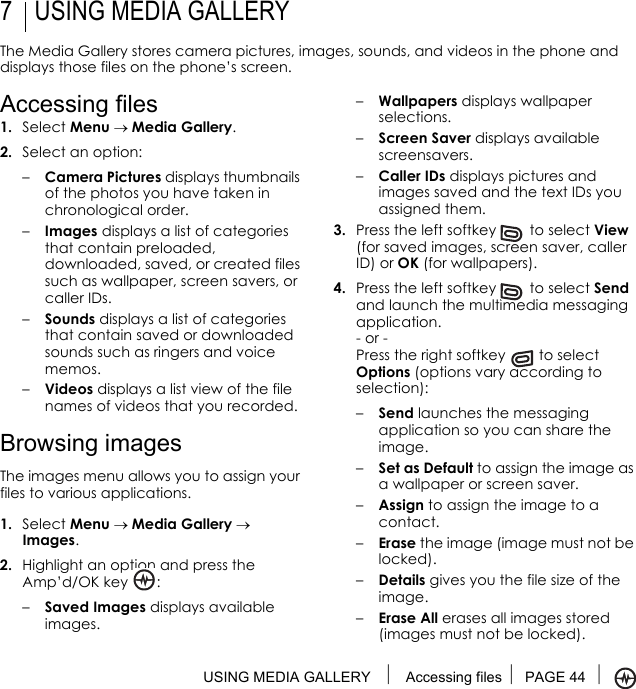
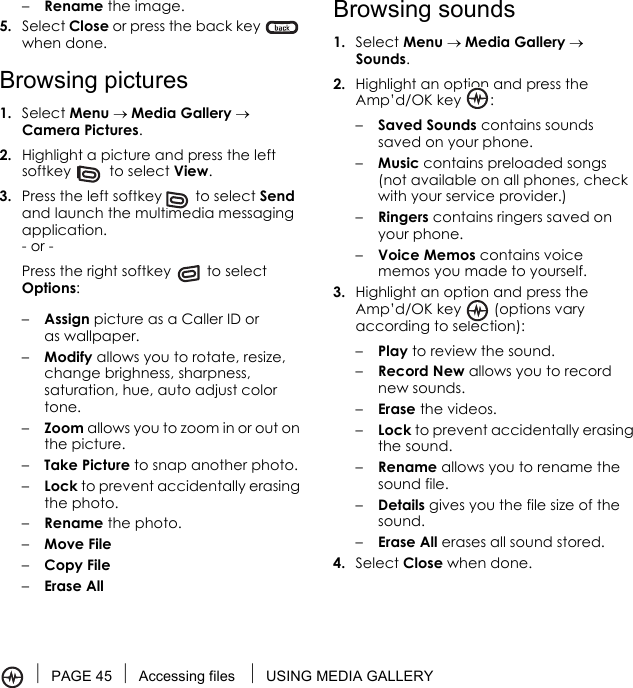
![PAGE 7 Getting to know your phone GETTING STARTEDPerforming basic functionsNote: The phone must be powered ON to perform the following functions.To... From the home screen...Turn the phone on Press the End/Power key and wait until the phone beeps.Make a call Press and hold the Send/Talk key to initiate voice dialing. Contact must have voice tag assigned (see page 83).Answer a call Press the Send/Talk key .Activate voice dialing Say “Dial” or press the Send/Talk key once and follow the prompts (see page 83).Silence the ringer on an incoming callPress the End/Power key or the right softkey(??) then the Send/Talk key to answer.End a call Press the End/Power key .Access voicemail Press and hold the “1” key and follow the system prompts.Push to Talk Press [PTT key]Launch Amp’d Live Press the Amp’d/OK key .Verify your phone number Select Menu → Phone Info. Record a voice memo Select Menu → Tools → Voice Memo → Record New.Adjust volume during a callPress the volume key on the left side of the phone up or down.Acknowledge an alert Press the end kye to stop, or the right softkey(??) to snooze.](https://usermanual.wiki/Kyocera/KWC-KX18/User-Guide-595737-Page-14.png)