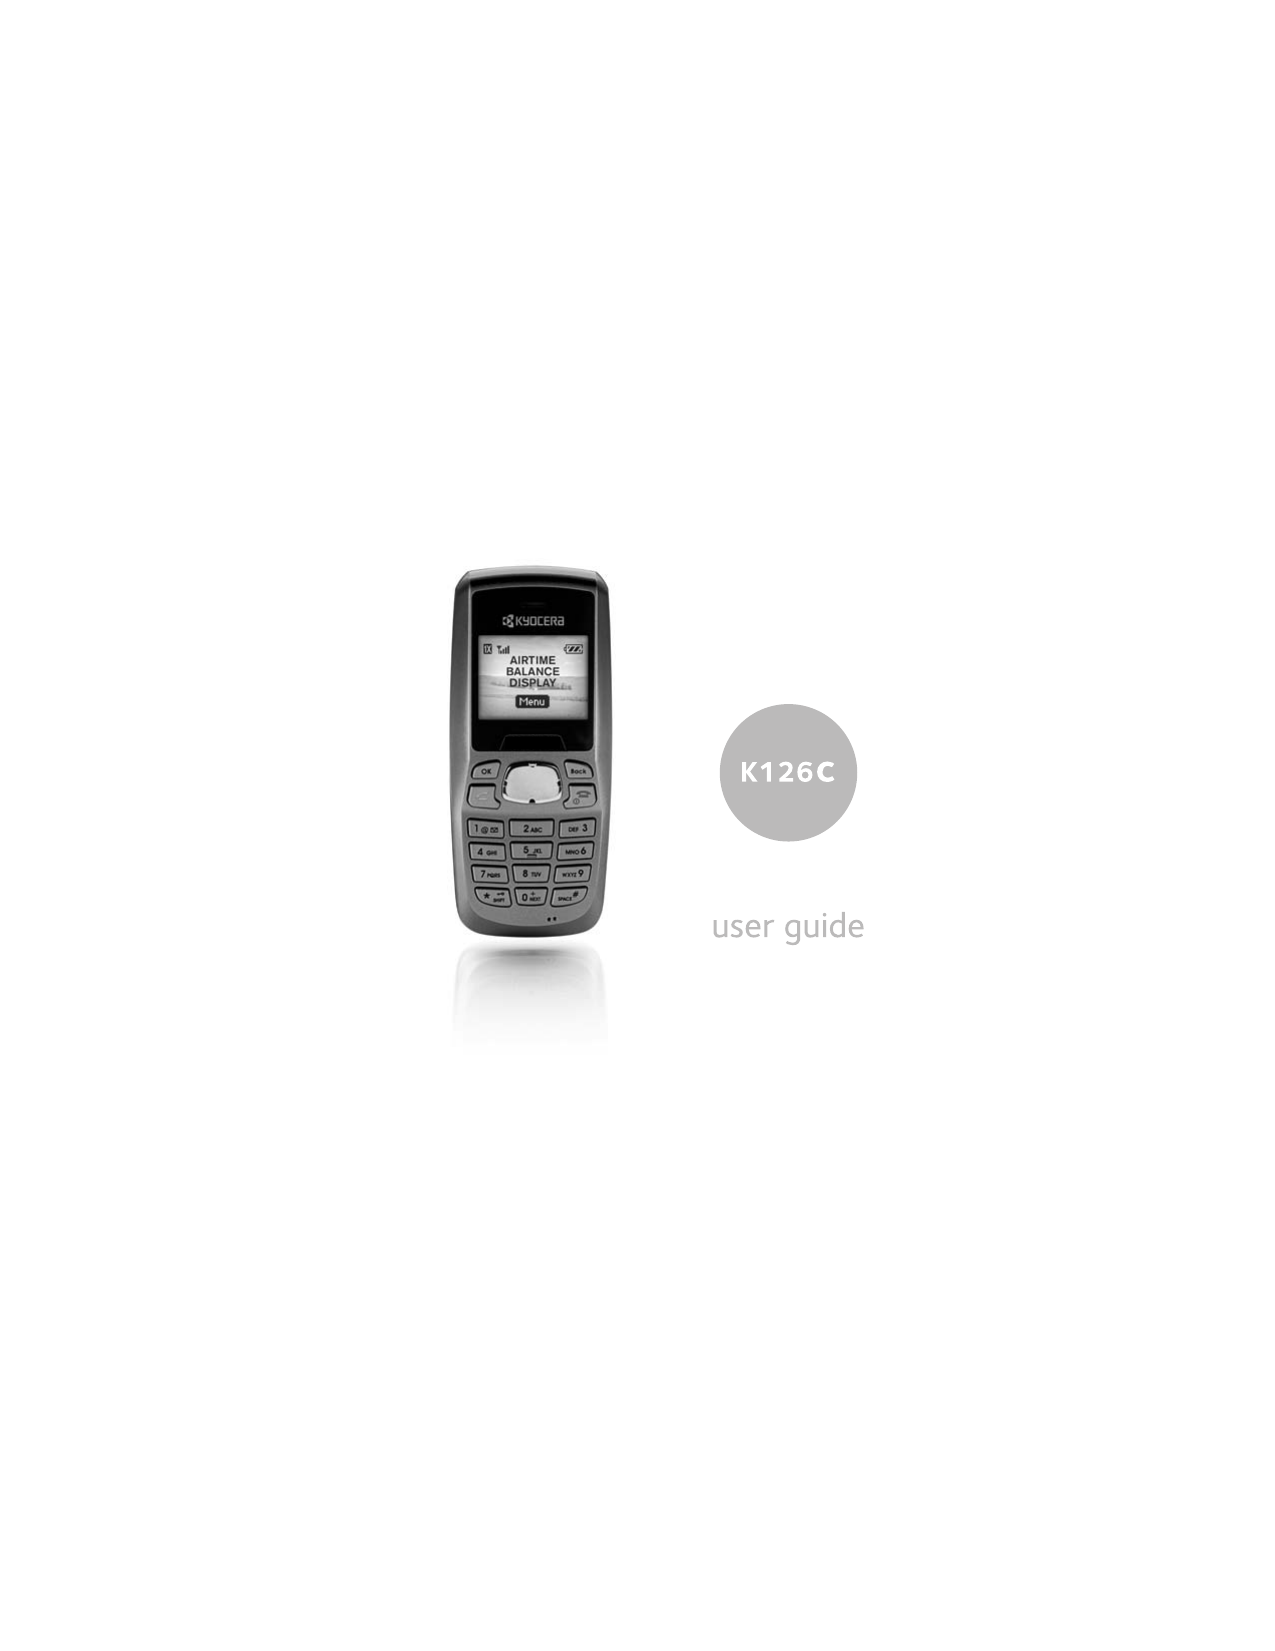
Kyocera KWC-S6000-150 Dual-Band Dual-Mode Cellular Phone User Manual 82 G1858 1EN

Kyocera Communications, Inc Dual-Band Dual-Mode Cellular Phone 82 G1858 1EN

User Manual

iiUser Guide for the Kyocera K126C PhoneThis manual is based on the production version of the Kyocera K126 phone. Software changes may have occurred after this printing. Kyocera reserves the right to make changes in technical and product specifications without prior notice. The products and equipment described in this documentation are manufactured under license from QUALCOMM Incorporated under one or more of the following U.S. patents:4,901,307 5,109,390 5,267,262 5,416,797 5,506,8655,544,196 5,657,420 5,101,501 5,267,261 5,414,7965,504,773 5,535,239 5,600,754 5,778,338 5,228,0545,337,338 5,710,784 5,056,109 5,568,483 5,659,5695,490,165 5,511,073  Other patents pending.The Kyocera Wireless Corp. ("KWC") products described in this manual may include copyrighted KWC and third party software stored in semiconductor memories or other media. Laws in the United States and other countries preserve for KWC and third party software providers certain exclusive rights for copyrighted software, such as the exclusive rights to distribute or reproduce the copyrighted software. Accordingly, any copyrighted software contained in the KWC products may not be modified, reverse engineered, distributed or reproduced in any manner not permitted by law. Furthermore, the purchase of the KWC products shall not be deemed to grant either directly or by implication, estoppel, or otherwise, any license under the copyrights, patents or patent applications of KWC or any third party software provider, except for the normal, non-exclusive royalty-free license to use that arises by operation of law in the sale of a product.Kyocera is a registered trademark of Kyocera Corporation. Brick Attack™ is a trademark of Kyocera Wireless Corp. QUALCOMM is a registered trademark of QUALCOMM, Inc. eZiText is a registered trademark of Zi Corporation. All other trademarks are the property of their respective owners. Copyright © 2007 Kyocera Wireless Corp. All rights reserved. Ringer Tones Copyright © 2000-2007 Kyocera Wireless Corp.82-G1858-1EN, Rev. X4FCC NoticeThis device complies with part 15 of the FCC rules. Operation is subject to the following two conditions: (1) This device may not cause harmful interference, and (2) this device must accept any interference received, including interference that may cause undesired operation.Other accessories used with this device for body-worn operations must not contain any metallic components and must provide at least 22.5 mm separation distance including the antenna and the user’s body.THIS MODEL PHONE MEETS THE GOVERNMENT’S REQUIREMENTS FOR EXPOSURE TO RADIO WAVES.Your wireless phone is a radio transmitter and receiver. It is designed and manufactured not to exceed the emission limits for exposure to radio frequency (RF) energy set by the Federal Communications Commission of the U.S. Government. These limits are part of comprehensive guidelines and establish permitted levels of RF energy for the general population. The guidelines are based on standards that were developed by independent scientific organizations through periodic and thorough evaluation of scientific studies. The standards include a substantial safety margin designed to assure the safety of all persons, regardless of age and health.The exposure standard for wireless mobile phones employs a unit of measurement known as the Specific Absorption Rate, or SAR. The SAR limit set by the FCC is 1.6 W/kg.* Tests for SAR are conducted using standard operating positions specified by the FCC with the phone transmitting at its highest certified power level in all tested frequency bands.
User Guide for the Kyocera K126C Phone iiiAlthough the SAR is determined at the highest certified power level, the actual SAR level of the phone while operating can be well below the maximum value. This is because the phone is designed to operate at multiple power levels so as to use only the power required to reach the network. In general, the closer you are to a wireless base station antenna, the lower the power output.Before a phone model is available for sale to the public, it must be tested and certified to the FCC that it does not exceed the limit established by the government-adopted requirement for safe exposure. The tests are performed in positions and locations (e.g., at the ear and worn on the body) as required by the FCC for each model.Body-worn measurements differ among phone models, depending upon availability of accessories and FCC requirements. While there may be differences between the SAR levels of various phones and at various positions, they all meet the government requirement for safe exposure. The FCC has granted an Equipment Authorization for this model phone with all reported SAR levels evaluated as in compliance with the FCC RF emission guidelines. SAR information on this model phone is on file with the FCC and can be found under the Display Grant section at http://www.fcc.gov/oet/fccid after searching on the FCC ID: OVFKWC-S6000-150.Additional information on SAR can be found on the Cellular Telecommunications and Internet Association (CTIA) web-site at http://www.wow-com.com.* In the United States and Canada, the SAR limit for mobile phones used by the public is 1.6 watts/kg (W/kg) averaged over one gram of tissue. The standard incorporates a substantial margin of safety to give additional protection for the public and to account for any variations in measurements.CautionThe user is cautioned that changes or modifications not expressly approved by the party responsible for compliance could void the warranty and user’s authority to operate the equipment.Optimize your phone’s performanceUse the guidelines on page 2 to learn how to optimize the performance and life of your phone and battery.Air bagsIf you have an air bag, DO NOT place installed or portable phone equipment or other objects over the air bag or in the air bag deployment area. If equipment is not properly installed, you and your passengers risk serious injury.Medical devicesPacemakers—Warning to pacemaker wearers: Wireless phones, when in the ‘on’ position, have been shown to interfere with pacemakers. The phone should be kept at least six (6) inches away from the pacemaker to reduce risk.The Health Industry Manufacturers Association and the wireless technology research community recommend that you follow these guidelines to minimize the potential for interference.• Always keep the phone at least six inches (15 centimeters) away from your pacemaker when the phone is turned on.• Do not carry your phone near your heart.• Use the ear opposite the pacemaker.• If you have any reason to suspect that interference is taking place, turn off your phone immediately.Hearing aids—Some digital wireless phones may interfere with hearing aids. In the event of such interference, you may want to consult your service provider or call the customer service line to discuss alternatives.Other medical devices—If you use any other personal medical device, consult the manufacturer of the device to determine if it is adequately shielded from external RF energy. Your physician may be able to help you obtain this information.
ivIn health care facilities—Turn your phone off in health care facilities when instructed. Hospitals and health care facilities may be using equipment that is sensitive to external RF energy.Potentially unsafe areasPosted facilities—Turn your phone off in any facility when posted notices require you to do so.Vehicles—RF signals may affect improperly installed or inadequately shielded electronic systems in motor vehicles. Check with the manufacturer of the device to determine if it is adequately shielded from external RF energy.Blasting areas—Turn off your phone where blasting is in progress. Observe restrictions, and follow any regulations or rules.Potentially explosive atmospheres—Turn off your phone when you are in any area with a potentially explosive atmosphere. Obey all signs and instructions. Sparks in such areas could cause an explosion or fire, resulting in bodily injury or death.Areas with a potentially explosive atmosphere are often, but not always, clearly marked. They include:• fueling areas such as gas stations• below deck on boats• transfer or storage facilities for fuel or chemicals• vehicles using liquefied petroleum gas, such as propane or butane• areas where the air contains chemicals or particles such as grain, dust, or metal powders• any other area where you would normally be advised to turn off your vehicle engineUse with careUse only in normal position (to ear). Avoid dropping, hitting, bending, or sitting on the phone.Keep phone dryIf the phone gets wet, turn the power off immediately and contact your dealer. Water damage may not be covered under warranty.Resetting the phoneIf the screen seems frozen and the keypad does not respond to keypresses, reset the phone by completing the following steps:1Remove the battery door.2Remove and replace the battery.If the problem persists, return the phone to the dealer for service.AccessoriesUse only Kyocera-approved accessories with Kyocera phones. Use of any unauthorized accessories may be dangerous and will invalidate the phone warranty if said accessories cause damage or a defect to the phone.To shop online for phone accessories, visit www.kyocera-wireless.com/store.To order by phone, call 800-349-4188 (U.S.A. only) or 858-882-1410.Radio Frequency (RF) energyYour telephone is a radio transmitter and receiver. When it is on, it receives and sends out RF energy. Your service provider’s network controls the power of the RF signal. This power level can range from 0.006 to 0.6 watts.Hearing Aid Compatibility (HAC) with Mobile PhonesSome mobile phones and hearing devices (hearing aids and cochlear implants), when used together, result in buzzing, humming, or whining noises detected by the user. Some hearing devices are more immune than others to this interference noise, and phones also vary in the amount of interference they generate. The wireless telephone industry has developed ratings for some of their mobile phones, to assist hearing device users in finding phones that may be compatible with their hearing devices. Not all phones have been rated. Phones that are rated have the rating on their box or a label on the box. The ratings are not
User Guide for the Kyocera K126C Phone vguarantees and results will vary depending on the user’s hearing device and hearing loss. If your hearing device happens to be vulnerable to interference, you may not be able to use a rated phone successfully. Trying out the phone with your hearing device is the best way to evaluate it for your personal needs.M-Ratings— Phones rated M3 or M4 meet FCC requirements and are likely to generate less interference to hearing devices than phones that are not labeled. M4 is the better/higher of the two ratings.T-Ratings— Phones rated T3 or T4 meet FCC requirements and are likely to be more usable witha hearing device’s telecoil (“T Switch” or “Telephone Switch”) than unrated phones. T4 is the better/higher of the two ratings. (Note that not all hearing devices have telecoils in them.)Hearing devices may also be measured for immunity to this type of interference. Your hearing device manufacturer or hearing health professional may help you choose the proper rating for your mobile phone. The more immune your hearing aid is, the less likely you are to experience interference noise from mobile phones.For more information about hearing aid compatibility, visit the FCC's Consumer & Governmental Affairs Bureau Web site at www.fcc.gov/cgb/dro. Battery and charger specificationsKyocera Wireless Corp.10300 Campus Point Drive, San Diego, CA 92121 U.S.A.Visit us at www.kyocera-wireless.comTo purchase accessories, visit www.kyocera-wireless.com/storeCharger Input OutputCE90-R2233-01 100-240VAC 50/60Hz 5VDC 350mA Standard Battery:CV90-N3344-04, 3.7 V / 900 mAh
viCONTENTS1 Getting Started. . . . . . . . . . . . . . . . . . . . .   1Installing the battery . . . . . . . . . . . . . . . . . . . . . . 1Getting to know your phone . . . . . . . . . . . . . . . . 3Using menus   . . . . . . . . . . . . . . . . . . . . . . . . . . . 4Performing basic functions   . . . . . . . . . . . . . . . . 52 Making and Answering Calls  . . . . . . . . .   6Making a call  . . . . . . . . . . . . . . . . . . . . . . . . . . . 6Dealing with missed calls . . . . . . . . . . . . . . . . . . 7Viewing recent calls  . . . . . . . . . . . . . . . . . . . . . . 7Speed dialing  . . . . . . . . . . . . . . . . . . . . . . . . . . . 8Setting up voicemail . . . . . . . . . . . . . . . . . . . . . . 8Silencing an incoming call  . . . . . . . . . . . . . . . . . 9Calling emergency services   . . . . . . . . . . . . . . . . 9Locking the keypad  . . . . . . . . . . . . . . . . . . . . . 103 Entering Text, Numbers, and Symbols   114 Storing Contacts . . . . . . . . . . . . . . . . . .   14Creating a new contact . . . . . . . . . . . . . . . . . . . 14Editing or erasing a contact  . . . . . . . . . . . . . . . 15Editing a phone number . . . . . . . . . . . . . . . . . . 15Finding contact information . . . . . . . . . . . . . . . 165 Sending and Receiving Text Messages  17Sending text messages  . . . . . . . . . . . . . . . . . . . 17Retrieving text messages   . . . . . . . . . . . . . . . . . 19Customizing message settings . . . . . . . . . . . . . . 216 Customizing Your Phone  . . . . . . . . . . .   22Silencing all sounds  . . . . . . . . . . . . . . . . . . . . . 22Choosing ringers  . . . . . . . . . . . . . . . . . . . . . . . 23Adjusting volume  . . . . . . . . . . . . . . . . . . . . . . . 23Setting message alerts   . . . . . . . . . . . . . . . . . . . 24Using shortcuts   . . . . . . . . . . . . . . . . . . . . . . . . 24Personalizing the screen   . . . . . . . . . . . . . . . . . 25Creating a secure environment . . . . . . . . . . . . . 26Network settings . . . . . . . . . . . . . . . . . . . . . . . . 28Factory reset  . . . . . . . . . . . . . . . . . . . . . . . . . . 287 Fun & Games . . . . . . . . . . . . . . . . . . . . .   29Brick Attack . . . . . . . . . . . . . . . . . . . . . . . . . . .  29My Sounds . . . . . . . . . . . . . . . . . . . . . . . . . . . .  29My Pictures  . . . . . . . . . . . . . . . . . . . . . . . . . . .  298 Tools . . . . . . . . . . . . . . . . . . . . . . . . . . . .   30Scheduler  . . . . . . . . . . . . . . . . . . . . . . . . . . . .  30Alarm Clock . . . . . . . . . . . . . . . . . . . . . . . . . . .  30Tip Calculator  . . . . . . . . . . . . . . . . . . . . . . . . .  30Calculator  . . . . . . . . . . . . . . . . . . . . . . . . . . . .  31World Clock   . . . . . . . . . . . . . . . . . . . . . . . . . .  31Timer   . . . . . . . . . . . . . . . . . . . . . . . . . . . . . . .  329 Using Voice Recognition  . . . . . . . . . . .   34Setting up voice dialing  . . . . . . . . . . . . . . . . . .  34Making a call using voice tags  . . . . . . . . . . . . .  35Making a call using digit dialing   . . . . . . . . . . .  35Using voice features . . . . . . . . . . . . . . . . . . . . .  3610 Getting Help . . . . . . . . . . . . . . . . . . . . . .   37Customer support  . . . . . . . . . . . . . . . . . . . . . .  3711 Consumer Limited Warranty. . . . . . . . .   39Index 41
User Guide for the Kyocera K126C Phone 11GETTING STARTEDInstalling the batteryYour phone comes with a removable lithium ion (LiIon) battery. 1. Hold the phone with the back facing you.2. Unsnap the battery door by using the latch located at the bottom of the battery door.3. Place the battery in the phone casing with the metal contacts toward the bottom of the phone.4. Place the battery door tabs in the openings on the side of the phone.5. Press the battery door until it snaps into place.Charging the batteryYou must have at least a partial charge in the battery to make or receive calls. Fully charge the battery before using the phone.To charge the battery, connect the AC adapter to the jack on the bottom of the phone, then plug the adapter into a wall outlet.The battery icon in the upper-right corner of the screen tells you whether the phone is:• Charging (the icon is animated)• Partially charged • Fully charged Recharging the batteryYou can safely recharge the battery at any time, even if it has a partial charge.
2 Getting StartedCaring for the batteryGeneral safety guidelines• Do not take apart, puncture, or short-circuit the battery.• If you have not used the battery for more than a month, recharge it before using your phone.• Avoid exposing the battery to extreme temperatures, direct sunlight, or high humidity.• Never dispose of any battery in or near a fire – it could explode.Common causes of battery drain• Playing games.• Keeping backlighting on.• Operating in digital mode when far away from a base station or a cell site.• Using the headset.• Operating when no service is available, or when service is available intermittently.• High earpiece and ringer volume settings.• Repeating sound, vibration, or lighted alerts.• Long conversaton.• Operating in speakerphone mode.Understanding screen iconsThese icons may appear on your phone’s home screen.The phone is operating in IS95 digital mode.The phone is receiving a signal. You can make and receive calls. Fewer bars indicate a weaker signal.A call is in progress.The phone is not receiving a signal. You cannot make or receive calls.You have a voice message.The battery is fully charged. The more black bars, the greater the charge.The alarm clock is set.The phone is in privacy mode.The phone is at the home screen. To access Menu, press  .The phone is set to light up instead of ring.The phone is set to vibrate or to vibrate and then ring.Keyguard is on. The keypad is locked.Phone is set to Auto Answer.
User Guide for the Kyocera K126C Phone 3Getting to know your phoneHome screen.OK key selects a menu item or option.Send/Talk key starts or answers calls.Keypad for entering numbers, letters, or symbols.* Shift key changes the text mode in text entry and also activates the keypad lock.Back key accesses menu options, erases characters in text entry, returns to previous screen.Navigation key positions cursor during text entry. Scrolls through menu lists.End/Power key turns the phone on and off. Ends a call.# Space key enters a space during text entry. 0 Next key cycles through word choices during text entry and is also used for “+” dialing.Jack for hands-free headset (sold separately)*Jack for AC adapter (included)*.*Warning: Inserting an accessory into the incorrect jack will damage the phone.123456789101112
4 Getting StartedUsing menusAccessing menu items• Press  to select Menu.• Press   left, right, up, or down to view menus and options*.• Press   to select a menu item.• Press   to back up a menu level.• Press  to return to the home screen.In this guide, an arrow → tells you to select an option from a menu. For example, Menu → Settings means select Menu, then select the Settings option.* To change the way the menus appear, select Menu → Settings → Display → Main Menu View, then select Graphic, or List and press  . See “Choosing a menu view” on page 25 for details.The contents of the main menu are as follows:PrepaidAdd AirtimeBuy AirtimeMy Phone NumberAirtime BalanceAirtime DisplaySerial NumberCode Entry ModeRecent CallsAll CallsIncoming CallsOutgoing CallsMissed CallsErase ListsContactsView AllAdd NewFind NameAdd Voice DialSpeed Dial ListVoice Dial ListBusiness ListPersonal ListInformationMessagesNew Text MsgVoicemailInBoxOutboxSavedDraftsMsg SettingsGroup ListsErase MsgsSettingsSilent ModeKeyguardSoundsDisplayVoice ServicesSecurityCall InformationNetworkConvenienceMsg SettingsAccessoriesPhone InfoFactory ResetTools & GamesToolsFun & Games
User Guide for the Kyocera K126C Phone 5Performing basic functionsTo... From the home screen...Turn the phone on Press   and wait until the phone chimes.Turn the phone off Press and hold   until the phone beeps.Make a call Enter the number, and press  .End a call Press .Answer a call Press .Access voicemail Press and hold   and follow the system prompts.Verify your phone number Select Menu → Settings → Phone Info → Build Info. Silence the ringer on an incoming call Press  , then   to answer.-or-Press   up or down, then   to answer.Access contacts list Press  down.Silence all sounds Press and hold   right, or press and hold  .Send a text message Press and hold   left.Access your shortcut Press and hold   up. See “Defining the feature shortcut (up)” on page 25.
6 Making and Answering Calls2MAKING AND ANSWERING CALLSMaking a call1. Make sure you are in an area where a signal can be received. Look for   on the home screen.Note: The more bars you see in this symbol, the stronger the signal. If there are no bars, move to where the signal strength is better.2. Enter the phone number.3. Press .4. Press   to end the call.Redialing a numberTo redial the last number called, received, or missed, press   three times.Calling a saved numberIf you have already saved a phone number, you can use the Contacts list to find it quickly.1. Press   down to view all Contacts.2. Scroll down the list to find the contact you want to call.3. Highlight the name and press   to dial the number.Note:  If the contact has more than one phone number assigned to it, press   to select the contact’s name, highlight the phone number you want to call, and press  .Answering callsWhen a call comes in, the phone rings and “ Incoming Call” appears on the screen. The phone number of the caller also appears if it is not restricted. If the number is stored in your Contacts directory, the contact name appears. To answer the call, press  .To silence or ignore the call When an incoming call is received, you can choose to do one of the following:• Press   down to silence the ringer.• Press   to silence the ringer.• Press  . Then press   to answer the call.•Select Ignore Call to immediately send the caller to voicemail. “Missed Calls” appears on your screen until the caller leaves a message. Note that in the absence of voicemail, this feature drops the call.Adjusting the volume during a call• To adjust the earpiece volume during a call, press   up or down.Using the speakerphone• To activate the speakerphone during a call, press   right once and then press   to select  On.
User Guide for the Kyocera K126C Phone 7• To deactivate the speakerphone during a call, select  Off.Dealing with missed callsWhen you have missed a call, “Missed Calls” appears on your screen unless the caller leaves a voicemail. • To clear the screen, press  .• To return the call, highlight Missed Calls, press  then press .Setting missed call alertsYou can set an alert to beep every five minutes after you have missed a call.•Select Menu → Settings → Sounds → Missed Call → Enabled.Viewing recent callsDetails on the last calls you made, received, and missed (10 each, 30 total) are stored in the Recent Calls list and are identified by the following icons:Recent call details1. To view details of recent call, select Menu → Recent Calls. 2. Select from All Calls, Incoming Calls, Outgoing Calls, and Missed Calls.3. Select a recent call and press  . Select from the following:–Time displays the time the call was made, received, or missed and its duration.–Number displays the phone number of the call.–Send Msg allows you to send a text message to the phone number.–Prepend allows you to add an area code to the number if you plan to save the number as a contact.–Save New adds the phone number to the Contacts list.-or- View Contact allows you to view the contact information to make changes, if necessary.–Add to adds the phone number to a saved contact.–Erase deletes the call from the list of recent calls.Note:  If the phone number has been classified as “secret,” you must enter your four-digit lock code to view or edit it. For information on the lock code, see “Changing your lock code” on page 26. To classify a phone number as secret, see “Creating a new contact” on page 14.Outgoing call Incoming callMissed call (flashing)
8 Making and Answering CallsCalling recent calls1. Select Menu → Recent Calls.2. Select a list: All Calls, Incoming Calls, Outgoing Calls, or Missed Calls.3. Highlight the number you want to call.4. Press .Erasing recent calls1. Select Menu → Recent Calls → Erase Lists.2. Select an option: Incoming Calls, Outgoing Calls, Missed Calls or Erase All.3. Press   right and press   to select Yes.Speed dialingSpeed dialing allows you to quickly dial a stored phone number by entering a one- or two-digit speed dialing location number and pressing  .Note:  Before you can use speed dialing, you must save a phone number as a contact and assign a speed dial location to it. Refer to “Creating a new contact” on page 14 to create a new contact, or “Editing or erasing a contact” on page 15 to add speed dial to an existing contact.Using speed dialingTo call a contact that has a speed dial location:• From the home screen, enter the one- or two-digit speed dialing location and press  .1-Touch dialing1-Touch dialing is the fastest way to speed dial a contact that has a speed dial location.Note:  You must (1) enable 1-Touch dialing on your phone and (2) have a speed dial location assigned to a contact. See “Enabling 1-Touch dialing,” and “Using 1-Touch dialing”on this page.Enabling 1-Touch dialing1. Select Menu → Settings → Convenience → 1-Touch Dialing → Enabled.2. Press .Using 1-Touch dialingTo call a contact that has a speed dial location:• From the home screen, press and hold the speed dialing number. If it is a two-digit number, press the first digit briefly, then press and hold the second digit. For example, if the speed dialing location is 15, press   briefly, then press and hold .Setting up voicemailBefore your phone can receive voicemail messages, you must set up a password and record a personal greeting with your service provider. When you have set up your voicemail, all unanswered calls to your phone are automatically transferred to voicemail, even if your phone is in use or turned off.
User Guide for the Kyocera K126C Phone 91. From the home screen, press and hold  .2. Press   at the message.3. Follow the system prompts to create a password and record a greeting.Note:  If you are having trouble accessing your voicemail, contact your service provider.Checking voicemail messagesWhen a voice message is received, your screen displays “1 New Voicemail(s)” along with the  symbol at the top of your screen. The symbol flashes if the message is urgent. If you see “1 New Voicemail(s)”1. Press  to select Call, which initiates a call to your voicemail number.2. Follow the prompts to retrieve the message.To clear the screen without checking messages:• Press   right and press   to select Ignore.If you see only the   symbol1. Press and hold   to initiate a call to your voicemail number.2. Follow the prompts to retrieve the message.• You can set the phone to beep or vibrate every five minutes to remind you that you have voicemail. See “Setting message alerts” on page 24.Silencing an incoming call• To silence an incoming call quickly, press . Then press   to answer the call.This action silences the current call only. The next call will ring as normal.Calling emergency services• Dial  the 3-digit emergency code (911) and press .You can call the code even if your phone is locked or your account is restricted. When you call, your phone enters Emergency mode. This enables the emergency service exclusive access to your phone to call you back, if necessary. To make or receive regular calls after dialing the code, you must exit this mode.To exit Emergency modeWhen you have completed the emergency call:1. Press   to select Exit.2. Press   again to confirm your choice.Tracking callsYou can track the number and duration of calls made and received on your phone.1. Select Menu → Settings → Call Information → Call Timers.2. Select a timer:–Recent Calls Timer—Tracks all calls you have made and received since you last
10 Making and Answering Callsreset this timer. To reset this timer to zero, select Reset and press .–Home Calls Timer—Tracks all calls you have made and received in your home service area since you last reset this timer. To reset this timer to zero, select Reset and press .–Roam Calls Timer—Tracks all calls you have made and received outside of your home service area since you last reset this timer. To reset this timer to zero, select Reset and press  .–Dialed Calls Timer—Tracks all outgoing calls you have made since you last reset ths timer. To reset this timer to zero, select Reset and press  .3. Press   to return to the Call Information menu to select one of the following:–All Calls Timer—Tracks all calls you have made and received. This timer cannot be reset.–Reset All Timers—Resets timers for all recent, home, and roam calls.Timing your callsYou can set your phone to beep 10 seconds before each minute passes when you are on a call.•Select Menu → Settings → Sounds → Minute Alert → Enabled.Locking the keypadThe Keyguard locks your keypad to prevent accidental key presses when the phone is turned on and a call is not in progress. You can still answer or silence an incoming call.• To lock the keypad from the home screen, press and hold  .• To unlock the keypad, press   and then .Changing the keyguard setting1. Select Menu → Settings → Keyguard.2. Highlight an option. You can set the phone to lock the keypad immediately, or automatically if no key is pressed after 30 seconds, 1 minute, or 5 minutes.3. Press to save.
User Guide for the Kyocera K126C Phone 113ENTERING TEXT, NUMBERS, AND SYMBOLSYou can enter letters, numbers, and symbols in Contacts, text messages, and your banner.Understanding text entry screensThe current text entry mode (and capitalization setting, when applicable) are indicated by icons.Text entry modesThere are five text entry modes:Case change Normal alpha Rapid Entry Numbers onlyAdd SymbolNote:  The mode you start in depends on the task you are doing. For example, when entering a phone number, you’re in number mode. When entering a name for a contact, you’re in normal text mode.Entering numbers• To enter a number while in   mode, press a number key once.• To enter a number while in   or   mode, press and hold a number key until the number appears on the screen.Entering words letter by letterUse normal alpha to enter letters.1. Press a key once for the first letter, twice for the second letter, and so on. If your phone is set to Spanish, accented letters are available.2. Wait for the cursor to move right and enter the next letter. Entering words quicklyWhen you press a series of keys using   mode,  checks its dictionary of common words and guesses at the word you are trying to spell.1. For each letter of the word you want, press the key once. For example, to enter the word “any” press:   →  → .2. If the word doesn’t match what you want, press   to look at other word matches.3. When you see the word you want, press .Entering symbolsWhile entering text, you can enter symbols by pressing   until you see the symbol you want. text entry fieldtext entry modetext entry fieldtext entry mode
12 Entering Text, Numbers, and SymbolsUsing this method, you have access to the following symbols:To access the full set of symbols:1. Select .2. Select   Symbols and press  .3. Press   up or down to view the list of symbols.4. Press the number key corresponding to the symbol you want.Switching default text entry modesYou can change the default text entry mode when creating a text message. This setting applies only to the message body screen, not the “To” screen. 1. Select Menu → Messages → Msg Settings → Default Text.2. Select Normal Alpha or Rapid Mode.Changing modesSometimes you need to change modes. For example, to enter numbers in an email address while in  mode, you must change to mode, enter the numbers, and then change back to  mode to complete the address.To change text entry modes, you can either:• Press and hold   until the icon for the mode you want appears.-or-• Highlight  , press   and scroll through the options.Capitalization settingsThree capitalization settings are available in  and  modes:To change capitalization settings:• Press   until the icon for the setting you want appears..@?!-,&:’1Capitalize next letterLower case next letterCapitalize first letter of every word (in a contact) or sentence (in a text message)If no icon appears, all letters will be in lower case.
User Guide for the Kyocera K126C Phone 13Quick reference to text entryThis table gives general instructions for entering letters, numbers, and symbols.To... Do this...Enter a letter Use   mode and press a key until you see the letter you want. For more information, see page 11.Enter a number Use   mode and press a key once to enter its number. For more options, see page 11.Enter a symbol Press   until you find the symbol you want. See page 11.Enter a space Press .Erase a character Press .Erase all characters Press and hold  .Move the cursor right or left Press   up or down.Change text entry modes Press and hold  .Change to uppercase In   mode, press  . Choose  .Change to lowercase In   mode, press  . Choose  .Select options on the screen Press .
14 Storing Contacts4STORING CONTACTSUse your phone’s Contacts directory to store information about a person or company. Your phone can hold, on average, about 200 phone numbers.Creating a new contact1. From the home screen, enter the phone number you want to save, including the area code.-or-Select Menu → Contacts → Add New → Phone Number, then enter the phone number you want to save, including the area code.2. Select Save New or Next.3. Enter a name for the contact. If you need to learn how to enter letters, see page 11.4. Press   right twice and select Options to add information to the contact’s number.–Save the contact to the Contacts list.–Assign or Unassign Ringer to identify an incoming call from this contact.–Number Type to designate a number as Work, Home, Mobile, Pager, or Fax.–Add Voice Dial to add a voice dialing tag to this number.–Speed Dialing to assign a speed dial number to your phone number.–Secret hides the number from view in the contacts list and other areas of the phone.–Primary Number assigns phone number as primary number for contact.–Classify Contact as Personal, Business, or Neither. (See page 23 to set the phone to ring differently for personal and business calls.)5. Select Save when done.Adding a code or extensionWhen you save the phone number of an automated service, you may include a pause where your phone would stop dialing; for example, where you would wait to dial an extension.1. Enter the first portion of the phone number.2. Select a type of pause:– Press   left once to select Hard Pause, which stops dialing until you select Release. The   icon is displayed.-or-– Press   left twice to select Time Pause, which stops dialing for two seconds, then continues to dial. The   icon is displayed.3. Enter the remaining numbers.X
User Guide for the Kyocera K126C Phone 154. Select Save New or Next and follow the prompts.Editing or erasing a contactTo make changes to a contact, take these steps. 1. Select Menu → Contacts. 2. Select View All or Find Name to find the contact you want to edit. 3. Highlight the contact to edit and press  .4. Select Options.5. Highlight an option and press   to select it:–Add New to add a new Phone Number, Email Address, Street Address, URL, or Note to the contact.–Assign Ringer or Unassign Ringer to identify an incoming call from this contact.–Erase Contact to delete this contact from the phone.–Edit Name to change the name that the contact is stored as.–Classify Contact to designate the contact as Personal, Business, or Neither.Editing a phone number1. Select Menu → Contacts. 2. Select View All or Find Name to find the contact you want to edit. 3. Highlight the contact to edit and press  .4. Press   down to highlight the phone number or email address you want to edit and press .5. Choose from the following options:–Send Text Msg to send a text message to that number or email address.–View Number to see the phone number you selected.–Add Voice Dial to add a voice dialing tag to this number.–Speed Dialing to assign or remove the location you use to speed dial the number.–Edit Type to assign a type: work, home, mobile, pager, or fax. The type icon appears next to the phone number in the Contacts list.–Erase Number to erase the number from the contact.–Erase Records to erase any voice tags from the contact.–Edit Number to change the phone number.–Edit Voice Dial to change the voice dialing tag for this number.–Secret to make the number secret so that it will not appear on the screen until the lock code is entered. Secret numbers can be called without a lock code. (For more information, see “Restricting calls” on page 27.)
16 Storing Contacts–Primary Number to make this number the first one that shows up when you open the contact.–Prepend to move the cursor to the beginning of the number so you can add the area code.6. Enter the new information and follow the prompts.7. Select Save, if necessary.Finding contact informationTo find a phone number or contact, you can (1) check the frequent contacts list, (2) search the Contacts directory, or (3) use Fast Find.Checking the Frequent ListPress   down. The last 15 of your most frequently called contacts appear when the Frequent List is enabled. Scroll past the double line for an alphabetical list of all contacts.To enable the Frequent List setting•Select Menu → Settings → Convenience → Frequent List → Enabled.Searching the Contacts directoryPress  down for a list of all contacts.To quickly get down the list, enter the first letter of the contact. The menu skips to that letter of the alphabet.-or-1. Select Menu → Contacts.2. Select from the following:–View All: List all contacts.–Find Name: Locate a specific name. Enter part of the contact name, then select Find.–Speed Dial List, Business List, or Personal List: Select a contact from a list.3. Scroll down until you find the name you want, then press  .– To call the contact, highlight the number and press  .Using Fast FindTo set Fast FindWith Fast Find, you press one or two keys to view close matches of the number you are looking for.• From the home screen, select Menu → Settings → Convenience → Fast Find → Enabled.To use Fast Find1. From the home screen, press the keys corresponding to the letters of the name you want to find. A matching contact appears.2. When the name you want is displayed, press  to select View. 3. Press   down to select the number, then press   to call.
User Guide for the Kyocera K126C Phone 175SENDING AND RECEIVING TEXT MESSAGESThis chapter describes how to send, receive, and erase text messages from your phone. For information on voicemail messages, see page 8.Important:  The features and menus described in this chapter may vary depending on services available in your area. In addition, usage charges may apply to each message. For details, check with your service provider.Sending text messagesYou can only send text messages to phones that are capable of receiving them. Creating a text message1. Select Menu → Messages → New Text Msg. 2. Select an address to enter the recipient’s phone number or email address:– Select a saved number from the Recent List or Contacts List, or select from the Group Lists you have created. For more about group lists, see page 21.– Enter a New Address manually. (To learn how to enter text, see page 11.)3. To add another recipient to this message, choose a method:– Scroll right to Options and press  . Select Recent List, Contacts, or Group Lists.-or-– Enter a space after the first number. Then enter another recipient manually.Note:  You can send a message to up to 10 recipients at once. The messages will be sent one at a time, once to each addressee.Note:  You can not send messages to secret numbers.4. When you are done entering addresses, select Next.5. Enter the message. To learn how to enter text, see page 11.– To add smileys or prewritten text, press  right to Options and press . Select Insert... → Smileys or AutoText.6. Once you have completed the message, select Send to send the message immediately.-or-Select Options and choose one of the following:–Insert...—Insert a smiley, prewritten text, contact information, picture, or sound into your text message.–Add Address—Return to the “To” screen to add another recipient without losing the message text. Enter the new address, then select Next to return to the message entry screen.
18 Sending and Receiving Text Messages–Set Priority—Label the message as “Urgent.”–Callback Number—includes a callback number with the message to let recipients know at what number they can call you back. Select Yes to include your own number or Edit to enter a different callback number.–Send Later—Schedule when to send the message.–Save Message—Save the message in your Drafts folder. This prevents the message from being deleted if you have activated AutoErase, and enables you to send the message to others.–Save AutoText—Save the message you have just entered as a prewritten message, then return to the message entry screen so you can send the message.When you have finished setting options, press  to return to the message window, then select Send to send the message.Adding a signatureThe signature you create does not display in the message creation screen; however, the signature is included at the end of all outgoing messages and is counted as characters in your messages. To create a signature:1. Select Menu → Messages → Msg Settings → Signature.2. Enter your signature in the text field.3. Select   to save the setting.If you cannot send messagesYou may not be able to send or receive messages if your phone’s memory is nearly full, or if digital service is not available at the time. To free up memory, erase old messages. See “Erasing messages” on page 20.Receiving incoming calls while creating messages• If you don’t wish to answer the call, select Ignore. The phone returns to the message screen.• To answer the call, press  . Your message is saved to the Drafts folder. To return to the message, select Menu → Messages → Drafts and select Resume.Viewing the OutBoxYou can check the status of messages you have sent as long as they have been saved to the OutBox.To set the OutBoxThe OutBox default is set to disabled to conserve memory. If you want to save your sent messages:•Select Menu → Messages → Msg Settings →Save to OutBox.–Select Enabled to save all sent messages to the OutBox.
User Guide for the Kyocera K126C Phone 19–Select Prompt to alert you to choose whether or not to save your message.To view the OutBox1. Select Menu → Messages → OutBox.2. Press   up or down through the list of messages. One of the following symbols appears next to each message:Retrieving text messagesWhen a text message is received, your screen displays “1 New Text Message(s)”, along with the  symbol at the top of your screen. The  symbol flashes if the message is urgent.If you see “1 New Text Message(s)”You can choose to:•View the message—Press .•Ignore the message—Press  right, then press .Note:  If you receive a new message while you are reading a message, the one you are reading will be replaced by the new one. You can find the older message in the InBox: Select Menu → Messages → InBox.If you see the   symbolIf the   symbol is flashing, the message is urgent.1. Select Menu → Messages → InBox. A list of all your received messages appears.New, unread messages appear in italics. indicates an “Urgent” message.2. Press   up or down to scroll through the list of messages.3. Press   to read a message.Reading the messageThe options available to you may vary. Check with your service provider.The message is pending and will be sent when possible. You can cancel delivery of the message.The scheduled message will be sent at the scheduled time. You cannot cancel delivery of the message.The message cannot be sent because service is not available. An alert appears on your phone if the message cannot be sent.The scheduled message has been sent and will be delivered as scheduled. You cannot cancel delivery of the message.The message has been sent to more than one recipient.
20 Sending and Receiving Text MessagesNote:  Sounds embedded in text messages will not play if the phone is set to Silent Mode.1. If the text message is long, press   down to view the entire message.2. When you are finished, you can Reply to the sender, Erase the message, Save the message to your Saved folder, or set additional Options for the message:–View Sender information.–Save New Address to save the sender’s phone number or email address in your Contacts list.–Forward to forward the message.–Reply with Copy to reply to the message with a copy of the original attached.–Save AutoText to save the text from the message as AutoText, which you can insert into other messages. Graphics and sound will not be saved as part of AutoText.(For more about AutoText, see page 21.)3. Select Done.Setting message alertsYou can set your phone to alert you of incoming text messages or pages. For more information, see “Setting message alerts” on page 24.Erasing messagesIt is a good idea to erase old messages, as messages take up memory in your phone. You have the option of erasing text messages and pages as you send or read them, erasing them one at a time from the list in the OutBox or InBox, or erasing them all at once.Erasing single messages1. Select Menu → Messages.2. Press   down to find the type of text message you want to erase: InBox, OutBox, Saved Msgs, or Drafts.3. Press .4. Highlight the message to erase and press .5. Press   to select Erase. A notification appears: “Erase this message?”6. Select Yes to erase the message.Note:  You can erase a scheduled message from the OutBox, but you cannot cancel delivery of the message.Erasing all messages1. Select Menu → Messages → Erase Msgs.2. Select a folder to erase all messages from: InBox, OutBox, Saved Folder, or Drafts. To erase messages from all folders, select All Messages.3. A message appears: “Erase all messages?” Select Yes to erase messages or No to cancel.
User Guide for the Kyocera K126C Phone 21Erasing messages automaticallyUse this setting to have old messages automatically erased from the InBox when memory is low.1. Select Menu → Messages → Msg Settings → Auto-Erase.2. Highlight Old InBox Msgs and press  . Older messages will now be erased as new messages are received.• To disable this setting select Menu → Messages → Msg Settings → Auto-Erase → Disabled.Customizing message settingsTo make messaging easier, you can customize settings for sending and receiving messages.Creating group listsYou can create and save a list of multiple recipients. Your phone stores five group lists with up to 10 recipients per list.1. Select Menu → Messages → Group Lists → Create New.2. Enter a name for the list. For help entering text, see page 11.3. Press  to select Next.4. To enter the first phone number or email address, select an option:–Recent List to select numbers from your Recent List.–New Address to enter the phone number or email address manually.–Contacts List to select numbers or email addresses from your phone book. 5. Select Options to select the next number.6. Select Recent List or Contacts then the contact to add.7. When finished, select Done.8. To send a message to your new group, see “Sending text messages” on page 17.Creating and editing prewritten messages (AutoText)Your phone comes with prewritten (AutoText) messages, such as “Please call me,” which you can insert into the body of a text message. You can create new ones. Your phone will store up to 40 AutoText messages, with up to 100 characters per message.1. Select Menu → Messages → Msg Settings →Edit AutoText.2. To create a new pre-written message, select New AutoText.-or-To edit an existing pre-written message, highlight the message and press  .3. Enter or edit the text and press   to select Done. For help entering text, see page 11.
22 Customizing Your Phone6CUSTOMIZING YOUR PHONESilencing all soundsYour phone is set to make sounds when you receive calls, press keys, navigate through menus, and receive alerts (such as new messages).You can silence all sounds and set the phone to vibrate or light up when you receive calls and alerts.The contents of the Settings menu are as follows.Silent ModeVibrate OnlyVibrate, RingLights OnlyNorm. SoundsKeyguardGuard Now30s autogrd1m autogrd5m autogrdDisabledSoundsRinger VolumeRinger TypeBusiness RingPersonal RingEarpiece VolumeSpkrphone Vol.Key VolumeKey LengthMissed Call Smart SoundMinute AlertDisplayBacklightingMy BannerMain Menu ViewAuto-HyphenLanguageTime FormatVoice ServicesAdd Voice DialErase RecordsVoice Wake-UpVoice AnswerSecurityLock PhoneLimit CallsLock CodeErase ContactsEmergency #’sCall InformationCall TimersAll Calls TimerReset All TimersNetworkPrivacy AlertLocationConvenienceShortcut KeyFast FindFrequent List1-Touch DialingCall GuardCall ForwardCall WaitingConferenceMsg SettingsVoicemail Num.AlertsSignatureEdit AutoTextCallback NumberBlock MsgsSave to OutboxAuto-EraseDefault TextAccessoriesPwr BacklightHeadset RingAuto-AnswerTTY DeviceHearing AidPhone InfoBuild InfoIcon KeysFactory Reset
User Guide for the Kyocera K126C Phone 23Setting the phone to vibrate or light up 1. Select Menu → Settings → Silent Mode.2. Choose an option and press  :–Vibrate Only—Causes the phone to vibrate for the duration of the incoming call or other alert.  appears. –Vibrate, Ring—Causes the phone to vibrate for the first 10 seconds and then ring for the remainder of the incoming call alert. appears.–Lights Only—Causes the phone to light up for the duration of the incoming call or other alert.  appears.–Norm. Sounds—Causes the phone to ring for the incoming call or alert (in effect, returns phone to a non-silent mode).3. Press   to return to the home screen.Note:  The phone will ring when it is attached to an external power source (such as a charger), even if all sounds have been silenced.Choosing ringersYour phone has several preset ringers you can choose to use for incoming calls. 1. Select Menu → Settings → Sounds → Ringer Type.2. Scroll down the list to hear the different rings.3. Press   to select a ringer from the list.Assigning business and personal ringersYou can assign ringers to contacts classified as business or personal in your Contacts directory.Note:  To classify a contact as Business or Personal, see page 14.1. Select Menu → Settings → Sounds.2. Ηighlight Business Ring or Personal Ring and press  .3. Select a ringer and press  .Smart SoundThis setting automatically adjusts the volume during a call, based on surrounding noise levels.1. Select Menu → Settings → Sounds → Smart Sound.2. Highlight Disabled or Enabled and press .Adjusting volumeYou can adjust the earpiece, speakerphone, and ringer volume as well as key tones.Adjusting the earpiece volumeTo adjust the earpiece volume manually during a call, press   up or down.To set the earpiece volume:1. Select Menu → Settings → Sounds → Earpiece Volume.
24 Customizing Your Phone2. Press   right to increase the volume, or left to decrease the volume.3. Press  to save.Adjusting the ringer volume1. Select Menu → Settings → Sounds → Ringer Volume.2. Press   right to increase the volume, or left to decrease the volume.3. Press  to save.Adjusting key tone volumeYou can change the volume of the tones the phone makes when you press the keys. 1. Select Menu → Settings → Sounds → Key Volume.2. Press   right to increase the volume, or left to decrease the volume.3. Press  to save.Setting key lengthYou can change duration of the tones the phone makes when you press the keys. 1. Select Menu → Settings → Sounds → Key Length.2. Choose Normal or Long.3. Press  to save.Setting message alertsYou can choose how you want be alerted of incoming voicemail, pages, or text messages.1. Select Menu → Settings → Msg Settings → Alerts.2. Select the type of alert: Message Alert, Page Alert, or Voicemail Alert.3. Press   to select an option:–Disabled—Turn off message alerts.–Vibrate, Beep, HiYa!, Rock!, Happy, sets the phone to alert you once when a new message is received.–Vibe, remind; Beep, remind; HiYa! remind; Rock! remind; Happy, remind sets the phone to notify you once when a new message is received and then notify you again every five minutes. To stop a reminder alert, press   to select Ignore. Using shortcutsFrom the home screen, you can access shortcuts by pressing   in four different directions.Three shortcuts are automatically programmed into your phone (down, left, and right). •Down lists the phone’s Contacts directory.•Left beings a new text message.•Right silences sounds and sets phone to vibrate.
User Guide for the Kyocera K126C Phone 25For the fourth direction (up), you can set a shortcut to one of the features of your phone.Defining the feature shortcut (up)1. Select Menu → Settings → Convenience → Shortcut Key.2. Highlight the feature you want a shortcut to, and press   to select it.Using the up feature shortcut• From the home screen, press and hold  up.Creating a shortcut to frequent contactsBy default, your phone lists your entire contacts list when you select Contacts. You can also set the phone to show a list of your most frequent contacts.1. Select Menu → Settings → Convenience → Frequent List.2. Select Enabled to include the list or Disabled to remove it.Using the Frequent Contacts shortcut• From the home screen, press   down. Your 15 most frequently called contacts appear at the top of the list, followed by your complete Contact list.Personalizing the screenChanging your bannerThe banner is the personal label for your phone. It appears on the home screen above the time and date. The banner can be up to 14 characters long.Note:  The banner only appears if you have disabled Airtime Balance Display.1. Select Menu → Settings → Display → My Banner.2. Press   right and then   to select Edit.3. Enter your new text. Press   to clear any characters.4. Press   to select Save.Choosing a menu view Two menu views are available: 1. Select Menu → Settings → Display → Main Menu View, then the option you want:–Graphic displays a graphical icon view of menu items.–List displays menu items in text format.2. Press   to return to the home screen. The next time you select Menu, you will see the menu view you selected.Adjusting the backlightingYour screen lights up while you are in a call or when you press a key on the keypad. However,
26 Customizing Your Phoneyou can set the length of time that bright backlighting remains on.1. Select Menu → Settings → Display → Backlighting.2. Select an option from the list:–Disabled—Turns backlighting off.–5 seconds, 10 seconds, 30 seconds, 1 minute —Turn backlighting on for 5, 10, 30 seconds or 1 minute after your last keypress.–5 sec/in call, 10 sec/in call, 30 sec/in call, 1 min/in call—Turn backlighting on for the duration of a call, and for 5, 10, 30 seconds or 1 minute after your last keypress. Note: These settings drain the battery more quickly and reduce talk and standby times.Note:  When the keypad is locked (see “Locking the keypad” on page 10), the backlight will not activate, even when keys are pressed.Setting power backlightingYou can set backlighting to remain on when an external power source, such as the AC adapter, is used with the phone.Note:  Power backlighting may not be available on your phone. Check with your service provider for availability.Note:  Power backlighting may not be available with accessories.1. Select Menu → Settings → Accessories → Pwr Backlight.2. Select Always On to keep backlighting on.Note:  The battery charges more slowly when power backlighting is on.Setting numbers to auto-hyphenateAuto-hyphenation, when enabled, automatically inserts hyphens into your phone numbers to be consistent with the U.S. dialing plan. For example, 1-222-333-4444.•Select Menu → Settings → Display → Auto-Hyphen → Enabled.Choosing a different time/date format1. Select Menu → Settings → Display → Time Format.2. Highlight the option you want.3. Press   to save the setting.Creating a secure environmentThis section describes all the features involved in securing your phone and preventing access to personal information. All security features are shielded by a four-digit lock code. Changing your lock codeThe lock code is typically 0000 or the last 4 digits of your phone number.1. Select Menu → Settings → Security.2. Enter your four-digit lock code.
User Guide for the Kyocera K126C Phone 273. Select Lock Code. A message appears: “Change Code?” 4. Press  to select Yes and enter a new four-digit code.5. Enter your new lock code again.Locking your phoneWhen your phone is locked, you can call only emergency numbers or your service provider number. You can still receive incoming calls.1. Select Menu → Settings → Security.2. Enter your four-digit lock code.3. Select Lock Phone.4. Highlight an option:–Never does not lock the phone.–On power up locks the phone every time you turn it on.–Now locks the phone immediately.5. Press .Unlocking the phone1. From the home screen, press   to select Unlock.2. Enter your four-digit lock code. Restricting callsYou can restrict the calls that can be made from your phone to emergency numbers, your contacts, and service provider numbers.1. Select Menu → Settings → Security.2. Enter your four-digit lock code.3. Select Limit Calls.4. Choose an option:–No Limit limits no calls.–Limit Out [going] calls only. Incoming calls can still be received and answered.–Limit All calls, both incoming and outgoing.Designating emergency numbersThe emergency numbers feature allows you to specify three personal phone numbers that can be called when the phone is locked.1. Select Menu → Settings → Security.2. Enter your four-digit lock code.3. Select Emergency #’s.4. Select an Unassigned slot.Note:  Enter the phone number, including the area code. Do not enter 1 before the area code.5. Press   to select Done.Notes:• You can view these numbers only when they’re being entered for the first time.• You cannot edit these numbers.• To make a call to an emergency number from a locked phone, you must dial the number (including area code) exactly as it was stored in Emergency Numbers.
28 Customizing Your PhoneErasing all contactsYou can erase all entries from your Contacts directory.1. Select Menu → Settings → Security.2. Enter your four-digit lock code.3. Select Erase Contacts.4. Select Yes. A message appears: “Erase ALL contacts?”5. Select Yes and press   to erase all contacts.Network settingsSetting privacy alertsThis setting enables or disables privacy alerts. A privacy alert is displayed whenever digital CDMA privacy is lost or regained.1. Select Menu → Settings → Network → Privacy Alert.2. Select Enabled or Disabled.Setting position locationThis setting allows you to share your location information with network services other than emergency services (For example: 911, 111, 999, and 000) in markets where service has been implemented.Note:  This feature works only when your phone is in digital mode. You do not have the option of turning off the locator to emergency services.1. Select Menu → Settings → Network → Location.2. Select 911 Only or Location on.–911 Only (default) shares your position information only with emergency services when you call your 3-digit emergency code (911, 000, 111, etc.).–Location on shares your position information with Virgin Mobile’s network, in addition to emergency services.Accessory settingsConnecting to a TTY/TDD deviceYou can connect the phone to a TTY device for the hearing impaired. Note: Enable TTY only when using the phone with a TTY device.1. Connect the TTY device to the phone.2. Select Menu → Settings → Accessories → TTY Device.3. Select OK.Using a Hearing Aid deviceYou can reduce interference while using the phone with a hearing aid device by activating the phone’s T-Coil HAC feature. Note: Enable this feature only when using the phone with a hearing aid device.1. Select Menu → Settings → Accessories → Hearing Aid.2. Select OK.
User Guide for the Kyocera K126C Phone 297FUN & GAMESThe games in this section may not be available on your phone. Check with your service provider for availability.If you receive an incoming call alert while you are playing Brick Attack™, the game is paused and exited. You can return to play once the call alert ends. Games do not remain paused if the phone is turned off or loses power.Brick AttackThe goal of this game is to eliminate bricks arranged in levels. You send a moving ball upward using a paddle at the bottom of the screen.1. Select Menu → Fun & Games → Brick Attack.2. Press  to select New.– To pause the game, press  , then press  to Resume.– To move the paddle, press   left or right.– To exit the game, highlight Exit and press .My Sounds The My Sounds menu displays sounds stored on your phone. To access stored sounds:1. Select Menu → Fun & Games → My Sounds.2. Press   up or down to scroll through the sounds.3. Highlight an option and press   to select it:–Play allows you to listen to the sound.–Send opens a new message entry screen.–Assign allows you to use the sound as a ringer on your phone.–Delete erases the sound from your My Sounds list and from the Ringer menu.–Exit exits the My Sounds menu.My PicturesThe My Pictures menu displays pictures stored on your phone. To access stored pictures:1. Select Menu → Fun & Games → My Pictures.2. Press   up or down to scroll through the pictures.3. Highlight an option and press   to select it:–Send opens a new message entry screen.–Delete erases the picture from your My Pictures list.–Exit exits the My Pictures menu.
30 Tools8TOOLSSchedulerThe Scheduler allows you to schedule events and set reminder alerts. Creating an event1. Select Menu → Tools → Scheduler.2. Press   down to select Add Event and press .3. Enter a name for the event. For help entering text, see page 11.4. Select Next.5. Enter the time, length, and alarm for the event. – Press   up or down to select date, hour, minutes, and timing of alarm.– Press   left or right to move between fields.6. Select Next, enter a note if required.7. Select Next.Viewing, editing, or erasing an event1. Select Menu → Tools → Scheduler.2. Select View Day or View Month to find the event you want to view, edit, or erase.3. Press   up, down, left, or right to highlight an event and press   to select it.4. Select Edit or Erase. Follow the prompts.5. Press   to return to the home screen.Alarm ClockUse the Alarm Clock to set an alert for a specific time. The alert occurs only if the phone is on.1. Select Menu → Tools → Alarm Clock.2. Select Set.– Press   up or down to select an hour and minutes. – Press   left or right to switch between hours, minutes, and a.m./p.m.– Use the phone keypad to enter numbers.3. Press   to select Done and save the setting.4. When the alarm rings, select Off to turn off the alarm or Snooze to silence the alarm for 10 minutes.Tip CalculatorThe Tip Calculator helps you calculate how much tip to include on a bill. 1. Select Menu → Tools → Tip Calc.2. Enter the amount of your bill.3. Select Next.4. Select the amount you want to include as a tip (10%, 15%, 18%, 20%, Other) and press . Your total bill appears, including tip.5. To split the bill, select Split and press .
User Guide for the Kyocera K126C Phone 316. Enter the number of guests and press   to select Next. The amount each guest pays is calculated.7. Select Done.CalculatorUse the calculator for basic mathematical equations.1. Select Menu → Tools → Calculator.2. Use the keypad to enter numbers.3. Use   to navigate left and right to select mathematical operations.4. Select = to calculate the result. Example: Enter 5, press   right to select X, press  , enter 2, and then press   to select = and obtain the result of 10.5. Press   to clear the screen.6. Press   to return to the home screen.World ClockWorld Clock may not be available on your phone. Check with your service provider for availability.The World Clock lets you check times in cities around the world in relation to local time.1. Select Menu → Tools → World Clock.Your local time and date is on the first line, followed by your selected world city and that city’s time and date.When you first access World Clock, you are prompted to select a city.2. Press   to select Cities. The Cities menu is displayed, showing 85 world cities in alphabetical order.3. Press   up or down to scroll through the cities. You can also use the number keys (2-9) to alphabetically tab through the list.4. Press   to select a city, like Athens. The World Clock menu is displayed again, with Athens’ time and date.From the World Clock menu, you can also select Search to search by city or country.1. Select Search from the World Clock menu.The Search By menu is displayed.2. Select your type of search.– Press   to search by City.– Press   down, then press   to search by Country.Options±Changes the number to positive or negative.CClears the last entry.Inserts a decimal point.M+ Adds displayed digit to the value stored in memory.MR Displays currently stored value on screen.MC Clears value currently stored in memory.
32 Tools3. If you search by City, the Find City screen is displayed.a. Use your number keys (2-9) to enter the letter(s) by which you want to search. For example, press   once to enter the letter A.b. Press Search.c. Cities beginning with A are displayed, like Anchorage, Athens, and Atlanta.d. Use   to move through the list, then press   to select a city.4. If you search by Country, the Find Country screen is displayed.a. Use your number keys (2-9) to enter the letter(s) by which you want to search. For example, press   once to enter the letter A.b. Press Search.c. Countries beginning with A are displayed, like Afghanistan, Algeria, and Australia.5. Use   to move through the list, then press  to select a country.TimerThis timer counts down for a specified amount of time. It beeps when that amount of time has elapsed.1. Select Menu → Tools → Timer.2. Select Set.3. Press   up or down to set the hours, minutes, and seconds. To move the cursor, press  left or right.4. Select Start and begin the countdown.Select Stop to pause the countdown.Select Reset to clear the timer.5. Press   to silence the alarm.Stopwatch1. Select Menu → Tools → Stopwatch.2. Select Start to begin counting. 3. Select Stop to stop counting.4. Select Reset to clear the counter.5. Press   to return to the home screen.
User Guide for the Kyocera K126C Phone 33
34 Using Voice Recognition9USING VOICE RECOGNITIONVoice recognition allows you to make and answer calls by speaking commands into the phone’s microphone.Note:  You cannot use voice recognition to end a call; you must press   when the flip is open.Setting up voice dialingTo make or receive calls using voice dialing, contacts must be saved with associated voice tags.Creating a voice tag for a contact1. Select Menu → Contacts → View All.2. Highlight the contact and press  .3. Press   down to highlight the number and select .4. Highlight Add Voice Dial and press  .5. Follow the voice prompts. You will need to say the name twice.-or-1. Select Menu → Settings → Voice Services → Add Voice Dial.2. Follow the voice prompts. You will need to say the name twice.3. Select Add New to create a new contact with the voice tag (see “Creating a new contact” on page 14).-or-Select Add to existing to add the voice tag to an existing contact.a. Select the desired contact and press  .b. Select the desired number for the contact and press  .Viewing entries with voice tags•Select Menu → Contacts → Voice dial list. A list of all contacts with assigned voice tags appears.Editing a voice tag1. Select Menu → Contacts → Voice dial list.2. Highlight the contact to edit and press  .3. Highlight the phone number and press  .4. Select Edit Voice Dial and press  .5. Follow the prompts.Erasing a voice tag1. Select Menu → Contacts → Voice dial list.2. Highlight the contact to edit and press  .3. Highlight the phone number and press  .4. Select Erase Records and press  .5. Press   right once and then press   to select Yes, or simply press   to select No.
User Guide for the Kyocera K126C Phone 35Erasing voice tagsTo erase all voice name dial recordings in your phone:1. Select Menu → Settings → Voice Services→ Erase Records.2. Select Yes. A message appears: “Erase all voice name dial recordings?”3. Press   right once and then press   to select Yes, or simply press   to select No.Making a call using voice tags1. If you haven’t already done so, record a voice tag for the person you wish to call.2. With the flip open, from the main screen, press  . The phone responds: “Say a name or say ‘Dial’.”3. Say the name of the person you want to call.4. If the name you said matches a contact in the Voice Dial List, the phone responds: “Calling (Name).” Remain silent to make the call, or say No to cancel.Note:  If the phone finds multiple voice tags that sound like the name you said, you will be asked to verify which name you want to call. Say Yes when you hear the correct name. Say No when you hear an incorrect name.5. When you are finished with the call, press .Making a call using digit dialingWhen using digit dialing, you speak digits to dial a phone number.Note:  You cannot speak a string of digits. You must speak one digit at a time and wait for the prompt.1. From the main screen, press  . The phone responds: “Say a name or say ‘Dial’.”2. Say “Dial”. The phone responds: “Speak a digit.”3. Speak the first digit of the phone number you want to call. Once the phone repeats the digit, you can speak the next digit.If you pause, the phone will prompt you with the following five options. After the prompt, speak an option.–Say “Clear” to erase the last digit entered. The phone responds: “Digit cleared.”To clear the entire phone number, say “Clear” again. When the phone prompts you with “Clear entire phone number?”, say “Yes” to clear or “No” to cancel.–Say “Call” to dial the number.–Say “Verify” to cause phone to repeat the set of digits that you input.–Say “Cancel” to exit voice recognizer and return to the main screen.– Speak a digit to enter the next digit. Once the phone repeats the digit, you can speak the next digit or pause to hear the prompt.
36 Using Voice RecognitionUsing voice featuresYou can use voice commands to make a phone call or to answer the phone only if your phone is connected to the AC adaptor.Waking up the phoneIf your phone is connected to a Kyocera hands-free headset, you can use the voice command to activate the phone to make a phone call.To activate the Voice wake-up setting:•Select Menu → Settings → Voice Services → Voice wake-up → With ext. pwr.To wake up the phone:1. Say “Wake up” and listen for a tone. 2. Say “Wake up” again until you hear two tones.Answering the phoneYou can set your phone to (1) answer automatically or (2) answer using a voice command.Answering automaticallyYou can set your phone to answer automatically.Note:  This setting also works with the portable hands-free headset.•Select Menu → Settings → Accessories → Auto-Answer → After 5 seconds.Answering using voice commandsIf Auto-answer is turned off, you can use a voice command to answer an incoming call when using a hands-free headset.•Select Menu → Settings → Accessories → Auto-Answer → Disabled.To activate the Voice answer setting:1. Select Menu → Settings → Voice Services→ Voice Answer.2. Highlight Enabled and press .To answer a call:When you receive an incoming call, the phone responds: “Incoming call, answer?” If the caller is recognized as a contact entry in your phone, then the phone will say “Incoming call from (Name), answer?”•Say “Yes” or press any key except  .Ignoring an incoming callTo ignore an incoming call, do one of the following:•Say “No” and press   to silence the alert.• Remain silent. The voice alert repeats twice and the phone rings once, then returns to the main screen.
User Guide for the Kyocera K126C Phone 3710 GETTING HELPCustomer supportYour service provider’s customer support department may be accessible directly from your phone when you dial a number such as *611 (check with your service provider). They can answer questions about your phone, phone bill, call coverage area, and specific features available to you, such as call forwarding or voicemail.For questions about the phone features, refer to the materials provided with your phone, or visit www..com.For additional questions, you may contact the Xxxxxxx Customer Care Center in either of the following ways:• Web site: www..com or www..com• Phone: 1-800-867-7183 or 1-877-XXX-XXXXBefore requesting support, please try to reproduce and isolate the problem. When you contact the Customer Care Center, be ready to provide the following information:• The name of your service provider. • The actual error message or problem you are experiencing. • The steps you took to reproduce the problem. • The phone’s electronic serial number (MEID).– To locate the MEID select Menu → Settings → Phone Info → Build Info and scroll down to MEID: for the 11-digit number.Qualified serviceIf the problem with your phone persists, return the phone with all accessories and packaging to the dealer for qualified service.Phone accessoriesTo shop for phone accessories, visit www.kyocera-wireless.com/store. You may also call us at 1-800-349-4188 (U.S.A. only) or 1-858-882-1410.Become a product evaluatorTo participate in the testing and evaluation of Kyocera Wireless Corp. products, including cellular or PCS phones, visit beta.kyocera-wireless.com.
38 Getting Help
User Guide for the Kyocera K126C Phone 3911 CONSUMER LIMITED WARRANTYKyocera Wireless Corp. (“KYOCERA”) offers you a limited warranty that the enclosed product or products (the “Product”) will be free from defects in material and workmanship for a period that expires one year from the date of sale of the Product to you, provided that you are the original end user purchaser of the Product and provided that your purchase was made from an authorized supplier. Transfer or resale of a Product will automatically terminate warranty coverage with respect to that Product. This limited warranty is not transferable to any third party, including but not limited to any subsequent purchaser or owner of the Product.KYOCERA shall, at its sole and absolute discretion, either repair or replace a Product (which unit may use refurbished parts of similar quality and functionality) if found by KYOCERA to be defective in material or workmanship, or if KYOCERA determines that it is unable to repair or replace such Product, KYOCERA shall refund the purchase price for such Product, provided that the subject Product (i) is returned, with transportation prepaid, to a KYOCERA authorized service center within the one year warranty period, and (ii) is accompanied by a proof of purchase in the form of a bill of sale or receipted invoice which evidences that the subject Product is within the one year warranty period ("Proof of Purchase"). After the one year warranty period, you must pay all shipping, parts and labor charges.This limited warranty does not cover and is void with respect to the following: (i) any Product which has been improperly installed, repaired, maintained or modified; (ii) any Product which has been subjected to misuse (including any Product used in conjunction with hardware electrically or mechanically incompatible or used with accessories not approved by KYOCERA), abuse, accident, physical damage, abnormal operation, improper handling, neglect, exposure to fire, water or excessive moisture or dampness or extreme changes in climate or temperature; (iii) any Product operated outside published maximum ratings; (iv) cosmetic damage; (v) any Product on which warranty stickers or Product serial numbers have been removed, altered, or rendered illegible; (vi) cost of installation, removal or reinstallation; (vii) signal reception problems (unless caused by defects in material and workmanship); (viii) damage the result of fire, flood, acts of God or other acts which are not the fault of KYOCERA and which the Product is not specified to tolerate, including damage caused by mishandling, shipping and blown fuses; (ix) consumables (such as fuses); or (x) any Product which has been opened, repaired, modified or altered by anyone other than KYOCERA or a KYOCERA authorized service center.
40 Consumer Limited WarrantyUSE ONLY KYOCERA APPROVED ACCESSORIES WITH KYOCERA PHONES. USE OF ANY UNAUTHORIZED ACCESSORIES MAY BE DANGEROUS AND WILL INVALIDATE THE PHONE WARRANTY IF SAID ACCESSORIES CAUSE DAMAGE OR A DEFECT TO THE PHONE.KYOCERASPECIFICALLY DISCLAIMS LIABILITY FOR ANY AND ALL DIRECT, INDIRECT, SPECIAL, GENERAL, PUNITIVE, EXEMPLARY, AGGRAVATED, INCIDENTAL OR CONSEQUENTIAL DAMAGES, EVENIF ADVISED OF THE POSSIBILITY THEREOF, WHETHER FORESEEABLE OR UNFORESEEABLE OF ANY KIND WHATSOEVER, INCLUDING BUT NOT LIMITED TO LOSS OF PROFITS, UNANTICIPATED BENEFITS OR REVENUE, ANTICIPATED PROFITS ARISING OUT OF USE OF OR INABILITY TO USE ANY PRODUCT (FOR EXAMPLE, WASTED AIRTIME CHARGES DUE TO THE MALFUNCTION OF A PRODUCT) OR CONTRIBUTION OR INDEMNITY IN RESPECT OF ANY CLAIM RELATED TO A PRODUCT.REPAIR OR REPLACEMENT OF A DEFECTIVE PRODUCT OR REFUND OF THE PURCHASE PRICE RELATING TO A DEFECTIVE PRODUCT, AS PROVIDED UNDER THIS WARRANTY, ARE YOUR SOLE AND EXCLUSIVE REMEDIES FOR BREACH OF THE LIMITED WARRANTY, AND SUBJECT TO THIS WARRANTY, THE PRODUCTS ARE APPROVED AND ACCEPTED BY YOU "AS IS". KYOCERA MAKES NO OTHER WARRANTIES, REPRESENTATIONS OR CONDITIONS OF ANY KIND, ORAL OR VERBAL, EXPRESS OR IMPLIED, STATUTORY OR OTHERWISE, WITH RESPECT TO THE PRODUCTS, INCLUDING BUT NOT LIMITED TO ANY IMPLIED WARRANTY OR CONDITION OF MERCHANTABILITY OR FITNESS FOR A PARTICULAR PURPOSE OR AGAINST INFRINGEMENT OR ANY IMPLIED WARRANTY OR CONDITION ARISING OUT OF TRADE USAGE OR OUT OF A COURSE OF DEALING OR COURSE OF PERFORMANCE. NO DEALER, DISTRIBUTOR, AGENT OR EMPLOYEE IS AUTHORIZED TO MAKE ANY MODIFICATION OR ADDITION TO THIS WARRANTY.Some jurisdictions do not allow the exclusion or limitation of incidental or consequential damages, or allow limitations on how long an implied warranty lasts, so the above limitations or exclusions may not apply to you.This limited warranty gives you specific legal rights, and you may also have other rights which vary from jurisdiction to jurisdiction.IN THE EVENT YOU REQUIRE WARRANTY SERVICE DO NOT RETURN YOUR PRODUCT DIRECTLY TO KYOCERA. For warranty service information, please contact your Xxxxxxx retailer or call the following telephone number from anywhere in the continental United States and Canada: Xxxxxxx Wireless: 1 -800-xxx-xxxx. If for any reason you are unable to obtain assistance from Xxxxxxx Wireless, Inc., you may contact KYOCERA by telephone at 858-882-1401; or contact KYOCERA by mail at the following address: 10300 Campus Point Drive, San Diego, California, 92121-1582, USA, Attention: Technical Support.
User Guide for the Kyocera K126C Phone 41INDEXNumerics1-touch dialing, 8Aaccessories, 36alarm clock, 2, 30alertsfor messages, 24for missed calls, 7assigning business and personal ringers, 23auto-hyphenation, 26AutoText, 21Bbanner, 25battery, 1blocking outgoing calls, 27Brick Attack, 29Ccalculator, 31call counters, 9calls answering, 6missed, 6redialing, 6contactsvoice dialing, 34contacts directory, 14countdown timer, 32Ddigital mode, 2Eemergencycalls, 9emergency mode, 9exit emergency mode, 9erasingcontact entries, 28text messages, 20Ffast find, 16finding contact information, 16frequent contacts, 16GgamesBrick Attack, 29My Sounds, 29Hhands-free car kitpurchasing, iv, 37hands-free headsetpurchasing, iv, 37hands-free headset, answering using voice, 36hard pause, 14, 16Iicons, 2inbox, 19Kkeyguard, 2, 10keypad, locking, 10Llights-only mode, 2, 23limiting calls out, 27lock code, 26lockingkeypad, 10phone, 27Mmemory, saving, 20menu view, 25My Sounds, 29Nnumber mode, 11Ooutbox, 18Pphone numbersediting, 15verifying your own, 5phone, unlocking, 27prepend, 16Rrecent call icons, 7resetting the phone, ivringerschoosing types, 23silencing, 5volume, 24Ssaved phone numbersediting, 15scheduler, 30screen icons, 2, 11, 19, 23secret contacts, 7security, 26shortcuts, 24setting, 25
42using, 25silent mode, 2, 22sound files, 29stopwatch, 32symbol mode, 11Ttechnical support, 37text entry, 11quick reference, 13text messages, 17time format, 26timer, 32timing calls, 9tip calculator, 30Toolsalarm clock, 30calculator, 31scheduler, 30stopwatch, 32timer, 32tip calculator, 30world clock, 31TTY/TDD, 28Uunlocking the phone, 27Vvibrate, 2, 22, 23Voice Answer, 36voice dialing, 34voice recognition, 34voicemail, 8, 9setting up, 5volumeearpiece, 6, 23key beep, 24ringer, 24Wwarranty, 39world clock, 31
4

Navigation menu