User manual
MODEL: LI-S208
MODEL NAME:BOOGIE
MODEL NAME: BOOGIE
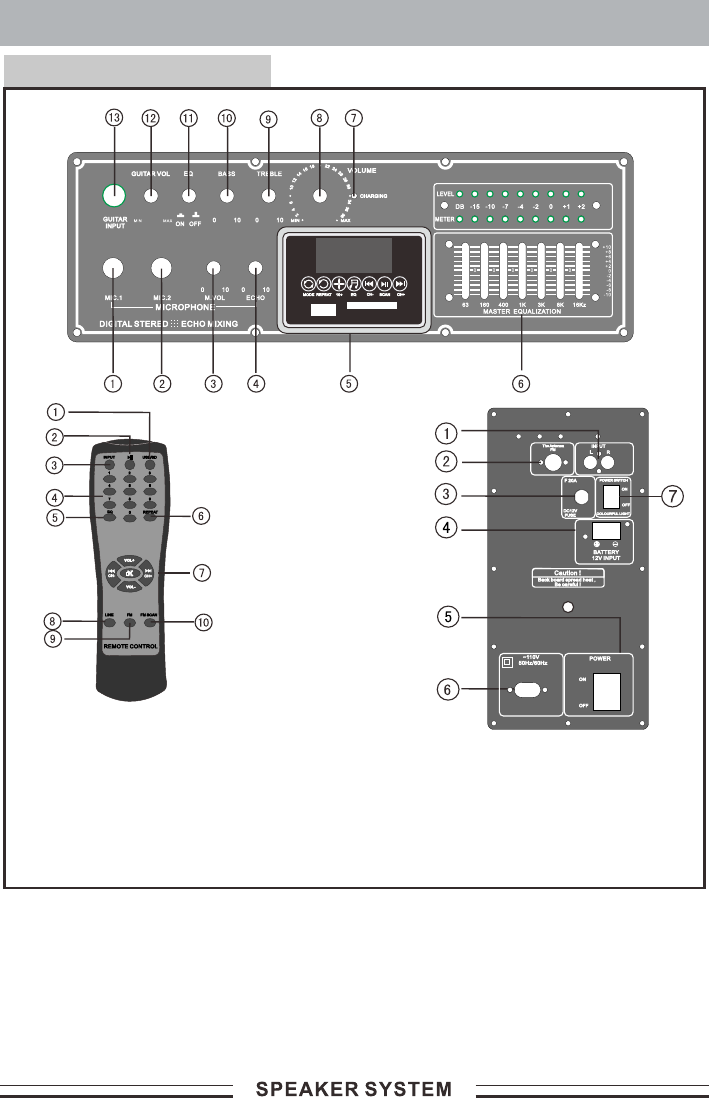
Schematic diagram:
1. Audio DVD or AUX input
2. Radio FM antenna
3. DC12V fuse F20A
4. DC12V battery input
5. Power on/off
6. AC ~110V/60Hz input
7. Colourful light power on/off
1. MIC1 jack
2. MIC2 jack
3.
13. Guitar jack
MIC volume control
4. Echo control
5. USB/SD play control
6. EQ control
7. Charging LED
8. Volume
9. Treble volume
10. Bass volume
11. EQ on/off
12. Guitar volume control
1. USB/SD
2.
3.
select key
number select key
USB/SD play/pause control key
Input select USB/SD; FM ; LINE; BLUE
4. USB/SD play
5. EQ control key
6. USB/SD play repeat select key
7. Play control & FM CH- or CH+ & volume + or -
8. Line AUX input select key
9. Radio FM input select key
10. Radio FM scan control key
OPERATION INSTRUCTION FOR KARAOKE &WIRELESS MICROPHONE
1.Insert the microphone plug into the microphone input MIC2.
2.Adjust the microphone volume knob MIC VOL for proper volume.
Then adjust the echo depth to the proper position. Now you can start
the karaoke.
3.Open wireless MIC “on & off ” buttom, Adjust the microphone volume
knob MIC VOL for proper volume. and adjust the echo depth to the
proper position. Then you can start the wireless Microphone.
OPERATION PANEL
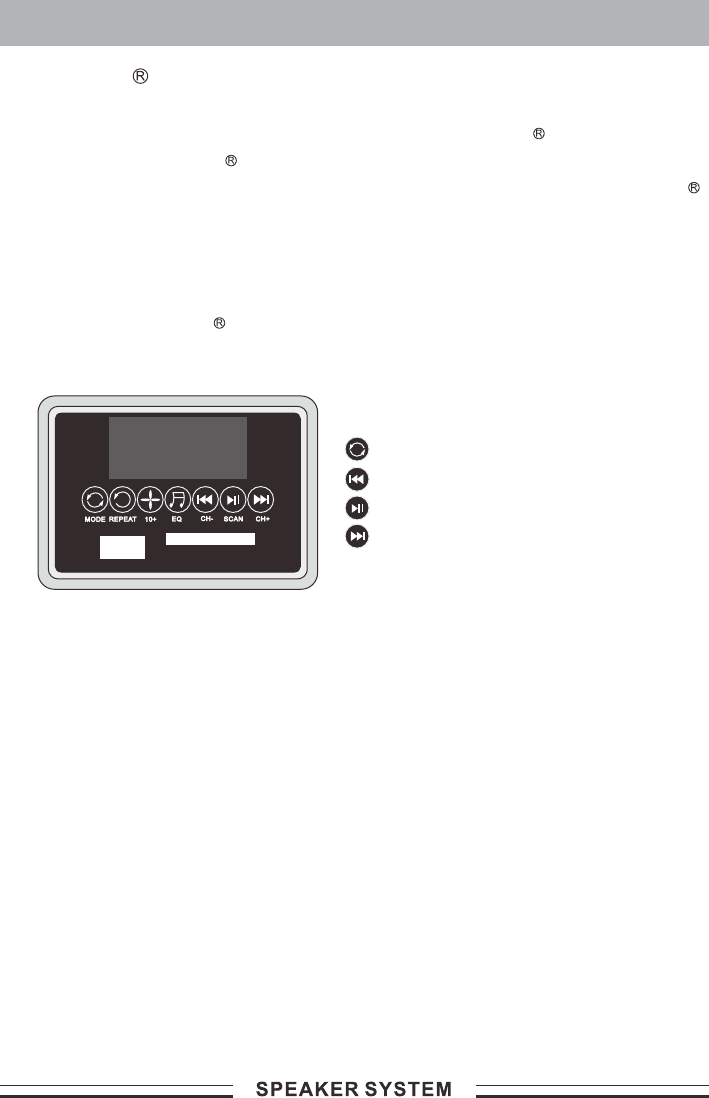
OPERATION PANEL
MODE: AUX. USB/SD. FM;
PREV OR RADIO FM CHANNEL-
PL/PA OR RADIO FM SCAN
NEXT OR RADIO FM CHANNEL+
Matters need attention:
Battery is integrated in the unit with an auto protection function.When
the battery is out of power and you need to recharge your speaker unit
be sure the power switch is ON before you connect the system to 110V
power plug. When your unit is charging the red LED indicator will be ON.
PLEASE NOTE: If you do not set the power switch to ON before charging
the unit, the battery auto protection will take effect and the unit will
NOT charge.
1.
Full recharge takes 8-12 hours
Voltage for recharge must be ~110V
When you are using your unit while it is plugged to an external power
source,be sure the battery switch is ON.
To protect the lifespan of the built in battery ,be sure to fully charge
your unit on the same day the battery runs out. Not charging your unit
right away can hurt the long term life span of your unit.
When you change fuse, please use model (10A)
2.
3.
4.
5.
6.
1. Please press the “MODE” button to start the Bluetooth connection. This
will turn on the Bluetooth flashing LED light on the control panel.
2. Your unit will now be ready to pair with your mobile device via Bluetooth .
From your mobile device scan for “LAX-MAX”. The password for connection is
“0000” and once you have paired your device to the DJ system, the LED
flashing light will become solid.
3. You can control the volume and tracks from the unit’s control panel or from
your external Bluetooth enabled device.
Bluetooth Connection:
VALUED CUSTOMER
Thank you for purchasing the LAX-MAX New Generation
professional DJ system, please be sure to follow operating
instructions to insure proper use of this unit.
Keep this manual for your future reference.
OPERATION PANEL

FCCCaution
Thisdevicecomplieswithpart15oftheFCCRules.Operationissubjecttothe
followingtwoconditions:(1)Thisdevicemaynotcauseharmfulinterference,and(2)
thisdevicemustacceptanyinterferencereceived,includinginterferencethatmay
causeundesiredoperation.
AnyChangesormodificationsnotexpresslyapprovedbythepartyresponsiblefor
compliancecouldvoidtheuser'sauthoritytooperatetheequipment.
Note: ThisequipmenthasbeentestedandfoundtocomplywiththelimitsforaClass
Bdigitaldevice,pursuanttopart15oftheFCCRules.Theselimitsaredesignedto
providereasonableprotectionagainstharmfulinterferenceinaresidentialinstallation.
Thisequipmentgeneratesusesandcanradiateradiofrequencyenergyand,ifnot
installedandusedinaccordancewiththeinstructions,maycauseharmfulinterference
toradiocommunications.However,thereisnoguaranteethatinterferencewillnot
occurinaparticularinstallation.Ifthisequipmentdoescauseharmfulinterferenceto
radioortelevisionreception,whichcanbedeterminedbyturningtheequipmentoff
andon,theuserisencouragedtotrytocorrecttheinterferencebyoneormoreofthe
followingmeasures:
-Reorientorrelocatethereceivingantenna.
-Increasetheseparationbetweentheequipmentandreceiver.
-Connecttheequipmentintoanoutletonacircuitdifferentfromthattowhichthe
receiverisconnected.
-Consultthedealeroranexperiencedradio/TVtechnicianforhelp.