LG Electronics USA 42GA6400UD LED TV MONITOR User Manual
LG Electronics USA LED TV MONITOR
UserManual.wiki
>
LG Electronics USA
>
42GA6400UD User Manual
User Manual
Navigation menu
Upload a User Manual
Namespaces
Wiki Guide
HTML
PDF
Info
Views
User Manual
Discussion / Help
Navigation


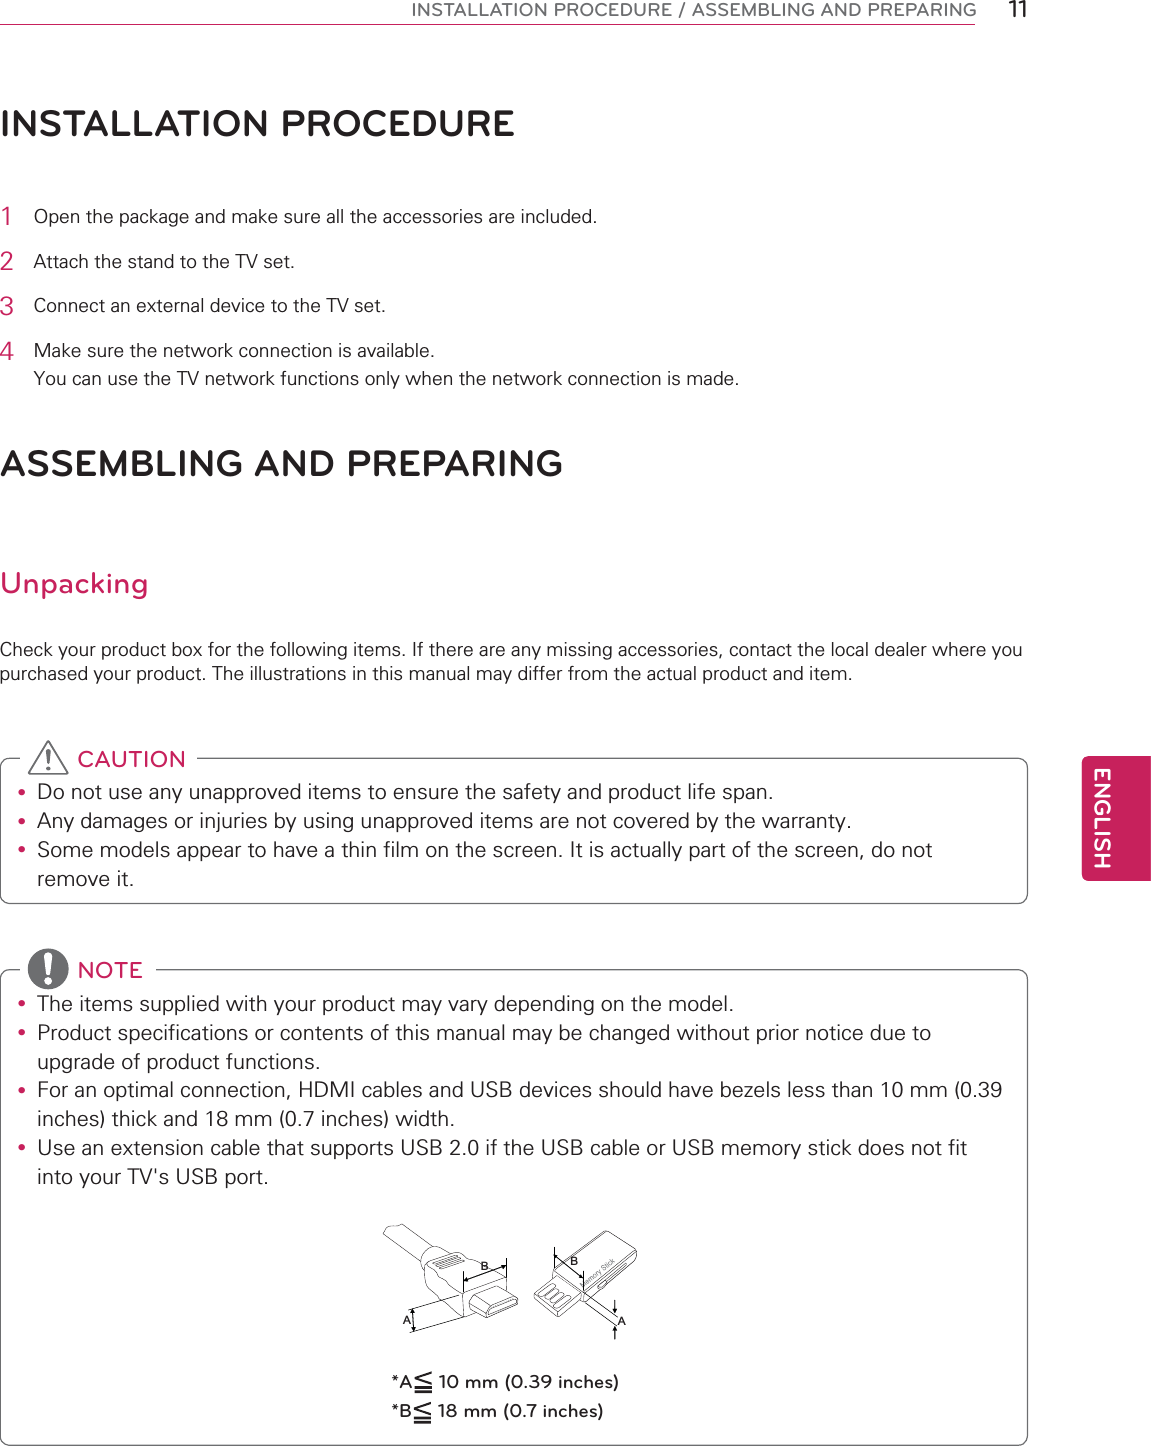


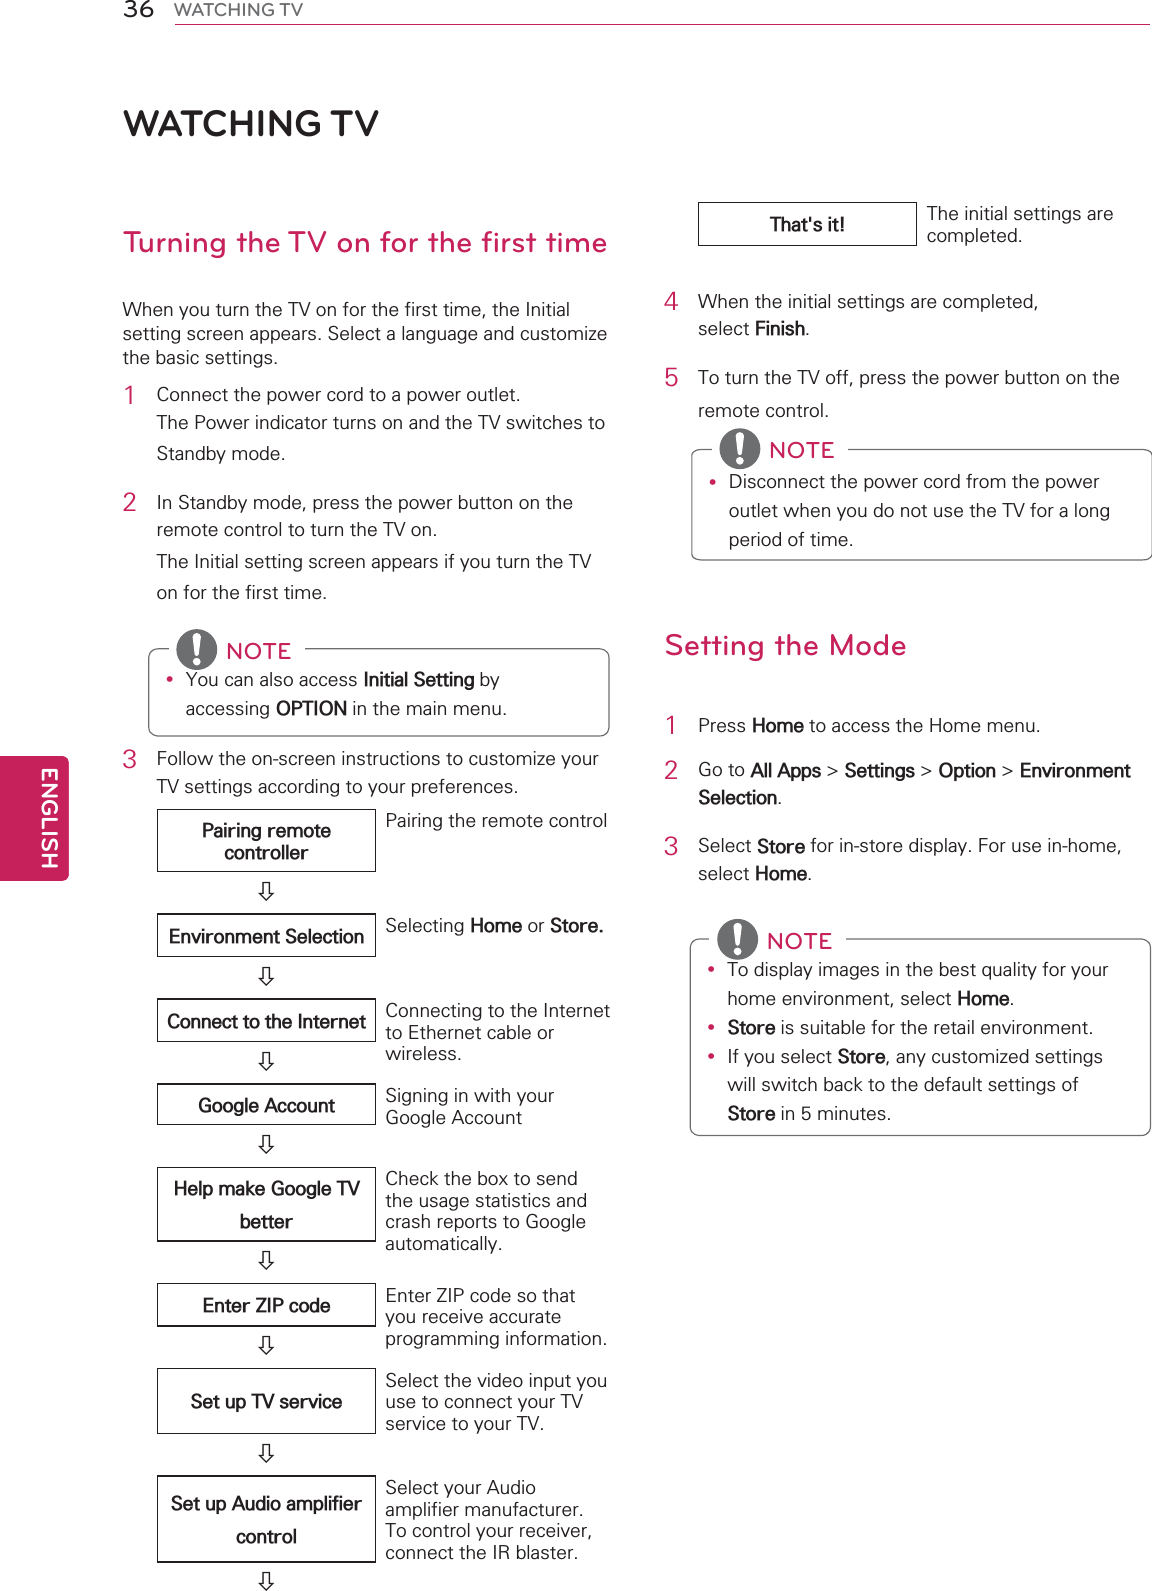
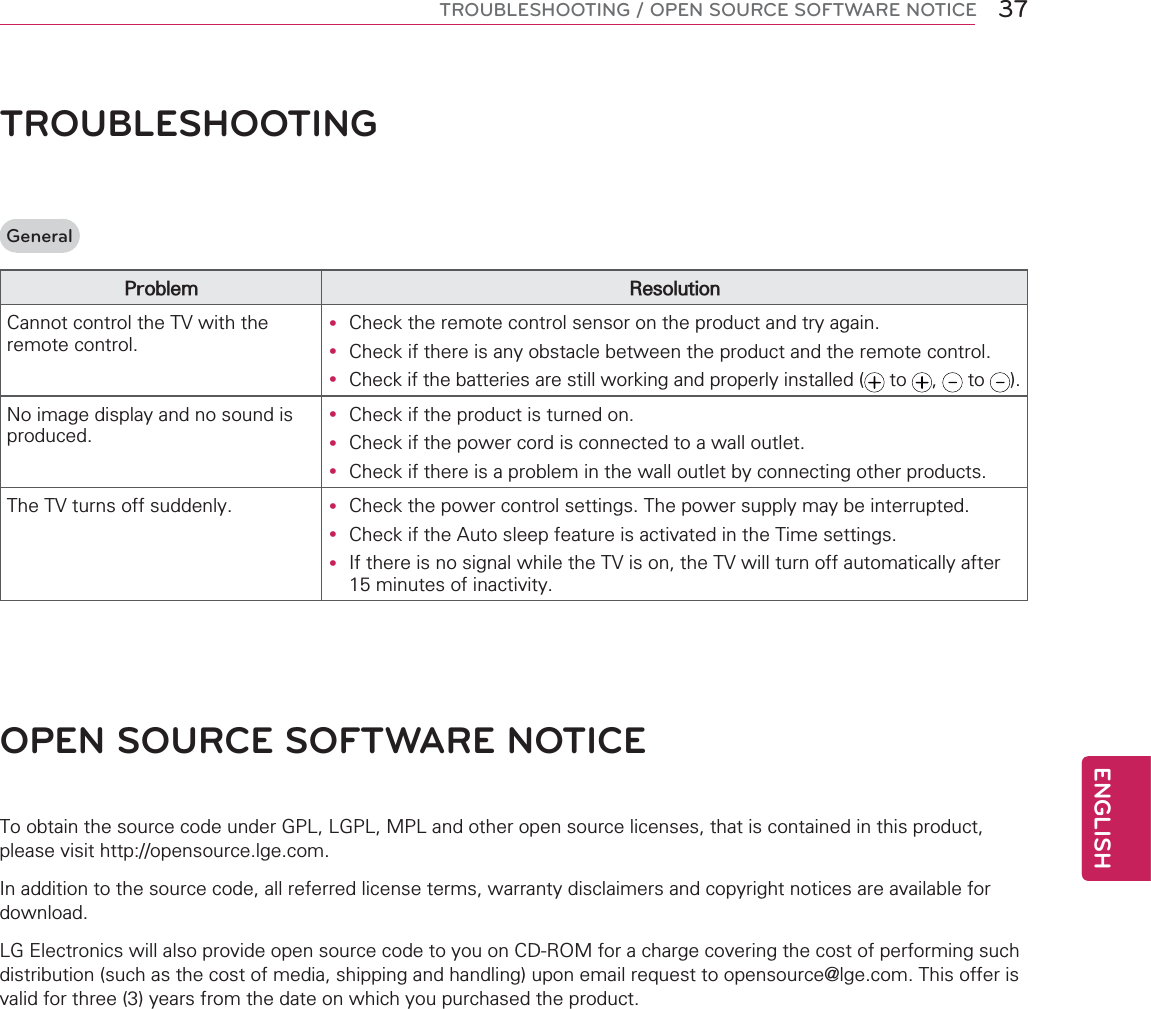
![35ENGENGLISHREMOTE CONTROLRegistering the remote controlThe Remote Control operates by pairing with your TV. Once you purchased the TV, please register the Remote Control as follows;How to register the remote controlPress the Center wheel button to pair the remote control.How to re-register the remote control after registration failureReset the remote control by pressing and holding the ᰳBACK button for 3 seconds. (Once the reset is complete, the light on the Pointer blinks.) Then repeat the above procedure to register the remote control.How to use the zoom in/out gestures1 Press and hold the 3D button for 2 seconds.2 While holding the 3D button, draw a circle in a clockwise direction to zoom in or counter-clockwise direction to zoom out. (This feature is only available while using Web.)Speak to WatchYou can use Speak to Watch to get directions, send messages, and perform a number of other common tasks.EX)“open” [app name] : open the application “goto” [cnn.com] : Go to the website [cnn.com] on Google chrome.“watch” [cars two] : Open the [Cars two] pages on TV & Movies.Precautions to take when using the remote controly Use the remote control within the maximum communication distance (10 m, 32.8 ft). Using the remote control beyond this distance, or with an object obstructing it, may cause a communication failure.y A communication failure may occur due to nearby devices. Electrical devices such as a microwave oven or wireless LAN product may cause interference, as these use the same bandwidth (2.4 GHz) as the Remote Control.y The Remote Control may be damaged or may malfunction if it is dropped or receives a heavy impact.y Manufacturer and installer cannot provide service related to human safety as the applicable wireless device has possibility of electric wave interference.y It is recommended that an Access Point (AP) be located more than 1 m (3.28 ft) away from the TV. If the AP is installed closer than 1 m (3.28 ft), the remote control may not perform as expected due to frequency interference.y LG Qwerty remote control or Logitech google keyboard is only supported. Other keyboard(HID) is may not be compatible.y When the Qwerty side is faced up, the cursor is not moved to prevent the wobble.](https://usermanual.wiki/LG-Electronics-USA/42GA6400UD/User-Guide-1875187-Page-35.png)