LG Electronics USA 47WV30 SIGNAGE DISPLAY User Manual EMISSION TEST REPORT
LG Electronics USA SIGNAGE DISPLAY EMISSION TEST REPORT
UserManual.wiki
>
LG Electronics USA
>
47WV30 User Manual
Users Manual
Navigation menu
Upload a User Manual
Namespaces
Wiki Guide
HTML
PDF
Info
Views
User Manual
Discussion / Help
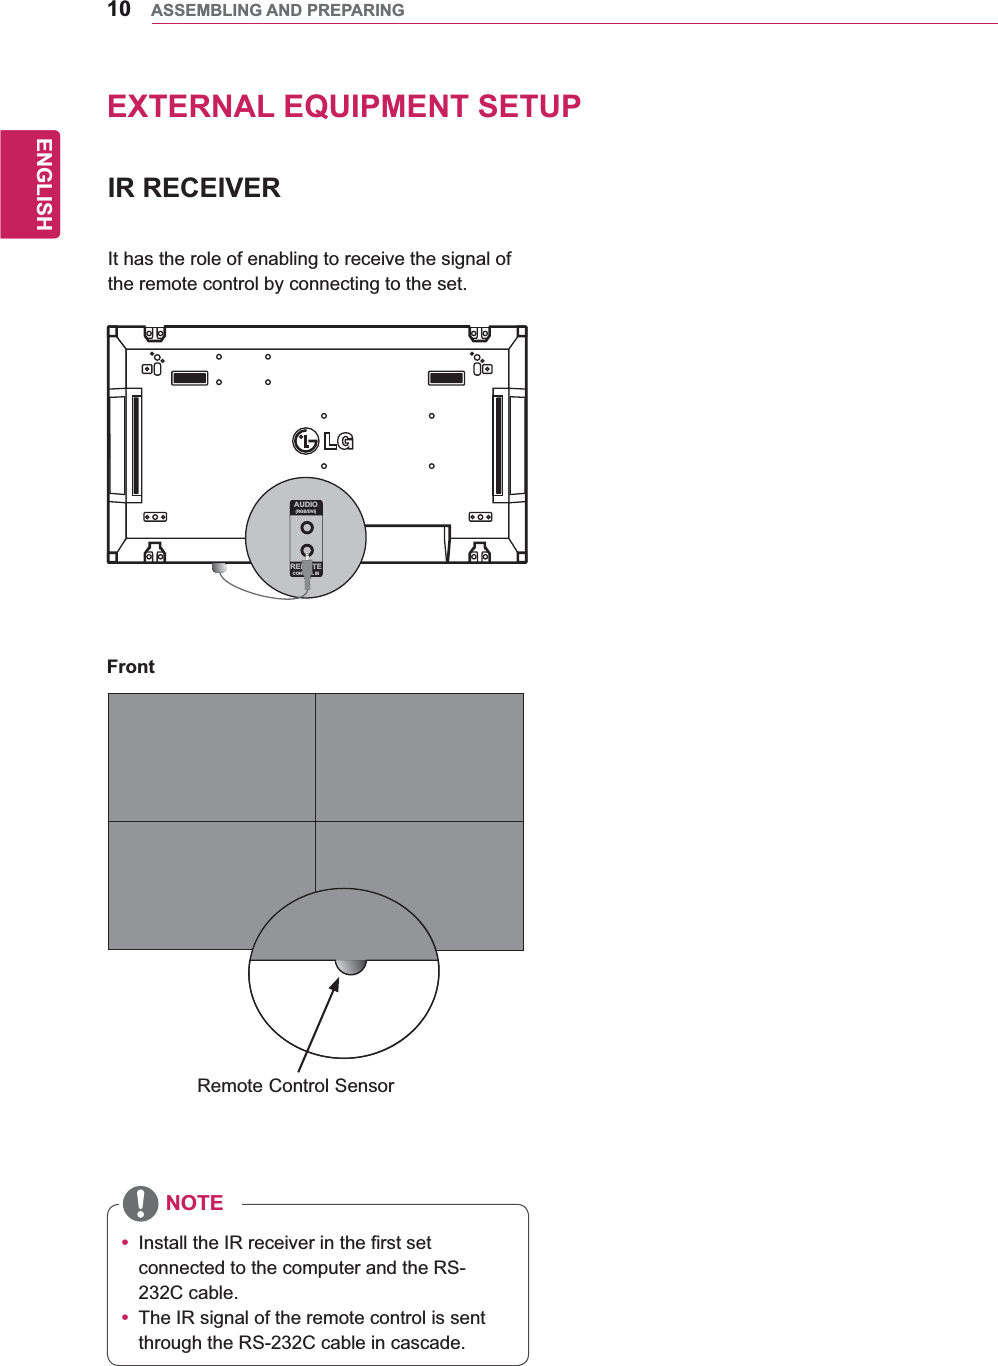
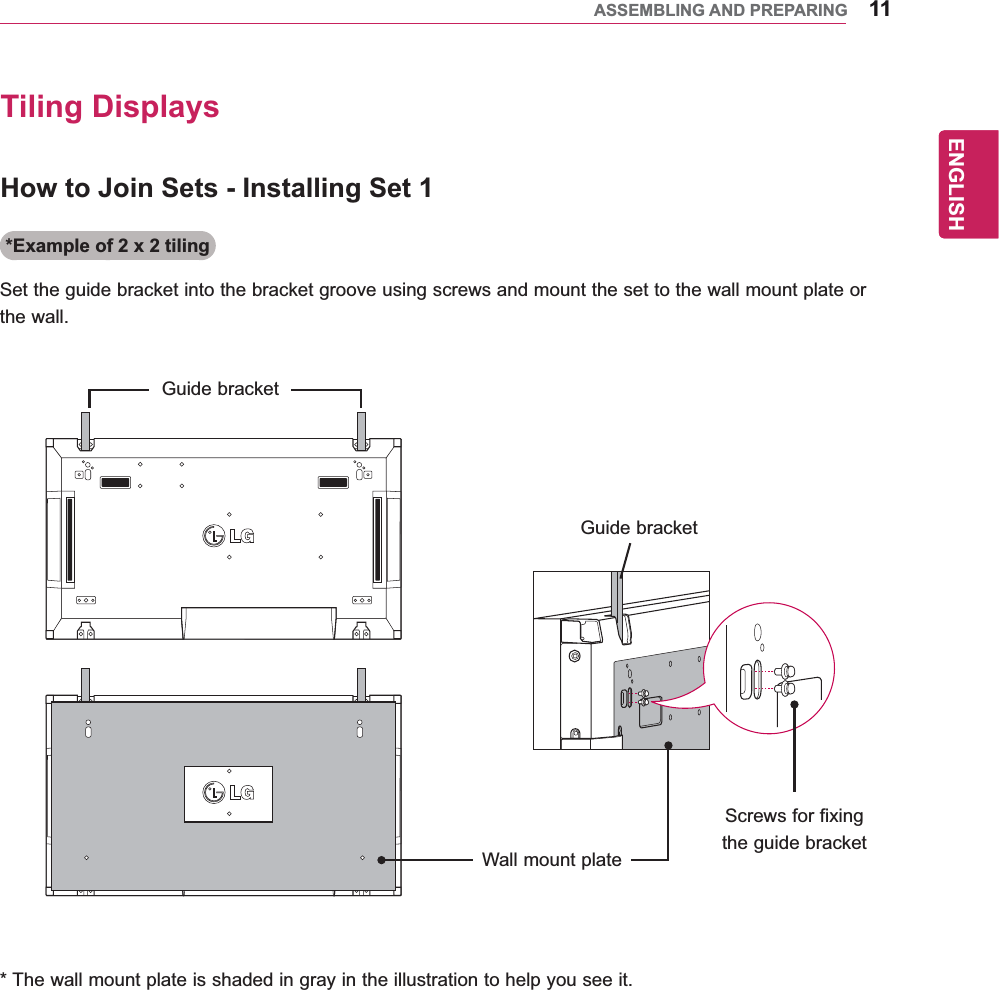
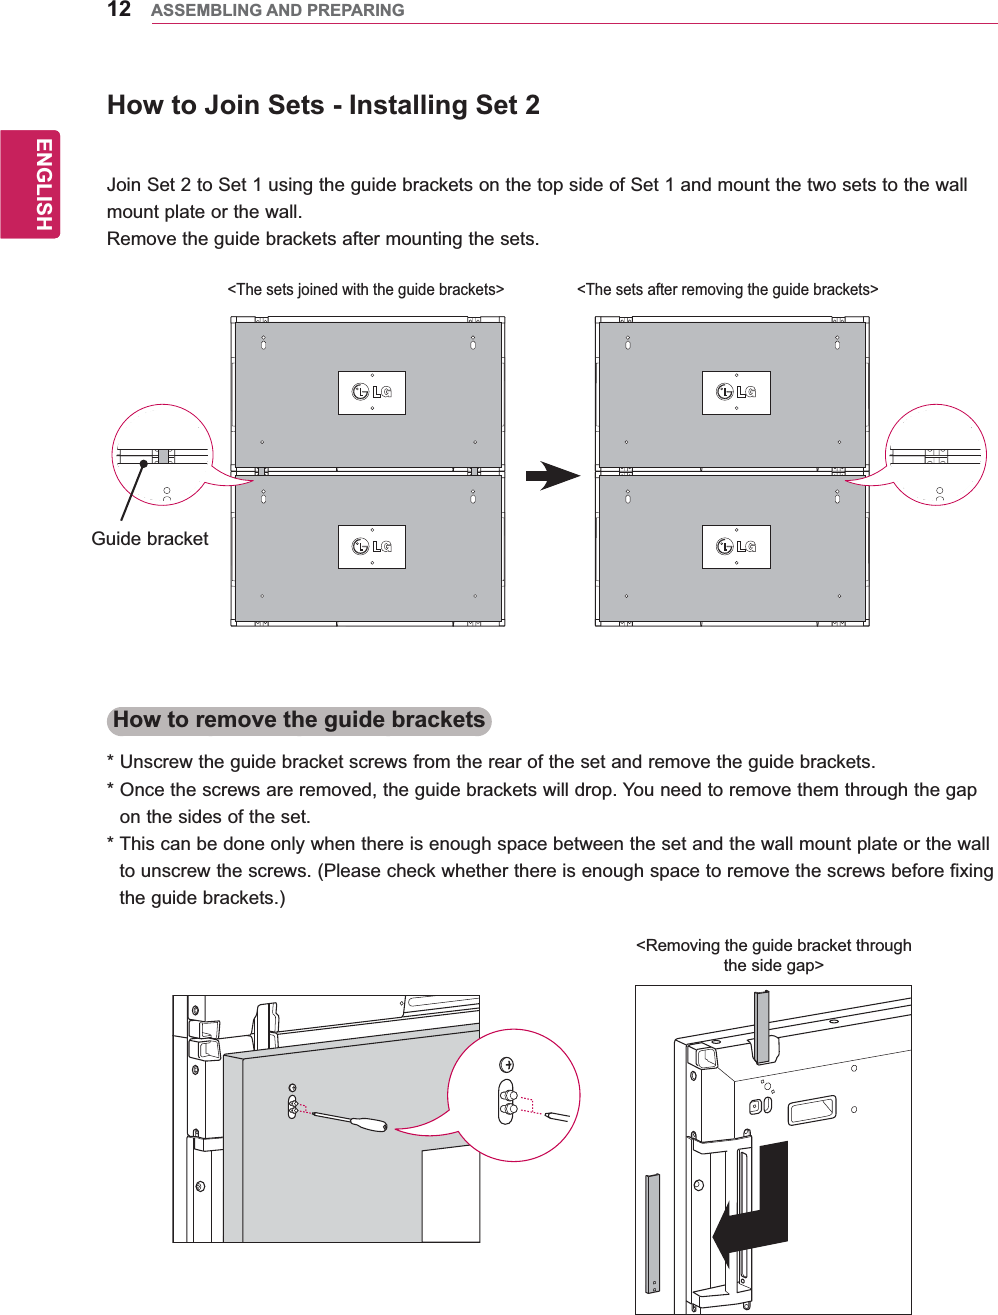
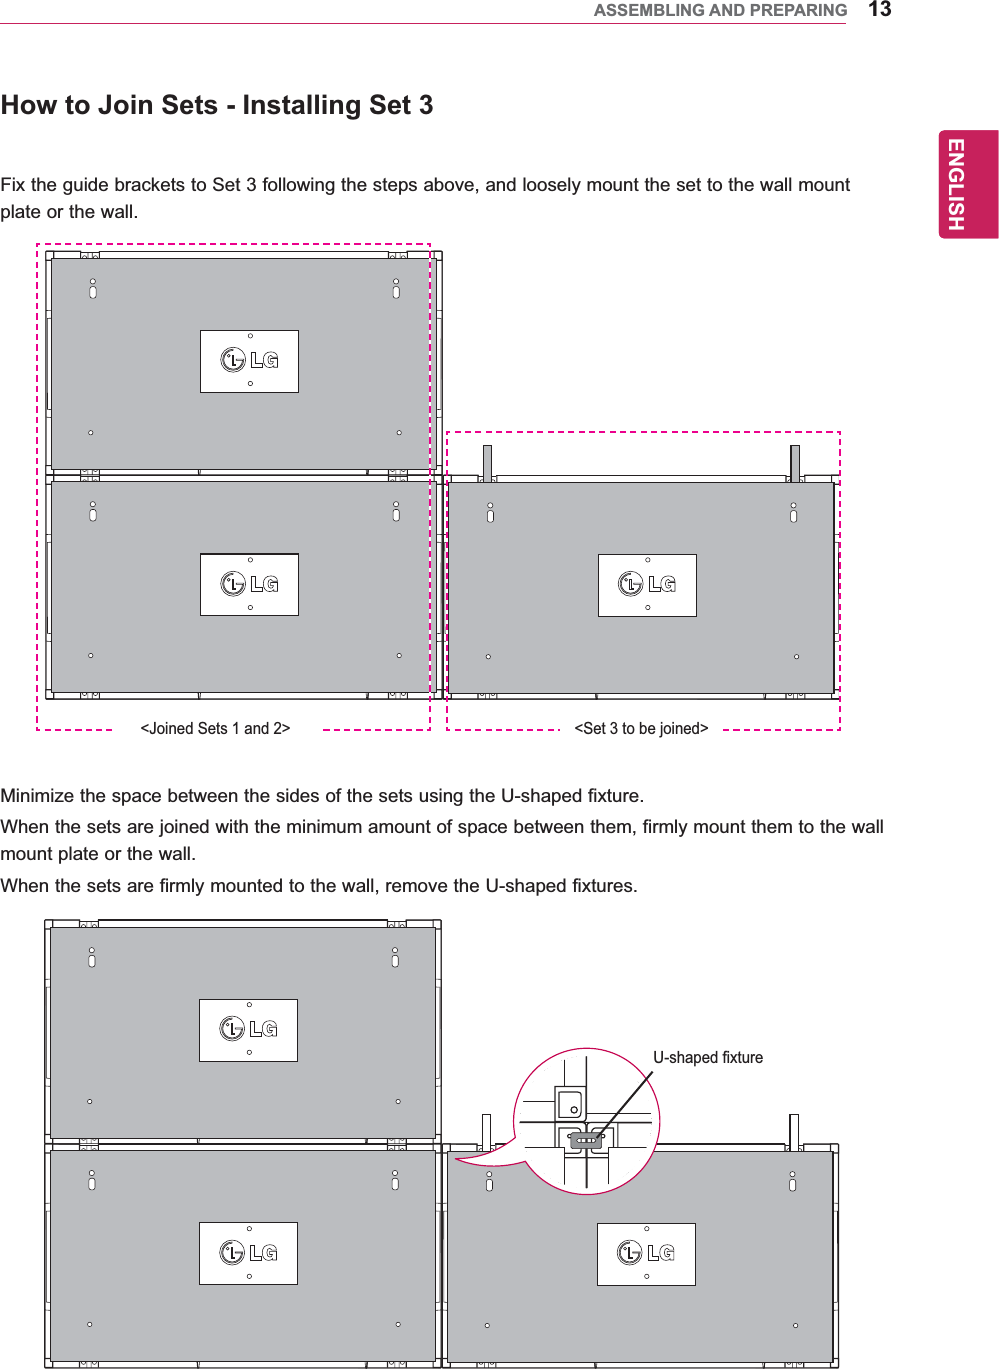
Navigation

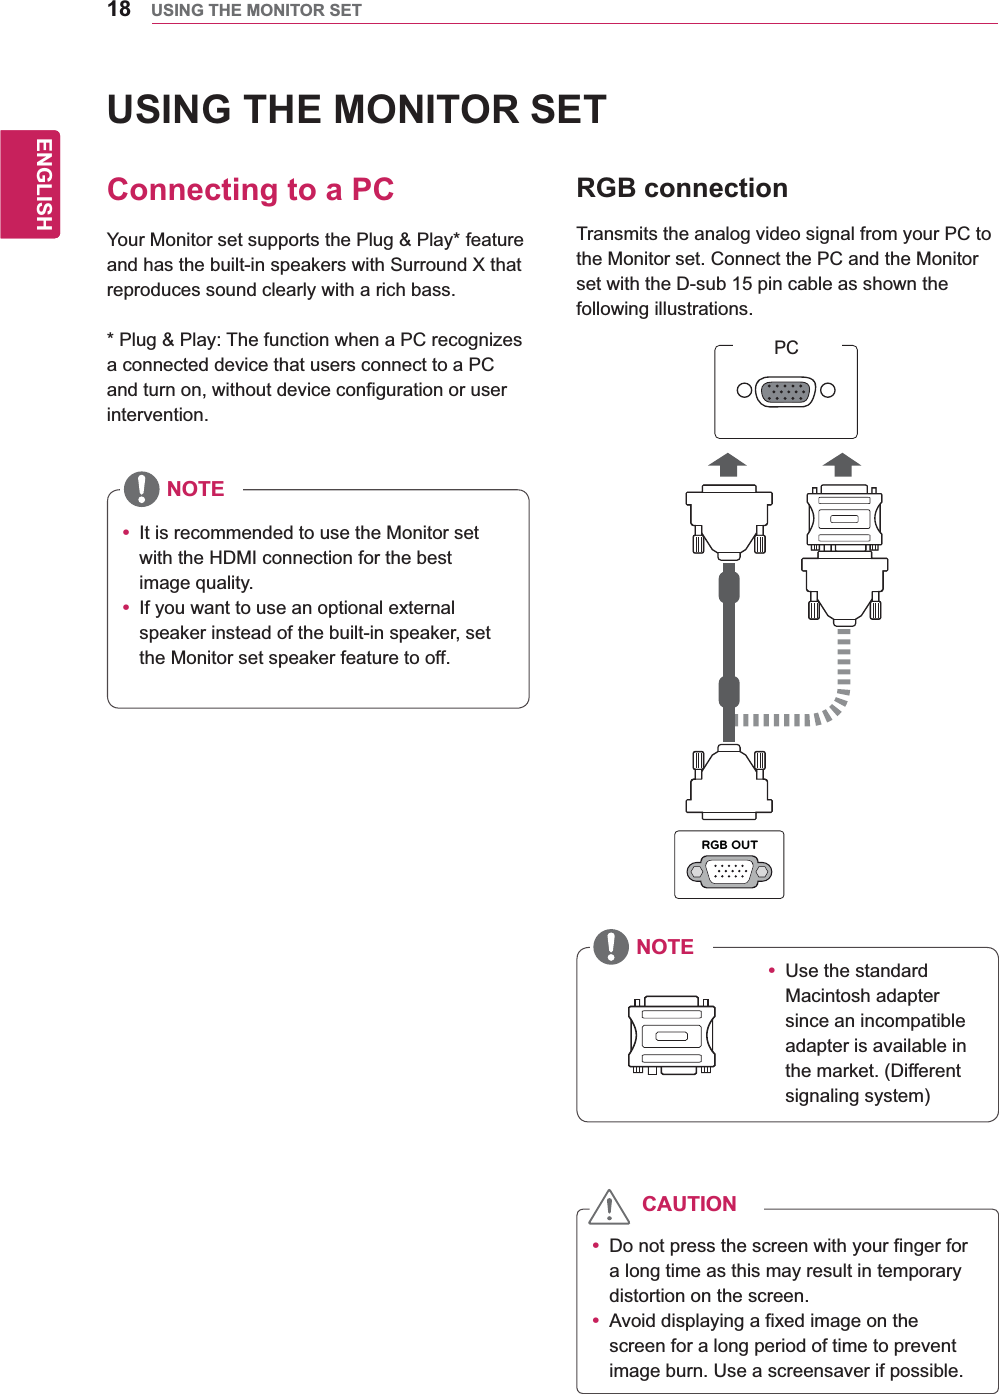
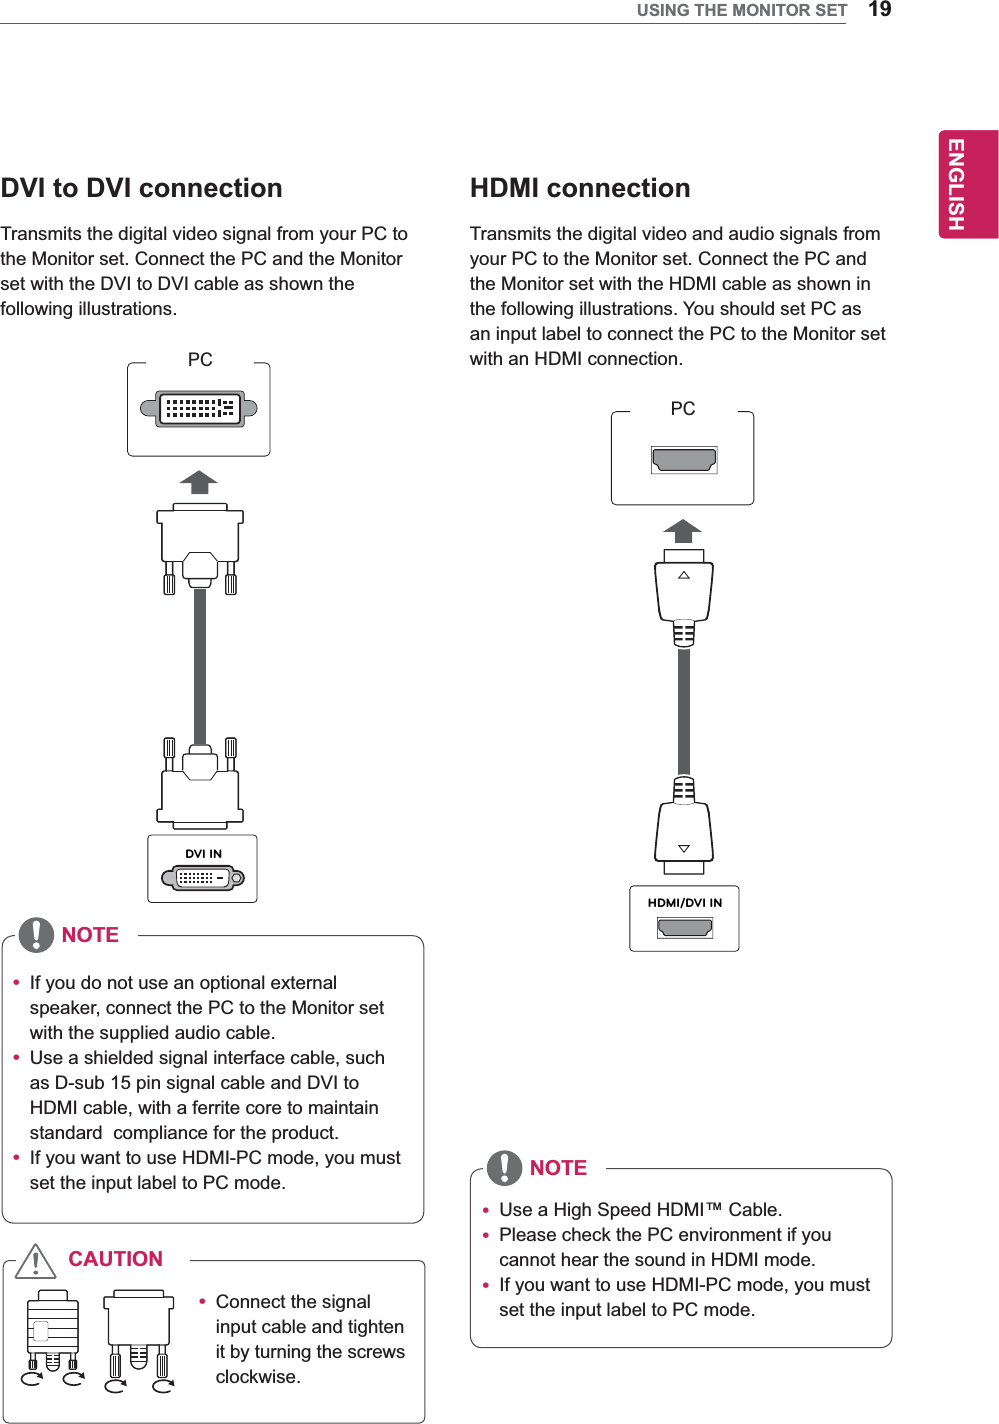
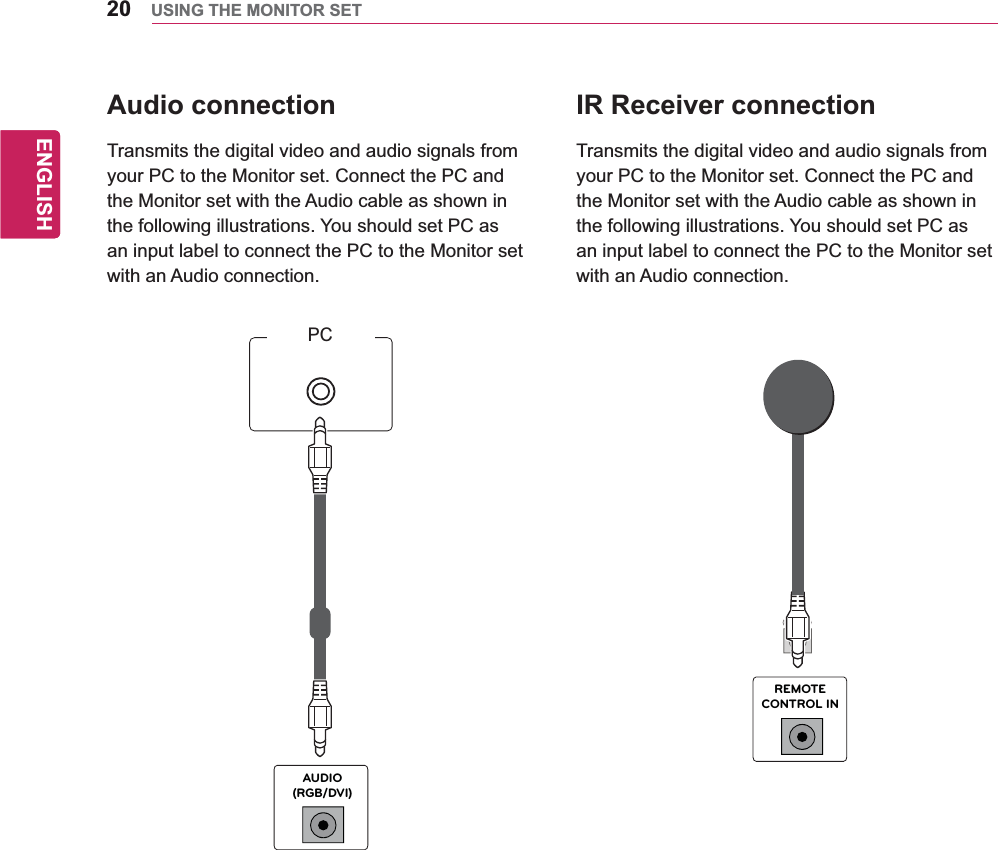
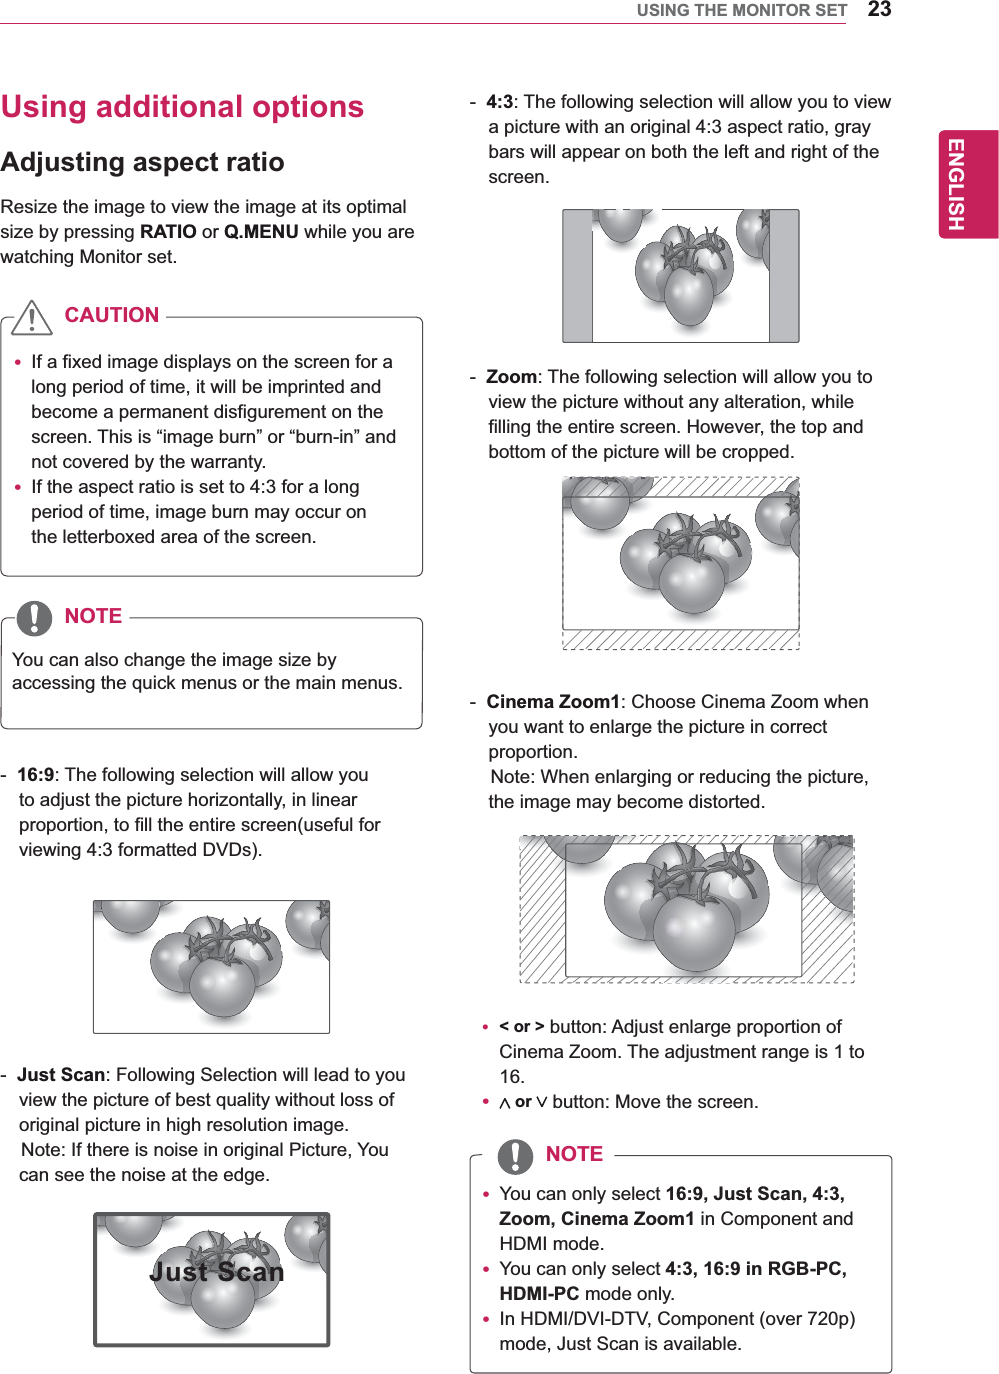
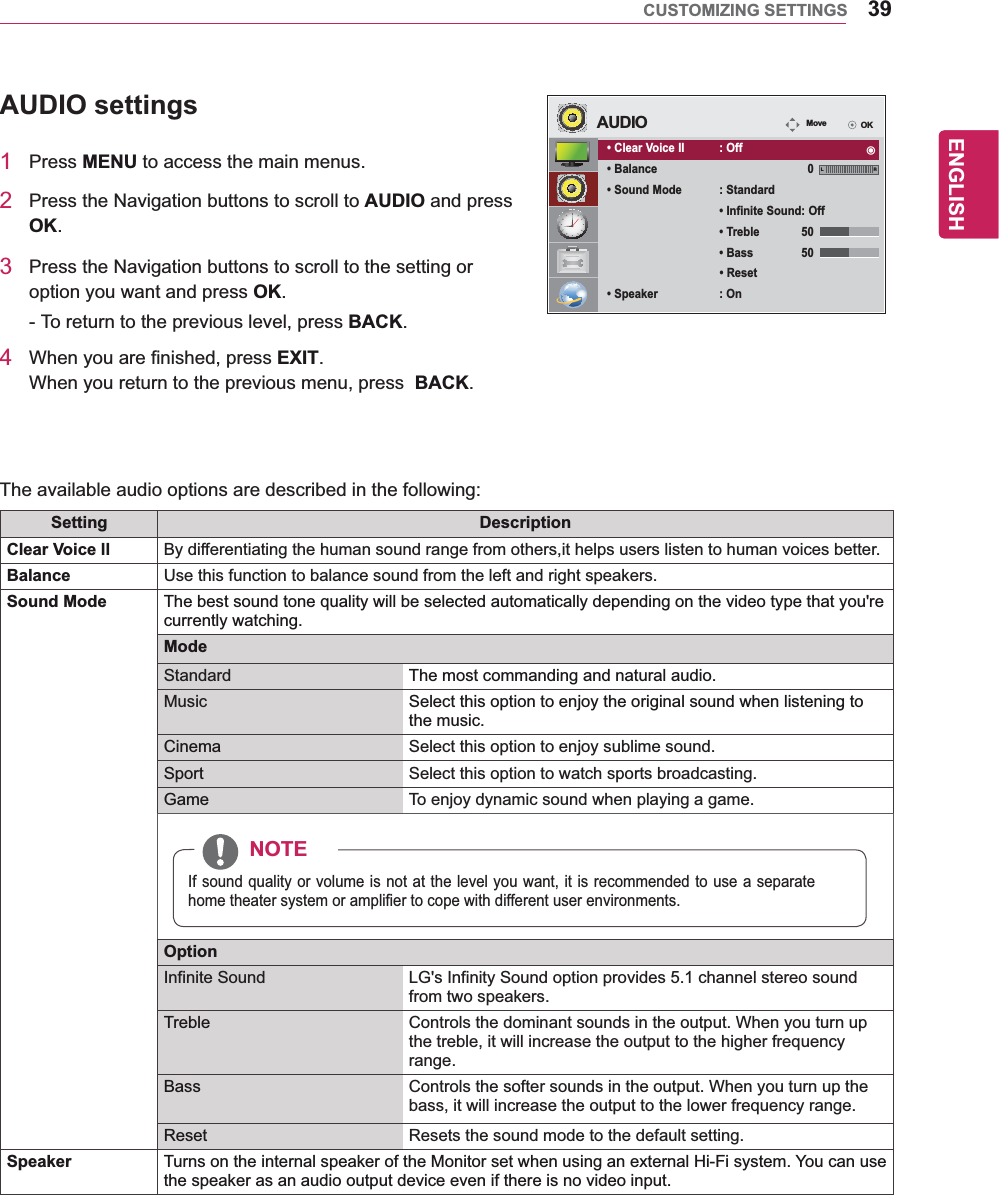
![22ENGENGLISHUSING THE MONITOR SETCustomizing PC display optionsCustomize options of each image mode for thebest image quality.y This function works in the following mode: RGB[PC] mode.1 Press MENU to access the main menus.2 Press the Navigation buttons to scroll to PICTURE and press OK.3 Press the Navigation buttons to scroll to Screen and press OK.4 Select and adjust following options, and then press OK.Option DescriptionResolution Selects a proper Resolution.Auto ConfigureSets to adjust the screen Position, Size and Phase automatically. The displayed image may be unstable for a few seconds while the configuration is in progress.Position/Size/PhaseAdjusts the options when the image is not clear, especially when characters are shaky, after the auto configuration.Reset Restores the options to the default setting.5 When you are finished, press EXIT.When you return to the previous menu, press BACK.Adjusting the soundSelecting an sound modePlay the sound in its optimized settings by selecting one of the preset sound modes.1 Press MENU to access the main menus.2 Press the Navigation buttons to scroll to AUDIO and press OK.3 Press the Navigation buttons to scroll to Sound Mode and press OK.4 Press the Navigation buttons to scroll to a sound mode you want and press OK.Mode DescriptionStandard Selects when you want standard-quality sound.Music Selects when you listen to music.Cinema Selects when you watch movies.Sport Selects when you watch sports events.Game Selects when you play games.5 When you are finished, press EXIT.When you return to the previous menu, press BACK.Customizing sound optionsCustomize options of each sound mode for the best sound quality.1 Press MENU to access the main menus.2 Press the Navigation buttons to scroll to AUDIO and press OK.3 Press the Navigation buttons to scroll to Sound Mode and press OK.4 Press the Navigation buttons to scroll to a sound mode you want and press OK.5 Select and adjust following options, and then press OK.Option DescriptionInfinite SoundLG's Infinity Sound option provides 5.1 channel stereo sound from two speakers.Treble Controls the dominant sounds in the output. When you turn up the treble, it will increase the output to the higher frequency range.Bass Controls the softer sounds in the output. When you turn up the bass, it will increase the output to the lower frequency range.Reset Resets the sound mode to the default setting.6 When you are finished, press EXIT.When you return to the previous menu, press BACK.](https://usermanual.wiki/LG-Electronics-USA/47WV30/User-Guide-1441218-Page-23.png)