LG Electronics USA 50PJ350UB PLASMA TV/MONITOR User Manual SAC34173301 Edit1 en
LG Electronics USA PLASMA TV/MONITOR SAC34173301 Edit1 en
UserManual.wiki
>
LG Electronics USA
>
50PJ350UB User Manual
>
User Manual 1
Contents
1.
User Manual 1
2.
User Manual 2
User Manual 1
Navigation menu
Upload a User Manual
Namespaces
Wiki Guide
HTML
PDF
Info
Views
User Manual
Discussion / Help
Navigation
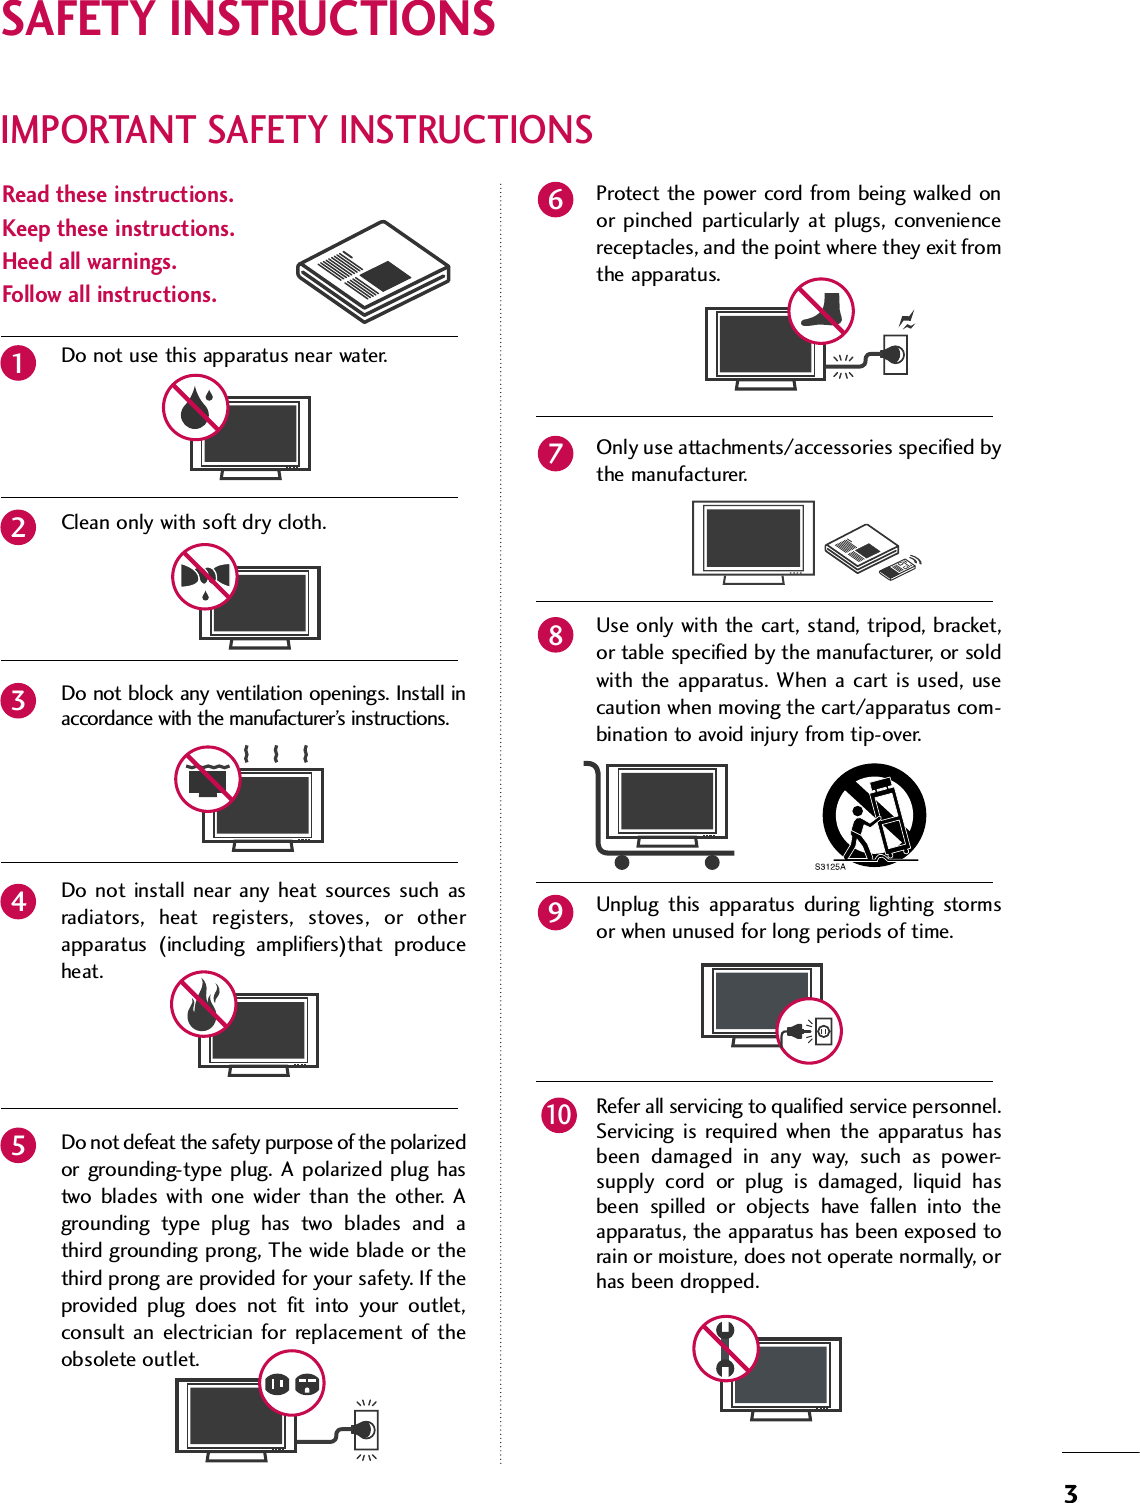
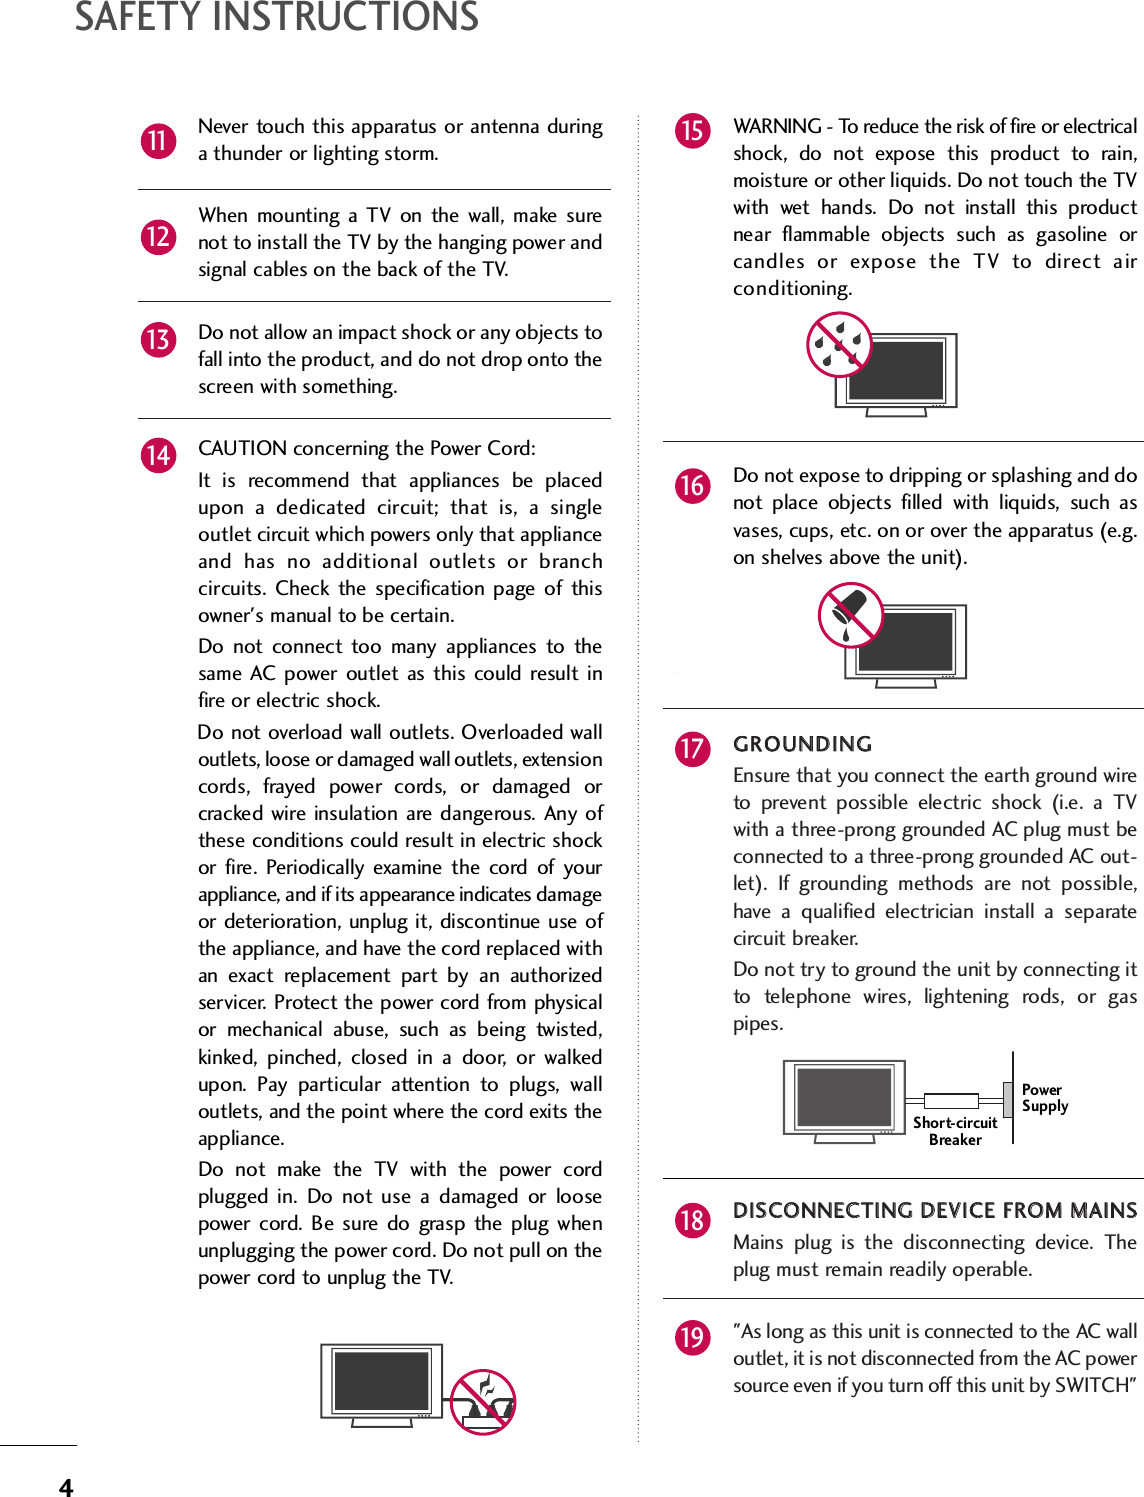
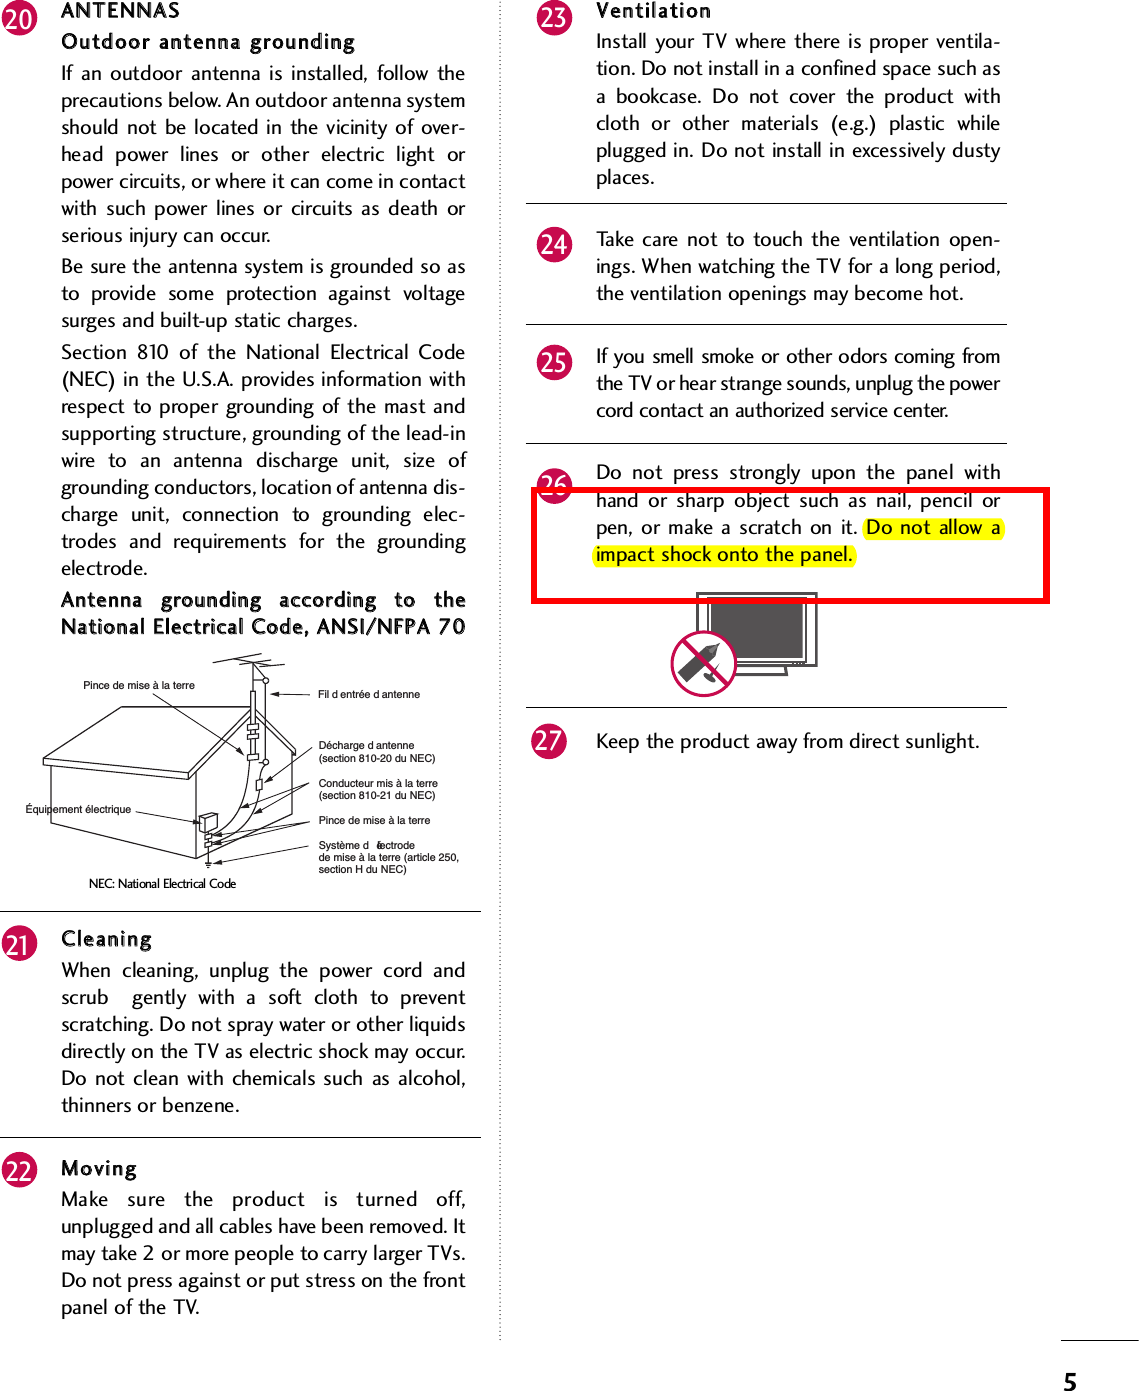


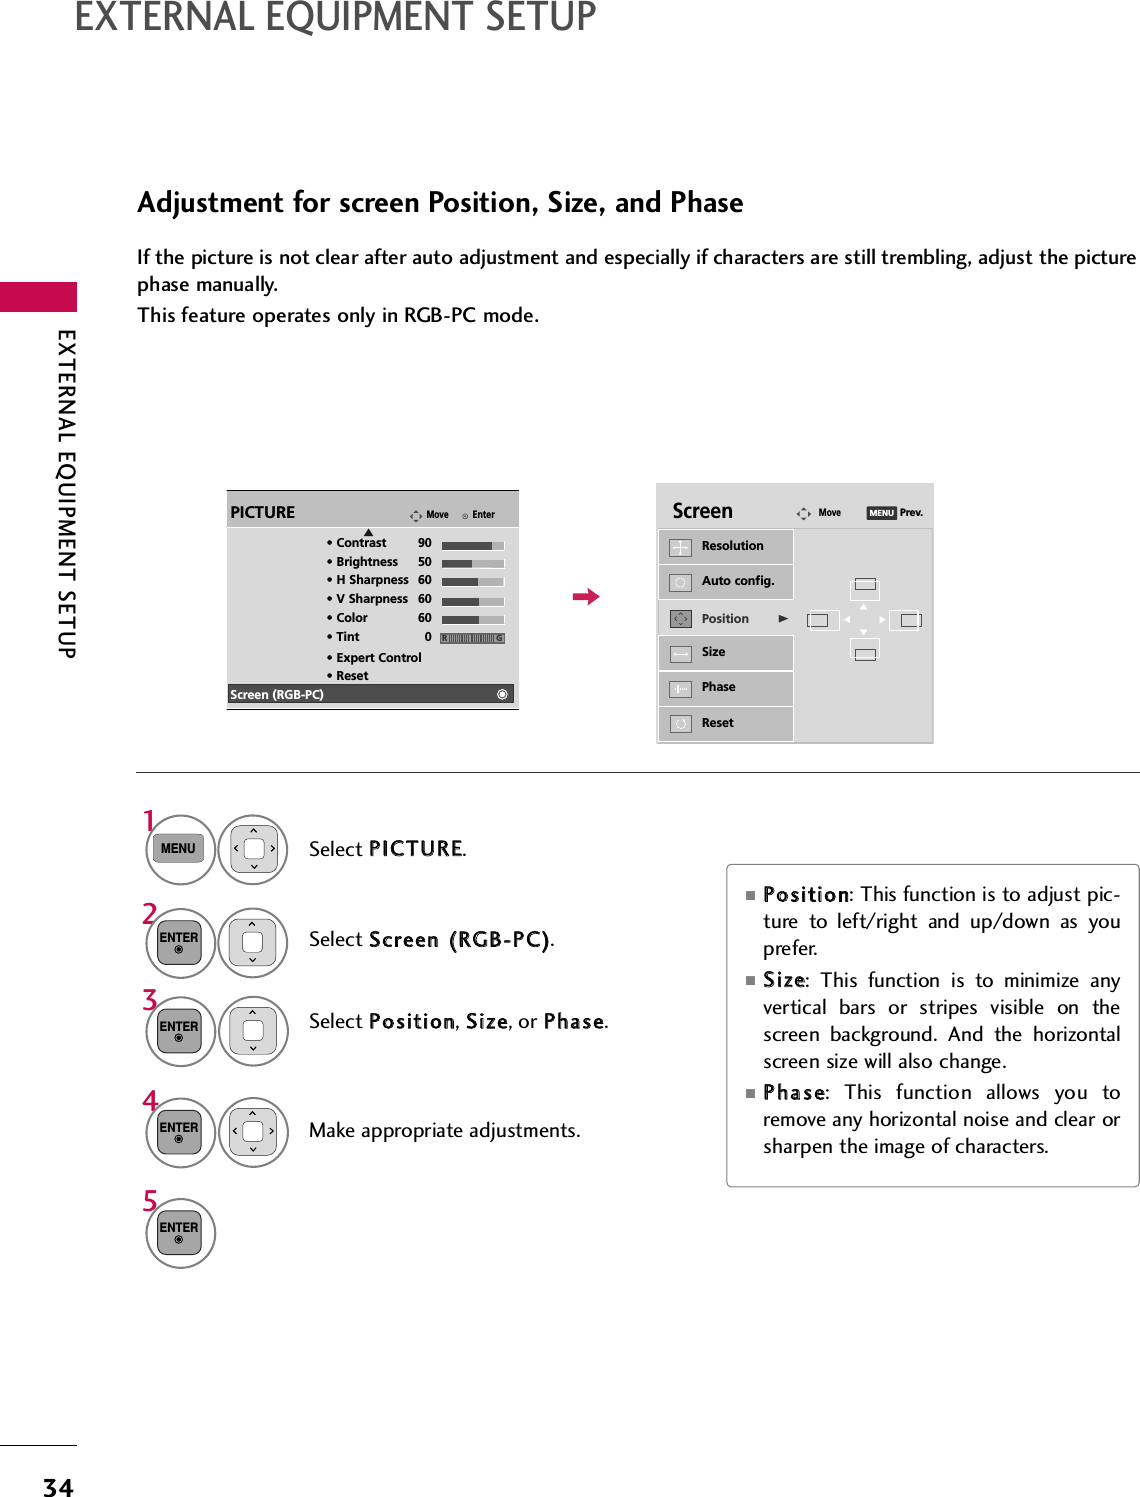
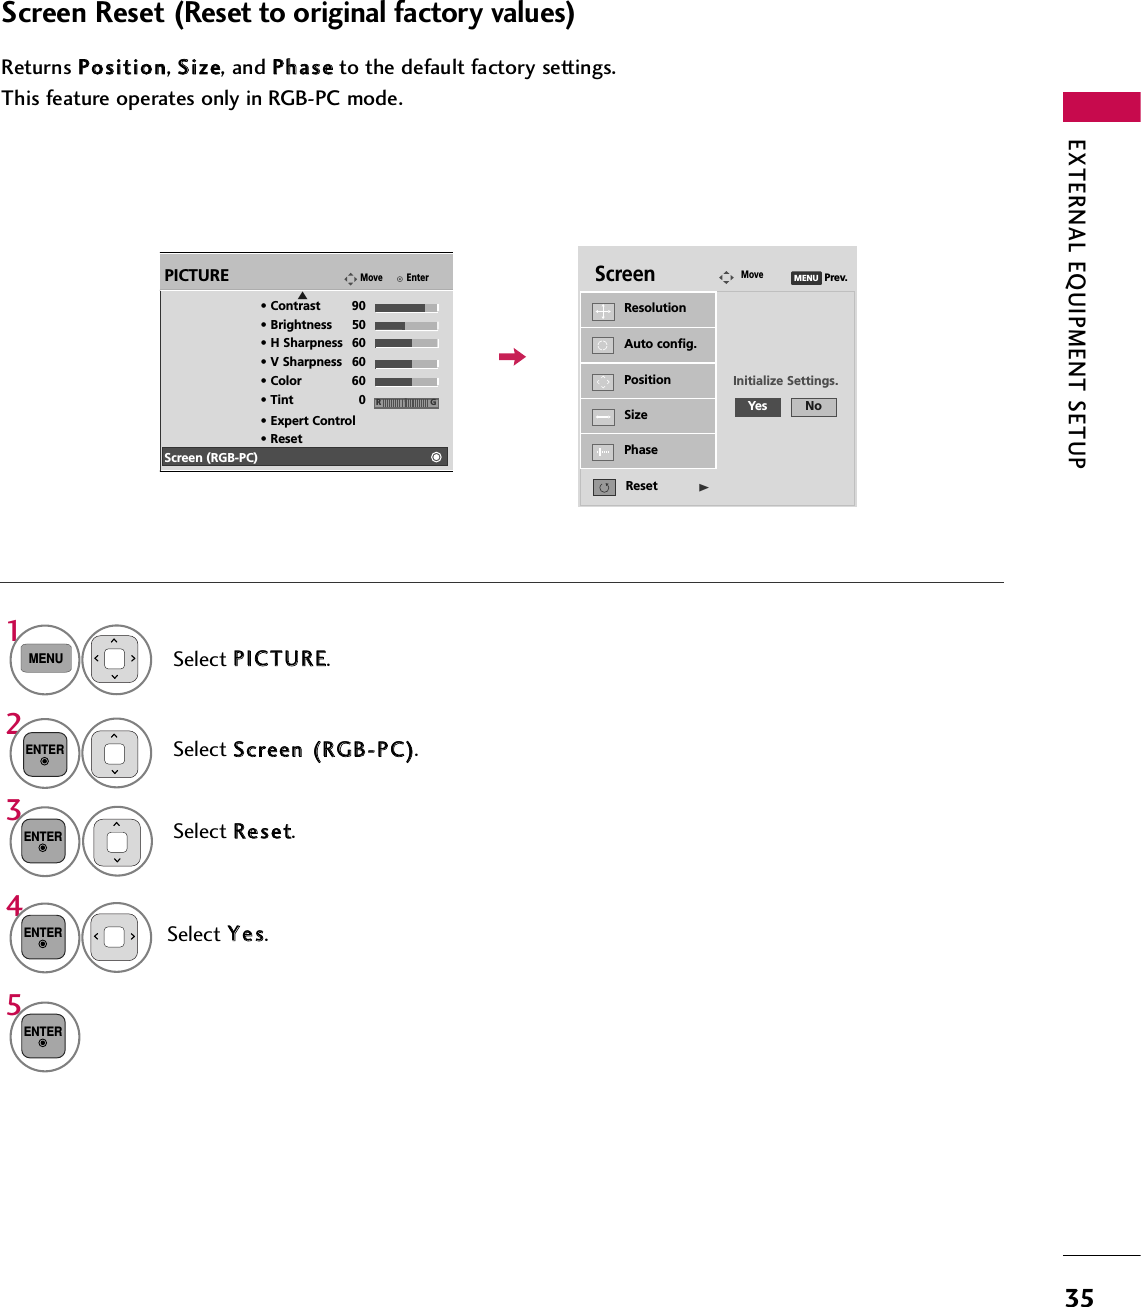
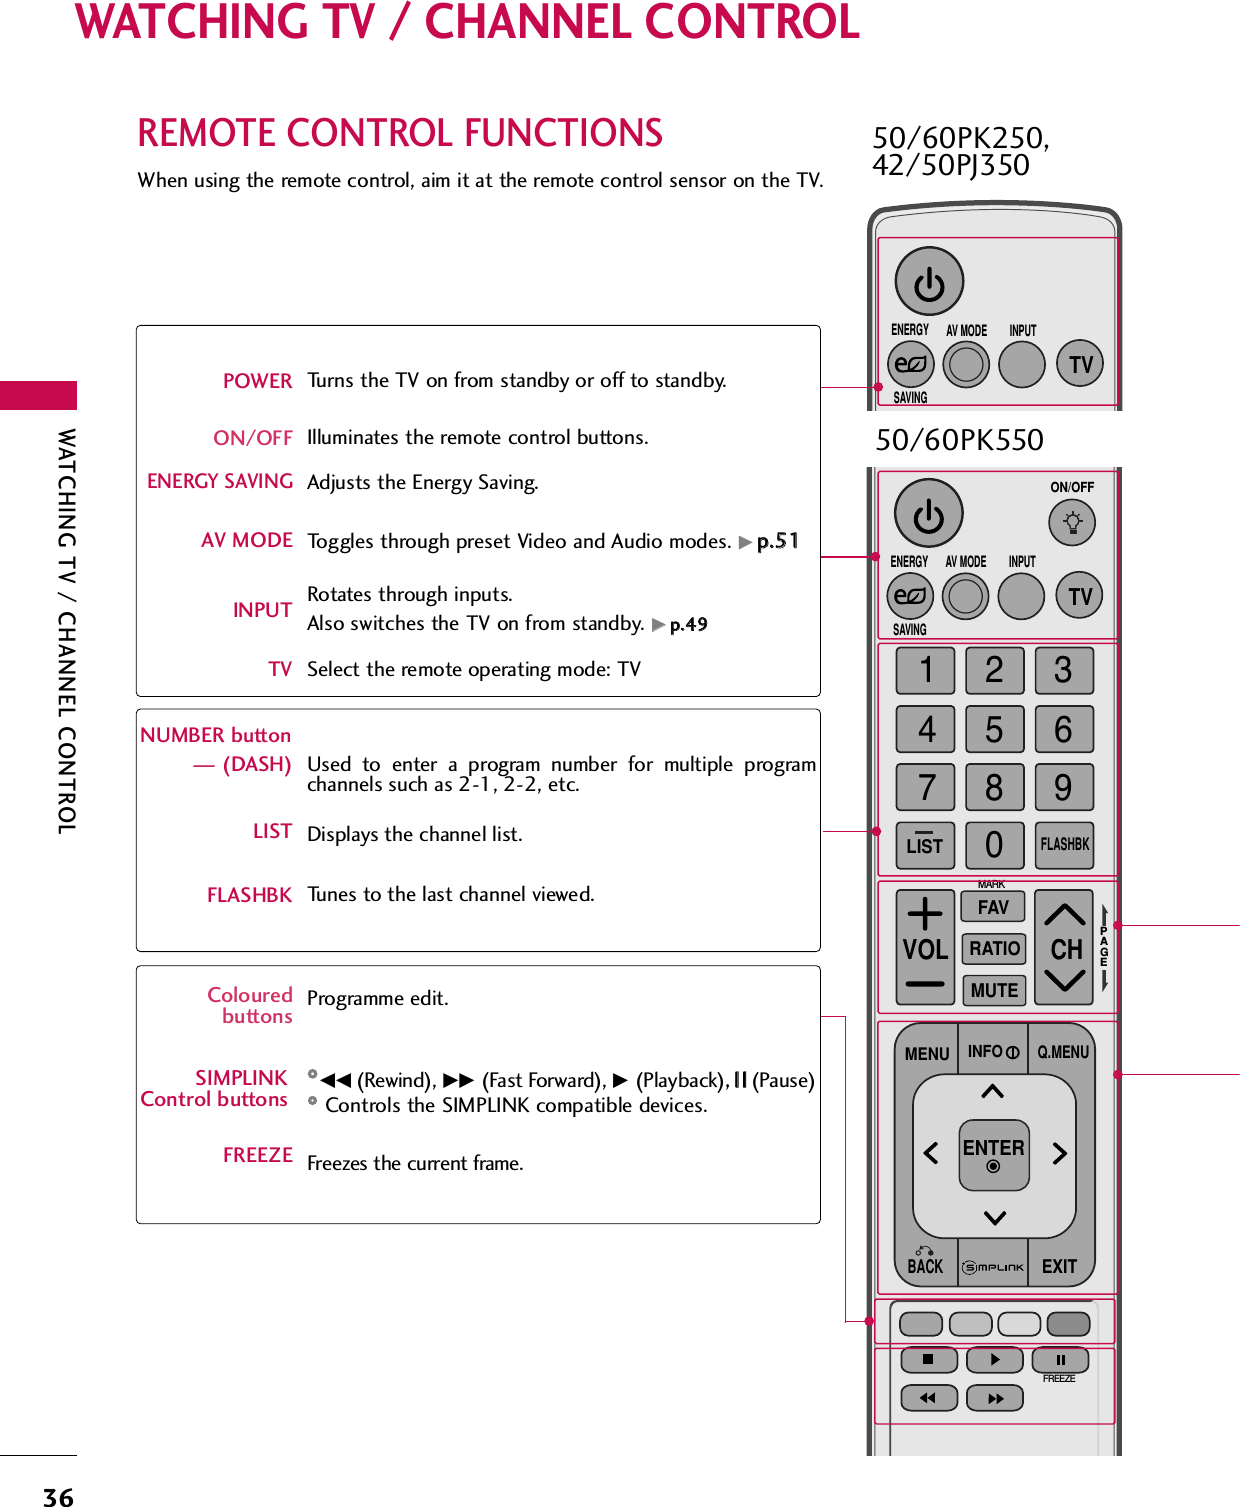
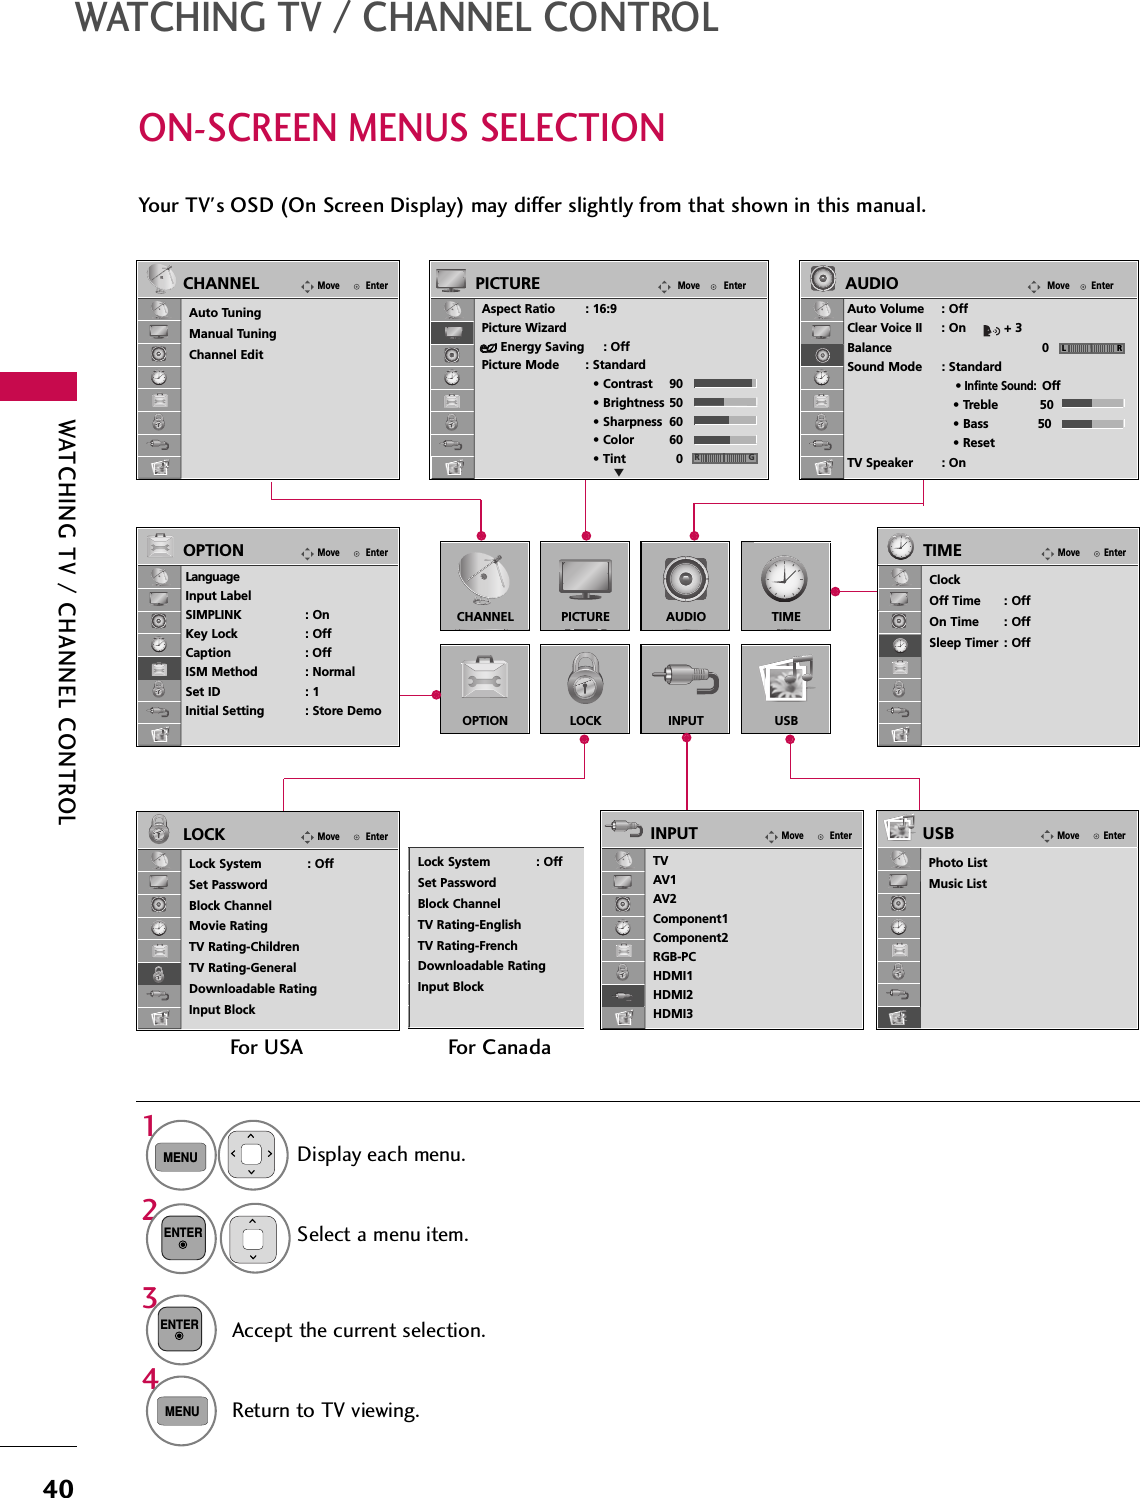
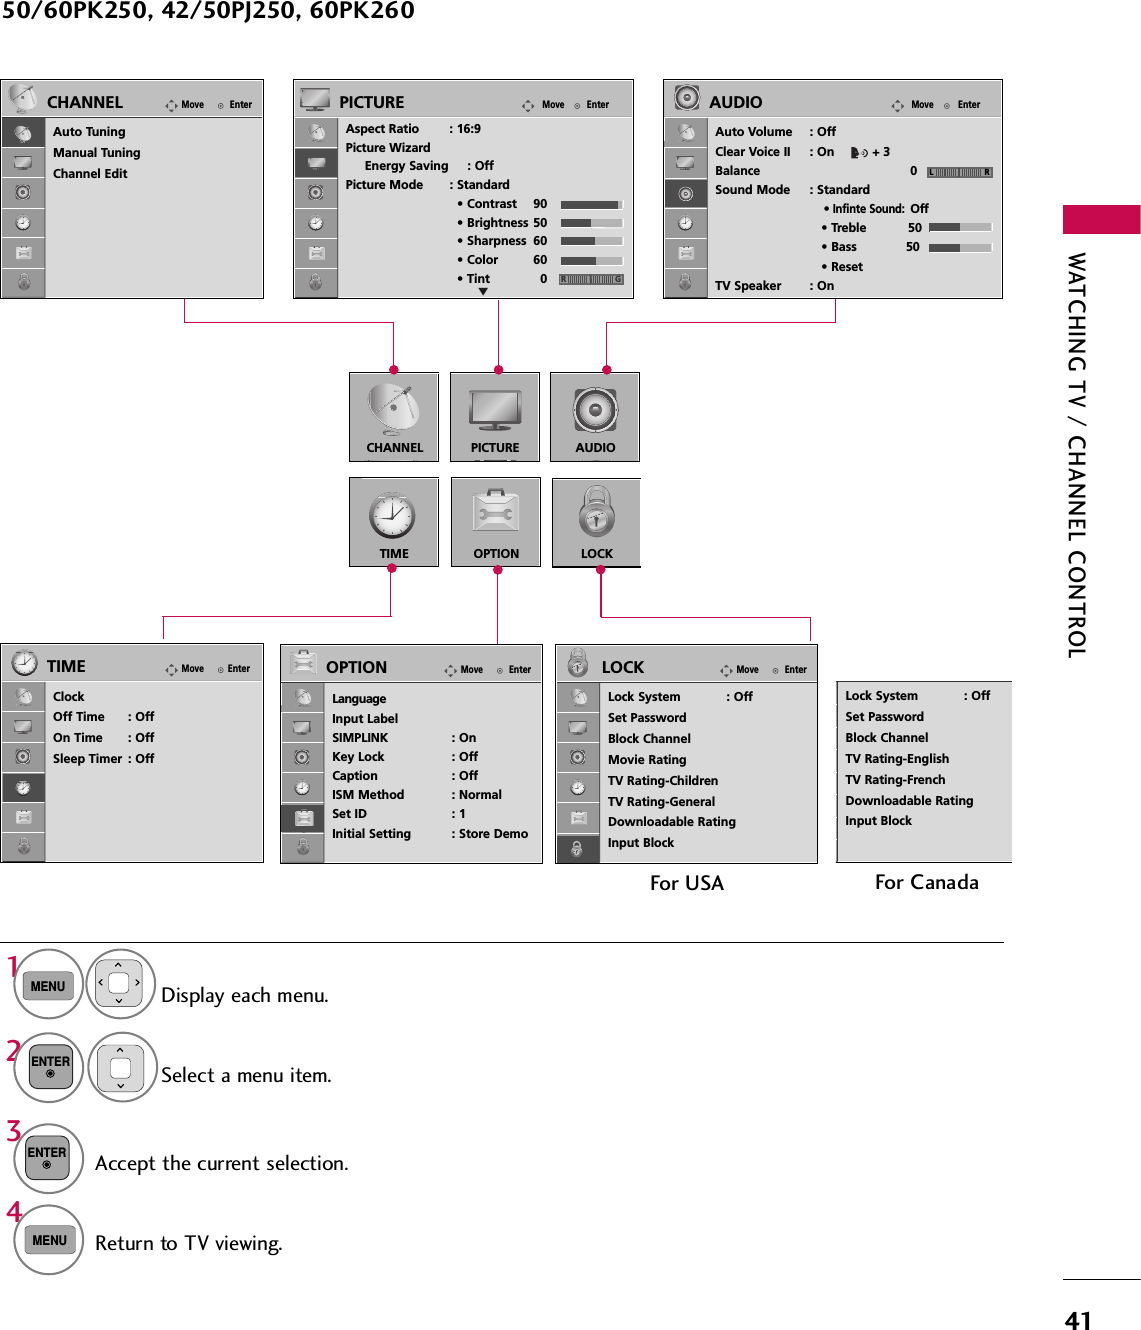
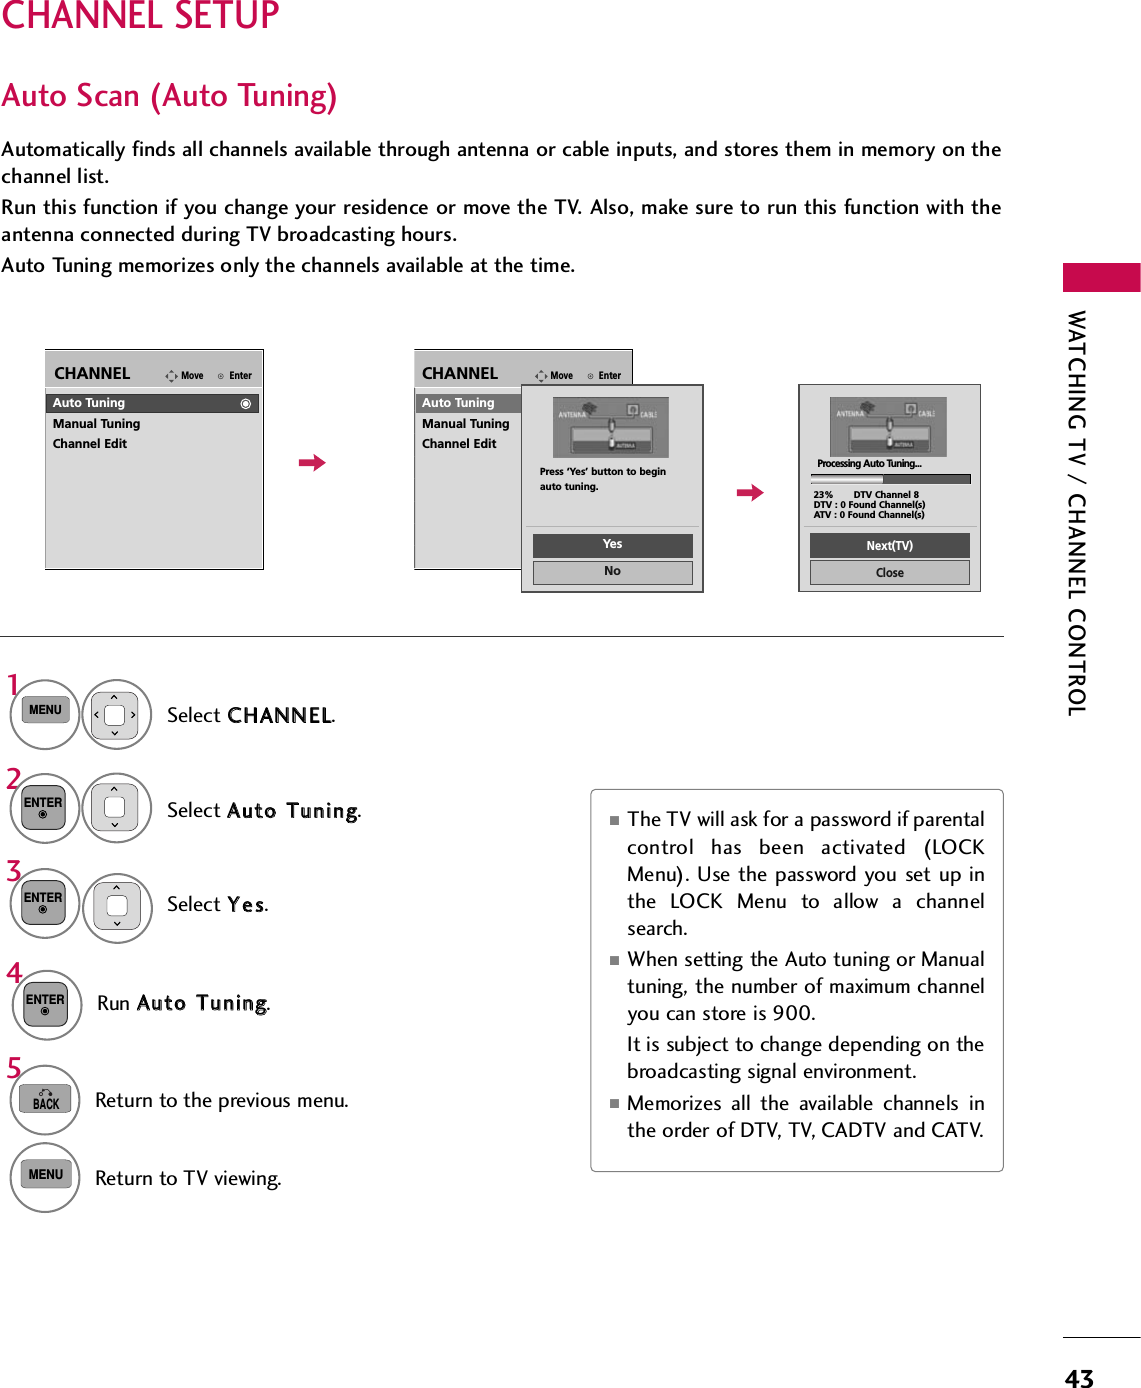
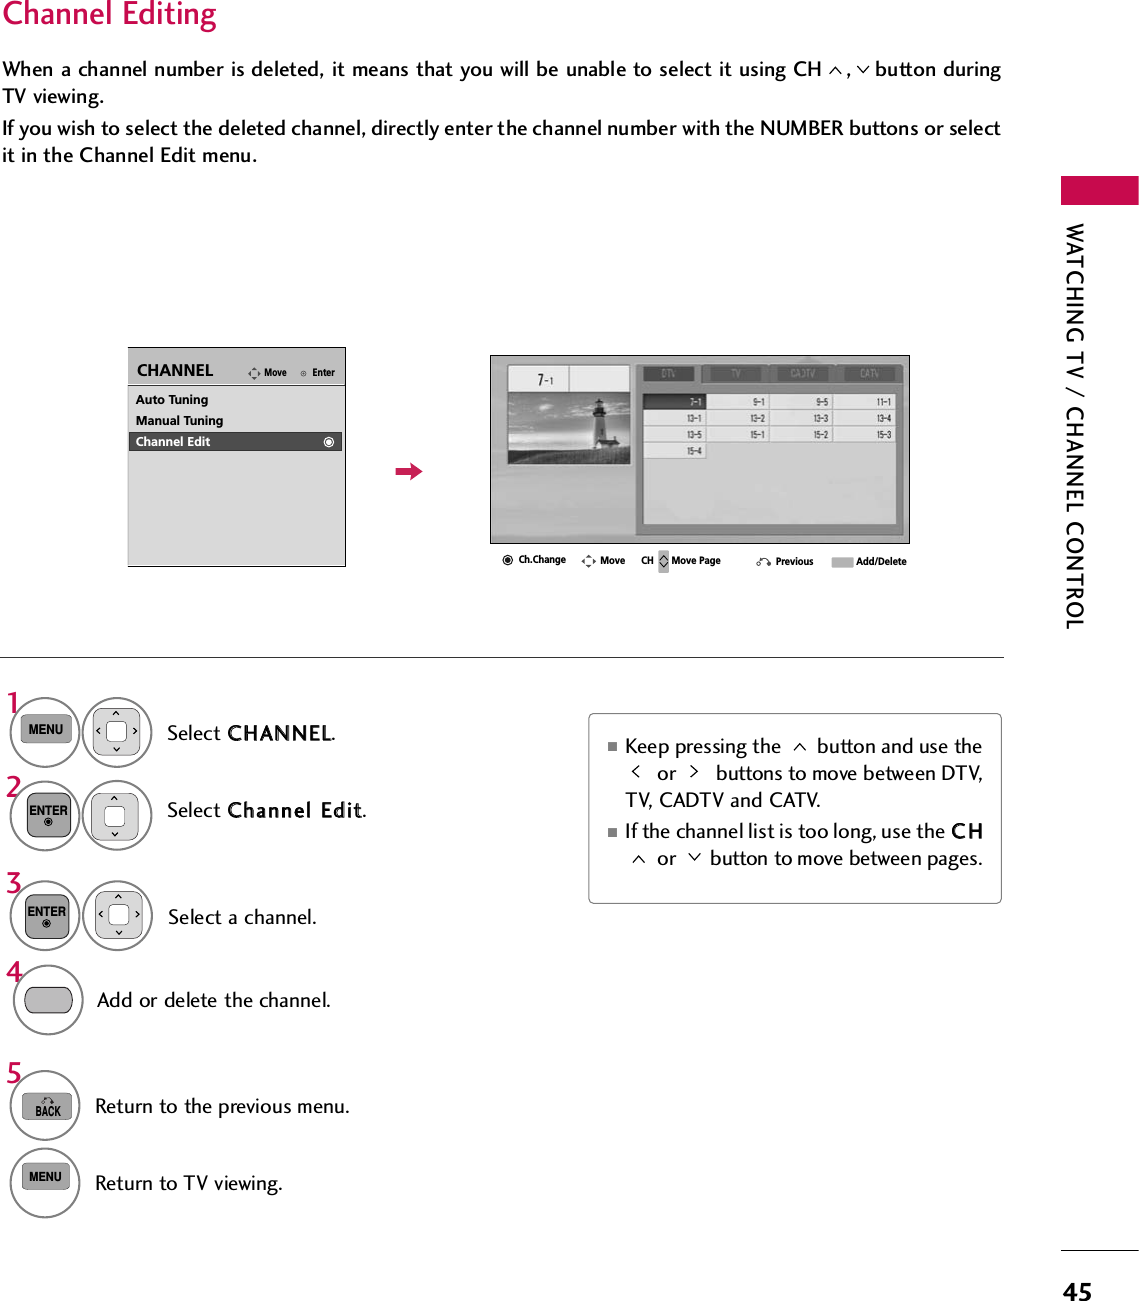
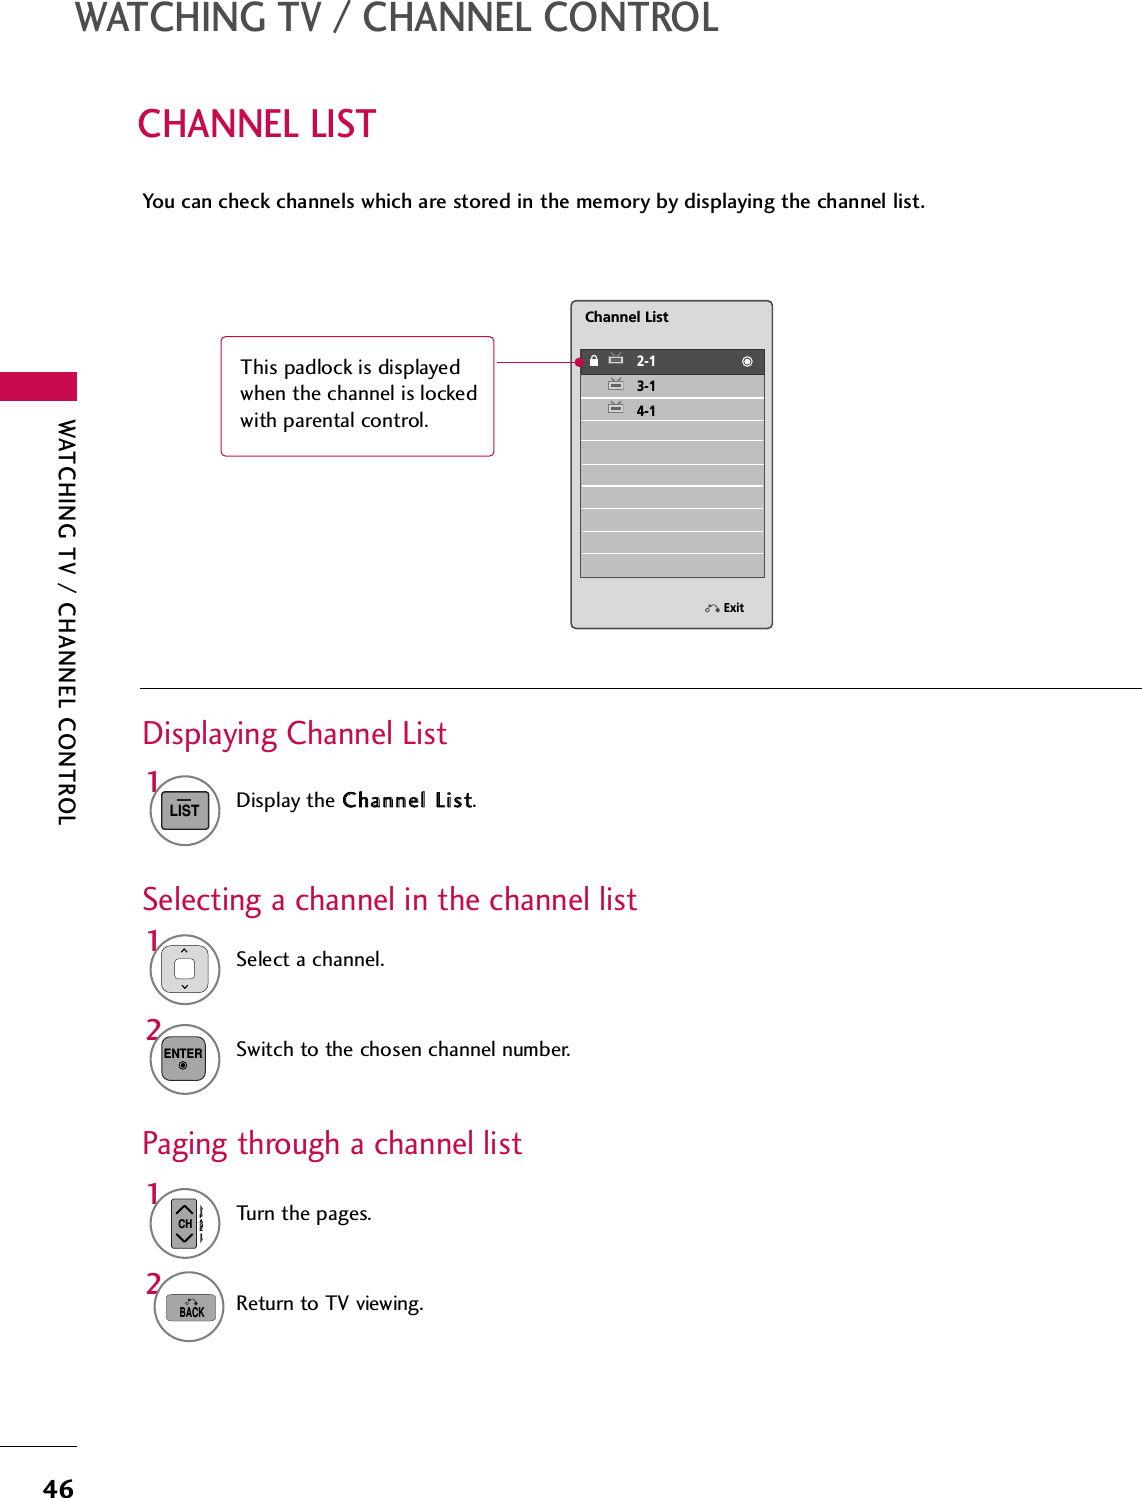
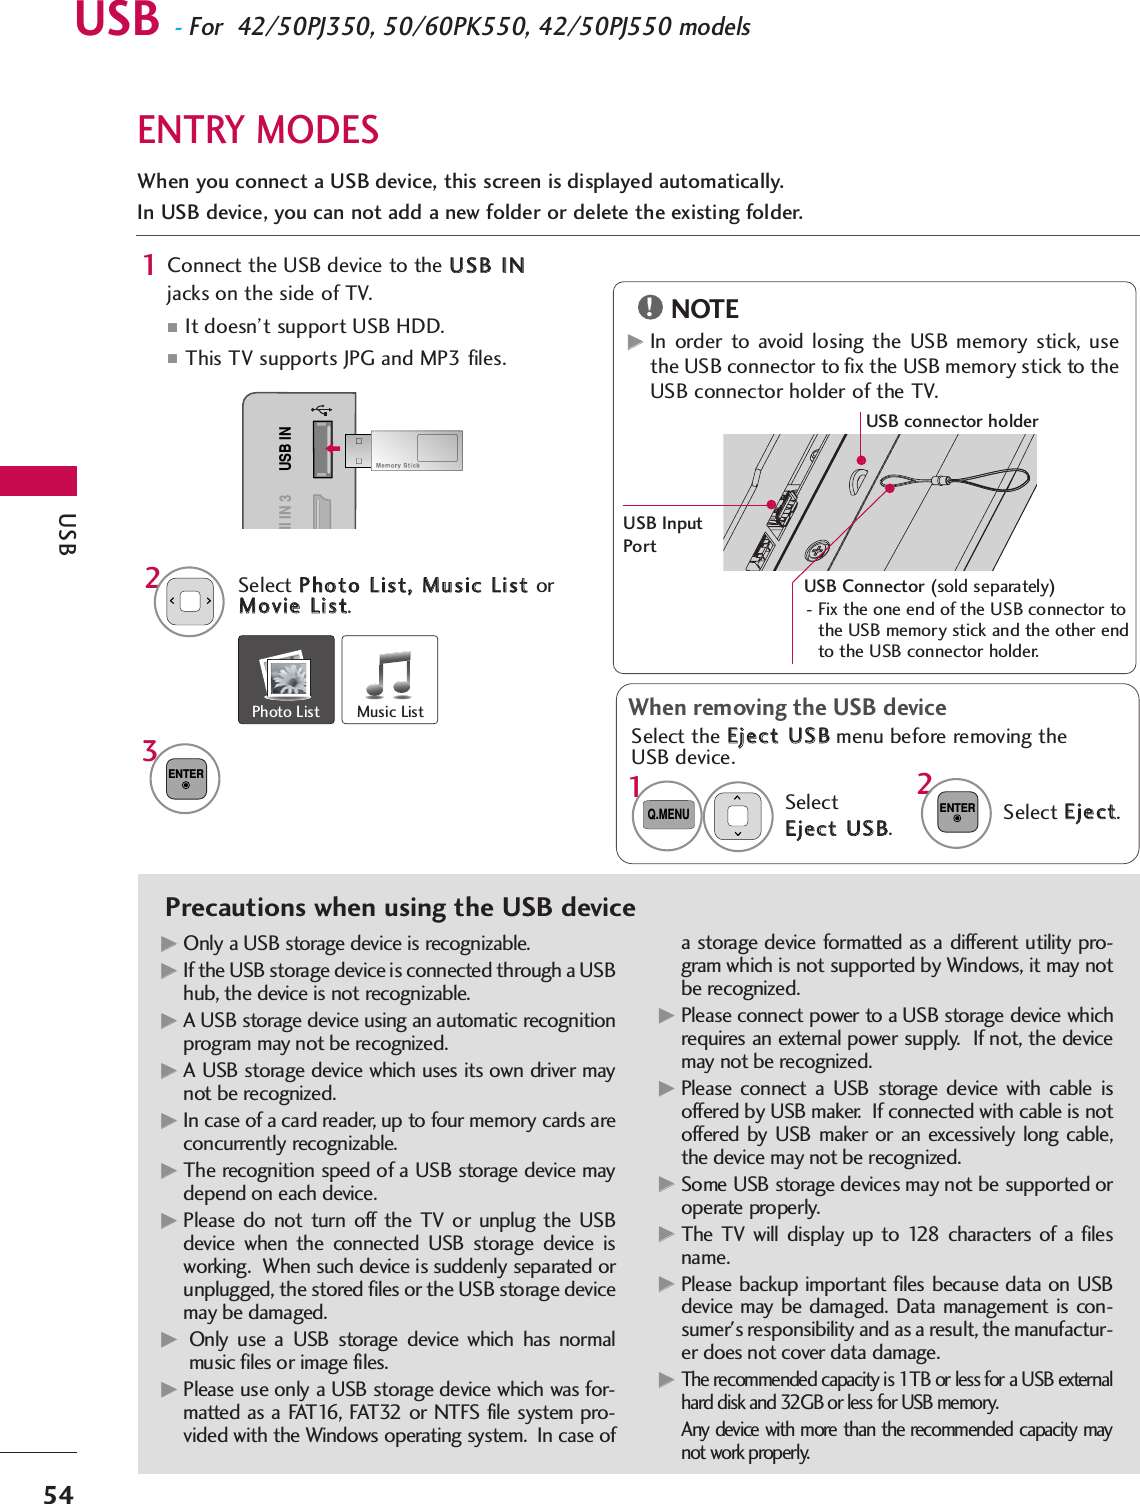
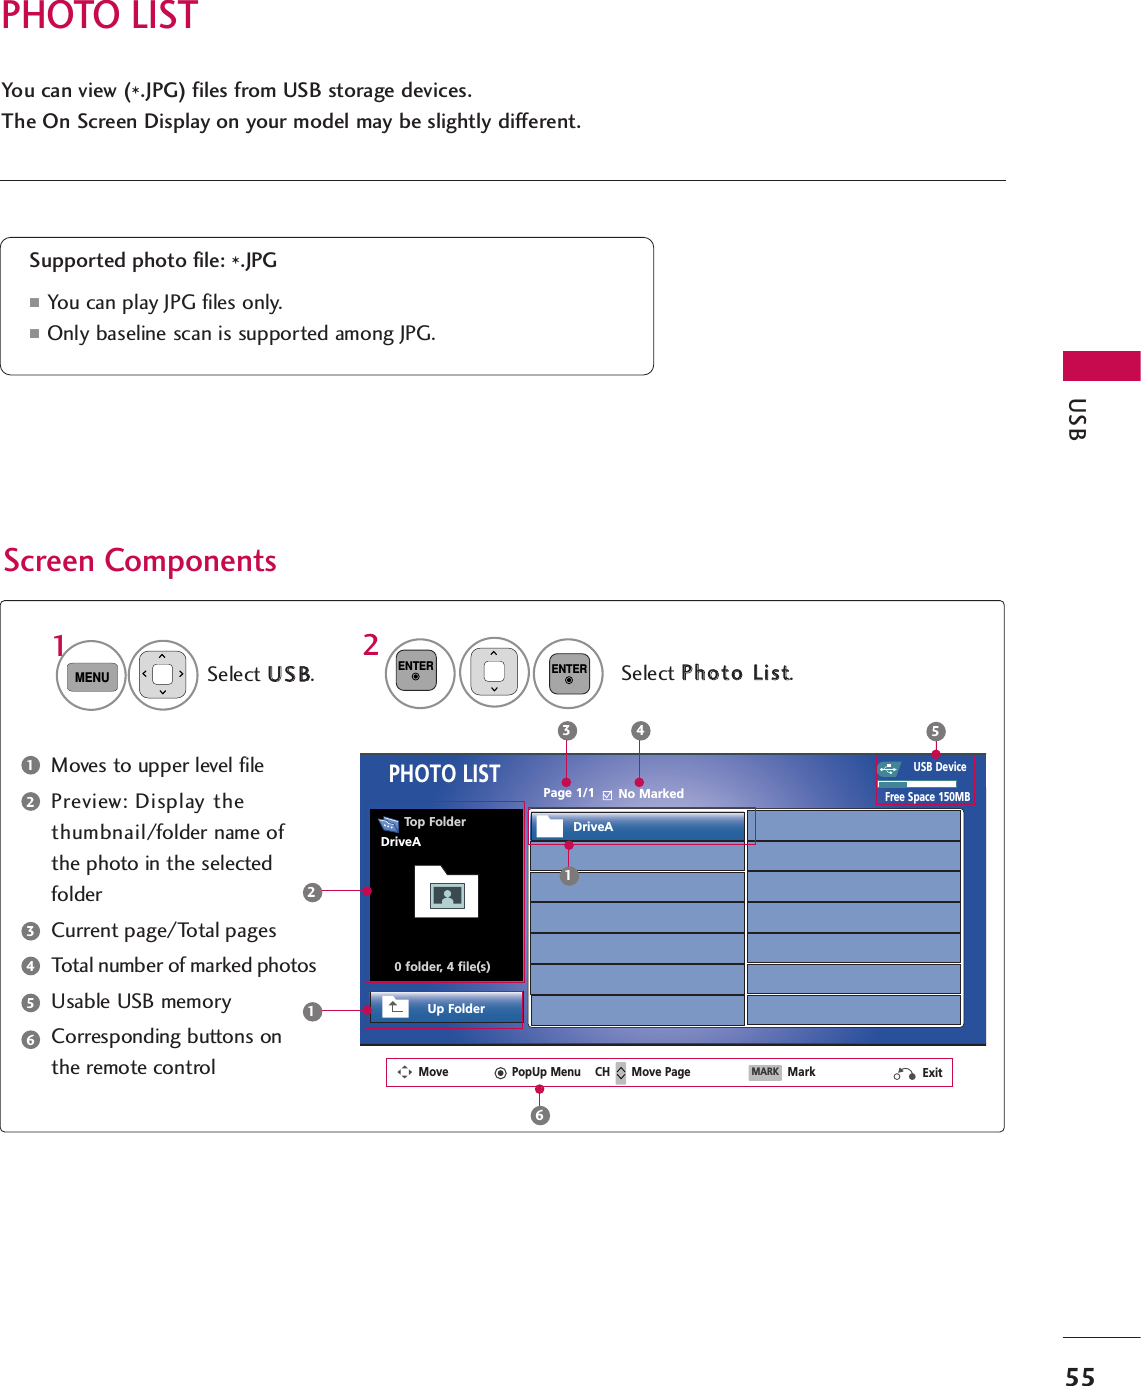
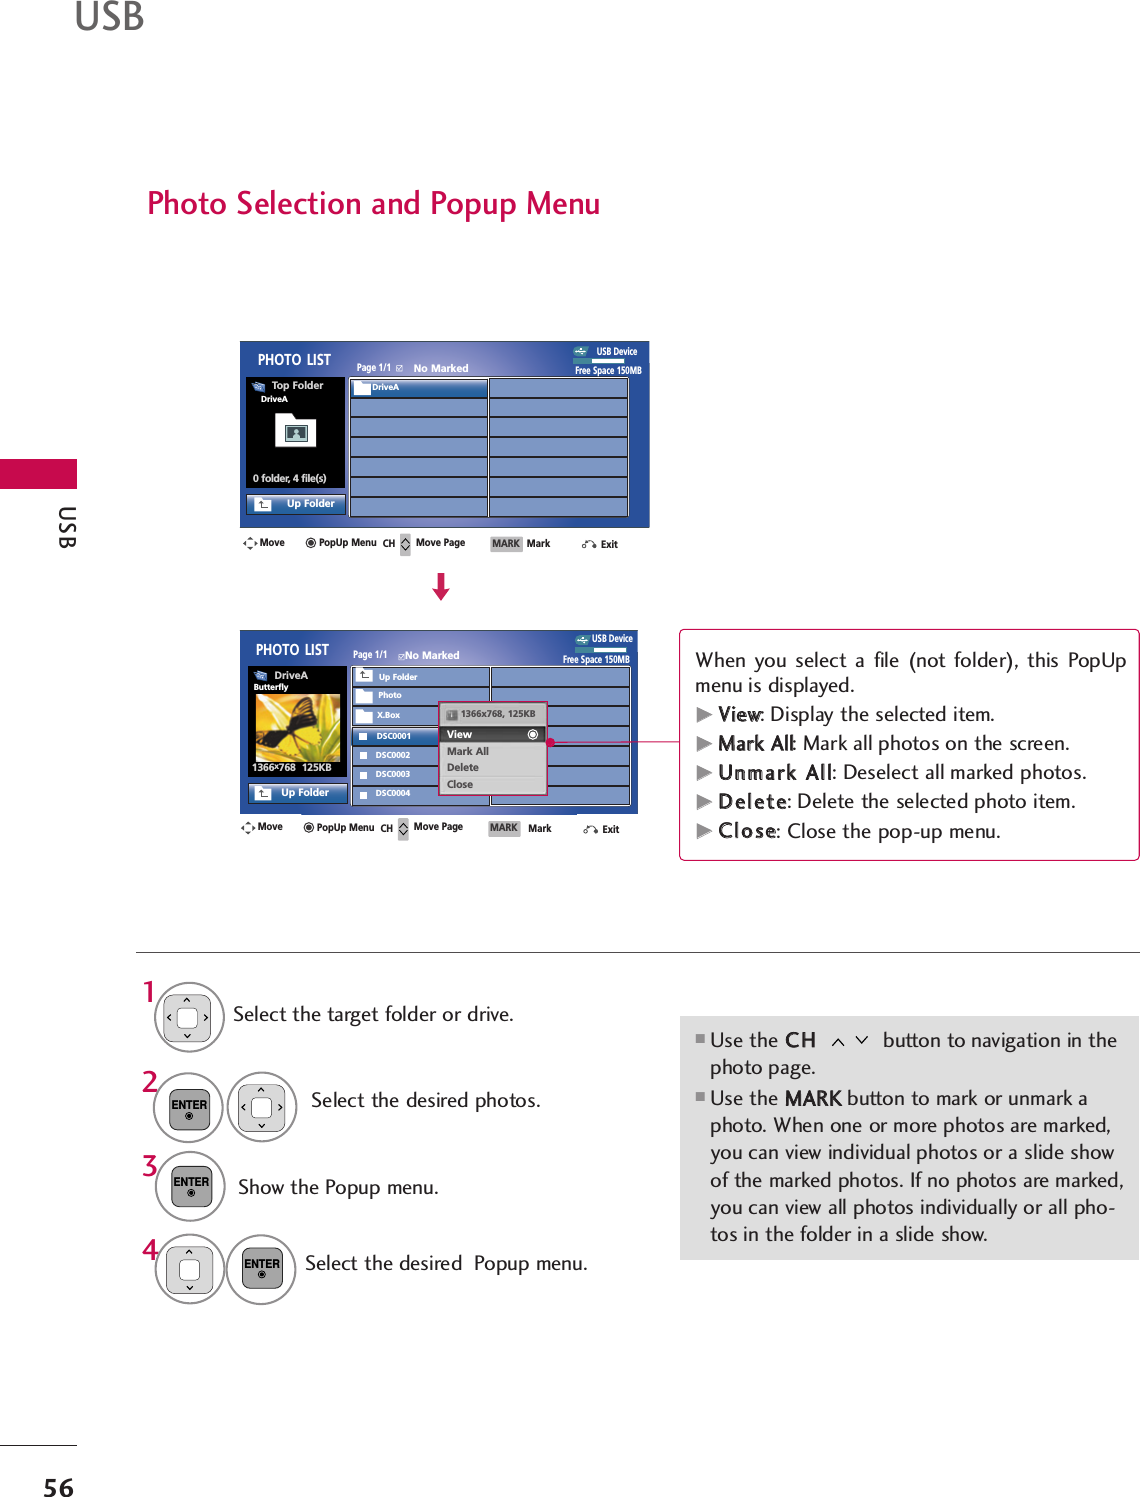
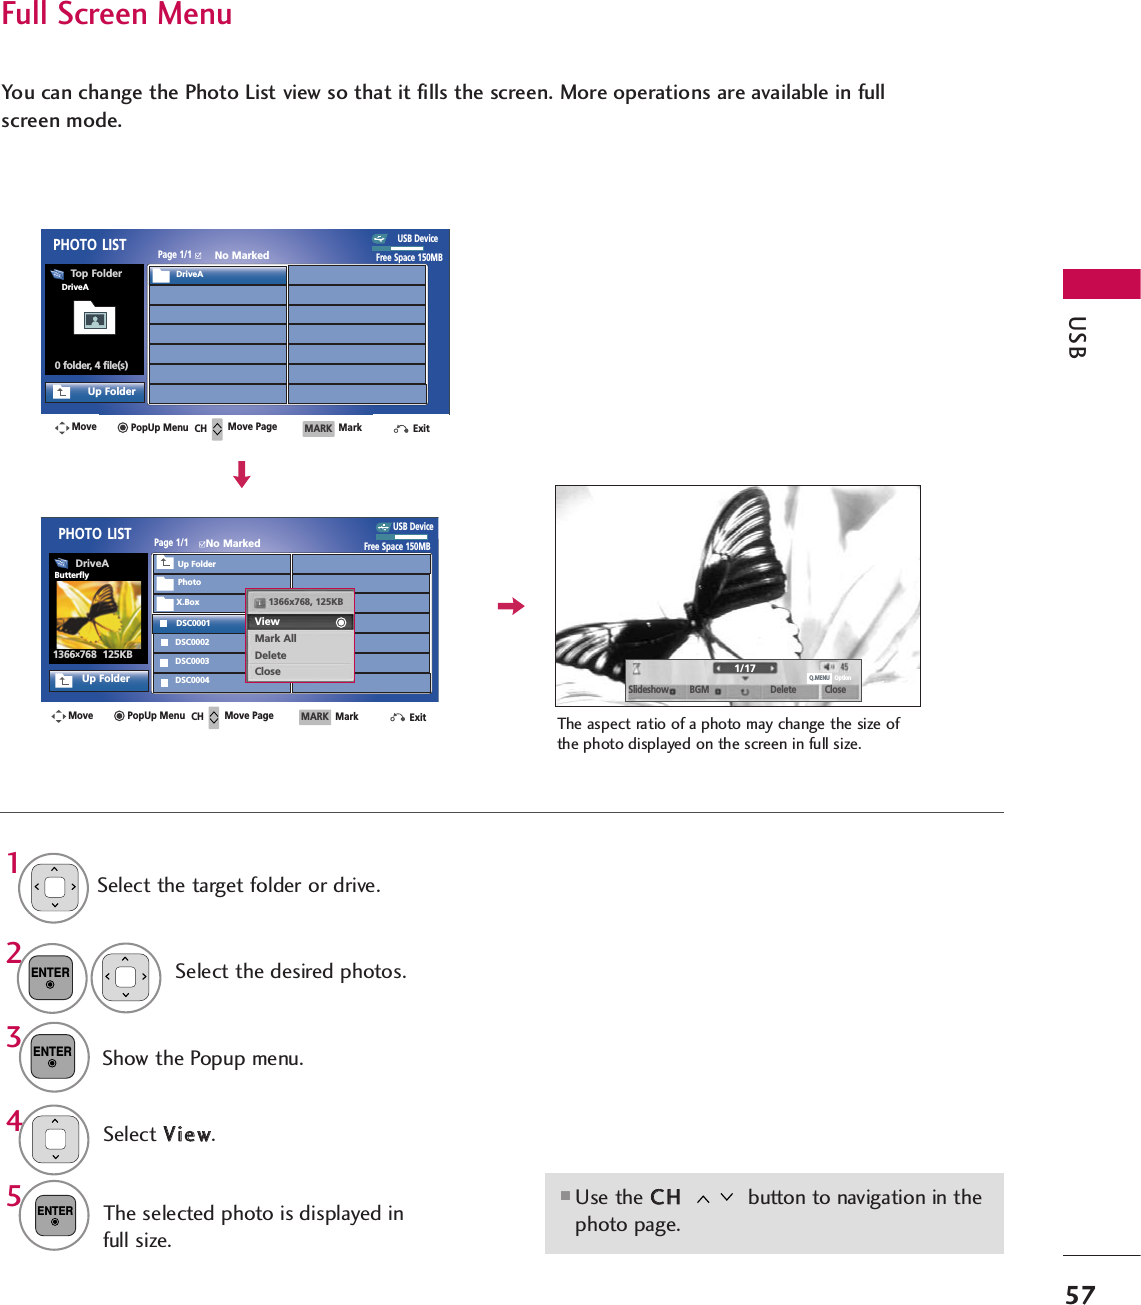
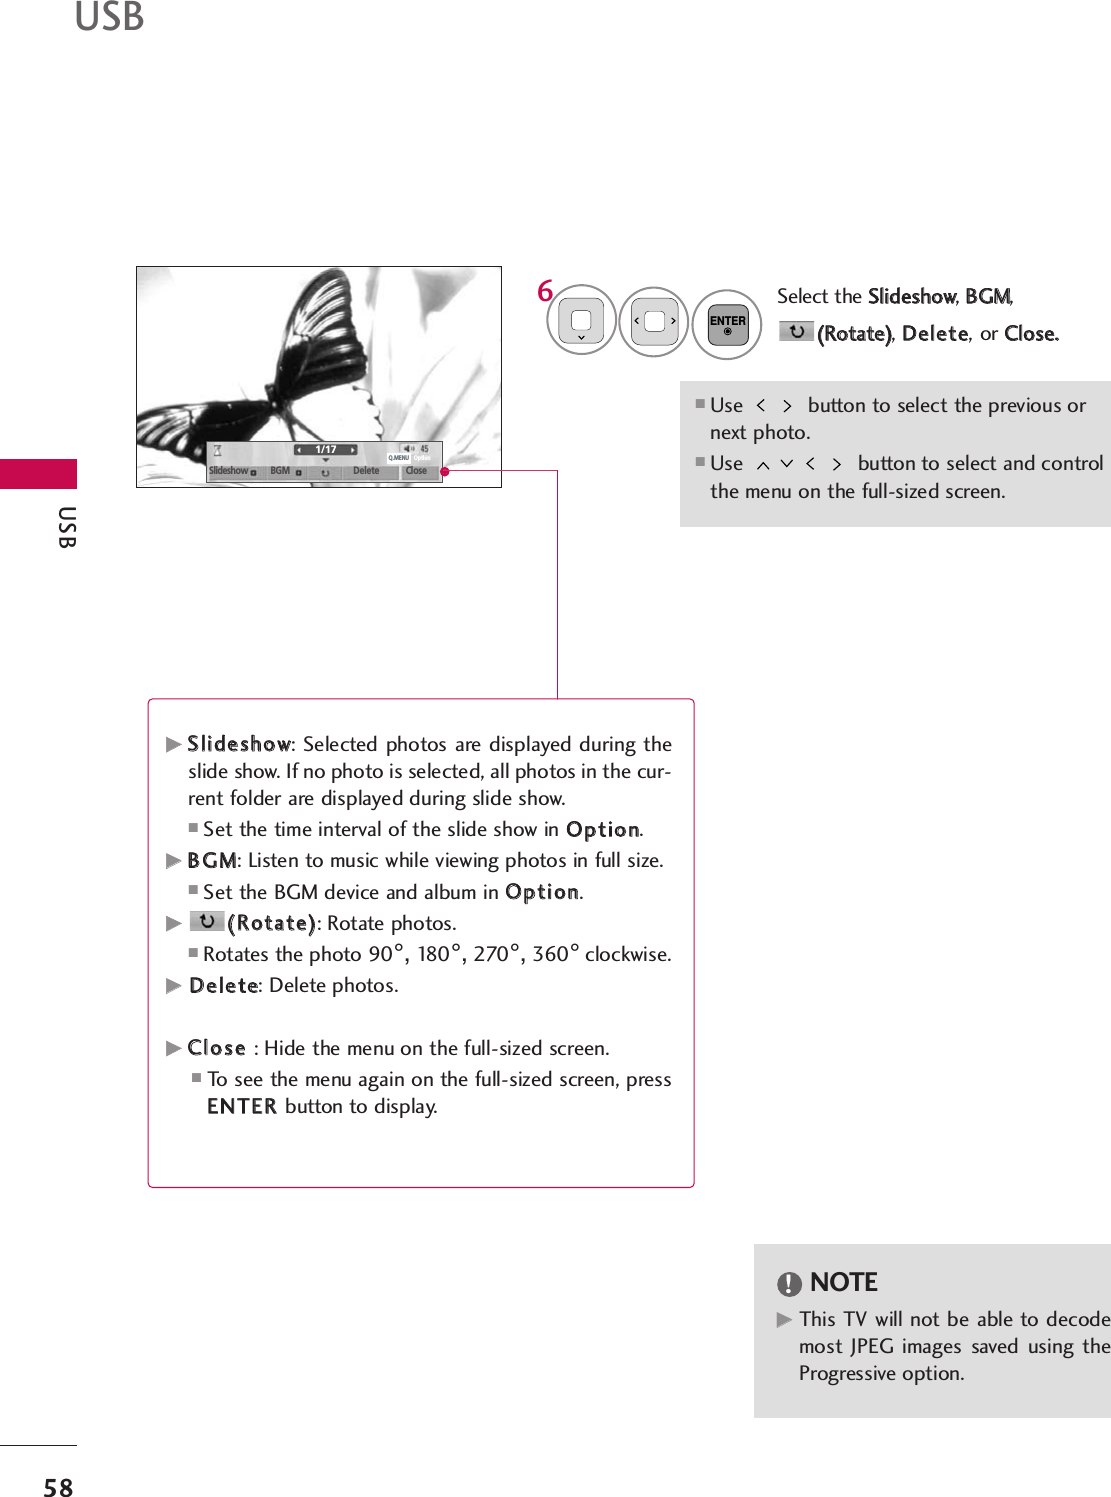
![WATCHING TV / CHANNEL CONTROL39INITIAL SETTINGThis Function guides the user to easily set the essential items for viewing the TV for the first time when pur-chasing the TV. It will be displayed on the screen when turning the TV on for the first time. It can also be acti-vated from the user menus.Select HHoommeeUUsseemode.1ENTERSelecting the environment.Choose the setting mode you want.Store DemoHome UsePrevious NextMode SettingStep3. Mode setting■Default selection is “HHoommee UUssee”. We recommend setting the TV to “HHoommee UUssee” mode for the best picturein your home environment.■“SSttoorree DDeemmoo” Mode is only intended for use in retail environments. Customers can adjust the “PPiiccttuurreemenu - PPiiccttuurree mmooddee” manually while inspecting the TV, but the TV will automatically return to preset in-store mode after 5 minutes.■You can also adjust IInniittiiaall SSeettttiinnggin the OOPPTTIIOONN menu.Factory defaults are set when you choose “HHoommee UUssee”.■If you do not complete the IInniittiiaall sseettttiinngg, it will appear whenever the TV is switched on until the IInniittiiaallsseettttiinngg procedure is completed.Select [Home Use] to use this TV at home.Select menu Language.1ENTERNextEspañol FrançaisLanguageEnglishStep2. Language SelectingSelect AAuuttooor MMaannuuaall.Select desired time option.1ENTER2YearCurrent Time Setting2007Month 11Date 15Hour 5 PMMinute 52Time Zone EasternDaylight SavingOffFF Auto GGTime SettingStep4. Time settingPrevious NextStart AAuuttoo TTuunniinngg.1ENTERCheck your antenna connection.The previous channel information will be updatedduring Auto Tuning.Previous NextAuto TuningStep5. Auto TuningNextStep1. WelcomeWELCOME !Thank you for choosing LG1ENTER](https://usermanual.wiki/LG-Electronics-USA/50PJ350UB.User-Manual-1/User-Guide-1219784-Page-39.png)