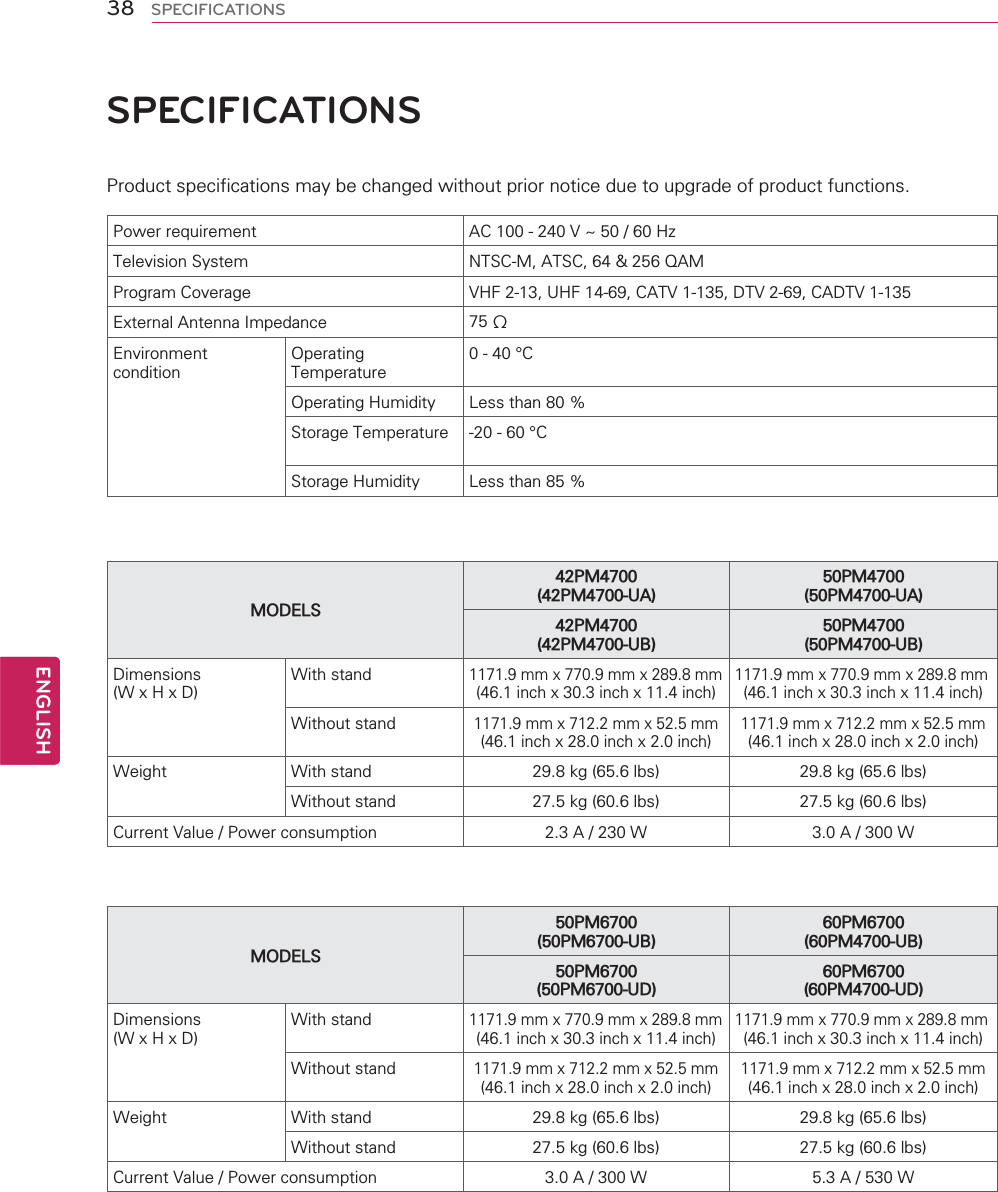
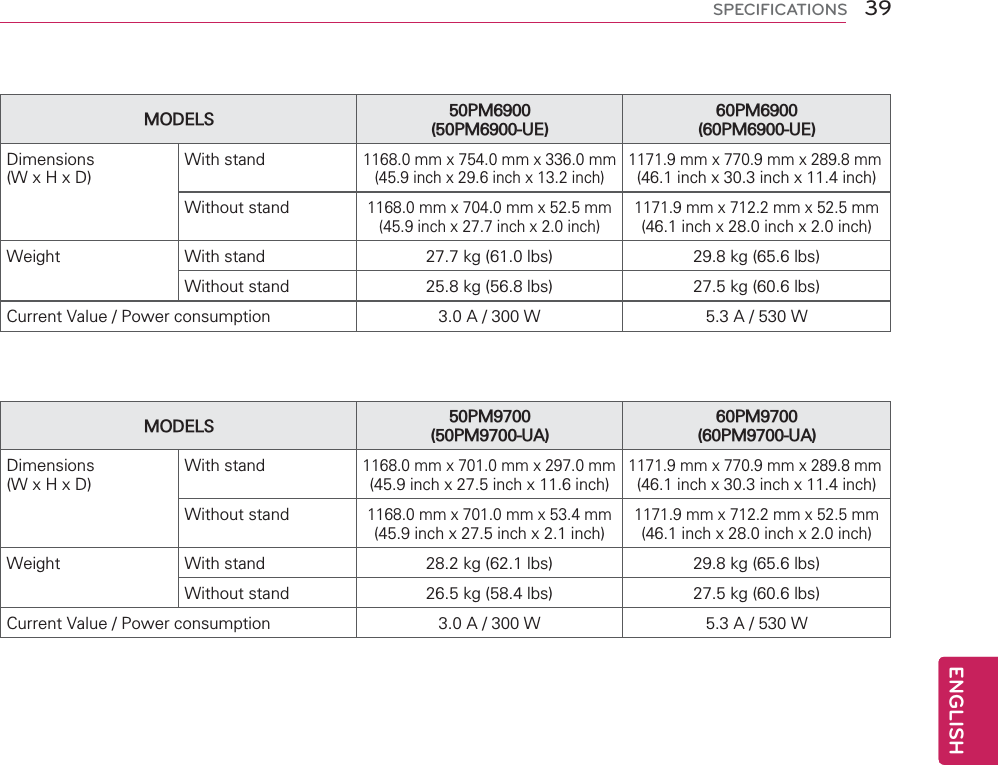
LG Electronics USA 50PM4700UB Plasma Monitor User Manual MFL67468601 en GP4M U indd
LG Electronics USA Plasma Monitor MFL67468601 en GP4M U indd
UserManual.wiki
>
LG Electronics USA
>
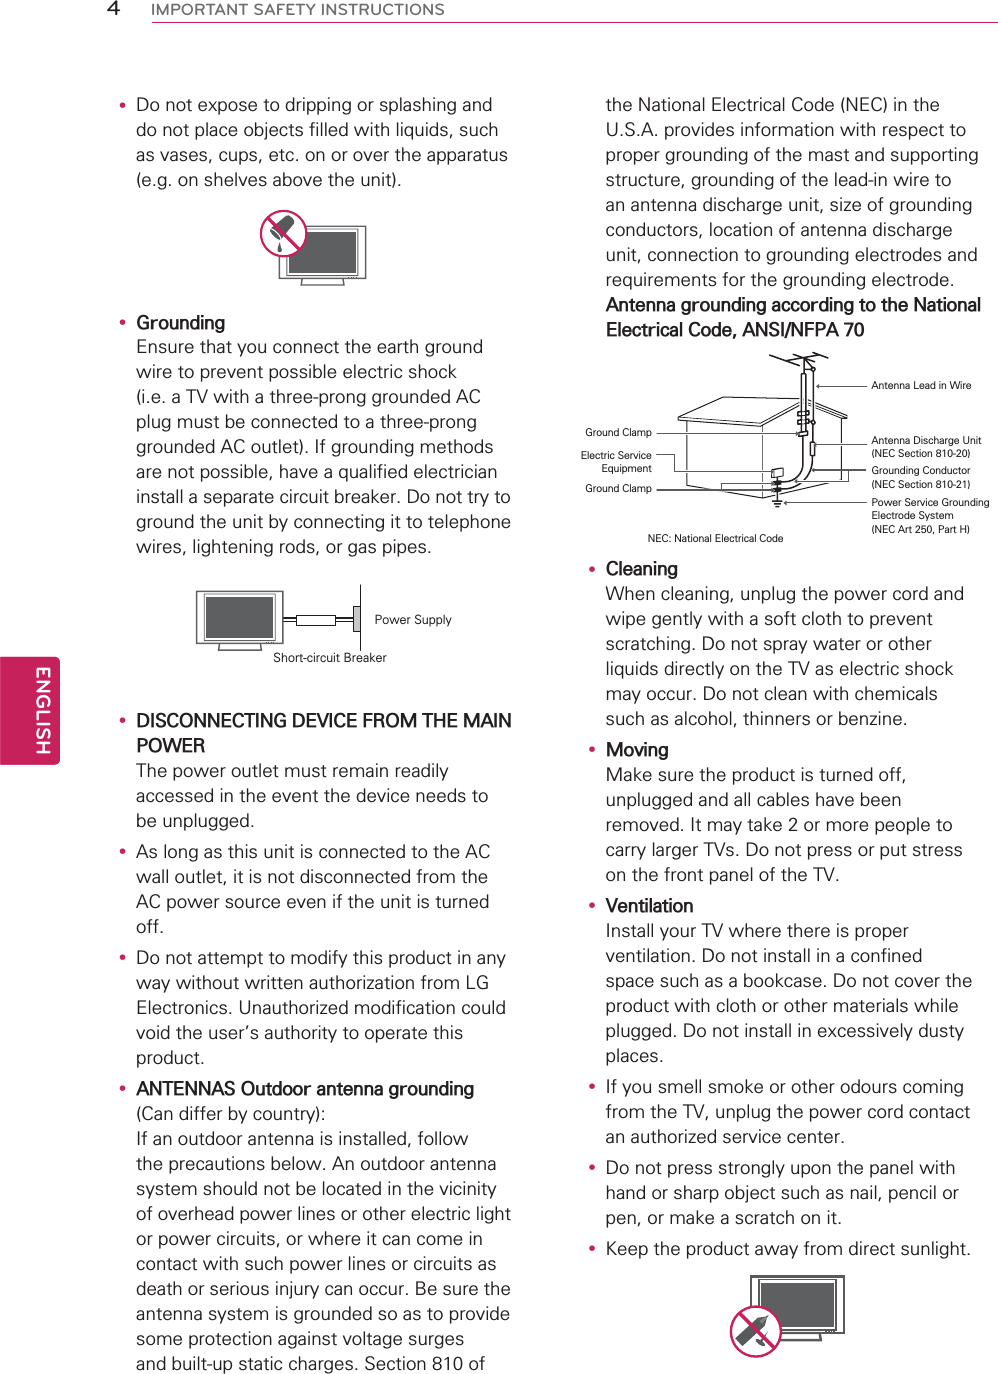
50PM4700UB User Manual
User manual
Navigation menu
Upload a User Manual
Namespaces
Wiki Guide
HTML
PDF
Info
Views
User Manual
Discussion / Help
Navigation


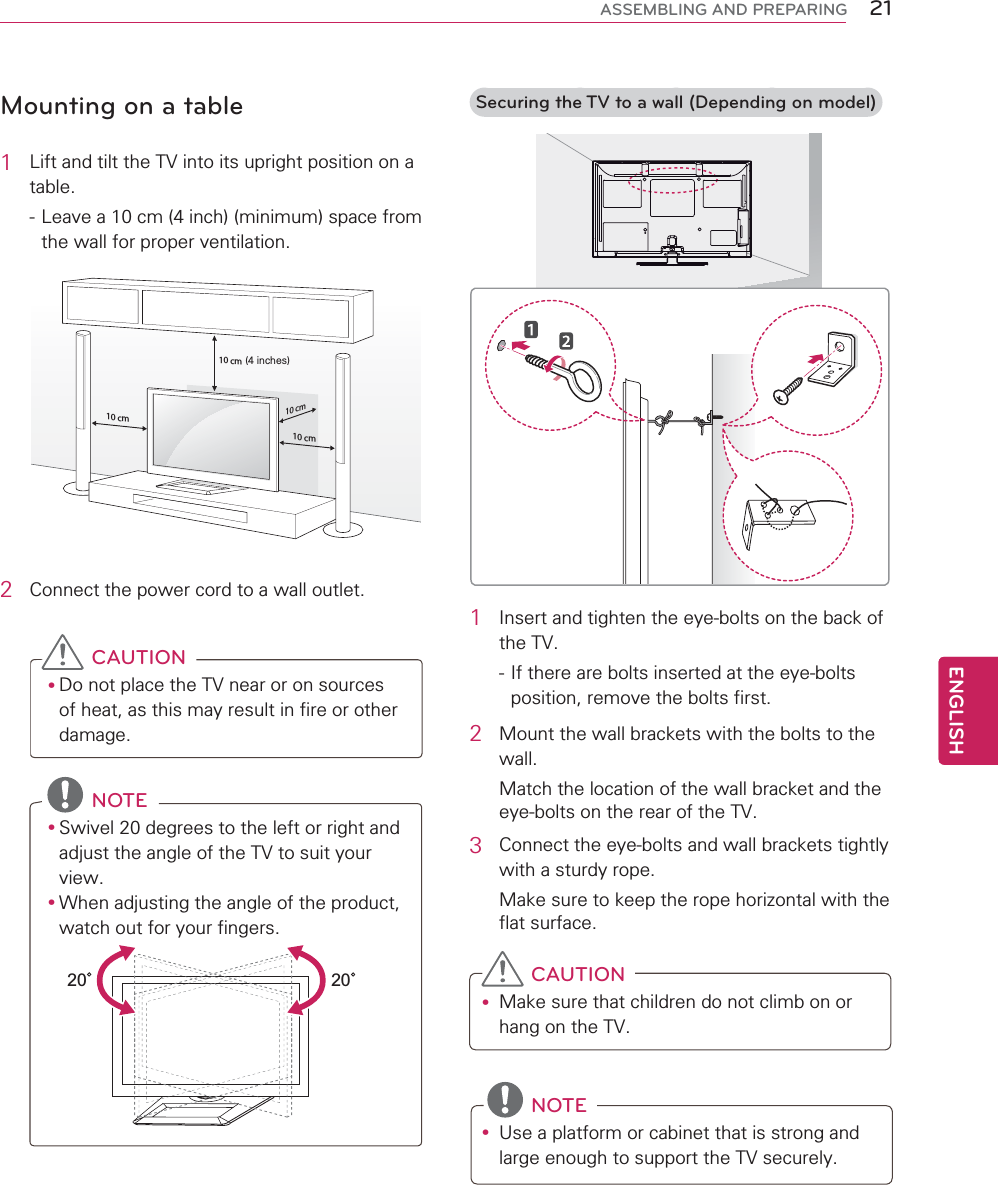
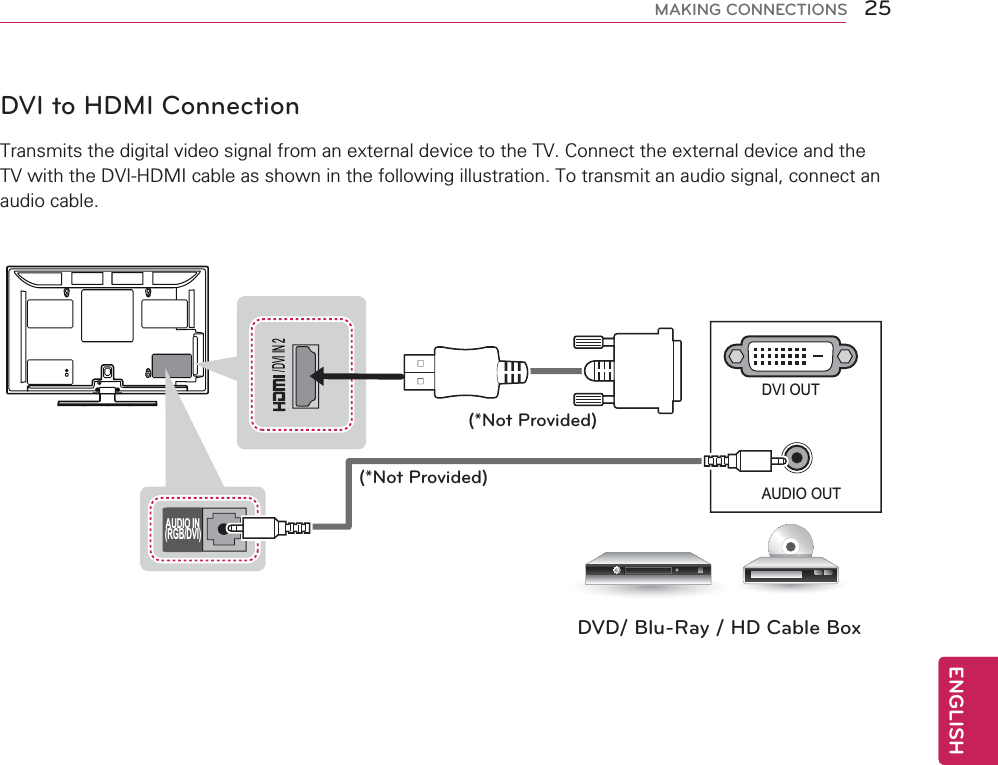
![11ENGENGLISHASSEMBLING AND PREPARINGNOTEyHow to use the ferrite core1 Use the ferrite core to reduce the electromagnetic interference in the PC audio cable.Wind the PC audio cable on the ferrite core thrice. Place the ferrite core close to the TV.[to an External device] [to the TV][Figure 1][Cross Section of Ferrite Core]10 mm (+/-5 mm)2 Use the ferrite core to reduce the electromagnetic interference in the power cable.Wind the power cable on the ferrite core once. Place the ferrite core close to the TV and wall plug.[to a wall plug] [to the TV][Figure 2] [Cross Section of Ferrite Core]3 Use the ferrite core to reduce the electromagnetic interference in the LAN cable. Wind the LAN cable once on the ferrite core. Place the ferrite core close to the TV.[to an External device] [to the TV][Figure 3][Cross Section of Ferrite Core]10 mm (+/-5 mm)- If there is one ferrite core, follow as shown in Figure 1.- If there are three ferrite cores, follow as shown in Figures 1 and 2.- If there are fore ferrite cores, follow as shown in Figures 1,2 and 3.](https://usermanual.wiki/LG-Electronics-USA/50PM4700UB/User-Guide-1601133-Page-11.png)

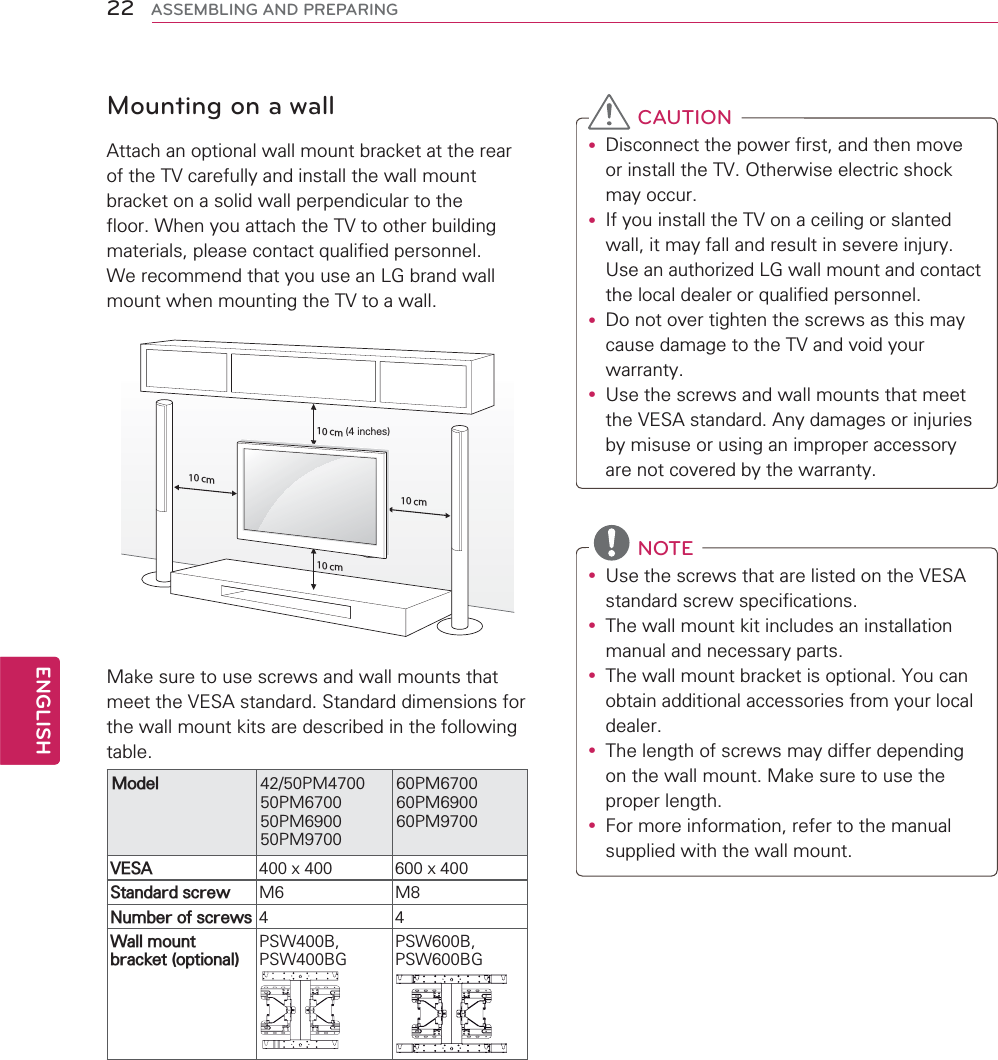
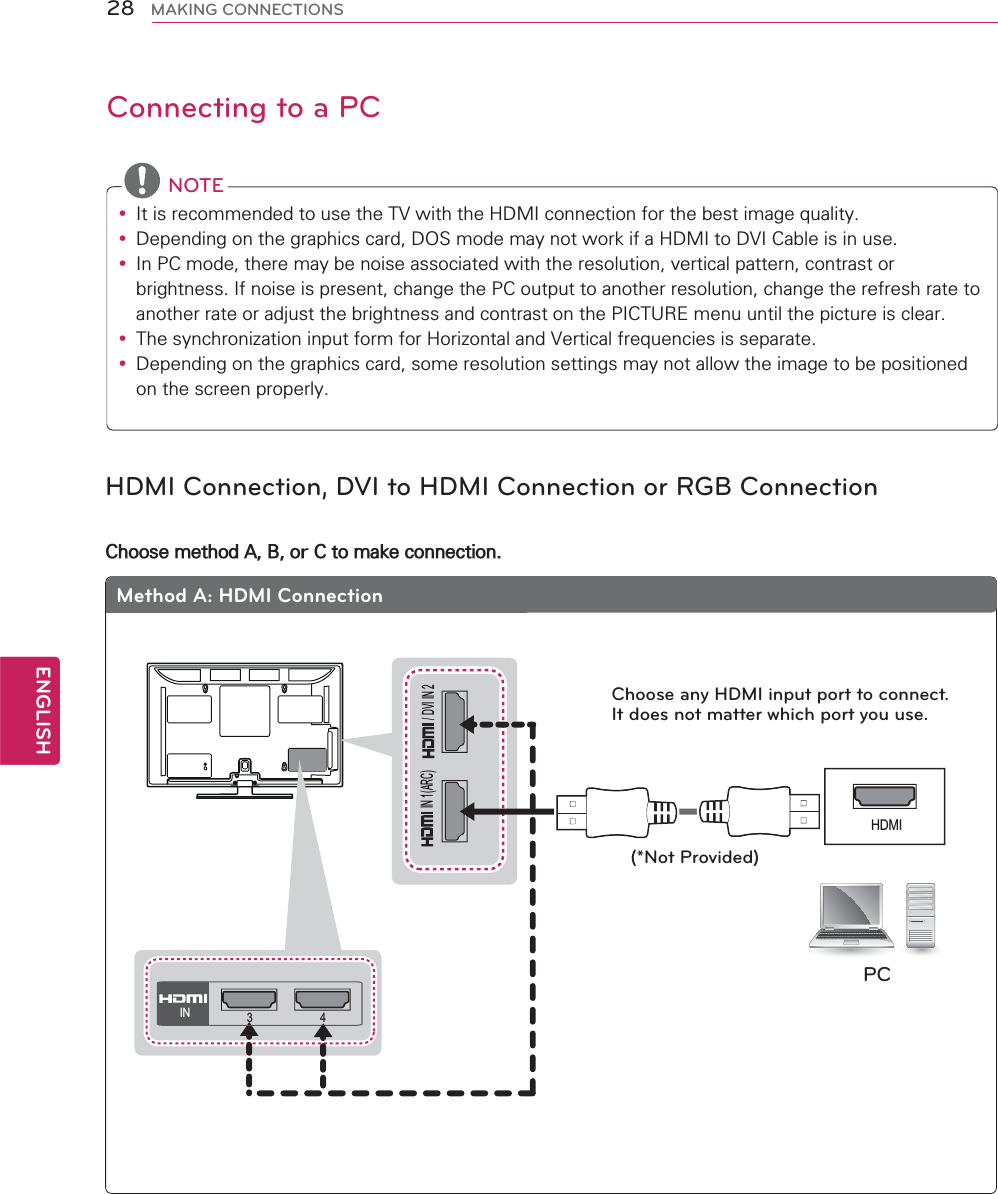
![37ENGENGLISHTROUBLESHOOTINGTROUBLESHOOTINGGeneralProblem ResolutionCannot control the TV with the remote control.yCheck the remote control sensor on the product and try again.yCheck if there is any obstacle between the product and the remote control.yCheck if the batteries are still working and properly installed ( to , to ).No image display and no sound is produced.yCheck if the product is turned on.yCheck if the power cord is connected to a wall outlet.yCheck if there is a problem in the wall outlet by connecting other products.The TV turns off suddenly. yCheck the power control settings. The power supply may be interrupted.yCheck if the Auto sleep feature is activated in the Time settings. yIf there is no signal while the TV is on, the TV will turn off automatically after 15 minutes of inactivity.PentouchProblem ResolutionThe touch pen does not work. yCheck that you used the remote control to enter Pentouch mode.yCheck that the Pentouch dongle is connected to the computer and the red LED is on.yPress the (Power) button on the touch pen to check that it is powered on.yCheck that the touch pen is paired for use. (The touch pen is correctly paired if the red LED is on once when you press the Home button on the touch pen.)ySet the computer screen to display only on the TV.The TV screen doesn’t look normal when using Pentouch.yCheck that the computer is correctly connected to the TV.yCheck that you are using the optimal resolution.ySet the aspect ratio on the TV to Just Scan.The touch pen is touched on wrong positions.ySet the computer screen to display only on the TV.yIf the point you touch on the TV screen using the touch pen and the point indicated as touched on the computer screen do not match when the computer and the TV are connected by a PC signal (RGB) cable, use the TV remote control to select [SETTINGS] ĺ [Picture] ĺ [Screen] (RGB-PC), then select [Auto Config.] to adjust the screen.The touch pen movement is not smooth.yCheck whether the computer and the TV are too far from each other. Check whether there are too many obstructions between the computer and the TV.yCheck whether many other applications are running on the computer. (Please avoid running other applications while using the Pentouch program.)OPEN SOURCE SOFTWARE NOTICETo obtain the source code under GPL, LGPL, MPL and other open source licenses, that is contained in this product, please visit http://opensource.lge.com.In addition to the source code, all referred license terms, warranty disclaimers and copyright notices are available for download.](https://usermanual.wiki/LG-Electronics-USA/50PM4700UB/User-Guide-1601133-Page-37.png)