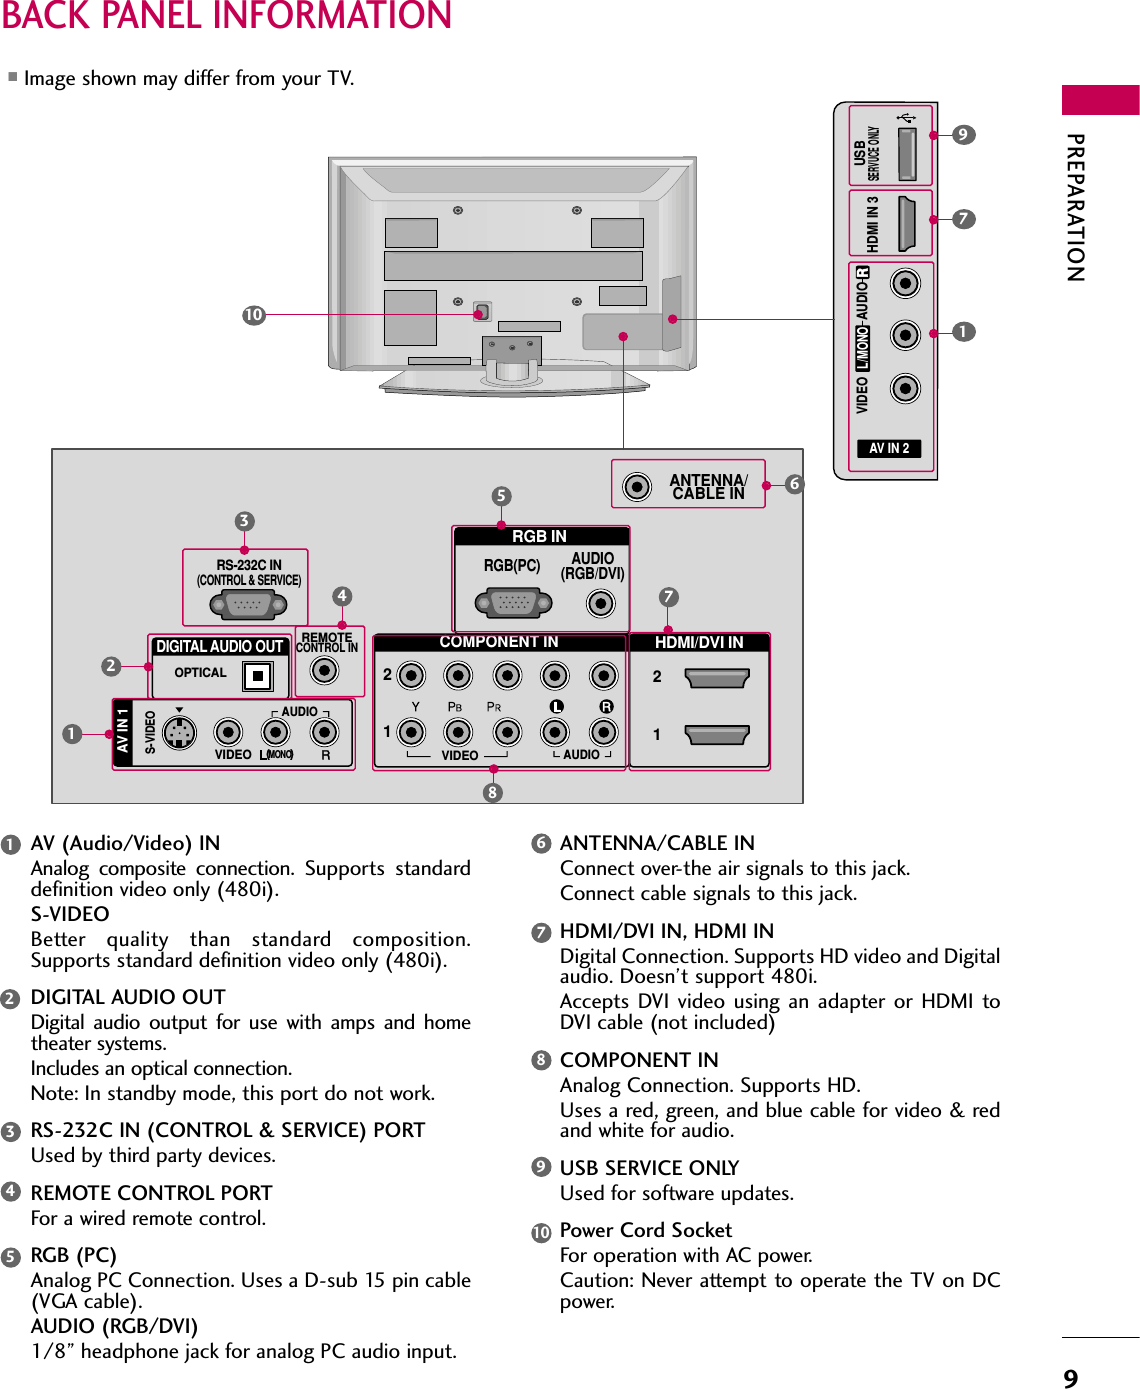
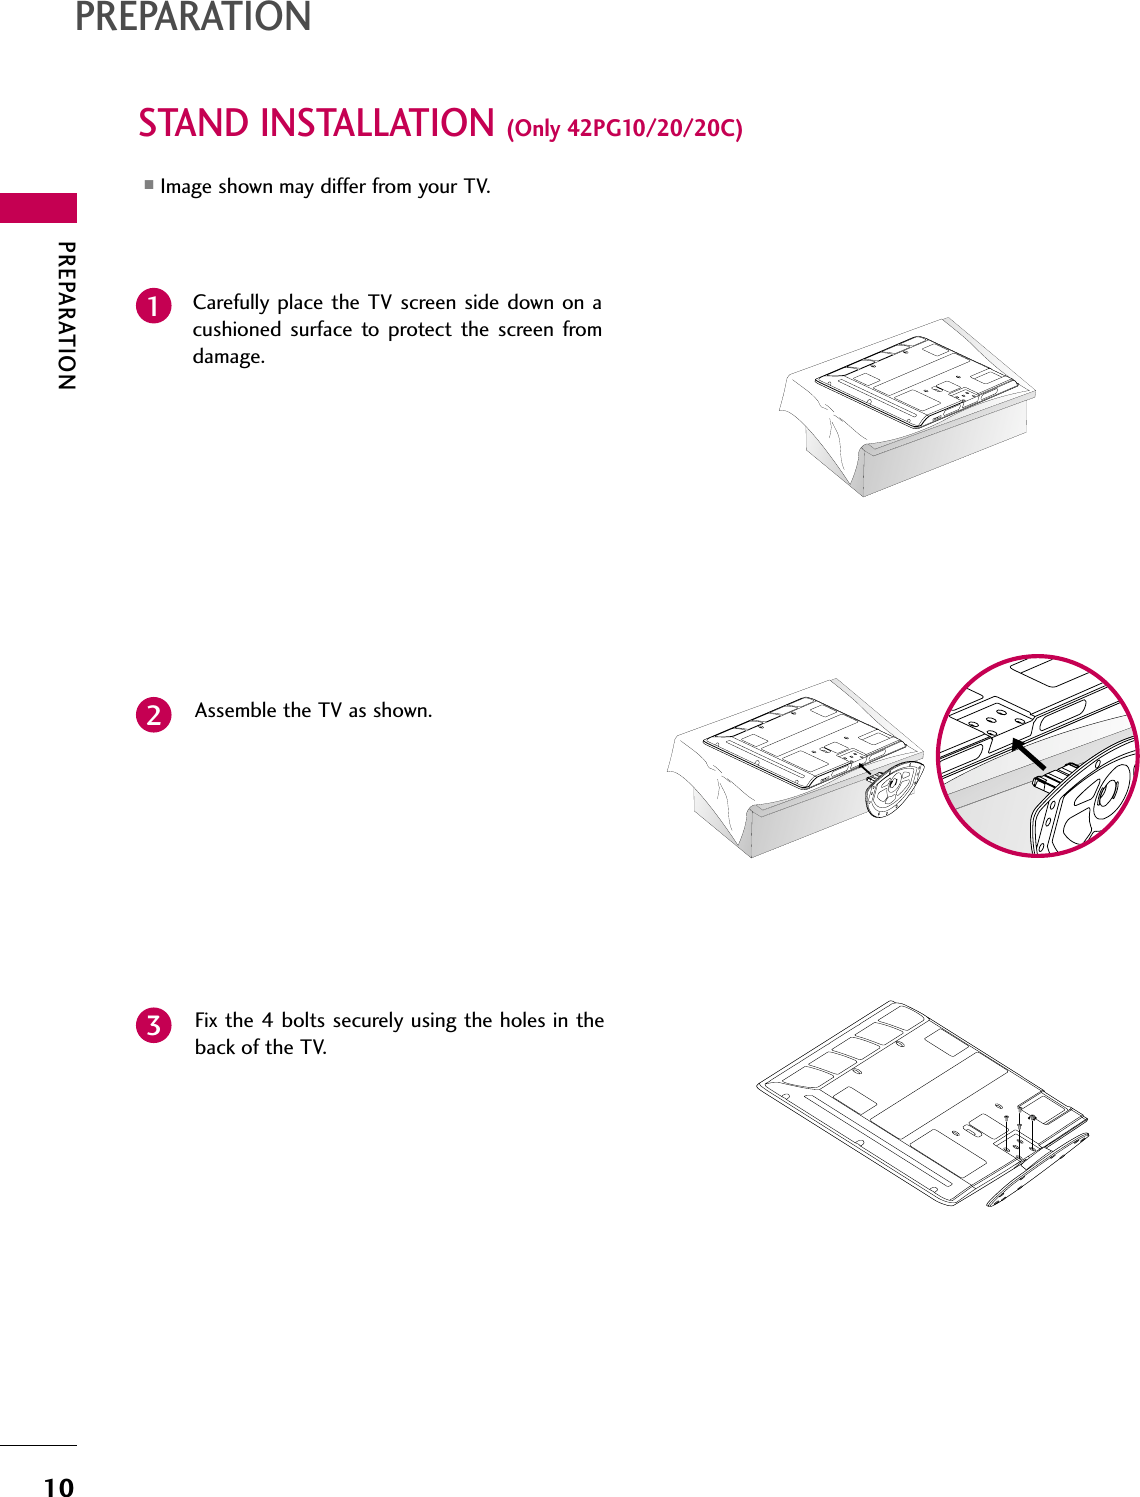
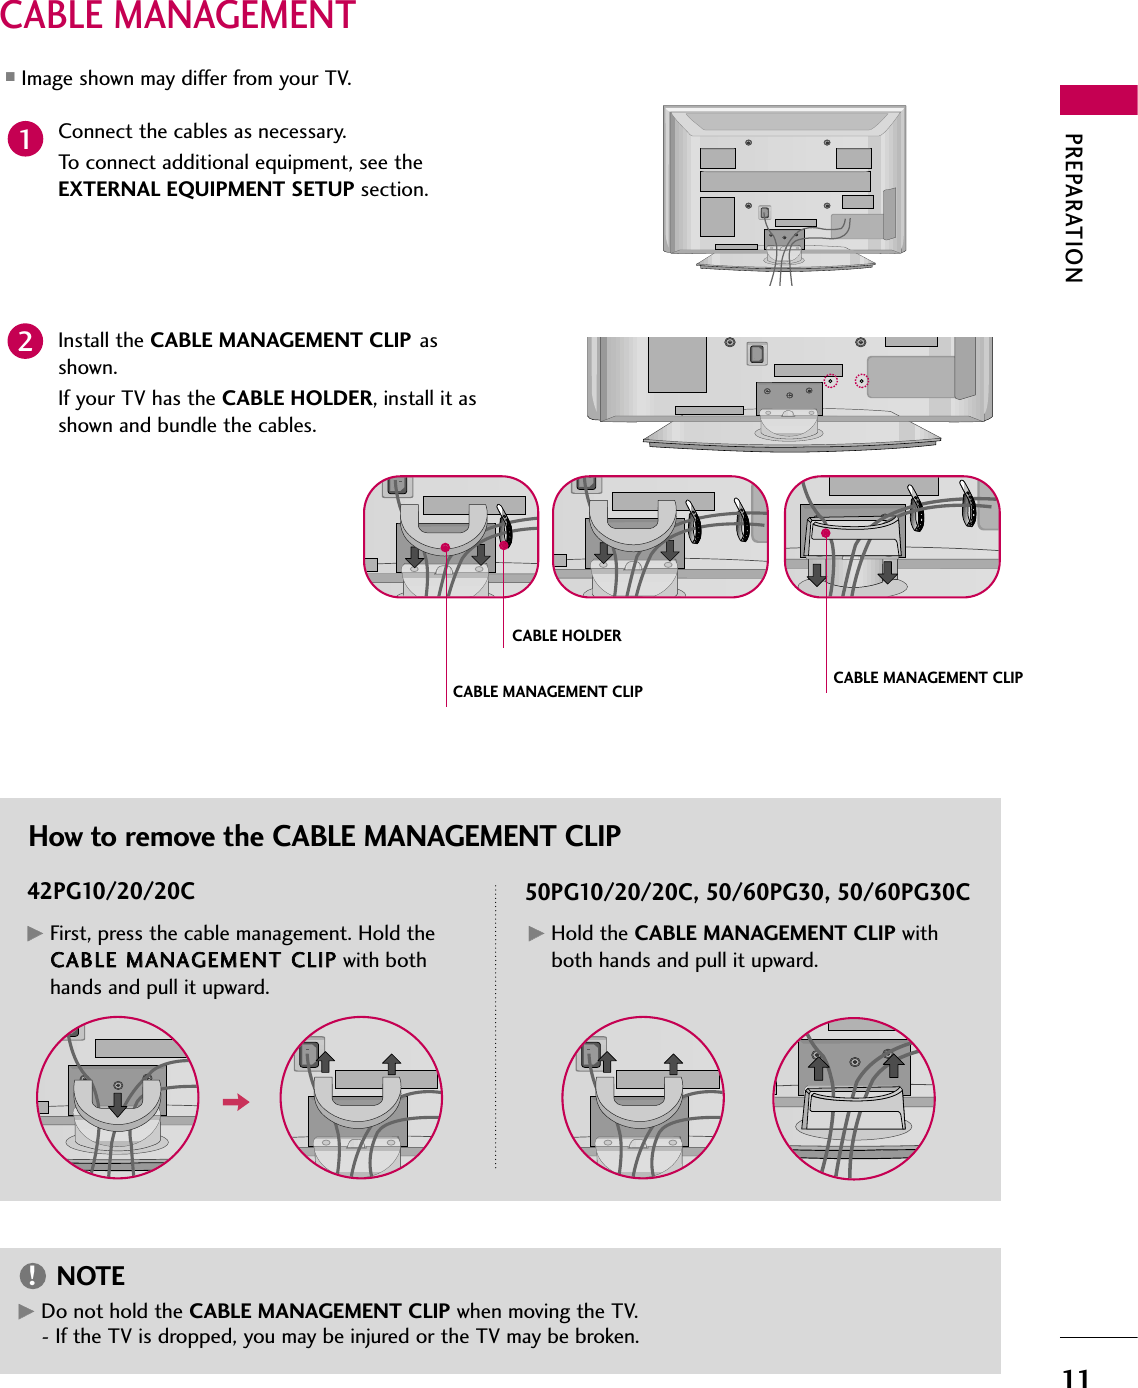
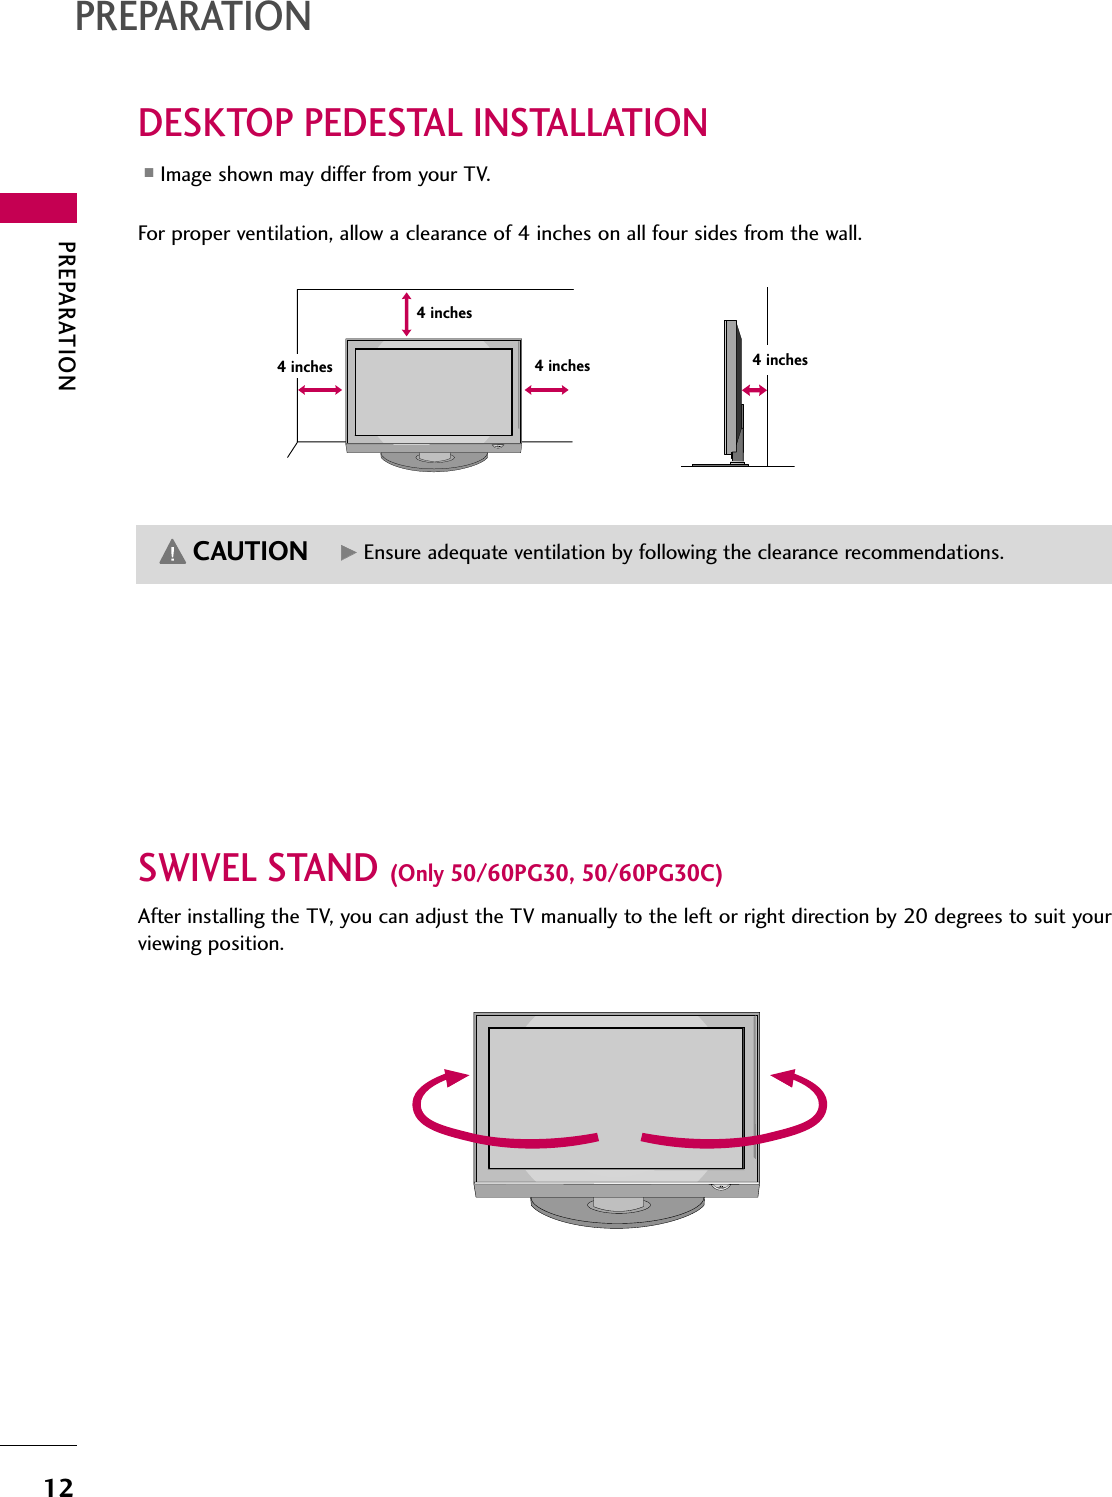
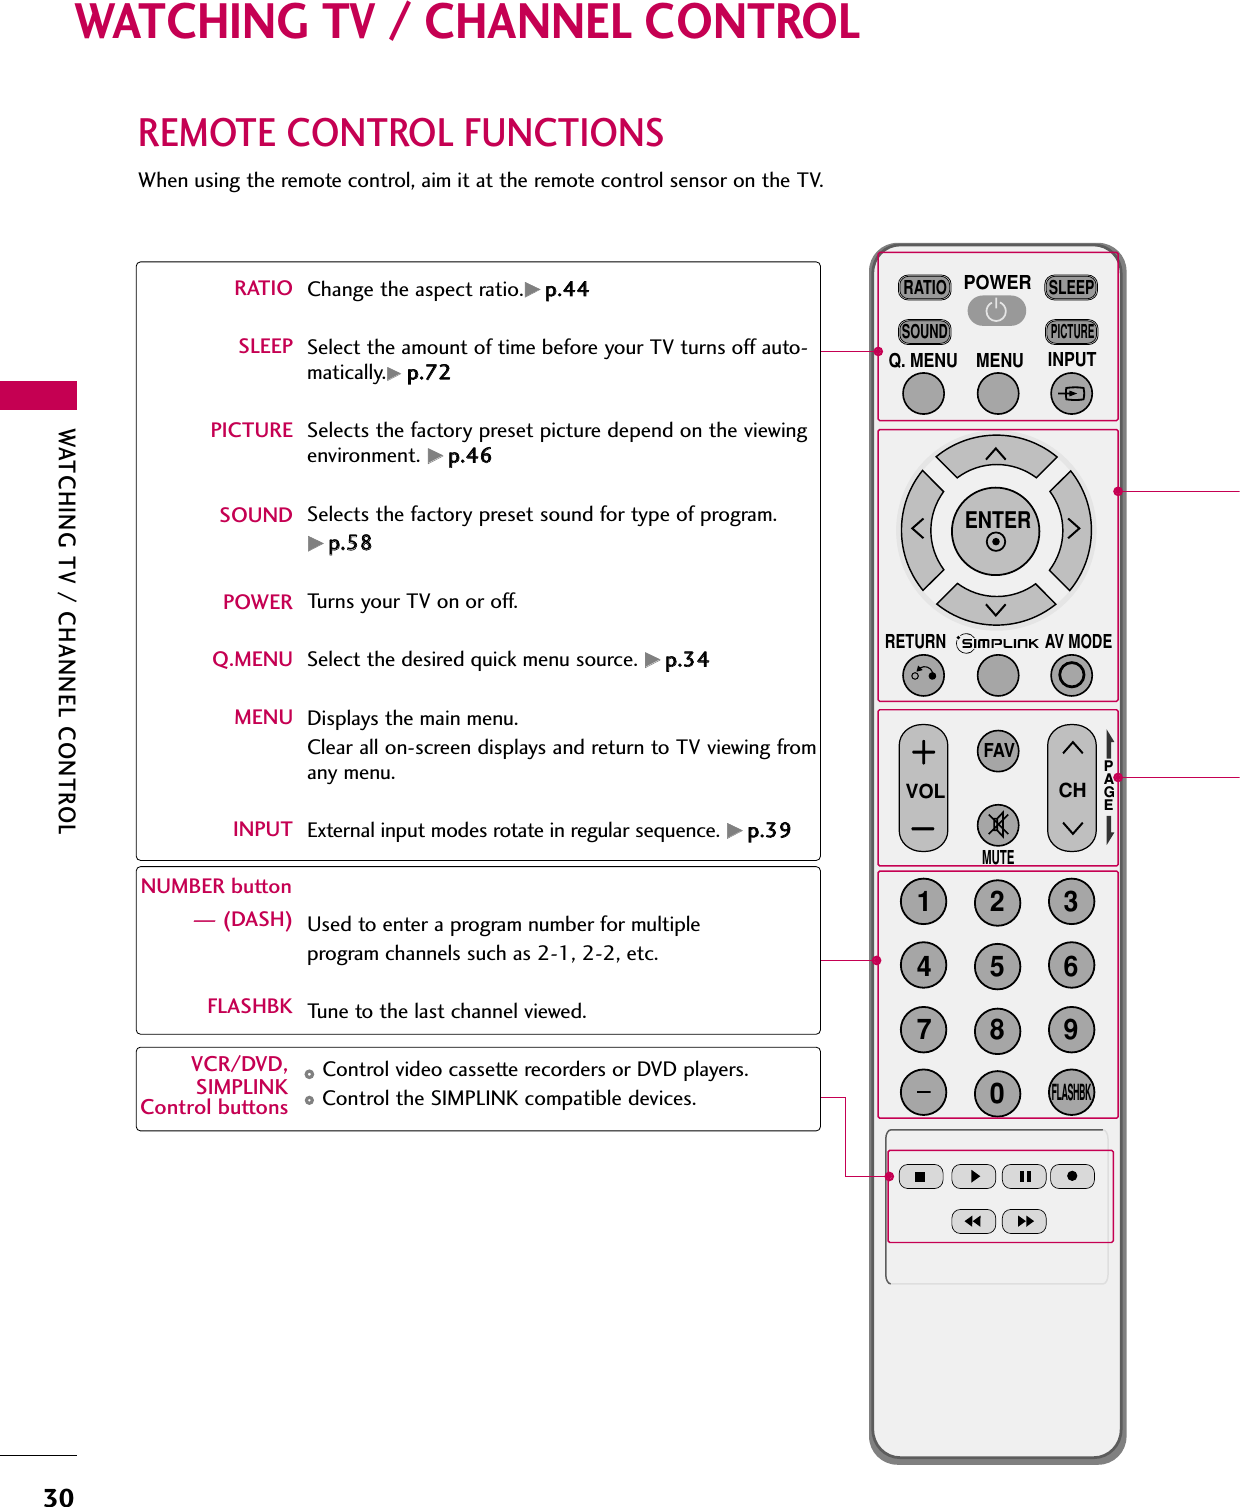
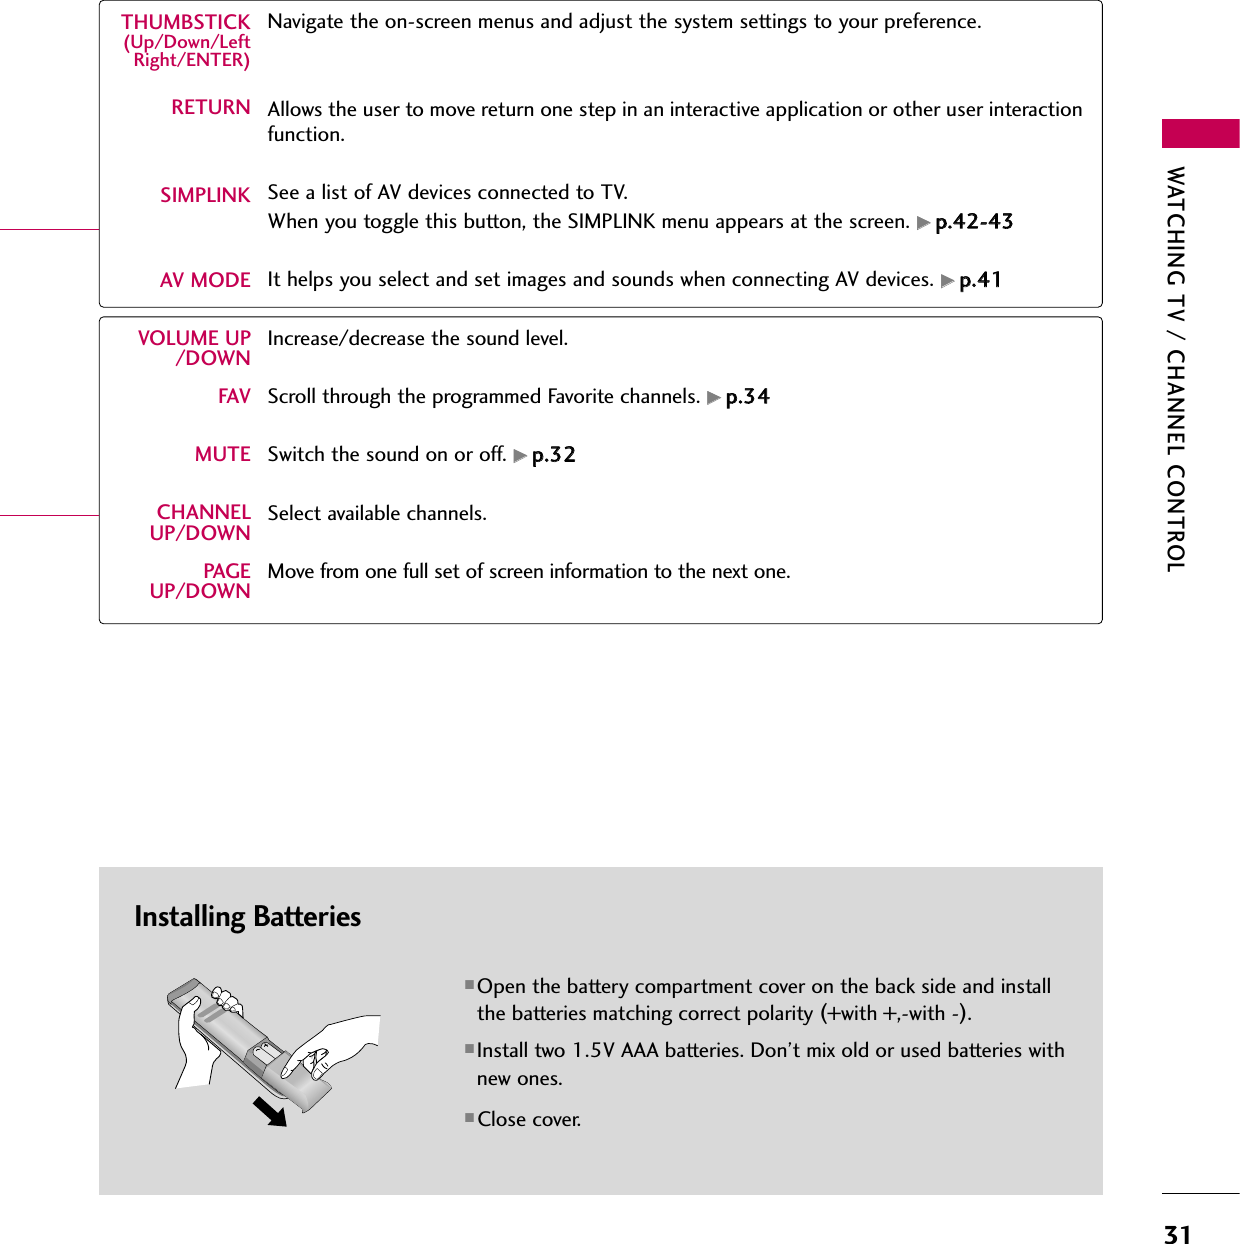
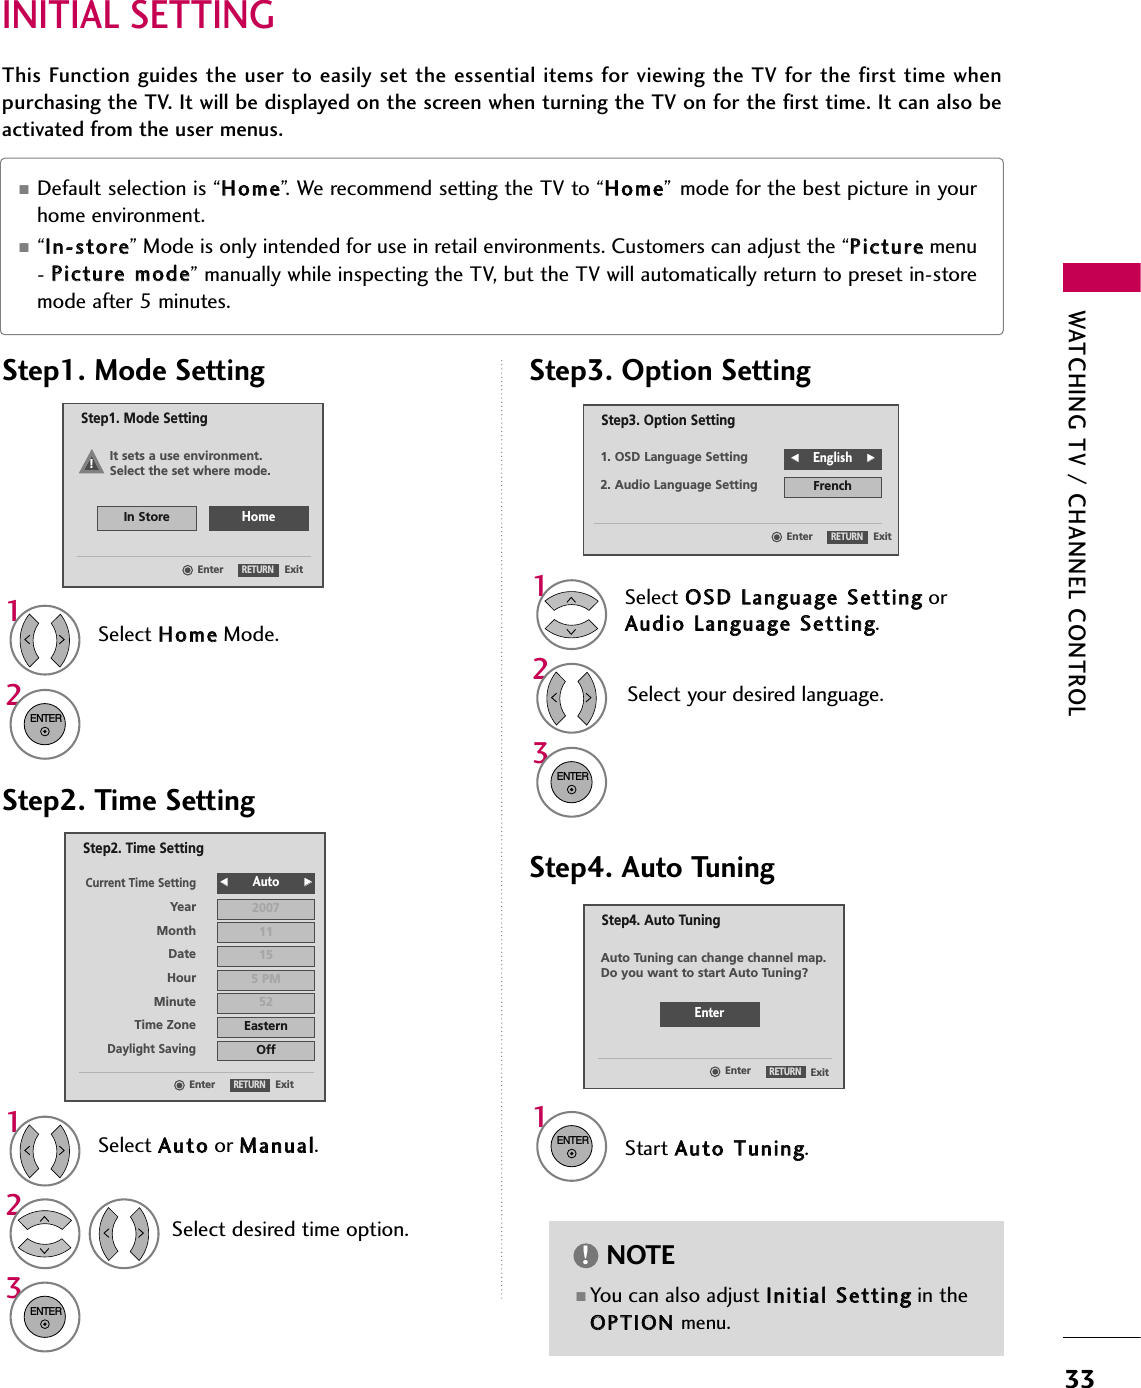
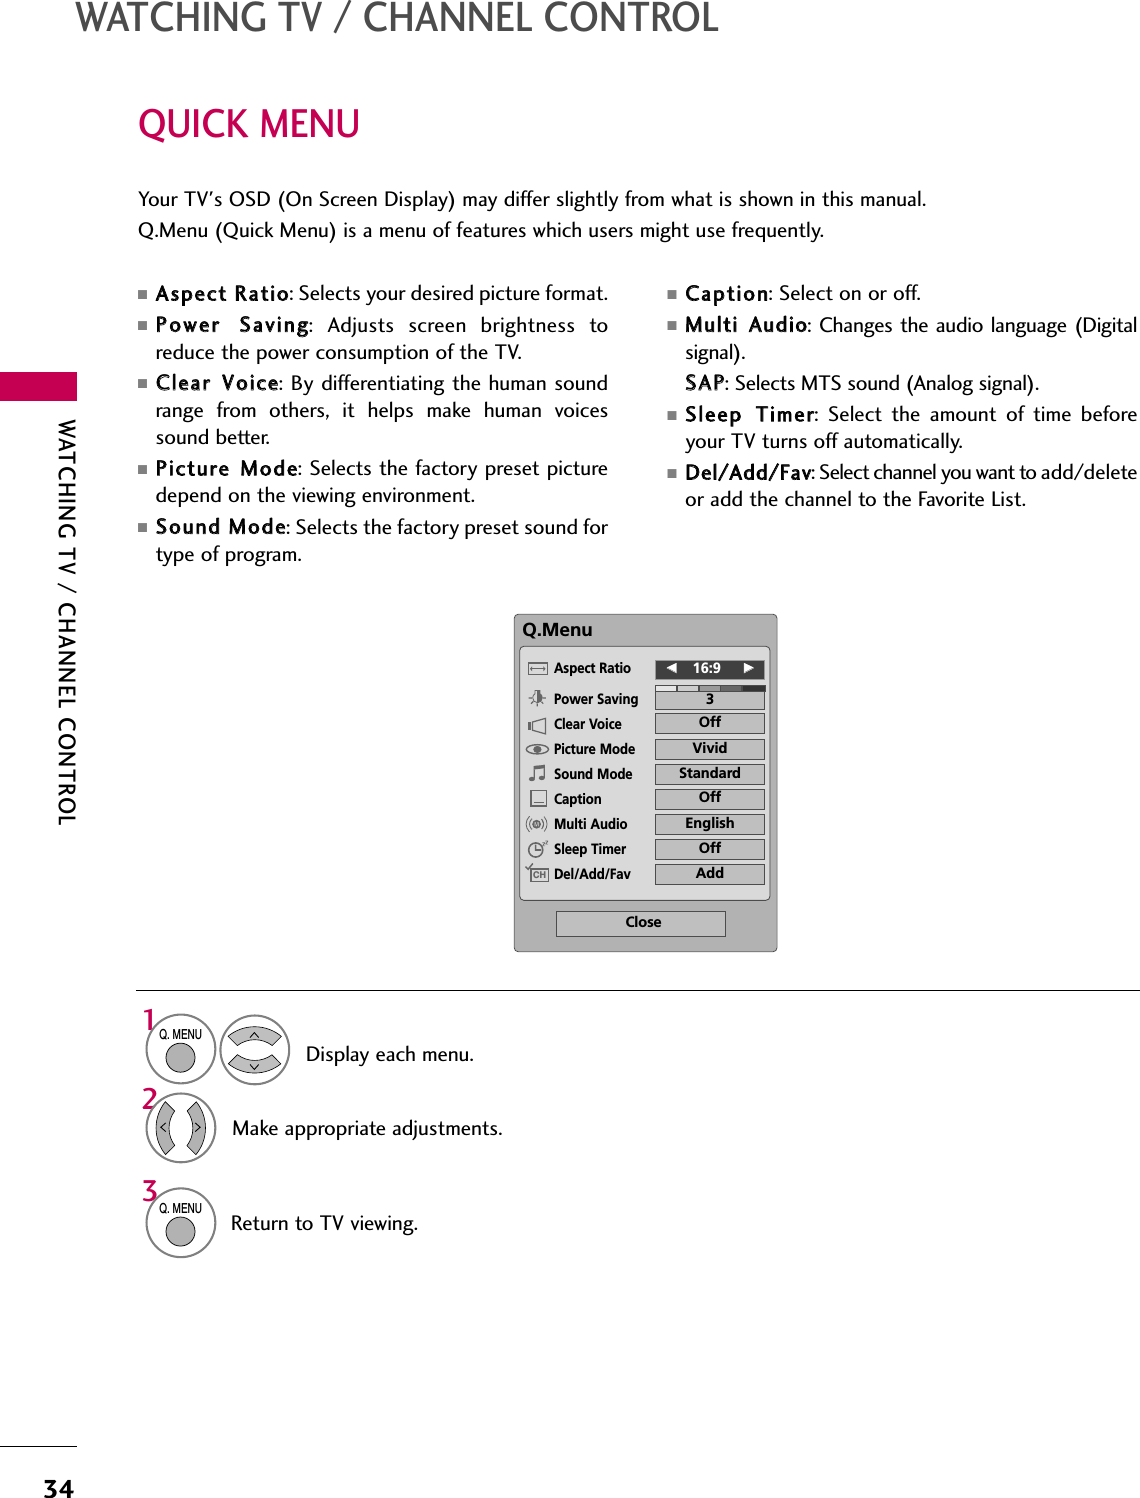
LG Electronics USA 60PG30FUA PLASMA TV/MONITOR User Manual SAC30708031 Edit1 en rev2
LG Electronics USA PLASMA TV/MONITOR SAC30708031 Edit1 en rev2
UserManual.wiki
>
LG Electronics USA
>
60PG30FUA User Manual
>
User manual 1 of 2
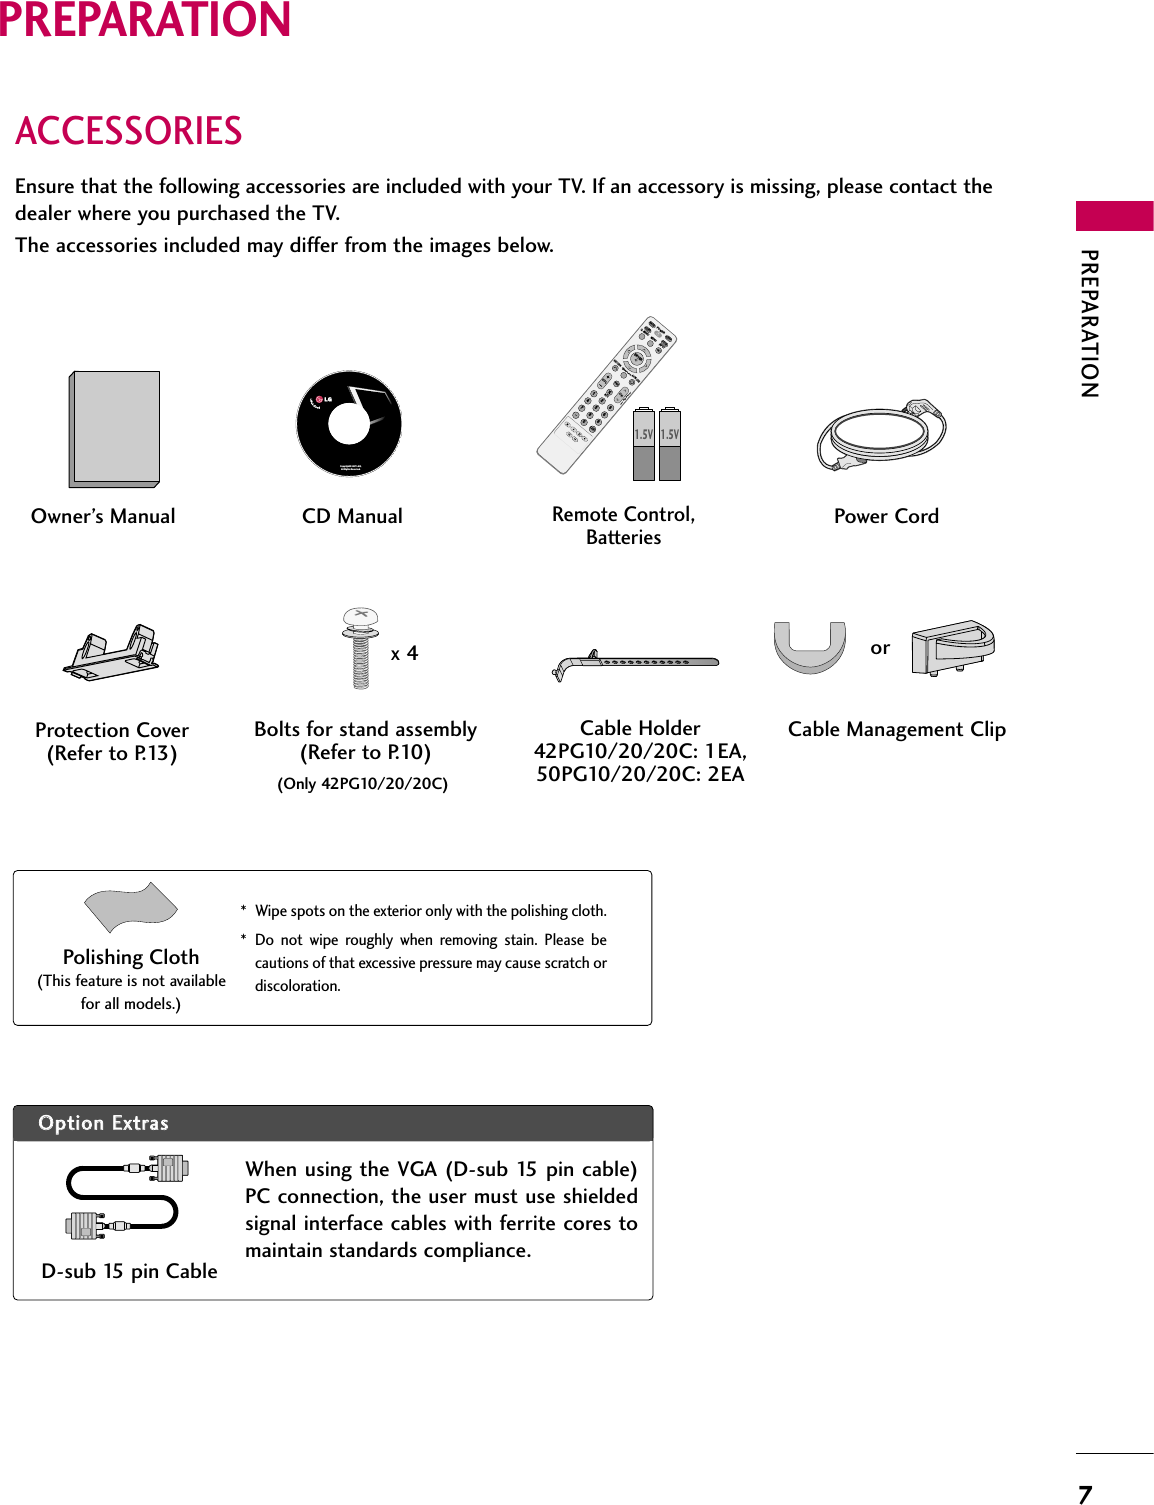
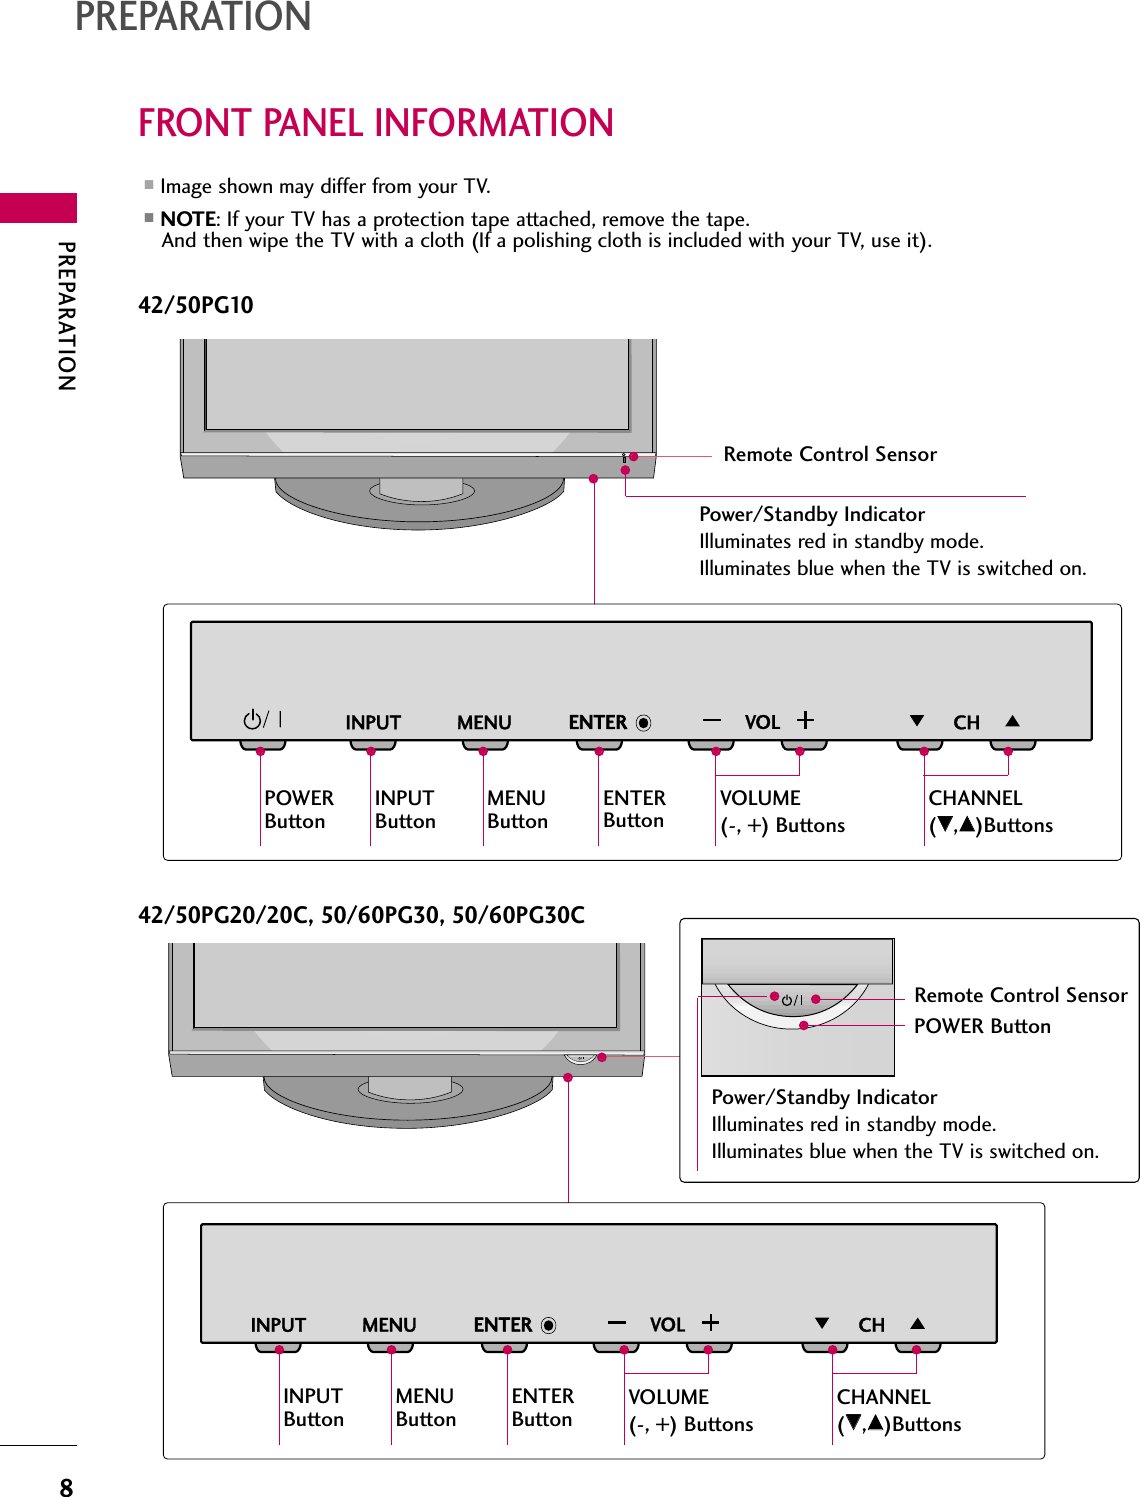
Contents
1.
User manual 1 of 2
2.
User manual 2 of 2
User manual 1 of 2
Navigation menu
Upload a User Manual
Namespaces
Wiki Guide
HTML
PDF
Info
Views
User Manual
Discussion / Help
Navigation