LG Electronics USA 60PX950UA Plasma monitor User Manual 60PX950 U 2
LG Electronics USA Plasma monitor 60PX950 U 2
Contents
- 1. User manual 1 of 3
- 2. User manual 2 of 3
- 3. User manual 3 of 3
User manual 2 of 3
61
WATCHING TV / CHANNEL CONTROL
TURNING ON THE TV
CHANNEL SELECTION
VOLUME ADJUSTMENT
Adjust the volume to suit your personal preference.
1First, connect power cord correctly.
At this moment, the TV switches to standby mode.
ᯫ
In standby mode to turn TV on, press the / I,INPUT,CH (ᰜor ᰝ) button on the TV or press
the , INPUT, CH (ᰜor ᰝ),Number (0-9) button on the remote control.
2Select the viewing source by using the INPUT button on the remote control.
3When finished using the TV, press the POWER button on the remote control. The TV reverts
to standby mode.
!
NOTE
Ź If you intend to be away on vacation, disconnect the power plug from the wall power outlet.
Ź If you do not complete the Initial setting, it will appear whenever the TV is switched on until the
Initial setting procedure is completed.
1Press the CH (ᰜor ᰝ) or NUMBER buttons to select a channel number.
1 Press the VOL (+ or -) button to adjust the volume.
2If you want to switch the sound off, press the MUTE button.
3You can cancel the Mute function by pressing the MUTE or VOL (+ or -) button.
WATCHING TV / CHANNEL CONTROL
WATCHING TV / CHANNEL CONTROL
62
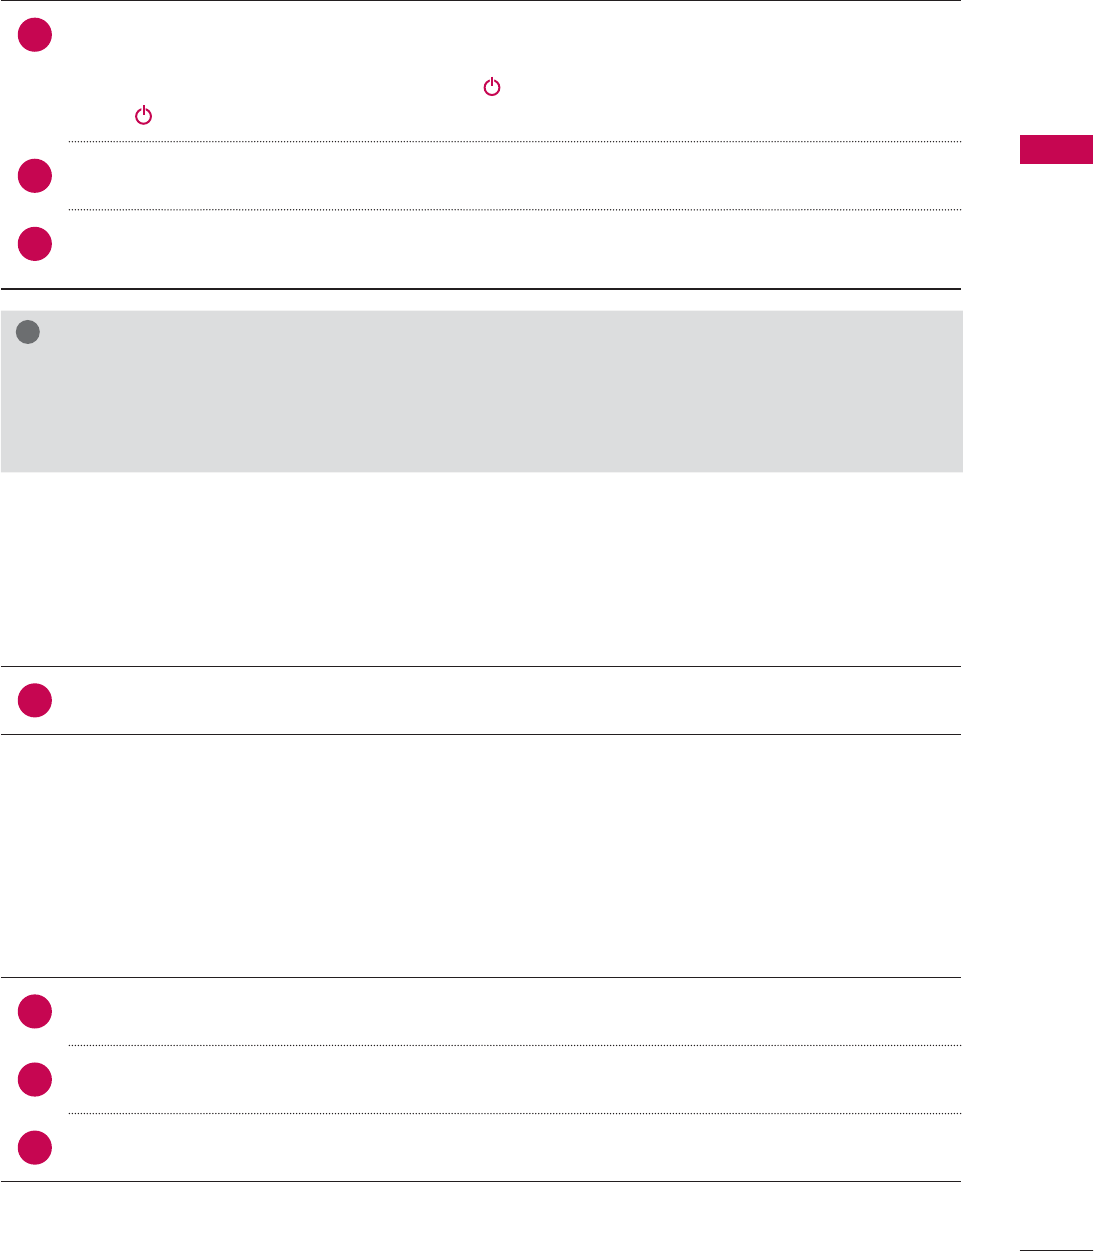
Step 1. Selecting Language
Step 2. Mode setting
INITIAL SETTING
This Function guides the user to easily set the essential items for viewing the TV for the first time
when purchasing the TV. It will be displayed on the screen when turning the TV on for the first time. It
can also be activated from the user menus.
ᯫ
Default selection is “Home Use”. We recommend setting the TV to “Home Use” mode for the best
picture in your home environment.
ᯫ
“Store Demo” Mode is only intended for use in retail environments. Customers can adjust the
“Picture menu - Picture mode” manually while inspecting the TV, but the TV will automatically
return to preset in-store mode after 5 minutes.
ᯫ
“Store Demo” Mode is an optimal setting for displaying at stores. “Store Demo” mode initializes
the TV to set the image quality.
6WHS0RGH6HWWLQJ
6HOHFWLQJWKHHQYLURQPHQW
&KRRVHWKHVHWWLQJPRGH\RXZDQW
6HOHFW>+RPH8VH@ZKHQVHWWLQJ79XS
LQKRPH<RXFDQDGMXVWSLFWXUHTXDOLW\
DFFRUGLQJO\WKURXJK3LFWXUH0RGHPHQX
RSWLRQ
:(/&20(
7KDQN\RXIRUFKRRVLQJ/*
6WHS/DQJXDJH
(QJOLVK
(VSDñol
)UDQ«DLV
䭢⍴㮻
L
+RPH8VH 6WRUH'HPR
ؒ 'HPR0RGH 2II
For LED LCD TV
1
ENTER
Select Menu Language.
1
ENTER
Select Home Use.
ᯙ1H[W
ᯙ1H[Wᰙ3UHYLRXV
܁2II ۽
63
WATCHING TV / CHANNEL CONTROL
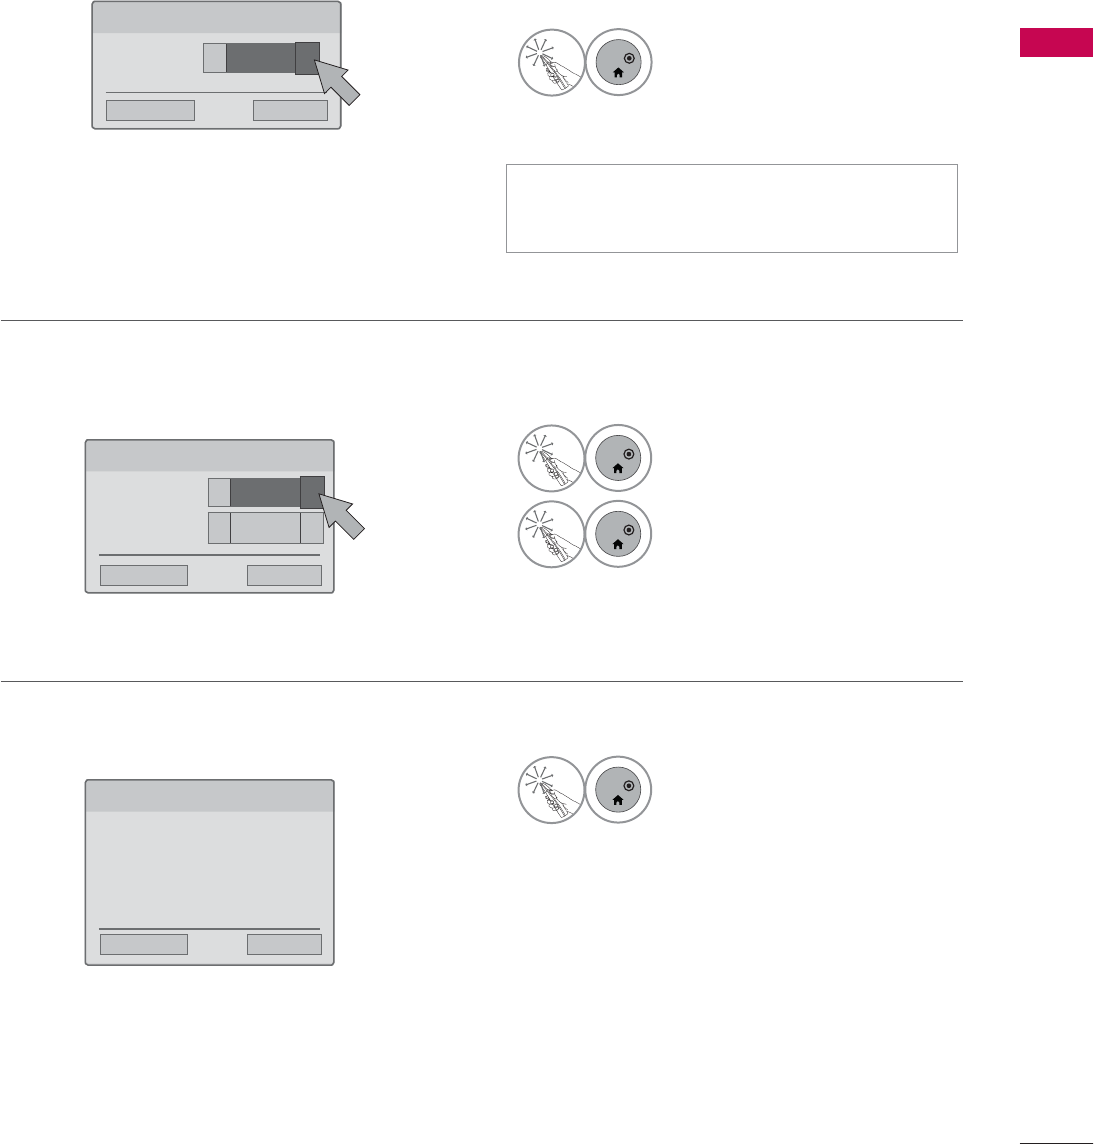
Step 4. Time Zone
Step 5. Auto Tuning
6WHS7LPH=RQH
6WHS$XWR7XQLQJ
%HIRUHVWDUWLQJ
EHVXUHWKDWWKH
79DQWHQQDLVFRQQHFWHG
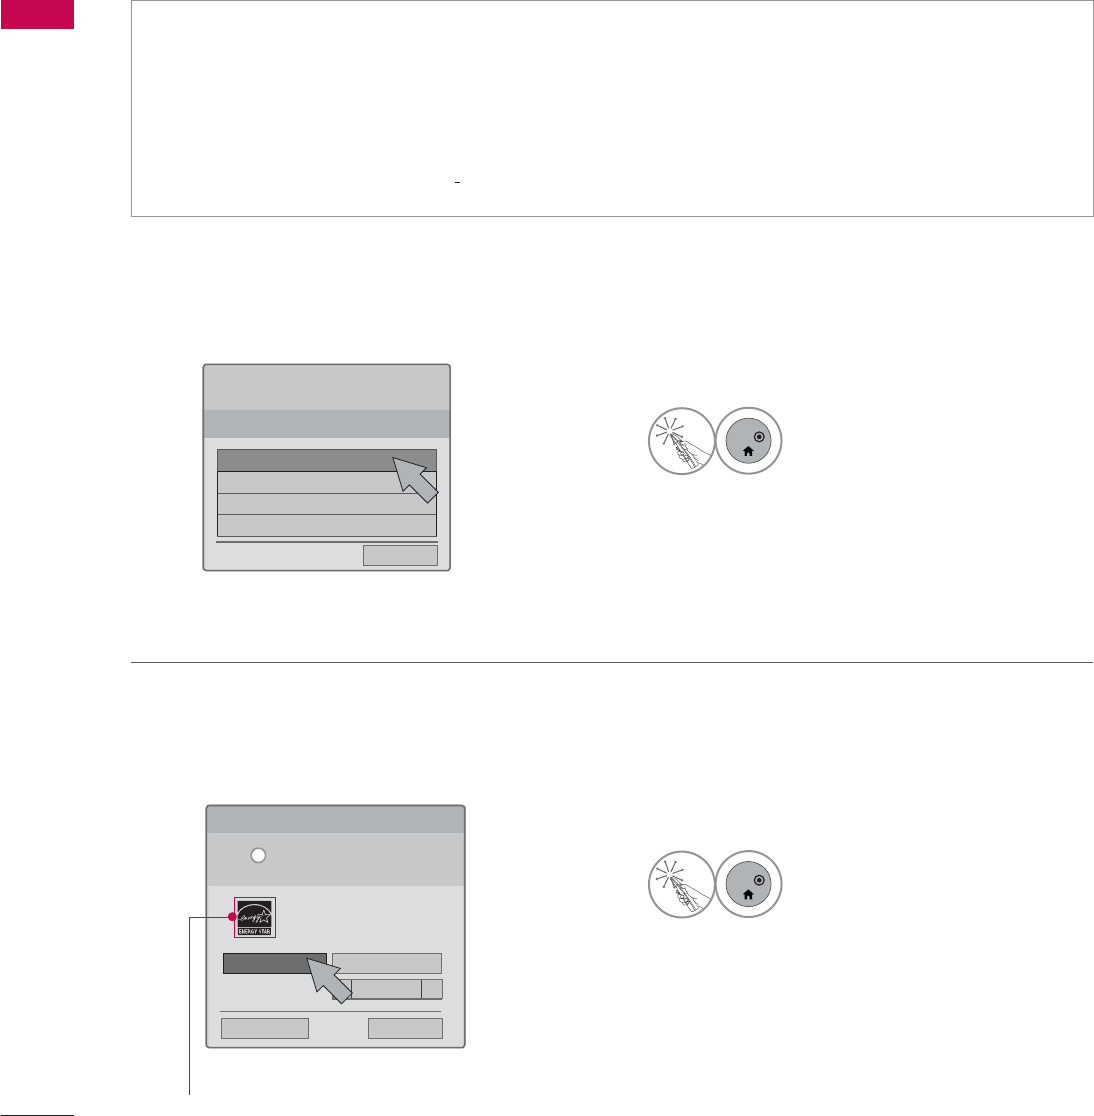
Step 3. Power Indicator (For LED LCD TV)
6WHS3RZHU,QGLFDWRU
ᯫ
This function is disable in “Step2. Mode
Setting - Store Demo”.
1
ENTER
Select On or Off.
1
ENTER
Select Time Zone option.
2
ENTER
Select Daylight Saving option.
1
ENTER
Check your antenna connec-
tion and start Auto Tuning.
6WDQGE\/LJKW ܁2II ۽
۽
ᯙ1H[Wᰙ3UHYLRXV
ᯙ1H[W
ᯙ1H[W
ᰙ3UHYLRXV
ᰙ3UHYLRXV
7LPH=RQH ܁(DVWHUQ ۽
'D\OLJKW6DYLQJ ܁Auto ۽
۽
WATCHING TV / CHANNEL CONTROL
WATCHING TV / CHANNEL CONTROL
64
&+$11(/
237,21
3,&785(
$8',2 7,0(
/2&.
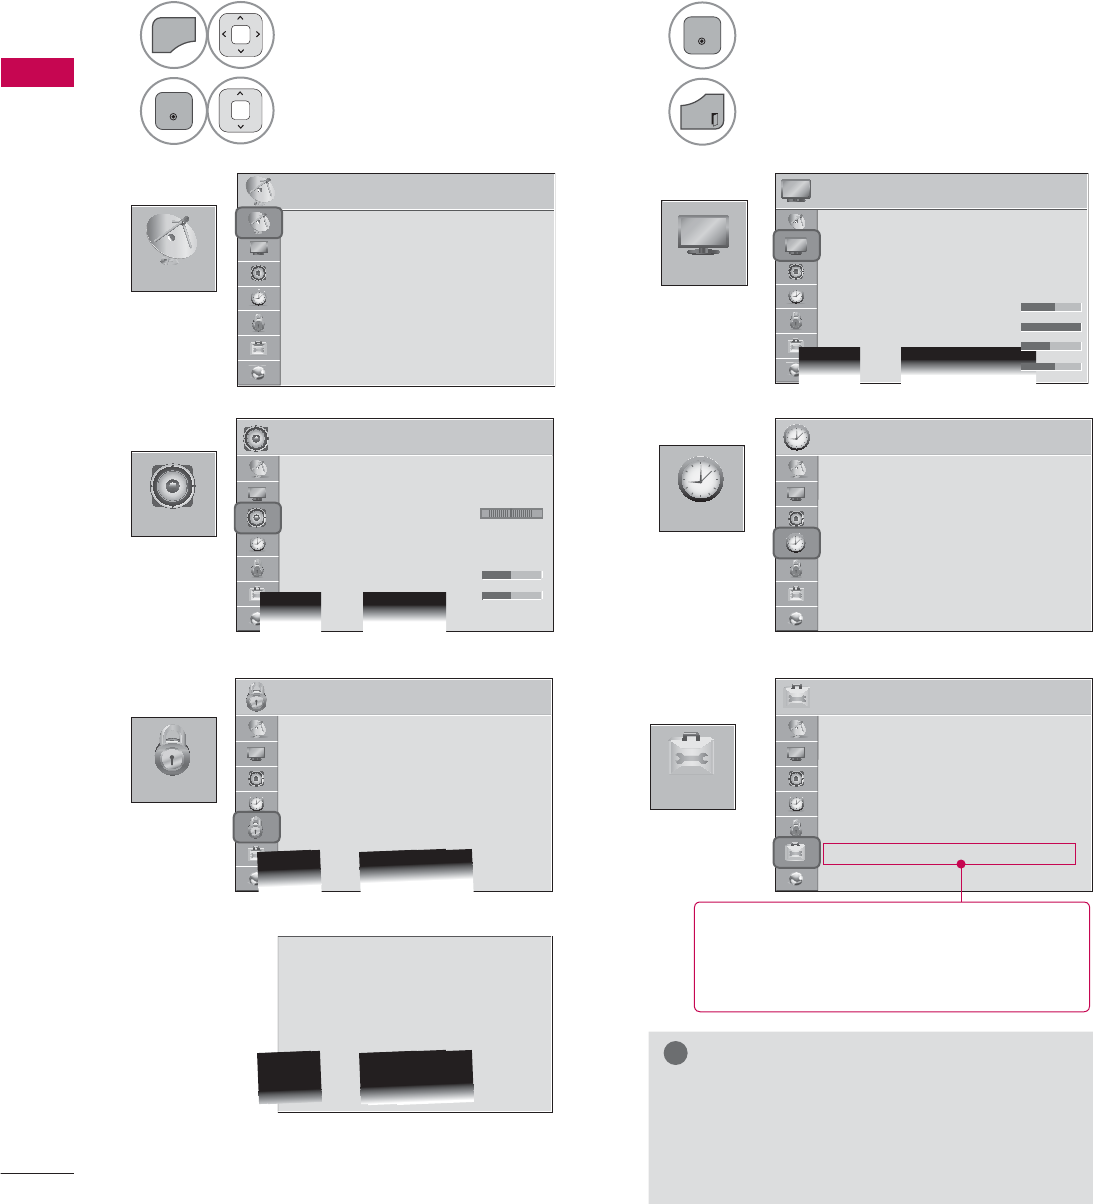
ON-SCREEN MENUS SELECTION
Your TV's OSD (On Screen Display) may differ slightly from that shown in this manual.
3,&785( ᯒ0RYHᯙ(QWHU
ؒ $VSHFW5DWLR
ؒ 3LFWXUH:L]DUG
ؒ ᰚ(QHUJ\6DYLQJ 2II
ؒ 3LFWXUH0RGH 6WDQGDUG
ؒ%DFNOLJKW
ؒ&RQWUDVW
ؒ%ULJKWQHVV
ؒ6KDUSQHVV
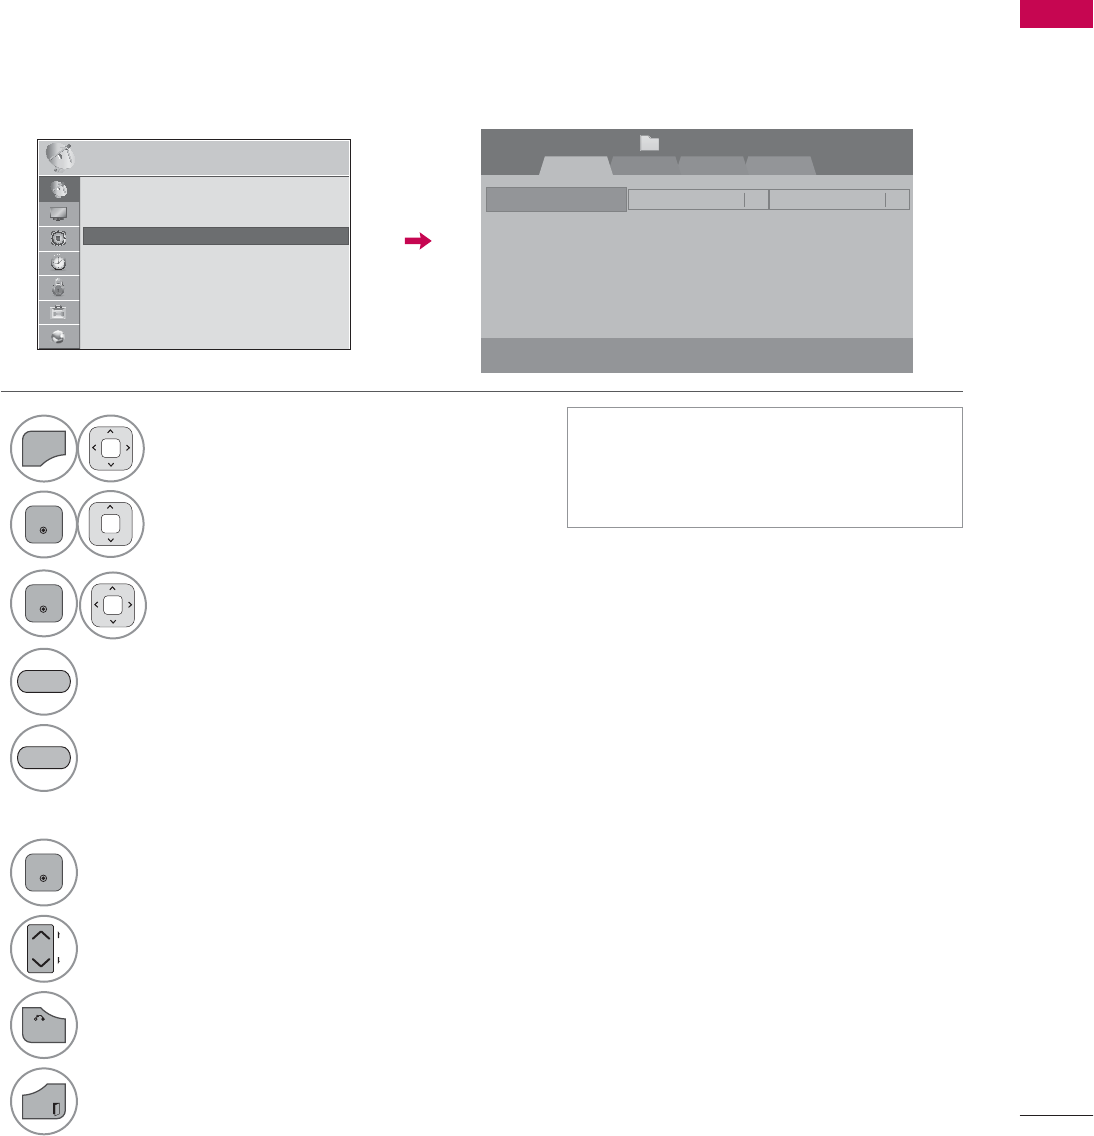
7,0( ᯒ0RYHᯙ(QWHU
ؒ &ORFN
ؒ 2II7LPH 2II
ؒ 2Q7,PH 2II
ؒ 6OHHS7LPHU 2II
/2&. ᯒ0RYHᯙ(QWHU
ؒ 6HW3DVVZRUG
ؒ /RFN6\VWHP 2Q
ؒ%ORFN&KDQQHO
ؒ0RYLH5DWLQJ
ؒ795DWLQJ&KLOGUHQ
ؒ795DWLQJ*HQHUDO
ؒ'RZQORDGDEOH5DWLQJ
ؒ,QSXW%ORFN
ؒ 6HW3DVVZRUG
ؒ /RFN6\VWHP 2Q
ؒ%ORFN&KDQQHO
ؒ795DWLQJ(QJOLVK
ؒ795DWLQJ)UHQFK
ؒ'RZQORDGDEOH5DWLQJ
ؒ,QSXW%ORFN
ؒ .H\/RFN 2II
237,21 ᯒ0RYHᯙ(QWHU
ؒ /DQJXDJH
ؒ &DSWLRQ 2II
ؒ 3RZHU,QGLFDWRU
ؒ ,QLWLDO6HWWLQJ
ؒ 6HW,'
ؒ 0RGH6HWWLQJ +RPH8VH
ؒ ,5%ODVWHU 2II
$8',2 ᯒ0RYHᯙ(QWHU
ؒ $XWR9ROXPH 2II
ؒ &OHDU9RLFH,, 2IIᰕ3
ؒ %DODQFH
ؒ 6RXQG0RGH 6WDQGDUG
ؒ
,QILQLWH6RXQG2II
ؒ7UHEOH
ؒ%DVV
ؒ5HVHW
/R
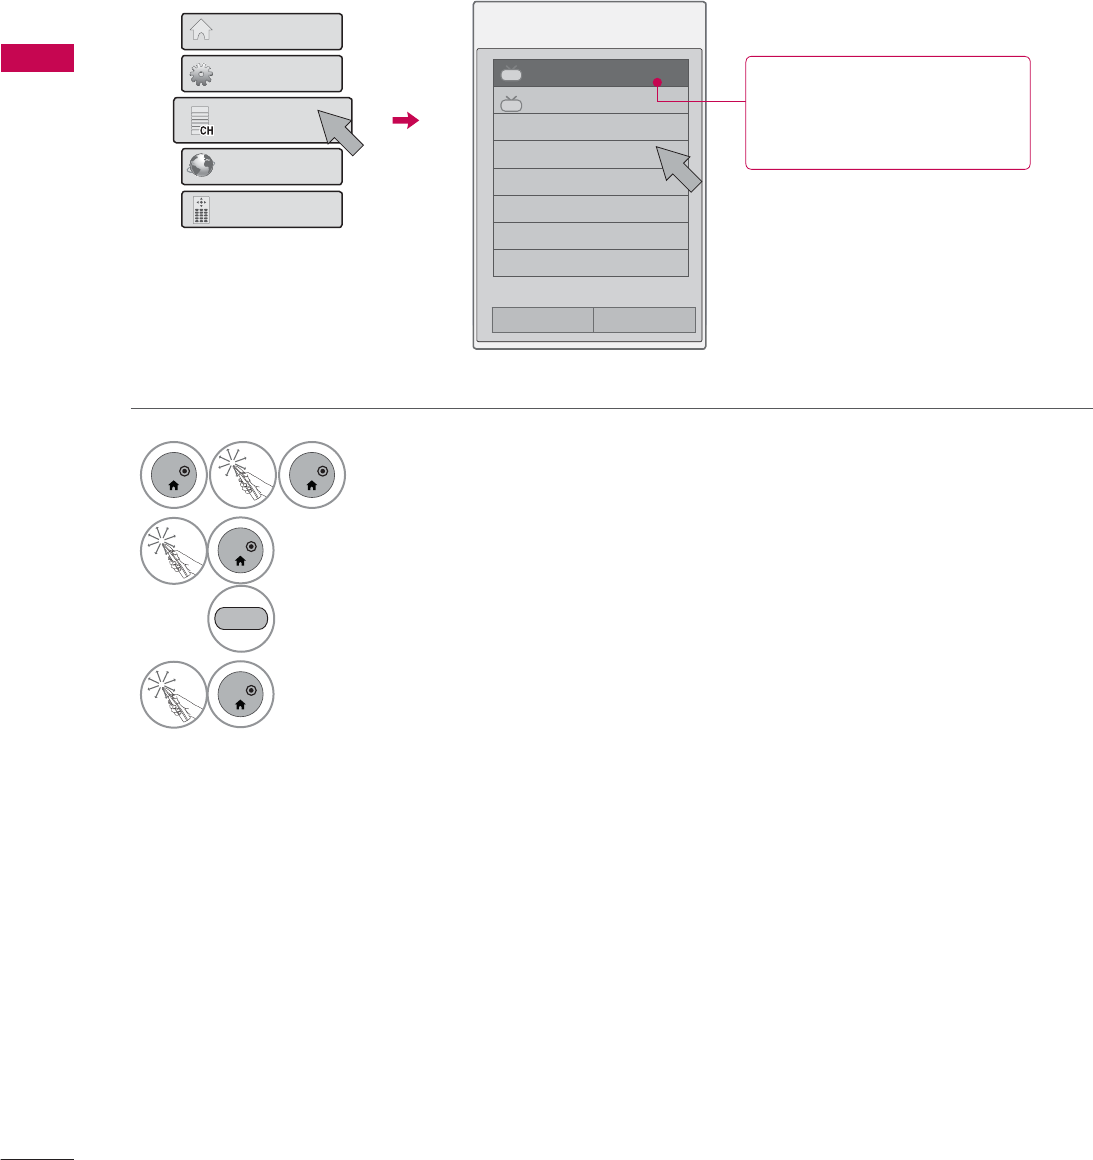
&+$11(/ ᯒ0RYHᯙ(QWHU
ؒ $XWR7XQLQJ
ؒ 0DQXDO7XQLQJ
ؒ &KDQQHO(GLW
1
MENU
Display each menu.
2
ENTER
Select a menu item.
3
ENTER
Accept the current selection.
4
EXIT
Return to TV viewing.
!
NOTE
ŹISM Method: For Plasma TV.
ŹBacklight, TruMotion, LED Local Dimming,
Power Indicator: For LED LCD TV.
ᯫ
For further information, refer to the
optional “Wireless Media Box”
manual for operating instructions.
For USA
For Canada
65
WATCHING TV / CHANNEL CONTROL
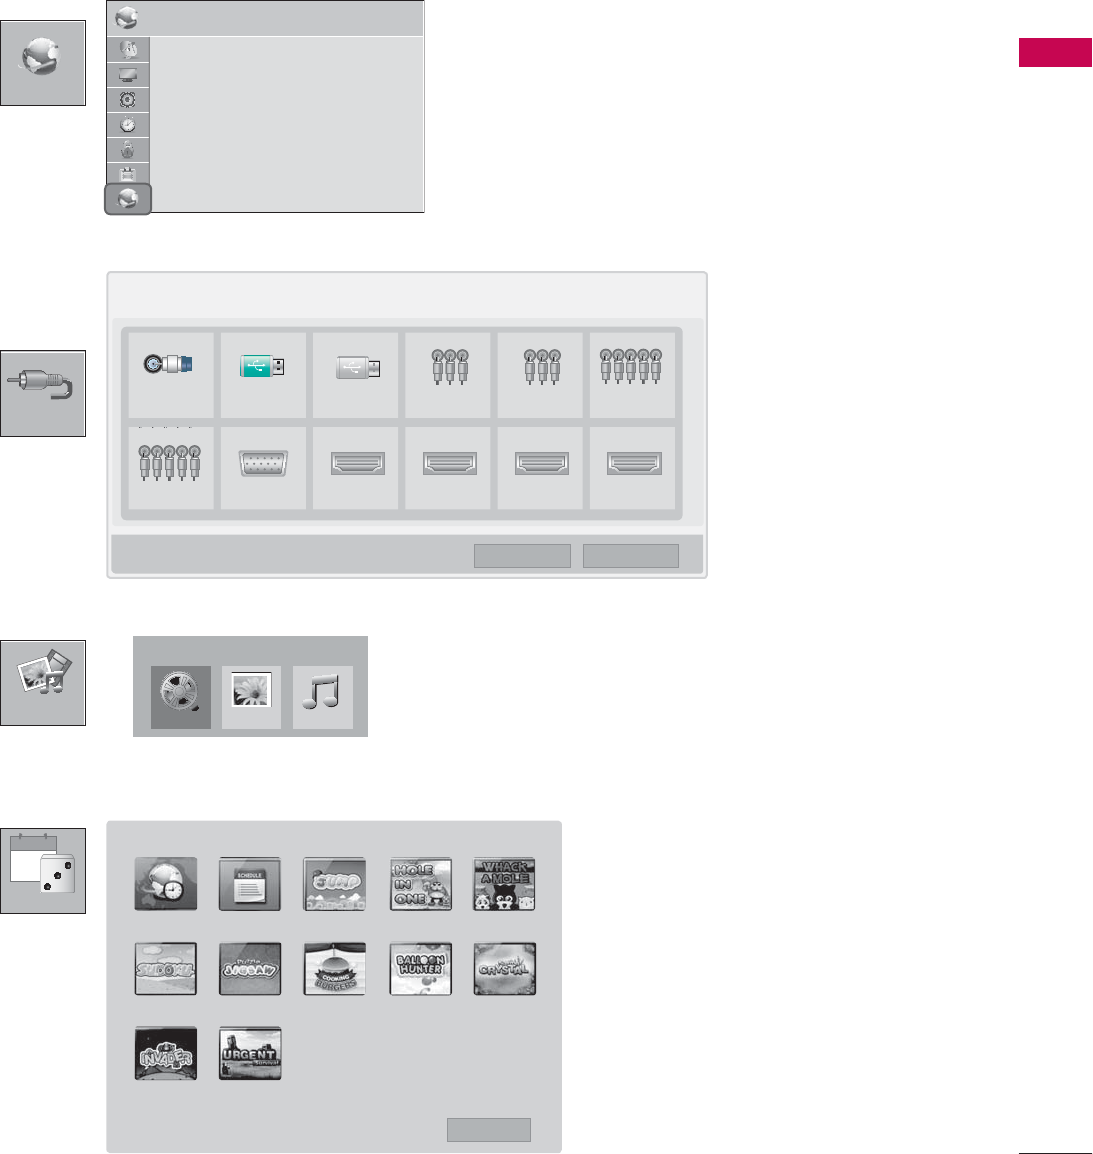
,1387
0<0(',$
30
Today
*$0(6&+('8/(
,QSXW/LVW ᯒ0RYH ᯙ(QWHU
79 86% 86% $9 $9 &RPSRQHQW
&RPSRQHQW 5*%3& +'0, +'0, +'0, +'0,
ᯕ,QSXW/DEHO ᰙ([LW
0RYLH/LVW
0<0(',$
3KRWR/LVW 0XVLF/LVW
1(7:25.
1(7:25. ᯒ0RYHᯙ(QWHU
ؒ 1HWZRUN6HWWLQJ 1RQH
ؒ 1HWZRUN6WDWXV 1RWFRQQHFWHG
ؒ /HJDO1RWLFH
ؒ (61
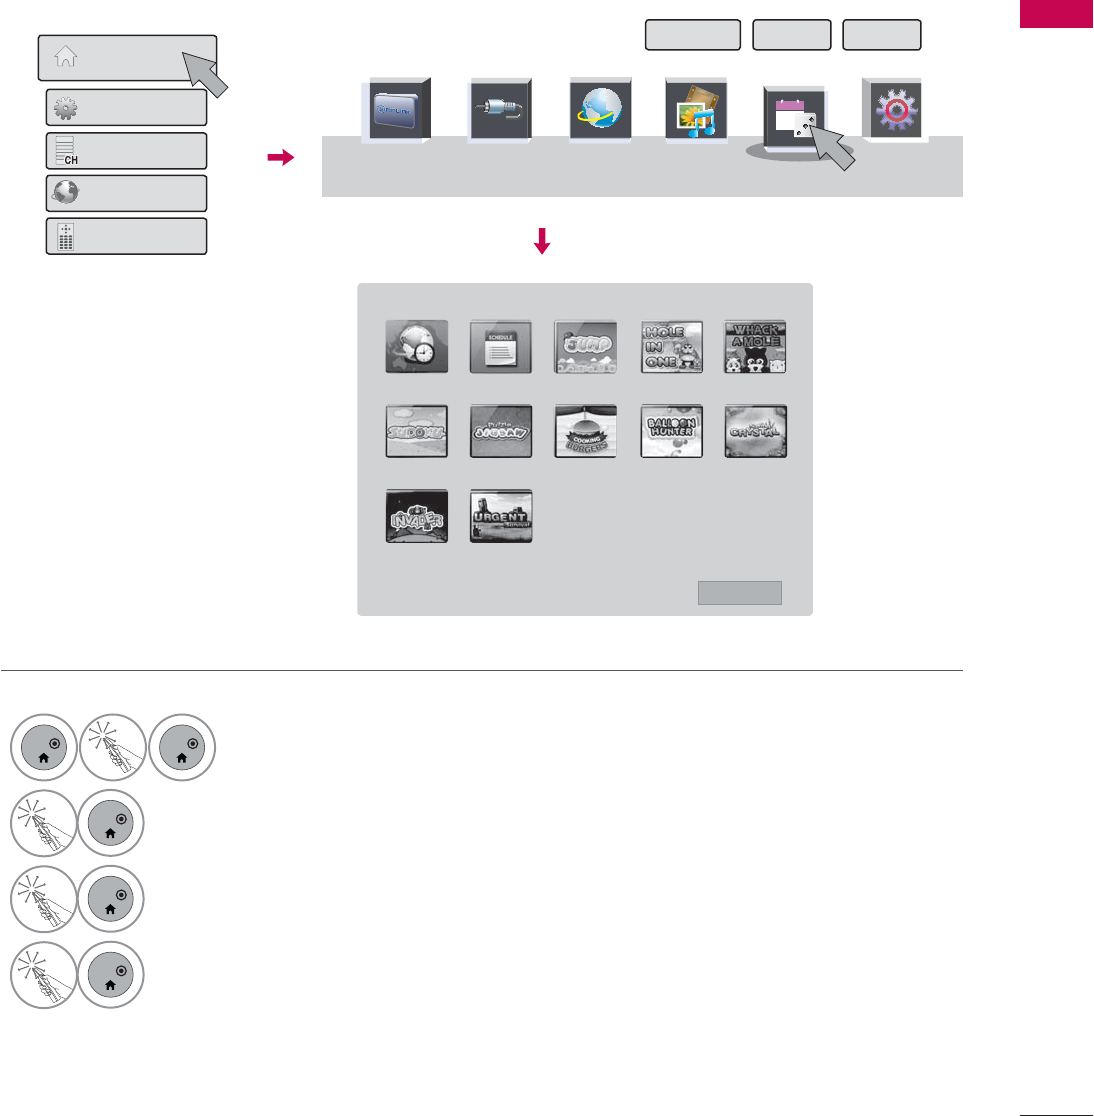
:25/'7,0( 6&+('8/( -803 +2/(,121( :+$&.$02/(
68'2.8 -,*6$: &22.,1*%85*(5 %$//221+817(5 6$9,1*&5<67$/
,19$'(5 85*(176859,9$/
᰿([LW
*$0(6&+('8/(
WATCHING TV / CHANNEL CONTROL
WATCHING TV / CHANNEL CONTROL
66
A
ᯙ
$VSHFW5DWLR
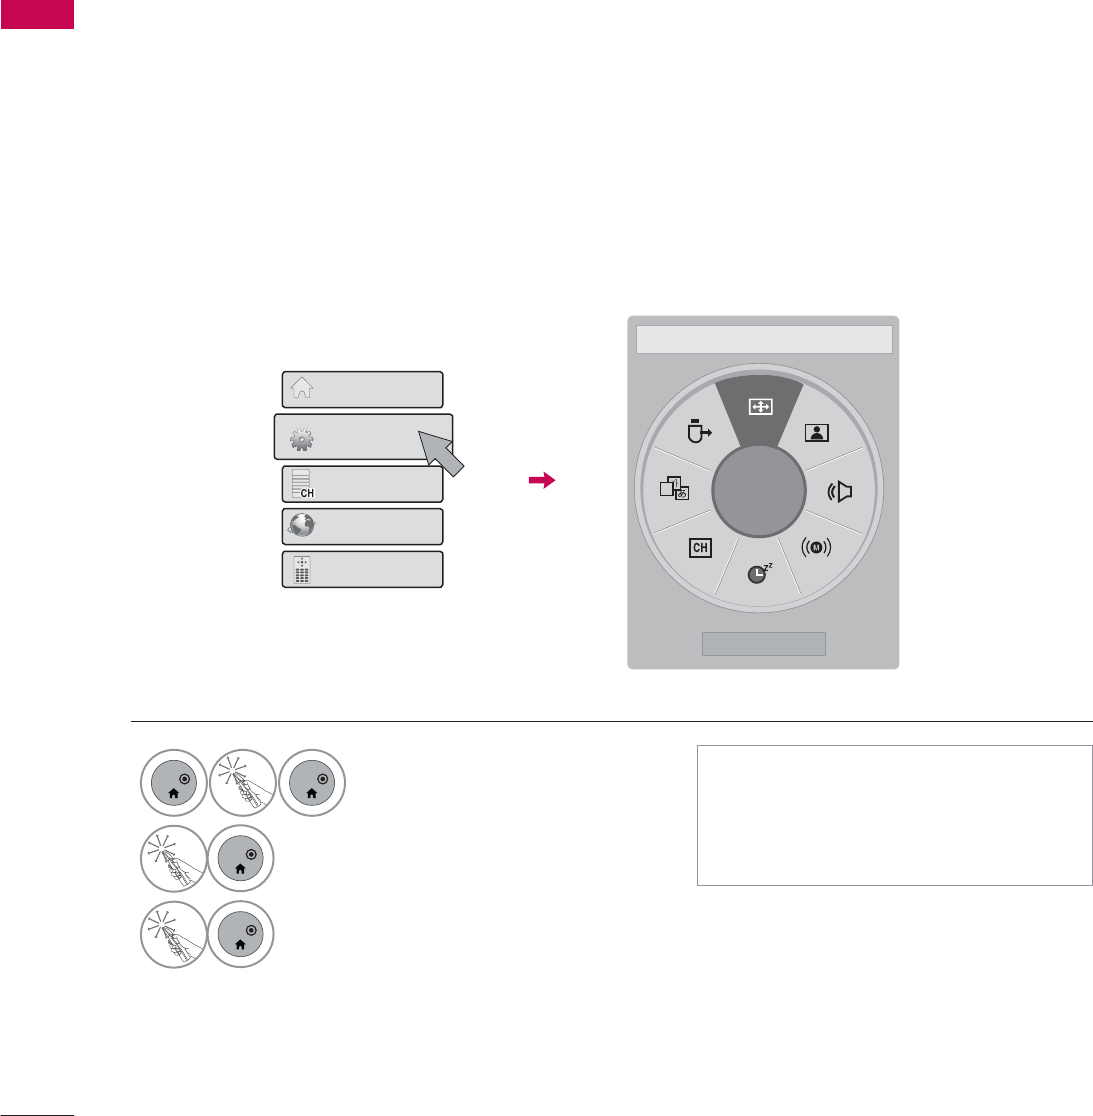
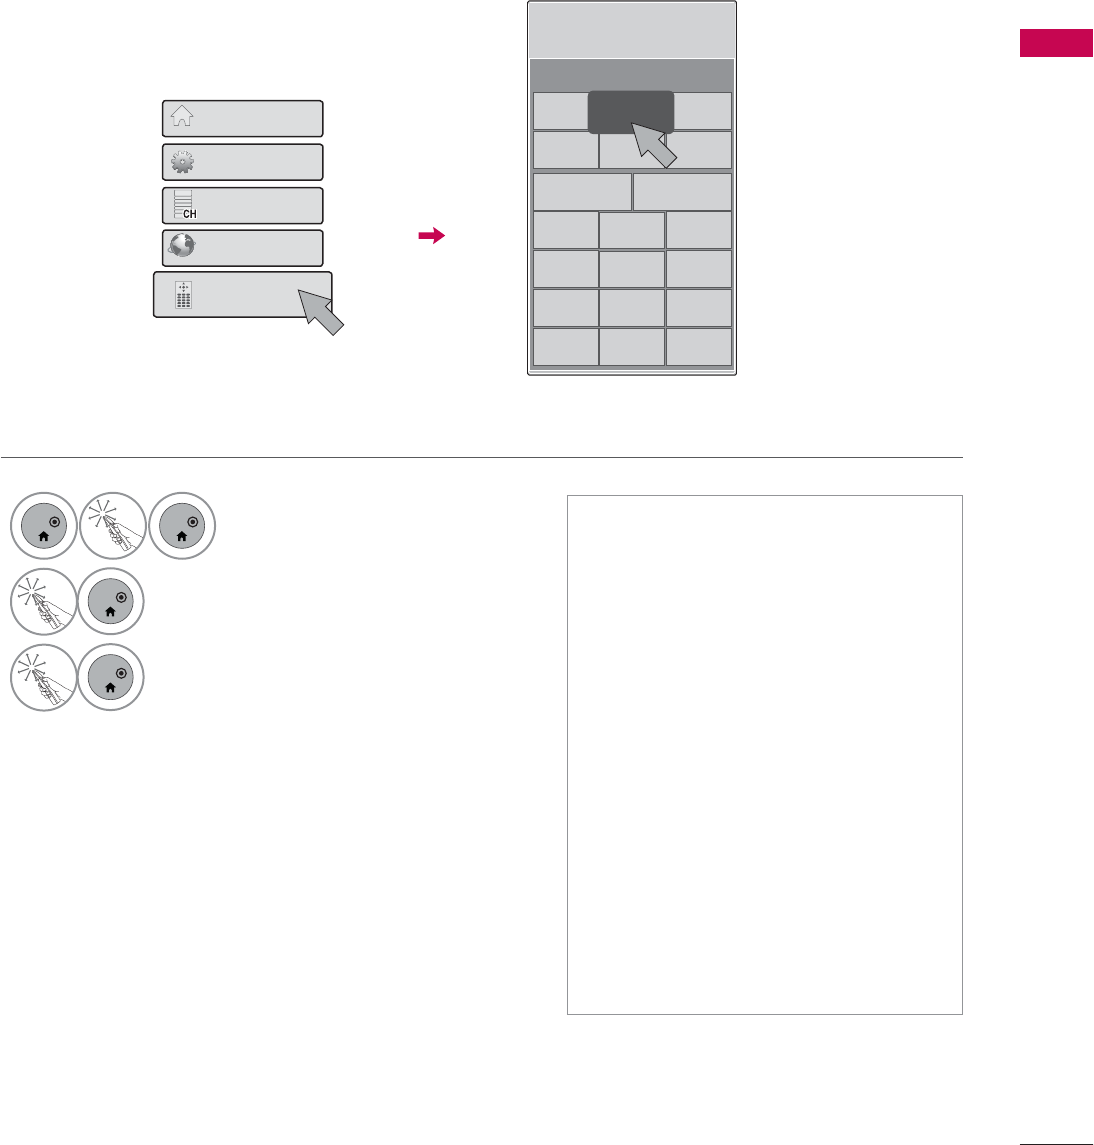
QUICK MENU
Your TV's OSD (On Screen Display) may differ slightly from what is shown in this manual.
Q.Menu (Quick Menu) is a menu of features which users might use frequently.
1
ENTER
ENTER
Select Quick Menu.
2
ENTER
Select a menu item.
3
ENTER
Select Close.
4XLFN0HQX
&KDQQHO/LVW
1HWFDVW
6FUHHQ5HPRWH
+RPH0HQX
ᰙ&ORVH
ᰑAspect Ratio: Selects your desired picture format.
ᰗPicture Mode: Selects the desired preset picture setting.
ᰘSound Mode: Selects the desired preset sound setting.
ᰄMulti Audio: Changes the audio language (Digital signal).
ᰄSAP: Selects MTS sound (Analog signal).
Sleep Timer: Select the amount of time before your TV turns off automatically.
ᰃDel/Add: Select channel you want to add or delete.
ᰔCaption: Select on or off.
᯲USB Device: Select “Eject” in order to eject a USB device.
ᯫ
Quick Menu can be selected either by
pressing the Q.MENU button on a
standard remote control, or by select-
ing on the Home Menu screen.
67
WATCHING TV / CHANNEL CONTROL
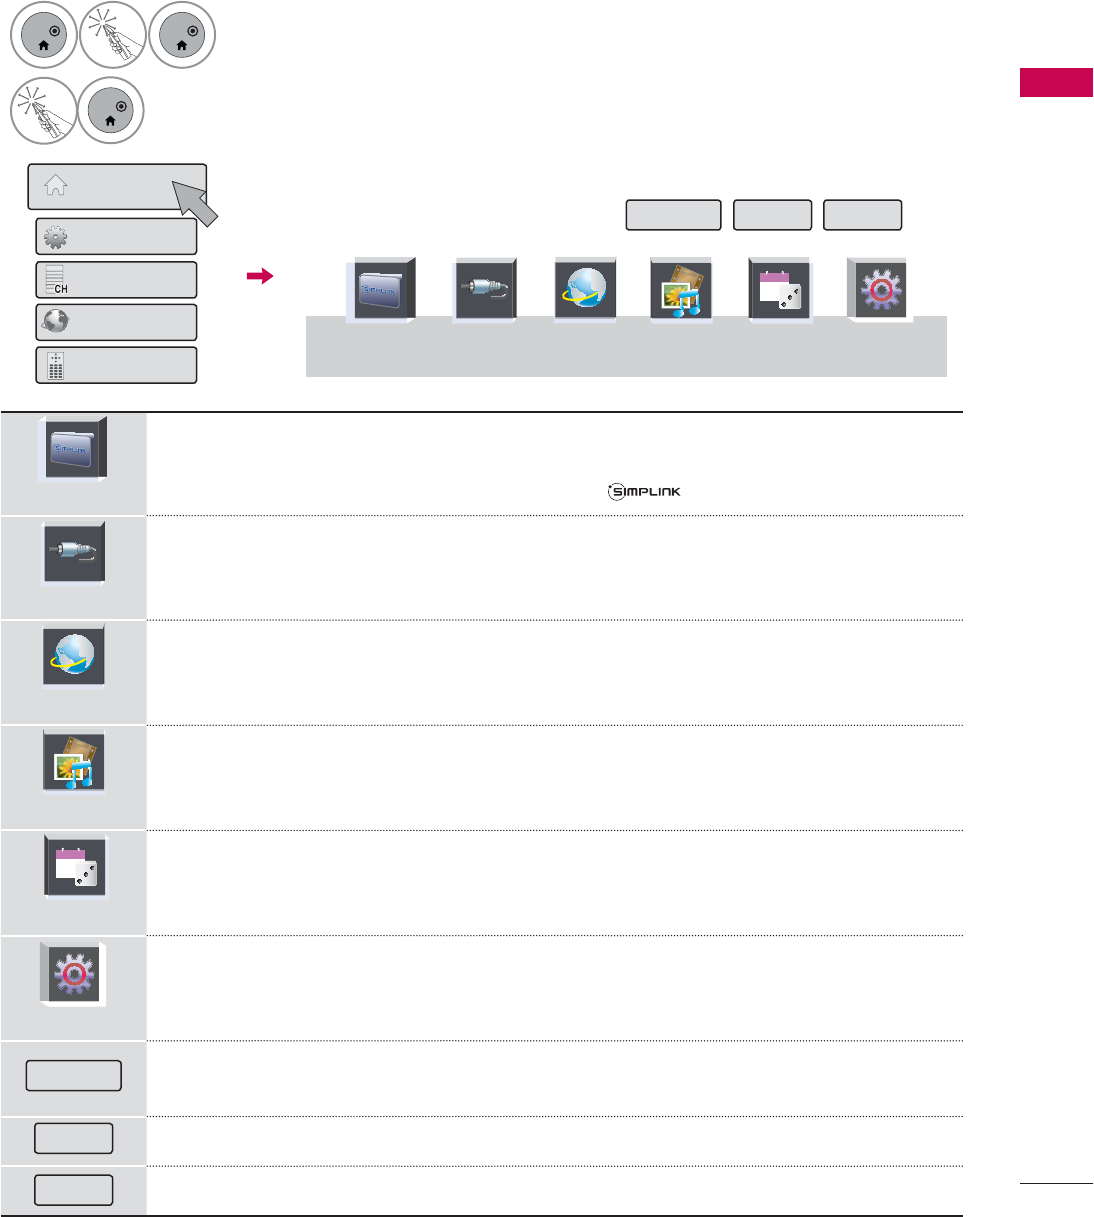
HOME MENU
Your TV's OSD (On Screen Display) may differ slightly from that shown in this manual.
1
ENTER
ENTER
Select Home Menu.
2
ENTER
Select a menu item.
6LPSOH0DQXDO 3RLQWHU ([LW
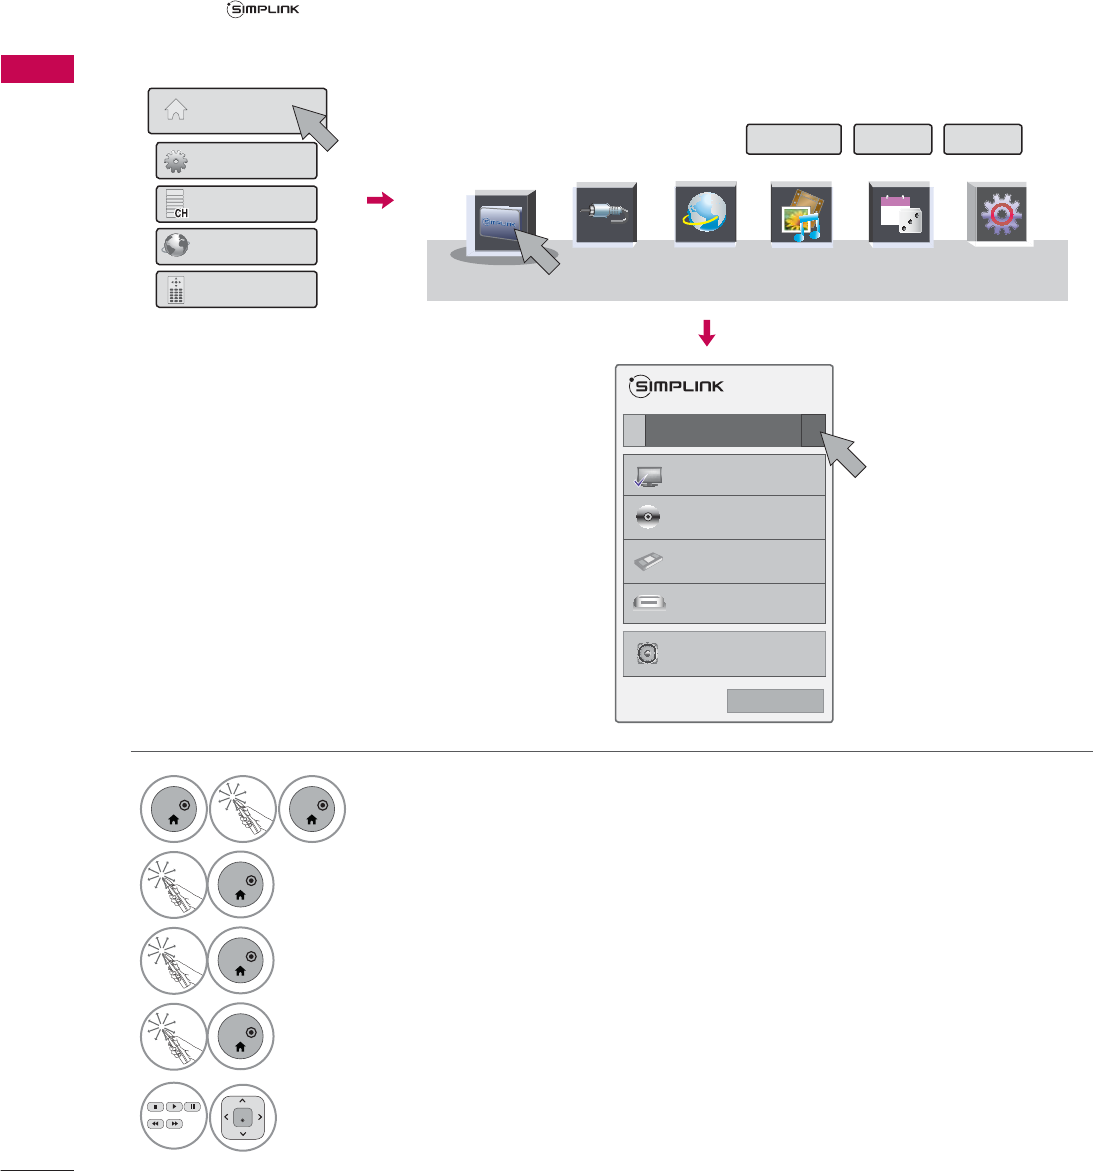
6,03/,1.
SIMPLINK allows you to control and play other AV devices connected with HDMI
cable without additional cables and settings. This TV may work with devices with
HDMI-CEC support, but only devices with the logo are fully supported.
,1387
Select the desired input source.
1(7&$67
Select NETCAST menu option and enjoy Online Service.
0<0(',$
Used for viewing photos, watching movies and listening to MP3s.
*$0(6&+('8/(
30
Today
Allows you to enjoy the games installed on the TV or set the schedule.
48,&.0(18
Q.Menu (Quick Menu) is a menu of features which users might use frequently.
6LPSOH0DQXDO You can easily and effectively access the TV information by viewing a simple manu-
al on the TV.
3RLQWHU Set up the Magic Motion Remote Control setting.
([LW Close the Home menu.
+RPH0HQX
4XLFN0HQX
&KDQQHO/LVW
1HWFDVW
6FUHHQ5HPRWH
6,03/,1. 1(7&$67 0<0(',$ 48,&.0(18
,1387 *$0(6&+('8/(
30
Today

WATCHING TV / CHANNEL CONTROL
WATCHING TV / CHANNEL CONTROL
68
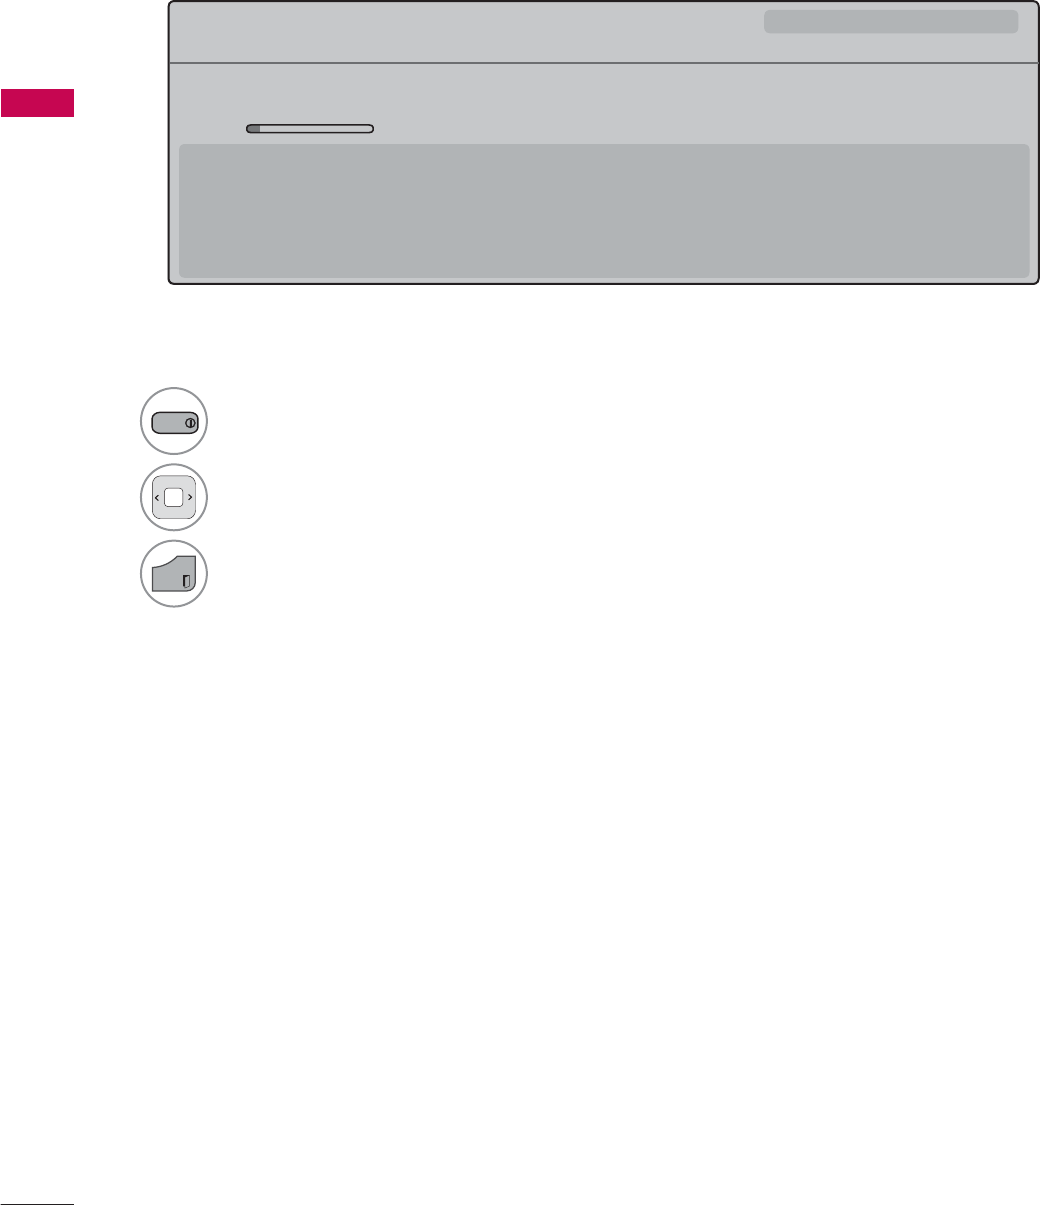
CUSTOMER SUPPORT
Software Update
ᯡ6RIWZDUH8SGDWH
۳3LFWXUH7HVW
۳6RXQG7HVW
۳3URGXFW6HUYLFH,QIR
۳1HWZRUN7HVW
&ORVH
6RIWZDUH8SGDWH 2Q
ؒ&XUUHQW9HUVLRQ
&KHFN8SGDWH9HUVLRQ
&ORVH
You can update the TV with the latest software to enhance the product operation and/or add new fea-
tures.
You can update the software by connecting the TV directly to the software update server.
The Software Update function may not work properly depending on your internet environment. In this
case, you can obtain the latest software from the authorized LG Electronics Service Center then update
your TV.
1
MENU
Select Customer Support.
2
ENTER
Select Software Update.
3
ENTER
Select Check Update Version to check
the newest version.
When selecting “Software Update-On”
- If the TV is connected to the internet
and it finds a software update on the
LG server, the update popup menu will
appear automatically.
- If the updated digital software informa-
tion is transmitted, the update popup
menu will appear automatically.
RED
ᯫ
The software downloading time will
vary depending on the software size
and network conditions.
ᯫ
During the software update proce-
dure, do not turn off the TV or dis-
connect AC power, or disconnect the
LAN cable.
ᯫ
After software update, you can con-
firm the update software version at
software Update menu.
ᯫ
When update is completed, the TV
will restart automatically in 5 sec-
onds.
ᯫ
The TV functions may be improved
or changed by software update.
ᯫ
The available time or functionality of
NetCast menu may be depends on
your ISP network conditions.
ᯫ
When an update is completed, some
CHANNEL, PICTURE, and AUDIO
menu settings may need resetting.
ᯫ
This TV cannot be updated to previ-
ous software version.
ᯫ
Use the “Check Update Version” but-
ton to update the latest software on
the Network server manually.
ᯫ
You cannot open NetCast while the
software is being updated.
69
WATCHING TV / CHANNEL CONTROL
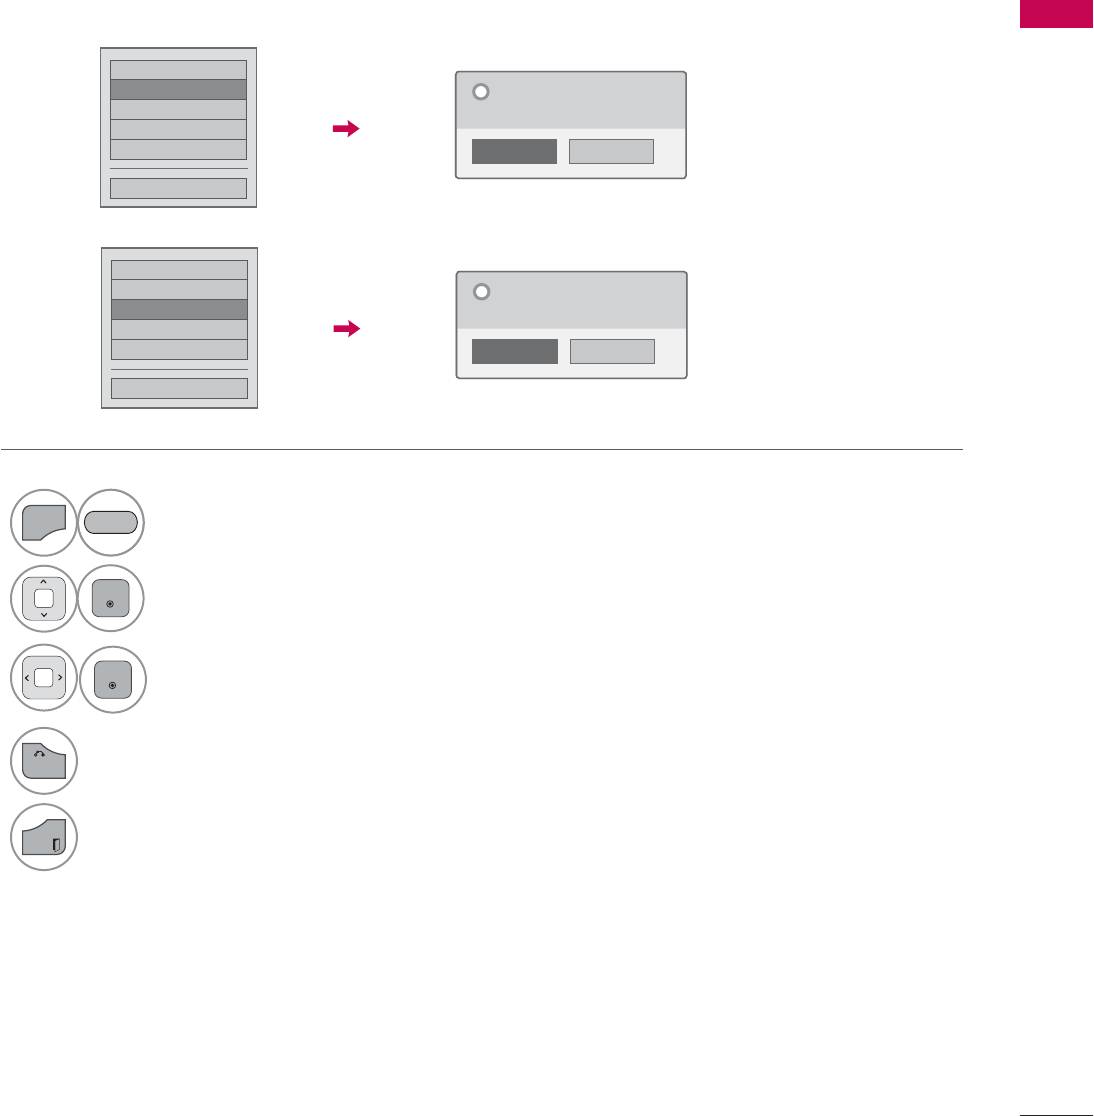
Picture Test/Sound Test
This function is a customer support function that can execute picture and sound tests.
۳6RIWZDUH8SGDWH
۳3LFWXUH7HVW
ᯡ6RXQG7HVW
۳3URGXFW6HUYLFH,QIR
۳1HWZRUN7HVW
&ORVH
1R
Yes
'R\RXKDYHDVRXQGSUREOHPLQWKLV
VFUHHQ"
"
1
MENU
Select Customer Support.
2
ENTER
Select Picture Test or Sound Test.
3
ENTER
Select Yes.
4
BACK
Return to the previous menu.
EXIT
Return to TV viewing.
۳6RIWZDUH8SGDWH
ᯡ3LFWXUH7HVW
۳6RXQG7HVW
۳3URGXFW6HUYLFH,QIR
۳1HWZRUN7HVW
&ORVH
1R
Yes
'R\RXKDYHDSUREOHPLQWKLVWHVW
VFUHHQ"
"
RED

WATCHING TV / CHANNEL CONTROL
WATCHING TV / CHANNEL CONTROL
70
Product/Service Info.
This function shows support and product information.
Customer Service Center can differ by country.
1
MENU
Select Customer Support.
2
ENTER
Select Product/Service Info..
You can check the various
product/Service infomation
based on your model.
3
BACK
Return to the previous menu.
EXIT
Return to TV viewing.
RED
71
WATCHING TV / CHANNEL CONTROL
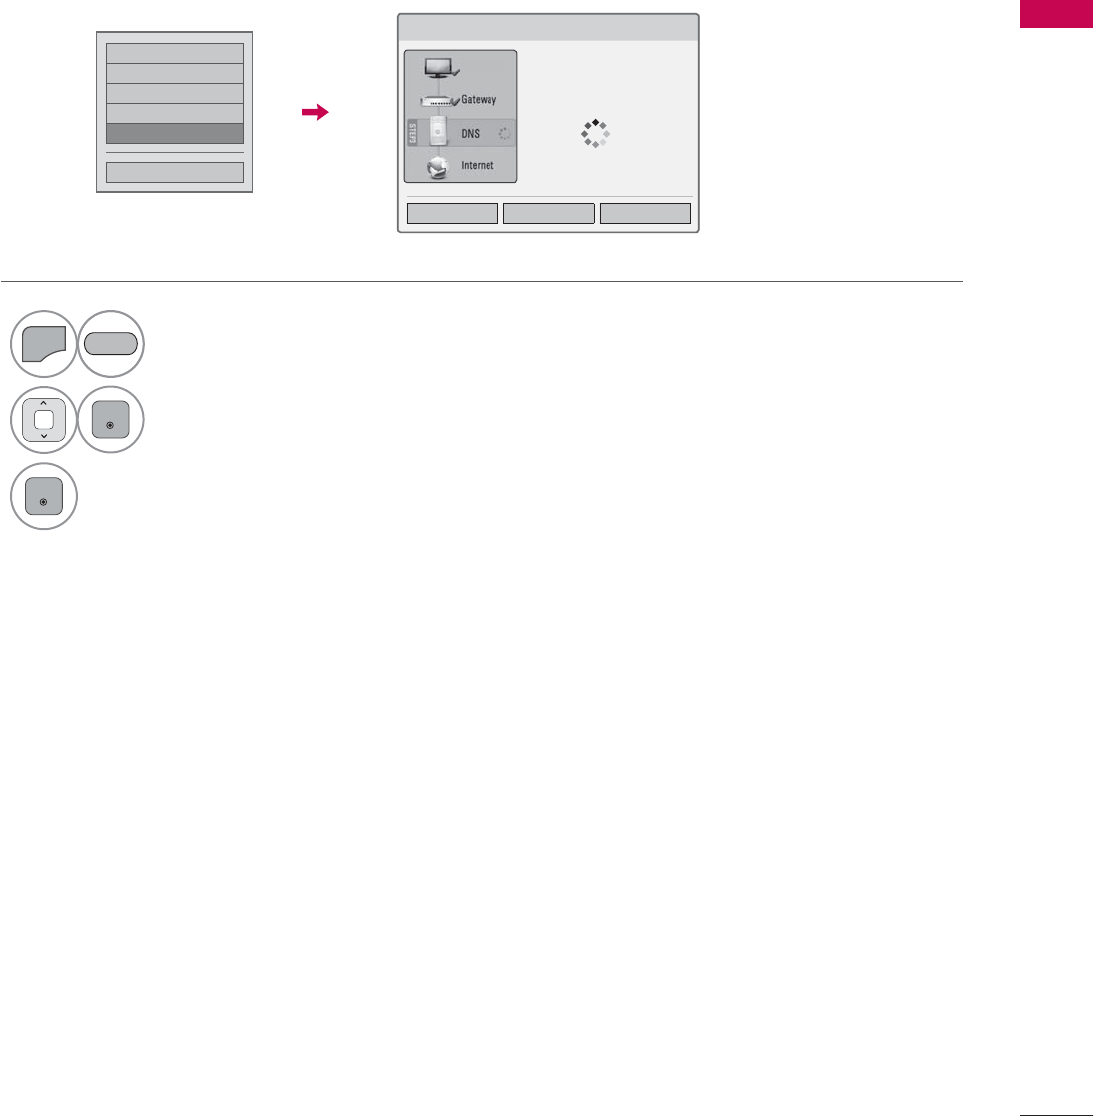
Network Test
۳6RIWZDUH8SGDWH
۳3LFWXUH7HVW
۳6RXQG7HVW
۳3URGXFW6HUYLFH,QIR
ᯡ1HWZRUN7HVW
&ORVH
Check the newtwork status.
1
MENU
Select Customer Support.
2
ENTER
Select Network Test.
3
ENTER
Check the newtwork status.
RED
1HWZRUN6WDWXV
1HWZRUNFRQQHFWLQJ
6HWWLQJ 7HVW &ORVH
79
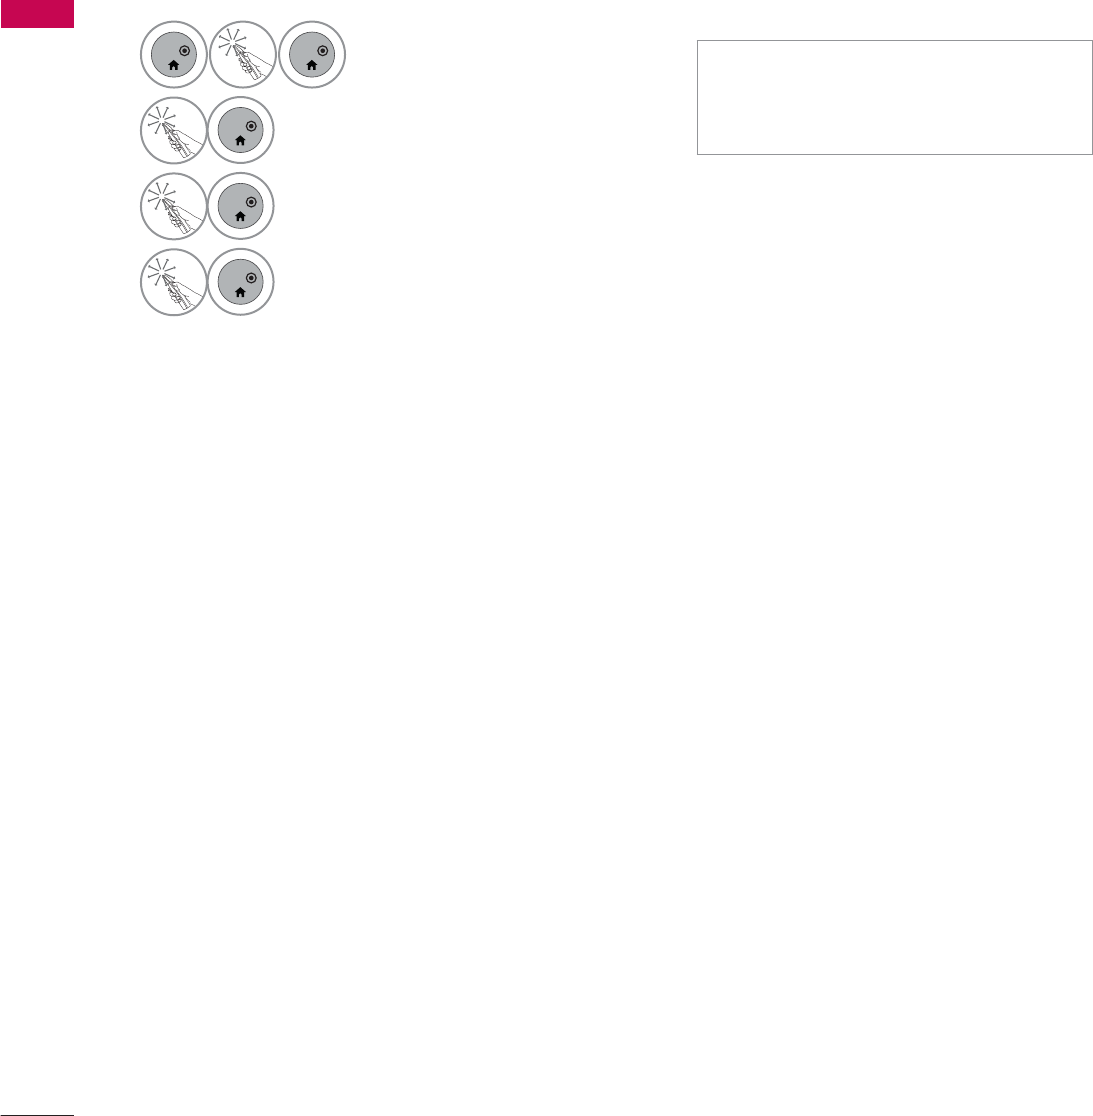
WATCHING TV / CHANNEL CONTROL
WATCHING TV / CHANNEL CONTROL
72
SIMPLE MANUAL
You can easily and effectively access the TV information by viewing a simple manual on the TV.
During the Simple Manual operation, audio will be muted.
1
ENTER
ENTER
Select Home Menu.
2
ENTER
Select Simple Manual.
3
ENTER
Select the part of the manual you
would like to see.
3
ENTER
Select Exit.
ᯫ
RED: Go to the Index page.
ᯫ
BLUE: Play the Simple Manual auto-
matically or manually.
73
WATCHING TV / CHANNEL CONTROL
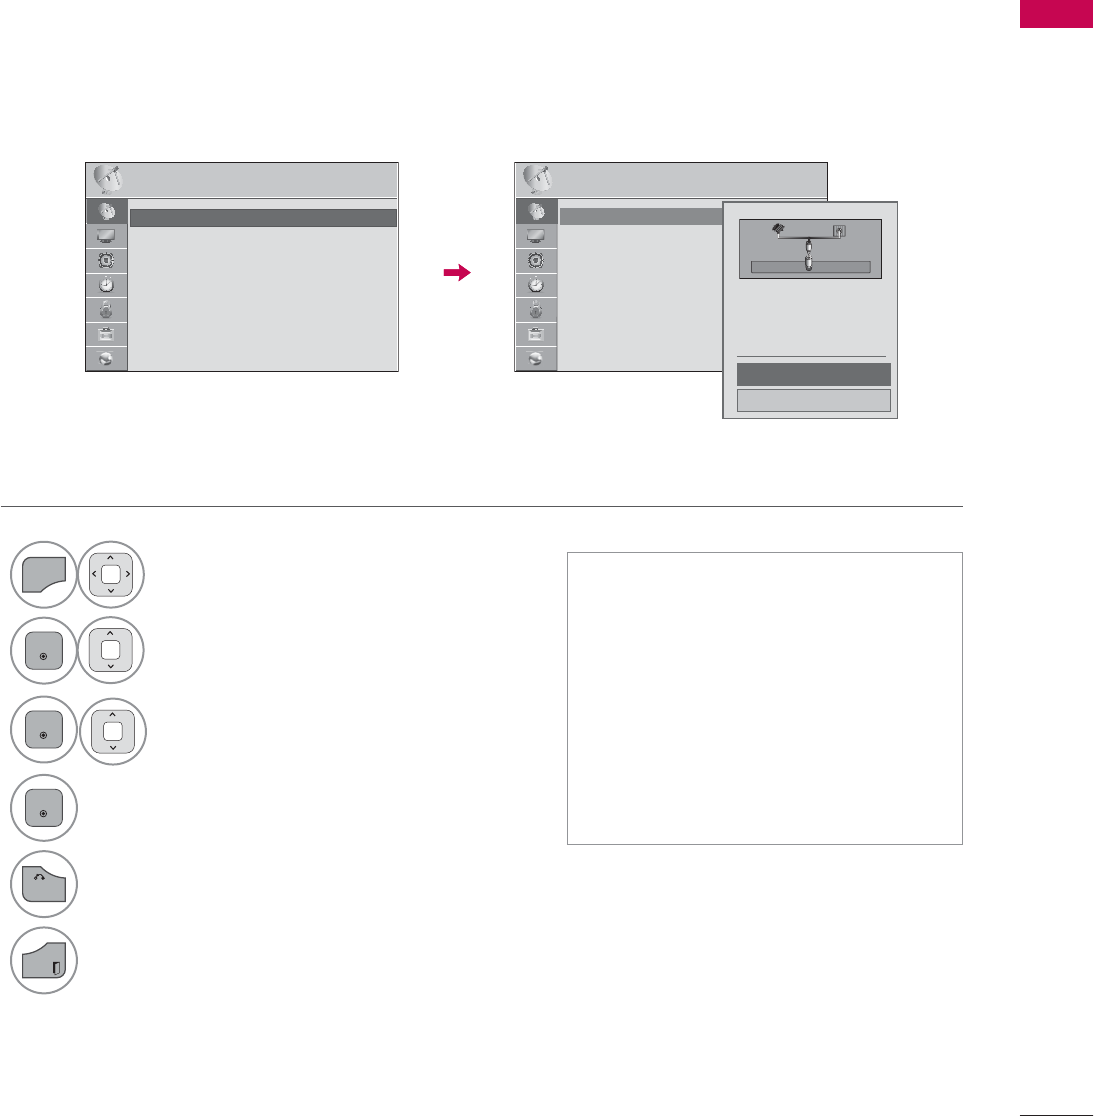
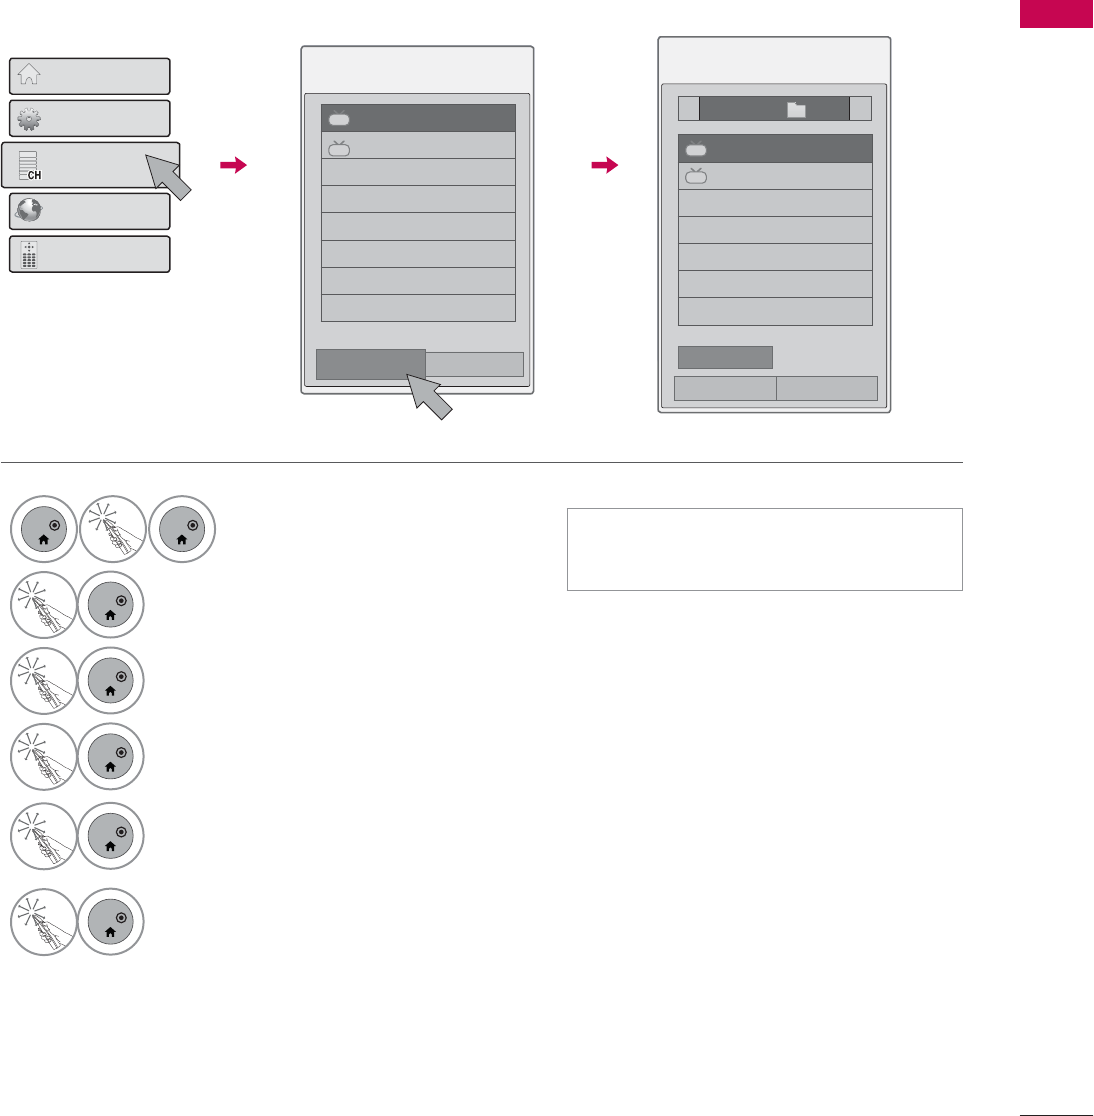
CHANNEL SETUP
Auto Scan (Auto Tuning)
Automatically finds all channels available through antenna or cable inputs, and stores them in memory
on the channel list.
Run this function if you change your residence or move the TV.
Auto Tuning memorizes only the channels available at the time.
1
MENU
Select CHANNEL.
2
ENTER
Select Auto Tuning.
3
ENTER
Select Start.
4
ENTER
Run Auto tuning.
5
BACK
Return to the previous menu.
EXIT
Return to TV viewing.
ᯫ
The TV will ask for a password if
parental control has been activated
(LOCK Menu). Use the password you
set up in the LOCK Menu to allow a
channel search.
ᯫ
The maximum number of channels
the TV can store is 1000.
ᯫ
Found channels are grouped in the
order of DTV, TV, Cable DTV and
Cable TV.
&+$11(/ &+$11(/
ᯒ0RYHᯙ(QWHU ᯒ0RYHᯙ(QWHU
ᯱ
ᯙ
ؒ $XWR7XQLQJ
ؒ 0DQXDO7XQLQJ
ؒ &KDQQHO(GLW
ؒ $XWR7XQLQJ
ؒ 0DQXDO7XQLQJ
ؒ &KDQQHO(GLW
&KHFN\RXUDQWHQQDFRQQHFWLRQ
7KHSUHYLRXVFKDQQHOLQIRUPDWLRQ
ZLOOEHXSGDWHGGXULQJ$XWR7XQLQJ
$QWHQQD
&DEOH
6WDUW
&ORVH
WATCHING TV / CHANNEL CONTROL
WATCHING TV / CHANNEL CONTROL
74
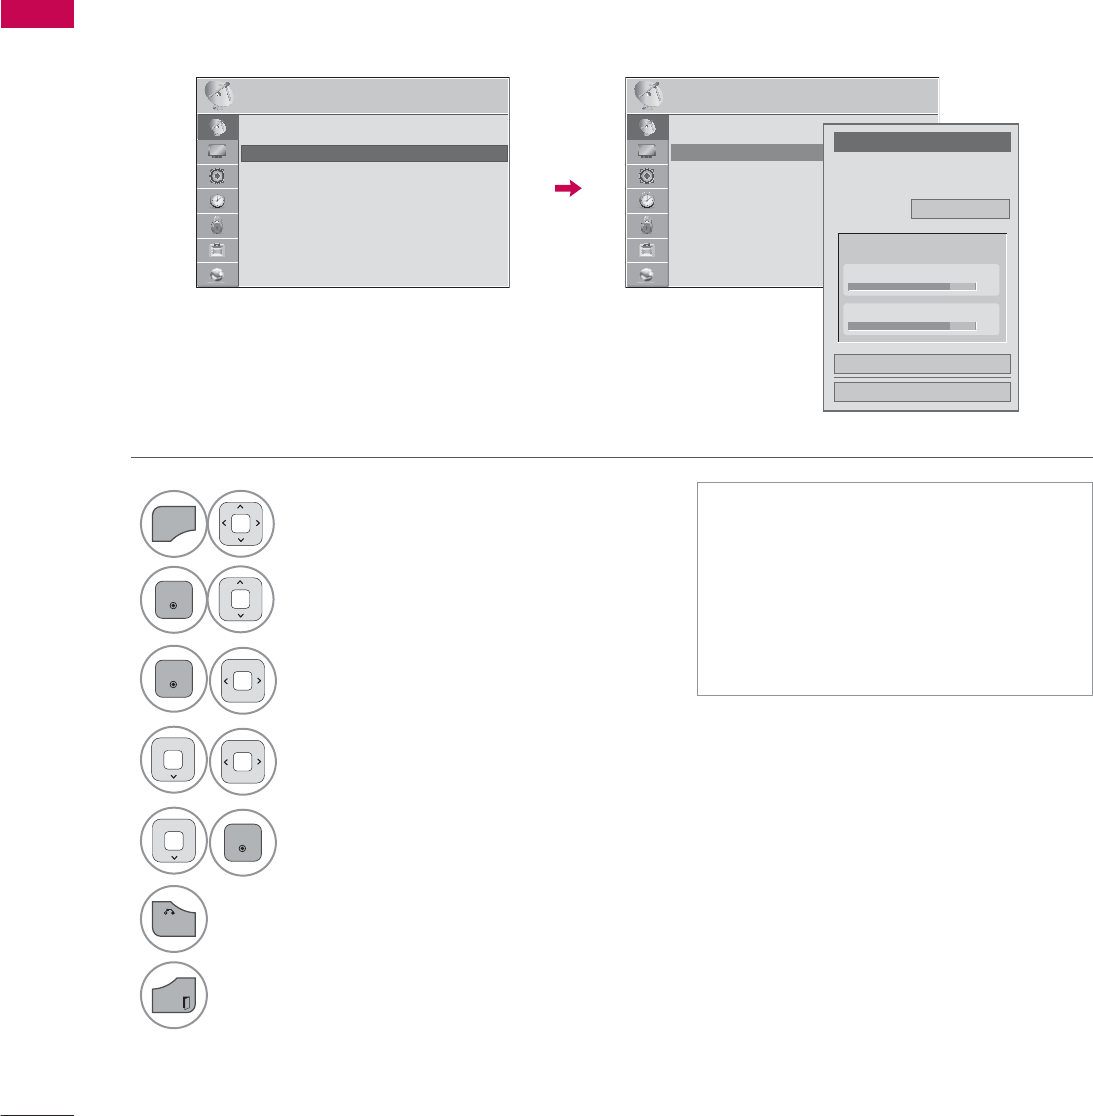
Add/Delete Channel (Manual Tuning)
When selecting DTV or Cable DTV input signal in Manual Tuning, you can view the on-screen signal
strength monitor to see the quality of the signal being received.
1
MENU
Select CHANNEL.
2
ENTER
Select Manual Tuning.
3
ENTER
Select DTV,TV,Cable DTV,
or Cable TV.
4Select channel you want to
add or delete.
5
ENTER
Select Add or Delete.
6
BACK
Return to the previous menu.
EXIT
Return to TV viewing.
ᯫ
The TV will ask for a password if
parental control has been activated
(LOCK Menu). Use the password you
set up in the LOCK Menu to allow a
channel search.
ᯫ
The maximum number of channels
the TV can store is 1000.
&+$11(/ &+$11(/
ᯒ0RYHᯙ(QWHU ᯒ0RYHᯙ(QWHU
ؒ $XWR7XQLQJ
ؒ 0DQXDO7XQLQJ
ؒ &KDQQHO(GLW
&KDQQHO
6HOHFWFKDQQHOW\SHDQG5)FKDQQHO
QXPEHU
܁
'79
۽
2
&ORVH
'HOHWH
'79
ؒ6LJQDO6WUHQJWK
ؒ6LJQDO4XDOLW\
ᯐ
ᯙ
ؒ $XWR7XQLQJ
ؒ 0DQXDO7XQLQJ
ؒ &KDQQHO(GLW
75
WATCHING TV / CHANNEL CONTROL
Channel Editing
The channels in the Channel Edit List are displayed in black and the channels deleted from the Channel
Edit List are displayed in blue.
When a channel number is deleted, it means that you will be unable to select it using CHنهbutton
during TV viewing. If you wish to select the deleted channel, directly enter the channel number with the
NUMBER buttons or select it in the Channel Edit menu.
ᯫ
Keep pressing the ᰜbutton and use
the
or
>
buttons to move between
DTV, TV, Cable DTV and Cable TV.
1
MENU
Select CHANNEL.
2
ENTER
Select Channel Edit.
3
ENTER
Select a channel.
4Add or delete a channel.
Block or unblock the channel.
You can block/unblock channels even if
you select “Lock system-Off” in the LOCK
menu.
ENTER
Switch to the chosen channel number.
CH
P
A
G
E
Move the pages when the channel list is
too long.
5
BACK
Return to the previous menu.
EXIT
Return to TV viewing.
BLUE
YELLOW
&+$11(/ ᯒ0RYHᯙ(QWHU
5-13-1 7-1
ᯙ&+&KDQJH
'79 79 &DEOH'79 &DEOH79
ᯒ1DYLJDWLRQ ᱇3DJH&KDQJH ᯕ%ORFN8QEORFN ᯕ$GG'HOHWH
᱆)DYRULWH&K
&KDQQHO(GLW 3DJH
ᱭ)DYRULWH&K*URXS ᰙ3UHYLRXV
)DYRULWH*URXS A
ᯙ
ᯰ
ؒ $XWR7XQLQJ
ؒ 0DQXDO7XQLQJ
ؒ &KDQQHO(GLW
WATCHING TV / CHANNEL CONTROL
WATCHING TV / CHANNEL CONTROL
76
CHANNEL LIST
1
ENTER
ENTER
Select Channel List.
2
ENTER
Select a channel you want to switch.
BLUE Tune to the “CHANNEL menu -
Channel Edit”.
3
ENTER
Select Exit.
You can check which channels are stored in the memory by displaying the channel list.
&KDQQHO/LVW
DTV
ᯢᯙ
DTV
ᯕ&K(GLW
This padlock is displayed
when the channel is locked
with parental control.
4XLFN0HQX
&KDQQHO/LVW
1HWFDVW
6FUHHQ5HPRWH
+RPH0HQX
᱆)DYRULWH/LVW
ᰙ([LW
77
WATCHING TV / CHANNEL CONTROL
1
ENTER
ENTER
Select Channel List.
2
ENTER
Select Favorite List.
3
ENTER
Select your desired favorite channel
group from A to D.
4
ENTER
Select your desired channel.
5
ENTER
Select Ch.Reg to register or cancel
the current channel in favorite chan-
nel list.
6
ENTER
Select Exit.
FAVORITE CHANNEL SETUP
Favorite Channels are a convenient feature that lets you quickly select channels of your choice without
waiting for the TV to select all the in-between channels.
&KDQQHO/LVW
DTV
ᯢᯙ
DTV
ᯕ&K(GLW
4XLFN0HQX
&KDQQHO/LVW
1HWFDVW
6FUHHQ5HPRWH
+RPH0HQX
᱆)DYRULWH/LVW
ᰙ([LW
᱆)DYRULWH/LVW
ᯫ
You can also setup Favorite List in
the CHANNEL menu - Channel Edit.
ᯚᯛ)DYRULWH&K*URXS
)DYRULWH/LVW
܁*URXSA۽
DTV
ᯙ
DTV
ᯕ&K5HJ ᯕ&K(GLW
&KDQQHO/LVW
ᰙ([LW
ᯕ
/,67
WATCHING TV / CHANNEL CONTROL
WATCHING TV / CHANNEL CONTROL
78
Displaying Channel Information
CHANNEL INFORMATION
1
INFO
Show the current channel program Information on the screen.
2Show a previous or next channel’s program information
3
EXIT
Return to TV viewing.
%ULHI,QIR7LWOH7HVW
᯦'79&11 ᯐ&K&KDQJH۽1H[Wᯙ:DWFK᰿([LW
0XOWLOLQJXDO᯿&DSWLRQᰇLᯢ793*'/69
$0 $0
1RLQIRUPDWLRQ
6DUDK%UDGOH\6WHYH*UD\DQG%UHQGRQ3RQJLDSUHVHQWWKHODWHVWLQIDVKLRQWKHDUWVHQWHUWDLQPHQWOLIHVW\OHDQGFRRNLQJ
ZLWKUHJXODUDQGVSHFLDOJXHVWV
6DUDK%UDGOH\6WHYH*UD\DQG%UHQGRQ3RQJLDSUHVHQWWKHODWHVWLQIDVKLRQWKHDUWVHQWHUWDLQPHQWOLIHVW\OHDQGFRRNLQJ
ᯱ
ᯕ8S
ᯕ'RZQ

79
WATCHING TV / CHANNEL CONTROL
CHANNEL BRIEF INFORMATION
Brief Info shows the present screen information.
1
ENTER
Shows the current channel’s brief info screen.
2
ENTER
Return to TV viewing.
1Program title
2Day, Month, Year,
Present time
3Program start time
4Program progress
bar
5Program finish
time
6Banner information
6XQ)HE$0
0XOWLOLQJXDO᯿&DSWLRQᰇLᯢ793*'/69
$0 $0
%ULHI,QIR7LWOH7HVW
1H[W$01HZV
&11
᯦'79
ᱏ
6 3 11 4 5 2
Multilingual : The program contains two or more audio servic-
es. Use the Q.MENU menu to select wanted Audio.
᯿Caption : The program contains one or more caption services.
Use the Q.MENU menu to select wanted Closed caption.
Dolby Digital: The program contains a Dolby Digital audio
signal in TV and HDMI input source.
ᰆThe original aspect ratio of the video is 4:3
ᰇThe original aspect ratio of the video is 16:9 (wide)
480i
480p
720p
1080i
1080p
The video resolution is 720x480i
The video resolution is 720x480p
The video resolution is 1280x720p
The video resolution is 1920x1080i
The video resolution is 1920x1080p
ᯢ
V-Chip: The program contains V-Chip information. Refer to
the LOCK menu: A (Age), D (Dialogue), L (Language), S (Sex),
V (Violence), FV (Fantasy Violence)
WATCHING TV / CHANNEL CONTROL
WATCHING TV / CHANNEL CONTROL
80
ᯫ
When new external device is connected, this popup
menu is displayed automatically.
If selecting Yes, you can select input source that you
want to appreciate.
ᯫ
But, when selecting “SIMPLINK - On”, popup menu for
HDMI input will not be displayed.
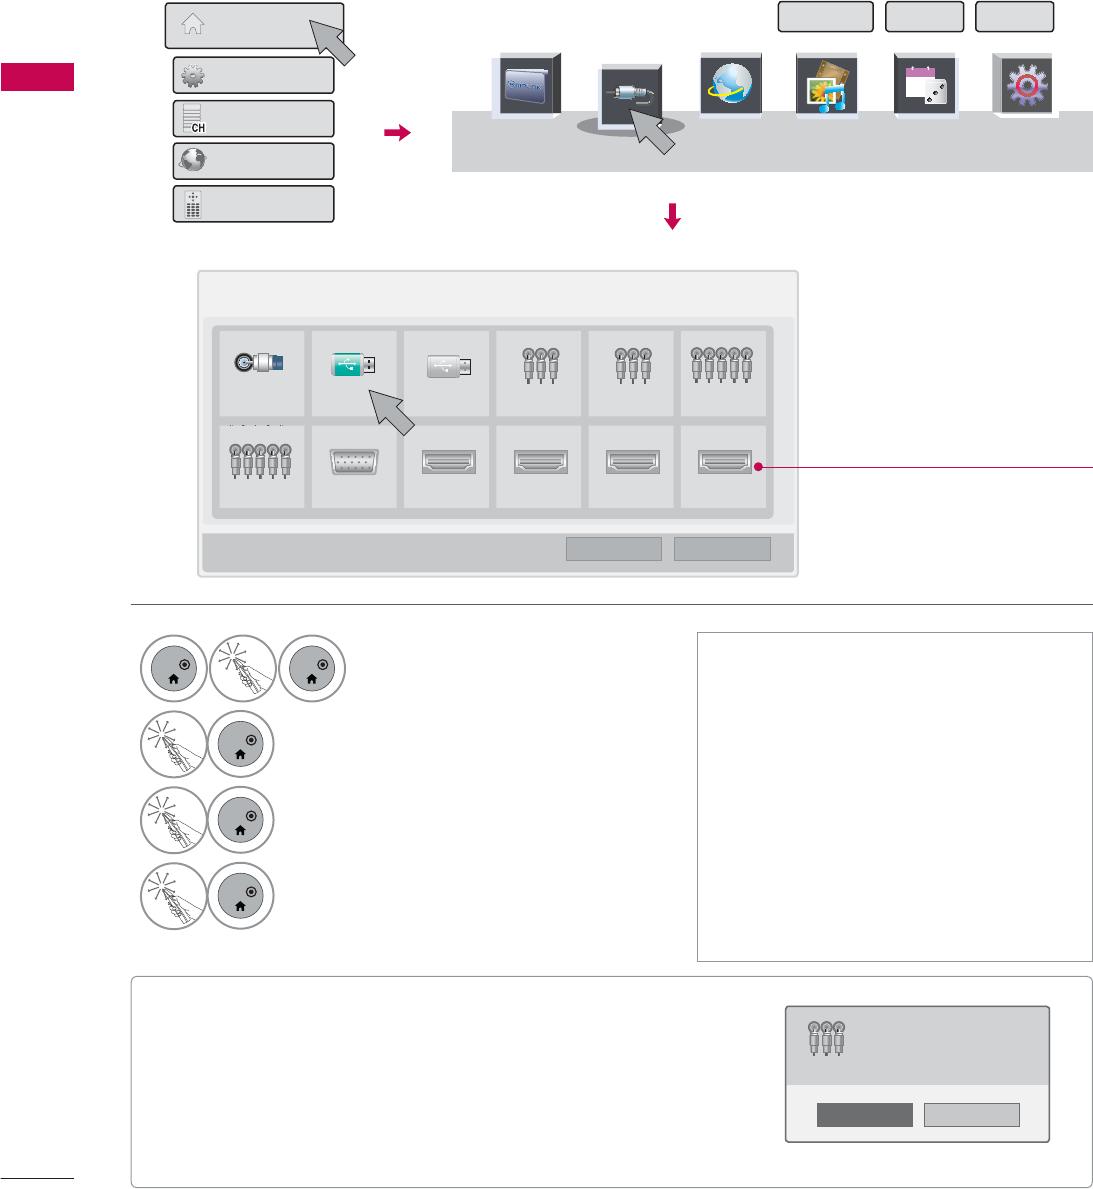
INPUT LIST
Only these input signals which are connected to a TV can be activated and selected.
1R
Yes
1HZH[WHUQDOLQSXWLVFRQQHFWHG
'R\RXZDQWWRXVHWKLV"
$9
Disconnected inputs are inactive
(grayed out)
,QSXW/LVW ᯒ0RYH ᯙ(QWHU
79 86% 86% $9 $9 &RPSRQHQW
&RPSRQHQW 5*%3& +'0, +'0, +'0, +'0,
ᯕ,QSXW/DEHO ᰙ([LW
6,03/,1. 1(7&$67 0<0(',$ *$0(6&+('8/(
30
Today
48,&.0(18
,1387
1
ENTER
ENTER
Select Home Menu.
2
ENTER
Select INPUT.
3
ENTER
Select the desired input source.
4
ENTER
Select Exit.
ᯫ
TV: Select it to watch over-the-air,
cable and digital cable broadcasts.
ᯫ
USB: Select it to use movie, photo, or
music files.
ᯫ
AV: Select them to watch a VCR or
other external equipment.
ᯫ
Component: Select them to watch
DVD or a Digital set-top box.
ᯫ
RGB-PC: Select it to view PC input.
ᯫ
HDMI: Select them to watch high
definition devices.
6LPSOH0DQXDO 3RLQWHU ([LW
+RPH0HQX
4XLFN0HQX
&KDQQHO/LVW
1HWFDVW
6FUHHQ5HPRWH
i.e)
81
WATCHING TV / CHANNEL CONTROL
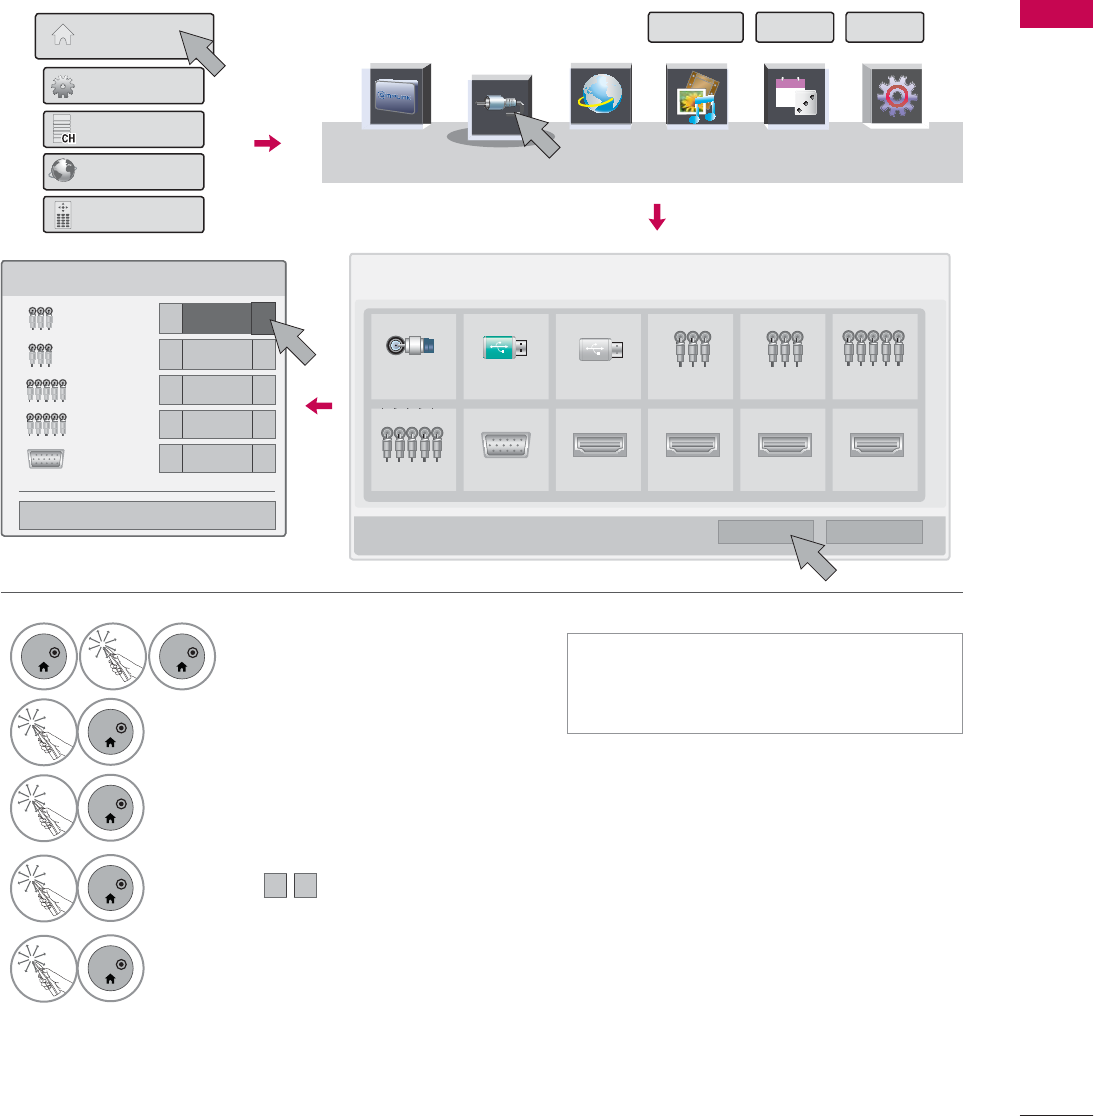
INPUT LABEL
This indicates which device is connected to which input port.
,QSXW/DEHO
$9 ܁9&5 ۽
$9 ܁۽
&RPSRQHQW ܁۽
&RPSRQHQW ܁۽
5*%3& ܁۽
ᯝ
&ORVH
,QSXW/LVW ᯒ0RYH ᯙ(QWHU
79 86% 86% $9 $9 &RPSRQHQW
&RPSRQHQW 5*%3& +'0, +'0, +'0, +'0,
ᯕ,QSXW/DEHO ᰙ([LW
1
ENTER
ENTER
Select Home Menu.
2
ENTER
Select INPUT.
3
ENTER
Select Input Label.
4
ENTER
Select the desired input source and
then select ܁۽
to choose the input
label.
5
ENTER
Select Exit.
ᯫ
You can also select the Input label
using the BLUE button on the TV
remote control.
۽
6,03/,1. 1(7&$67 0<0(',$ *$0(6&+('8/(
30
Today
48,&.0(18
,1387
6LPSOH0DQXDO 3RLQWHU ([LW
+RPH0HQX
4XLFN0HQX
&KDQQHO/LVW
1HWFDVW
6FUHHQ5HPRWH
i.e)

WATCHING TV / CHANNEL CONTROL
WATCHING TV / CHANNEL CONTROL
82
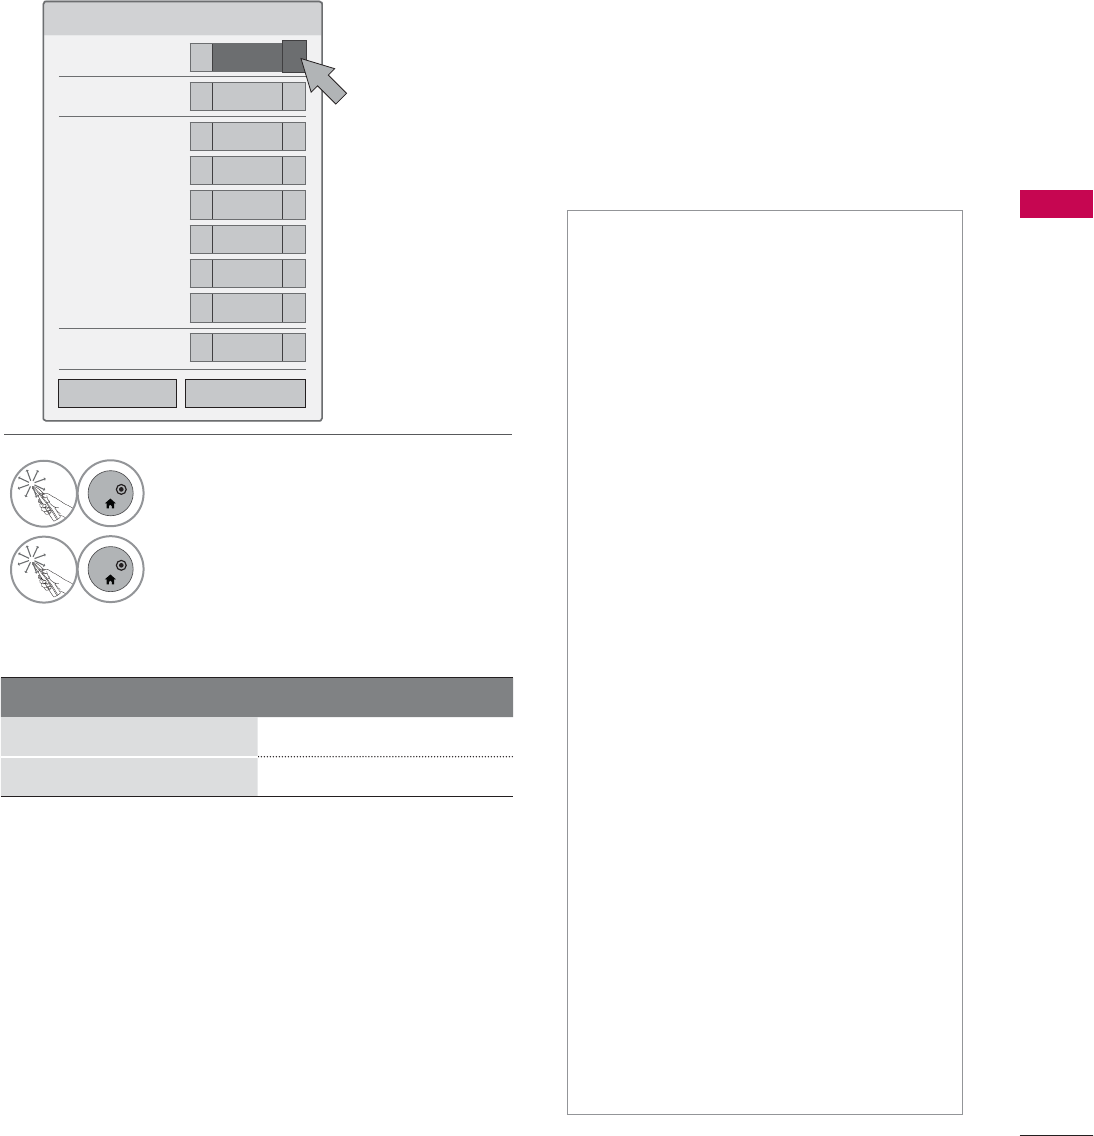
RESET TO FACTORY DEFAULT (INITIAL SETTING)
This function resets the TV to factory default and erases all stored channels.
ᯫ
When selecting “Lock System - On”
in the LOCK menu, the message to
enter the password appears.
ᯫ
If you forget your password, press
“0-3-2-5” on the remote control.
237,21 ᯒ0RYHᯙ(QWHU 237,21 ᯒ0RYHᯙ(QWHU
ؒ /DQJXDJH
ؒ &DSWLRQ 2II
ؒ 3RZHU,QGLFDWRU
ؒ ,QLWLDO6HWWLQJ
ؒ 6HW,'
ؒ 0RGH6HWWLQJ +RPH8VH
ᯐ
ᯙ
ؒ /DQJXDJH
ؒ &DSWLRQ 2II
ؒ 3RZHU,QGLFDWRU
ؒ ,QLWLDO6HWWLQJ
ؒ 6HW,'
ؒ 0RGH6HWWLQJ +RPH8VH
1
MENU
Select OPTION.
2
ENTER
Select Initial Setting.
3
ENTER
Select Yes.
4
ENTER
TV turns off automatically and starts
factory reset.
1R
Yes
$OOXVHUVHWWLQJVDQGFKDQQHOVHWWLQJVZLOO
EHUHVHW6WLOOFRQWLQXH"
83
WATCHING TV / CHANNEL CONTROL
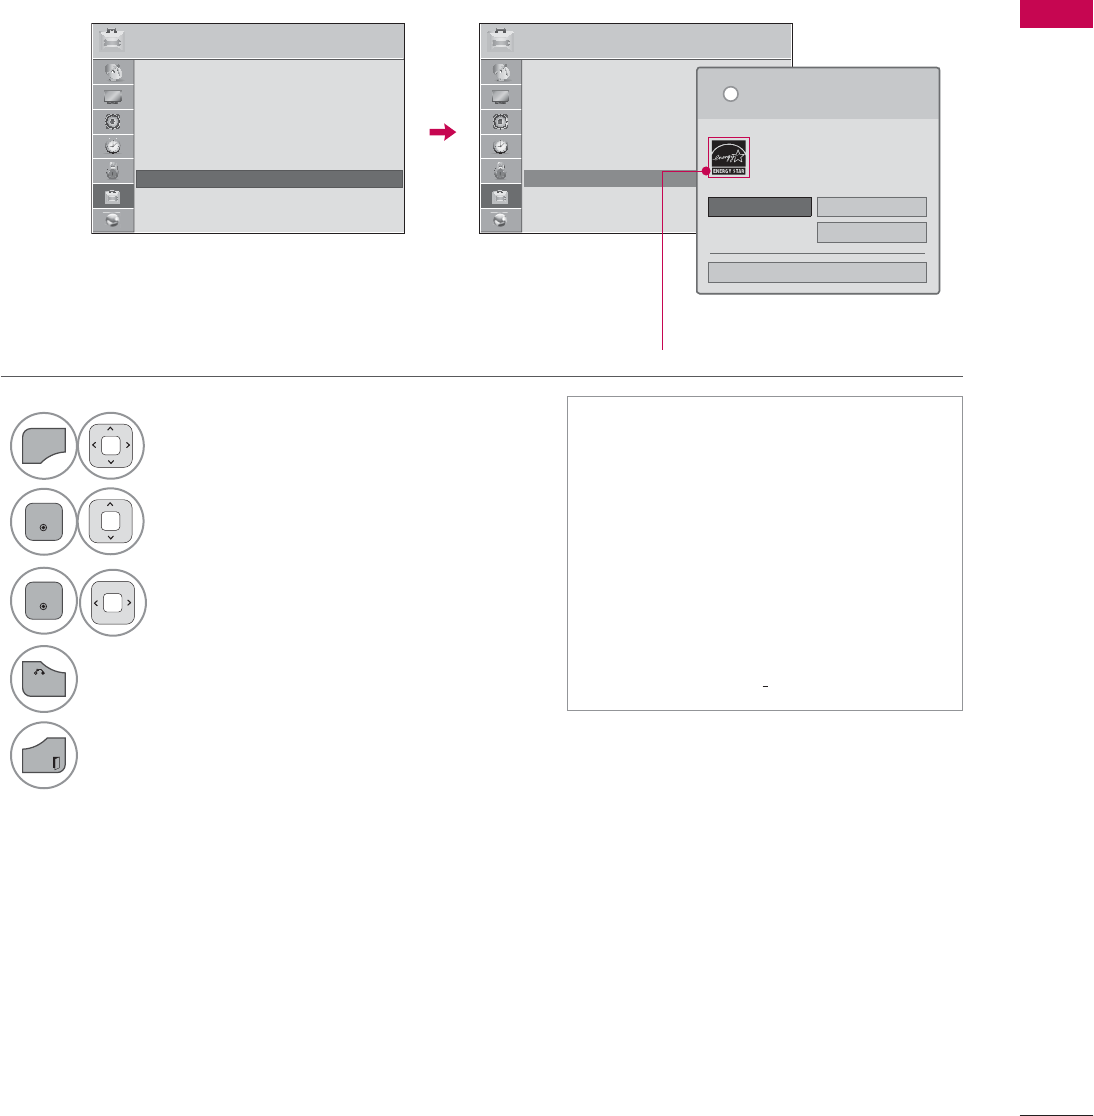
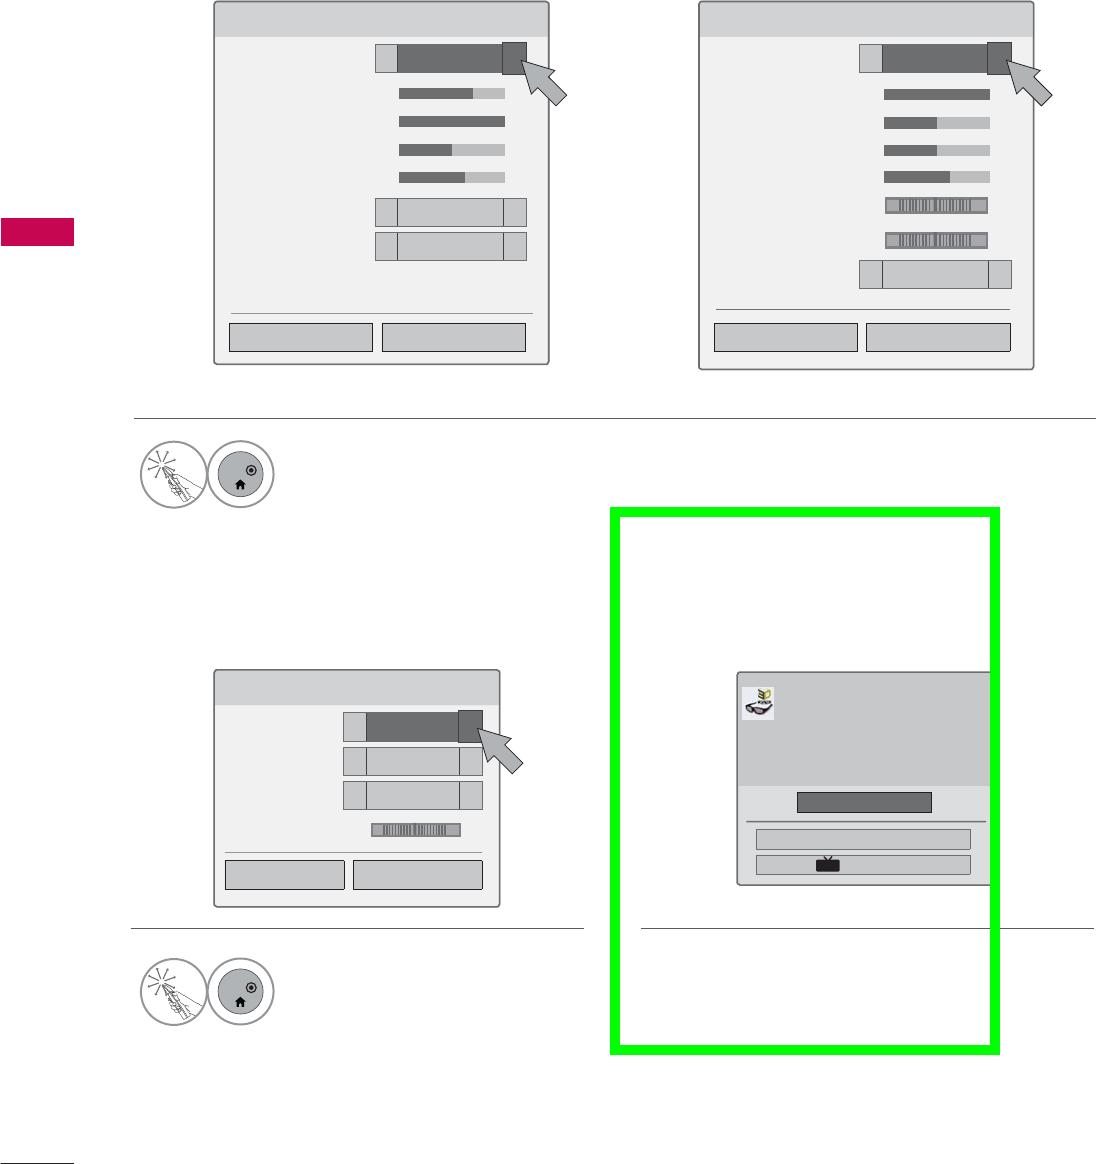
MODE SETTING
Default selection is “Home Use”. We recommend setting the TV to “Home Use” mode for the best
picture in your home environment.
ᯫ
“Store Demo” Mode is only intended
for use in retail environments.
Customers can adjust the “Picture
menu - Picture mode” manually while
inspecting the TV, but the TV will
automatically return to preset in-
store mode after 5 minutes.
ᯫ
“Store Demo” Mode is an optimal
setting for displaying at stores. “Store
Demo” mode initializes the TV to set
the image quality.
237,21 ᯒ0RYHᯙ(QWHU 237,21 ᯒ0RYHᯙ(QWHU
ؒ /DQJXDJH
ؒ &DSWLRQ 2II
ؒ 3RZHU,QGLFDWRU
ؒ ,QLWLDO6HWWLQJ
ؒ 6HW,'
ؒ 0RGH6HWWLQJ +RPH8VH
1
MENU
Select OPTION.
2
ENTER
Select Mode Setting.
3
ENTER
Select Home Use.
4
BACK
Return to the previous menu.
EXIT
Return to TV viewing.
ᯙ
ᯰ
ؒ /DQJXDJH
ؒ &DSWLRQ 2II
ؒ 3RZHU,QGLFDWRU
ؒ ,QLWLDO6HWWLQJ
ؒ 6HW,'
ؒ 0RGH6HWWLQJ +RPH8VH
6HOHFWLQJWKHHQYLURQPHQW
&KRRVHWKHVHWWLQJPRGH\RXZDQW
L
+RPH8VH 6WRUH'HPR
ؒ 'HPR0RGH 2II
&ORVH
6HOHFW>+RPH8VH@ZKHQVHWWLQJ79XS
LQKRPH<RXFDQDGMXVWSLFWXUHTXDOLW\
DFFRUGLQJO\WKURXJK3LFWXUH0RGHPHQX
RSWLRQ
For LED LCD TV
WATCHING TV / CHANNEL CONTROL
WATCHING TV / CHANNEL CONTROL
84
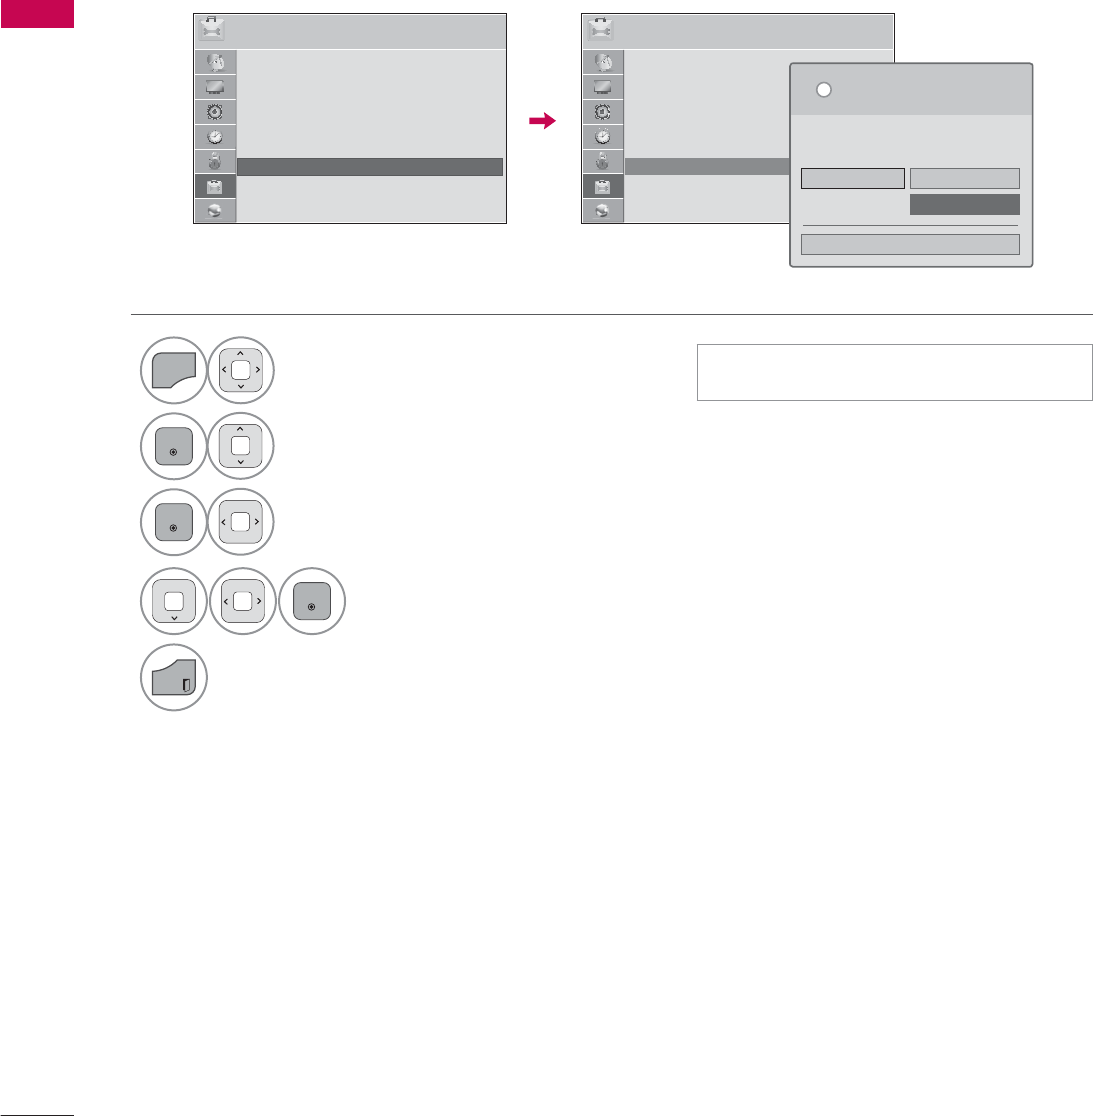
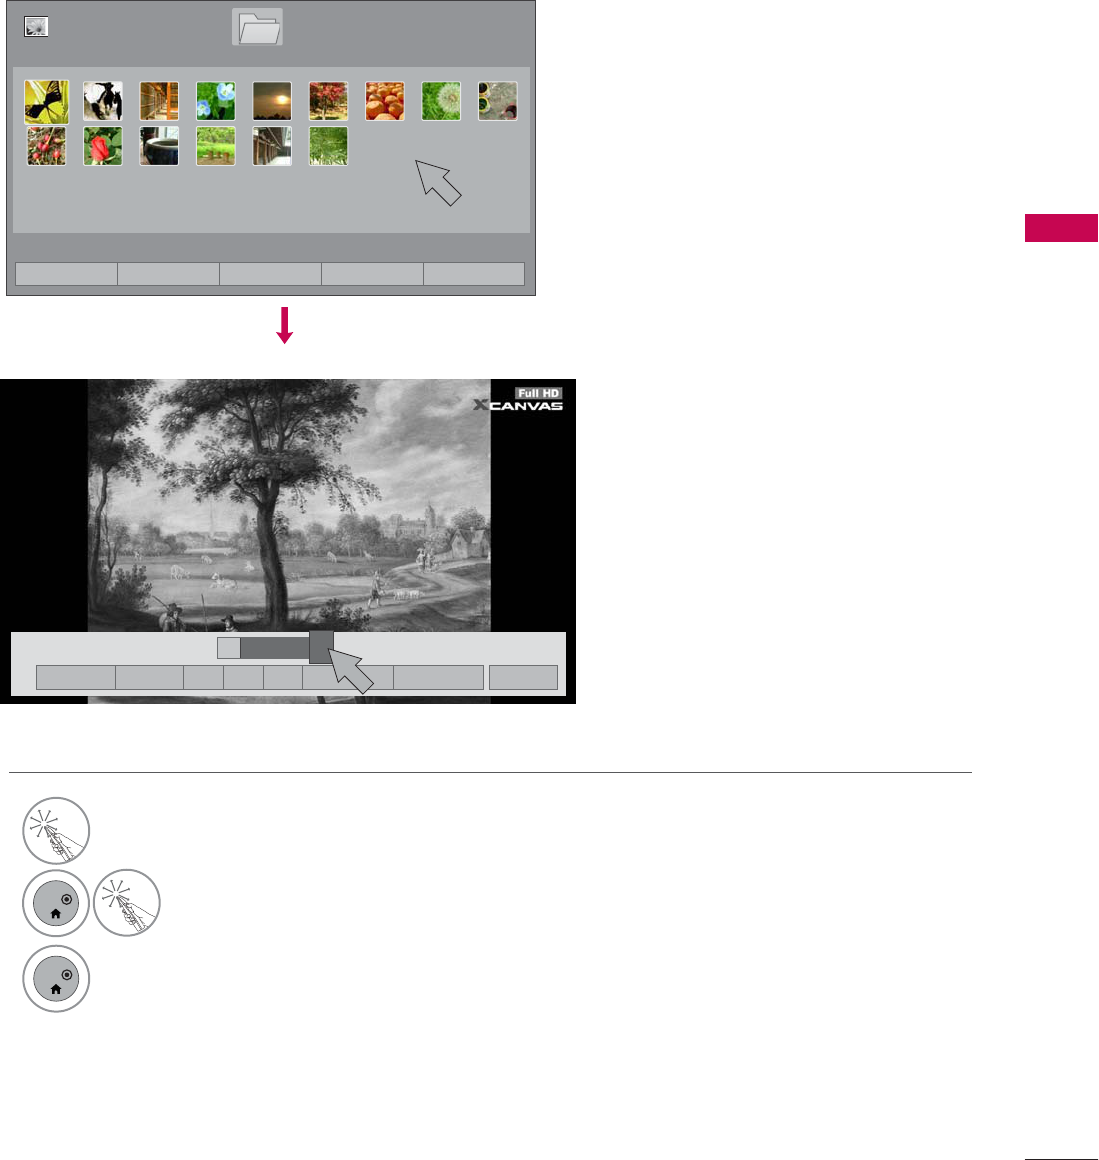
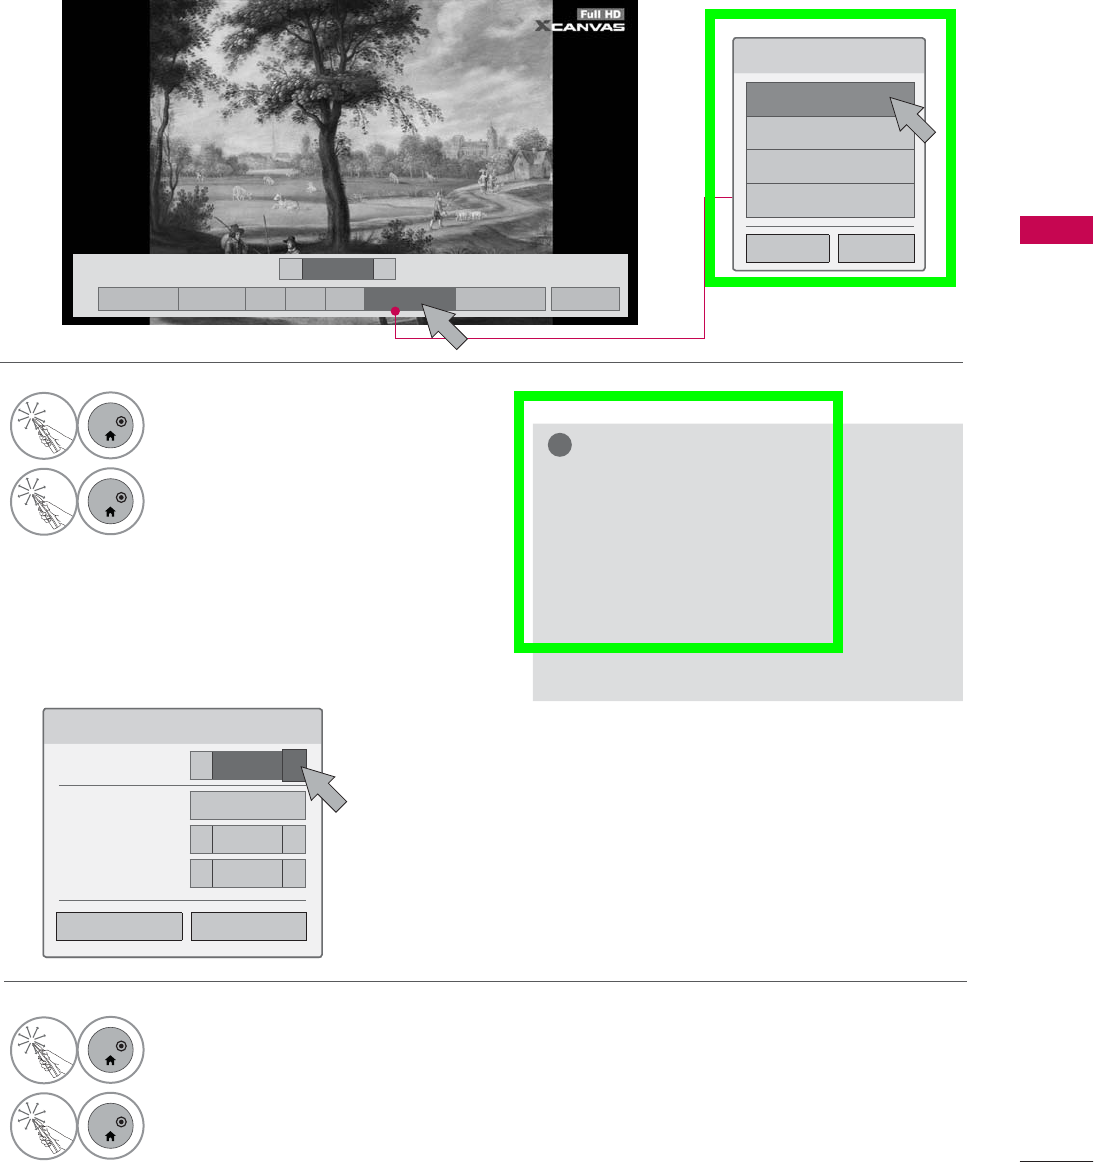
DEMO MODE
Displays a slide show to explain the various feature of this TV.
237,21 ᯒ0RYHᯙ(QWHU 237,21 ᯒ0RYHᯙ(QWHU
ؒ /DQJXDJH
ؒ &DSWLRQ 2II
ؒ 3RZHU,QGLFDWRU
ؒ ,QLWLDO6HWWLQJ
ؒ 6HW,'
ؒ 0RGH6HWWLQJ 6WRUH'HPR
6HOHFWLQJWKHHQYLURQPHQW
&KRRVHWKHVHWWLQJPRGH\RXZDQW
6HOHFW>6WRUH'HPR@IRULQVWRUHGVSOD\)RUXVH
LQKRPHVHOHFW>+RPH8VH@
L
+RPH8VH 6WRUH'HPR
ؒ 'HPR0RGH 2II
&ORVH
1
MENU
Select OPTION.
2
ENTER
Select Mode Setting.
3
ENTER
Select Store Demo.
4
ENTER
Select On.
5
EXIT
Return to TV viewing.
After a while, Demo Mode. starts.
If you want to stop the demo, press any
button (Except VOL +, - and MUTE button).
ᯙ
ᯰ
ؒ /DQJXDJH
ؒ &DSWLRQ 2II
ؒ 3RZHU,QGLFDWRU
ؒ ,QLWLDO6HWWLQJ
ؒ 6HW,'
ؒ 0RGH6HWWLQJ +RPH8VH
ᯫ
This feature is disabled in “Home Use”.
85
WATCHING TV / CHANNEL CONTROL
AV MODE
AV Mode toggles through preset Video and Audio settings.
ᯫ
If you select “Cinema / Cinema”
in AV mode, Cinema / Cinema
will be selected both for “PICTURE
menu - Picture Mode” and “AUDIO
menu - Sound Mode” respectively.
ᯫ
If you select “Off” in AV mode, the
“Picture Mode” and “Sound Mode”
return to previous selected value.
ᯫ
Off: Disables the AV MODE.
ᯫ
Cinema / Cinema: Optimizes
video and audio for watching movies.
ᯫ
Sport: Optimizes video and audio for
watching sports events.
ᯫ
Game: Optimizes video and audio for
playing games.
ᯫ
Press the AV MODE button repeat-
edly to select your desired menu
option.
1
ENTER
ENTER
Select Screen Remote.
2
ENTER
Select AV MODE.
3
ENTER
Select AV MODE repeatedly to select
your desired menu option.
3UHVVEXWWRQWRUXQWKHVHOHFWHG
IXQFWLRQ
6FUHHQ5HPRWH
(1(5*<
6$9,1* $90RGH ,1387
)$9 40(18 6,03/,1.
(QWHU &ORVH
/,67 )/$6+%.
123
45
9
0
$902'(
+RPH0HQX
4XLFN0HQX
&KDQQHO/LVW
1HWFDVW
6FUHHQ5HPRWH
WATCHING TV / CHANNEL CONTROL
WATCHING TV / CHANNEL CONTROL
86
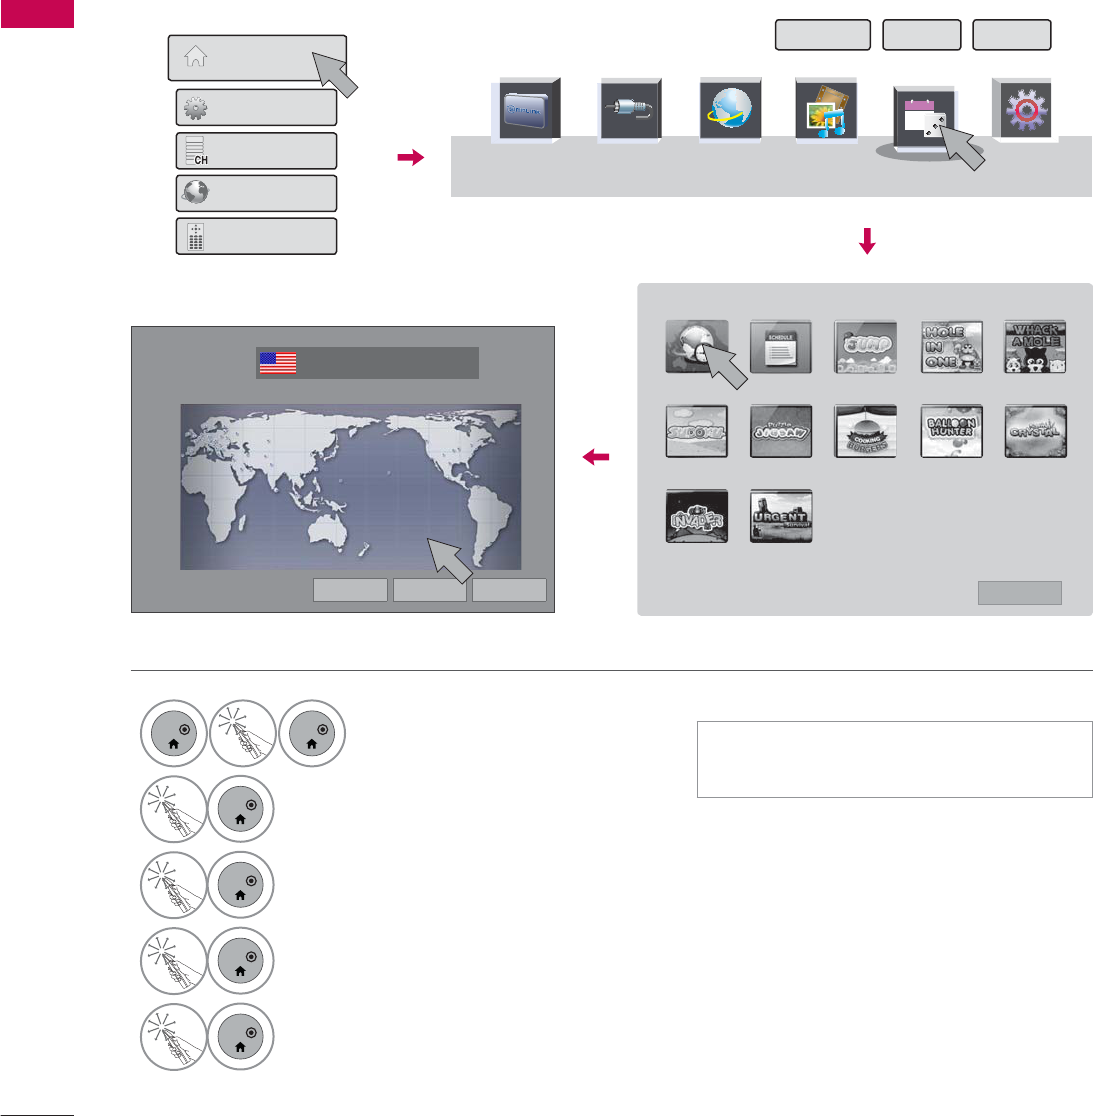
GAME/SCHEDULE
This function operates only if the current time has been set.
6,03/,1. 1(7&$67 0<0(',$ 48,&.0(18
,1387
1
ENTER
ENTER
Select Home Menu.
2
ENTER
Select GAME/SCHEDULE.
3
ENTER
Select WORLD TIME.
4
ENTER
Select a desired city.
You can check the world time.
5
ENTER
Select Exit.
*$0(6&+('8/(
30
Today
6LPSOH0DQXDO 3RLQWHU ([LW
+RPH0HQX
4XLFN0HQX
&KDQQHO/LVW
1HWFDVW
6FUHHQ5HPRWH
:25/'7,0( 6&+('8/( -803 +2/(,121( :+$&.$02/(
68'2.8 -,*6$: &22.,1*%85*(5 %$//221+817(5 6$9,1*&5<67$/
,19$'(5 85*(176859,9$/
᰿([LW
*$0(6&+('8/(
World Time
ᯒ0RYHᯙ6HOHFW5HJLRQ ᯕ&LW\/LVW ᰙ3UHYLRXV ᰿([LW
:RUOG&ORFN
(DVWHUQ86$
)UL
86$
:DVKLQJWRQ'&
)UL
ᯫ
The day light saving is not shown at
the world clock.
87
WATCHING TV / CHANNEL CONTROL
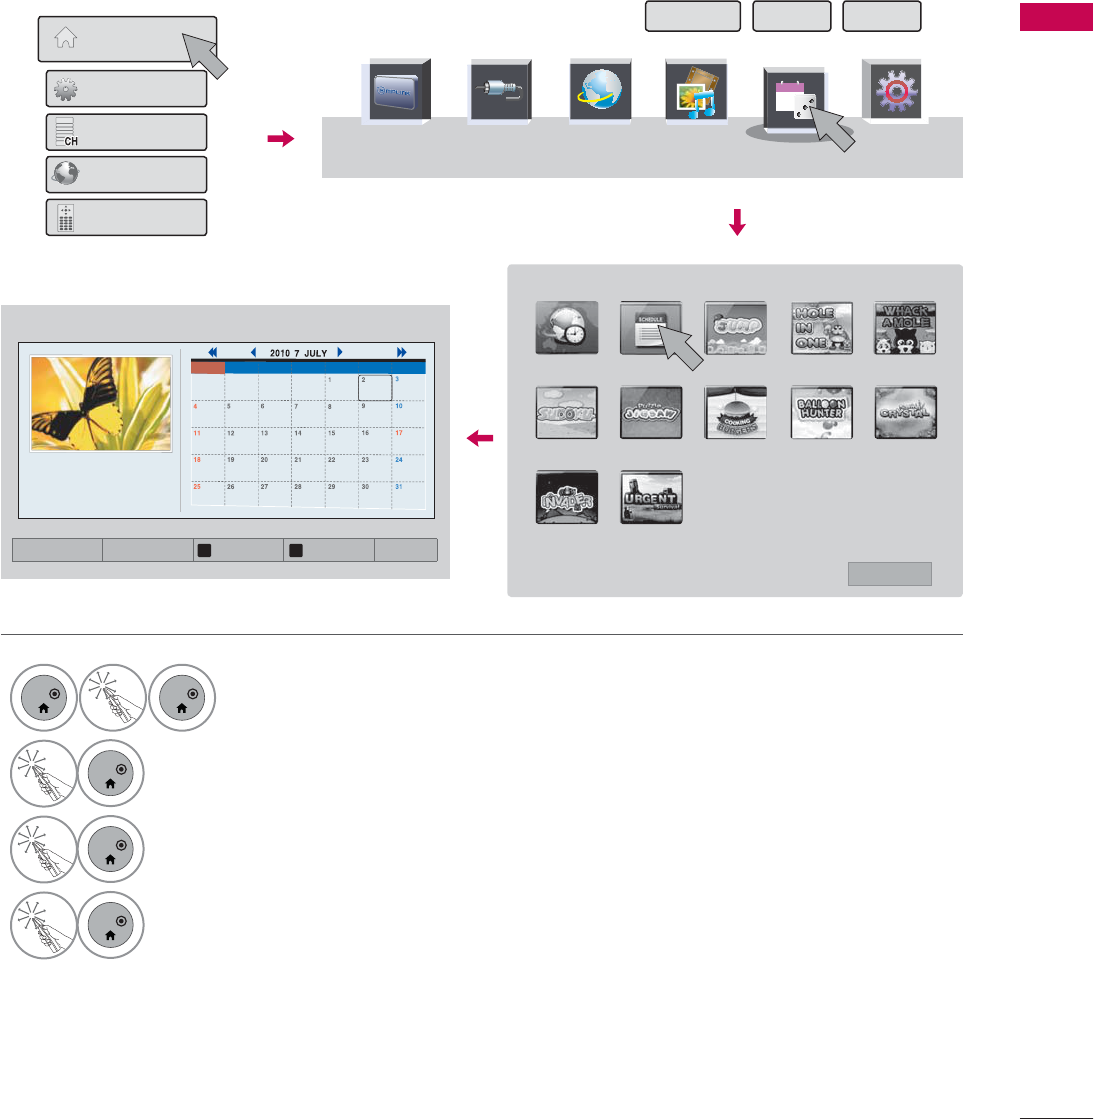
This function operates only if the current time has been set.
Schedule
6,03/,1. 1(7&$67 0<0(',$ 48,&.0(18
,1387 *$0(6&+('8/(
30
Today
6LPSOH0DQXDO 3RLQWHU ([LW
+RPH0HQX
4XLFN0HQX
&KDQQHO/LVW
1HWFDVW
6FUHHQ5HPRWH
:25/'7,0( 6&+('8/( -803 +2/(,121( :+$&.$02/(
68'2.8 -,*6$: &22.,1*%85*(5 %$//221+817(5 6$9,1*&5<67$/
,19$'(5 85*(176859,9$/
᰿([LW
*$0(6&+('8/(
1
ENTER
ENTER
Select Home Menu.
2
ENTER
Select GAME/SCHEDULE.
3
ENTER
Select Schedule.
4
ENTER
Select a desired date.
You can check the schedule.
Sun.
Jul. 4
Lunar May 23
Mon. Tue. Wed. Thu. Fri. Sat.
6FKHGXOH ᯒ1DYLJDWLRQᯙ$GG(GLW
ᯕ/LVWYLHZ ᯕ3LFWXUHFKDQJH 3UHYLRXV0RQWK 1H[W0RQWK ᰿([LW
&+
ه
ن
&+
WATCHING TV / CHANNEL CONTROL
WATCHING TV / CHANNEL CONTROL
88
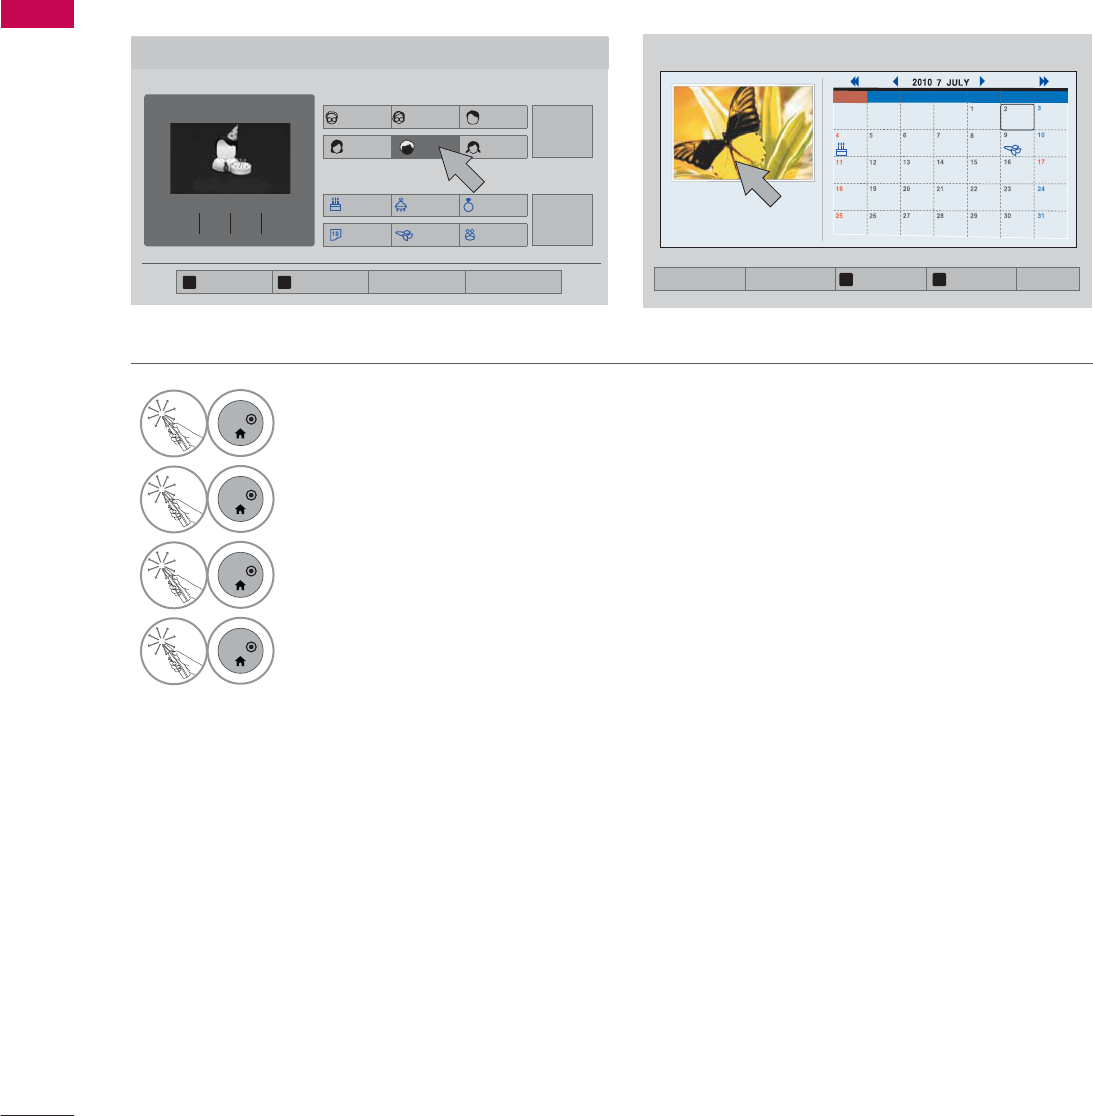
5
ENTER
Select the desired menu option.
6
ENTER
The icon is displayed.
7
ENTER
Select List View to use schedule.
8
ENTER
Select Exit.
Sun.
Jul. 4
Lunar May 23
Mon. Tue. Wed. Thu. Fri. Sat.
6&+('8/( ᯒ1DYLJDWLRQᯙ$GG(GLW
ᯕ/LVWYLHZ ᯕ3LFWXUHFKDQJH 3UHYLRXV0RQWK 1H[W0RQWK ᰿([LW
&+
ه
ن
&+
Schedule Registration
3HUVRQ
(YHQW
*UDQGIDWKHU
*UDQGPRWKHU
)DWKHU
&XVWRP
&XVWRP
0RWKHU 6RQ 'DXJKWHU
%LUWKGD\ 0HPRULDO $QQLYHUVDU\
7HVW 7UDYHO 0HHWLQJ
Sun, Jul. 4 Lunar 5.23
Father Birthday
Repeat Solar/Lunar Notice D-day
3UHYLRXV6WHS 1H[W6WHS ᯕ6DYH ᰙ&DQFHO
&+
ه
ن
&+
$GG6FKHGXOH 1/2
No
repeat Solar The day Add a
D-Day
i.e)
89
WATCHING TV / CHANNEL CONTROL
Allows you to enjoy the games installed on the TV.
6,03/,1. 1(7&$67 0<0(',$ 48,&.0(18
,1387
1
ENTER
ENTER
Select Home Menu.
2
ENTER
Select GAME/SCHEDULE.
3
ENTER
Enter the selected game mode.
4
ENTER
Select Exit.
*$0(6&+('8/(
30
Today
6LPSOH0DQXDO 3RLQWHU ([LW
+RPH0HQX
4XLFN0HQX
&KDQQHO/LVW
1HWFDVW
6FUHHQ5HPRWH
:25/'7,0( 6&+('8/( -803 +2/(,121( :+$&.$02/(
68'2.8 -,*6$: &22.,1*%85*(5 %$//221+817(5 6$9,1*&5<67$/
,19$'(5 85*(176859,9$/
᰿([LW
*$0(6&+('8/(
Game
WATCHING TV / CHANNEL CONTROL
WATCHING TV / CHANNEL CONTROL
90
SIMPLINK
SIMPLINK allows you to control and play other AV devices connected with HDMI cable without addi-
tional cables and settings. This TV may work with devices with HDMI-CEC support, but only devices
with the logo are fully supported.
SIMPLINK can be turned on and off in the user menus.
1
ENTER
ENTER
Select Home Menu.
2
ENTER
Select SIMPLINK.
3
ENTER
Select On.
4
ENTER
Select the desired device.
5
ENTER
Control connected AV devices.
ᯙ(QWHUᰙ([LW
܁2Q۽
:DWFK79
܁۽
܁۽
+''5HFRUGHU
܁۽
',6&
+'''9'5
9&5
+'+7
6SHDNHU
796SHDNHU
܁2Q ۽
ᰙ([LW
۽
+RPH0HQX
4XLFN0HQX
&KDQQHO/LVW
1HWFDVW
6FUHHQ5HPRWH
6LPSOH0DQXDO 3RLQWHU ([LW
1(7&$67 48,&.0(18
,1387 *$0(6&+('8/(
30
Today
0<0(',$
6,03/,1.
91
WATCHING TV / CHANNEL CONTROL
SIMPLINK Functions
ᯫ
Direct Play: After connecting AV devices to the TV, you can directly control the devices and play media
without additional settings.
ᯫ
Select AV device: Enables you to select one of the AV devices connected to the TV.
ᯫ
Disc playback: Control connected AV devices by pressing the ᰜᰝ
!
, ENTER, ᰦ, ᰧ, ᰨ, ᰪand ᰩ but-
tons.
ᯫ
Power off all devices: When you power off the TV, all connected devices are turned off.
ᯫ
Switch audio-out: Offers an easy way to switch audio-out.
ᯫ
Sync Power on: When the equipment with Simplink function connected HDMI terminal starts to play,
The TV will automatically turn on.
Note: To operate SIMPLINK, an High Speed HDMI cable with *CEC function should be used. (*CEC:
Consumer Electronics Control).
(A device, which is connected to the TV through a HDMI cable but does not support SIMPLINK, does
not provide this function)
!
NOTE
ŹConnect the HDMI/DVI IN or HDMI IN terminal of the TV to the rear terminal (HDMI terminal) of
the SIMPLINK device with the HDMI cable
ŹWhen you switch the Input source with the INPUT button on the remote control, the SIMPLINK
device will stop.
ŹWhen you select a device with home theater functionality, the sound output automatically switches
to the home theater speakers and the TV speakers are turned off.
ŹIf a connected SIMPLINK home theater system doesn’t play the audio from the TV, connect the
DIGITAL AUDIO OUT terminal on the back of the TV to the DIGITAL AUDIO IN terminal on the
back of the SIMPLINK device with an OPTICAL cable.
Ź
When no device is con-
nected (displayed in gray)
Ź
Selected Device
Ź
When a device is conect-
ed (displayed in bright
color)
ᯙ(QWHUᰙ([LW
܁2Q۽
:DWFK79
܁۽
܁۽
+''5HFRUGHU
܁۽
',6&
+'''9'5
9&5
+'+7
6SHDNHU
796SHDNHU
܁2Q ۽
ᰙ([LW
1
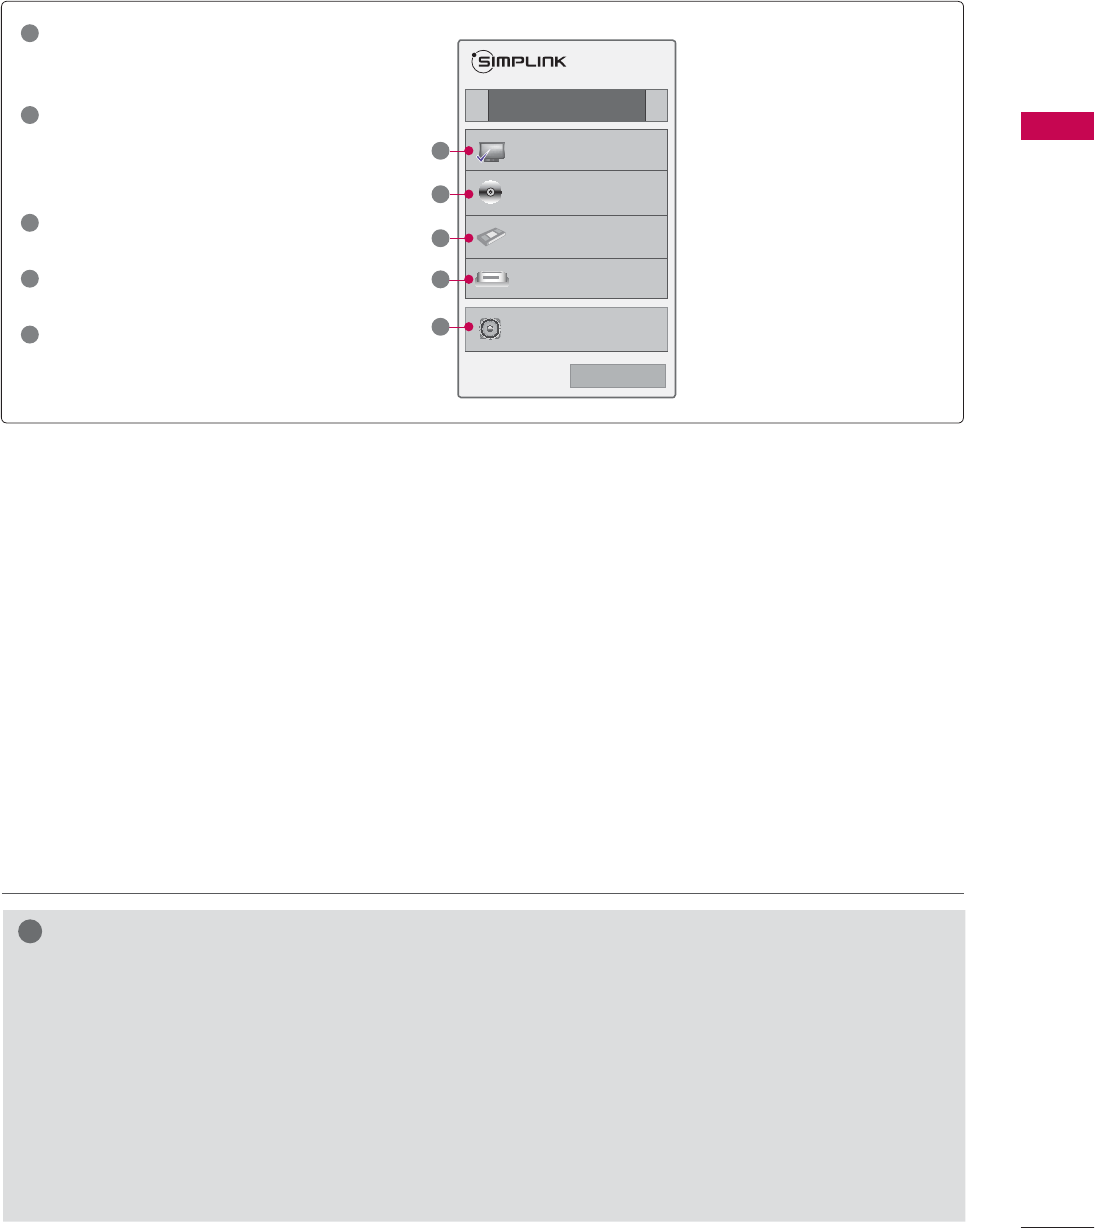
TV viewing: Switch to the previous TV
channel regardless of the current
mode.
2
DISC playback: Select and play discs.
When multiple discs are available, the
disc devices are conveniently displayed
at the bottom of the screen.
3
VCR playback: Control the connected
VCR.
4
HDD Recordings playback: Control
recordings stored in HDD.
5
Audio Out to Home Theater speaker/
Audio Out to TV: Select Home Theater
speaker or TV speaker for Audio Out.
1
2
3
4
5

3D IMAGING
3D IMAGING
92
3D IMAGING (FOR LED LCD TV, 50/60PX950)
This TV can display in 3D via 3D broadcasting or when the TV is connected to a compatible device, such
as a Blu-ray 3D Player. You need such a device to watch the TV in 3D. The 3D TV displays two separate
pictures formatted for each eye. The viewer needs to wear 3D glasses in order to see these images in
3D format.
3D TECHNOLOGY
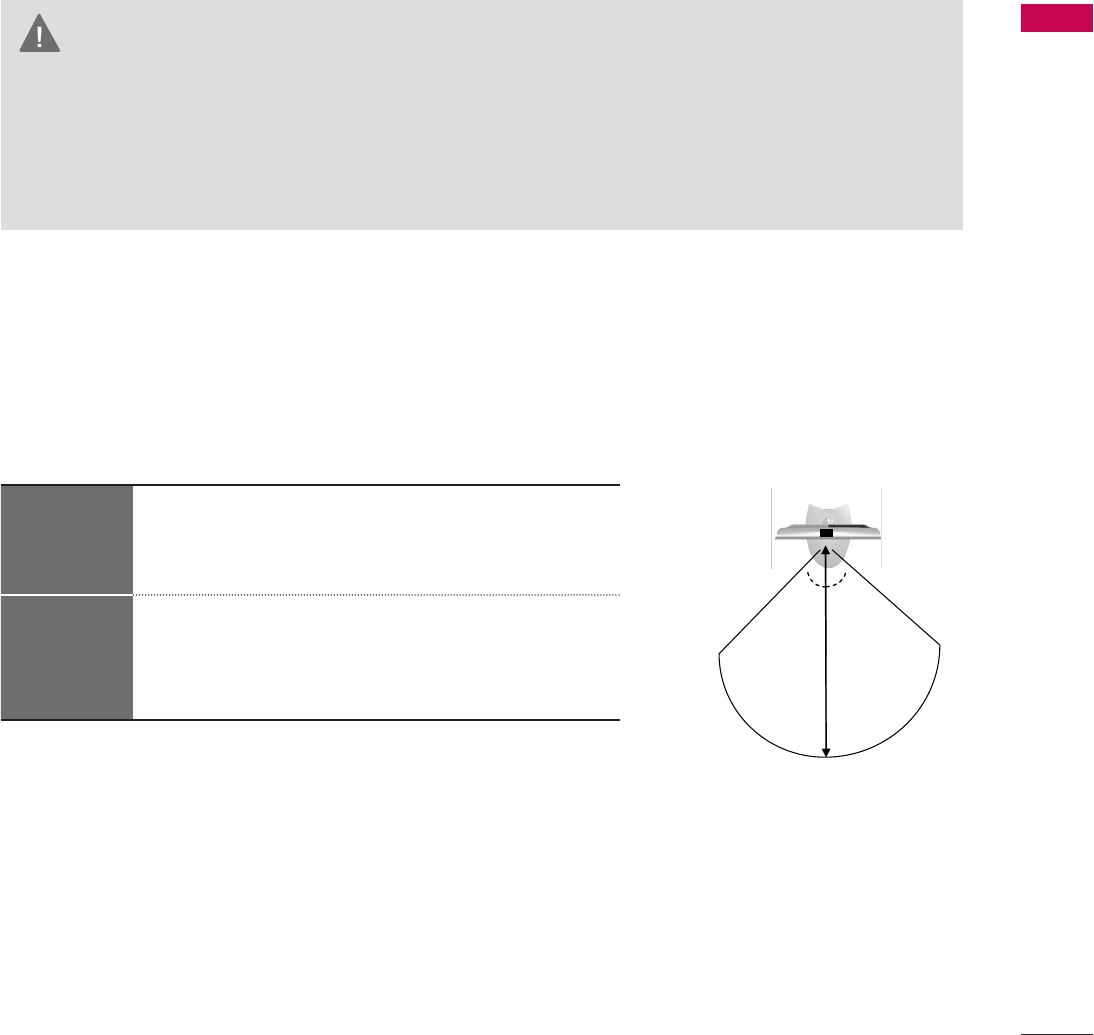
Viewing 3D Imaging
WARNING
ŹWhen viewing 3D imaging, watch the TV from
an effective viewing angle and within the ap-
propriate distance. The appropriate angel and
distance are provided on the next page of this
manual. If you exceed this viewing angle or dis-
tance, you may not be able to view the 3D im-
aging. Furthermore, the 3D imaging may not
display if it is viewed while you are lying down.
ŹIf you watch the 3D imaging too closely or for a
long period of time, it may harm your eyesight.
ŹWatching the TV or playing video games that
incorporate 3D imaging with the 3D glasses
for a long period of time can cause drowsiness,
headaches or fatigue to you and/or your eyes. If
you have a headache, or otherwise feel fatigued
or drowsy, stop watching the TV and take a rest.
ŹPregnant woman, seniors, persons with heart
problems or persons who experience frequent
drowsiness should refrain from watching 3D TV.
ŹSome 3D imaging may cause you to duck or
dodge the image displayed in the video. There-
fore, it is best if you do not watch 3D TV near
fragile objects or near any objects that can be
knocked over easily.
Ź Please prevent children under the age of 5 from
watching 3D TV. It may affect their vision devel-
opment.
ŹWarning for photosensitization seizure:
Some viewers may experience a seizure or epi-
lepsy when exposed to certain factors, including
flashing lights or images in TV or video games.
If you or anybody from your family has a history
of epilepsy or seizure, please consult with your
doctor before watching 3D TV.
Also certain symptoms can occur in unspeci-
fied conditions without any previous history. If
you experience any of the following symptoms,
immediately stop watching the 3D imaging and
consult a doctor: dizziness or lightheadedness,
visual transition or altered vision, visual or facial
instability, such as eye or muscle twitching, un-
conscious action, convulsion, loss of conscience,
confusion or disorientation, loss of directional
sense, cramps, or nausea. Parents should mon-
itor their children, including teenagers, for these
symptoms as they may be more sensitive to the
effects of watching 3D TV.
Risk of photosensitization seizure can be re-
duced with the following actions.
- Take frequent breaks from watching 3D TV.
- For those who have vision that is different in
each eye, they should watch the TV after tak-
ing vision correction measures.
- Watch the TV so that your eyes are on the
same level as the 3D screen and refrain from
sitting too closely to the TV
- Do not watch the 3D imaging when tired or
sick, and avoid watching the 3D imaging for a
long period of time.
- Do not wear the 3D glasses for any other pur-
pose than viewing 3D imaging on a 3D TV.
- Some viewers may feel disoriented after
watching 3D TV. Therefore, after you watch
3D TV, take a moment to regain awareness of
your situation before moving.
ŹTo watch the TV in 3D, you must put on your
3D glasses. For best results, you should wear
LG Brand 3D glasses. The 3D imaging may not
display properly when using another brand of
3D glasses. Please see the 3D glasses manual
for instructions on how to use the 3D glasses.
ŹAfter powering on the TV, a few seconds may be
needed for your TV to calibrate.
Ź It may take a moment for you to see the 3D
imaging if you look away from the TV and then
revert your eyes back to the 3D program.
ŹThe TV may flicker slightly if the 3D imaging is
displayed under 3 wavelength lamp fluorescent
light (50 Hz - 60 Hz) or around windows dis-
playing natural light.In such instances, it is rec-
ommended to turn the lights low and/or block
the sun light with a curtain.
ŹIf there is an obstacle between the TV and the
3D glasses, the 3D imaging may not display
properly.
ŹDo not use the TV in close proximity to other
electronic equipments and IR equipments.
ŹIn Analog TV, 3D Imaging does not work.
!
NOTE
93
3D IMAGING
TV
60ƕ
60ƕ
7 m
2 m 2 m
3D Imaging viewing range
When using 3D Glasses
Viewing
Distance
2 m - 7 m
(6.5 ft - 22.9 ft)
Viewing
Angle
120º (When the viewing distance is 2 m (6.5 ft))
TV size, viewing angle & other circumstances may change the viewing distance and the angle of view.
Ź3D glasses are sold separately. Refer to the 3D glasses manual for operating instructions.
ŹDo not use the 3D glasses to replace your corrective glasses, sunglasses or protective goggles.
ŹDo not store the 3D glasses in hot or cold locations.
ŹDo not drop objects onto the 3D glasses. Do not drop or bend the glasses.
ŹSince the lenses of the 3D glasses are easily scratched, make sure to clean only with a soft cloth.
Shake off any dust before using the cloth since the glasses are easily scratched.
CAUTION
3D IMAGING
3D IMAGING
94
1Play the video produced in 3D.
Refer to the following for the supported imaging.
WATCHING 3D IMAGING
Signal Resolution Horizontal
Frequency (kHz)
Vertical
Frequency (Hz) Playable 3D video format
HDMI
Input
720p 1280x720 45.00
60
Top & Bottom, Side by Side
HDMI (V. 1.4 with HDMI 3D)
Frame Packing
1080i
1920X1080
33.75 Top & Bottom, Side by Side
1080p
67.50
Top & Bottom, Side by Side,
Checker Board
Single Frame Sequential
27.00 24
Top & Bottom, Side by Side,
Checker Board
HDMI (V. 1.4 with HDMI 3D)
Frame Packing
33.75 30 Top & Bottom, Side by Side
Checker Board
USB
Input
1080p 1920X1080 33.75 30 Top & Bottom, Side by Side
Checker Board
Signal Playable 3D video format
DTV 720p, 1080p Top & Bottom, Side by Side
Media contents and a player need to support HDMI (V. 1.4 with HDMI 3D) Frame Packing to play in 3D.
Video, which is input as HDMI (V. 1.4 with HDMI 3D) Frame Packing format, is switched into the 3D screen
automatically.
To turn on 3D Mode, select this icon.
ᯑ0RYHᯙ(QWHU ᰿([LW
2
3D
ENTER
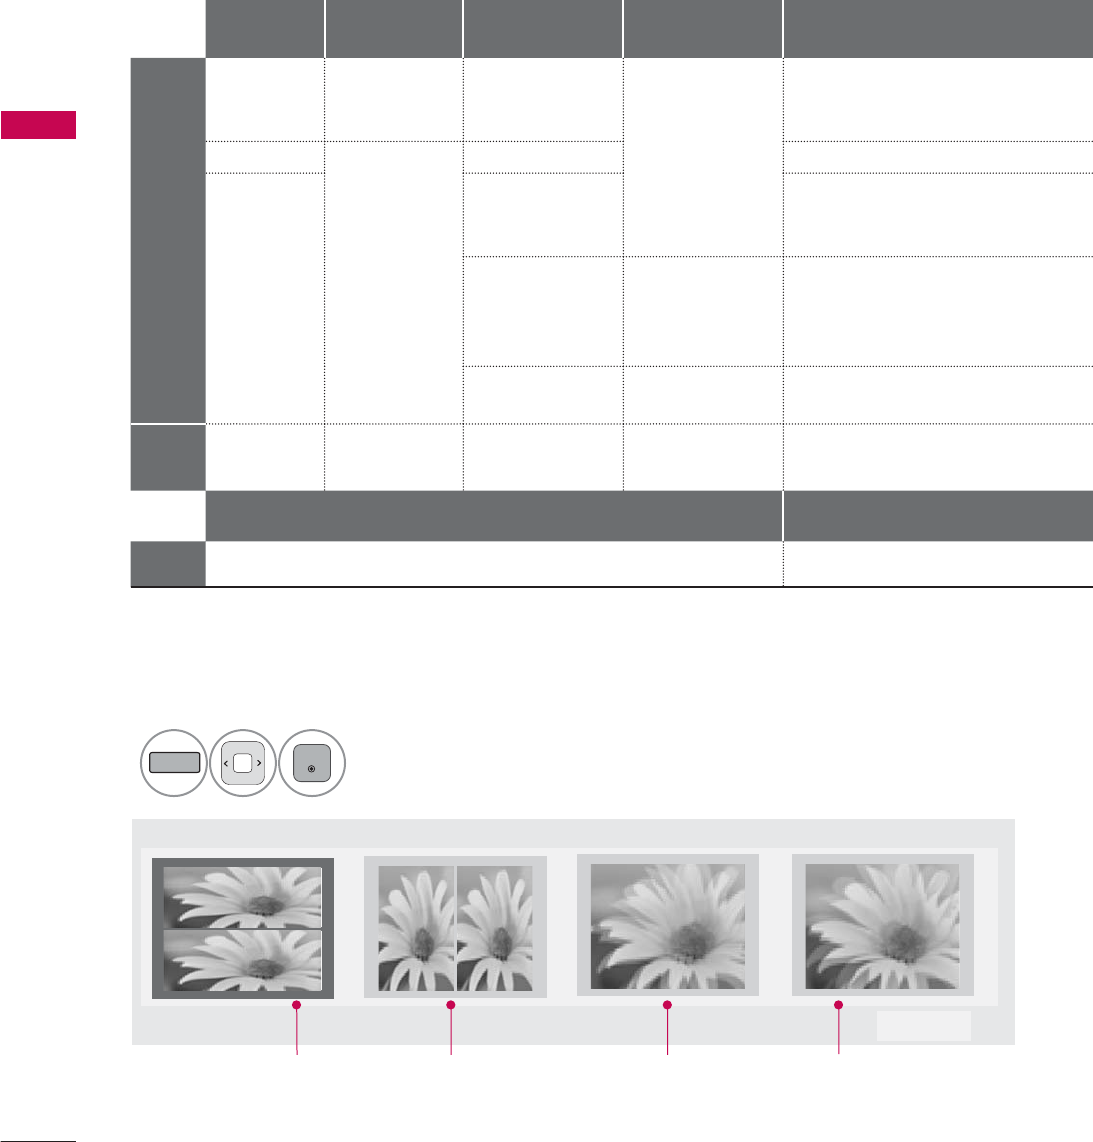
After selecting the shape as shown in the screen on TV,
wear the 3D glasses.
Top & Bottom Side by Side Checker Board Frame Sequential
95
3D IMAGING
or
3
ENTER
L/R SELECT
Select Setting Left/Right.4
ENTER
Select Left/Right or Right/
Left.
Select the screen with 3D
video with better visibility.
5
3D
The 3D imaging mode is changed
to the 2D imaging mode.
!
NOTE
ŹIf you select 3D mode, "Power indicator" is turned off automatically.
ŹWhile watching 3D imaging, you cannot adjust video/audio settings using the menu.
ŹSome menus may not work while watching the TV in 3D.
ŹYou can only choose "Standard ث Cinema ث Game"with the AV MODE button on remote control.
AV Mode is set as Standard while playing in 3D.
ŹThe 3D imaging mode is disabled automatically when switching DTV channels.
ŹThe screen may not be displayed properly if you view 2D DTV images in 3D imaging mode.
Ź3D effect can be seen when 3D Mode is selected appropriately for the 3D input signal supplied
to the TV.
ŹFor *mpo files (3D camera files), the 3D imaging mode is enabled automatically.
ŹEnergy Saving is disabled while playing in 3D.
ŹTo enable the 3D imaging mode, you can also press the ENTER button on the Magic Motion
remote control.
ᯕ6HWWLQJ/HIW5LJKW
ᯡ/HIW5LJKW
۳5LJKW/HIW
(QG'9LGHR
᰿([LW
'
ᯕ6HWWLQJ/HIW5LJKW
(QG'9LGHR
ᯙ(QWHU
3XWRQ'JODVVHV
6LWPHWHUVIURP79WRHQMR\WKHEHVW'
YLHZ
7RVHOHFWPRUHFRPIRUWDEOHYLHZIRU
\RXFKDQJHWROHIWULJKWLPDJHRIJODVVHV
ZLWKᯕEXWWRQ
'
NOTES FOR VIEWING 3D IMAGE WITH 3D BROADCASTING (
* In Analog TV, 3D Imaging does not work.)
When switching the 2D image display to the
3D image display with the 3D button on the
remote control, the overlapped image may be
displayed.
ᯫ
Disable the 3D imaging mode with the 3D button.
ᯫ
The 3D imaging mode is disabled automatically
if you change the channel.
If the screen is divided into
left/right or top/bottom when
you change the channel
ᯫ
This channel supports the 3D imaging mode.
Select the 3D imaging type displayed on the
screen by pressing the 3D button on the remote
control.
If your eyes are soaring or the screen looks
blurry while viewing 3D images
ᯫ
Press the L/R SELECT button on the remote con-
trol and select L/R or R/L, which you find better
for viewing 3D images.
MY MEDIA
MY MEDIA
96
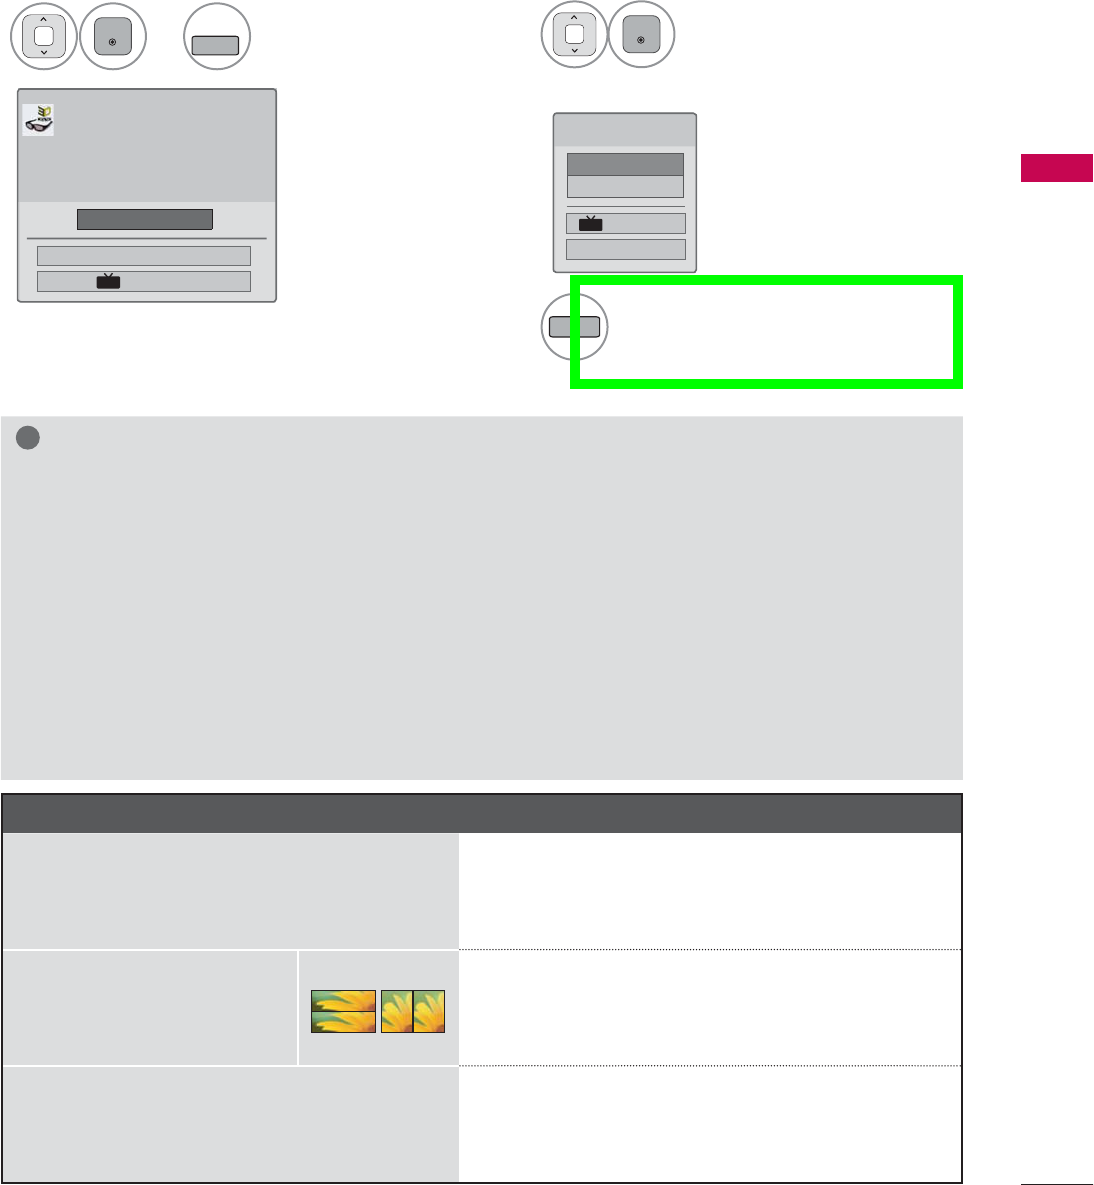
ENTRY MODE
The My Media menu will open automatically when you insert a USB drive. My Media can also be
accessed by choosing My Media in the user menu.
After choosing the desired type of media, choose a device to open files from. The options are: USB
device, or DLNA.
When removing the USB device
Select the USB Device menu before
removing the USB device.
ᯫ
This TV can view JPG image files, HD DivX
files and play MP3 audio files.
0RYLH/LVW
0<0(',$
3KRWR/LVW 0XVLF/LVW
3OHDVHVHOHFWWKHGHYLFH
86%/DEHO
86%/DEHO
'/1$
ᯙ'HYLFH6HOHFWLRQ
ᯕ6HDUFK ᰙ3UHYLRXV
1
ENTER
ENTER
Select Home Menu.
2
ENTER
Select MY MEDIA.
3
ENTER
Select Movie List, Photo List or
Music List.
4
ENTER
Select the desired device. 1
ENTER
ENTER
Select Quick Menu.
2
ENTER
Select USB device.
3
ENTER
Select Eject.
Search other network device.
BLUE
MY MEDIA
6LPSOH0DQXDO 3RLQWHU ([LW
+RPH0HQX
4XLFN0HQX
&KDQQHO/LVW
1HWFDVW
6FUHHQ5HPRWH
6,03/,1. 1(7&$67 48,&.0(18
,1387 *$0(6&+('8/(
30
Today
0<0(',$
97
MY MEDIA
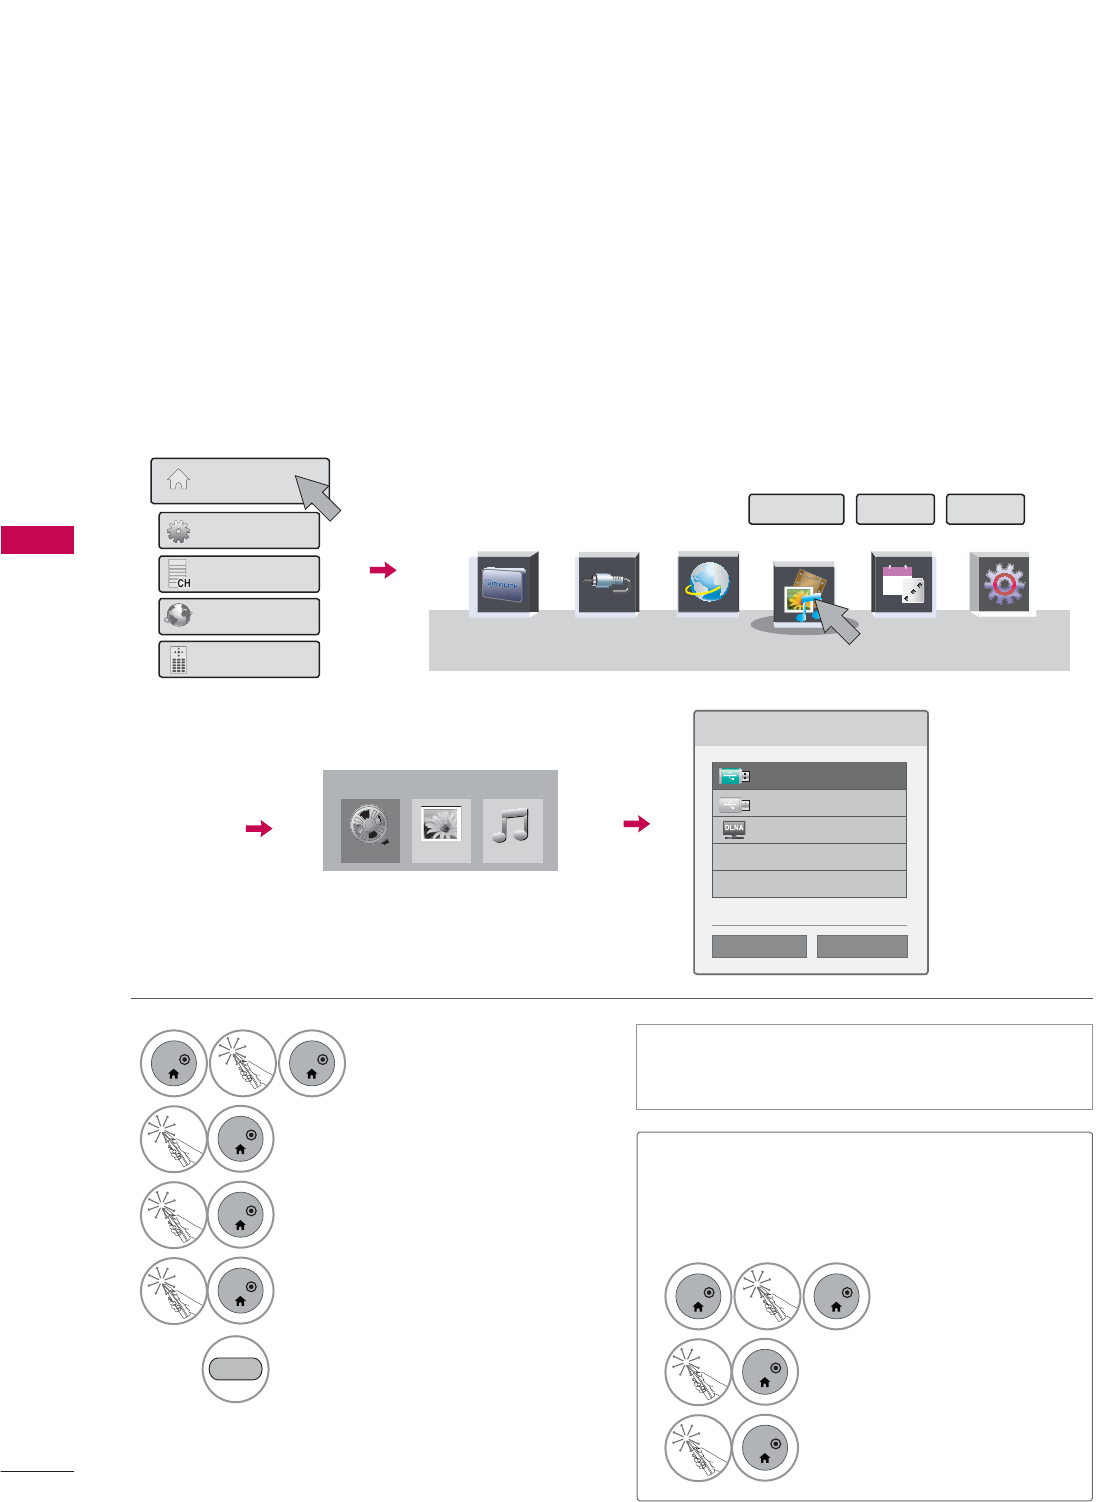
CONNECTION METHOD
USB Connection
Connect the USB device to the USB IN jack on the side of TV.
1
Precautions when using the USB device
ŹOnly a USB storage device is recognizable.
ŹConnecting a USB storage device through a USB hub is not supported.
ŹA USB storage device which uses its own driver may not be recognized.
ŹThe recognition speed of a USB storage device may depend on each device.
ŹPlease do not turn off the TV or unplug the USB device when the connected USB storage device
is working. When such device is suddenly separated or unplugged, the stored files or the USB
storage device may be damaged.
ŹOnly use a USB storage device which has normal music files, image files, or movie files.
ŹPlease use only a USB storage device which was formatted as a FAT 32 or NTFS file system pro-
vided with the Windows operating system. Others may not be recognized.
ŹSome USB storage devices require a power adapter. The power adapter must be connected in
order to be seen by the TV.
ŹIf a device is not recognized by the TV, try a different cable. Excessively long cables are not sup-
ported.
ŹSome USB storage devices may not be supported or operate properly.
ŹPlease backup important files because data on USB device could be damaged. Data management
is consumer's responsibility and as a result, the manufacturer does not cover data damage.
ŹIf your USB memory device has multiple partitions, or if you use a USB multi-card reader, you can
use up to 4 partitions or USB memory devices.
ŹFile alignment method of USB storage device is similar to Window XP and file names can be up
to 100 English characters.
ŹThe recommended capacity is 1 TB or less for a USB external hard disk and 32 GB or less for USB
memory.
ŹIf a USB external hard disk with a “Energy Saving” function doesn’t work, turn the hard disk off and
on again to make it work properly. Refer to the user manual of the USB external hard disk.
ŹUSB storage devices below USB 2.0 are supported as well. But they may not work properly in the
movie list.
ŹMaximum of 999 folders or files can be recognized under one folder.
ŹIf there are too many folders and files in one folder, it may not operate properly.
IN 4
USB IN 1 USB IN 2
Memory Key

MY MEDIA
MY MEDIA
98
DLNA
About DLNA
This TV is a DLNA Certified digital media product.
It can display and play movie, photo and music content from your DLNA server.
The Digital Living Network Alliance (DLNA) is a cross-industry organization of consumer electronics,
computing industry and mobile device companies. Digital Living provides consumers with easy sharing
of digital media through a wired or wireless network in the home.
The DLNA certification logo makes it easy to find products that comply with the DLNA Interoperability
Guidelines. This unit complies with DLNA Interoperability Guidelines v1.5. When a PC running DLNA
server software or other DLNA compatible device is connected to this TV, some setting changes of
software or other devices may be required. Please refer to the operating instructions for the software or
device for more information.
!
NOTE
ŹThe supplied Nero MediaHome 4 Essentials CD-ROM is a customized software edition only for
sharing files and folders to this TV.
ŹThe supplied Nero MediaHome 4 Essentials software does not support following functions:
Transcoding, Remote UI, TV control, Internet services and Apple iTunes
ŹThis manual explains operations with the English version of Nero MediaHome 4 Essentials as
examples. Follow the explanation referring to the actual operations of your language version.
Ź
If there are too many folders and files in one folder, it may not operate properly.
Ź
For the DLNA option, use the Nero MediaHome programme that is provided with the TV. However, we
cannot guarantee that third party program will work perfectly.
Ź
You can select a channel while viewing the small preview channel list on your TV screen.
ŹCheck your network settings when the DLNA option does not work properly.
ŹIf there is an abnormal operation or an error occurs in Nero Media Home, the DLNA option may
not work properly. In this case, exit Nero Media Home and restart the programme. You can down-
load the latest version of Nero Media Home by clicking the question mark at the bottom-left of
the program.
ŹWhen the network is unstable, the device may be slower or may need to load during playback.
ŹWhen playing a video in DLNA mode, the Multi Audio and Closed Caption features are not supported.
ŹWhen selecting Full Screen in DLNA mode, the ratio of the outputted screen may differ from the
original.
ŹWhen more than one TV is connected to a single server in DLNA mode, a file may not play properly,
depending on the server performance.
ŹIf the play time information is not provided by the server, it is displayed as "--:--:--."
ŹWhen using Movie List, DRM/*.tp/*.trp files in the DLNA server cannot be played.
ŹDLNA operation may not work properly according to the AP manufacturers.

99
MY MEDIA
Installing Nero MediaHome 4 Essentials
Nero MediaHome 4 Essentials is easy to use DLNA server software for Windows.
Requirement PC system before you install Nero MediaHome 4 Essentials
ᯫ
Windows® XP (Service Pack 2 or higher), Windows Vista® (no Service Pack required), Windows® XP
Media Center Edition 2005 (Service Pack 2 or higher), Windows Server® 2003
ᯫ
Windows Vista® 64-bit edition (application runs in 32-bit mode)
ᯫ
Hard drive space: 200 MB hard drive space for a typical installation of Nero MediaHome stand-
alone
ᯫ
1.2 GHz Intel® Pentium® III or AMD Sempron™ 2200+ processors
ᯫ
Memory: 256 MB RAM
ᯫ
Graphics card with at least 32 MB video memory, minimum resolution of 800 x 600 pixels, and
16-bit color settings
ᯫ
Windows® Internet Explorer® 6.0 or higher
ᯫ
DirectX® 9.0c revision 30 (August 2006) or higher
ᯫ
Network environment: 100 Mb Ethernet, WLAN (IEEE 802.11b/g/n)
1Start up your computer, and insert the Nero MediaHome 4 Essentials CD-ROM into your compu-
ter’s CD-ROM drive.
An installation wizard will walk you through the quick and uncomplicated installation process.
2Close all Microsoft Windows programs and exit any anti-virus software that may be running.
3Insert the Nero MediaHome 4 Essentials CD-ROM into your computer’s CD-ROM drive.
4Click Nero MediaHome 4 Essentials. The installation is prepared and the installation wizard appears.
5Click the Next button to display the serial number input screen.
Click Next to go to the next step.
6If you accept all conditions, click I accept the License Conditions check box and click Next.
Installation is not possible without this agreement.
7Click Typical and click Next. The installation process is started.
8If you want to take part in the anonymous collection of data, select the check box and click the
Next button.
9Click the Exit button to complete the installation.

MY MEDIA
MY MEDIA
100
Sharing files and folders
After installing Nero MediaHome, you must add folders you wish to share.
1Double-click the Nero MediaHome 4 Essentials icon on the desktop.
2Click Network icon on the left and define your network name in the Network name field. The
Network name you enter will be recognized by your TV.
3Click Shares icon on the left.
4Click Local Folders tab on the Shared screen.
5Click Add icon to open the Browse Folder window.
6Select the folder containing the files you want to share. The selected folder is added to the list of
shared folders.
7Click Start Server icon to start the server.
!
NOTE
ŹIf the shared folders or files are not displayed on the TV, click the folder on the Local Folders
tab and click Rescan Folder at the More button.
ŹVisit www.nero.com for more information and software tools.
101
MY MEDIA
Playing back shared contents
You can display and play movie, photo and music content stored on your computer or other DLNA
media servers.
1Start the server on your computer or other device that connected on your home network.
!
NOTE
ŹTo play the file on the media server, the TV and the media server must be connected to the
same access point.
ŹBecause the compatibility and available playback functions on the MY MEDIA menu are tested
on the bundle DLNA server (Nero MediaHome 4 Essentials) environment, file requirements and
playback functions on the MY MEDIA may differ depending on media servers.
ŹThe file requirements on this page are not always compatible. There may have some restrictions
by file features and media server’s ability.
ŹEven the files that are not supported can be displayed in photo thumbnail or music thumbnail.
ŹMovie thumbnail is not supported in DLNA Movie.
ŹIf there is an unplayable music file in the MY MEDIA menu, the TV will skip the file and play next
file.
ŹThe file information indicated on the screen may not always correct for music and movie files in
MY MEDIA menu
ŹThis TV only supports movie subtitle files supplied by Nero MediaHome 4.
ŹThe subtitle file name and movie file name have to be the same and located at the same folder.
ŹIf subtitle files have been added after a directory has been indexed already, the user has to
remove and re-add the folder to the list of shares.
ŹThe playback and operating quality of the MY MEDIA function may be affected by your home
network condition.
ŹThe files from removable media such as USB drive, DVD-drive etc. on your media server may
not share properly.
ŹWhen playing the Media through DLNA connection, it does not support the DivX file play which
is protected by DRM.
ŹUp to 200 folders in one folder and 999 including folders and files can be recognized.
ŹIf there are too many folders and files in one folder, it may not operate properly.
2
MENU
Select MY MEDIA.
3
ENTER
Select Movie List, Photo List or Music List.
4
ENTER
Select the DLNA.
Depending on the media server, this TV may need to get the permission from
the server.
If you want to re-scan available media server, press blue color button.

MY MEDIA
MY MEDIA
102
MOVIE LIST
It displays all of the video files it recognizes.
The On-Screen Display on your model may be slightly different.
Precautions when playing the video files
ŹSome user-created subtitles may not work properly.
ŹSome special characters are not supported in subtitles.
ŹHTML tags are not supported in subtitles.
ŹTime information in an external subtitle file should be arranged in ascending order to be played.
ŹChanging font and color in subtitles is not supported.
ŹSubtitles in languages other than one specified are not supported.
ŹVideo files with subtitle files of 1 MB or larger may not be played properly.
ŹThe screen may suffer temporary interruptions (image stoppage, faster playback, etc.) when the
audio language is changed.
ŹA damaged video file may not be played correctly, or some functions may not be usable.
ŹVideo files produced with some encoders may not be played correctly.
ŹIf the video and audio structure of recorded file is not interleaved, the file not playback properly.
ŹVideo with resolution higher than maximum resolution supported for each frame, cannot be guar-
anteed for smooth playback.
ŹVideo files other than the specified types and formats may not work properly.
ŹThe movie file encoded by the GMC (Global Motion Compensation) and Qpel (Quarterpel Motion
Estimation) is not supported.
ŹOnly 10000 sync blocks are supported within the subtitle file.
ŹWe do not guarantee smooth playback of profiles encoded level 4.1 or higher in H.264/AVC.
ŹDTS Audio codec is not supported.
ŹA video file more than 30GB in file size is not supported for playback.
ŹPlaying a video via a USB connection that doesn’t support high speed may not work properly.
ŹUSB storage devices below USB 2.0 are supported as well. But they may not work properly in the
movie list.
ŹThe video file and its subtitle file must be located in the same folder.
At this time, a video file name and its subtitle file name must be identical for it to be displayed.
ŹWhen you are watching a movie via the Movie List function, you can adjust the picture with the
ENERGY SAVING and AV MODE button on the remote control. User setup for each picture mode
is not supported.
ŹTrick Mode does not support other functions than ᰩif video files do not have index information.
ŹWhen playing video file using network, the Trick mode is limited to 2-times speed.
ŹVideo file names that contain special characters may not be playable.
Supported movie file
ᯫ
Resolution: under 1920 pixel (width) x 1080 pixel (height)
ᯫ
Frame Rate: under 30 frame/sec (1920x1080), under 60 frame/sec (1280x720)
ᯫ
Max bitrate of playable video file: 20 Mbps (Mega bit per second)
ᯫ
Bit rate of audio format: within 32 kbps to 320 kbps (MP3)
ᯫ
Supported external subtitle format: *.smi/*.srt/*.sub(MicroDVD,Subviewer1.0/2.0)/*.ass/*.ssa/*.
txt(TMPlayer)/*.psb(PowerDivX)
ᯫ
Supported Internal subtitle format: only XSUB (It is the subtitle format used in DivX6 files)

103
MY MEDIA
Supported Video Formats
File
Extensions
Audio/
Video Codec Profile/Level Support Explanation
.asf
.wmv
Video
VC-1 Advanced Profile Advanced Profile@Level 3
(e.g. 720p60, 1080i60, 1080p30) Only streams compliant
to SMPTE 421M VC-1
standard are supported.
VC-1 Simple and Main Profiles Simple Profile@Medium Level (e.g. CIF, QVGA)
Main Profile@High Level (e.g. 1080p30)
Audio WMA Standard
WMA 9 Professional
.divx
.avi
Video
DivX3.11
Global motion compen-
sation or quarterpel
motion estimation does
not supported. Streams
using this syntax are not
supported.
DivX4
DivX5
DivX6
Advanced Simple Profile
(e.g. 720p/1080i)
XViD
H.264 / AVC
Main Profile@ Level 4.1
High Profile@ Level 4.1
(e.g. 720p60, 1080i60, 1080p30)
Audio
MPEG-1 Layer I, II
MPEG-1 Layer III (MP3)
Dolby Digital
.mp4
.m4v
Video
H.264 / AVC
Main Profile@ Level 4.1
High Profile@ Level 4.1
(e.g. 720p60, 1080i60, 1080p30)
Global motion compen-
sation or quarterpel
motion estimation does
not supported. Streams
using this syntax are not
supported.
MPEG-4 Part 2 Advanced Simple Profile (e.g. 720p/1080i)
Audio AAC AAC-LC and HE-AAC
.mkv
Video H.264 / AVC
Main Profile@ Level 4.1
High Profile@ Level 4.1
(e.g. 720p60, 1080i60, 1080p30)
Most of the MKV con-
tent available is encod-
ed by the open source
x264 codec.
Audio AAC AAC-LC and HE-AAC
Dolby Digital
.ts
.trp
.tp
Video
H.264 / AVC
Main Profile@ Level 4.1
High Profile@ Level 4.1
(e.g. 720p60, 1080i60, 1080p30)
MPEG-2 Main Profile@High Level(e.g. 720p60, 1080i60)
VC-1
Simple Profile@Medium Level
(e.g. CIF, QVGA)
Main Profile@High Level
(e.g. 1080p30)
Advanced Profile@Level3
(e.g. 720p60, 1080i60, 1080p30)
Only streams compliant
to SMPTE 421M VC-1
standard are supported.
Audio
MPEG-1 Layer I, II
MPEG-1 Layer III (MP3)
Dolby Digital
AAC AAC-LC and HE-AAC
.vob
Video MPEG-1
MPEG-2 Main Profile@High Level (e.g. 720p60, 1080i60)
Audio
Dolby Digital
MPEG-1 Layer I, II
DVD-LPCM
.mpg Video MPEG-1 Main Profile@High Level (e.g. 720p60, 1080i60) Only streams compliant
configured properly for
TS, PS or ES
Audio MPEG-1 Layer I, II
MY MEDIA
MY MEDIA
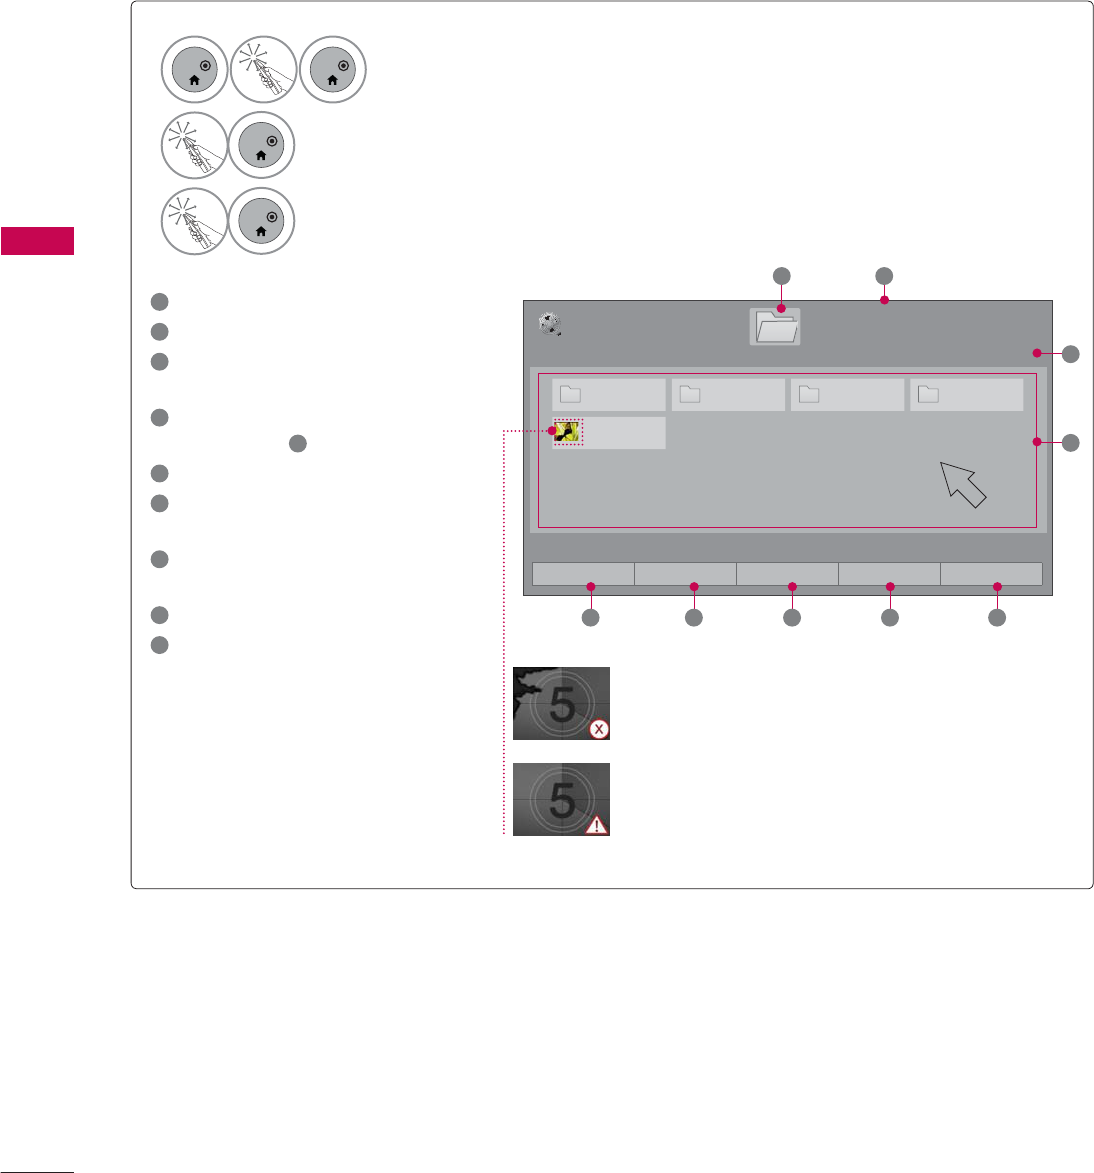
104
1Moves to upper level folder
2Current page/Total pages
3Current page/ total pages of
contents
4Contents under the folder
focused on 1
5Change to a different input.
6Move to Photo List or Music
List.
7Changes the number or
thumbnails displayed at a time.
8Allows you to mark certain files.
9Return to TV viewing.
Screen Components
3DJH
0RYLH/LVW
3DJH86%;7,&.
ᯙ3OD\᱇3DJH&KDQJH
'ULYH
0 0 0 0
%XWWHUIO\B
1
3
4
2
Abnormal files are
displayed using this
graphic.
Non-supported files
are displayed using
this graphic.
1
ENTER
ENTER
Select Home Menu.
2
ENTER
Select MY MEDIA.
3
ENTER
Select Movie List.
ᯕ&KDQJH'HYLFH ᯕ7R3KRWR/LVW ᯕ&KDQJH1XPEHUV ᯕ0DUN0RGH ᰿([LW
5 6 7 8 9
105
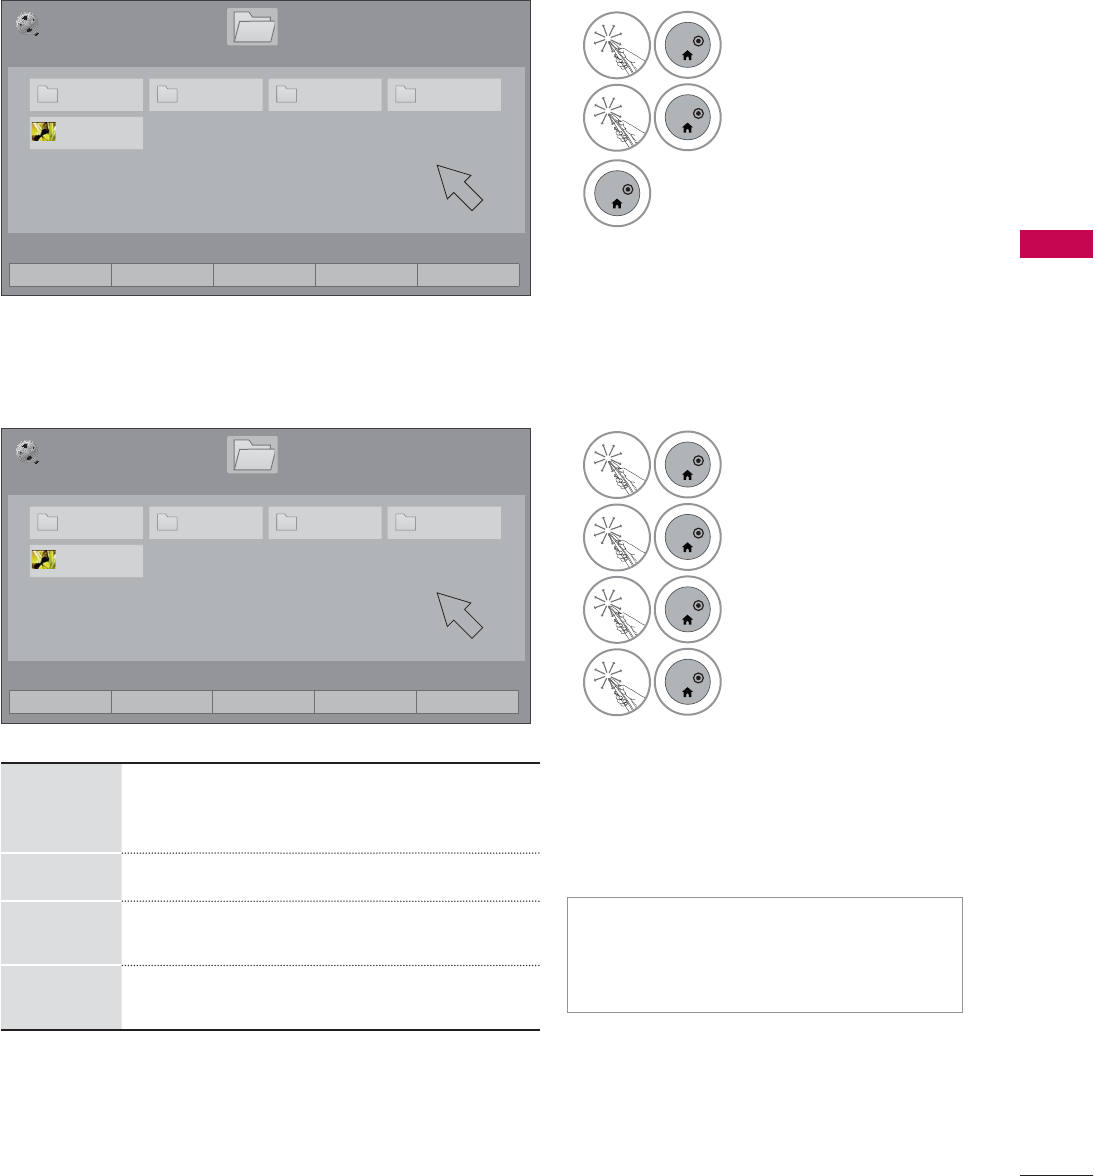
MY MEDIA
ᯫ
When one or more movie files are
marked, the marked movies will be
played in sequence.
1
ENTER
Select the target folder
or drive.
2
ENTER
Select Mark Mode.
3
ENTER
Select the desired
movie title.
4
ENTER
Select Play Marked.
Play the marked movie
file.
It displays the current
movie status progress
bar on the bottom of
the screen.
Movie Selection
Mark Mode
Play
Marked
Play the first selected file. Once a movie
finishes playing, the next selected one will
be played automatically.
Mark All Mark all files in the folder.
Unmark
All Deselect all marked files.
Exit Mark
Mode Enter or exit the Mark Mode.
3DJH
0RYLH/LVW
3DJH86%;7,&.
ᯙ3OD\᱇3DJH&KDQJH
'ULYH
0 0 0 0
%XWWHUIO\B
3DJH
0RYLH/LVW
3DJH
86%;7,&.
ᯙ3OD\᱇3DJH&KDQJH
'ULYH
0 0 0 0
%XWWHUIO\B
1
ENTER
Select the target folder
or drive.
2
ENTER
Select the desired
movie title.
3
ENTER
Play the movie file.
0DUN0RGH
ᯕ&KDQJH'HYLFH ᯕ7R3KRWR/LVW ᯕ&KDQJH1XPEHUV ᯕ0DUN0RGH ᰿([LW
ᯕ3OD\0DUNHG ᯕ0DUN$OO ᯕ8QPDUN$OO ᯕ([LW0DUN0RGH ᰿([LW
MY MEDIA
MY MEDIA
106
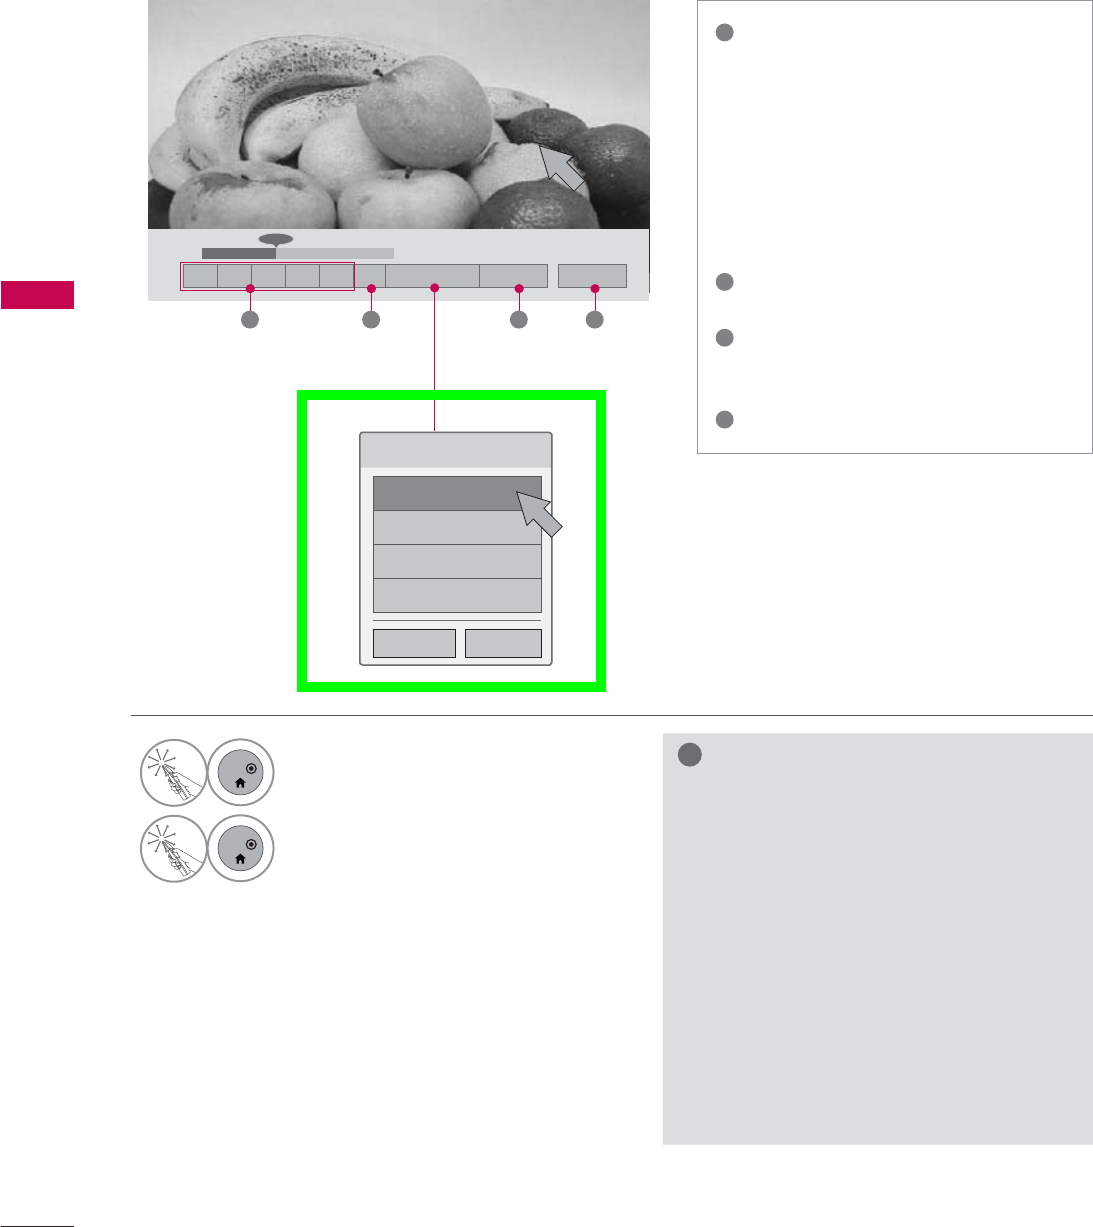
Playing the Movie
!
NOTE
ŹWhen replaying a video file after stop-
ping, you can play from where it stopped
automatically.
ŹIf you select “Yes” when playing the
same file after the video file has been
stopped, it will restart where it stopped
previously.
ŹIf continuous series files exist within the
folder, the next file will automatically be
played. But, this excludes cases when
the Repeat function of Movie List Option
is turned “On” (Refer to page 107) or
when set as Marked Play.
ᰦ
ᯚᯛ
ᰧᰦᰨᰪᰩᰚᱭ2SWLRQ ᰙ+LGH ᰿([LW
1
ENTER
Show the Option menu.
2
ENTER
Select the desired menu option.
&KRRVHRSWLRQV
6HW9LGHR3OD\
6HW9LGHR
6HW$XGLR
6HW'YLGHR
1 2 3 4
1ᰧStop playback.
ᰦReturn to normal playback.
ᰨPaused playback. If no buttons
are pressed on the remote control
for 10 minutes after pausing, the
TV returns to the playback state.
ᰪᰩSelect the required speed:
x2, x4, x8, x16, x32 (backward/for-
ward).
2Increase or decrease the bright-
ness of your screen.
3Hide the menu on screen. To see
the menu again, press ENTER
button.
4Return to the previous menu.
ᰙ3UHYLRXV &ORVH
107
MY MEDIA
Subtitle Language Group Supported Language
Latin1 English, Spanish, French
Korean English, Korean
Set Video Play Menu Options
6HW9LGHR3OD\
3LFWXUH6L]H ܁)XOO ۽
$XGLR/DQJXDJH ܁۽
6XEWLWOH/DQJXDJH ܁2Q ۽
ؒ/DQJXDJH ܁(QJOLVK ۽
ؒ&RGH3DJH ܁'HIDXOW ۽
ؒ6\QF ܁۽
ؒ3RVLWLRQ ܁۽
ؒ6L]H ܁1RUPDO ۽
5HSHDW ܁2II ۽
Code Page
ᯫ
Picture Size: Selects your desired
picture format for videos.
Full Mode: Files are played in full
screen mode regardless of the aspect
ratio of video.
Original Mode: Files are played
according to the aspect ratio of
video.
ᯫ
Audio Language: Changes the
Language Group of the audio for
video files. Files with a single audio
track cannot be selected.
ᯫ
Subtitle Language: The subtitles can
be turned on or off.
ᯫ
Language: Activated for SMI subtitles
and can select the language within
the subtitle.
ᯫ
Code Page: Subtitle font selection.
When set to default, contents are
displayed in the language set in
"Option - Language - Menu
Language."
ᯫ
Sync: When the video is not synchro-
nized with the captions, it can be
adjusted by 0.5 second.
ᯫ
Position: Move the location of the
subtitles.
ᯫ
Size: Changes the subtitle font size.
ᯫ
Repeat: Turn on/off repeat function
of movie playback. When turned on,
the file within the folder will be played
back repeatedly. When turned off, if
the next file name is similar to the
previous file, it can be played sequen-
tially.
1
ENTER
Select the desired menu option.
2
ENTER
Make appropriate adjustments.
۽
ᰙ3UHYLRXV &ORVH
MY MEDIA
MY MEDIA
108
* Image shown may differ from your TV.
Set Video Menu Options
Set Audio Menu Options Set 3D video Menu Options
6HW9LGHR
3LFWXUH0RGH ܁6WDQGDUG ۽
ؒ%DFNOLJKW ܁۽
ؒ&RQWUDVW ܁۽
ؒ%ULJKWQHVV ܁۽
ؒ&RORU ܁۽
ؒ(GJH(QKDQFHU ܁+LJK ۽
ؒ1RLVH5HGXFWLRQ ܁0HGLXP ۽
3LFWXUH5HVHW
ۿ
6HW$XGLR
6RXQG0RGH ܁6WDQGDUG ۽
$XWR9ROXPH ܁2II ۽
&OHDU9RLFH,, ܁2II ۽
%DODQFH ܁۽
/5
For LED LCD TV
6HW9LGHR
3LFWXUH0RGH ܁6WDQGDUG ۽
ؒ&RQWUDVW ܁۽
ؒ%ULJKWQHVV ܁۽
ؒ6KDUSQHVV ܁۽
ؒ&RORU ܁۽
ؒ7LQW ܁۽
ؒ&RORU7HPS ܁۽
ؒ1RLVH5HGXFWLRQ ܁/RZ ۽
For Plasma TV
5G
WC
1
ENTER
Make appropriate adjustments.
Then, select Close.
1
ENTER
Make appropriate adjustments.
Then, select Close.
۽۽
۽
ᰙ3UHYLRXV &ORVH
ᰙ3UHYLRXV &ORVH
ᰙ3UHYLRXV &ORVH
ᯕ6HWWLQJ/HIW5LJKW
(QG'9LGHR
ᯙ(QWHU
3XWRQ'JODVVHV
6LWPHWHUVIURP79WRHQMR\WKHEHVW'
YLHZ
7RVHOHFWPRUHFRPIRUWDEOHYLHZIRU
\RXFKDQJHWROHIWULJKWLPDJHRIJODVVHV
ZLWKᯕEXWWRQ
'
For more information, see the 3D Imaging sec-
tion in the Owner's Manual.
109
MY MEDIA
The On-Screen Display on your model may be slightly different.
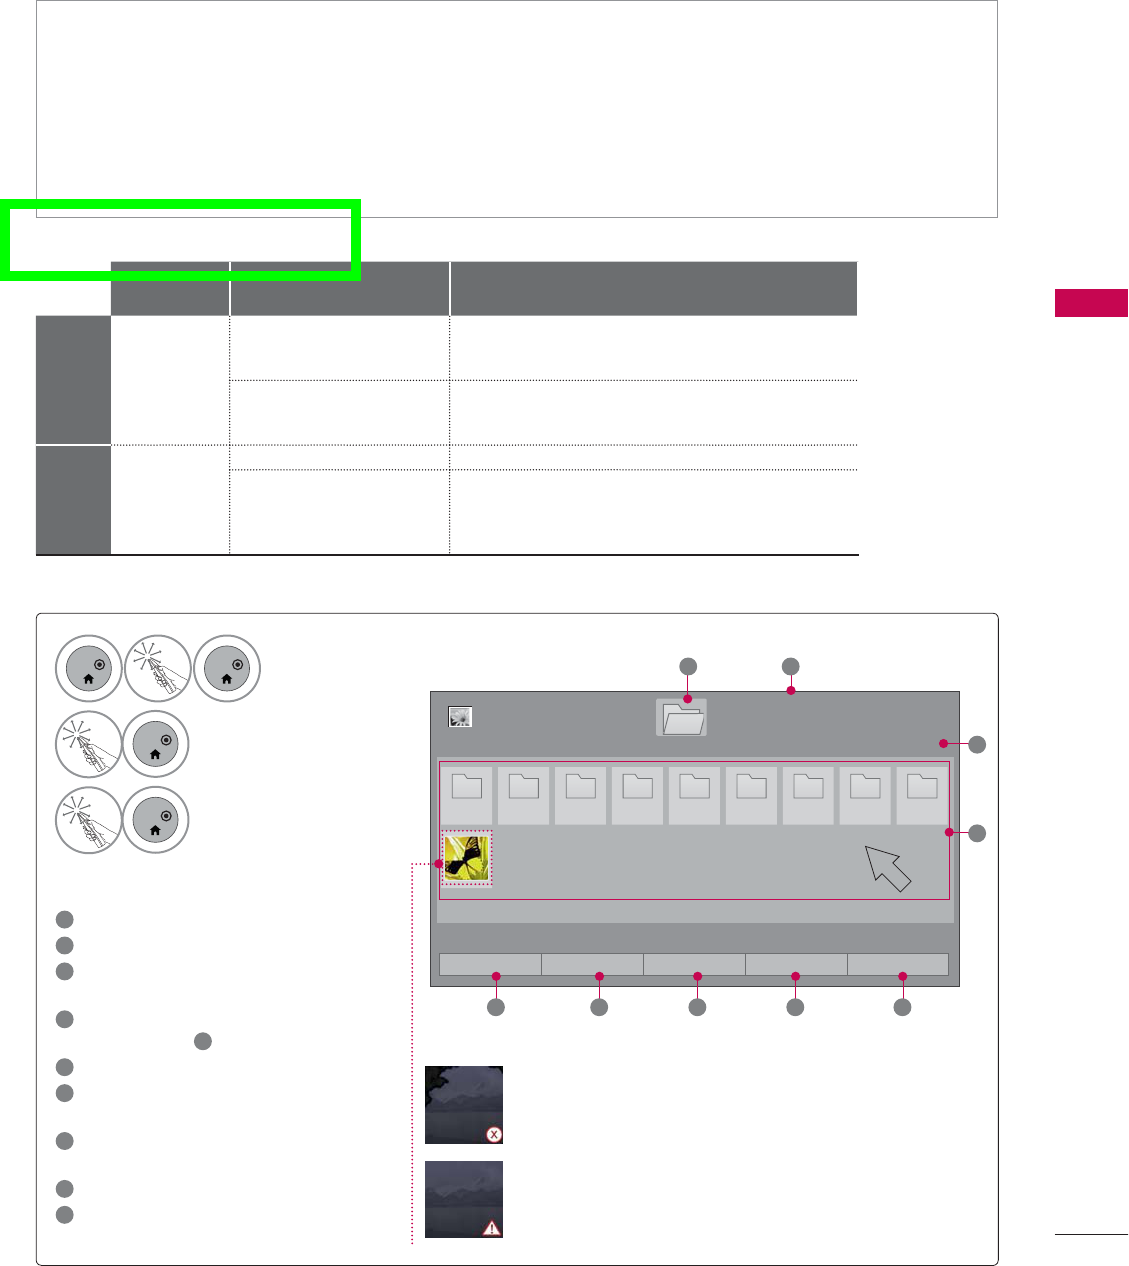
PHOTO LIST
Screen Components
1Moves to upper level folder
2Current page/Total pages
3Current page/total pages of
contents
4Contents under the folder
focused on 1
5Change to a different input.
6Move to Music List or Movie
List.
7Changes the number or
thumbnails displayed at a time.
8Allows you to mark certain files.
9Return to TV viewing.
Supported photo file: *.JPG
ᯫ
Baseline: 64 pixel (width) x 64 pixel (height) to 15360 pixel (width) x 8640 pixel (height)
ᯫ
Progressive: 64 pixel (width) x 64 pixel (height) to 1920 pixel (width) x 1440 pixel (height)
ᯫ
You can play JPEG files only.
ᯫ
Non-supported files are displayed in the form of predefined icon.
ᯫ
An error message occurs for corrupted files or file formats that cannot be played.
ᯫ
Corrupted image files may not be displayed properly.
ᯫ
It may take some time to view high-resolution images in full screen.
1
ENTER
ENTER
Select Home Menu.
2
ENTER
Select MY MEDIA.
3
ENTER
Select Photo List.
3DJH
3KRWR/LVW
3DJH
'ULYH
1
3
2
3 3 3 3 3 3 3 P8 P9
4
86%;7,&.
ᯙ9LHZ᱇3DJH&KDQJH
ᯕ&KDQJH'HYLFH ᯕ7R0XVLF/LVW ᯕ&KDQJH1XPEHUV ᯕ0DUN0RGH ᰿([LW
Abnormal files are
displayed using this
graphic.
Non-supported files
are displayed using
this graphic.
5 6 7 8 9
File
Extensions Item Profile
2D
jpeg
jpg
jpe
supproted file format
SOF0: baseline
SOF1: Extend Sequential
SOF2: Progressive
photo size
Min: 64 x 64
Max - Normal Type: 15360 (W) x 8640 (H)
Progressive Type: 1920 (W) x 1440 (H)
3D mpo
supproted file format mpo
photo size
4:3 size: 3648 x 2736
2592 x 1944
2048 x 1536
3:2 size: 3648 x 2432
For 47/55LX9500, 50/60X950
MY MEDIA
MY MEDIA
110
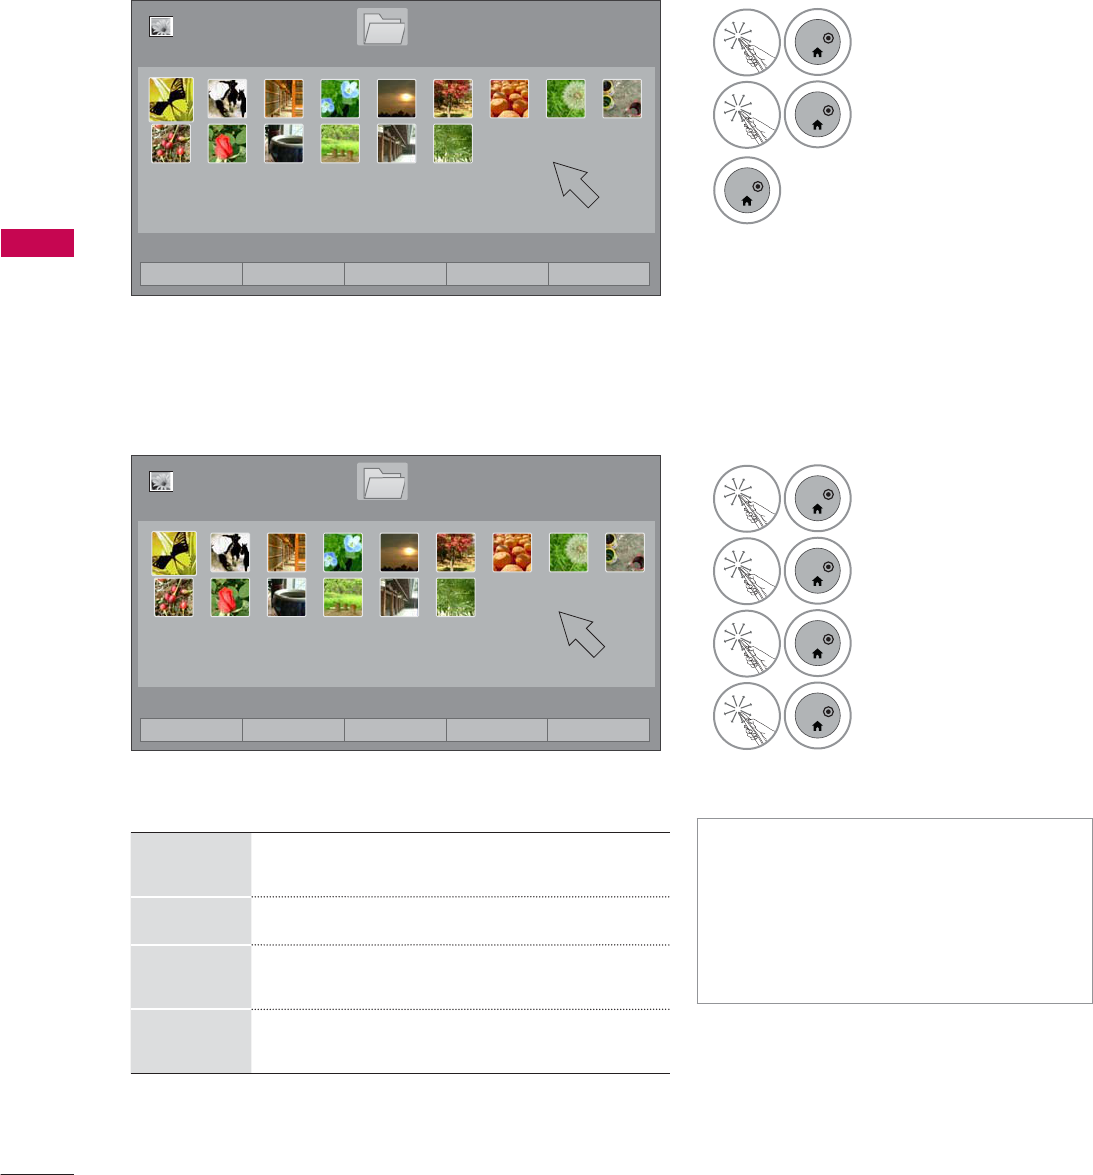
Photo Selection
ᯫ
When one or more photos are
marked, you can view individual pho-
tos or a slide show of the marked
photos. If no photos are marked, you
can view all photos individually or all
photos in the folder in a slide show.
Mark Mode
3DJH
3KRWR/LVW
3DJH
'ULYH
86%;7,&.
ᯙ9LHZ᱇3DJH&KDQJH
ᯕ&KDQJH'HYLFH ᯕ7R0XVLF/LVW ᯕ&KDQJH1XPEHUV ᯕ0DUN0RGH ᰿([LW
3DJH
3KRWR/LVW
3DJH
'ULYH
86%;7,&.
ᯙ9LHZ᱇3DJH&KDQJH
0DUN0RGH
ᯕ9LHZ0DUNHG ᯕ0DUN$OO ᯕ8QPDUN$OO ᯕ([LW0DUN0RGH ᰿([LW
1
ENTER
Select the target folder
or drive.
2
ENTER
Select Mark Mode.
3
ENTER
Select the desired
photo files.
4
ENTER
Select View Marked.
View the marked photo
files.
View
Marked Display the selected photo.
Mark All Mark all photos on the screen.
Unmark
All Deselect all marked photos.
Exit Mark
Mode Enter or exit the Mark Mode.
1
ENTER
Select the target folder
or drive.
2
ENTER
Select the desired pho-
tos.
3
ENTER
Photo file is displayed.
111
MY MEDIA
Full Screen Menu
More operations are available in full screen mode.
The aspect ratio of a photo may change the size
of the photo displayed on the screen in full size.
1Select the target folder or drive.
2
ENTER
Select the desired photos.
3
ENTER
The selected photo is displayed in full
size.
3DJH
3KRWR/LVW
3DJH
'ULYH
86%;7,&.
ᯙ9LHZ᱇3DJH&KDQJH
ᯕ&KDQJH'HYLFH ᯕ7R0XVLF/LVW ᯕ&KDQJH1XPEHUV ᯕ0DUN0RGH ᰿([LW
܁۽
BDMSJ
[
.%
6OLGHVKRZᱥ %*0ᱥ ᱨ ᱂ᰚ ᱭ2SWLRQ ᰙ+LGH ᰿([LW
܁ ۽
۽

MY MEDIA
MY MEDIA
112
܁۽
BDMSJ
[
.%
܁ ۽
ŹSlideshow: Selected photos are displayed during the slide show. If no photo is selected, all photos
in the current folder are displayed during slide show.
ᯫ
Set the time interval of the slide show in Option-Set Photo View. menu (Refer to p. 113).
ᯫ
You can adjust Option by using the Q.MENU button on the remote control.
ŹBGM (Background Music): Listen to music while viewing photos in full size.
ᯫ
Set the BGM device and album in Option-Set Photo View. menu (Refer to p. 113).
ᯫ
You can adjust Option by using the Q.MENU button on the remote control.
Źᱨ(Rotate): Rotate photos.
ᯫ
Rotates the photo 90 °, 180 °, 270 °, 360 ° clockwise.
ᯫ
Photos cannot be rotated if its width is greater than the available supported resolution height.
Ź᱂ /᱃:View the photo in full mode or original mode.
Źᰚ(Energy Saving): Increase the brightness of your screen by using ENERGY SAVING button.
ŹOption: Set values for Slide Speed and BGM (Refer to p.113).
ᯫ
You cannot change BGM while BGM is playing.
ᯫ
You can only select the MP3 folder saved on the device that currently displays the photo.
ŹHide: Hide the menu on the full-sized screen.
ᯫ
To see the menu again on the full-sized screen, press ENTER button to display.
ŹExit: Move to the previous menu screen.
4
ENTER
Select the Slideshow,
BGM,ᱨ(Rotate),᱂ /᱃,ᰚ
(Energy Saving),Option, or Hide.
6OLGHVKRZᱥ %*0ᱥ ᱨ ᱂ᰚ ᱭ2SWLRQ ᰙ+LGH ᰿([LW
113
MY MEDIA
Using the Photo List Function
Set Photo View Menu Options
6HW3KRWR9LHZ
6OLGH6SHHG ܁)DVW ۽
%*0 'ULYH
ؒ5HSHDW ܁2Q ۽
ؒ5DQGRP ܁2II ۽
܁۽
BDMSJ
[
.%
6OLGHVKRZᱥ %*0ᱥ ᱨ ᱂ᰚᱭ2SWLRQ ᰙ+LGH ᰿([LW
܁ ۽
1
ENTER
Show the Option menu.
2
ENTER
Select the desired menu option.
1
ENTER
Select Slide Speed or BGM.
2
ENTER
Make appropriate adjustments.
۽
ᰙ3UHYLRXV &ORVH
!
NOTE
ŹYou cannot select the Option in 3D
imaging mode.
ŹIf you want to listen to BGM (background
music) while viewing *mpo image files,
play a *jpg file and set the BGM folder in
"Option - Set Photo View." Then, you
can select and listen to BGM when view-
ing *mpo files.
&KRRVHRSWLRQV
6HW3KRWR9LHZ
6HW9LGHR
6HW$XGLR
6HW'YLGHR
ᰙ3UHYLRXV &ORVH
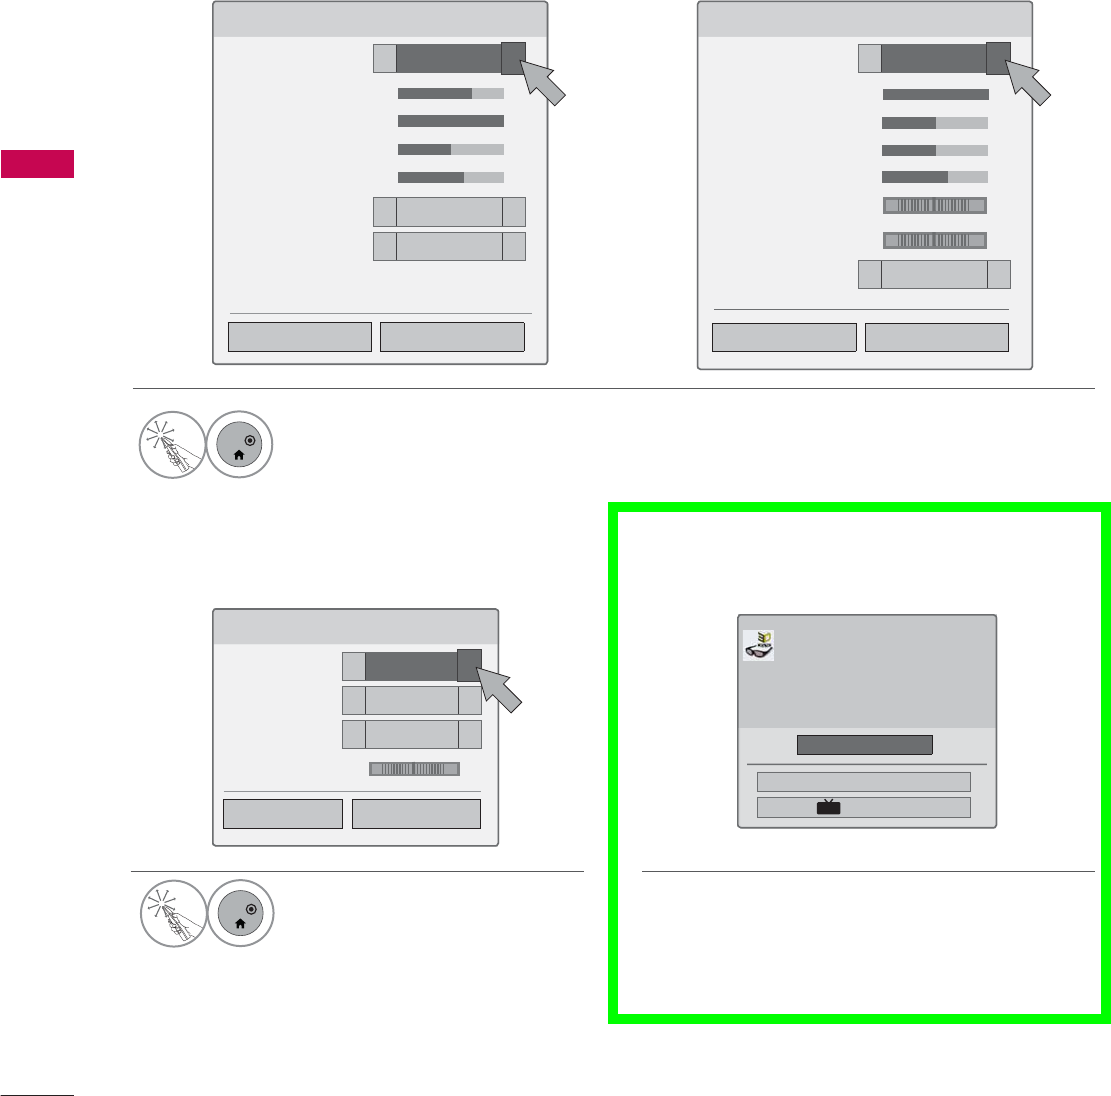
MY MEDIA
MY MEDIA
114
* Image shown may differ from your TV.
Set Video Menu Options
Set Audio Menu Options
6HW9LGHR
3LFWXUH0RGH ܁6WDQGDUG ۽
ؒ%DFNOLJKW ܁۽
ؒ&RQWUDVW ܁۽
ؒ%ULJKWQHVV ܁۽
ؒ&RORU ܁۽
ؒ(GJH(QKDQFHU ܁+LJK ۽
ؒ1RLVH5HGXFWLRQ ܁0HGLXP ۽
3LFWXUH5HVHW
ۿ
6HW$XGLR
6RXQG0RGH ܁6WDQGDUG ۽
$XWR9ROXPH ܁2II ۽
&OHDU9RLFH,, ܁2II ۽
%DODQFH ܁۽
/5
For LED LCD TV
6HW9LGHR
3LFWXUH0RGH ܁6WDQGDUG ۽
ؒ&RQWUDVW ܁۽
ؒ%ULJKWQHVV ܁۽
ؒ6KDUSQHVV ܁۽
ؒ&RORU ܁۽
ؒ7LQW ܁۽
ؒ&RORU7HPS ܁۽
ؒ1RLVH5HGXFWLRQ ܁/RZ ۽
For Plasma TV
5G
WC
1
ENTER
Make appropriate adjustments. Then, select Close.
1
ENTER
Make appropriate adjustments.
Then, select Close.
۽۽
۽
ᰙ3UHYLRXV &ORVH
ᰙ3UHYLRXV &ORVH
ᰙ3UHYLRXV &ORVH
Set 3D video Menu Options
ᯕ6HWWLQJ/HIW5LJKW
(QG'9LGHR
ᯙ(QWHU
3XWRQ'JODVVHV
6LWPHWHUVIURP79WRHQMR\WKHEHVW'
YLHZ
7RVHOHFWPRUHFRPIRUWDEOHYLHZIRU
\RXFKDQJHWROHIWULJKWLPDJHRIJODVVHV
ZLWKᯕEXWWRQ
'
For more information, see the 3D Imaging sec-
tion in the Owner's Manual.
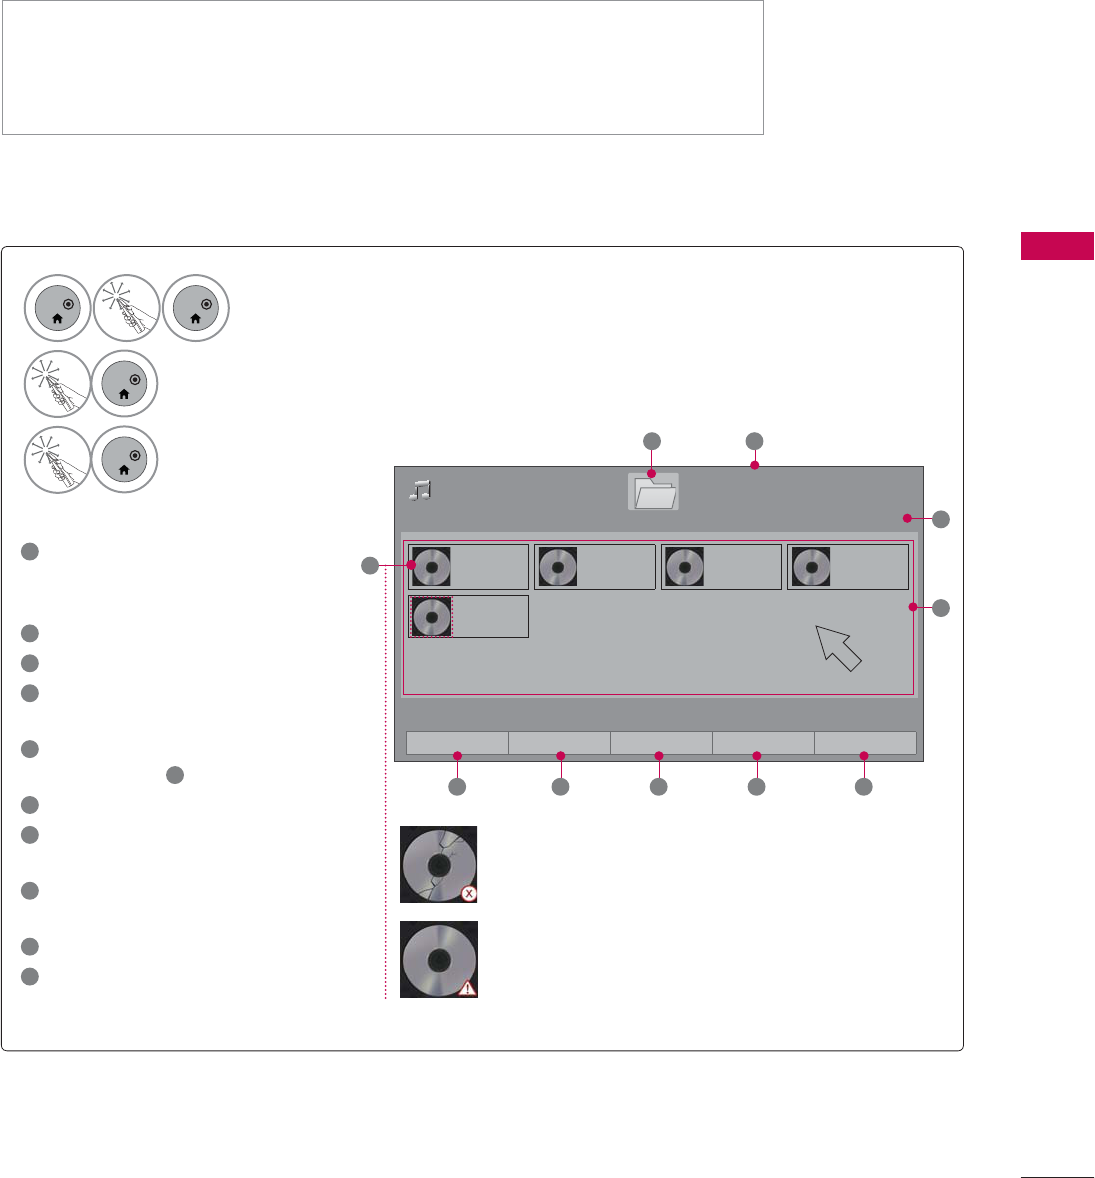
115
MY MEDIA
MUSIC LIST
This TV cannot play back copy-protected files.
The On-Screen Display on your model may be slightly different.
Supported Music File: *.MP3
Bit rate range: 32 Kbps - 320 Kbps
ţ4BNQMJOHSBUF.1&(-BZFSL)[L)[L)[
ţ4BNQMJOHSBUF.1&(-BZFSL)[L)[L)[
Screen Components
1Preview: If any album jacket for
the file (Album Art Image)
exists, this picture is displayed.
2Moves to upper level folder
3Current page/Total pages
4Current page/total pages of
contents
5Contents under the folder
focused on 2
6Change to a different input.
7Move to Movie List or Photo
List.
8Changes the number or
thumbnails displayed at a time.
9Allows you to mark certain files.
10 Return to TV viewing.
Abnormal files are
displayed using this
graphic.
Non-supported files
are displayed using
this graphic.
1
ENTER
ENTER
Select Home Menu.
2
ENTER
Select MY MEDIA.
3
ENTER
Select Music List.
3DJH
0XVLF/LVW
3DJH
%PS
%PS
%PS
%PS
%PS
4
3
5
1
'ULYH
86%;7,&.
2
ᯙ3OD\᱇3DJH&KDQJH
ᯕ&KDQJH'HYLFH ᯕ7R0RYLH/LVW ᯕ&KDQJH1XPEHUV ᯕ0DUN0RGH ᰿([LW
6 7 8 9 10
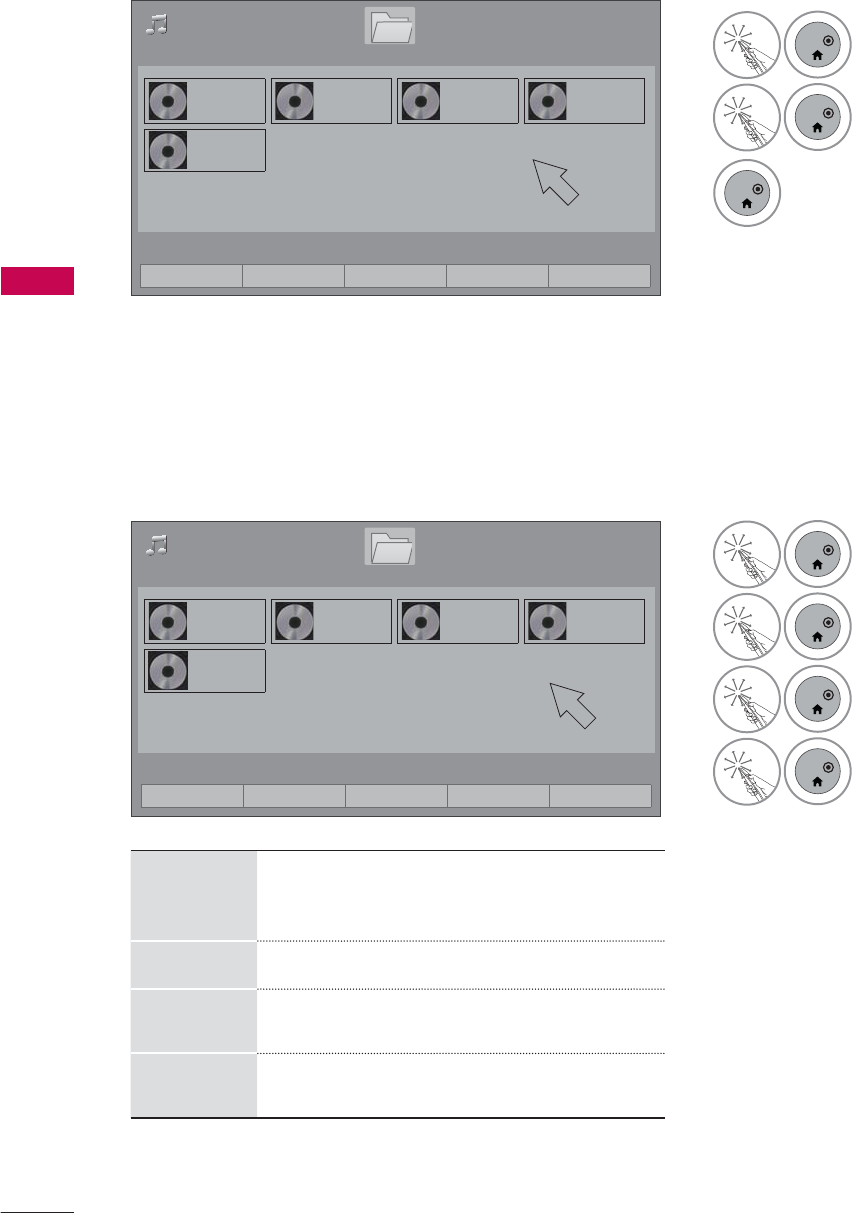
MY MEDIA
MY MEDIA
116
Music Selection
Mark Mode
3DJH
0XVLF/LVW
3DJH
%PS
%PS
%PS
%PS
%PS
'ULYH
86%;7,&.
ᯙ3OD\᱇3DJH&KDQJH
3DJH
0XVLF/LVW
3DJH
%PS
%PS
%PS
%PS
%PS
'ULYH
86%;7,&.
ᯙ3OD\᱇3DJH&KDQJH
0DUN0RGH
Play
Marked
Play the selected songs. Once a song
finishes playing, the next selected one
will be played automatically.
Mark All Mark all songs in the folder.
Unmark
All Deselect all marked song.
Exit Mark
Mode Enter or exit the Mark Mode.
ᯕ3OD\0DUNHG ᯕ0DUN$OO ᯕ8QPDUN$OO ᯕ([LW0DUN0RGH ᰿([LW
ᯕ&KDQJH'HYLFH ᯕ7R0RYLH/LVW ᯕ&KDQJH1XPEHUV ᯕ0DUN0RGH ᰿([LW
1
ENTER
Select the target folder
or drive.
2
ENTER
Select Mark Mode.
3
ENTER
Select the desired
music file.
4
ENTER
Select Play Marked.
Play the marked music
file.
1
ENTER
Select the target folder
or drive.
2
ENTER
Select the desired
music file.
3
ENTER
Music files are played.

117
MY MEDIA
Using the Music List Function
!
NOTE
ŹYou can listen to the music only within
the device currently played.
1
ENTER
Show the Option menu.
2
ENTER
Select Set Audio Play. or Set Audio..
3DJH
0XVLF/LVW
3DJH
ᰦ%PS ᯚᯛ
ᰧᰦᰨᰪᰩᯕ3OD\ZLWK3KRWR ᰚ ᱭ2SWLRQ ᰙ+LGH ᰿([LW
ILOHV0DUNHG
%PS
%PS
%PS
%PS
%PS
ᯡ
ᰦ
ᯡᯡ
'ULYH
1 2 3 4 5
&KRRVHRSWLRQV
6HW$XGLR3OD\
6HW$XGLR
ᰙ3UHYLRXV &ORVH
1ᰧStop playback.
ᰦReturn to normal playback.
ᰨPaused playback.
ᰪᰩSelect the previous or next
song.
2Play with Photo: Start playing the
selected songs and then move to
the Photo List.
3Increase or decrease the bright-
ness of your screen
4Hide the menu on screen.
5Move to the previous menu
screen.
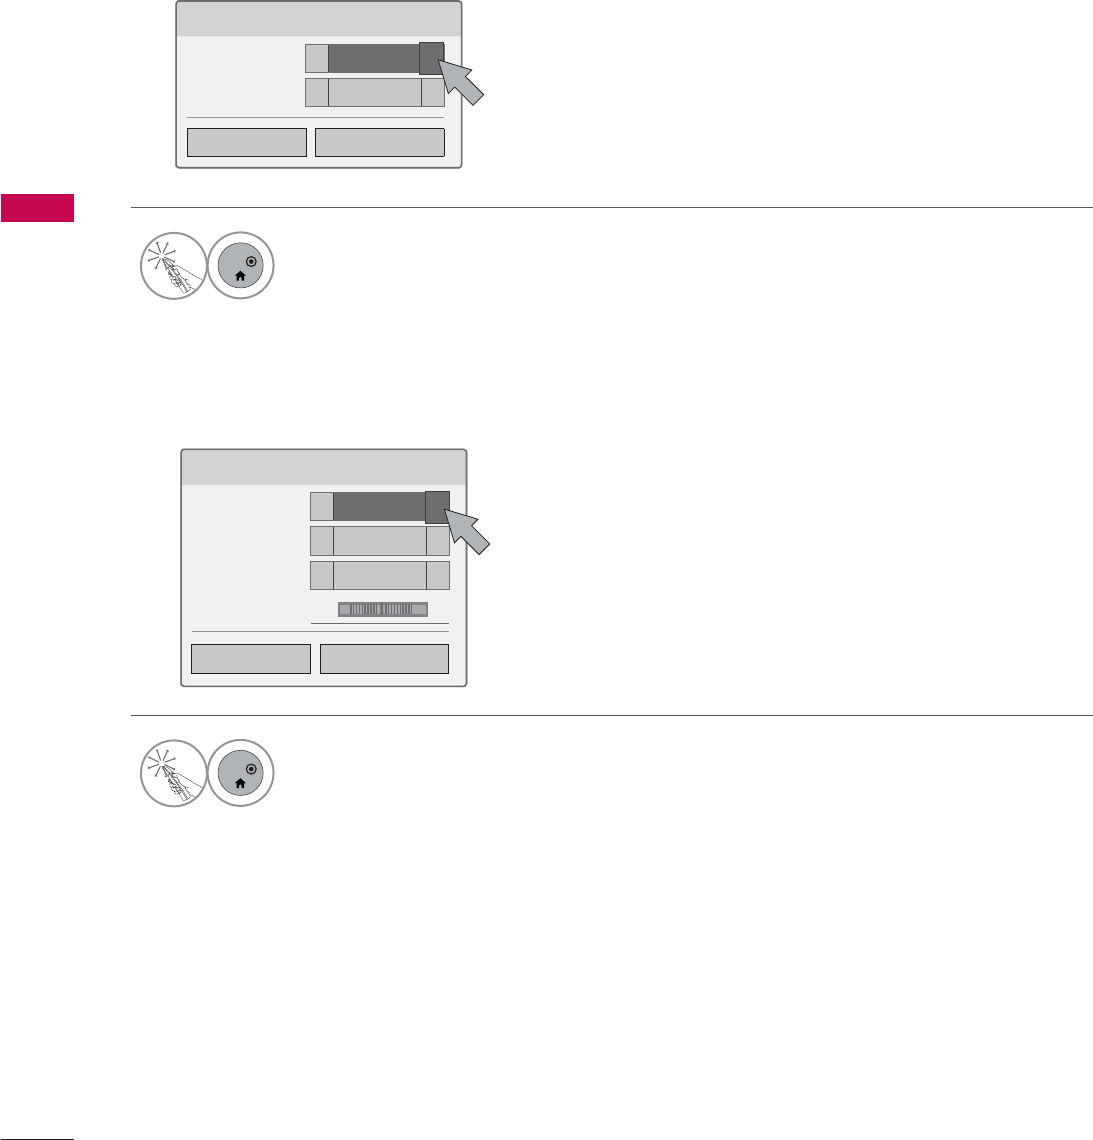
MY MEDIA
MY MEDIA
118
6HW$XGLR3OD\
5HSHDW ܁2Q ۽
5DQGRP ܁2II ۽
Set Audio Play Menu Options
Set Audio Menu Options
6HW$XGLR
6RXQG0RGH ܁6WDQGDUG ۽
$XWR9ROXPH ܁2II ۽
&OHDU9RLFH,, ܁2II ۽
%DODQFH ܁۽
/5
۽
۽
1
ENTER
Make appropriate adjustments.
Then, select Close.
1
ENTER
Make appropriate adjustments.
Then, select Close.
ᰙ3UHYLRXV &ORVH
ᰙ3UHYLRXV &ORVH
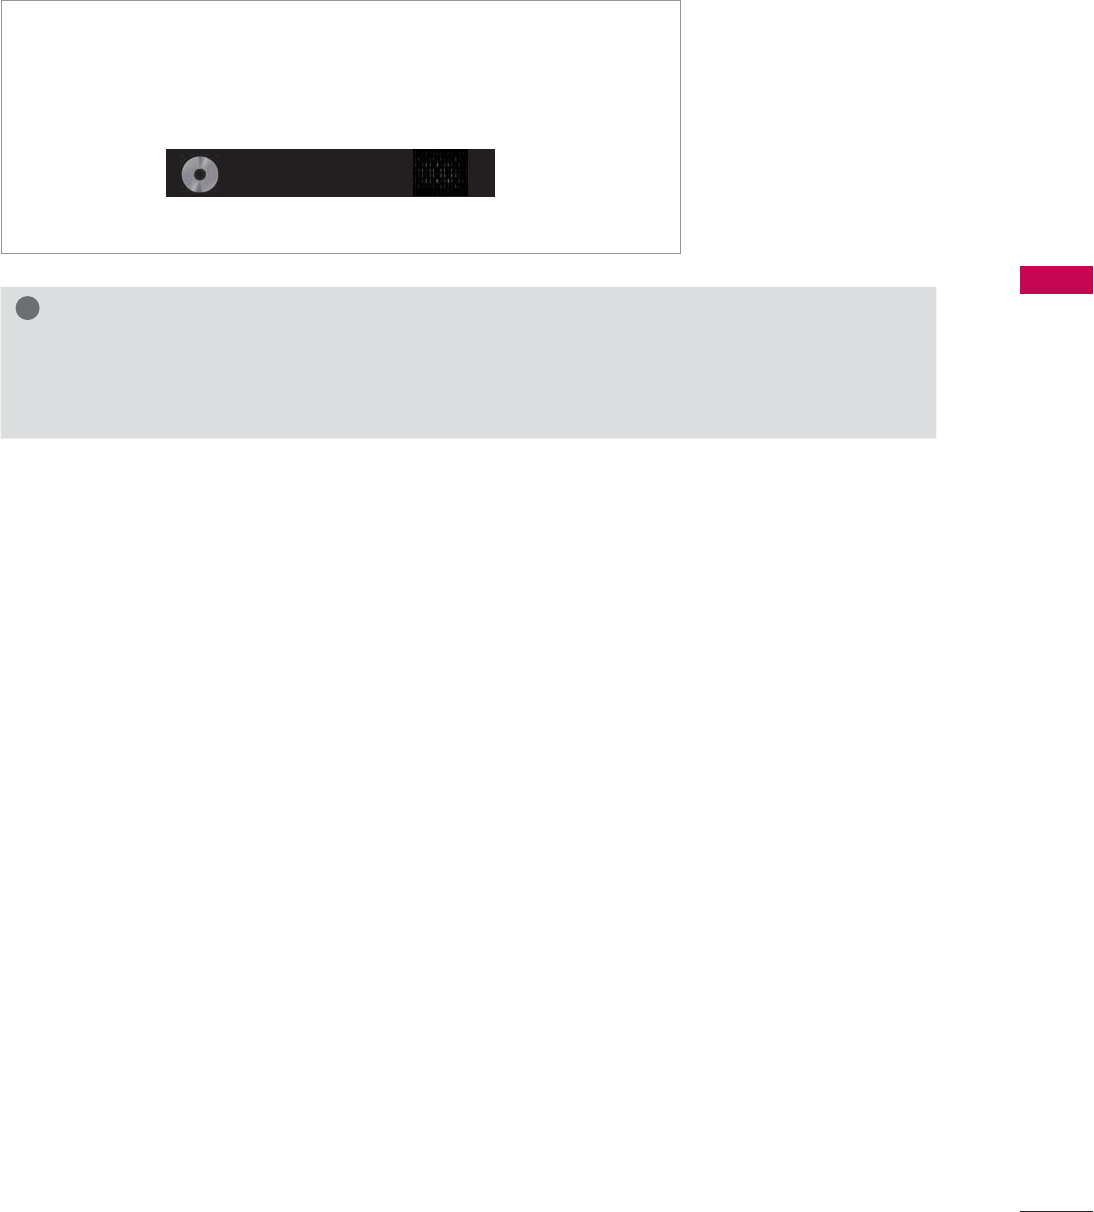
119
MY MEDIA
!
NOTE
ŹA damaged or corrupted music does not play but displays 00:00 in playtime.
ŹMusic files with copy-protection will not play.
ŹPress ENTER or ᰧ button to stop the screen saver.
ᯫ
If you don't press any buttons for a while, the play information box
will float across the screen. This prevents screen pixel damage due
to a fixed image remaining on the screen for a extended period of
time.
%PS
ᰦ
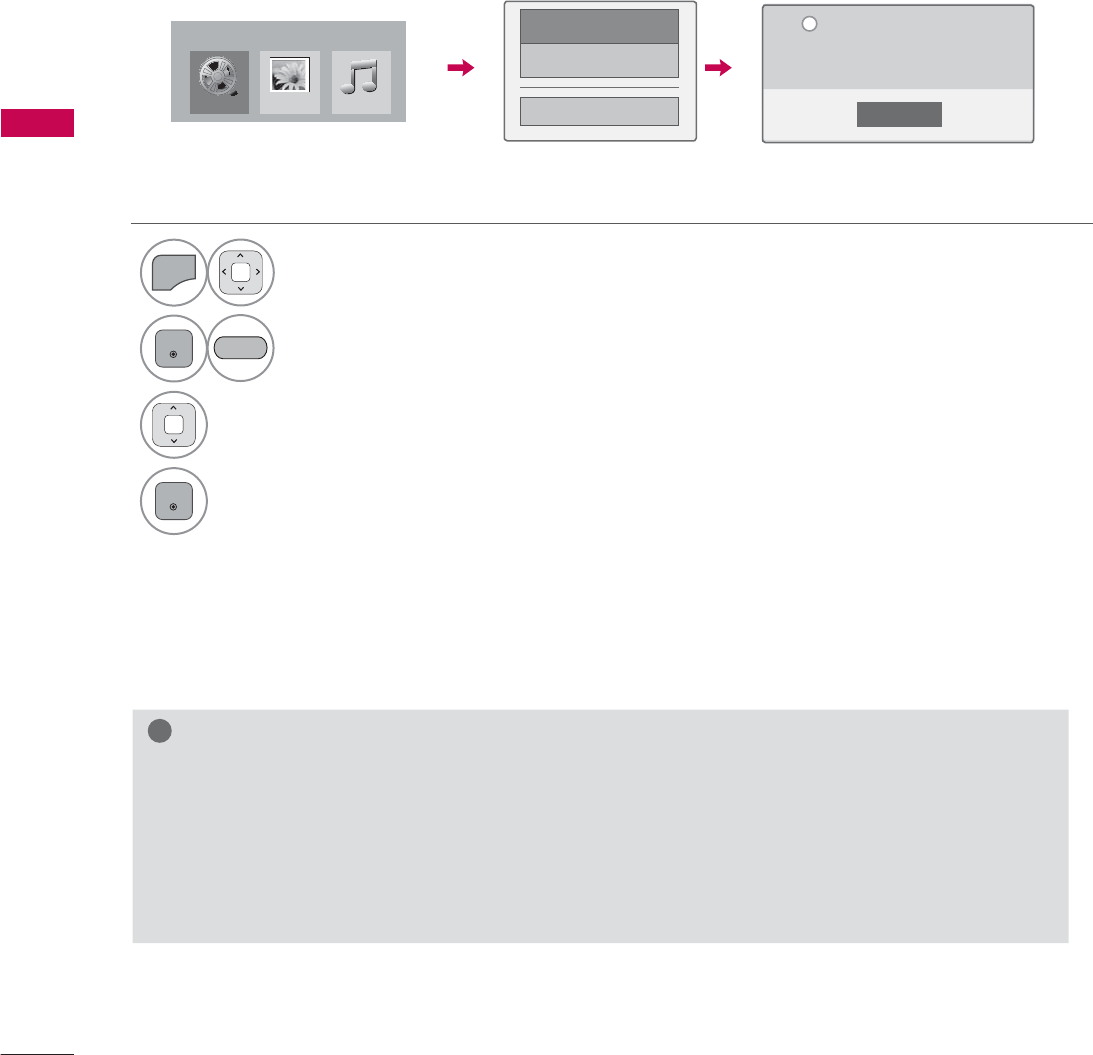
MY MEDIA
MY MEDIA
120
DIVX REGISTRATION CODE
Using the registration number, movies can be rented or purchased at www.divx.com/vod.
Only DivX files matched with the registration code of the purchased TV are playable.
1
MENU
Select MY MEDIA.
2
ENTER
Select DivX Option.
3Select DivX Reg. Code.
4
ENTER
Display Divx Reg. Code.
&ORVH
<RXPXVWUHJLVWHU\RXUGHYLFHWR
SOD\'LY;SURWHFWHGYLGHRV
5HJLVWUDWLRQFRGH[[[[[[[[[[
5HJLVWHUDWKWWSYRGGLY[FRP
L
'LY;5HJ&RGH
'HDFWLYDWLRQ
ᰙ3UHYLRXV
0RYLH/LVW
0<0(',$
3KRWR/LVW 0XVLF/LVW
BLUE
!
NOTE
ŹWhen loading, some buttons may not work.
ŹIf you use the DivX registration code of another device, the rented or purchased DivX file cannot
be played. Therefore always use the DivX registration code assigned to this product.
ŹThe video or audio of a file converted based on a standard other than the DivX codec standard
may be corrupted or unable to be played.
ŹThe DRM/*.tp/*.trp file in DLNA server is not played when Movie List is in operation.
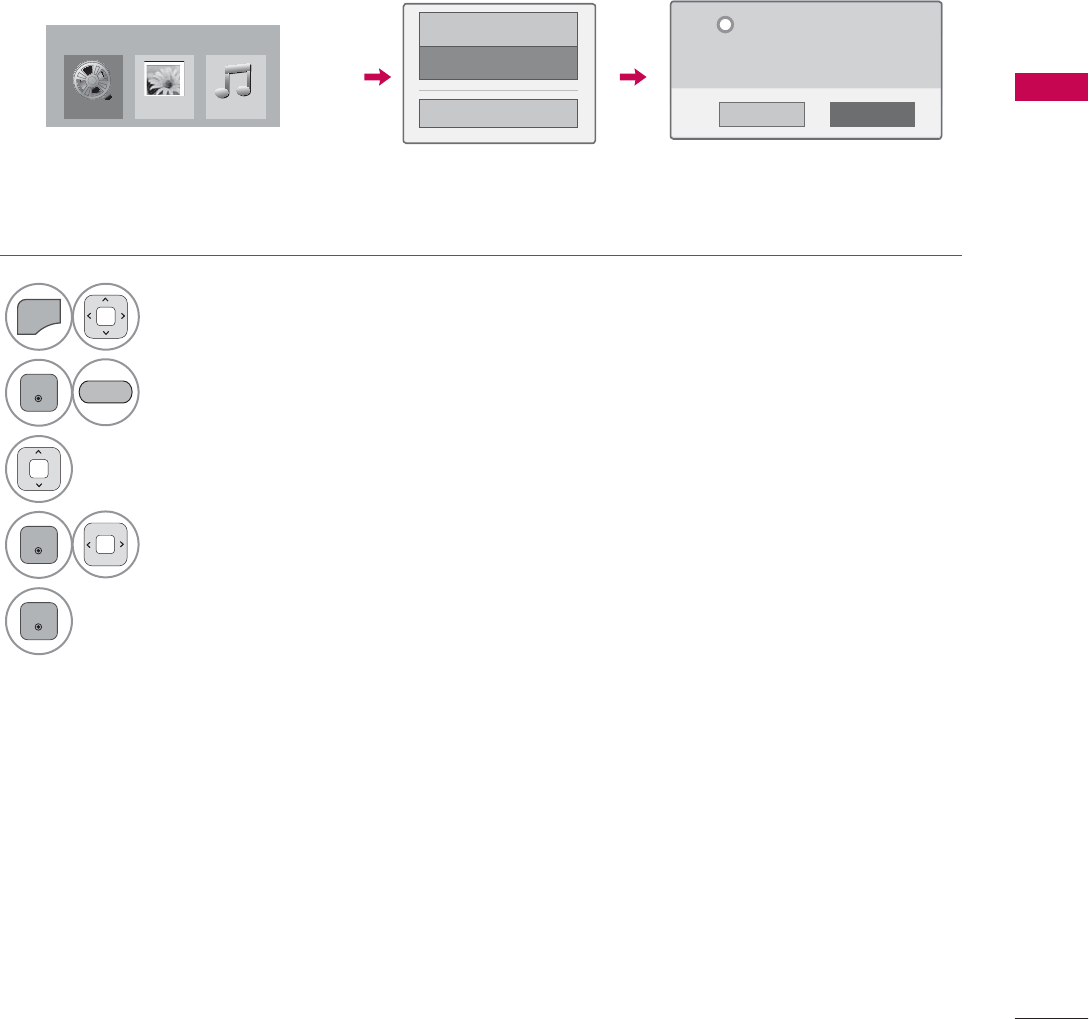
121
MY MEDIA
DEACTIVATION
The purpose of deactivation is to allow deactivation of devices for users who have activated all the
available devices through the web server and are blocked from activating more devices. DivX VOD
allows the consumer to activate up to 6 devices under one account.
Delete the existing authentication information to receive a new DivX user authentication for TV. Once
this function is executed, a DivX user authentication is required again to see DivX DRM files.
1
MENU
Select MY MEDIA.
2
ENTER
Select DivX Option.
3Select Deactivation.
4
ENTER
Select Yes.
5
ENTER
Display Deactivation.
'LY;5HJ&RGH
'HDFWLYDWLRQ
ᰙ3UHYLRXV
<HV 1R
'HUHJLVWUDWLRQFRGH
********
'HUHJLVWHUDWKWWSYRGGLY[FRP
&RQWLQXHZLWKUHJLVWUDWLRQ"
L
BLUE
0RYLH/LVW
0<0(',$
3KRWR/LVW 0XVLF/LVW
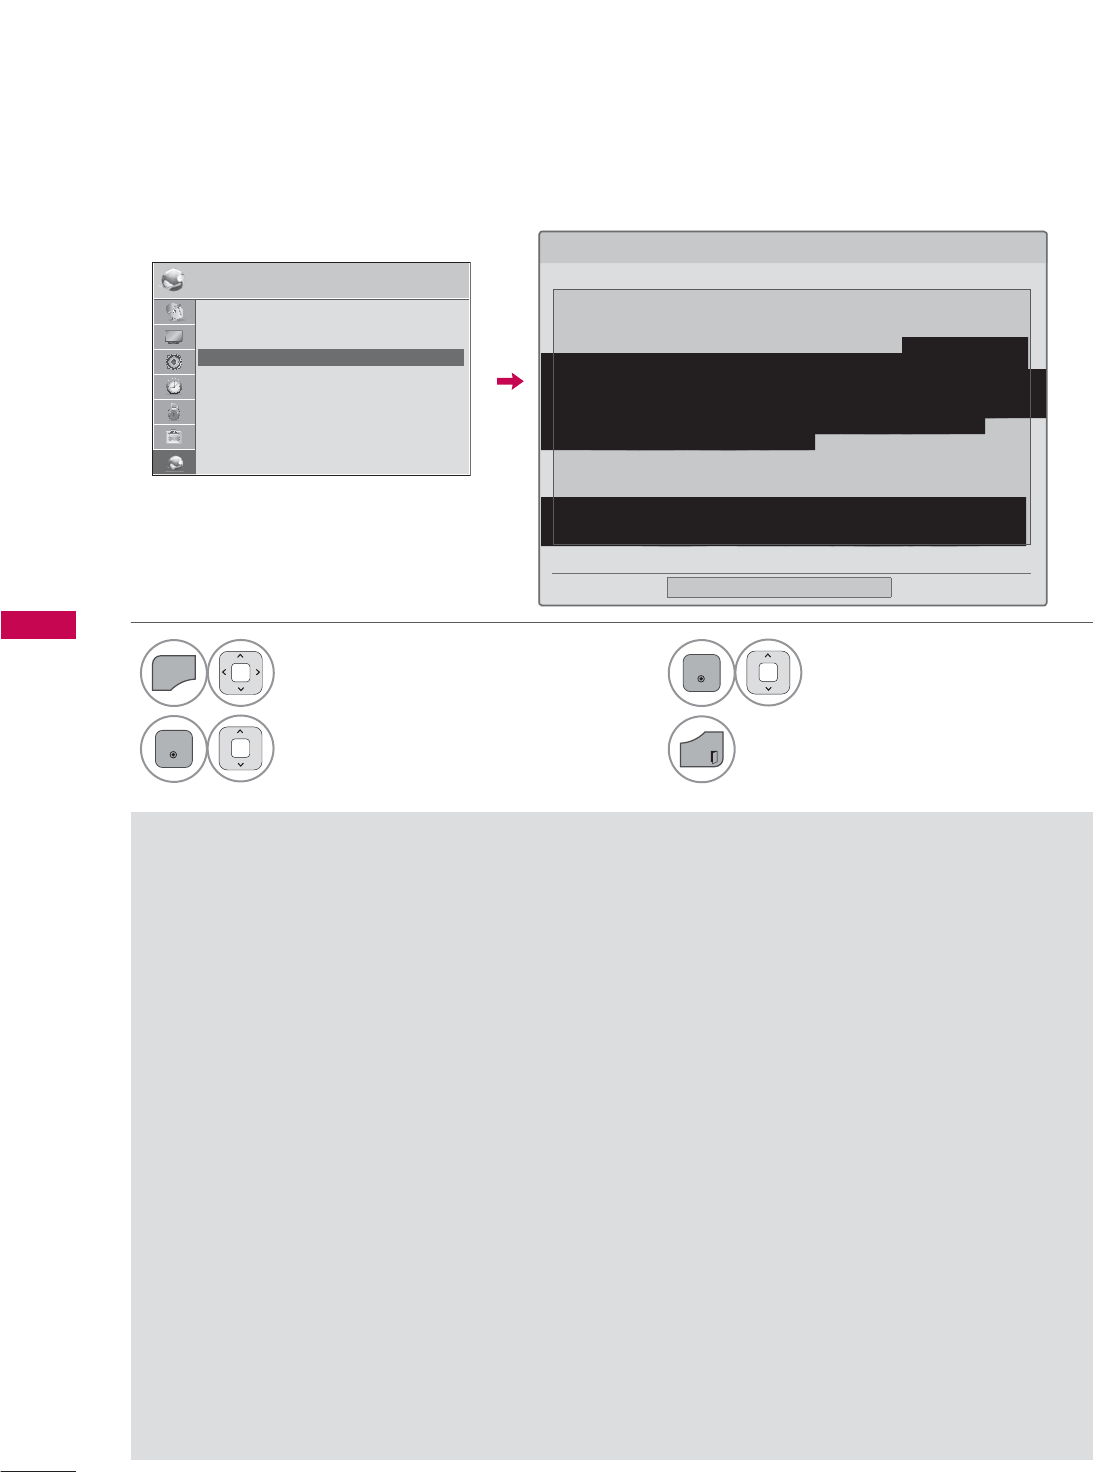
NETWORK
NETWORK
122
LEGAL NOTICE
NETWORK
1
MENU
Select NETWORK.
2
ENTER
Select Legal Notice.
3
ENTER
Check Legal notice.
4
EXIT
Return to TV viewing.
NETWORK ᯒ0RYHᯙ(QWHU
ؒ 1HWZRUN6HWWLQJ :LUHG
ؒ 1HWZRUN6WDWXV ,QWHUQHWLVFRQQHFWHG
ؒ /HJDO1RWLFH
ؒ (61
ᯐ
ᯙ
/HJDO1RWLFH
ᯝ
&ORVH
,03257$17127,&(5(/$7,1*721(7:25.6(59,&($OOFRQWHQWDQGVHUYLFHV
DFFHVVLEOHWKURXJKWKLVGHYLFHEHORQJWRWKLUGSDUWLHVDQGDUHSURWHFWHGE\FRS\ULJKWSDWHQW
WUDGHPDUNDQGRURWKHULQWHOOHFWXDOSURSHUW\ODZV6XFKFRQWHQWDQGVHUYLFHVDUHSURYLGHG
VROHO\IRU\RXUSHUVRQDOQRQFRPPHUFLDOXVH<RXPD\QRWXVHDQ\FRQWHQWRUVHUYLFHVLQD
PDQQHUWKDWKDVQRWEHHQDXWKRUL]HGE\WKHFRQWHQWRZQHURUVHU YLFHSURYLGHU:LWKRXW
OLPLWLQJWKHIRUHJRLQJXQOHVVH[SUHVVO\DXWKRUL]HGE\WKHDSSO LFDEOHFRQWHQWRZQHURUVHUYLFH
SURYLGHU\RXPD\QRWFRS\XSORDGSRVWWUDQVPLWWUDQVODWH VHOOPRGLI\FUHDWH
GHULYDWLYHZRUNVRUGLVWULEXWHLQDQ\PDQQHUR UPHGLXPDQ\FRQWHQWRUVHUYLFHVGLVSOD\HG
WKURXJKWKLVGHYLFH<28(;35(66/<$&.12:/('*($1'$*5((7+$77+('(9,&($1'
$//7+,5'3$57<&217(17$1'6(59,&(6$5(3529,'('$6,6:,7+287:$55$17<
2)$1<.,1'(,7+(5(;35(6625,03/,('/*(/(&7521,&6(;35(66/<',6&/$,06$//
:$55$17,(6$1'&21',7,216:,7+5(63(&772$1<&217(17$1'6(59,&(6(,7+(5
(;35(6625,03/,(',1&/8',1*%87127/,0,7('72:$55$17,(62)
0(5&+$17$%,/,7<2)6$7,6)$&725<48$/,7<),71(66)25$3$57,&8 /$5385326(
SDJH
IMPORTANT NOTICE RELATING TO NETWORK SERVICE
All content and services accessible through this device belong
to third parties and are protected by copyright, patent, trademark
and/or other intellectual property laws. Such content and ser-
vices are provided solely for your personal noncommercial use.
You may not use any content or services in a manner that has
not been authorized by the content owner or service provider.
Without limiting the foregoing, unless expressly authorized by
the applicable content owner or service provider, you may not
copy, upload, post, transmit, translate, sell, modify, create deriva-
tive works, or distribute in any manner or medium any content
or services displayed through this device.
YOU EXPRESSLY ACKNOWLEDGE AND AGREE THAT THE
DEVICE AND ALL THIRD PARTY CONTENT AND SERVICES
ARE PROVIDED "AS IS" WITHOUT WARRANTY OF ANY KIND,
EITHER EXPRESS OR IMPLIED. LG ELECTRONICS EXPRESSLY
DISCLAIMS ALL WARRANTIES AND CONDITIONS WITH
RESPECT TO ANY CONTENT AND SERVICES, EITHER
EXPRESS OR, IMPLIED, INCLUDING BUT NOT LIMITED TO,
WARRANTIES OF MERCHANTABILITY, OF SATISFACTORY
QUALITY, FITNESS FOR A PARTICULAR PURPOSE, AND
NON-INFRINGEMENT OF THIRD PARTY RIGHTS. LG DOES
NOT GUARANTEE THE ACCURACY, VALIDITY, TIMELINESS,
LEGALITY, OR COMPLETENESS OF ANY CONTENT OR
SERVICE MADE AVAILABLE THROUGH THIS DEVICE AND
DOES NOT WARRANT THAT THE DEVICE OR SERVICES WILL
MEET YOUR REQUIREMENTS, OR THAT OPERATION OF THE
DEVICE OR SERVICES WILL BE UNINTERRUPTED OR ERROR-
FREE. UNDER NO CIRCUMSTANCES, INCLUDING
NEGLIGENCE, SHALL LG BE LIABLE, WHETHER IN CONTRACT
OR TORT, FOR ANY DIRECT, INDIRECT, INCIDENTAL, SPECIAL
OR CONSEQUENTIAL DAMAGES, OR ANY OTHER DAMAGES
ARISING OUT OF, ANY INFORMATION CONTAINED IN, OR
ANY CONTENT OR SERVICE ACCESSED BY YOU OR ANY
THIRD PARTY, EVEN IF ADVISED OF THE POSSIBILITY OF
SUCH DAMAGES.
Third party services may be changed, suspended, removed,
terminated or interrupted, or access may be disabled at any
time, without notice, and LG makes no representation or war-
ranty that any content or service will remain available for any
period of time. Content and services are transmitted by third
parties by means of networks and transmission facilities over
which LG has no control. LG may impose limits on the use of or
access to certain services or content, in any case and without
notice or liability. LG expressly disclaims any responsibility or
liability for any change, interruption, disabling, removal of or
suspension of any content or service made available through
this device.
LG is neither responsible nor liable for customer service related
to the content and services. Any question or request for service
relating to the content or services should be made directly to the
respective content and service providers.
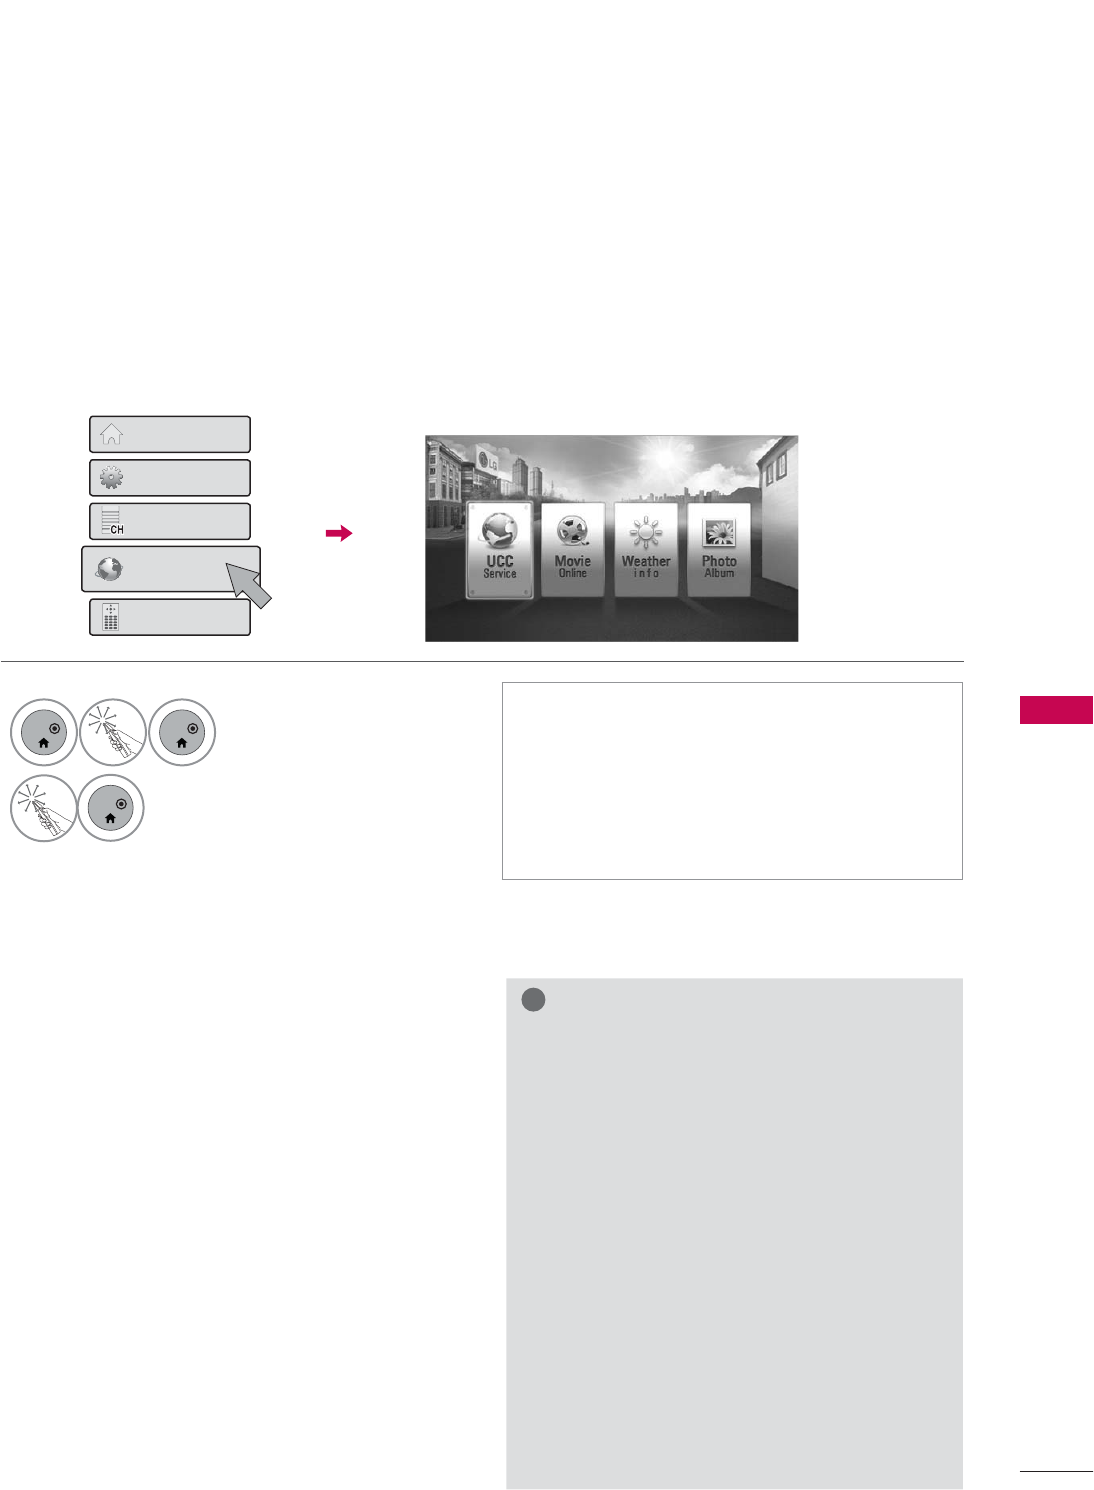
123
NETCAST
NETCAST
NETCAST MENU
These services are provided by separate Content Provider.
NETCAST menu source can differ by country.
What is a NETCAST?
Stream movies, TV shows and video, or get up to the minute news, stock information or weather updates
directly to your TV.
ᯫ
To view the owner’s manual that provided by
the Content Provider, visit our website at
http://www.lg.com.
ᯫ
To see the activation method of Yahoo!,
Netflix, or Vudu, click the Yahoo!, Netflix,
Vudu in the CD manual (For USA).
ᯫ
You can also select the NETCAST using the
NETCAST button on the TV remote control.
1
ENTER
ENTER
Select NetCast.
2
ENTER
Select NETCAST menu option.
Enjoy Online Service.
+RPH0HQX
4XLFN0HQX
&KDQQHO/LVW
1HWFDVW
6FUHHQ5HPRWH
ᯫ
Yahoo! (For USA)
Yahoo! TV Widgets give you the best of the
Internet in perfect harmony with the simplicity
and reliability of your TV. TV Widgets deliver a
Cinematic internetTM experience by converting
your favorite web services for viewing on the TV.
ᯫ
Netflix (For USA)
You can instantly watch movies (quite a few new
releases) & TV episodes from Netflix streamed
over the internet to your TV.
To become a Netflix member visit: www.netflix.
com/LG
Note that this service is provided by the Content
Provider, Netflix. It is dependent on Netflix to pro-
vide the data.
ᯫ
Vudu (For USA)
In order to make rental/purchase transactions on
the Vudu service, a user must create an account
on vudu.com.
That account is linked to a specific device, via a
process called “activation”. It is possible to have
multiple devices associated with a single Vudu
account.
Note that this service is provided by the Content
Provider, Vudu. It is dependent on Vudu to pro-
vide the data.
ᯫ
YouTube
YouTube is a video sharing website where users
can upload, view, and share video clips.
ᯫ
Picasa
Picasa is an application from Google that appre-
ciates digital image files.
!
NOTE
ŹThe videos list searched from the TV may
different with the list searched from a web
browser on PC.
ŹThe settings of this TV do not affect the
YouTube’s playback quality.
ŹThe playback of videos may be paused,
stopped or buffering occurring often
depending on your broadband speed.
Ź For service that requires log in, join the
applicable service on the website using the
PC and log in through the TV to enjoy
various additional functionalities.
ŹWhen you set the city you want with Setup
by pressing the red button, the background
of NetCast will be set to the weather of the
selected city.
ŹFor Plasma TV: If there is no user action 2
minutes following freezing image or video
on screen, the screensaver will activate
itself preventing fixed image remaining on
screen.
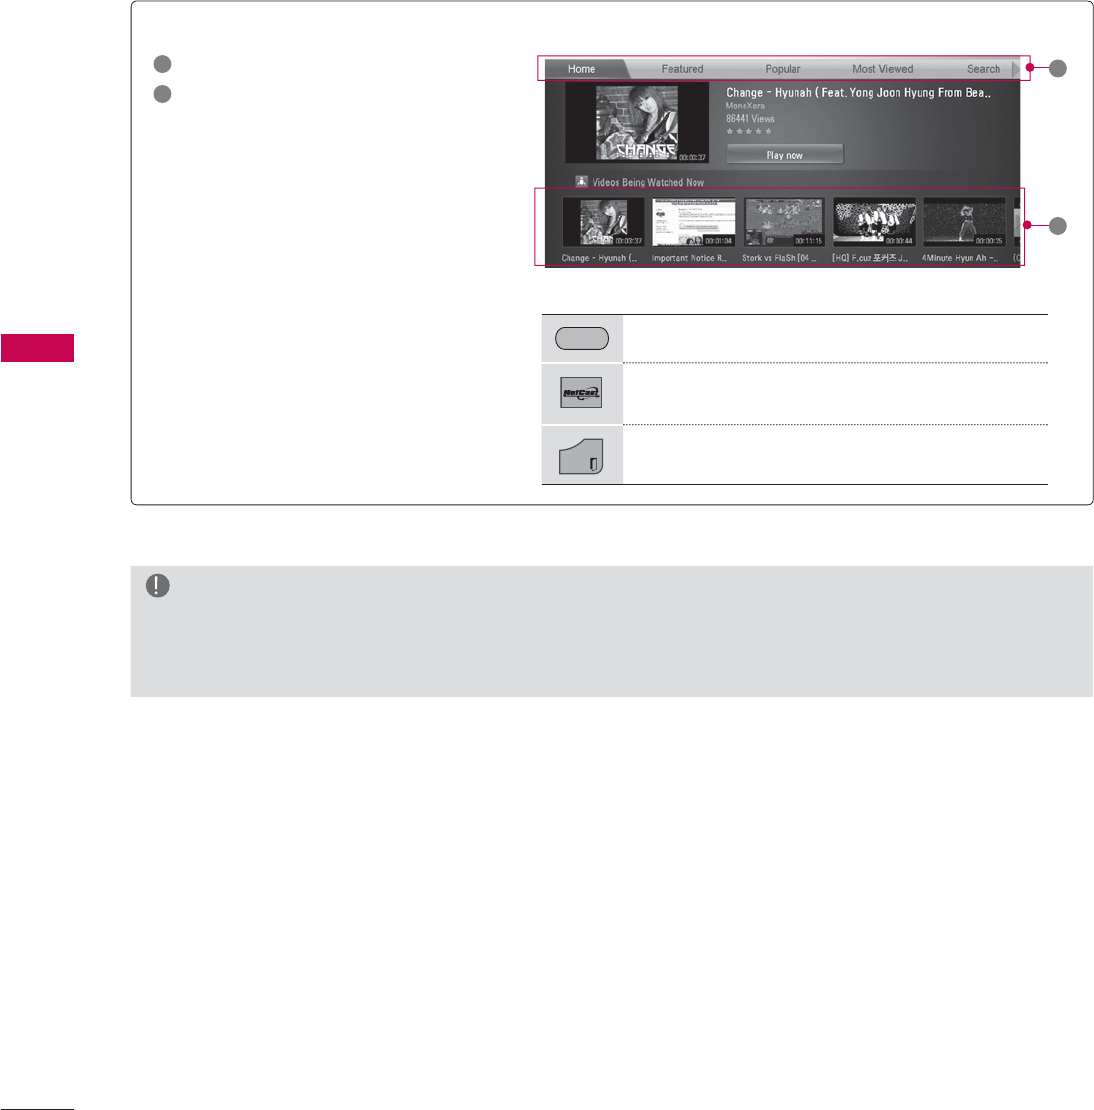
NETCAST
NETCAST
124
YOUTUBE
YouTube is a video sharing website where users can upload, view, and share video clips.
Screen Components
1YouTube menu
2Videos list
1
RED Set the option menu.
Return to Netcast menu.
EXIT
Return to TV viewing.
2
NOTE
ŹWhen you press the Q.menu button while the Youtube video is playing in full mode, you can set
the video options.

125
NETCAST
Home: You can watch the popular video in real time.
Featured: The featured videos list will be displayed.
Popular: The best rated videos list from YouTube server will be displayed.
Most Viewed: The most viewed videos list will be displayed.
Search: The keypad/keyboard menu will be displayed.
History: The videos list that you previously played will be displayed. Maximum of 20 videos can be stored.
Favorites: In sign-in status, this menu will be displayed the videos list that is arranged in the YouTube
server with your account (Some videos may not appear on the Favorites list, even if the videos are
arranged in the server).
Sign in (Sign Out): Displays the keypad/keyboard menu to sign in or returns to the sign-out status.
YouTube menu
Stops the video and displays related videos list.
Pause the video while it is playing.
Play the selected video.
Skip the playback forward or backward.
RED Set the option menu.
Return to Netcast menu.
EXIT
Return to TV viewing.
Using the remote control
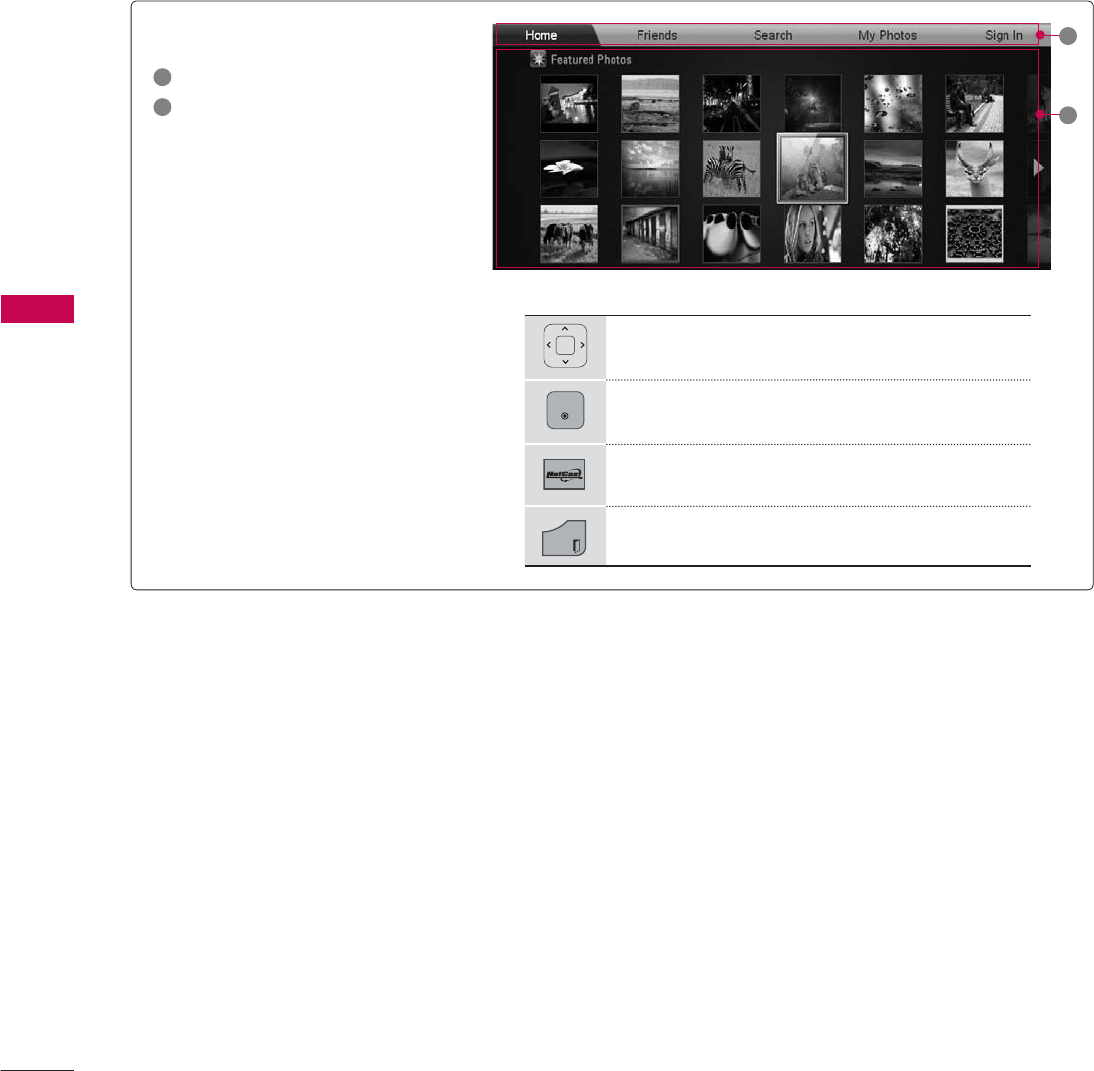
NETCAST
NETCAST
126
PICASA
Picasa is a photo organizing or sharing website where users can upload, view, and share photos.
Screen Components
1Picasa menu
2Photo list
1
2
Navigate the desired photos.
ENTER
The selected photo file is displayed.
Return to Netcast menu.
EXIT
Return to TV viewing.

127
NETCAST
Home: The featured photos list will be displayed.
Friends:
You can register users with the pictures you want as friends. You can add up to 10 friends.
Search: The keypad/keyboard menu will be displayed.
My Photos:
You can view the pictures uploaded to the Web. This function can only be used when you sign
in.
Sign in (Sign Out): Displays the keypad/keyboard menu to sign in or returns to the sign-out status.
Picasa menu
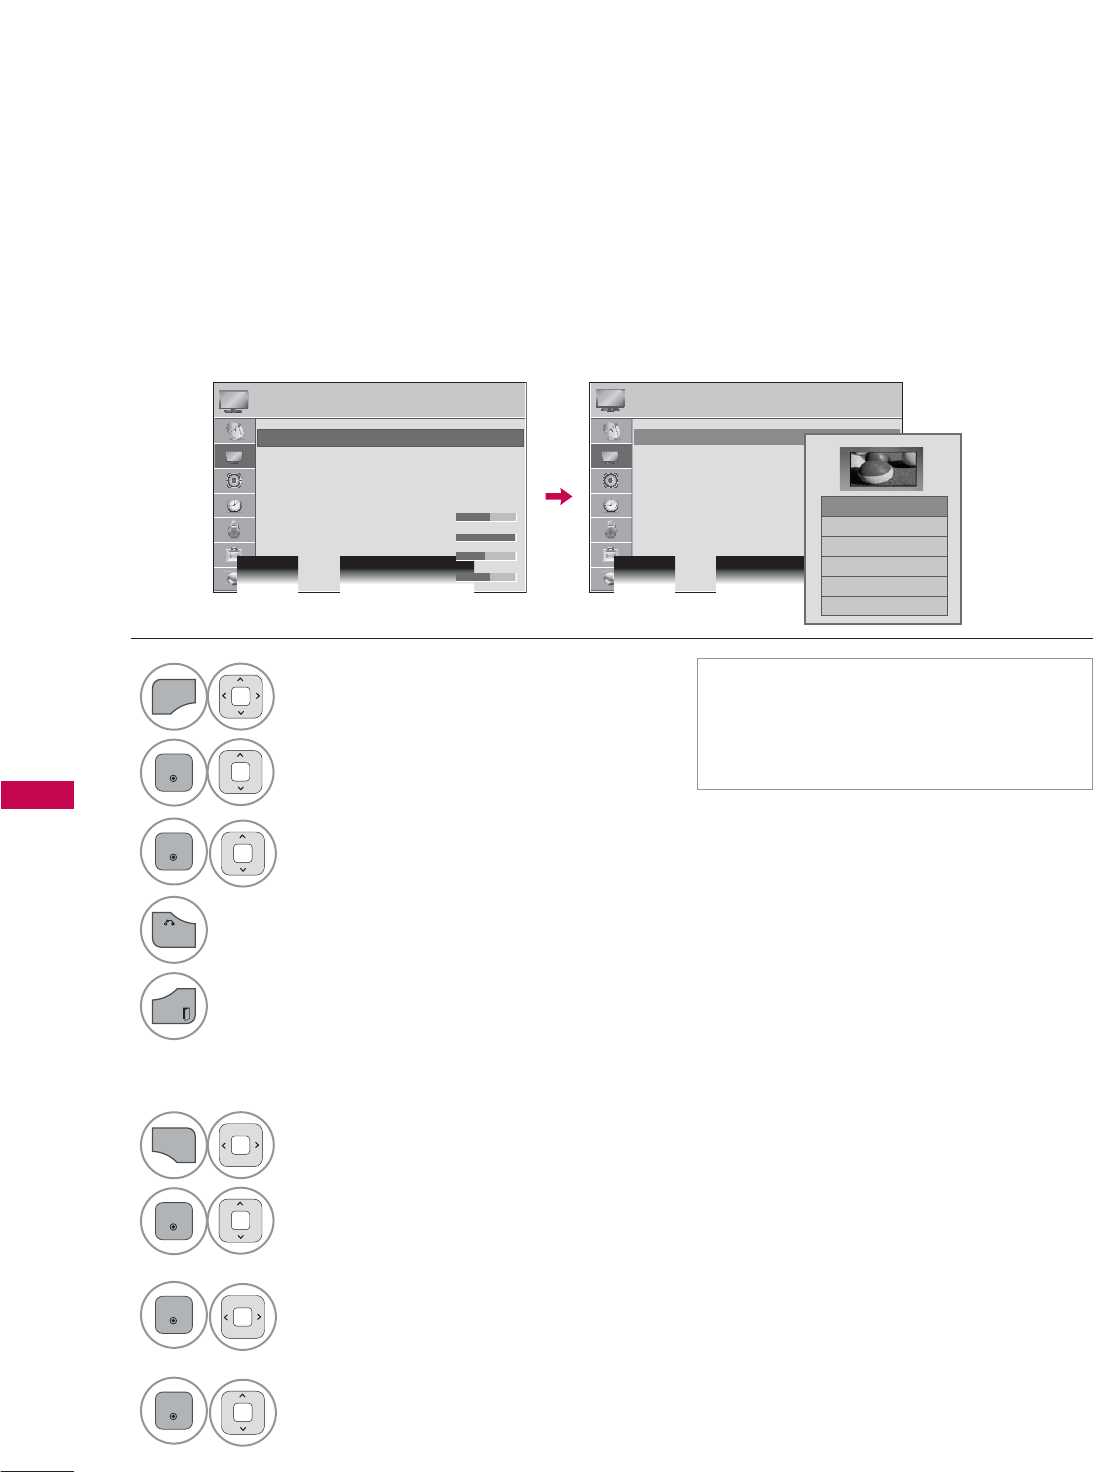
PICTURE CONTROL
PICTURE CONTROL
128
PICTURE SIZE (ASPECT RATIO) CONTROL
PICTURE CONTROL
This feature lets you choose the way an analog picture with a 4:3 aspect ratio is displayed on your TV.
You can select a different aspect ratio depending on input source (analog broadcasting, digital broad-
casting, aux).
1
MENU
Select PICTURE.
2
ENTER
Select Aspect Ratio.
3
ENTER
Select the desired picture format.
4
BACK
Return to the previous menu.
EXIT
Return to TV viewing.
ᯫ
You can also adjust Aspect Ratio in
the Q.MENU.
ᯫ
Press the RATIO button repeatedly to
select the desired picture format.
PICTURE PICTURE
ᯒ0RYHᯙ(QWHU ᯒ0RYHᯙ(QWHU
ؒ $VSHFW5DWLR
ؒ 3LFWXUH:L]DUG
ؒ ᰚ(QHUJ\6DYLQJ 2II
ؒ 3LFWXUH0RGH 6WDQGDUG
ؒ%DFNOLJKW
ؒ&RQWUDVW
ؒ%ULJKWQHVV
ؒ6KDUSQHVV
ؒ $VSHFW5DWLR
ؒ 3LFWXUH:L]DUG
ؒ ᰚ(QHUJ\6DYLQJ 2II
ؒ 3LFWXUH0RGH 6WDQGDUG
ؒ%DFNOLJKW
ؒ&RQWUDVW
ؒ%ULJKWQHVV
ؒ6KDUSQHVV
ᯱ
ᯙ
1
Q.MENU
Select Aspect Ratio.
2
ENTER
Select Zoom or Cinema
Zoom.
3
ENTER
Adjust proportion of Zoom or
Cinema Zoom. The Cinema
Zoom adjustment range is
1-16.
4
ENTER
Move the image on the screen.
ᯡ
۳-XVW6FDQ
۳6HW%\3URJUDP
۳
۳=RRP
۳&LQHPD=RRP
When adjusting Zoom or Cinema Zoom in Q.MENU
ᯱ
ᯙ
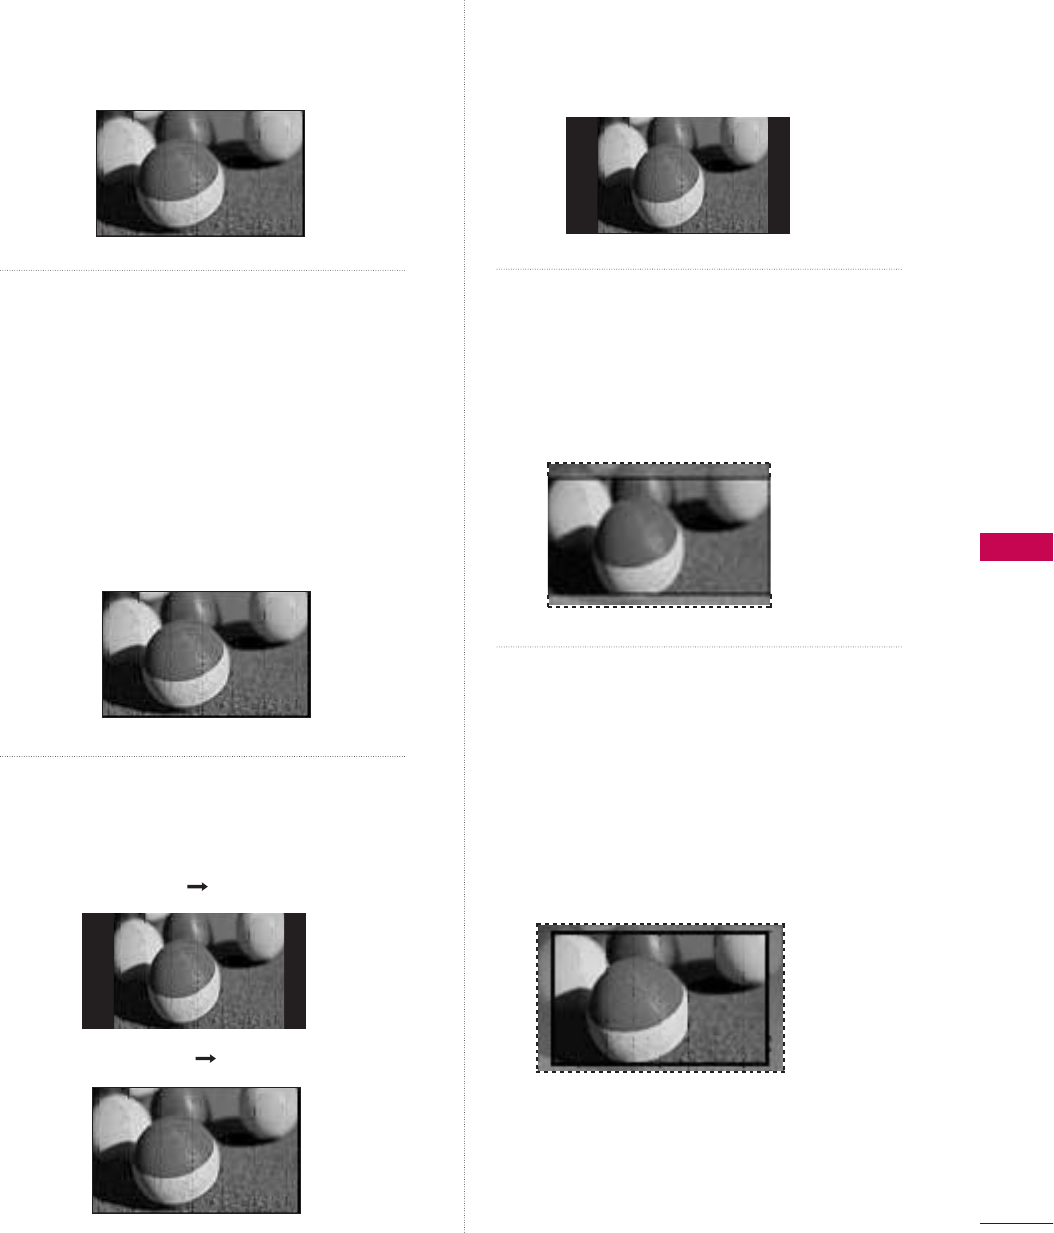
PICTURE CONTROL
129
16:9
Adjust the picture horizontally, in a linear
proportion to fill the entire screen.
Just Scan
Normally the edges of video signals are
cropped 1-2%. Just Scan turns off this
cropping and shows the complete video.
Notes: If there is noise on the edges of the
original signal, it will be visible when Just Scan
is activated.
Just Scan operates only in DTV/Cable DTV/
Component/HDMI-DTV/DVI-DTV
(720p/1080i/1080p) input source.
Set By Program
Selects the proper picture proportion to
match the source’s image.
4:3
Choose 4:3 when you want to view a picture
with an original 4:3 aspect ratio.
Zoom
Choose Zoom when you want to view the
picture without any alteration. However, the
top and bottom portions of the picture will
be cropped.
Cinema Zoom
Choose Cinema Zoom when you want to
enlarge the picture in correct proportion.
This enlarges an image with cinemascope
aspect ratio (2.35:1) without distortion.
Note: When enlarging or reducing the pic-
ture, the image may become distorted.
-XVW6FDQ
(4:3 4:3)
(16:9 16:9)
6HW%\3URJUDP
6HW%\3URJUDP
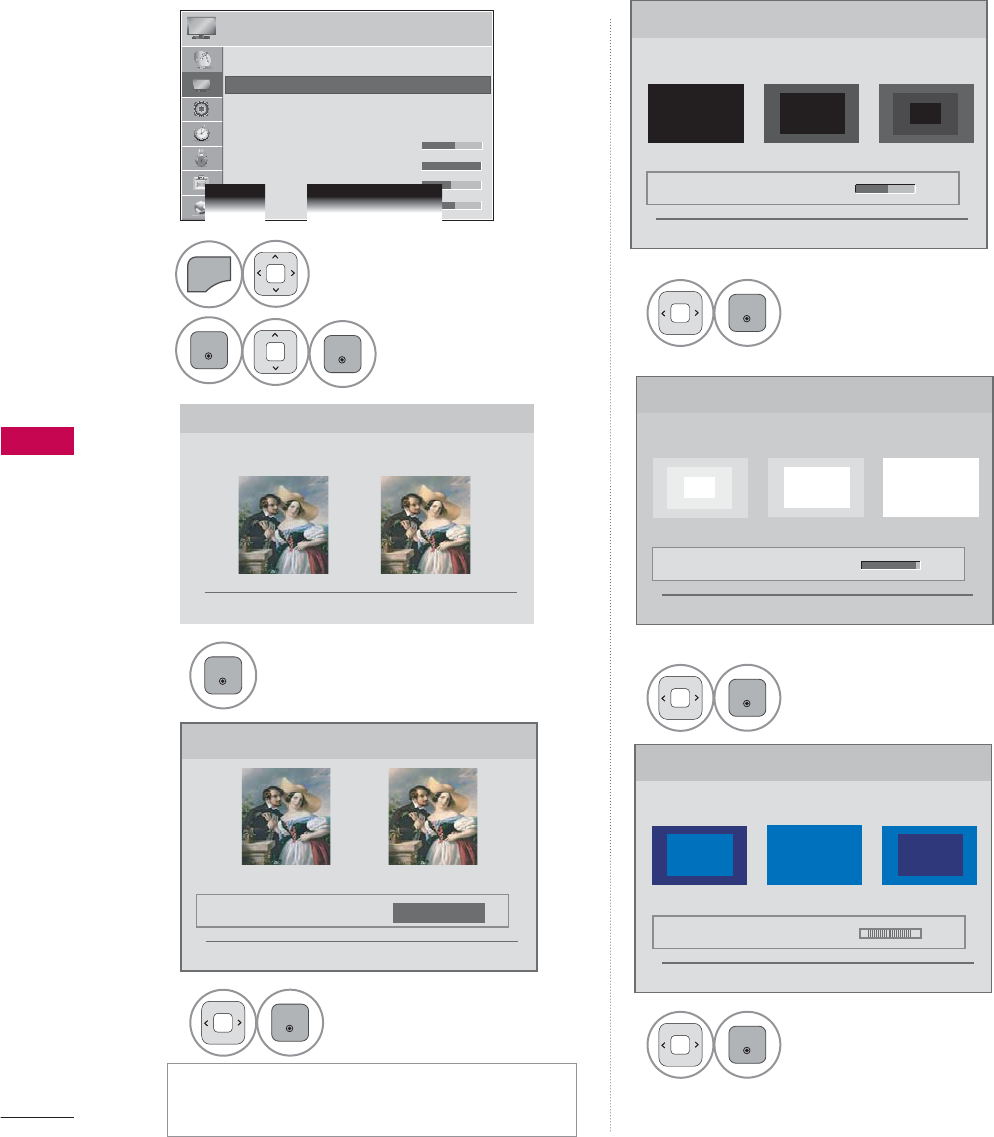
PICTURE CONTROL
PICTURE CONTROL
130
PICTURE WIZARD
3LFWXUH:L]DUG
:LWK3LFWXUH:L]DUG\RXFDQDGMXVWWKHSLFWXUHTXDOLW\RIWKH
RULJLQDOLPDJH
ᰦ
This feature lets you adjust the picture quality of the original image. Use this to calibrate the screen
quality by adjusting the Black and White Level etc. You can calibrate the screen quality by easily follow-
ing each step. When you adjust the image to Low,Recommended or High, you can see the example of
the changes you made.
1
MENU
Select PICTURE.
2
ENTER
ENTER
Select Picture
Wizard.
3
ENTER
Adjust Picture Wizard.
4
ENTER
Adjust Standard/
Preferred.
5
ENTER
Adjust Black Level.
6
ENTER
Adjust White Level.
7
ENTER
Adjust Tint.
ᯫ
If you select Preferred, OSD (On Screen
Display) differ from that shown in this manual.
PICTURE ᯒ0RYHᯙ(QWHU
ᰙ3UHYLRXV ᯙ1H[W
%ODFN/HYHO
6HWWKHVFUHHQDERYHLGHQWLFDOWRWKH5HFRPPHQGHGVDPSOH
EHORZ
ؒ%ULJKWQHVV
/RZ +LJK5HFRPPHQGHG
ᰙ3UHYLRXV ᯙ1H[W
܁۽
:KLWH/HYHO
6HWWKHVFUHHQDERYHLGHQWLFDOWRWKH5HFRPPHQGHGVDPSOH
EHORZ
ؒ&RQWUDVW
/RZ +LJK5HFRPPHQGHG
ᰙ3UHYLRXV ᯙ1H[W
܁۽
ؒ6WDQGDUG3UHIHUUHG
ᰙ3UHYLRXV ᯙ1H[W
6WDQGDUG 3UHIHUUHG
3LFWXUH:L]DUG
܁6WDQGDUG۽
7LQW
6HWWKHVFUHHQDERYHLGHQWLFDOWRWKH5HFRPPHQGHGVDPSOH
EHORZ
/RZ +LJK5HFRPPHQGHG
ؒ7LQW
ᰙ3UHYLRXV ᯙ1H[W
܁۽
RG
ᯐ
ᯙ
ؒ $VSHFW5DWLR
ؒ 3LFWXUH:L]DUG
ؒ ᰚ(QHUJ\6DYLQJ 2II
ؒ 3LFWXUH0RGH 6WDQGDUG
ؒ%DFNOLJKW
ؒ&RQWUDVW
ؒ%ULJKWQHVV
ؒ6KDUSQHVV