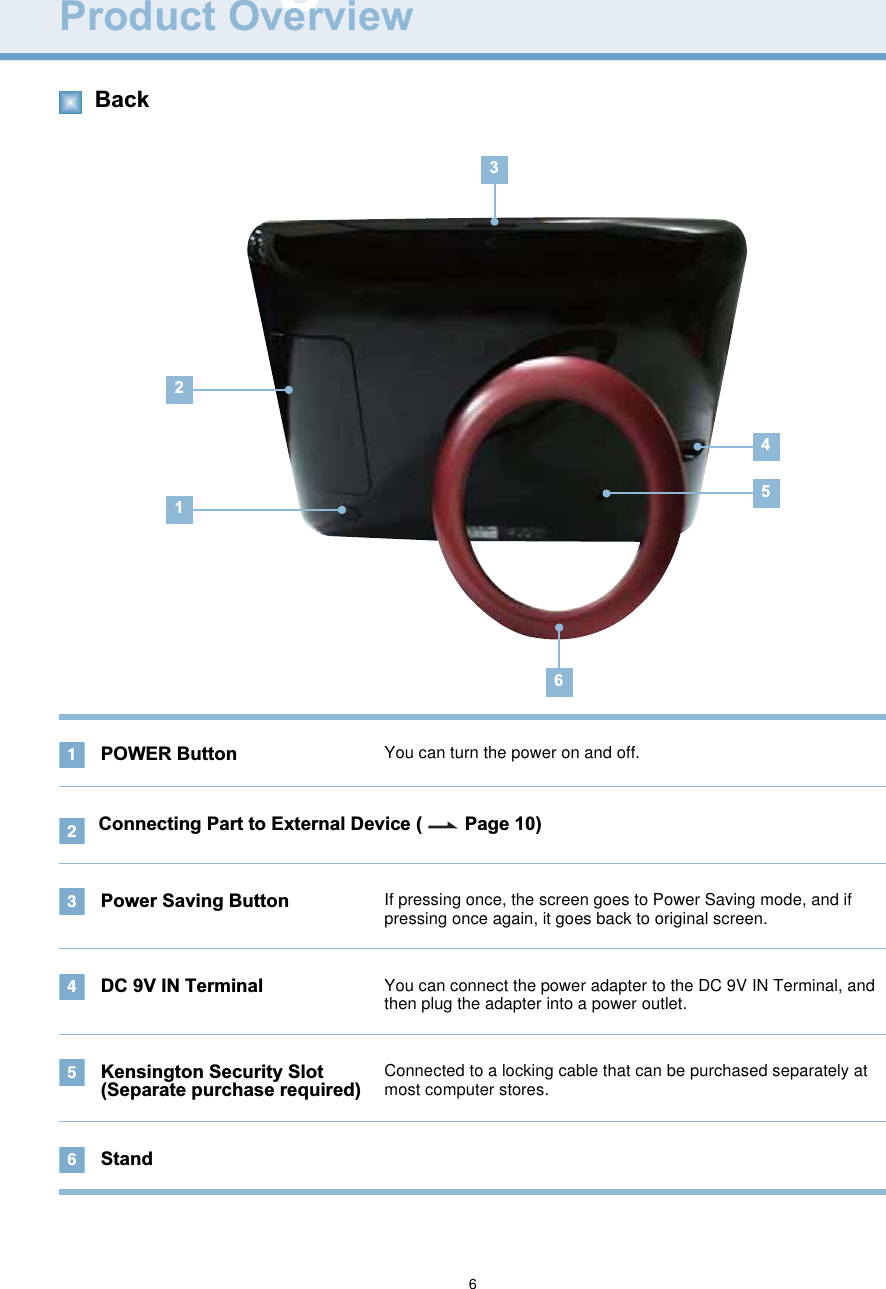
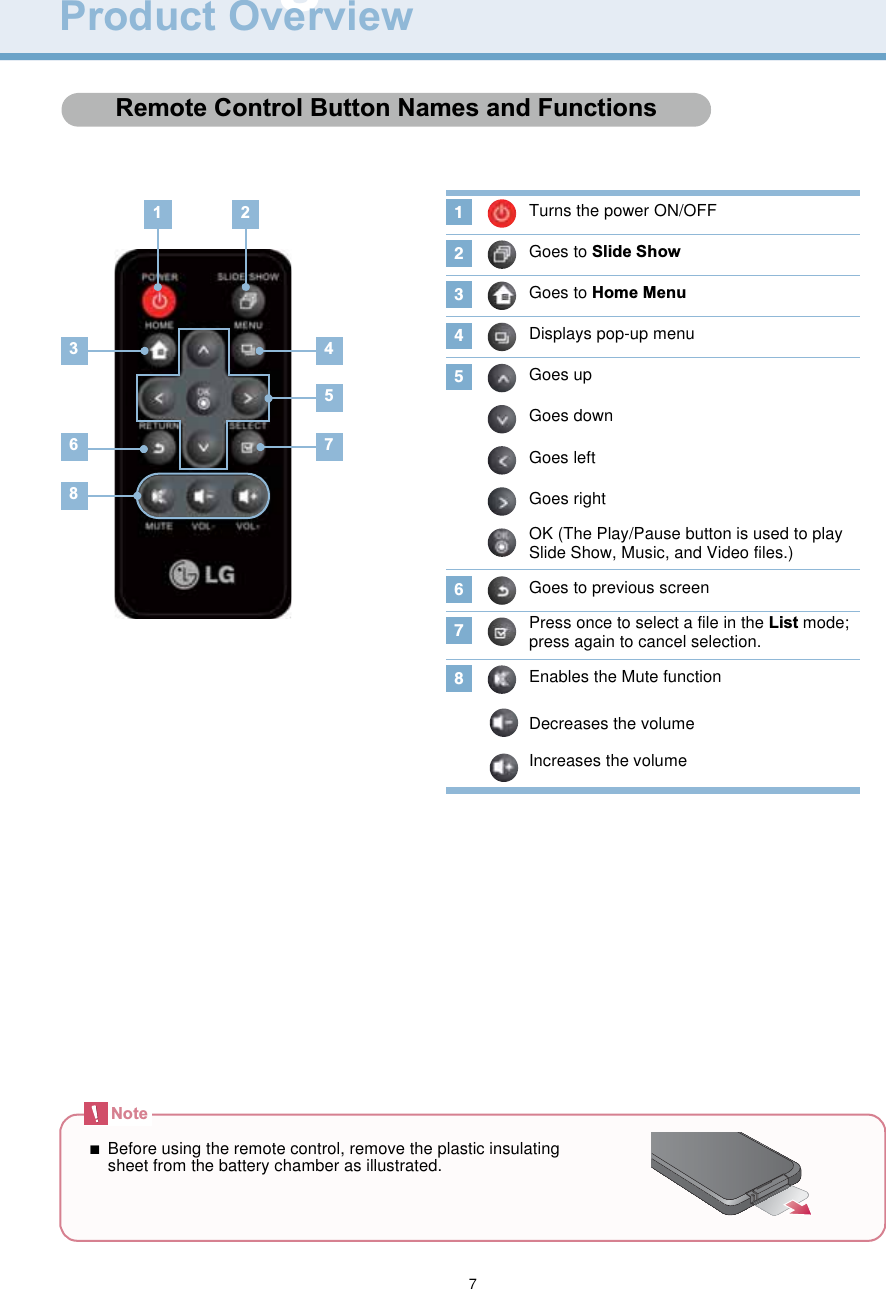
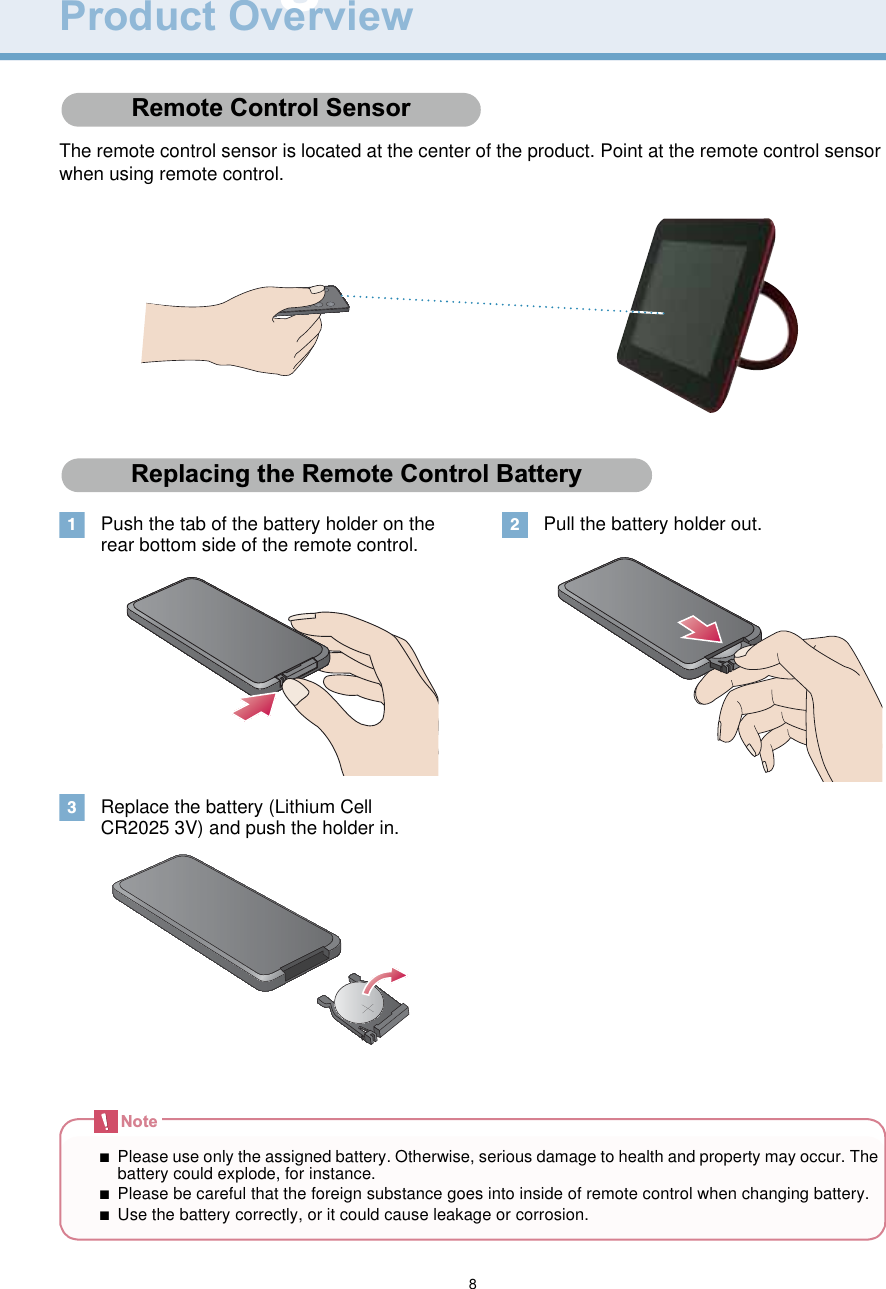
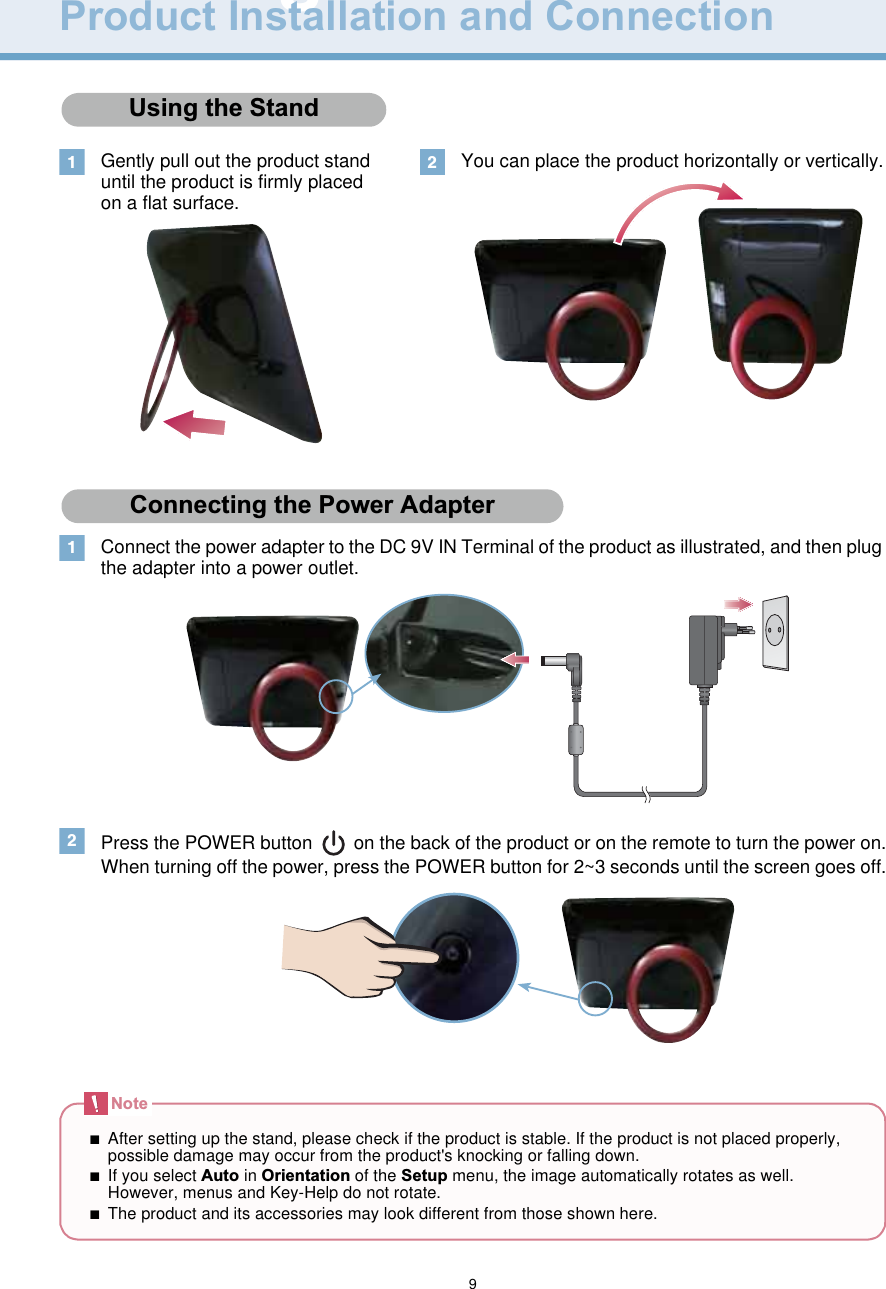
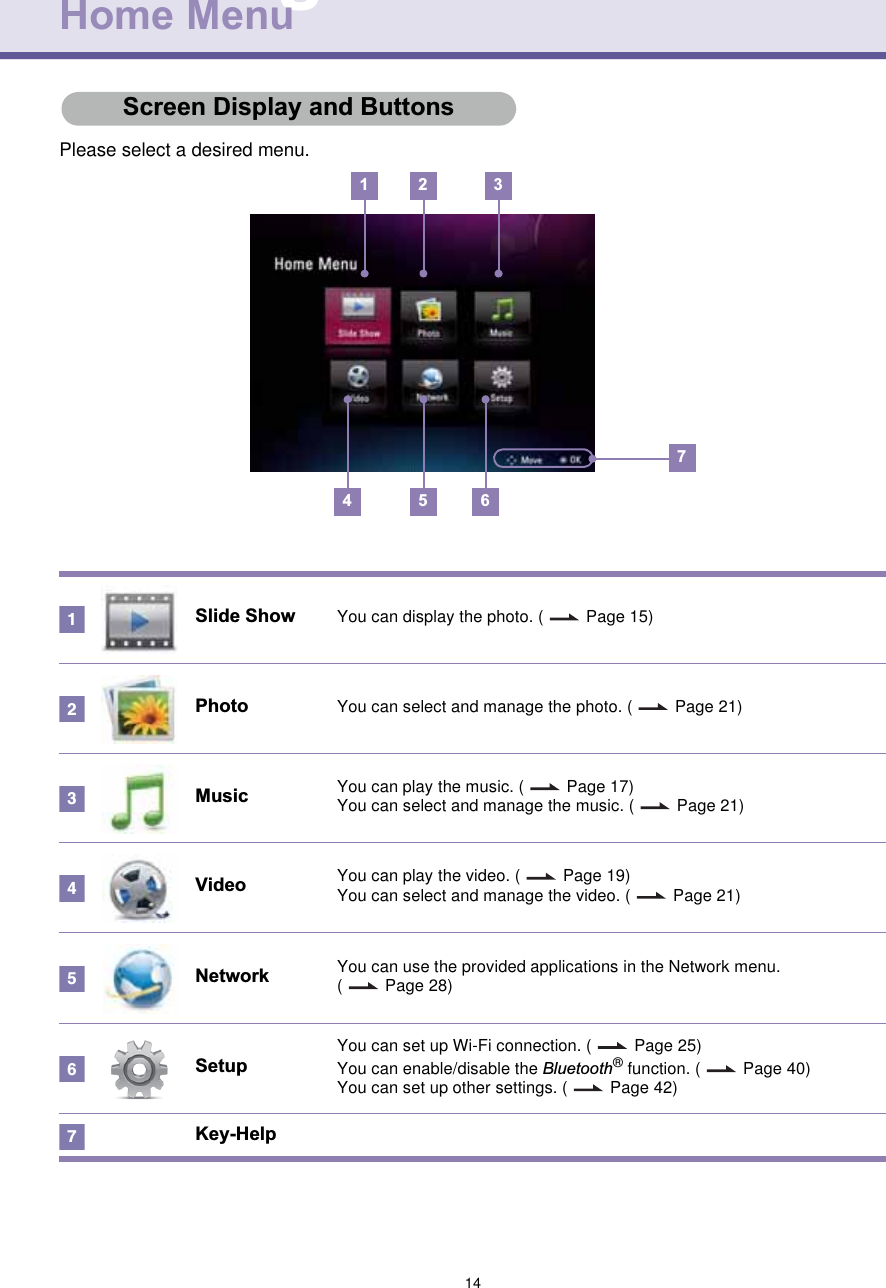
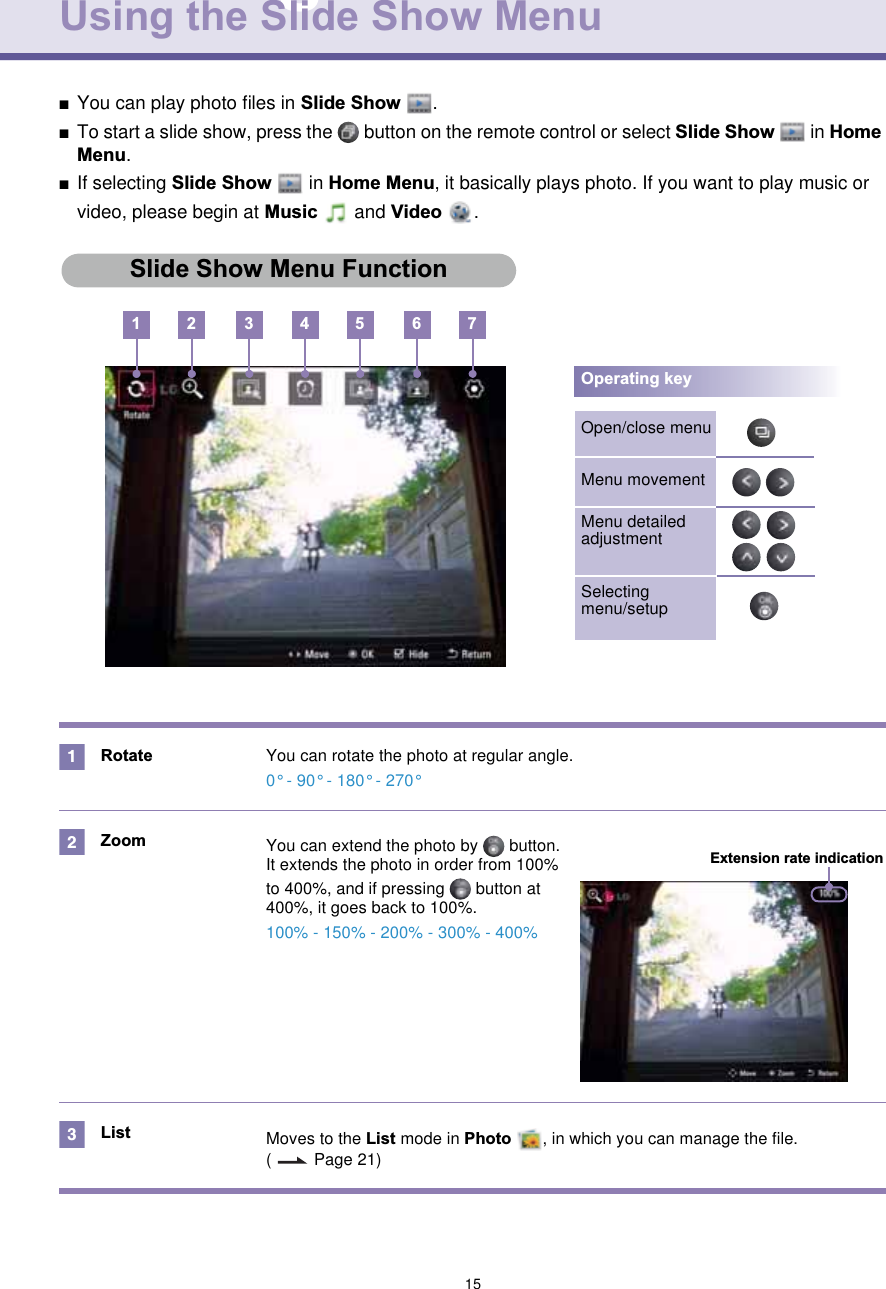
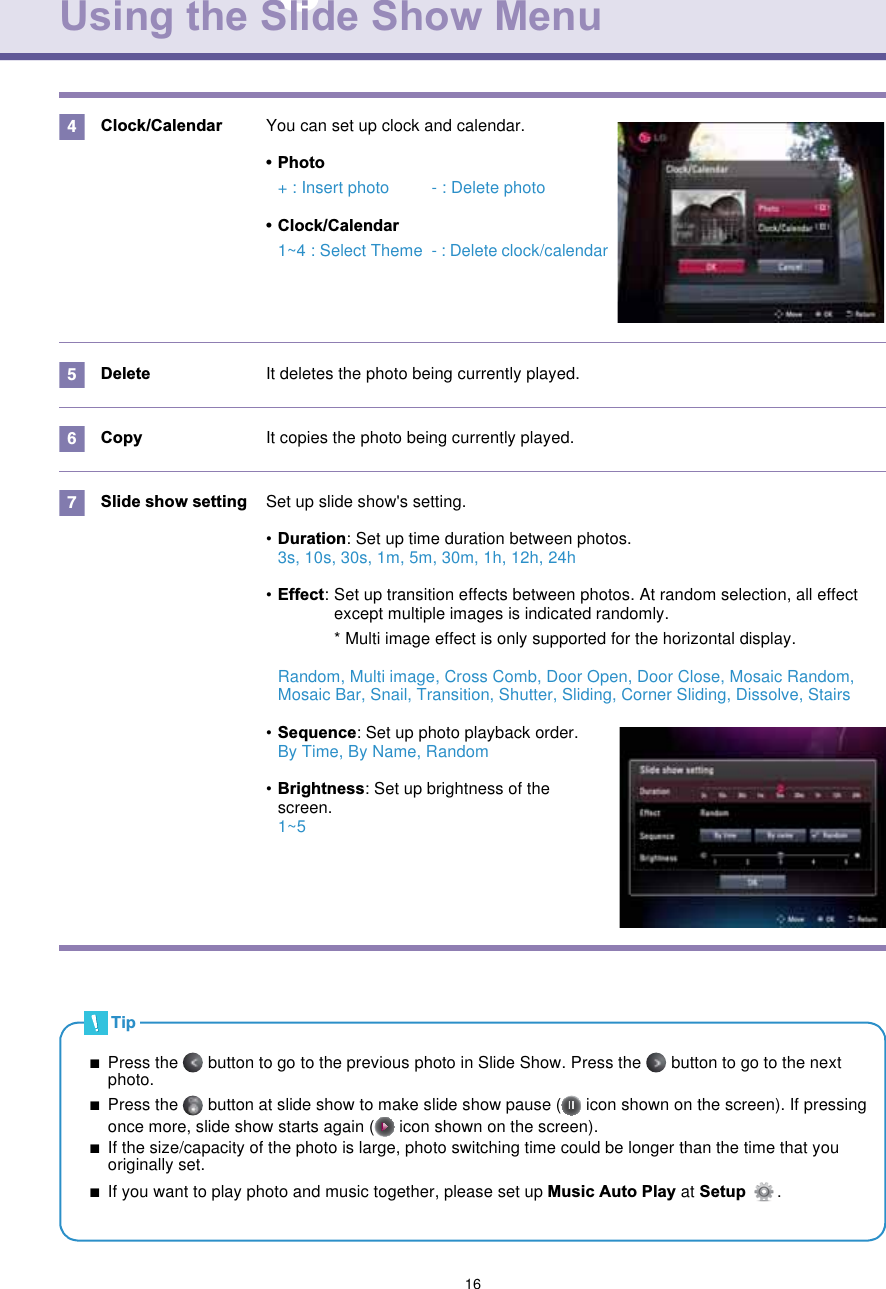
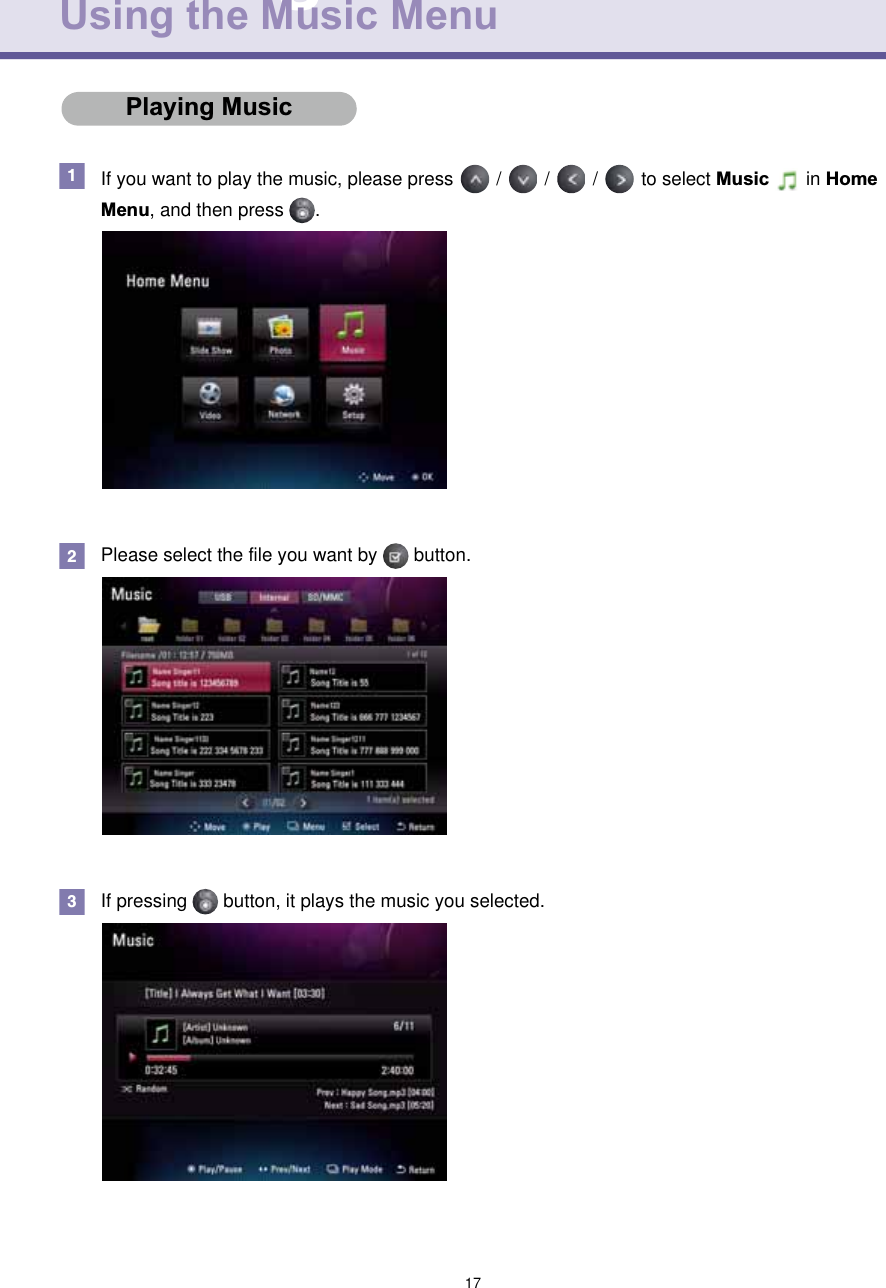
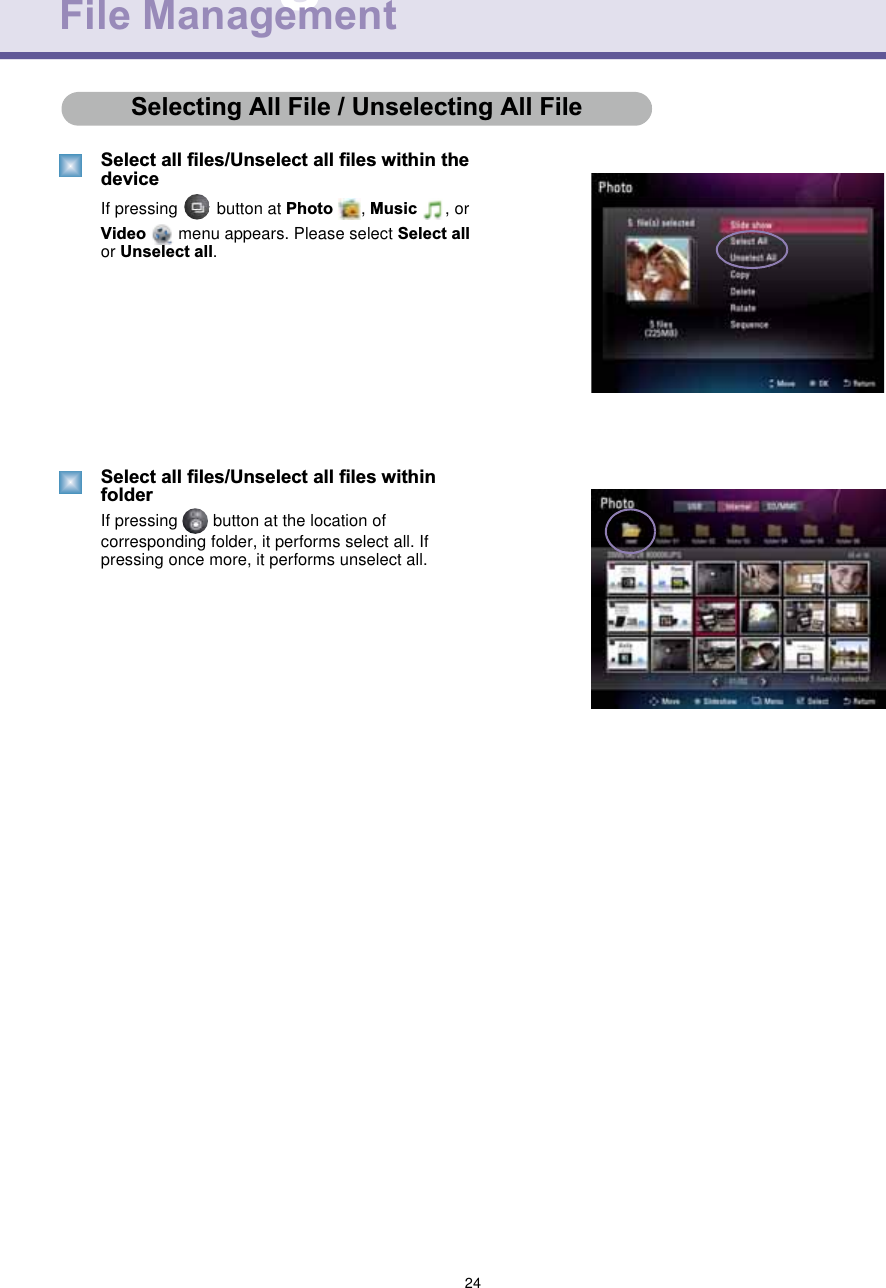
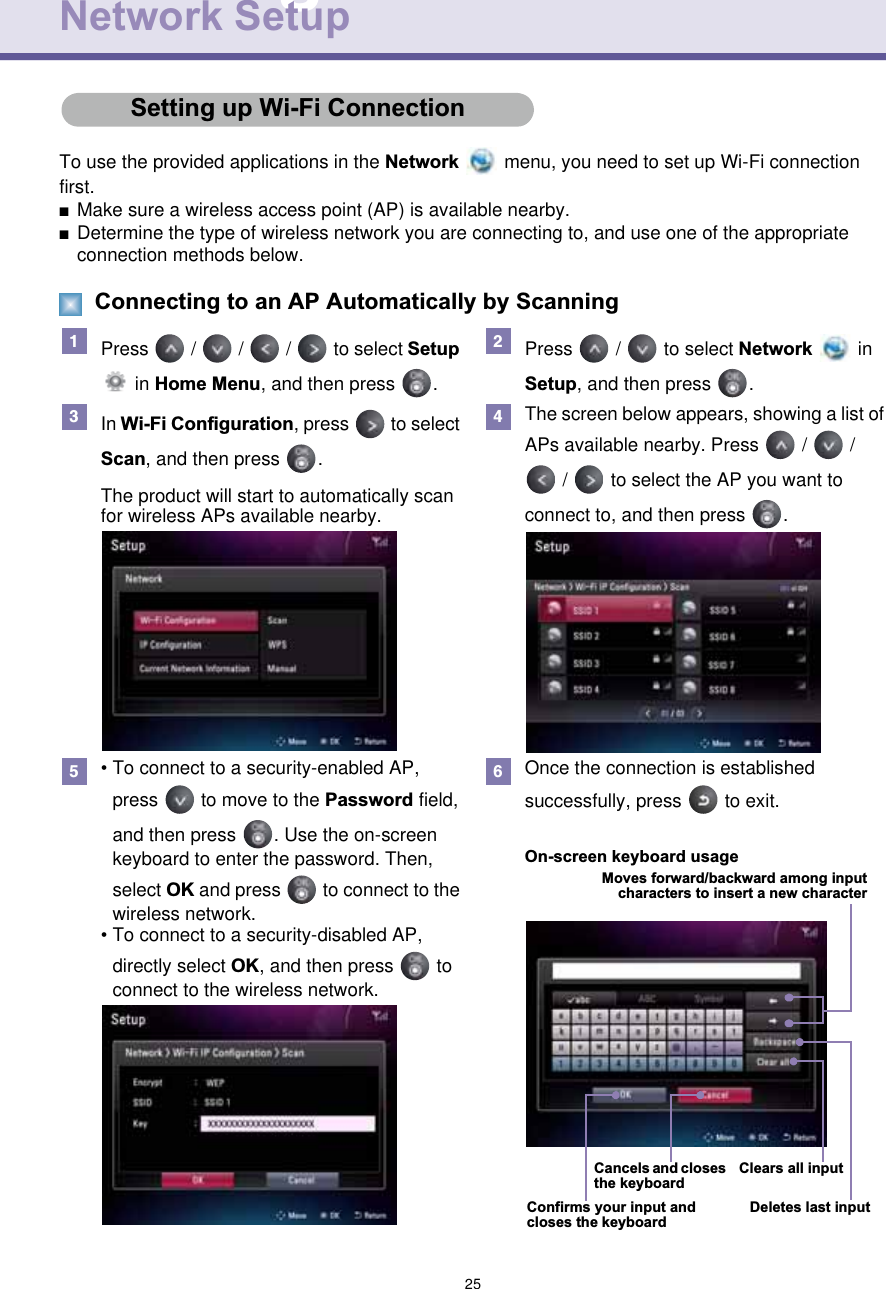
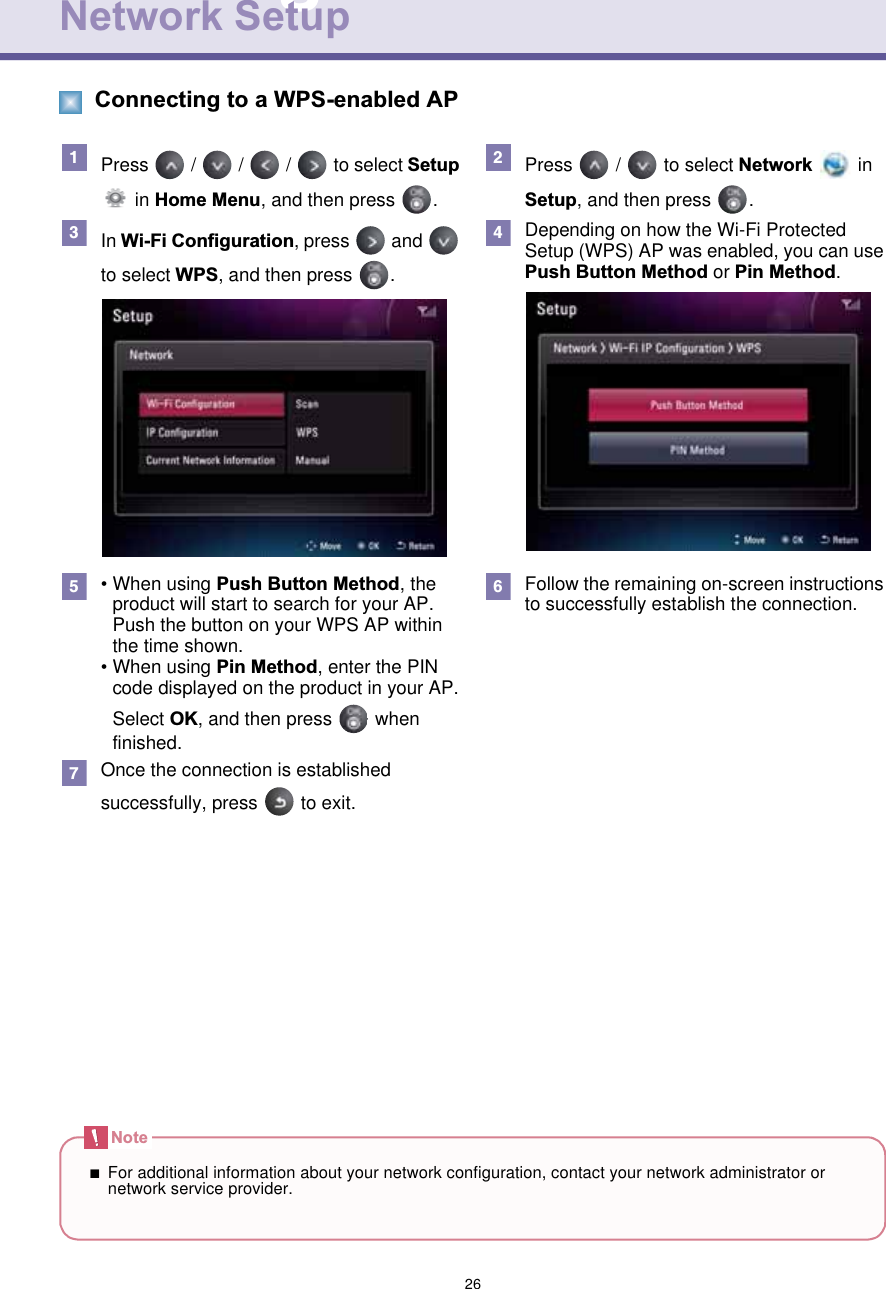
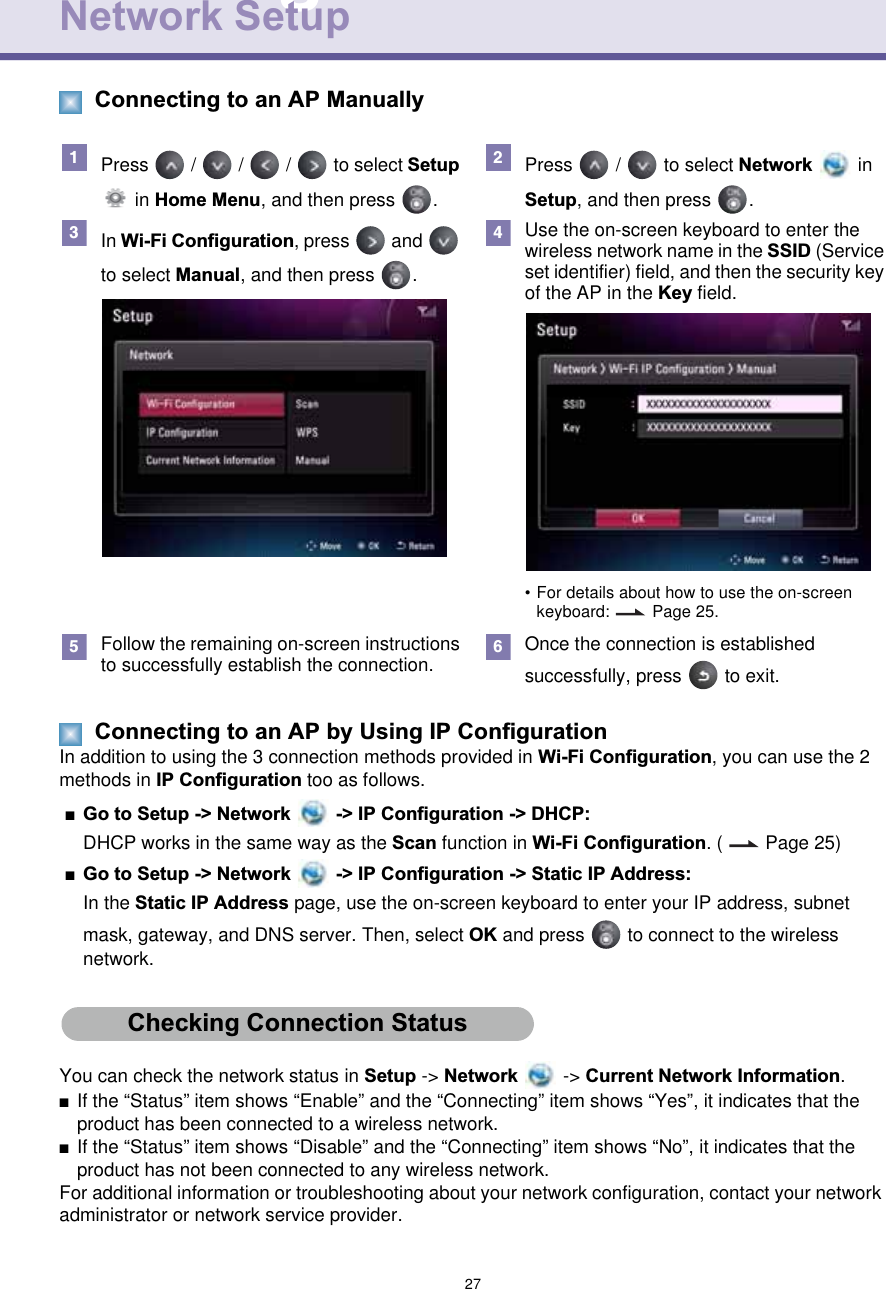
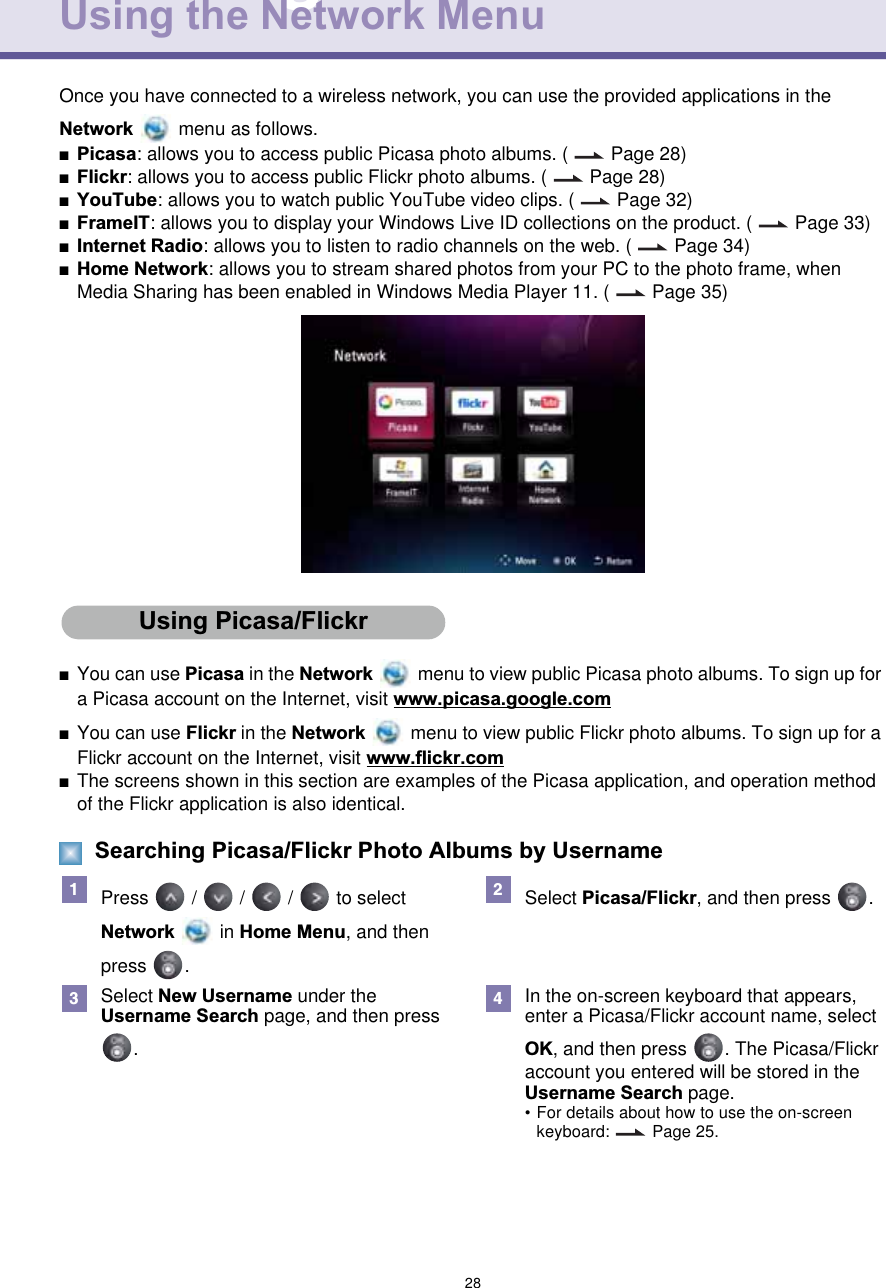
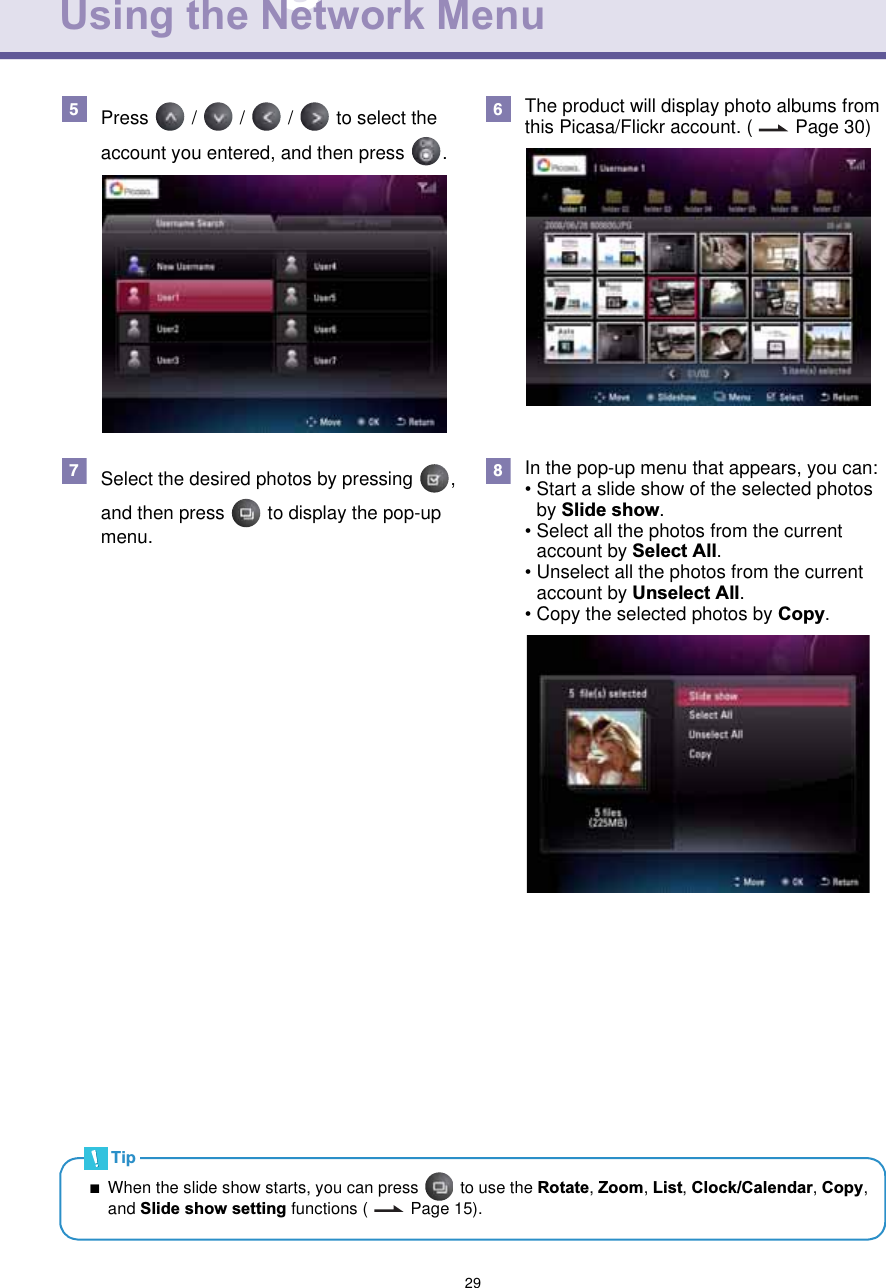
LG Electronics USA 9QK-F8010P DIGITAL PHOTO FRAME User Manual
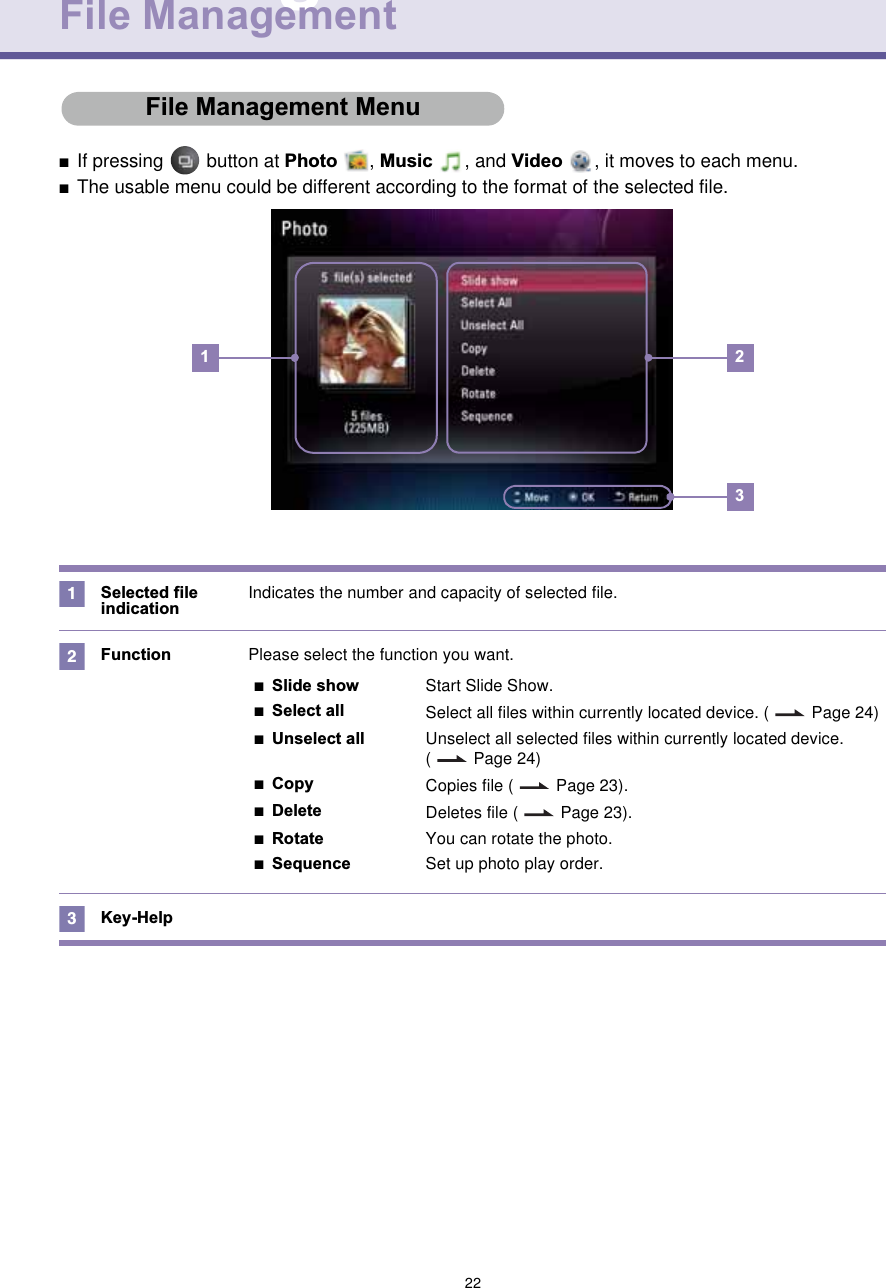
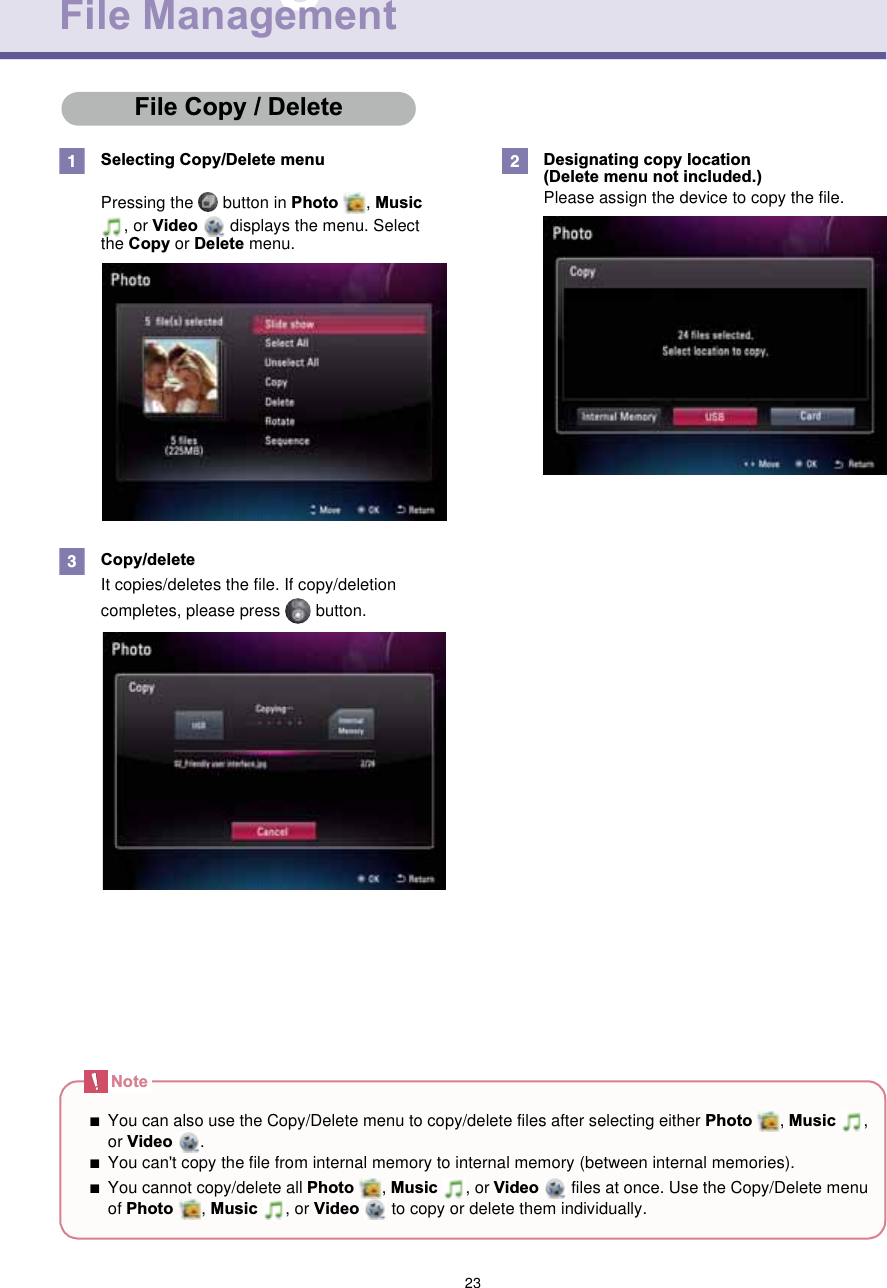
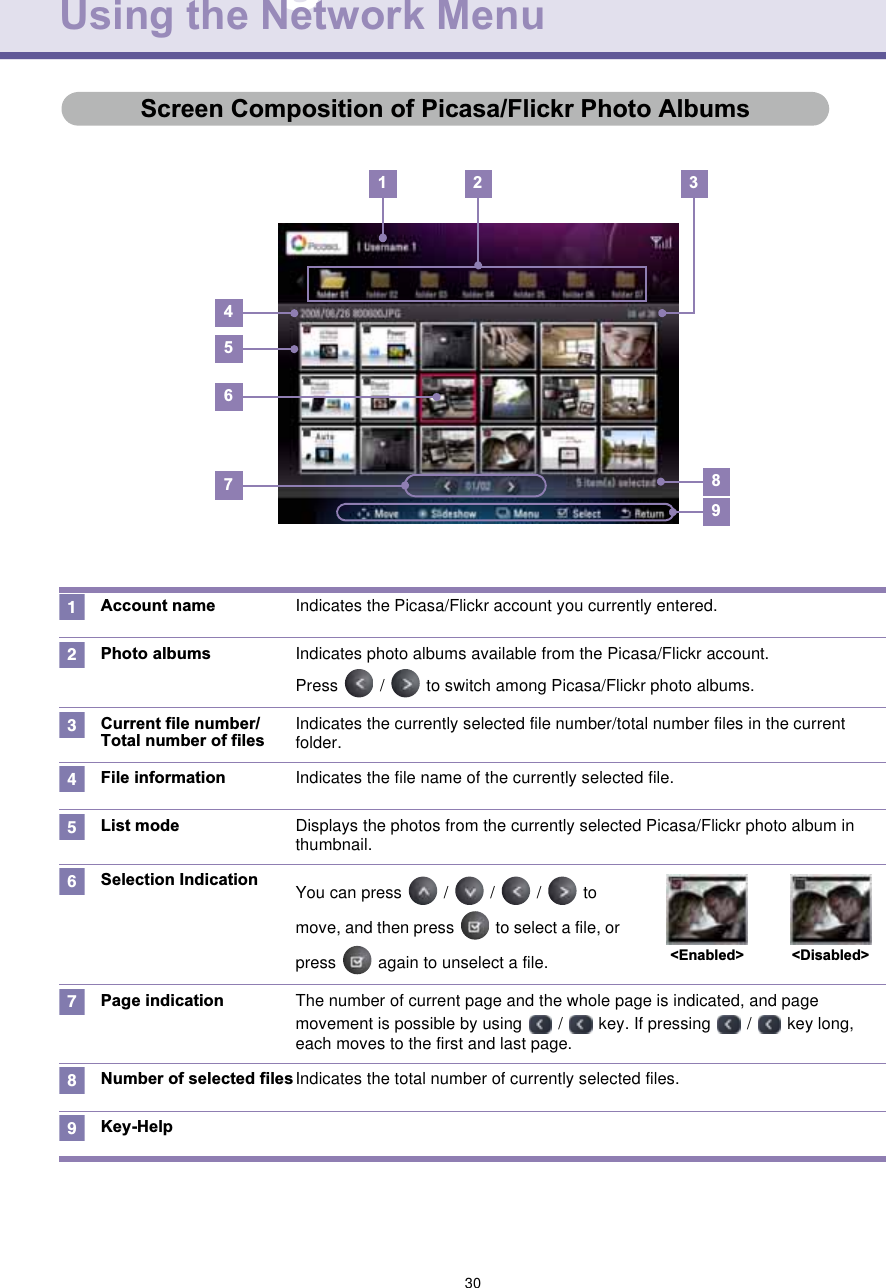
LG Electronics USA DIGITAL PHOTO FRAME
UserManual.wiki
>
LG Electronics USA
>
9QK F8010P User Manual
Users Manual
Navigation menu
Upload a User Manual
Namespaces
Wiki Guide
HTML
PDF
Info
Views
User Manual
Discussion / Help
Navigation

![3Federal Communication Commission Interference StatementThis equipment has been tested and found to comply with the limits for a Class B digital device, pursuant to Part 15 of the FCC Rules. These limits are designed to provide reasonable protection against harmful interference in a residential installation. This equipment generates, uses and can radiate radio frequency energy and, if not installed and used in accordance with the instructions, may cause harmful interference to radio communications. However, there is no guarantee that interference will not occur in a particular installation. If this equipment does cause harmful interference to radio or television reception, which can be determined by turning the equipment off and on, the user is encouraged to try to correct the interference by one of the following measures:■Reorient or relocate the receiving antenna.■Increase the separation between the equipment and receiver.■Connect the equipment into an outlet on a circuit different from that to which the receiver is connected.■Consult the dealer or an experienced radio/TV technician for help.IMPORTANT NOTE:FCC Radiation Exposure Statement:This equipment complies with FCC radiation exposure limits set forth for an uncontrolled environment. This equipment should be installed and operated with minimum distance 20cm between the radiator & your body.For product available in the USA/Canada market, only channel 1~11 can be operated. Selection of other channels is not possible.FCC Caution:Any changes or modifications not expressly approved by the party responsible for compliance could void the user's authority to operate this equipment. This device complies with Part 15 of the FCC Rules. Operation is subject to the following two conditions: (1) This device may not cause harmful interference, and (2) this device must accept any interference received, including interference that may cause undesired operation. This device and its antenna(s) must not be co-located or operating in conjunction with any other antenna or transmitter.IC Radiation Exposure Statement:This equipment complies with IC RSS-102 radiation exposure limits set forth for an uncontrolled environment. This equipment should be installed and operated with minimum distance 20 cm between the radiator & your body. This Class [B] digital apparatus complies with Canadian ICES-003.Cet appareil numérique de la classe [B] est conforme à la norme NMB-003 du Canada](https://usermanual.wiki/LG-Electronics-USA/9QK-F8010P/User-Guide-1222655-Page-5.png)

![37Windows Media Player 11 - Media SharingIn the [Library] menu, select [Add to Library]. On the [Add to Library] window, select [My folders and those of others that I can access]. Select a folder in the monitored folder list to share with the photo frame. If no searched folder is desired, click the [Add] button to add a folder and then press the [OK] button.Note■For Windows Media Player 11 download, please refer tohttp://www.microsoft.com/windows/windowsmedia/player/11/default.aspx1 2](https://usermanual.wiki/LG-Electronics-USA/9QK-F8010P/User-Guide-1222655-Page-39.png)
![38Windows Media Player 11 - Media SharingIn the [Library] menu, select [Media Sharing]. On the [Media Sharing] window, select [Share my media]. If no [Available device] is displayed, proceed to step 5. If displayed, proceed to step 6.Click the [Networking] button and check whether the current network is [Private Network]. If not, set to [Private Network].If [Available device] is displayed, click the [Settings] button.3 45 6](https://usermanual.wiki/LG-Electronics-USA/9QK-F8010P/User-Guide-1222655-Page-40.png)
![39Windows Media Player 11 - Media SharingClick the [Setup] button to display the [Media Sharing - Default Setup] window. To add external devices or a PC to be connected automatically, select [Allow new device and computers automatically]. Select Photo from Media types, select a rating, and click the [OK] button.Select the device (your photo frame) to share, and then press the [OK] button.7 8](https://usermanual.wiki/LG-Electronics-USA/9QK-F8010P/User-Guide-1222655-Page-41.png)
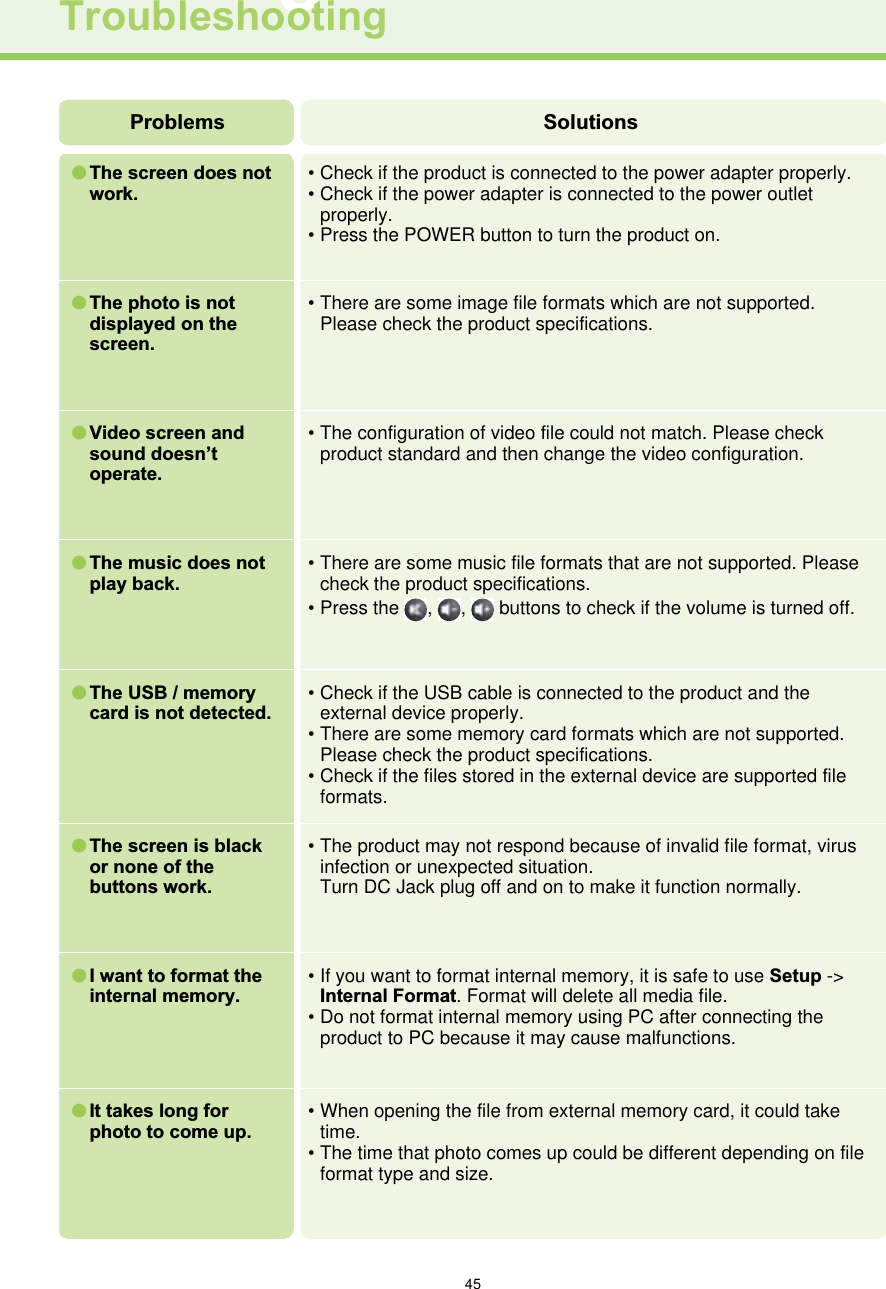
![46Digital Photo FrameTroubleshootingProblems Solutions●The screen ratio is not normal.• Please adjust the aspect ratio of the screen. You can adjust it in the Setup -> Photo Aspect Ratio or Setup -> Video Aspect Ratio.●The screen color is dim or dark.• Please adjust screen brightness. You can adjust at Setup -> Brightness or Slide show setting -> Brightness.●The photo frame cannot connect to Wi-Fi network.• Verify that the access point you are connecting to is active and working properly.• The product only supports 802.11b/g wireless network.• For technical support, contact your network administrator or network service provider.●I cannot connect the digital photo frame to Windows Media Player 11 on the PC.• Check if your computer and photo frame are connected t the same WAP (Wireless Access Point).• Select your photo frame from Library - Media Sharing in Windows Media Player 11, and check if [Allow new device and computers automatically] is selected.●I cannot access Picasa and Flickr.• Check if you have entered a correct Picasa or Flickr user ID.• Check if the Picasa and Flickr sites are currently online, and then see if they deny sharing media with your network.●I cannot receive a file using the Bluetooth®menu.•See if the Bluetooth® icon ( ) is indicated on the upper right side of the Main Menu screen.• Keep the distance between your photo frame and device within 5 meters.●The new name of the digital photo frame is not recognized by other devices• Restart the photo frame, and then use the other device to search for the photo frame.](https://usermanual.wiki/LG-Electronics-USA/9QK-F8010P/User-Guide-1222655-Page-48.png)