LG Electronics USA 9QKE40660 DVD Recorder / Video Cassette Recorder User Manual RC297H M EVNT
LG Electronics USA DVD Recorder / Video Cassette Recorder RC297H M EVNT
UserManual.wiki
>
LG Electronics USA
>
9QKE40660 User Manual
manual
Navigation menu
Upload a User Manual
Namespaces
Wiki Guide
HTML
PDF
Info
Views
User Manual
Discussion / Help
Navigation
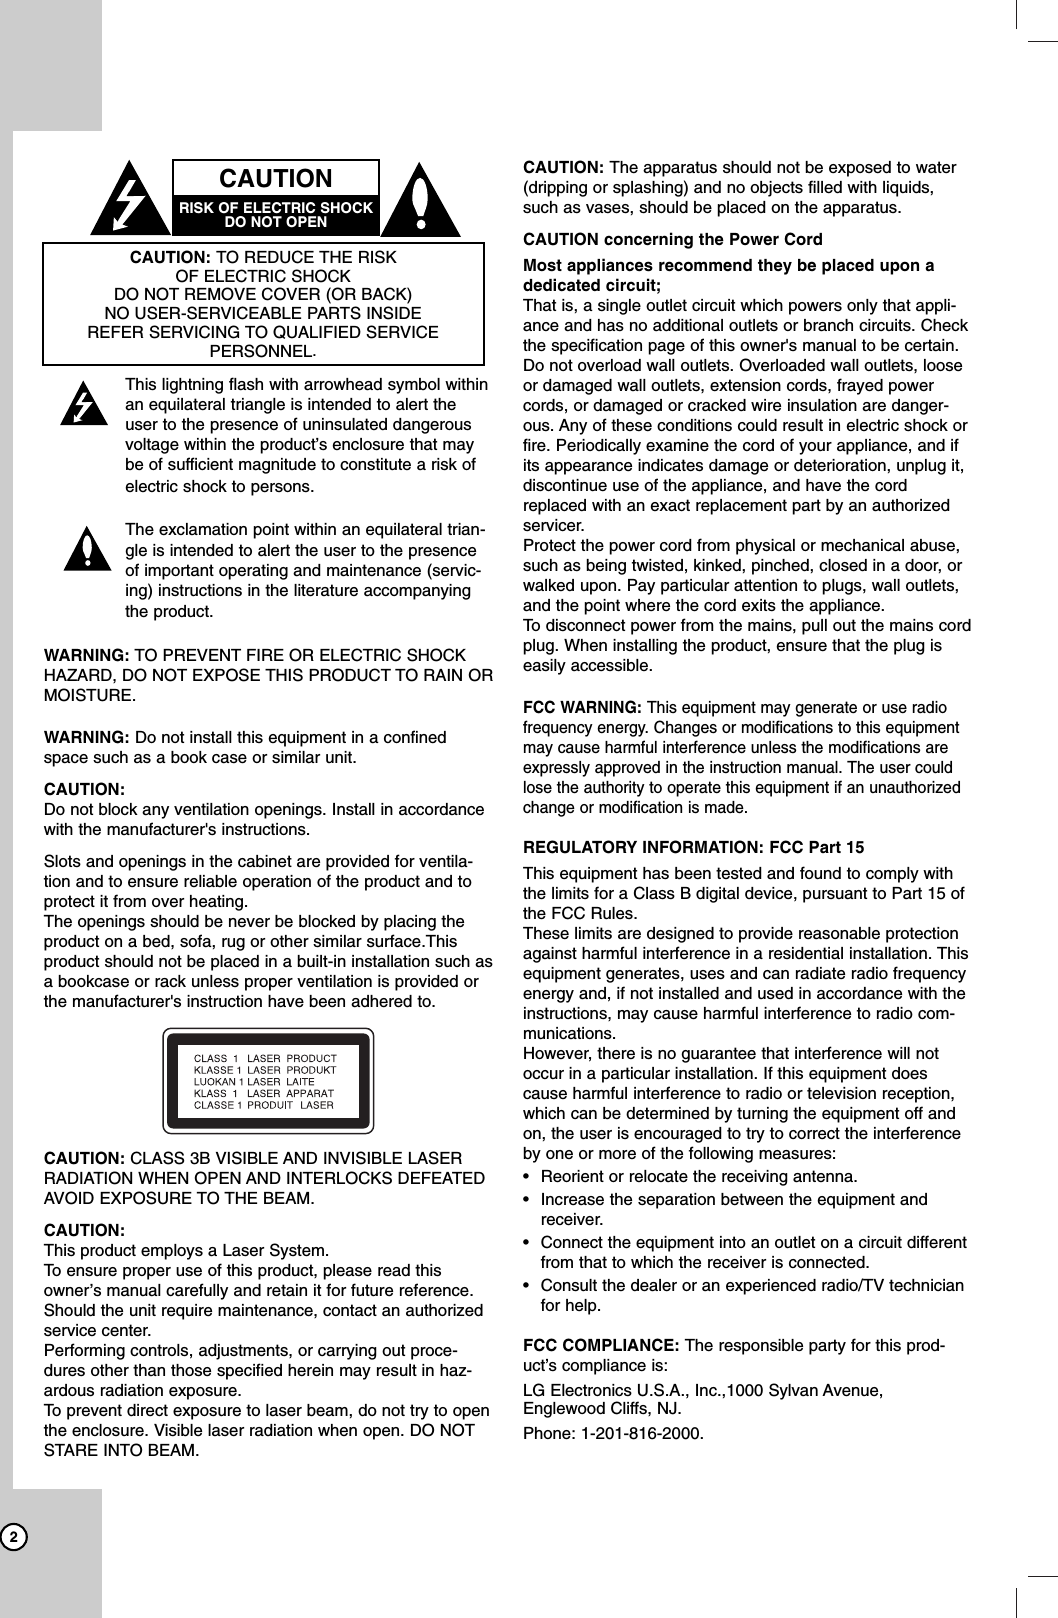
![HOOKUP ANDSETTINGSPLAYBACKRECORDINGEDITTINGREFERENCE6Recordable and Playable DiscsDVD-RW (DVD - ReWritable)DVD-RW discs can be formatted for VR mode recording or Video mode recording.These Discs can be recorded on repeatedly. Recordings can be erased, then you can record again on thesame Disc.[VR mode]Recordings can be extensively editedPlayable only on VR mode compatible players (after finalization)[Video mode]Playable on regular DVD players (after finalization)Limited editing featuresDVD-R (DVD - Recordable)These Discs can be recorded only once. After you finalize a DVD-R, you cannot record on it or edit it.DVD-R discs can be only formatted to Video mode.Playable on regular DVD players (after finalization)Limited editing featuresDVD-RAM (DVD - Random Access Memory)DVD-RAM discs can be formatted for VR mode recording.These Discs can be recorded on repeatedly. Recordings can be erased, then you can record again on thesame Disc.Playable on DVD-RAM compatible players.Recordings can be extensively edited.Only DVD-RAM standard Version 2.0, 2.1 and 2.2 discs can be used in this unit.You cannot use the cartridge-type DVD-RAM disc in this unit.DVD+RW (DVD+ ReWritable) These Discs can be recorded on repeatedly. Recordings can be erased, then you can record again on thesame Disc.Playable on DVD+RW compatible players (automatically finalization)The edited contents are playable on DVD+RW compatible players only after finalization.Recordings can be edited the title/chapterDVD+R (DVD + Recordable)These Discs can be recorded only once. After you finalize a DVD+R, you cannot record on it or edit it anymore.Playable on DVD+R compatible players (after finalization)Any edited contents are not be compatible on DVD+R compatible players. (Hide, chapter combine, addedchapter mark, etc.)Limited title/chapter editing features.DVD+R DL (DVD + Recordable; Double Layer)These Discs can be recorded only once. After you finalize a DVD+R DL, you cannot record on it or edit it anymore.Storage space is nearly doubled with double layer DVD+R media, allowing consumers to record up to 8.5GBof video on a single DVD+R DL disc.Playable on DVD+R compatible players (after finalization)Any edited contents are not be compatible on DVD+R DL compatible players. (Hide, chapter combine, addedchapter mark, etc.)Limited title/chapter editing features.Recommended recordable DVD discsDVD-RMitsubishi (8x, 16x)That’s (8x, 16x)SONY (16x)--DVD+RMitsubishi (8x, 16x)Ricoh (8x, 16x)SONY (16x)--DVD-RWMitsubishi (4x)Verbatim (4x)JVC (4x)Victor (4x)Maxell (4x)DVD+RWMitsubishi (4x)SONY (2.4x)Verbatim (2.4x)Ricoh (2.4X, 4x)-DVD+R DLMitsubishi (2.4x)Maxell (2.4x)---DVD-RAMFujifilm (2x)Mitsubishi (3x)---INTRODUCTION](https://usermanual.wiki/LG-Electronics-USA/9QKE40660/User-Guide-749897-Page-6.png)
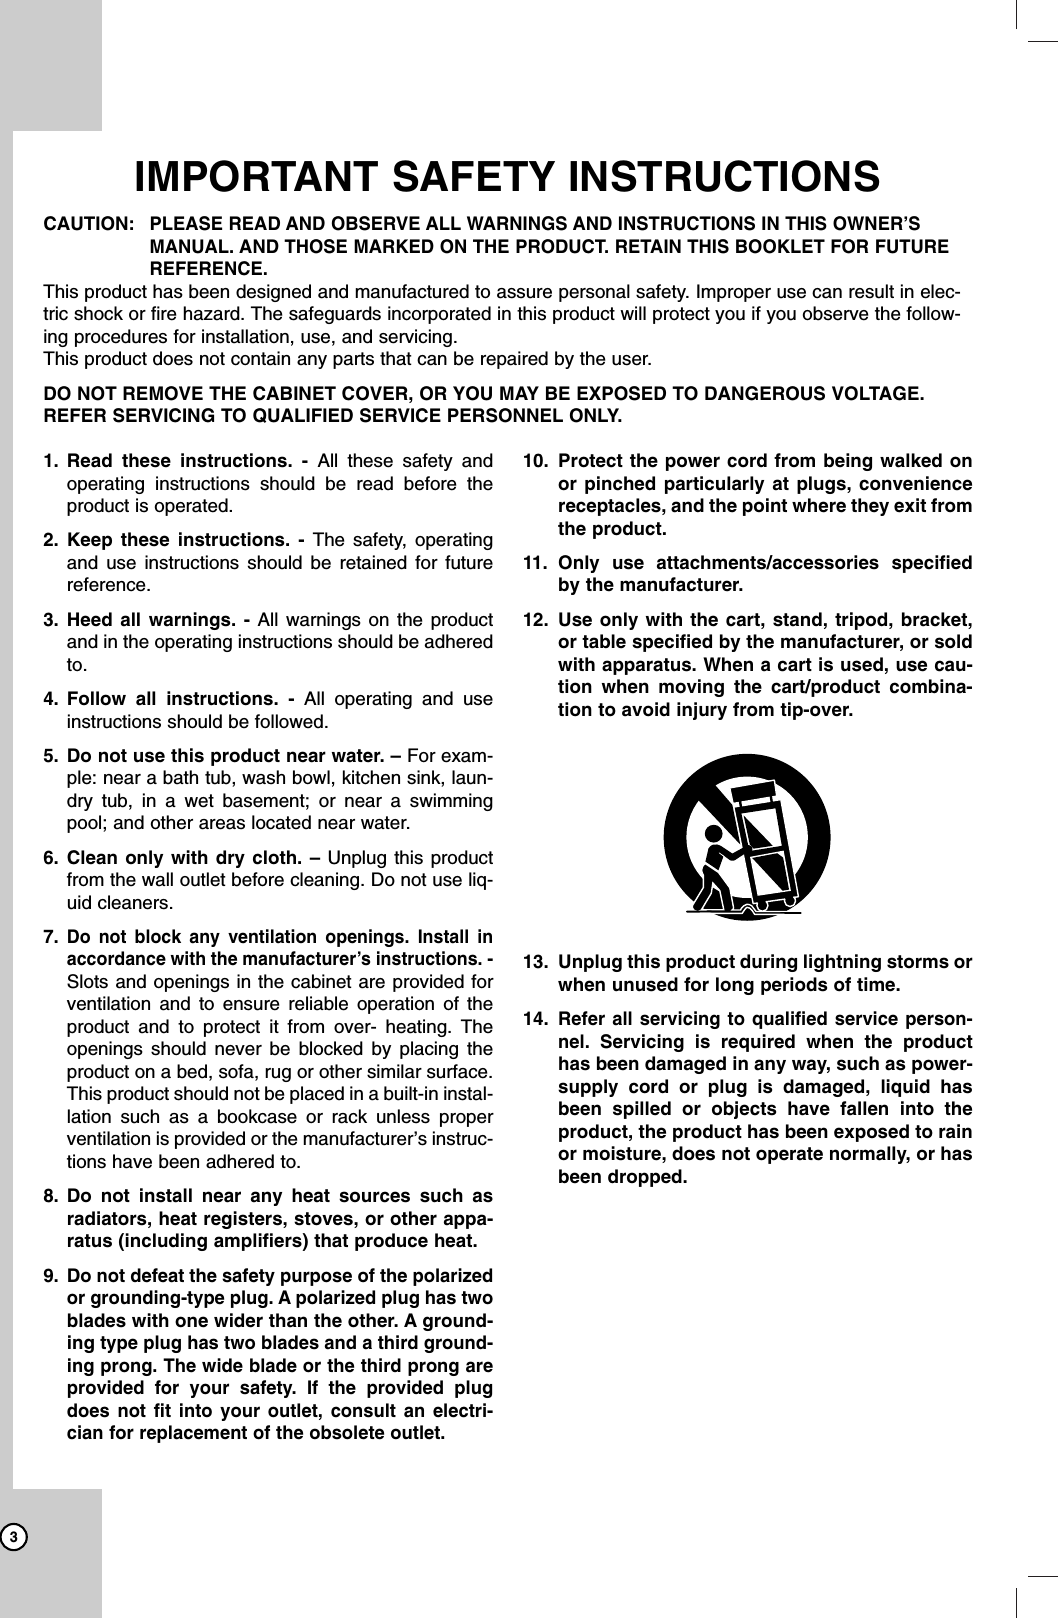
![9Recording time and picture qualityThere are five preset recording quality modes:XP – Highest quality setting, gives about 1 hour of recording time on a DVD (4.7GB).SP – Default quality, sufficient for most applications,gives about 2 hours of recording time on a DVD (4.7GB).LP – Slightly lower video quality, gives about 4hour of recording time on a DVD disc (4.7GB).EP – Lowest video quality, gives about 6 hour ofrecording time on a DVD (4.7GB).You may see a fragmented picture during playingback the contents recorded in EP mode .MLP – The longest recording time with video quali-ty of EP mode, gives you about 11 hours of record-ing time on a DVD (4.7GB).Note:You may see a fragmented picture during playingback the contents recorded in EP or MLP mode.Using an USB Memory StickThis unit can play the MP3 / WMA / JPEG files con-tained in the USB Memory Stick.Inserting/Removing the USB Memory StickInserting the USB Memory StickInsert straight-in until it fits into place.Removing the USB Memory StickWithdraw the USB Memory Stick carefully.Note:Keep the USB Memory Stick out of reach of chil-dren. If swallowed, seek medical advice immediate-ly.This unit supports only USB Flash Memory withFAT16 or FAT36 format.Do not extract the USB Memory Stick in operat-ing (play, move, etc.). Compatible USB Memory Stick1. USB Memory Stick which require additional pro-gram installation when you have connected it to acomputer, are not supported.2. USB Flash Drive: USB Memory Stick that supportUSB1.1.Using the USB Memory Stick1. Insert an USB Memory Stick.2. Press HOME on the remote control.3. Select [MUSIC] or [PHOTO] option.4. Select [USB] then press ENTER.Details for the options are on page 19.5. Press RETURN (O) to exit the MUSIC orPHOTO List menu before extracting the USBMemory Stick.Notes:The USB Memory Stick option in the HOMEmenu is not selectable if the unit is in VCRmode.For details on each operation item, refer to relevantpages.About the Remote ControlOperation RangePoint the Remote Control at the remote sensor andpress the buttons.Distance: About 23 ft (7 m) from the front of theremote sensor.Angle: About 30° in each direction of the front ofthe remote sensor.Battery installationDetach the battery cover on the rearof the Remote Control, and insert two(R03/AAA) size batteries with 3and#aligned correctly.Do not mix old and new batteries and nevermix different types of batteries such as stan-dard, alkaline, etc.](https://usermanual.wiki/LG-Electronics-USA/9QKE40660/User-Guide-749897-Page-9.png)

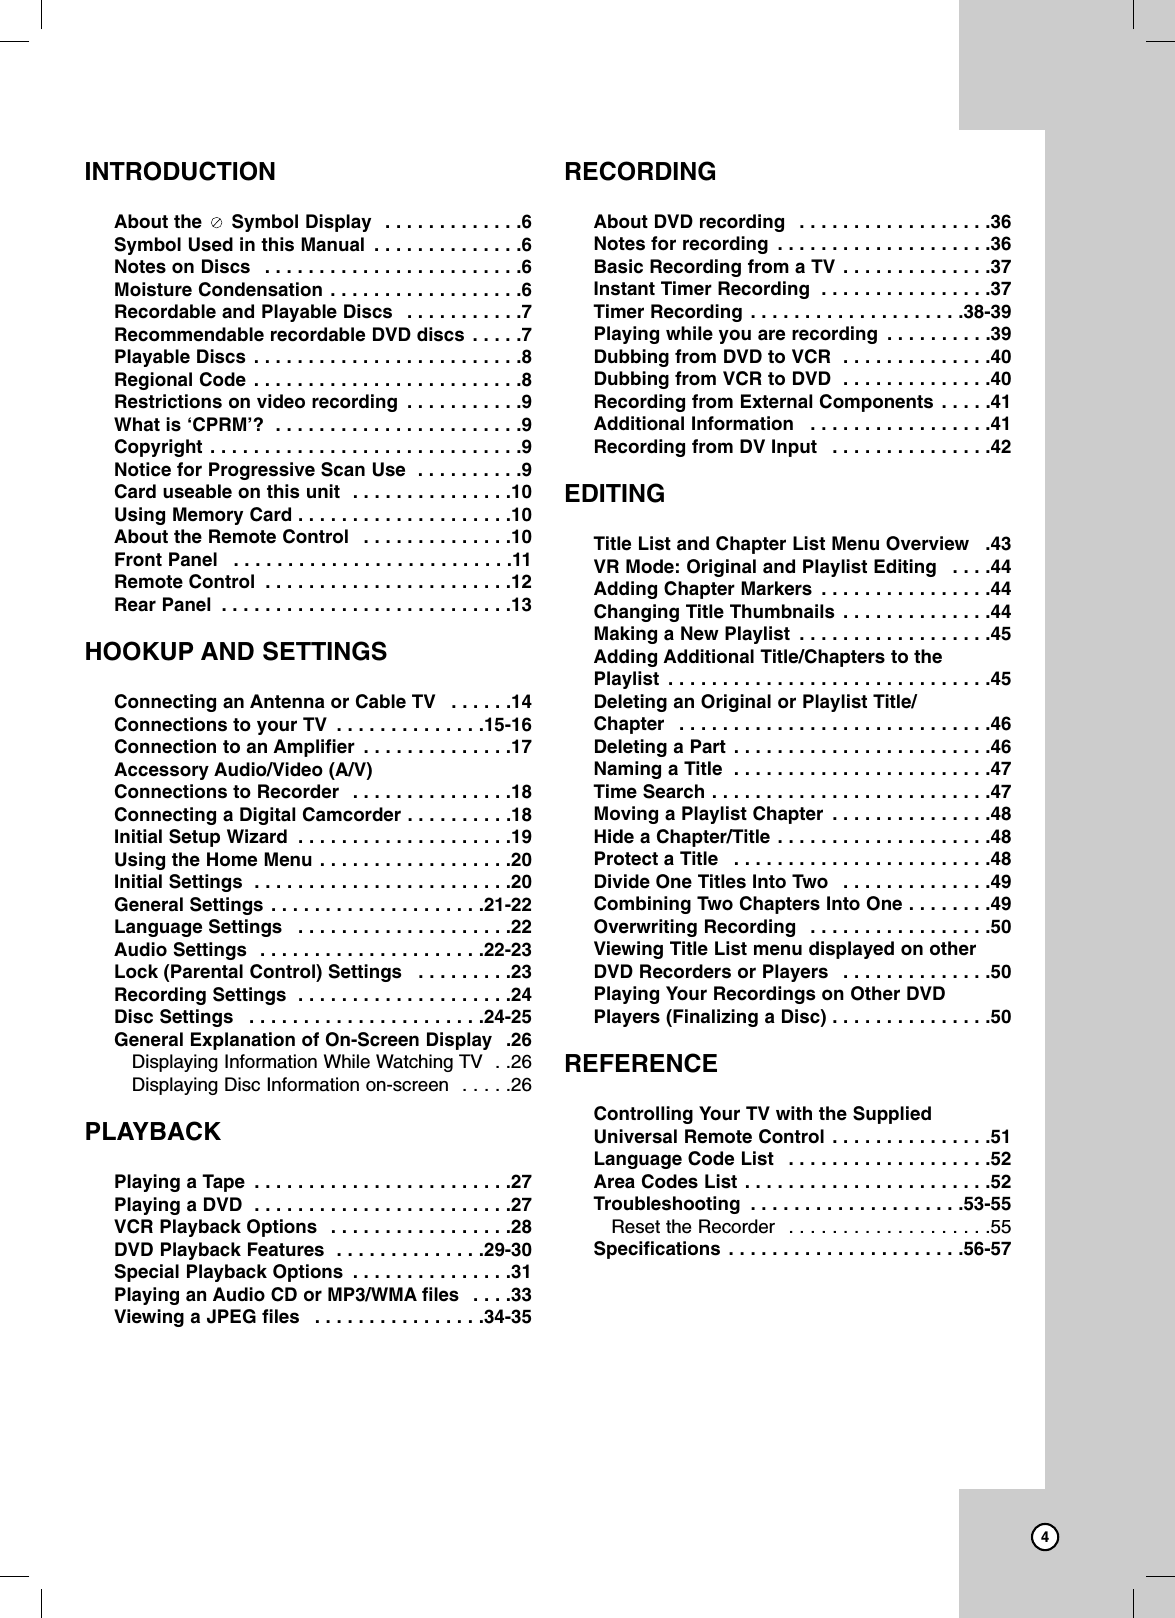
![14Connections to your TVConnections to your TVMake one of the following connections, depending onthe capabilities of your TV.RF coaxial connectionConnect the RF OUT jack on the Recorder to theantenna in jack on the TV using the supplied 75-ohmCoaxial Cable (R).How to set the Recorder’s RF output channel1. When the Recorder is turned off, press and holdCH (V/v) on the front panel for more than fiveseconds. [RF03] or [RF04] appears in the displaywindow.2. Press CH (V/v) to change the RF output channel(RF03 or RF04). 3. Tune the TV to this channel.Video connection Connect the VIDEO OUT jack on the Recorder to thevideo in jack on the TV using the video cable supplied (V).Note:If you use this connection, set the TV’s source selector toVIDEO.S-Video connection Connect the S-VIDEO OUT jack on the Recorder tothe S-Video in jack on the TV using the optional S-Video cable (S).Component Video / Progressive Scan connectionIf your television is a high-definition or “digital ready”television, you may take advantage of the Recorder’sprogressive scan output for the highest video resolu-tion possible. Connect the COMPONENT/PROGRESSIVE SCANVIDEO OUT jacks on the Recorder to the correspon-ding in jacks on the TV using an optional Y Pb Prcable (C).Notes:• Set the resolution to 480p or 720p using RESOLUTIONor RES. button for progressive signal.• Progressive Scan does not work with the RF,Audio/Video or S-Video connections.• If your TV does not accept the Progressive Scan format,the picture will appear scrambled.• If the resolution is set to 720p or 1080i, the VIDEO OUT,S-VIDEO OUT and COMPONENT VIDEO OUT connec-tions are not available.Audio connection Connect the Left and Right AUDIO OUT jacks on theRecorder to the audio left/right in jacks on the TVusing the supplied audio cables (A1 or A2).HOOKUP ANDSETTINGSRear of RecorderA1VRear of TVRear of TVYPbPrCOMPONENT/PROGRESSIVE SCANVIDEO INPUTLRAUDIO INPUTS-VIDEO INPUTSA2CR](https://usermanual.wiki/LG-Electronics-USA/9QKE40660/User-Guide-749897-Page-14.png)
![15HDMI connection If you have a HDMI TV or monitor, you can connect itto this recorder using a HDMI cable.1. Connect the HDMI OUT jack on the recorder tothe HDMI jack on a HDMI compatible TV or moni-tor (H).2. Set the TV’s source to HDMI (refer to TV’sOwner’s manual).Notes:•When you use the HDMI connection, the audio’ssampling frequency is outputted only with 48KHzeven if you select [96KHz].•This recorder does not perform internal (2 chan-nel) decoding of a DTS sound track. To enjoyDTS multi channel surround, you must connectthis recorder to a DTS compatible receiver viaone of this recorder’s digital audio outputs.•No sound will be outputted from HDMI cable ifthe [Dolby Digital] or [MPEG] option is not setto [PCM] on the Setup menu (See page 22).•The arrow on the cable connector body shouldface up for correct alignment with the connectoron the recorder.•If there is noise or lines on the screen, pleasecheck the HDMI cable.•Not all HDCP-compatible Tip :When you use HDMI connection, you can change theresolution (480i, 480p, 720p, or 1080i) for the HDMIoutput using RESOLUTION or RES. button.CautionChanging the resolution when the recorder is con-nected with HDMI connector may result in malfunc-tions. To solve the problem, turn off the recorder andthen turn it on again.About HDMIHDMI (High Definition Multimedia Interface) supportsboth video and audio on a single digital connectionfor use with DVD Players, Set-Top Boxes, and otherAV devices.HDMI was developed to provide the technologies ofHDCP (High Definition Contents Protection). HDCP isused to protect digital content transmitted andreceived.HDMI has the capability to support standard,enhanced, or high-definition video plus standard tomulti-channel surround-sound audio, HDMI featuresinclude uncompressed digital video, a bandwidth ofup to 5 gigabytes per second, one connector (insteadof several cables and connectors), and communica-tion between the AV source and AV devices such asDTVs.HDMI, the HDMI logo and High-Definition MultimediaInterface are trademarks or registered trademarks ofHDMI licensing LLC.Additional Information for HDMI•When you connect a HDMI or DVI compatibledevice make sure of the followings:- Try switching off the HDMI/DVI device and thisrecorder. Next, switch on the HDMI/DVI deviceand leave it for around 30 seconds, then switchon this recorder.- The connected device’s video input is set correctly for this unit.- The connected device is compatible with720(1440)x480i or 720x480 progressive videoinput.•Not all HDCP-compatible DVI devices will workwith this recorder.- It’s impossible copy protected-DVD title’s play-back in non-HDCP devices.•For best performance, directly connect the HDMIoutput to an HDMI input on your TV. If connectingto some device other than a TV or monitor, suchas a home theater receiver with an HDMI input,check the following to make sure the HDMI signalwill be received correctly:- Check the operating instructions of the con-nected device to make sure that the HDMIinput of the device complies with HDMI-HDCPspecifications.- Check that the HDMI setup menu of any non-display device is set to “pass-through” so thatHDMI signals received are not changed in anyway (such as changing the video or audio for-mat).HDMIHDMI compatible TVH(Type A)](https://usermanual.wiki/LG-Electronics-USA/9QKE40660/User-Guide-749897-Page-15.png)
![16Connection to an Connection to an AmplifierAmplifierConnecting to an amplifier equipped with twochannel analog stereo or Dolby Pro Logic II/ProLogicConnect the Left and Right AUDIO OUT (orDVD/VCR AUDIO OUT) jacks on the Recorder to theaudio left and right in jacks on your amplifier, receiv-er, or stereo system using the audio cables (A) sup-plied.Connecting to an amplifier equipped with two chan-nel digital stereo (PCM) or to an Audio/Video receiv-er equipped with a multi-channel decoder (DolbyDigital™, MPEG 2, or DTS)1. Connect one of the Recorder’s DIGITAL AUDIOOUT jacks (OPTICAL O, COAXIAL X) to the cor-responding in jack on your amplifier. Use anoptional digital (OPTICAL O, coaxial X) audiocable.2. You will need to activate the Recorder ’s digitaloutput. (See [Audio Settings] on page 22).Digital Multi-channel soundA digital multi-channel connection provides the bestsound quality. For this you need a multi-channelAudio/Video receiver that supports one or more of theaudio formats supported by your Recorder (MPEG 2,Dolby Digital and DTS). Check the receiver manualand the logos on the front of the receiver.Caution:Due to the DTS Licensing agreement, the digital output will be in DTS digital out when DTS audiostream is selected.Notes:•If the audio format of the digital output does not match thecapabilities of your receiver, the receiver will produce astrong, distorted sound or no sound at all. • Six Channel Digital Surround Sound via digital connec-tion can only be obtained if your receiver is equippedwith a Digital Multi-channel decoder. • To see the audio format of the current DVD in the on-screen display, press AUDIO.• This Recorder does not perform internal (2 channel)decoding of a DTS sound track. To enjoy DTS multichannel surround, you must connect this Recorder to aDTS compatible receiver via one of this Recorder’s digi-tal audio outputs.HOOKUP ANDSETTINGSRLAUDIO INPUTDIGITAL INPUTCOAXIALDIGITAL INPUTOPTICALAmplifier (Receiver)Rear of RecorderAXOManufactured under license from DolbyLaboratories. “Dolby”, “Pro Logic”, and thedouble-D symbol are trademarks of DolbyLaboratories.DTS and DTS Digital Out are trademarks ofDigital Theater Systems, Inc.](https://usermanual.wiki/LG-Electronics-USA/9QKE40660/User-Guide-749897-Page-16.png)
![17Accessory Accessory Audio/VAudio/Video (A/V)ideo (A/V)Connections to Connections to RecorderRecorderConnect the AV IN 1 or AV 2 IN jacks on theRecorder to the audio/video out jacks on your acces-sory component, using the optional audio/videocables. (Refer to page 41 for [Recording fromExternal Components].)Note: If you use the S-VIDEO IN jack on the front panel,the VIDEO IN jack on the front panel is not available.Connecting a DigitalConnecting a DigitalCamcorderCamcorderUse a DV cable (not supplied) to connect the DVin/out jack of your DV Digital Camcorder to the frontpanel DV IN jack of this Recorder.Note:This jack is for connection to DV equipment only. It isnot compatible with digital satellite tuners or D-VHSvideo decks.Rear of Recorder Front of RecorderDV Digital CamcorderFront of RecorderDVIN/OUT](https://usermanual.wiki/LG-Electronics-USA/9QKE40660/User-Guide-749897-Page-17.png)
![18Initial Setup WInitial Setup WizardizardAfter the POWER is pressed for the first time to turnon the unit, the Initial Setup Wizard function sets theLanguage, Channels and Clock step-by-step until thesetup is complete.1. Use v / V to select a language for the Setupmenu and information display then press ENTER.2. Check your antenna connections.Press Bto move next step.3. Select the [Tuning Band] option then press B.TV is for over-the-air antenna reception.CATV is for cable subscribers.4. Press ENTER to begin the channel search.You can skip the analog channel scanning bypressing B. 4. Enter the necessary information for year, date andtime.b / B (left/right): Moves the cursor to theprevious or next column.v / V (up/down): Changes the setting at thecurrent cursor position.Press ENTER to confirm your setting.5. Press ENTER to exit the menu.Note:You can reset the Initial Setup Wizard from the[Factory Set] in the setup menu.(see page 22).HOOKUP ANDSETTINGS](https://usermanual.wiki/LG-Electronics-USA/9QKE40660/User-Guide-749897-Page-18.png)
![19Using the Home MenuUsing the Home MenuFrom the Home Menu screen you can access all theMedia for playback and recording of the recorder. 1. Press HOME and the Home menu appears. 2. Use b / B to select the desired main option.3. Use v / V to select the desired Sub option thenpress ENTER to confirm your selection. 4. To exit the HOME menu, press HOME.SETUP•Setup Start: Displays Setup menu.TV•Auto Scan : Displays [Auto Channel Set] menu.(See page 21)•Ch. Edit : Displays [CH. Add/Del] menu. (See page 21)•Timer Record : Displays [Timer Record] menu.(See page 38)Movie•VCR: Plays back Video tape.•DISC: - Displays TITLE LIST menu for recordable disc(page 43)- Plays back DVD-Video disc (page 29-30).Photo (See page 34)•DISC: Displays [Photo] menu for disc.•USB: Displays Photo List menu for USB MemoryStick.Music (See page 33)•DISC: Displays Music (or Audio CD) menu fordisc.•USB: Displays Photo List menu for USB MemoryStick.SPECIAL•Dubbing : Displays [Dubbing] menu.•Disc Manager : Displays Disc Setup menu.•Rec. Mode : Displays Record Mode setup menu.•DV Input : Displays DV Input mode.Initial SettingsInitial SettingsIn this menu system, there are several ways to cus-tomize the settings provided. Most menus consist ofthree levels to set up the options, but some requiregreater depth for the variety of settings.1. Press HOME and the Home menu appears. 2. Select [SETUP] > [Setup Start] and pressENTER.3. Use v / V to select the desired option.4. While the desired item is selected, press Btomove to the second level.5. Use v / V to select the second desired option.6. Press Bto move to the third level.7. Use v / V to select the desired setting then pressENTER to confirm your selection.Some items require additional steps.8. Press RETURN (O) or HOME to exit the Setupmenu.Note:Press bto go back to the previous level.](https://usermanual.wiki/LG-Electronics-USA/9QKE40660/User-Guide-749897-Page-19.png)
![20General SettingsGeneral SettingsAuto Channel SetThis recorder is equipped with a frequency synthesized tuner capable of receiving up to 88 ana-log channels and 150 digital channels. 1. Select the [Auto Channel Set] option then pressB.2. Use v / V to select the tuning band (TV orCATV) option.TV is for over-the-air antenna reception.CATV is for cable subscribers.3. Press Bto highlight [Start] icon.4. Press ENTER to begin the channel search.The tuner will automatically cycle through all available channels in the area and place them inthe tuner’s memory.Note:After the Auto Channel Set proceeding is complete,make sure the Tuning Band is set appropriately (TVor CATV) on tuning band, follow step 2 as shown pre-vious (Tuning Band Select) to choose the correctTuning Band (TV or CATV).Program EditYou can edit a channel manually (add, delete, etc.). 1. Select the [Program Edit] option then press B. 2. Use v/ Vto select the [Edit] option then pressENTER.The Program List menu appears.3. Use b / B/ v / Vto select a channel numberthen press ENTER.4. Use v/ Vto select an option then press ENTER.[Add] Adds a channel manually.[Delete] Deletes a channel from channel list.[Skip On/Off] (for digital channel only) Set the program to the skipped program.[Favorite On/Off] Set the program to favoritechannel.[MFT Adjust] (for analog channel only) To obtain a clearer picture, tune the MFToption.5. Press RETURN (O) repeatedly to exit ProgramList menu.HOOKUP ANDSETTINGS](https://usermanual.wiki/LG-Electronics-USA/9QKE40660/User-Guide-749897-Page-20.png)
![21Clock SetYou can set the clock.1. Select the [Clock Set] option then B.2. Enter the necessary information for year, dateand time.b / B (left/right): Moves the cursor to the previous or next column.v / V (up/down): Changes the setting at thecurrent cursor position.3. Press ENTER to confirm your setting.TV Aspect 4:3 Letter Box:Select when a standard 4:3 TV is connected.Displays theatrical images with masking barsabove and below the picture.4:3 Pan Scan: Select when a standard 4:3 TV is connected.Displays pictures cropped to fill your TV screen.Both sides of the picture are cut off.16:9 Wide: Select when a 16:9 wide TV is connected.Power Save ModeSet Power Save Mode to [ON] to place yourRecorder into an economic power save mode.Factory SetYou can reset the Recorder to its original factory settings.1. Select the [Factory Set] option.2. Press Bto select [SET] then press ENTER.3. Select [OK] and press ENTER.4. Follow the Initial Setup Wizard on page 19.](https://usermanual.wiki/LG-Electronics-USA/9QKE40660/User-Guide-749897-Page-21.png)
![22Language SettingsLanguage SettingsDisplay MenuSelect a language for the Setup menu and information display. Disc Menu / Audio / Subtitle[Original] : Refers to the original language inwhich the disc was recorded.[Others] : To select another language, pressnumber buttons then ENTER to enter the corresponding 4-digit number according to the language code list in the reference chapter (seepage 52). If you enter the wrong language code,press CLEAR.[OFF] (for Disc Subtitle) : Turn off Subtitle.DTV CaptionDigital channels sometimes provide caption, often in adifferent language. You can set a default caption lan-guage with this setting. If you select [Off], DTVCaption is not displayed.Note:DTV caption will appear only if provided by the broad-caster. Tips:If available, you can also select a subtitle languagewhile viewing digital TV viewing, press SUBTITLErepeatedly.If subtitles are available, the DTV subtitle icon ( )appears on the program information display to indi-cate that you can select one of those subtitleoptions with the SUBTITLE button.DTV Caption StyleSelects the font type for captions.[Set by program] Default font type provided by abroadcaster is shown when captions appear.[Custom] Customized text is shown when captionsappear. Use [DTV Caption Option] to customize thefont type.DTV Caption OptionSelects DTV Captions appearance menu optionswhen [DTV Caption Style] is selected in [Custom].Style: Selects the font style for captions.Size: Selects the font size for captions.Color: Selects the font color for captions.Opacity: Selects the font opacity for captions.Solid: The text is solid (without any transparency).Flash: The text blinks twice a second.Translucent: The text is translucent.Transparent: The text is transparent (In this case,whatever the color is, the color does not affect thecaptions display).BG (Background) Color: Selects the backgroundcolor for captions.Bg. (Background) Opacity: Selects the back-ground opacity for captions.Solid: The text background color is solid (withoutany transparency).Flash: The text background color blinks twice asecond.Translucent: The text background color is translu-cent.Transparent: The text background color is transpar-ent (In this case, whatever the background color is,the color does not affect the captions.).Edge Color: Selects the edge color for captions. Edge Type: Selects the edge type for captions.None: The text has no edge.Raised: The text is raised.Depressed: The text is depressed.Uniform: The text has a uniform edge.Left Shadow: The text has a left-shadow edge.Right Shadow: The text has a right-shadow edge.DTV AudioDigital channels sometimes provide multiple audiotracks, often in a different language. You can set adefault audio language with this setting. Tip:If provided by the broadcaster, you can also select adifferent audio language while viewing digital TV bypressing AUDIO repeatedly.HOOKUP ANDSETTINGS](https://usermanual.wiki/LG-Electronics-USA/9QKE40660/User-Guide-749897-Page-22.png)
![23Audio SettingsAudio SettingsEach DVD disc has a variety of audio output options.Set the Recorder’s Audio Output according to thetype of audio system you use. Dolby Digital / DTS / MPEG[Bitstream]: Select [Bitstream] if you connect theDVD+VCR’s DIGITAL AUDIO OUT jack to anamplifier or other equipment with a Dolby Digital,DTS or MPEG decoder.[PCM] (for Dolby Digital / MPEG): Select whenconnected to a two-channel digital stereo amplifi-er. DVDs encoded in Dolby Digital or MPEG willbe automatically downmixed to two-channel PCMaudio.[OFF] (for DTS): If you select [OFF], the DTS signal is not output through the DIGITAL AUDIOOUTSampling Freq. (Frequency)If your receiver or amplifier is NOT capable of han-dling 96 kHz signals, select 48 kHz. When this choiceis made, this unit automatically converts any 96 kHzsignals to 48 kHz so your system can decode them. If your receiver or amplifier is capable of handling 96kHz signals, select 96 kHz. When this choice ismade, this unit passes each type of signal throughwithout any further processing. Check the documentation for your amplifier to verifyits capabilities. DRC (Dynamic Range Control)With the DVD format, you can hear a program’ssoundtrack in the most accurate and realistic presen-tation possible, thanks to digital audio technology.However, you may wish to compress the dynamicrange of the audio output (the difference between theloudest sounds and the quietest ones). This allowsyou to listen to a movie at a lower volume without los-ing clarity of sound. Set DRC to [ON] for this effect.Lock (Parental Control)Lock (Parental Control)Settings Settings RatingBlocks playback of rated DVDs based on theircontent. Not all discs are rated. 1. Select [Rating] option then press B.2. To access the Rating, Password and Area Codefeatures, you must input the 4-digit security codeyou created. If you have not yet entered a security code you areprompted to do so. Input a 4-digit code. Enter itagain to verify. If you make a mistake pressCLEAR.3. Select a rating from 1 to 8 using the v/Vbuttons. [1]-[8] : Rating one (1) has the most restrictionsand rating eight (8) is the least restrictive.[No Limit] : If you select [No Limit], parental control is not active and the disc plays in full.4. Press ENTER to confirm your rating selection,then press HOME to exit the menu.5. Press OPEN/CLOSE (Z) to activate parental control.Note:If you set a rating for the recorder, all disc scenes with thesame rating or lower are played. Higher rated scenes arenot played unless an alternate scene is available on thedisc. The alternative must have the same rating or a lowerone. If no suitable alternative is found, playback stops. Youmust enter the 4-digit password or change the rating level inorder to play the disc.](https://usermanual.wiki/LG-Electronics-USA/9QKE40660/User-Guide-749897-Page-23.png)
![24Set PasswordYou can enter or change password.1. Select [Set Password] option then press B. 2. Follow step 2 as shown [Rating]. To change the password, select the [Change],press ENTER and input the new 4-digit code. Input it again to verify.3. Press HOME to exit the menu.If you forget your passwordIf you forget your password you can clear it using thefollowing steps:1. Press HOME and the Home menu appears. 2. Select [SETUP] > [Setup Start] and pressENTER.3. Input the 6-digit number [210499]. The messageappears, select [OK] then press ENTER. Thesecurity code is cleared. 4. Enter a new code as described above.Area Code Enter the Area Code whose standards were used torate the DVD video disc, based on the list in the reference chapter (see page 52).1. Select [Area Code] option then press B.2. Follow step 2 as shown [Rating].3. Select the first character using v/Vbuttons.4. Shift the cursor using Bbuttons and select thesecond character using v/ Vbuttons.5. Press ENTER to confirm your area code selection, then press HOME to exit the menu.Recording SettingsRecording SettingsDisc Record ModeYou can set the picture quality for recording; XP (High Quality), SP (Standard Quality), LP (LowQuality), EP (Extend Quality), MLP (Maximum LongPlay).1. Select the [Disc Record Mode] option then pressB.2. Use v / V to select a desired Disc Record Mode(XP, SP, LP or EP). 3. Press ENTER to confirm your selection, thenpress HOME to exit the menu.VCR Record ModeYou can set the picture quality for VCR recording; SP (Standard Play), SLP (Super Long Play).DV Record AudioYou need to set this if you have a camcorder using32kHz/12-bit sound connected to the front panel DVIN jack. Some digital camcorders have two stereotracks for audio. One is recorded at the time of shoot-ing; the other is for overdubbing after shooting.On the Audio 1 setting, the sound that was recordedwhile shooting is used. On the Audio 2 setting, theoverdubbed sound is used.Auto ChapterDuring recording, chapter markers are added auto-matically at fixed intervals. You can set this interval to5 minutes or 10 minutes. To turn off automatic chap-ter marking, select [None].AV Control???????????????????AV Control Option???????????????????HOOKUP ANDSETTINGS](https://usermanual.wiki/LG-Electronics-USA/9QKE40660/User-Guide-749897-Page-24.png)
![25Disc SettingsDisc SettingsInitializeIf you load a completely blank disc, the recorder willinitialize the disc. • DVD-R: The recorder initialize the disc to Video mode.The recording mode will always be Video mode.• DVD-RW: The Initialize menu will appear. Select [VRMode] or [Video Mode] then press ENTER.• DVD+RW/DVD+R(DL)/DVD-RAM: The Initialize menuwill appears. Select [OK] then press ENTER.Also, you can reformat the DVD-RW/DVD+RW/DVD-RAM from the Setup menu as below.1. Select the [Initialize] option then press B. [Start] icon is highlighted.2. Press ENTER.•In case of DVD-RW, use b / B to select adesired Disc Initialize Mode (VR Mode or VideoMode) then press ENTER.•In case of DVD+RW/DVD-RAM, use b / B toselect [OK], and press ENTER.It takes a few moments to format the disc.CautionIf you want to change the disc format, everythingrecorded on the disc will be erased.FinalizeFinalizing ‘fixes’ the recordings in place so that thedisc can be played on a regular DVD player or com-puter equipped with a suitable DVD-ROM drive.Finalizing a Video mode disc creates a menu screenfor navigating the disc. This is accessed by pressingDISC MENU/LIST or TITLE.CautionOnce you have finalized a DVD-R and DVD+R (DL)disc, you cannot edit or record anything else on thatdisc except DVD+RW. However, you can record andedit a DVD-RW disc by choosing [Unfinalize] option.1. Select the [Finalize] option then press B.2. Press ENTER while [Finalize] is selected.Finalize menu appears.3. Select [OK] then press ENTER.The Recorder starts finalizing the disc.Notes:• Finalization can take up to 3-4 minutes or more depend-ing on the type of disc, how much is recorded on thedisc, and the number of titles on the disc.• DVD+R DL disc can take up to 30 minutes to finalize.Tips:• If you load a DVD-RW that has already been finalized,you can ‘Unfinalize’ it by choosing [Unfinalize] from theFinalize menu. After doing this, you can edit and re-record onto the disc.• You cannot unfinalize a DVD-R and DVD+R (DL) disc.• If [Disc Protect] option is set to [ON], the finalize is notavailable. To finalize, set [Disc Protect] option to [OFF].Disc LabelUse the Disc Label feature to enter a name for thedisc. This name appears when you load the disc andwhen you display disc information on-screen.• The Disc label can be up to 32 characters long.• For discs formatted on a different Recorder, youwill see only a limited character set.1. Select the [Disc Label] option then press B.[Edit] icon is highlighted.2. Press ENTER.Keyboard menu appears.To enter characters, see page 47.Disc ProtectDepending on the type of disc you are using, DiscProtect allows you to preserve your recordings in avariety of ways:• DVD+RW : Prevents editing, erasing, or overwrit-ing of existing recordings. Allows regular record-ing.• DVD+R : Prevents editing or erasing of existingrecordings. Allows regular recording.• DVD-RW (VR mode)/DVD-RAM : Prevents editing, erasing, and regular recording.Notes:• Disc Protect is not compatible with DVD-RW discs inVideo mode or DVD-R discs.• If you need to unlock a disc to make edits, select [OFF].AutoPlayWhen you load a DVD with AutoPlay turned on, theRecorder will bypass the Disc menu and trailers andstart playing the movie automatically. Set [AutoPlay] to [ON] or [OFF].](https://usermanual.wiki/LG-Electronics-USA/9QKE40660/User-Guide-749897-Page-25.png)
![26General Explanation ofGeneral Explanation ofOn-Screen DisplayOn-Screen DisplaySome DVDs require specific operation or allow onlylimited operation during playback. When this occurs,is displayed, action prohibited or not available.Displaying Information WhileWatching TVDuring viewing the TV, press DISPLAY to display/remove the information displayed on-screen.(Extended Text Message Icon): Indicates that there is an Extended Text Messageavailable to provide detailed descriptions of the pro-gram (see page 25).(DTV Subtitle Icon)Indicates that the current program contains the subti-tle.Wide IconIndicates that the current program is shown in widepicture format.(Teletext Icon): Indicates that there is a Telext available (see page25).Displaying Disc Information on-screenYou can display various information about the disc ortape loaded on-screen. Some items can be changedusing the menu.1. Press DISPLAY once to show current status.Example: DVD-RW in VR mode2. Press DISPLAY once again to show various playback information.The items displayed differ depending on the disctype or playing status. 3. You can select an item by pressing v/ Vandchange or select the setting by pressing b/ B.For details about each item, see the pages inparentheses.•[Title]: Current title (or track) number/totalnumber of titles (or tracks) (page 29)•[Chapter]: Current chapter number/total number of chapters (page 29)•[Time]: Elapsed playing time (page 31)•[Audio]: Selected audio language (DVDVIDEO only) or audio channel (page 30)•[Subtitle]: Selected subtitle (page 29)•[Angle]: Selected angle/total number of angles(page 31)•[Sound]: Selected sound mode (page 31)Note:If no button is pressed for 7 seconds, the on-screen displaydisappears.Indicates channel number, station name,and audio signal by the tuner.Indicates program title, start time,end time, etc. Details are below.(Digital channel only)Indicates current date and time.Indicates audio language.Indicates the disc format,free space, and elapsedtime progress bar.](https://usermanual.wiki/LG-Electronics-USA/9QKE40660/User-Guide-749897-Page-26.png)
![27Playing a TPlaying a Tapeape1. Press VCR to control the VCR deck.2. Insert a pre-recorded video cassette.• If the unit is powered off, it will power on automatically when the tape is loaded.• If the Timer indicator lights on the front paneldisplay window, press POWER once.3. Press PLAY (N) to start playback.• If a tape without a safety tab is inserted theunit starts playback automatically. 4. Press STOP (x)to stop playback. • If the tape reaches the end before you pressSTOP (x) the Recorder automatically stops,rewinds and ejects the tape.Note:S-VHS Quasi Playback (SQPB)• This Recorder can play back S-VHS recordedtapes, however, it cannot make recordings usingS-VHS format tapes.• SQPB is an abbreviation for S-VHS QuasiPlayback.Playing a DVDPlaying a DVD1. Press DVD to control the DVD deck.1. Press OPEN/CLOSE (Z) to open the disc tray.Load your chosen disc in the tray, with the playback side down. 2. Press OPEN/CLOSE (Z) to close the tray.Playback starts automatically. If playback doesnot start, press PLAY (N) or Starts playbackusing HOME menu.3. To stop the playback, press STOP x.The unit records the stopped point, depending onthe disc. “Xx” appears on the screen briefly.Press PLAY (N) to resume playback (from thescene point). If you press STOP xagain orunload the disc (“x” appears on the screen.), theunit will clear the stopped point.4. Press OPEN/CLOSE (Z) to remove the disc.Press OPEN/CLOSE (Z) to close disc tray orpress POWER (1), the disc tray closes automatically and unit turns off.Note:If parental control is set and the disc is not within the ratingsettings you must input the password. (See [Rating] on page 23).PLAYBACKPlayback](https://usermanual.wiki/LG-Electronics-USA/9QKE40660/User-Guide-749897-Page-27.png)
![30DVD Playback Features (Continued)Buttons OperationsPLAY MODE Select a desired play mode while playback.[A-] : Repeats a sequence between A (Start point) and B(End point) during playback. Press ENTER at yourchosen end point then the repeat sequence begins.[CHAPTER] : Repeats the current chapter.[TITLE] : Repeats the current title.[ALL] : Repeats the all titles/tracks. [TRACK] : Repeats the current track.[RANDOM] : Random playback[Folder] : Repeats all the tracks on a folder of a disc.[OFF] : Does not play repeatedly.•If you press SKIP (>) once during Repeat Chapter(Track) playback, the repeat playback cancels.•By pressing SKIP (>) during Random playback, theRecorder selects another title (track) and resumesRandom playback.AUDIO ( ) Press AUDIO then press b/ Brepeatedly to hear a different audio language or audio track.Note:Some discs feature both Dolby Digital and DTS sound-tracks. There is no analog audio output when DTS isselected. To listen to the DTS soundtrack, connect thisrecorder to a DTS decoder via one of the digital outputs.See page 17 for connection details.Press AUDIO then press b/ Brepeatedly during playbackto hear a different audio channel.With DVD-RW discs recorded in VR mode that have botha main and a Bilingual audio channel, you can switchbetween Main (L), Bilingual (R), or a mix of both (Main +Bilingual) by pressing AUDIO.DiscsWMAMP3+R-R+RWRAM-RWVideo-RWVRDVDDVD ALLWMAMP3Karaoke DVDWMAMP3ACD-RWVRACDKaraoke DVDDVD ALLDVD ALLKaraoke DVDACDDVD ALL](https://usermanual.wiki/LG-Electronics-USA/9QKE40660/User-Guide-749897-Page-30.png)
![31Special Playback OptionsSpecial Playback OptionsIf a menu screen is displayed In some cases, the disc menu might appear instead. Use the b B v V buttons to select the title/chapteryou want to view, then press ENTER to start. PressTITLE or DISC MENU/LIST to return to the menuscreen.Time Search To start playing at any chosen time on the disc:1. Press DISPLAY twice during playback. The timesearch box shows the elapsed playing time.2. Press v/Vto select the time clock icon and[-:--:--] appears.3. Input the required start time in hours, minutes,and seconds from left to right. If you enter thewrong numbers, press b/Bto move the underbar (_) to the wrong number. Then enter the correct numbers.4. Press ENTER to confirm. Playback starts from theselected time.Marker Search To enter a Marker You can start playback from up to six memorizedpoints. To enter a marker, press MARKER at thedesired point on the disc. The Marker icon appearson the TV screen briefly. Repeat to enter up to sixmarkers.To Recall or Clear a Marked Scene 1. During disc playback, press SEARCH.The marker search menu appears on the screen.2. Use b/B/v/V to select a marker scene that youwant to recall or clear.3. Press ENTER and playback starts from themarked scene. Or, Press CLEAR and use b/ Bto select [OK] then press ENTER to deletemarked scene from the list.4. To remove the Marker Search menu,press RETURN (O).Camera Angle If the disc contains scenes recorded at different camera angles, you can change to a different cameraangle during playback. Press DISPLAY then selectthe Angle icon during playback. Use b/ Bto select adesired angle. Note that the number of the currentangle appears on the display.Tip:The Camera Angle icon is displayed on the TV screen whenalternate angles are available.3D Surround This unit can produce a 3D Surround effect, which simulates multi-channel audio playback from two conventional stereo speakers, instead of the five ormore speakers normally required to listen to multi-channel audio from a home theater system. 1. Press DISPLAY twice then use v/ Vto select thesound icon. Then, use b/ Bto select [3D SUR.].2. To turn off the 3D Surround effect, select [NORMAL].Last Scene Memory This Recorder memorizes last scene from the lastdisc that is viewed. The last scene remains in memo-ry even if you remove the disc from the Recorder orswitch off the Recorder. If you load a disc that hasthe scene memorized, the scene is automaticallyrecalled.Notes:• Settings are stored in memory for use any time.• This Recorder does not memorize settings of a disc ifyou switch off the Recorder before commencing to playit.• Last Scene Memory function for a previous DVD title iserased once a different DVD title is played.DVDDVD ALLDVDDVD ALLDVD ALLDVDDVDPLAYBACK](https://usermanual.wiki/LG-Electronics-USA/9QKE40660/User-Guide-749897-Page-31.png)
![32Playing an Playing an Audio CD or Audio CD or MP3/WMAMP3/WMA filesfilesThe Recorder can play Audio CDs and MP3/WMAfiles. Before playing MP3/WMA files, read [MP3/WMAaudio file requirement] on right.1. Press HOME and the Home menu appears. 2. Select [Music] > [DISC] or [MEMORY CARD] andpress ENTER.The Audio CD or Music menu appears on the TVscreen.Example) Audio CD Menu3. Use v/Vto select a track or filethen press PLAY (N). Playback starts. You can use variable playback functions. Refer topages 29-31.4. To stop playback at any time, press STOP (x).Tips:• You can view TV channel or video input source bypressing RETURN (O). If you want to return to theMusic menu, press DISC MENU/LIST.• Press DISPLAY to view ID3-Tag information for the MP3file. If ID3-Tag information is not present, [MP3 ID3 tag:None] will appear. If you select a folder, the number ofsubfolders and number of MP3/WMA files in the folderare displayed. Press DISPLAY again to remove theinformation screen.• On the Music menu, you can display the folders on thedisc. Use vVbBto select the “Folder” icon on theMusic menu then press ENTER twice. • On CDs, DVDs or Memory Card with mixed content(Audio tracks, MP3/WMA files or JPEG files), you canselect among the Music menu, Movie menu and Photomenu by pressing TITLE repeatedly.• If you are in a file list and want to return to the Folderlist, use the v/Vto highlight and press ENTER toreturn to the previous menu screen.Audio CD and Music menu options1. Press v/Vto select a track/file or folder on theAudio CD or Music menu then press ENTER. 2. Use v/Vto select an option, then press ENTER.•[Play] Start playback the selected track or file.•[Open] Opens the folder and a list of files in thefolder appears.•[Ramdom] Start or stop random playback.•[Delete] Deletes the file(s) or folder(s) from theMemory Card.Random1. Press v/Vto select a file then press ENTER.The menu options appear.2. Press v/Vto select [Random] option then pressENTER. The unit automatically begins random playbackand “RANDOM” appears on the menu screen.3. To return to normal playback, select [Random]option again then press ENTER. Tip:By pressing SKIP ./> during Random play-back, the unit selects another track and resumesRandom playback.PLAYBACKMP3/WMA audio file requirementFile extensions“.mp3”, “.wma”.Sampling frequency:within 8 - 48 kHz (MP3), within 32 - 48kHz (WMA)Bit rate: within:8 - 320kbps (MP3), 32 - 192kbps (WMA)CD-R Format:ISO 9660 and JOLIET.DVD±R/RW Format:ISO 9660 (UDF Bridge format)Maximum Files/Disc: Less than 1999 (total number of files and folders)](https://usermanual.wiki/LG-Electronics-USA/9QKE40660/User-Guide-749897-Page-32.png)
![33VViewing a JPEG filesiewing a JPEG filesThis unit can play JPEG files. Before playing JPEGrecordings, read “About JPEG image files” on page35.1. Press HOME and the Home menu appears. 2. Select [Photo] > [DISC] or [MEMORY CARD] andpress ENTER.3. Use v V b B to select a file or folder and pressENTER.2. Use v / V to select option and press ENTER.Example: When you select a file.3. Use v/ Vto select [Full Screen] then pressENTER.The selected image is displayed in full screen.4. To stop viewing at any time, press STOP (x).Notes:• If the icon displays in the Photo menu, it means youcannot see those JPEG files.• You can view TV channel or video input source bypressing RETURN (O). If you want to return to thePhoto menu, press DISC MENU/LIST.• If you are in a file list and want to return to the Folderlist, use the v/Vto highlight and press ENTER toreturn to the previous menu screen.• On CDs, DVDs or Memory Card with mixed content(Audio tracks, MP3/WMA files or JPEG files), you canselect among the Music menu, Movie menu and Photomenu by pressing TITLE repeatedly.Photo menu options1. Use v V b B to select a file then press ENTER. The menu options appear.2. Use v/ Vto select an option then press ENTERto confirm your selection.•[Open] Opens the folder and a list of files in thefolder appears.•[Full Screen] Shows the selected file as fullscreen.•[Slide Show] Displays Slide Show menu. •[Delete] Deletes the selected file(s) or folder(s)from the Memory Card.•[Copy] Copies the file(s) or folder to MemoryCard.Tip:You can create new folder in the Memory Card.Select [New Album] option then press ENTER.[NONAME##] folder is created.Still pictureUse PAUSE/STEP (X) while showing a picture topause mode.Skip ImagesWhile viewing a picture, press SKIP (> or .)once to advance to the next file or return to the previous file.Rotate ImagesUse v / V while viewing a picture to flip the pictureclockwise or counterclockwise.Press ENTER to appear or disappear this menu.](https://usermanual.wiki/LG-Electronics-USA/9QKE40660/User-Guide-749897-Page-33.png)
![34View Slide Shows1. Select [Slide Show] option on the Photo menu.2. Press ENTER.3. Use b/ B/ v/ Vto set the options.[Object] option: • [Selected] Views slide show only selectedfiles. • [All] Views slide show all files.[Speed] option: Sets the Slide Show speed to [Normal], [Slow], or [Fast].4. Select the [Start] option then press ENTER tostart the Slide Show.5. Press STOP (x) to stop the Slide Show andreturns to the Photo menu. Tips:• Use the CLEAR button to select all files, or cancel allmarked files.• Selecting multiple files1. Press MARKER.A check mark appears on the file. Press MARKERagain to cancel the marked file. 2. Repeat step 1 to mark additional file.PLAYBACKPhoto file requirementFile extensions“.jpe”, “.jpeg”Photo size: Less than 4MB recommendedCD-R Format:ISO 9660 and JOLIET.DVD±R/RW Format:ISO 9660 (UDF Bridge format)Maximum Files/Disc: Less than 1999 (total number of files and folders)Notes on JPEG fileProgressive and lossless compression JPEG imagefiles are not supported.](https://usermanual.wiki/LG-Electronics-USA/9QKE40660/User-Guide-749897-Page-34.png)
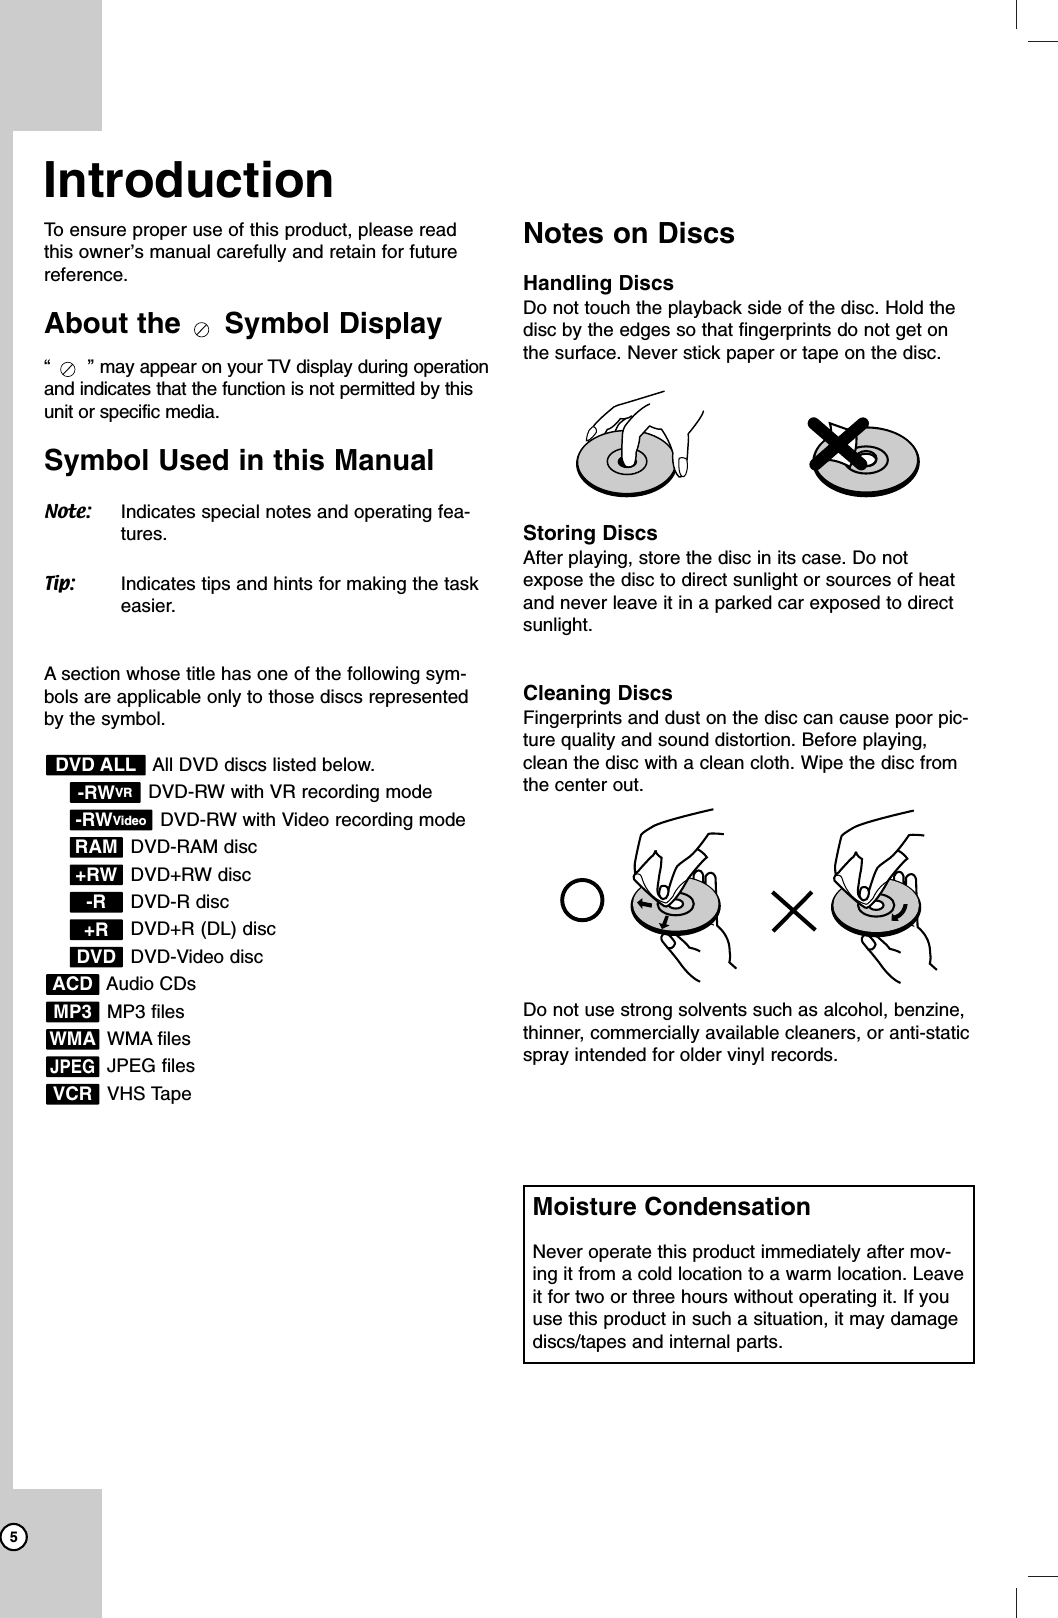
![37TTimer Recordingimer RecordingThe Timer Recording function allows you to record upto 8 programs within a period of one month.1. Press HOME and the Home menu appears.2. Select [TV] > [Timer Record] and press ENTER.3. Select [NEW] and press ENTER.The Timer Record menu will appear.• [Media] – Choose a media (DVD or VCR).• [Ch.] – Choose a channel (2-69 or 1-125 forantenna or cable channels respectively,excluding skip channels), or one of the exter-nal inputs from which to record (AV1 or AV2).• [Date] – Choose a date up to 1 month inadvance, or select a daily or weekly program.• [Start Time] – Set the recording start time.• [End Time] – Set the recording end time.• [Mode] – Choose a record mode.DVD: EP, LP, SP, XP, or AT (Auto)VCR: SP, SLP, or AT (Auto)AT(Auto) mode determines how much time is avail-able on the disc or tape and switches record mode,if necessary, to complete recording the program.2. Enter the necessary information for your timerrecording(s).•b / B (left/right) – Move the cursor left/right•v / V (up/down) – Change the setting at the current cursor position• Press RETURN (O) to exit the Timer Recordmenu.3. Press ENTER to save the program.4. Press RETURN (O) to exit the Timer RecordList.Notes:• You must insert a recordable disc or tape.• The Timer indicator lights on the front panel display.• The Recorder will record the audio according tothe current TV tuner setting (Stereo, Mono orSAP). Use the AUDIO button to set the audiobefore switching the Recorder to Standby mode.• The Recorder will automatically power off whenthe Timer Recording ends. • If the unit is DVD mode when the VCR timerrecording ends, the unit will not automaticallypower off.• There is a short delay when a timer recording fin-ishes to confirm the recorded program. If twotimer recordings are set to record sequentially(one right after the other), the very beginning ofthe later program may not be recorded.• You must press STOP (x) to stop the TimerRecording.Checking Timer Recording DetailsProgramming can be checked whenever theRecorder is turned on. 1. Press HOME and the Home menu appears.2. Select [TV] > [Timer Record] and press ENTER.3. Use v / V to select a program.4. Press ENTER to edit the selected program.Timer Record menu appears.Canceling a Timer RecordingYou can clear a timer setting anytime before therecording actually starts.• Use v / V to select a program you want to eraseon the Timer Recorder List, then press CLEARand select [OK] than press ENTER.](https://usermanual.wiki/LG-Electronics-USA/9QKE40660/User-Guide-749897-Page-37.png)
![INTRODUCTIONHOOKUP ANDSETTINGSPLAYBACKEDITTINGREFERENCE38Timer Recording TroubleshootingEven though the timer is set, the recorder will notrecord when:• There is no disc (or tape) loaded.• A non-recordable disc (or tape) is loaded.• Disc Protect is set to [ON] in the Disc menu(see page 25).• There are already 99 titles (DVD-RW, DVD-R,DVD-RAM), 49 titles (DVD+RW, DVD+R(DL))recorded on the disc.You cannot enter a timer program when:• A recording is already underway.• The time you’re trying to set has alreadypassed.• There are already 8 timer programs set.If two or more timer programs overlap:• The earlier program takes priority.• When the earlier program finishes, the laterprogram starts.• If two programs are set to start at exactly thesame time, the program entered first takespriority.If the disc is damaged, the recording may not complete successfully. In this case even though theCheck field shows [Rec. OK], it may not be.To record one TV program whilewatching another1. Press TV/VCR to select the TV mode duringrecording. The TV indicator appears.2. Using the TV, select the channel to be viewed.Tip (VCR mode only)Always use PAUSE/STEP (X) for best results when makingchanges during recording .For example: To change channels during recording, firstpress PAUSE/STEP (X) to put the unit in pause mode.Then select the desired channel on the Recorder, and pressPAUSE/STEP (X) again to resume recording.Playing while you arePlaying while you arerecordingrecordingYou can start play from the beginning of the title whilecontinuing to record it. While recording (in DVD mode)1. Press PLAY (N).Start play of the title you are recording.2. Press STOP (x) to return to the current recordingscreen.or1. Press TIMESHIFT.The PIP(Picture-In-Picture) window appears onthe screen as shown below. What is currentlybeing recorded appears as a PIP and you willhear the playback audio.2. Press STOP (x) to return to the current recordingscreen.Notes:• Play cannot be started until at least 30 seconds afterrecording starts.• This function does not work in VCR Recording mode.• This function can operate the DVD-RAM disc only.RAMRECORDING](https://usermanual.wiki/LG-Electronics-USA/9QKE40660/User-Guide-749897-Page-38.png)
![39Dubbing from DVD to VCRDubbing from DVD to VCRYou can copy the contents of a DVD to a VHS tapeusing the DUBBING button.1. Insert a blank VHS videotape into the VCR deck.2. Insert the disc you wish to copy in the DVD deckand close the disc tray.3. Find the place on the DVD (or Disc) from whichyou want to start dubbing using the PLAY, FF,REW and PAUSE functions. For best results, pause playback at the point fromwhich you want to record.4. Press the DUBBING button.The Dubbing menu appears.5. Use v / V / b / B to select the desired RecordMode: SP or SLP (3 times SP).6. Select [Dubbing] then press ENTER or DUBBINGto start copying.7. To stop dubbing at any other time,press STOP (x).You must stop the dubbing process manuallywhen the DVD movie ends, or the unit may replayand record over and over again.Note:If the DVD (or Discs) you are attempting to copy iscopy protected, you will not be able to copy the disc.It is not permitted to copy Macrovision encodedDVDs (or Discs). [Copy-protected. Cannot record.] isdisplayed on the TV screen.Tip:If you press PAUSE during Dubbing mode, both theDVD and VCR decks go into Pause mode and theDUBBING button blinks on the front panel. While inPause mode, you can adjust the DVD playback posi-tion using PLAY, REW, FF, PAUSE/STEP, etc. TheVCR deck will remain in Pause mode. To resumeDubbing, press the DUBBING button twice.Dubbing from VCR to DVDDubbing from VCR to DVDYou can copy the contents of a VHS tape to a DVDusing the DUBBING button. This allows you toarchive your old VHS tapes to DVD.1. Insert a blank DVD disc in the DVD deck andclose the disc tray. 2. Insert the VHS video tape you wish to copy intothe VCR deck.3. Find the place on the VHS tape from which youwant to start dubbing using the PLAY, FF, REWand PAUSE functions. For best results, pauseplayback at the point from which you want torecord.4. Press the DUBBING button.The Dubbing menu appears.5. Use v / V / b / B to select the desired RecordMode: EP, LP, SP or XP.6. Select [Dubbing] then press ENTER or DUBBINGto start copying.7. To stop dubbing at any other time, press STOP (x). Dubbing will stop automatically when the VHStape ends.Note:If the VHS video tape you are attempting to copy iscopy protected, you will not be able to copy the tape.It is not permitted to copy Macrovision encodedtapes.Tip:If you press PAUSE during Dubbing mode, both theDVD and VCR decks go into Pause mode and theDUBBING button blinks on the front panel. While inPause mode, you can adjust the VCR playback posi-tion using PLAY, REW, FF, PAUSE/STEP, etc. TheDVD deck will remain in Pause mode. To resumeDubbing, press the DUBBING button twice.](https://usermanual.wiki/LG-Electronics-USA/9QKE40660/User-Guide-749897-Page-39.png)
![INTRODUCTIONHOOKUP ANDSETTINGSPLAYBACKEDITTINGREFERENCE40Recording from ExternalRecording from ExternalComponentsComponentsYou can record from an external component, such asa camcorder or VCR, connected to any of theRecorder’s external inputs.1. Make sure that the component you want to recordfrom is connected properly to the Recorder. Seepage 18.2. Press INPUT repeatedly to select the externalinput to record from.• AV1: Audio/Video Input mounted on backpanel.• AV2: Audio/Video Input mounted on frontpanel.• DV: DV Input mounted on front panel.3. Load a recordable disc or tape.4. Set a recording mode as necessary by pressingREC MODE repeatedly. DVD: XP, SP, LP or EP.VCR: SP or SLP5. Press zREC once to start recording.The REC indicator lights in the display window.6. Press STOP (x) to stop recording.Notes:•Check that the Audio In settings DV Record Audioare as you want them. See page 24.•If your source is copy-protected usingCopyGuard, you will not be able to record it usingthis recorder. See Copyright on page 9 for moredetails.•Recording continues until you press STOP (x) orthe disc is full.•To record for a fixed length of time, see [InstantTimer Recording] on page 37.Additional InformationAdditional InformationSimultaneous Play and RecordYou can play or record a DVD during the VCR playback, press DVD to change DVD mode andperform the DVD playback or recording.Notes:•You cannot play or record both DVD and VCR atthe same time.•You can not change VCR mode during the DVDrecording mode.•If you wish VCR playback or record during theDVD playback, press VCR to change VCR modeand perform the VCR playback or recording. RECORDING](https://usermanual.wiki/LG-Electronics-USA/9QKE40660/User-Guide-749897-Page-40.png)
![41Recording from DV InputRecording from DV InputBefore DV dubbingYou can connect a DV-equipped camcorder to thisrecorder using a single DV cable for input and outputof audio, video, data and control signals.This recorder is only compatible with DV-format(DVC-SD, DV25) camcorders. Digital satellitetuners and Digital VHS video recorders are notcompatible.You cannot connect more than one DV camcorderat a time to this recorder.You cannot control this recorder from externalequipment connected via the DV IN jack (includingtwo recorders).It may not always be possible to control the con-nected camcorder via the DV IN jack.Digital camcorders can usually record audio asstereo 16-bit/48kHz, or twin stereo tracks of 12-bit/32kHz. This recorder can only record one stereoaudio track. Set [DV Record Audio] option to Audio1 or Audio 2 as required (see page 24).Audio input to the DV IN jack should be 32 or48kHz (not 44.1kHz).Picture disturbance on the recording may occur ifthe source component pauses playback or plays anunrecorded section of tape, or if the power fails inthe source component, or the DV cable becomesdisconnected.Recording from a Digital CamcorderYou can record from a digital camcorder connected tothe DV IN jack on the front panel of this recorder.Using the recorder’s remote, you can control both thecamcorder and this recorder.Before recording, make sure that the audio input forthe DV IN jack is set up (see page 24).Tips:•The source signal must be DVC-SD format.•Some camcorders cannot be controlled using thisrecorder’s remote.•If you connect a second recorder using a DVcable, you cannot control the second DVD fromthis one.•You cannot control this unit remotely from a com-ponent connected to the DV IN jack.•You cannot record date and time information froma DV cassette.1. Make sure your digital camcorder is connected tothe front panel DV IN jack. See page 18.2. Check that the DV audio input is as you require.You can choose between Audio 1 (original audio)and Audio 2 (overdubbed audio).DV Input is set from the DV Record Audio insub-menu of the Setup menu. See [DV RecordAudio] on page 24 for more information.3. Press INPUT repeatedly to select the DV input.4. Find the place on the camcorder tape that youwant to the recording to start from.For best results, pause playback at the point fromwhich you want to record.Depending on your camcorder, you can usethis recorder’s remote to control the camcorderusing the STOP, PLAY, BACKWARD, FOR-WARD and PAUSE functions.5. Press zREC once to start recording. Recording is automatically stopped if therecorder detects no signal.You can pause or stop the recording by press-ing PAUSE/STEP (X) or STOP (x). You cannot control the camcorder from thisRemote Control during recording.In Video mode, the final frame of the recordingmay remain displayed on screen for a whileafter recording stops.TroubleshootingIf you cannot get a picture and/or audio through theDV IN jack, check the bullet points:Make sure the DV cable is properly connected.Try switching off the connected equipment thenswitch back on.Try switching the audio input.Note:Depending on the connected camcorder, you may notbe able to control it using the Remote Control suppliedwith this recorder.](https://usermanual.wiki/LG-Electronics-USA/9QKE40660/User-Guide-749897-Page-41.png)
![INTRODUCTIONHOOKUP ANDSETTINGSPLAYBACKRECORDINGREFERENCE42TTitle List and Chapter Listitle List and Chapter ListMenu Overview Menu Overview Using the Title List menu you can edit video content.The editing features available in the Title List menudepend on whether you are editing video on DVD,and whether you’re editing Original content, or aPlaylist.There are two ways to edit VR mode DVD-RW discs.You can directly edit the Original content of the disc,or you can create and edit a Playlist. The Playlistdoesn’t actually change any of the content on thedisc, but just controls how the content is played back.1. Press DISC MENU/LIST to display the TITLELIST menu.Playback should be stopped when you do this.When selecting titles, use the v/ Vbuttons todisplay the previous/next page if there are morethan six titles.If you are editing a VR mode disc, press DISCMENU/LIST to switch between Original andPlaylist menu.On the left side of the screen are the menuoptions. The main part of the screen showsthumbnails of the titles (or chapter) on the DVD.You can change these thumbnails using theTHUMBNAIL button. (see [Changing TitleThumbnails] on page 44.)Press DISPLAY to display the information ofselected title on the Title List menu.After selecting a title or chapter on the Title Listof Chapter List menu, then press ENTER. Themenu options on the left side of the menu. Usev/ Vto select a option then press ENTER toconfirm your selection. 2. To exit the TITLE LIST menu, press RETURN(O) repeatedly.1. Menu options: To display menu option, select atitle or chapter then press ENTER. The optionsdisplayed differ depending on the disc type.• [Play] Start playback of the selected title or chapter.The hidden titles and chapters on the DVD+R/RWcannot be play back.• [Search] - [Chapter] ; Displays Chapter List of the Title.- [Time] ; Search time for you want start pointof the title .• [Delete] Deletes the title or chapter. (page 50)• [Move] Moves chapter position on [Chapter List -Playlist] menu (page 53).• [Protect] Protects accidental recording, editing ordeleting of the title.(page 53)• [Edit] Edits or Deletes a part of the title.- [Title Name] Edits the title name. (page 51).- [Delete Part] Deletes a part of the Title (page 50).- [Divide] Divides a title into two (page 52).- [Hide (Show)] Hides (or Shows) the selected title orchapter. (page 53)• [Playlist Add] Adds the title or chapter to the Playlist.(page 49)• [Dubbing] Dubs the title to VCR.• [Title] Displays Title List of the chapter.• [Combine] Combines two titles or chapters into one(page 52).• [Full Play] Starts playback of the selected title includ-ing the hidden chapters.2. Current media.3. Indicates the record mode, free space, andelapsed time progress bar.4. Currently selected title.5. Thumbnail.6. Shows the selected title number and total numberof titles.7. Shows the title name, recorded date, and record-ing length.Editing123 4 5 67EDITTING](https://usermanual.wiki/LG-Electronics-USA/9QKE40660/User-Guide-749897-Page-42.png)
![43VR Mode: Original andVR Mode: Original andPlaylist EditingPlaylist EditingTitles, Chapters and PartsTitles in the disc’s original content contain one ormore chapters. When you insert a disc’s title into thePlaylist, all the chapters within that title also appear.In other words, chapters in the Playlist behave exact-ly as chapters on a DVD-Video disc do. Parts aresections of Original or Playlist titles. From the Originaland Playlist menu you can add or delete parts.Adding a chapter or title to the Playlist creates a newtitle made up of a section (ie., chapter) of an Originaltitle. Deleting a part removes part of a title from theOriginal or Playlist menu.CautionWhen editing using the Delete, Add and Move func-tions, the start and end frames may not be exactlyas set in the start and end point display.During Playlist playback, you may notice a momen-tary pause between edits. This is not a malfunction.Is editing a DVD like editing a video tape?No. When you edit a video tape you need one videodeck to play the original tape and another to recordthe edits. With DVD, you edit by making a ‘Playlist’ ofwhat to play and when to play it. On playback, theRecorder plays the disc according to the Playlist.About word ‘Original’and ‘Playlist’Throughout this manual, you will often see the wordsOriginal and Playlist to refer to the actual content andthe edited version.Original: content refers to what’s actually recordedon the disc.Playlist: content refers to the edited version of thedisc — how the Original content is to be played.Adding Chapter MarkersAdding Chapter MarkersYou can create chapters within a title by insertingchapter marks at the desired points.Note:Chapter markers are inserted at regular intervalsautomatically. You can change this interval from theInitial Setup menu (see [Auto Chapter] on page 24).During recording or playing back, at the point youwant to start a new chapter, press CHP. ADD.A chapter marker icon appears on the TV screen.Changing TChanging Title Thumbnailsitle ThumbnailsEach title displayed in the Title List menu is repre-sented by a thumbnail picture taken from the start ofthat title or chapter.If you prefer, select a different still picture from withina title.Press THUMBNAIL to make the currently displayedpicture the one that appears in the Title List menu.The still picture that you choose appears in both theOriginal or Playlist menu.Tip:You can also change the thumbnail picture of the titleon the Chapter List menu. Select a chapter on theChapter List menu then press THUMBNAIL. Thethumbnail picture of the title that includes the chapteris changed.RAM+R+RW-RWVRRAM+R+RW-RWVRRAM-RWVR](https://usermanual.wiki/LG-Electronics-USA/9QKE40660/User-Guide-749897-Page-43.png)
![INTRODUCTIONHOOKUP ANDSETTINGSPLAYBACKRECORDINGREFERENCE44Making a New Playlist Making a New Playlist Use this function to add an Original title or chapter tothe Playlist. When you do this, the whole title is putinto the Playlist (you can delete bits you don’t needlater - see [Deleting an Original or Playlist title/chap-ter] on page 50).The title appears in the Playlist complete with thechapter markers that appear in the Original. However,if you add more chapter markers to the Original later,these are not automatically copied over into thePlaylist title.1. Choose a title or chapter on the [TITLE LIST-Original] menu or [Chapter List-Original] menu toput into the Playlist, then press ENTER.The menu options appears on the left side of themenu.2. Use v/ Vto select [Playlist Add] option thenpress B.3. Select [New Playlist] then press ENTER.The new title appears in the updated Playlist. Allchapters of the title are added to the Playlist.Adding Adding Additional TAdditional Title /itle /Chapters to the PlaylistChapters to the PlaylistYou can add an Original title or chapter to add to aPlaylist title even if it is already registered.1. Choose a title or chapter on the [TITLE LIST-Original] menu or [Chapter List-Original] menu toput into the Playlist, then press ENTER.The menu options appears on the left side of thescreen.2. Use v/ Vto select [Playlist Add] from menuoptions then press B.3. Choose a Title List-Playlist that is already regis-tered to insert a title or chapter, then pressENTER.4. Repeat steps 1-3 to add additional title or chapteron the Playlist.You can view the added chapters on the [ChapterList-Playlist] menu.5. Press RETURN (O) to exit, or DISC MENU/LISTto go back to the [Title List-Original] menu.RAM-RWVRRAM-RWVREDITTING](https://usermanual.wiki/LG-Electronics-USA/9QKE40660/User-Guide-749897-Page-44.png)
![45Deleting an Original orDeleting an Original orPlaylist TPlaylist Title/Chapteritle/ChapterWhen you erase a title or chapter from the Playlistmenu, you only remove it from the Playlist; thetitle/chapter remains in the Original menu.If you choose to delete a title or chapter from theOriginal (title/chapter) menu, the title or chapter isactually deleted from the disc and the remaining timeavailable for recording increases. Titles/chaptersdeleted from the Original are also removed from thePlaylist.Note:It may not be possible to delete chapters that are lessthan 5 seconds long.1. Use b/ B/ v/ Vto choose a chapter or title youwant to delete on the [TITLE LIST] or [ChapterList] menu then press ENTER.The menu options appears on the left side of thescreen.2. Select [Delete] option from the options on themenu.Example: Title List (DVD-VR)3. Press ENTER to confirm.The confirm message for deleting will appear.4. Use b/ Bto select [OK] then press ENTER.The selected chapter or title is deleted.After pressing ENTER, the new, updated menu isdisplayed.5. Repeat steps 1 - 4 to continue to delete from themenu.6. Press RETURN (O) repeatedly to exit the menu.Notes:•When DVD+RW recording, the deleted title’sname is changed to [Deleted Title].•If more than two titles are repeatedly deleted, thetitles are combined into one.•When you are deleting a title or chapter, only thelast one on DVD+R/RW increases remainingrecording time.Deleting a PartDeleting a PartYou can delete a part which you do not want in thetitle.1. Use b/ B/ v/ Vto choose a title you want todelete on the Title List menu then press ENTER.The options appears on the left side of the menu.2. Select [Edit] > [Delete Part] option then pressENTER.[Edit] menu appears on the TV screen.Example: Edit (Delete Part) (DVD-VR)3. Starts playback and use pause step, search andslow-motion to find the starting point.4. Press ENTER at the starting point of the sectionyou want to delete. [End Point] icon is highlighted.The part is indicated on the Progress Bar. 5. Use pause step, search and slow-motion to findthe ending point.6. Press ENTER at the ending point of the sectionyou want to delete.You can cancel the selected point, use v/Vtoselect [Cancel] icon then press ENTER.7. If you finish to edit, select [Done] icon then pressENTER. The confirm message for deleting will appear.Use b/ Bto select [OK] then press ENTER.The selected part is deleted from the title and TitleList menu appears.Notes:• It may not be possible to delete parts that are less than3 seconds long.• If you select [Cancel] then press ENTER, the Recorderwill go to previous option and into Pause mode.RAM-RWVR](https://usermanual.wiki/LG-Electronics-USA/9QKE40660/User-Guide-749897-Page-45.png)
![INTRODUCTIONHOOKUP ANDSETTINGSPLAYBACKRECORDINGREFERENCE46Naming a TNaming a TitleitleYou can name Original and Playlist titles independ-ently.1. Choose the title you want to name on the Title Listmenu, then press ENTER.The menu options appears on the left side of themenu.2. Use v/Vto select [Edit] > [Title Name] option thenpress ENTER. Keyboard menu appears.3. Enter a name for the title. Use b/ B/ v/ Vtoselect a character then press ENTER to confirmyour selection.•Language : Selects a keyboard type.•Space: Inserts a space at the cursor position.•Delete: Deletes the character to the left of thecursor position.•b / B: Moves the cursor left or right.•OK: Confirms the name you have entered.•Cancel: Deletes all characters and exits theKeyboard menu.Remote control buttons for entering a name•PLAY (NN): Inserts a space at the cursor posi-tion.•PAUSE/STEP (X): Deletes the character tothe right of the cursor position.•SKIP (. / >): Moves the cursor left orright.•STOP (x), CLEAR: Deletes the character tothe left of the cursor position.•0-9: Enters the character corresponding to theselected column. •DISC MENU/LIST, DISPLAY: Switches thekeyboard type.4. Choose [OK] then press ENTER to fix the nameand return to the previous menu screen.5. Press RETURN (O) repeatedly to exit the menu.Notes:•Names can be up to 32 characters long.•For discs formatted on a different recorder, youwill see only a limited character set.•When recording on DVD-R, DVD+R or DVD+RWdiscs, the entered name is displayed on the DVDplayer only after finalization.TTime Searchime SearchYou can select start point of the title.1. Use b/ B/ v/ Vto choose a title on the TITLELIST menu then press ENTER.The options appears on the left side of the menu.2. Select [Search] > [Time] option then pressENTER.[Time] menu appears on the TV screen.3. Use b/ Bto find the point you want to start.The point increase 1 minute step.If you press and hold b/ Bthen the pointincrease 5 minute step.4. Press ENTER to start seleted point.Current pictureSeleted timeStart timeSelected pointEnd timeEDITTING](https://usermanual.wiki/LG-Electronics-USA/9QKE40660/User-Guide-749897-Page-46.png)
![47Moving a Playlist Chapter Use this function to re-arrange the playing order ofPlaylist chapters on the Chapter List-Playlist menu.Note:This function is not available if there is only onechapter.1. Select a chapter on the Chapter List-Playlistmenu.2. Press ENTER.The menu options appears on the left side of themenu.3. Use v/ Vto select [Move] option from Playlist options then press ENTER.4. Use b/ B/ v/ Vto choose the place you want tomove the chapter then press ENTER.After pressing ENTER, the updated menu is displayed.Hide a Chapter/THide a Chapter/TitleitleYou can skip playing chapters or titles without delet-ing from the disc.1. Use vVbBto choose a chapter or title youwant to hide on the [TITLE LIST] or [Chapter List]menu, then press ENTER.Options appear on the left side of the screen.2. Select [Edit] > [Hide] option.Example: Title List (DVD+RW)3. Press ENTER to confirm.The chapter’s or title’s thumbnail will dim.Tip:If you select a hidden chapter or title on the TITLELIST or Chapter List menu, you can ‘show’ it bychoosing [Show] option on the menu. After doing that,you are able to see the chapter or title.Protect a TProtect a TitleitleUse this function to protect against accidental record-ing, editing or deleting of the title.1. Press DISC MENU/LIST to display the [TITLELIST] menu.2. Use vVbBto choose a title you want to protectthen press ENTER.Options appear on the left side of the screen.3. Select [Protect] from the options.Example: Title List (DVD+RW)4. Press ENTER to confirm.The lock mark will appears on the title’s thumbnail.Tip:If you select a title that has already been protectedon the Title List menu, you can ‘unprotect’ it bychoosing [Unprotect] option from the Title List menuoptions. After doing that, you can edit and delete thetitle.RAM-RWVR+R+RW+R+RW-RWVR](https://usermanual.wiki/LG-Electronics-USA/9QKE40660/User-Guide-749897-Page-47.png)
![INTRODUCTIONHOOKUP ANDSETTINGSPLAYBACKRECORDINGREFERENCE48Divide One TDivide One Title Into Title Into TwowoUse this command to split a title up into two newtitles.1. On the Title List menu, select a title you want todivide then press ENTER.The menu options appears on the left side of thescreen.2. Select [Edit] > [Divide] option.Example: Title List (DVD+RW)3. Press ENTER.[Edit (Divide)] menu appears.4. Use play, pause step, search and slow-motion tofind the point you want to divide the title.5. Select [Divide] option then press ENTER at thepoint. To reset the point, select [Cancel] option thenpress ENTER. Repeat from step 3.6. Choose [Done] option then press ENTER to fixthe dividing point.The title is divided into two new titles. It take up to 4 minutes to divide.Note:You cannot select dividing point less than 3 seconds.Combining TCombining Two Chapterswo ChaptersInto OneInto OneUse this function to combine two adjacent chaptersinto one.1. On the Chapter List menu, select the secondchapter of the two chapters you want to combinethen press ENTERThe menu options appears on the left side of thescreen.2. Use v/ Vto select [Combine] option.The combine indicator appears between the twochapters you want to combine.Example: Title List (DVD+RW)3. Repeat steps 1 - 2 to continue to combine fromthe menu.4. Press RETURN ( O) repeatedly to exit themenu.Notes:This function cannot operate listed as below;•If there is only one chapter within the title.•If you select first chapter.•If two chapters created by erasing a part from an original title.•If two chapters created from different titles.•If two chapters created by moving an order from an original title.RAM+R+RW-RWVR+RWThe first title’sthumbnailCurrent pictureThe secondtitle’s thumbnailEDITTING](https://usermanual.wiki/LG-Electronics-USA/9QKE40660/User-Guide-749897-Page-48.png)
![49Overwriting RecordingOverwriting RecordingTo overwrite a new video recording on a previouslyrecorded title, follow these steps. This feature is notavailable for DVD+Rs, that always record at the endof the Disc.1. Select input source you want to record (TV channel, AV1-2, DV). 2. Press DISC MENU/LIST to display the TITLELIST menu.3. Use vVbBto choose a title you want to overwrite.4. Press zREC to start overwrite recording.Overwrite recording starts from the start point ofthe title.5. Press STOP (x) to stop the overwrite recording.The new title is created and updated menu is dis-played.Notes:• This function is not available for a protected title. •If the overwrite is longer than the recordinglength of the current title, the next title is over-written. But if next title is protected, the over-writing stops at the starting point of the title.• If the selected title’s recording length is less than10 seconds, the next title is overwritten. But if thenext title is protected, overwriting stops.VViewing Tiewing Title List menu itle List menu displayed on other DVDdisplayed on other DVDRecorders or PlayersRecorders or PlayersYou can view the Title List menu displayed on theother DVD player that is capable of playing DVD+RWor DVD+R discs. 1. Insert DVD+R or DVD+RW disc recorded already.2. Press TITLE in Play mode or DVD tuner mode.Title List menu will appear as shown below.3. To play back a title, select the title you want thenpress ENTER or PLAY (N).Tip:You can remove the Title List menu by pressingSTOP (x).Playing Playing YYour Recordings onour Recordings onOther DVD PlayersOther DVD Players(Finalizing a Disc)(Finalizing a Disc)Most regular DVD players can play finalized discsrecorded in Video mode, finalized DVD+R orDVD+RWs. A small number of players can also playDVD-RW discs recorded in VR mode, finalized or not.Check the manual that came with the other player tocheck what formats of discs it will play.Finalizing ‘fixes’ the recordings and editings in placeso that the disc can be played on a regular DVD play-er or computer equipped with a suitable DVD-ROMdrive.Finalizing a Video mode disc creates a menu screenfor navigating the disc. The menu can be accessedby pressing DISC MENU/LIST or TITLE. To finalize a disc, refer to [Finalize]on page 25.Notes:• Unfinalized DVD+RW is playable on regular DVDplayers.• The edited contents of a DVD+RW (DL) disc iscompatible on regular DVD players only afterfinalization.• Any edited contents of the DVD+R disc are not compatible on regular DVD players.(Hide, chapter combine, added chapter mark, etc.)• How long finalization takes depends on the typeof disc, how much is recorded on the disc, andthe number of titles on the disc. • DVD+R DL disc can take up to 30 minutes to finalize.+R+RW+RW](https://usermanual.wiki/LG-Electronics-USA/9QKE40660/User-Guide-749897-Page-49.png)
![INTRODUCTIONHOOKUP ANDSETTINGSPLAYBACKRECORDINGEDITTING52TTroubleshootingroubleshootingSymptomNo power.Abnormal or no picture.No sound.The playback picture ispoor.Picture from externalinput is distorted.Some channels areskipped over whenusing CH (v/ V).CauseThe power cord is disconnected.The TV is not set to receive Recordersignal output.The video cable is not connectedsecurely.Unit output setting and TV resolutioncapabilites mismatch.Wrong connection.The equipment connected with theaudio cable is not set to receiveRecorder signal output.The audio cables are not connectedsecurely.The power of the equipment connectedwith the audio cable is turned off.The AUDIO options are set to the wrongposition.In HDMI mode, audio selection is notset to PCM.The disc is dirty.The TV channels are not tuned in properly.Tape heads are dirty.Tape is a rental or was recorded onanother VCR.The video signal from the external component is copy-protected.The skipped channels were deleted withthe CH. Add/Del feature.CorrectionPlug the power cord into the wall out-let securely.Select the appropriate video inputmode on the TV so the picture fromthe Recorder appears on the TVscreen.Connect the video cable into the jackssecurely. Check TV capability.Check mode of connections(eg. S-Video, Components etc.).Check unit Resolution setting accord-ing to TV capability and mode of con-nection.Check the connection.Select the correct input mode of theaudio receiver so you can listen to thesound from the Recorder.Connect the audio cable into the jackssecurely.Turn on the equipment connected withthe audio cable.Set the AUDIO options to the correctposition.Change AUDIO setup to PCM mode.Clean the disc.Check tuning, carry out tuning again.Clean video heads.Use CH/TRK (v/V) for manual trackingadjustment while tape is playing.You cannot connect via the Recorder.Connect the component directly toyour TV.Use the CH. Add/Del feature torestore channels. See [To Add orErase Channels] on page 21. Check the following guide for the possible cause of a problem before contacting service.REFERENCE](https://usermanual.wiki/LG-Electronics-USA/9QKE40660/User-Guide-749897-Page-52.png)
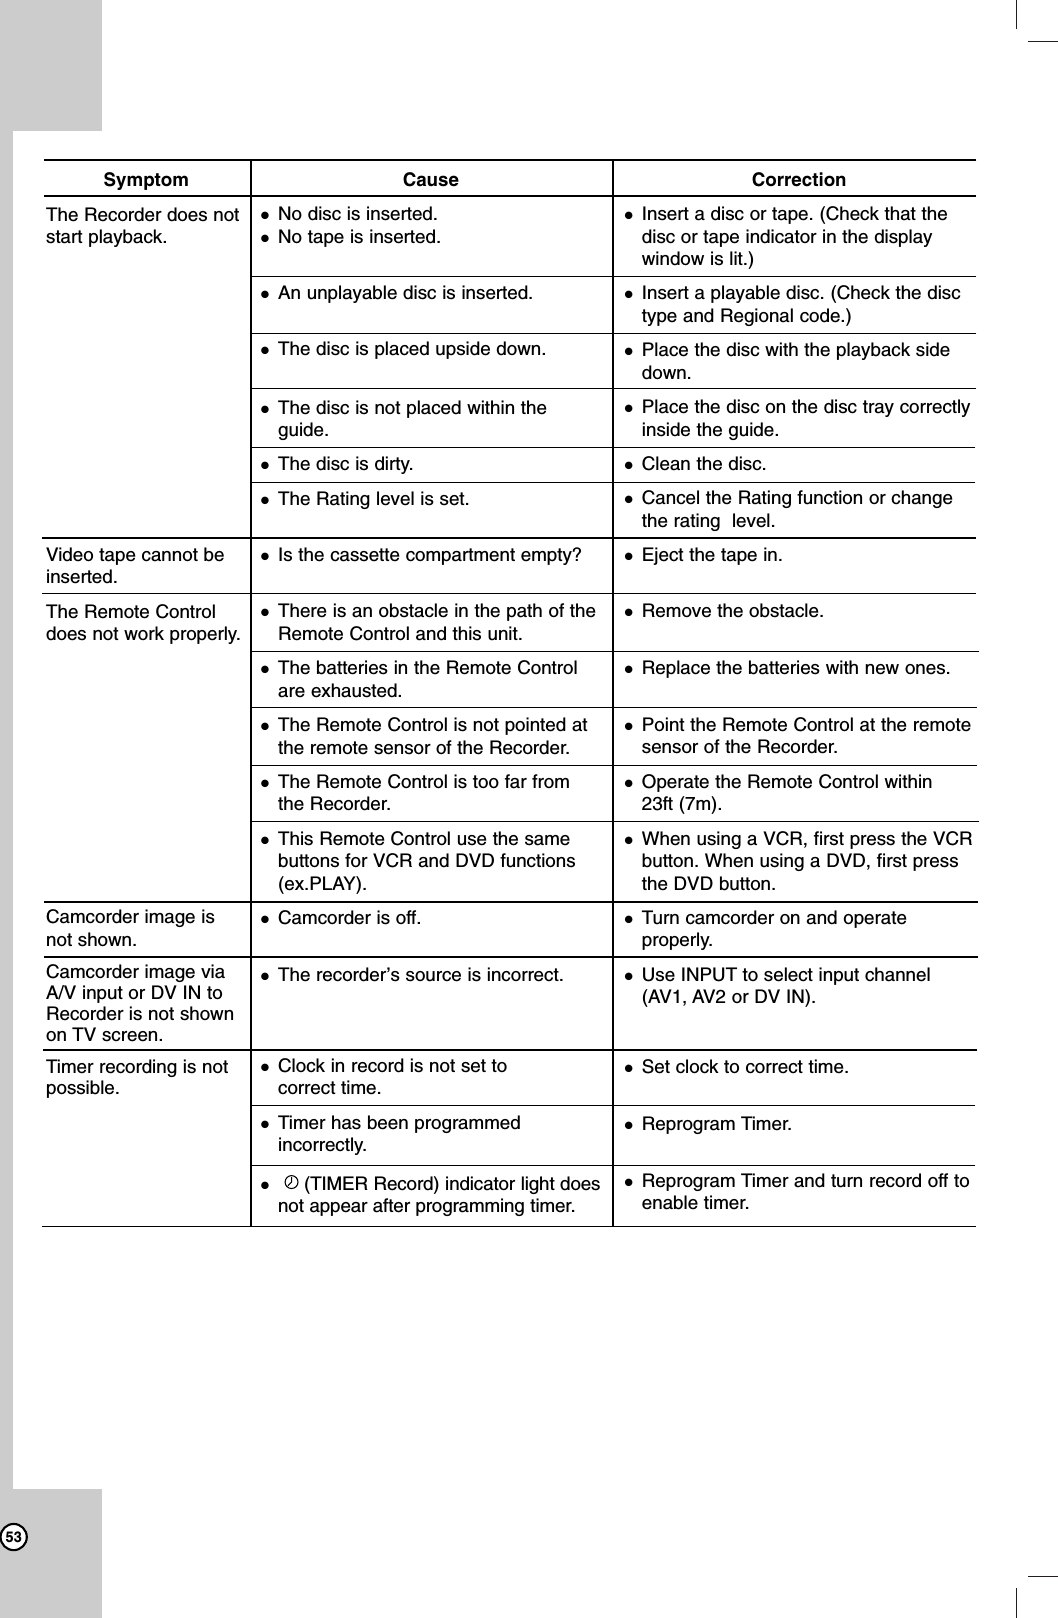
![INTRODUCTIONHOOKUP ANDSETTINGSPLAYBACKRECORDINGEDITTING54SymptomPicture or sound ofbroadcasting channel isweak or missing.Can’t play disc recordedon this Recorder onanother DVD player.Cannot record or didnot record successfully.Stereo Audio Recordand/or Playback notpresent.CauseAntenna or cables are loose.Wrong Tuning Band is selected in theRecorder Setup menu.The disc was recorded in Video mode.Some players will not play even afinalized disc recorded in Video mode.The disc was recorded in VR mode.Discs recorded with copy-once materi-al cannot be played on other players.The remaining blank space on thedisc is insufficient.The source you are trying to record iscopy-protected.When setting the recording channel,the channel is tuned on the TV’s owntuner.When recording to a Video mode disc,programs that are copy-once protect-ed cannot be recorded.TV is not Stereo-compatible.Broadcast program is not in stereo for-mat.Recorder A/V Out jacks are not connected to TV A/V In jacks.Recorder Audio/Video Out is notselected for viewing at the TV.Recorder’s TV audio channel is set toSAP or MONO.CorrectionTighten connections or replace cable.Try [Tuning Band Select] options; seepage 21 for details.Finalize the disc; see page 25.No solution.The other player must be RW compatible in order to play it.No solution.Use another disc.You cannot record the source.Select the channel on the Recorder’sbuilt-in TV tuner.Use a VR mode formatted disc forcopy-once material.No solution.No solution.Make A/V connections. Stereo is avail-able only via A/V output from Recorder.Select AUX or A/V source as TV input.Set TV audio channel mode to Stereo.See [Changing TV Audio Channel] onpage 26.Reset the RecorderIf you observe any of the following symptoms...• When the Recorder is plugged in, but thepower will not turn on or off.• When the display window does not working.• When the Recorder does not operate normally.You can reset the Recorder as follows :• Press and hold the POWER button for morethan five seconds. This will force the Recorderto power off.Press the POWER button again to turn theRecorder back on.• Unplug the power cord and then plug thepower cord again after more than five sec-onds.REFERENCE](https://usermanual.wiki/LG-Electronics-USA/9QKE40660/User-Guide-749897-Page-54.png)