LG Electronics USA ASW1000UA Media Box User Manual
LG Electronics USA Media Box
Contents
- 1. User manual 1 of 3
- 2. User manual 2 of 3
- 3. User manual 3 of 3
User manual 2 of 3

WATCHING TV / CHANNEL CONTROL
41
NOTE
!
Select the viewing source by using the INPUT button on the remote control.
■This TV is programmed to remember which power state it was last set to, even if the power cord is out.
When finished using the TV, press the POWER button on the remote control. The TV reverts to standby
mode.
3
4
GIf you intend to be away on vacation, disconnect the power plug from the wall power outlet.
GIf you do not complete the Initial setting, it will appear whenever the TV is switched on until the Initial
setting procedure is completed.
GIf you remove power from the TV/Media Box or turn off the main power switch on the TV/Media Box, the
Clock will be reset.

WATCHING TV / CHANNEL CONTROL
42
CHANNEL SELECTION
WATCHING TV / CHANNEL CONTROL
Press the CH ( or )or NUMBER buttons to select a channel number.
1
VOLUME ADJUSTMENT
Press the VOL (+ or -) button to adjust the volume.
If you want to switch the sound off, press the MUTE button.
You can cancel the Mute function by pressing the MUTE or VOL (+ or -)
button.
Adjust the volume to suit your personal preference.
1
2
3
WATCHING TV / CHANNEL CONTROL
43
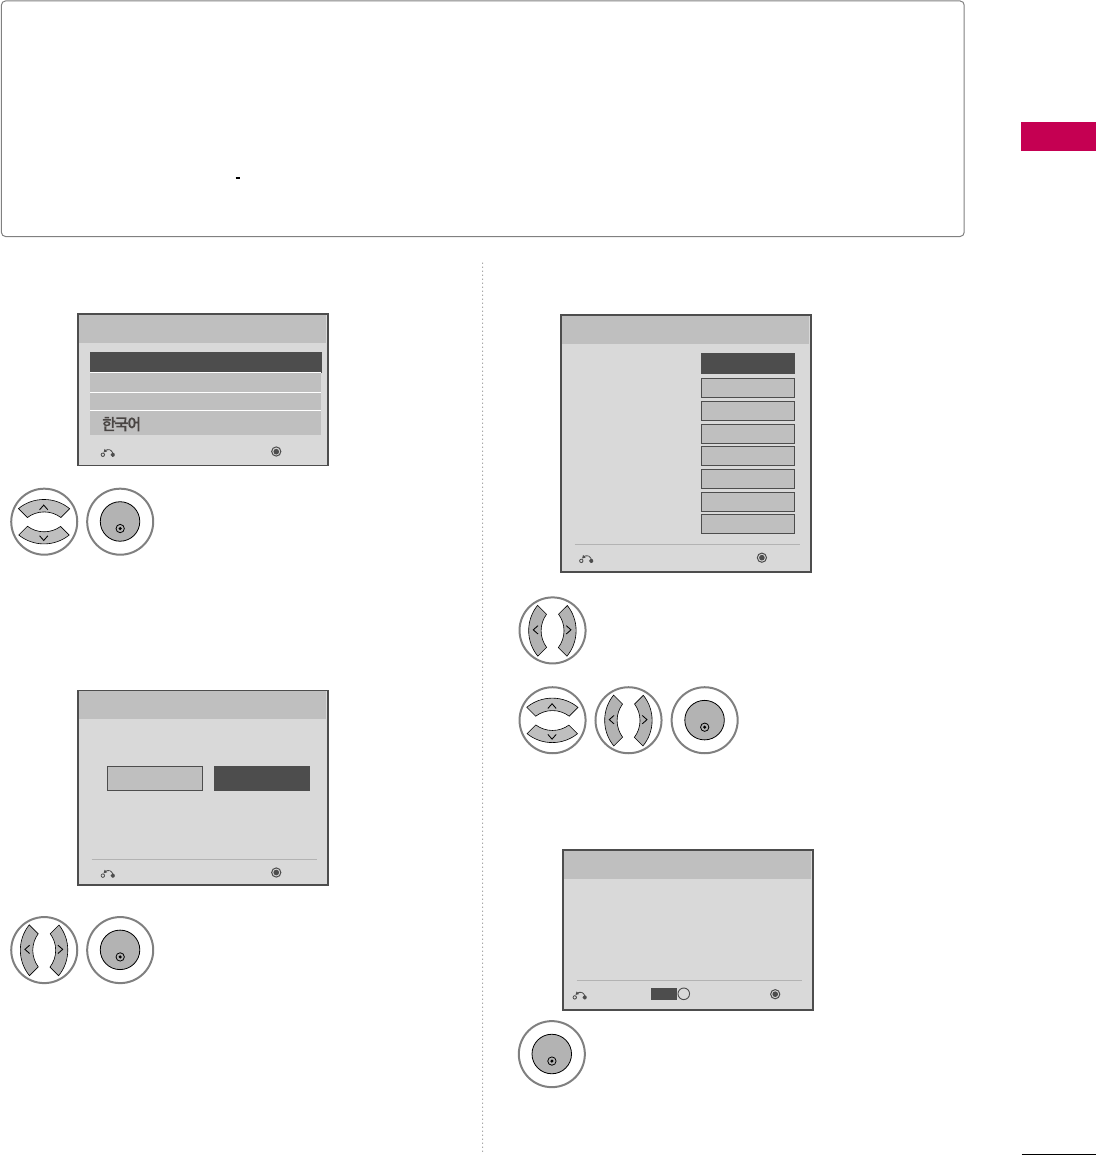
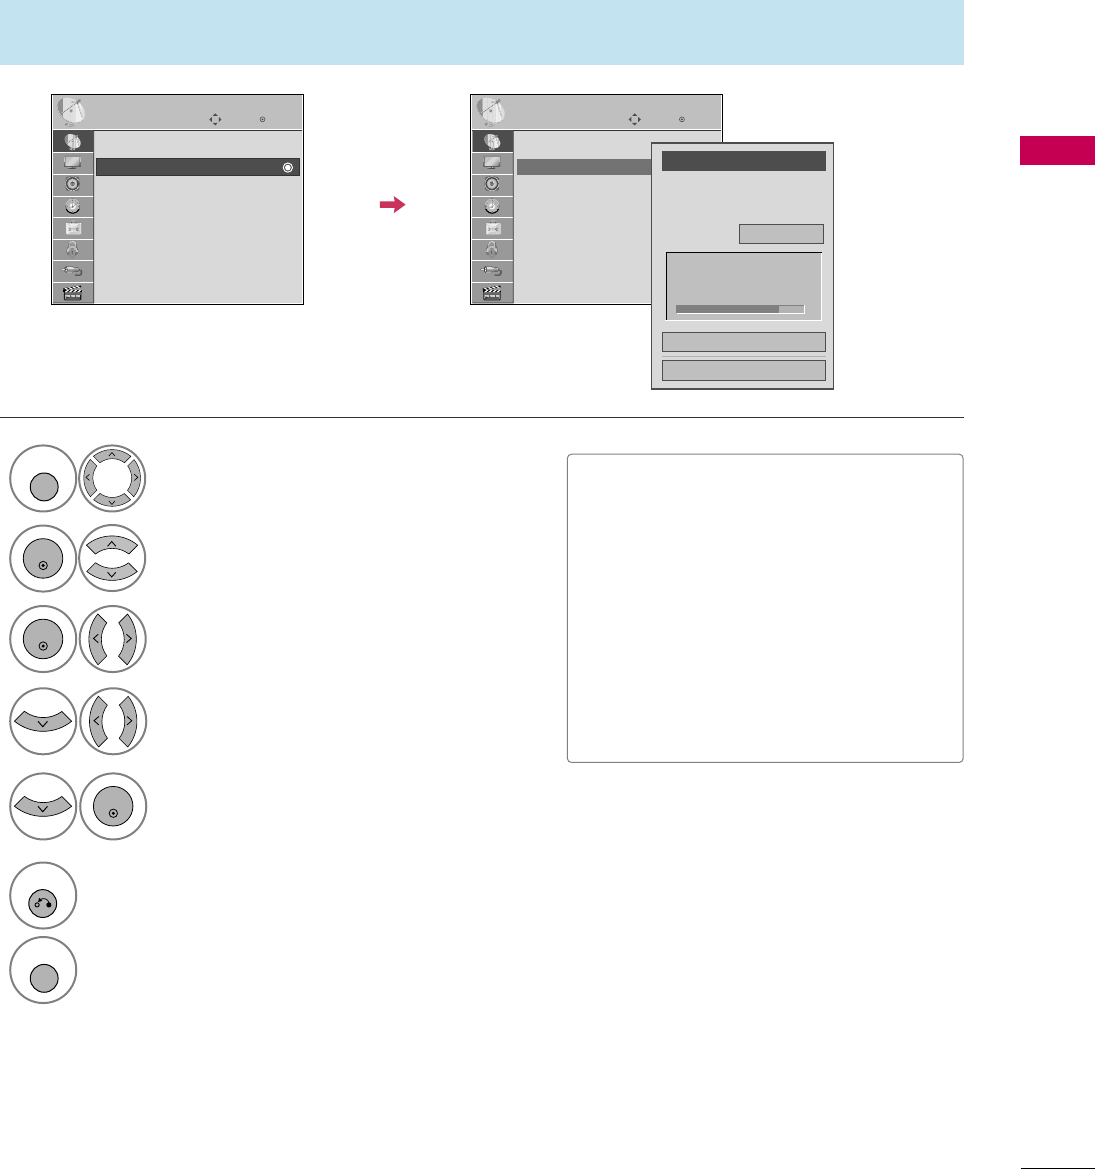
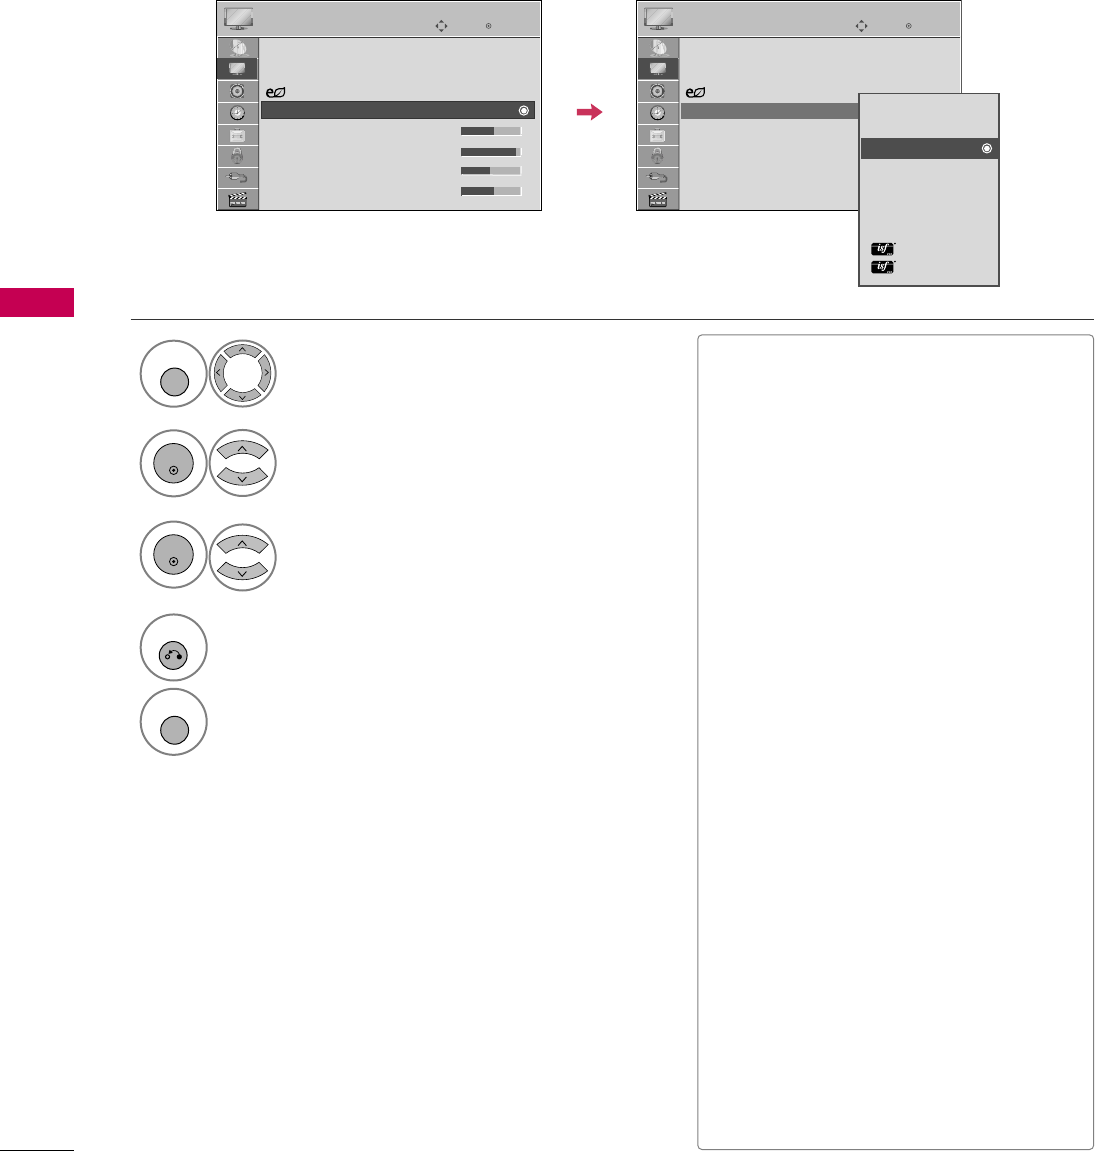
INITIAL SETTING
This Function guides the user to easily set the essential items for viewing the TV for the first time when
purchasing the TV. It will be displayed on the screen when turning the TV on for the first time. It can also be
activated from the user menus.
■Default selection is “Home Use”. We recommend setting the TV to “Home Use” mode for the best pic-
ture in your home environment.
■“Store Demo” Mode is only intended for use in retail environments. Customers can adjust the “Picture
menu - Picture mode” manually while inspecting the TV, but the TV will automatically return to preset in-
store mode after 5 minutes.
■“Store Demo” Mode is an optimal setting for displaying at stores. “Store Demo” mode initializes the TV
to set the image quality.
■You can also adjust Initial Setting in the OPTION menu.
Check your antenna connection and start
Auto Tuning.
1
ENTER
Step3. Time setting
Step4. Auto Tuning
Language
Step1. Selecting Language
English
Español
Français
Selecting the environment.
Choose the setting mode you want.
Select [Home Use] to use this TV at home.
To use this TV at Store, select [Store Demo].
Store Demo
Home Use
Mode Setting
Step2. Mode setting
NextPrevious
NextPrevious
Select Auto or Manual.
Select desired time
option.
1
2
ENTER
Month
Current Time Setting
02
Date 21
Year 2009
Hour 10 AM
Minute 10
Time Zone Eastern
Daylight Saving
Auto
F Auto G
Time Setting
NextPrevious
Before starting,
be sure that the
TV antenna is connected.
Auto Tuning
Next
Simple Manual
Previous
INFO
i
Select Menu Language.
1
ENTER
Select Home Use.
1
ENTER
WATCHING TV / CHANNEL CONTROL
44
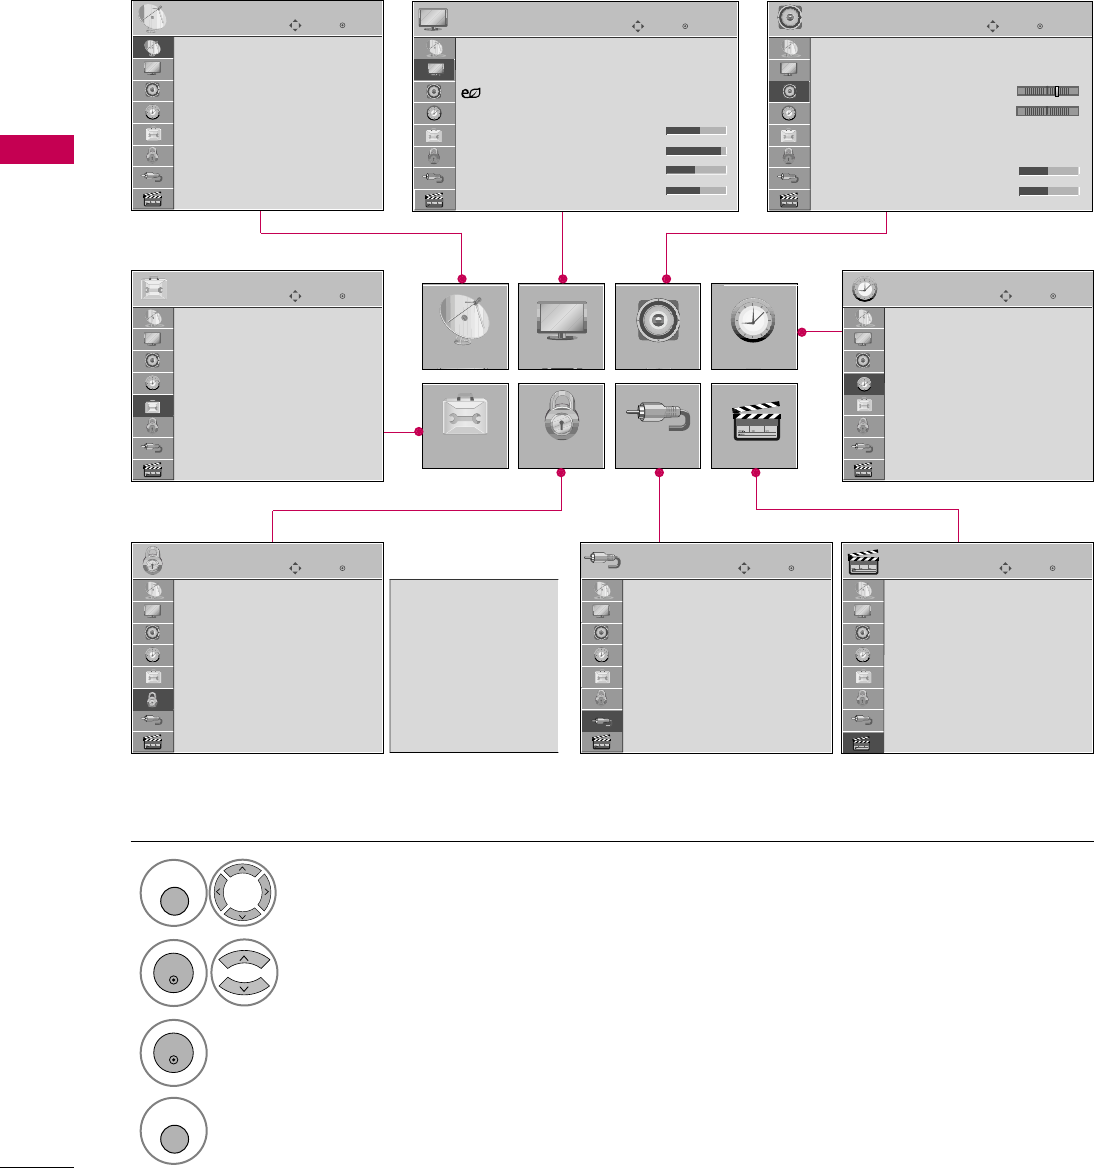
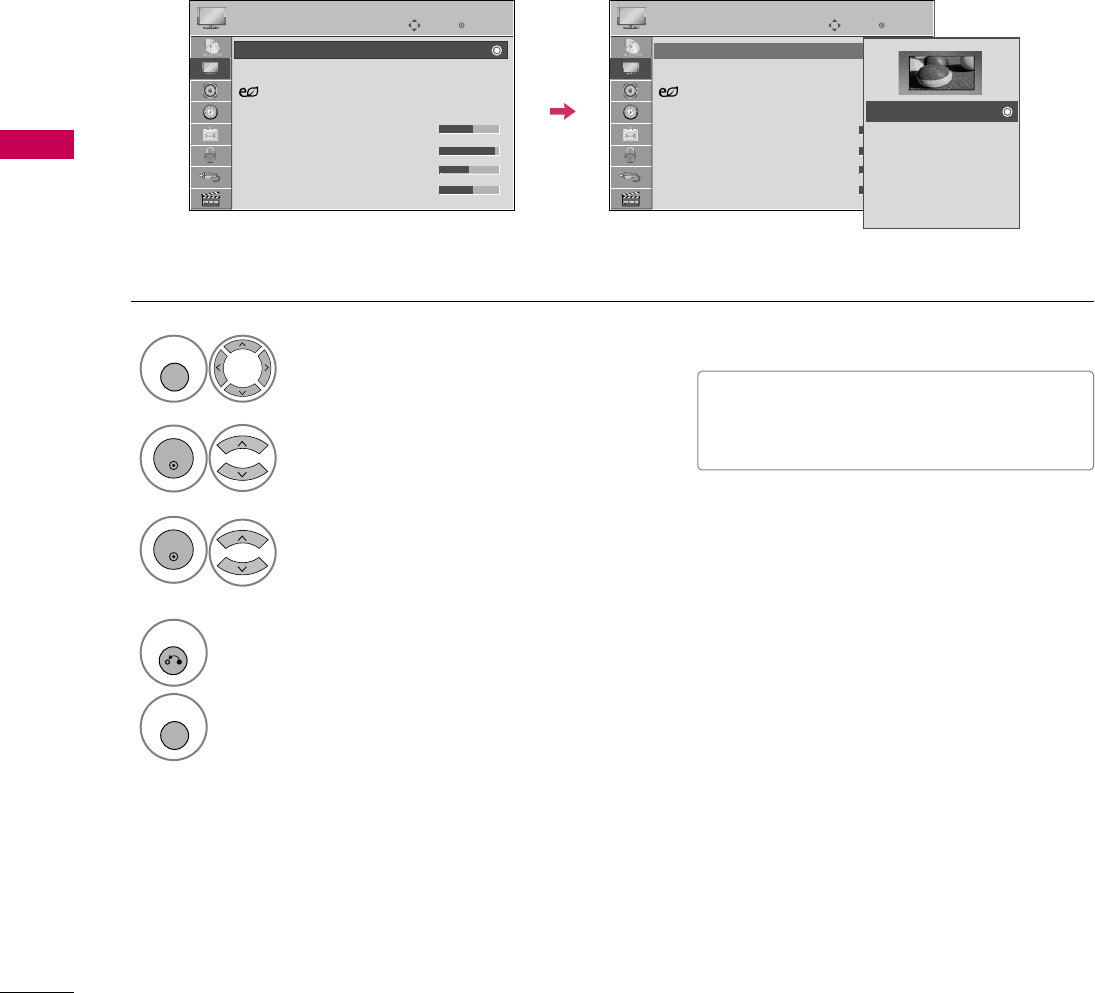
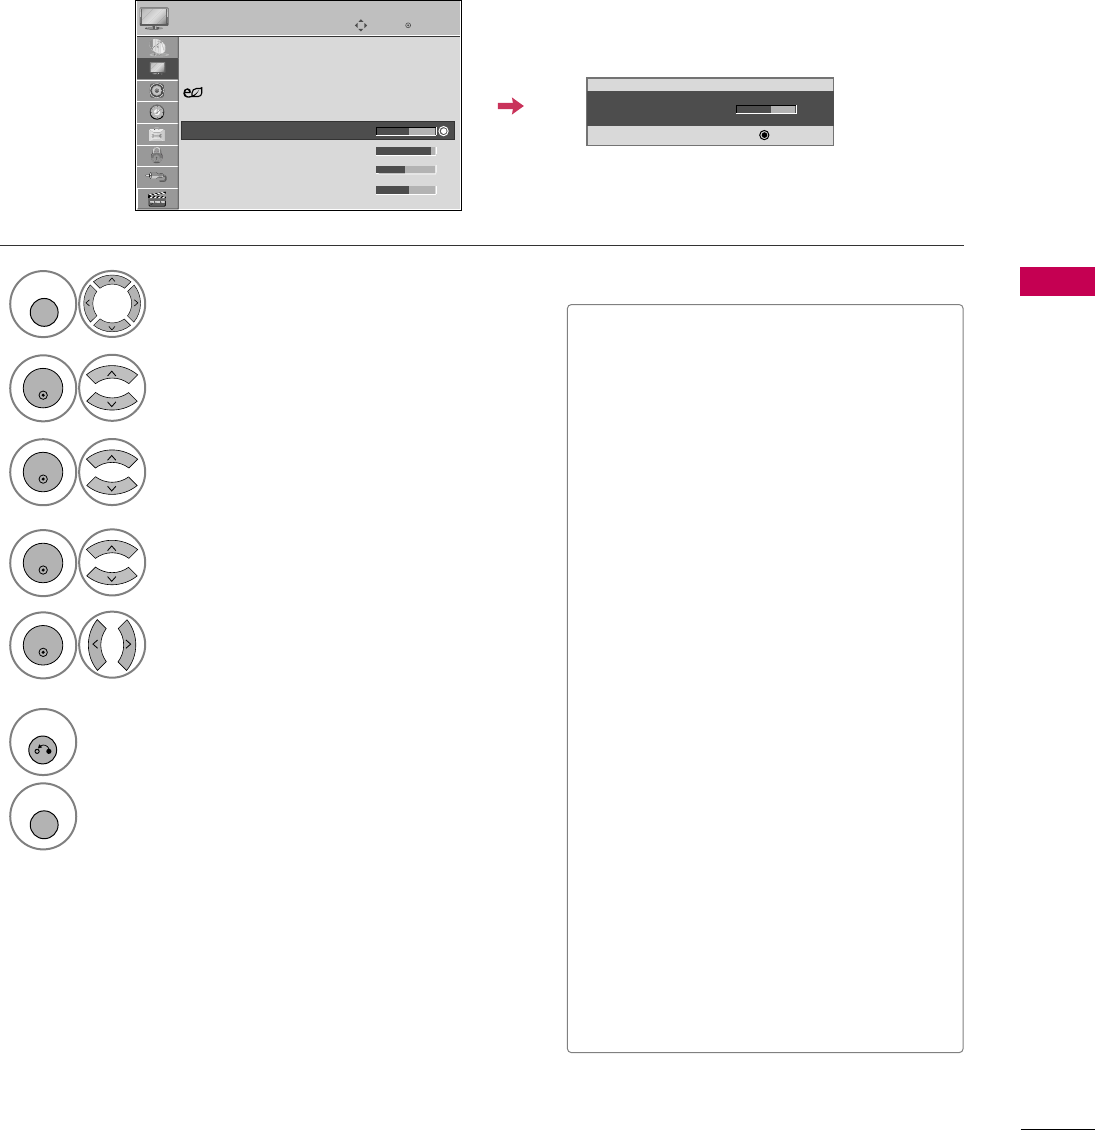
ON-SCREEN MENUS SELECTION
WATCHING TV / CHANNEL CONTROL
Your TV's OSD (On Screen Display) may differ slightly from that shown in this manual.
Display each menu.
Select a menu item.
Accept the current selection.
1
MENU
3
2
ENTER
ENTER
Return to TV viewing.
4
MENU
Enter
Move
Auto Tuning
Manual Tuning
Channel Edit
CHANNEL
CHANNEL
OPTION
PICTURE
LOCK
AUDIO
INPUT
TIME
USB
Enter
Move
Aspect Ratio : 16:9
Picture Wizard
Energy Saving
: Off
Picture Mode : Standard
• Backlight 70
• Contrast 90
• Brightness 50
• Sharpness 70
PICTURE
E
Enter
Move
Auto Volume : On
Clear Voice II : On
• Level 3
Balance 0
Sound Mode : Standard
•
SRS TruSurround XT:
Off
• Treble 50
• Bass 50
AUDIO
E
Enter
Move
Clock
Off Time : Off
On Time : Off
Sleep Timer : Off
TIME
Enter
Move
Photo List
Music List
Movie List
DivX Reg.Code
Deactivation
USB
Enter
Move
TV
AV1
AV2
Component1
Component2
RGB-PC
HDMI1
HDMI2
INPUT
E
Enter
Move
Lock System : Off
Set Password
Block Channel
Movie Rating
TV Rating-Children
TV Rating-General
Downloadable Rating
Input Block
LOCK
Lock System : Off
Set Password
Block Channel
TV Rating-English
TV Rating-French
Downloadable Rating
Input Block
Enter
Move
Menu Language : English
Audio Language : English
Input Label
SIMPLINK : On
Key Lock : Off
Simple Manual
Caption : Off
Power Indicator
OPTION
For USA For Canada
E
LR
-+
WATCHING TV / CHANNEL CONTROL
45
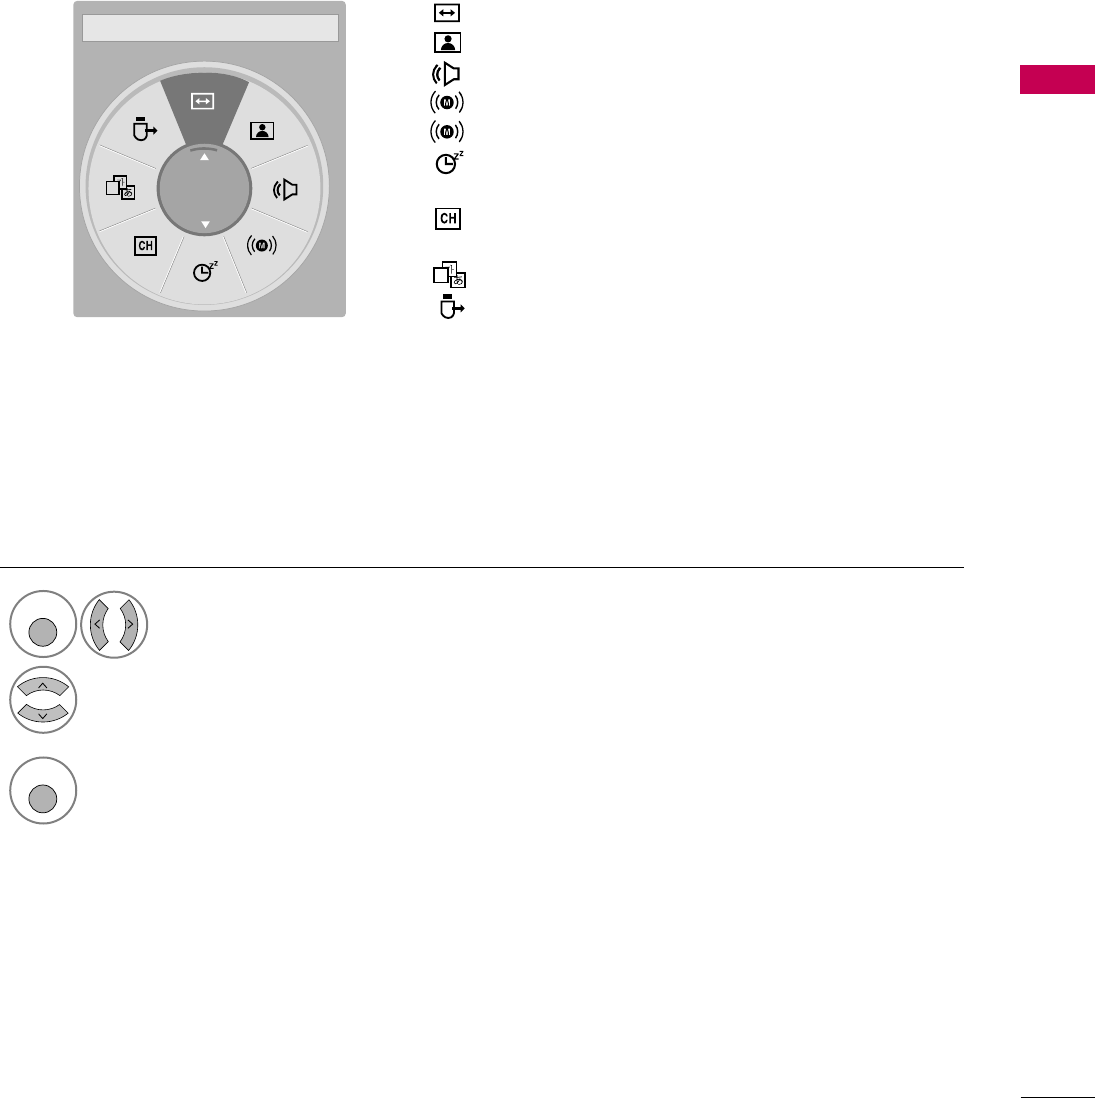
QUICK MENU
Display each menu.
Make appropriate adjustments.
Your TV's OSD (On Screen Display) may differ slightly from what is shown in this manual.
Q.Menu (Quick Menu) is a menu of features which users might use frequently.
1
Q. MENU
2
3
Q. MENU
Return to TV viewing.
A
16:9
F Aspect Ratio GAspect Ratio: Selects the desired picture format.
Picture Mode: Selects the desired preset picture setting.
Sound Mode: Selects the desired preset sound setting.
Multi Audio: Changes the audio language (Digital signal).
SAP: Selects MTS sound (Analog signal).
Sleep Timer: Select the amount of time before your TV
turns off automatically.
Del/Add/Fav: Select channel you want to add/delete or
add the channel to the Favorite List.
Caption: Select on or off.
USB Device: Select “Eject” in order to eject a USB
device.
A
WATCHING TV / CHANNEL CONTROL
46
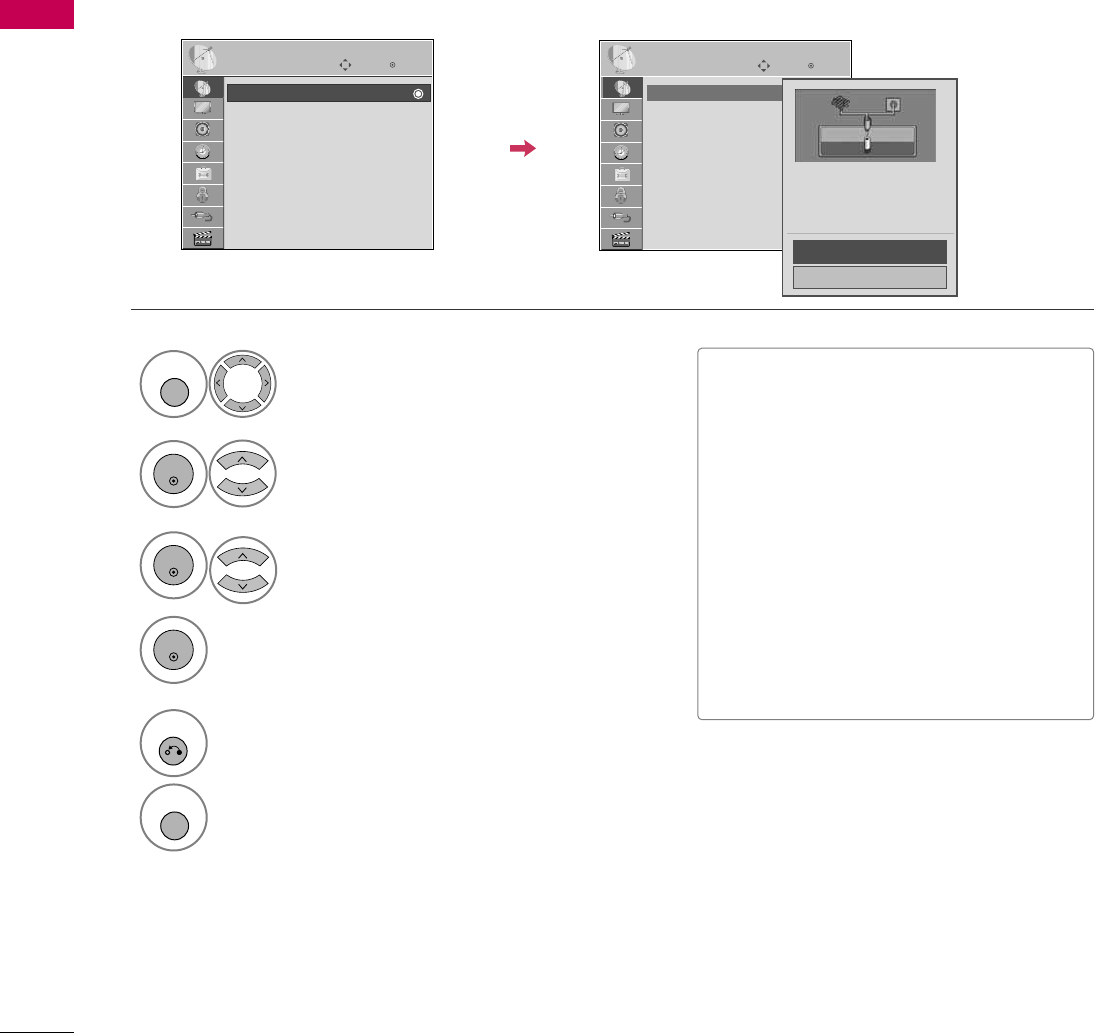
CHANNEL SETUP
WATCHING TV / CHANNEL CONTROL
Auto Scan (Auto Tuning)
Automatically finds all channels available through antenna or cable inputs, and stores them in memory on the
channel list.
Run this function if you change your residence or move the TV. Also, make sure to run this function with the
antenna connected during TV broadcasting hours.
Auto Tuning memorizes only the channels available at the time.
Select CHANNEL.
Select Auto Tuning.
Select Yes.
Run Auto tuning.
Enter
Move
CHANNEL
Enter
Move
CHANNEL
1
MENU
3
2
ENTER
ENTER
4
ENTER
Auto Tuning
Manual Tuning
Channel Edit
Auto Tuning
Manual Tuning
Channel Edit
■The TV will ask for a password if parental
control has been activated (LOCK
Menu). Use the password you set up in
the LOCK Menu to allow a channel
search.
■When setting the Auto tuning or Manual
tuning, the number of maximum channels
you can store is 1000.
It is subject to change depending on the
broadcasting signal environment.
■Memorizes all the available channels in
the order of DTV, TV, CADTV and CATV.
5
RETURN
Return to the previous menu.
MENU
Return to TV viewing.
Check your antenna connection.
The previous channel information
will be updated during Auto
Tuning.
Yes
No
WATCHING TV / CHANNEL CONTROL
47
Select CHANNEL.
1
MENU
2
ENTER
When selecting DTV or CADTV input signal in the Manual Tuning menu, you can view the on-screen signal
strength monitor to see the quality of the signal being received.
Add/Delete Channel (Manual Tuning)
Enter
Move
CHANNEL
Enter
Move
CHANNEL
Channel
Select channel type and
RF-channel number.
F
DTV
G
2
Close
Delete
Auto Tuning
Manual Tuning
Channel Edit
DTV 2-1
Bad Normal Good
Select Manual Tuning.
Select DTV, T V, CADTV, or CATV.
Select channel you want to add
or delete.
3
ENTER
4
Select Add or Delete.
5
ENTER
Auto Tuning
Manual Tuning
Channel Edit
■The TV will ask for a password if parental
control has been activated (LOCK
Menu). Use the password you set up in
the LOCK Menu to allow a channel
search.
■When setting the Auto tuning or Manual
tuning, the number of maximum channels
you can store is 1000.
It is subject to change depending on the
broadcasting signal environment.
6
RETURN
Return to the previous menu.
MENU
Return to TV viewing.
WATCHING TV / CHANNEL CONTROL
48
WATCHING TV / CHANNEL CONTROL
Select a channel.
Add or delete a channel.
3
ENTER
4
The channels in the Channel Edit List are displayed in black and the channels deleted from the Channel Edit
List are displayed in blue.
When a channel number is deleted, it means that you will be unable to select it using CH button during TV
viewing.
If you wish to select the deleted channel, directly enter the channel number with the NUMBER buttons or select
it in the Channel Edit menu.
Channel Editing
Enter
Move
CHANNEL
Auto Tuning
Manual Tuning
Channel Edit
Select CHANNEL.
1
MENU
2
ENTER
Select Channel Edit.
Return to the previous menu.
5
RETURN
Return to TV viewing.
MENU
Ch. Change Page Change
CH
Navigation Previous
Add/Delete
■Keep pressing the button and use the
or buttons to move between DTV,
TV, CADTV and CATV.
■If the channel list is too long, use the
CH or button to move between
pages.
BLUE
WATCHING TV / CHANNEL CONTROL
49
CHANNEL LIST
Exit
2-1
3-1
4-1
DTV
DTV
DTV
Channel List
You can check which channels are stored in the memory by displaying the channel list.
Display the Channel List.
1
LIST
Displaying Channel List
Select a channel.
1
Switch to the chosen channel number.
2
ENTER
Selecting a channel in the channel list
Turn the pages.
1
CH
P
A
G
E
Return to TV viewing.
2
RETURN
Paging through a channel list
This padlock is displayed
when the channel is locked
with parental control.
WATCHING TV / CHANNEL CONTROL
50
FAVORITE CHANNEL SETUP
WATCHING TV / CHANNEL CONTROL
FAVORITE CHANNEL LIST
Favorite Channels are a convenient feature that lets you quickly select channels of your choice without waiting
for the TV to select all the in-between channels.
To tune to a favorite channel, press the FAV (Favorite) button repeatedly.
Return to TV viewing.
4
Q. MENU
Select Favorite.
3
Select your desired channel.
1
CH
P
A
G
E
1
456
78
0
9
23
2
Q. MENU
Select Del/Add/Fav.
or
A
Favorite
F Del/Add/Fav G
Exit
2-1
3-1
4-1
DTV
DTV
DTV
Favorite List
Select a channel.
1
Switch to the chosen channel number.
2
ENTER
Selecting a channel in the favorite channel list
Turn the pages.
1
CH
P
A
G
E
Return to TV viewing.
2
RETURN
Paging through a favorite channel list
Display the Favorite channel list.
1
MARK
FAV
Displaying the favorite channel list
WATCHING TV / CHANNEL CONTROL
51
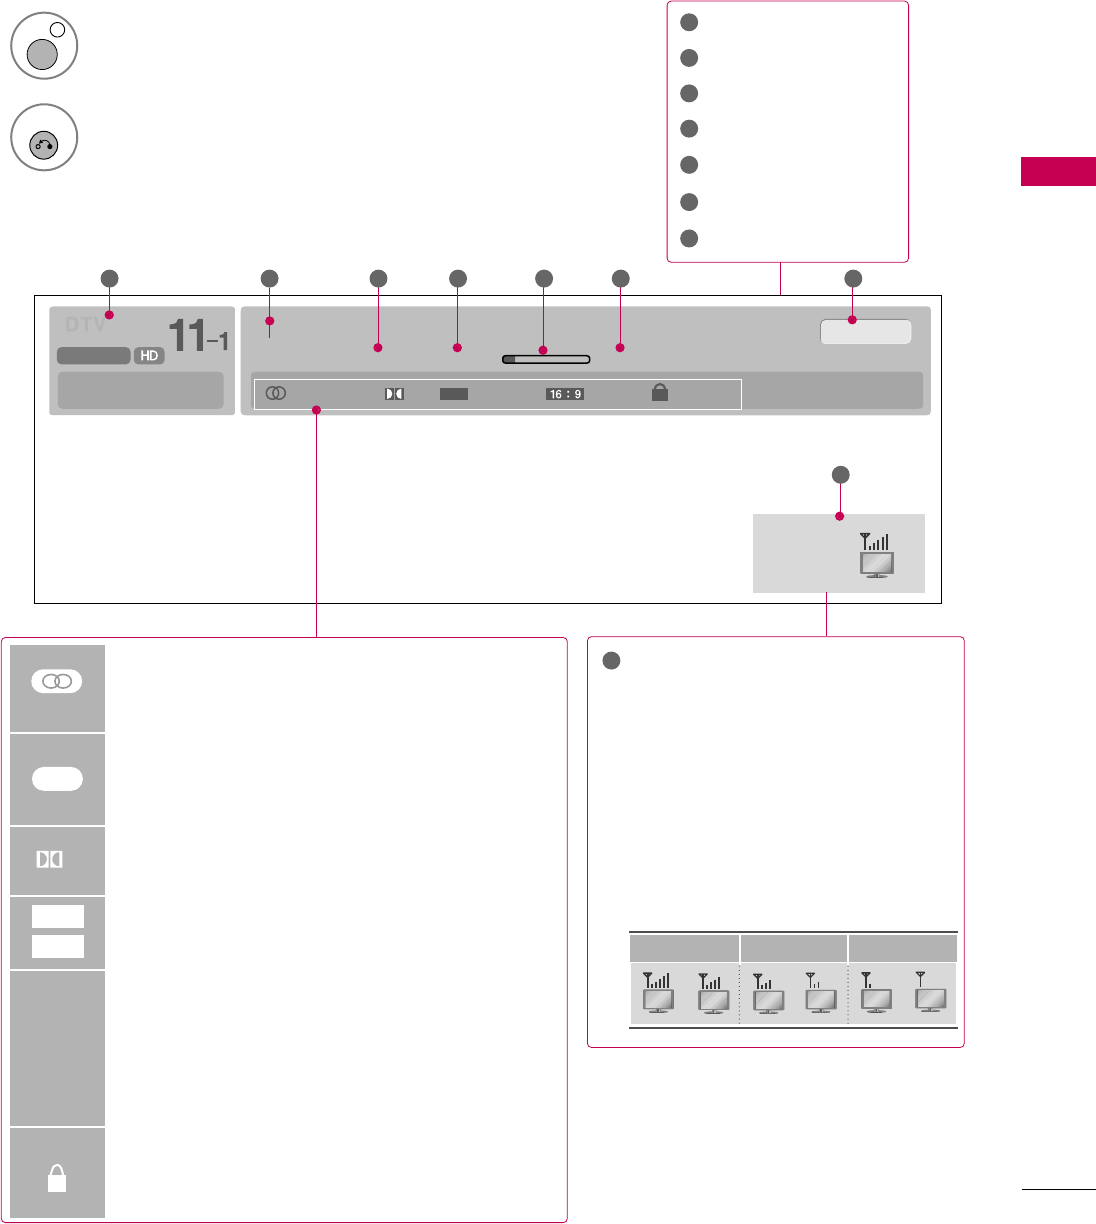
BRIEF INFORMATION
1
INFO i
Brief Info shows the present screen information.
Show the Brief Info on the screen.
2
RETURN
Return to TV viewing. 4
5
6
7
Program title
Day, Month, Year
Program start time
Program progress bar
Program finish time
Present time
Banner information
1
2
3
4
5
6
7
Brief Info Title Test..
Sat, Feb 21, 2009 10:10 AM 11:40 AM
CNN
DOLBY DIGITAL
10:40 AM
Multilingual CaptionD 1080i TV-PG D L S V
CC
1 2 3 4 5 67
Wireless
Signal
8
Multilingual : The program contains two or more
audio services. Use the Q.MENU menu to select
wanted Audio.
Caption : The program contains one or more caption
services. Use the Q.MENU menu to select wanted
Closed caption.
Dolby Digital: The program contains a Dolby Digital
audio signal in TV, HDMI input source, or DivX.
The original aspect ratio of the video is 4:3
The original aspect ratio of the video is 16:9 (wide)
The video resolution is 720x480i
The video resolution is 720x480p
The video resolution is 1280x720p
The video resolution is 1920x1080i
The video resolution is 1920x1080p
V-Chip: The program contains V-Chip information.
Refer to the LOCK menu: A (Age), D (Dialogue), L
(Language), S (Sex), V (Violence), FV (Fantasy Violence)
480i
480p
720p
1080 i
1080 p
4:3
16:9
CC
Received wireless signal strengh
indicator.
The signal strength meter changes con-
tinuously due to external influences.
The performance of wireless signal may
differ depending on where the TV and
Media Box are located. Make sure to
install the Media Box where the sensi-
tivity of radio-signal reception is
“GOOD".
8
Good Middle Poor
D
WATCHING TV / CHANNEL CONTROL
52
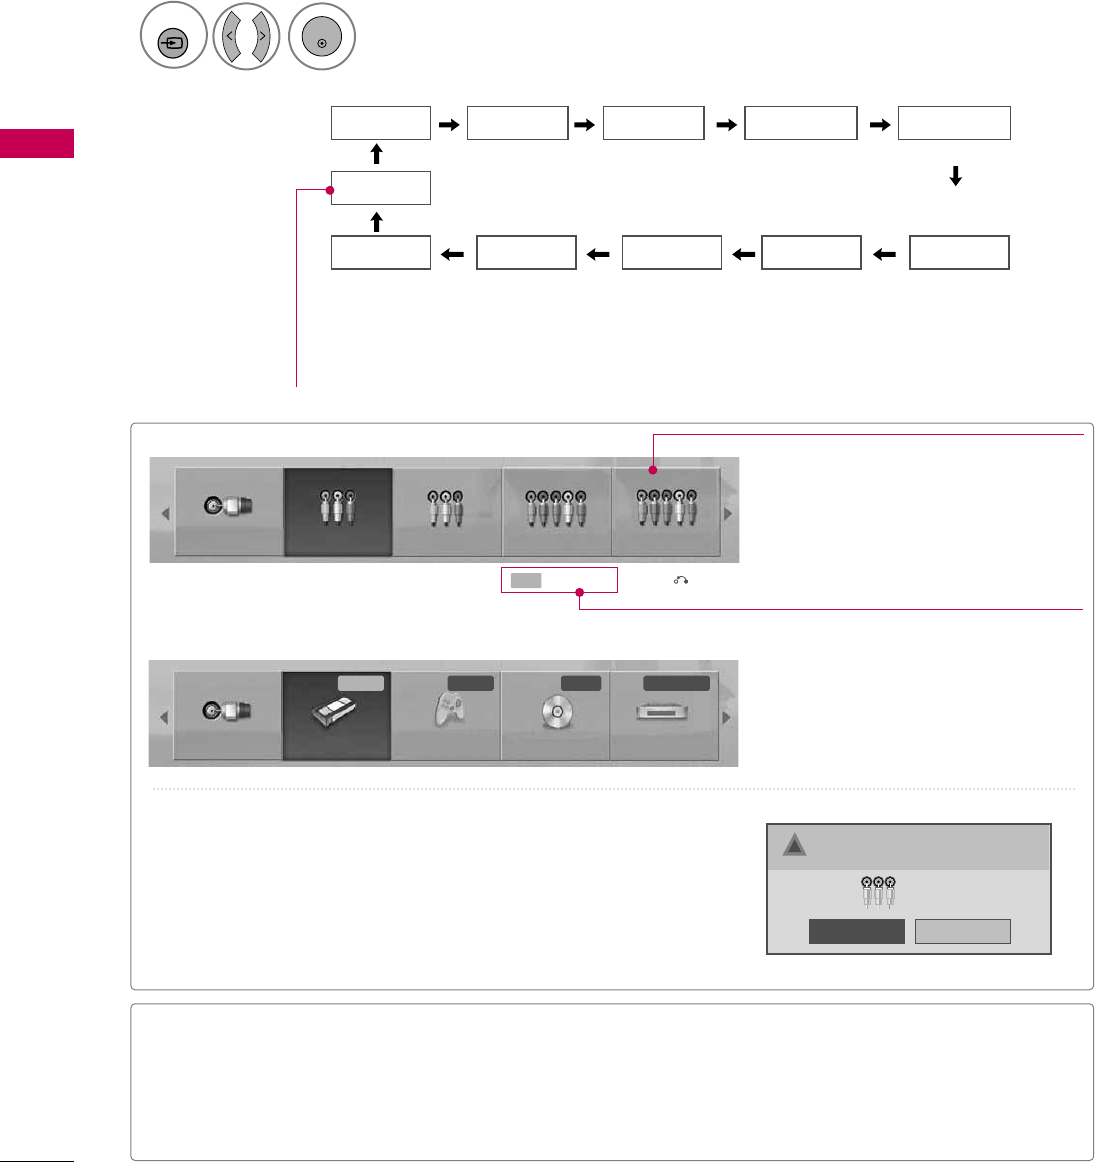
INPUT LIST
WATCHING TV / CHANNEL CONTROL
TV AV1 AV2
HDMI4
HDMI5
HDMI3 HDMI2 HDMI1
Component1 Component2
RGB-PC
Select the desired input source.
■You can also select the desired input source in the INPUT menu.
1
INPUT
ENTER
TV AV1 AV2 Component1 Component2
TV AV1 AV2 Component1 Component2
Input Label Exit
Select a desired input source (except T V).
Then, you can select your desired Input
Label with using Blue button. Gp.53
ie)
ie) In case of changing the input label using Blue button
Only these input signals which are connected to a TV can be activated and selected.
■T V: Select it to watch over-the-air, cable and digi-
tal cable broadcasts.
■A V: Select them to watch a VCR or other external
equipment.
■Component: Select them to watch DVD or a
Digital set-top box.
■RGB-PC: Select it to view PC input.
■HDMI: Select them to watch high definition
devices.
VCR Game DVD Set Top Box
■When a new external device is connected, this popup menu is
displayed automatically.
If selecting Yes, you can select input source that you want to
appreciate.
■But, when selecting “SIMPLINK - O n”, popup menu for HDMI
input will not be displayed.
No
Yes
!New external input is connected.
Do you want to use this?
AV2
Disconnected inputs are inactive (grayed out)
■Some menus are not available when using HDMI 5.
■HDMI 5 doesn't support SIMPLINK (HDMI-CEC).
WATCHING TV / CHANNEL CONTROL
53
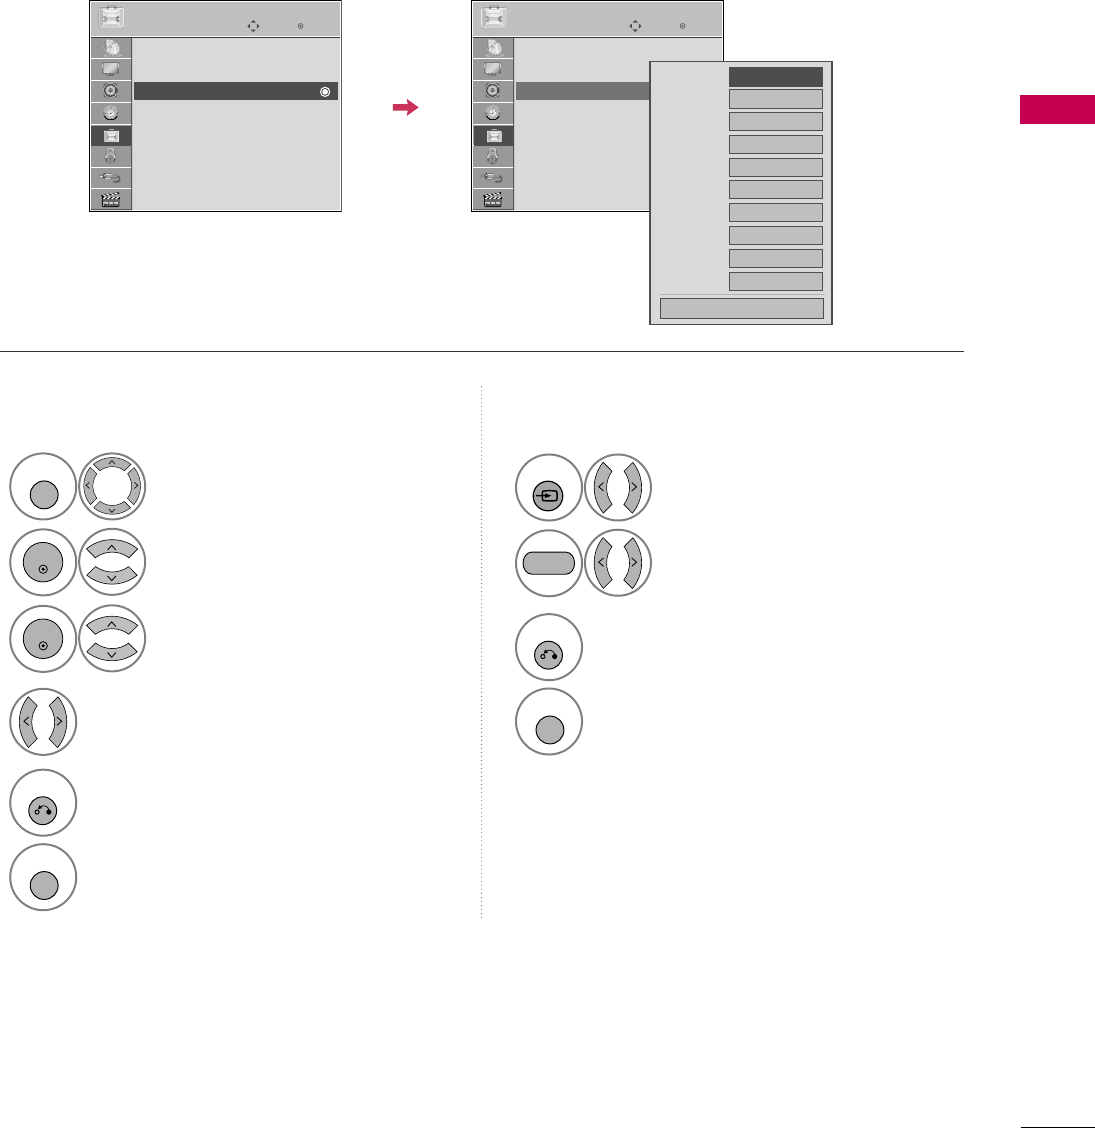
INPUT LABEL
You can set a label for each input source when it's not in use.
This indicates which device is connected to which input port.
Enter
Move
OPTION
Menu Language : English
Audio Language : English
Input Label
SIMPLINK : On
Key Lock : Off
Simple Manual
Caption : Off
Power Indicator
Select OPTION.
Select Input Label.
Select the label.
1
MENU
2
ENTER
Select the source.
3
ENTER
4
5
RETURN
Return to the previous menu.
MENU
Return to TV viewing.
With using OPTION menu
Select the source.
Select the label.
1
INPUT
2
3
RETURN
Return to the previous menu.
MENU
Return to TV viewing.
With using INPUT button
AV1
AV2
Component1
Component2
RGB-PC
HDMI1
HDMI2
HDMI3
HDMI4
HDMI5
F G
Close
E
Enter
Move
OPTION
Menu Language : English
Audio Language : English
Input Label
SIMPLINK : On
Key Lock : Off
Simple Manual
Caption : Off
Power Indicator
E
BLUE
WATCHING TV / CHANNEL CONTROL
54
AV MODE
WATCHING TV / CHANNEL CONTROL
AV Mode toggles through preset Video and Audio settings.
1
AV MODE
2
Off Cinema
Game Sport
Press the AV MODE button repeatedly to
select the desired source.
ENTER
■If you select “Cinema” in AV mode,
Cinema will be selected both for “PIC-
TURE menu - Picture Mode” and “AUDIO
menu - Sound Mode” respectively.
■If you select “Off” in AV mode, the
“Picture Mode” and “Sound Mode”
return to previous selected value.
■Off: Disables the AV MODE.
■Cinema: Optimizes video and audio for
watching movies.
■Sport: Optimizes video and audio for
watching sports events.
■Game: Optimizes video and audio for
playing games.
SIMPLE MANUAL
Enter
Move
OPTION
Menu Language : English
Audio Language : English
Input Label
SIMPLINK : On
Key Lock : Off
Simple Manual
Caption : Off
Power Indicator
E
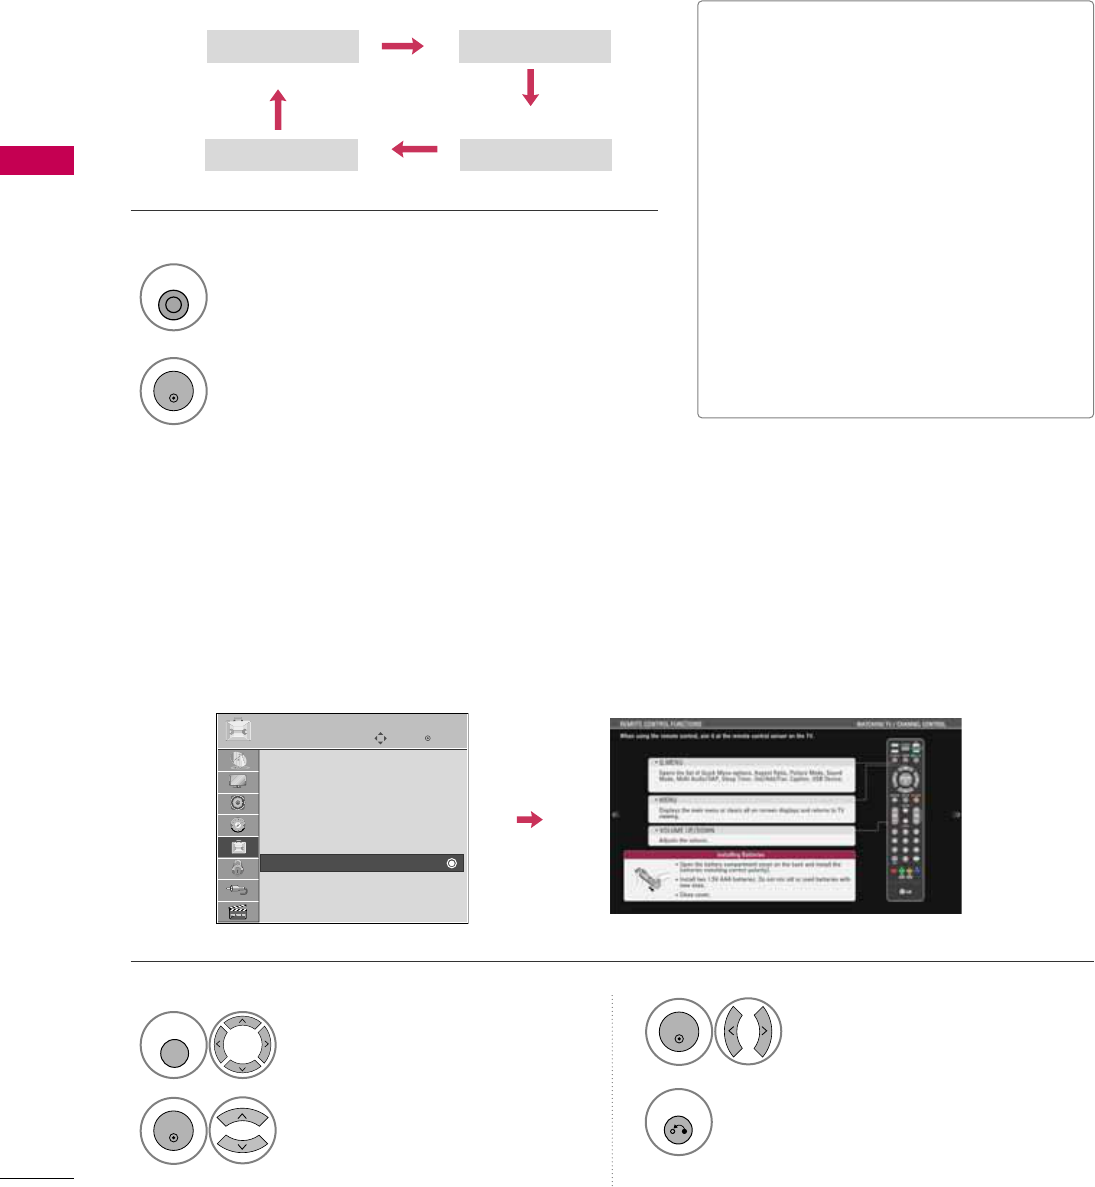
You can easily and effectively access the TV information by viewing a simple manual on the TV.
During the Simple Manual operation, audio will be muted.
Select OPTION.
Select Simple Manual.
1
MENU
2
ENTER
Select the part of the manual
you want to see.
3
ENTER
4
RETURN
Return to TV viewing.
Working
WATCHING TV / CHANNEL CONTROL
55
KEY LOCK
This feature can be used to prevent unauthorized viewing by locking out the front panel controls, so that it can
only be used with the remote control.
This TV is programmed to remember which option it was last set to even if you turn the TV off.
Select OPTION.
Select Key Lock.
1
MENU
2
ENTER
Select O n or Off.
3
ENTER
■In Key Lock ‘O n’, if the TV is turned off,
press the r
r/ I, INPUT, CH ( ) button
on the TV or POWER, INPUT, CH (
) or NUMBER buttons on the remote
control.
■With the Key Lock On, the display
‘ Key Lock’ appears on the screen if
any button on the front panel is pressed
while viewing the TV.
4
RETURN
Return to the previous menu.
MENU
Return to TV viewing.
!
Enter
Move
OPTION
Menu Language : English
Audio Language : English
Input Label
SIMPLINK : On
Key Lock : On
Simple Manual
Caption : Off
Power Indicator
E
Enter
Move
OPTION
Menu Language : English
Audio Language : English
Input Label
SIMPLINK : On
Key Lock : Off
Simple Manual
Caption : Off
Power Indicator
E
Off
On
WATCHING TV / CHANNEL CONTROL
56
WATCHING TV / CHANNEL CONTROL
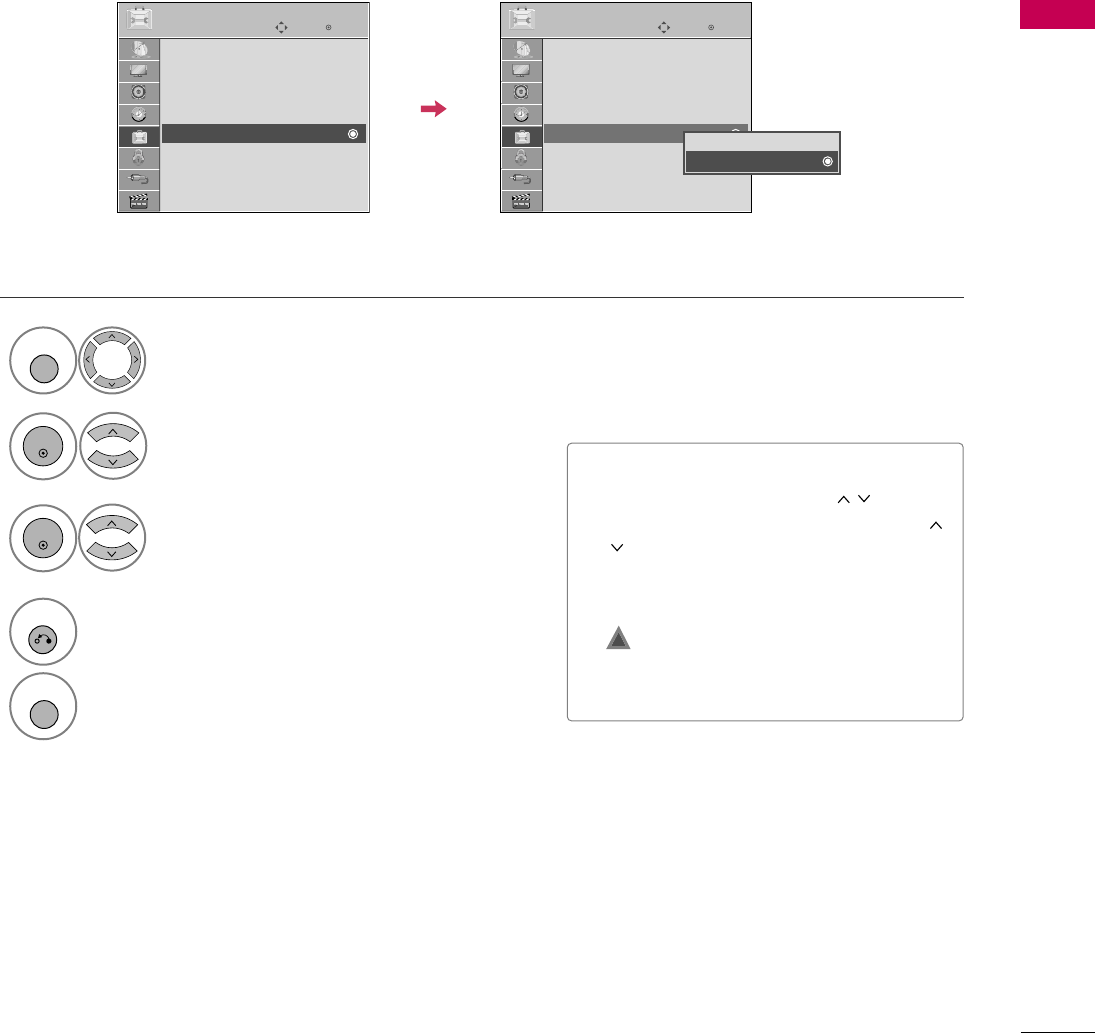
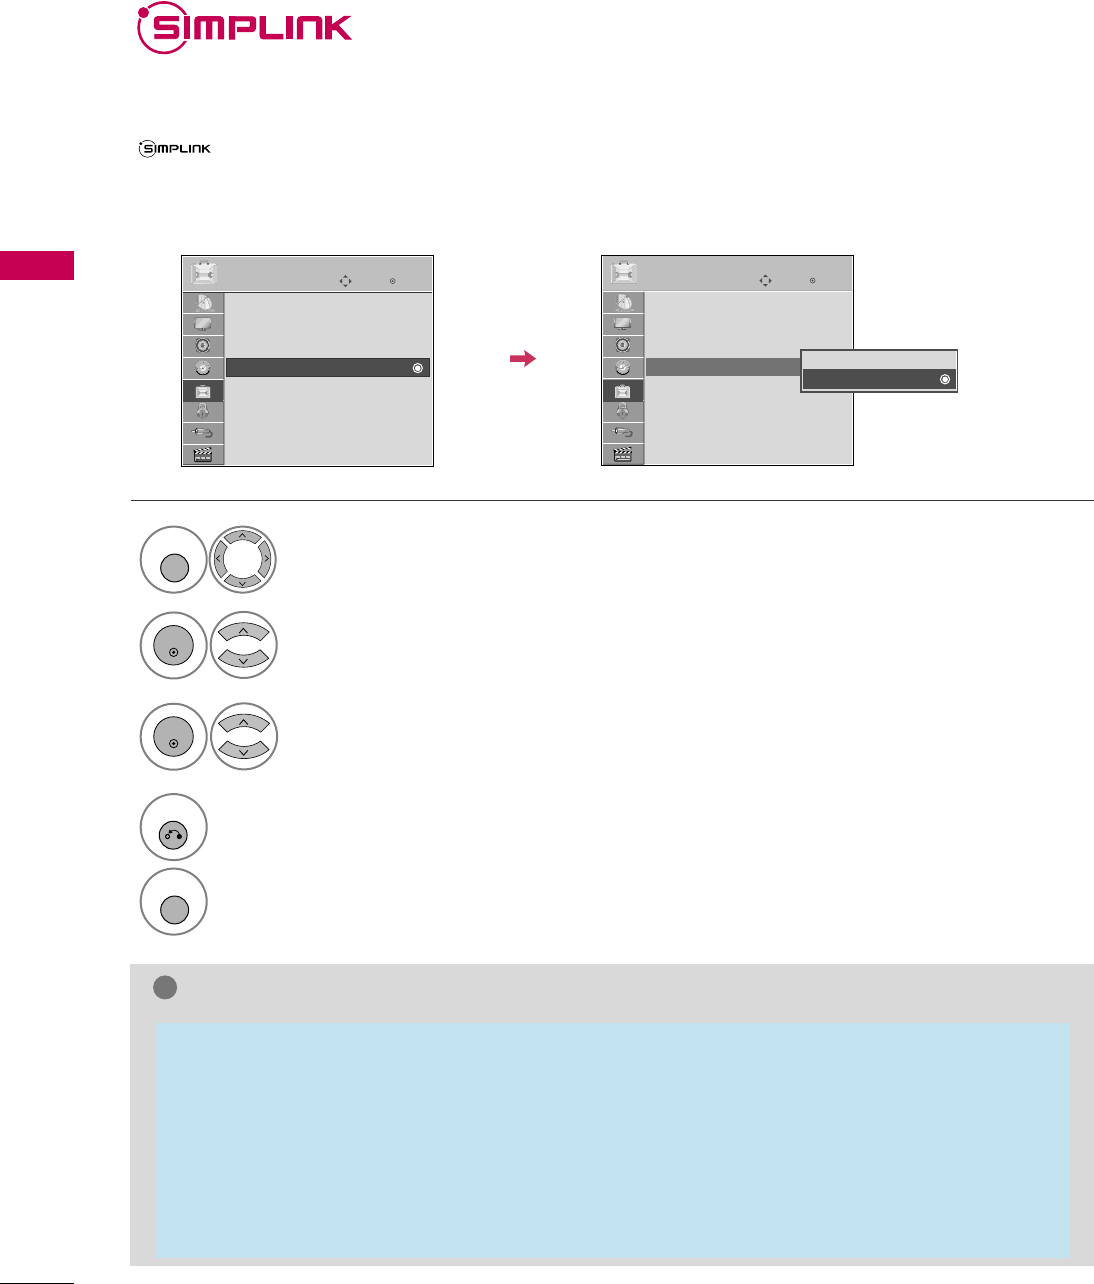
SIMPLINK allows you to control and play other AV devices connected with HDMI cable without additional
cables and settings. This TV may work with devices with HDMI-CEC support, but only devices with the
logo are fully supported.
SIMPLINK can be turned on and off in the user menus.
SIMPLINK is not supported by the HDMI IN 5 input.
Enter
Move
OPTION
Select OPTION.
Select SIMPLINK.
Select On or Off.
Enter
Move
OPTION
E
1
MENU
3
2
ENTER
ENTER
Menu Language : English
Audio Language : English
Input Label
SIMPLINK : On
Key Lock : Off
Simple Manual
Caption : Off
Power Indicator
Menu Language : English
Audio Language : English
Input Label
SIMPLINK : On
Key Lock : Off
Simple Manual
Caption : Off
Power Indicator
Off
On
NOTE
!
GConnect the HDMI/DVI IN or HDMI IN terminal of the Media Box to the rear terminal (HDMI terminal) of
the SIMPLINK device with an HDMI cable.
GWhen you switch the Input source with the INPUT button on the remote control, the SIMPLINK device
will stop.
GWhen you select a device with home theater functionality, the sound output automatically switches to
the home theater speakers and the TV speakers are turned off.
GIf a connected SIMPLINK home theater system doesn't play the audio from the TV, connect the DIGITAL
AUDIO OUT terminal on the back of the Media Box to the DIGITAL AUDIO IN terminal on the back of
the SIMPLINK device with an OPTICAL cable.
E
4
RETURN
Return to the previous menu.
MENU
Return to TV viewing.
WATCHING TV / CHANNEL CONTROL
57
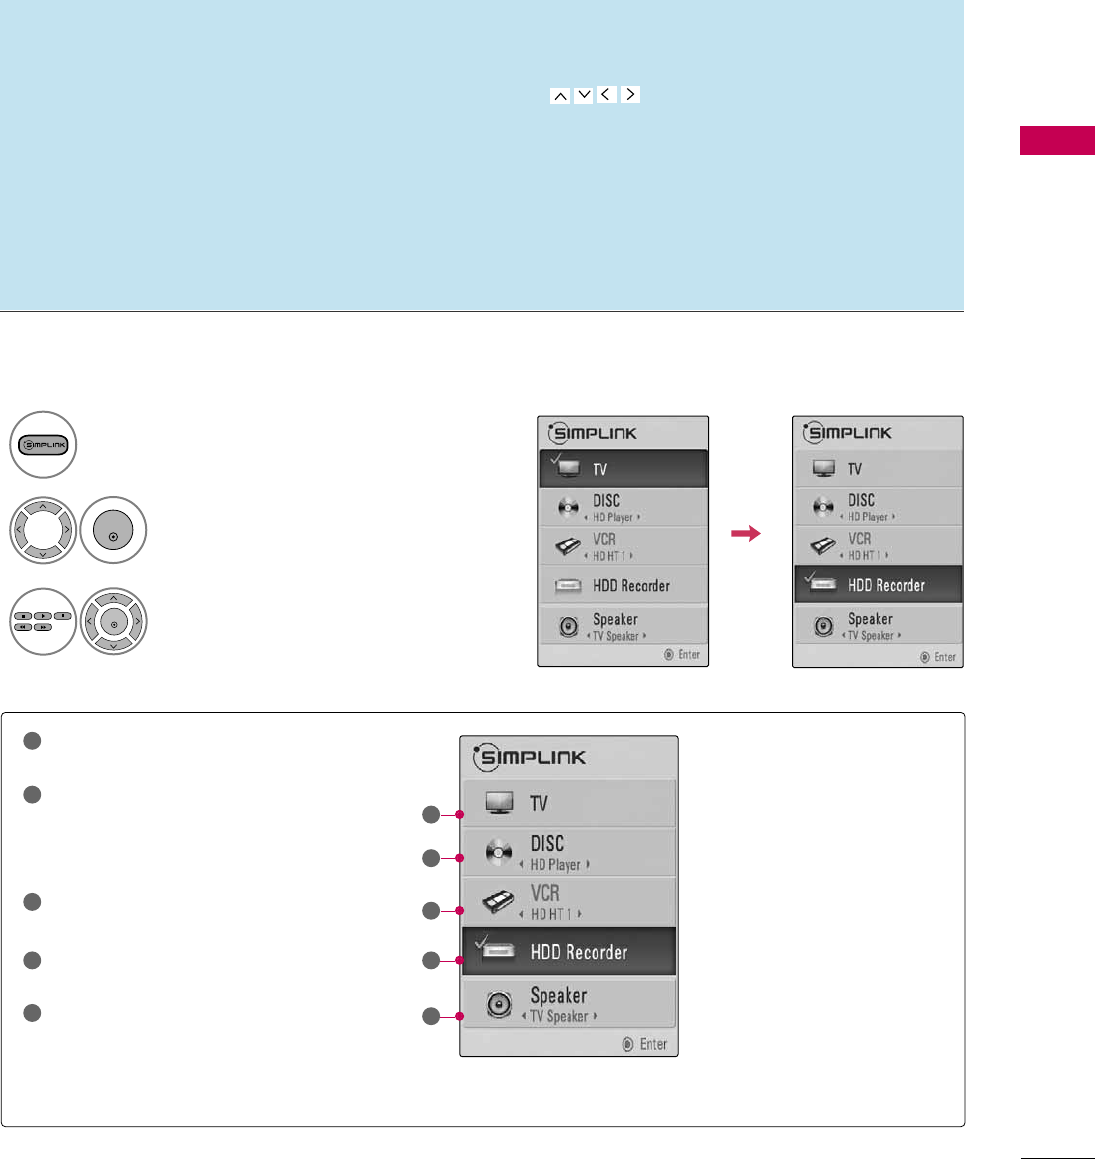
SIMPLINK Menu
TV viewing: Switch to the previous TV
channel regardless of the current mode.
DISC playback: Select and play discs.
When multiple discs are available, the titles
of discs are conveniently displayed at the
bottom of the screen.
VCR playback: Control the connected
VCR.
HDD Recordings playback: Control
recordings stored in HDD.
Audio Out to Home Theater speak-
er/Audio Out to TV: Select Home
Theater speaker or TV speaker for Audio
Out.
SIMPLINK Functions
1
2
3
4
5
G
When no device is connected
(displayed in gray)
G
Selected Device
G
When a device is connected
(displayed in bright color)
1
2
3
4
5
Display SIMPLINK menu.
Select the desired device.
Control connected AV devices.
1
3
2
ENTER
ENTER
■Direct Play: After connecting AV devices to the Media Box, you can directly control the devices and play media
without additional settings.
■Select AV device: Enables you to select one of the AV devices connected to the Media Box.
■Disc playback: Control connected AV devices by pressing the ,
ENTER,
G
,
A
, l l
,
FF and GG buttons.
■Power off all devices: When you power off the TV, all connected devices are turned off.
■Switch audio-out: Offers an easy way to switch audio-out.
Note: To operate SIMPLINK, an HDMI cable over Version 1.3 with *CEC function should be used (*CEC: Consumer
Electronics Control).
(A device, which is connected to the Media Box through a HDMI cable but does not support SIMPLINK, does not
provide this function)
ENTRY MODES
USB
58
USB
Precautions when using the USB device
GOnly a USB storage device is recognizable.
GConnecting a USB storage device through a USB
hub is not supported
GA USB storage device which uses its own driver
may not be recognized.
GThe recognition speed of a USB storage device
may depend on each device.
GIn case of several paritions or a card reader, up to
four memory cards are concurrently recognizable.
GIf your USB memory device has multiple parti-
tions, or if you use a USB multi-card reader, you
can use up to 4 partitions or USB memory
devices.
GPlease do not turn off the TV or unplug the USB
device when the connected USB storage device is
working. When such device is suddenly separat-
ed or unplugged, the stored files or the USB stor-
age device may be damaged.
GOnly use a USB storage device which has normal
music files, image files, or movie files.
GPlease use only a USB storage device which was
formatted as a FAT 32 or NTFS file system provid-
ed with the Windows operating system. Others
may not be recognized.
GData in a USB storage device cannot be deleted in
the NTFS file system.
GSome USB storage devices require a power
adapter. The power adapter must be connected in
order to be seen by the TV.
GIf a device is not recognized by the TV, try a dif-
ferent cable. Excessively long cables are not sup-
ported.
GSome USB storage devices may not be supported
or operate properly.
GPlease backup important files because data on
the USB device could be damaged. Data manage-
ment is the consumer's responsibility and as a
result, the manufacturer does not cover data
damage.
GA USB storage device with several partitions may
not work properly.
GIf the USB memory device does not work proper-
ly, disconnect and reconnect it.
GConnect an external power source to a USB stor-
age device if required.
GWhen using a USB extension cable, a USB hard
disk without an external power source is not sup-
ported.
GFile alignment method of USB storage device is
similar to Window XP and file names can be up to
100 English characters.
GThe recommended capacity is 1TB or less for a
USB external hard disk and 32 GB or less for USB
memory.
GIf a USB external hard disk with a “Energy Saving”
function doesn’t work, turn the hard disk off and
on again to make it work properly. Refer to the
user manual of the application USB external hard
disk.
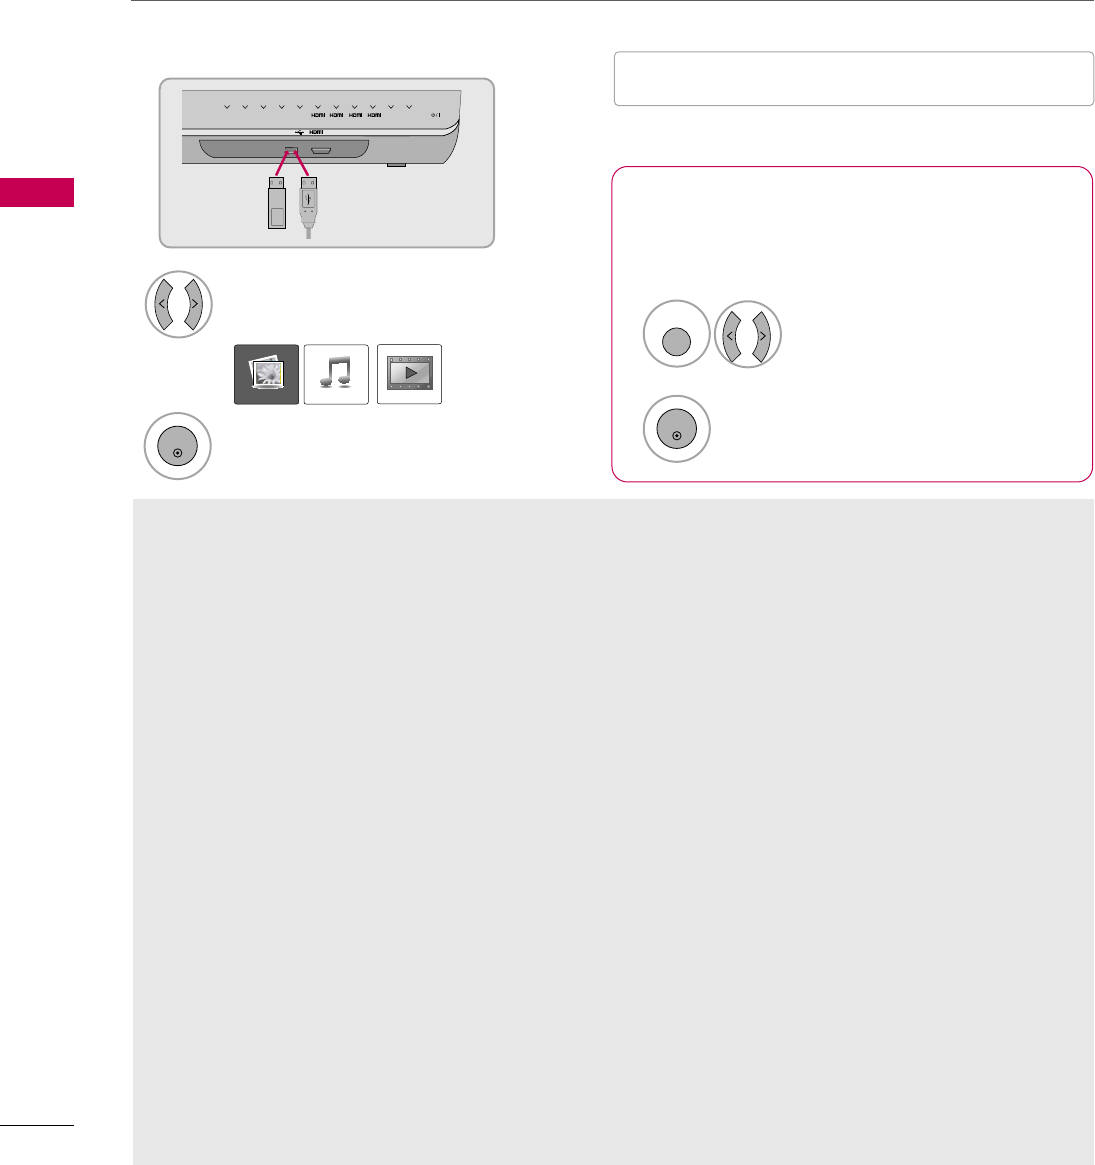
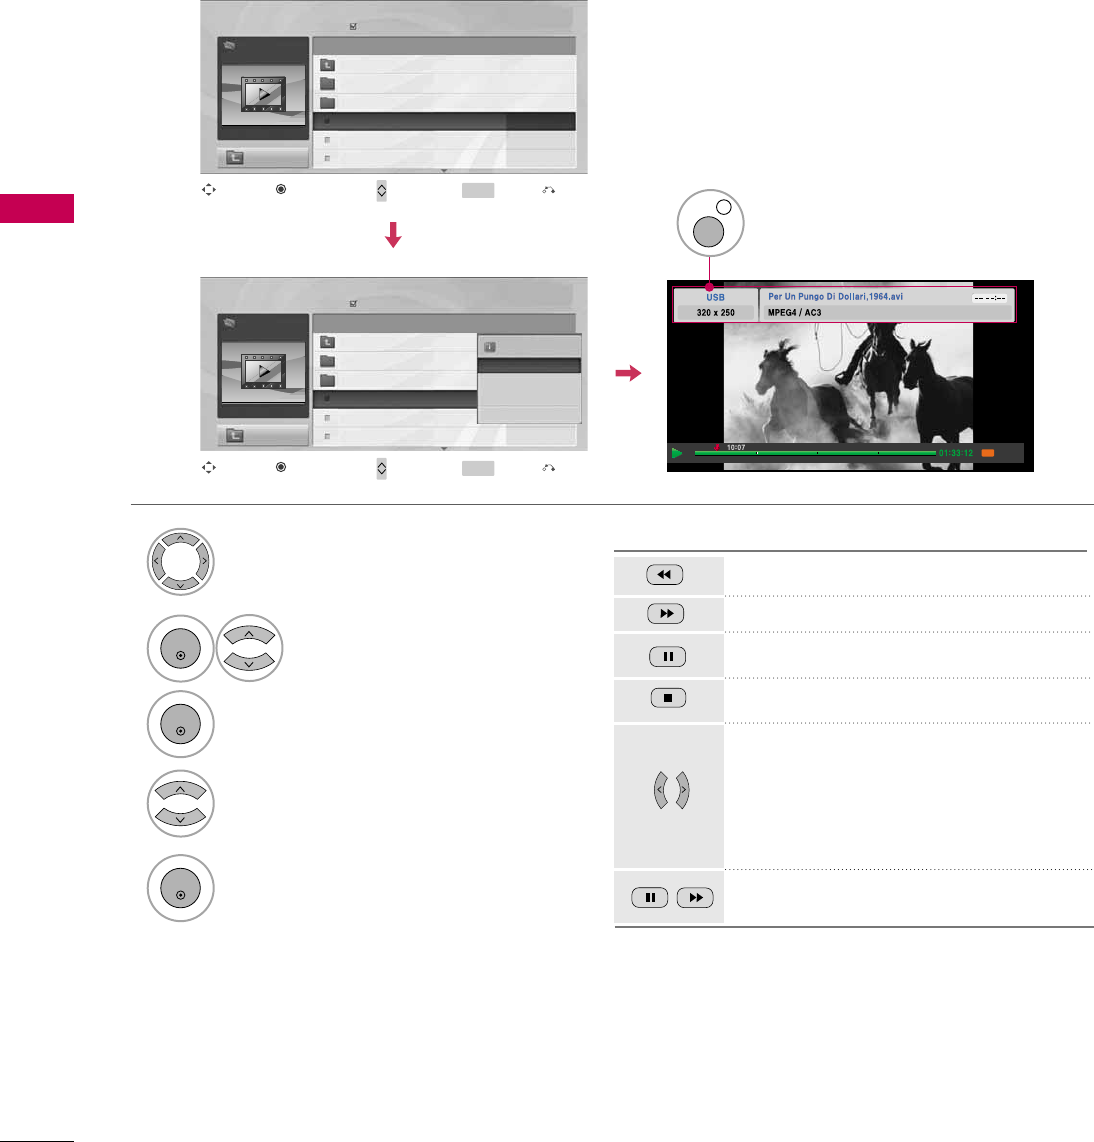
When removing the USB device
Connect the USB device to the USB IN
jacks on the Media Box.
3
Select PHOTO LIST, MUSIC LIST or
MOVIE LIST.
1
USB IN IN 4
TV COM1 COM2 AV1 AV2 1RGB WIRELESS
2 3 4
Memory Key
Select USB Device.
Select Eject.
Select the USB Device menu before removing the
USB device.
2
ENTER
1
Q. MENU
2
ENTER
■This TV supports JPG, MP3 files, and HD DivX.
When you connect a USB device, this pop up menu is displayed automatically.
When the Pop Up menu does not appear, you can select Photo List, Music List or Movie List in the USB menu.
On a USB device, you can not add a new folder or delete an existing folder.
PHOTO LIST MUSIC LIST MOVIE LIST
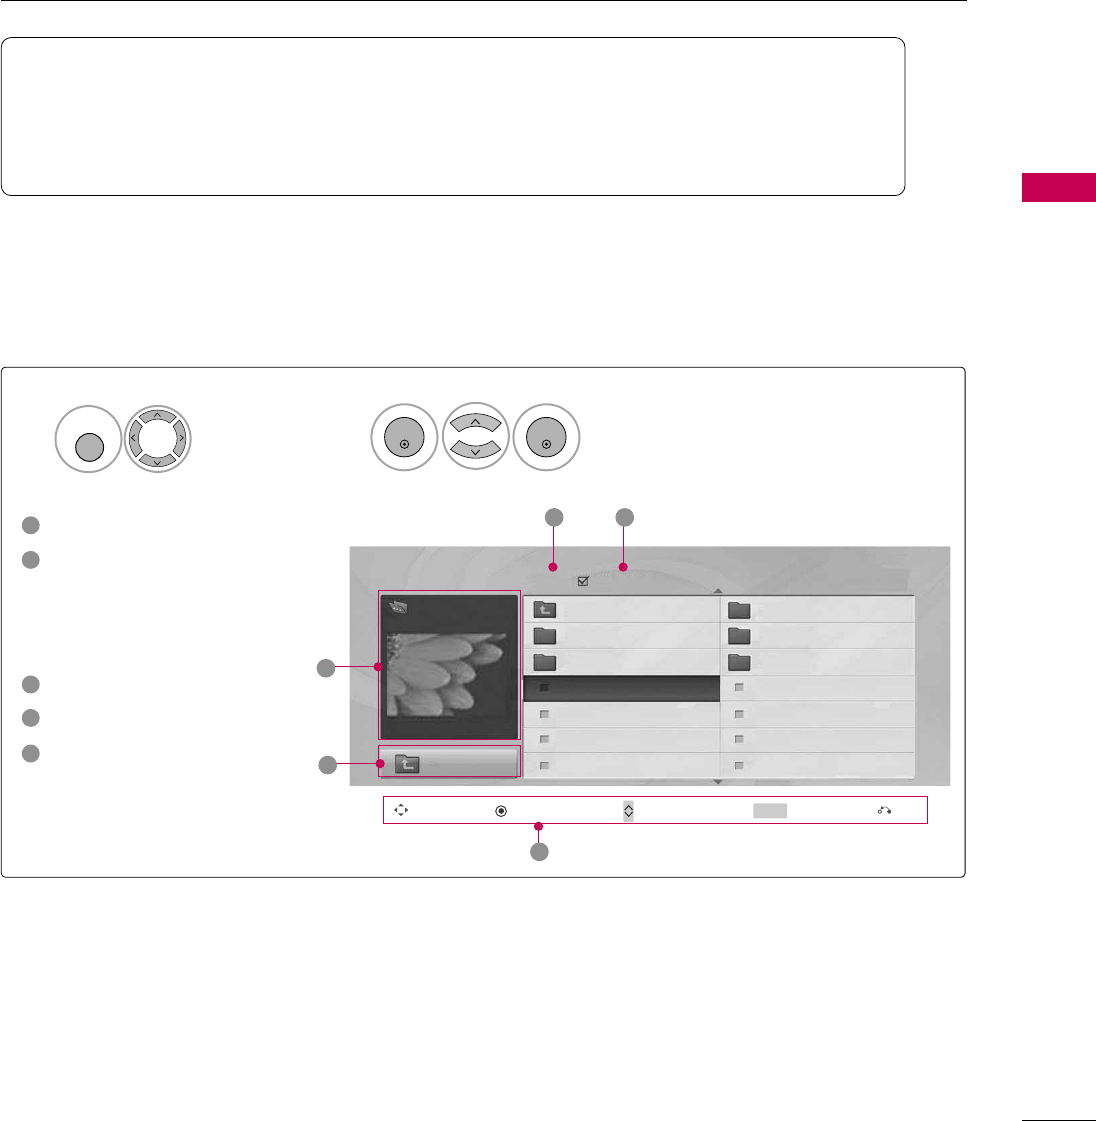
PHOTO LIST
USB
59
You can view .JPG files from USB storage devices.
The On-Screen Display on your model may be slightly different.
Screen Components
Moves to upper level folder
Preview: Display the
thumbnail/folder name of
the photo in the selected
folder
Current page/Total pages
Total number of marked photos
Corresponding buttons on
the remote control
Select USB.Select Photo List.
2
1
MENU
ENTER
ENTER
1
2
3
4
5
Navigation Popup Menu Page Change Mark Exit
CH MARK
5
Page 2/3 No Marked
Photo List
Up Folder
1366x768, 125KB
KY101 06/10/2008
KY102 04/03/2008
JMJ001 01/01/2000
JMJ002 06/15/2008
JMJ003 04/03/2008
JMJ004 02/18/2008
KY103 03/30/2008
KY104 06/19/2008
KY105 01/31/2008
JMJ005 05/13/2008
JMJ006 05/26/2008
JMJ007 02/18/2008
JMJ008 02/18/2008
Up Folder
Drive1
JMJ001
3 4
2
1
Supported photo file: *.JPG
■You can play JPG files only.
■Only baseline scan is supported among JPG (not progressive).
■Available JPG size: 64 pixel (width) x 64 pixel (height) to 15360 pixel (width) x 8640 pixel (height)
USB
60
USB
Photo Selection and Popup Menu
Select the target folder or drive.
Select the desired photos.
2
Show the Popup menu.
3
1
■Use the CH button to navigation in the
photo page.
■Use the MARK button to mark or unmark a
photo. When one or more photos are marked,
you can view individual photos or a slide show
of the marked photos. If no photos are marked,
you can view all photos individually or all pho-
tos in the folder in a slide show.
4Select the desired option in the
Popup menu.
ENTER
ENTER
ENTER
Page 2/3
No Marked
Photo List
Up Folder
1366x768, 125KB
KY101 06/10/2008
KY102 04/03/2008
JMJ001 01/01/2000
JMJ002 06/15/2008
JMJ003 04/03/2008
JMJ004 02/18/2008
KY103 03/30/2008
KY104 06/19/2008
KY105 01/31/2008
JMJ005 05/13/2008
JMJ006 05/26/2008
JMJ007 02/18/2008
JMJ008 02/18/2008
Up Folder
Page 2/3
No Marked
Photo List
Up Folder
1366x768, 125KB
KY101 06/10/2008
KY102 04/03/2008
JMJ001 01/01/2000
JMJ002 06/15/2008
JMJ003 04/03/2008
JMJ004 02/18/2008
KY103 03/30/2008
KY104 06/19/2008
KY105 01/31/2008
JMJ005 05/13/2008
JMJ006 05/26/2008
JMJ007 02/18/2008
JMJ008 02/18/2008
Up Folder
Drive1
Drive1
JMJ001
JMJ001 1366x768, 125KB
View
Mark All
Delete
Close
Navigation Page Change Mark Exit
CH MARK
Popup Menu
Navigation Page Change Mark Exit
CH MARK
Popup Menu
When you select a file (not folder), this PopUp
menu is displayed.
GView: Display the selected item.
GMark All: Mark all photos on the screen.
GUnmark All: Deselect all marked photos.
GDelete: Delete the selected photo item.
GClose: Close the pop-up menu.
USB
61
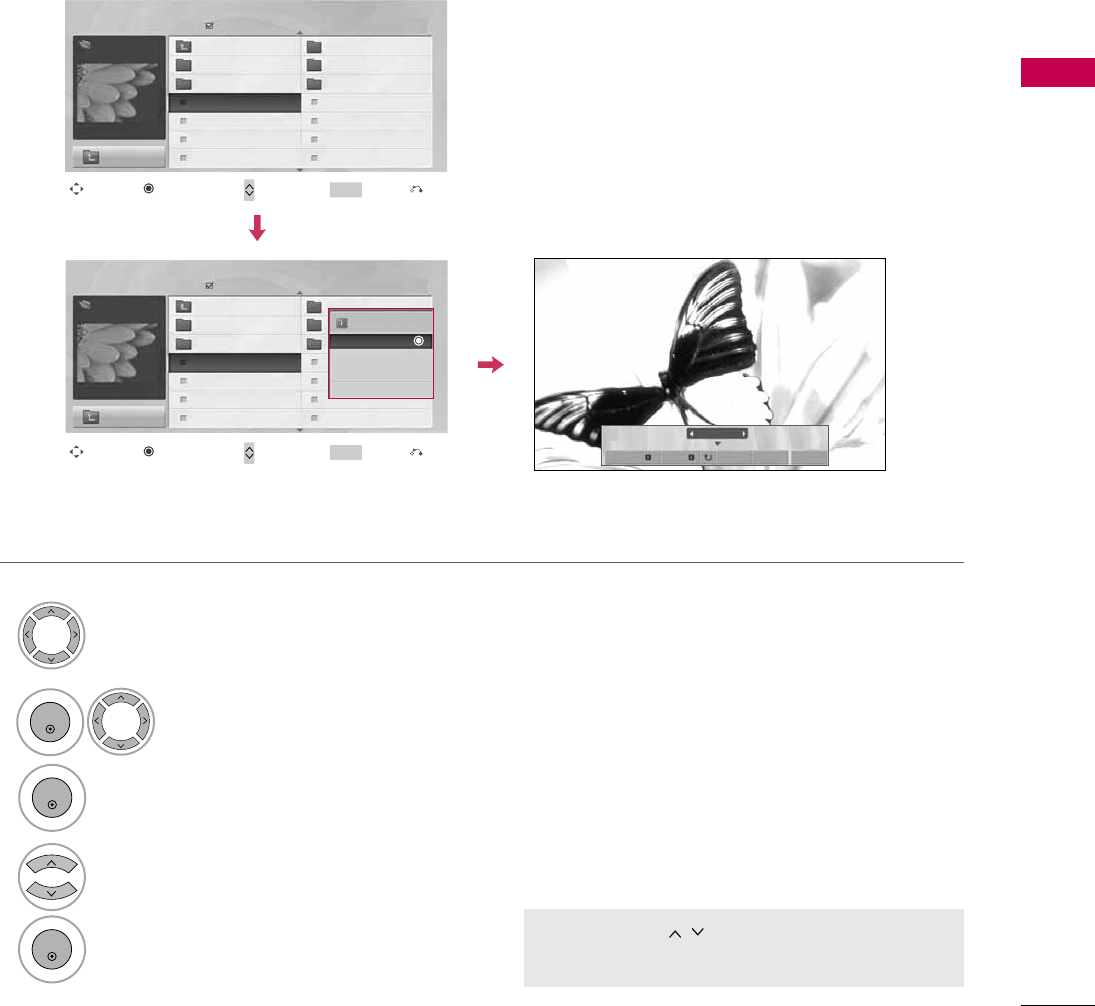
Full Screen Menu
You can change the Photo List view so that it fills the screen. More operations are available in full
screen mode.
■Use the CH button to navigation in the
photo page.
Select the target folder or drive.
Select the desired photos.
Show the Popup menu.
5
Select View.
The selected photo is displayed in
full size.
2
3
1
4
ENTER
ENTER
ENTER
Page 2/3
No Marked
Photo List
Up Folder
1366x768, 125KB
KY101 06/10/2008
KY102 04/03/2008
JMJ001 01/01/2000
JMJ002 06/15/2008
JMJ003 04/03/2008
JMJ004 02/18/2008
KY103 03/30/2008
KY104 06/19/2008
KY105 01/31/2008
JMJ005 05/13/2008
JMJ006 05/26/2008
JMJ007 02/18/2008
JMJ008 02/18/2008
Up Folder
Page 2/3
No Marked
Photo List
Up Folder
1366x768, 125KB
KY101 06/10/2008
KY102 04/03/2008
JMJ001 01/01/2000
JMJ002 06/15/2008
JMJ003 04/03/2008
JMJ004 02/18/2008
KY103 03/30/2008
KY104 06/19/2008
KY105 01/31/2008
JMJ005 05/13/2008
JMJ006 05/26/2008
JMJ007 02/18/2008
JMJ008 02/18/2008
Up Folder
Drive1
Drive1
JMJ001
JMJ001 1366x768, 125KB
View
Mark All
Delete
Close
Navigation Page Change Mark Exit
CH MARK
Popup Menu
Navigation Page Change Mark Exit
CH MARK
Popup Menu
The aspect ratio of a photo may change the size of
the photo displayed on the screen in full size.
1/17
Slideshow BGM Delete Option Hide
USB
62
USB
Select the Slideshow, BGM, (Rotate),
Delete,Option, or Hide.
■Use button to select the previous or
next photo.
■Use button to select and control
the menu on the full-sized screen.
ENTER
6
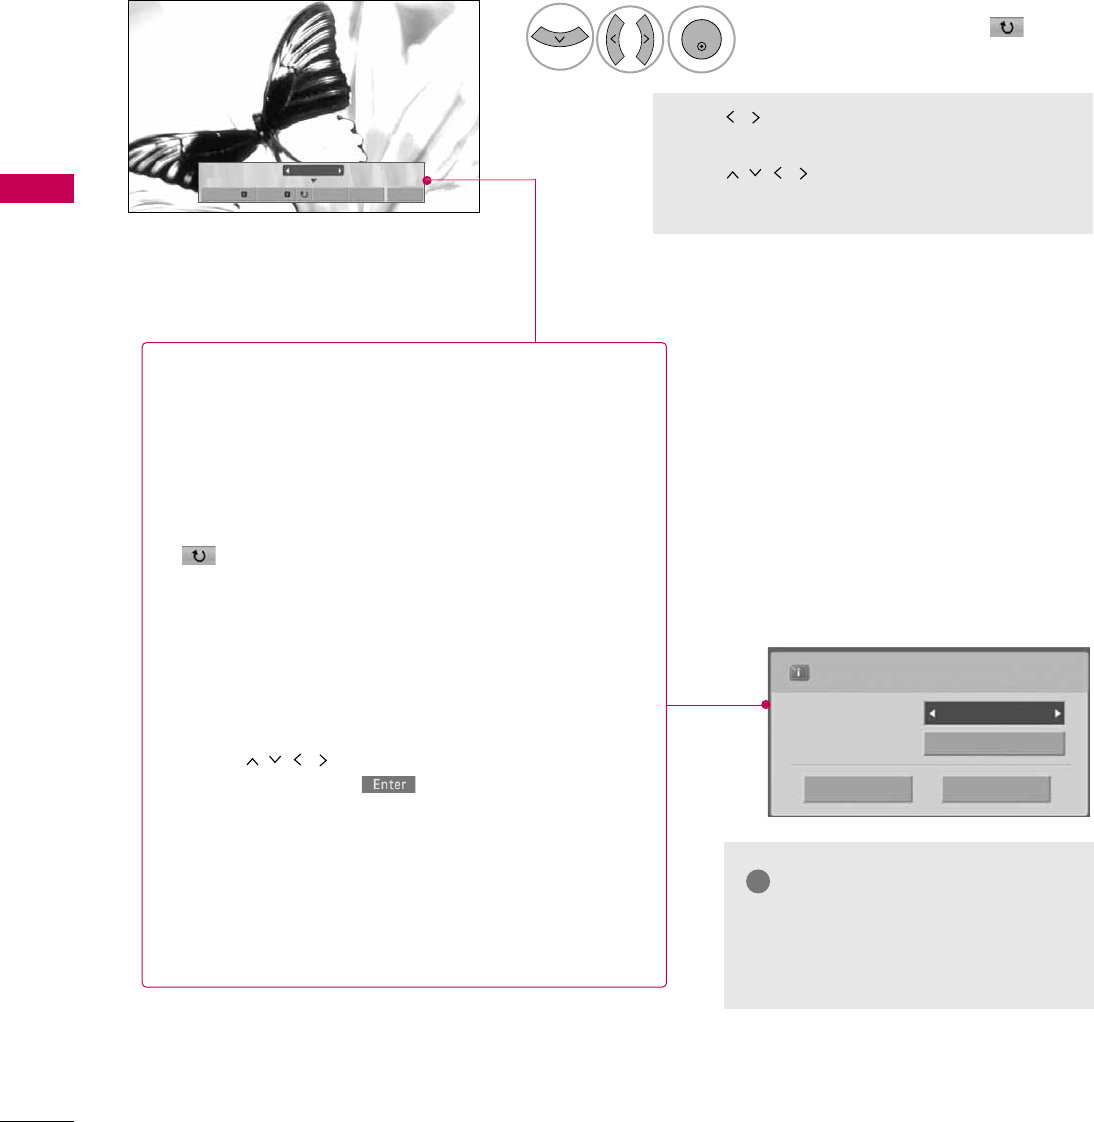
NOTE
!
GThis TV will not be able to decode
most JPG images saved using the
Progressive option.
1/17
Slideshow BGM Delete Option Hide
Press F G to set the time interval between slides.
Slide Speed Fast
Cancel
...
Music Album
Enter
GSlideshow: Selected photos are displayed during the
slide show. If no photo is selected, all photos in the cur-
rent folder are displayed during slide show.
■Set the time interval of the slide show in Option.
GBGM: Listen to music while viewing photos in full size.
■Set the BGM device and album in Option.
G(Rotate): Rotate photos.
■Rotates the photo 90°, 18 0 °, 270°, 360°clockwise.
■Photo cannot be rotated if its width is greater than
the available supported resolution height.
GDelete: Delete photos.
GOption: Set values for Slide Speed and Music
Album.
■Use button and ENTER button to set
values. Then go to and press ENTER to save
the settings.
■You cannot change Music Album while BGM is
playing.
GHide : Hide the menu on the full-sized screen.
■To see the menu again on the full-sized screen, press
ENTER button to display.
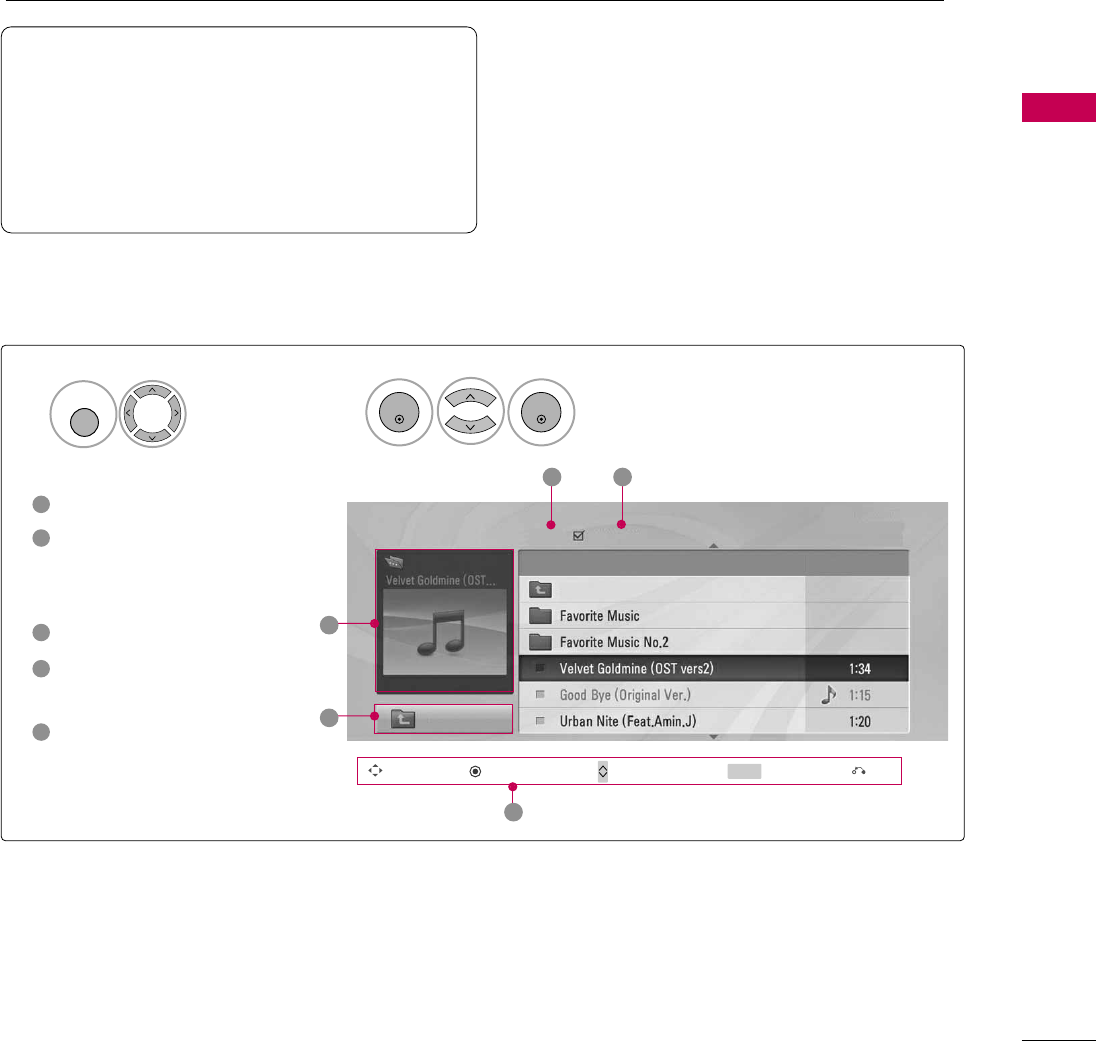
MUSIC LIST
USB
63
You can use the Music List menu to play MP3 files form a USB storage device.
This TV cannot play back copy-protected files.
The On-Screen Display on your model may be slightly different.
Screen Components
Supported music file: *.MP3
Bit rate range 32 Kbps - 320 Kbps
• Sampling rate (Sampling Frequency)
MPEG1 layer 3: 32 kHz, 44.1 kHz, 48 kHz
MPEG2 layer 3: 16 kHz, 22.05 kHz, 24 kHz
MPEG2.5 layer 3: 8 kHz, 11.025 kHz, 12 kHz
Moves to upper level folder
Preview: If any album jacket
for the file exists, this jack-
et is displayed.
Current page/Total pages
Total number of marked
musics
Corresponding buttons on
the remote control
1
3
4
5
2
Select USB.Select Music List.
12
MENU
ENTER
ENTER
Music List
Up Folder
Title Duration
3 4
2
1
Page 2/3 No Marked
Drive1
Navigation Popup Menu Page Change Mark Exit
CH MARK
5
A 00:00 / 04:16
Up Folder
USB
64
USB
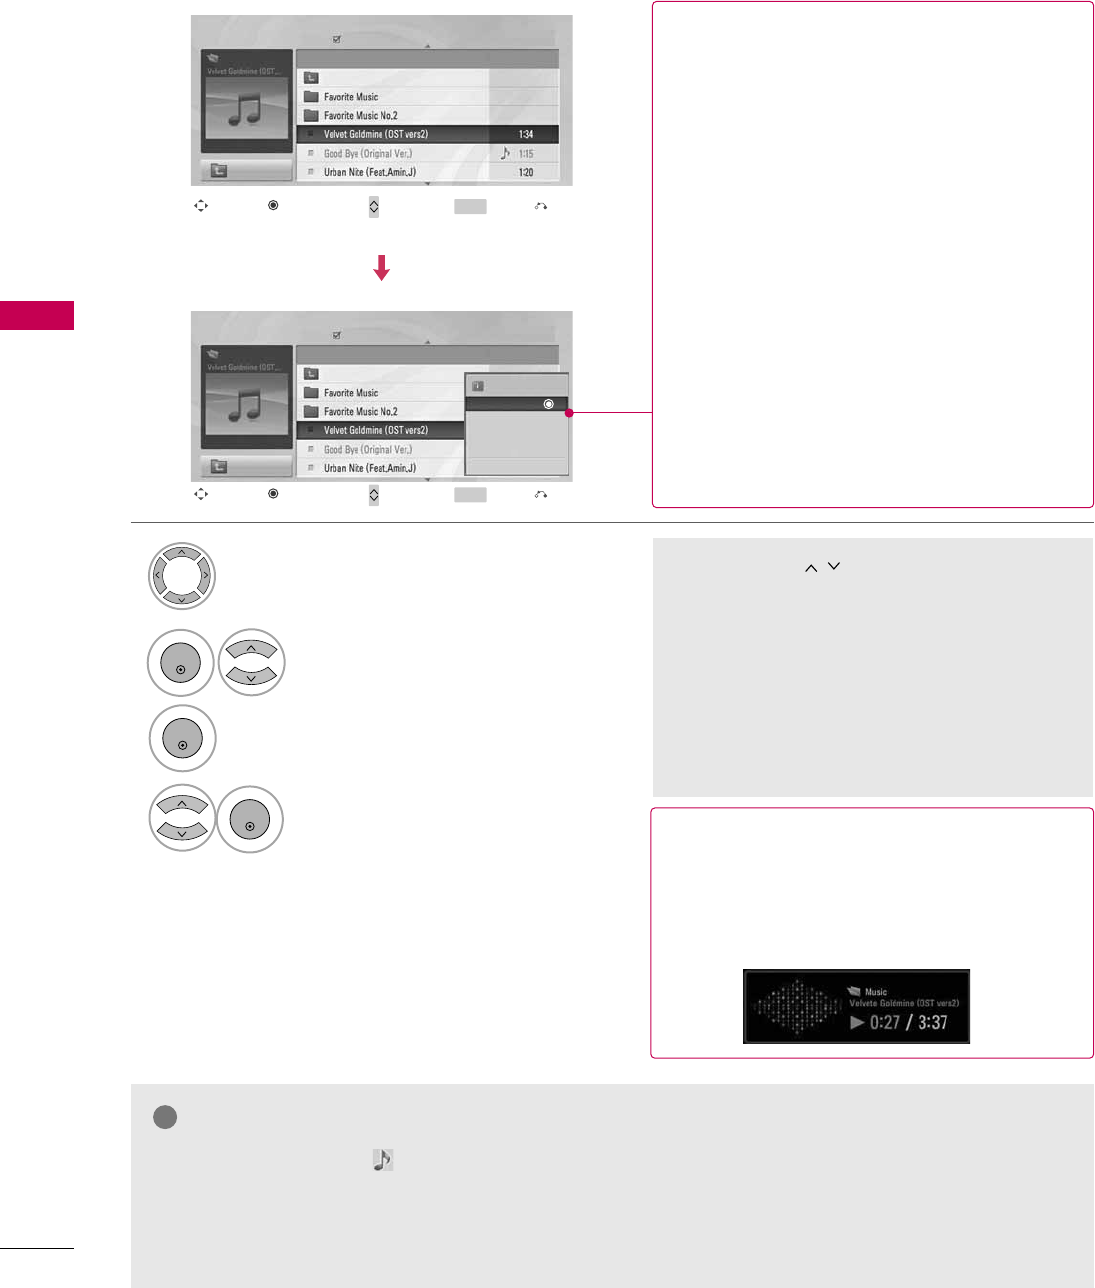
Music Selection and Popup Menu
■The play information box (as shown below)
will automatically move across the screen
when there is no user input to prevent a fixed
image remaining on the screen for a extended
period of time.
NOTE
!
GWhen music is playing, is displayed in front of the music play time.
GA damaged or corrupted music file that does not play displays 00:00 as the play time.
GMusic files with copy-protection will not play.
GPress ENTER, A, or RETURN button to stop the screen saver.
■Use the CH button to navigation in
the music page.
■Use MARK button to mark or unmark a music
file. If no music is marked, all the music in the
folder will be played in sequence. When one or
more music files are marked, the marked music
files will be played in sequence. If you want to
listen to only one song repeatedly, just mark
that one file and play.
Select the target folder or drive.
Select the desired musics.
Show the Popup menu.
Select the desired Popup menu.
2
3
1
4
ENTER
ENTER
ENTER
Navigation Page Change Mark Exit
CH MARK
Popup Menu
Navigation Page Change Mark Exit
CH MARK
Popup Menu
Page 2/3
No Marked
Music List
Up Folder
A 00:00 / 04:16
Up Folder
Drive1 Title
Duration
Page 2/3
No Marked
Music List
Up Folder
A 00:00 / 04:16
Up Folder
Drive1 Title
Duration
3945 KB
128 Kbps
Play
Play with Photo
Mark All
Delete
Close
GPlay (During stop): Play the selected song.
Once a song finishes playing, the next selected
one will be played. When there are no selected
songs to play, the next one in the current fold-
er will be played. If you go to a different folder
and press the ENTER button, the current
songs in playback will stop.
GPlay Marked: Play the selected songs. Once
a song finishes playing, the next selected one
will be played automatically.
GStop Play (During playback): Stop the play-
ing the song.
GPlay with Photo: Start playing the selected
songs and then move to the Photo List.
GMark All: Mark all songs in the folder.
GUnmark All: Deselect all marked song.
GDelete (USB file only): Delete the selected song.
GClose: Close the pop-up menu.
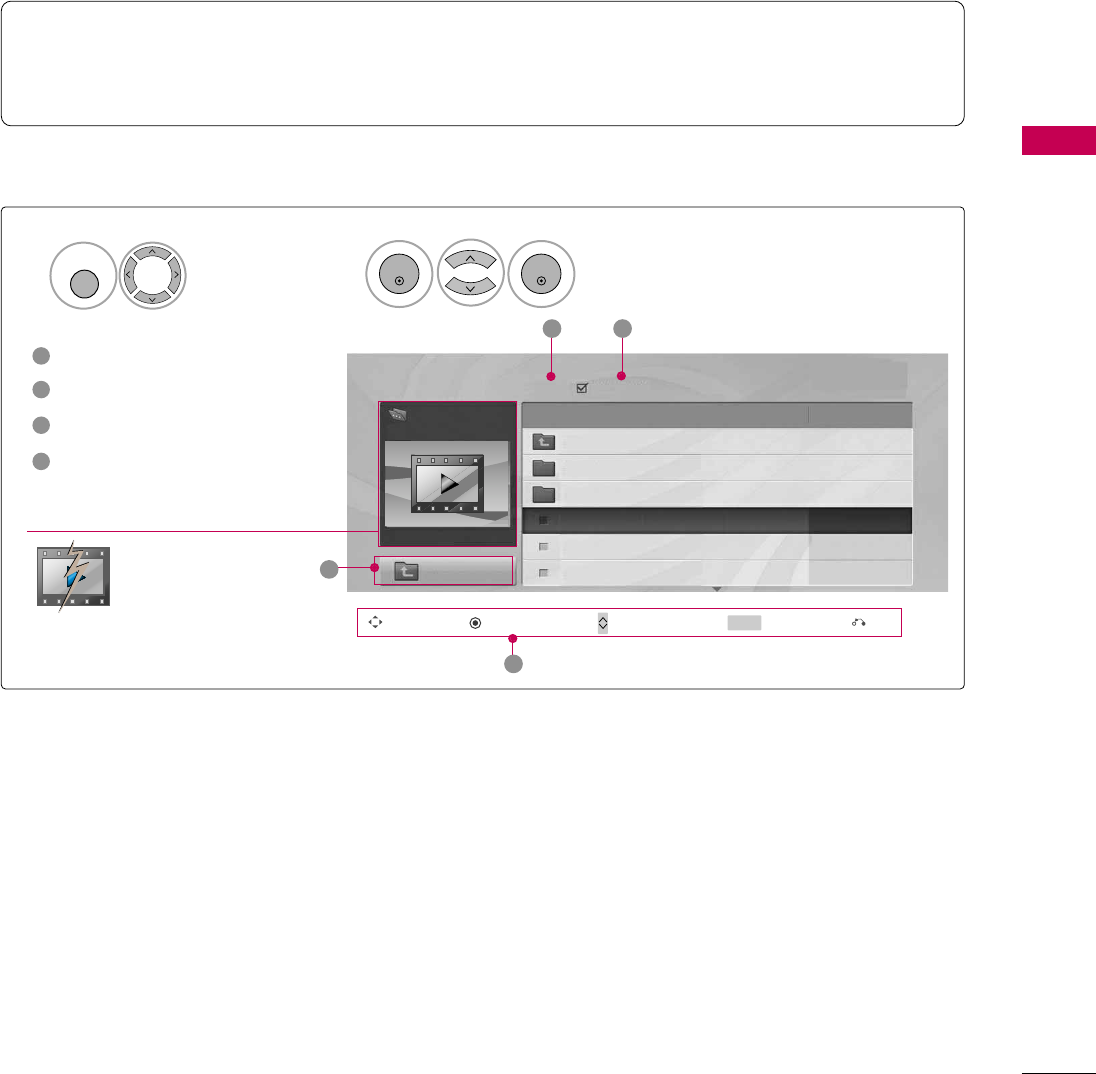
MOVIE LIST
USB
65
The movie list is activated once a USB drive is detected. It is used when playing movie files on the TV.
It displays all of the video files it recognizes.
The On-Screen Display on your model may be slightly different.
Screen Components
Moves to upper level folder
Current page/Total pages
Total number of marked movie
Corresponding buttons on
the remote control
1
3
4
2
Select USB.Select Movie Li st.
12
MENU
ENTER
ENTER
Movie List
Up Folder
Title Duration
2 3
1
Page 1/2 No Marked
Drive1
Navigation Popup Menu Page Change Mark Exit
CH MARK
4
640x480, 707MB
Up Folder
KR1
KR2
SJS001
SJS002
SJS003
00:00:00
00:00:00
00:00:00
SJS001
Non-supported
files are displayed
using this graphic.
■Max bitrate of playable movie file: 20Mbps (Mega bit per second)
■Bit rate of audio format: within 32 ~320kbps (MP3)
■
Supported subtitle format : *.smi, *.srt, *.sub (MicroDVD, SubViewer1.0/2.0), *.ass, *.ssa, *.txt (TMPlayer), *.psb(PowerDivx)

USB
66
USB
MPEG1, MPEG2
MPEG1
MPEG2, H.264/AVC
MPEG4 SP, MPEG4 ASP, DivX 3.11, DivX 4.12,
DivX 5.x, DivX 6, Xvid 1.00, Xvid 1.01, Xvid
1.02, Xvid 1.03, Xvid 1.10-beta 1, Xvid 1.10-
beta 2, H.264/AVC
MPEG 2, MPEG 4 SP, MPEG4 ASP, Divx 3.11,
DivX 4, DivX 5, DivX 6, Xvid 1.00, Xvid 1.01,
Xvid 1.02, Xvid 1.03, Xvid 1.10-beta 1,
Xvid 1.10-beta 2, H.264/AVC
H.264/AVC, MPEG 1, MPEG 2, MPEG 4 SP,
MPEG4 ASP
MPEG 2, MPEG 4 SP, MPEG4 ASP, Divx 3.11,
DivX 4, DivX 5, DivX 6, Xvid 1.00, Xvid 1.01,
Xvid 1.02, Xvid 1.03, Xvid 1.10-beta 1,
Xvid 1.10-beta 2, H.264/AVC
Dolby Digital, MPEG, MP3, LPCM
Dolby Digital, MPEG, MP3, LPCM
Dolby Digital, AAC, MPEG
Dolby Digital, HEAAC, AAC,
MPEG, MP3, LPCM
Dolby Digital, HEAAC, AAC,
MPEG, MP3, LPCM
Dolby Digital, HEAAC, AAC,
MPEG, MP3, LPCM
Dolby Digital, HEAAC, AAC,
MPEG, MP3, LPCM
1920x1080P
@25/30P
1280x720P
@50/60P
File Extension Video Decoder Audio Codec Resolution
Supported DivX file
(*.avi/*.dat/*.divx/*.mkv/*.mp4/*.mpeg/*.mpg/*.tp/*.trp/*.ts/*.vob)
mpg, mpeg, vob
dat
tp, trp, ts
mp4
avi
mkv
divx
Precautions when playing the video files
GSome user-created subtitles may not work properly.
GSome special characters are not supported in sub-
titles.
GHTML tags are not supported in subtitles.
GSubtitles in languages other than the supported
languages are not available.
GTime information in an external subtitle file should
be arranged in ascending order to be played.
GThe screen may suffer temporary interruptions
(image stoppage, faster playback, etc.) when the
audio language is changed.
GA damaged video file may not be played correctly,
or some player functions may not be usable.
GVideo files produced with some encoders may not
be played correctly.
GIf the video and audio structure of recorded file is
not interleaved, either video or audio is outputted.
GVideo with resolution higher than maximum reso-
lution supported for each frame, cannot be guar-
anteed for smooth playback.
GMovie files other than the specified types and for-
mats may not work properly.
GThe movie file encoded by the GMC (Global
Motion Compensation) is not supported.
GOnly the files saved in ASCII Code is supported in
subtitles.
GOnly 250 Korean characters, 500 alphabets and
500 numbers are supported for each line of the
subtitle.
GOnly 10,000 of sync blocks can be supported
within the subtitle file.
GMax bitrate of playable movie file is 20Mbps.
GWe do not guarantee smooth playback of profiles
encoded level 4.1 or higher in H.264.
GDTS Audio codec is not supported.
GA video file more than 30GB in file size is not sup-
ported for playback.
GPlaying a video via a USB connection that doesn’t
support high speed may not work properly.
GUSB storage devices below USB 2.0 are support-
ed as well. But they may not work properly in the
movie list.
GThe video file and its subtitle file must be located
in the same folder.
At this time, a video file name and its subtitle file
name must be identical for it to be displayed.
USB
67
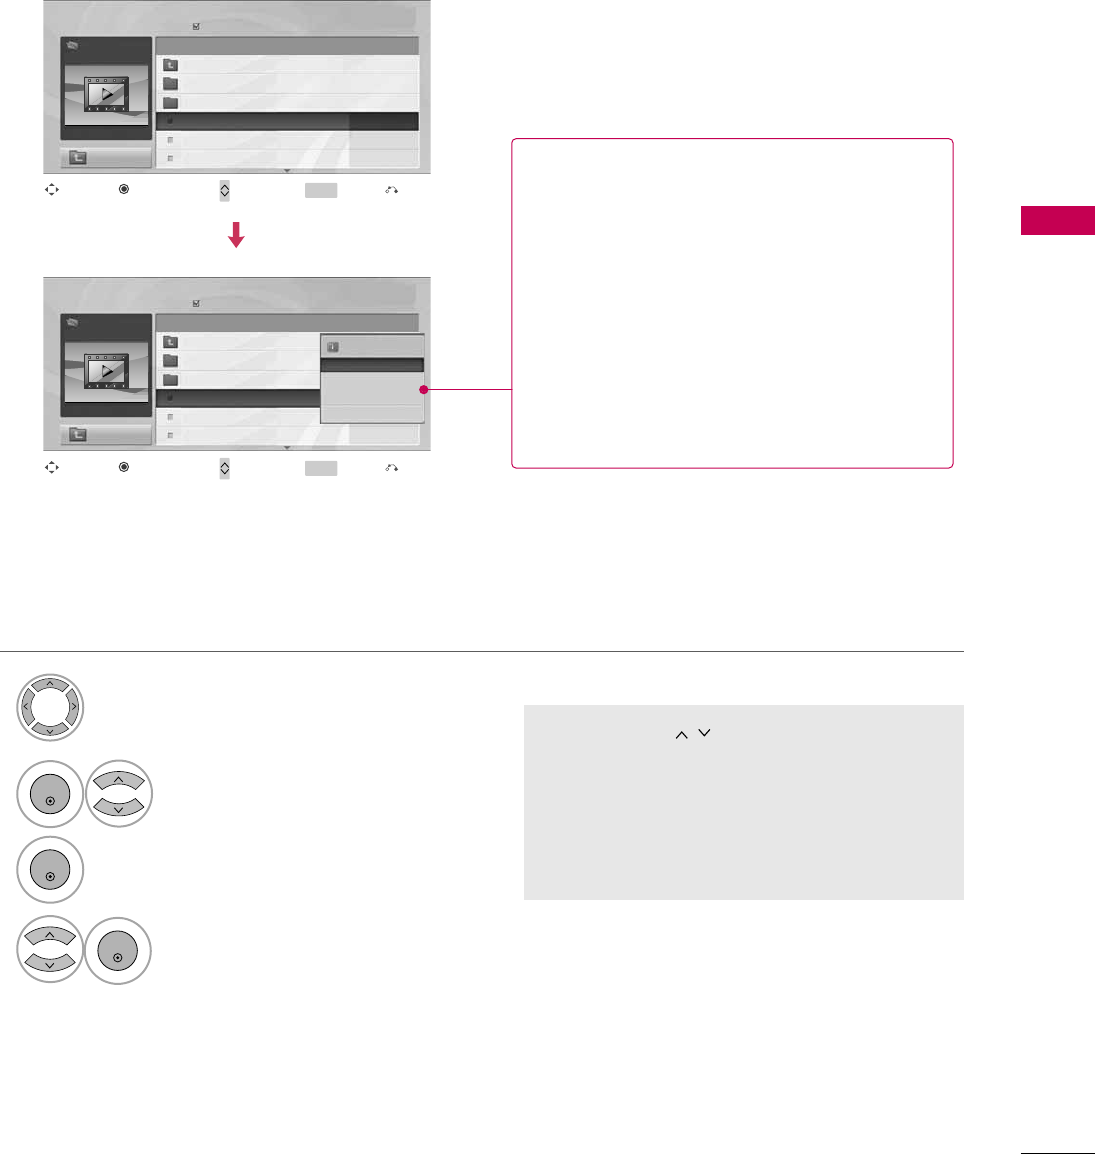
Movie Selection and Popup Menu
Page 1/2 No M arked
Movie List
Up Folder
640x480, 707MB
Up Folder
Title Duration
KR1
KR2
SJS001
SJS002
SJS003
SJS001
Drive1
■Use the CH button to navigation in
the movie page.
■Use the MARK button to mark or unmark a
movie file. When one or more movie files are
marked, the marked movie files will be played
in sequence.
Select the target folder or drive.
Select the desired movies.
Show the Popup menu.
Select the desired Popup menu.
2
3
1
4
ENTER
ENTER
ENTER
Page 1/2 No M arked
Movie List
Up Folder
640x480, 707MB
Up Folder
Title Duration
KR1
KR2
SJS001
SJS002
SJS003
00:00:00
00:00:00
00:00:00
SJS001
Drive1
624x352, 699MB
Play
Mark All
Delete
Close
00:00:00
Navigation Page Change Mark Exit
CH MARK
Popup Menu
Navigation Page Change Mark Exit
CH MARK
Popup Menu
GPlay: Play the selected file.
Divx Play is executed while the screen changes.
GPlay Marked: Play the selected file. Once a
movie finishes playing, the next selected one
will be played automatically.
GMark All: Mark all files in the folder.
GUnmark All: Deselect all marked movies.
GDelete or Delete marked (FAT32 file sys-
tem only): Delete the selected file.
GClose: Close the pop-up menu.
USB
68
USB
Playing the Movie
Select the target folder or drive.
Select the desired movies.
Show the Popup menu.
Select Play.
2
3
1
4
ENTER
Display the current movie status progress
bar in the bottom of the screen.
5
ENTER
ENTER
Option
You can adjust various method during the movie play.
Display the DivX Banner in the
top of the screen.
INFO i
Using the remote control
Press it to rewind.
Press it to forward fast.
Displayed the still screen.
Stopped the screen.
Move to a specific frame forward or back-
ward while playing a movie. A cursor indi-
cating the position can be viewed on the
screen. It may not work properly for some
files while playing a movie.)
Displays a slow motion.
Page 1/2 No M arked
Movie List
Up Folder
640x480, 707MB
Up Folder
Title Duration
KR1
KR2
SJS001
SJS002
SJS003
SJS001
Drive1
Page 1/2 No M arked
Movie List
Up Folder
640x480, 707MB
Up Folder
Title Duration
KR1
KR2
SJS001
SJS002
SJS003
00:00:00
00:00:00
00:00:00
SJS001
Drive1
624x352, 699MB
Play
Mark All
Delete
Close
00:00:00
Navigation Page Change Mark Exit
CH MARK
Popup Menu
Navigation Page Change Mark Exit
CH MARK
Popup Menu
USB
69
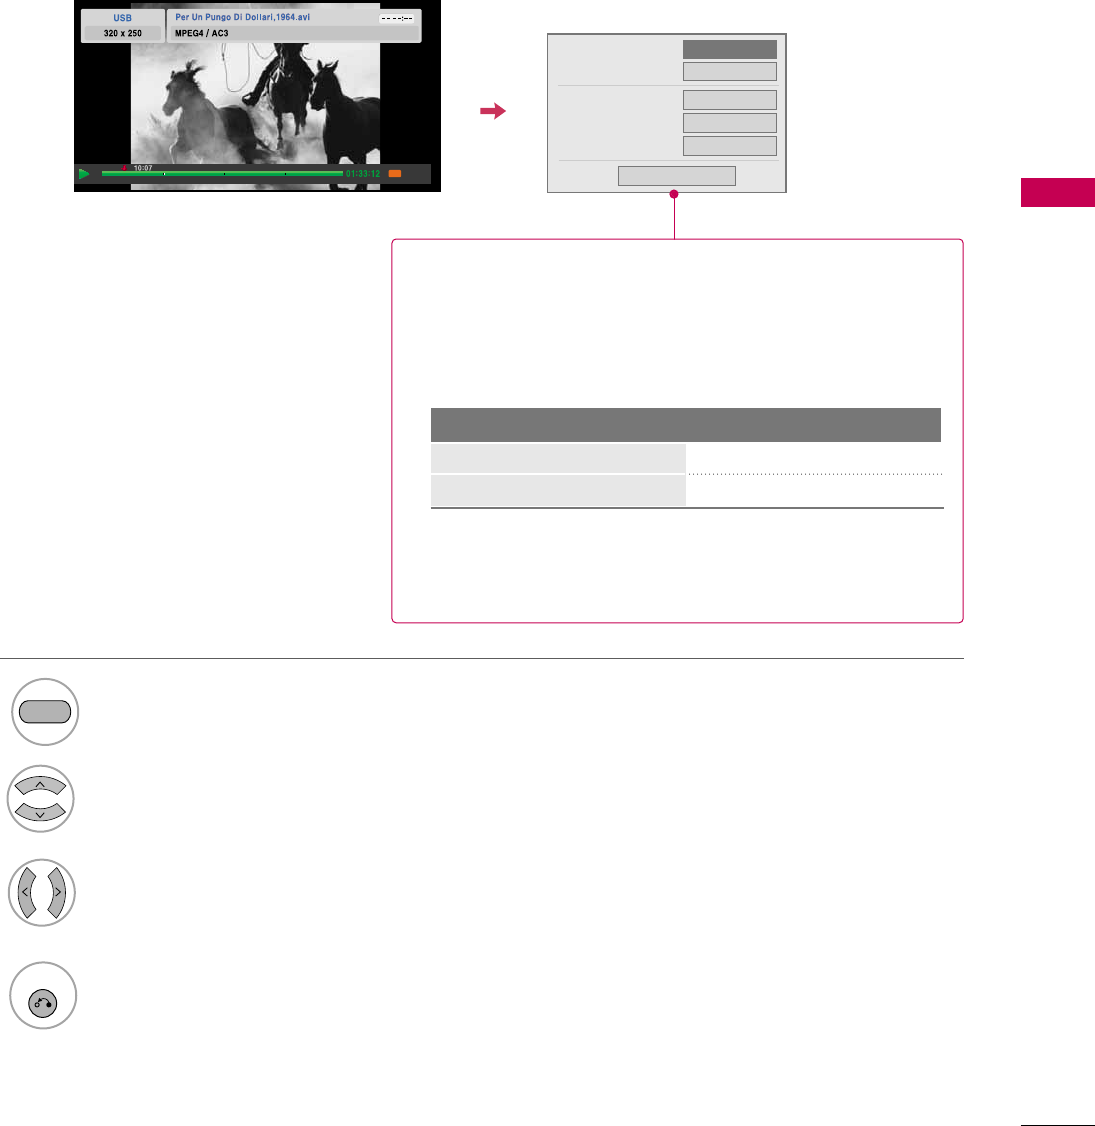
Option Menu Selection
Option
Select Option.
1
3
Select the desired option.
4
RETURN
Return to movie viewing
Select Picture Size, Audio Language,
Subtitle Language, Sync or Position.
2
RED
Picture Size
Audio Language
Subtitle Language
.Sync
.Position
FF Full G
1
0
0
Close
Off
During the movie play, the following options are available.
GPicture Size: Select the Full screen or Original size.
GAudio Language: Select the language.
But, the file with only one audio can not be selected.
GSubtitle Language: The subtitles can be turned on or off.
If there are two or more subtitles, you can select one of them.
• Sync: When the video is not synchronized with the captions,
it can be adjusted by 0.5 second.
• Position: Move the location of the subtitle.
Latin1
Korean
English, Spanish, French
English, Korean
Subtitle Language Group Supported Language
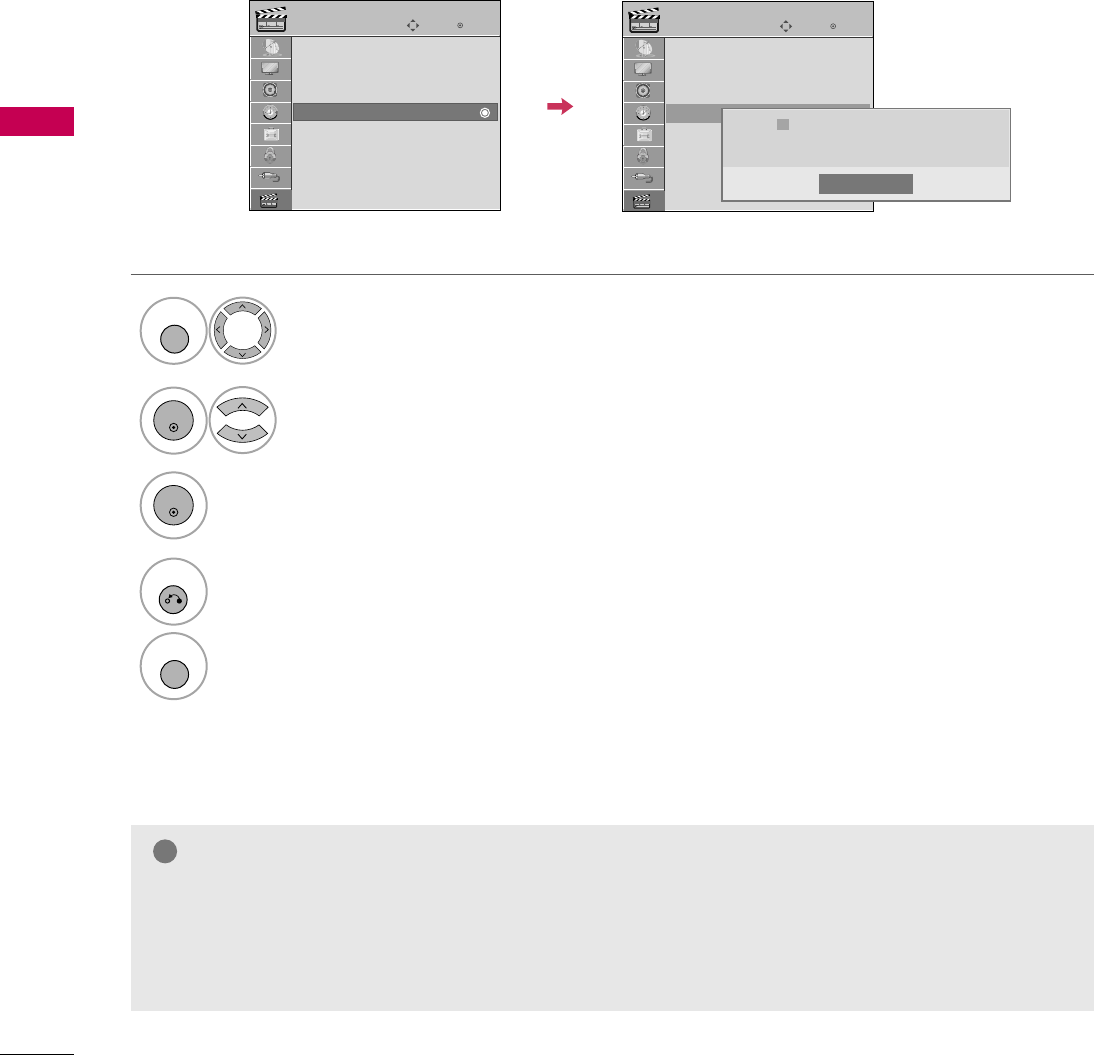
DIVX REGISTRATION CODE
USB
70
USB
Display DivX Reg. Code.
3
ENTER
Select USB.
Select DivX Reg. Code.
1
MENU
2
ENTER
Confirm the DivX registration code number of the TV. Using the registration number, movies can be rented or
purchased at www.divx.com/vod.
With a DivX registration code from other TV, playback of rented or purchased DivX file is not allowed. (Only DivX
files matched with the registration code of the purchased TV are playable.)
NOTE
!
GWhen loading, some buttons may not work.
GIf you use the DivX registration code of another device, the rented or purchased DivX file cannot be played.
Therefore always use the DivX registration code assigned to this product.
GThe video or audio of a file converted based on a standard other than the DivX codec standard may be cor-
rupted or unable to be played.
4
RETURN
Return to the previous menu.
MENU
Return to TV viewing.
Enter
Move
USB
Photo List
Music List
Movie List
DivX Reg. Code
Deactivation
Enter
Move
USB
Photo List
Music List
Movie List
DivX Reg. Code
Deactivation
Close
DivX(R) Video On Demand
Your registration code is : xxxxxxxxxx
To learn more visit www.divx.com/vod
ii
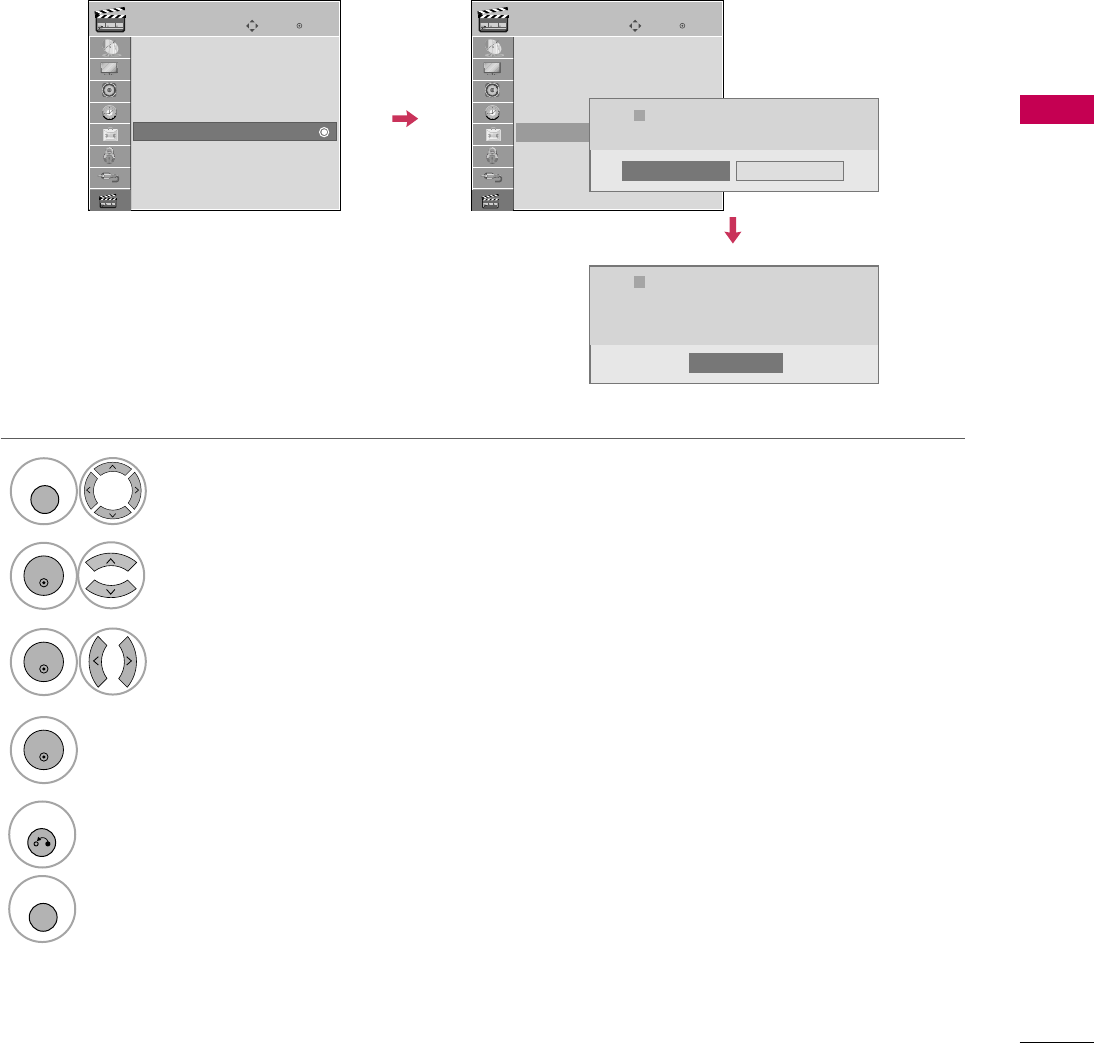
DEACTIVATION
USB
71
Select USB.
1
MENU
Select Yes.
3
Select Deactivation.
2
ENTER
5
RETURN
Return to the previous menu.
Display Deactivation.
MENU
Return to TV viewing.
ENTER
4
The purpose of deactivation is to allow deactivation of devices for users who have activated all the available
devices through the web_server and are blocked from activating more devices. DivX VOD allows the consumer
to activate up to 6 devices under one account.
Delete the existing authentication information to receive a new DivX user authentication for TV. Once this func-
tion is executed, a DivX user authentication is required again to see DivX DRM files.
Close
ENTER
Enter
Move
USB
Photo List
Music List
Movie List
DivX Reg. Code
Deactivation
Enter
Move
USB
Photo List
Music List
Movie List
DivX Reg. Code
Deactivation
Yes No
DivX(R) Video On Demand
This device is deactivated.
Your deactivation code is : xxxxxxxxx
To learn more visit www.divx.com/vod
i
DivX(R) Video On Demand
Do you want to deactivate your device?
i
PICTURE CONTROL
72
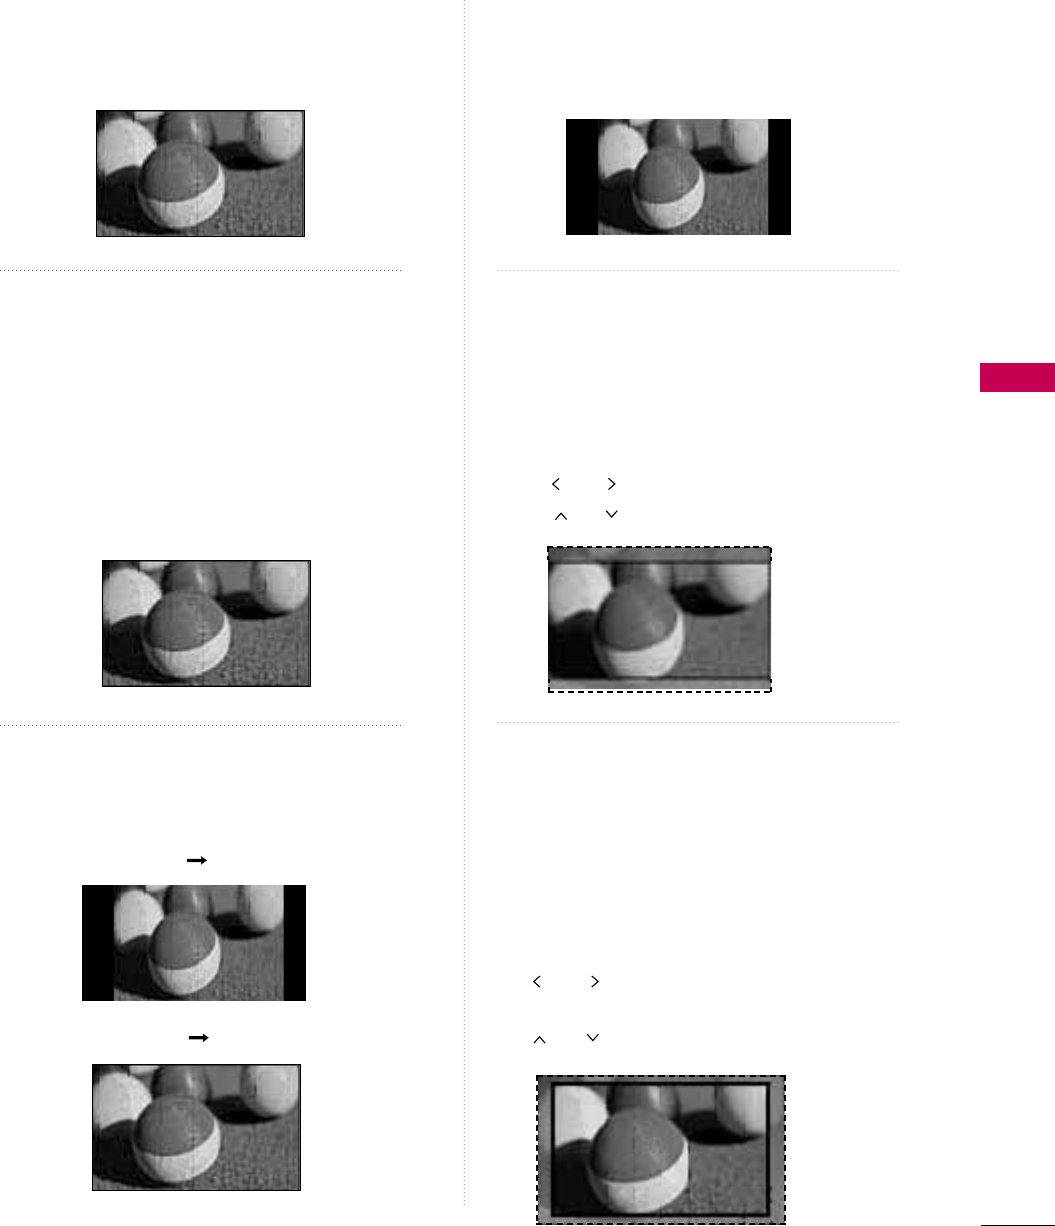
PICTURE SIZE (ASPECT RATIO) CONTROL
PICTURE CONTROL
This feature lets you choose the way an analog picture with a 4:3 aspect ratio is displayed on your TV.
HDMI/RGB-PC input only support 4:3 or 16:9 aspect ratio. But you can select all aspect ratios in HDMI-PC
1920X1080 input.
You can select a different aspect ratio depending on input source (analog broadcasting, digital broadcasting,
aux).
■You can also adjust Aspect Ratio in
the Q.MENU.
Select PICTURE.
Select Aspect Ratio.
Select the desired picture format.
1
MENU
3
2
ENTER
ENTER
4
RETURN
Return to the previous menu.
MENU
Return to TV viewing.
Enter
Move
PICTURE
E
Aspect Ratio : 16:9
Picture Wizard
Energy Saving
: Off
Picture Mode : Standard
• Backlight 70
• Contrast 90
• Brightness 50
• Sharpness 70
Enter
Move
PICTURE
E
Aspect Ratio : 16:9
Picture Wizard
Energy Saving
: Off
Picture Mode : Standard
• Backlight 80
• Contrast 90
• Brightness 50
• Sharpness 60
16:9
Just Scan
Set By Program
4:3
Zoom
Cinema Zoom 1
PICTURE CONTROL
73
16:9
Adjust the picture horizontally, in a linear pro-
portion to fill the entire screen.
Just Scan
Normally the edges of video signals are cropped
1-2%. Just Scan turns off this cropping and
shows the complete video.
Notes: If there is noise on the edges of the original
signal, it will be visible when Just Scan is activated.
Just Scan operates only in
DTV/CADTV/Component/HDMI-DTV/DVI-DTV
(720p/1080i/1080p) input source.
Set By Program
Selects the proper picture proportion to match
the source’s image.
4:3
Choose 4:3 when you want to view a picture
with an original 4:3 aspect ratio.
Zoom
Choose Zoom when you want to view the picture
without any alteration. However, the top and
bottom portions of the picture will be cropped.
■When adjusting in Q.MENU menu,
a. or button: Adjust proportion of Zoom.
b. or button: Move the image on the screen.
Cinema Zoom
Choose Cinema Zoom when you want to
enlarge the picture in correct proportion.
This enlarges an image with cinemascope aspect
ratio (2.35:1) without distortion.
Note: When enlarging or reducing the picture,
the image may become distorted.
■or button: Adjust proportion of
Cinema Zoom. The adjustment range is 1-16.
■or button: Move the image on the screen.
JUST SCAN
(4:3 4:3)
(16:9 16:9)
Set By Program
Set By Program
PICTURE CONTROL
74
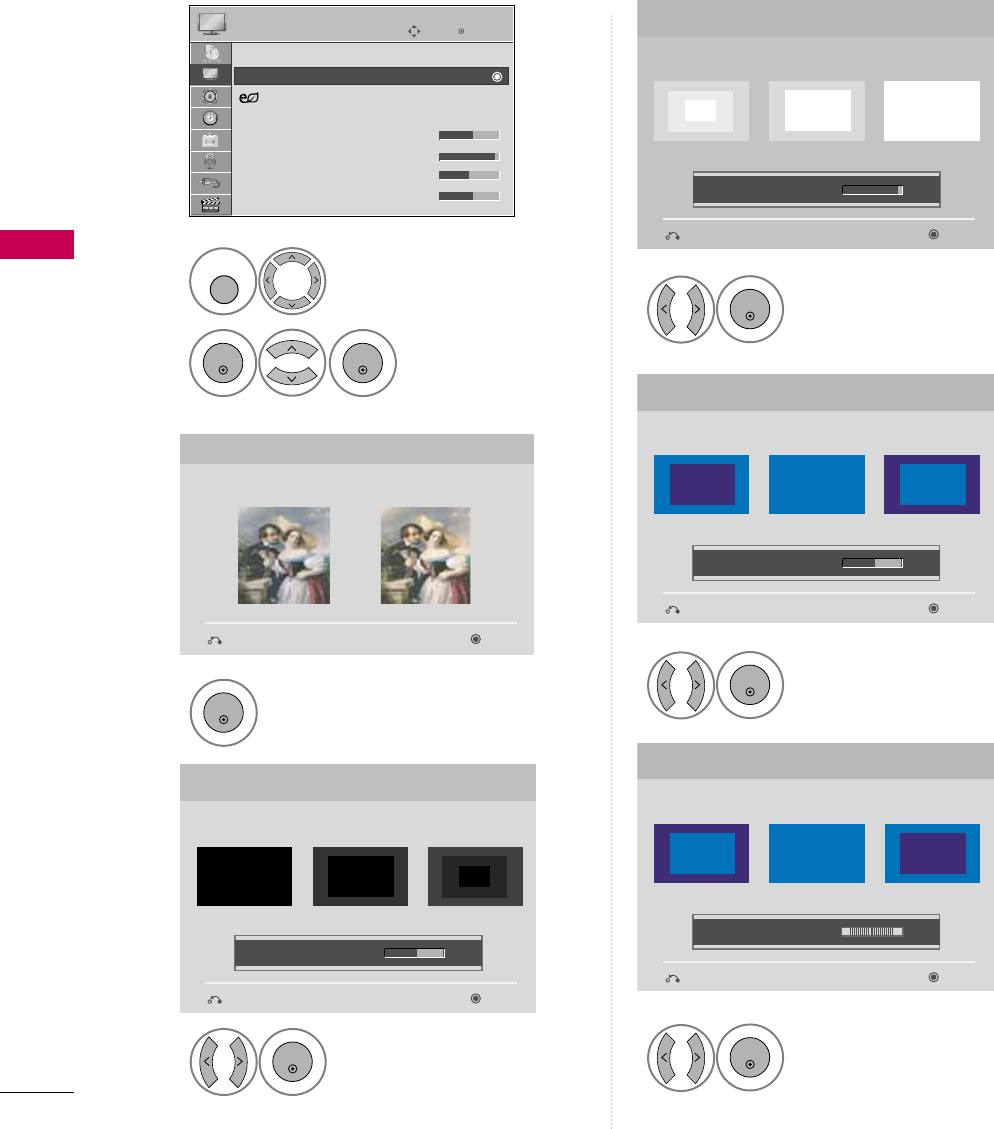
PICTURE WIZARD
PICTURE CONTROL
Select PICTURE.
Select Picture
Wizard.
1
MENU
2
ENTER
ENTER
Adjust Picture Wizard.
Adjust White Level.
3
ENTER
Adjust Black Level.
4
ENTER
5
ENTER
Adjust Color.
6
ENTER
Adjust Tint.
7
ENTER
Picture Wizard
With Picture Wizard, you can adjust the picture quality of the
original image.
G
Black Level
Set the screen above identical to the Recommended sample
below.
NextPrevious
NextPrevious
• Brightness 50
EE
E
Low HighRecommended
Color
Set the screen above identical to the Recommended sample
below.
NextPrevious
• Color 50
E
E
Low HighRecommended
White Level
Set the screen above identical to the Recommended sample
below.
NextPrevious
Low HighRecommended
• Contrast 90
E
E
Tint
Set the screen above identical to the Recommended sample
below.
NextPrevious
Low HighRecommended
• Tint 0
E
E
RG
Enter
Move
PICTURE
E
Aspect Ratio : 16:9
Picture Wizard
Energy Saving
: Off
Picture Mode : Standard
• Backlight 70
• Contrast 90
• Brightness 50
• Sharpness 70
This feature lets you adjust the picture quality of the original image.
Use this to calibrate the screen quality by adjusting the Black and White Level etc. You can calibrate the screen
quality by easily following each step.
When you adjust the image to L
Low, Recommended or High, you can see the example of the changes you
made.
PICTURE CONTROL
75
Adjust Horizontal
Sharpness.
8
ENTER
Select input source to apply the
settings.
11
MARK
FAV
Adjust Vertical
Sharpness.
9
ENTER
Adjust Backlight.
10
ENTER
Finish the Picture Wizard.
13
ENTER
Save.
12
ENTER
Complete
ConfirmMovePrevious
Horizontal Sharpness
Set the screen above identical to the Recommended sample
below.
NextPrevious
• H Sharpness 50
E
E
Low HighRecommended
Vertical Sharpness
Set the screen above identical to the Recommended sample
below.
NextPrevious
• V Sharpness 50
E
E
Low HighRecommended
Backlight
Set the Backlight to your Brightness preference.
NextPrevious
• Backlight 50
E
E
Dark BrightRecommended
DTV
TV
AV1
AV2
Component1
Component2
RGB-PC
HDMI1
HDMI2
HDMI3
HDMI4
Select (an) input(s) to apply the settings.
Warning: The picture quality may vary according to the
different types of signal and inputs.
E
E
Mark
MARK
■If you stop the setting before the final
step, the changes will not be saved to
the TV.
■Once the Picture Wizard sets the pic-
ture quality, Energy Saving is changed
to Off automatically.
■Picture Wizard setup value is not
applied for the HDMI5 input source.
Close
The current adjustment value is saved to
Expert1.
i
PICTURE CONTROL
76
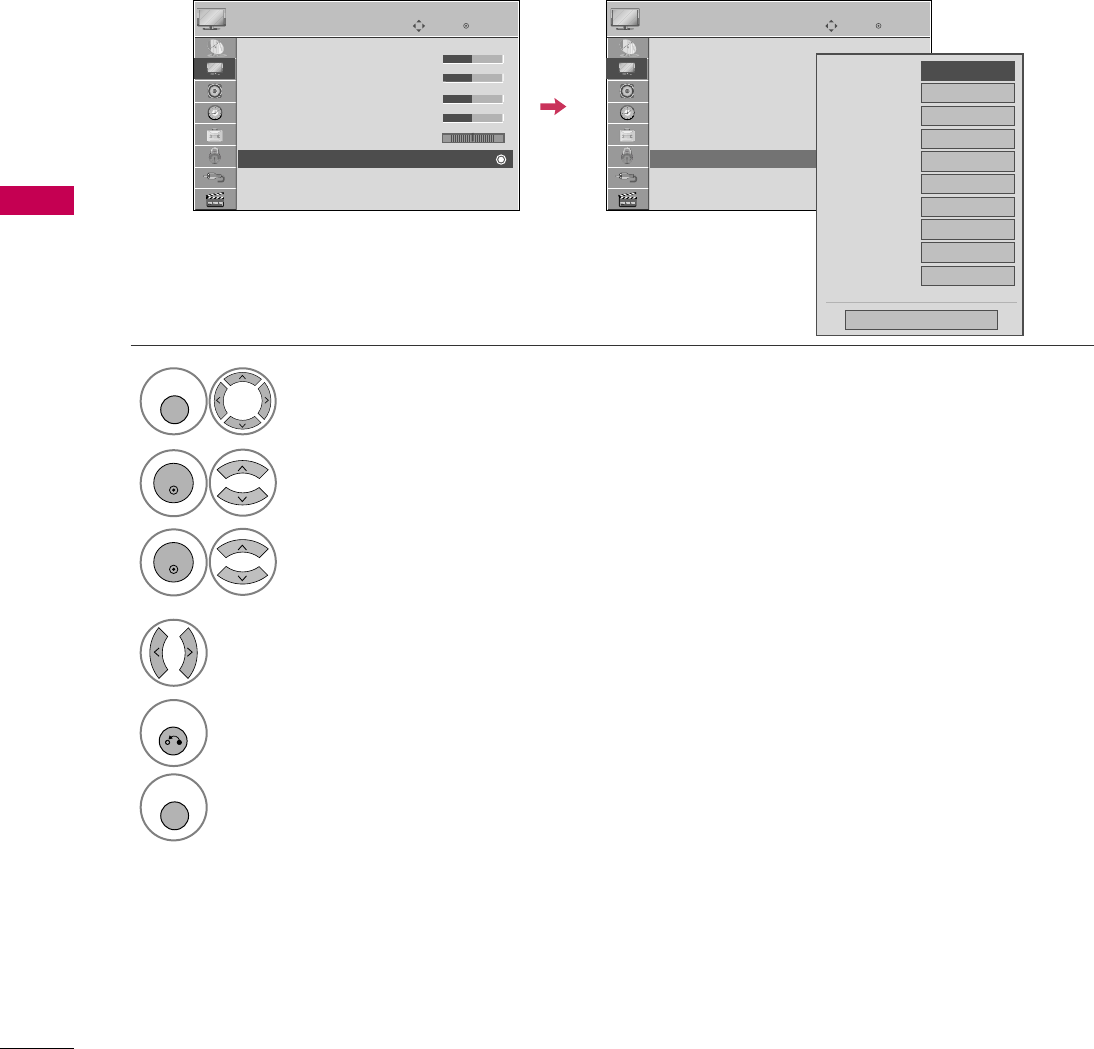
PRESET PICTURE SETTINGS (PICTURE MODE)
PICTURE CONTROL
There are factory presets for picture settings available in the user menus. You can use a preset, change each
setting manually, or use the Intelligent Sensor.
Select PICTURE.
Select Picture Mode.
Select Intelligent Sensor, Vivid,
Standard, Natural, Cinema, Sport,
or Game.
1
MENU
3
2
ENTER
ENTER
4
RETURN
Return to the previous menu.
MENU
Return to TV viewing.
Enter
Move
PICTURE
E
Enter
Move
PICTURE
E
Aspect Ratio : 16:9
Picture Wizard
Energy Saving
: Off
Picture Mode : Standard
• Backlight 70
• Contrast 90
• Brightness 50
• Sharpness 70
Aspect Ratio : 16:9
Picture Wizard
Energy Saving
: Off
Picture Mode : Standard
• Backlight 70
• Contrast 90
• Brightness 50
• Sharpness 70
Intelligent Sensor
Vivid
Standard
Natural
Cinema
Sport
Game
Expert1
Expert2
■When selecting Intelligent Sensor,
Energy Saving is changed to Auto
automatically.
■When selecting Intelligent Sensor, it
is changed contrast, brightness, sharp-
ness, color and tint automatically.
■Vivid, Standard, Natural, Cinema,
Sport, and Game Settings are preset
for the optimum picture quality at the
factory.
■Intelligent Sensor: The most suitable
picture is automatically adjusted accord-
ing to the surrounding conditions.
■Vivid: This is the mode to maximize the
effect of the video in the retail store.
Strengthen the contrast, brightness,
color and sharpness for vivid picture.
■Standard: This is the mode to realize
optimum viewing condition for the gen-
eral user.
■Natural: This is the mode to display the
most natural screen status.
■Cinema: This mode optimizes video for
watching movies.
■Sport: This is the video mode to
emphasize dynamic video and primary
color (e.g, white, uniform, grass, sky blue
etc.) by realizing the optimal screen for
sports.
■Game: This is the mode to realize fast
response speed in a fast gaming screen.
■Expert: This is the mode to adjust the
video in detail for video quality expert
and general user.
■You can also adjust Picture Mode in
the Q.MENU.
PICTURE CONTROL
77
MANUAL PICTURE ADJUSTMENT - USER MODE
Adjust the picture appearance to suit your preference and viewing situations.
Select PICTURE.
1
MENU
Select Picture Mode.
2
ENTER
Enter
Move
PICTURE
E
• Backlight 70
E
E
E
E
Enter
Make appropriate adjustments.
Select Backlight, Contrast, Brightness,
Sharpness, Color, or Tint.
Select Vivid,Standard, Natural,
Cinema, Sport, or Game.
3
ENTER
4
ENTER
5
ENTER
6
RETURN
Return to the previous menu.
MENU
Return to TV viewing.
■When adjusting Energy Saving,
Backlight function is disabled.
■Backlight: This function adjusts the
brightness of LCD panel, to control the
brightness of the screen. Adjusting the
backlight is recommended when setting
the brightness of the set. When decreas-
ing the backlight, the brightness of the
black becomes darker without any loss in
video signal and the power consumption
is reduced.
■Contrast: Increase or decrease the gra-
dient of the video signal. You may use
Contrast when the bright part of the pic-
ture is saturated.
■Brightness: Adjusts the base level of
the signal in the picture. You may use
Brightness when the dark part of the pic-
ture is saturated.
■Sharpness: Adjusts the level of crisp-
ness in the edges between the light and
dark areas of the picture. The lower the
level, the softer the image.
■Color: Adjusts intensity of all colors.
■Tint: Adjusts the balance between red
and green levels.
Aspect Ratio : 16:9
Picture Wizard
Energy Saving
: Off
Picture Mode : Standard
• Backlight 70
• Contrast 90
• Brightness 50
• Sharpness 70
PICTURE CONTROL
78
PICTURE IMPROVEMENT TECHNOLOGY
PICTURE CONTROL
Select PICTURE.
Select Advanced Control.
Select your desired options.
1
MENU
3
2
ENTER
ENTER
5
RETURN
Return to the previous menu.
MENU
Return to TV viewing.
Make appropriate adjustments.
4
Enter
Move
PICTURE
E
RG
• Contrast 50
• Brightness 50
• Sharpness 50
• Color 50
• Tint 0
• Advanced Control
• Picture Reset
Screen (RGB-PC)
Enter
Move
PICTURE
E
RG
• Contrast 50
• Brightness 50
• Sharpness 50
• Color 50
• Tint 0
• Advanced Control
• Picture Reset
Screen (RGB-PC)
You can calibrate the screen for each Picture Mode or set the video value according to the special video screen.
You can set the video seeing differently for each input.
To reset to the factory default after making adjustments to each input source, execute the Picture Reset
function for each Picture Mode.
Color Temperature
FMedium G
Dynamic Contrast
Off
Dynamic Color
Off
Noise Reduction
Off
Gamma
Medium
Black Level
Low
Eye Care
Off
Real Cinema
Off
TruMotion 120Hz
Low
Color Gamut
High
Close
E
PICTURE CONTROL
79
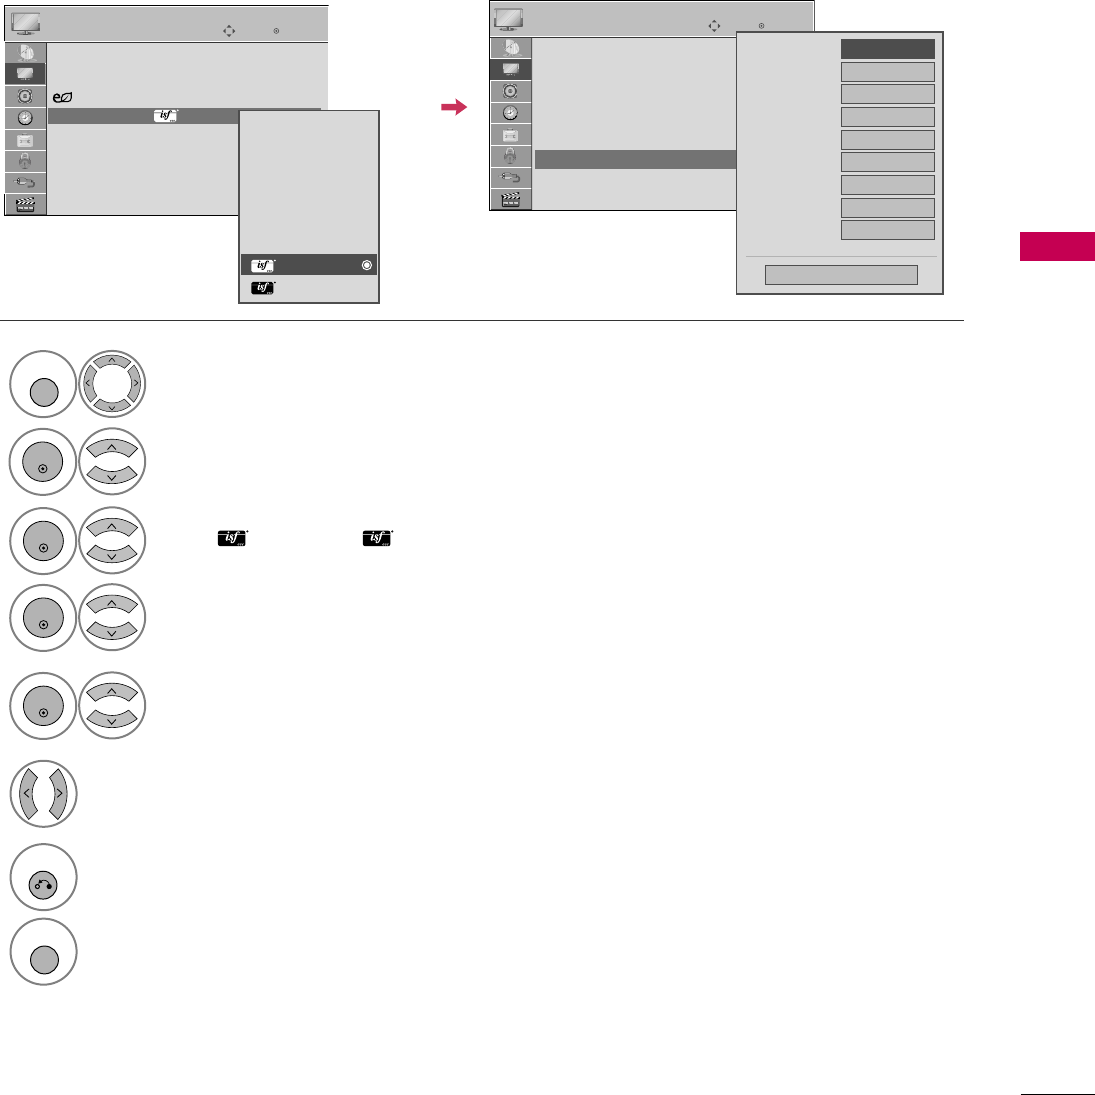
EXPERT PICTURE CONTROL
Select PICTURE.
Select Picture Mode.
Select Expert Control.
Select Expert1 or Expert2.
1
MENU
3
2
ENTER
ENTER
4
ENTER
Make appropriate adjustments.
6
7
RETURN
Return to the previous menu.
MENU
Return to TV viewing.
Enter
Move
PICTURE
E
RG
• Brightness 50
• H Sharpness 50
• V Sharpness 50
• Color 50
• Tint 0
• Expert Control
• Picture Reset
Screen (RGB-PC)
Dynamic Contrast
FOff G
Noise Reduction
Low
Gamma Medium
Black Level
Low
Real Cinema
Off
TruMotion 120Hz
Low
Color Standard
HD
Color Gamut
Standard
Edge Enhancer
High
Close
E
Select your desired menu option.
5
ENTER
Enter
Move
PICTURE
E
Aspect Ratio : 16:9
Picture Wizard
Energy Saving
: Off
Picture Mode : Expert1
• Backlight 70
• Contrast 90
• Brightness 50
• H Sharpness 50
Intelligent Sensor
Vivid
Standard
Natural
Cinema
Sport
Game
Expert1
Expert2
By segmenting categories, Expert1 and Expert2 provide more categories which users can set as they see
fit, offering the optimal picture quality for users.
This may also be used by a professional to help optimize the TV performance in the environment the TV is in.

PICTURE CONTROL
80
PICTURE CONTROL
■Set to warm to enhance hotter colors such as red, or set to cool to enhance cooler
colors such as blue.
■Adjusts the contrast to keep it at the best level according to the brightness of the
screen. The picture is improved by making bright parts brighter and dark parts darker.
■Adjusts screen colors so that they look livelier, richer and clearer. This feature
enhances hue, saturation and luminance so that red, blue, green and white look
more vivid.
■Reduces screen noise without compromising video quality.
Low : Make dark and middle gray level area of the picture brighter.
Medium: Express original picture levels.
High: Make dark and middle gray level area of the picture darker.
■You can adjust brightness of dark area and middle gray level area of the picture.
Low: The reflection of the screen gets darker.
High: The reflection of the screen gets brighter.
■Set black level of the screen to proper level.
■This function is available in the following modes: AV (NTSC-M), HDMI or
Component.
■Adjust the brightness of the screen to prevent the screen from being too bright.
Dims extremely bright pictures.
■This feature is disabled in “Picture Mode-Vivid, Cinema, Intelligent Sensor”.
■Makes video clips recorded in film look more natural by eliminating judder effect.
■DVD and Blu-ray movies are filmed at 24 frames per second (fps). With LG Real
Cinema, every frame is consistently processed 5 times in 1/24 of a second produc-
ing 120 fps with TruMotion or 2 times in 1/24 of a second producing 48 fps with-
out TruMotion, thus totally eliminating the judder effect.
■This function can work when TruMotion is off.
High: Provides smoother picture movement.
Low: Provides smooth picture movement. Use this setting for standard use.
Off: Use this setting when "High" and "Low" settings result in noise.
■TruMotion works with all inputs except PC mode.
■If you enable "TruMotion", noise may appear on the screen.
If this occurs, set "TruMotion" to "Off".
Dynamic Contrast
Dynamic Color
Noise Reduction
Gamma
Black Level
Eye Care
Real Cinema
TruMotion
Color Temperature