LG Electronics USA BX327JD DLP PROJECTOR User Manual G User s manual
LG Electronics USA DLP PROJECTOR G User s manual
UserManual.wiki
>
LG Electronics USA
>
BX327JD User Manual
Users Manual
Navigation menu
Upload a User Manual
Namespaces
Wiki Guide
HTML
PDF
Info
Views
User Manual
Discussion / Help
Navigation


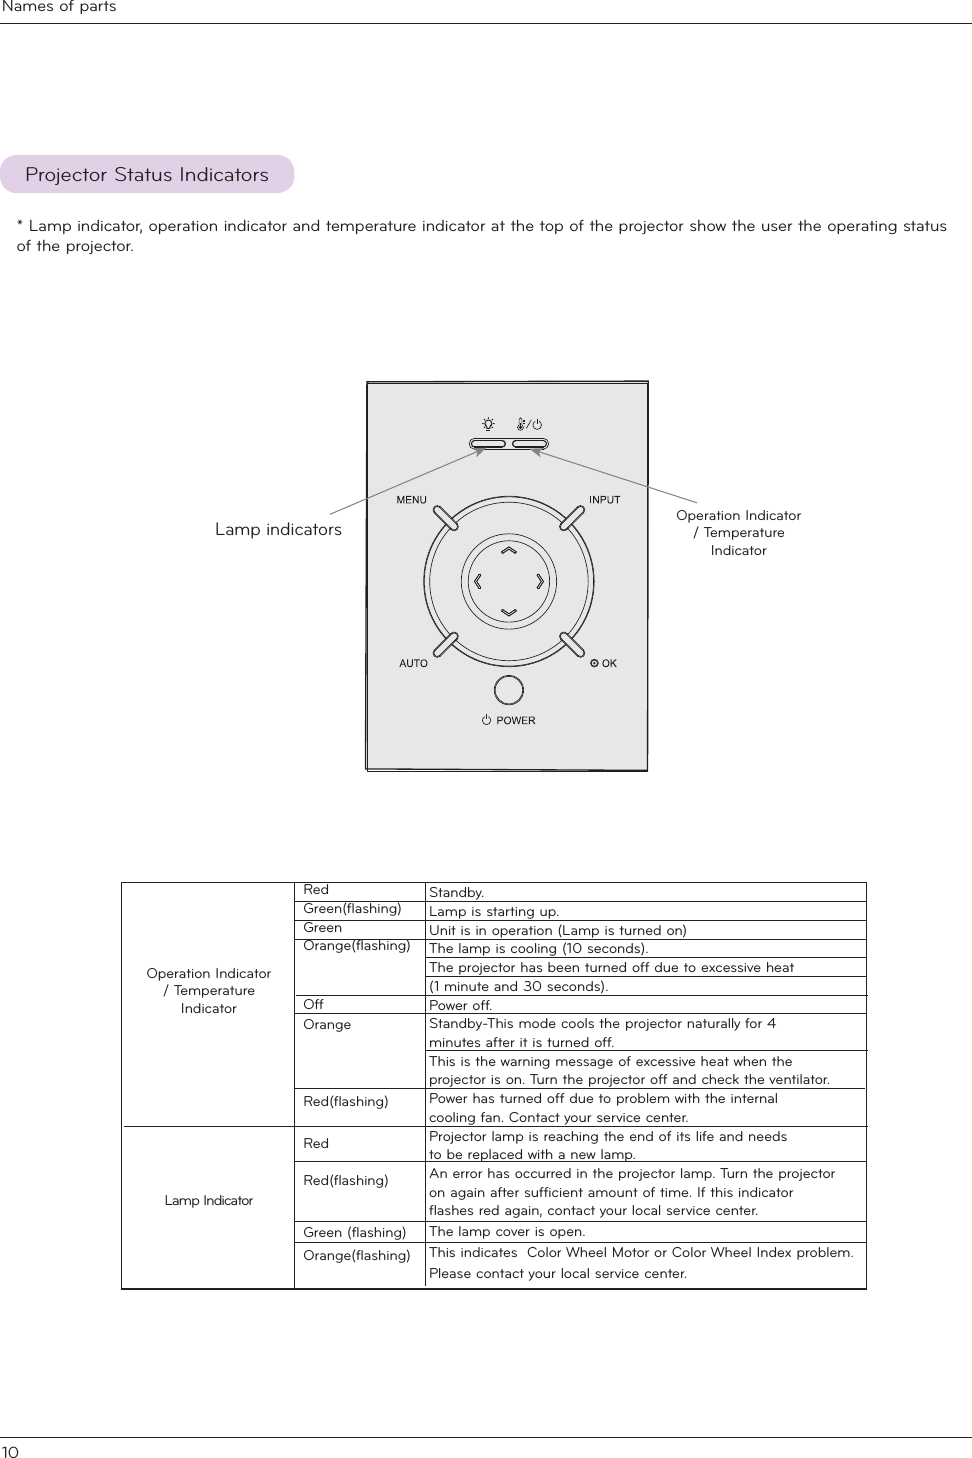
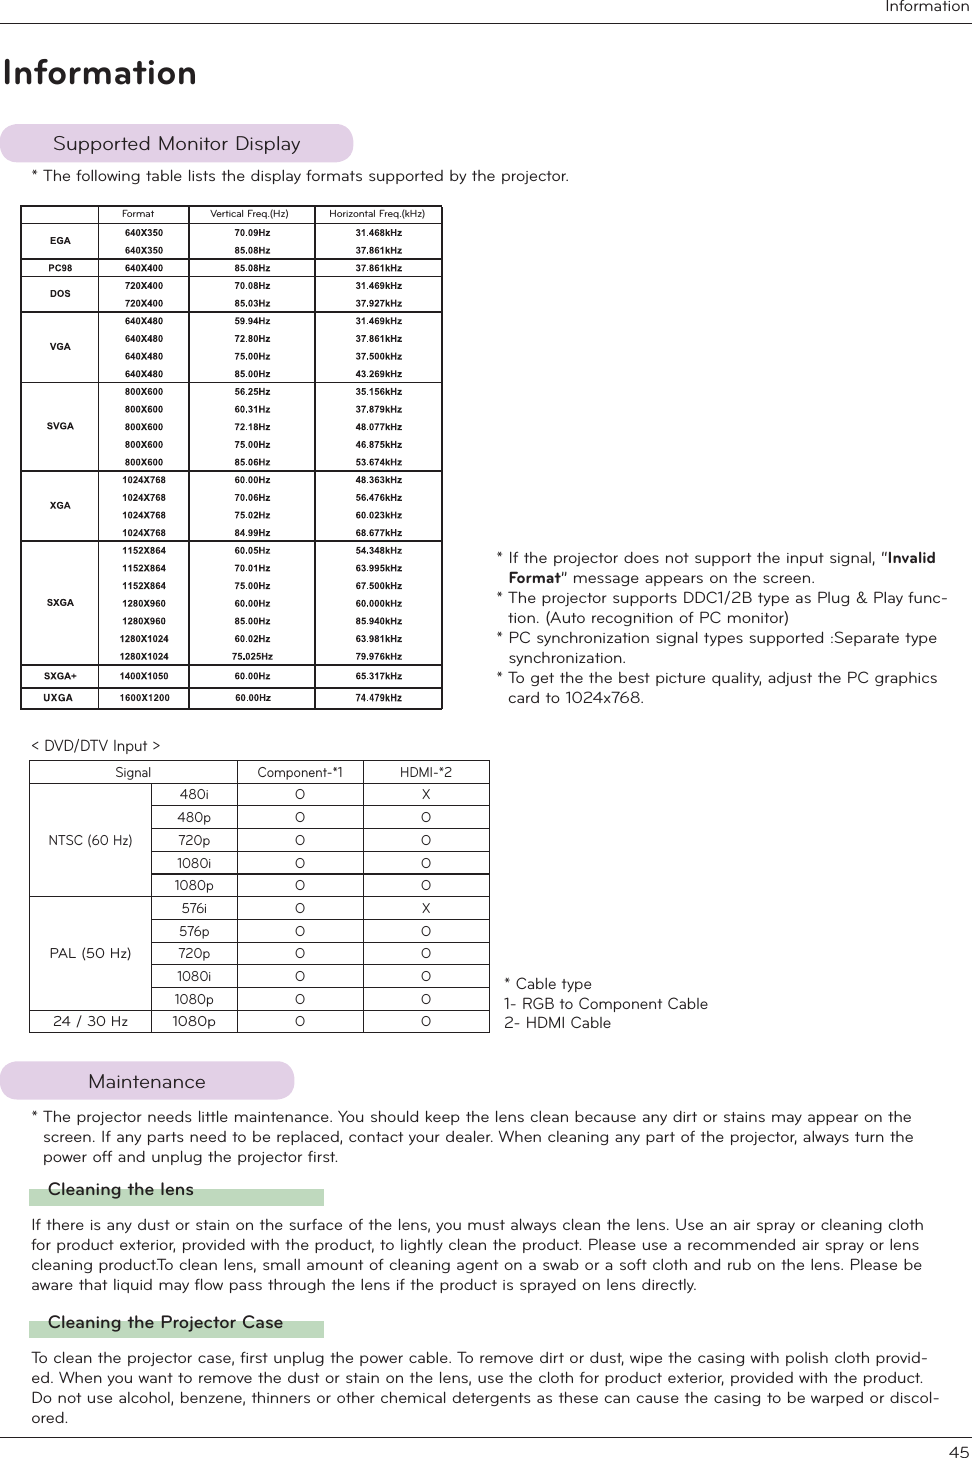
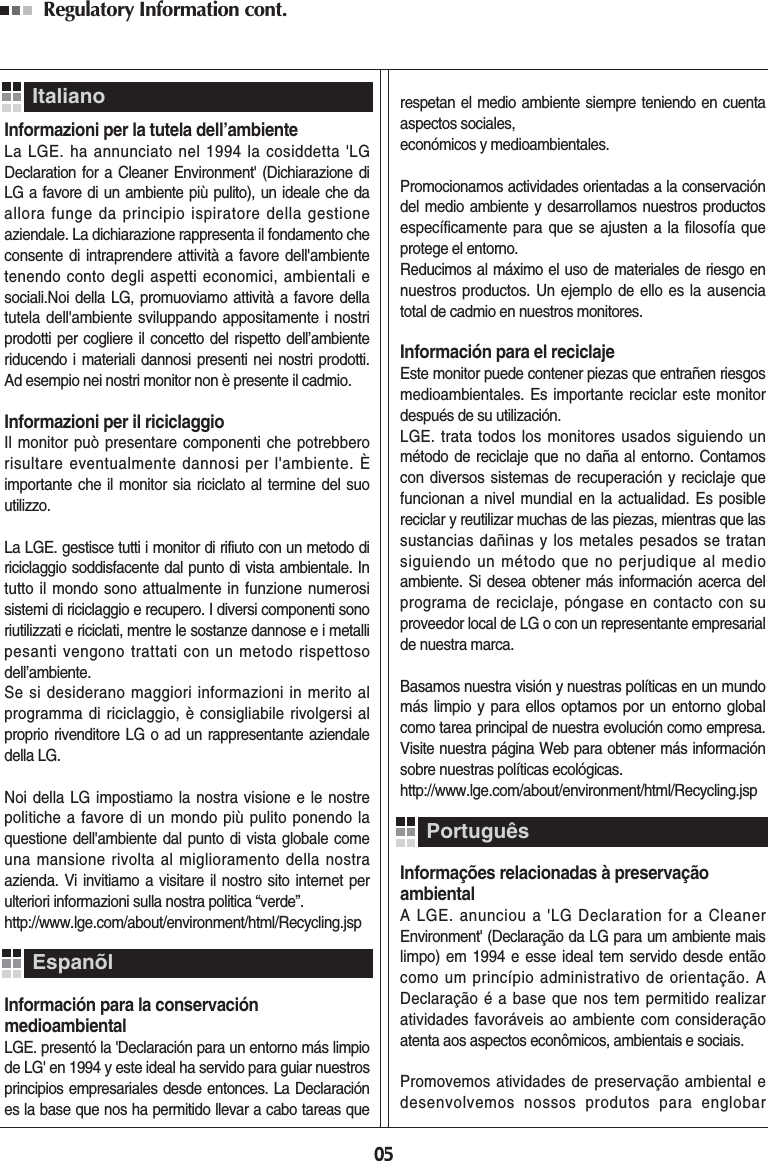
![Information46The change interval of lamp may depend on the use environment of Projector.You can see the used lamp time in the Lamp Time section of the Menu (page.33). You must replace the lamp when:* The projected image gets darker or starts to deteriorate.* The lamp indicator is red.* The message “Replace the lamp” appears on the screen when turning theprojector on.- Press the POWER button on the control panel or remote control to turn off power.- If the operation indicator LED is orange and blinking, do not disconnect the main supply until the operation indicator LEDis lit up constantly (orange).- Allow the lamp to cool for 1 hour before replacing it.- Replace only with the same type lamp from an LG Electronics Service Center. Using another manufacturers lamp maycause damage to the Projector and lamp.- Pull out the lamp only when replacing the lamp.- Keep the lamp unit out of reach of children. Keep the Lamp away from heat sources such as radiators, stoves etc.- To reduce the risk of fire do not expose the lamp to liquids or foreign materials.- Do not place the lamp near any heat source.- Make sure the new lamp is securely tightened with screws. If not, the image may be dark or there could be an increasedrisk of fire.- Never touch the lamp unit glass otherwise image quality may be compromised or lamp life maybe reduced.Dispose of the used lamp by returning it to the LG Electronics Service Center.Lamp model number is on page 50. Check the lamp model and then purchase it from an LG Electronics Service Center.Using another manufacturers lamp may cause damage to the projector.Lamp indicators<Front panel of the Projector>FYd`UW]b[h\Y@UadLamp ReplacementBe careful when replacing lampTo obtain a replacement Lamp unitLamp unit disposalOperation Indicator/ Temperature Indicator](https://usermanual.wiki/LG-Electronics-USA/BX327JD/User-Guide-1280855-Page-23.png)
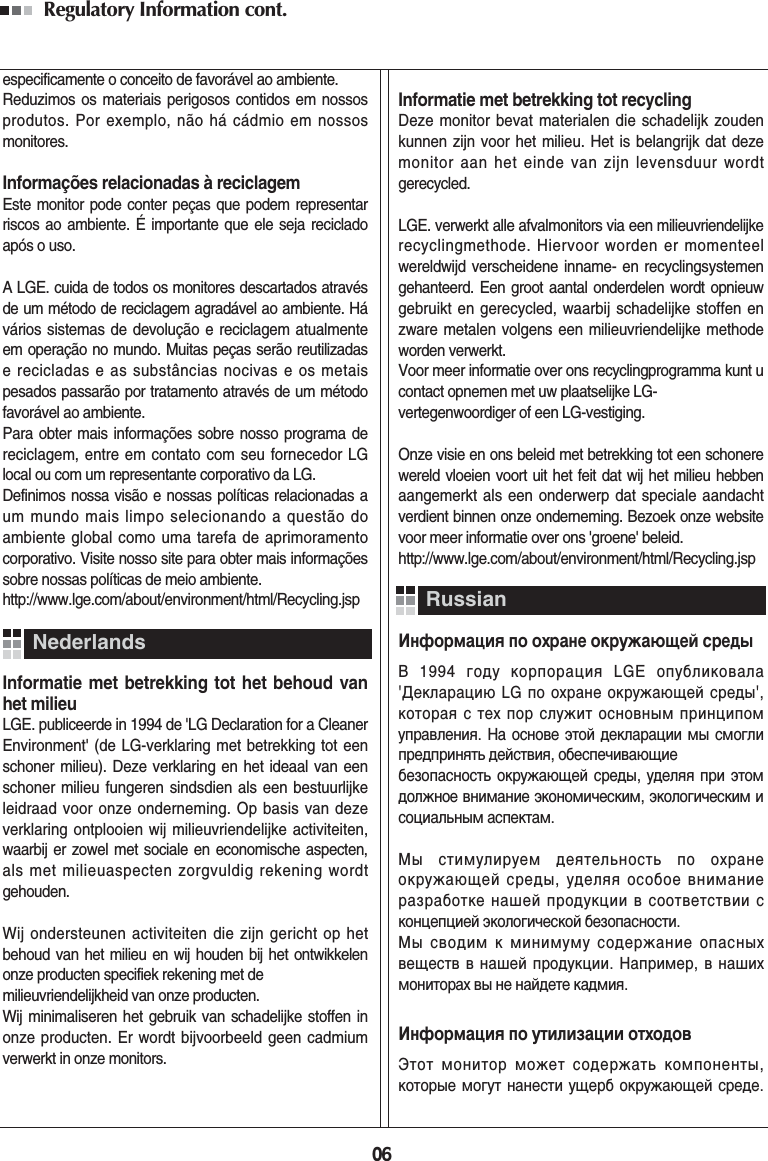
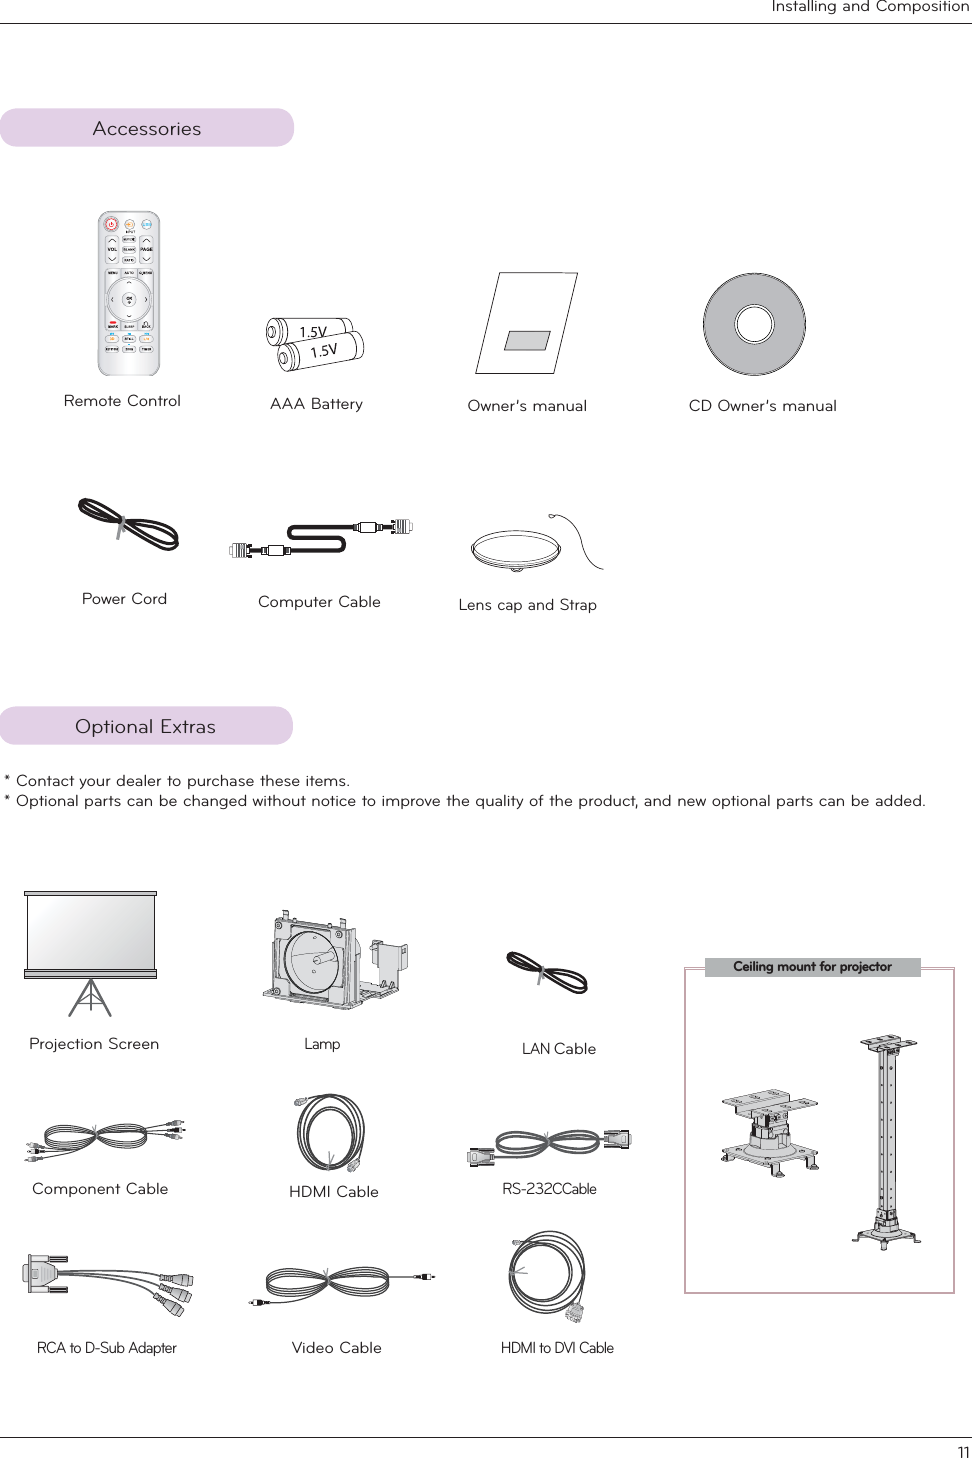
![Information47Turn off the projector and unplug the power cable.Carefully place on a cushioned surface.(Allow the lamp to cool for 1 hour beforeremoving the used lamp from the projector.)After lifting the lamp cover off, remove the tworetaining screws on the lamp case with a screwdriver.4659Insert the new lamp gently into the correct position.Make sure it is inserted correctly.:Tighten the screws you removed in step 3.(Make sure they are fixed firmly.);Close the lamp cover and install the screws fromstep 2 to install the cover.(If the lamp cover is not installed correctly the unit will not power on.)ScrewsLift the lamp up from the projector.7FYd`UW]b[h\Y@UadUsing another manufacturers lamp may cause damage to the projector or lamp.Make sure the lamp cover is securely fastened. If the lamp cover is not installed correctly the unit will not power on. If this fault persists contact an LG Authorized Service Center.Knob8Pull out the handle slowly and remove the lampcase.Unscrew the screw from the lamp cover using ascrewdriver.Lamp case screw](https://usermanual.wiki/LG-Electronics-USA/BX327JD/User-Guide-1280855-Page-24.png)
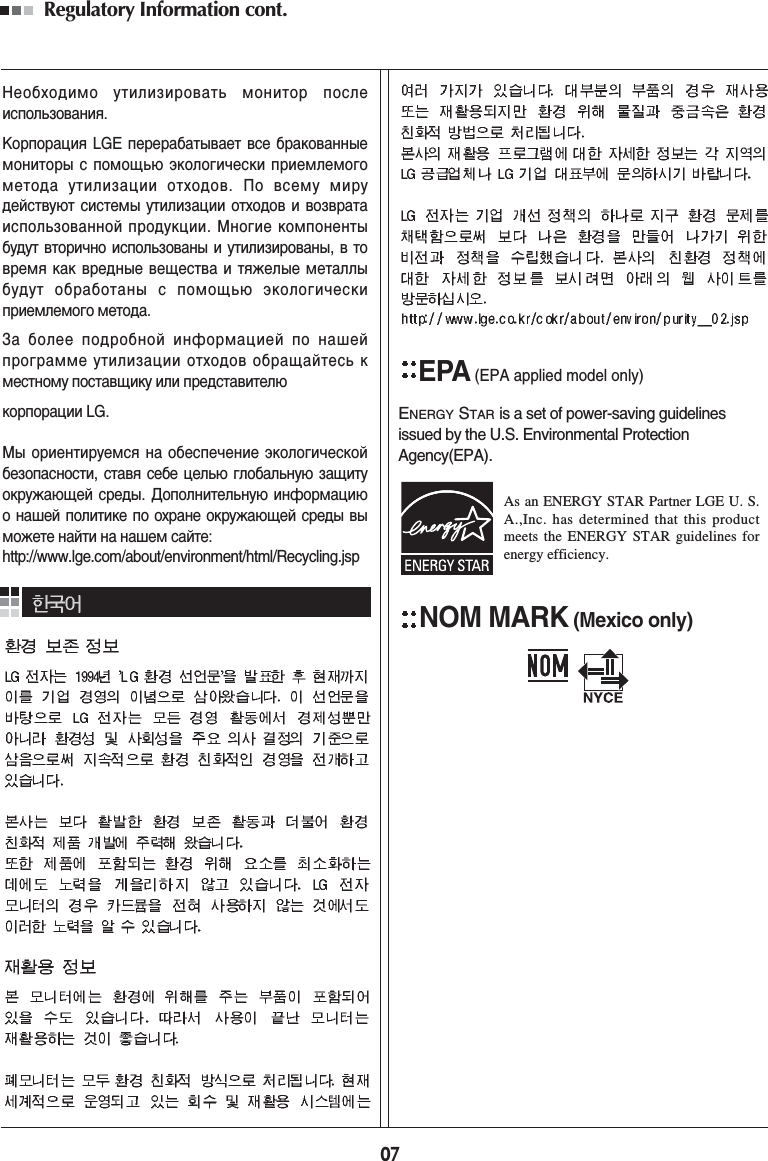
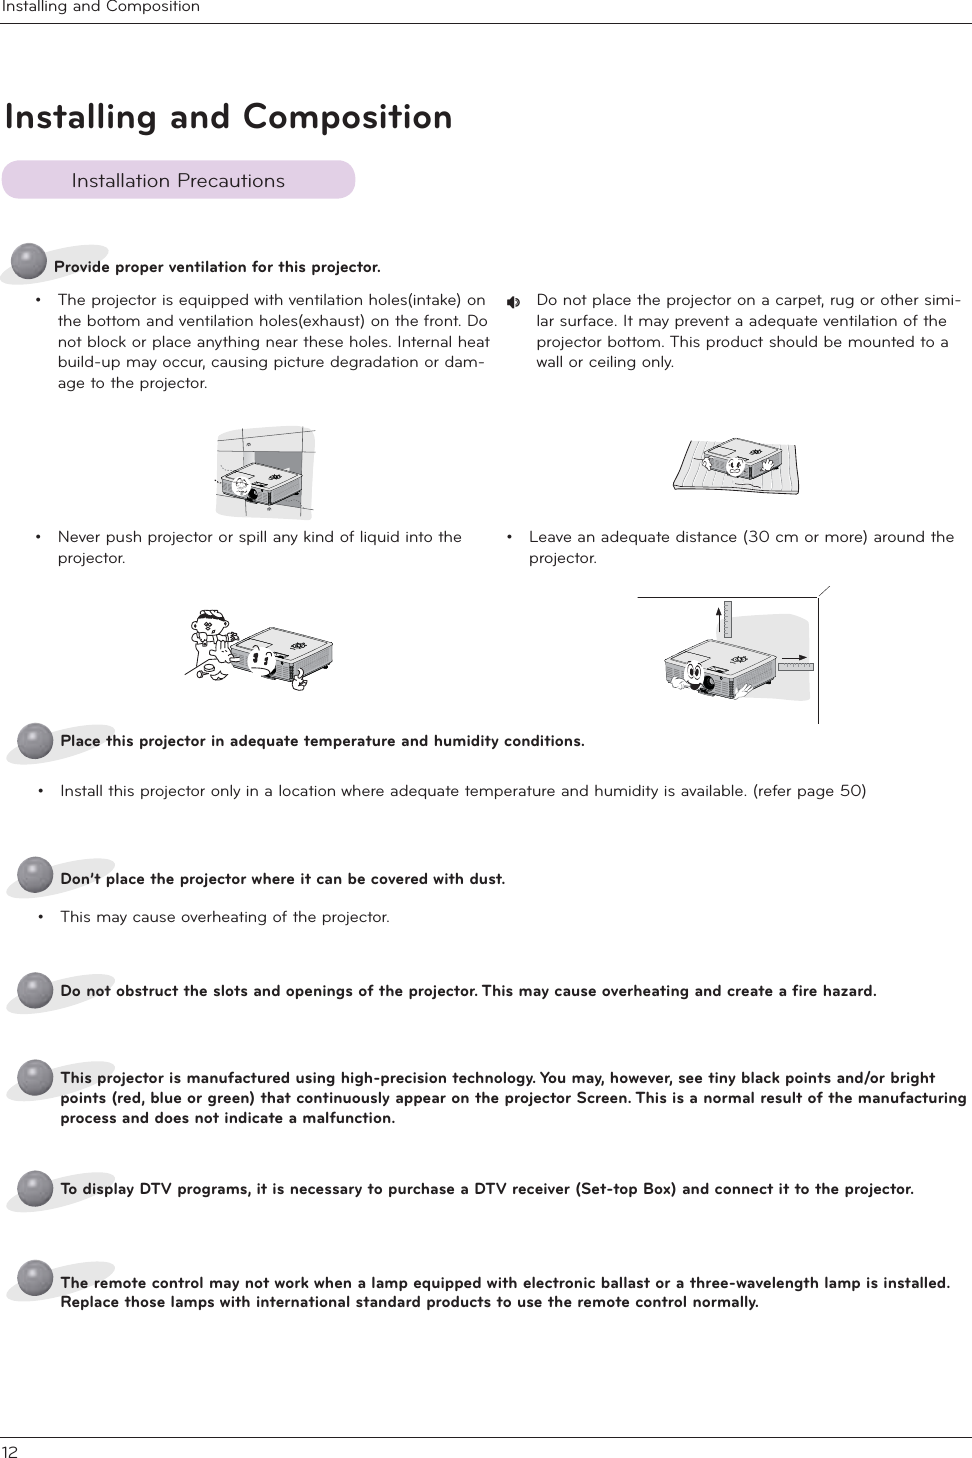
![Information48<ckhcZ]lh\Y`YbgWUdhch\Ydfc^YWhcfPrepare the lens cap and the strap supplied asaccessories.Insert the non-knot end of the strap into the hole atthe bottom of the lens section of the projector.Fix the strap at the hole of the projector into thehole of the lens cap, and then pass the lens capthrough the strp lasso.465They are completely assembled as shown atthe below figure.7<ckhcZ]lh\Y`YbgWUdFY[UfX]b[h\Ydfc^YWhcf`UadWcbhfc`* Don’t turn off the projector at least in 5 minutes after activating it.- The frequent On/Off changes may cause the lamp function to deteriorate.* Don’t pull out the power cord while activating the projector and the cooling fan.- It may cause the lamp life-span to shorten and get damaged.* The life-span of projector may considerably depend on the use environment and treatment conditions.* The projector uses the high pressure mercury lamp so that the serious caution is essential. The shock or abuse while using may cause lamp to blow off with explosion.* When you continue to use the projector after an interval of lamp replacement, the lamp may be blown off with explosion.* The following treatment should be done, in case of lamp blow-off.- Pull off the power cord immediately.- Let some fresh air in immediately (Ventilation).- Check the product condition at the nearer service center and replace it with new lamp, if necessary.- Don’t try to disassemble the product without the authorized technician.WARNING](https://usermanual.wiki/LG-Electronics-USA/BX327JD/User-Guide-1280855-Page-25.png)