LG Electronics USA CG180 Cellular/PCS GSM Phone User Manual CG180 Eng 0516
LG Electronics USA Cellular/PCS GSM Phone CG180 Eng 0516
UserManual.wiki
>
LG Electronics USA
>
CG180 User Manual
Users Manual
Navigation menu
Upload a User Manual
Namespaces
Wiki Guide
HTML
PDF
Info
Views
User Manual
Discussion / Help
Navigation
![8For Your SafetyImportant InformationThis user guide contains important information on the use andoperation of this phone. Please read all the informationcarefully for optimal performance and to prevent any damageto or misuse of the phone. Any changes or modifications notexpressly approved in this user guide could void your warrantyfor this equipment.Before You StartSafety InstructionsWARNING! To reduce the possibility of electric shock, do notexpose your phone to high humidity areas, such as thebathroom, swimming pool, etc.Always store your phone away from heat. Never store yourphone in settings that may expose it to temperatures less than32°F or greater than 104°F, such as outside during extremeweather conditions or in your car on a hot day. Exposure toexcessive cold or heat will result in malfunction, damageand/or catastrophic failure.Be careful when using your phone near other electronicdevices. RF emissions from your mobile phone may affectnearby in adequately shielded electronic equipment. Youshould consult with manufacturers of any personal medicaldevices such as pacemakers and hearing aides to determine ifthey are susceptible to interference from your mobile phone.Turn off your phone in a medical facility or at a gas station.Never place your phone in a microwave oven as this willcause the battery to explode.IMPORTANT! Please read the TIA SAFETY INFORMATION onpage 78 before using your phone.Safety InformationRead these simple guidelines. Breaking the rules may bedangerous or illegal. Further detailed information is given in thisuser guide.]Never use an unapproved battery since this could damagethe phone and/or battery and could cause the battery toexplode.]Never place your phone in a microwave oven as it willcause the battery to explode.]Do not dispose of your battery by fire or with hazardous orflammable materials.]Make sure that no sharp-edged items come into contactwith the battery. There is a risk of this causing a fire.]Store the battery in a place out of reach of children.]Be careful that children do not swallow any parts such asrubber plugs (earphone, connection parts of the phone,etc.). This could cause asphyxiation or suffocation.](https://usermanual.wiki/LG-Electronics-USA/CG180/User-Guide-809347-Page-4.png)
![9For Your Safety]Unplug the power cord and charger during lightning stormsto avoid electric shock or fire.]When riding in a car, do not leave your phone or set up thehands-free kit near to the air bag. If wireless equipment isimproperly installed and the air bag is activated, you may beseriously injured.]Do not use a hand-held phone while driving.]Do not use the phone in areas where its use is prohibited.(For example: aircraft).]Do not expose the battery charger or adapter to directsunlight or use it in places with high humidity, such as abathroom.]Never store your phone in temperatures less than- 4°F orgreater than 122°F.]Do not use harsh chemicals (such as alcohol, benzene,thinners, etc.) or detergents to clean your phone. There is arisk of this causing a fire.]Do not drop, strike, or shake your phone severely. Suchactions may harm the internal circuit boards of the phone.]Do not use your phone in high explosive areas as the phonemay generate sparks.]Do not damage the power cord by bending, twisting, pulling,or heating. Do not use the plug if it is loose as it may causea fire or electric shock.]Do not place any heavy items on the power cord. Do notallow the power cord to be crimped as it may cause fire orelectric shock.]Do not handle the phone with wet hands while it is beingcharged. It may cause an electric shock or seriouslydamage your phone.]Do not disassemble the phone.]Do not place or answer calls while charging the phone as itmay short-circuit the phone and/or cause electric shock orfire.]Only use the batteries, antennas, and chargers provided byLG. The warranty will not be applied to products provided byother suppliers.]Only authorized personnel should service the phone and itsaccessories. Faulty installation or service may result inaccidents and consequently invalidate the warranty.]Do not hold or let the antenna come in contact with yourbody during a call.]An emergency call can be made only within a service area.For an emergency call, make sure that you are within aservice area and that the phone is turned on.](https://usermanual.wiki/LG-Electronics-USA/CG180/User-Guide-809347-Page-5.png)
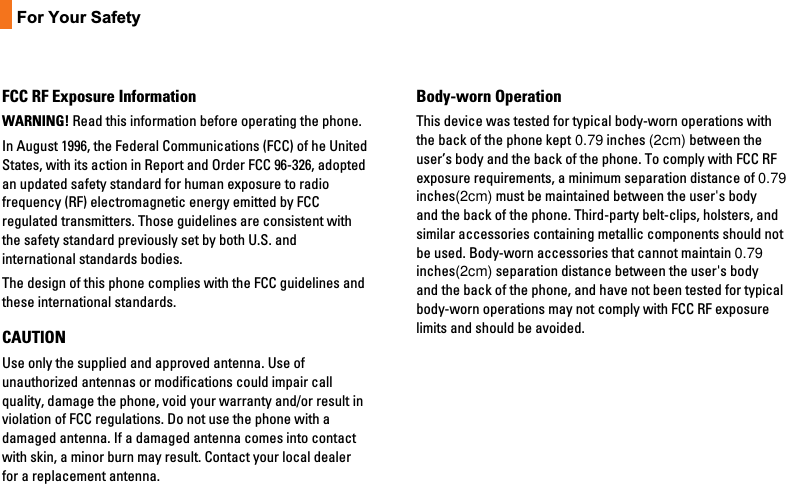
![11For Your SafetyVehicle Mounted External Antenna(optional, if available)A minimum separation distance of 8 inches (20cm) must bemaintained between the user/bystander and the vehiclemounted external antenna to satisfy FCC RF exposurerequirements. For more information about RF exposure, visitthe FCC website at www.fcc.govFCC Part 15 Class B ComplianceThis device and its accessories comply with part 15 of FCCrules. Operation is subject to the following two conditions: (1) This device and its accessories may not cause harmfulinterference, and (2) this device and its accessories mustaccept any interference received, including interference thatmay cause undesired operation.Cautions for Battery]Do not disassemble.]Do not short-circuit.]Do not expose to high temperature: 60°C (140°F).]]Do not incinerate.Battery Disposal]Please dispose of your battery properly or bring to yourlocal wireless carrier for recycling.]Do not dispose in fire or with hazardous or flammablematerials.Adapter (Charger) Cautions]Using the wrong battery charger could damage your phoneand void your warranty.]The adapter or battery charger is intended for indoor useonly.Do not expose the adapter or battery charger to direct sunlightor use it in places with high humidity, such as the bathroom.](https://usermanual.wiki/LG-Electronics-USA/CG180/User-Guide-809347-Page-7.png)
![Installing the SmartChipWhen you subscribe to a cellularnetwork, you are provided with a plug-inSmartChip loaded with your subscriptiondetails, such as your PIN, any optionalservices available and many others.nImportant!The plug-in SmartChip and its contacts canbe easily damaged by scratches orbending, so be careful when handling,inserting or removing the card. Keep allSmartChips out of the reach of smallchildren.1. If necessary, switch off the phone byholding down the [END] key untilthe power-off image displays.2. Remove the battery. To do so:3. Slide the SmartChip into theSmartChip socket so that it locks thecard into place. Make sure that thenotched corner is top left and thegold contacts of the card face into thephone.nNoteWhen you need to remove the SmartChip,slide it, as shown, and take it out of thesocket.Getting Started16CG180_Eng_0516 5/16/07 2:12 PM Page 16](https://usermanual.wiki/LG-Electronics-USA/CG180/User-Guide-809347-Page-11.png)
![3. When charging is finished, disconnectthe travel charger from the phone bypressing on the gray tabs on bothsides of the connector while pullingthe connector out.nNotice]If your phone is powered on whilecharging, you’ll see the bars in thebattery indicator icon cycle.When the battery is fully charged, thebars in the battery indicator icon willflash on and off.If the battery fails to charge completely:]After turning the phone on and off,please attempt to recharge the battery.]After detaching and reattaching thebattery, please attempt to recharge thebattery.Turning Your Phone Onand Off1. Hold down the [END] key untilthe phone switches on.2. If the phone asks for a PIN, enter thePIN and the key.The phone searches for your networkand after finding it goes to the idlescreen as illustrated below. From the idlescreen, you can make or receive a call.nNoteThe display language is preset toAutomatic at the factory. To change thelanguage, use the Languages menu option(Menu 9.2.5).3. When you wish to switch the phoneoff, hold down the [END] keyuntil the power-off image displays.Getting Started18Menu MallMenu MallCG180_Eng_0516 5/16/07 2:12 PM Page 18](https://usermanual.wiki/LG-Electronics-USA/CG180/User-Guide-809347-Page-13.png)
![Making a Call1. Make sure your phone is powered on.2. Enter a phone number including thearea code. To edit a number on thedisplay screen, simply press thekey to erase one digit at a time.]Press and hold the key to erasethe entire number.3. Press the [SEND] key to call thenumber.4. When finished, press the [END]key.Making a Call by Send Key2. Press the [SEND] key, and themost recent incoming, outgoing andmissed phone numbers will bedisplayed.2. Select the desired number by usingthe navigation key.3. Press the [SEND] key.Making International Calls1. Press and hold the key and theinternational access character ‘+’willappear.2. Enter the country code, area code,and the phone number.3. Press the [SEND] key.Ending a CallWhen you have finished a call, pressthe [END] key.Making a Call From theContactsYou can store names and phonenumbers dialed frequently in theSmartChip as well as in the phonememory known as the Contacts.You can dial a number by simplyselecting a name in the contacts andpressing the [SEND] key.General Functions20CG180_Eng_0516 5/16/07 2:12 PM Page 20](https://usermanual.wiki/LG-Electronics-USA/CG180/User-Guide-809347-Page-15.png)
![Adjusting the VolumeDuring a call, if you want to adjust theearpiece volume, use the side keys of thephone.In idle mode, you can adjust the ringvolume using the side keys.Answering a CallWhen you receive a call, the phone ringsand the flashing phone icon appears onthe screen. If the caller can be identified,the caller’s phone number (or name ifstored in your Address Book) is displayed.1. Open the flip and press the[SEND] key or the left soft key toanswer an incoming call. If Any Keyhas been set as the answer mode(Menu 9.4.2), any key press willanswer a call except for the[END] key or the right soft key.nNotice]To reject an incoming call, press and holdthe side keys on the left side of thephone.]If Flip Open has been set as the AnswerMode (Menu 9.4.2), you do not need topress any key. You can answer the callsimply by opening the flip.2. End the call by closing the phone orpressing the [END] key.nNoticeYou can answer a call while using theAddress Book or other menu features.Vibrate Mode (Quick)Vibrate Mode can be activated bypressing and holding down the[Star] key.Signal StrengthIf you are inside a building, being near awindow may give you better reception.You can see the strength of your signalby the signal indicator on your phone’sdisplay screen.21General FunctionsCG180_Eng_0516 5/16/07 2:12 PM Page 21](https://usermanual.wiki/LG-Electronics-USA/CG180/User-Guide-809347-Page-16.png)
![As new letters are added, the wordchanges to reflect the most likelycandidate from the dictionary.1. When you are in the T9 predictive textinput mode, start entering a word bypressing keys to press onekey per letter.]The word changes as letters aretyped - ignore what’s on the screenuntil the word is typed completely.]If the word is still incorrect aftertyping completely, press thekey once or more to cycle throughthe other word options.]If the desired word is missing fromthe word choices list, add it by usingthe ABC mode.2. Enter the whole word before editingor deleting any keystrokes.3. Complete each word with a space bypressing the key or the rightnavigation key.To delete letters, press . Press andhold down to erase the letterscontinuously.In T9 input mode, you can select adifferent T9 language such as English,Spanish and French by pressing andholding down the key.Using the ABC ModeUse the keypad keys to enter your text.1. Press the key labeled with therequired letter:]Once for the first letter]Twice for the second letter]And so on2. To insert a space, press the keyonce. To delete letters, press thekey. Press and hold down the keyto erase the letters continuously.nNoticeRefer to the table below for moreinformation on the characters availableusing the keys.23General FunctionsCG180_Eng_0516 5/16/07 2:13 PM Page 23](https://usermanual.wiki/LG-Electronics-USA/CG180/User-Guide-809347-Page-18.png)
![Using the 123 (Numbers)ModeThe 123 Mode enables you to enternumbers in a text message (a telephonenumber, for example) more quickly.Press the keys corresponding to therequired digits before manuallyswitching back to the appropriate textentry mode.Using the Symbol ModeThe Symbol Mode enables you to entervarious symbols or special characters.To enter a symbol, press the key.Use the navigation keys to select thedesired symbol and press the [OK] key.T9 dictionaryThe T9 dictionary is a feature that allowsthe user to add any unique or personalwords to the T9 standard languagedatabase. The T9 dictionary function canbe selected from the Text Entry Settingssub menu under the Options soft keymenu. Within the T9 dictionary functionthe user can add, modify, delete or resetthe personal words.General Functions24Key Characters in Display OrderUpper Case Lower Case1 . , - ? ! ' @ : 1 . , - ? ! ' @ : 12 A B C 2 a b c 23 D E F 3 d e f 34 G H I 4 g h i 45 J K L 5 j k l 56 M N O 6 m n o 67 P Q R S 7 p q r s 78 T U V 8 t u v 89 W X Y Z 9 w x y z 90Space Key, Space Key,0 (Long press) 0 (Long press)CG180_Eng_0516 5/16/07 2:13 PM Page 24](https://usermanual.wiki/LG-Electronics-USA/CG180/User-Guide-809347-Page-19.png)
![Your phone provides a number of controlfunctions that you can use during a call.To access these functions during a call,press the right soft key [Options].During a CallThe menu displayed on the handsetscreen during a call is different than thedefault main menu displayed when inidle screen, and the options aredescribed below.Making a Second CallYou can select a number you wish to dialfrom the Address Book to make a secondcall. Press the right soft key [Options]then select Contacts.Swapping Between Two CallsTo switch between two calls, press the[SEND] key.Answering an Incoming CallTo answer an incoming call when thehandset is ringing, simply press the[SEND] key. The handset is also able towarn you of an incoming call while youare already on a call. A tone sounds inthe earpiece, and the display will showthat a second call is waiting. This feature,known as Call Waiting, is only available ifyour network supports it.If Call Waiting is on, you can put the firstcall on hold and answer the second call,by pressing the [SEND] key.Rejecting an Incoming CallYou can reject an incoming call withoutanswering by simply pressing the[END] key.During a call, you can reject an incomingcall by pressing the [END] key.Muting the MicrophoneYou can mute the microphone during acall by pressing the left soft key [Mute].The handset can be unmuted bypressing the left soft key [Unmute].When the handset is muted, the callercannot hear you, but you can still hearthe caller.Using the SpeakerphoneYou can use the integratedSpeakerphone during a call by pressingthe right soft key [Options] then selectIn-Call Menu26CG180_Eng_0516 5/16/07 2:13 PM Page 26](https://usermanual.wiki/LG-Electronics-USA/CG180/User-Guide-809347-Page-21.png)
![Speaker On. The speakerphone indicator[ ] will display on the display screen.The loudspeaker is automaticallydeactivated when you end the call.nWarningBecause of the higher volume level, don’tplace the phone too close your ear whilethe speakerphone is enabled.Conference CallsThe conference service provides you withthe ability to have a simultaneousconversation with more than one caller.The conference call feature can be usedonly if your network service providersupports this feature. The conference callcan only be set up when you have onecall active and one call on hold, meaningboth calls must have been answered.Once a conference call is set up, calls maybe added, disconnected or separated(that is, removed from the conferencecall but still connected to you) by theperson who set up the conference call.These options are all available from theIn-Call menu. The maximum number ofcallers in a conference call is five. Oncestarted, you are in control of theconference call, and only you can addcalls to the conference call. Making a Second CallYou can make a second call whilecurrently on a call simply by entering thesecond number and pressing the[SEND] key. When the second call isconnected, the first call is automaticallyplaced on hold. You can swap betweencalls, by pressing the [SEND] key.Setting Up a Conference CallTo set up a conference call, place one callon hold, conference in the second activecall by pressing the right soft key andselect the Join Calls sub menu optionfrom the Conference Call menu. Activate the Conference Callon HoldTo activate a conference call on hold,press the [SEND] key.27In-Call MenuCG180_Eng_0516 5/16/07 2:13 PM Page 27](https://usermanual.wiki/LG-Electronics-USA/CG180/User-Guide-809347-Page-22.png)
![Adding Calls to the ConferenceCallTo add a call to an existing conferencecall, press the right soft key, and thenselect the Join Calls sub menu from theConference Call option.Private Call in a ConferenceCallTo have a private call with one caller froma conference call, press the right soft keyand select the Private Menu from theConference Call option. When thenumbers of the callers are displayed,select the one you wish to speak inprivate. Ending a Conference CallCurrently active conference call can bedisconnected by pressing the [END]key.In-Call Menu28CG180_Eng_0516 5/16/07 2:13 PM Page 28](https://usermanual.wiki/LG-Electronics-USA/CG180/User-Guide-809347-Page-23.png)
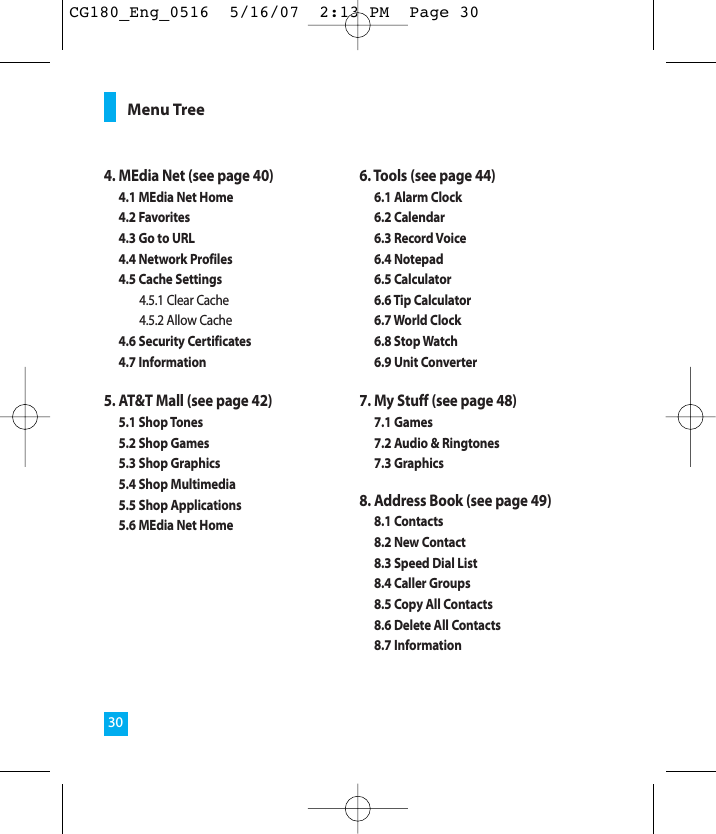
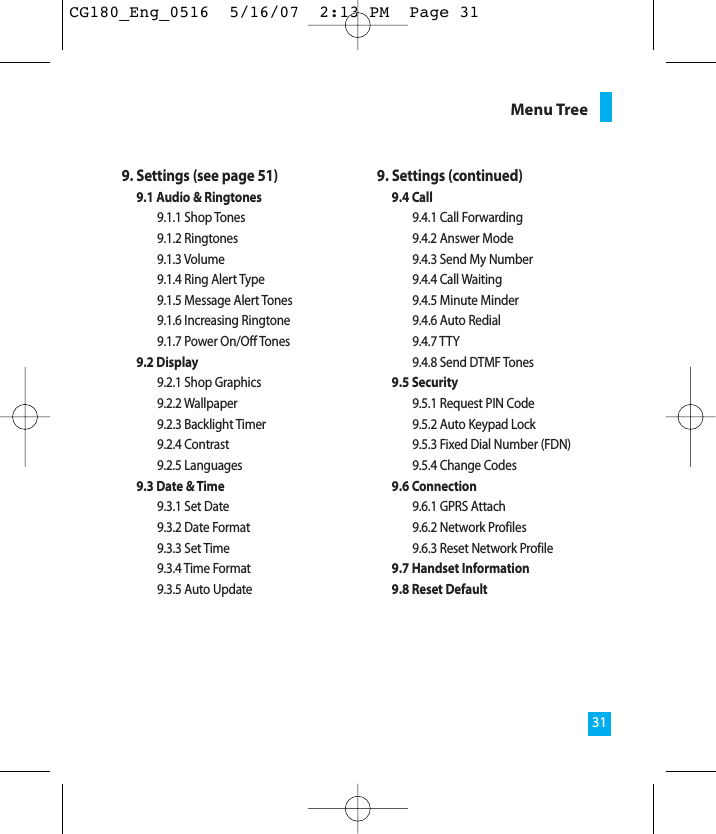
![1. Alarm Clock (see page 32)2. Messaging (see page 33)2.1 New Message2.2 Inbox2.3 Drafts2.4 Outbox2.5 Sent2.6 Voice Mail2.7 Templates2.7.1 Text2.7.2 Business Card2.8 Message settings2.9 Check Memory 3. Recent Calls (see page 38)3.1 Missed Calls3.2 Dialed Calls3.3 Received Calls3.4 All Calls3.5 Call Duration3.5.1 Last Call3.5.2 Dialed Calls3.5.3 Received Calls3.5.4 All Calls3.6 Data Information3.6.1 Web Data3.6.2 Data Call3.6.3 Total DataThe following illustration shows the available menu structure and indicates the:]Number assigned to each menu option.]Page where you can find the feature description.Menu Tree29CG180_Eng_0516 5/16/07 2:13 PM Page 29](https://usermanual.wiki/LG-Electronics-USA/CG180/User-Guide-809347-Page-24.png)
![Set the alarm to ring at a specific time. Inthe Alarm Clock menu, the followingoptions are available:On: Set the time(hour and minute) foractivating the alarm.1. Enter the menu.2. Select [On] by pressing the right/leftnavigation keys.3. If you want to set the time foractivating the alarm, press the downnavigation key.4. Enter the required time, press thedown navigation key.5. The following options are available.• Once: The alarm rings only once andis then deactivated.• Daily: The alarm rings every day atthe same time.• Weekly: The alarm rings every weekon the same day and at the sametime.• Monthly: The alarm rings everymonth on the same day and at thesame time.6. Allows you to select the alarm melodyby using the right/left navigation keys.7. Press the left soft key [Save].Off: Cancel the alarm setting.nNoticeIf this option is set to On, the alarm willring at the specified time, even when thephone is switched off.To stop the alarm when it rings, open thephone and press the right soft key[Quit].Alarm Clock32CG180_Eng_0516 5/16/07 2:13 PM Page 32](https://usermanual.wiki/LG-Electronics-USA/CG180/User-Guide-809347-Page-27.png)
![33New MessageMenu 2.1You can write and edit text messages ofup to 913 characters.1. Type in a message using key presses.For details on how to enter text, referto page 22 (Entering Text).2. After completing the message selectthe required option by pressing theright soft key [Options].The following options are available.]Send To: Enter the phone number orselect the number from the addressbook.]Insert• Symbol: You can insert symbolsranging from sentence notes toemoticons. Select the one you wantby navigating the left/soft keys.• Picture: You can select a graphicimage by using the left/rightnavigation keys. You can preview theselected picture by pressing thecenter key [View]. If you press[Cancel] on the right key, it allows youto go back to the previous screen.• Animation: You can attach ananimation in a message can be donethrough EMS(Enhanced MessagingService).• Audio: You can insert variousringtones.• Text Template: You can easily insertthe frequently used sentences in thetext message.• Contact: You can browse one of yourcontacts and insert it.• Business Card: Input your ownbusiness card created in (Menu 2.9.3).For further details, see page 40.]Save to Drafts: Saves the selectedslide to draft.]Set T9: You can set on and off for theT9 input mode.]Clear Text: Deletes the writtenmessage.]Cancel: Exit the text editor.MessagingCG180_Eng_0516 5/16/07 2:13 PM Page 33](https://usermanual.wiki/LG-Electronics-USA/CG180/User-Guide-809347-Page-28.png)
![InboxMenu 2.2You will be alerted when you receive amessage. They will be stored in theInbox.In the Inbox, you can identify eachmessage by icons. If you are notified thatyou have received a multimediamessage, you can download the wholemultimedia message by selecting it inthe Receive menu.The following [Options] are available inthe Inbox list.]Delete: Deletes the selected messagefrom the Inbox.]Reply: Allows you to reply to thesender of the selected message.]Reply All: Allows you to reply to allrecipients on the selected message(Only for Multimedia message).]Forward: Forwards a received messageto other recipients. After recipients areentered, the message can beforwarded.]Return call: Call back the sender.]Delete All Read: Deletes all messagesthat you have read in the list.]Delete All- Text Messages: Deletes only textmessages in the list.- Multimedia Messages: Deletes onlymultimedia messages in the list.- Download Messages: Deletes onlydownloaded messages in the list.- All Messages: Deletes all messages inthe list.DraftsMenu 2.3You can view the messages saved as adraft. The draft messages are listed withthe date and time of when the messageswere saved.The following [Options] are available.]Delete: Deletes the message youchoose.]Delete all: Deletes all messages in thefolder.34MessagingCG180_Eng_0516 5/16/07 2:13 PM Page 34](https://usermanual.wiki/LG-Electronics-USA/CG180/User-Guide-809347-Page-29.png)
![35MessagingOutboxMenu 2.4If the message transmission fails, you cansave the message in the Outbox.The following [Options] are available inthe Outbox list.]Delete: Deletes the message youchoose.]Edit: Allows you to edit the selectedmessage (Only for Text message).]Resend: Allows you to send theselected message again (only formultimedia messages).]Delete All: Deletes all messages in thefolder.SentMenu 2.5This menu allows you to save the sentsuccessfully messages. For sent messagesyou can see the delivery status.The following [Options] are available inthe Sent list.]Delete: Deletes the selected messagefrom the Sent list.]Forward: Forwards the currentmessage to other recipients.]Delete all: Deletes all messages in thefolder.Voice MailMenu 2.6This menu provides you with a quick wayof accessing your voice mailbox (ifprovided by your network).Before using this feature, you must enterthe voice server number obtained fromyour service provider.This may already be available; to check thevoicemail, press and hold the key.When new voicemail is received, thesymbol will be displayed on the screen.nNotePlease check with your network serviceprovider for details of their service in orderto configure the handset accordingly.CG180_Eng_0516 5/16/07 2:13 PM Page 35](https://usermanual.wiki/LG-Electronics-USA/CG180/User-Guide-809347-Page-30.png)
![TemplatesMenu 2.7There are 6 predefined messages in thelist. You can view and edit the templatemessages or create new messages. Text (Menu 2.7.1)• Please call me back• I’m late. I will be there at• Where are you now?• I’m on the way.• Urgent! Please contact.• I love youThe following [Options] are available.]Send Via Text Message: Allows you tosend the selected template messagevia SMS.]Delete: Allows you to delete theselected template message.Business Card (Menu 2.7.2)This feature allows you to create yourown name card. You can key in theName, Mobile number, Office number,Fax number and E-mail address.]Send Via- Text Message: Sends the selectedname card by SMS.- Multimedia Message: Sends theselected name card by MMS.]Delete: Allows you to delete theselected name card.Message settingsMenu 2.8Text Message (Menu 2.8.1)]Message Center Number: If you wantto send a text message, you can receivethe address of the SMS center throughthis menu.]Email Gateway: You can send the textmessage to an Email Address via thisgateway.]Subject: You can enter the SMSSubject when this menu is on.]Bearer Setting: You can select GSM orGPRS. Contact your network operatoror service provider for informationrelated to setting a selected bearer,pricing and connection speed.Messaging36CG180_Eng_0516 5/16/07 2:13 PM Page 36](https://usermanual.wiki/LG-Electronics-USA/CG180/User-Guide-809347-Page-31.png)
![37MessagingVoicemail Number (Menu 2.8.2)Allows you to change the voice mailserver number, if necessary.nNoteVoice Mail is a network feature. Pleasecontact your service provider for furtherdetails.Download Message (Menu 2.8.3)]Receive: You can set the optionwhether you want to receive themessage or not.Check MemoryMenu 2.9You can check the current memorystatus of each memory for Text.CG180_Eng_0516 5/16/07 2:13 PM Page 37](https://usermanual.wiki/LG-Electronics-USA/CG180/User-Guide-809347-Page-32.png)

![You can access various WAP (WirelessApplication Protocol) / Web services suchas news, and weather. These services arespecially designed for mobile phonesand they are maintained by the serviceproviders.nNoteCheck the availability of WAP services,pricing and tariffs with your networkoperator and/or the service providerwhose service you wish to use. Serviceproviders will also give you instructions onhow to use their services.Please contact your service provider toopen an Internet account.Once connected, the homepage isdisplayed. The content depends on theservice provider.To exit the browser at any time, press the[END] key. The idle screen isdisplayed.Menus for the BrowserYou can surf the Internet using either thephone keys or the WAP Browser menu.Using the Navigation KeysWhen surfing the Internet, the keysfunction differently than when in thephone mode.Using the WAP Browser MenuThere are various menus available whensurfing the Internet.MEdia Net HomeMenu 4.1Connect to AT&T’s homepage. Thehomepage is defined in the activatedaccount and cannot be changed. FavoritesMenu 4.2This function allows you to store and editfrequently accessed sites. The following[Options] are available.nNoteYour phone may have some pre-installedbookmarks for sites not affiliated with LG.LG does not warrant or endorse these sites.MEdia Net40Key Descriptionup/downnavigation keyScroll each line of thecontent areaCG180_Eng_0516 5/16/07 2:13 PM Page 40](https://usermanual.wiki/LG-Electronics-USA/CG180/User-Guide-809347-Page-35.png)
![If you choose to access them, you shouldtake the same precautions for security orcontent as you would with any site.]View: Display the favorite title and URL]Delete: Allow you to erase the selectedfavorite]Edit: Modify the existing favorite item]Move to Folder: Move the selectedfavorite to the folder that you'vecreated.]New Favorite: Add a new favoritemanually.]New Folder: Add a new foldermanually]Send URL: Allows the favoriteinformation to be sent via SMS toanother person]Delete All: Allows you to erase allfavoritesGo to URLMenu 4.3You can directly connect to the site youwant. You need to enter a specific URL.Network ProfilesMenu 4.4This menu shows the Network Profile.You can register, delete and edit by usingthe Option Menu. Cache SettingsMenu 4.5The web pages you have accessed arestored in the memory of the phone.Clear Cache (Menu 4.5.1)Remove all cached data in the memory.Allow Cache (Menu 4.5.2)Set a value whether a connectionattempt is made through cache or not.nNoteA cache is a buffer memory, which is usedto store data temporarily.Security CertificatesMenu 4.6You can see the list of certificates andview them in detail.InformationMenu 4.7The WAP Browser version is displayed.41MEdia NetCG180_Eng_0516 5/16/07 2:13 PM Page 41](https://usermanual.wiki/LG-Electronics-USA/CG180/User-Guide-809347-Page-36.png)
![Alarm ClockMenu 6.1Set the alarm to ring at a specific time. Inthe Alarm Clock menu, the followingoptions are available:On: Set the time(hour and minute) foractivating the alarm.1. Enter the menu.2. Select [On] by pressing the right/leftnavigation keys.3. If you want to set the time foractivating the alarm, press the downnavigation key.4. Enter the required time, press thedown navigation key.5. The following options are available.• Once: The alarm rings only once andis then deactivated.• Daily: The alarm rings every day atthe same time.• Weekly: The alarm rings every weekon the same day and at the sametime.• Monthly: The alarm rings everymonth on the same day and at thesame time.6. Allows you to select the alarm melodyby using the right/left navigation keys.7. Press the left soft key [Save].Off: Cancel the alarm setting.nNoticeIf this option is set to On, the alarm willring at the specified time, even when thephone is switched off.To stop the alarm when it rings, open thephone and press the right soft key[Quit].CalendarMenu 6.2When you enter this menu a calendarwill be displayed. The square cursor isused to locate a particular day. The underbar on the calendar indicates schedule(s)on for that day. This function helps toremind you of the schedule. The phonewill sound an alarm tone if it has beenset for a specific schedule item.For changing the day, month, and year.Tools44CG180_Eng_0516 5/16/07 2:13 PM Page 44](https://usermanual.wiki/LG-Electronics-USA/CG180/User-Guide-809347-Page-39.png)
![]Delete: Allows you to delete theselected schedule.]New Schedule: You can edit amaximum of 30 characters and createup to 30 notes.]Edit: Allows you to edit the selectedschedule.]Calendar: Allows you to consult thecalendar.]Scheduler Tone: The phone can soundan alarm tone when the scheduleddate for an event has been reachedwith this option.]All Schedules: Shows the notes thatare set for all days. Use the up/downnavigation keys to browse through thenote lists. You can use the menu bypress the right soft key [Options].]Go to Date: Allows you to jump to aspecific date.]Delete Old: Delete the past scheduleevent that has already been notified.]Delete All: Delete all schedules. Youare asked to confirm your action.Record VoiceMenu 6.3Allows you to record a memo. You canrecord up to 3 voice messages with eachmessage up to 30 seconds.You can use the Voice Memo feature to:• Play the recorded voice memos• Delete one or all voice memos1. Once recording is started, the message‘ Recording... ’ and the remainingtime is displayed.nNoteIf all memo locations are full, you mustdelete an old memo before recording anew one.2. If you want to finish recording, pressthe left soft key [Save].45ToolsKey Descriptionup/down navigation key Weeklyleft/right navigation key Dailykey / key Yearlykey / key MonthlyCG180_Eng_0516 5/16/07 2:13 PM Page 45](https://usermanual.wiki/LG-Electronics-USA/CG180/User-Guide-809347-Page-40.png)
![]Play: Allows you to play back allmemos recorded, starting with themost recent memo. The screen displaysthe date and time when the memo wasrecorded.]Delete: Allows you to delete a specificmemo. All memos recorded are playedback, starting with the most recentone.]Record New: Allows you to record amemo.]Rename: Allows you to rename aspecific memo.]Delete All: Allows you to delete allmemos.NotepadMenu 6.4You can create up to a maximum of 30memos.1. Select a memo pad to edit.2. Press the left soft key [New] to create anew memo.3. Input the memo and press the left softkey [Save] to save.CalculatorMenu 6.5Using this feature, you can use the phoneas a calculator. The calculator providesthe basic arithmetic functions: addition,subtraction, multiplication and division.Using the Calculator1. Enter the first number using thenumeric keys.2. Use the navigation keys to select asign for calculation.nNote To input a decimal point, press the key.3. To calculate the result, press thekey.Tip CalculatorMenu 6.6This feature allows you to quickly andeasily calculate the tip amount based onthe total bill as well as the split of thetotal bill based on the number of people.Tools46CG180_Eng_0516 5/16/07 2:13 PM Page 46](https://usermanual.wiki/LG-Electronics-USA/CG180/User-Guide-809347-Page-41.png)
![World ClockMenu 6.7Allows you to check the currentGreenwich Mean Time(GMT) and majorcities around the world, using theleft/right navigation keys.The screen shows the city name, currentdate and time.To select the time zone in which you arelocated, proceed as follows:1. Select the city corresponding to yourtime zone by pressing the left/rightnavigation keys one or more times.The local date and time are displayed.2. If you want to set, press the left softkey.3. If you want to set Daylight Savings,press the right soft key.nNoteThe time zone setting of each city in Worldtime menu may be affected by networkcondition.Stop WatchMenu 6.81. Press[Start] to take time and record thelap time by pressing[Lap].2. Press[Stop] to ascertain the record oflap time.3. Press[Reset] to default condition.Unit ConverterMenu 6.9This function converts any measurementinto the unit you want.There are 4 types that can be convertedinto units: Length, Surface, Weight, andVolume.1. You can select one of four unit typesby pressing the left soft key [Unit].2. Select the standard value by using theleft/right navigation keys.3. Select the unit you want to convert bypressing the up/down navigation keys.4. You can check the converted value forthe unit you want. Also, you can inputa decimal number by pressing thekey.47ToolsCG180_Eng_0516 5/16/07 2:13 PM Page 47](https://usermanual.wiki/LG-Electronics-USA/CG180/User-Guide-809347-Page-42.png)
![GamesMenu 7.1The Games menu displays the list of Javaprograms downloaded using the WAP. Allprevious downloaded programs can beselected, deleted or viewed in detailwithin the Games menu. From the listwithin the My Stuff menu, the followingoptions are available:]Delete: Delete the selected program.Once deleted, you will not be able torestore the program unless it isdownloaded again using the WAP.]Rename: Rename the game.]New Folder: Create a new folder.Audio & RingtonesMenu 7.2The right soft key [Options] will bring upthe following options.]Send Via: You can send the selectedaudio file in a Text Message.]Set as Ringtone: You can set as theRingtone with the selected audio file.]Delete: You can delete the currentlyselected audio file.]Rename: You can change the title ofthe selected audio file.]Delete All: You can delete all audiofiles in the list.nNoteSounds supplied as default can only beused under the Set as Ringtone mode.GraphicsMenu 7.3The right soft key [Options] will bring upthe following options.]Set as Wallpaper: You can set as theRingtone with the selected audio file.]List/Icon View: You can configure thegraphic files to List style or Icon style.nNotePictures supplied as default can only beused under the Set as Wallpaper mode.My Stuff48CG180_Eng_0516 5/16/07 2:13 PM Page 48](https://usermanual.wiki/LG-Electronics-USA/CG180/User-Guide-809347-Page-43.png)
![ContactsMenu 8.1This menu allows you to save andmanage contact address information.The Contacts functions allow you to adda new address or search saved contactaddresses by name.New ContactMenu 8.2This menu allows you to add a newcontact address. You can input contactaddress information including name,phone numbers, email addresses, groupinformation items, memos, and image(photograph).Speed Dial ListMenu 8.3This menu allows you to configure thespeed dial numbers. You can select anumber as a speed dial from 2 to 9. Youcan configure speed dial numbers forany of the 8 numbers for a specificcontact address so that a contact addressmay have multiple speed dial numbers.Caller GroupsMenu 8.41. Scroll to Caller Groups then press theleft soft key [OK] to enter this menu.2. Every Group list will be displayed:Family, VIP, Friends, Colleague,Group 1, Group 2, No Group.3. Select the Group name that you wantto manage by pressing the right softkey [Options].4. You will see the following submenusunder the predefined groups exceptfor the No Group group.• Group Ringtone: Allows you toselect the ringtone to be used whenyou receive a voice phone call from aperson in the group.• Group Icon: Allows you to select thegraphic icon to be displayed whenyou receive a call from a person in thegroup.• Add Member: Allows you to add themember to the group.• Remove Member: Allows you todelete the member in the group.• Rename: Allows you to assign aname to the group.Address Book49CG180_Eng_0516 5/16/07 2:13 PM Page 49](https://usermanual.wiki/LG-Electronics-USA/CG180/User-Guide-809347-Page-44.png)
![Copy All ContactsMenu 8.5This menu allows you to copy all of theinformation from your SmartChip, e.g.name, handset number, etc., to yourhandset. If a name is duplicated duringthe copying operation, the information isalso duplicated.]SmartChip to Phone: You can copythe entry from the SmartChip card tothe phone memory.]Phone to SmartChip: You can copythe entry from the handset memory tothe SmartChip card (not all the datawill be copied).Delete All ContactsMenu 8.6You can delete all entries in theSmartChip and the Phone.Press the [END] key to return tostandby mode.InformationMenu 8.7Service Dial Number (Menu 8.7.1)You can view the list of Service DialingNumbers (SDN) assigned by yournetwork provider (If supported by theSIM card). Such numbers include theemergency, directory assistance andvoice mail numbers.1. Select the Service dial number option.2. The names of the available serviceswill be shown.3. Use the up/down navigation keys toselect a service. Press the [SEND]key.Check Memory (Menu 8.7.2)You can check how many names andnumbers are stored in the Address Book(SIM card and phone memories).My Numbers (Menu 8.7.3)Allows you to display your phonenumber in the SIM card.Address Book50CG180_Eng_0516 5/16/07 2:13 PM Page 50](https://usermanual.wiki/LG-Electronics-USA/CG180/User-Guide-809347-Page-45.png)
![You have various preset images available.You can also select the blank backgroundand any images downloaded from theInternet.2. Press the left soft key [View] when therequired image is highlighted.3. Press the left soft key [Set], then theselected image will be displayed instandby mode.Backlight Timer (Menu 9.2.3)You can select whether or not the phoneuses the backlight.• 10 Seconds turns the backlight off10 seconds after the last key waspressed.• 30 Seconds turns the backlight off30 seconds after the last key waspressed.• 60 Seconds turns the backlight off60 seconds after the last key waspressed.• 180 Seconds turns the backlight off180 seconds after the last key waspressed.Contrast (Menu 9.2.4)This option allows you to adjust thecontrast of the LCD screen by pressingthe navigation key.Languages (Menu 9.2.5)You can change the language for the thedisplay text in your phone. This featurealso change the Language Input mode.Date & TimeMenu 9.3Set Date (Menu 9.3.1)This allows you to enter the day, monthand year. You can change the dateformat via the Date Format menuoption.Date Format (Menu 9.3.2)YYYY/MM/DD(year/month/day)DD/MM/YYYY(day/month/year)MM/DD/YYYY(month/day/year)Set Time (Menu 9.3.3)This allows you to enter the current time.You can choose the time format via theTime Format menu option.52SettingsCG180_Eng_0516 5/16/07 2:13 PM Page 52](https://usermanual.wiki/LG-Electronics-USA/CG180/User-Guide-809347-Page-47.png)
![53SettingsTime Format (Menu 9.3.4)24 Hours/12 HoursAuto Update (Menu 9.3.5)Select On to set the phone toautomatically update the time and dateaccording to the current time zone.CallMenu 9.4Call Forwarding (Menu 9.4.1)When this network service is activated,you can direct your incoming calls toanother number, for example, to yourvoice mailbox number. For details,contact your service provider. Select oneof the divert options, for example, selectIf busy to divert voice calls when yournumber is busy or when you rejectincoming calls.The following options are available:]All Voice Calls: Diverts voice callsunconditionally.]If Busy: Diverts voice calls when thephone is in use.]If No Reply: Diverts voice calls whichyou do not answer.]If Out Of Reach: Diverts voice callswhen the phone is switched off or outof coverage.]All Data Calls: Diverts to a numberwith a PC connection unconditionally.]All Fax Calls: Diverts to a number witha fax connection unconditionally.]Cancel All: Cancels all call divertservice.Answer Mode (Menu 9.4.2)This allows you to determine when toanswer the phone.]Flip Open: This option allows you toanswer a call simply by opening theflip.]Any Key: You can answer an incomingcall by pressing any key, except the[END] key.]Send Key Only: You can answer anincoming call by only pressing the[SEND] key.CG180_Eng_0516 5/16/07 2:13 PM Page 53](https://usermanual.wiki/LG-Electronics-USA/CG180/User-Guide-809347-Page-48.png)
![Send My Number (Menu 9.4.3)This network service allows you to setyour phone number to be displayed Onor hidden Off from the person to whomyou are calling. You can select Set byNetwork if you prefer to have differentsettings for different service provider.Call Waiting (Menu 9.4.4)The network will notify you of a newincoming call while you have a call inprogress. Select Activate to request thenetwork to activate call waiting, Cancelto request the network to deactivate callwaiting, or View Status, to check if thefunction is active or not.Minute Minder (Menu 9.4.5)This option allows you to specifywhether the phone must beep everyminute during an outgoing call to keepyou informed of the length of the call.Auto Redial (Menu 9.4.6)Select On, your phone redials thenumber you're trying to call up to 10times after you hear a quick, busy signal.Press [END] key to stop the callattempts.This feature attempts to redial numbersthat are busy due to the wirelessnetwork. It does not redial numbers to abusy party.TTY (Menu 9.4.7)Allows you to attach a TTY deviceenabling you to communicate withparties also using a TTY device. A phone with TTY support is able totranslate typed characters to voice. Voicecan also be translated into charactersand then displayed on the TTY.Send DTMF Tones (Menu 9.4.8)You can send the DTMF (dual tone multi-frequency) tones of the number on thedisplay during a call.This option is helpful for entering apassword or account number when youcall an automated system, like a bankingservice.Settings54CG180_Eng_0516 5/16/07 2:13 PM Page 54](https://usermanual.wiki/LG-Electronics-USA/CG180/User-Guide-809347-Page-49.png)
![55SettingsSecurityMenu 9.5Various codes and passwords are used toprotect the features of your phone. Theyare described in the following sections(see pages 19)Request PIN Code (Menu 9.5.1)When the PIN code request feature is isset to ‘Enable’, you must enter your PINeach time you switch the phone on.Consequently, any person who does nothave your PIN cannot use your phonewithout your approval.nNoteBefore disabling the PIN code requestfeature, you must enter your PINThe following options are available:]Enable: You must enter the PIN eachtime the phone is switched on.]Disable: The phone connects directlyto the network when you switch it on.Auto Keypad Lock (Menu 9.5.2)This menu allows to set the time of AutoKeypad Lock.nNoteYou cannot make emergency calls underthe key lock.Fixed Dial Number (FDN) (Menu 9.5.3)This allows you to restrict your outgoingcalls to selected phone numbers, if thisfunction is supported by your SmartChip.The PIN2 code is required.The following options are available:]Enable: You can only call phonenumbers stored in the Address Book.You must enter your PIN2.]Disable: You can call any number.]Number List: You can view thenumber list saved as fixed dial number.nNoteNot all SIM cards have a PIN2. If your SIMcard does not, this menu option is notdisplayed.CG180_Eng_0516 5/16/07 2:13 PM Page 55](https://usermanual.wiki/LG-Electronics-USA/CG180/User-Guide-809347-Page-50.png)
![Please check to see if any problems you have encountered with the phone aredescribed in this section before taking the phone in for a service or calling a serviceengineer.Q&A58QHow do I view the list of outgoing calls,incoming calls and missed calls?APress the [SEND] key.QHow do I view all numbers stored inmemory?APress the down navigation key.QWhy is the connection inconsistent ornot audible in certain areas?AWhen frequency environment isunstable in a certain area, connectionmay be inconsistent and not audible.Relocate to another area and try again.QWhy is the connection not consistentabruptly disconnects even whenestablished?AWhen frequency is unstable or weakor if there are too many users,connection may be cut off even after itwas established. Please try again lateror attempt after relocating to otherareas.QWhy does the LCD not turn on?ARemove the battery and turn on thepower after placing it back on. If thereis no change, fully charge the batteryand try again.QWhy is there an echo when aconnection is made with certaintelephones in a certain area?AThis is called the ‘Echo Phenomenon’,where it occurs if connection volume istoo high or caused by specialproperties (semi electronic telephoneexchange) of the equipment on theother end.CG180_Eng_0516 5/16/07 2:13 PM Page 58](https://usermanual.wiki/LG-Electronics-USA/CG180/User-Guide-809347-Page-53.png)