LG Electronics USA CP250 Cellular/PCS GSM/EDGE Phone with Bluetooth User Manual CP250 Eng 0123
LG Electronics USA Cellular/PCS GSM/EDGE Phone with Bluetooth CP250 Eng 0123
UserManual.wiki
>
LG Electronics USA
>
CP250 User Manual
Users Manual
Navigation menu
Upload a User Manual
Namespaces
Wiki Guide
HTML
PDF
Info
Views
User Manual
Discussion / Help
Navigation
![8For Your SafetyImportant InformationThis user guide contains important information on the use andoperation of this phone. Please read all the informationcarefully for optimal performance and to prevent any damageto or misuse of the phone. Any changes or modifications notexpressly approved in this user guide could void your warrantyfor this equipment.Before You StartSafety InstructionsWARNING! To reduce the possibility of electric shock, do notexpose your phone to high humidity areas, such as thebathroom, swimming pool, etc.Always store your phone away from heat. Never store yourphone in settings that may expose it to temperatures less than32°F or greater than 104°F, such as outside during extremeweather conditions or in your car on a hot day. Exposure toexcessive cold or heat will result in malfunction, damageand/or catastrophic failure.Be careful when using your phone near other electronicdevices. RF emissions from your mobile phone may affectnearby in adequately shielded electronic equipment. Youshould consult with manufacturers of any personal medicaldevices such as pacemakers and hearing aides to determine ifthey are susceptible to interference from your mobile phone.Turn off your phone in a medical facility or at a gas station.Never place your phone in a microwave oven as this willcause the battery to explode.IMPORTANT! Please read the TIA SAFETY INFORMATION onpage 78 before using your phone.Safety InformationRead these simple guidelines. Breaking the rules may bedangerous or illegal. Further detailed information is given in thisuser guide.]Never use an unapproved battery since this could damagethe phone and/or battery and could cause the battery toexplode.]Never place your phone in a microwave oven as it willcause the battery to explode.]Do not dispose of your battery by fire or with hazardous orflammable materials.]Make sure that no sharp-edged items come into contactwith the battery. There is a risk of this causing a fire.]Store the battery in a place out of reach of children.]Be careful that children do not swallow any parts such asrubber plugs (earphone, connection parts of the phone,etc.). This could cause asphyxiation or suffocation.](https://usermanual.wiki/LG-Electronics-USA/CP250/User-Guide-908952-Page-4.png)
![9For Your Safety]Unplug the power cord and charger during lightning stormsto avoid electric shock or fire.]When riding in a car, do not leave your phone or set up thehands-free kit near to the air bag. If wireless equipment isimproperly installed and the air bag is activated, you may beseriously injured.]Do not use a hand-held phone while driving.]Do not use the phone in areas where its use is prohibited.(For example: aircraft).]Do not expose the battery charger or adapter to directsunlight or use it in places with high humidity, such as abathroom.]Never store your phone in temperatures less than- 4°F orgreater than 122°F.]Do not use harsh chemicals (such as alcohol, benzene,thinners, etc.) or detergents to clean your phone. There is arisk of this causing a fire.]Do not drop, strike, or shake your phone severely. Suchactions may harm the internal circuit boards of the phone.]Do not use your phone in high explosive areas as the phonemay generate sparks.]Do not damage the power cord by bending, twisting, pulling,or heating. Do not use the plug if it is loose as it may causea fire or electric shock.]Do not place any heavy items on the power cord. Do notallow the power cord to be crimped as it may cause fire orelectric shock.]Do not handle the phone with wet hands while it is beingcharged. It may cause an electric shock or seriouslydamage your phone.]Do not disassemble the phone.]Do not place or answer calls while charging the phone as itmay short-circuit the phone and/or cause electric shock orfire.]Only use the batteries, antennas, and chargers provided byLG. The warranty will not be applied to products provided byother suppliers.]Only authorized personnel should service the phone and itsaccessories. Faulty installation or service may result inaccidents and consequently invalidate the warranty.]Do not hold or let the antenna come in contact with yourbody during a call.]An emergency call can be made only within a service area.For an emergency call, make sure that you are within aservice area and that the phone is turned on.](https://usermanual.wiki/LG-Electronics-USA/CP250/User-Guide-908952-Page-5.png)
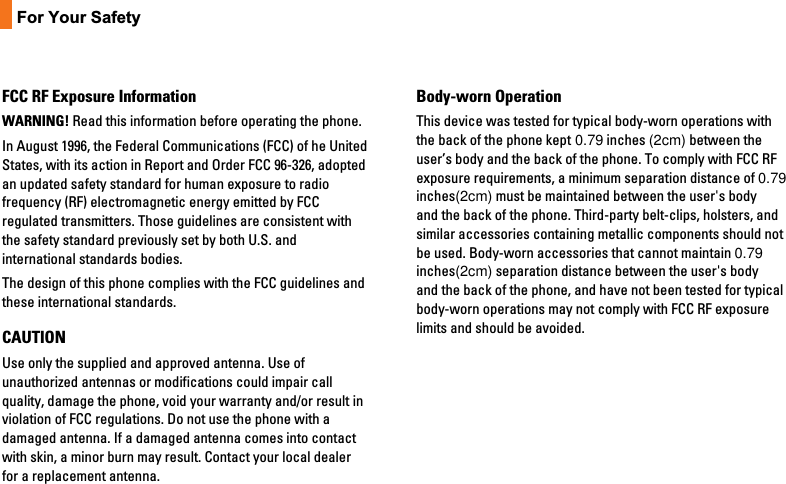
![11For Your SafetyVehicle Mounted External Antenna(optional, if available)A minimum separation distance of 8 inches (20cm) must bemaintained between the user/bystander and the vehiclemounted external antenna to satisfy FCC RF exposurerequirements. For more information about RF exposure, visitthe FCC website at www.fcc.govFCC Part 15 Class B ComplianceThis device and its accessories comply with part 15 of FCCrules. Operation is subject to the following two conditions: (1) This device and its accessories may not cause harmfulinterference, and (2) this device and its accessories mustaccept any interference received, including interference thatmay cause undesired operation.Cautions for Battery]Do not disassemble.]Do not short-circuit.]Do not expose to high temperature: 60°C (140°F).]]Do not incinerate.Battery Disposal]Please dispose of your battery properly or bring to yourlocal wireless carrier for recycling.]Do not dispose in fire or with hazardous or flammablematerials.Adapter (Charger) Cautions]Using the wrong battery charger could damage your phoneand void your warranty.]The adapter or battery charger is intended for indoor useonly.Do not expose the adapter or battery charger to direct sunlightor use it in places with high humidity, such as the bathroom.](https://usermanual.wiki/LG-Electronics-USA/CP250/User-Guide-908952-Page-7.png)
![18Making a Call1. Make sure your phone is powered on.2. Enter a phone number including the areacode. To edit a number on the displayscreen, simply press the key to eraseone digit at a time.]Press and hold the key to erase theentire number.3. Press the [SEND] key to call thenumber.4. When finished, press the [END] key.Making a Call by Send Key1. Press the [SEND] key, and the mostrecent incoming, outgoing and missedphone numbers will be displayed.2. Select the desired number by using thenavigation key.3. Press the [SEND] key.Making International Calls1. Press and hold the key and theinternational access character ‘+’ willappear.2. Enter the country code, area code, and thephone number.3. Press the [SEND] key.Ending a CallWhen you have finished a call, press the [END] key.Making a Call From the ContactsYou can store names and phone numbersdialed frequently in the SmartChip as well asin the phone memory known as the Contacts.You can dial a number by simply selecting aname in the contacts and pressing the [SEND] key.General FunctionsCP250_Eng_0123 1/23/08 2:36 PM Page 18](https://usermanual.wiki/LG-Electronics-USA/CP250/User-Guide-908952-Page-8.png)
![19Adjusting the VolumeDuring a call, if you want to adjust theearpiece volume, use the side keys of thephone.In idle mode, you can adjust the ring volumeusing the side keys.Answering a CallWhen you receive a call, the phone rings andthe flashing phone icon appears on the screen.If the caller can be identified, the caller’s phonenumber (or name if stored in your AddressBook) is displayed.1. Open the Flip and press the [SEND] keyor the left soft key to answer an incomingcall. If Any Key has been set as the answermode (Menu 9.5.4), any key press willanswer a call except for the [END] keyor the right soft key.nNote]To reject an incoming call, press and hold theside keys on the left side of the phone.]If Open Flip has been set as the AnswerMode (Menu 9.5.4), you do not need to pressany key. You can answer the call simply byopening the flip.2. End the call by closing the phone orpressing the [END] key.nNoticeYou can answer a call while using the AddressBook or other menu features.Using the SpeakerphoneYou can use the integrated Speakerphoneduring a call by pressing the right soft key[Options] then select Speaker On. Thespeakerphone indicator [ ] will display onthe display screen. The loudspeaker isautomatically deactivated when you end thecall.nWarningDue to higher volume levels, don’t place thephone near your ear while the speakerphone isenabled.Vibrate Mode (Quick)Vibrate Mode can be activated by pressing andholding down the [Star] key.General FunctionsCP250_Eng_0123 1/23/08 2:36 PM Page 19](https://usermanual.wiki/LG-Electronics-USA/CP250/User-Guide-908952-Page-9.png)
![21General FunctionsUsing the T9 ModeThe T9 predictive text input mode allows youto enter words easily with a minimum numberof key presses. As you press each key, thephone begins to display the characters that itthinks you are typing based on a built-indictionary. As new letters are added, the wordchanges to reflect the most likely candidatefrom the dictionary.1. When you are in the T9 predictive text inputmode, start entering a word by pressingkeys to . Press one key per letter.]The word changes as letters are typed -ignore what’s on the screen until theword is typed completely.]If the word is still incorrect after typingcompletely, press thethe up/downnavigation keys once or more to cyclethrough the other word options.]If the desired word is missing from theword choices list, add it by using theabc/ABC mode.2. Enter the whole word before editing ordeleting any keystrokes.3. Complete each word with a space bypressing the key or the right navigationkey.To delete letters, press . Press and holddown to erase the letters continuously.Continue hoding to erase entire words.Using the ABC ModeUse the keypad keys to enter your text.1. Press the key labeled with the requiredletter:]Once for the first letter]Twice for the second letter]And so on2. To insert a space, press the key once.To delete letters, press the key. Pressand hold down the key to erase theletters continuously.nNoteRefer to the table below for more information onthe characters available using the keys.CP250_Eng_0123 1/23/08 2:36 PM Page 21](https://usermanual.wiki/LG-Electronics-USA/CP250/User-Guide-908952-Page-11.png)
![22General FunctionsUsing the 123 (Numbers) ModeThe 123 Mode enables you to enter numbers ina text message (a telephone number, forexample) more quickly.Press the keys corresponding to the requireddigits before manually switching back to theappropriate text entry mode.Using the Symbol ModeThe Symbol Mode enables you to enter varioussymbols or special characters.To enter a symbol, press the [Star] key.Use the navigation keys to select the desiredsymbol and press the [OK] key.Key Characters in the Order DisplayUpper Case Lower Case1. , - ? ! ' @ : 1 . , - ? ! ' @ : 12A B C 2 a b c 23D E F 3 d e f 34G H I 4 g h i 45J K L 5 j k l 56M N O 6 m n o 67P Q R S 7 p q r s 78T U V 8 t u v 89W X Y Z 9 w x y z 90Space Key, 0 (Long press)Space Key, 0 (Long press)CP250_Eng_0123 1/23/08 2:36 PM Page 22](https://usermanual.wiki/LG-Electronics-USA/CP250/User-Guide-908952-Page-12.png)
![24Your phone provides a number of controlfunctions that you can use during a call. Toaccess these functions during a call, press theright soft key [Options].During a CallThe menu displayed on the handset screenduring a call is different than the default mainmenu displayed when in idle screen, and theoptions are described below.Making a Second CallYou can select a number you wish to dial fromthe Address Book to make a second call. Pressthe right soft key then select Contacts.Swapping Between Two CallsTo switch between two calls, press the rightsoft key, and then select Swap or press the[SEND] key.Answering an Incoming CallTo answer an incoming call when the handsetis ringing, simply press the [SEND] key.The handset is also able to warn you of anincoming call while you are already on a call. Atone sounds in the earpiece, and the displaywill show that a second call is waiting. Thisfeature, known as Call Waiting, is onlyavailable if your network supports it.If Call Waiting is on, you can put the first callon hold and answer the second call, bypressing the [SEND] key.Rejecting an Incoming CallYou can reject an incoming call withoutanswering by simply pressing the [END]key.During a call, you can reject an incoming callby pressing the [END] key.Muting the MicrophoneYou can mute the microphone during a call bypressing the left soft key [Mute]. The handsetcan be unmuted by pressing the left soft key[Unmute]. When the handset is muted, thecaller cannot hear you, but you can still hearthe caller.Conference CallsThe conference service provides you with theability to have a simultaneous conversationwith more than one caller. The conference callfeature can be used only if your networkIn-Call MenuCP250_Eng_0123 1/23/08 2:36 PM Page 24](https://usermanual.wiki/LG-Electronics-USA/CP250/User-Guide-908952-Page-14.png)
![25service provider supports this feature. Theconference call can only be set up when youhave one call active and one call on hold,meaning both calls must have been answered.Once a conference call is set up, calls may beadded, disconnected or separated (that is,removed from the conference call but stillconnected to you) by the person who set upthe conference call. These options are allavailable from the In-Call menu. The maximumnumber of callers in a conference call is five.Once started, you are in control of theconference call, and only you can add calls tothe conference call. Making a Second CallYou can make a second call while currently ona call simply by entering the second numberand pressing the [SEND] key. When thesecond call is connected, the first call isautomatically placed on hold. You can swapbetween calls, by pressing the [SEND]key.Setting Up a Conference CallTo set up a conference call, place one call onhold, conference in the second active call bypressing the right soft key and select the JoinCalls sub menu option from the ConferenceCall menu. Activate the Conference Call onHoldTo activate a conference call on hold, press the[SEND] key.Adding Calls to the ConferenceCallTo add a call to an existing conference call,press the right soft key, and then select theJoin Calls sub menu from the Conference Calloption.Private Call in a Conference CallTo have a private call with one caller from aconference call, press the right soft key andselect the Private Menu from the ConferenceCall option. When the numbers of the callersare displayed, select the one you wish to speakin private. Ending a Conference CallCurrently active conference call can bedisconnected by pressing the [END] key.In-Call MenuCP250_Eng_0123 1/23/08 2:36 PM Page 25](https://usermanual.wiki/LG-Electronics-USA/CP250/User-Guide-908952-Page-15.png)
![261. IM (see page 29)2. Messaging (see page 33)2.1 New Message2.1.1 Text2.1.2 Multimedia2.2 Inbox2.3 Mobile Email2.4 Drafts2.5 Outbox2.6 Sent2.7 IM2.8 Voicemail2.9 Templates2.9.1 Text Templates2.9.2 Multimedia Templates2.9.3 Business Card2.0 Message Settings2.0.1 Text Message2.0.2 Multimedia Message2.0.3 Voicemail Number2.0.4 Download Message3. Recent Calls (see page 40)3.1 Missed Calls3.2 Dialed Calls3.3 Received Calls3.4 All Calls3.5 Call Duration3.5.1 Last Call3.5.2 Dialed Calls3.5.3 Received Calls3.5.4 All Calls3.6 Data Information3.6.1 Web Data3.6.2 Data Call3.6.3 Total DataThe following illustration shows the available menu structure and indicates the:]Number assigned to each menu option.]Page where you can find the feature description.Menu TreeCP250_Eng_0123 1/23/08 2:36 PM Page 26](https://usermanual.wiki/LG-Electronics-USA/CP250/User-Guide-908952-Page-16.png)
![29IMThe Instant Messaging feature can only beused with the support of the network operatoror communities such as AIM, Windows LiveMessenger, Y! Messenger. For InstantMessaging users, a valid User ID andPassword will be required in order to login andexchange messages as well as checking theonline status.There are two ways to use the InstantMessaging feature.1. Through the Main Menu.2. Through the IM hotkey (the right navigationkey). Short pressing the hotkey will bring upthe available IM clients. The menu itemsbelow might not appear since not all IMcommunities support the various options.Also the menu strings may appear differentlybased on the selected IM communities. Thekeywords such as User ID, Login and Contactwill be used as general terms in IM menusaccording to the currently selectedcommunities such as AIM, Windows LiveMessenger, Y! Messenger.Offline MenuSign InThis allows users to login by filling in the UserID and Password.nNoteIf your phone number is not registered on theSmartChip you will not be able to log into the IMclientYou can check your phone number in the Mynumbers menu (Menu 8.8)nNoteOnce the User ID and Password are saved, youwill not be required to type them in again duringthe Login process. This feature is optional.Saved ConversationsThis is where a user can view savedconversations.Settings]Save Passwaord: You can save yourpassword in login Input.]Power - on Sing In: If you set the desiredIM community that saved your ID andPassword, you will be automatically login tothe community when you switch the phoneon.IM InformationThis indicates the Instant Messaging ClientInformation such as Client Name and VersionNumber.CP250_Eng_0123 1/23/08 2:36 PM Page 29](https://usermanual.wiki/LG-Electronics-USA/CP250/User-Guide-908952-Page-19.png)
![30Online Menu / 1 to 1conversationAfter successful Login, a list of contacts withScreen Names will appear on screen.Depending on the cursor location in thecontacts, the menu options will be available.When cursor is located on aConversations ListnNoteThe Converations List contains both the activecontact where a conversation has taken place aswell as unknown contact.]View/Hide Conversation: This providesthe option to view or hide contacts from theselected list.nNoteWhen you select the left/right navigation key orthe Confirm key on the Conversations List, itoffers the ability to view or hide conversations.]Send to Others: This offers the ability tosend a message to an unknown contact.When selected, User ID must be typed inprior to starting an IM session orconversation.]Saved Conversations: You may view ordelete the stored conversation session.]Settings• My Status: Allows you to set your statusto Available, Busy or Invisible.• Show Offline Contacts: You have theability to show all contacts or only onlinecontacts while in Y! Messenger service.• Display Name: You may change yourdisplay name to be used while inWindows Live Messenger service.]Log Out: This begins the Logout process.When the cursor is located on aConversation]End Conversation: This closes the selectedconversation. If an unknown contact wasselected, that contact is deleted.]Block/Unblock Contact: This allows youto block/unblock the selected ConversationsContact.]View Information: This allows you to viewthe User ID and Status Text information. ]Refresh Contact: This refreshes thepresence information of the selected contact.IMCP250_Eng_0123 1/23/08 2:36 PM Page 30](https://usermanual.wiki/LG-Electronics-USA/CP250/User-Guide-908952-Page-20.png)
![31IM]Settings: Please refer to the previousSettings Menu.]Log Out: This begins the Logout process.When the cursor is located on aContact List]View/Hide Conversations: This providesthe option to view or hide contacts fromselected list.]Add Contact: This adds a new contact tothe selected contacts list, in the meantimethis searches for the contact on the basis ofE-mail Address, First Name, or Last Name.]Blocked List: This allows you to view theblocked list.]Refresh List: This refreshes the presenceinformation of the contacts within thecontacts.]Send to Others: This offers the ability tosend a message to an unknown contact.When selected, the User ID must be typed inprior to starting an IM session orconversation.]Settings: Please refer to the previousSettings Menu.]Logout: This begins the Logout process.When the cursor is located on aContact]Add Contact: This adds a new contact tothe selected contacts list; in the meantimethis searches for the contact on the basis ofE-mail Address, First Name, or Last Name.]Delete Contact: This deletes the selectedContact.]Block/Unblock Contact: This allows orblocks conversation with the selectedContact.]Refresh Contact: This refreshes thepresence information of the selected contact.]View Information: This allows you to viewinformation. It provides User ID, Status Text.]Settings: Please refer to the previousSettings Menu.]Logout: This begins the Logout process.CP250_Eng_0123 1/23/08 2:36 PM Page 31](https://usermanual.wiki/LG-Electronics-USA/CP250/User-Guide-908952-Page-21.png)
![32IMMenu options available in theConversation screen]Send: This allows you to send the typedmessage.]Back To List: This brings the screen back tothe contacts.]Insert: You can insert Symbol, Template andemoticons in the conversation screen.]Block/Unblock Contact: This allows orblocks conversation with the selectedContact.]Save Conversation: Stores currently activeconversation.]End Conversation: This ends the activeconversation and clears the conversationbuffer.]View Information: This allows you to viewthe User ID and Status Text information.]Set T9: This selects the T9 predictive modeLanguage.nNote• Within the conversation screen, you can insertsymbols, emoticons and text templates byusing the left soft key.• In the conversation window, you can use theup/down navigation key for scrolling throughthe conversation.• Maximum number of characters supported bya message is 400 characters for receiving and128 characters for sending.• The presence information might not update inreal time so the “Refresh List”/“RefreshContact” option can be used for most up todate status.CP250_Eng_0123 1/23/08 2:36 PM Page 32](https://usermanual.wiki/LG-Electronics-USA/CP250/User-Guide-908952-Page-22.png)
![33MessagingNew MessageMenu 2.1Text(Menu 2.1.1)You can write and edit text messages of up to918 characters.1. Type in a message using key presses. Fordetails on how to enter text, refer to page 20(Entering Text).2. After completing the message select therequired option by pressing the right soft key[Options].The following options are available.]Insert• Symbol: Attach special characters. • Picture: Send and receive text messagesthat contain pictures, known as EnhancedMessaging Service. Several presetpictures are available in the phone andthey can be replaced with new onesreceived from other sources.• Animation: Attaching an animation in amessage can be done throughEMS(Enhanced Messaging Service).• Audio: Attach sounds that are availablefor short message.• Text Template: Use the text templatesalready set in the phone.• Contact: Attach a phone number.• Business Card: Attach your name card.]Save to Drafts: Save the message so that itcan be sent later.]T9 Languages: Choose between English orSpanish T9 language. For details on how toenter text, refer to page 21 (Using the T9 Mode).]Clear Text: Deletes the written message.]Cancel: Exit the text editor.Press the left soft key [Send To].]Send To: Enter the phone number or selectthe number from the address book.Multimedia(Menu 2.1.2)You can write and edit multimedia messages,checking message size.You can create a new message or choose oneof the multimedia message templates alreadymade.Press the left soft key [Send To].]Send To: You can send multimediamessages to multiple recipients, prioritizeyour message, and make it sent later aswell.CP250_Eng_0123 1/23/08 2:36 PM Page 33](https://usermanual.wiki/LG-Electronics-USA/CP250/User-Guide-908952-Page-23.png)
![34Press the right soft key [Options].The following options are available.]Insert: Symbol, Graphic, Audio, Video, NewPhoto, New Audio, Template, Contact,Business Card, vCard or vCalendar.]New Slide: You can insert a slide and placeit to Insert Slide Before or Insert SlideAfter.]Preview: You can preview multimediamessages you wrote.]Save: You can save multimedia messages ToDrafts or As Template.]Set Duration: You can set timer for slide.]T9 Languages: Choose between English orSpanish T9 language. For details on how toenter text, refer to page 21 (Using the T9Mode).]Cancel: You can back to the Messagemenu.nNoteIf you select the photo on writing multimediamessage, loading duration will take about 5seconds. At that time, you can’t activate any keyduring loading time. After that time, it isavailable to write multimedia message.InboxMenu 2.2You will be alerted when you receive amessage. They will be stored in the Inbox. In the Inbox, you can identify each message byicons.If you are notified that you have received amultimedia message, you can download thewhole multimedia message by selecting it inthe Receive menu. The following [Options] are available in theInbox list.]Delete: You can delete the current message.]Reply: You can reply to the sender.]Forward: You can forward the selectedmessage to another party.]Return Call: Call back the sender.]Information: You can view informationabout received messages.]Delete all Read: You can delete all readmessages.]Delete All: You can delete all messages.MessagingCP250_Eng_0123 1/23/08 2:36 PM Page 34](https://usermanual.wiki/LG-Electronics-USA/CP250/User-Guide-908952-Page-24.png)
![35MessagingMobile EmailMenu 2.3Mobile Email allows you to access your Yahoo!Mail, AOL Mail, AIM Mail, Windows Live Mail,AT&T Yahoo!, BellSouth Mail and Otherproviders accounts on your phone. So, now youcan quickly and easily check your email whileyou’re away from your computer.To Set Up Mobile Email]Open Mobile Email: Highlight MobileEmail and press OK.]Select an Email Provider: Use thenavigation key to highlight the email provideryou wish to use and press Select.]Log In1. Highlight the ID entry field, press down onthe navigation key, and then type in yourexisting email ID.2. Scroll down and highlight the Passwordfield, press down on the navigation key,and enter your password. Quick Tip: Yourpassword is case sensitive. Press the on the keypad to change to lower case orupper case.3. To save your password scroll down toRemember Me and press down on thenavigation key to check the box.4. Select Sign In.]Opening an Email: Just scroll down andhighlight the email subject line you want toopen and press down on the navigation key.Once the email opens, just select Options toreply, forward, or delete.]Deleting an Email: Just scroll down to theemail you want to delete, press Options,then Delete.For additional details, visit www.att.com/emailDraftsMenu 2.4You can view the messages saved as a draft. The following [Options] are available.]Edit: Edits the message ou choose.]Delete: Deletes the message you choose.]Information: Allows you to view theinformation on the message. ]Delete All: Deletes all messages in thefolder.CP250_Eng_0123 1/23/08 2:36 PM Page 35](https://usermanual.wiki/LG-Electronics-USA/CP250/User-Guide-908952-Page-25.png)
![36MessagingOutboxMenu 2.5Outbox is a temporary storage place formessages waiting to be sent.When you press the left soft key [Send], themessage moves to the Outbox and from therethe message is sent.If the message fails to be sent from theOutbox, you will receive a sound alert alongwith a Message Sending Fail notice on thescreen. Another attempt will be made to sendthe failed message and after two unsuccessfulattempts, the message will no longer be sentautomatically. In order to send the messagethat has failed, you must press Resend.After the maximum number of Send attemptshas been reached the Send function has failed.If you were trying to send a text message,open the message and check that the Sendingoptions are correct.When the message Send has failed, thefollowing [options] are available.]Delete: Deletes the selected messagewhich has been failed to send.]Resend: Allows you to send the messageagain after a time-out period.]Edit: You can edit a selected message.]Information: Allows you to view theinformation of the message.]Delete All: Deletes all messages whichhave been failed to send.SentMenu 2.6This is where you can view the lists andcontents of sent messages and also verify iftransmission was successful.]Delete: Deletes the selected message fromthe Sent list.]Forward: Forwards the current message toother recipients.]Information: Allows you to view theinformation of the message.]Delete All: Deletes all messages from theSent list.IMMenu 2.7Instant Messaging feature can only be usedwith the support of the network operator orcommunities. For Instant Messaging users, avalid User ID and Password will be required inorder to login and exchange messages as wellas checking the online status. For furtherdetails, see page 29.CP250_Eng_0123 1/23/08 2:36 PM Page 36](https://usermanual.wiki/LG-Electronics-USA/CP250/User-Guide-908952-Page-26.png)
![37MessagingVoicemailMenu 2.8This menu provides you with a quick way ofaccessing your voice mailbox (if provided byyour network).Before using this feature, you must enter thevoice server number obtained from your serviceprovider.This may already be available; to check thevoicemail, press and hold the key.When new voicemail is received, the symbolwill be displayed on the screen.TemplatesMenu 2.9There are 6 predefined messages in the list.You can view and edit the template messagesor create new messages. Text Templates (Menu 2.9.1)The following options are available.]Edit: You can edit the selected templatemessage.]Send via- Text Message: Sends the selectedtemplate message by SMS.- Multimedia Message: Sends theselected template message by MMS.]Delete: Allows you to delete the selectedtemplate message.Multimedia Templates(Menu 2.9.2)For further details, see page 33.Business Card (Menu 2.9.3)This option allows you to make your own namecard. Key in the Name, Mobile number, Officenumber, Fax number and E-mail address.]Send via- Text Message: Sends the selected namecard by SMS.- Multimedia Message: Sends theselected name card by MMS.]Delete: Allows you to delete the selectedname card.CP250_Eng_0123 1/23/08 2:36 PM Page 37](https://usermanual.wiki/LG-Electronics-USA/CP250/User-Guide-908952-Page-27.png)
![38MessagingMessage SettingsMenu 2.0Text Message (Menu 2.0.1)]Message Center Number: If you want tosend the text message, you can receive theaddress of the SMS center through thismenu.]Email Gateway: You can send the textmessage to an Email Address via thisgateway.]Subject: If you set it to on, allows you toenter the subject. ]Bearer Setting: You can select GPRS orGSM. Contact your network operator orservice provider for information related tosetting a selected bearer, pricing andconnection speed. GSM Preferred/GPRSPreferred.Multimedia Message (Menu 2.0.2)Via this menu, you can set up defaultmultimedia message information.The following options are available:]Subject: If you set it to on, allows you toenter the subject. ]Set Duration: Display the duration of eachpage when writing the message.]Priority: You can set the priority of themessage you choose.]Validity Period: This network serviceallows you to set how long your multimediamessages will be stored at the messagecenter.]Delivery Receipt: If it is set to Yes in thismenu, you can check whether your messageis sent successfully.]Read Report: This menu allows you todetermine whether to request a readconfirmation mail to a recipient.]Auto Download• On: You can always receive multimediamessages automatically.• Off: You receive only notificationmessages in the inbox and then you cancheck the notifications.• Home network only: If you are in homenetwork, it works like “On”.]Accounts: For further details, see page 43.]Permitted Message TypesPersonal: Personal message.Advertisement: Commercial message.Informational: Necessary information.CP250_Eng_0123 1/23/08 2:36 PM Page 38](https://usermanual.wiki/LG-Electronics-USA/CP250/User-Guide-908952-Page-28.png)
![39MessagingVoicemail Number (Menu 2.0.3)This menu allows you to get the voice mail ifthis feature is supported by the networkservice provider. Please check with yournetwork service provider for details of theirservice in order to configure the handsetaccordingly.Download Message (Menu 2.0.4)]Receive: You can set the Service option todetermine whether you will receive theservice messages or not.]Auto Download: You can set the AutoDownload option to determine whether youwill automatically connect to the service ornot.CP250_Eng_0123 1/23/08 2:36 PM Page 39](https://usermanual.wiki/LG-Electronics-USA/CP250/User-Guide-908952-Page-29.png)

![42You can access various WAP (WirelessApplication Protocol) / Web services such asnews, and weather. These services arespecially designed for mobile phones and theyare maintained by the service providers.nNoteCheck the availability of WAP services, pricingand tariffs with your network operator and/or theservice provider whose service you wish to use.Service providers will also give you instructionson how to use their services.Please contact your service provider to open anInternet account.To launch the browser in standby mode, pressthe key.Once connected, the homepage is displayed.The content depends on the service provider.To exit the browser at any time, press the [END] key. The idle screen is displayed.Menus for the BrowserYou can surf the Internet using either thephone keys or the WAP Browser menu.Using the Navigation KeysWhen surfing the Internet, the keys functiondifferently than when in the phone mode. Using the WAP Browser MenuThere are various menus available whensurfing the Internet.MEdia Net HomeMenu 4.1Connect to AT&T homepage. The homepage isdefined in the activated account and cannot bechanged. BookmarksMenu 4.2This function allows you to store and editfrequently accessed sites. The following[Options] are available.nNoteYour phone may have some pre-installedbookmarks for sites not affiliated with LG. LGdoes not warrant or endorse these sites. If youchoose to access them, you should take thesame precautions for security or content as youwould with any site.MEdia NetKey Descriptionup/down navigationkeyScroll each line ofthe content areaCP250_Eng_0123 1/23/08 2:36 PM Page 42](https://usermanual.wiki/LG-Electronics-USA/CP250/User-Guide-908952-Page-32.png)
![43To Set Up Bookmarks• View: Display the bookmark title and URL.• New: Create new Bookmarks.• Edit: Modify the existing bookmark item.• Delete: Allow you to erase the selectedbookmark.• Send URL: Allows the bookmarkinformation to be sent via SMS to anotherperson.• Delete All: Allows you to erase allbookmarks.Saved PagesMenu 4.3This saves the page on display as an off-linefile. A maximum of 20 pages can be saved.Enter URLMenu 4.4Input the URL manually to connect to theInternet site.Recent PagesMenu 4.5You can manage the list of the Internet pagesyou visited.SecurityMenu 4.6A list of the available certificates is shown.]Certificates: You can see the list ofcertificates and view them in detail.]Clear Session: Removes the securesession.Browser SettingsMenu 4.7Accounts (Menu 4.7.1)This includes the network information used toconnect the browser to the Internet. Select the desired account by pressing the softkey, which is labelled as “Activate”. This willactivate the account that will be used forfuture connection.MEdia Net is the predefined account that is setas default.]View: Allows you to see the specificaccount information.]Activate: Select the account among the listof accounts, so it can be used for futureconnection. ]Edit: Allows you to change the accountinformation.MEdia NetCP250_Eng_0123 1/23/08 2:36 PM Page 43](https://usermanual.wiki/LG-Electronics-USA/CP250/User-Guide-908952-Page-33.png)
![44MEdia Net]Delete: Allows you to delete the account.]New: Allows you to create a maximum of 10new accounts.nNoteYou cannot edit and delete pre-installedaccounts.nNote1. The account information will be available fromyour operator. 2. Creating or editing an account requires care.The browser cannot connect to the Internet ifthe account information is not correct.Cache Settings (Menu 4.7.2)The web pages you have accessed are storedin the memory of the phone.]Clear Cache: Remove all cached data in thememory.]Allow Cache: Set a value to determinewhether a connection attempt is madethrough the cache or not.nNoteA cache is a buffer memory, which is used tostore data temporarily, especially when it isonline.Cookie Settings (Menu 4.7.3)The information or services you have accessedare stored in the cookie.]Delete Cookies: Remove all cookies.]Allow Cookies: This allows you to usecookie when browsing.Show Image (Menu 4.7.4)This allows you to view pictures whenbrowsing. CP250_Eng_0123 1/23/08 2:36 PM Page 44](https://usermanual.wiki/LG-Electronics-USA/CP250/User-Guide-908952-Page-34.png)
![46Games & AppsGames & AppsMenu 6.1Java is a technology developed by SunMicrosystems. Similar to the way you woulddownload the Java Applet using the standardNetscape or MS Internet Explorer browsers,Java MIDIet can be downloaded using a WAPenabled phone. Depending on the serviceprovider, Java based programs such as Javagames can be downloaded and run on a phone.Once downloaded, the Java program can beviewed within the Games & Apps menu whereyou can select, execute or delete. nNoteThe JAR file is a compressed format of the Javaprogram and the JAD file is a description file thatincludes all detailed information. From thenetwork, prior to download, you can view alldetailed file descriptions from the JAD file.nWarningOnly J2ME (Java 2 Micro Edition) basedprograms will run in a phone environment.The J2SE (Java 2 Standard Edition) basedprograms will only run in a PC environment.Java AccountsMenu 6.2This includes the network information used toconnect the browser to the Internet. Select the desired account by pressing theright soft key [Options] - [Activate]. This willactivate the account that will be used forfuture connection.MEdia Net is the predefined account that is setas default.]View: Allows you to see the specificaccount information.]Activate: Select the account among the listof accounts, so it can be used for futureconnection. ]Edit: Allows you to change the accountinformation.]Delete: Allows you to delete the account.]New: Allows you to create a maximum of 20new accounts.nNoteYou cannot edit and delete pre-installedaccounts.CP250_Eng_0123 1/23/08 2:36 PM Page 46](https://usermanual.wiki/LG-Electronics-USA/CP250/User-Guide-908952-Page-36.png)
![48My StuffGames & AppsMenu 7.1For further details, see page 46.Audio & RingtonesMenu 7.2]Shop Tones: This menu option connects toAT&T’s ringtone download site.]Record Voice: You can record your ownaudio by pressing the center key [OK].]Files: You can view the audio files in the list.GraphicsMenu 7.3]Shop Graphics: This menu option connectsto AT&T’s graphic download site.nNoteAdditional charges may be incurred whendownloading graphics. Contact your serviceprovider for further information.]Take Photo: You can take your own photoby pressing the center key [OK].]Files: You can view the graphic files in thelist.VideoMenu 7.4]Video: You can view the video files you havesaved.ToolsMenu 7.5Alarm Clock (Menu 7.5.1)The alarm function allows you to set upmultiple separate alarms. You can also set thetime, repetition interval and alarm sound.Select your desired alarm setting to configurefrom the alarm list. If there is no alarm setting,press the left soft key [New] to add a newalarm.]Time: Select the desired set time modeusing the navigation key. Input your desiredalarm time by specifying the hour andminute. If the time is in 12 hour clock format,you have to select either am’ or pm’ usingthe center soft key.]Repeat: Select the desired repeat modeusing the navigation key.nNoteIf battery gets separated during the files in user memory are being deleted, the files may not be deletedand still remains in the memory.CP250_Eng_0123 1/23/08 2:36 PM Page 48](https://usermanual.wiki/LG-Electronics-USA/CP250/User-Guide-908952-Page-38.png)
![49]Alarm Tone: Select the alarm sound to usefor the alarm using the key.]Title: Input alarm name.Calendar (Menu 7.5.2)When you enter this menu a calendar will bedisplayed. The square cursor is used to locatea particular day. The bottom bar on thecalendar indicates schedule(s) for that day. Thisfunction helps to remind you of the schedule.The phone will sound an alarm tone if it hasbeen set for a specific schedule item.The following [Options] are available:]View: Allows you to view the schedule.]Delete: Allows you to delete the schedule. ]New Schedule: You can edit maximum of30 characters and create up to 30 notes. ]Send via: Sends the selected schedule byMessage or Bluetooth.]Edit: Allows you to edit the schedule. ]Calendar: Allows you to consult thecalendar. ]Scheduler Tone: The phone can sound analarm tone when the scheduled date for anevent has been reached with this option. ]All Schedules: Shows the notes that areset for all days. Use the up/down navigationkeys to browse through the note lists. ]Go to Date: Allows you to jump to a specificdate.]Delete Old: Delete past schedule event thathas already been notified. ]Delete All: Delete all schedules. You areasked to confirm your action. nNoteYou can see Edit, Delete, View all schedules,Delete past, and Delete all menus dependent onsetting of the schedule. Notepad (Menu 7.5.3)You can create up to a maximum of 30 memos.1. Select a memo pad you want to edit.2. Press the left soft key [New] to create a newmemo.Key Descriptionup/down navigation key Weeklyleft/right navigation key Dailykey/ key Annuallykey/ key MonthlyMy StuffCP250_Eng_0123 1/23/08 2:36 PM Page 49](https://usermanual.wiki/LG-Electronics-USA/CP250/User-Guide-908952-Page-39.png)
![50My Stuff3. Input the memo and press the left soft key[Save] to save.Calculator (Menu 7.5.4)The calculator function allows you to add,subtract, multiply and divide. You can inputnumbers using the number keys, and inputoperators using the up, down, left, and rightnavigation keys.You can input a decimal point by pressing the[Star] key.Whenever you press the key, charactersare sequentially deleted in reverse order.Tip Calculator (Menu 7.5.5)This feature allows you to quickly and easilycalculate the tip amount based on the total billas well as the split of the total bill based onthe number of people.World Clock (Menu 7.5.6)The World clock function provides timeinformation on major cities worldwide.1. You can view the time of desired city usingthe right soft key [Options] - [Change City].Unit Converter (Menu 7.5.7)This function converts any measurement into aunit you want.There are 4 types of units that can beconverted: Area, Length, Weight, and Volume.nNoteYou can input a decimal number by pressing the[Star] key.Camera & RecordingsMenu 7.6Take Photo (Menu 7.6.1)Using the camera module built into your phone,you can take pictures of people or events whileon the move. Additionally, you can send photosto other people in a picture message. The rightsoft key [Options] will bring up the followingoptions.]Resolution: Sets the image size to640*480(default), 320*240. The selectedimage size appears on the capture screen.]Quality: You can select the desired qualityof photo by selecting either Super Fine, Fineor Normal mode by using the navigationkeys.CP250_Eng_0123 1/23/08 2:36 PM Page 50](https://usermanual.wiki/LG-Electronics-USA/CP250/User-Guide-908952-Page-40.png)
![51My Stuff]Multishot: This feature enables the amountof continuous frames that can be taken atone time. ]Self Timer: Determines the camera timer.]White Balance: This adjusts the LightEffect level and you can select from thefollowing options: Auto / Daylight /Incandescent / Cloudy / Fluorescent]Color Effect: Allows you to apply specialeffects to the picture. Press the left or rightnavigation key to find the tone you want touse from the following options: Color, Sepia,Mono and Negative.]Shutter Tone: Allows you to select a soundwhen you press the shutter. Tone 1 / Tone 2 /Tone 3 /Off]Set Default: This restores the defaultcamera settings (Size, Brightness, Zoom,etc.).nNoteIn Take Photo mode, you can adjust the zoomscale by using the up/down navigation keys. In Take Photo mode, you can adjust thebrightness by using the left/right navigation key. Record Voice (Menu 7.6.2)You can record an audio clip in this menu. Therecorded audio file is saved automatically inthe Audio & Ringtones menu (Menu 7.2).Other FilesMenu 7.7When you receive files of an undefined format(such as .vcs, .vcf, etc.), the files are saved inthis folder.The following [Options] are available.]Delete: You can delete the selected file.]Rename: You can edit the name of theselected file.]New Folder: You can create a new folder.]Sort By: You can sort the folders by name,date and type.]Delete All: You can delete all files.Resolution Zoom scale640*480 Level 1~ Level 20320*240 Level 1~Level 20CP250_Eng_0123 1/23/08 2:36 PM Page 51](https://usermanual.wiki/LG-Electronics-USA/CP250/User-Guide-908952-Page-41.png)
![52My Stuff]Multi Delete: You can delete several filesat once.]Information: You can view informationabout the selected folder.CP250_Eng_0123 1/23/08 2:36 PM Page 52](https://usermanual.wiki/LG-Electronics-USA/CP250/User-Guide-908952-Page-42.png)
![53Contact ListMenu 8.1This menu allows you to save and managecontact address information. The Contacts’functions allow you to add a new address orsearch saved contact addresses by name.New ContactMenu 8.2This menu allows you to add a new contactaddress. You can enter input contact addressinformation including name, phone numbers,email addresses, group information items,memos, ring tones, and image (photograph).You have to select the Handset or theSmartChip memory using the left and rightnavigation keys.Caller GroupsMenu 8.3This menu allows you to manage groupinformation. By default, there are 4 groups:Family, Friends, Colleague and VIP. You canalso configure a ring tone for a group so thatthe group ring tone sounds when a call from aspecific contact address within that grouparrives and there is no ring tone configured forthe specific contact address.Speed Dial ListMenu 8.4This menu allows you to configure the speeddial numbers. You can select a number from 2to 9 as a speed dial. You can configure speeddial numbers for any of the 8 numbers for aspecific contact address so that a contactaddress may have multiple speed dialnumbers.Copy All ContactsMenu 8.5This menu allows you to copy all of theinformation from your SmartChip, e.g. name,handset number, etc., to your handset. If aname is duplicated during the copyingoperation, the information is also duplicated.]SmartChip to Handset: You can copy theentry from the SmartChip card to the phonememory.]Handset to SmartChip: You can copy theentry from the handset memory to theSmartChip card (not all the data will becopied).Address BookCP250_Eng_0123 1/23/08 2:36 PM Page 53](https://usermanual.wiki/LG-Electronics-USA/CP250/User-Guide-908952-Page-43.png)
![54Delete All ContactsMenu 8.6You can delete all entries in the SmartChipand the Handset.Press the [END] key to return to standbymode.Service Dial NumbersMenu 8.7You can view the list of Service DialingNumbers (SDN) assigned by your networkprovider. Such numbers could include theemergency, directory assistance and voice mailnumbers.1. Select the Service dial number option.2. The names of the available services will beshown.3. Use the up/down navigation keys to select aservice. Press the [SEND] key.My NumbersMenu 8.8This displays your phone numbers stored in theSmartChip.Address BookCP250_Eng_0123 1/23/08 2:36 PM Page 54](https://usermanual.wiki/LG-Electronics-USA/CP250/User-Guide-908952-Page-44.png)
![55Audio & RingtonesMenu 9.1There can be 4 sound modes: General, VibrateAll, Silent and Ear Mic. General, Vibrate, andAll Silent modes can be changed from theVolume menu under Ring tone. In addition,pressing and holding the [Star] key on idlescreen mode can swap Normal and Mannermode. Ear Mic is available when respectiveinstruments are attached.Shop Tones (Menu 9.1.1)Connects to AT&T Ring tone Shops.Ringtones (Menu 9.1.2)Shows and plays ring tones. These can bedownloaded ring tones from Ring tone shops.Volume (Menu 9.1.3)This menu controls Ringtone, Key Tone, Calland Multimedia volume. It is available on Ringtone volume level 1~5.Message Alert Tones (Menu 9.1.4)Allows you to select an alert tone which isplayed when a message is received. You canselect any one from 5 message alert tones.nNoteFull length music tracks cannot be set as ringtones.Alert Type (Menu 9.1.5)]Ring Alert Type: Supports 3 ring alert types.Ring, Ring and Vibration, and Ring afterVibration.]Message Alert Type: Supports six types ofmessage alerts.- Ring Once, Ring Every 2 Min., Ring Every15 Min., Ring and Vibration, Vibrate, Silent]Other Alert Type: You can select Ring orSilent.Increasing Ringtone (Menu 9.1.6)Allows you to select an increasing ringtonetype that is played when there is an incomingcall. You can set it on / off.Power On/Off Tones (Menu 9.1.7)Allows you to select an power on/off tones.You can set it on / off.SettingsCP250_Eng_0123 1/23/08 2:36 PM Page 55](https://usermanual.wiki/LG-Electronics-USA/CP250/User-Guide-908952-Page-45.png)
![57SettingsBluetooth On/Off (Menu 9.3.1)This menu sets the Bluetooth on or off usingthe navigation key. Device List (Menu 9.3.2)This function allows you to view the list of alldevices that are paired with your phone atonce.To add a new device, press the left soft key[New]1. Select the [New] key to search the devicethat can be connected and which is withinrange. 2. If you want to stop searching, press the rightsoft key [Cancel].3. All of the devices found are displayed in thepop-up menu.Select the desired device by pressing the OKkey, and entering the password.Bluetooth Settings (Menu 9.3.3)This menu allows you to configure the profilefor a Bluetooth.]My Visibility1. Selecting the Show option exposes yourphone to other Bluetooth devices.2. Selecting Hide shows your phone only toalready paired devices.]My Name: Allows you to change thehandset's name that can be seen by otherBluetooth devices.]My Address: You can check your Bluetoothaddress. You cannot change the defaultsetting.Date & TimeMenu 9.4Set Date (Menu 9.4.1)This allows you to enter the day, month andyear. You can change the date format via theDate Format menu option. Date Format (Menu 9.4.2)DD/MM/YYYY(day/month/year)MM/DD/YYYY(month/day/year)YYYY/MM/DD(year/month/day)Set Time (Menu 9.4.3)This allows you to enter the current time. Youcan choose the time format via the TimeFormat menu option.CP250_Eng_0123 1/23/08 2:36 PM Page 57](https://usermanual.wiki/LG-Electronics-USA/CP250/User-Guide-908952-Page-47.png)
![58SettingsTime Format (Menu 9.4.4)12 Hours/24 HoursAuto Update (Menu 9.4.5)Select On to set the phone to automaticallyupdate the time and date according to thecurrent local time zone.CallMenu 9.5Call Forwarding (Menu 9.5.1)When this network service is activated, youcan direct your incoming calls to anothernumber, for example, to your voice mailboxnumber. For details, contact your serviceprovider. Select one of the divert options, forexample, select If busy to divert voice callswhen your number is busy or when you rejectincoming calls. The following options are available: ]All Voice Calls: Diverts voice callsunconditionally. ]If Busy: Diverts voice calls when the phoneis in use.]If No Answer: Diverts voice calls which youdo not answer.]If Out of Reach: Diverts voice calls whenthe phone is switched off or out of coverage.]All Data Calls: Diverts to a number with aPC connection unconditionally. ]All Fax Calls: Diverts to a number with afax connection unconditionally. ]Deactivate All: Cancels all call divertservice.Send My Number (Menu 9.5.2)This network service allows you to set yourphone number to be displayed On or hiddenOff from the person you are calling. You canselect Set by Network if you prefer to havedifferent settings for different serviceproviders.Auto Redial (Menu 9.5.3)Select On, your phone redials the numberyou're trying to call up to 10 times after youhear a quick, engaged signal. Press [END]to stop the call attempts.This feature attempts to redial numbers thatare engaged due to the wireless network.nNoteThere will be no alert indicating the call has beenconnected.CP250_Eng_0123 1/23/08 2:36 PM Page 58](https://usermanual.wiki/LG-Electronics-USA/CP250/User-Guide-908952-Page-48.png)
![59SettingsYou must stay on the line to hear when the call isconnected.Answer Mode (Menu 9.5.4)This allows you to determine how to answerthe phone.]Open Flip: When the phone rings, you cananswer a call simply by opening the flip.]Any Key: You can answer an incoming callby pressing any key, except the [END]key.]Send Key Only: You can only answer anincoming call by pressing the [SEND]key.Minute Minder (Menu 9.5.5)This option allows you to specify whether thephone will beep every minute during anoutgoing call to keep you informed of thelength of the call.Call Waiting (Menu 9.5.6)The network will notify you of a new incomingcall while you have a call in progress. SelectActivate to request the network to activatecall waiting, Deactivate to request thenetwork to deactivate call waiting, or ViewStatus, to check if the function is active or not.TTY (Menu 9.5.7)Allows you to attach a TTY device enabling youto communicate with parties also using a TTYdevice. A phone with TTY support is able to translatetyped characters to voice. Voice can also betranslated into characters and then displayedon the TTY.Send DTMF Tones (Menu 9.5.8)You can send the DTMF (dual tone multi-frequency) tones of the number on the displayduring a call.This option is helpful for entering a passwordor account number when you call anautomated system, like a banking service.Hearing Aid (Menu 9.5.9)If you select On, users having hearing aid withT-Coil will have better quality of sound. This T-Coil mode will remain On for all calls.CP250_Eng_0123 1/23/08 2:36 PM Page 59](https://usermanual.wiki/LG-Electronics-USA/CP250/User-Guide-908952-Page-49.png)
![60SettingsSecurityMenu 9.6Various codes and passwords are used toprotect the features and settings of yourphone. They are described in the followingsections.PIN Code Request (Menu 9.6.1)When the PIN code request feature is set to‘On’, you must enter your PIN each time youswitch the phone on. Consequently, any personwho does not have your PIN cannot use yourphone without your approval.nNoteBefore setting the PIN code request feature toOff, you must enter your PIN.The following [Options] are available:]On: You must enter the PIN each time thephone is switched on.]Off: The phone connects directly to thenetwork when you switch it on.Fixed Dial Number (Menu 9.6.2)This allows you to restrict your outgoing callsto selected phone numbers, if this function issupported by your SmartChip. The PIN2 code isrequired.The following [Options] are available:]On: You can make a call by only phonenumbers stored in the Number List. You mustenter your PIN2.]Off: You can call any number.]FDN List: You can view the number listsaved as fixed dial number. nNoteNot all SmartChips have a PIN2. If yourSmartChip does not, this menu option is notdisplayed.Change Codes (Menu 9.6.3)The Change codes feature allows you tochange your current password to a new one.You must enter the current password beforeyou can specify a new one.You can change the access codes for: SecurityCode, PIN1 Code, PIN2 CodenNotePIN: Personal Identification Number.CP250_Eng_0123 1/23/08 2:36 PM Page 60](https://usermanual.wiki/LG-Electronics-USA/CP250/User-Guide-908952-Page-50.png)
![61SettingsConnectionMenu 9.7GPRS Attach (Menu 9.7.1)If you select Power On and you are in anetwork that supports packet data, the phoneregisters to the GPRS network and sendingshort messages will be done via GPRS. Also,starting an active packet data connection, forexample, to send and receive e-mail, isquicker. If you select When Needed, thephone will use a packet data connection onlyif you start an application or action that needsit. The GPRS connection is closed after it is notused by any application.nNoteIf there is no GPRS coverage and you havechosen Power On, the phone will periodically tryto establish a packet data connection. Network Profile (Menu 9.7.2)This menu shows the Network Profile. You canregister, delete and edit by using the OptionMenu. However, you cannot delete or editdefault configurations provided by AT&T.Reset Network Profile(Menu 9.7.3)This allows Profile information to be restoredto original setting. Flight ModeMenu 9.8This allows you to use only the phone’sfeatures that do not require the use of thewireless network when you are in an airplaneor in places where the wireless network isprevented.If you set the flight mode on, the icon willbe displayed on the screen instead of thenetwork signal icon.]On: You cannot make (or receive) any calls,including emergency calls, or use otherfeatures that require network coverage.]Off: You can deactivate the flight mode andrestart your handset to access the network.CP250_Eng_0123 1/23/08 2:36 PM Page 61](https://usermanual.wiki/LG-Electronics-USA/CP250/User-Guide-908952-Page-51.png)
![63Q&APlease check to see if any problems you have encountered with the phone are described in thissection before taking the phone in for a service or calling a service engineer.QHow do I view the list of outgoing calls,incoming calls and missed calls?APress the key.QHow do I clear all call history?APress the left soft key [Menu] and then the, , [Option], key.QWhy is the connection inconsistent or notaudible in certain areas?AWhen frequency environment is unstable ina certain area, connection may beinconsistent and not audible. Relocate toanother area and try again.QWhy is the connection not consistentabruptly disconnects even whenestablished?AWhen frequency is unstable or weak or ifthere are too many users, connection may becut off even after it was established. Pleasetry again later or attempt after relocating toother areas.QWhy does the LCD not turn on?ARemove the battery and turn on the powerafter placing it back on. If there is nochange, fully charge the battery and tryagain.QWhy is there an echo when a connection ismade with certain telephones in a certainarea?AThis is called the ‘Echo Phenomenon’, whereit occurs if connection volume is too high orcaused by special properties (semi electronictelephone exchange) of the equipment onthe other end.QWhy does the phone heat up?AThe phone may get hot when there is a verylong call duration or when games are playedor even when surfing the Internet for a longtime. This has no effect upon the life of theproduct or performance.CP250_Eng_0123 1/23/08 2:36 PM Page 63](https://usermanual.wiki/LG-Electronics-USA/CP250/User-Guide-908952-Page-53.png)