LG Electronics USA D2343PB Part15 Subpart B-LCD Monitor User Manual BEJD2343PB 3
LG Electronics USA Part15 Subpart B-LCD Monitor BEJD2343PB 3
Contents
- 1. BEJD2343PB_User Manual 1
- 2. BEJD2343PB_User Manual 3
- 3. BEJD2343PB_User Manual 2
BEJD2343PB_User Manual 3
17
ENG
ENGLISH
CUSTOMIZING SETTINGS
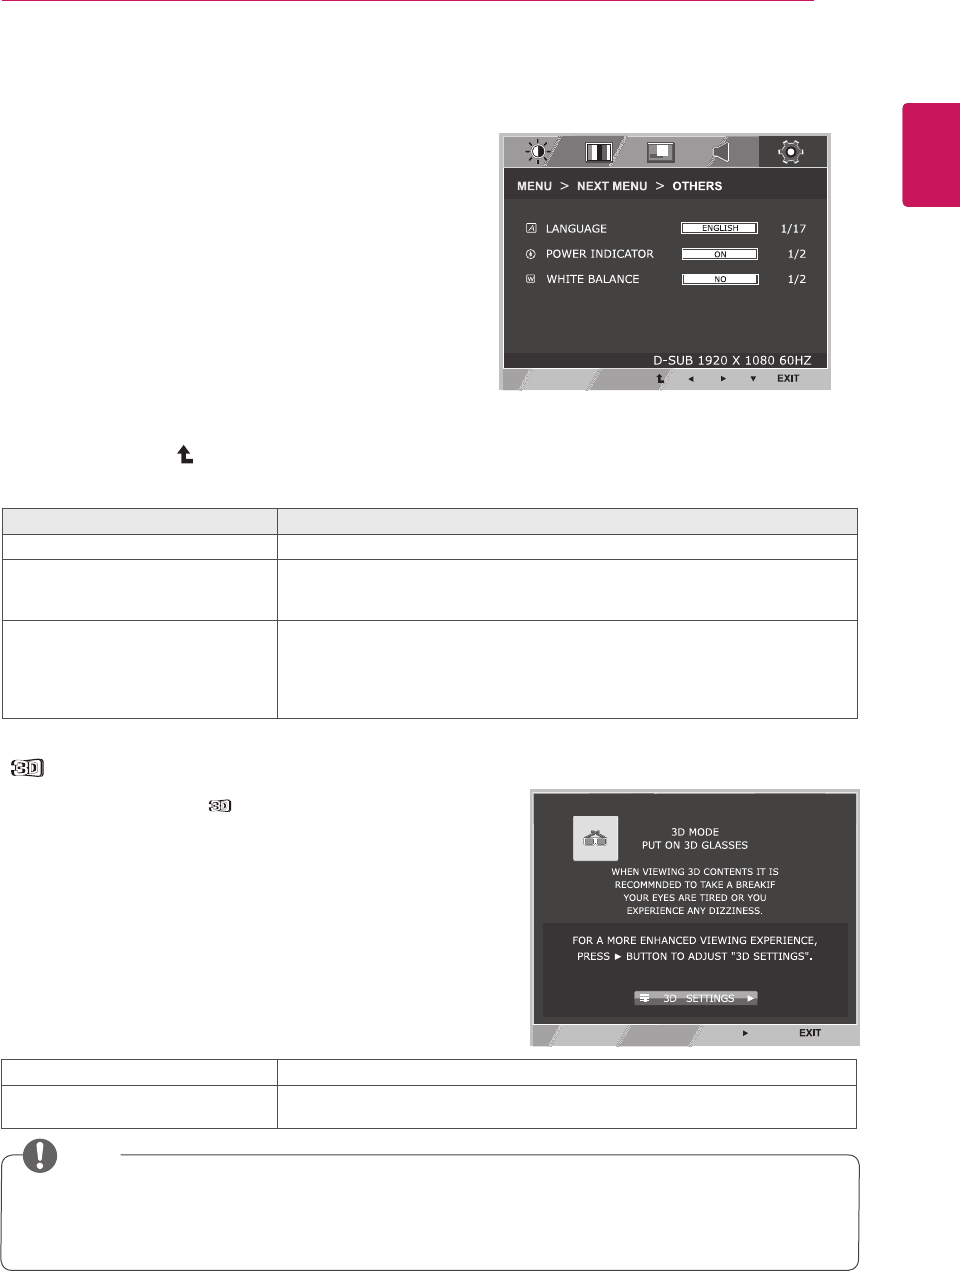
OTHERS
1 Press MENU button on the bottom of the Monitor set
to display the MENU OSD.
2 Select the "NEXT MENU" button to enter the more
option settings.
3 Select OTHERS by pressing the ► button.
4 Enter to OTHERS by pressing the ▼ button.
5 Set the options by pressing the ◄ or ► or ▼
buttons.
6 Select EXIT to leave the OSD menu.
To return to the upper menu or set other menu items,
use the up arrow ( ) button.
Each option is explained below.
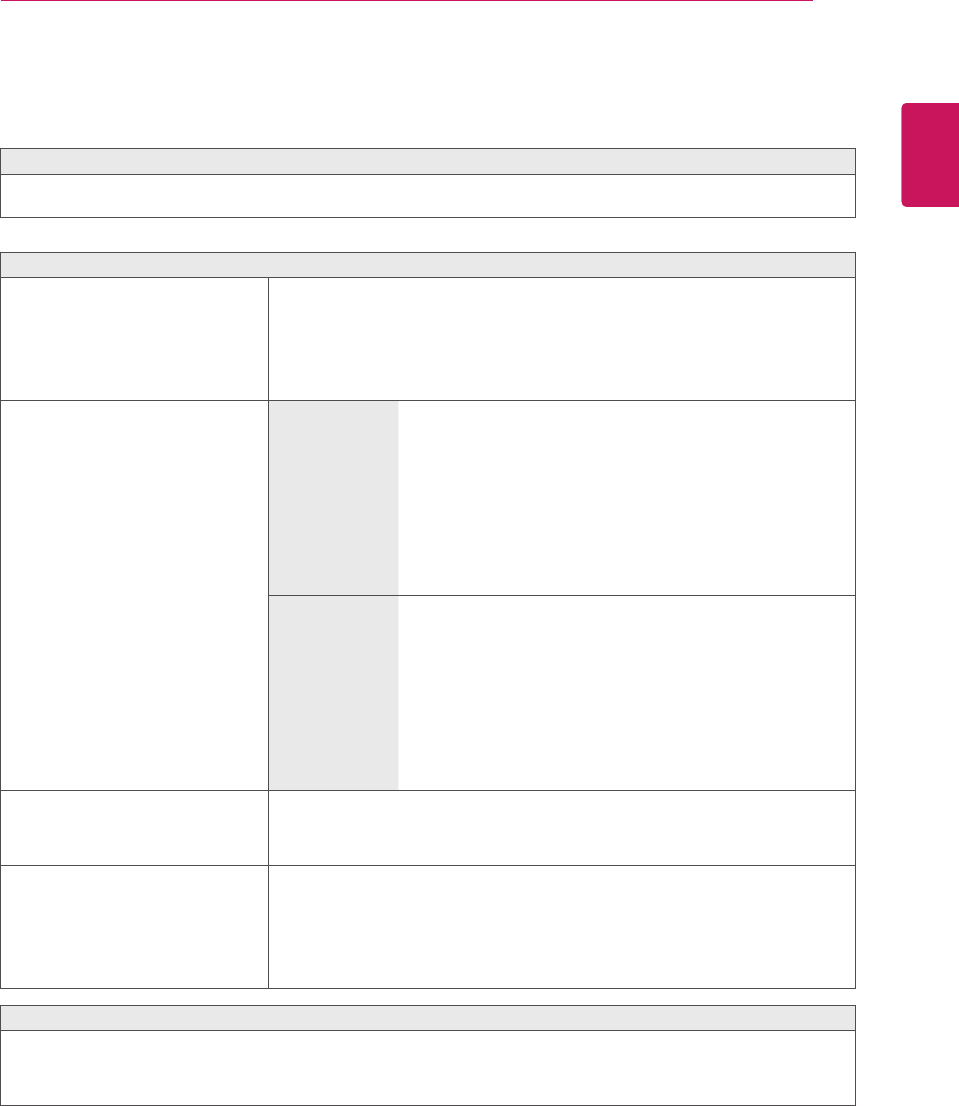
MENU > NEXT MENU > OTHERS Description
LANGUAGE To choose the language in which the control names are displayed.
POWER
INDICATOR
Use this function to set the power indicator on the bottom side of the monitor to
ON or OFF.If you set OFF, it will go off.
If you set ON at any time, the power indicator will automatically be turned on.
WHITE
BALANCE
If the output of the video card is different the required specifications,the color
level may deteriorate due to video signal distortion. Using this function, the
signal level is adjusted to fit into the standard output level of the video card in
order to provide the optimal image.Activate this function when white and black
colors are present in the screen.
ySet Media Player in “Full Screen” Mode to watch 3D movies.
yIt is recommended to select 1920x1080@60Hz for optimal 3D viewing.
yWhen the 3D mode is activated, the OSD size increases to 3D OSD.
NOTE
SETTINGS
1 To watch 3D, press the button at the bottom of the monitor.
2 To start 3D setting, press the ► button to go to the "3D
SETTINGS" menu.
3 Select EXIT to leave the OSD menu.
Each option is explained below.
3D Description
3D MODE Recognizes the input image automatically and displays 3D images on the
screen.
yThe white balance function is only available for analog input.
18
ENG
ENGLISH
CUSTOMIZING SETTINGS
FUNC.Settings
3D SETTINGS
1 To display the 3D OSD, press the FUNC. button at
the bottom of the monitor.
2 Press the ◄ , ► or ▼ button to change settings.
3 Select EXIT to leave the OSD menu.
To return to the upper menu or set other menu items,
use the up arrow ( ) button.
Each option is explained below.
FUNC. > 3D
SETTINGS
Description
OFF Displays the input data as it is.
2D → 3D A user can see 2D picture as 3D images.
3D COLOR EFFECT The colors suitable for 3D pictures are applied.
3D DEPTH Adjusts the stereoscopic effect of the 3D image converted from a 2D
image.
3D VIEWPOINT Adjusts the perspective of 3D picture.
SIDE BY SIDE
TOP & BOTTOM
SIDE BY SIDE: An image signal transmitted in side-by-side format is processed for viewing in 3D.
TOP & BOTTOM: An image signal transmitted in up-and-down format is processed for viewing in
3D.
3D COLOR EFFECT The colors suitable for 3D picture are applied
3D → 2D Converts 3D images into 2D images.
3D L/R CHANGE The L/R picture is switched. Select a screen with better 3D display
quality.
R-L The right output of the 3D image is displayed before the left.
L-R The left output of the 3D image is displayed before the right.
y3D Mode.
SIDE BY SIDE TOP & BOTTOM
ySelect the appropriate format according to the 3D input signal.
yIf the 3D option selected is incorrect, images may not be displayed properly.
yTo watch 3D images, select 3D mode.
yIf 3D is converted to 2D for some content, the left or right image may be truncated, depending on
the content.
CAUTION
NOTE
yThe [2D → 3D] mode is available for all input modes.
yWhen input is changed, 3D mode is automatically turned off.
ySome menus may not work while watching 3D video.
19
ENG
ENGLISH
CUSTOMIZING SETTINGS
Setting Dual Play
1 Connect a game console to the monitor.
2 To start Dual Play mode, press the FUNC. button at the bottom of the monitor.
3 Select the screen split mode supported by the game.
4 Put on the Dual Play glasses to enjoy game.
y Certain images may appear overlapped during playing game. It is recommended to play right in front
of the screen.
y When the game console has a low resolution, the picture quality may not be good in Dual Play mode.
y Please note that Dual Play glasses are different from regular 3D glasses. There is the mark "Dual
Play" written on the Dual Play glasses.
CAUTION
NOTE
yWhat is Dual Play mode?
When playing a 1:1 battle game with a game console, such as Playstation,XBox and Wii,users used
to play the game with the screen divided top and bottom or side by side.
With Dual Play mode, each player can enjoy the game with a full screen.
y To play in Dual Play mode, the Dual Play glasses (type A and B) are required.
y The Dual Play glasses are not provided with the monitor. Please purchase them separately.
y The game should support the screen split mode to be played in Dual Play mode.
(Operation type of Dual Play: Side by Side / Top & Bottom)
y If the screen does not look clear enough with the Dual Play glasses on, change the glasses with
each other.
yYou should choose proper glasses according to the operation type of Dual Play.
20
ENG
ENGLISH
CUSTOMIZING SETTINGS
Each option is explained below.
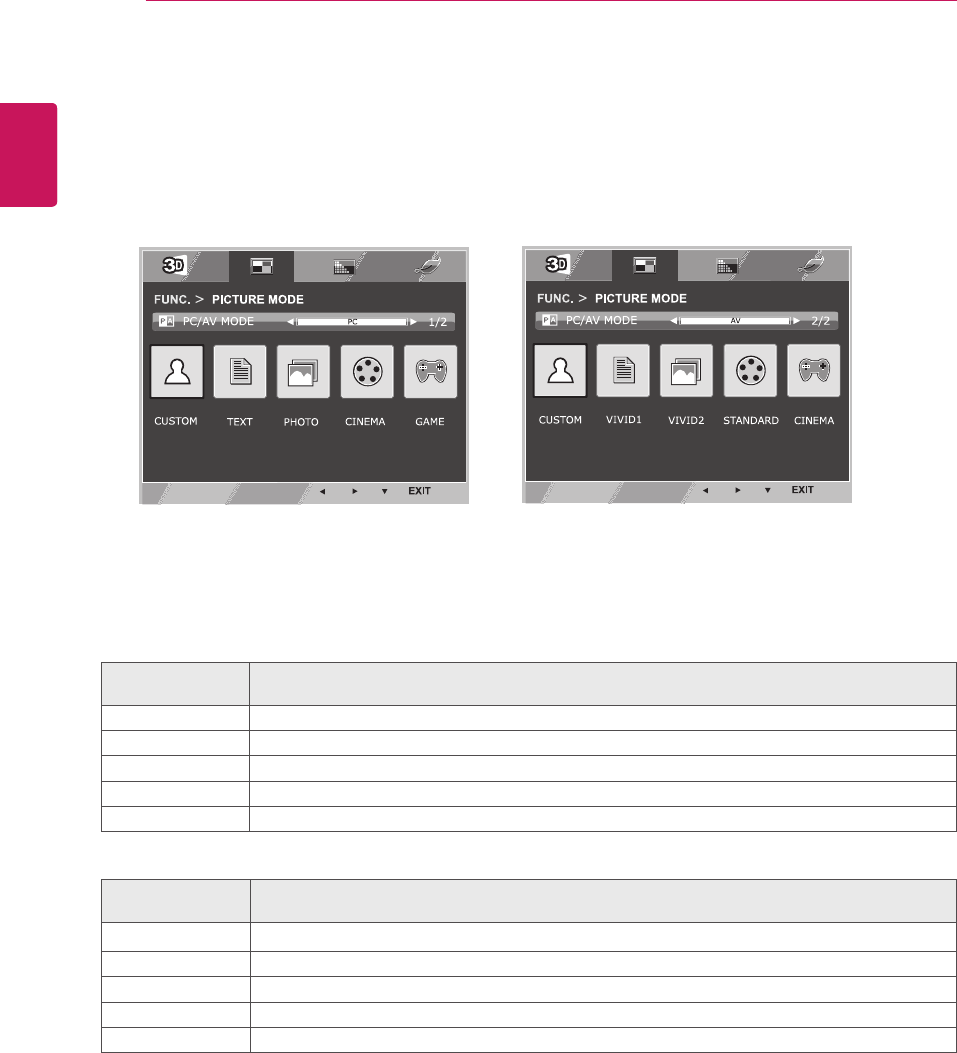
PICTURE MODE
1 To display the PICTURE MODE OSD, press the FUNC. button at the bottom of the monitor.
2 Set the options by pressing the ◄ or ► or ▼ buttons.
3 Select EXIT to leave the OSD menu.
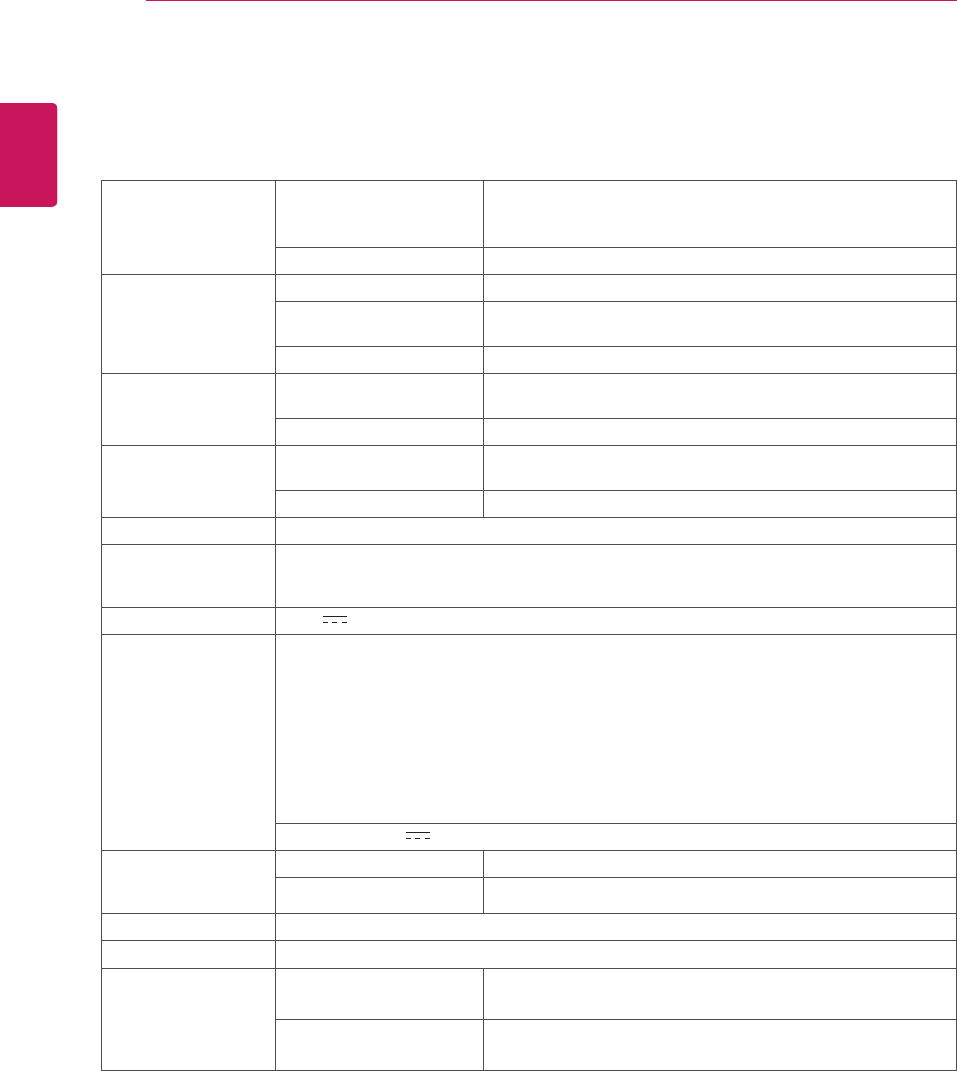
FUNC. > PICTURE
MODE> PC MODE
Description
CUSTOM The user can adjust each element. The color mode of the main menu can be adjusted.
TEXT The screen can be optimized for document processing.
PHOTO The screen can be optimized to improve the visual effect of an image.
CINEMA The screen can be optimized to improve the visual effect of a video.
GAME The screen can be optimized for game play.
FUNC. > PICTURE
MODE> AV MODE
Description
CUSTOM A user can adjust each element. The color mode of main menu can be adjusted.
VIVID 1 The screen can be optimized for vivid visual effects.
VIVID 2 The screen can be optimized for more vivid visual effects.
STANDARD The screen can be optimized to display normal picture quality.
CINEMA The screen can be optimized to improve the visual effect of a video.
yOptions in PC/AV MODE are available only with HDMI input.
< PC mode: D-Sub, DVI-D, HDMI input > < AV mode: HDMI input >
21
ENG
ENGLISH
CUSTOMIZING SETTINGS
SUPER+RESOLUTION
1 To display
SUPER+RESOLUTION
OSD, press the
FUNC. button on the bottom of the
monitor
.
2 Press ◄ , ► or ▼ button to set up options.
3 Select EXIT to leave the OSD menu.
Each option is explained below.
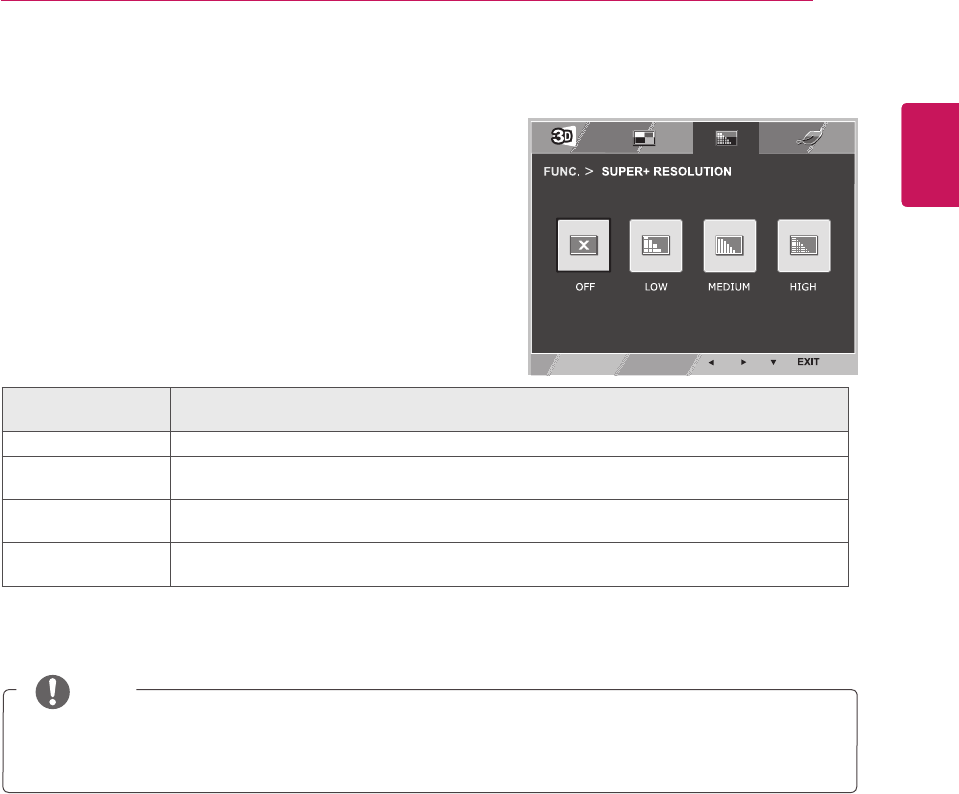
FUNC. > SUPER+
RESOLUTION
Description
OFF Select this option for everyday viewing. SUPER+RESOLUTION is turned off in this mode.
LOW The optimized picture quality is displayed when a user wants smooth and natural images. It is
effective for slow-moving pictures or still images.
MEDIUM The optimized picture quality is displayed when a user wants images between low and high
modes for comfortable viewing. It is effective for UCC or SD video.
HIGH Optimized picture quality is displayed when a user wants crystal clear images. It is effective for
high quality video or game.
NOTE
ySelect SR (SUPER+ RESOLUTION) mode to display a blurred image as a sharp image. (Please
note there may be a noise depending on the SR mode.)
22
ENG
ENGLISH
CUSTOMIZING SETTINGS
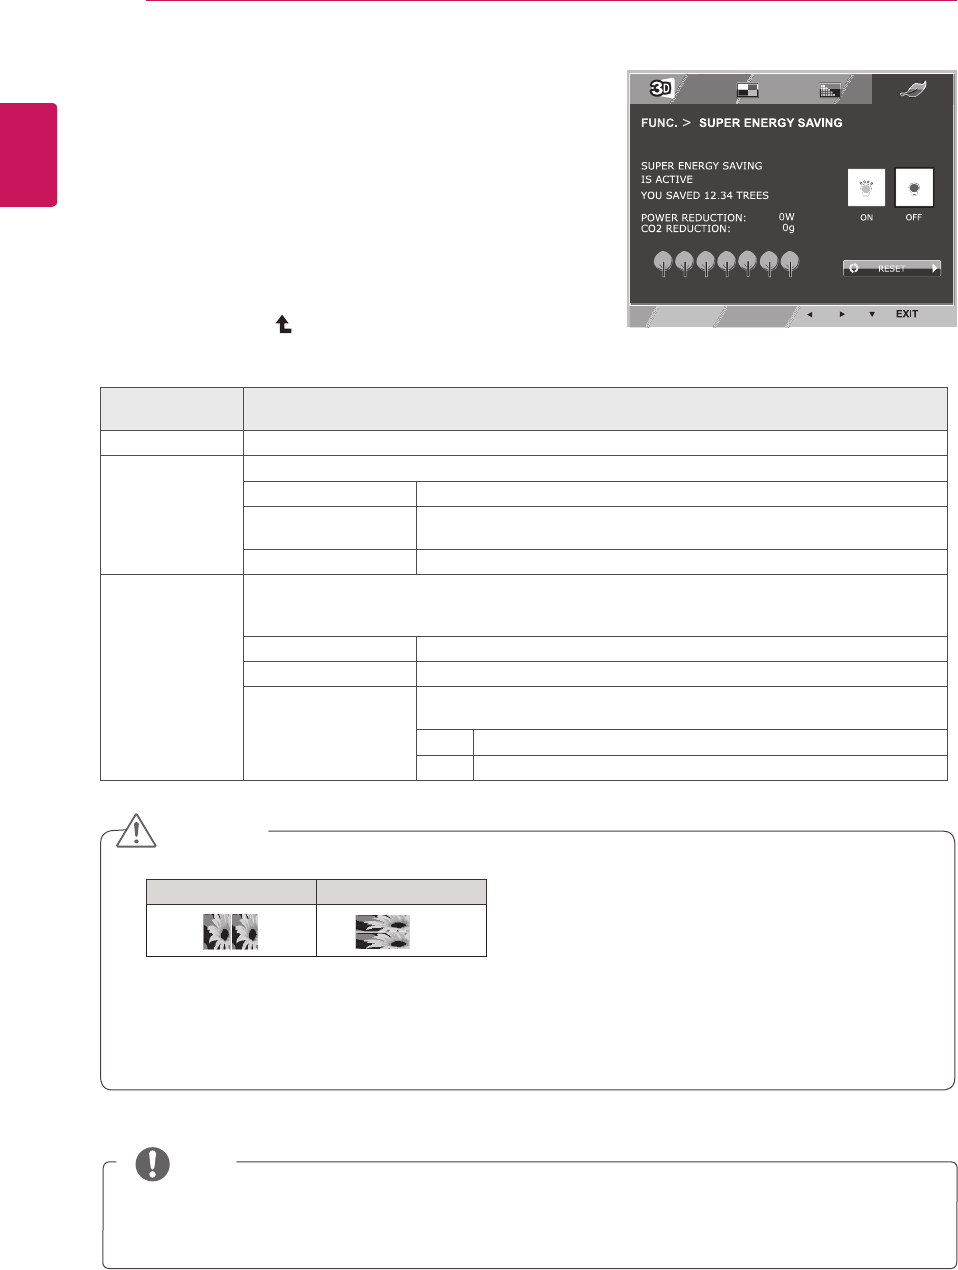
SUPER ENERGY SAVING
1 To display SUPER ENERGY SAVING OSD, press the
FUNC. button at the bottom of the monitor.
2 Set the options by pressing the ◄ or ► or ▼ buttons.
3 Select EXIT to leave the OSD menu.
Each option is explained below.
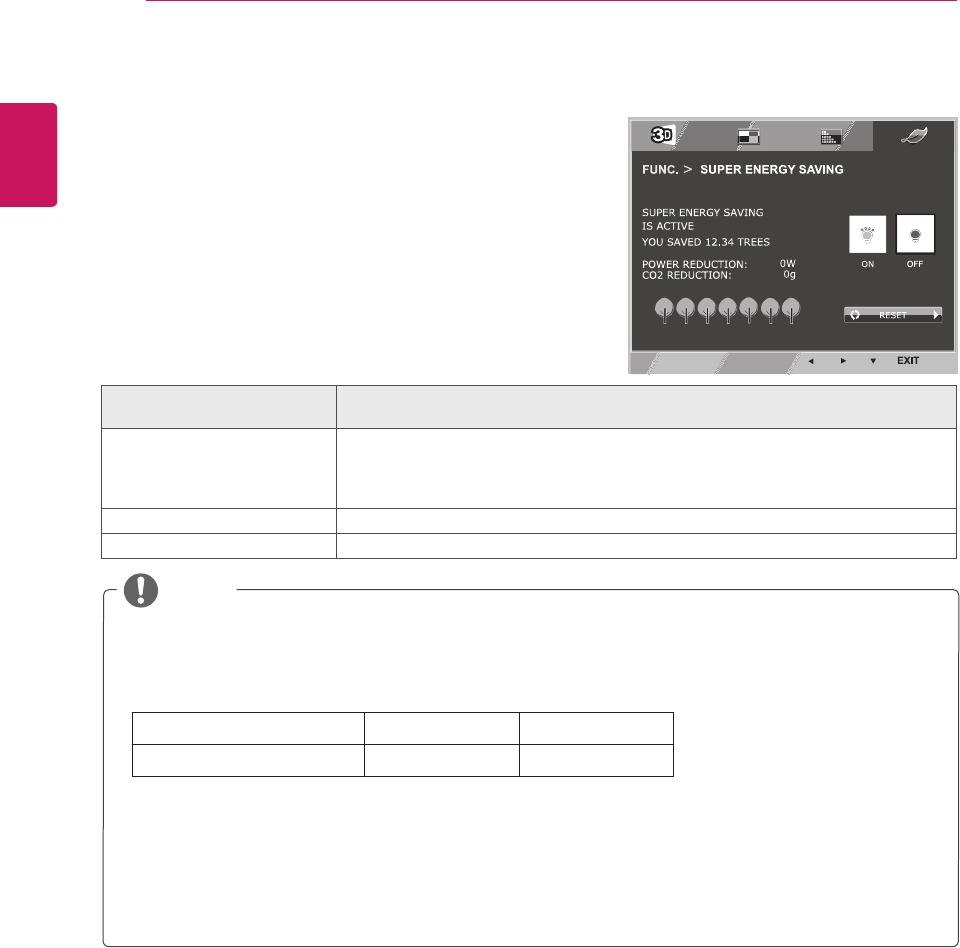
FUNC. >SUPER ENERGY
SAVING
Description
ON
The SUPER ENERGY SAVING function is used to save energy to the maximum extent
while using the monitor.
When the SUPER ENERGY SAVING function is turned on, you can save as much energy
as Super Energy Saving efficiency allows.
OFF Disables the SUPER ENERGY SAVING function.
RESET Resets the values of total energy consumption reduction and CO2 emission reduction.
yPOWER REDUCTION: Total amount of reduced energy consumption.
yCO2 REDUCTION: Total amount of reduced CO2.
yEnergy saving data (W/h)
584 mm (23 inch) 686 mm (27 inch)
SUPER ENERGY SAVING 7 W/h 9 W/h
yThe energy-saving data may vary depending on panel or panel supplier.
yLG measures the data by using a "Broadcast Video Signal".
(Broadcasting video included: IEC 62087)
yThe Super Energy Saving data indicates how much energy can be saved when the Super Energy
Saving function is used.
NOTE
23
ENG
ENGLISH
TROUBLESHOOTING
TROUBLESHOOTING
Check the following before calling for service.
No image appears
Is the power cord of the display
connected?
yCheck and see if the power cord is connected properly to the power
outlet.
Is the power indicator light on?
yPress the Power button.
Is the power on and the power
indicator Red?
yAdjust the brightness and the contrast.
Is the power indicator flickering?
yIf the display is in power saving mode, try moving the mouse or
pressing any key on the keyboard to bring up the screen.
yTry to turn on the PC.
Do you see an "OUT OF RANGE"
message on the screen?
yThis message appears when the signal from the PC (video card) is
out of horizontal or vertical frequency range of the display. See the
'Specifications' section of this manual and configure your display
again.
Do you see a "NO SIGNAL"
message on the screen?
yWhen the monitor is on "No-Signal" in 5 minutes, the monitor goes to
DPM mode.
Do you see a "OSD LOCKED" message on the screen?
Do you see “OSD LOCKED” when
you push MENU button?
yYou can secure the current control settings, so that they cannot be
inadvertently changed. You can unlock the OSD controls at any time
by pushing the MENU button for several seconds: the message “OSD
UNLOCKED” will appear.
Display image is incorrect
Display Position is incorrect.
yPress the AUTO button to automatically adjust your display image to
the ideal setting.
On the screen background, vertical
bars or stripes are visible.
yPress the AUTO button to automatically adjust your display image to
the ideal setting.
Any horizontal noise appearing in
any image or characters are not
clearly portrayed.
yPress the AUTO button to automatically adjust your display image to
the ideal setting.
yCheck Control Panel ► Display ► Settings and adjust the display
to the recommended resolution or adjust the display image to the ideal
setting. Set the color setting higher than 24 bits (true color).
24
ENG
ENGLISH
TROUBLESHOOTING
Display image is incorrect
The screen color is mono or
abnormal.
yCheck if the signal cable is properly connected and use a screwdriver
to fasten if necessary.
yMake sure the video card is properly inserted in the slot.
ySet the color setting higher than 24 bits (true color) at Control Panel
► Settings.
The screen blinks.
yCheck if the screen is set to interlace mode and if yes, change it to the
recommend resolution.
Do you see an "Unrecognized monitor, Plug&Play (VESA DDC) monitor found" message?
Have you installed the display
driver?
yBe sure to install the display driver from the display driver CD (or
diskette) that comes with your display. Or, you can also download the
driver from our web site: http://www.lg.com.
yMake sure to check if the video card supports Plug&Play function.
yCheck Control Panel ► Display ► Settings and see if the frequency or the resolution were
changed. If yes, readjust the video card to the recommend resolution.
yIf the recommended resolution (optimal resolution) is not selected, letters may be blurred and the
screen may be dimmed, truncated or biased. Make sure to select the recommend resolution.
yThe setting method can differ by computer and O/S (Operation System), and resolution mentioned
above may not be supported by the video card performance. In this case, please ask to the computer
or the video card manufacturer.
CAUTION
25
ENG
ENGLISH
TROUBLESHOOTING
TROUBLESHOOTING WHEN USING 3D MODE
I can see a swirling oil-like pattern on the monitor when the monitor is turned off.
yThis is caused by the interference of external light in the air layer between the LCD surface and 3D filter.
The pattern becomes almost invisible when you turn on the power again.
I cannot see 3D image properly
If you are not using the glasses
provided with the monitor,
yWhen you view 3D images with this monitor, it is very important
that you use the glasses provided with the monitor. The glasses are
designed to compensate optically for the 3D filter attached to the
surface of the monitor. If you wear third-party glasses, you may not
see 3D images properly on the monitor.
If you view 3D images outside the
optimal viewing angle or distance,
D2343P
yThe optimal viewing angle of the monitor is 12° in
vertical direction while 130° in horizontal direction;
the monitor 3D viewing range is between 55 cm to
400 cm from the monitor.
When you view 3D images outside the optimal
viewing angle or the monitor 3D viewing range, the
images may look overlapped or not be displayed
properly in 3D.
D2743P
yThe optimal viewing angle of the monitor is 12° in
vertical direction while 120° in horizontal direction;
the monitor 3D viewing range is between 55 cm to
500 cm from the monitor.
When you view 3D images outside the optimal
viewing angle or the monitor 3D viewing range, the
images may look overlapped or not be displayed
properly in 3D.
If you have not set the resolution,
yPlease set the resolution of the monitor to the maximum (1920 x
1080 @ 60 Hz) in the display settings. The 3D software may not
work properly if the resolution is not set to the maximum.
If the images that your left and right
eyes see are reversed,
yThe stripe images in the odd-numbered lines are the ones that your
right eye sees on the monitor. If you only see the stripe images, not
3D images, set the images for your right eye to be displayed in the
odd-numbered lines by changing the player or viewer option of the
3D software.
I cannot see 3D but only 2D images.
yThis monitor works both in 2D and 3D mode. You can view a video in 3D if it is made in 3D. If you try
to view 2D images in 3D, they might not be displayed properly or you may experience poor picture
quality.
26
ENG
ENGLISH
SPECIFICATIONS
SPECIFICATIONS
Display Screen Type 58.4 cm (23 inch) Flat Panel Active matrix-TFT LCDAnti-
Glare coating
Visible diagonal size: 58.4 cm
Pixel Pitch 0.265 mm x 0.265 mm (Pixel Pitch)
Sync Input Horizontal Frequency 30 kHz to 83 kHz (Automatic)
Vertical Frequency 56Hz to 75Hz (D-SUB, DVI-D)
56Hz to 61Hz (HDMI)
Input Form Separate Sync. Digital
Video Input Signal Input 15 pin D-SUB Connector /DVI-D Connector (Digital)
HDMI Connector
Input Form RGB Analog (0.7 Vp-p/ 75 ohm), Digital
Resolution Max D-SUB(Analog) : 1920 x 1080 @ 60 Hz
DVI / HDMI (Digital) : 1920 x 1080 @ 60 Hz
Recommend VESA 1920 x 1080 @ 60 Hz
Plug & Play DDC 2B(Analog,Digital,HDMI)
Power
Consumption
On Mode : 25 W(Typ.)
Sleep Mode ≤ 0.5 W
Off Mode ≤ 0.5 W
Power Input 19 V 1.6 A
AC-DC Adapter
Type ADS-40SG-19-3 19032G, manufactured by SHENZHEN HONOR ELECTRONIC
or Type ADS-40FSG-19 19032GPG-1, manufactured by SHENZHEN HONOR ELECTRONIC
or Type ADS-40FSG-19 19032GPBR-1, manufactured by SHENZHEN HONOR ELECTRONIC
or Type ADS-40FSG-19 19032GPI-1, manufactured by SHENZHEN HONOR ELECTRONIC
or Type ADS-40FSG-19 19032GPCU-1, manufactured by SHENZHEN HONOR ELECTRONIC
or Type LCAP21A, manufactured by LIEN CHANG ELECTRONIC ENTERPRISE
or Type LCAP26A-A, manufactured by LIEN CHANG ELECTRONIC ENTERPRISE
or Type LCAP26A-E, manufactured by LIEN CHANG ELECTRONIC ENTERPRISE
or Type LCAP26A-I, manufactured by LIEN CHANG ELECTRONIC ENTERPRISE
or Type LCAP26A-B, manufactured by LIEN CHANG ELECTRONIC ENTERPRISE
OUTPUT: 19 V 1.7 A
Dimensions
(Width x Height x
Depth)
With Stand 54.4 cm x 40.6 cm x 18.1 cm
Without Stand 54.4 cm x 33.2 cm x 5.5 cm
Weight 3.2 kg
Tilt Range -5° to 20°
Environmental
conditions
Operating Temperature
Operating Humidity
10°C to 35 °C
10 % to 80 %
Storage Temperature
Storage Humidity
-20°C to 60 °C
5 % to 90 % non-Condensing
Product specifications shown above may be changed without prior notice due to upgrade of product
functions.
D2343P
27
ENG
ENGLISH
SPECIFICATIONS
Display Screen Type 68.6 cm (27 inch) Flat Panel Active matrix-TFT LCDAnti-
Glare coating
Visible diagonal size: 68.6 cm
Pixel Pitch 0.311 mm x 0.311 mm (Pixel Pitch)
Sync Input Horizontal Frequency 30 kHz to 83 kHz (Automatic)
Vertical Frequency 56Hz to 75Hz (D-SUB, DVI-D)
56Hz to 61Hz (HDMI)
Input Form Separate Sync. Digital
Video Input Signal Input 15 pin D-SUB Connector /DVI-D Connector (Digital)
HDMI Connector
Input Form RGB Analog (0.7 Vp-p/ 75 ohm), Digital
Resolution Max D-SUB(Analog) : 1920 x 1080 @ 60 Hz
DVI / HDMI (Digital) : 1920 x 1080 @ 60 Hz
Recommend VESA 1920 x 1080 @ 60 Hz
Plug & Play DDC 2B(Analog,Digital,HDMI)
Power
Consumption
On Mode : 27 W(Typ.)
Sleep Mode ≤ 0.5 W
Off Mode ≤ 0.5 W
Power Input 19 V 1.6 A
AC-DC Adapter
Type ADS-40SG-19-3 19032G, manufactured by SHENZHEN HONOR ELECTRONIC
or Type ADS-40FSG-19 19032GPG-1, manufactured by SHENZHEN HONOR ELECTRONIC
or Type ADS-40FSG-19 19032GPBR-1, manufactured by SHENZHEN HONOR ELECTRONIC
or Type ADS-40FSG-19 19032GPI-1, manufactured by SHENZHEN HONOR ELECTRONIC
or Type ADS-40FSG-19 19032GPCU-1, manufactured by SHENZHEN HONOR ELECTRONIC
or Type LCAP21A, manufactured by LIEN CHANG ELECTRONIC ENTERPRISE
or Type LCAP26A-A, manufactured by LIEN CHANG ELECTRONIC ENTERPRISE
or Type LCAP26A-E, manufactured by LIEN CHANG ELECTRONIC ENTERPRISE
or Type LCAP26A-I, manufactured by LIEN CHANG ELECTRONIC ENTERPRISE
or Type LCAP26A-B, manufactured by LIEN CHANG ELECTRONIC ENTERPRISE
OUTPUT: 19 V 1.7 A
Dimensions
(Width x Height x
Depth)
With Stand 64.2 cm x 45.9 cm x 20.3 cm
Without Stand 64.2 cm x 39.0 cm x 4.7 cm
Weight 4.8 kg
Tilt Range -5° to 20°
Environmental
conditions
Operating Temperature
Operating Humidity
10°C to 35 °C
10 % to 80 %
Storage Temperature
Storage Humidity
-20°C to 60 °C
5 % to 90 % non-Condensing
Product specifications shown above may be changed without prior notice due to upgrade of product
functions.
SPECIFICATIONS
D2743P
28
ENG
ENGLISH
SPECIFICATIONS
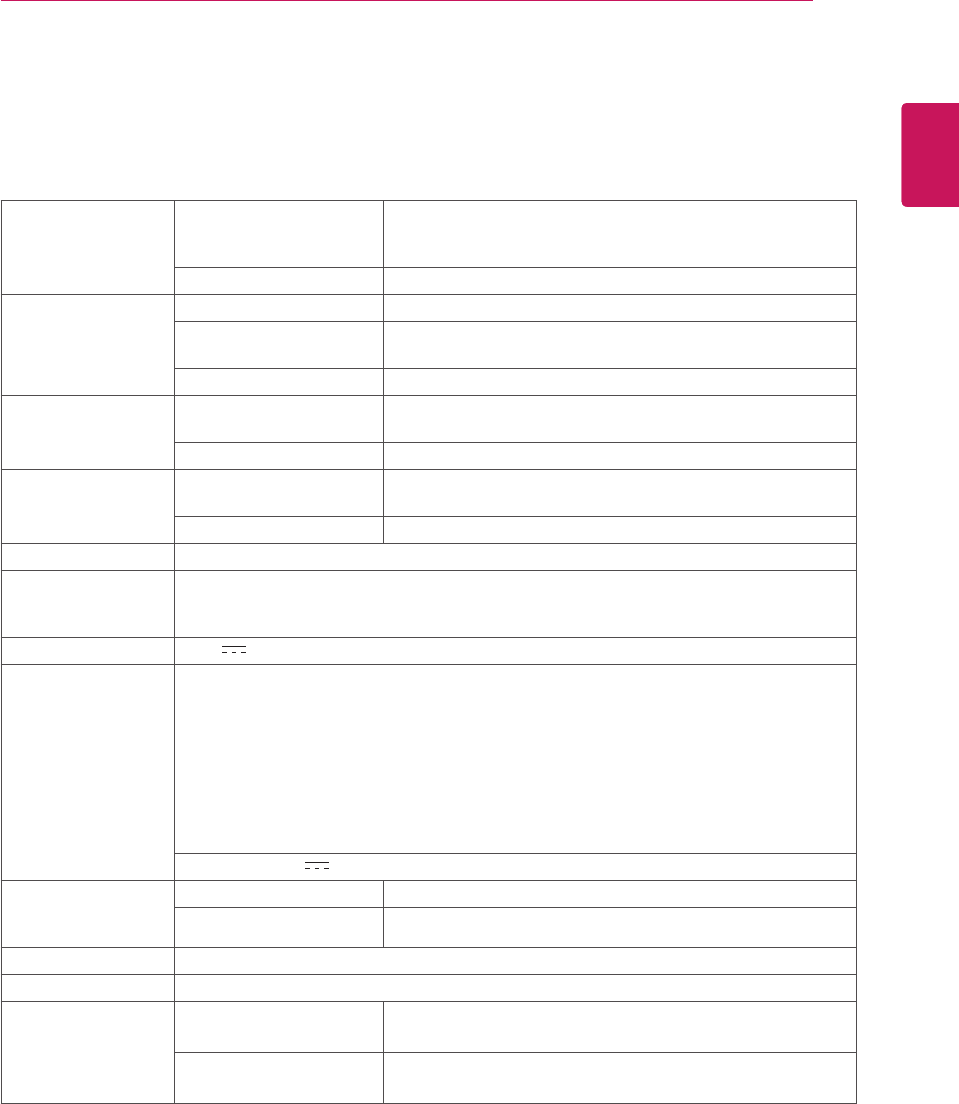
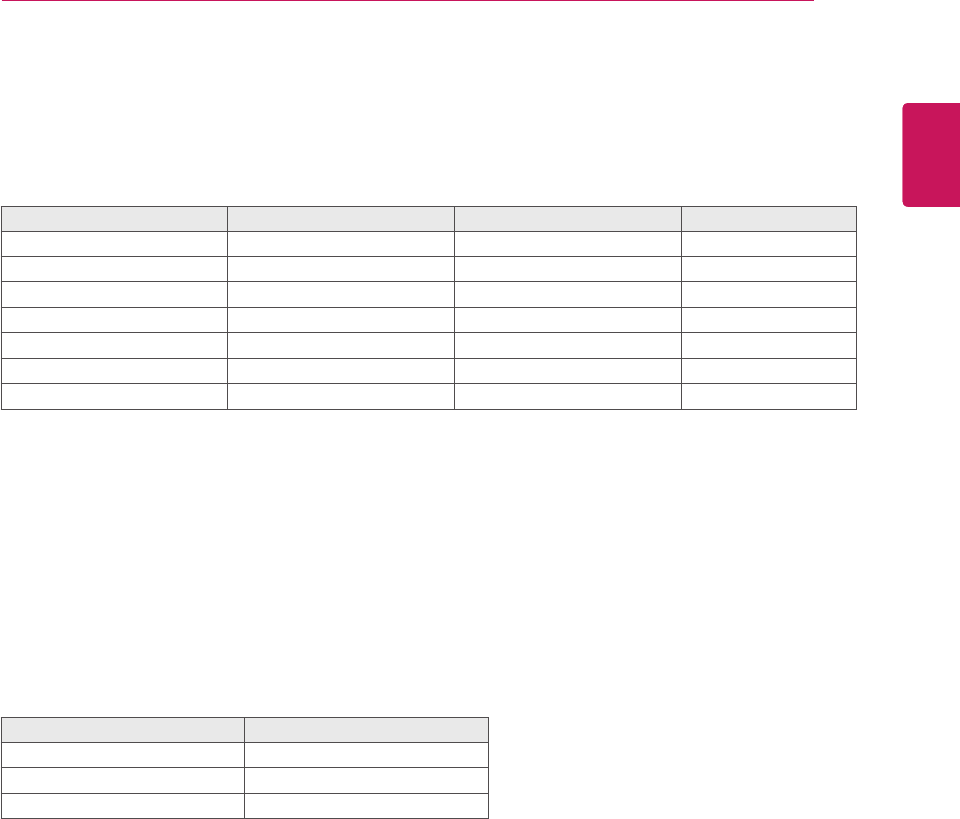
Preset Modes (Resolution)
Display Modes (Resolution) Horizontal
Frequency(kHz)
Vertical
Frequency(Hz) Polarity(H/V) Remark
720 x 400 31.468 70 -/+ *
640 x 480 31.469 60 -/-
640 x 480 37.500 75 -/- *
800 x 600 37.879 60 +/+
800 x 600 46.875 75 +/+ *
1024 x 768 48.363 60 -/-
1024 x 768 60.023 75 +/+ *
1152 x 864 67.500 75 +/+ *
1280 x 1024 63.981 60 +/+
1280 x 1024 79.976 75 +/+ *
1680 x 1050 65.290 60 -/+
1920 x 1080 67.500 60 +/+ Recommend Mode
* HDMI PC mode not supported.
HDMI video 3D timing
Resolution Play Rate 3D Format
1920x1080p 59.94 Hz / 50 Hz Top & Bottom
Side by Side (half)
1280x720p 59.94 Hz / 50 Hz
Frame Packing
Top & Bottom
Side by Side (half)
1920x1080i 59.94 Hz / 50 Hz Side by Side (half)
1920x1080p 24 Hz / 30 Hz
Frame Packing
Top & Bottom
Side by Side (half)
CAUTION
y To play 3D videos in HDMI 3D Frame Packing, HDMI 3D Side by Side or HDMI 3D Top & Bottom,
the media content and player need to support these formats.
y The video input in HDMI 3D format is automatically converted into 3D video.
29
ENG
ENGLISH
SPECIFICATIONS
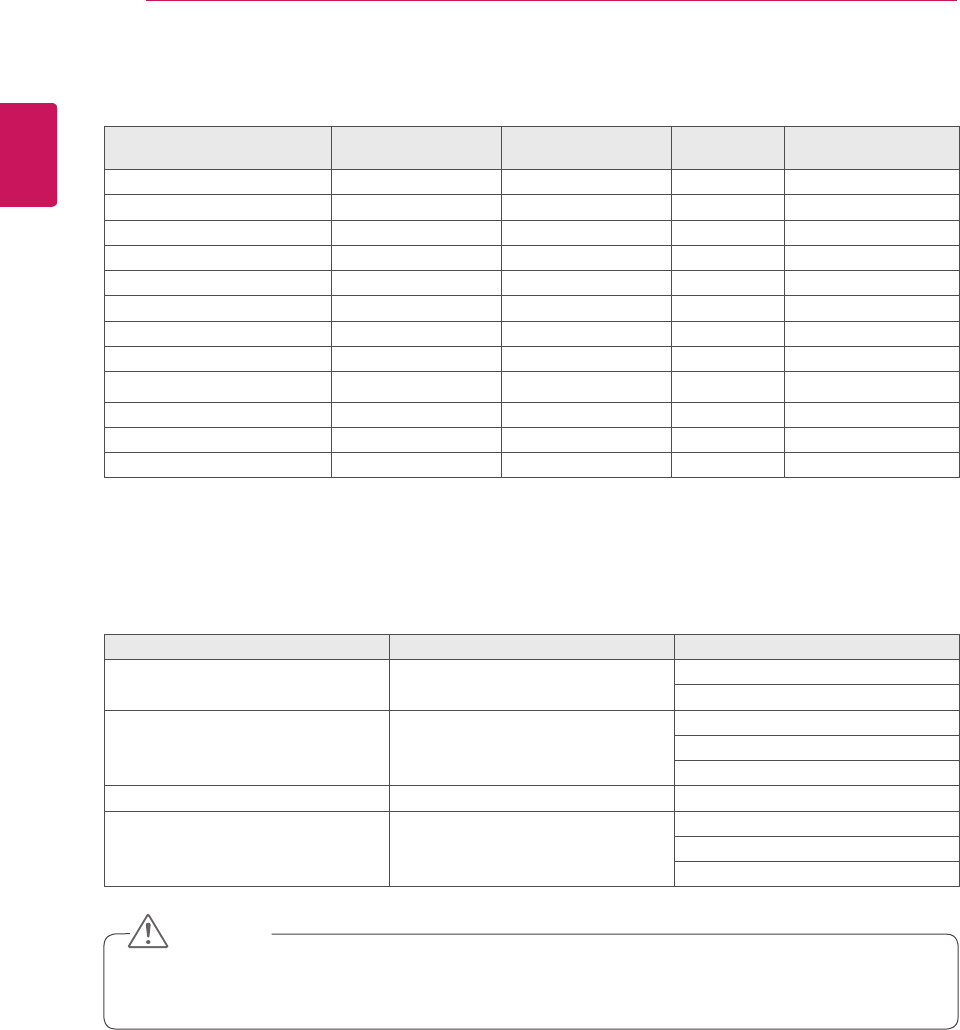
HDMI TIMING
Display Modes (Resolution) Horizontal Frequency(kHz) Vertical Frequency(Hz)
576P 31.25 50
720P 37.50 50
720P 45.00 60
1080i 28.12 50
1080i 33.75 60
1080P 56.25 50
1080P 67.50 60 Recommend Mode
Indicator
Mode LED Color
On Mode Red
Sleep Mode Blinking Red
Off Mode Off
30
ENG
ENGLISH
PRECAUTIONS TO TAKE WHEN VIEWING 3D IMAGES
If you view 3D images from too close a distance,
your eyesight may deteriorate.
If you view images in 3D for a long period of time,
you may feel dizzy or experience blurred vision.
If you are pregnant, elderly, have heart problems,
experience severe nausea or if you are under
the influence of alcohol, we recommend that you
do not view 3D images. This is because the 3D
images can cause disorientation and confusion.
Put fragile or breakable objects away when viewing
3D images. Such objects may break, or cause
personal injuries when you are startled by the
realistic 3D images.
Parents should prevent children who are 5 years
or younger from watching 3D images because
viewing 3D images can be harmful to vision
development.
Warning about photosensitivity seizures
Some users may have a seizure or other abnormal
reactions when they are exposed to a flashing light
or a particular pattern in a video game or film.
If anyone in your family has a history of epilepsy or
has ever experienced any kind of seizure, please
consult your doctor before viewing 3D images.
If you exhibit any of the symptoms listed below
when viewing 3D images, stop viewing immediately
and have a break.
yDizziness, blurred vision or facial tics,
involuntary movements, twitching, blackouts,
confusion and disorientation. Please consult
your doctor if such symptoms persist.
To prevent a photosensitivity seizure, please take
the following precautions.
yHave a 5- to 15-minute break every hour.
yIf your left and right eye sight is significantly
different, correct the sight difference first.
yYou should be able to see all of the screen at
eye level.
yIf you experience headaches, fatigue or
dizziness, stop viewing and have a rest.
yDo not view 3D images when you are tired or
ill.
Precautions to take when
viewing 3D images
Precautions to take when viewing
3D images
When using 3D Glasses
CAUTION
CAUTION
WARNING
Parents/guardians should monitor children’s viewing of 3D images because they may not be accustomed to
the 3D viewing experience and lack knowledge on how to handle potential risks.
yDo not use the 3D glasses as regular glasses, sunglasses, or goggles. This may cause your vision to
get worse.
yDo not keep the 3D glasses in an extremely hot or cold place. This may cause damage to the shape.
Do not use the 3D glasses if they are damaged because this may cause your vision to get worse or
dizziness.
yThe lenses of the 3D glasses (polarizing film) are easily scratched. Use a soft and clean cloth when
cleaning it. Do not use any chemicals.
SAFETY PRECAUTIONS
31
ENG
ENGLISH
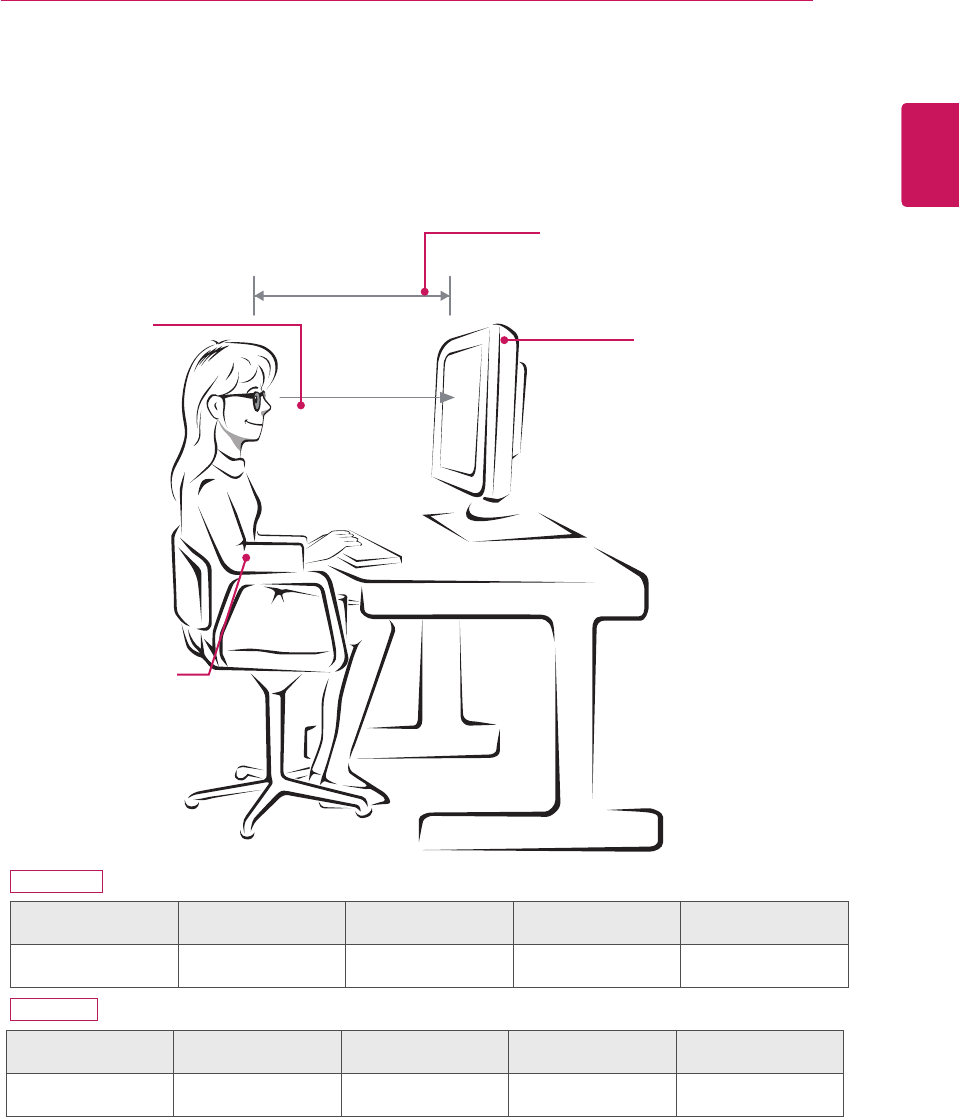
PROPER POSTURE
Proper posture for using the Monitor set.
PROPER POSTURE
Mode Size Monitor 3D viewing
range (L)
Monitor 3D optimal
viewing distance (L)
Optimal viewing
angle (D)
When viewing 3D
images 68.6 cm 55 cm to 500 cm 100 cm 12°
Precautions to take when viewing 3D images
yWear the 3D glasses provided with the Monitor set.
yWatch your posture.
yRemain at the optimal distance and angle when viewing 3D images.
(Viewing 3D images too closely may cause your vision to worsen, or you may experience dizziness.)
Adjust the
Monitor set and
your posture to
allow you to view
images at the
optimal viewing
angle (D).
Place your hands
gently on the
keyboard, keeping
your arms bent at
the elbows and
horizontally outright.
Adjust your distance from the Monitor
set to allow you to view images from
the optimal distance (L).
Adjust the location of the
Monitor set to avoid it
reflecting light.
D2343P
D2743P
Mode Size Monitor 3D viewing
range (L)
Monitor 3D optimal
viewing distance (L)
Optimal viewing
angle (D)
When viewing 3D
images 58.4 cm 55 cm to 400 cm 90 cm 12°
Make sure to read the Safety Precautions before
using the product.
Keep the Owner’s Manual (CD) in an accessible
place for future reference.
The model and serial number of the SET is
located on the back and one side of the SET.
Record it below should you ever need service. As an ENERGY STAR Partner LGE
U. S. A.,Inc. has determined that this
product meets the ENERGY STAR
guidelines for energy efficiency.
ENERGY STAR is a set of power-saving
guidelines issued by the U.S.Environmental
Protection Agency(EPA).
MODEL
SERIAL