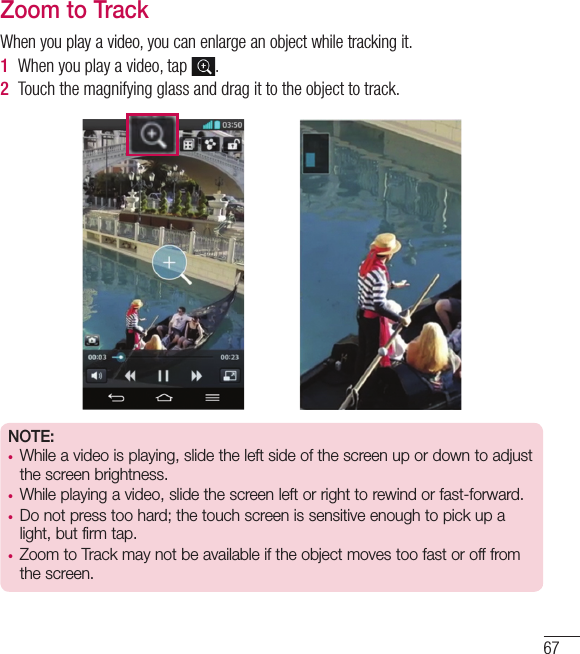
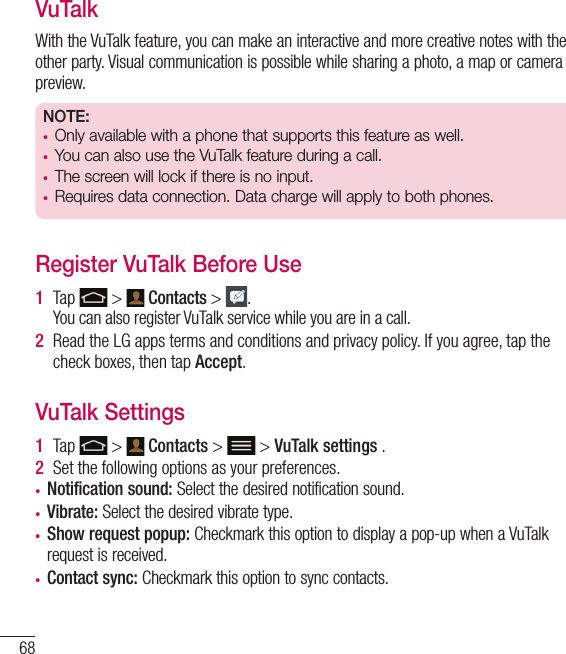
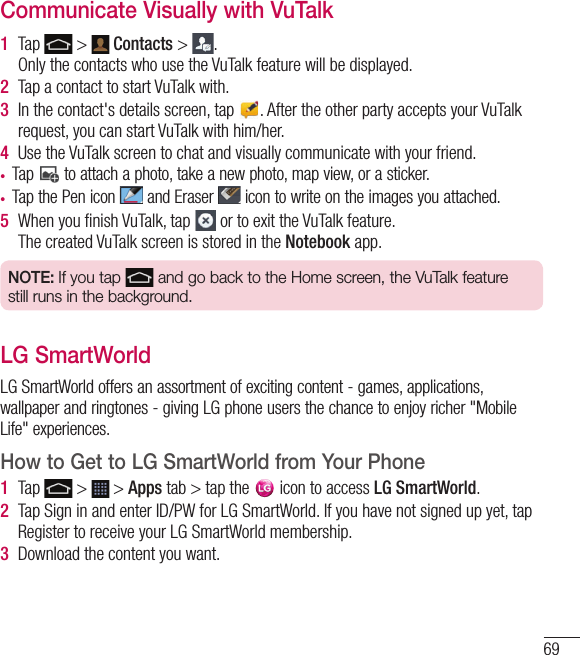
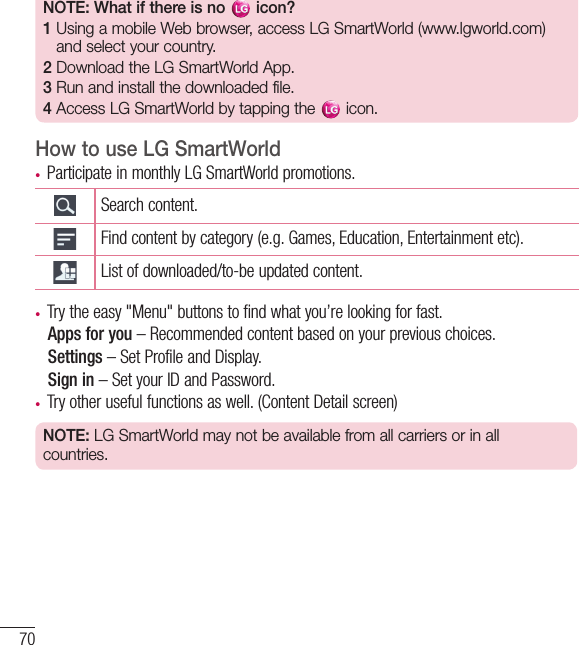
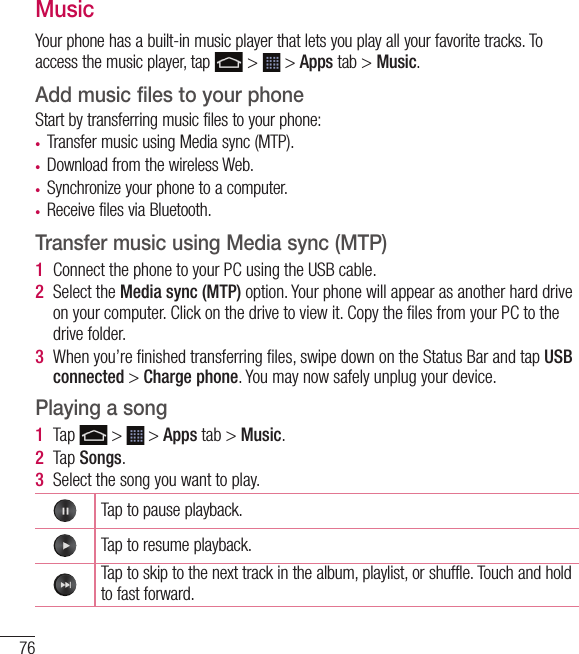
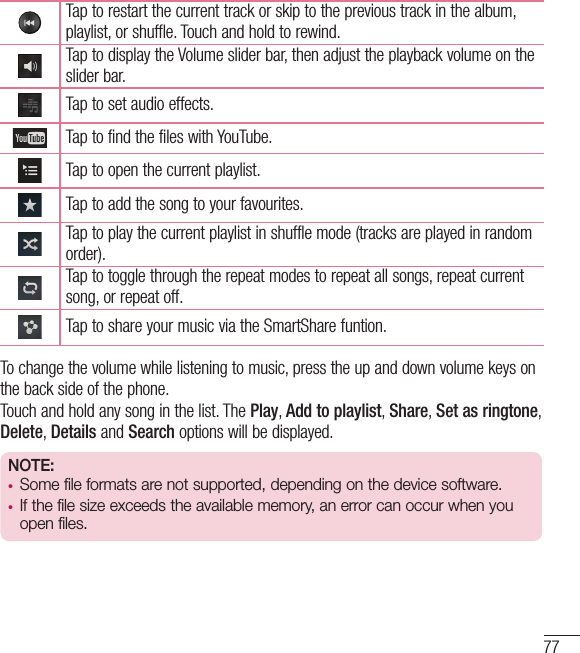
LG Electronics USA D956 Portable Handset w/ Multi-Band GSM/EDGE/WCDMA/LTE, BT, WLAN, RFID User Manual LG D956 ENG UG 131203 indd

LG Electronics MobileComm USA, Inc. Portable Handset w/ Multi-Band GSM/EDGE/WCDMA/LTE, BT, WLAN, RFID LG D956 ENG UG 131203 indd

Contents

Users Manual 2

63QuickTranslatorSimply aim the camera of your smart phone at the foreign sentence you want to understand. You can get the real-time translation anywhere and anytime.You can buy additional dictionaries for offline translation from the Google Play Store. Home language. Destination language. Translation of word. Translation of sentence. Translation of block. Settings.1  Tap   >   > Apps tab >   QuickTranslator.2  Tap Word, Line or Block.3  Tap and select the desired language.4  Hold the phone toward the subject you want to translate for a few seconds.NOTE: Only one dictionary is provided free of charge. Additional dictionaries must be purchased. Please select from the list below the dictionary you would like to install as your complimentary dictionary.NOTE: There may be a difference in the rate of recognization depending on the size, font, colour, brightness and angle of the letters that need to be translated.
64QSlideFrom any screen, bring up a notepad, calendar, and more as a window inside your screen. ORTap to exit the QSlide and return to full window.Tap to adjust transparency.Tap to end the QSlide.Tap to adjust the size.1  Touch and slide the status bar downwards > tap QSlide apps or while using applications that support QSlide, tap  . The function will be continuously displayed as a small window on your screen.2  You can make a call, browse the Web, or choose other phone options. You can also use and tap the screen under the small windows when the transparency bar is not full  .NOTE: The QSlide can support up to two windows at the same time.Function
65QTheaterQTheater allows you to see the slideshow for Photos, Videos, and YouTube.1  From the lock screen, hold the phone horizontally.2  Pull the screen with the thumb of both hands.3  You can see the slideshow for desired functions.NOTE: The screen lock mode should be set as Swipe before you use QTheater function. 1   Tap    >   Apps tab >   Settings > Display tab > Lock screen > Select screen lock. 2   Select Swipe.QuickRemoteQuickRemote turns your phone into a Universal Remote for your home TV, Set top box, audio system, DVD/Blu-ray players, air conditioner and projector.
66OR1  Touch and slide the status bar downwards and tap   > ADD REMOTE.OR Tap   >   > Apps tab > QuickRemote > tap  . 2  Select the type and brand of device, then follow the on-screen instructions to confi gure the device(s).3  Touch and slide the status bar downwards and use QuickRemote functions.Tap the Menu key  to select Magic Remote setting, Edit remote name, Learn remote, Move remote, Delete remote, Edit room, Settings and Help.NOTE: The QuickRemote operates the same way as an ordinary remote control infrared (IR) signals. Be careful not to cover the infrared sensor on the back of the phone when you use the QuickRemote function. This function may not be supported depending on the model, the manufacturer or service company.Function
67Zoom to TrackWhen you play a video, you can enlarge an object while tracking it.1  When you play a video, tap  .2  Touch the magnifying glass and drag it to the object to track.NOTE: •  While a video is playing, slide the left side of the screen up or down to adjust the screen brightness.•  While playing a video, slide the screen left or right to rewind or fast-forward.•  Do not press too hard; the touch screen is sensitive enough to pick up a light, but firm tap. •  Zoom to Track may not be available if the object moves too fast or off from the screen.
68VuTalkWith the VuTalk feature, you can make an interactive and more creative notes with the other party. Visual communication is possible while sharing a photo, a map or camera preview.NOTE: •  Only available with a phone that supports this feature as well.•  You can also use the VuTalk feature during a call.•  The screen will lock if there is no input. •  Requires data connection. Data charge will apply to both phones.Register VuTalk Before Use1  Tap   >   Contacts >  . You can also register VuTalk service while you are in a call.2  Read the LG apps terms and conditions and privacy policy. If you agree, tap the check boxes, then tap Accept.VuTalk Settings1  Tap   >   Contacts >   > VuTalk settings .2  Set the following options as your preferences.•  Notification sound: Select the desired notification sound.•  Vibrate: Select the desired vibrate type.•  Show request popup: Checkmark this option to display a pop-up when a VuTalk request is received. •  Contact sync: Checkmark this option to sync contacts.Function
69Communicate Visually with VuTalk 1  Tap   >   Contacts >  . Only the contacts who use the VuTalk feature will be displayed.2  Tap a contact to start VuTalk with.3  In the contact's details screen, tap  . After the other party accepts your VuTalk request, you can start VuTalk with him/her.4  Use the VuTalk screen to chat and visually communicate with your friend.•  Tap   to attach a photo, take a new photo, map view, or a sticker.•  Tap the Pen icon   and Eraser   icon to write on the images you attached.5  When you fi nish VuTalk, tap   or to exit the VuTalk feature.The created VuTalk screen is stored in the Notebook app.NOTE: If you tap  and go back to the Home screen, the VuTalk feature still runs in the background.LG SmartWorldLG SmartWorld offers an assortment of exciting content - games, applications, wallpaper and ringtones - giving LG phone users the chance to enjoy richer "Mobile Life" experiences.How to Get to LG SmartWorld from Your Phone1  Tap   >   > Apps tab > tap the   icon to access LG SmartWorld.2  Tap Sign in and enter ID/PW for LG SmartWorld. If you have not signed up yet, tap Register to receive your LG SmartWorld membership.3  Download the content you want.
70NOTE: What if there is no   icon? 1  Using a mobile Web browser, access LG SmartWorld (www.lgworld.com) and select your country. 2  Download the LG SmartWorld App. 3  Run and install the downloaded file.4  Access LG SmartWorld by tapping the   icon.How to use LG SmartWorld•  Participate in monthly LG SmartWorld promotions.Search content.Find content by category (e.g. Games, Education, Entertainment etc).List of downloaded/to-be updated content.•  Try the easy "Menu" buttons to find what you’re looking for fast.   Apps for you – Recommended content based on your previous choices.  Settings – Set Profile and Display.  Sign  in – Set your ID and Password.•  Try other useful functions as well. (Content Detail screen)NOTE: LG SmartWorld may not be available from all carriers or in all countries.Function
71On-Screen PhoneOn-Screen Phone allows you to view your mobile phone screen from a PC via a USB or Wi-Fi connection. You can also control your mobile phone from your PC, using the mouse or keyboard.On-Screen Phone iconsConnects your mobile phone to your PC, or disconnects it.Changes the On-Screen Phone preferences.Exits the On-Screen Phone programme.Maximises the On-Screen Phone window.Minimize the On-Screen Phone window.On-Screen Phone features•  Real-time transfer and control: displays and controls your mobile phone screen when connected to your PC.•  Mouse control: allows you to control your mobile phone by using the mouse to click and drag on your PC screen.•  Text input with keyboard: allows you to compose a text message or note using your computer keyboard.•  File transfer (mobile phone to PC): sends files from your mobile phone (e.g. photos, videos, music and POLARIS Viewer 5 files) to your PC. Simply right-click on the file which you want to send to PC and click on "Save to PC". •  File transfer (PC to mobile phone): sends files from your PC to your mobile phone. Just select the files you wish to transfer and drag and drop them into the On-Screen Phone window. The files sent are stored in internal SD card.
72•  Real-time event notifications: prompts a pop-up to inform you of any incoming calls or text/multimedia messages.How to install On-Screen Phone on your PC1  Visit LG Home (www.lg.com) and select a country of your choice.2  Go to Support > Mobile Phone Support > Select the Model (LG-D956) > Click OSP ( On-Screen Phone ) to download. You can install the On-Screen Phone on your PC.Function
73GalleryOpen the Gallery application to view albums of your pictures and videos.1  Tap   >   > Apps tab >   Gallery.You can manage and share all your image and video fi les with Gallery.NOTE:•  Some file formats are not supported, depending on the software installed on the device.•  Some files may not play properly, depending on how they are encoded.Viewing picturesLaunching Gallery displays your available folders. When another application, such as Email, saves a picture, the download folder is automatically created to contain the picture. Likewise, capturing a screenshot automatically creates the Screenshots folder. Select a folder to open it.Pictures are displayed by creation date in a folder. Select a picture to view it full screen. Scroll left or right to view the next or previous image.Zooming in and outUse one of the following methods to zoom in on an image:•  Double-tap anywhere to zoom in.•  Spread two fingers apart on any place to zoom in. Pinch to zoom out, or double-tap to return.Multimedia
74Playing videosVideo files show the   icon in the preview. Select a video to watch it and tap  . The Videos application will launch.Editing photosWhen viewing an photo, tap the Menu key  > Edit.Deleting photos/videosUse one of the following methods:•  In a folder, tap   and select photos/videos by ticking, and then tap on Delete.•  When viewing a photo/Video, tap  .Setting as wallpaperWhen viewing a photo, tap the Menu key  > Set image as to set the image as wallpaper or assign to a contact.NOTE:•  Some file formats are not supported, depending on the device software.•  If the file size exceeds the available memory, an error can occur when you open files.•  The resolution is automatically resized from Ultra-HD to Full-HD when the handset is connected to TV via Slimport (or Miracast).VideosYour phone has a built-in video player that lets you play all of your favorite videos. To access the video player, tap   >   > Apps tab >   Videos.Multimedia
75Playing a video1  Tap   >   > Apps tab > Videos. 2  Select the video you want to play.Tap the desired direction for audio zoom.Tap to use Zoom to Track feature. Tap to enter into Qslide mode.Tap to share your video via the SmartShare function.Tap to lock a video screen.  Tap to view the video list.Tap to capture the screen shot.Tap to pause video playback.Tap to resume video playback.Tap to go 10 seconds forward.Tap to go 10 seconds backward.Tap to manage the video volume.Tap to change the ratio of the video screen.   To change the volume while watching a video, press the up and down volume keys on the rear side of the phone.Touch and hold a video in the list. The Share, Delete and Details options will be displayed.
76MusicYour phone has a built-in music player that lets you play all your favorite tracks. To access the music player, tap   >   > Apps tab > Music.Add music files to your phoneStart by transferring music files to your phone:•  Transfer music using Media sync (MTP).•  Download from the wireless Web.•  Synchronize your phone to a computer.•  Receive files via Bluetooth.Transfer music using Media sync (MTP)1  Connect the phone to your PC using the USB cable.2  Select the Media sync (MTP) option. Your phone will appear as another hard drive on your computer. Click on the drive to view it. Copy the fi les from your PC to the drive folder.3  When you’re fi nished transferring fi les, swipe down on the Status Bar and tap USB connected > Charge phone. You may now safely unplug your device.Playing a song1  Tap   >   > Apps tab > Music. 2  Tap Songs.3  Select the song you want to play.Tap to pause playback.Tap to resume playback.Tap to skip to the next track in the album, playlist, or shuffle. Touch and hold to fast forward.Multimedia
77Tap to restart the current track or skip to the previous track in the album, playlist, or shuffle. Touch and hold to rewind.Tap to display the Volume slider bar, then adjust the playback volume on the slider bar.Tap to set audio effects.Tap to find the files with YouTube.Tap to open the current playlist.Tap to add the song to your favourites.Tap to play the current playlist in shuffle mode (tracks are played in random order).Tap to toggle through the repeat modes to repeat all songs, repeat current song, or repeat off.Tap to share your music via the SmartShare funtion.To change the volume while listening to music, press the up and down volume keys on the back side of the phone.Touch and hold any song in the list. The Play, Add to playlist, Share, Set as ringtone, Delete, Details and Search options will be displayed.NOTE:•  Some file formats are not supported, depending on the device software.•  If the file size exceeds the available memory, an error can occur when you open files.
78NOTE: Music file copyrights may be protected by international treaties and national copyright laws. Therefore, it may be necessary to obtain permission or a licence to reproduce or copy music. In some countries, national laws prohibit private copying of copyrighted material. Before downloading or copying the file, check the national laws of the relevant country concerning the use of such material.Multimedia
79   Slide Aside (Quick task-switching with THREE fingers) You can quickly switch to another task using three fingers. 1  Place three fi ngers on the screen which you are currently working on and slide the screen to the left. The current screen is saved and you can do another task.•  You can save up 3 (three) apps in the left side of the screen.  2  To reopen the saved screen and continue to use the app, place three fi ngers on a screen and slide it to the right. NOTE: Please be careful not to place another fingers or palm on the screen. Dual WindowThe two split-screen can be viewed at the same time.1  Touch and hold the Back button to split the screen.2  Tap or drag app icon you want to use.Utilities
80 (Switch icon) : Switch two screens. (Drag icon) : Drag to resize split screens.  (Menu icon) : Tap to view the app list, change to the full screen or close the current app.NOTE: The Dual Window should be set before you use the function. 1  Tap   >   Apps tab >   Settings > General tab > Multitasking > Dual Window.2  Checkmark the Dual Window checkbox. Guest Mode  To protect your privacy or limit some applications to your children, you can use the Guest mode.When you lend your phone to others, you can limit the applications to be displayed.In advance, set the Guest mode and customize the options.NOTE: To use the Guest mode, the pattern lock should be set in advance. 1  Tap   >   > Apps tab >   Settings > General tab > Guest mode.2  Tap to make Guest mode on. Setting your alarm1  Tap   >   > Apps tab > Alarm/Clock >  .2  After you set the alarm, your phone lets you know how much time is left before the alarm will go off.3  Set Repeat, Snooze duration, Vibration, Alarm sound, Alarm volume, Auto app starter, Puzzle lock and Memo. Tap Save.Utilities
81NOTE: To change alarm settings in the alarm list screen, tap the Menu key  and select Settings.Using your calculator1  Tap   >   > Apps tab > Calculator.2  Tap the number keys to enter numbers.3  For simple calculations, tap the function you want to perform (+, –, x or ÷) followed by =.4  For more complex calculations, tap   > Scientifi c calculator.5  To check the history, tap   > Calculation history.Adding an event to your calendar1  Tap   >   > Apps tab > Calendar.2  On the screen, you can fi nd the different view types for the Calendar (Day, Week, Month, Year, Agenda, Life Square).3  Tap on the date for which you wish to add an event and tap  .4  Tap Event name and enter the event name.5  Tap Location and enter the location. Check the date and enter the time you wish your event to start and fi nish.6  If you wish to add a note to your event, tap Link note to select the saved notebook image. (Only available on the Phone calendar)7  If you wish to repeat the alarm, set REPEAT and set REMINDERS, if necessary.8  Tap Save to save the event in the calendar.
82Voice RecorderUse the voice recorder to record voice memos or other audio files.Recording a sound or voice1  Tap   >   >   Voice Recorder.2  Tap   to begin recording.3  Tap   to end the recording.4  Tap   to listen to the recording.NOTE: Tap   to access your album. You can listen to the saved recording. The available recording time may differ from actual recording time.Sending the voice recording1  Once you have fi nished recording, you can send the audio clip by tapping  .2  Choose from Bluetooth, E-mail, Gmail, Memo, Messaging or SmartShare Beam. When you select E-mail, Gmail, Memo, or Messaging the voice recording is added to the message. You may then write and send the message as you usually would.Task ManagerYou can manage your applications using Task Manager. You can easily check the number of applications that are currently running and shut down certain applications. Utilities
83TasksThis task can be synchronized with MS Exchange account. You can create task, revise it and delete it in MS outlook or MS Office Outlook Web Access.To Synchronize MS Exchange1  From the Home Screen, Tap   >   > Apps tab >   Settings.2  Tap General tab > Accounts & sync > Add account.3  Tap Microsoft Exchange to create Email address and Password.4  Make sure if you checkmark Sync task.NOTE: MS Exchange may not be supported depending on email server.POLARIS Viewer 5POLARIS Viewer 5 is a professional mobile office solution that lets users conveniently view various types of office documents, including Word, Excel and PowerPoint files, anywhere  or anytime, using their mobile devices.Tap   >   > Apps tab >   POLARIS Viewer 5.Viewing filesMobile users can now easily view a wide variety of file types, including Microsoft Office documents and Adobe PDF, right on their mobile devices. When viewing documents using POLARIS Viewer 5, the objects and layout remain the same as in the original documents.
84Google+Use this application to stay connected with people via Google’s social network service.•  Tap   >   > Apps tab >   Google+.NOTE: This application may not be available depending on the region or service provider.Voice SearchUse this application to search webpages using voice.1  Tap   >   > Apps tab >   Voice Search.2  Say a keyword or phrase when Speak now appears on the screen. Select one of the suggested keywords that appear.NOTE: This application may not be available depending on the region or service provider.DownloadsUse this application to see what files have been downloaded through the applications.•  Tap   >   > Apps tab >   Downloads.NOTE: This application may not be available depending on the region or service provider.Utilities
85The WebInternetUse this application to browse the Internet. Browser gives you a fast, full-colour world of games, music, news, sports, entertainment and much more, right on your mobile phone wherever you are and whatever you enjoy.NOTE: Additional charges apply when connecting to these services and downloading content. Check data charges with your network provider.1  Tap   >   > Apps tab >   Internet.Using the Web toolbarTap slide it upwards with your finger to open.Tap to go back one page.Tap to go forward one page, to the page you connected to after the current one. This is the opposite of what happens when you tap  , which takes you to the previous page.Tap to go to the Home page. Tap to add a new window.Tap to access bookmarks.Viewing webpagesTap the address field, enter the web address and tap Go.
86Opening a pageTo go to new page, tap     .To go to another webpage, tap  , scroll up or down, and tap the page to select it.Searching the web by voiceTap the address field, tap   , speak a keyword, and then select one of the suggested keywords that appear.NOTE: This feature may not be available depending on the region or service provider.BookmarksTo bookmark the current webpage, tap  > Save to bookmarks > OK.To open a bookmarked webpage, tap   and select one.HistoryTap   > History to open a webpage from the list of recently-visited webpages. To clear the history, tap Menu key   Clear all history.ChromeUse Chrome to search for information and browse webpages.1  Tap   >   > Apps tab >   Chrome.NOTE: This application may not be available, depending on your region and service provider.Viewing webpagesTap the Address field, and then enter a web address or search criteria.The Web
87Opening a pageTo go to a new page, tab      New tab.To go to another webpage, tap  , scroll up or down and tap the page to select it.Syncing with other devicesSync open tabs and bookmarks to use with Chrome on another device when you are logged in with the same Google account.To view open tabs on other devices, tap Menu key   Other devices. Select a webpage to open.To add bookmarks, tap  .
88SettingsThis section provides an overview of items you can change using your phone's System settings menus. To access the Settings menu:Tap   >  > System settings.- or -Tap   >  > Apps tab >   Settings. Networks< Wi-Fi >Wi-Fi – Turns on Wi-Fi to connect to available Wi-Fi networks.TIP! How to obtain the MAC addressTo set up a connection in some wireless networks with MAC filters, you may need to enter the MAC address of your phone in the router.You can find the MAC address in the following user interface: tap   >   > Apps tab >  Settings > Networks tab > Wi-Fi >   > Advanced Wi-Fi > MAC address.< Bluetooth >Turn the Bluetooth wireless feature on or off to use Bluetooth.< Mobile data >Displays the data usage and set mobile data usage limit.< Call >Configure phone call settings such as call forwarding and other special features offered by your carrier.Voicemail – Allows you to select your carrier’s voicemail service.Fixed dialing numbers – Turn on and compile a list of numbers that can be called from your phone. You’ll need your PIN2, which is available from your operator. Only numbers within the fixed dial list can be called from your phone.
89Incoming call pop-up – Display incoming call popup when using camera and videos.Call reject – Allows you to set the call reject function. Choose from Call reject mode or Reject calls from.Decline with message – When you want to reject a call, you can send a quick message using this function. This is useful if you need to reject a call during a meeting.Privacy keeper – Hides the caller name and number for an incoming call.Call forwarding – Choose whether to divert all calls when the line is busy, when there is no answer or when you have no signal.Auto answer – Set the time before a connected hands-free device automatically answers an incoming call. Choose from Disable, 1 second, 3 seconds, and 5 seconds.Connection vibration – Vibrates your phone when the other party answers the call.Voice enhancement – Enhances voice quality in noisy environments so you can hear more clearly.Save unknown numbers – Add unknown numbers to contacts after a call.Power button ends call – Allows you to select your end call.Call barring – Lock incoming, outgoing or international calls.Call duration – View the duration of calls including Last call, Outgoing calls, Incoming calls and All calls.Additional settings – Allows you to change the following settings:   Caller ID: Choose whether to display your number in an outgoing call.  Call waiting: If call waiting is activated, the handset will notify you of an incoming call while you are on a call (depending on your network provider).< Share & connect >NFC – Your phone is an NFC-enabled mobile phone. NFC (Near Field Communication) is a wireless connectivity technology that enables two-way communication between electronic devices. It operates over a distance of a few centimeters. You can share your content with an NFC tag or another NFC support device by simply tapping it with your device. If you tap an NFC tag with your device, it will display the tag content on your device.
90   To switch NFC on or off: From the Home screen, touch and slide the notification panel down with your finger, then select the NFC icon to turn it on.NOTE: When airplane mode is activated, the NFC application can be used.  Using NFC: To use NFC, make sure your device is switched on, and activate NFC if disabled.Direct/Android Beam – When this feature is turned on, you can beam app content to another NFC-capable device by holding the devices close together. Just bring the device together(typically back to back) and then tap your screen. The app determines what gets beamed.SmartShare Beam – Turn on to receive multimedia content via SmartShare Beam from LG phones or tablets.Miracast – Mirror phone screen and sound onto Miracast dongle or TV Wirelessly.Wireless storage – You can manage files on your phone in the computer or copy files to the phone from the computer without a USB connection. After switching on Wireless storage, make sure that the phone and computer are connected to the same network. Then, enter the web addresses shown on your phone in the address bar of the browser on your computer.< Tethering & networks >Wi-Fi hotspot – You can also use your phone to provide a mobile broadband connection. Create a hotspot and share your connection. Please read "Sharing your phone's data connection" for more information. Bluetooth tethering – Allows you to set your phone whether you are sharing the Internet connection or not.Help – Tap to view help information on the Wi-Fi hotspot and Bluetooth tethering functions.Airplane mode – After switching to Airplane mode, all wireless connections are disabled.Settings
91NOTE: You must set a lock screen PIN or password before you can use credential storage.Mobile networks – Set options for data roaming, network mode & operators, access point names (APNs) etc. VPN – Displays the list of Virtual Private Networks (VPNs) that you've previously configured. Allows you to add different types of VPNs.SoundSound profile – Choose Sound, Vibrate only or Silent.Volumes – Adjust the phone's volume settings to suit your needs and your environment.Vibrate strength – Allows you to set the vibrate strength for calls, notifications, and touch feedback.Quiet mode – Set up your Quiet mode. Tap the Turn quiet mode on now switch to toggle it On or Off. You can schedule Quiet mode to activate automatically and designate exceptions to your Quiet mode.   Set quiet time: Tap the switch to toggle it On or Off. You can also set the days and times to automatically turn Quiet mode on.  Vibrate: Checkmark to provide vibration for allowed calls or notifications when Quiet mode is on.  Incoming call settings    Block incoming calls: Checkmark to block all incoming calls.     Allow repeated calls: Checkmark to allow a call that is repeated within 3 minutes.    Allowed contact lists: Designate which Contacts calls will be allowed.      Auto reply to blocked calls: Set how to you want to automatically reply to silenced calls.Phone ringtone – Set the ringtone for calls. You can also add a ringtone by tapping  at the top right corner of the screen.
92Smart ringtone – Checkmark to increase phone ringtone volume automatically in noisy environments.Incoming call vibration – Sets the incoming call vibration Options.Gentle vibration – Checkmark to gradually increasing vibration up to current strength set.Ringtone with vibration – Checkmark to set the phone to vibrate in addition to the ringtone when you receive calls.Voice notifications – Tap the Voice notifications switch to toggle it On or Off. On allows your device to read out incoming call and message events automatically.Notification sound – Allows you to set the sound for notifications. You can also add a sound by tapping  at the top right corner of the screen.Touch feedback & system – Allows you to set the feedback (tones and/or vibration) while using your device.Display< Home screen > Set the Theme,  Wallpaper, Screen swipe effect, Allow Home screen looping, or Portrait view only. Home backup & restore – You can backup and restore app/widget layouts and themes.Help – Tap to view help information on Home screen. < Lock screen >Select screen lock – Set a screen lock type to secure your phone. Opens a set of screens that guide you through drawing a screen unlock pattern. Set None, Swipe, Face Unlock, Pattern, PIN or Password.If you have enabled a Pattern lock type when you turn on your phone or wake up the screen, you will be asked to draw your unlock pattern to unlock the screen.Settings
93Swing Lock screen – Checkmark to move Lock screen naturally up or down, when you tilt your phone in that direction.Screen swipe effect – Sets the screen swipe effect options. Choose from Ripple, Dewdrop, White hole, Particle, and Crystal.NOTE: Screen swipe effect becomes Pattern effect if the screen lock is set to Pattern.Weather animation – Checkmark to show weather animation for current location or primary city set in Weather based on auto data updates.Wallpaper – Sets your Lock screen wallpaper. Select it from Gallery orWallpaper gallery.Shortcuts – Allows you to change the shortcuts on the Swipe Lock screen.Owner info – Checkmark to set the device owner’s name to be displayed on the Lock screen. Tap  to enter the text to be displayed as the Owner info.Lock timer – Sets the amount of time before the screen automatically locks after the screen has timed-out.Power button instantly locks – Checkmark to instantly lock the screen when the Power/Lock Key is pressed. This setting overrides the Security lock timer setting.< Front touch buttons >Set the Front Touch Keys displayed at the bottom of all of the screens. Set which ones are displayed, their position on the bar, and what they look like. Select the keys and order, the theme, and the background.< SCREEN >Brightness – Adjusts the brightness of the screen. For best battery performance, use the dimmest comfortable brightness.Screen timeout – Sets the amount of time before the screen times out.Screen-off effect – Sets the screen-off effect. Choose from Fade out, Black hole, Retro TV.
94Auto-rotate screen – Checkmark to set the phone to automatically rotate the screen based on the phone orientation (portrait or landscape).Screen mode – Set the screen mode. Choose from Standard, Vivid, or Natural.Daydream – Tap the Daydream switch to toggle it On or Off. On allows the set screensaver to be displayed when the phone is sleeping while docked and/or charging. Choose from Clock, Charging, Colours, Photo Frame, and Photo Table.< FONT >Font type – Sets the type of font used for the phone and menus.Font size – Sets the size of the font displayed in the phone and menus.< SMART ON >Smart screen – Checkmark to keep the screen from timing-out when the device detects your eyes looking at the screen.Smart video – Checkmark to pause the video when it doesn't detect your eyes looking at the screen.< ADVANCED SETTINGS >Notification LED – Tap the switch to toggle it On or Off. On will activate the LED light for the notifications you select, in the colour you set for each one.Auto-adjust screen tone – Checkmark to save battery power by adjusting screen brightness automatically with analysis of image colour.Screen capture area – Allow you to set capture screen area. Choose from Capture full screen or Capture part of screen.Aspect ratio correction – Allows you to change the aspect ratio of a downloaded application to fix screen distortion.General< Gestures >Screen on/off – Checkmark to enable KnockON to turn the screen on and off. Quickly double-tap center screen to turn it on. Double-tap the Status Bar, an empty area on Settings
95the Home screen, or the Lock screen to turn the screen off. For the best results, do not move the phone while using the KnockON feature.Answer an incoming call – Checkmark to enable you to bring the phone to your ear to automatically answer the incoming call.Fade out ringtone – Checkmark to enable you to pick up the phone from the flat surface to fade out the incoming call ringtone.Silence incoming calls – Checkmark to enable you to flip the phone to silence incoming calls.Snooze or turn off alarm – Checkmark to enable you to simply flip the device to snooze or stop the alarm.Pause video – Checkmark to enable you to simply flip the device to pause the currently playing video.Move Home screen items – Checkmark to enable you to move an icon to another screen by tilting the phone. Tap and hold the icon and tilt the phone left or right, then let go on the screen where you want the icon.Help – Opens a help guide on how to use the Gestures features of your device.Motion sensor calibration – Allows you to improve the accuracy of the tilt and speed of the sensor.< One-handed operation >Dial keypad – Checkmark to enable you move the dial keypad to the right or left side of the device. Simply tap the arrow to move it to one side or the other.LG keyboard – Checkmark to enable you move the keyboard to the right or left side of the device. Simply tap the arrow to move it to one side or the other.Gesture control – Checkmark to enable you to swipe the keyboard left or right to adjust the position of LG keyboard.Lock screen – Checkmark to enable you move the PIN Lock screen keypad to the right or left side of the device. Simply tap the arrow to move it to one side or the other.Swipe front touch buttons – Checkmark to swipe the front touch buttons left or right side to adjust the position of buttons in order to use it easily with one hand.
96Help – Displays information regarding one-handed operation.< Storage >INTERNAL STORAGE – View the internal storage usage.< Battery >BATTERY INFORMATIONThe Battery charge information is displayed on a battery graphic along with the percentage of the remaining charge and its status. Touch the Battery charge icon to display the Battery use screen to see battery usage level and battery use details. It displays which components and applications are using the most battery power. Tap one of the entries to see more detailed information.Battery percentage on status bar – Checkmark to display the battery level percentage on the Status Bar next to the battery icon.BATTERY SAVERTap the Battery saver switch to toggle it On or Off. Tap Battery saver to access the following settings:Turn Battery saver on – Sets the battery charge percent level that will automatically turn on Battery saver. Choose from Immediately, 10% battery, 20% battery, 30% battery, and 50% battery.BATTERY SAVING ITEMSAuto-sync – Checkmark to turn off Auto-sync when Battery saver is activated.Wi-Fi – Checkmark to turn Wi-Fi off when data is not being used while Battery saver is activated.Bluetooth – Checkmark to turn Bluetooth off when not connected while Battery saver is activated.Vibrate on touch – Checkmark to turn off touch feedback when Battery saver is activated.Settings
97Brightness – Checkmark to set the screen brightness when Battery saver is activated. Tap   to change the setting.Auto-adjust screen tone – Checkmark to turn on auto-adjust screen tone when Battery saver is activated.Screen timeout – Checkmark to set the screen timeout when Battery saver is activated. Tap the Settings icon to change the setting.Notification LED – Checkmark to turn off the LED light for notifications when Battery saver is activated.< Apps >View and manage your applications.< Multitasking >Slide Aside – Checkmark the Slide Aside checkbox to use Slide Aside feature. (Please see Slide Aside.)Dual Window – Checkmark the Dual Window checkbox to use Dual Window feature. (Please see Dual Window.)Split view – Checkmark the Split view checkbox to tap a link on the full screen to run dual windows automatically.Help – Opens a help guide on how to use the Multitasking features of your device.< Accounts & sync >Permits applications to synchronize data in the background, whether or not you are actively working in them. Deselecting this setting can save battery power and lower (but  not eliminate) data usage.< Cloud >Add a cloud account to quickly and easily use cloud service on LG apps. < Guest mode >To protect your privacy or limit some applications to your children, you can use the Guest mode.When you lend your phone to others, you can limit the applications to be displayed.
98In advance, set the Guest mode and customize the options.< Location access >Access to my location – If you select Google's location service, your phone determines your approximate location using Wi-Fi and mobile networks. When you select this option, you're asked whether you consent to allowing Google to use your location when providing these services.GPS satellites – If you select GPS satellites, your phone determines your location to street-level accuracy.Wi-Fi & mobile network location – Lets apps use data from sources such as Wi-Fi and mobile networks to determine your approximate location.< Security >Encrypt phone – Allows you to encrypt data on the phone for security. You will be required to enter a PIN or password to decrypt your phone each time you power it on.Set up SIM card lock – Set up Micro-USIM card lock or change the Micro-USIM card PIN.Password typing visible – Show the last character of the hidden password as you type.Phone administrators – View or deactivate phone administrators.Unknown sources – Default setting to install non-Play store applications.Verify apps – Disallow or warn before installation of apps that may cause harm.Trusted credentials – Display trusted CA certificates.Install from storage – Choose to install encrypted certificates.Clear credentials – Remove all certificates.< Language & input >Use the Language & input settings to select the language for the text on your phone and to configure the on-screen keyboard, including words you've added to its dictionary.< Backup & reset >Settings
99Change the settings for managing your settings and data.Backup my data – Set to backup your settings and application data to the Google server.Backup account – Set to backup your account.Automatic restore – Set to restore your settings and application data when the applications are reinstalled on your device.LG Backup service – Backs up all information on the device and restores it in the event of data loss or replacement.Factory data reset – Reset your settings to the factory default values and delete all your data. If you reset the phone this way, you are prompted to re-enter the same information as when you first started Android.< Date & time >Use Date & time settings to set how dates will be displayed. You can also use these settings to set your own time and time zone rather than obtaining the current time from the mobile network.< Accessibility >Use the Accessibility settings to configure accessibility plug-ins you have installed on your phone.NOTE: Requires additional plug-ins to become selectable.< PC connection >Select USB connection method – Set the desired mode: Charge phone, Media sync (MTP), Tethering, LG software or Send images (PTP).Ask upon connecting – Ask in USB connection mode when connecting to a computer.Help – Help for USB connection.PC Suite – Check this to use LG PC Suite with your Wi-Fi connection.Please note that Wi-Fi network should be connected to LG PC Suite via a Wi-Fi
100connection.On-Screen Phone – Check this  to receive Wi-Fi connection request from On-Screen Phone.Help – Help for LG software.  <  Accessory  >QuickWindow case – Activate to make features, such as music, weather, and clock, available in small view when using the QuickWindow case.USB storage – Sets the Plug & Pop feature for USB storage. Checkmark the App panel option to automatically display the app panel when connecting an OTG (On-the-Go) USB cable. Tap Edit app panel to change the applications you want to make available.Earphone – Sets the Plug & Pop feature for earphones. Checkmark the App panel option to automatically display the app panel when connecting an earphone. Tap Edit app panel to change the applications you want to make available.< About phone >View legal information and check your phone status and software version.Settings
101"LG PC Suite" PC software is a program that helps you connect your device to a PC via a USB cable and Wi-Fi. Once connected, you can use the functions of your device from your PC.With your "LG PC Suite" PC Software, You Can...•  Manage and play your media contents (music, movie, picture) on your PC.•  Send multimedia contents to your device.•  Synchronizes data (schedules, contacts, bookmarks) in your device and PC.•  Backup the applications in your device.•  Update the softwares in your device.•  Backup and restore the device data.•  Play multimedia contents of your PC from your device.•  Backup and create and edit the memos in your deviceNOTE: You can use the Help menu from the application to find out how to use your "LG PC Suite" PC software.Installing "LG PC Suite" PC Software"LG PC Suite" PC software can be downloaded from the webpage of LG.1  Go to www.lg.com and select a country of your choice.2  Go to Support > MOBILE SUPPORT > LG Mobile Phones > Select the Model orGo to Support > Mobile > Select the Model.3  Click PC SYNC from MANUALS & DOWNLOAD and click DOWNLOAD to download "LG PC Suite" PC software.PC software (LG PC Suite)
102System Requirements for "LG PC Suite" PC software•  OS: Windows XP (Service pack 3) 32bit, Windows Vista, Windows 7, Windows 8•  CPU: 1 GHz or higher processors•  Memory: 512 MB or higher RAMs•  Graphic card: 1024 x 768 resolution, 32 bit colour or higher•  HDD: 500 MB or more free hard disk space (More free hard disk space may be needed depending on the volume of data stored.)•  Required software: LG integrated drivers, Windows Media Player 10 or laterNOTE: LG Integrated USB DriverLG integrated USB driver is required to connect an LG device and PC and is installed automatically when you install "LG PC Suite" PC software application.Synchronizing your Device to a PCData from your device and PC can be synchronized easily with "LG PC Suite" PC software for your convenience. Contacts, schedules and bookmarks can be synchronized.The procedure is as follows:1  Connect your device to PC. (Use a USB cable or Wi-Fi connection.)2  The Select USB connection method will appear, then select LG software.3  After connection, run the program and select the device section from the category on the left side of the screen.4  Click Personal information to select.5  Select the checkbox of contents to synchronize and click the Sync button.NOTE: To synchronize your phone with your PC, you need to install LG PC Suite onto your PC. Please refer to previous pages to install LG PC Suite.PC software (LG PC Suite)
103Moving contacts from your Old Device to your New Device1  Export your contacts as a CSV fi le from your old device to your PC using a PC sync program.2  Install "LG PC Suite" on the PC fi rst. Run the program and connect your Android mobile phone to the PC using a USB cable.3  On the top menu, select Device > Import to device > Import contacts.4  A popup window to select the fi le type and a fi le to import will appear.5  On the popup, click the Select a fi le and Windows Explorer will appear.6  Select the contacts fi le to import in Windows Explorer and click the Open.7  Click OK.8  A Field mapping popup to link the contacts in your device and new contacts data will appear.9  If there is a confl ict between the data in your PC contacts and device contacts, make the necessary selections or modifi cations in LG PC Suite.10 Click OK.
104Phone software updateLG Mobile phone software update from the InternetFor more information about using this function, please visit http://update.lgmobile.com or http://www.lg.com/common/index.jsp   select your country and language. This feature allows you to conveniently update the firmware on your phone to a newer version from the Internet without needing to visit a service center. This feature will only be available if and when LG makes a newer firmware version available for your device.Because the mobile phone firmware update requires the user's full attention for the duration of the update process, please make sure you check all instructions and notes that appear at each step before proceeding. Please note that removing the USB data cable during the upgrade may seriously damage your mobile phone.NOTE: LG reserves the right to make firmware updates available only for selected models at its own discretion and does not guarantee the availability of the newer version of the firmware for all handset models.LG Mobile Phone software update via Over-the-Air (OTA)This feature allows you to conveniently update your phone's software to a newer version via OTA, without connecting using a USB data cable. This feature will only be available if and when LG makes a newer firmware version available for your device.You should first check the software version on your mobile phone: Settings > General tab > About phone > Update Center > Software Update > Check now for update.Phone software update
105NOTE: Your personal data from internal phone storage—including information about your Google account and any other accounts, your system/application data and settings, any downloaded applications and your DRM licence—might be lost in the process of updating your phone's software. Therefore, LG recommends that you backup your personal data before updating your phone's software. LG does not take responsibility for any loss of personal data.NOTE: This feature depends on your network service provider, region and country.
106About this user guide•  Before using your device, please carefully read this manual. This will ensure that you use your phone safely and correctly.•  Some of the images and screenshots provided in this guide may appear differently on your phone.•  Your content may differ from the final product, or from software supplied by service providers or carriers, This content may be subject to change without prior notice. For the latest version of this manual, please visit the LG website at www.lg.com.•  Your phone's applications and their functions may vary by country, region, or hardware specifications. LG cannot be held liable for any performance issues resulting from the use of applications developed by providers other than LG.•  LG cannot be held liable for performance or incompatibility issues resulting from registry settings being edited or operating system software being modified. Any attempt to customize your operating system may cause the device or its applications to not work as they should.•  Software, audio, wallpaper, images, and other media supplied with your device are licensed for limited use. If you extract and use these materials for commercial or other purposes, you may be infringing copyright laws. As a user, you are fully and entirely responsible for the illegal use of media.•  Additional charges may be applied for data services, such as messaging, uploading and downloading, auto-syncing, or using location services. To avoid additional charges, select a data plan that is suitable for your needs. Contact your service provider to obtain additional details.Trademarks•  LG and the LG logo are registered trademarks of LG Electronics.•  All other trademarks and copyrights are the property of their respective owners.About this user guide
107DivX HD ABOUT DIVX VIDEO: DivX® is a digital video format created by DivX, LLC, a subsidiary of Rovi Corporation. This is an official DivX Certified® device that has passed rigorous testing to verify that it plays DivX video. Visit divx.com for more information and software tools to convert your files into DivX videos. ABOUT DIVX VIDEO-ON-DEMAND: This DivX Certified® device must be registered in order to play purchased DivX Video-on-Demand (VOD) movies. To obtain your registration code, locate the DivX VOD section in your device setup menu. Go to vod.divx.com for more information on how to complete your registration.DivX Certified® to play DivX® video up to HD 720p, including premium content.DivX®, DivX Certified® and associated logos are trademarks of Rovi Corporation or its subsidiaries and are used under license.Dolby Digital Plus Manufactured under license from Dolby Laboratories. Dolby, Dolby Digital Plus, and the double-D symbol are trademarks of Dolby Laboratories.Notice: Open Source SoftwareTo obtain the corresponding source code under GPL, LGPL, MPL and other open source licences, please visit http://opensource.lge.com/ All referred licence terms, disclaimers and notices are available for download with the source code.
108These accessories are available for use with the your phone. (Items described below may be optional.)Travel adaptor Stereo headsetQuick Start Guide Data cableMicro-USIM ejection toolAccessoriesNOTE: •  Always use genuine LG accessories. •  Failure to do this may void your warranty.•  Accessories may vary in different regions.
109TroubleshootingThis chapter lists some problems you might encounter when using your phone. Some problems require you to call your service provider, but most are easy to fix yourself.Message Possible causes Possible corrective measuresMicro-USIM card errorThere is no Micro-USIM card in the phone or it is inserted incorrectly.Make sure that the Micro-USIM card is correctly inserted.No network connection/ Dropped networkSignal is weak or you are outside the carrier network.Move toward a window or into an open area. Check the network operator coverage map.Operator applied new services.Check whether the Micro-USIM card is more than 6~12 months old. If so, change your Micro-USIM card at your network provider's nearest branch. Contact your service provider.Codes do not matchTo change a security code, you will need to confirm the new code by re-entering it.If you forget the code, contact your service provider.The two codes you have entered do not match.
110Message Possible causes Possible corrective measuresNo applications can be setNot supported by service provider or registration required.Contact your service provider.Calls not availableDialling error  New network not authorized.New Micro-USIM card inserted. Check for new restrictions.Pre-paid charge limit reached.Contact service provider or reset limit with PIN2.Phone cannot be switched onOn/Off key pressed too briefly.Press the On/Off key for at least two seconds.Battery is not charged.Charge battery. Check the charging indicator on the display.Troubleshooting
111Message Possible causes Possible corrective measuresCharging errorBattery is not charged. Charge battery.Outside temperature is too hot or cold.Make sure phone is charging at a normal temperature.Contact problem Check the charger and its connection to the phone.No voltage Plug the charger into a different socket.Charger defective Replace the charger.Wrong charger Use only original LG accessories.Number not allowedThe Fixed dialling number function is on.Check the Settings menu and turn the function off.Impossible to receive / send SMS & photosMemory full Delete some messages from your phone.Files do not openUnsupported file format Check the supported file formats.
112Message Possible causes Possible corrective measuresThe screen does not turn on when I receive a call.Proximity sensor problemIf you use a protection tape or case, make sure it has not covered the area around the proximity sensor. Make sure that the area around the proximity sensor is clean.No sound Vibration modeCheck the settings status in the sound menu to make sure you are not in vibration or silent mode.Hangs up or freezesIntermittent software problemTry to perform a software update via the website.Troubleshooting
113CategorySub-CategoryQuestion AnswerBTBluetoothDevicesWhat are the functions available via BluetoothYou can connect a Bluetooth audio device such as a Stereo/Mono headset or Car Kit. Also, when the FTP server is connected to a compatible device, you can share content stored on the storage media.BTBluetoothHeadsetIf my Bluetooth headset is connected, can I listen to my music through my 3.5 mm wired headphones?When a Bluetooth headset is connected, all system sounds are played over the headset. As a result, you will not be able to listen to music through your wired headphones.DataContactsBackupHow can I backup Contacts?The Contacts data can be synchronized between your phone and Gmail™.DataSynchronizationIs it possible to set up one-way sync with Gmail?Only two-way synchronization is available.DataSynchronizationIs it possible to synchronize all email folders?The Inbox is automatically synchronized. You can view other folders by tapping the Menu Key   and select Folders to choose a folder.Google™ ServiceGmail Log-InDo I have to log into Gmail whenever I want to access Gmail?Once you have logged into Gmail, no need to log into Gmail again.FAQ
114CategorySub-CategoryQuestion AnswerGoogle™ ServiceGoogle AccountIs it possible to filter emails?No, email filtering is not supported via the phone.Phone FunctionEmailWhat happens when I execute another application while writing an email?Your email will automatically be saved as a draft.Phone FunctionRingtoneIs there a file size limitation for when I want to use  MP3 file as  ring tone?There is no file size limitation.Phone FunctionMessage TimeMy phone does not display the time of receipt for messages older than 24 hrs. How can I change this?You will only be able to see the times for messages received the same day.Phone FunctionNavigationIs it possible to install another navigation application on my phone?Any application that is available at Play Store™ and is compatible with the hardware can be installed and used.Phone FunctionSynchronisationIs it possible to synchronize my contacts from all my email accounts?Only Gmail and MS Exchange server (company email server) contacts can be synchronized.FAQ
115CategorySub-CategoryQuestion AnswerPhone FunctionWait and PauseIs it possible to save a contact with Wait and Pause in the numbers?If you transferred a contact with the W & P functions saved into the number, you will not be able to use those features. You will need to re-save each number.How to save with Wait and Pause:1.  From the Home screen, tap the Phone icon  .2.  Dial the number, then tap the Menu Key  .3.  Tap Add 2-sec pause or Add wait.Phone FunctionSecurityWhat are the phone’s security functions?You are able to set the phone to require that an Unlock Pattern be entered before the phone can be accessed or used.
116CategorySub-CategoryQuestion AnswerPhone FunctionUnlockPatternHow do I create the Unlock Pattern?1.  From the Home screen, tap the Menu Key  .2.  Tap System settings > Display tab > Lock screen.3.  Tap Select screen lock > Pattern. The first time you do this, a short tutorial about creating an Unlock Pattern will appear.4.  Set up by drawing your pattern once, and once again for confirmation.Precautions to take when using the pattern lock.It is very important to remember the unlock pattern you set. You will not be able to access your phone if you use an incorrect pattern five times. You have five chances to enter your unlock pattern, PIN or password. If you have used all 5 opportunities, you can try again after 30 seconds. (Or, if you preset the backup PIN, you can use the backup PIN code to unlock the pattern.)FAQ
117CategorySub-CategoryQuestion AnswerPhone FunctionUnlockPatternWhat should I do if I forget the unlock pattern and I didn’t create my Google account on the phone?If you have forgotten your pattern:If you logged into your Google account on the phone but failed to enter the correct pattern 5 times, tap the forgot pattern button. You are then required to log in with your Google account to unlock your phone. If you have not created a Google account on the phone or you have forgotten it, you will have to perform a hard reset.Caution: If you perform a factory reset, all user applications and user data will be deleted. Please remember to backup any important data before performing a factory reset.Phone FunctionMemoryWill I know when my memory is full? Yes, you will receive a notification.Phone FunctionLanguage SupportIs it possible to change my phone's language?The phone has multilingual capabilities.To change the language:1.  From the Home screen, tap the Menu Key  and tap System settings.2.  Tap  General tab > Language & input > Language.3.  Tap the desired language.
118CategorySub-CategoryQuestion AnswerPhone FunctionVPNHow do I set up a VPN?VPN access configuration is different for each company. To configure VPN access from your phone, you must obtain the details from your company’s network administrator.Phone FunctionScreen time outMy screen turns off after only 15 seconds. How can I change the amount of time for the backlight to turn off?1.  From the Home screen, tap the Menu Key .2.  Tap System settings > Display tab.3.  Tap Screen timeout.4.  Tap the preferred screen backlight timeout time.Phone FunctionWi-Fi & mobile networkWhen Wi-Fi and mobile network are both available, which service will my phone use?When using data, your phone may default to the Wi-Fi connection (if Wi-Fi connectivity on your phone is set to On). However, there will be no notification when your phone switches from one to the other.To know which data connection is being used, view the mobile network or Wi-Fi icon at the top of your screen.Phone FunctionHome screenIs it possible to remove an application from the Home screen?Yes. Just touch and hold the icon until the dustbin icon appears at the top right hand side of the screen. Then, without lifting your finger, drag the icon to the trash can.FAQ
119CategorySub-CategoryQuestion AnswerPhone FunctionApplicationI downloaded an application and it causes a lot of errors. How do I remove it?1.  From the Home screen, tap the Menu Key  .2.  Tap System settings > General tab > Apps > DOWNLOADED.3.  Tap the application, then tap Uninstall.Phone FunctionChargerIs it possible to charge my phone using a USB data cable without installing the necessary USB driver?Yes, the phone will be charged by the USB cable regardless of whether the necessary drivers are installed or not.Phone FunctionAlarmCan I use music files for my alarm?Yes. In the Alarm clock setting, select the song as the Alarm sound.Phone FunctionAlarmWill my alarm be audible if the phone is turned off?No, this is not supported.Phone FunctionAlarmIf my ringer volume is set to Off or Vibrate, will I hear my alarm?Your alarm is programmed to be audible even in these scenarios.Recovery SolutionHard Reset (Factory Reset)How can I perform a factory reset if I can’t access the phone’s setting menu?If your phone does not restore to its original condition, use a hard reset (factory reset) to initialize it.
Wi-Fi Caution This device is capable of operating in 802.11a/n/ac mode. For 802.11a/n/ac devices operating in the frequency range of 5.15 – 5.25 GHz, they are restricted for indoor operations to reduce any potential harmful interference for Mobile Satellite Services (MSS) in the US. Wi-Fi Access Points that are capable of allowing your device to operate in 802.11a/n/ac mode(5.15 – 5.25 GHz band) are optimized for indoor use only.If your Wi-Fi network is capable of operating in this mode, please restrict your Wi-Fi use indoors to not violate federal regulations to protect Mobile Satellite Services.Part 15.105 statement This equipment has been tested and found to comply with the limits for a class B digital device, pursuant to Part 15 of the FCC Rules. These limits are designed to provide reasonable protection against harmful interference in a residential installation. This equipment generates uses and can radiate radio frequency energy and, if not installed and used in accordance with the instructions, may cause harmful interference to radio communications. However, there is no guarantee that interference will not occur in a particular installation. If you experience interference with reception (e.g.,television), determine if this equipment is causing the harmful interference by turning the equipment off and then back on to see if the interference is affected. If necessary, try correcting the interference by one or more of the following measures:  * Reorient or relocate the receiving antenna.  * Increase the separation between the equipment and receiver. * Connect the equipment into an outlet on a circuit different from    that to which the receiver is connected.   * Consult the dealer or an experienced radio/TV technician for    help.
Part 15.19 statement This device complies with part15 of FCC rules. Operation is subject to the following two conditions: (1) This device may not cause harmful interference. (2) This device must accept any interference received, including interference that may cause undesired operation.Part 15.21 statement Any changes or modifications not expressly approved by the manufacturer could void the user’s authority to operate the equipment.Body-worn Operation This device was tested for typical body-worn operations with the back of the phone kept 0.39 inches (1cm) between the user’s body and the back of the phone. To comply with FCC RF exposure requirements, a minimum separation distance of 0.39 inches (1cm) must be maintained between the user’s body and the back of the phone. Third-party belt-clips, holsters, and similar accessories containing metallic components may not be used. Body- worn accessories that cannot maintain 0.39 inches (1cm) separation distance between the user's body and the back of the phone, and have not been tested for typical body-worn operations may not comply with FCC RF exposure limits and should be avoided.

Navigation menu