LG Electronics USA DM120 Dual-Mode Cellular Phone (AMPS/CDMA) User Manual Guide
LG Electronics USA Dual-Mode Cellular Phone (AMPS/CDMA) Guide
Users Manual
LG-DM120
USER GUIDE
(LG-DM120)
For more information about RF exposure, please visit the FCC website at www.fcc.gov
FCC RF EXPOSURE INFORMATION
In August 1996 the Federal Communications Commission (FCC) of the United States
with its action in Report and Order FCC 96-326 adopted an updated safety standard
for human exposure to radio frequency electromagnetic energy emitted by FCC
regulated transmitters. Those guidelines are consistent with the safety standard
previously set by both U.S. and international standards bodies. The design of this
phone complies with the FCC guidelines and these international standards.
Use only the supplied or an approved antenna. Unauthorized antennas,
modifications, or attachments could impair call quality, damage the phone, or result in
violation of FCC regulations.
Do not use the phone with a damaged antenna. If a damaged antenna comes into
contact with the skin, a minor burn may result. Please contact your local dealer for
replacement antenna.
Body-worn Operation
This device was tested for typical body-worn operations with the back of the
phone kept 2.0 cm. from the body. To maintain compliance with FCC RF
exposure compliance requirements, use only belt-clips, holsters or similar
accessories that maintain a 2.0 cm. separation distance between the user’s
body and the back of the phone, including the antenna, whether extended or
retracted. The use of third-party belt-clips, holsters and similar accessories
should not contain metallic components in its assembly. The use of
accessories that do not satisfy these requirements may not comply with FCC
RF exposure compliance requirements, and should be avoided.
WARNING! Read this information before using your phone
LG-DM120
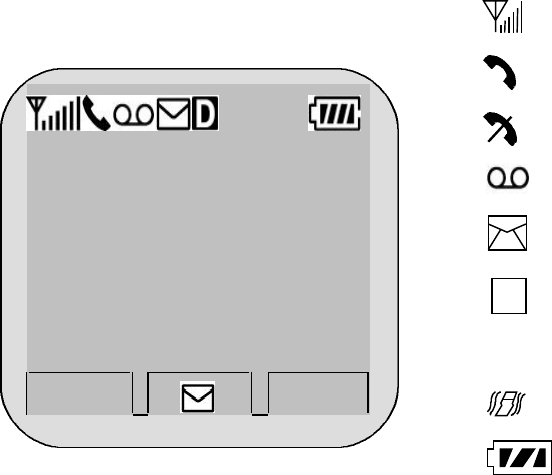
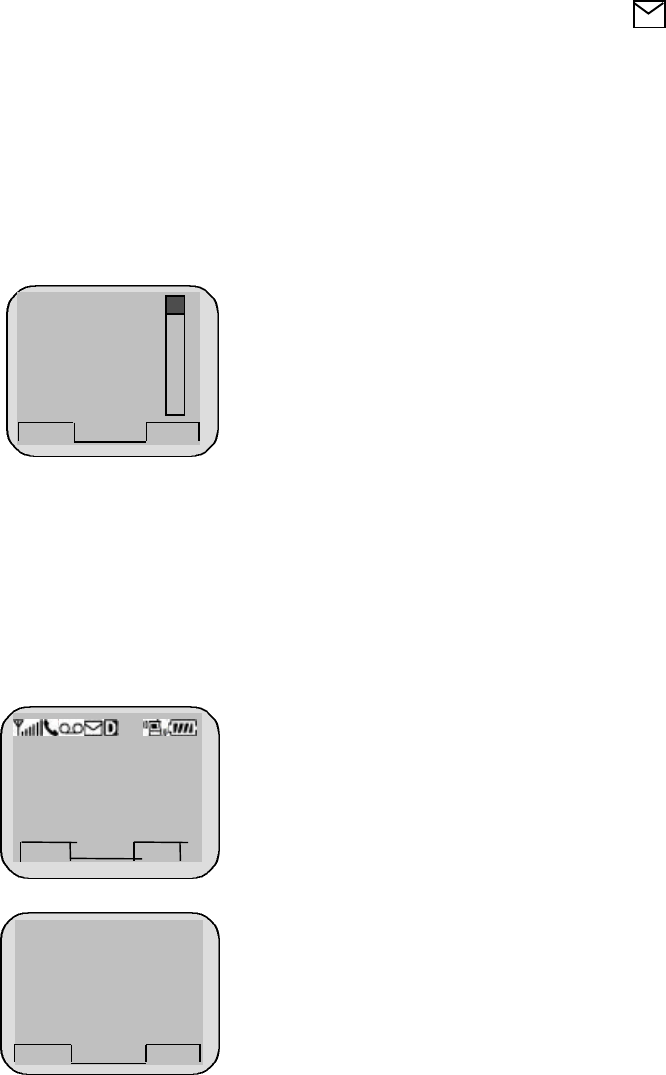
CHAPTER 1. THE NAME AND FUNCTIONS
Hold Icon
R
Signal Strength (RSSI)
In Use
No Service
Digital Service is available
Roaming
Short Message (Voice)
Battery Level
Short Message (Text)
Vibrator Enabled
D
LG CION BANNER
Sep/09
[Fri]
12:30pm
MENU BOOK
Rm
LG-DM120
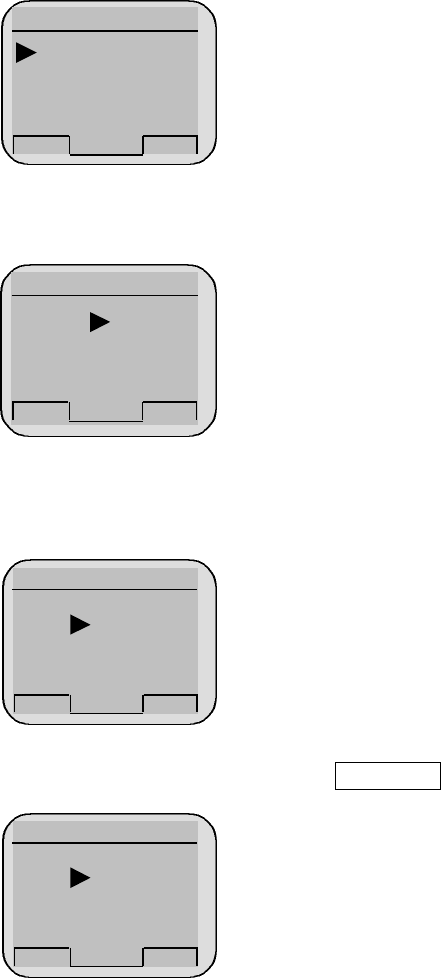
CHAPTER 2. BASIC FUNCTIONS
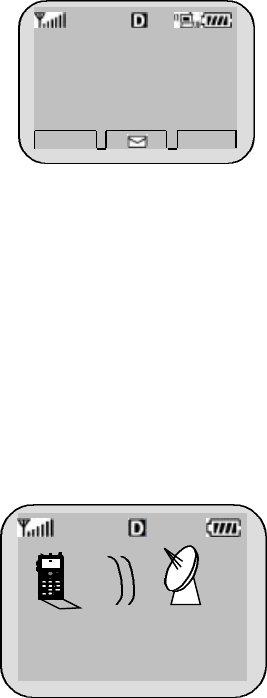
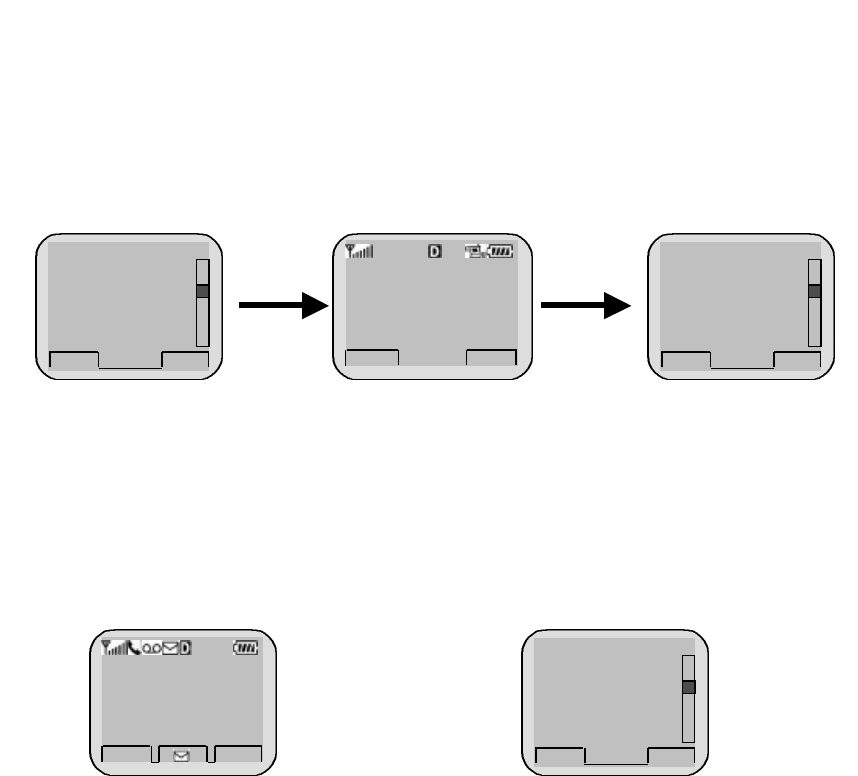
Turning the Phone On and Off
<Turning the Terminal On>
1. Connect the terminal to the charged battery or the external power supply.
2. Press the [END/PWR] key for about 1.5 seconds until a red right appears on the upper side
of the terminal.
< Turning the Terminal Off >
1. Press the [END/PWR] key until the end message appears on the LCD, and then stop pressing
the key.
2. If an antenna is stretched, push it in for safety.
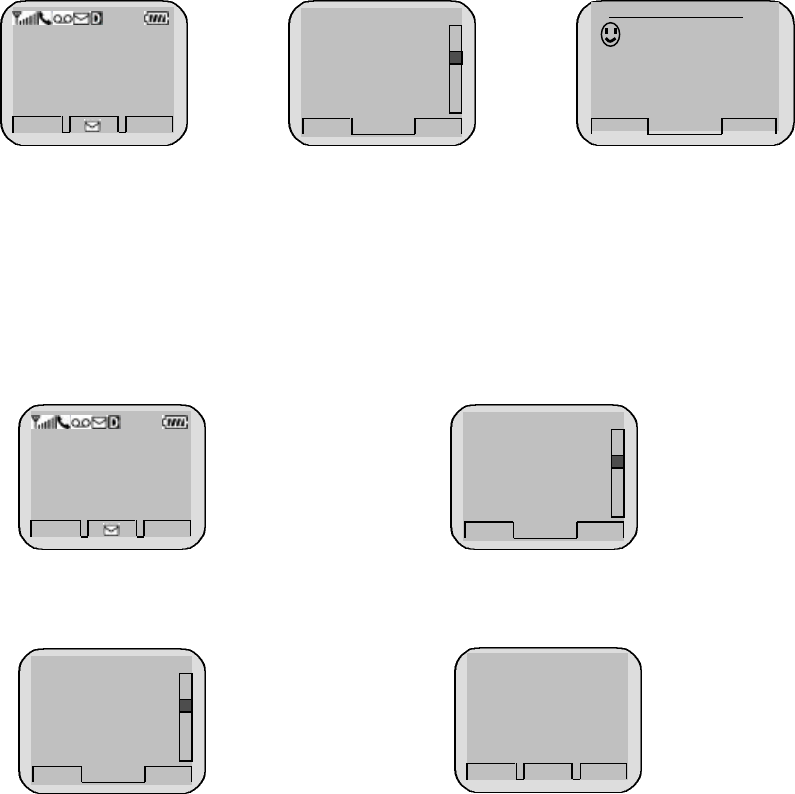
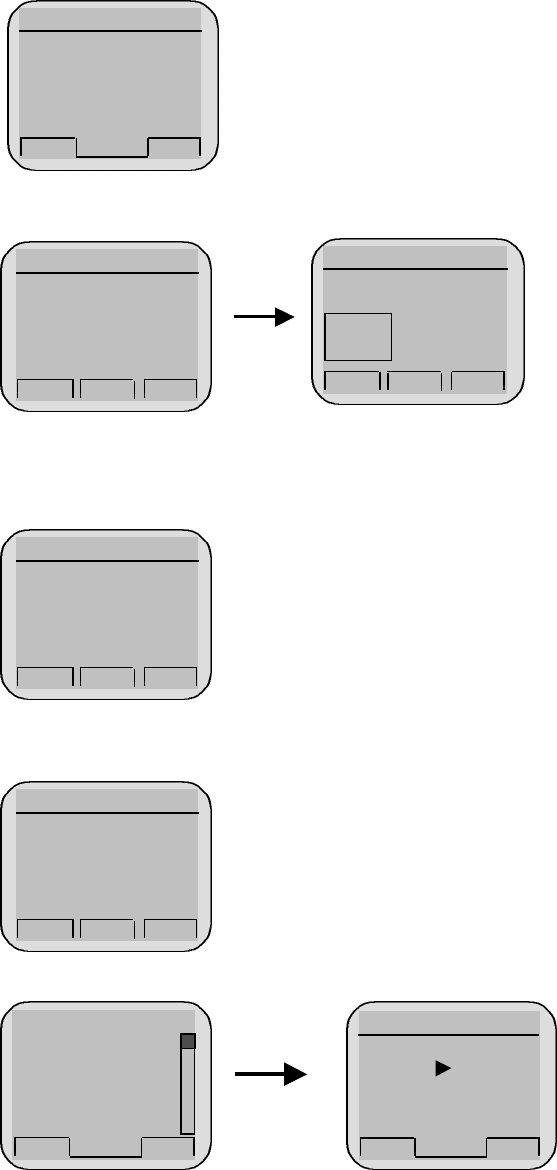
Making a Call
<Method1> Entering the Entire Phone Number
1. If the terminal is turned off, turn it on.
2. Enter the phone number.
(Enter the area code, if necessary.)
3. Press the [OK] key.
- If the terminal is locked on, enter the password to unlock the terminal. Then, attempt the
call again.
- If the call is not connected, “Call Failed” signal will be indicated on the LCD.
4. Press the [END] key.
<Method2> Using Phone Book Entry
1. Enter the phone entry number, and press the [OK] key or
2. press the related phone entry number for some time. Then, the call will be attempted.
e.g.) Press the [2] key for some time, then call will be
connected to the phone number stored in the Entry #2.
123-456-7890
OPT CLR
123-456-7890
Calling . . .
LG-DM120
3. If you are not sure of the phone entry number, select the Soft Key(BOOK) with the Right
Mouse Button.
4. Place the cursor on the Phone Book, and press the Soft Key(SEL) with the Left Mouse
Button.
5. Search the Phone Book Entry number or name requested in the Phone Book to attempt a call
to the phone number stored in it.
<Method3> Using the Recent Call History
1. Select the Soft Key(BOOK) with the Right Mouse Button..
2. If the screen changes, place the cursor on the Call History. Then, press the Soft Key(SEL)
with the Left Mouse Button.
3. If the “Outgoing”, “Incoming”, and “Missed” are indicated on the screen, select the menu
requested. Ten phone numbers of the recent calls are stored in each menu. Place the cursor on
the menu requested, and press the Soft Key(SEL) with the Left Mouse Button.
4. The phone number list appears on the screen. Then, search and place the cursor on the phone
number or name requested, and press the [OK] key.
Correcting Dialing Mistakes
1. Press the Soft Key(CLR) with the Right Mouse Button of the screen to erase the number or
character of the last entry.
2. Press the Soft Key(CLR) with the Right Mouse Button for one second, then all the number or
LG CION
BANNER
Sep/09
12:30p
m
MENU BOOK
Rm
SEL BACK
¡ã
¡å
1.Call History
2.Phone Book
3.Own Number
EDIT FIND
¡ã
¡å
PHONEBOOK SRCH
[???]
¢Î
019-111-1111
Enter Number!
LG CION
BANNER
Sep/09
12:30p
m
MENU BOOK
Rm
SEL BACK
¡ã
¡å
1.Call History
2.Phone Book
3.Own Number
VIEW BACK
¡ã
¡å
01 : 1111111
02 : 2222222
03 : 3333333
04 : 4444444
SAVE BACK
TIME
Call to
1111111
LG-DM120
character requested will be erased.
Receiving Calls
1. Press any key except for the [END/PWR] key to receive a call.
Η Press the END Key to end the incoming call
2. When the call completes, press the [END/PWR] key.
3. Or close the flip.
Mute
1. Press the Soft Key(MENU) with the Left Mouse Button during the call.
Redialing Last Outgoing Number
<Method 1>
1. Just press [SEND] key to redial the last outgoing number. Then, the call will be attempted.
<Method 2> using the Call History
1. Press the Soft Key(BOOK) with the Right Mouse Button.
2. Place the cursor on the Call history menu on the screen, and press the Soft Key(SEL) with
the Left Mouse Button.
3. Then, three menus will appear.
-
“Outgoing”: Ten last outgoing calls are stored in this menu.
-
“Incoming”: Ten last incoming calls are stored in this menu
.
2. If a popup menu appears on the screen,
place the cursor on the Mute menu and
press the Soft Key(SEL) with the Left
Mouse Button to select the Mute state.
(The message”Mute” will be indicated on
the screen.)
3. Press the Soft Key(MUNU) with the Left
Mouse Button to clear the function. The
popup menu will appear. Select the Unmute
menu. (The message “Mute” will be disappear on
the screen
SEL BACK
¡ã
¡å
1.Send Msg
2.Ear Volume
3.Mute
4.Memo
MENU BOOK
MUTE : 1 :20
SEL BACK
¡ã
¡å
1.Send Msg
2.Ear Volume
3.Mute
4.Memo
LG CION
BANNER
Sep/09
12:30p
m
MENU BOOK
Rm
SEL BACK
¡ã
¡å
1.Call History
2.Phone Book
3.Own Number
LG-DM120
-
“Missed”: Ten last missed calls are stored in this menu
.
4. Place the cursor on the menu requested, and press the Soft Key(SEL) with the Left Mouse
Button.
e.g.) Place the cursor on the “Outgoing” menu and press the Soft
Key (SEL) with the Left Mouse Button.
5. The phone number list will appear. Place the cursor on the phone number or name requested,
and press the [] key. Then, the call will be attempted.
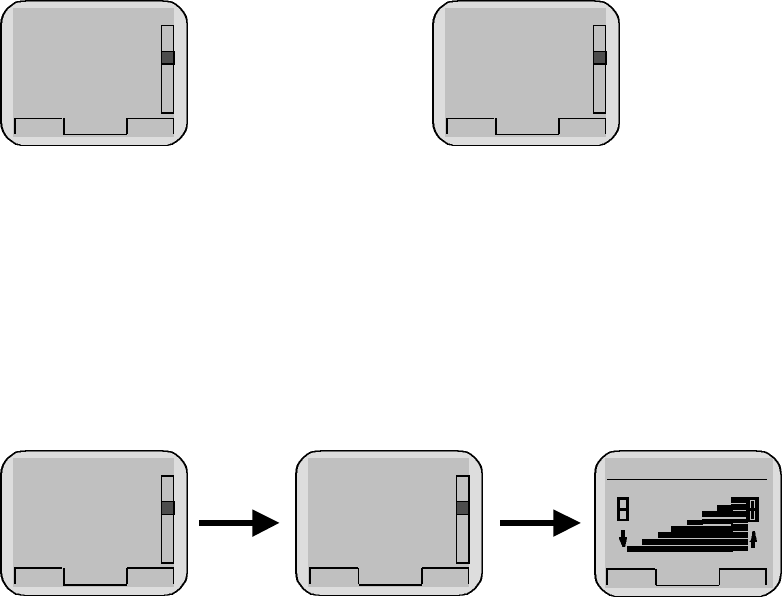
Adjusting the Volume
It is possible to adjust the speaker volume, ring volume, and the Ring Type with the volume
buttons on the upper left side of the terminal.
- It is possible to adjust the speaker volume during the call.
- It is possible to adjust the key tone volume in a idle state.
- It is possible to adjust the ring volume during the ringing time.
- It is possible to adjust the ring volume from the Sound item on the Menu screen also.
( F [MENU] [Sound][RingVolume] or [MENU]-1-3)
If you turn the ring volume down to the minimum, the message “-Ringer Off-“ will be indicated
on the LCD and no ringing sound will be sent out.
- Adjust the Ring Type on the Sound item on the Menu screen.
(F [MENU] [Sound][Ring Type] or [MENU]-1-2)
SEL BACK
¡ã
¡å
1.Outgoing
2.Incoming
3.Missed
VIEW BACK
¡ã
¡å
01 : 1111111
02 : 2222222
03 : 3333333
04 : 4444444
SEL BACK
¡ã
¡å
1.Sound
2.Display
3.System
4.Call info
SEL BACK
¡ã
¡å
1.Ring Sound
2.Ring Type
3.Ring Volume
4.Key Beep
OK BACK
¡ã
¡å
Key Volume
--------------
-
--------------
LG-DM120
CHAPTER 3. MENU FEATURE
Main Menu
It is possible to verify or change various functions or setup the terminal status on the main menu.
General Guidelines to MENU Access and Settings
1. Press the Soft Key(MENU) on the left and the menu items will appear.
2. Use the upside and downside keys (é ê) to move to the menu items not indicated on the
screen.
3. Place the cursor on the menu item requested with the direction keys to select a menu item,
and press the Soft Key(SEL) on the left. And then, press the number corresponding to the
menu item to be selected.
4. Use the upside and downside keys (é ê) to change the setup values in the menu items.
5. Press the Soft Key(SEL) on the left to store the setup values changed in the menu item, or
press the Soft Key(BACK) on the right to leave the setup values not stored.
6. Press the Soft Key(BACK) on the right to move up to the upper level during the value setup
in the menu items.
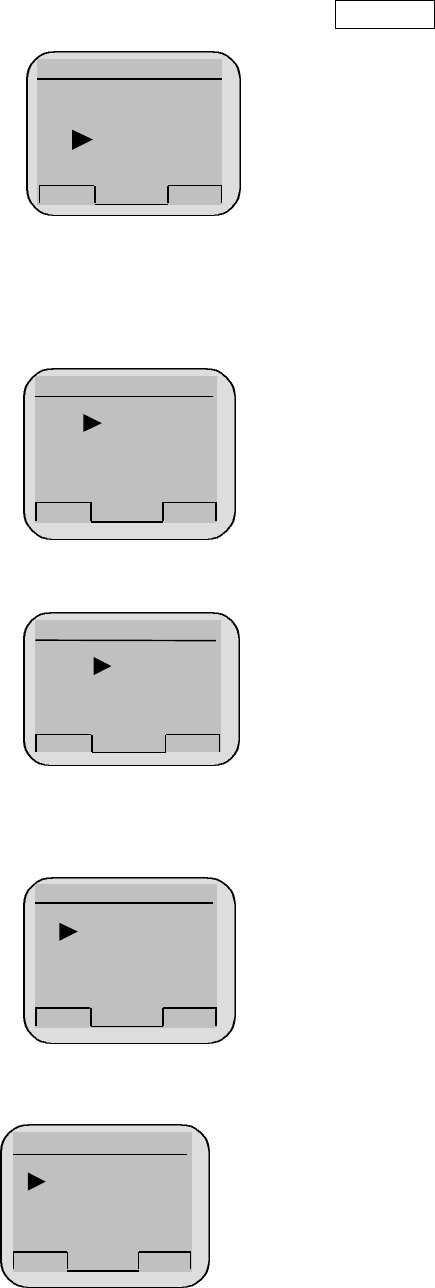
Menu Item Descriptions
Menu 1. <Sound>
1. Ring Sound ( F [MENU]-1-1 )
Select one of 3 bell Sound and 22 melodies with the direction keys.
Ring Sound
¢º
Sound 1
OK BACK
¡ã
¡å
LG CION
BANNER
Sep/09
12:30p
m
MENU BOOK
Rm
SEL BACK
¡ã
¡å
1. Sound
2. Display
3. System
4. Call Info

LG-DM120
OK BACK
¡ã
¡å
Ring Volume
---------------
---------------
OK BACK
¡ã
¡å
KeyBeep Volume
---------------
2. Ring Type ( F [MENU]-1-2 )
Set one of three Ring Types (Ring, Vibrator, Ring+Vibrate and Lamp) with the direction keys.
3. Ringer Volume ( F [MENU]-1-3 )
Set of the ring volume in five levels (Most High - High - Medium –
Low - Off ) with the direction keys. The ring
volume is also adjustable with the side keys while the bell is ringing
or in a call waiting state.
4. Key Beep (F [MENU]-1-4)
Set the tone length in two levels (Normal, Long) with the direction
keys.
5. Key Volume (F [MENU]-1-5)
Adjust the beep in five levels (Most High, High, Medium, Low, Off) with the direction keys.
6.Ear Volume (F [MENU]-1-6)
Adjust the earpiece volume in four levels (Most High, High, Medium,
Low) with the direction keys. It is also adjustable with the side keys
in a busy line state.
OK BACK
¡ã
¡å
Ring Type
Ring
Vibrate
VIB+Ring
Lamp
¢º
OK BACK
¡ã
¡å
Key Beep
Normal
Long
¢º
OK BACK
¡ã
¡å
Earpiece Volume
---------------
---------------

LG-DM120
7. Alerts Sound ( F [MENU]-1-7 )
An alert signal is activated according to each situation by five
submenus under the Alert menus.
- Fade: It is activated if the call is disconnected in a busy line state. (On / Off)
- Minute : This signal is activated when 1minute elapses from the call connection. (On /
Off)
- Service : This signal notifies whether a call is available or not between the service and the
no service areas. (On / Off)
- Call Connection : It is activated to notify that the call is connected. (On / Off)
- Roam Ringer : This signal notifies that the roam is activated
Menu 2. <Display>
1. Backlight ( F [MENU]-2-1 )
It is possible to adjust the keypad and the backlight time in 5 levels
with the direction keys.
(Always Off, 10 Sec, 30 Sec, Always On, On when flip open)
2. Banner ( F [MENU]-2-2 )
It is possible to store the characters to appear on the standby state
of the terminal. Select either “Keep” or “Change” with the
direction keys.
3. Auto Hyphen (F [MENU]-2-3 )
It is possible to set the function to enter the Hyphen to the input
number automatically to an “On” or “Off” state. .
SEL BACK
¡ã
¡å
1. Fade
2. Minute
3. Service
4. Call Connect
OK BACK
¡ã
¡å
Backlight
10 sec.
30 sec.
Flip Open
Always On
Always Off
OPT BACK
Banner
LG CYON BANNER
OK BACK
¡ã
¡å
Auto Hyphen
On
Off
LG-DM120
4. Languages ( F [MENU]-2-4 ) < TBD>
It is possible to set the language to be used in the terminal among
four languages with the direction keys
(Select one of three languages of English, Spanish, and
Portuguese)
Menu 3. <System>
1. Set NAM( F [MENU]-3-1 )
Select one NAM in the two NAM (Number Assignment Module)
services. Select either “No. 1” or “No. 2” with the direction key.
Both “No.1” and “No. 2” have different NAM parameters,
respectively. Therefore, if you select the NAM identified with the
subscribed number, the service is not available.
2.Auto NAM ( F [MENU]-3-2 )
This service enables setting of the NAM to the identified
subscribed number for one or more than one NAMs. Use the
direction keys to set the service to either “On” or “Off” state.
3.Force Call ( F [MENU]-3-3 )
This service set the prefer mode (Analog only, CDMA only,
Standard, Temp Analog)
4.Systemp Select ( F [MENU]-3-4 )
This service set the prefer mode (Analog only, CDMA only, Standard,
Temp Analog)
OK BACK
¡ã
¡å
Language
English
Protogunes
SELECT NAM
NAM # 1
NAM # 2
OK BACK
¡ã
¡å
Auto NAM
On
Off
OK BACK
¡ã
¡å
Force Mode
Analog Only
OK BACK
¡ã
¡å
System Select
Automatic-A
Automatic-B
Home only
OK BACK
¡ã
¡å
LG-DM120
Total: 2 Calls
Time: 00:08:00
All Calls
OK BACK
ZERO
Menu 4. <Call Info>
1. Last Call ( F [MENU]-4-1 )
This service shows the last call time.
2. Home Calls (F [MENU]-4-2 )
- Total call time at the Home system (not roaming) from initial setup to the present.
3. Roam Calls ( F [MENU]-4-3 )
Shows the call time at the roaming system from initial setup to the
present
4. All Calls ( F [MENU]-4-4 )
It shows the total call time to the present either at the Home system or
the roaming system or both.
Menu 5. <Features>
1. Data/Fax ( F [MENU]-5-1 )
OK BACK
02-850-3021
Data:8/11,2000
Time: 00:01:05
Last Calls
¡ã
¡å
Total: 2 Calls
Time: 00:08:00
Home Calls
OK BACK
ZERO
Home Calls
2 Calls
00:08:00
OK
Zero
OK BACK
ZERO
Total: 2 Calls
Time: 00:08:00
Roam Calls
OK BACK
ZERO
SEL BACK
¡ã
¡å
1. Data/Fax
2. Auto Retry
3. One-Touch
4. Voice priv.
OK BACK
Auto Receive
Off
Data In
Fax In
LG-DM120
OK BACK
¡ã
¡å
Off
After 1 ring
After 3 rings
Auto Answer
Data/Fax menu is selecting the (Off), (Data In), or (Fax In).
2. Auto Answer ( F [MENU]-5-2 )
Auto answer service is one of the most useful functions while
driving a vehicle, and it enables automatic answering to the
incoming call after the bell rings for designated times.
(Off, 1 ring after, 3 ring after, 5 ring after)
3. Auto Retry ( F [MENU]-5-3 )
If the called user is in a busy line state, this service automatically
attempts a call to that number in a certain interval. It is possible to
set the interval in four selections. (Off, every 10sec, every 30sec,
every 60sec)
4. One Touch ( F [MENU]-5-4 )
5. DM Mode Set ( F [MENU]-5-5 ) < TBD >
- Selecting the phone mode (DM mode or Data Mode)
Menu 6. Utility
- Country
- Calculator
OK BACK
¡ã
¡å
Off
10sec.
30sec.
60sec.
Auto Retry
OK BACK
¡ã
¡å
One Touch Dial
Enable
Disable
OK BACK
¡ã
¡å
DM Mode Set
DM Mode
Data Mode
LG-DM120
QUIT CLR
ENTER
LOCK CODE
____
Menu 7. <Security>
Select the Soft Key(MENU) on the left in an initial call waiting state,
and select [6. Security]. Then a message will appear on the LCD to
request the Lock Code. If you fail to enter the correct Lock Code of
four characters, the process will not proceed to the following low level
menu. And if the Lock Code is not correct, the process will return to
the Main Menu.
1. Lock Mode ( F [MENU]-7-1 )
Set the terminal lock function to either “On Power Up”, “Never”, or “Always” with the
direction key.
2. Restrict ( F [MENU]-7-2 )
This service enables restriction on the call service. Select either “Yesf” or “No” with the
direction key. The call service will be restricted only to the emergency phone numbers.
However, call termination is available.
3. Clear Callinfo (F [MENU]-7-3 )
This service enables clearing of all the call information in the Memory. Select either “Yes” or
“Back” with the direction key. Select “Yes”, then a message will appear on the LCD to
confirm the command before the service clears the information. Select “Yes” to clear the
information requested.
4. Emergency # ( F [MENU]-7-4 )
This service enables entering of the emergency phone numbers up to three.
It has two items of “Edit”, and “Next” as the Submenu. Select “Edit” to view the
emergency phone numbers. If the memory address is empty, the message “Empty” will be
indicated. Select “Add”, enter the phone number requested and then select the Soft
Key(SAVE) on the left, to add the emergency phone numbers. Enter the memory address
when a message appears to request the memory address on the following image, and then
press the Soft Key(SAVE) on the left to store it. Select “Erase All” to erase all the emergency
phone numbers. Then, a message will appear to confirm the command. Select the Soft
Key(YES) on the left to erase all the emergency phone numbers.
5. New Code ( F [MENU]-7-5 )
This service enables replacing of the present terminal Lock Code in four digits with a new
Lock Code. A message will appear to confirm the command to change the lock code.
LG-DM120
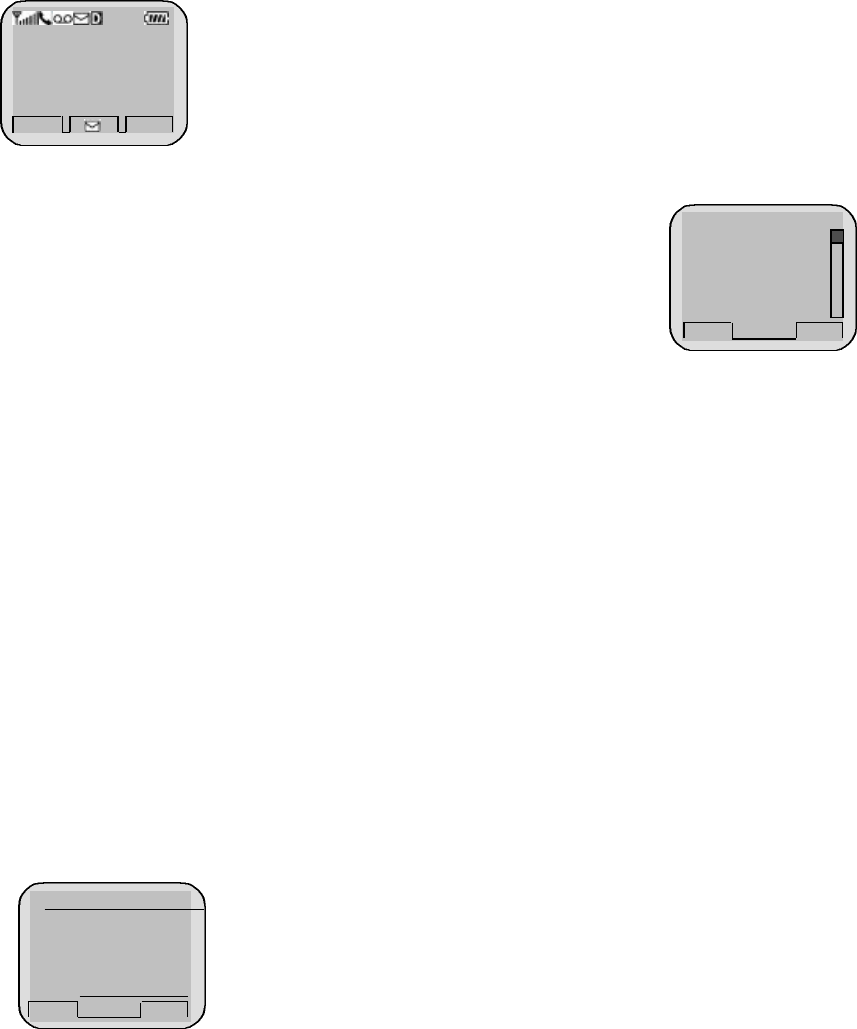
CHAPTER 4. Message
Massage Service
This service supports reception of the text message, alerting, origination of the text message,
and the voice mailbox. It is possible to access the above functions with the text
message key Call back
service is also available with the call key ([OK] key) , if the calling number is indicated on the
message received.
It is possible to store up to 25 messages (received message : 20 , originated message : 5) and to
receive up to 120 characters per message. It is recommended to check the number of character
receivable because the capacity depends on the system service provider.
<Initial Message Service Image >
- Move the cursor with the upside and downside keys,
and press Softkey(SEL) for the menu requested. Press
Softkey(BACK) to return to the initial image on the terminal.
- ( ): The number in the parenthesis indicates the
number of messages.
<Type of Menu>
- Received Msg : Menu to check incoming text
- Send Msg : Menu to send the text message
- Setting : Menu to select the alerting tone to report arrival of a message
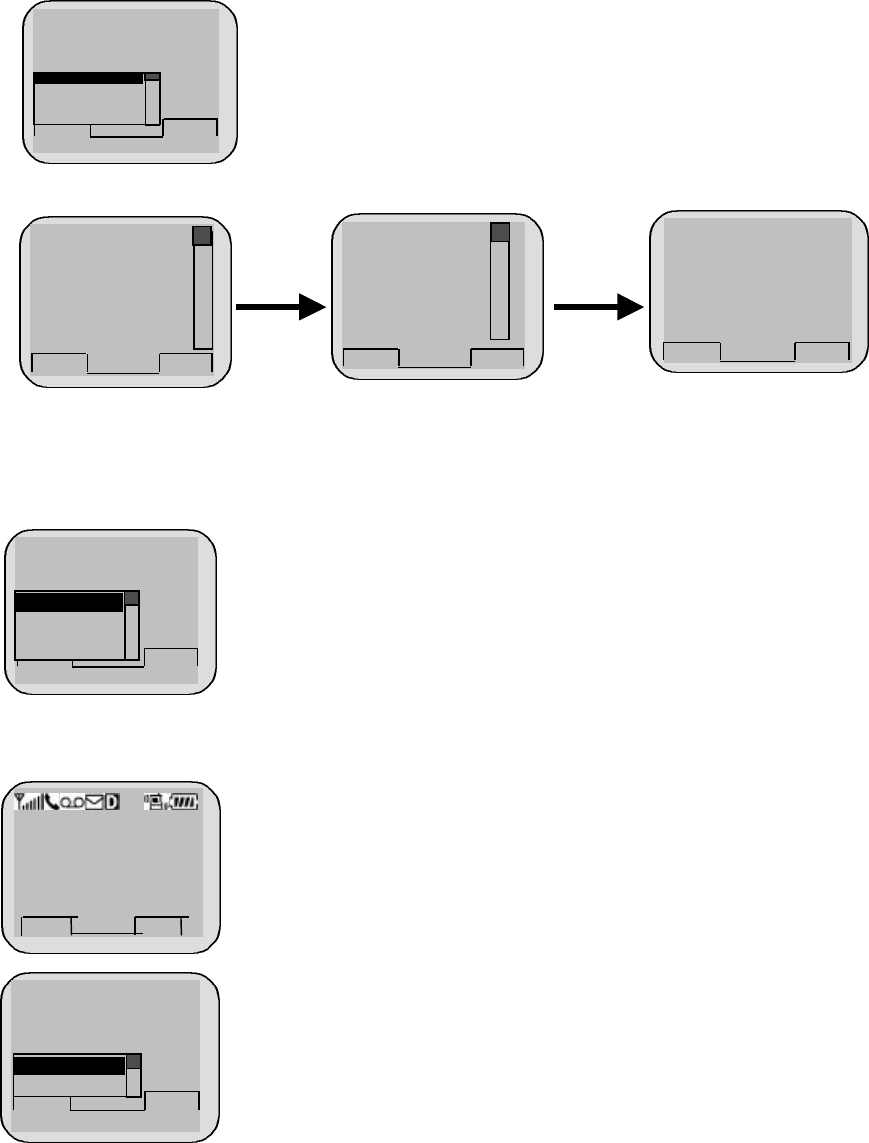
1. Received Msg
1.1 Text
1.1.1 New Meswsage
Menu to check the received message.
<When a message has been received. >
Select the VIEW, and the sub menu related to the message will appear.
For erasing or saving, select th softkey OPT
SEL BACK
¡ã
¡å
1. Received Msg
2. Send Msg
3. Setting
MESSAGE!
9/18 3:25pm
0113456789
VIEW BACK
Rm
9/18 3:25pm
Message from
Smith Kim
0113456789
Hello this is Ki
m from IBM.
OPT BACK
LG-DM120
Hello this is Ki
m from IBM. Plea
se call me ASAP.
I wiil be staying
at Hotel Clinton.
Waiting...
OPT BACK
OK
Erase
<When the Erase item is selected on the sub menu >
- [Next]: It indicates that there is another message received.
(If no more new message has been received, the old text list
will be indicated.)
- [Erase]: It erases the message.
- [Call back]: It calls back to the calling number.
1.1.2 Old Text (*)
-
- It indicates the checked but not erased messages in the form of the list.
- It indicates the checked and stored message in the form of the list. Move the location of > with
the upside or downside key to select the message.
1.2 Voice (*)
- It indicates the number of the voice messages in the voice mailbox.
- Press the voice mailbox identification number or the [Call] menu
key. Then, the voice mailbox will connect.
- Select the [Erase] menu item. Then, the messages will be erased, as
many as indicated on the LCD, without need to verify the number of
messages
SEL BACK
¡ã
¡å
1.Received Msg
2.Send Msg
3.Setting
SEL BACK
¡ã
¡å
1.Text(1/0)
2.Voice(0)
3.Erase All
01:*Hellp this
02:Let’s go for
¢º
BACK
OPT ¡ã
¡å
View
Erase
9/18 3:25pm
Message from
Smith Kim
0113456789
Hello this is Ki
m from IBM.
OPT BACK
Voice Mail
9/18 3:25pm
3 new message
OPT BACK
Rm
OPT BACK
¡ã
¡å
9/18 3:25pm
VOICE MAIL
Smith Kim
0112345678
3 New Messages
Erase
Call Back

LG-DM120
1.3 Erase All
- This service enables erasing of all the messages stored by the message
service.
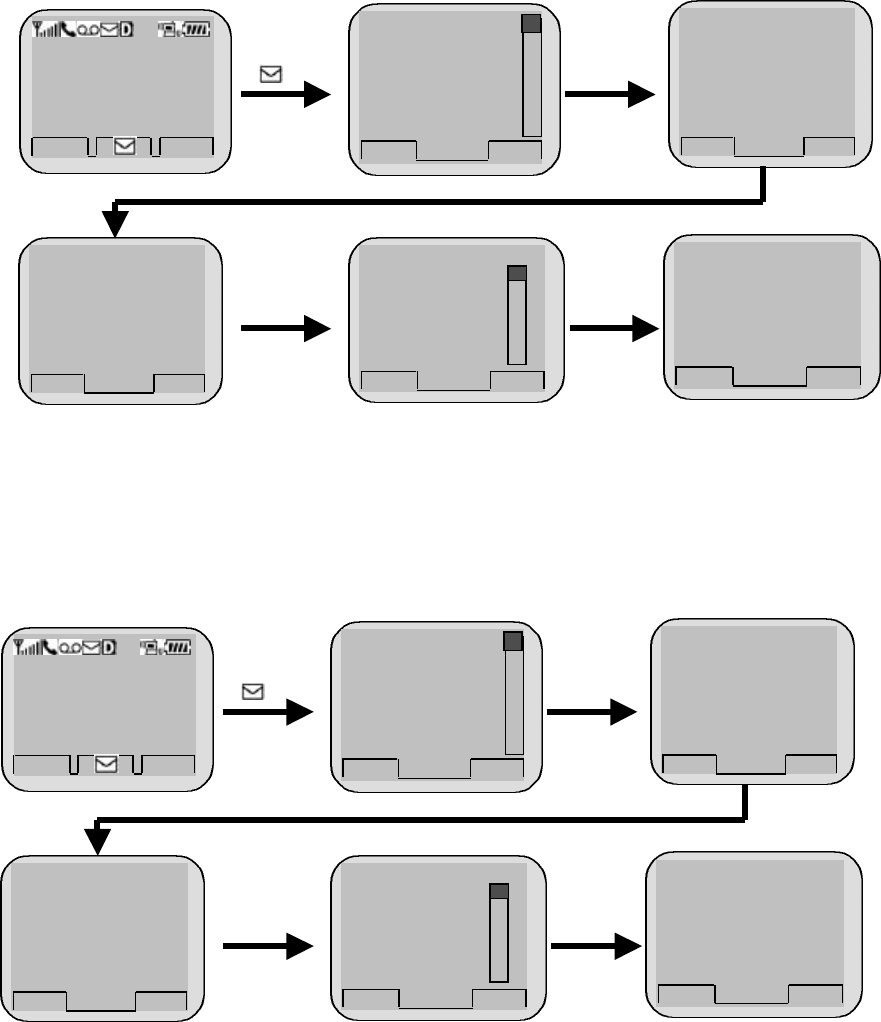
2. Send message
- Menu to originate SMS
2.1 New MSG
- Menu to originate new SMS
- After input message, select OK and Send message
LG CION BANNER
Sep/09
[Fri] 12:30p
m
MENU BOOK
Rm
SEL BACK
¡ã
¡å
1.Received Msg
2.Send Msg
3.Setting
SEL ¡ã
¡å
1.New Msg
2.Old Msg
3.Erase
BACK
Receiver Phone #
123-456
OK BACK
¡ã
¡å
Call Back#
567-890
¢º
OK BACK
¡ã
¡å SEL CLR
¡ã
¡å
Write MSG [80]
¢¸
English
¢º
Erase Message
Erase
All Message?
OK BACK
Erasing Data
Please Wait.
Selecting OK
LG-DM120
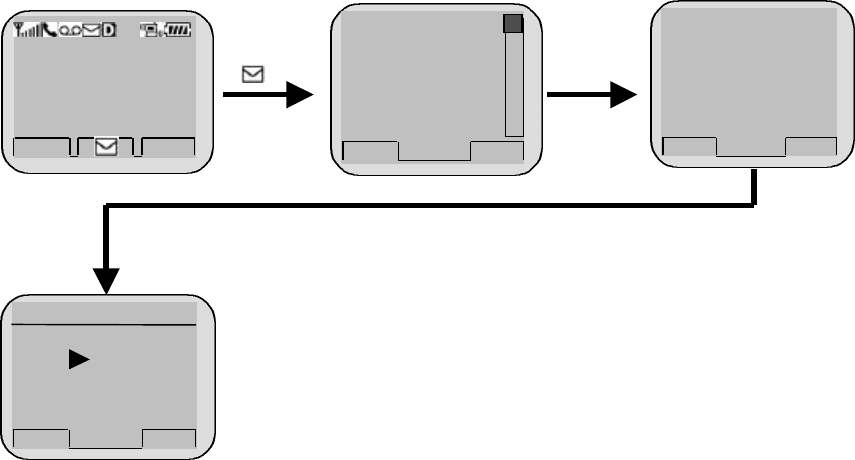
2.2 Old Message
- Menu to originate the message from the messages stored by the message service
- After selecting message number, select OK and SEND message
2.3 Erase
- This service enables erasing of all the originated messages stored by the
message service.
- After selecting want to erase, and select OK.
LG CION BANNER
Sep/09
[Fri] 12:30p
m
MENU BOOK
Rm
SEL BACK
¡ã
¡å
1.Received Msg
2.Send Msg
3.Setting
SEL ¡ã
¡å
1.New Msg
2.Old Msg
3.Erase
BACK
Receiver Phone #
123-456
OK BACK
¡ã
¡å
Call Back#
567-890
¢º
OK BACK
¡ã
¡å
1:Yes
2:No
3:Call me
4:Need directi
5:Where are yo
6:Will I call
¢º
SEL BACK
¡ã
¡å
LG-DM120
3. Setting
- It is possible for the user to set the alarm to report arrival of a message.
- Alert: Select one of 2 alerts, 4 alerts, mute and vibrator services.
- After selecting Alert, select OK
LG CION BANNER
Sep/09
[Fri] 12:30p
m
MENU BOOK
Rm
SEL BACK
¡ã
¡å
1.Received Msg
2.Send Msg
3.Setting
1.Alert
SEL BACK
¡ã
¡å
OK BACK
¡ã
¡å
Alert
2 Rings
4 Rings
Vibrator