LG Electronics USA DT-LG22V24 Personal Computer User Manual
LG Electronics USA Personal Computer Users Manual
Users Manual
2Instruction / Safety Information
Instruction / Safety Information
Using LG Easy Guide, LG Troubleshooting
LG Easy Guide (User's Guide) and LG Troubleshooting(Troubleshooting Guide) are
provided to users for easy and convenient use of the product.
LG Easy Guide and LG Troubleshootingcan be used on the Start screen and the
Desktop.
Running in the Start Screen
On the Start screen, press [LG Easy Guide] or [LG Troubleshooting] tile to run it.
•LG Easy Guide and LG Troubleshooting on the Start screen can be used only in the
online environment.
•If the product is not connected to the Internet, use [LG Easy Guide] and [LG
Troubleshooting] installed on the Desktop.
ENGLISH

Instruction / Safety Information 3
Running on the Desktop PC
1On the Start screen or Desktop, click [
] icon to run [LG Easy Starter].
TIP
LG Easy Starter may be installed through LG Update Center.
2From [LG Software] menu, run [LG Easy Guide] or [LG Troubleshooting].
•If LG Easy Starter is not installed, refer to [Run, Stand by and Exit Windows Store
App] and then run [LG Easy Guide] or [LG Troubleshooting].
ENGLISH

4Instruction / Safety Information
Information/Precautions Before Using
Before reading LG Easy Guide, first check the following information.
•Representative images are used in LG Easy Guide. Product purchase may differ in
appearance and color.
•LG Easy Guide includes instruction about optional products. There may be information
about products you did not purchase.
•This LG Easy Guide has been written for the Windows 8.1 operating system.
•Use, duplication, or reproduction of any part of LG Easy Guide without prior permission
from LG Electronics Inc. is strictly prohibited.
•The contents of LG Easy Guide are subject to change without prior notice.
•LG Electronics does not provide warranty for the data loss. In order to minimize damage
from data loss, please make backup copies of important data.
•Some games (online, 3D or 2D) may not be supported and you may experience skipped
video during the playback of some high definition video (Full HD or HD-level video, etc.).
•Windows 8.1 included in this program includes its own anti-virus program(Windows
Defender), and LG Electronics does not provide any separate anti-virus program.
Safety Precaution Notations
The below symbols are to inform you of dangers and safety concerns that you must be
aware of. Read the symbol-indicated instructions with caution to avoid any possible mishap.
WARNING
Appears in the case of noncompliance with the instruction that may cause serious
physical damage or fatal injuries.
CAUTION
Appears in the case of noncompliance with the instruction that may cause minor damage
to the body or the machine.
Text Notations
The below symbols are used to display information required to use the product. Familiarize
yourself with the instructions marked by the symbols to ensure proper operation of the
product.
TIP
Indicates that the following information is added to help the user utilize the machine more
conveniently.
ENGLISH
Instruction / Safety Information 5
The Optional symbol indicates that the concerned device is not included in the product
package and thus has to be purchased separately, or the device may not be applied to
the user's machine depending on model type.
Manufacturer and Copyright
Microsoft™, MS™, WinPE™, and Windows®are the registered trademarks of Microsoft
Corporation™.
IBM™, IBM Personal Computer™, PS/2™, and PC AT™are the registered trademarks of
International Business Machines Corporation™.
The SuperSpeed USB Trident logo is a registered trademark of USB Implementers Forum,
Inc.
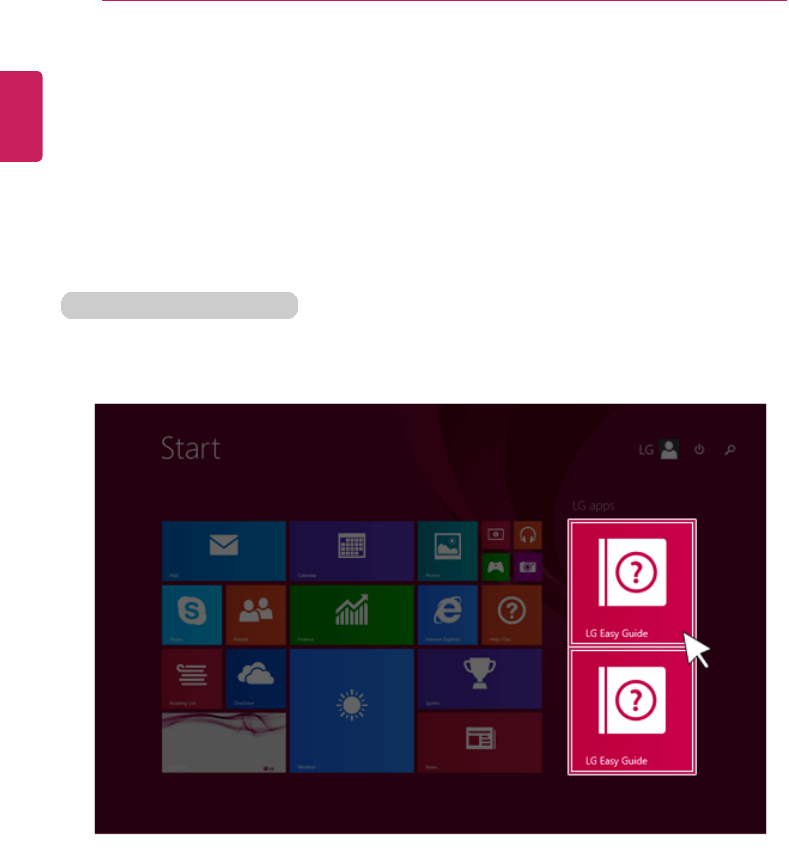
LG™logo is a registered trademark of LG™Corporation.
SONY ™logo and Memory Stick™are the registered trademarks of
SONY™Corporation.
Transcend™logo is a registered trademark of Transcend™Corporation.
SD™logo is a registered trademark of Secure Digital™Corporation.
xD™logo is a registered trademark of FUJIFILM™Co., ltd.
The terms HDMI and HDMI High-Definition Multimedia Interface, and the
HDMI logo are trademarks or registered trademarks of HDMI Licensing LLC
in the United States and other countries.
Please understand that LG Easy Guide may contain incorrect part information despite our
dedicated efforts to ensure accuracy.
The illustrated figures in LG Easy Guide may differ in appearance with the actual products.
LG Electronics Inc. reserves the right to modify any part of this manual for quality purposes,
without prior notice.
Unauthorized reproduction or duplication of any part of LG Easy Guide is strictly prohibited.
Copyright (C) 2014 LG Electronics Inc. Digitalmate Co., LTD
Country of Origin China
Manufacturer LG Electronics Inc.
ENGLISH

6Instruction / Safety Information
Open Source License Info.
- COPYRIGHT -, BSD
Copyright (c) 2012, Texas Instruments Incorporated All rights reserved.
Redistribution and use in source and binary forms, with or without modification, are
permitted provided that the following conditions are met:
Redistributions of source code must retain the above copyright notice, this list of conditions
and the following disclaimer.
Redistributions in binary form must reproduce the above copyright notice, this list of
conditions and the following disclaimer in the documentation and/or other materials
provided with the distribution.
Neither the name of Texas Instruments Incorporated nor the names of its contributors may
be used to endorse or promote products derived from this software without specific prior
written permission.
THIS SOFTWARE IS PROVIDED BY THE COPYRIGHT HOLDERS AND
CONTRIBUTORS "AS IS" AND ANY EXPRESS OR IMPLIED WARRANTIES,
INCLUDING, BUT NOT LIMITED TO, THE IMPLIED WARRANTIES OF
MERCHANTABILITY AND FITNESS FOR A PARTICULAR PURPOSE ARE DISCLAIMED.
IN NO EVENT SHALL THE COPYRIGHT OWNER OR CONTRIBUTORS BE LIABLE FOR
ANY DIRECT, INDIRECT, INCIDENTAL, SPECIAL, EXEMPLARY, OR CONSEQUENTIAL
DAMAGES (INCLUDING, BUT NOT LIMITED TO, PROCUREMENT OF SUBSTITUTE
GOODS OR SERVICES; LOSS OF USE, DATA, OR PROFITS; OR BUSINESS
INTERRUPTION) HOWEVER CAUSED AND ON ANY THEORY OF LIABILITY,
WHETHER IN CONTRACT, STRICT LIABILITY, OR TORT (INCLUDING NEGLIGENCE
OR OTHERWISE) ARISING IN ANY WAY OUT OF THE USE OF THIS SOFTWARE,
EVEN IF ADVISED OF THE POSSIBILITY OF SUCH DAMAGE.
- COPYRIGHT -
System Protection Feature
If the system becomes too hot, the system protection feature automatically switches to
power-off.
The system may not be reactivated until it cools down enough.
Information on Hard Drive / Memory Capacity
Hard Drive Capacity
The hard drive capacity shown by Windows is lower than that stated by the hard drive
manufacturer due to a difference in calculation.
ENGLISH
Instruction / Safety Information 7
Manufacturer Hard drive manufacturers use a decimal definition of 1 KB = 1,000
Bytes.
100 GB: 100,000 MB / 1,000 Bytes = 100 GB
Windows Windows use the binary definition of 1 KB = 1,024 Bytes.
100 GB: 100,000 MB / 1,024 Bytes = 97.6 GB
RAM Capacity
RAM capacity shown by Windows may be lower than the actual capacity because the PC
uses shared memory for BIOS and the integrated graphics card.
Due to BIOS using shared memory, 1,024 MB RAM may be reported as 1,022 MB or
slightly less.
If the PC has integrated graphics card, 1,024 MB RAM may be reported as 1,022 MB or
less than 1,000 MB.
Function of a CMOS backup battery
The CMOS backup battery of the main board ensures that the system setup (BIOS) does
not disappear even if the power is disconnected.
The CMOS backup battery is an expendable part.
CAUTION
•Please visit the LG Electronics Service Center to exchange the CMOS backup
battery.
•The computer may be damaged if an incompatible battery is used.
•The product warranty is not applied to failure or breakdown caused by willful
damage by the user.
Adjusting Volume (headset and speakers)
Check the volume level before listening to music.
CAUTION
•Before using the headset, check if the volume is too high.
•Do not use the headset too long.
ENGLISH
8Instruction / Safety Information
Important Safety Precautions
Please avoid any undesirable environmental factor that shortens the machine's life span.
Use the machine in a safe and stable place.
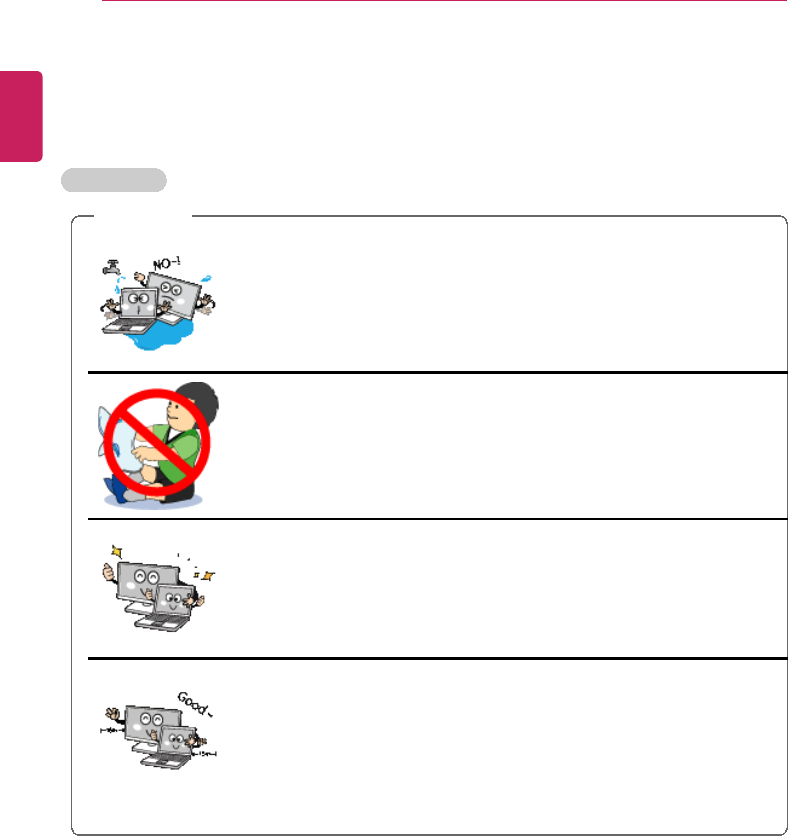
Installation
WARNING
Do not use the machine in damp places like a laundry room or
bathroom.
•Moisture may cause a glitch or an electric shock.
•The appropriate temperature and humidity ranges for use are from
10 °C to 35 °C and from 20% RH to 80% RH, respectively.
Dispose of the desiccating agent and wrapping plastic properly.
•The desiccating agent and wrapping plastic may cause
suffocation.
Use the product in a dust-free environment.
•Otherwise, the system may not function properly.
Do not leave any object nearer than 15 cm from the PC.
•Lack of ventilation could overheat the PC from inside and put
users at risk of burn injuries.
ENGLISH
Instruction / Safety Information 9
CAUTION
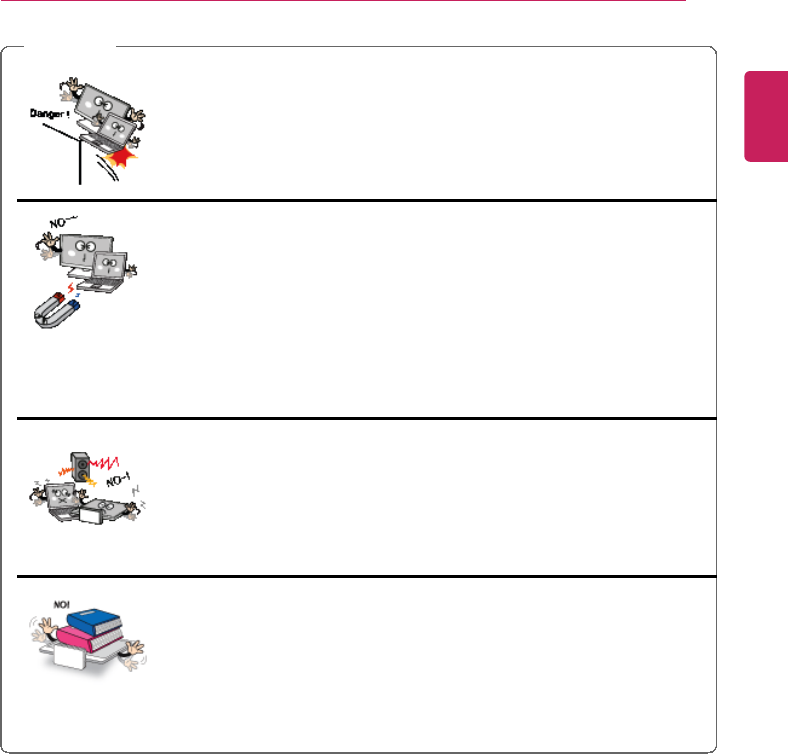
Place the machine in a safe place so that it does not fall.
•If dropped, the machine could be damaged and even cause an
injury.
Do not store or use the PC near a magnetic object (i.e. a bag
with a magnetic object, a diary, a wallet, a memo board, high-
powered speakers, a bracelet, or etc.).
•Otherwise, the H/D and the system may be damaged and fail to
operate properly.
Never place the PC on a bag with magnetic objects including
magnetic buttons.
•Otherwise, the H/D and the system may be damaged and fail to
operate properly.
Operate the product in a place without electromagnetic
interference.
•Keep a proper distance between the PC and electronic appliances
such as speakers that generate strong magnetic fields.
•Otherwise, data may be lost from the hard disk or the LCD may
show impaired coloration.
Do not put any heavy object on the machine.
•If falling, the object could damage the machine and cause an
injury.
ENGLISH
10 Instruction / Safety Information
Using a Battery
WARNING
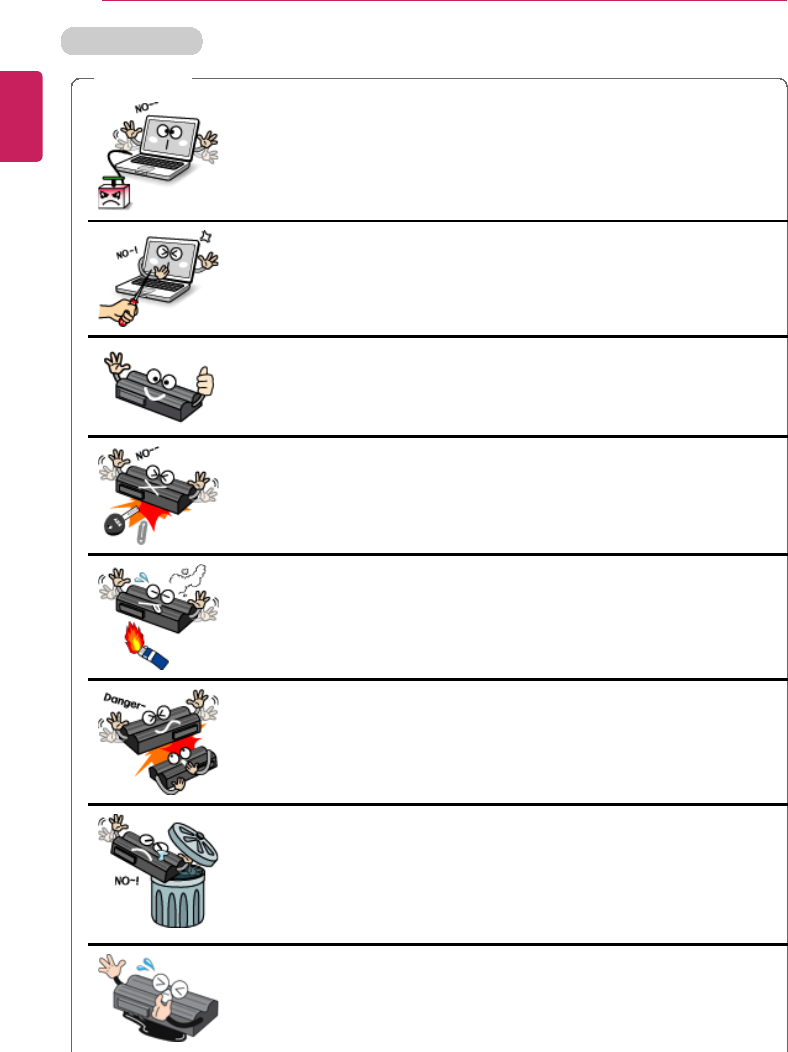
Charge the battery only with the provided instrument.
•Otherwise, the battery may be damaged presenting a risk of fire.
Do not throw or disassemble the battery.
•The resulting impairment may cause an injury, explosion, or fire.
Use batteries certified and acknowledged by LG Electronics
Inc.™
•Otherwise, an explosion or fire may occur.
Prevent the battery from being contact with any metallic object
like a car ignition key or a paper clip.
•Otherwise, the battery may be overheated to be damaged resulting
in a fire or an injury.
Keep the battery away from heat.
•Otherwise, an explosion or fire may occur.
Do not short-circuit the battery.
•Otherwise, it may explode.
Do not dispose of a spent (backup) battery arbitrarily.
•It may explode or cause a fire.
•Disposal methods may differ by country and region. Dispose of the
spent battery in accordance with the laws and safety rules of the
country and region you reside in.
If you find leakage or smell bad odor from the battery, remove
the battery and contact the local service center.
•It may explode or cause a fire.
ENGLISH

Instruction / Safety Information 11
Avoid humidity and heat above 60 °C as in cars or saunas.
•It may explode or cause a fire.
Keep the battery out of reach of children or pets.
•If damaged, it could cause an injury.
Keep the battery from being pierced by a sharp object or a chew
of your pet.
•It may explode or cause a fire.
Do not put the battery in water.
•Otherwise, the battery may be damaged or explode.
Ensure that the battery pack is locked to the machine after
installation.
•Otherwise, the battery may be damaged.
Do not use the PC on top of carpet, blanket or bed. Also, do not
put the adapter under the blanket.
•The PC may malfunction, cause a fire or burn the user due to
temperature rise.
Read the directions printed on the battery pack carefully before
use.
•Keep the battery at room temperature. Refer to other Tips and
directions in this guide to store the battery properly.
ENGLISH
12 Instruction / Safety Information
Using an AC Adapter
WARNING
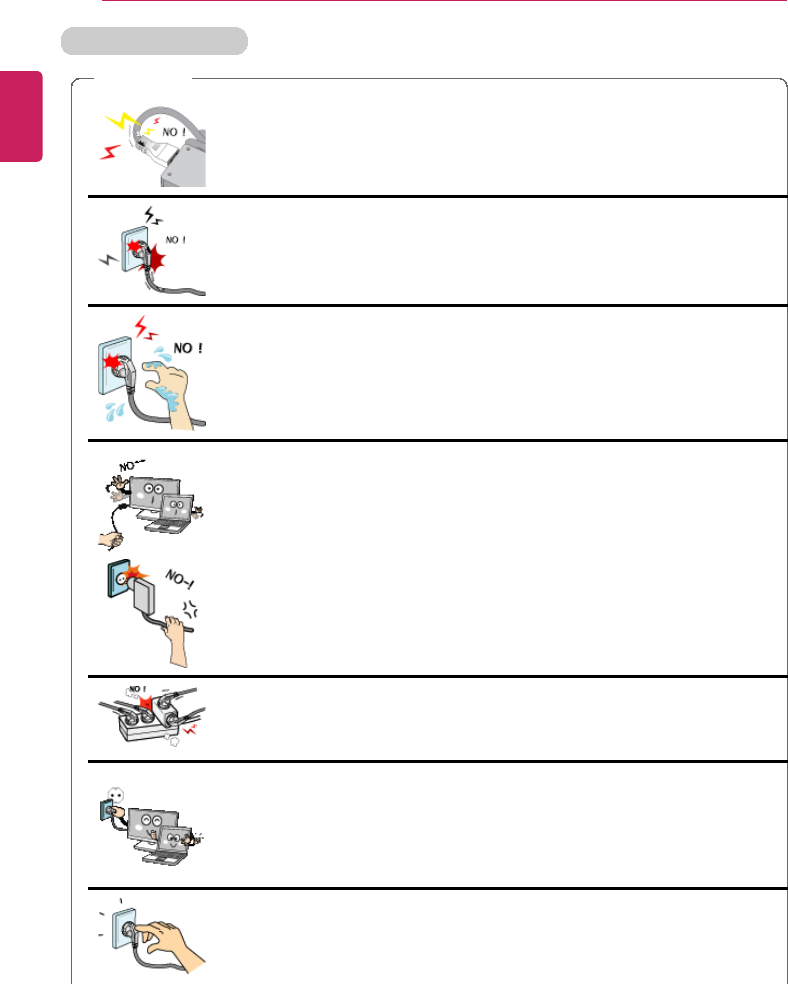
Do not bend the power cable for AC adapter too much or get
stamped by a sharp object.
•The wires inside the cable may break and cause electric shock or
fire.
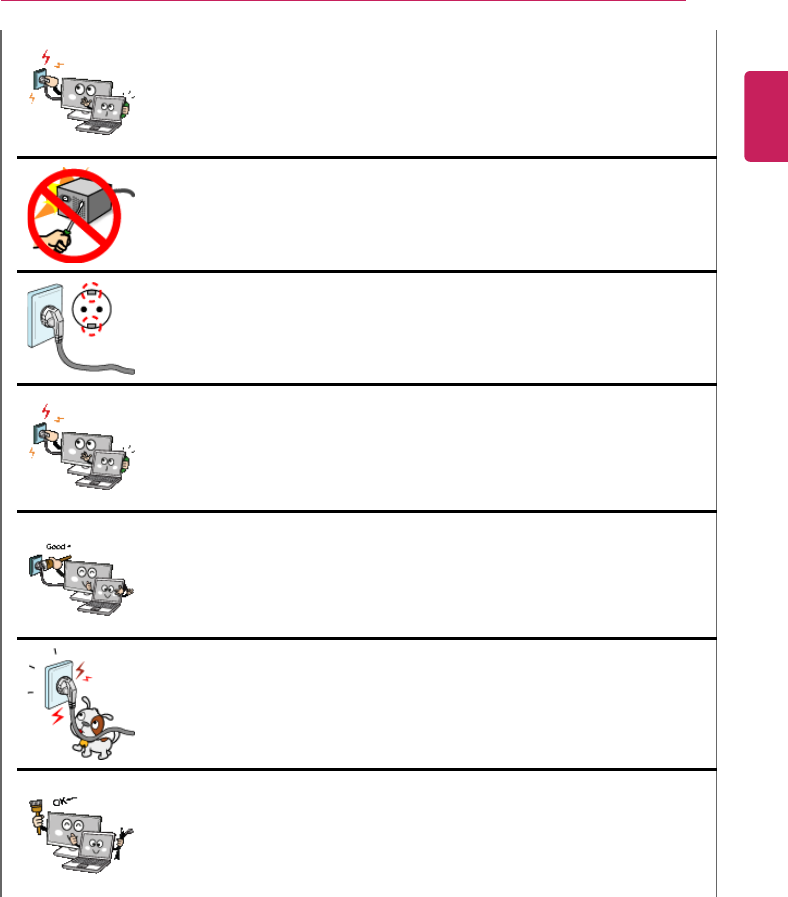
Do not use loose plugs or damaged power cords.
•An electric shock or fire may occur.
Do not touch the power cord with your hands wet.
•Otherwise, an electric shock may occur.
Pull the plug, not the cord, to disconnect the AC adaptor and
power jack.
•Otherwise, a fire or product damage may occur.
Operate the product at the proper voltage.
•Excessive voltage may result in damage on the product, electric
shock or fire.
Use power outlets with an earth pin installed and proper supply of
rated electricity.
•An electric leakage may cause an electric shock or fire.
Plug the power cord tightly into the outlet.
•Loose connection of the power cord could cause a fire.
ENGLISH
Instruction / Safety Information 13
In the case of strange noise from the cord or plug, disconnect the
power cord from the outlet immediately and contact the service
center.
•A fire or electric shock may occur.
Use the power supply/adapter provided with the product and
never disassemble the product.
•Using a different product or disassembling it may cause an electric
shock or fire.
Use a socket with an earth pin equipped.
•If not earthed, the product may cause an electric shock and get
damaged.
Ensure that the power outlet is earthed before plugging in.
•Otherwise, an electric shock from power leakage may occur.
Always keep the AC adapter and power outlet clean.
•A fire may occur.
Do not impair the cord by bending or pressing it too hard. Keep
children and pets from damaging the power cord.
•An impaired cord could damage the PC parts causing a fire or an
electric shock.
Disconnect the PC completely from others before cleaning it.
•Otherwise, an electric shock or impairment may occur.
ENGLISH

14 Instruction / Safety Information
If the power/AC adapter or the product is soaked, disconnect the
battery, power/AC adapter, and all other lines before contacting
the local service center.
•An electric shock or fire may occur.
Ensure that the power jack linked to the AC adapter and product
is connected firmly.
•Loose connection may cause malfunction or fire.
ENGLISH
Instruction / Safety Information 15
Using the PC
WARNING
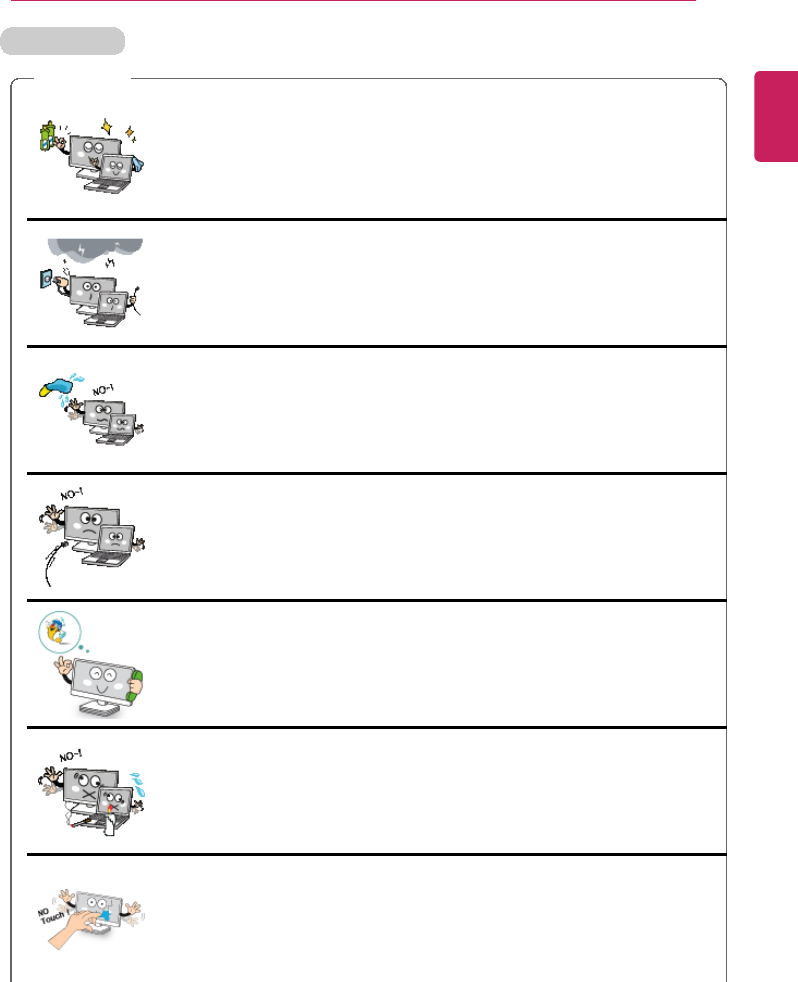
Clean the PC with a proper agent and dry it completely before
using it again.
•If the PC is wet while used, an electric shock or fire may occur.
When lightning flashes in your area, disconnect the power,
modem, LAN and other connections.
•An electric shock or fire may occur.
Do not leave a cup or other containers filled with watery
substance near the PC.
•In the case that liquid goes inside the PC, a fire or electric shock
may occur.
Do not connect the modem to a key telephone system.
•A fire may occur or the product may get damaged.
If you have dropped or damaged the PC, disconnect the power
and contact the local service center for a safety check.
•If a damaged PC is used continuously, an electric shock or fire may
occur.
Do not put a lit candle or live cigarette on the PC.
•A fire may occur.
The fluorescent lamps on the LCD contain mercury.
•If you have contacted the liquid from the LCD panel, immediately
wash the substance away with water. If you feel any slightest
trouble, visit your doctor immediately.
ENGLISH
16 Instruction / Safety Information
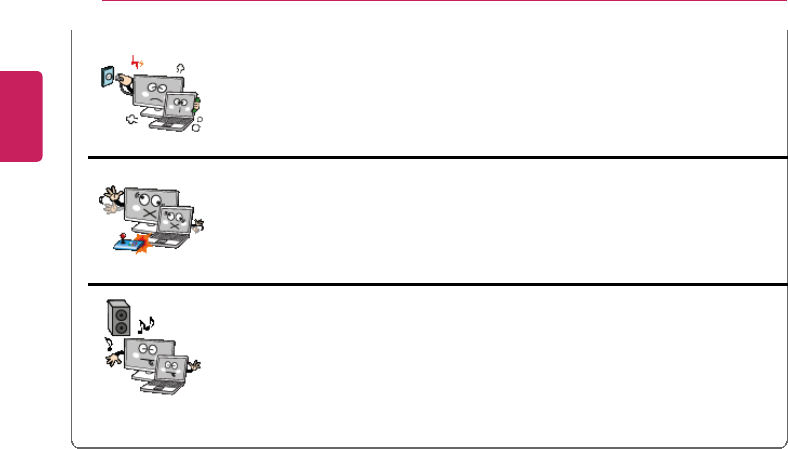
If you detect or smell smoke from the PC, stop use immediately
and disconnect the power source before contacting your local
service center.
•A fire may occur.
Do not play the PC games excessively.
•Playing a PC game for an extensive time may cause a mental
disorder. It could even inflict physical impairments on feeble people
including children and the elderly.
You may hear noise while on 3D mode.
ENGLISH
Instruction / Safety Information 17
CAUTION
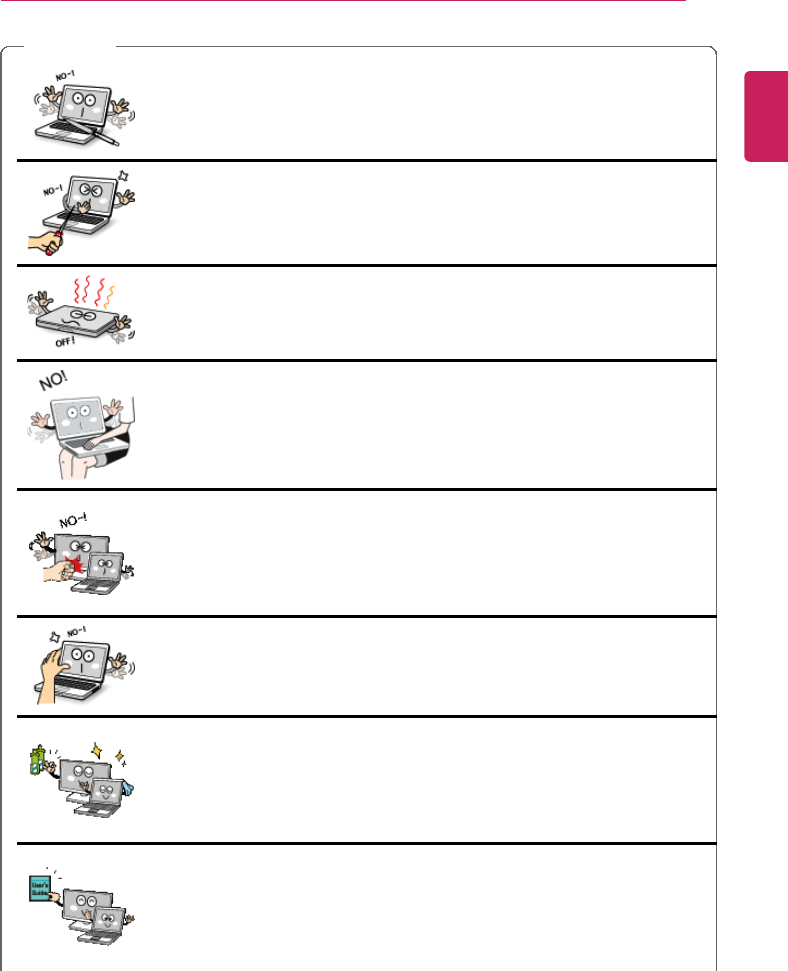
Do not leave any object such as a pen on the keypad.
•You might break the LCD by unwittingly shutting it down with a
foreign substance remaining on the pad.
Do not press or scratch the LCD panel with a sharp object.
•It may cause impairment.
Ensure the power is off before shutting the LCD.
•The machine may be deformed due to temperature rise.
The bottom of the PC gets hot when the system is working.
Please avoid touching it and do not put it on your laps.
Do not impose excessive force on the LCD screen or drop it.
•You could break the LCD glass panel.
Do not forcibly open the LCD screen with one hand.
•The machine may be twisted.
To clean the LCD screen, use designated agents and soft cloth
and rub the screen in one direction.
•Too much force may damage the screen.
When handling computer parts, follow the instructions in the
manual.
•Otherwise, damage may be inflicted.
ENGLISH
18 Instruction / Safety Information
Do not put your finger or an object in the PC card slots.
•An injury or electric shock may occur.
Install a vaccine program on your PC and do not download illegal
programs nor access any corruptive web site such as those
pushing pornographic contents.
•The system may be infected and impaired.
Please ask one of our service technicians to check the
operational state after your PC has been repaired.
•Otherwise, an electric shock or fire may occur.
For minors, we recommend a program that blocks access to
illegal or pornographic web sites.
•Minors' exposure to adult-only contents may inflict psychological
instability or even trauma on them. Take an extra precaution for your
children if the whole family is using this machine.
Do not press the Eject button while the optical disk drive (CD/
DVD/Blu-ray) is running.
•The data may be lost or the disk may spin out unexpectedly to cause
an injury.
Keep the machine away from heat-emitting devices such as a
heater.
•The product may get deformed or catch on fire.
Do not insert other devices than designated ones in the ports.
•Otherwise, the product may get damaged.
Do not use a damaged optical disc (CD/DVD/Blu-ray) or floppy
disk.
•It may cause product damage or physical injury.
ENGLISH
Instruction / Safety Information 19
Prevent children from thrusting their finger into the optical disk
drive (CD/DVD/Blu-ray) tray.
•The finger may be stuck in the tray and injured.
To remove an optical disc (CD/DVD/Blu-ray) from the tray, turn off
the program accessing the disc and wait until the disc drive light
is turned off before pressing the [Eject] button.
•The optical disk spins fast inside the tray and may be ejected from
the tray to cause bodily injury.
Do not block the ventilation hole with any object.
•Otherwise, an electric shock may occur.
Do not leave the machine in a car.
•The battery may cause an explosion or fire.
Avoid using a wireless LAN connection within the 5 m radius of a
microwave or plasma lamp. If you have to use wireless LAN and a
plasma bulb within the range, do it between channels 11 and 13.
•The transmission rate may drop even if the connection is made.
Turn off the PC if you are not going to use it for an extended time
period.
•It may overheat the battery.
As the AC adapter can be hot, do not touch it with bare skin while
using it.
•Extended period of exposure may cause burn.
Make sure that the memory cover is securely closed before
turning on the PC.
•Do not use the machine when the memory cover is open. It may
damage the machine.
ENGLISH
20 Instruction / Safety Information
Do not put in metal items such as coins, hair pin or other irons or
inflammables such as paper or matches. Especially, ensure that
children will not do so.
•A fire or electric shock may occur.
•If any foreign substance gets in the product, unplug the product and
contract the local service center
Do not put any heavy object on the power cable and AC adapter,
and avoid damage from impacts.
•A malfunction or fire may occur.
Upgrading PC
WARNING
To upgrade the PC, turn off the system and disconnect the power
cord and battery. Disconnect the telephone line if linked to the
modem.
•An electric shock or fire may occur.
When you upgrade the PC, ensure that children will not swallow
any parts including bolts.
•If a child swallowed a nut, they may get suffocated.
•In that case, see the doctor immediately.
ENGLISH
Instruction / Safety Information 21
CAUTION
Please use parts certified by LG Electronics Inc.™.
•Otherwise, a fire or product damage may occur.
Consult our service engineer before you use a peripheral device
not manufactured by LG Electronics Inc.™
•The product may get damaged.
Do not disassemble or moderate the machine arbitrarily.
•You could get an electric shock and would not be able to receive the
warranty service for that.
Handle devices and parts of the machine with care.
•The product may get damaged.
If you dissemble the PC, connect the power after reassembly is
done.
•Any exposed part may give you an electric shock.
Do not drop any part or device of the machine while
disassembling it.
•If dropped, it may be damaged and cause an injury.
ENGLISH
22 Instruction / Safety Information
Carrying the PC
CAUTION
Before carrying the machine, turn off the power and disconnect
all the cables.
•Otherwise, you may trip over the wire, damaging the PC and getting
an injury.
During air travel, follow the directions of flight attendants.
•Using the PC during flight may cause an aircraft accident.
Do not carry the machine with the LCD panel open.
•Otherwise, the product may get damaged.
When leaving the machine in a car, keep it in shadow.
•The product may be deformed or caught on fire due to temperature
rise.
Protect the machine from any shock while carrying it.
•System damage or an injury may result.
Carry the product in a bag designed for it.
•Carrying it in another type of bag may result in product damage.
If the machine is not used for a long time, remove the battery
pack and discharge electricity to store them.
•That way, the battery can maintain the optimal state.
Do not leave the powered-on PC in a space without enough
ventilation (i.e. bags) for an extended or repeated time.
•The battery may overheat and cause a fire.
ENGLISH
Instruction / Safety Information 23
Safety Notes to Prevent Data Loss (Hard Disk Management)
CAUTION
Handle the machine with care to prevent a data loss.
•Since the hard disk is fragile, you need to back up important data
frequently.
•The manufacturer is not responsible for any hard-disk data loss
caused by the user.
Hard disk damage and data loss may occur when:
•External shocks are inflicted on the machine while disassembling or
installing it.
•Hard disk damage may occur when the machine is reset (restart) or
turned off due to a power outage while it is running.
•The PC is infected with a virus, tainting the data irrecoverably.
•Abrupt turning-off of the PC can damage the PC.
•The machine is moved, shaken or pounded while the hard disk is
running, and thus file damage or bad sectors result.
To minimize data loss resulting from hard disk damage, back up
important data frequently.
•The manufacturer is not responsible for any data loss.
Precautions When Installing Other Operating System
CAUTION
We do not refund or replace a product that malfunctions due to
the installation or use of an operating system other than the
one provided by LG Electronics.
•Some software applications may not work properly in other
operating systems. Such malfunctions are not covered by the
warranty.
ENGLISH

24 Instruction / Safety Information
Energy Star
Energy Star
Energy Star Specifications
•LG Electronics participates in Energy Star and the energy efficiency of
the product complies with the specifications of ENERGY STAR.
•ENERGY STAR is a set of regulations that encourages manufacturers of
electronic devices to create more energy efficient products.
•The energy consumption of this product was decreased along with the
cost. Also, it helps preserve natural resources.
•This PC includes a function that lets it turn into (Sleep) mode when not
used for 15 minutes.
•To leave the hibernation mode, click a mouse button or press any key on
the keyboard.
ENGLISH
Instruction / Safety Information 25
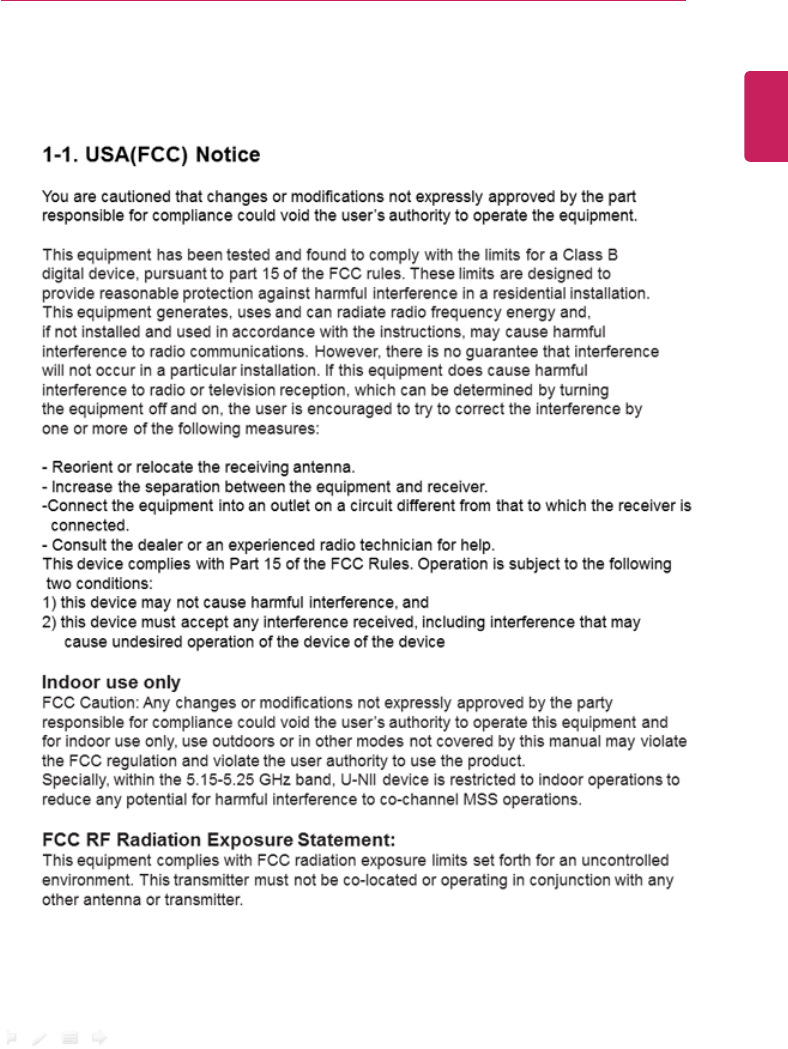
Regulatory Notices
ENGLISH
26 Instruction / Safety Information
Product Specifications
PC Specifications
Display 54.6 cm IPS LCD
CPU Intel®Pentium®/ Celeron®processor
The CPU specifications differ by model type and cannot be
replaced by the user.
Graphics Intel®HD Graphics
When processing large graphic data like 3D graphics. it utilizes
dynamically allocated shared graphics memory. The size of the allocated
memory depends on the system memory size.
System
Memory
DDR3L SODIMM
The maximum capacity of the main board is 8 GB (8,192 MB).
Memory of 3 GB or more is supported only in a 64-bit O/S.
The memory specifications may differ depending on the model.
Hard Disk
Space
6.35 cm SATA3 Hard Disk Drive
(Operating Mode: SATA2)
Bluetooth Bluetooth 4.0 + LE
If you connect to Bluetooth device and wireless LAN at the same time,
the system may become slow.
In order to use Bluetooth 4.0, the device you want to connect to should
support Bluetooth 4.0.
Wireless LAN Intel®3160NGW
Manufacturers and installers cannot provide services related to
human safety as this wireless device may cause radio interference.
Webcam HD Web Camera
Lan REALTEK Gigabit LAN
Product
Weight
Approx. 4.5 kg
Types and specifications of display, CPU, Graphics, hard disk, Bluetooth, Wireless
LAN and Web Camera may differ depending on the computer model.
Power Supply and Environments
AC Adapter (Free Voltage) Power Capacity: 65 W
Input: AC 100 V to 240 V, 1.6 A 50 / 60 Hz
Output: DC 19.0 V 3.42 A
Operating and Storage
Conditions
Operating Temperature: 10 °C to 35°C
Operating Humidity: 20 % RH to 80 % RH
ENGLISH

Instruction / Safety Information 27
Storage Temperature: -10 °C to 40°C
Storage Humidity: 10 % RH to 80 % RH
Power Consumption
Operating Conditions Approx. 35 W The system is running video clips.
Standby mode (Idle state) Approx. 10 W When the monitor display is off
Power Saving mode
(Sleep Mode)
2 W or lower In S3(Suspend)
Off Mode (Standby(off)
Mode)
0.5 W or lower The system is turned off.
•Power consumption during the states and modes above depends on the running
programs and the product specifications.
•Even when the system is turned off, a small amount of power will be consumed as long
as the power cord is connected. To cut off the power supply completely, disconnect the
power cord from the power outlet.
ENGLISH
28 Using Windows 8.1
Using Windows 8.1
Before Use
This LG Easy Guide has been created for the latest Windows update.
Please refer to and install the latest Windows update before using the PC.
TIP
If the latest Windows update does not install, the PC currently in use and the LG Easy
Guide information may differ.
New Start Screen
For the new Windows, a new Start screen was added to the existing desktop screen from
which programs may be run and a variety of functions may be used.
Windows 8.1 Start Button
Windows 8.1 Start button is designed to allow you to easily switch from Desktop to Start
Screen and also provides the pop-up menu including the shortcut keys for Control Panel,
Explorer, Search, System Shutdown, and the Desktop.
•Press [
] + [X] keys, and then the pop-up menu of the Start button appears.
Start Screen and Desktop
Windows 8.1 supports Desktop screen for compatibility with the Desktop app.
Users can switch between the Start screen and the Desktop screen at any time, if
necessary, while using the PC.
ENGLISH
Using Windows 8.1 29
ENGLISH
30 Using Windows 8.1
Taskbar and Title Bar
With the new Windows 8.1 taskbar and title bar, it is easier to use features like app
switching, power options, and screen split.
LG Easy Starter for Desktop Start
To use the Desktop like in previous versions of Windows, LG Electronics provides LG Easy
Starter.
LG Easy Starter may be installed through LG Update Center.
For more information, refer to [Using the Software] > [LG Easy Starter].
Windows Live Account
Windows 8.1 is built to connect you with your social media accounts through the Windows
Live account service, and allows you to download and use various apps found throughout
the entire store.
You must create a Windows Live account to access various features online and the App
Store provided by Microsoft.
ENGLISH

Using Windows 8.1 31
TIP
Apps downloaded and installed from the Store are unique apps for the Windows Live
account. If you login with another account, the apps do not appear on the Start screen.
ENGLISH
32 Using Windows 8.1
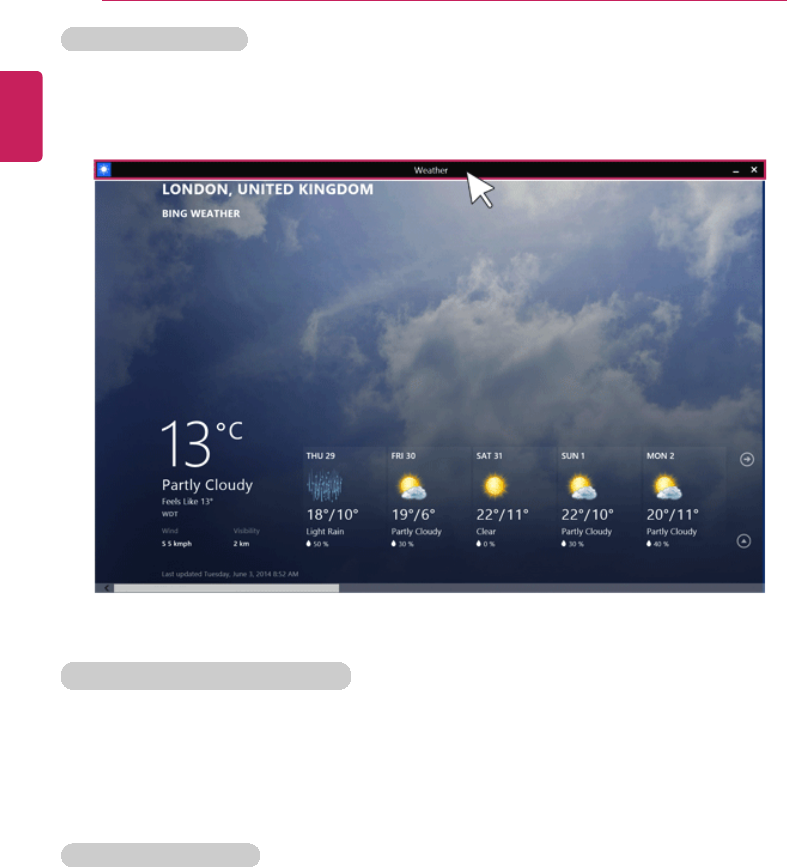
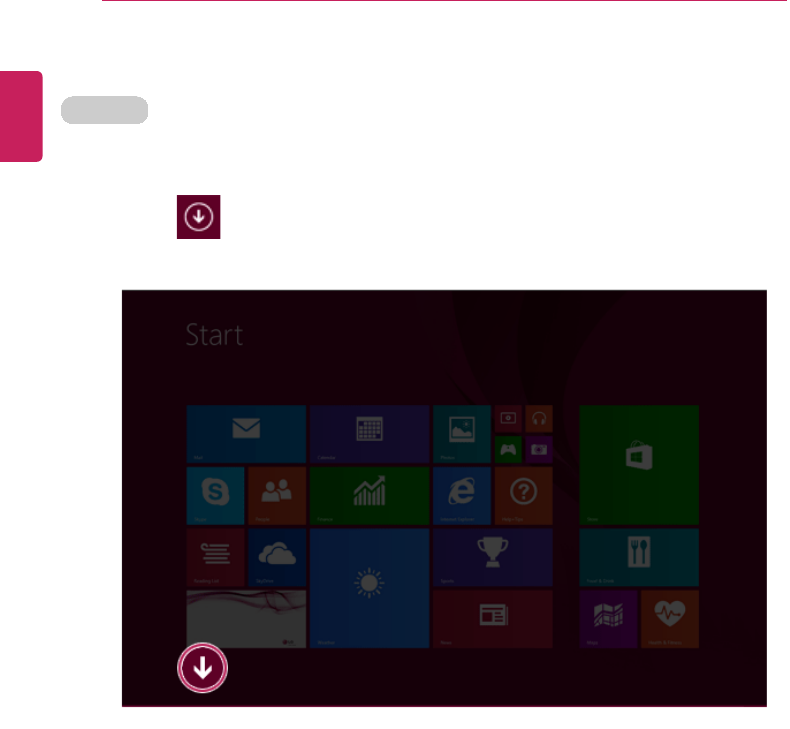
Start Screen
Windows 8.1's new Start screen has tiles to allow you to use apps more easily and check
updates, alarms, and information at a glance.
1User Account: It is possible to use the Change Picture, Lock, and Logout manuals.
2Power Options: It is possible to use the Hibernation, System Shutdown, and Restart
manuals.
3Search: Search system files, folders and other resources.
4App Tile: Windows Store apps and Desktop apps are arranged and displayed in the tile
format.
5Desktop Tile: Switch to Desktop.
6View All Apps : You can view the list of all apps at a glance.
7Screen Scroll: Scroll the Start screen horizontally.
8Zoom Out: You can quickly move to an app you want to use by zooming out from the
Start screen to see the entire screen at a glance.
TIP
If you move your mouse to the bottom of the Start screen, the taskbar appears.
ENGLISH
Using Windows 8.1 33
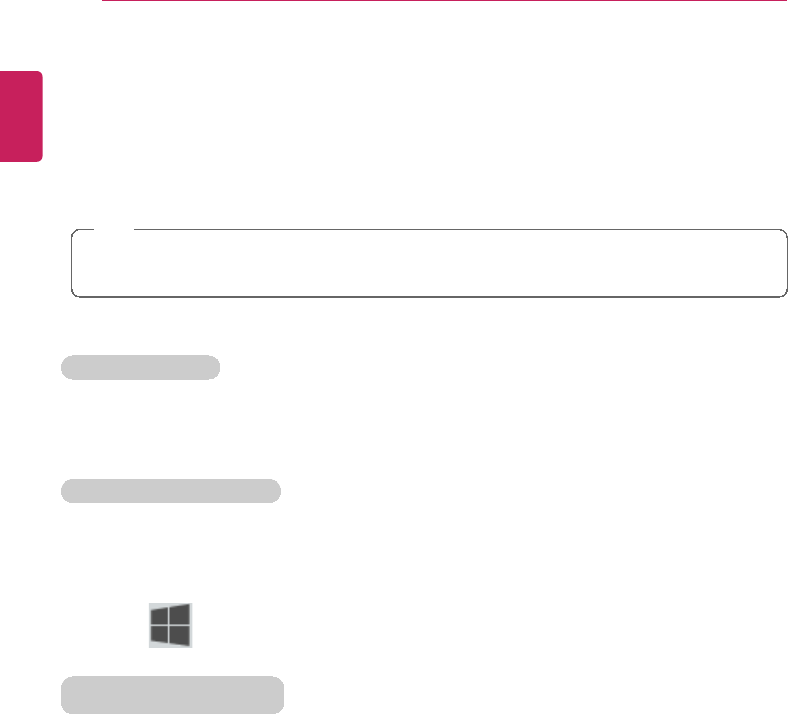
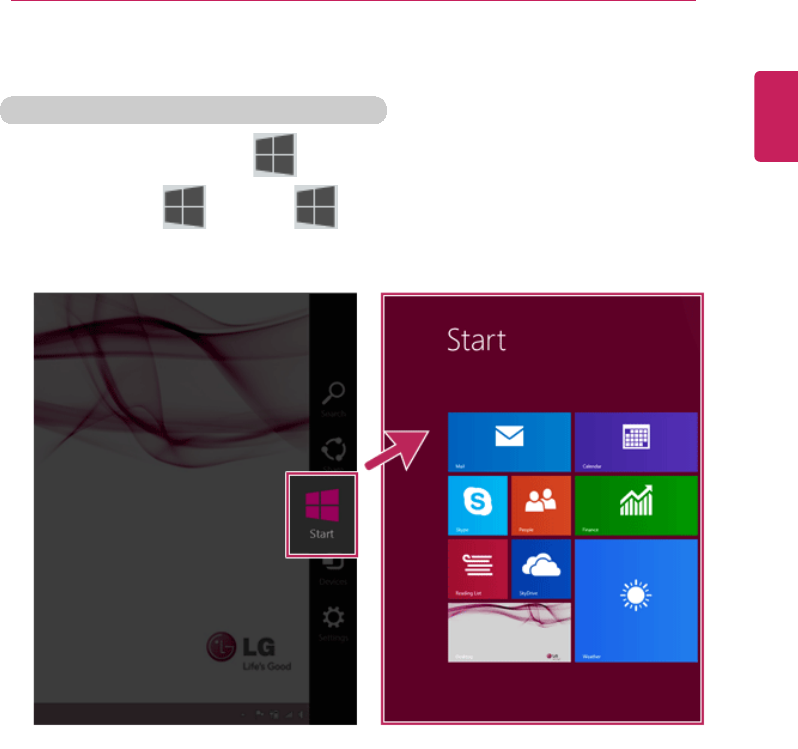
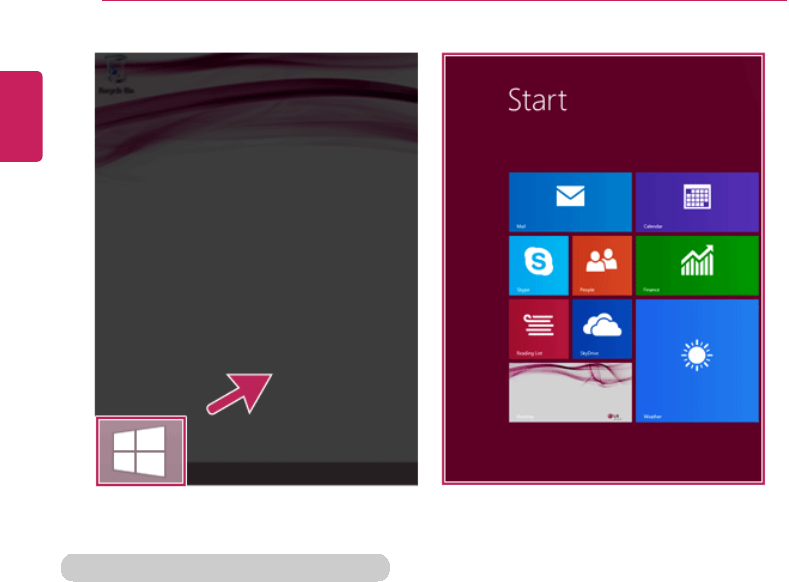
Start screen / Desktop screen switching
Switching from Desktop screen to Start Screen
On the Desktop screen, press [
] key on the keyboard.
Press [Charms] > [ ] button or [ ] button at the left bottom to switch to the Start
screen.
ENGLISH
34 Using Windows 8.1
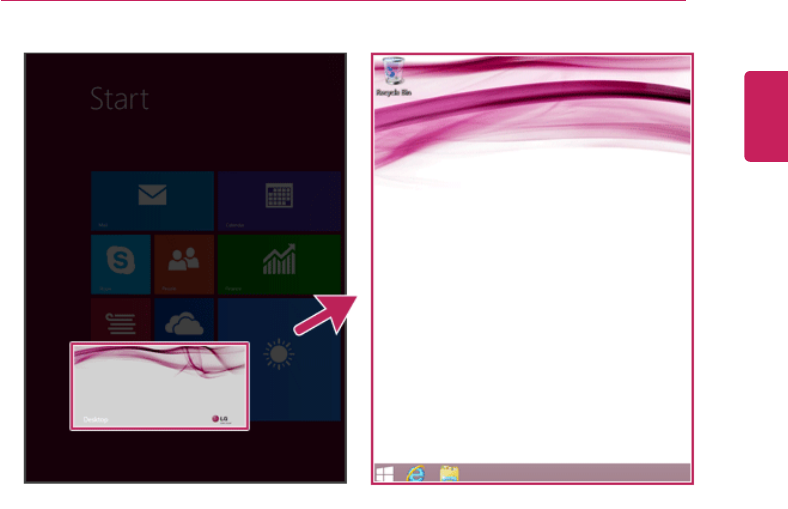
Switching from Start Screen to Desktop
Press the [Desktop] tile on the Start screen to switch to Desktop.
ENGLISH
Using Windows 8.1 35
ENGLISH
36 Using Windows 8.1
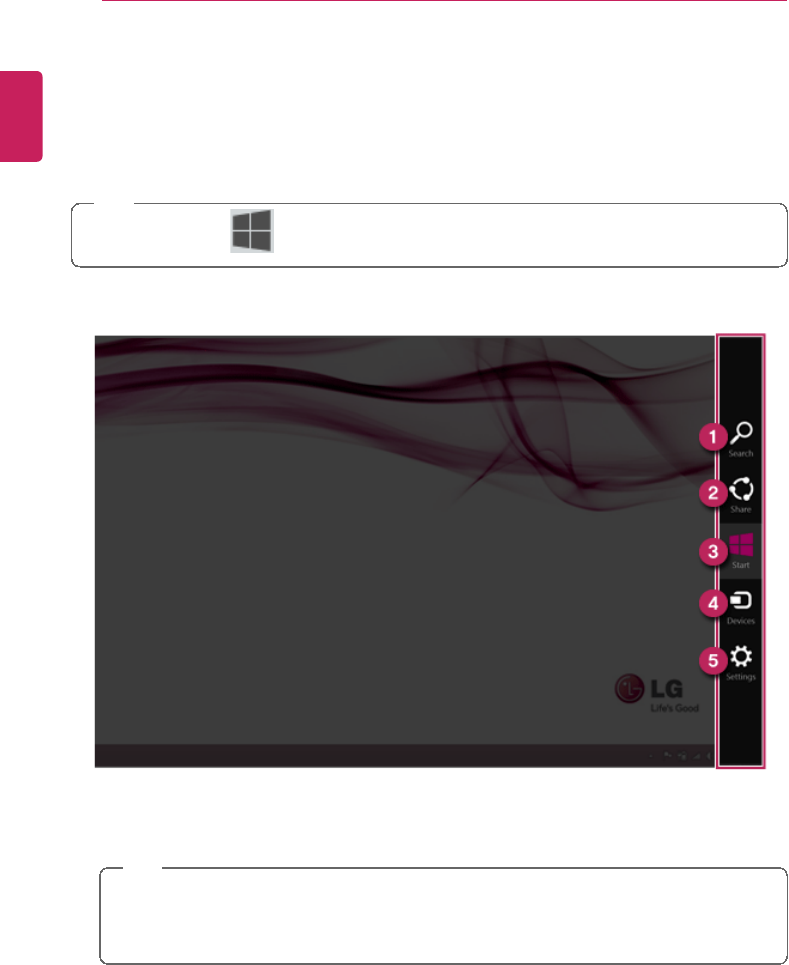
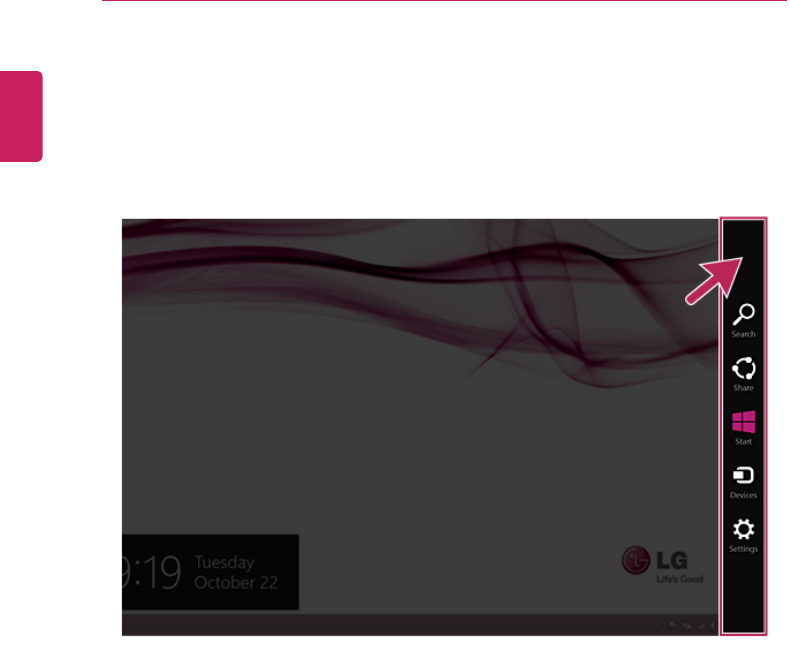
Using Charm Menu
Charms of the new Windows is a menu designed to allow you to easily access functions
such as Search, Share, Start, Device and Settings.
When you move the mouse pointer from the Start screen or the Desktop screen to the top
or bottom-right corner, Charms appears.
TIP
[When you press [
] + [C], Charms appears immediately.
1Search Menu: Search system files, folders and other resources.
TIP
If it is used in the app on the Start screen, it is used as a search function for the
running app.
(Some apps which do not support the search function may not work properly.)
2Share Menu: Setting the app sharing feature.
3Start Menu: Switch to the Start screen or the screen of the previously running app.
ENGLISH

Using Windows 8.1 37
4Device Menu: Send a file to a TV, a printer, or any other device, or set a connection
between the PC and an external display.
5Setting Menu: Use a menu that includes the Control Panel, Personal Settings, PC
Information, Help, System Preferences (network connection, volume, brightness, etc.)
and Power (hibernation, restart, and system shutdown).
TIP
If it is used in the app on the Start screen, a settings function of the running app is
provided.
Menus including System Preferences and Power are provided.
ENGLISH
38 Using Windows 8.1
Running, Standing by and Exiting App
Running
An app which is not added on the Start screen or Desktop may be run using the following
method:
1Click the [
] icon on the left bottom on the Start screen.
ENGLISH

Using Windows 8.1 39
2When the list of all apps appears, select an app to run on the screen.
TIP
Using Search in the Start screen or Charms, you can run the app.
•When you press [ ] + [Q] keys, the Search menu is run immediately.
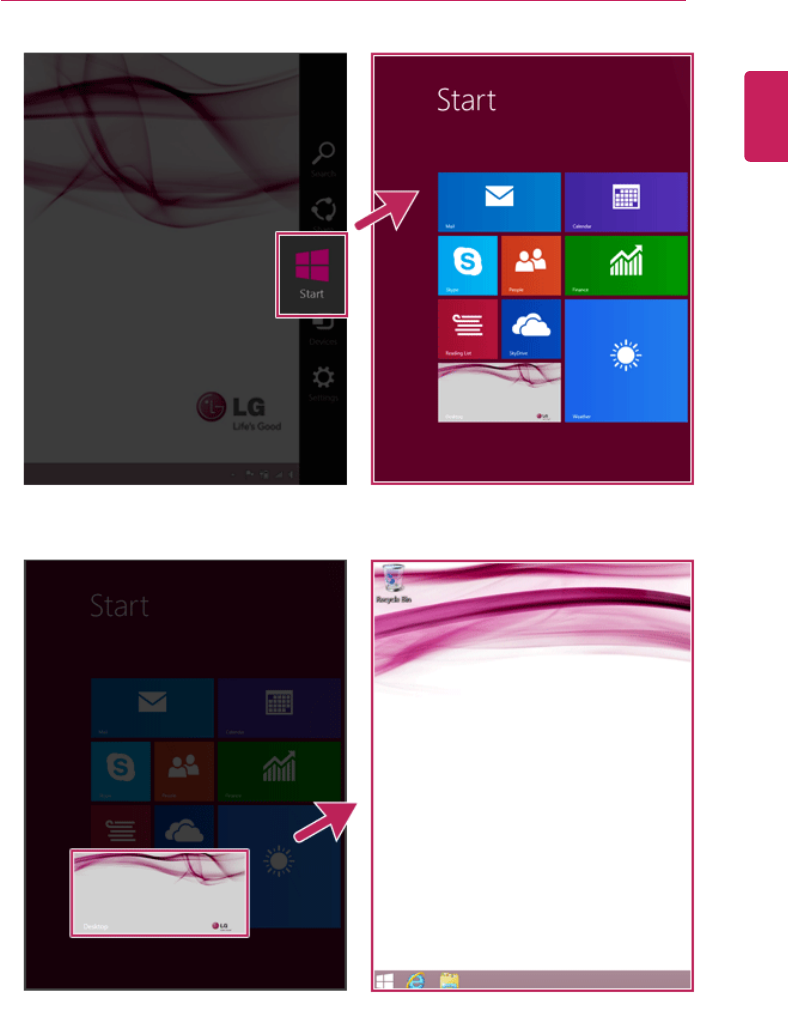
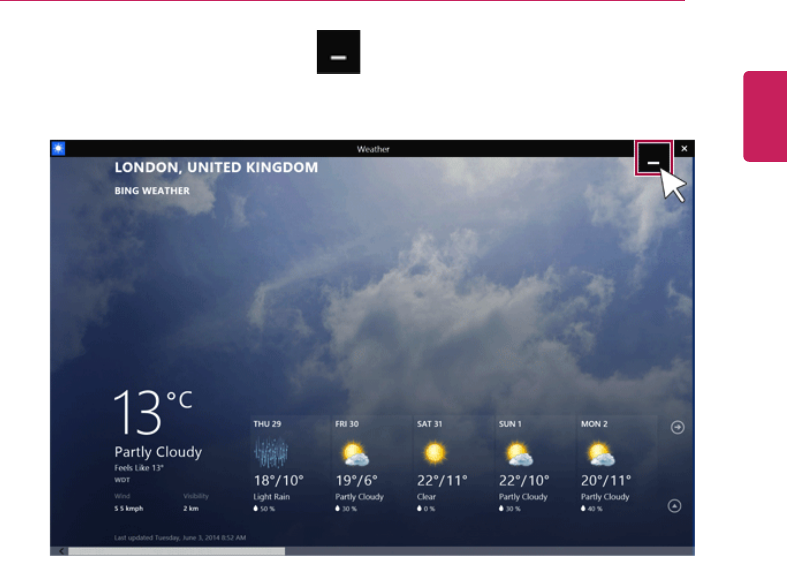
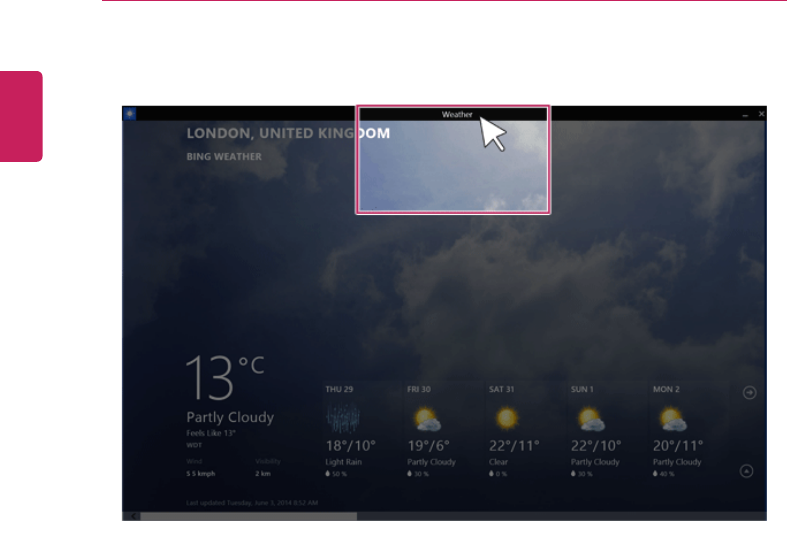
Switching to Standby Mode
Windows Store apps can switch the app to the standby mode to switch and use the app
rapidly.
ENGLISH

40 Using Windows 8.1
1If you move the mouse pointer to the bottom of the running app, the title bar appears.
ENGLISH
Using Windows 8.1 41
2When the title bar appears, click the [
] icon at the top-right to switch to standby
mode.
ENGLISH
42 Using Windows 8.1
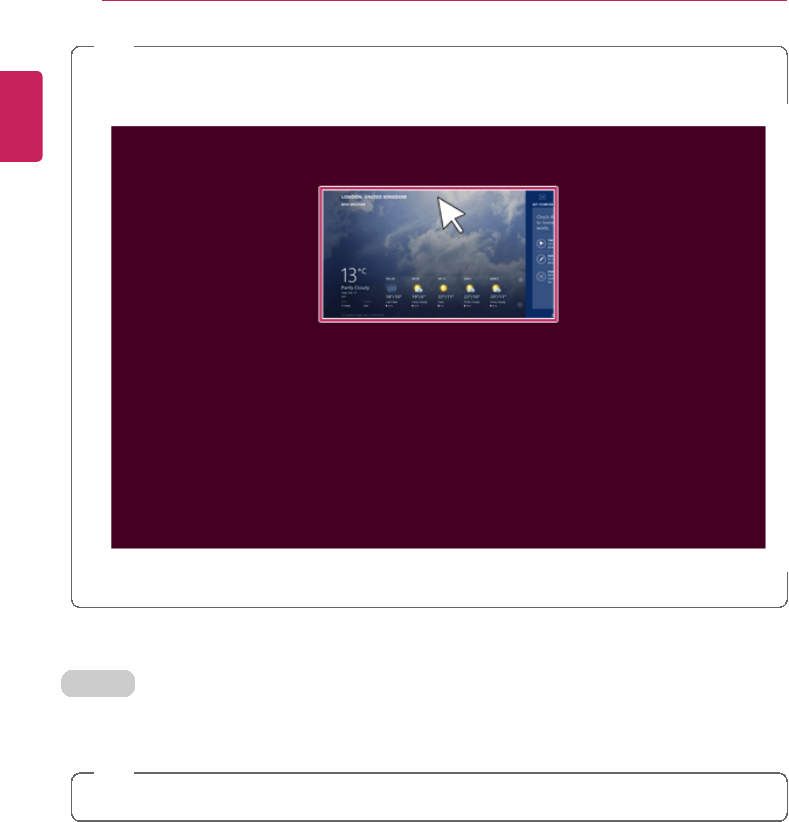
TIP
You can switch to standby mode by dragging the app from the top center of the screen to
the bottom.
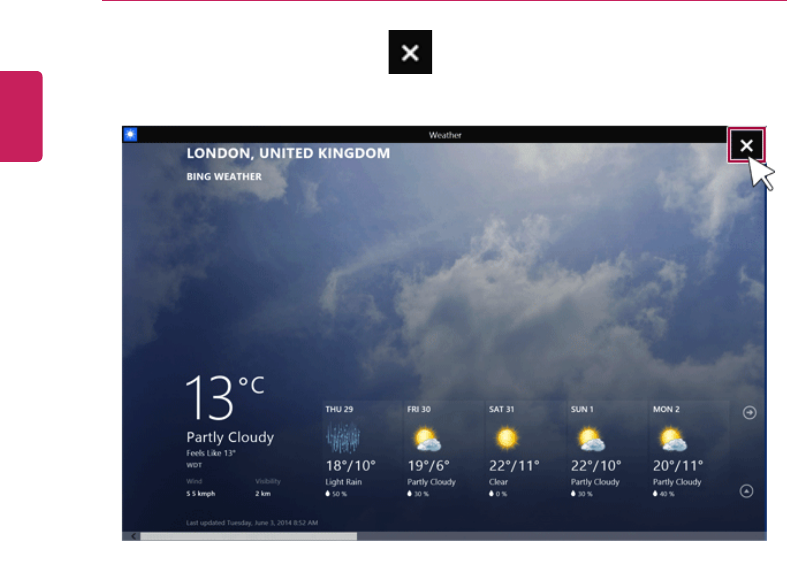
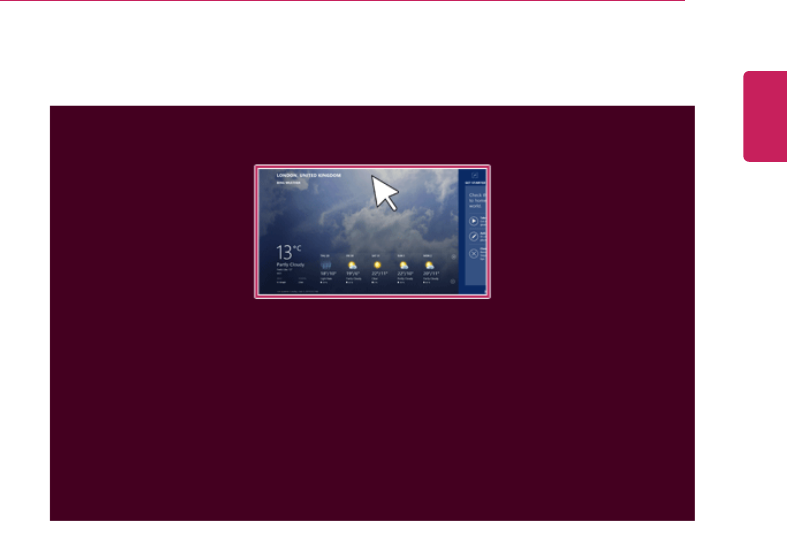
Exiting
Windows Store apps, unlike the Desktop apps, can be terminated using the following
method:
TIP
If not in use, Windows Store apps are automatically switched to standby mode.
ENGLISH
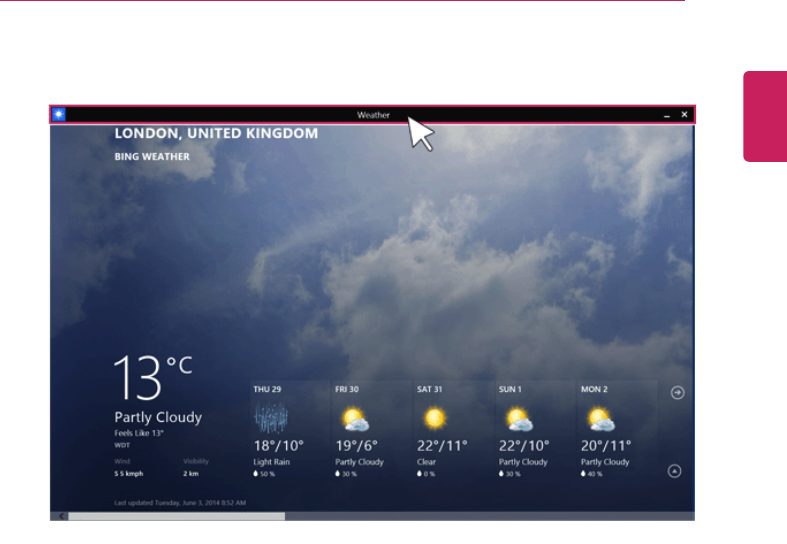
Using Windows 8.1 43
1If you move the mouse pointer to the bottom of the running app, the title bar appears.
ENGLISH
44 Using Windows 8.1
2When the title bar appears, click the [
] icon at the top-right to close the app.
ENGLISH
Using Windows 8.1 45
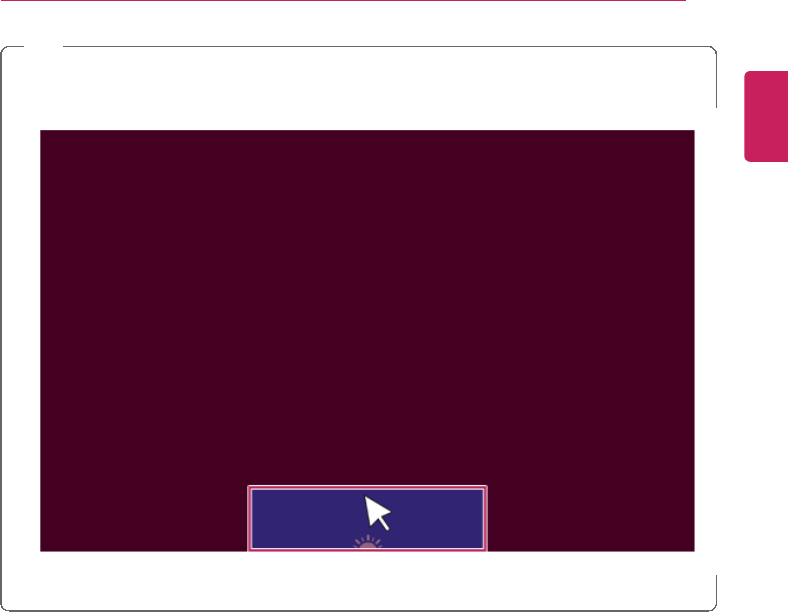
TIP
If you drag the app from the top center of the screen to the bottom, 2 seconds later the
app will close as it rotates halfway.
ENGLISH
46 Using Windows 8.1
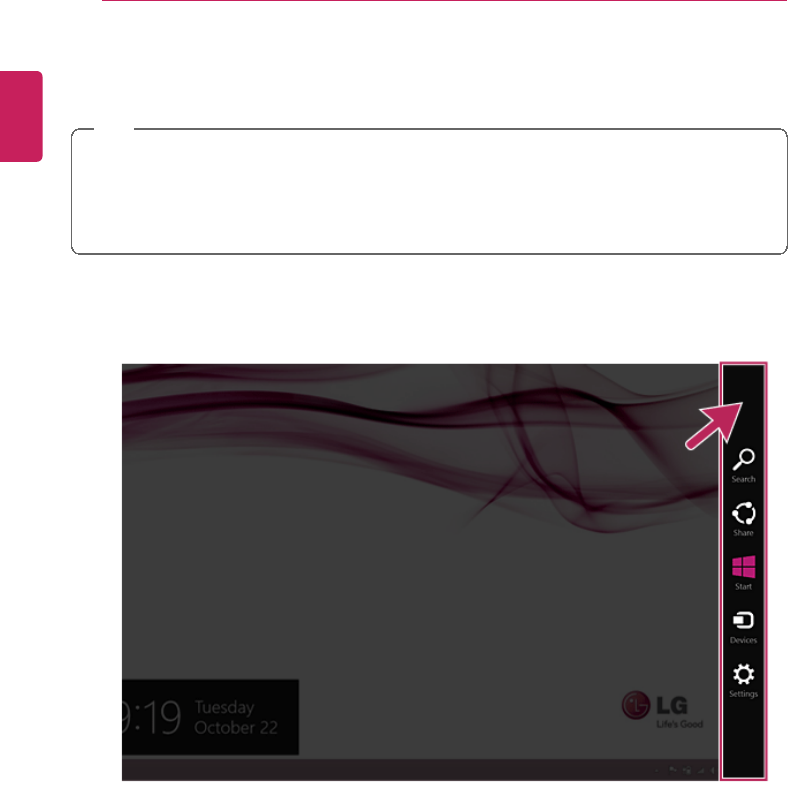
Windows Help and Support
Windows Help provides detailed information on how to use Windows easily.
TIP
On Desktop, you can press the [F1] key to run [Windows Help and Support].
On the Start screen, from [Charms], select [Settings] >[Help] to display the help of the
currently running app.
Some apps may not support help.
1Run [Charms] on the desktop screen.
ENGLISH
Using Windows 8.1 47
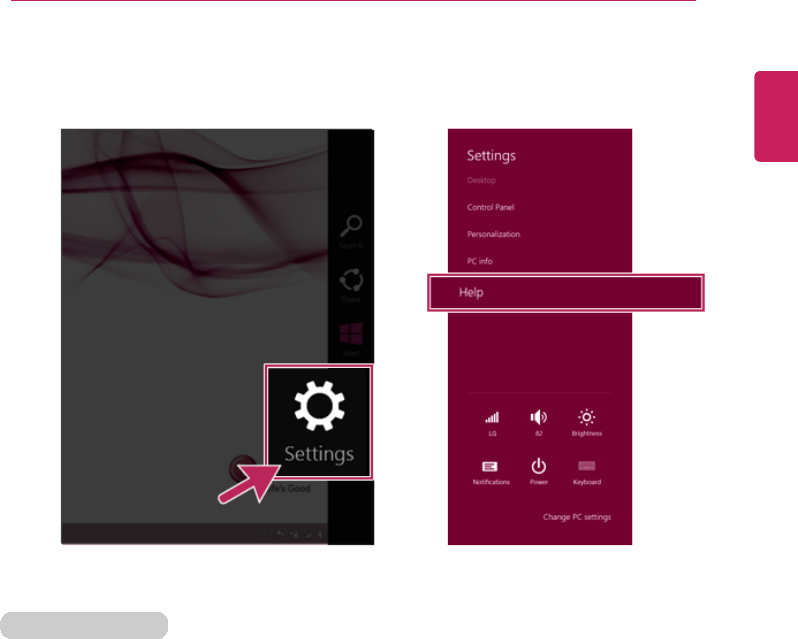
2Press the [Settings] >[Help] from the Charms to run the [Windows Help and
Support].
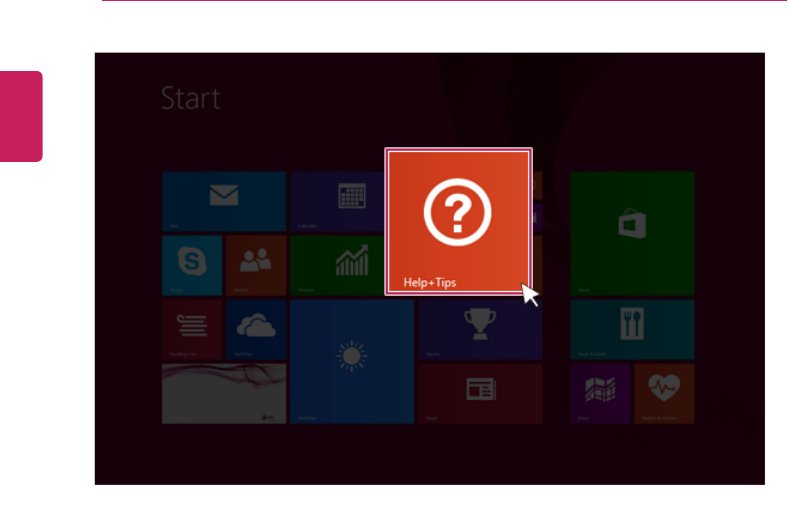
Help and Tips Tour
Press and run the [Help and Tips] tile on the Start screen to get information on the new
functions of Windows.
ENGLISH
48 Using Windows 8.1
ENGLISH
Using Windows 8.1 49
Using the Store (Installing and Deleting Windows Store Apps)
When you use the Windows store, you may install and use a variety of applications easily.
TIP
To use the store, you must have a Microsoft account.
While using a local account, you can create a Windows Live account through [Charms] >
[Settings] >[Change PC Settings] >[Account] >[Account].
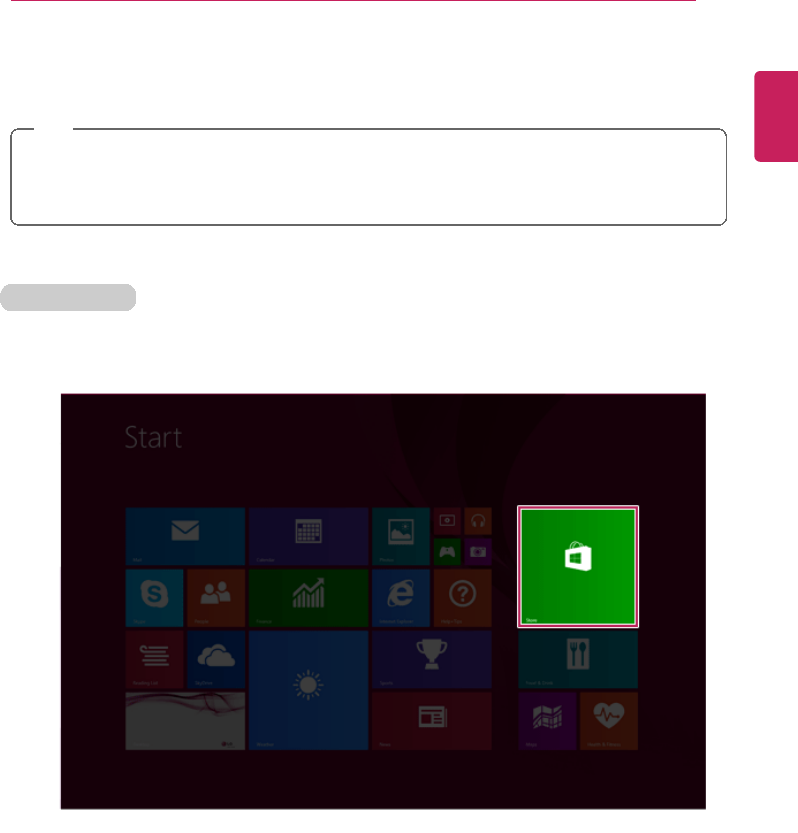
Installing Apps
1On the Start screen, select [Store] tile.
ENGLISH
50 Using Windows 8.1
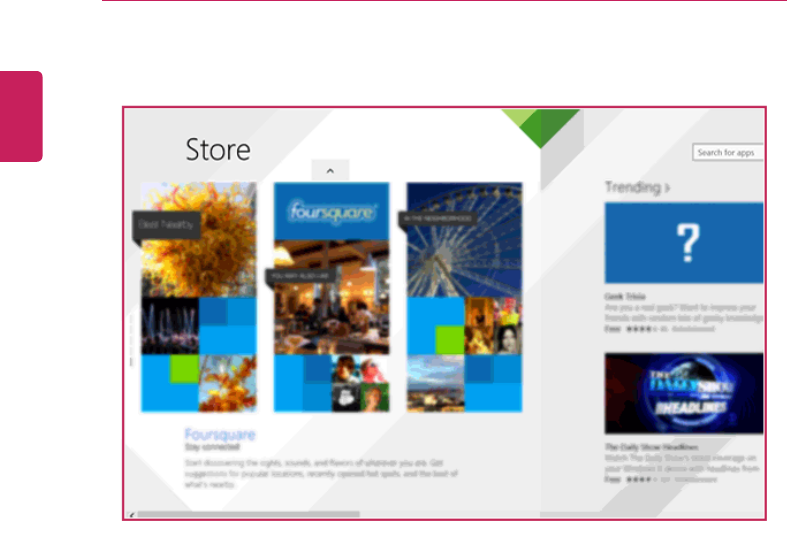
2The basic categories appear on the Store screen.
ENGLISH
Using Windows 8.1 51
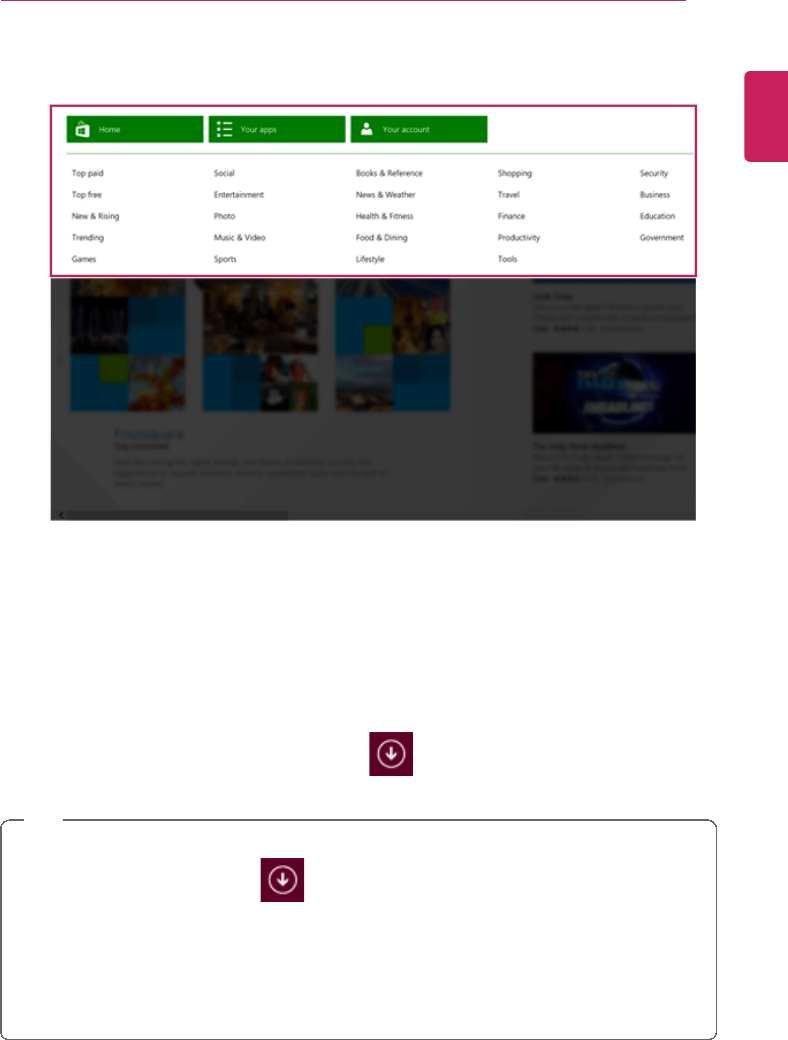
3Right-click the mouse to open the category details.
4Select an app in a category you want.
5When the detailed app screen appears, click the [Install] button.
If a local account is being used, a login screen appears.
Login with a Microsoft account, or press the [Register New Account] button to create
an account in accordance with the instructions.
6After a while, an Installation Guide message appears on the top-right of the screen.
7When the installation is complete, click the [ ] icon on the Start screen to check the
apps installed in the list of apps.
TIP
You can add a newly installed app tile on the Start screen as follows:
1On the Start screen, press [ ] icon.
2Right-click on the installed app in the App list, then press the [Lock in Start Screen]
button.
(Enter the name of the app in the search field and then you can find the app installed
faster.)
3The app tile selected is added to the Start screen.
ENGLISH
52 Using Windows 8.1
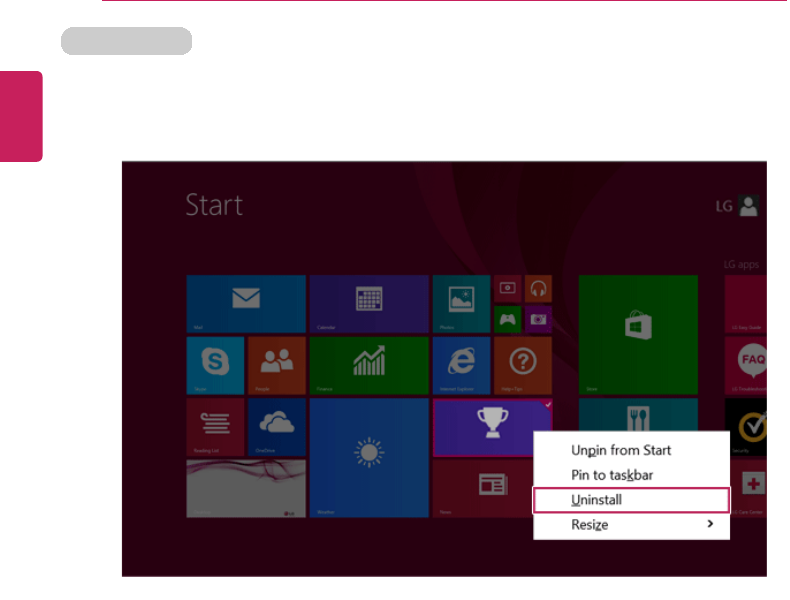
Deleting Apps
1Select the app you want to delete from the Start Screen by right-clicking on it, then
press the [Uninstall] button.
2When prompted to confirm the deletion, press the [Uninstall] button to delete the app.
ENGLISH

Using Windows 8.1 53
Switching and Exiting Running App
Windows' new app switching is different from previous versions of Windows. To exit a
program on the Start screen, refer to the instructions below.
TIP
The app on the Start screen does not have a separate Exit button. When you switch to
another app, or move to the Start screen, the mode is switched to standby mode.
ENGLISH

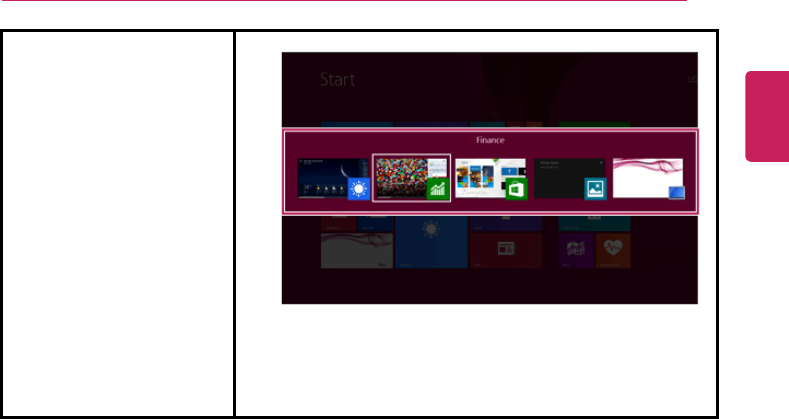
54 Using Windows 8.1
App switching on the Start
screen [
] + [Tab]
1[When you press the [ ] + [Tab] keys, a preview
screen of the running app on the Start screen appears
on the right side of the screen.
2[Whenever you press the [ ] key together with the
[Tab] key, an app is selected. When you deselect the
keys, the selected app becomes active.
[Desktop app does not appear.]
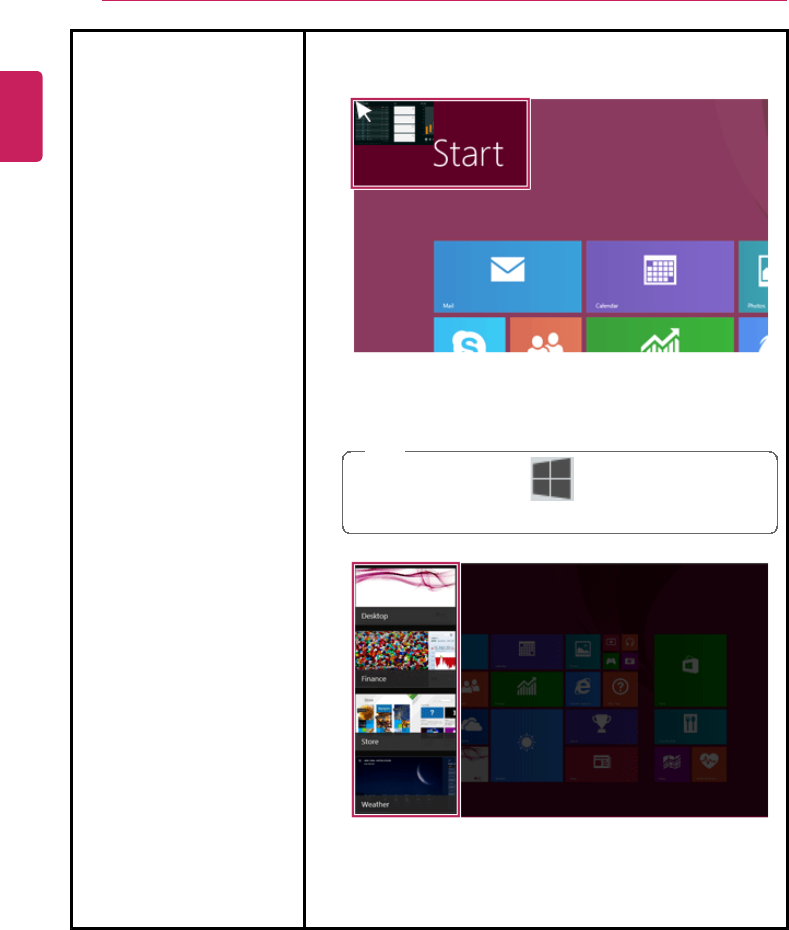
[] + [Ctrl] + [Tab]
1[When you press the [ ] + [Ctrl] + [Tab] keys, the
preview screen of the running app on the Start screen
appears in a fixed form.
2When you select an app that you intend to switch to,
the selected app becomes active.
App switching between the
Start screen and the
Desktop
1When you press the [Alt] + [Tab] keys, the preview
screen of the running apps on the Start screen and in
Desktop mode appear in the center of the screen.
ENGLISH
Using Windows 8.1 55
2Whenever you press the [Alt] key together with the
[Tab] key, an app is selected. When you deselect the
keys, the selected app becomes active.
ENGLISH
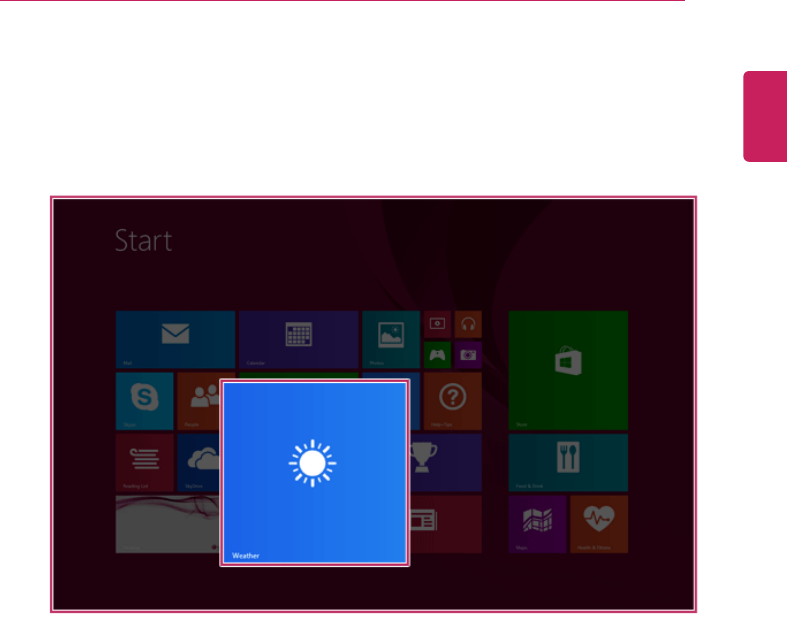
56 Using Windows 8.1
Exiting an app on the task
switching screen 1Place the cursor at the left top or bottom edge of the
screen on the Start screen or in Desktop.
2Move up or down the cursor and the running app's
preview appears.
TIP
[When you press the [ ] + [Ctrl] + [Tab] keys, the
preview screen of the running app appears.
3After placing the cursor on the app you want to exit,
press the right mouse button and [Close] button to exit
the app.
ENGLISH
Using Windows 8.1 57
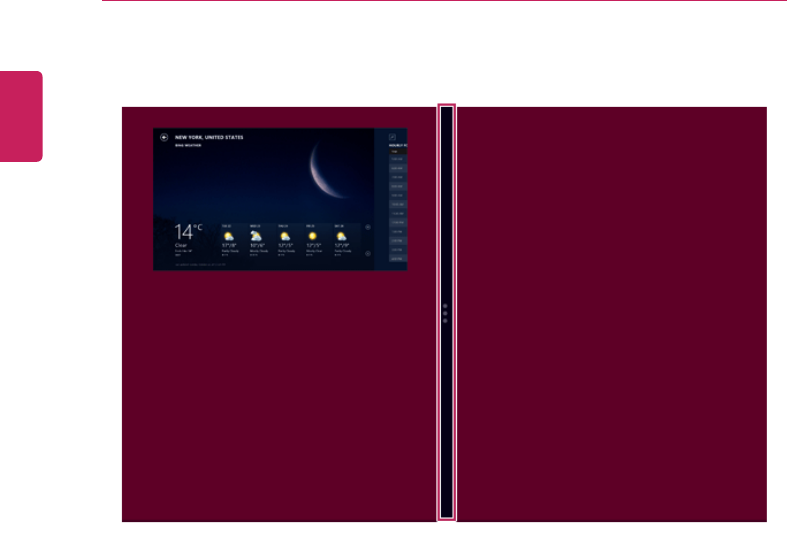
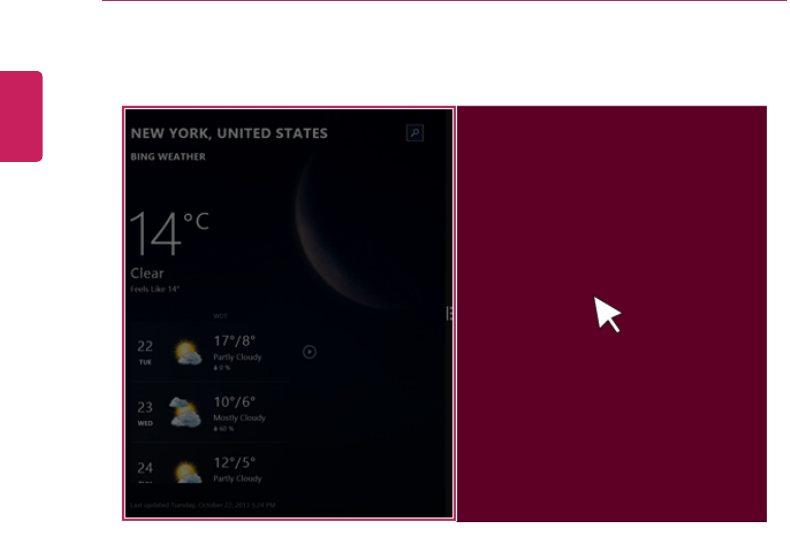
Using Screen Split
In Windows 8.1, you can work on two tasks by displaying two apps on one screen.
1On the Start screen, run the app you want.
ENGLISH
58 Using Windows 8.1
2Move the cursor to the top center of the running app screen.
ENGLISH
Using Windows 8.1 59
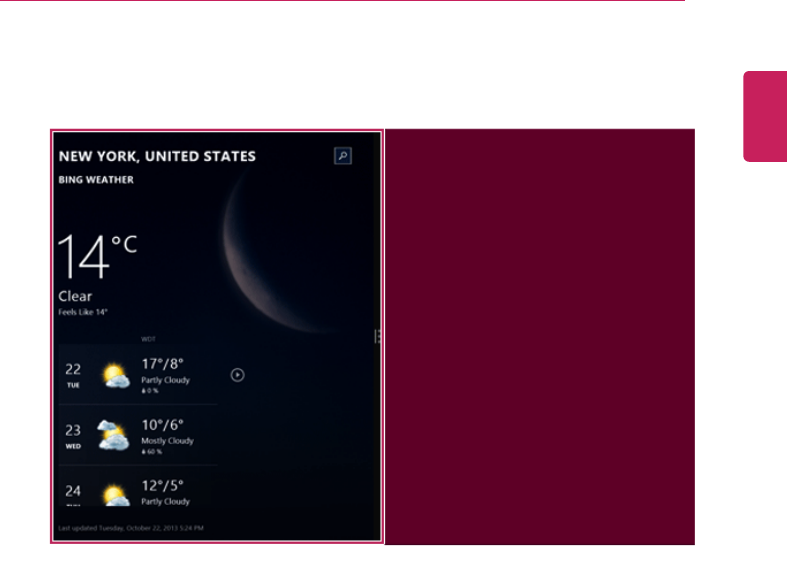
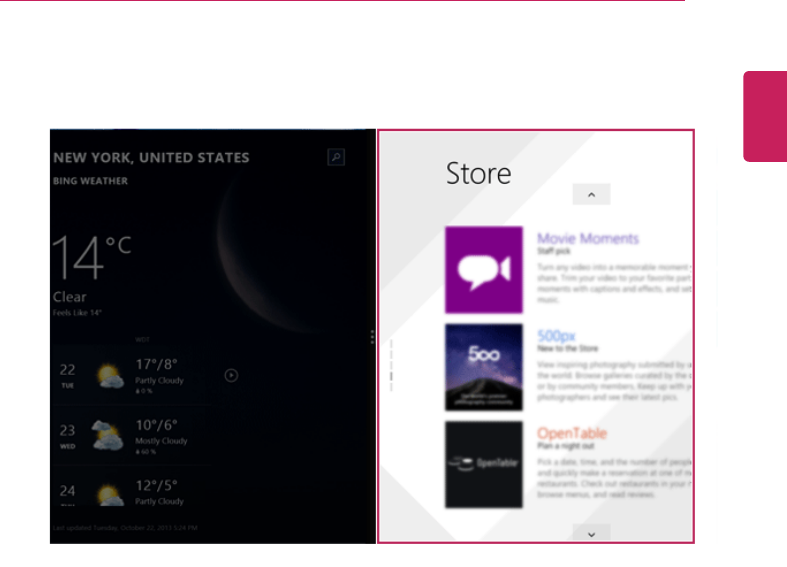
3When you drag the cursor down, the screen is reduced in size.
ENGLISH
60 Using Windows 8.1
4While moving the smaller app screen to the left or right, a vertical control bar appears.
ENGLISH
Using Windows 8.1 61
5After placing the app on the left or right side of the screen, release the left mouse button
to fix the app to that position.
ENGLISH
62 Using Windows 8.1
6Click on the empty screen to go to the Start screen.
ENGLISH
Using Windows 8.1 63
7When you select another app in Desktop or on the Start screen, the app is displayed in
the empty half of the screen.
ENGLISH
64 Using Windows 8.1
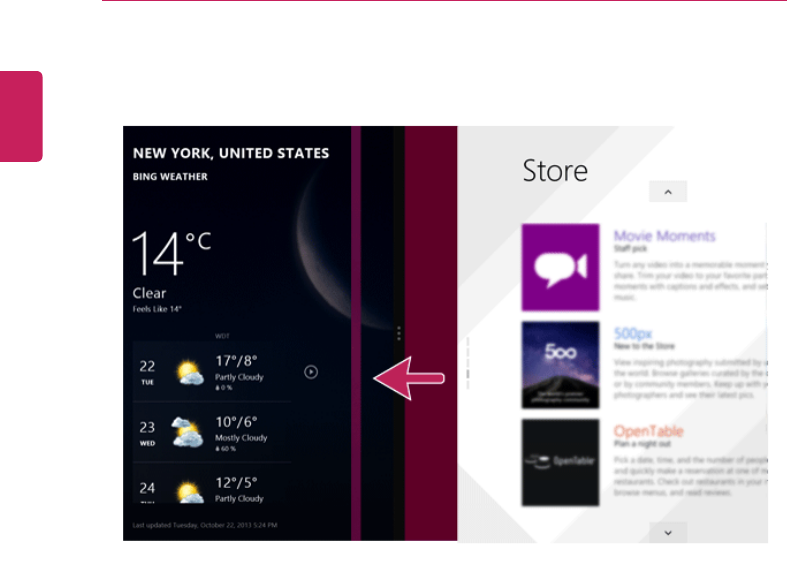
8You may change the screen ratio of an app by using the vertical control bar on the
screen.
9When you drag the vertical control bar to the end of the outer edge, the opened app
screen disappears.
ENGLISH
Using Windows 8.1 65
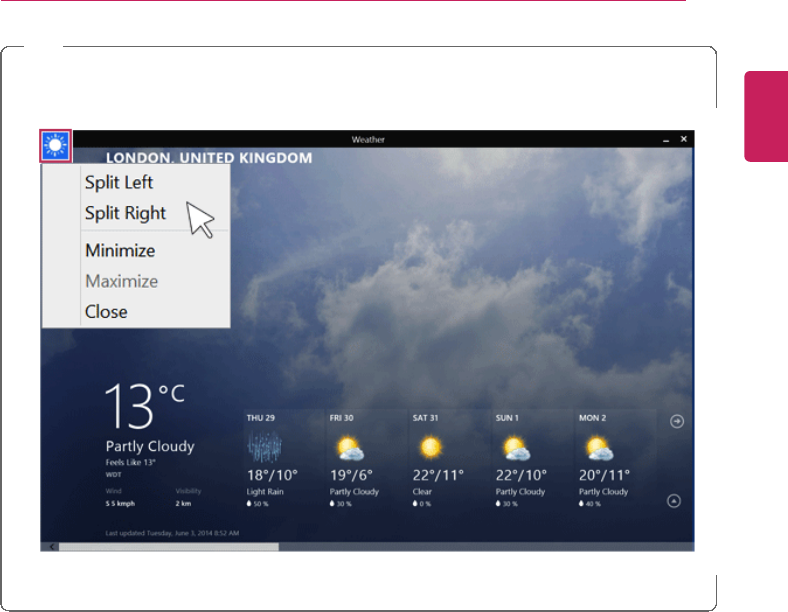
TIP
You can split the screen by also clicking the app icon in the title bar at the bottom-right of
the app that is running.
ENGLISH
66 Using Windows 8.1
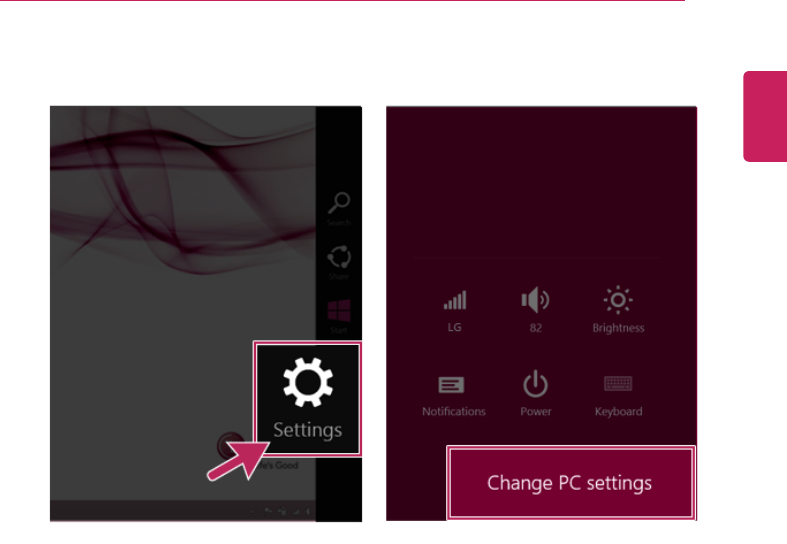
Setting the PC
Windows 8.1 provides an easy-to-use PC settings menu to allow you to setup the PC more
intuitively.
1Run [Charms] on the Desktop or the Start screen.
ENGLISH
Using Windows 8.1 67
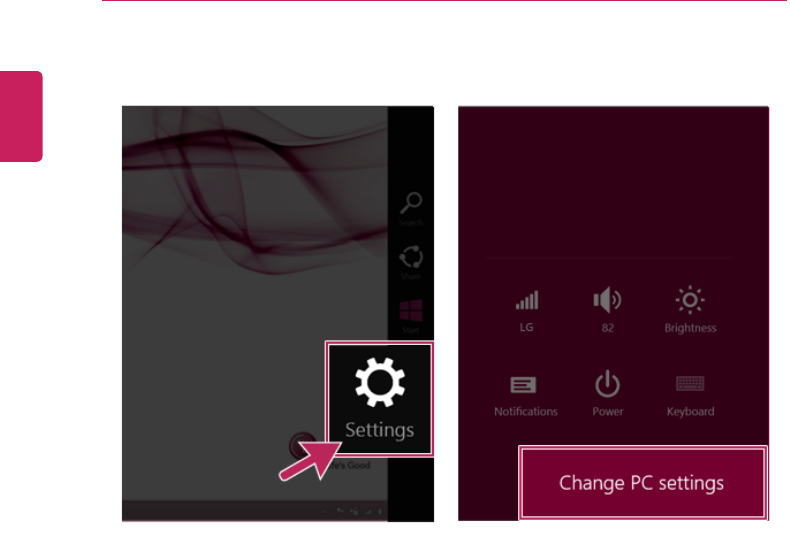
2In the Charms, click [Settings] >[Change PC Settings].
3Configure the PC using the Personal and User Settings.
ENGLISH

68 Using Windows 8.1
Unlocking Lock Screen
If the PC is not used for an extended period of time, it goes into a locked state.
When the PC is used again, a lock screen appears and it may be unlocked using the
following method:
Unlocking Lock Screen
1Press any key on the lock screen or drag up while pressing the left mouse button.
2When the window for entering the password appears, enter the password.
(If no password is set, the lock screen is immediately unlocked.)
ENGLISH
Using Windows 8.1 69
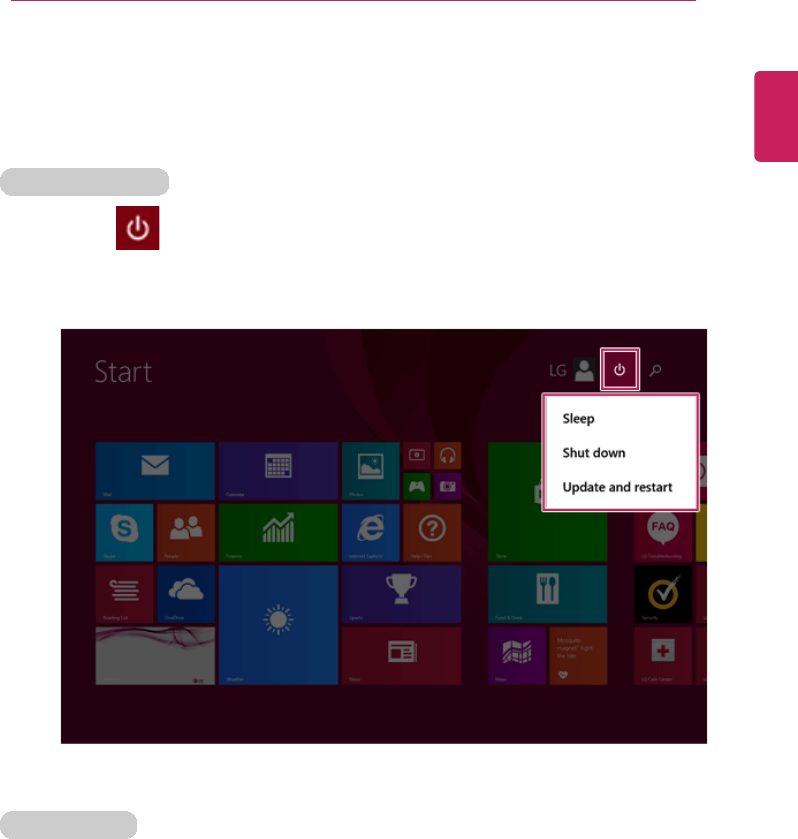
Shut Down Options
In Windows 8.1, you can use the shutdown options (hibernation, restart, system
shutdown) through Charms.
Using Start Screen
1Click the [
] icon on the bottom-right of the Start screen.
2As shown in the following, the power options appear.
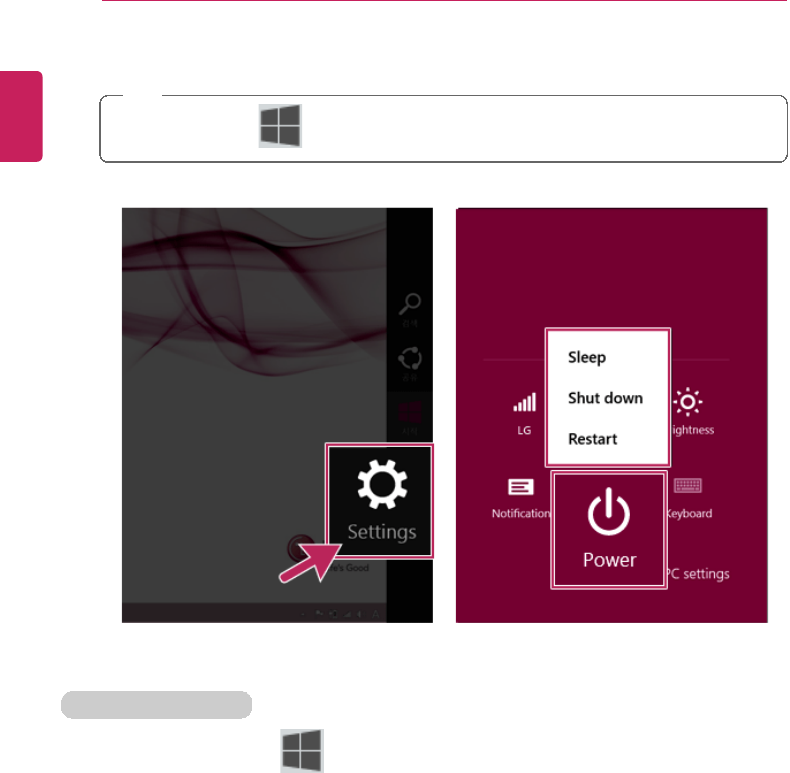
Using Charms
1Select [Settings]in [Charms] in the Desktop or on the Start screen.
ENGLISH
70 Using Windows 8.1
2When you press the [Power] icon on the [Settings] menu, the power options appear as
shown below.
TIP
[When you press [
] + [I], the [Settings] menu appears immediately.
Using the Start button
1Press the Start button ( ) on the bottom left corner of the Desktop by using the right
mouse button and then the pop-up window appears.
ENGLISH
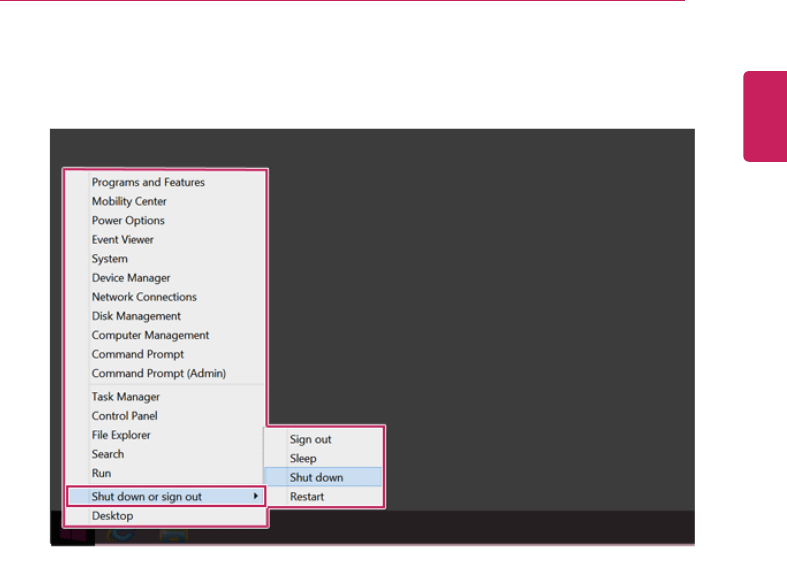
Using Windows 8.1 71
2Select [Exit and Logout] and then [System Shutdown] as shown in the following
figure.
ENGLISH
72 Using the PC
Using the PC
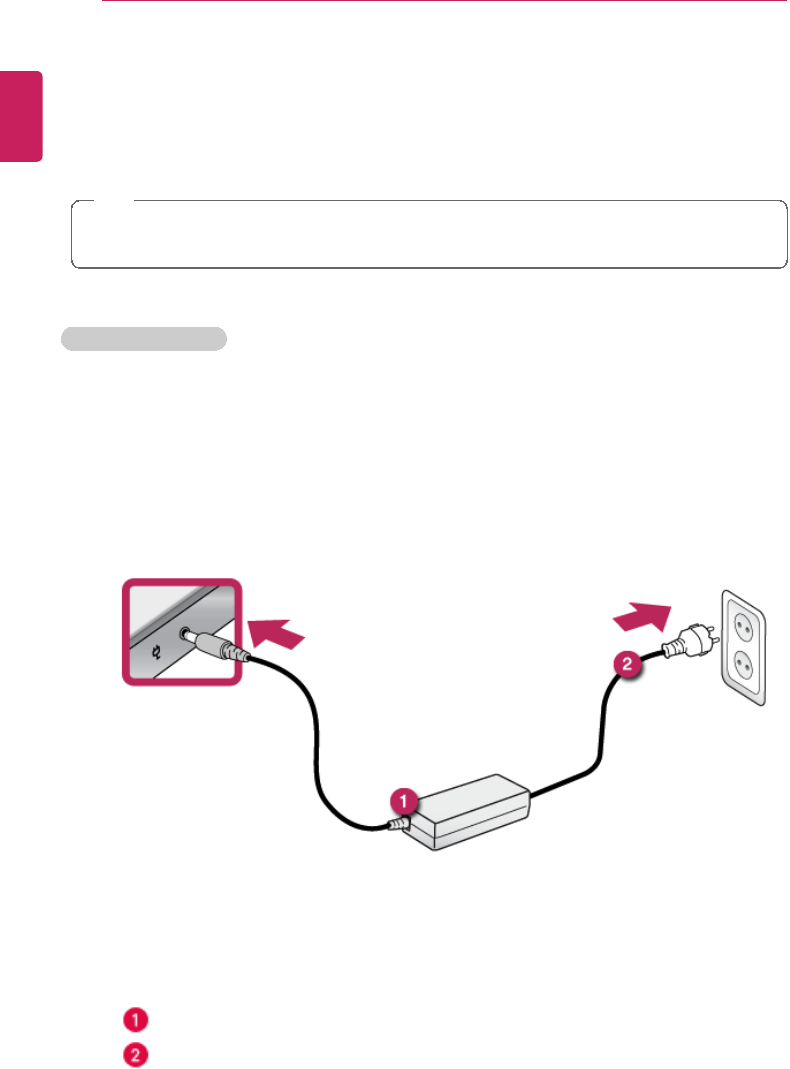
Power Connection
To supply power to the PC, use the AC adapters as follows.
TIP
The power cable and the AC adaptor type may differ per model type and country and
there is no difference in functionality.
Power Connection
The AC adapter can be used from 100 V to 240 V.
1Connect the AC adapter to a power outlet with the power cable.
2Connect the adapter to the machine.
a AC Adapter
bPower Cable
ENGLISH

Using the PC 73
TIP
•You need a different plug to use the AC adapter with 110 V(the plug for 110V is sold
separately).
CAUTION
Do not leave a liquid container on the PC.
•The system may be short-circuited and damaged.
WARNING
Please use an AC adapter certified by LG Electronics™.
•Otherwise, an explosion or fire may occur.
•It may cause a problem in battery charging or system operation.
When you use an AC adaptor, follow the below directions.
•60°C or more high-humidity spaces, for example, inside cars or saunas, should be
avoided when you use or store it.
•Do not disassemble or modify the AC adaptor.
•Do not twist the AC adaptor plug.
•When you connect the AC adaptor, do not forcefully push the plug.
ENGLISH
74 Using the PC
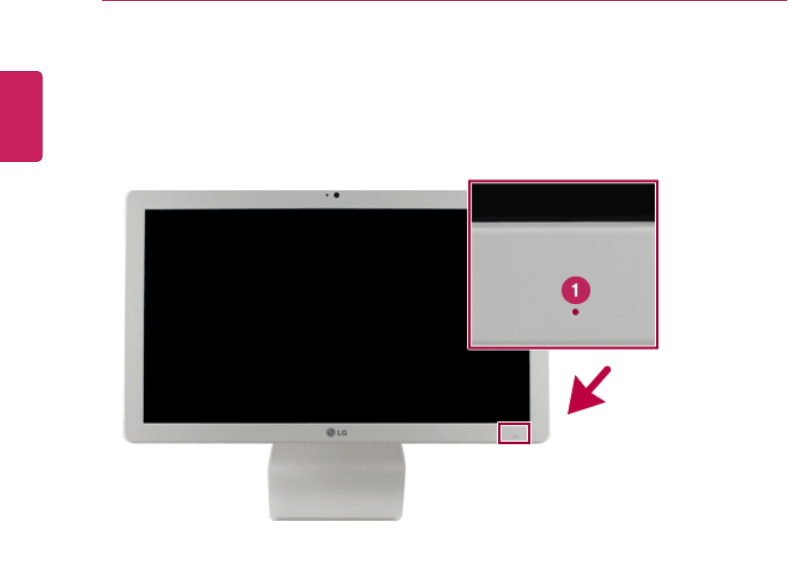
Operation Status Lamps
1Power Lamp:
•On (red): The system is turned off.
•On(white): The system is turned on.
•Blinking (white): When the system is in the sleep mode
•Off: The AC adapter is not connected.
Do not turn off the power forcibly while the power lamp is on or blinking.
Otherwise, the disk or its data may get damaged.
ENGLISH
Using the PC 75
Keyboard
The keyboard allows the user to input data or give commands.
The keyboard may differ depending on your country.
CAUTION
•Spilling a watery substance like coffee or juice on the keyboard may cause a fault,
malfunction, or electric shock.
•The keys may not work properly when you use several keys at the same time while
playing a PC game. (Please change the key combination settings according to the
combinations necessary for the game play.)
Using Hot Keys
You can use hot keys to use the PC more conveniently.
The hot key function is optional, and it may not be installed in some models.
Fn + F5 Search Hot Key
Fn + F6 Calculation Hot Key
Fn + F7 Internet Explorer Hot Key
Fn + F9 Turns down the volume.
Fn + F10 Stops or plays media.
Fn + F11 Mutes the volume.
Fn + F12 Turns up the volume.
ENGLISH
76 Using the PC
Shortcut Keys
TIP
•To change the input mode temporarily, you can press the Shift key together with the
letter you want to enter. By doing so, you can enter an uppercase letter when the
Caps Lock key is not pressed and a lowercase letter when the Caps Lock key is
pressed.
For more convenient use of Windows, remember the following Windows key
combinations:
•
+ F1
Displays Windows Help.
•+ F3
Displays "Search" window.
•+ R
Displays an input window for program execution.
•+ Tab
The running apps are converted in an order.
•+ M
Minimizes the current window.
ENGLISH

Using the PC 77
Connecting an External Digital Device
Connecting a digital camera, camcorder, cell phone, Smartphone or other digital devices to
the USB port, allows you to transfer data or use other additional features.
Please refer to the manual of the manufacturer of the digital device for detailed
information about its use.
The drive of the external digital device connected to the USB port can be differently
specified according to the model.
TIP
Devices that are not authorized with USB 3.0 may not operate normally when connected
to the USB 3.0port.
It is recommended to use the USB 2.0 port in case the device does not function normally.
Connecting the Device and Basic Use
The USB cable for connecting is not provided fromLG electronics™, it is provided
from the company of an external digital device or you have to purchase separately.
1Please turn on the power of the digital device after booting the PC.
2Use the USB cable to connect the external digital device to the PC.
After connecting Smartphones or other external digital devices to the USB cable,
select either [External Disk], [Disk Drive], [SD Card Mount] on the external digital
device to use it.
ENGLISH
78 Using the PC
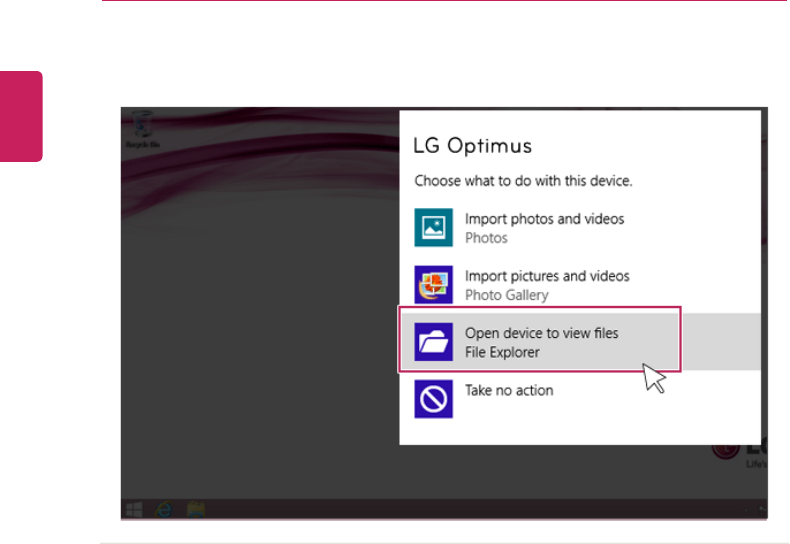
3When the [Autorun] window appears, select [Open Device to View Folder].
4Execute the operation you need when the files and data of the external digital device
appear.
ENGLISH
Using the PC 79
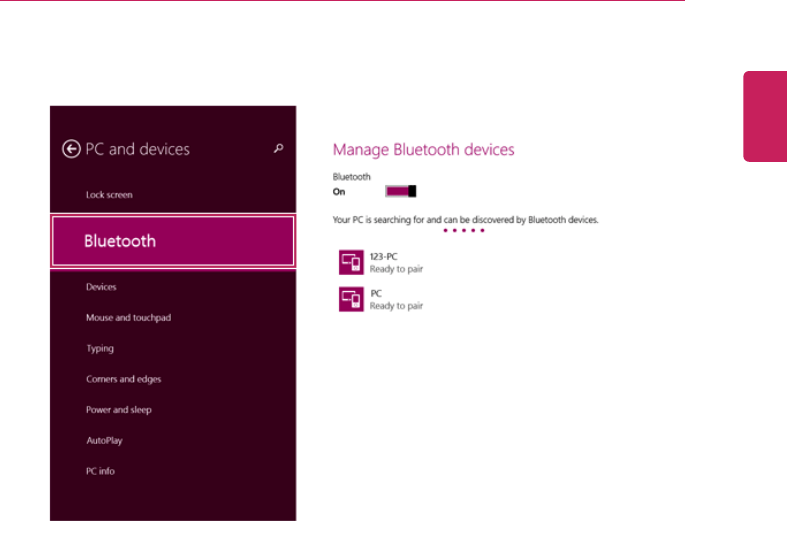
Bluetooth
Bluetooth allows the user to access wirelessly various devices such as camera, cell phone,
headset, printer, and GPS receiver that support Bluetooth
. It can also establish a network
and exchange data with other bluetooth -enabled PC or smartphone.
The Bluetooth device is optional, and it may not be available in some models.
The figures herein may differ by language selection and is subject to change for
performance improvements without prior notice.
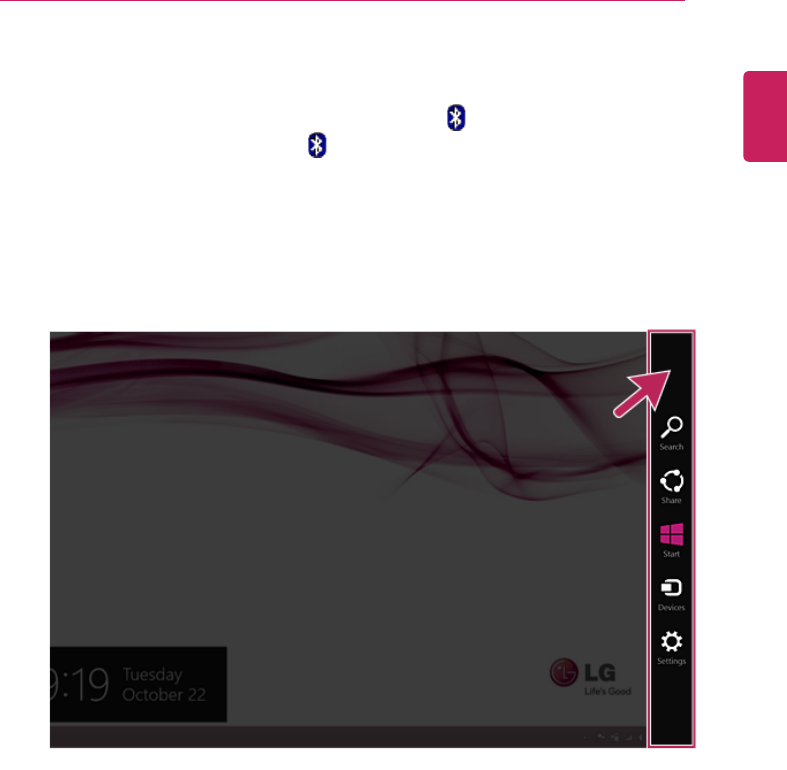
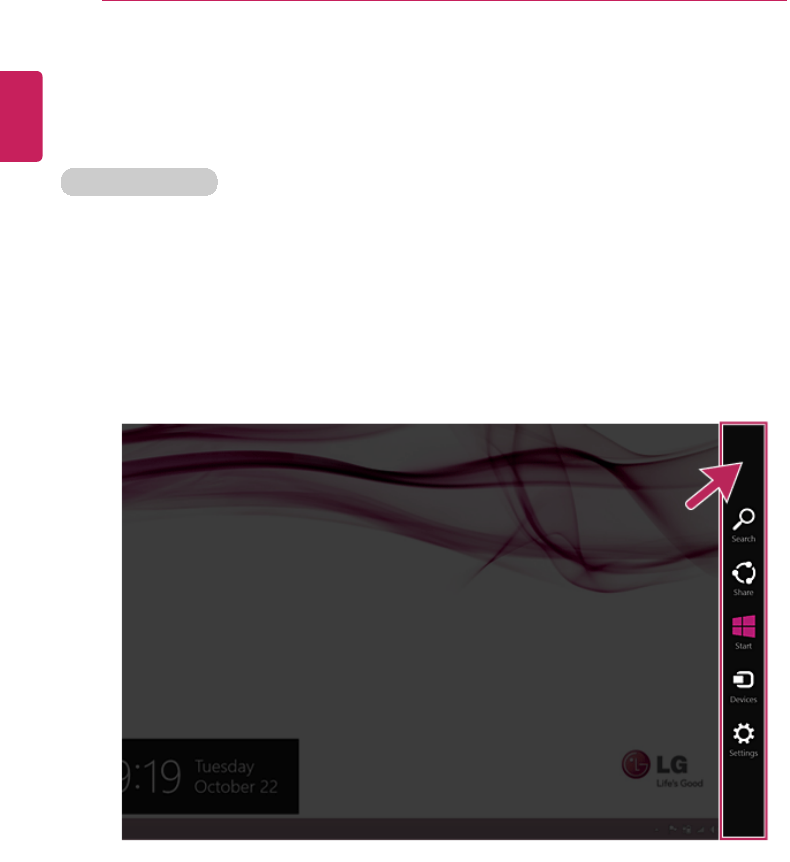
1Run [Charms] on the Desktop or the Start screen.
ENGLISH
80 Using the PC
2In the Charms, click [Settings] >[Change PC Settings].
ENGLISH
Using the PC 81
3On the [PC Settings] screen, as shown below, click [PC and Device] >[Bluetooth].
4When [Bluetooth] appears, search other connectible devices.
ENGLISH

82 Using the PC
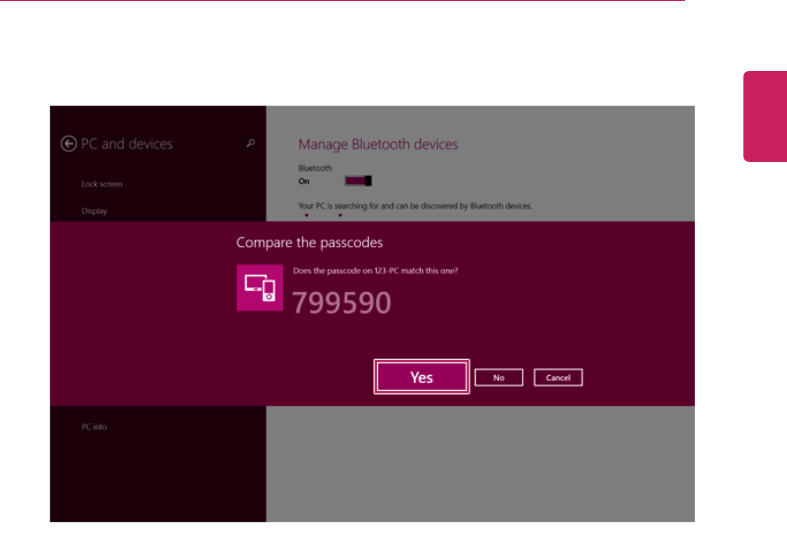
5When a device is found, click the device to connect.
ENGLISH
Using the PC 83
6When the passwords are matched, click [Yes] to complete the connection.
ENGLISH
84 Using the PC
LAN
LAN is the network environment that users can connect to by using a cable to connect to
their internet providers or the company's network.
Using Wired LAN
LAN is installed with an automatic IP (DHCP) as default value.
Please refer to the following instructions to find out more about setting up an automatic IP
(DHCP) or manual IP.
1Connect LAN cable to the LAN port.
2Switch to the Desktop mode after clicking the [Desktop] tile in the Start screen. And
then, run the [Charms].
ENGLISH

Using the PC 85
3In the Charms, click [Settings] >[Control Panel] >[View By] >[Small Icon] >
[Network and Sharing Center].
ENGLISH

86 Using the PC
4Click [Change Adapter Settings].
ENGLISH

Using the PC 87
5Right-click [Ethernet] and select [Properties].
ENGLISH

88 Using the PC
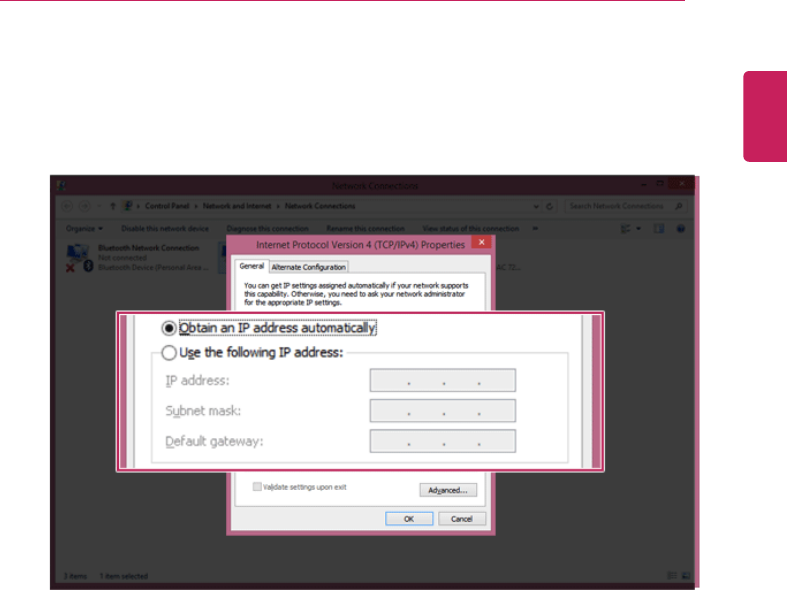
6Select [Internet Protocol Version 4 (TCP/IPv4)] and click [Properties].
ENGLISH
Using the PC 89
7If you want to use an automatic IP(DHCP), select [Obtain an IP Address
Automatically]. If you want to use a manual IP, select [Use Following IP Address] to
enter the address.
Please ask the network administrator about obtaining a manual IP.
8Press [OK] to complete the network setup.
9Click the [Internet Explorer] icon in the taskbar to check whether the internet is operating
normally.
ENGLISH
90 Using the PC
Wireless Network
The wireless network (Wireless LAN) is the network environment that connects a PC with
the internet provider or company network through an Access Point (wireless or regular
router).
Wireless network is optional, and so it may not be installed in some models.
Using the Wireless Network
If an Access Point (wired or wireless router) is in the vicinity of the PC, the wireless network
can easily be accessed.
During the search for a wireless network (Wireless LAN), various Access Point may
be found according to the location where the PC is used.
In case no accessible wireless network (Wireless LAN) is near the PC, no Access
Point might be found.
A password protected Access Point cannot be accessed without knowing the right
password.
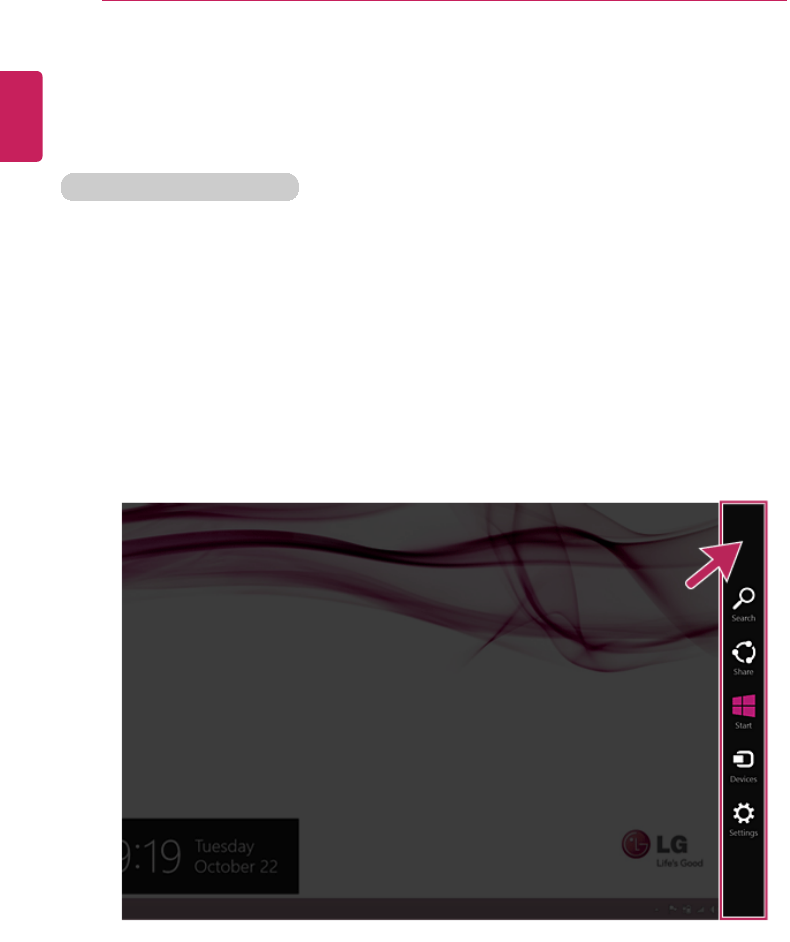
1Run [Charms] on the Start screen or in Desktop mode.
2In the Charms, click [Settings] >[Wireless Network Icon].
ENGLISH
Using the PC 91
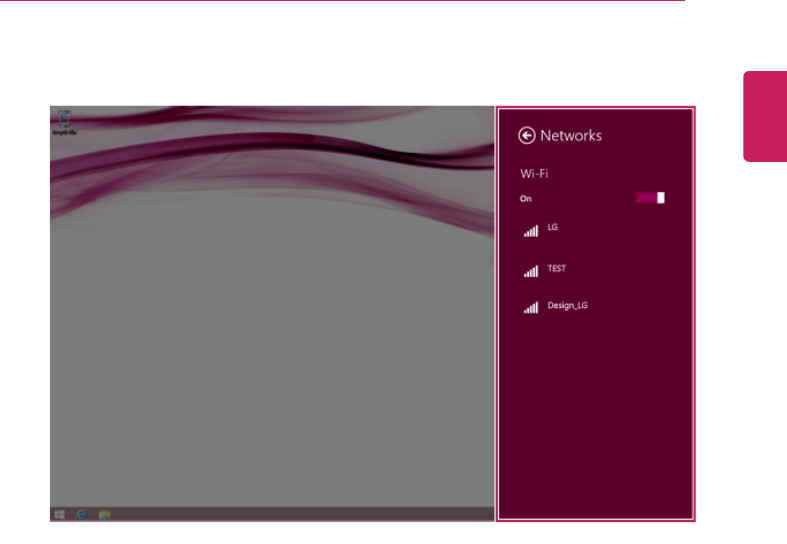
3Near available Access Point(wireless network) is automatically searched.
ENGLISH
92 Using the PC
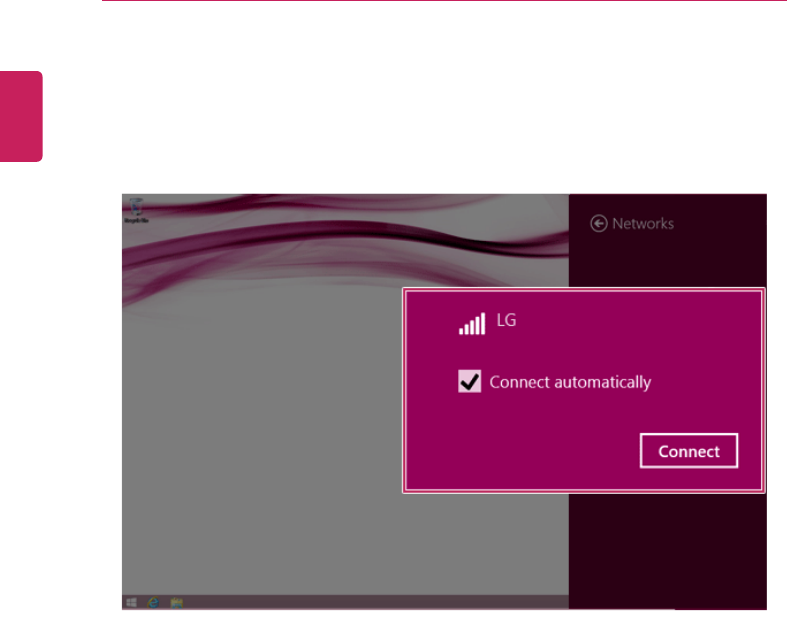
4Select the Access Point (wireless network) you want to use and click [Connect] to
connect to the Access Point.
If a password is set for the wireless network, the Enter Password window
appears.
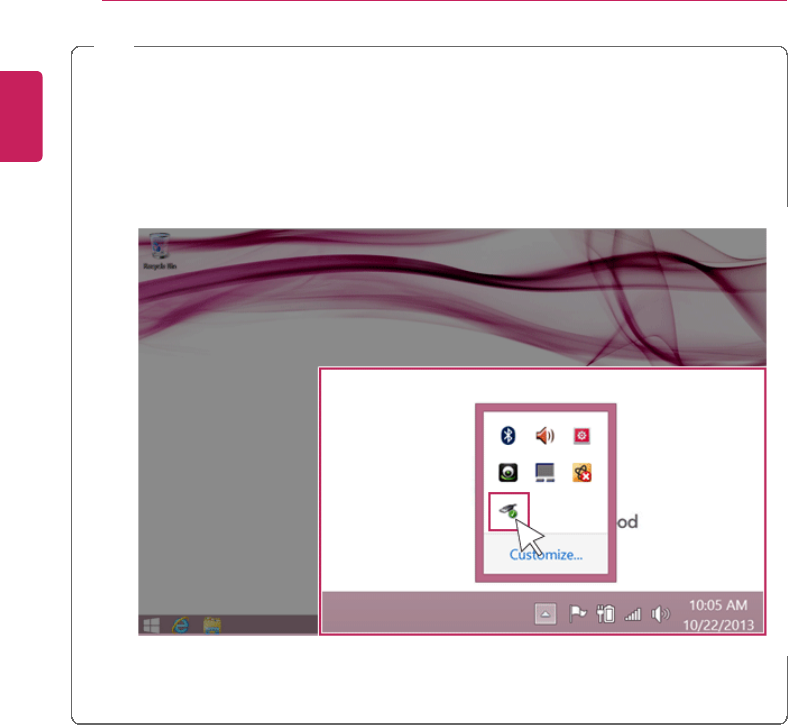
5When the connection is established, [Connected] is displayed in the connected Access
Point(wireless network).
6Click the [Internet Explorer] icon in the taskbar to check whether the internet is operating
normally.
ENGLISH

Using the PC 93
Using a Wireless or Regular Router
A wireless / regular router connects several PCs and mobile devices etc. to one internet line
and enables the use of internet and the network.
A wireless / regular router has to be bought separately. Refer to the manual provided
by the manufacturer for instructions.
Connecting a Wireless or Regular Router
If one internet line is used with a wireless / regular router and several devices are
connected, this may result in a slower connection.
In case of a wireless network, it is recommended to change the network name and security
settings for a more secure connection.
Network speed can differ according to operation environment and specifications.
1Connect the internet cable of the modem that was provided by your internet provider to
the router's WAN port.
2Connect all devices (PC, IPTV, internet phone, etc.) with a LAN cable to LAN ports 1 to
4 of the router.
The number of LAN ports can vary for each router model.
3Please refer to the manual provided by the router manufacturer for setup of the network
and Internet.
ENGLISH

94 Using the PC
Multi-card slot
Checking Available Memory Card
This model supports MMC and SD memory cards.
SD™, SDHC™, SDXC™, and MMC™cards are mobile storage devices, widely used in
many digital products these days.
To use a mini SD, micro SD or MMC mobile card, mount it on the dedicated adapter and
insert the adapter into the multi-card slot in the PC.
Directly applicable
memory cards
Memory cards
applicable indirectly
through dedicated
adapter
(The available memory type and capacity may differ by the PC model type.)
Check availability before buying a memory card.
Mounting and Using Memory Card
Insert the card into the multi-card slot to the fullest in the right direction.
ENGLISH

Using the PC 95
TIP
•When the memory card is formatted, the data stored in the memory card will be
deleted. Check whether there are important data before formatting the memory stick.
•To format a memory card, right-click the memory card drive and select Format.
When Format window appears, click Start to continue.
•Windows The format feature may not be available on those Windows whose version
is lower than Vista®. Format the card on other digital devices or format it after
installing Memory Stick Formatter.
•If the writing prevention tab of memory card is locked, the user cannot format the
memory stick nor write or delete the data.
•SD™, MMC™memory cards can be used only as storage devices and do not
support the copyright protection function.
CAUTION
When using an MMC™card
•Place the MMC™card with the arrow facing upward (▲), and insert it into the slot.
Forcing the MMC™card into the slot may cause an impairment.
•Some memory products manufactured by Transcend™are made of metal and may
cause a short circuit when contacting with the connection port in the multi-card slot.
Avoid using metallic-surfaced memory products. They could offset the system
performance.
When using a memory card through dedicated adapter:
•Use the dedicated adapter. Otherwise a short-circuit may occur, causing damage to
the PC and the memory card.
Removing memory card
Push the card with your finger to remove the memory card from the slot.
ENGLISH
96 Using the PC
TIP
To safely removing a memory card:
The figures herein may differ by language selection and is subject to change for
performance improvements without prior notice.
1Click the [Safely Remove Hardware and other Media] icon on the right side of the
taskbar.
2Select [Remove Multi-Card USB Device] to safely remove hardware.
ENGLISH
Using Software 97
Using Software
LG Easy Starter
LG Easy Starter provides classic functions, like the Start menu of previous Windows, in
Desktop Mode to allow you to easily use the desktop.
TIP
Windows Style apps do not appear in LG Easy Starter.
The figures herein are subject to change for performance improvements without prior
notice.
Installing LG Easy Starter
1Click the [
] tile on the Start screen, or the [ icon in Desktop mode to run LG
Update Center.
ENGLISH

98 Using Software
2Click the [All Lists] menu to access the update and install lists.
3Select LG Easy Starter and click [Install] to install.
4When the installation is completed, LG Easy Starter [ ] tile and icon are created on
the Start screen and Desktop.
Running LG Easy Starter
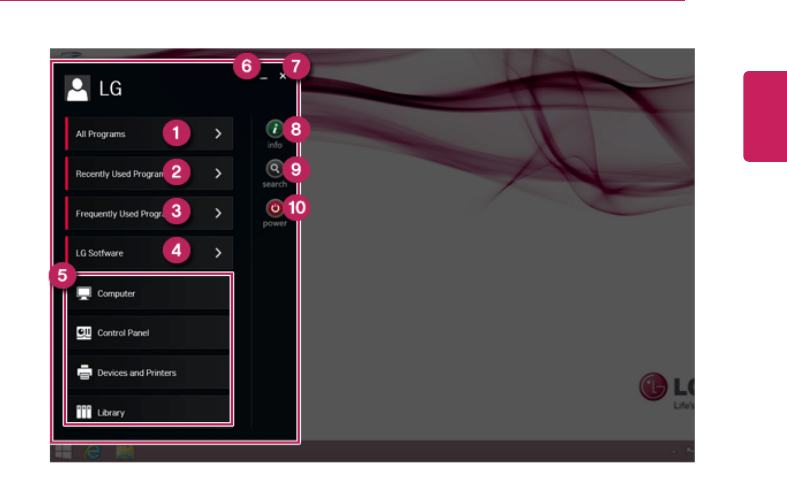
1Click the [ ] tile on the Start screen, or the [ ] icon in Desktop Mode to run [LG
Easy Starter].
2LG Easy Starter runs as follows:
ENGLISH
Using Software 99
aAll Programs: A list of desktop programs installed in the system is displayed.
bRecently Used Programs: A list of recently used desktop programs is displayed.
cFrequently Used Programs: Register and use frequently used desktop programs.
dLG Software: Possible to run software provided by LG Electronics Inc.
eShortcut: Shortcuts to Computer, Control Panel, Devices and Printers, and Library
menus.
fMinimization: Minimizes LG Easy Starter window.
gClosing: Closes LG Easy Starter.
hinfo: Displays information about LG Easy Starter.
iSearch : Goes to the Search Menu.
jPower : Provides Power Options menu.
ENGLISH
100 Using Software
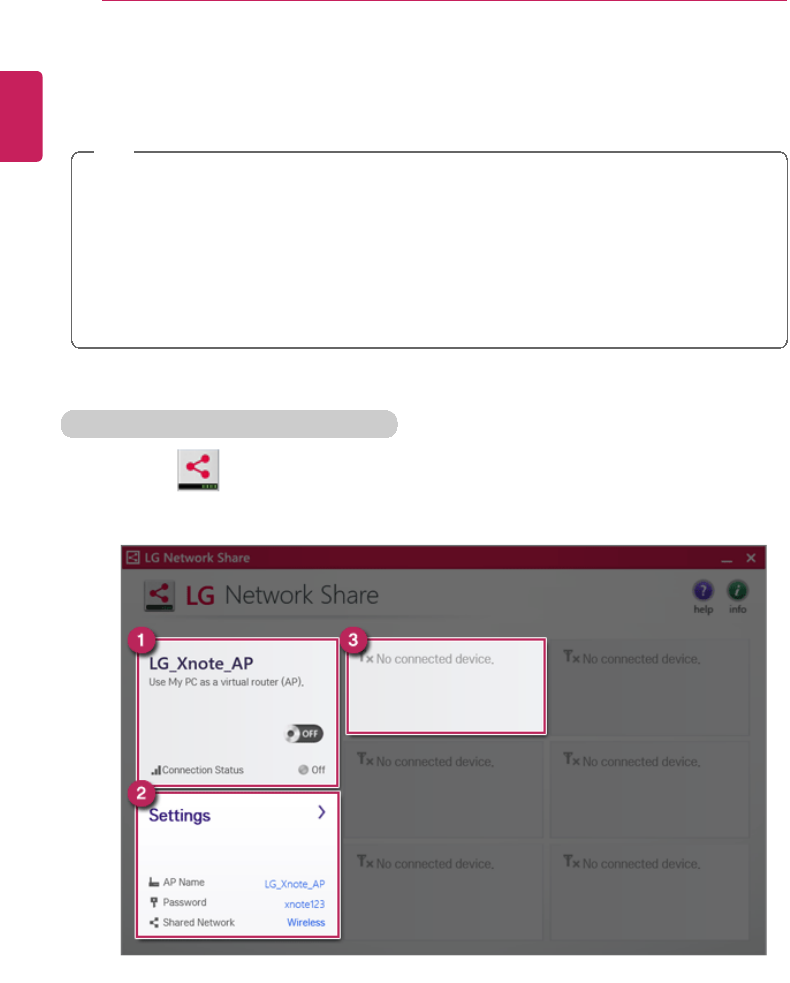
LG Network Share
LG Network Share is software that allows you to configure and use Virtual AP and File
Sharing.
TIP
LG Network ShareFor more details about how to use , refer to the corresponding
help.
The figures herein are subject to change without prior notice.
It may not work properly depending on user preferences (security tools, etc.) and the
network status.
If it is not a built-in communication device, you cannot use Network Share to use the
virtual AP function.
LG Network Share Using the Program
1Click the [
] tile from the Start screen to run LG Network Share.
aVirtual AP function ON/OFF: Turn on or off the virtual AP function.
ENGLISH

Using Software 101
bVirtual AP setup menu: You can modify the SSID, password, and the download
folder of the virtual AP.
cConnected Device Information Tile : It provides information on all connected
devices to the AP. Click to send a file and display the status of the transfer.
ENGLISH
102 Using Software
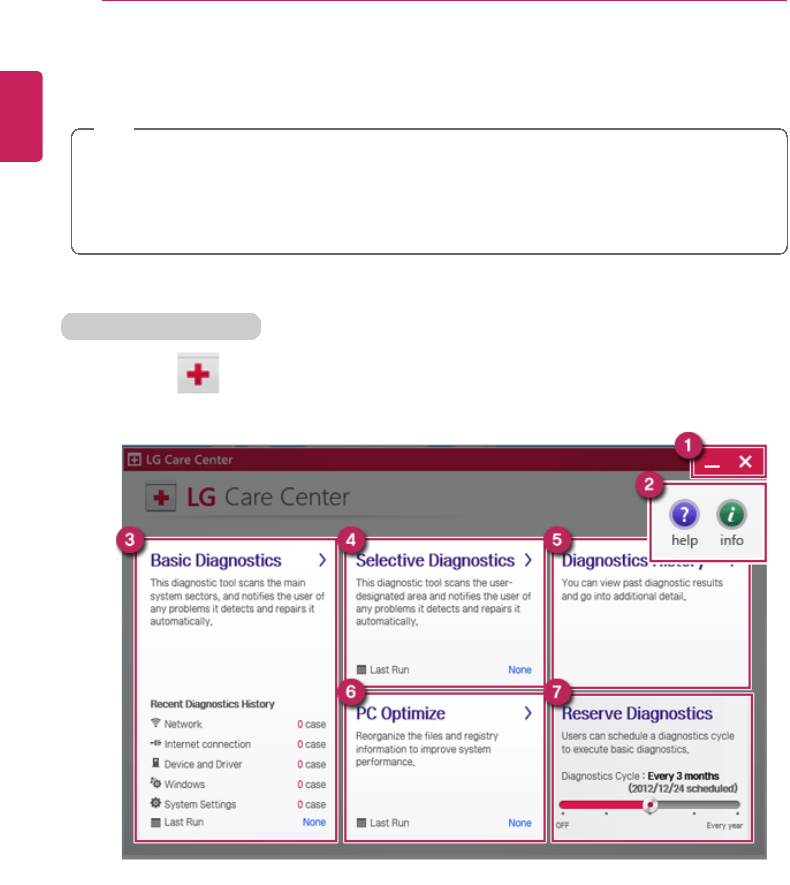
LG Care Center
LG Care Center allows you to easily diagnose/troubleshoot and optimize the system.
TIP
LG Care CenterFor more details about how to use , refer to the corresponding help.
Basic and selective diagnostics functions require network support or LG Update Center
support.
The figures herein are subject to change without prior notice.
Using LG Care Center
1Click the [
] tile from the Start screen to run LG Care Center.
aMinimize/Exit Button: Minimizes the size of the window, or exits the software.
bHelp/Information Button: Runs Help or displays information about the software.
cBasic Diagnostics: Diagnoses the critical areas of the system and notifies the user
of any discovered issues.
dSelective Diagnostics: Diagnoses specified system areas and notifies the user of
any issues.
ENGLISH

Using Software 103
eDiagnostics History: Retrieves and displays past diagnostics results in full detail.
fPC Optimization: Clean up the files and registry and improve system performance.
gDiagnostics Reservation: The user schedules when to perform the Basic
Diagnostics by setting the Diagnostics Cycle.
ENGLISH
104 Using Software
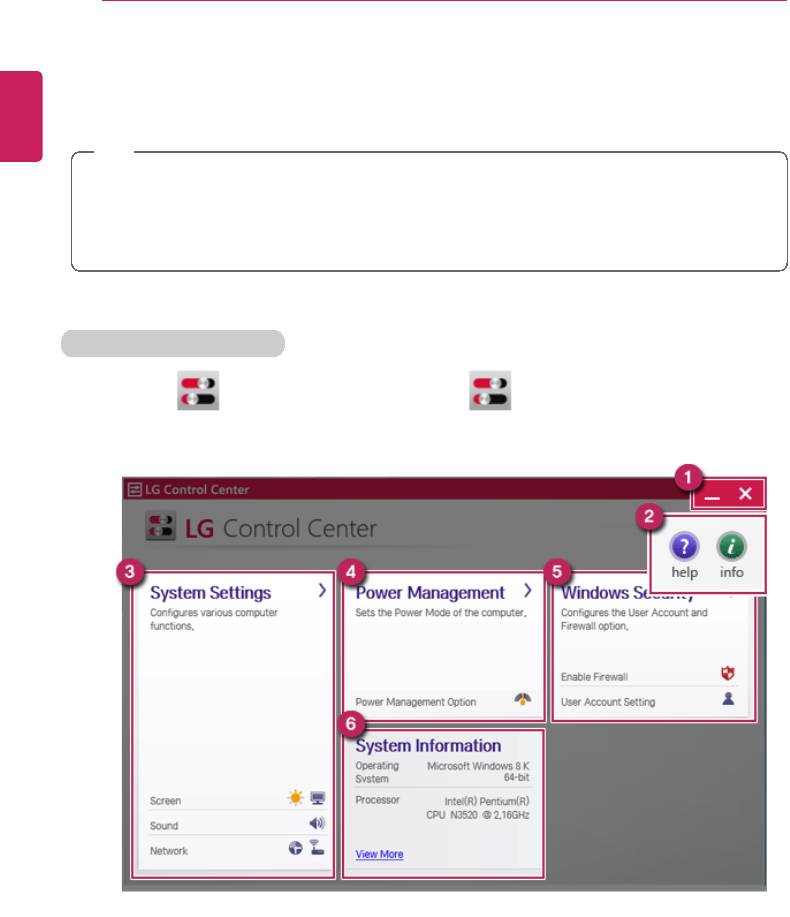
LG Control Center
LG Control Center is software that help you to change PC Settings, Power Settings,
Windows Security Settings, etc. as well as viewing system information.
TIP
LG Control CenterFor more details about how to use , refer to the corresponding
help.
The figures herein is subject to change for performance improvements without prior
notice and the functions supported by LG Control Center may vary from models.
Using LG Control Center
1Click the [
] tile on the Start screen, or the [ ] icon in Desktop to run LG
Control Center.
aMinimize/Exit Button: Minimizes the size of the window, or exits the software.
bHelp/Information Button: Runs Help or displays information about the software.
cSystem Settings : Sets up the screen brightness / resolution, external display, sound
and other various devices.
ENGLISH

Using Software 105
dPower Management Option : Sets up the power management option.
eWindows Security Settings : Sets User Account Control settings and Firewall
settings.
fSystem Information : Displays the PC OS in use, processor information and other
system information.
ENGLISH
106 Using Software
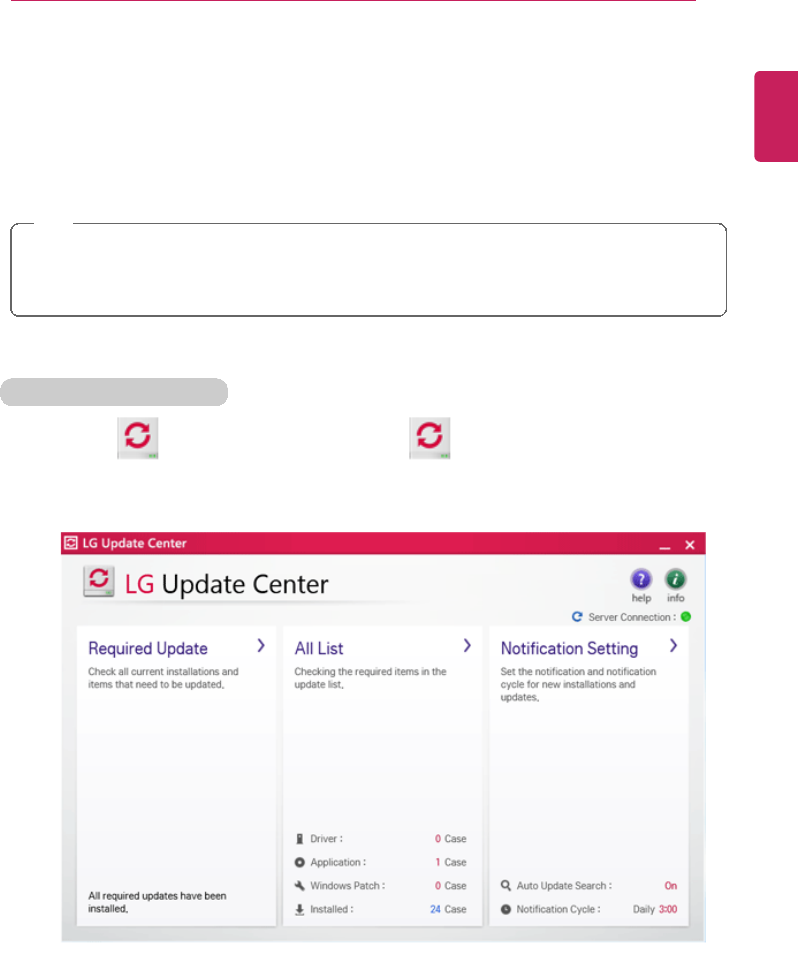
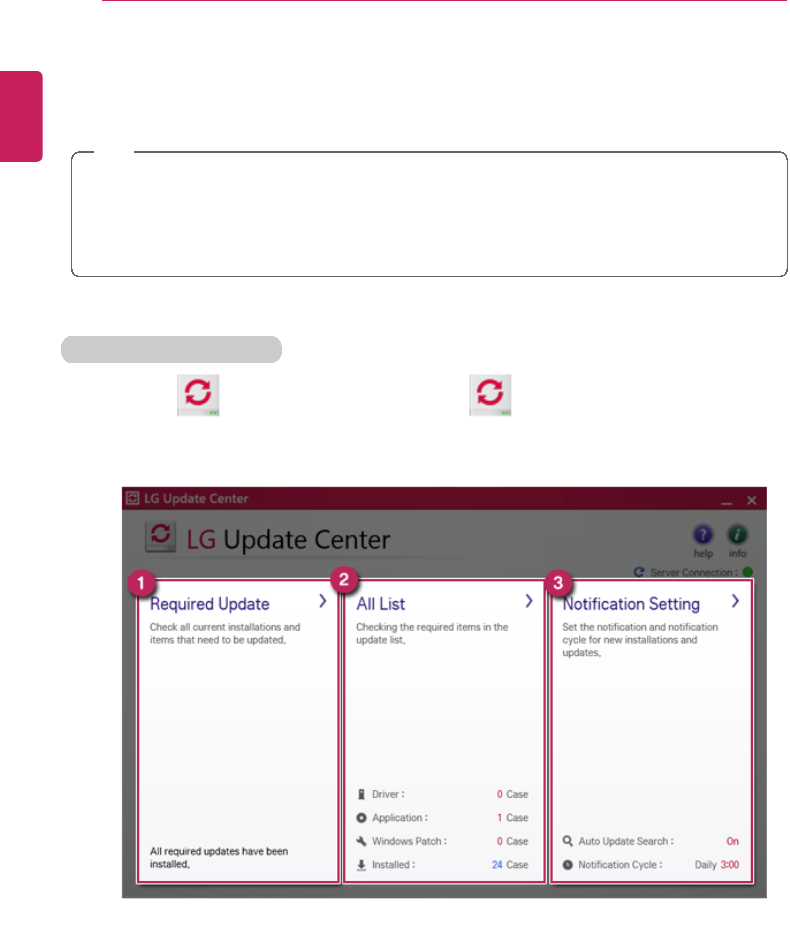
LG Update Center
LG Update Center allows you to install various PC drivers, applications and Windows
patches easily.
TIP
The illustrated images are subject to change without prior notice.
It may not work properly depending on user preferences (security tools, etc.) and the
network status.
For more information on LG Update Center, refer to [Help].
Using LG Update Center
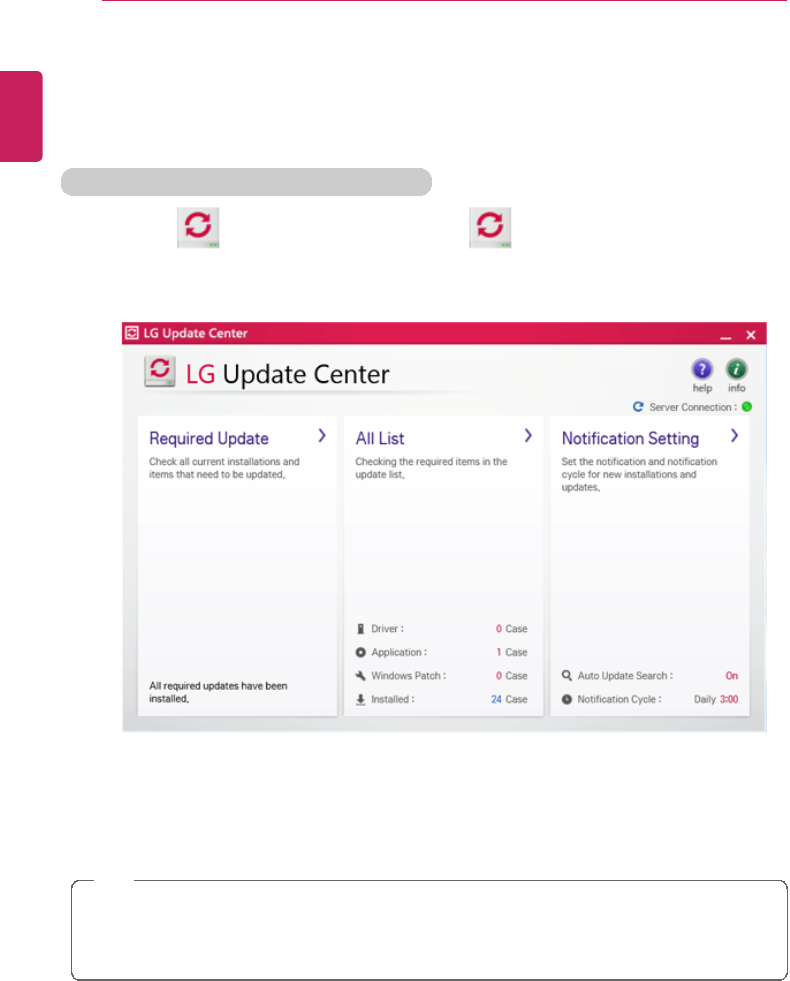
1Click the [
] tile on the Start screen, or the [ icon in Desktop mode to run LG
Update Center.
aCritical Updates : Installs critical items that must be applied to the system.
bAll Lists : Displays and installs all required items for the system.
cAlarm Setting : Sets up notifications for online updates for installed items.
ENGLISH

Using Software 107
TIP
You can use LG Update Center to install deleted drivers or latest drivers easily and
quickly.
Use LG Update Center to keep your system current and optimized.
ENGLISH
108 Using Software
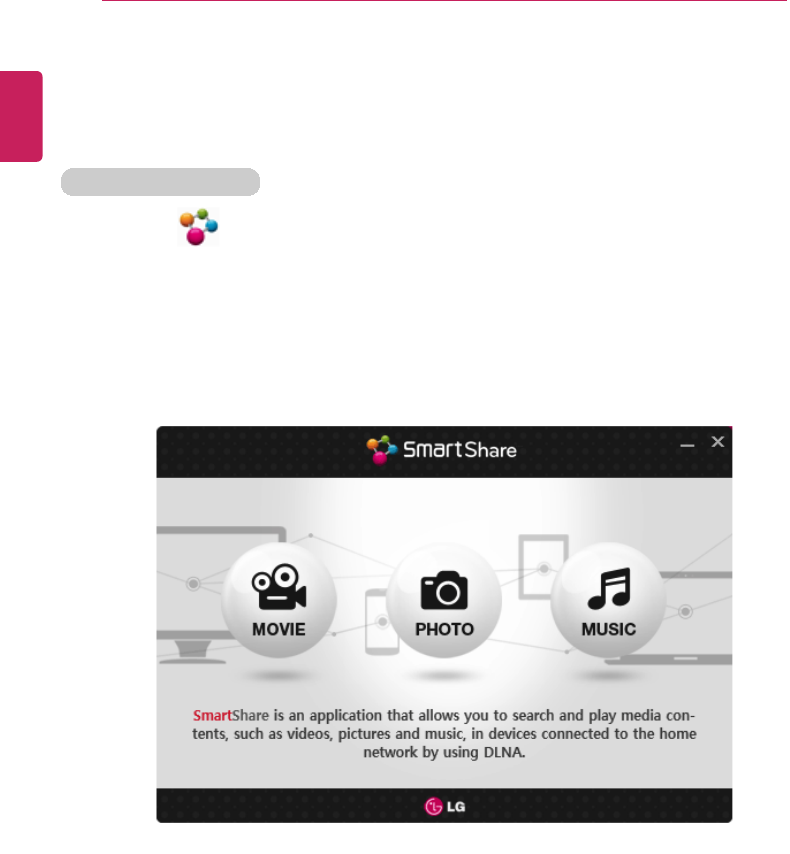
SmartShare™
SmartShare™uses DLNA to allow you to search and enjoy videos, photos, music and
other media contents using a device connected to a local network.
Starting SmartShare™
1Click the [
] tile from the Start screen to run SmartShare™.
2On SmartShare™screen, select one from MOVIE, PHOTO or MUSIC.
For more details about how to use SmartShare™, refer to the corresponding help.
The figures herein are subject to change without prior notice.
ENGLISH
Using Software 109
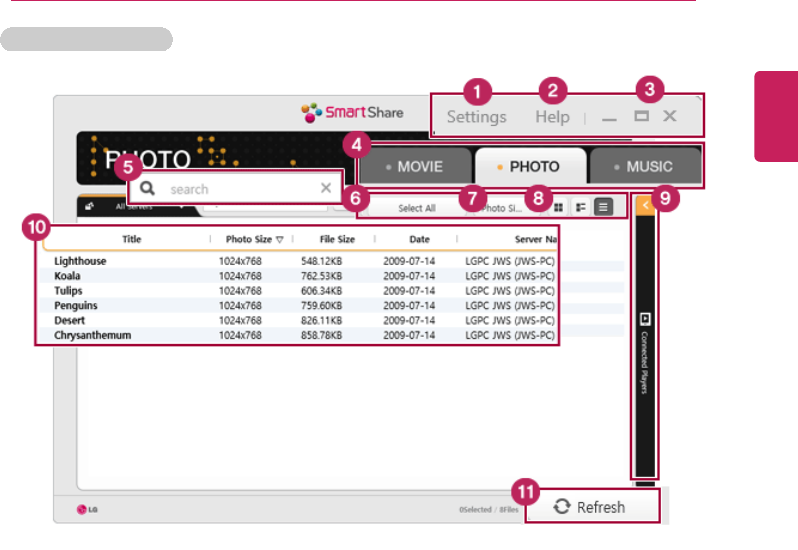
SmartShare™Tour
1Preferences button
•Edits the options for SmartShare™.
2Help button
•Displays the Help menu.
3Minimize,Maximize,Exit buttons
•Allows you to minimize or maximize the window or exit the program.
4Content type area
•Allows you to select a group by pushing a button among MOVIE, PHOTO, and
MUSIC.
5Search window
•Allows you to search for the contents you want by entering a keyword.
6View mode button
•Allows you to switch the view mode. The view mode includes Preview, Basic
Information, View Details, etc.
7Select All button
•Selects all the contents displayed on the window.
8Align button
•Allows you to align the contents based on their title, length, file size, etc.
ENGLISH

110 Using Software
9DMR area
•Displays the list of DMR devices.
10 Contents area
•Displays the contents of the devices connected to the local network.
11 Refresh button
•Refreshes the contents or the list of DMR devices.
TIP
When LG PC's SmartShare™function is interlocked with LG TV, the function runs most
smoothly with TV based on Netcast 3.0 and may not run smoothly with the older version
of TV.
TIP
To get source codes developed under GPL, LGPL, MPL, and other open source
licenses used in this product, visit http://opensource.lge.com.
All licenses including source codes, copyright notice and warranty disclaimer may
be downloaded.
When you request open source codes of the software embedded in this product by
sending e-mail to opensource@lge.com within three years after purchasing this
product, the codes recorded in a CD-ROM will be provided to you for minimal
costs, including media costs, transport fee, etc.
ENGLISH
Restoring the System 111
Restoring the System
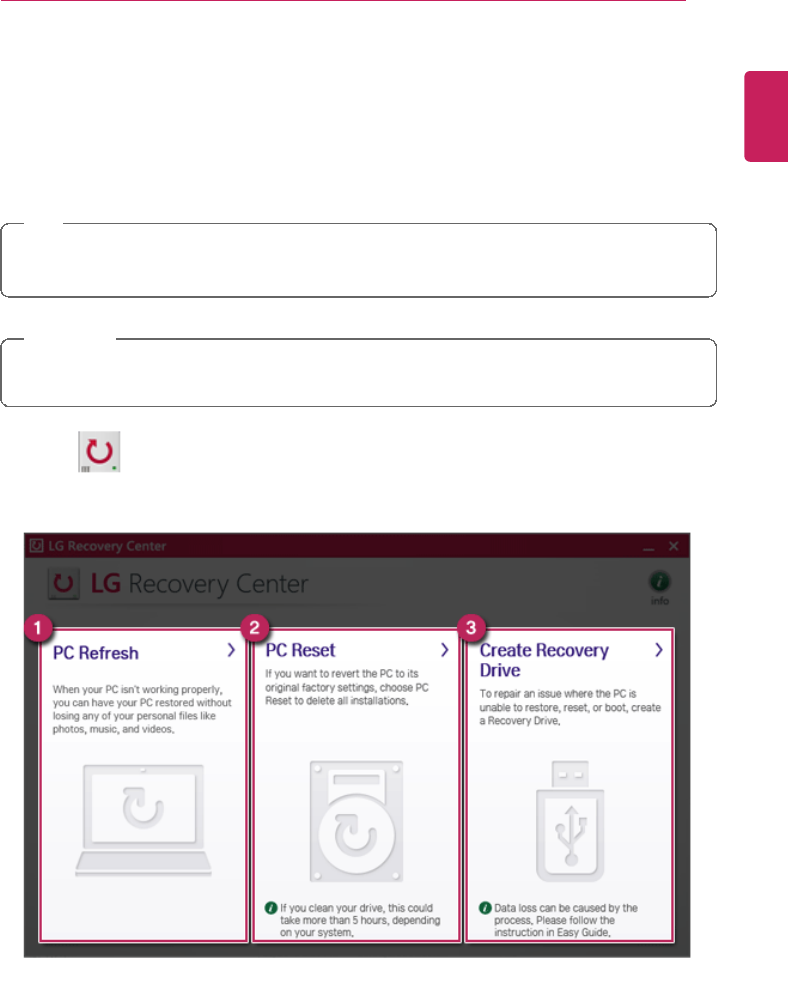
Using LG Recovery Center
If the system has an error, you can use LG Recovery Center to use Windows 8.1 recovery
function to recover or restore the system to its initial pre-purchase state.
TIP
LG Recovery Center uses the recovery function of Windows.
For more information about Windows recovery, refer to [Windows Help and Support].
CAUTION
If you have deleted the restoration data in the protected area of the hard disk, or have
arbitrarily installed another operating system, the restore function may not work.
Click the [
] icon in Desktop to run LG Recovery Center.
ENGLISH
112 Restoring the System
1PC Recovery: Recovers the PC without losing any personal files.
CAUTION
PC settings are reset to default and any user-installed software will be deleted.
2PC Initialization: Removes all items from the system and restores the system to its initial
pre-purchase state.
CAUTION
All data is lost during the initialization, so you must backup all critical data in advance.
It may take about 5 hours or longer depending on the system conditions.
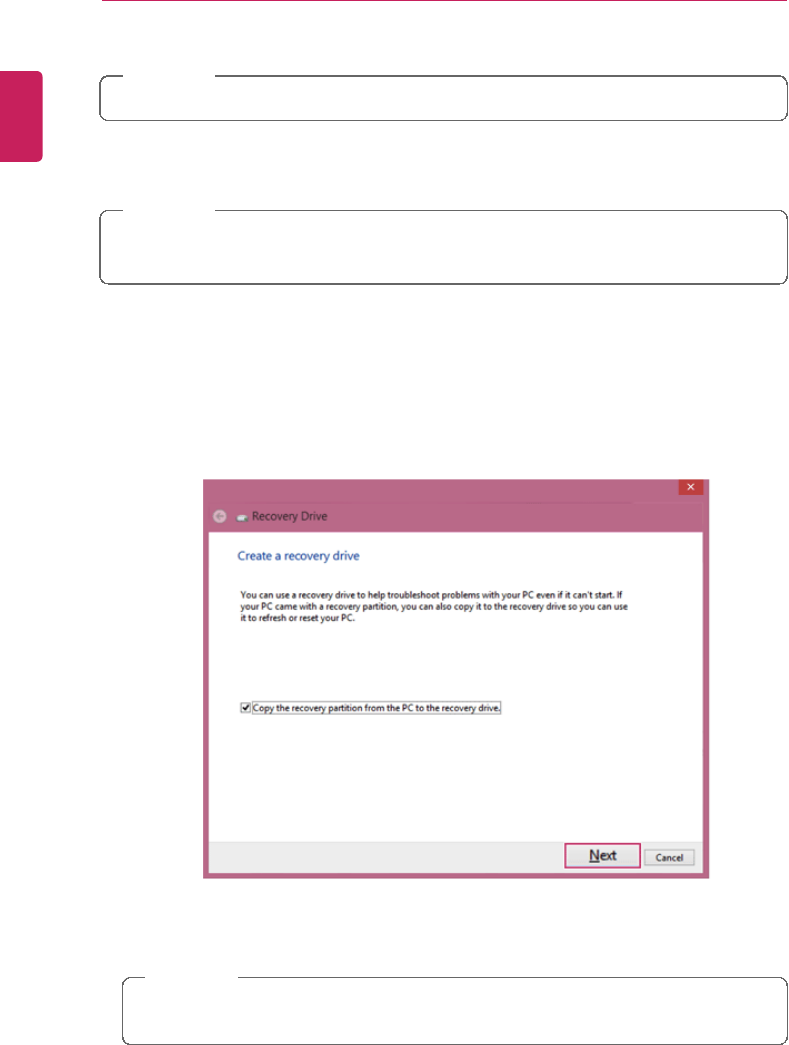
3Creating Recovery Drive: You can create a recovery drive in Windows as a precaution
against a system failure that prevents you from entering the operating system, or any
other severe system issues.
a When the following screen appears, select [Copy the PC's recovery partition to the
recovery drive.] and click [Next].
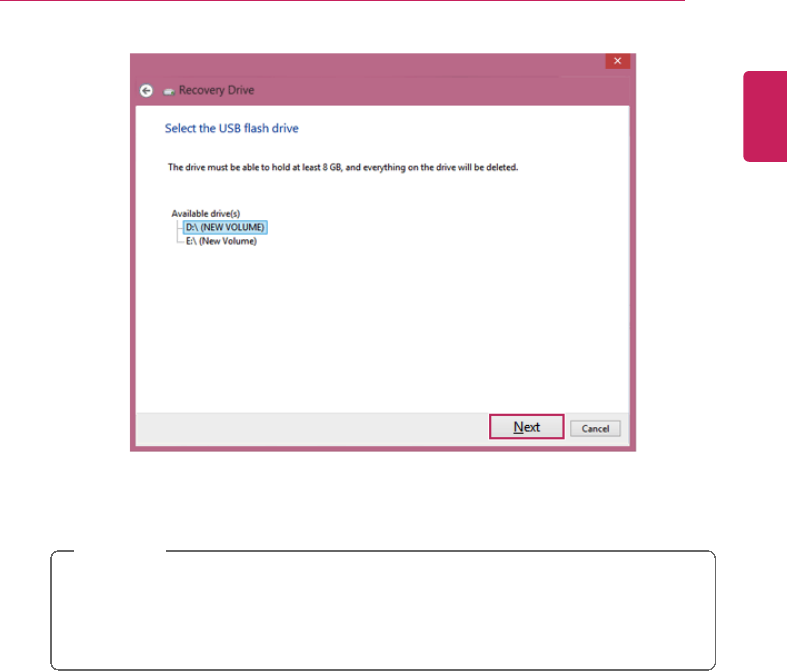
b When the following screen appears, select the USB flash drive and click [Next].
CAUTION
This process deletes all the data on the storage device designated as a recovery
drive. Make sure to back up its data in advance.
ENGLISH
Restoring the System 113
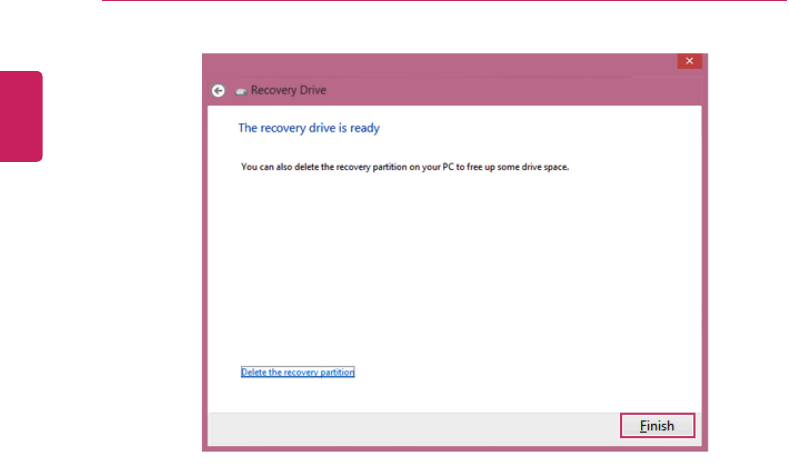
c Once the storage device is ready, click [Finish] to create a recovery drive.
CAUTION
Select [Remove the Recovery Partition] while creating a recovery drive to remove
the recovery partition in the PC.
Once the recovery partition is removed, you cannot use the recovery function of
the PC. You can only recover the system using the recovery media.
ENGLISH
114 Restoring the System
ENGLISH
Restoring the System 115
Recovering from a Boot Failure
If booting is impossible due to a serious error with the system, you can recover the system
using LG Recovery Center RE.
CAUTION
If you have deleted the restoration data in the protected area of the hard disk, the restore
function may not work.
Using LG Recovery Center RE
CAUTION
All data is lost during the initialization, so you must backup all critical data in advance.
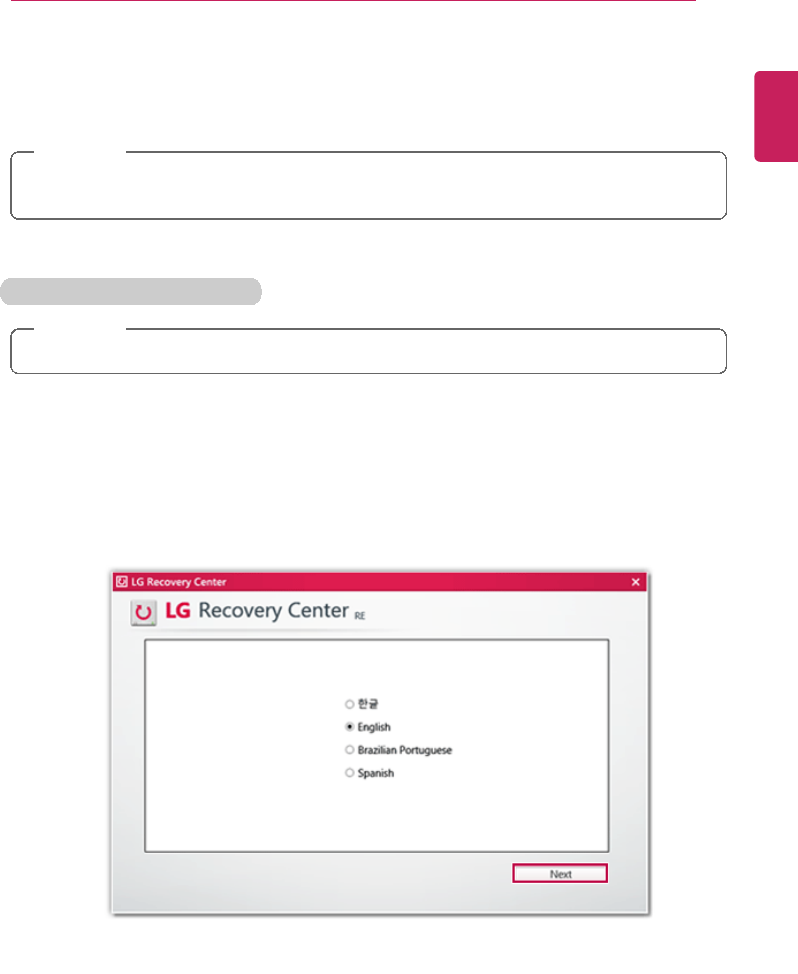
1Turn on the PC and press [F11].
2When the following screen appears, select a language you want to use and then click
[Next].
ENGLISH
116 Restoring the System
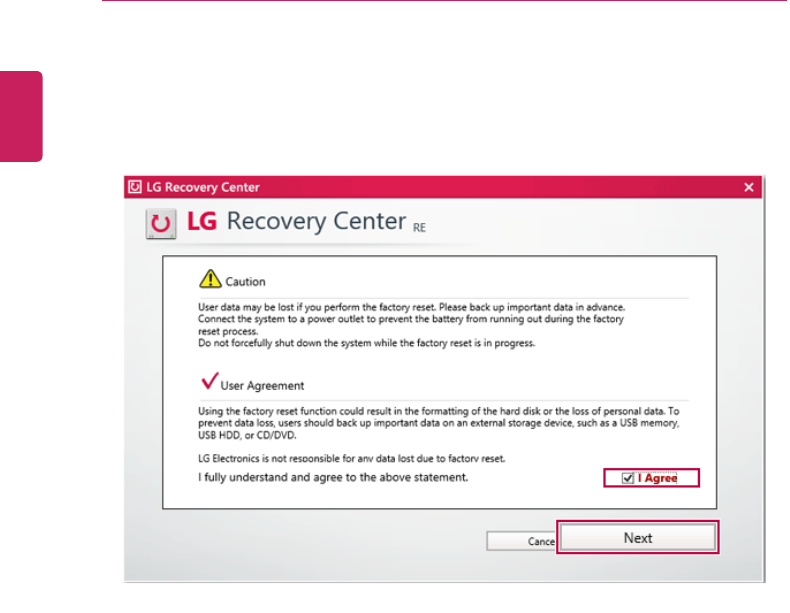
3When the following screen appears, select the [Agree] button and then click the [Next]
button.
For recovery, the AC adapter must be connected. Connect the system power and
then recover the system.
ENGLISH
Restoring the System 117
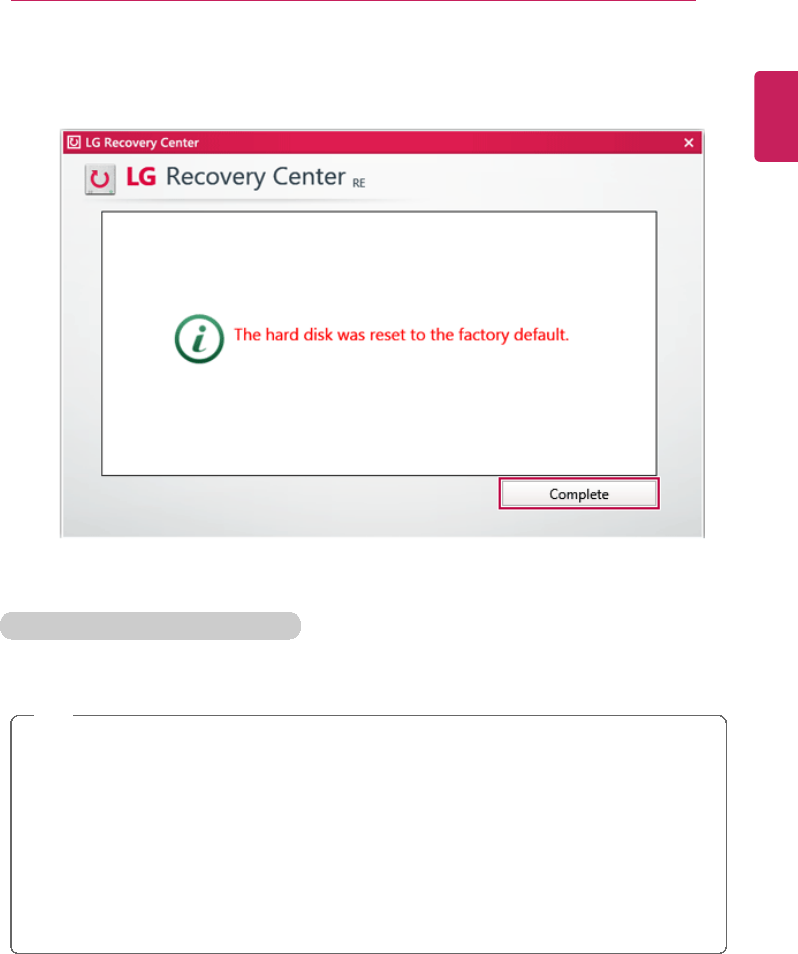
4When the factory reset has been completed as shown in the following figure, click the
[Complete] button and then restart the system.
Recover by Using a Recovery Drive
If it is impossible to recover by using [F11], you can recover the system through a recovery
drive.
TIP
To recover by using a recovery drive, you must have the recovery drive made through LG
Recovery Center [Create Recovery Drive].
1Connect the recovery drive to the USB port of the PC.
2Turn on the PC and press [F10].
3When the screen for selecting the boot device appears, select the connected recovery
drive and click [Enter].
4Select the [Troubleshooting] menu.
5Select the item you want and recover the system following the instructions.
ENGLISH
118 Setup and Upgrade
Setup and Upgrade
Information on Windows 8.1 Update
If the Windows 8.1 update does not install automatically or the system is not up-to-date, you
can manually install the update by following these steps.
TIP
Install the Windows 8.1 update to use the newly expanded features.
On a Windows 8.1 update-installed PC, the Exit and Search buttons will appear in the
upper-right corner of the Start screen.
You must be connected to the internet to install the Windows 8.1 update.
The update progress window may appear differently, depending on the device.
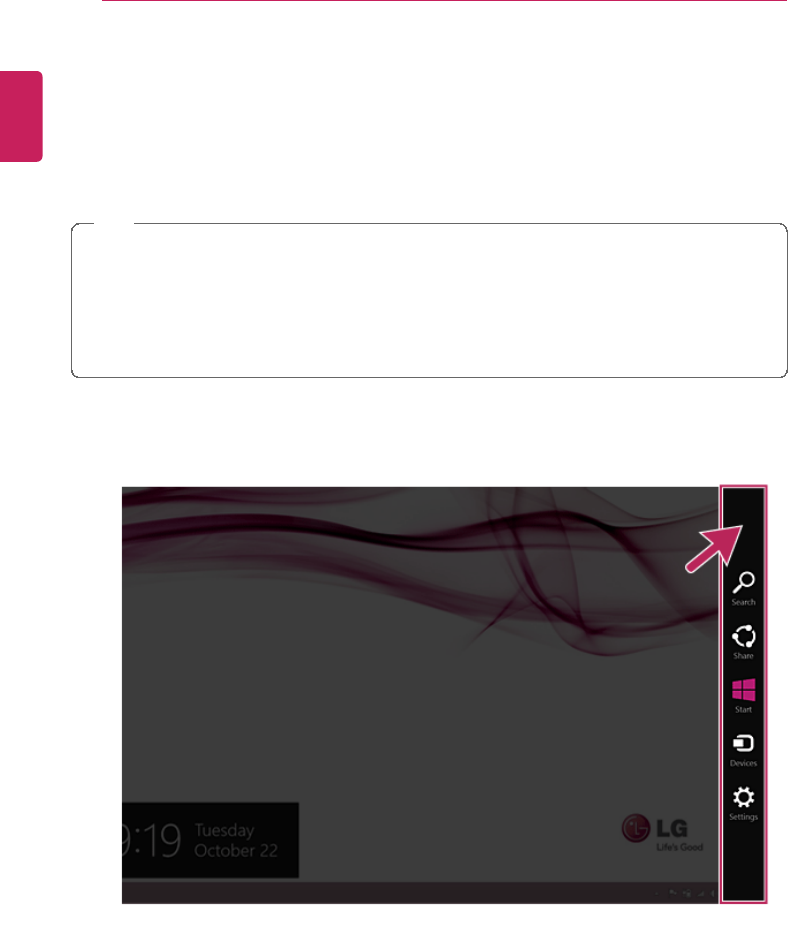
1Run [Charms] on the Desktop or Start screen.
ENGLISH

Setup and Upgrade 119
2In Charms, click [Setup] > [Change PC Changes]> [Update and Recovery] manual.
ENGLISH
120 Setup and Upgrade
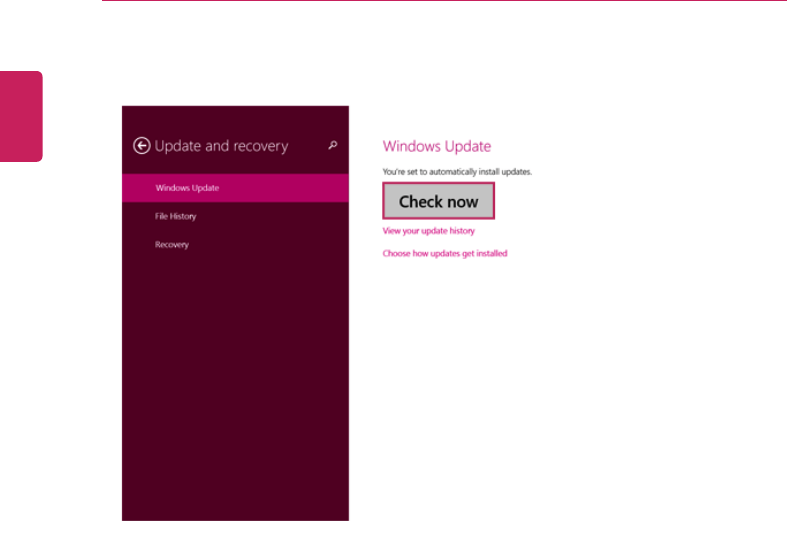
3As shown in the figure, when the Windows update window appears, click [Check now].
ENGLISH
Setup and Upgrade 121
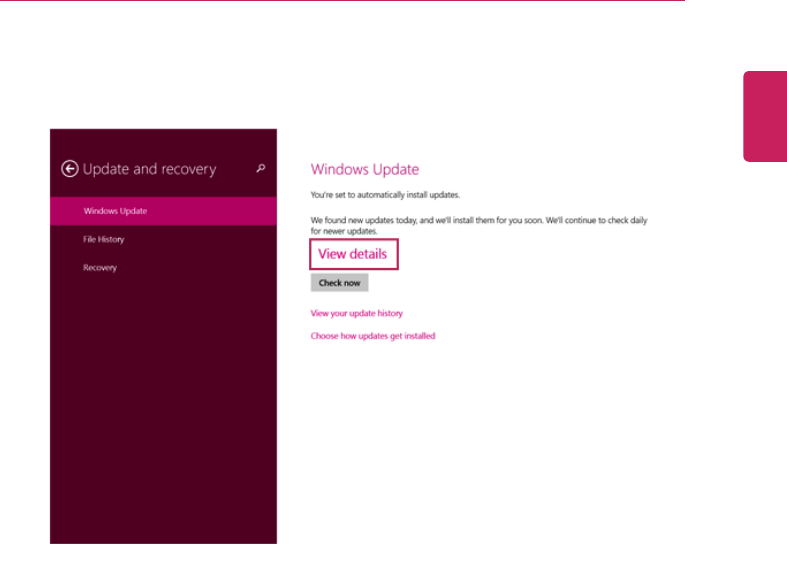
4As shown in the figure, when a message that new updates are available appears, click
[View Details].
ENGLISH
122 Setup and Upgrade
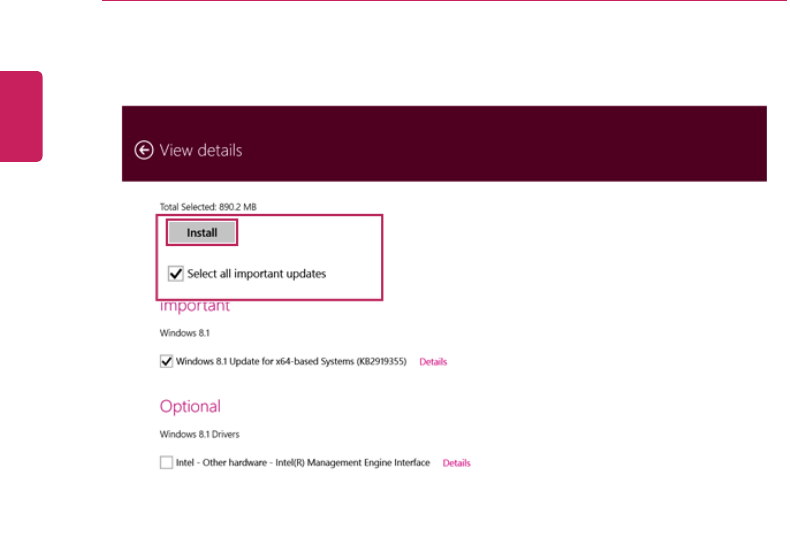
5In View Details, click [Select all important updates] and the Install button to proceed.
ENGLISH

Setup and Upgrade 123
6Once the new updates have been installed, click [Restart] when the following screen
appears to complete installation.
ENGLISH
124 Setup and Upgrade
Installing the Driver
The figures herein may differ by language selection and is subject to change for
performance improvements without prior notice.
Using LG Update Center to install the Driver
1Click the [
] tile on the Start screen, or the [ icon in Desktop mode to run LG
Update Center.
2Select [Critical Updates] or [All Lists] to install the driver.
For more information on LG Update Center, refer to [Help].
TIP
You can use LG Update Center to install deleted drivers or latest drivers easily and
quickly.
For the system optimization, use LG Update Center to keep up-to-date.
ENGLISH

Setup and Upgrade 125
How to download LG Update Center
You can download LG Update Center from LG Electronics Cyber Service Center (www.lg.
com).
ENGLISH

126 Setup and Upgrade
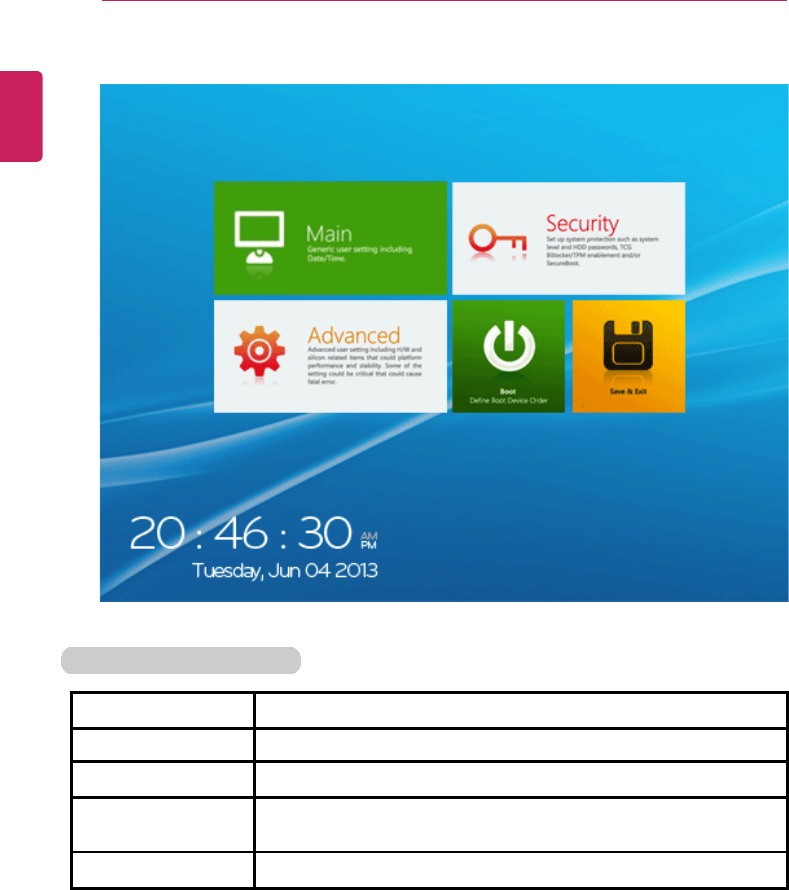
Starting System Setup
System setup means storing the hardware configuration information of the PC in the flash
memory. Through system setup, the PC retrieves various information including current date
and time, memory capacity, and hard disk capacity and type.
You setup the system when you set passwords, change the boot order, and add new
peripheral devices to the machine.
Items displayed on the Setup screen may differ by model type and spec.
•Refer to .
•
•
TIP
To use the system setup (F2), booting device selection (F10), or recovery (F11), you need
to restart the system (click [Restart] in the system power menu) and then immediately
press the corresponding function key due to the fast booting speed.
CAUTION
•Do not change the system setup unless necessary. Incorrect system setup may
cause errors during system operation. Use caution when changing the system
setup.
•For performance improvement, the system setup menu configuration and the initial
setup status may be changed and may become different from images included in the
user manual.
ENGLISH

Setup and Upgrade 127
1Reboot the system and press [F2].
ENGLISH
128 Setup and Upgrade
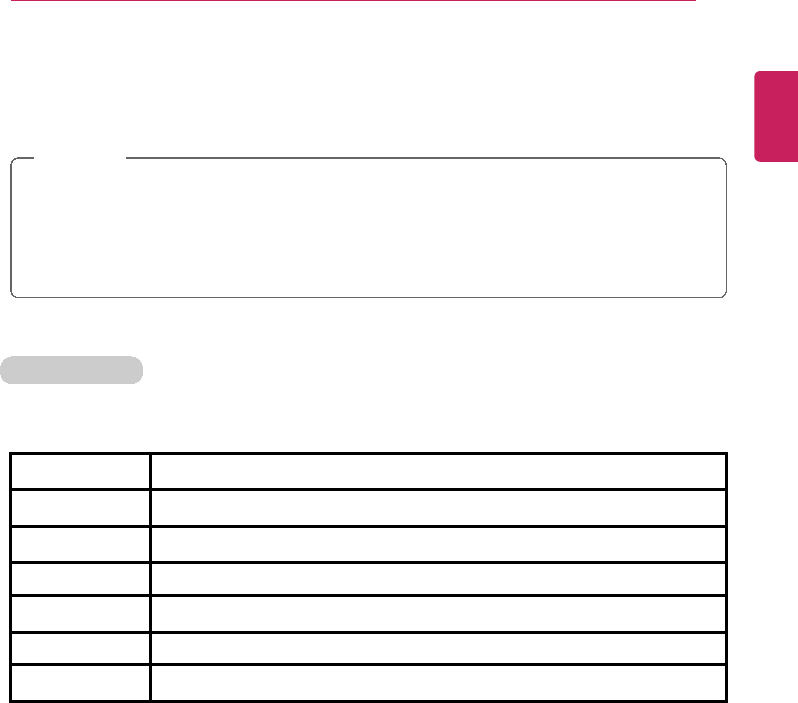
2In a few moments, the system setup screen appears.
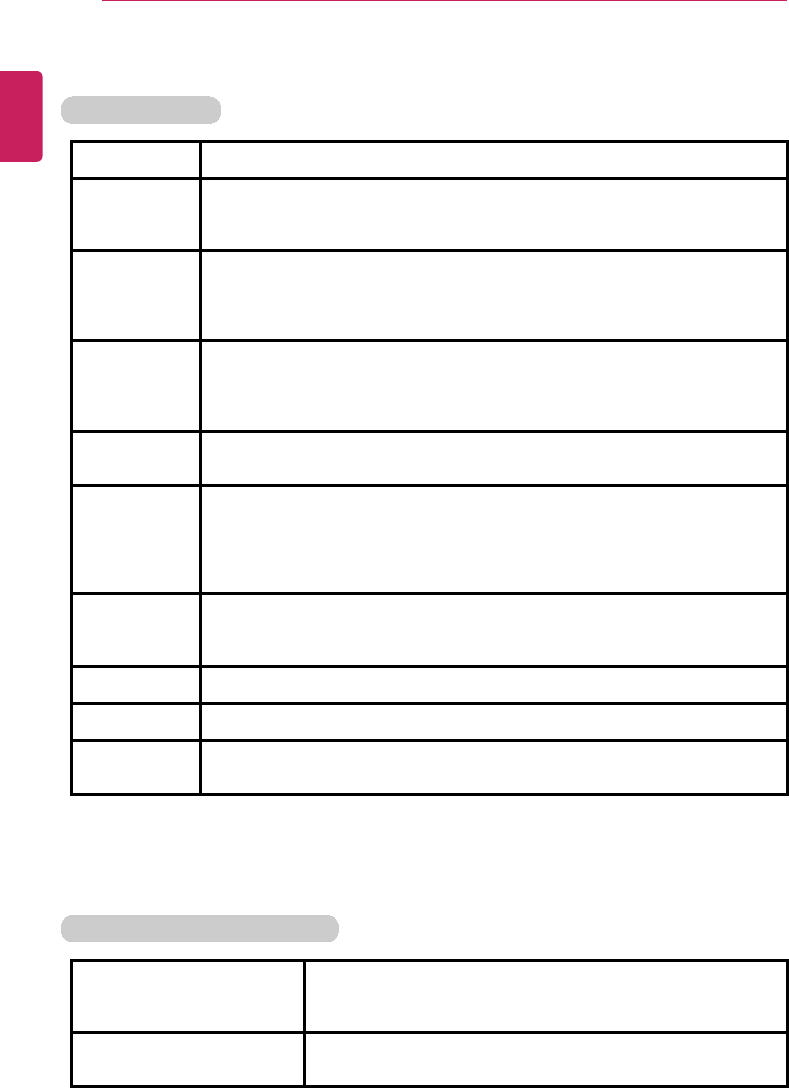
Keys Used in System Setup
Keys Function
Enter Selects the current item.
Esc To deselect the current item or to move to the previous screen.
▲,▼,◄,►(Arrow
keys)
Moves the cursor up, down, left, and right.
F10 Stores new settings or ends the system setup.
ENGLISH
Setup and Upgrade 129
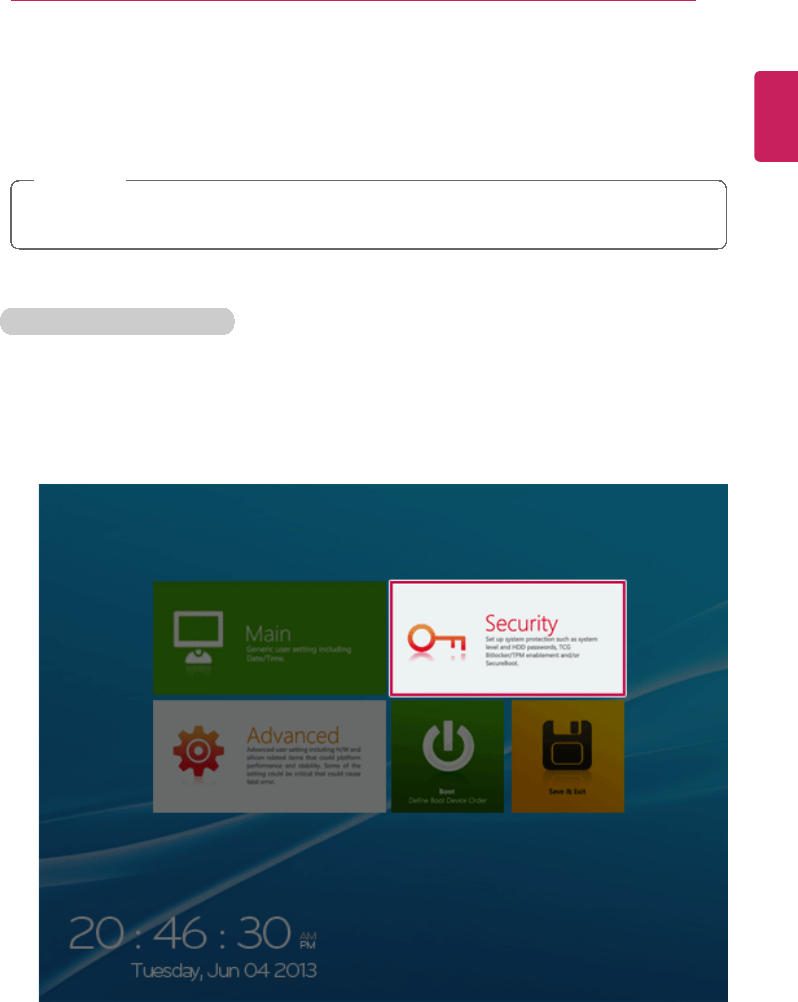
Setting the Password
This process is to set a password so that other people cannot use the PC or change the
settings.
The user can set a password while booting the system or setting up the system.
CAUTION
•Without the registered password, access to the system will be denied. Write down
and keep the password in a safe place.
Set Supervisor Password
The password prevents unauthorized people from accessing the PC. By default, no
password is set for the machine. If an unauthorized person changes the password in the
System Setup, you will be unable to access the system.
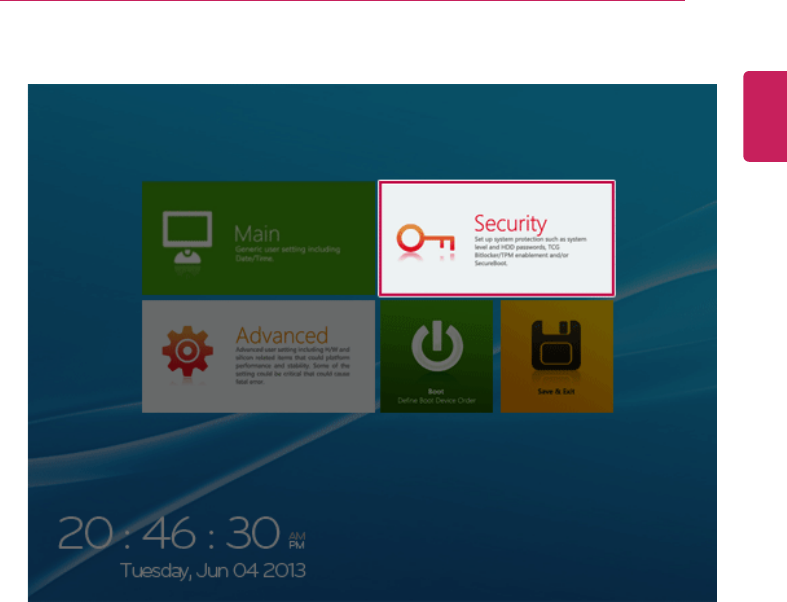
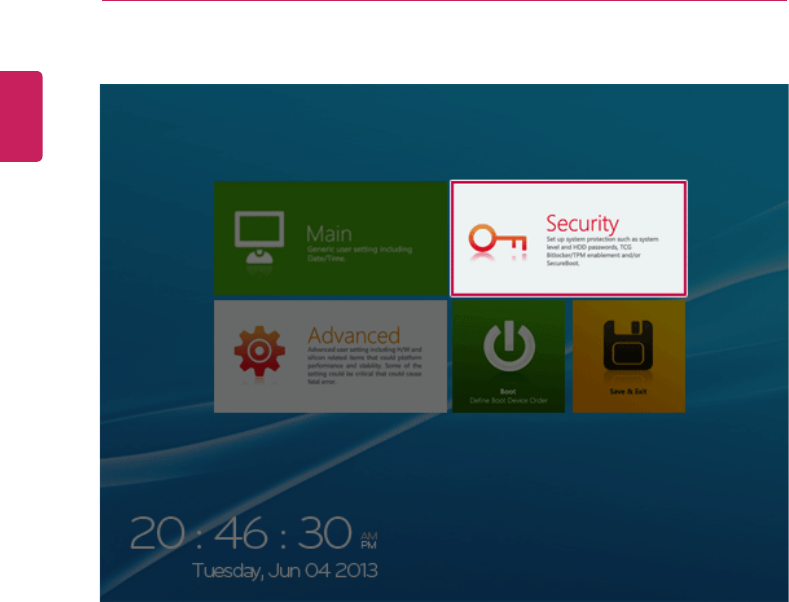
1After opening the system setup screen, click the [Security] button.
ENGLISH
130 Setup and Upgrade
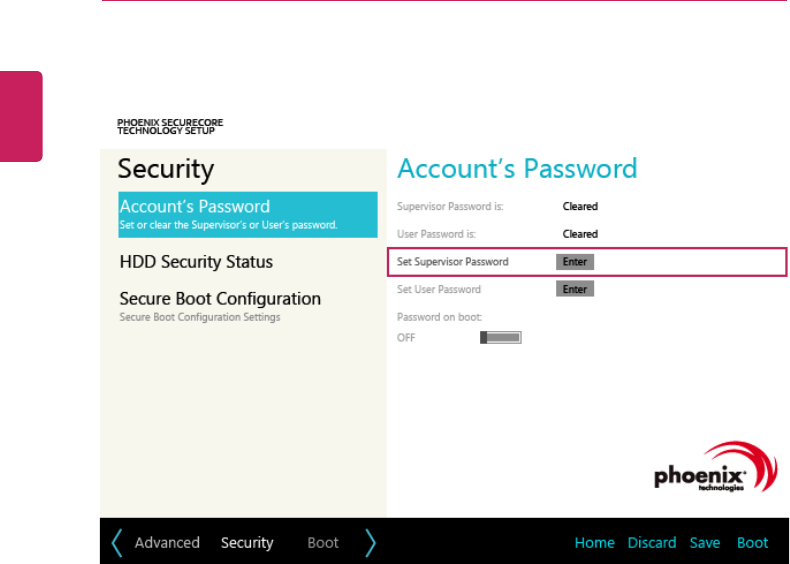
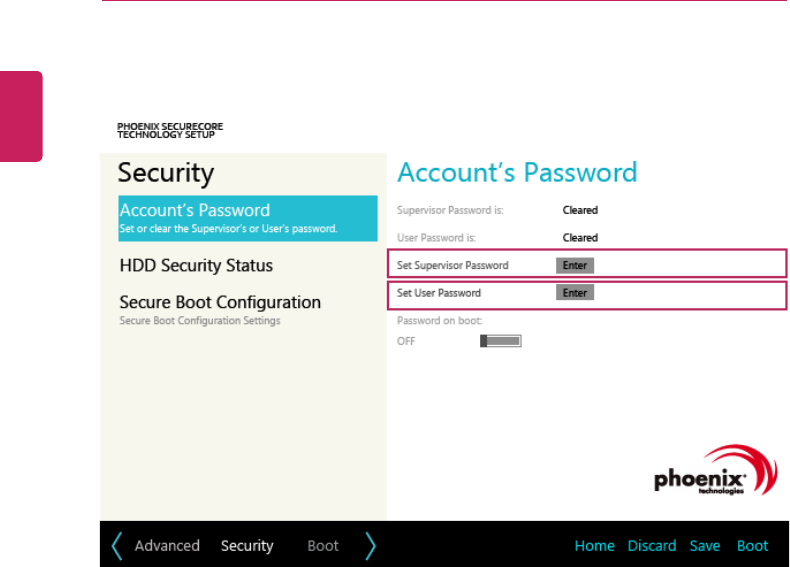
2When the following screen appears, click [Enter] in the [Set Supervisor Password]
menu.
ENGLISH
Setup and Upgrade 131
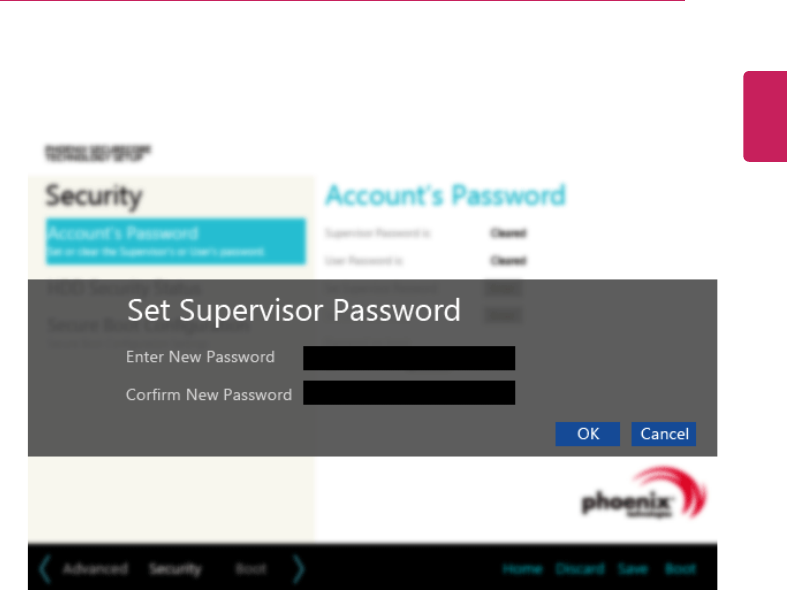
3When the following message appears, enter the password and click [OK]. The
password must not exceed 8 total characters consisting of letters (A - Z), numbers (0 -
9), or a combination of both.
ENGLISH

132 Setup and Upgrade
4When the following message appears, click [OK].
5To save the changes in system setup, press [F10].
ENGLISH
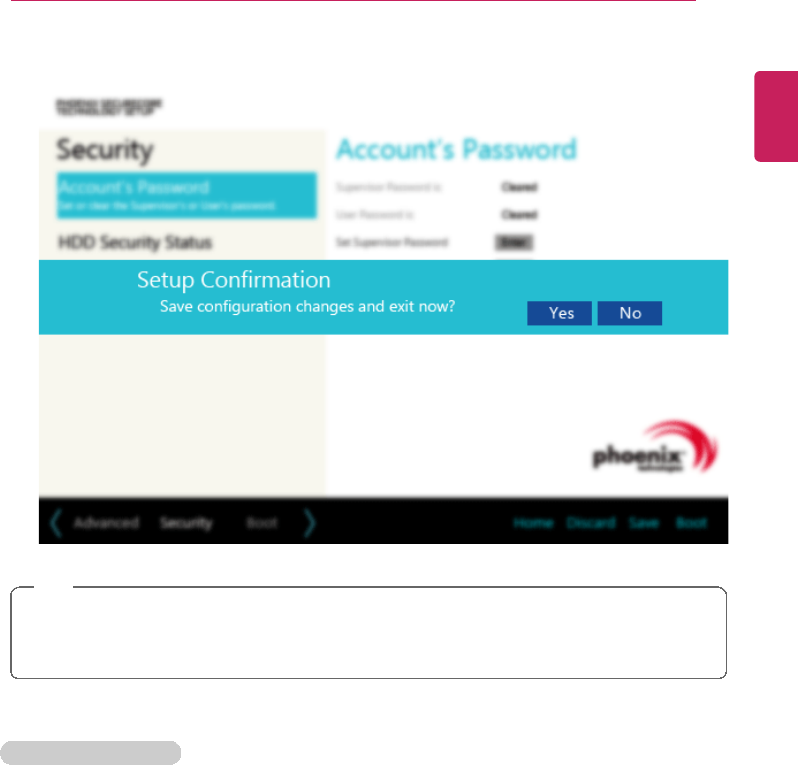
Setup and Upgrade 133
6When the following message appears, click [YES]. The PC will restart.
TIP
•With Supervisor Password, you are authorized to set all items in the System Setup
and to set Password on boot. In case other people also use the notebook PC, it is
recommended to set the Set User Password.
Set User Password
The password set by the [Set User Password] process is lower than that set by the [Set
Supervisor Password] process, and so the user can use the[Set User Password] only
after setting a password in the [Set Supervisor Password] menu.
ENGLISH

134 Setup and Upgrade
1After opening the system setup screen, click the [Security] button.
ENGLISH

Setup and Upgrade 135
2When the following screen appears, click [Enter] in the [Set User Password] menu.
ENGLISH
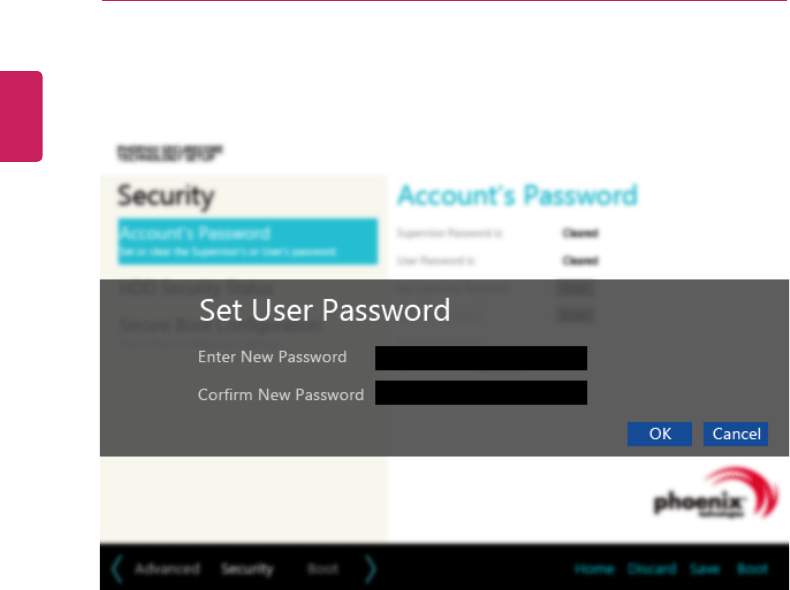
136 Setup and Upgrade
3When the following message appears, enter the password and click [OK]. The
password must not exceed 8 total characters consisting of letters (A - Z), numbers (0 -
9), or a combination of both.
ENGLISH
Setup and Upgrade 137
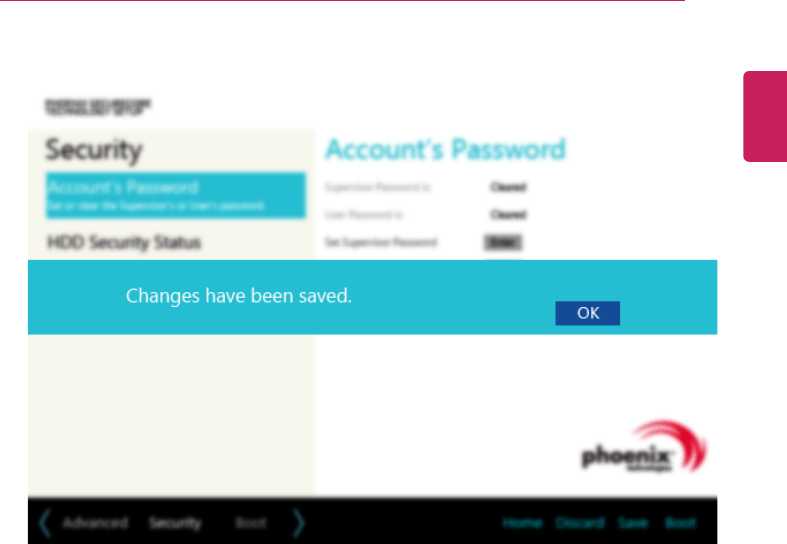
4When the following message appears, click [OK].
5To save the changes in system setup, press [F10].
ENGLISH
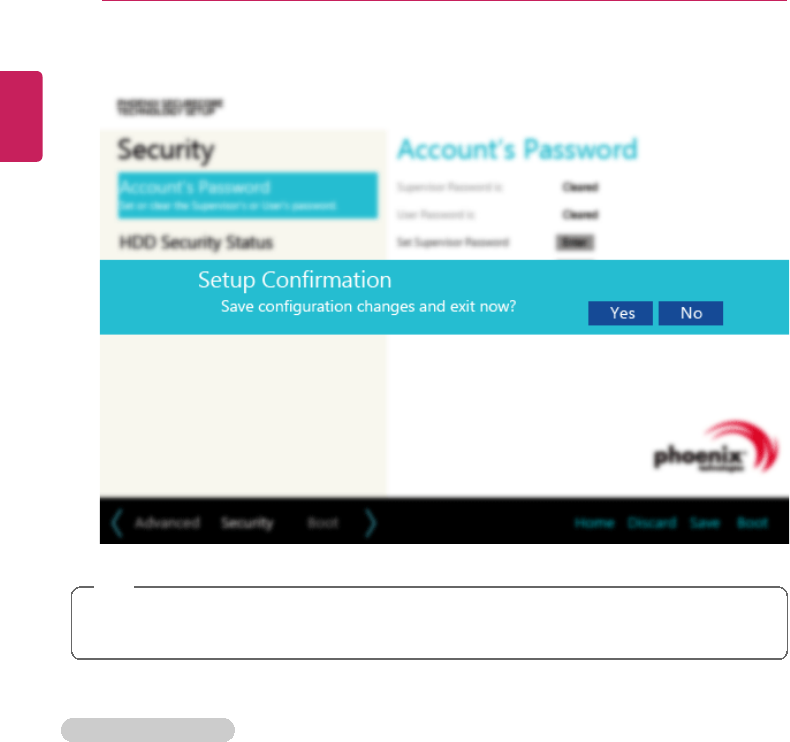
138 Setup and Upgrade
6When the following message appears, click [YES]. The PC will restart.
TIP
•[User Password] allows limited access to the items in the System Setup compared
to the [Supervisor Password] item.
Password on boot
[Password on boot] menu protects the system by requesting [Set Supervisor Password]
or [Set User Password] during boot up.
ENGLISH
Setup and Upgrade 139
1After opening the system setup screen, click the [Security] button.
ENGLISH
140 Setup and Upgrade
2When the following screen appears, set [Set Supervisor Password] only or both [Set
Supervisor Password] and [Set User Password].
ENGLISH
Setup and Upgrade 141
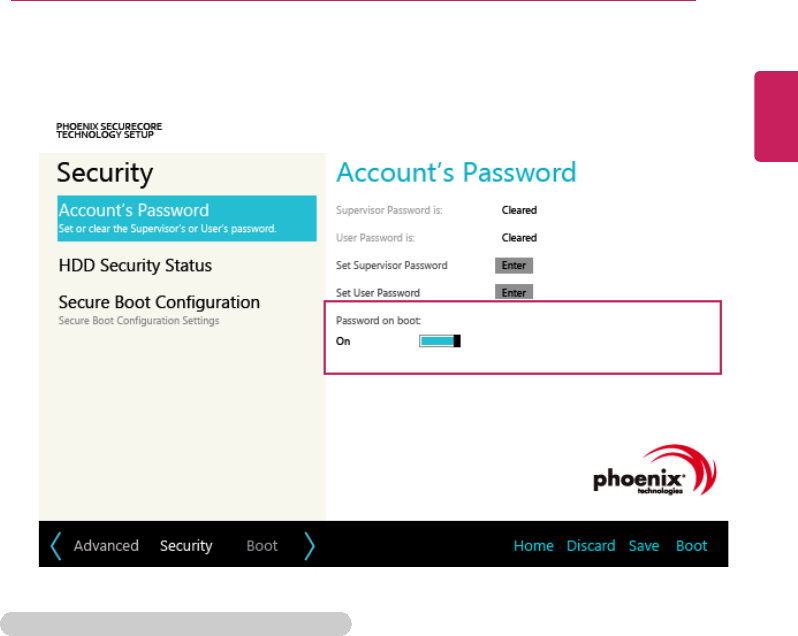
3Click the [Off] button in the [Password on boot] menu as shown in the following figure.
The button changes to [On] and the [Password on boot] setting is completed.
Set HDD Password / Set SSD Password
HDD / SSD Password is to set a password in the HDD and SSD separately from the
Supervisor Password.
If you set both HDD password and SSD password, the password input window
appears twice during booting.
If you set both HDD password and SSD password, the password input window
appears in order of [Boot Priority Order] at the top of the [Boot] menu.
SSD is an option, and the Set SSD Password function may not be supported in some
model.
ENGLISH
142 Setup and Upgrade
1After opening the system setup screen, click the [Security] button.
2When the [Security] menu appears, click the [HDD Security Status] button.
ENGLISH
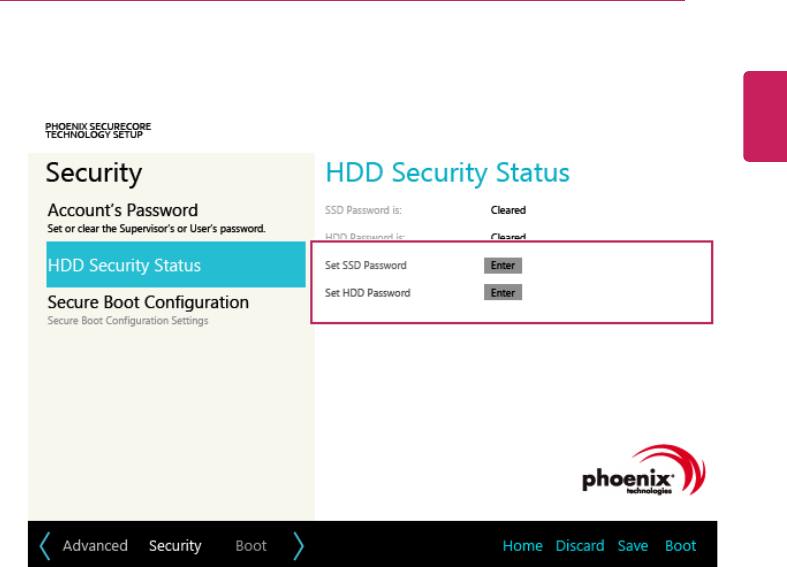
Setup and Upgrade 143
3When the following screen appears, click [Enter] in the [Set HDD Password] or [Set
SSD Password] menu.
ENGLISH

144 Setup and Upgrade
4When the following message appears, enter the password and click [OK]. The
password must not exceed 8 total characters consisting of letters (A - Z), numbers (0 -
9), or a combination of both.
ENGLISH
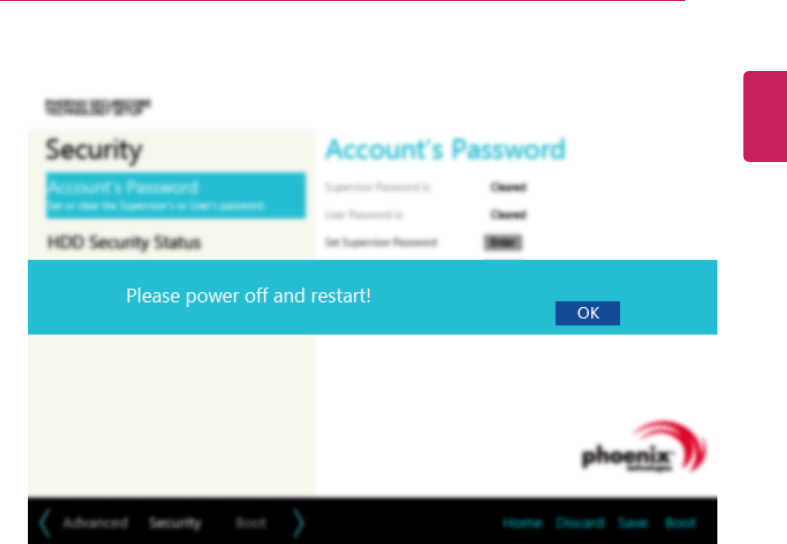
Setup and Upgrade 145
5When the following message appears, click [OK].
6To save the changes in system setup, press [F10].
ENGLISH
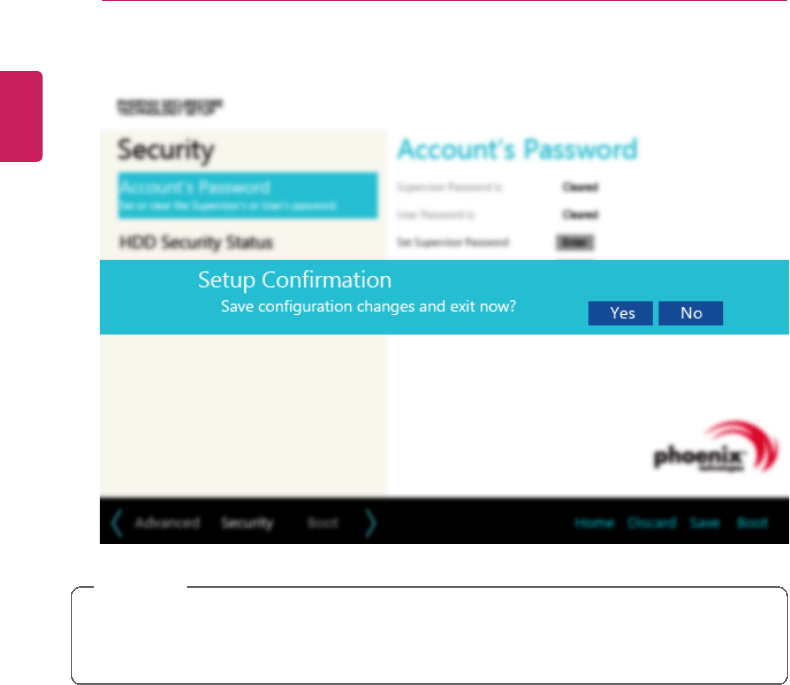
146 Setup and Upgrade
7When the following message appears, click [YES]. The PC will restart.
CAUTION
HDD PasswordWithout the password, it is impossible to recover the HDD.
•The replacement of HDD due to a forgotten HDD Password is not covered by
warranty.
ENGLISH
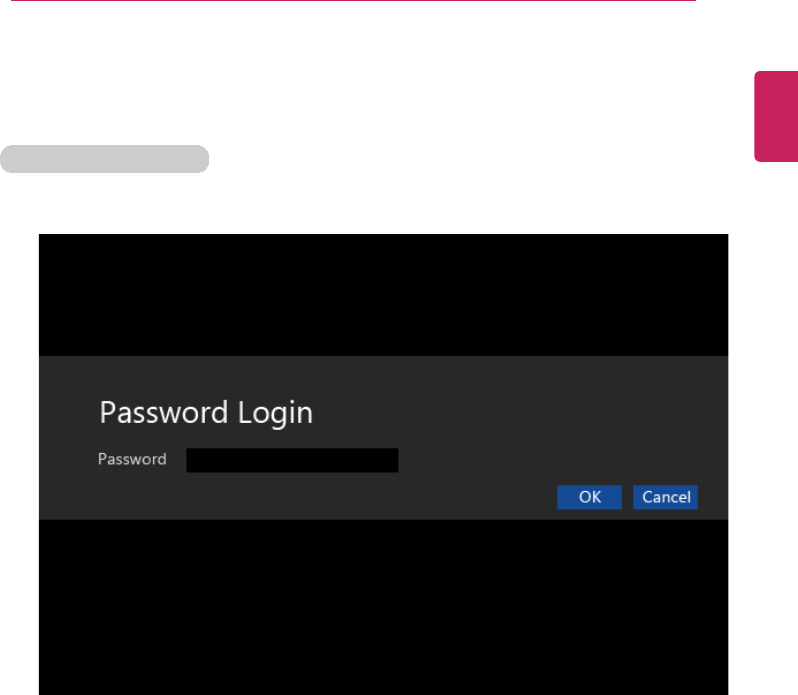
Setup and Upgrade 147
Changing or Deleting the Password
You can delete or change the password only after inputting the current password.
Changing the Password
1Execute System Setup, enter the password, and press [Enter].
2Change the password the same way as setting one.
ENGLISH
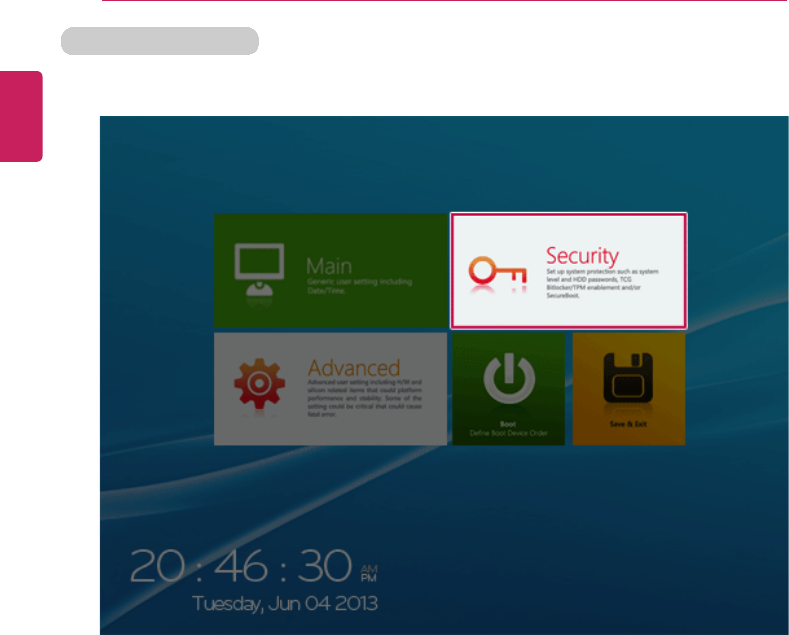
148 Setup and Upgrade
Deleting the Password
1Execute System Setup, enter the password, and press the [Security] button.
ENGLISH
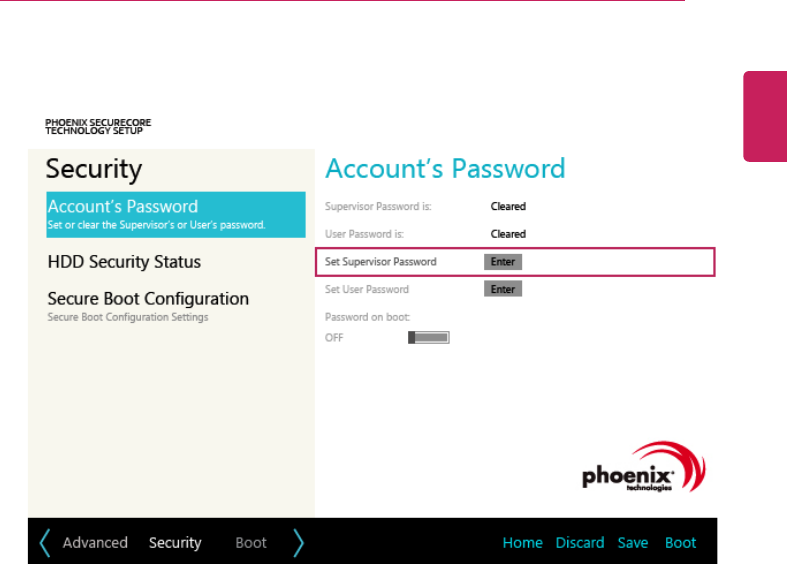
Setup and Upgrade 149
2When the following screen appears, click [Enter] in the [Set Supervisor Password]
menu.
ENGLISH
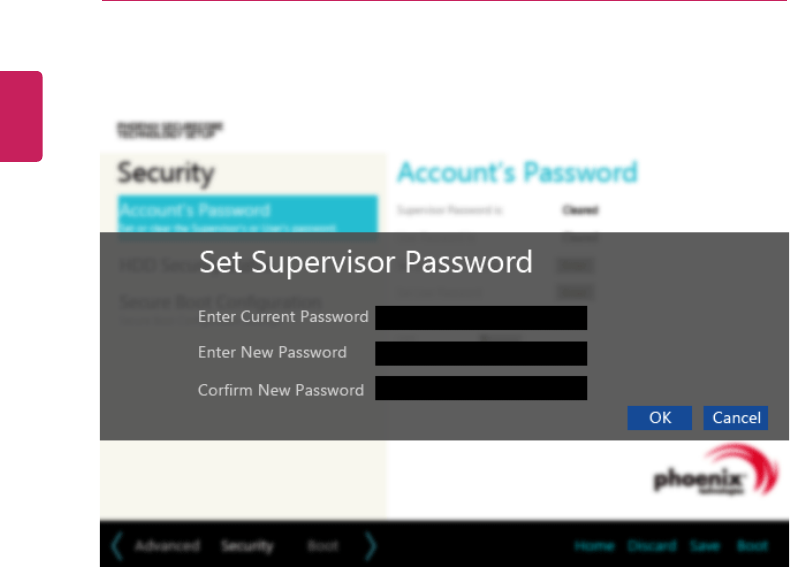
150 Setup and Upgrade
3When the following message appears, enter the current password in the [Enter Current
Password] field.
ENGLISH
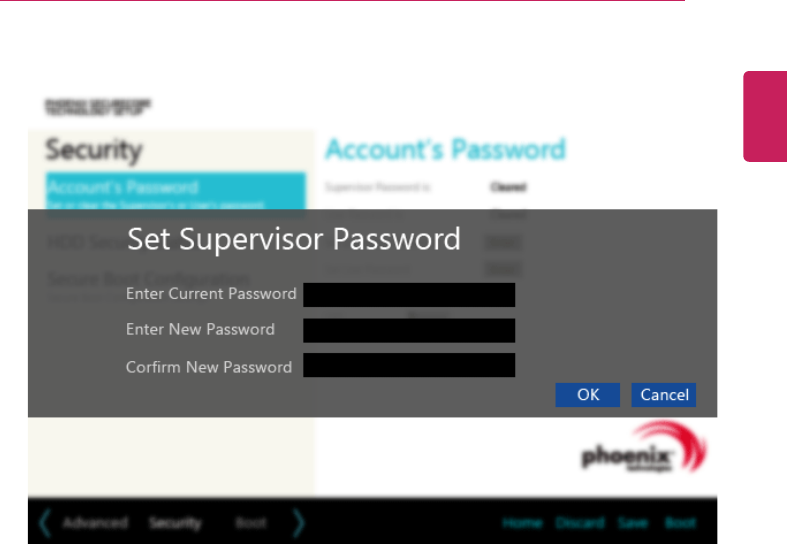
Setup and Upgrade 151
4Press [Enter] in [Enter New Password] and [Confirm New Password].
ENGLISH
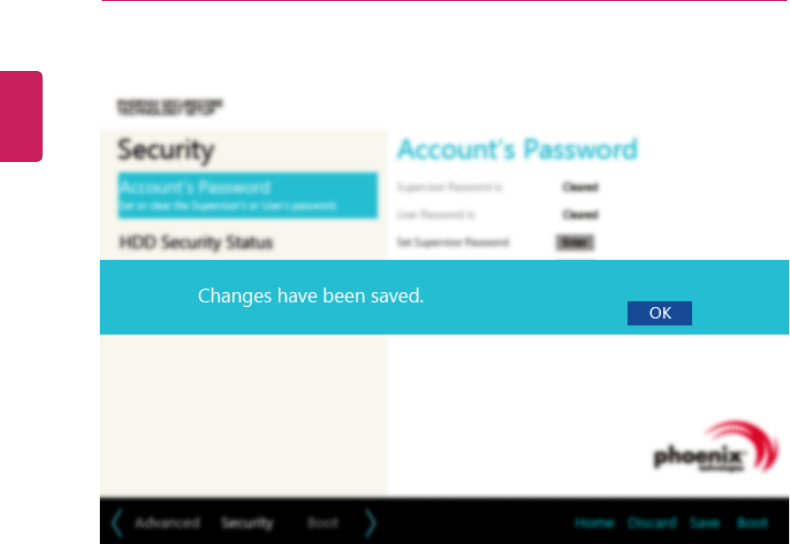
152 Setup and Upgrade
5When the following message appears, click [OK].
6To save the changes in system setup, press [F10].
ENGLISH

Setup and Upgrade 153
7When the following message appears, click [YES]. The PC will restart.
ENGLISH
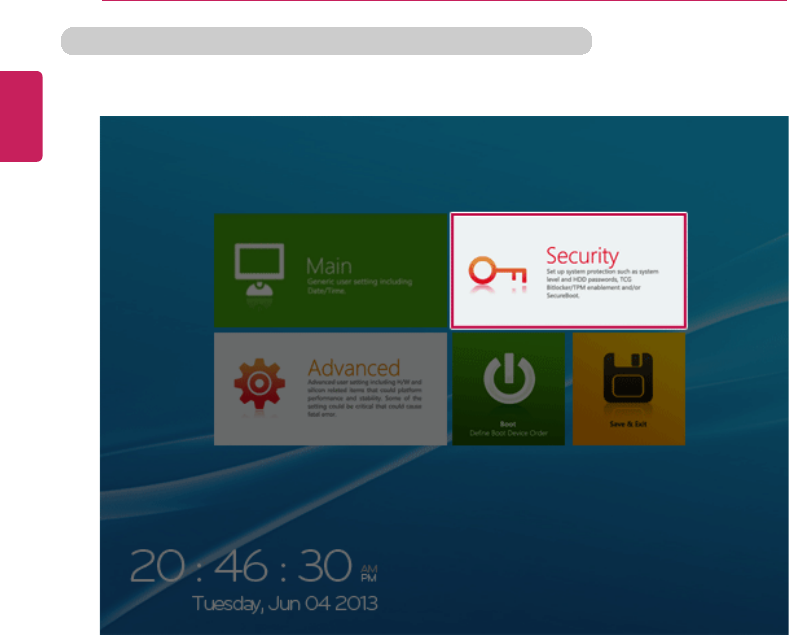
154 Setup and Upgrade
Deleting the Password (Set HDD Password / Set SSD Password)
1Execute System Setup, enter the password, and press the [Security] button.
2When the [Security] menu appears, click the [HDD Security Status] button.
ENGLISH

Setup and Upgrade 155
3When the following screen appears, click [Enter] in the [Set HDD Password] or [Set
SSD Password] menu.
ENGLISH
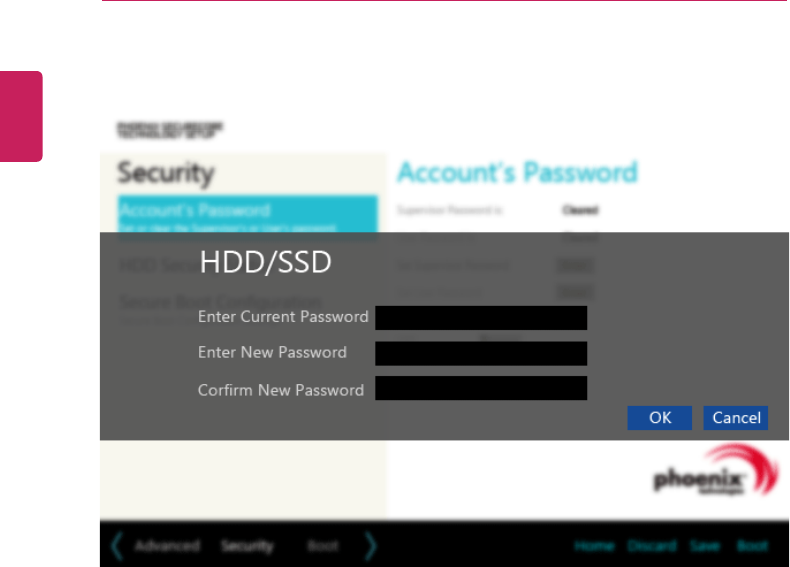
156 Setup and Upgrade
4When the following message appears, enter the current password in the [Enter Current
Password] field.
ENGLISH
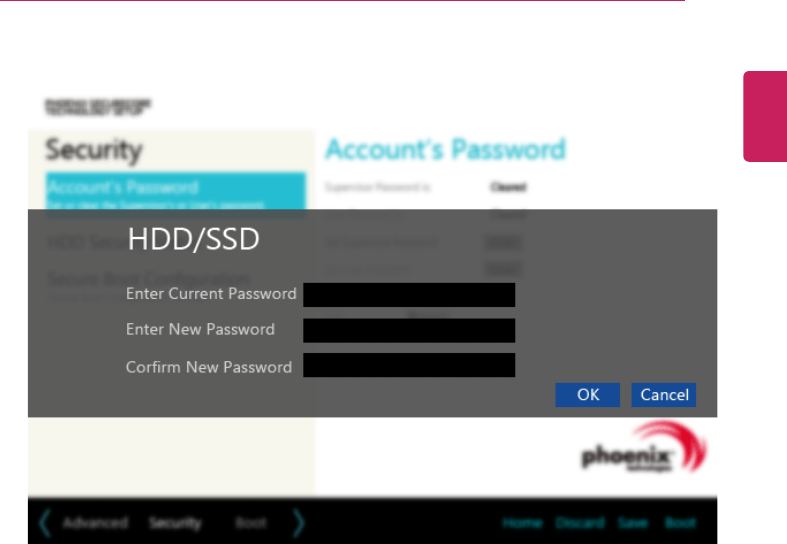
Setup and Upgrade 157
5Press [Enter] in [Enter New Password] and [Confirm New Password].
ENGLISH

158 Setup and Upgrade
6When the following message appears, click [OK].
7To save the changes in system setup, press [F10].
ENGLISH

Setup and Upgrade 159
8When the following message appears, click [YES]. The PC will restart.
ENGLISH
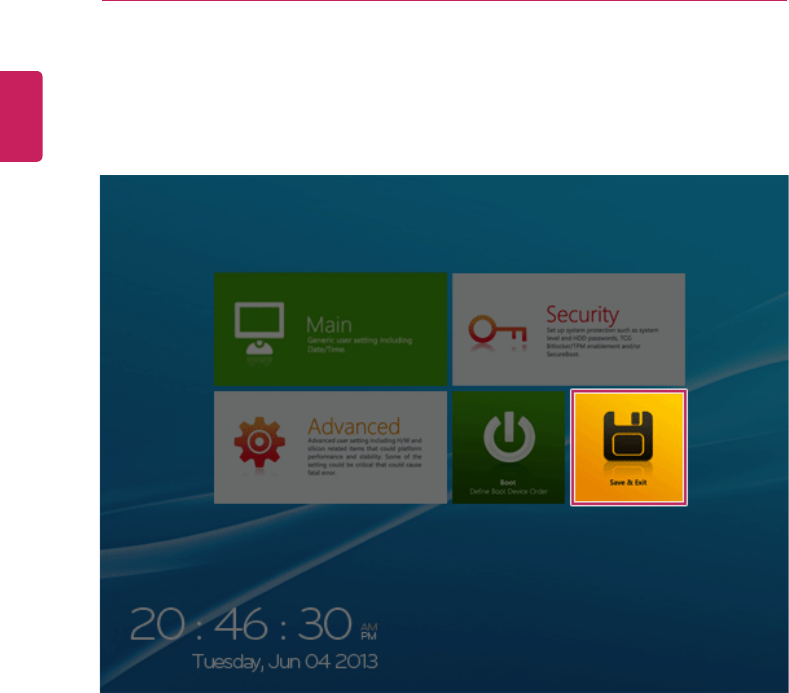
160 Setup and Upgrade
Restoring the Factory Default Settings
If you have changed the system setup by mistake, you can restore the default settings.
1After opening the system setup screen, click the [Save & Exit] button.
ENGLISH
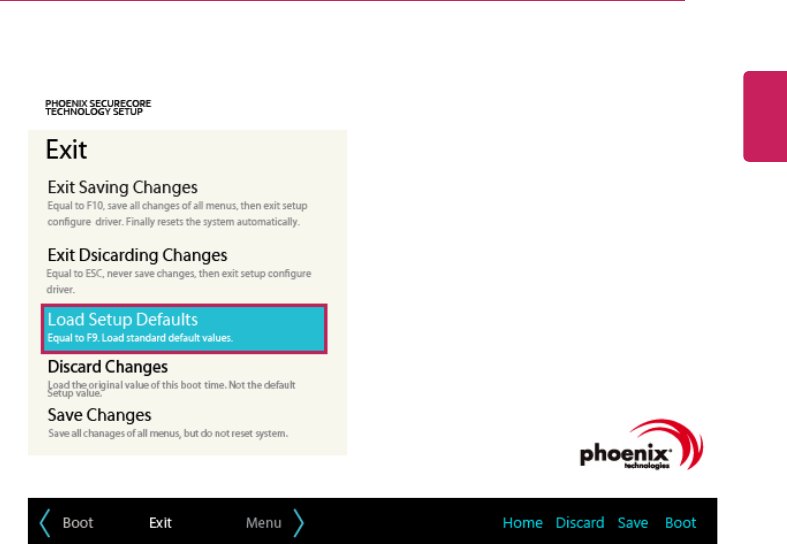
Setup and Upgrade 161
2When the [Exit] menu appears, click [Load Setup defaults].
ENGLISH
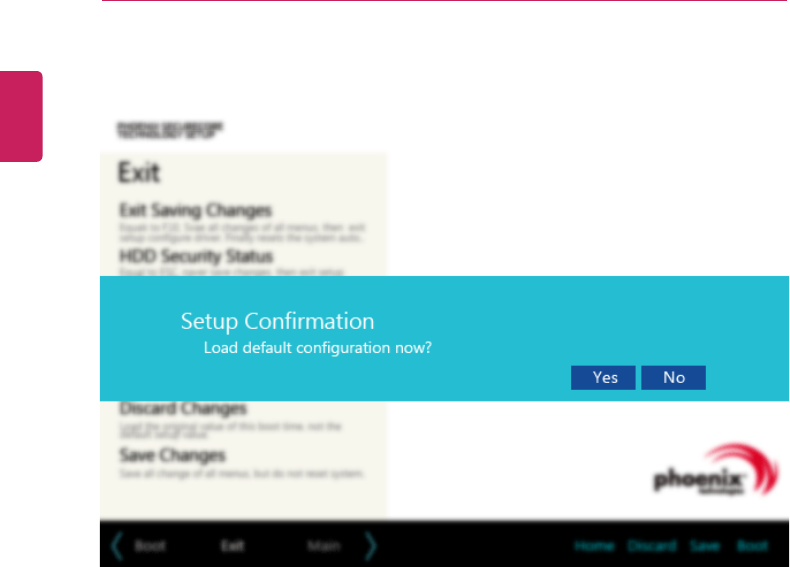
162 Setup and Upgrade
3When the following message appears, click [Yes]. The settings will be reset to the
factory default.
4To save the changes in the system setup, press [F10].
ENGLISH

Setup and Upgrade 163
5When the following message appears, click [YES]. The PC will restart.
TIP
•You may press [F9] to use the [Load Setup defaults] menu.
ENGLISH

164 Setup and Upgrade
Changing Boot Order
The user can change the boot order according to his or her needs, or select a boot device
The model in the example can differ from actual models and is subject to change for
performance improvements, without prior notice.
TIP
To use the system setup (F2), booting device selection (F10), or recovery (F11), you need
to restart the system (click [Restart] in the system power menu) and then immediately
press the corresponding function key due to the fast booting speed.
Changing Boot Order
1Reboot the system and press [F2].
ENGLISH
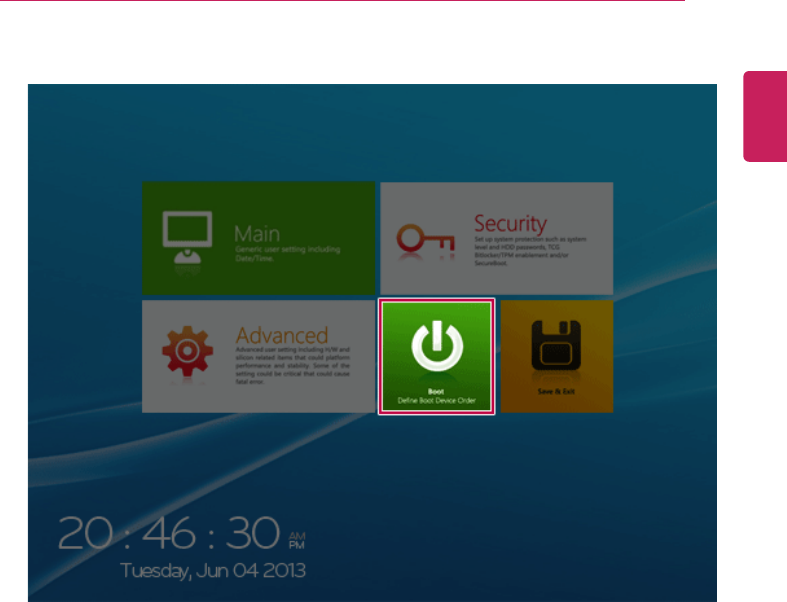
Setup and Upgrade 165
2When the system setup screen appears, click the [Boot] button.
ENGLISH
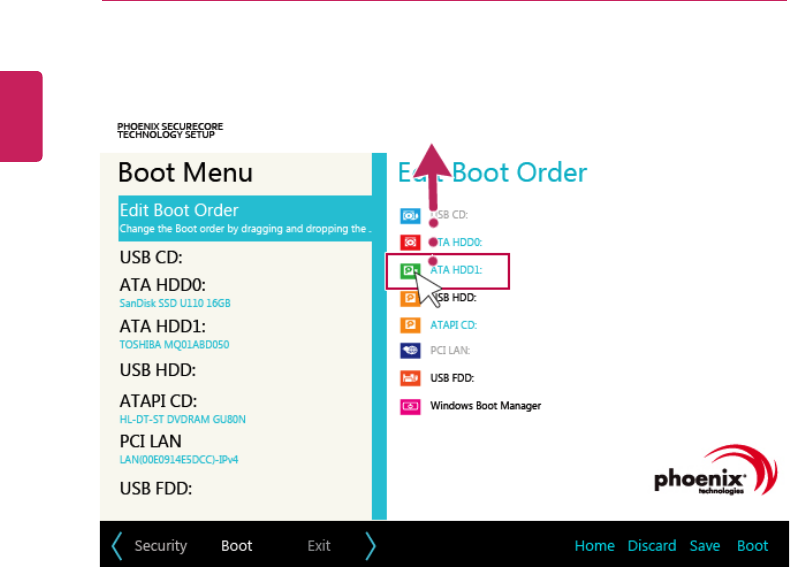
166 Setup and Upgrade
3Drag the icon of the device to change the booting order in the [Edit Boot Order] menu
to change the booting order.
ENGLISH
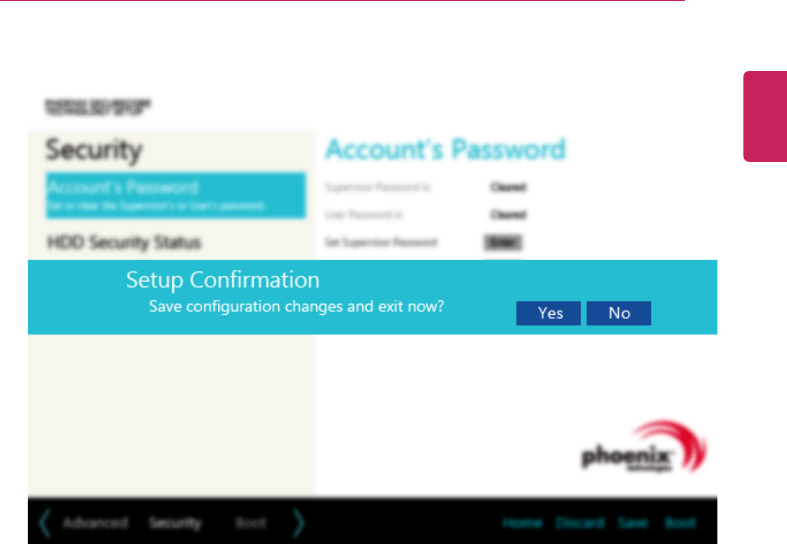
Setup and Upgrade 167
4When the following message appears, click [YES].
5The changes are saved and the system reboots.
ENGLISH

168 Setup and Upgrade
Selecting a Boot Device to Use
1Reboot the system and press [F10].
ENGLISH
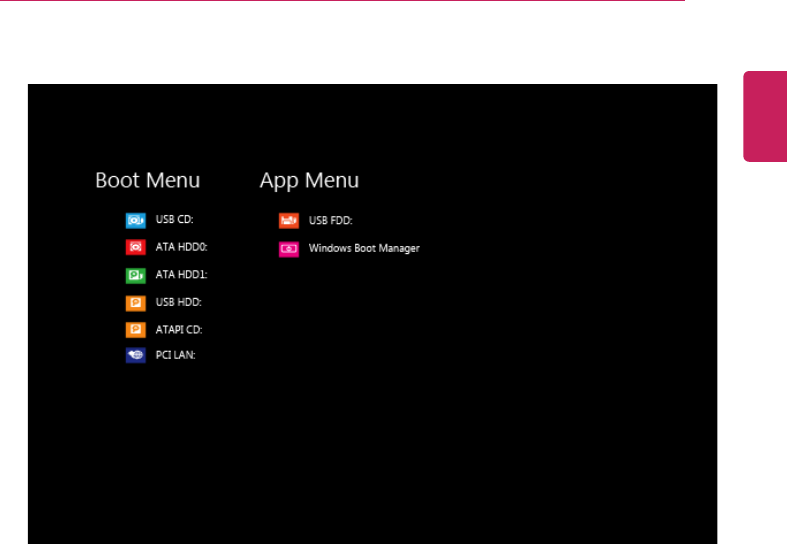
Setup and Upgrade 169
2When the Select Boot Device screen appears. select the device.
3Boots using the selected device.
ENGLISH
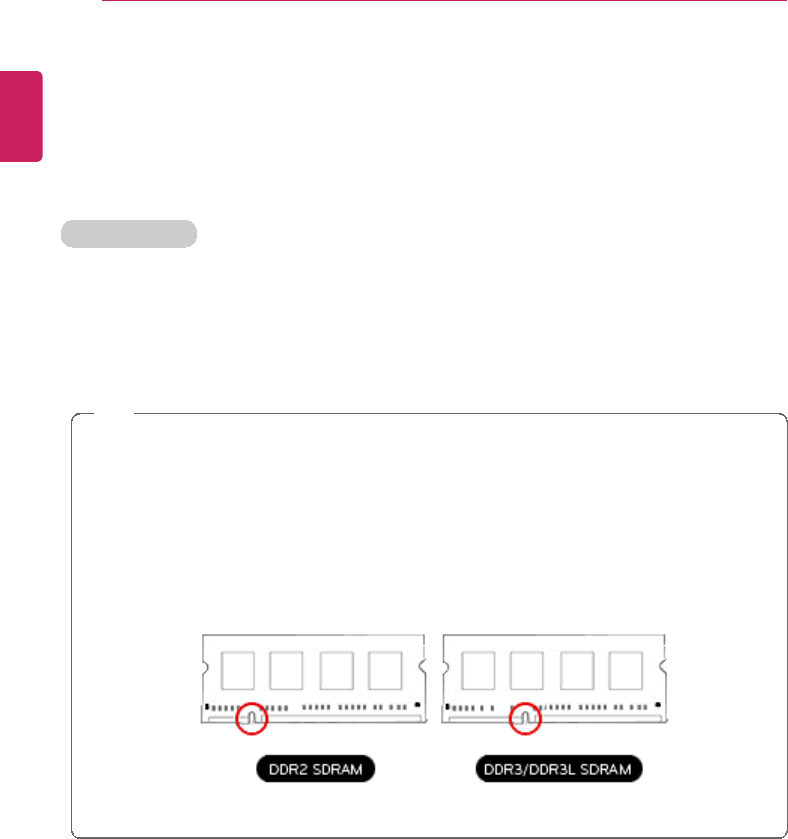
170 Setup and Upgrade
Replacing the Memory
You may need to replace the PC memory for better performance.
For memory replacement, we recommend that you receive a paid service from a
service center certified by LG Electronics. LG Electronics disclaims any
responsibility for damage resulting from uncertified service or arbitrary disassembly.
About Memory
This system uses a 204-pin, SO-DIMM (Small Outline Dual In-Line Memory Module)-type
DDR3L(DDR3 Low-Voltage) SDRAM.
The maximum capacity of the main board is 8 GB (8,192 MB).
Memory of 3 GB or more is supported only in a 64-bit O/S.
The memory capacity actually supported may differ depending on the model.
TIP
•When replacing the memory, add a memory with the same specification (1.35 V
DDR3L SDRAM).
•This product supports only DDR3L memory and using the DDR3 memory module
may cause the malfunction of the PC.
•The DDR3L memory provides greatly improved power consumption rate than the
existing DDR3 memory, and it has the same shape as the DDR3 memory.
For purchasing and replacing the memory, ensure it is DDR3L.
ENGLISH

Setup and Upgrade 171
CAUTION
It is recommended you visit an LG Electronics Service Center for memory
replacement.
The memory replacement is not covered in the warranty and may incur service
charges.
To upgrade the machine, turn off the system and disconnect the power cord and the
battery.
•Disconnect the telephone line if linked to the modem. An electric shock or fire may
occur.
Supported Memory
•PC3-8500 (1066 MHz) DDR3L SDRAM SO-DIMM
•PC3-10600 (1333 MHz) DDR3L SDRAM SO-DIMM
•PC3-12800 (1600 MHz) DDR3L SDRAM SO-DIMM
•Supported memory types are different depending on the model. Make sure to check
the memory type when you purchase memory.
•The operating speed of the memory depends on the maximum speed supported by
the internal memory controller (IMC) inside the CPU.
(E.g.) If the maximum speed supported by IMC is 1333 MHz, the PC3–12800
(1600 MHz) memory runs at 1333 MHz.
Preparing Memory
Before purchasing memory, study the specifications and features of the current memory.
1Rated Capacity: PC3-8500S(1066 MHz), 10600S(1333 MHz) or 12800S(1600 MHz)
DDR3L SDRAM SO-DIMM
2Type: 1 GB(1024 MB), 2 GB(2048 MB), 4 GB(4096 MB), 8 GB(8192 MB)
Replacing the Memory
Mainboard configuration, memory slot, and memory type may differ by model.
ENGLISH
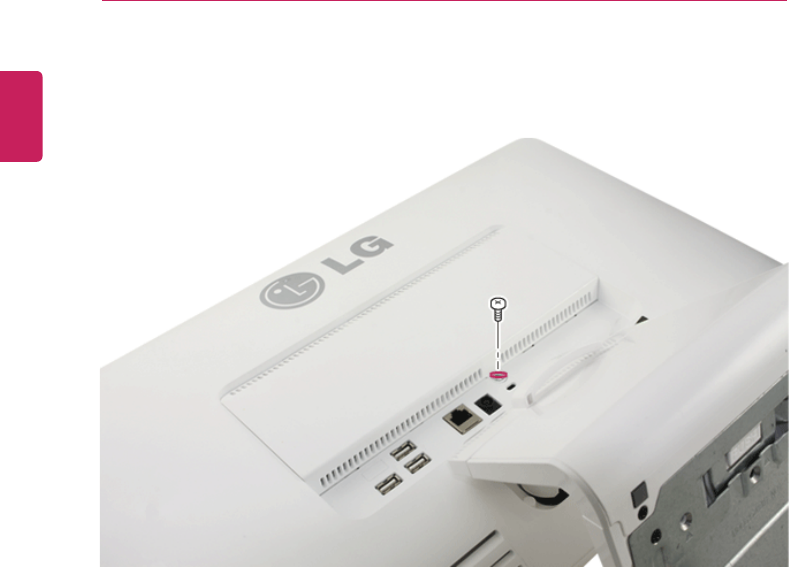
172 Setup and Upgrade
1As shown in the following picture, after loosening the screws fixed on the memory cover,
remove the memory cover.
ENGLISH
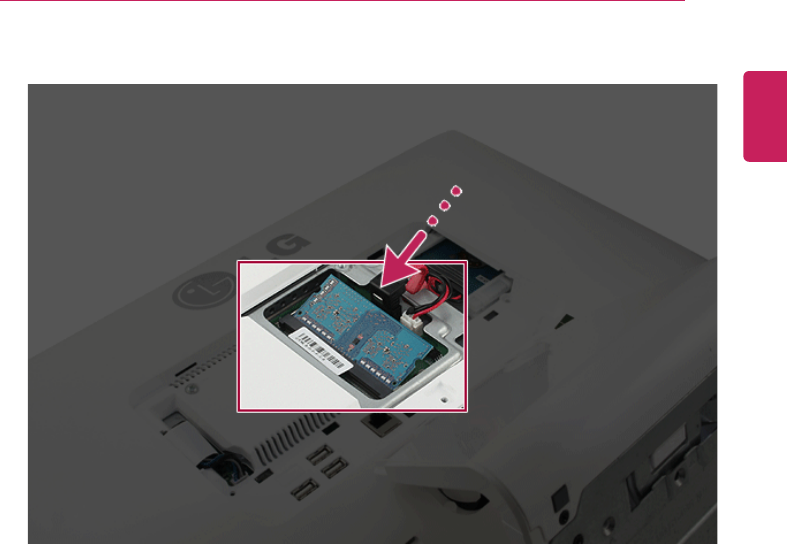
Setup and Upgrade 173
2Insert the replacement memory into the memory slot in the direction of the arrow.
ENGLISH
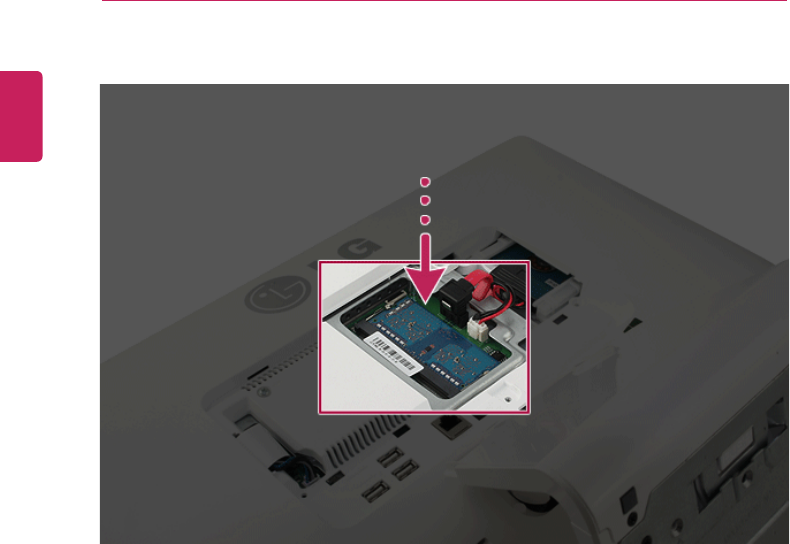
174 Setup and Upgrade
3Push the memory in the direction of the arrow until you hear a "click" sound.
ENGLISH
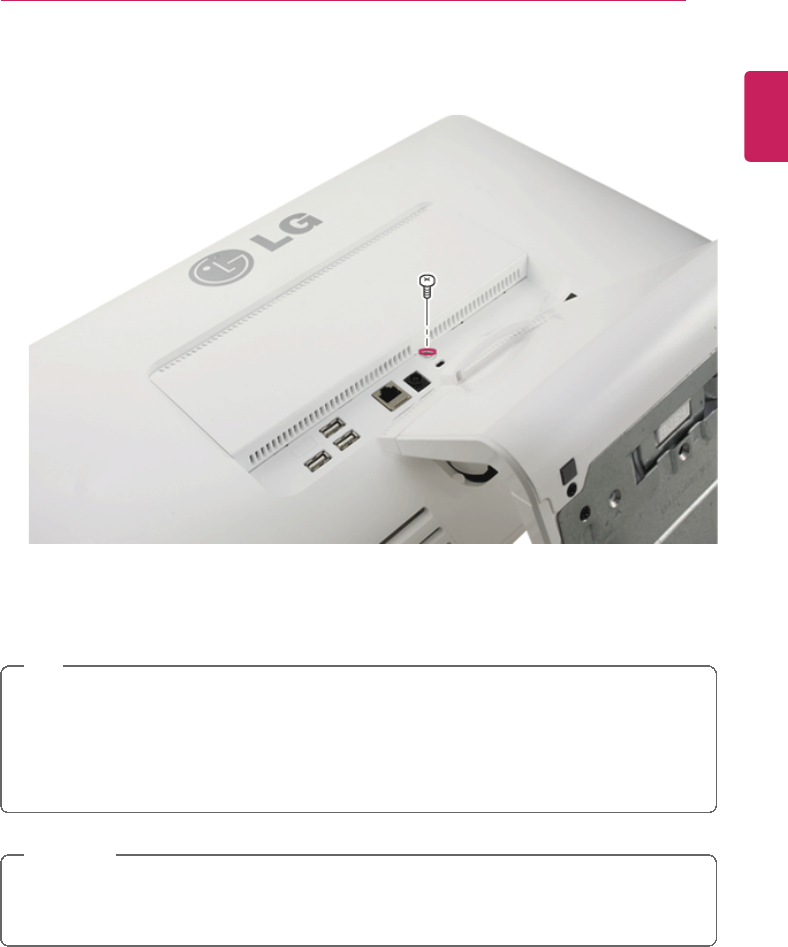
Setup and Upgrade 175
4After inserting the memory, fasten the cover with the screws.
5If an error message related to the main memory capacity is displayed during booting
after replacing the memory, press the [F2] key and save the settings on the setup
screen.
TIP
•Before removing the PC cover, turn off the AC power and remove the power cable
and all peripherals.
•Push till the memory is completely locked by the latches.
•Check the memory capacity during the second boot. If the memory capacity is not
correct, reinstall the memory card.
CAUTION
•Use only the main memory module for replacement manufactured by LG. Using a
memory module other than what is recommended may cause malfunctioning of the
product.
ENGLISH
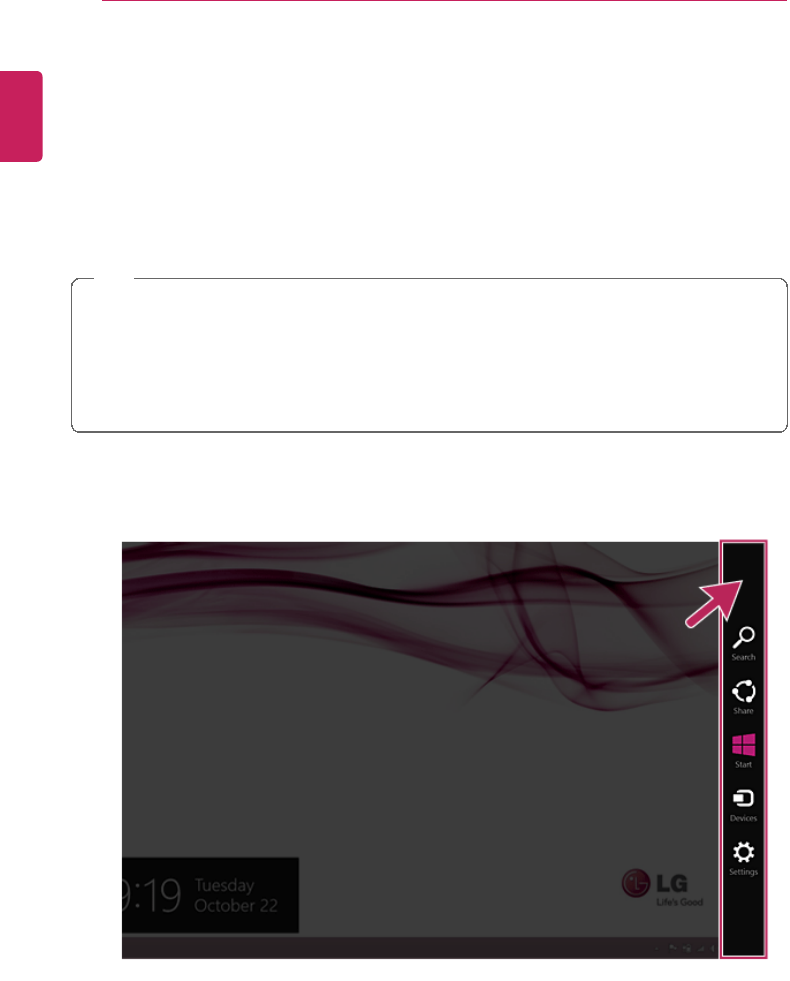
176 FAQ
FAQ
FAQ Content
Information on Windows 8.1 Update
If the Windows 8.1 update does not install automatically or the system is not up-to-date, you
can manually install the update by following these steps.
TIP
Install the Windows 8.1 update to use the newly expanded features.
On a Windows 8.1 update-installed PC, the Exit and Search buttons will appear in the
upper-right corner of the Start screen.
You must be connected to the internet to install the Windows 8.1 update.
The update progress window may appear differently, depending on the device.
1Run [Charms] on the Desktop or Start screen.
ENGLISH
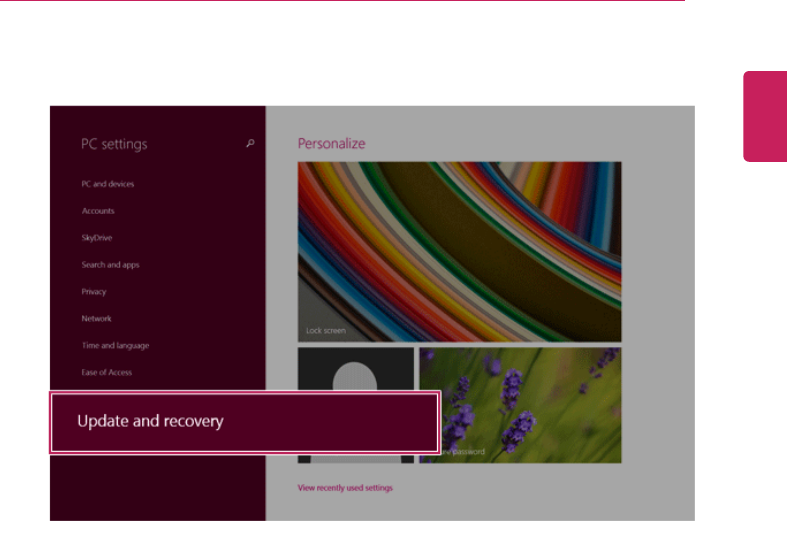
FAQ 177
2In Charms, click [Setup] > [Change PC Changes]> [Update and Recovery] manual.
ENGLISH

178 FAQ
3As shown in the figure, when the Windows update window appears, click [Check now].
ENGLISH

FAQ 179
4As shown in the figure, when a message that new updates are available appears, click
[View Details].
ENGLISH

180 FAQ
5In View Details, click [Select all important updates] and the Install button to proceed.
ENGLISH
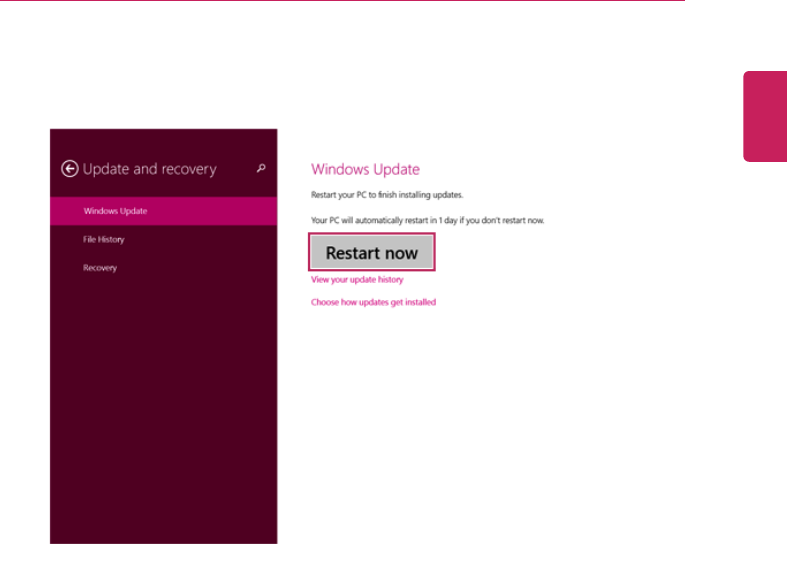
FAQ 181
6Once the new updates have been installed, click [Restart] when the following screen
appears to complete installation.
ENGLISH
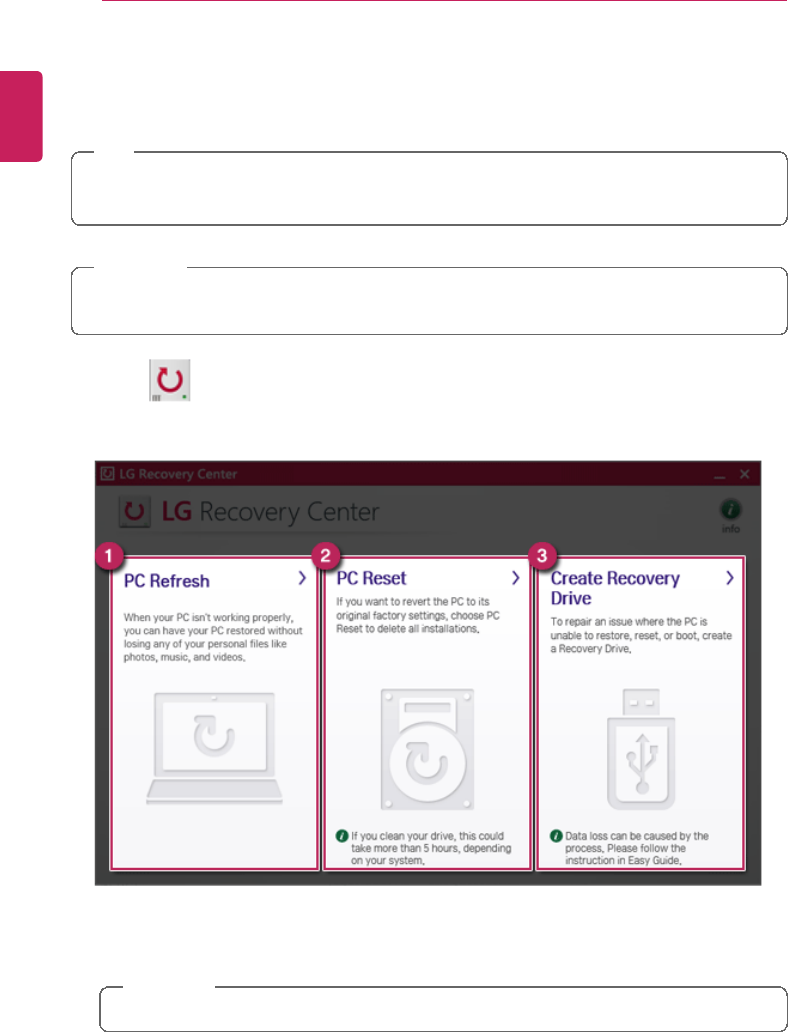
182 FAQ
Using LG Recovery Center
If the system has an error, you can use LG Recovery Center to use Windows 8.1 recovery
function to recover or restore the system to its initial pre-purchase state.
TIP
LG Recovery Center uses the recovery function of Windows.
For more information about Windows recovery, refer to [Windows Help and Support].
CAUTION
If you have deleted the restoration data in the protected area of the hard disk, or have
arbitrarily installed another operating system, the restore function may not work.
Click the [
] icon in Desktop to run LG Recovery Center.
1PC Recovery: Recovers the PC without losing any personal files.
CAUTION
PC settings are reset to default and any user-installed software will be deleted.
ENGLISH
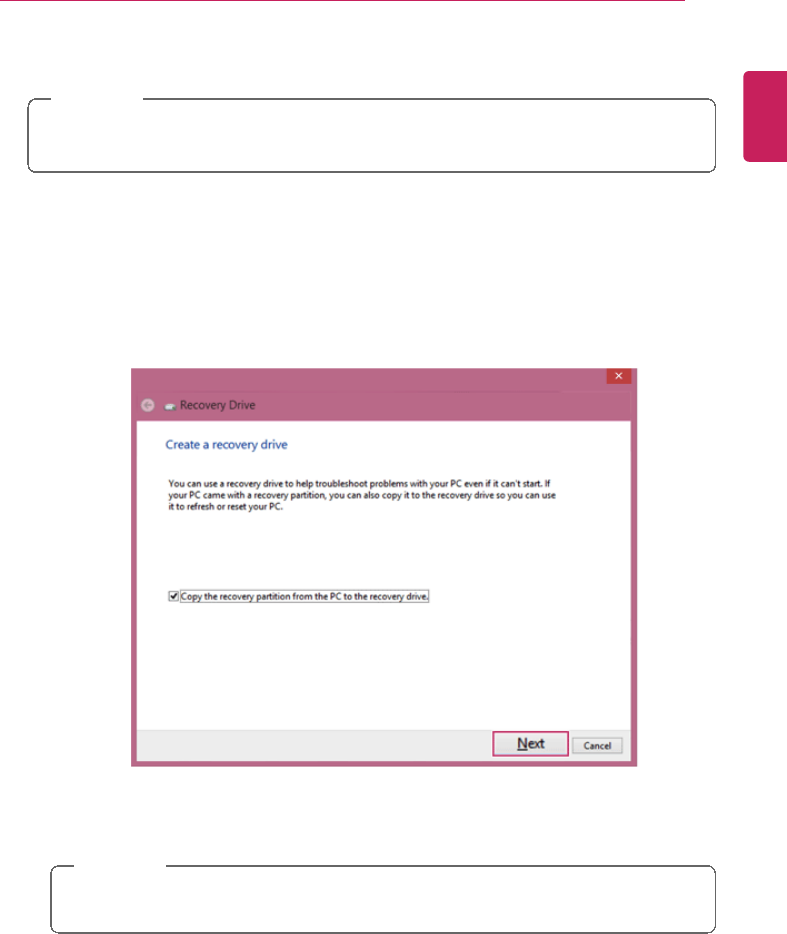
FAQ 183
2PC Initialization: Removes all items from the system and restores the system to its initial
pre-purchase state.
CAUTION
All data is lost during the initialization, so you must backup all critical data in advance.
It may take about 5 hours or longer depending on the system conditions.
3Creating Recovery Drive: You can create a recovery drive in Windows as a precaution
against a system failure that prevents you from entering the operating system, or any
other severe system issues.
a When the following screen appears, select [Copy the PC's recovery partition to the
recovery drive.] and click [Next].
b When the following screen appears, select the USB flash drive and click [Next].
CAUTION
This process deletes all the data on the storage device designated as a recovery
drive. Make sure to back up its data in advance.
ENGLISH
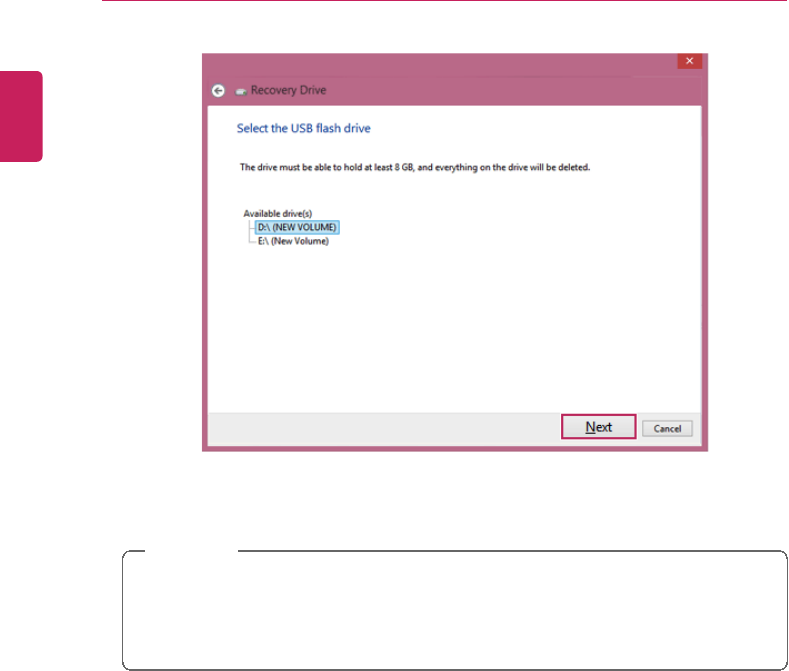
184 FAQ
c Once the storage device is ready, click [Finish] to create a recovery drive.
CAUTION
Select [Remove the Recovery Partition] while creating a recovery drive to remove
the recovery partition in the PC.
Once the recovery partition is removed, you cannot use the recovery function of
the PC. You can only recover the system using the recovery media.
ENGLISH
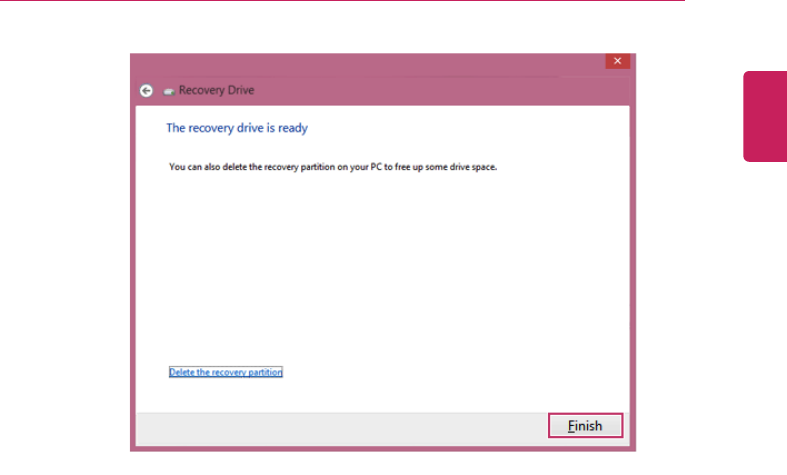
FAQ 185
ENGLISH

186 FAQ
Using a Wireless or Regular Router
A wireless / regular router connects several PCs and mobile devices etc. to one internet line
and enables the use of internet and the network.
A wireless / regular router has to be bought separately. Refer to the manual provided
by the manufacturer for instructions.
Connecting a Wireless or Regular Router
If one internet line is used with a wireless / regular router and several devices are
connected, this may result in a slower connection.
In case of a wireless network, it is recommended to change the network name and security
settings for a more secure connection.
Network speed can differ according to operation environment and specifications.
1Connect the internet cable of the modem that was provided by your internet provider to
the router's WAN port.
2Connect all devices (PC, IPTV, internet phone, etc.) with a LAN cable to LAN ports 1 to
4 of the router.
The number of LAN ports can vary for each router model.
3Please refer to the manual provided by the router manufacturer for setup of the network
and Internet.
ENGLISH
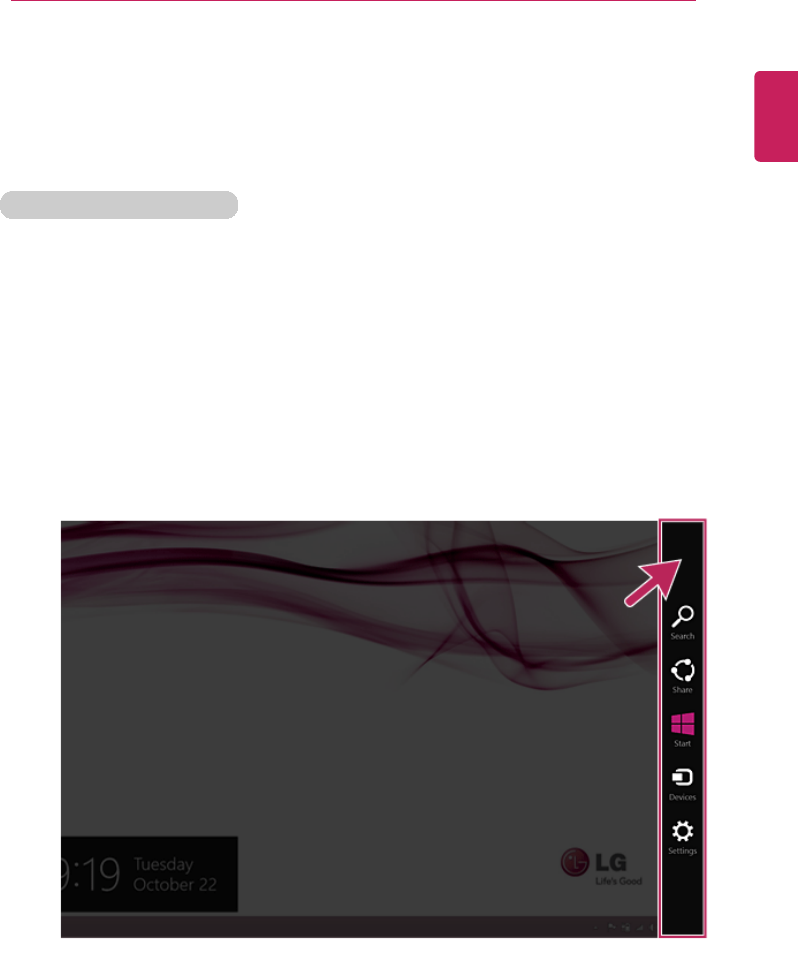
FAQ 187
Wireless Network
The wireless network (Wireless LAN) is the network environment that connects a PC with
the internet provider or company network through an Access Point (wireless or regular
router).
Using the Wireless Network
If an Access Point (wired or wireless router) is in the vicinity of the PC, the wireless network
can easily be accessed.
During the search for a wireless network (Wireless LAN), various Access Point may
be found according to the location where the PC is used.
In case no accessible wireless network (Wireless LAN) is near the PC, no Access
Point might be found.
A password protected Access Point cannot be accessed without knowing the right
password.
1Run [Charms] on the Start screen or in Desktop mode.
2In the Charms, click [Settings] >[Wireless Network Icon].
ENGLISH
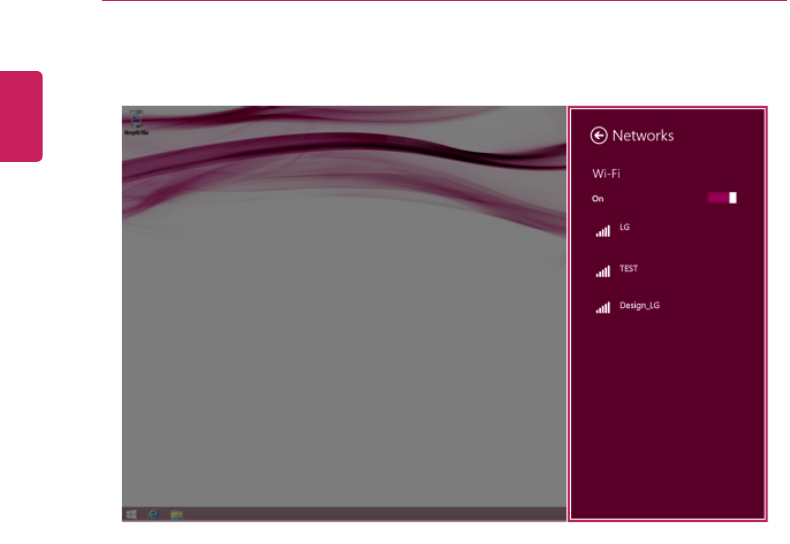
188 FAQ
3Near available Access Point(wireless network) is automatically searched.
ENGLISH
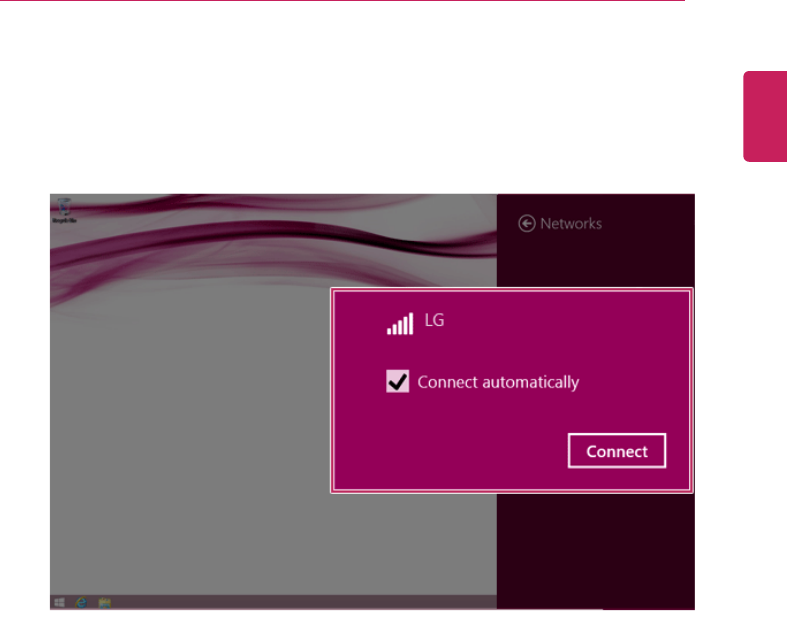
FAQ 189
4Select the Access Point (wireless network) you want to use and click [Connect] to
connect to the Access Point.
If a password is set for the wireless network, the Enter Password window
appears.
5When the connection is established, [Connected] is displayed in the connected Access
Point(wireless network).
6Click the [Internet Explorer] icon in the taskbar to check whether the internet is operating
normally.
ENGLISH

190 FAQ
LAN
LAN is the network environment that users can connect to by using a cable to connect to
their internet providers or the company's network.
Using Wired LAN
LAN is installed with an automatic IP (DHCP) as default value.
Please refer to the following instructions to find out more about setting up an automatic IP
(DHCP) or manual IP.
1Connect LAN cable to the LAN port.
2On the Start Screen, click the Desktop tile to convert to the Desktop.
3Run [Charms] on the Start screen or in Desktop mode.
ENGLISH

FAQ 191
4In the Charms, click [Settings] >[Control Panel] >[View By] >[Small Icon] >
[Network and Sharing Center].
ENGLISH
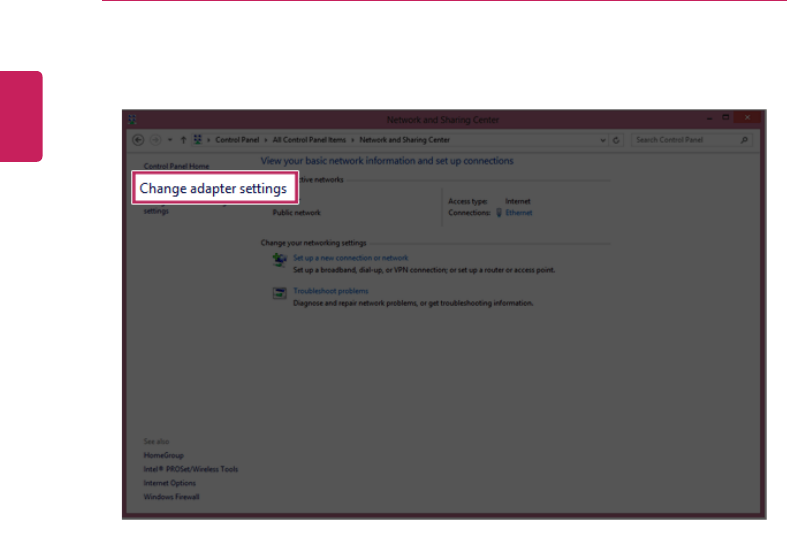
192 FAQ
5Click [Change Adapter Settings].
ENGLISH
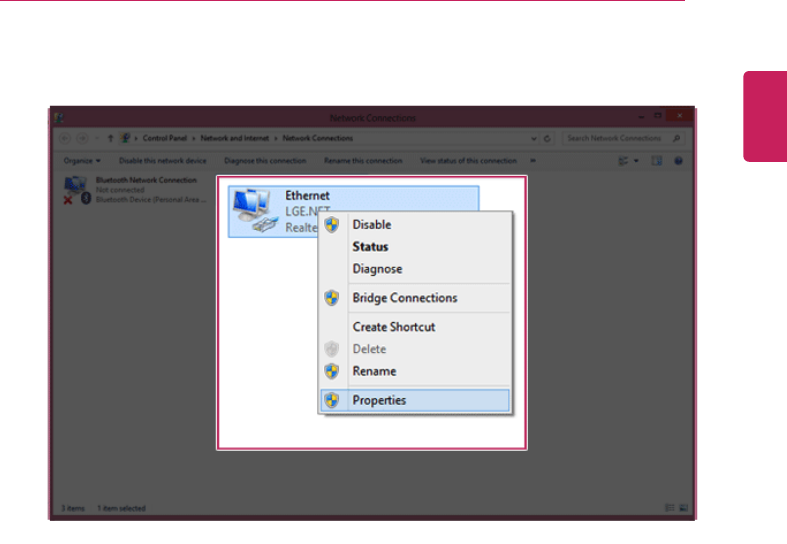
FAQ 193
6Right-click [Ethernet] and select [Properties].
ENGLISH
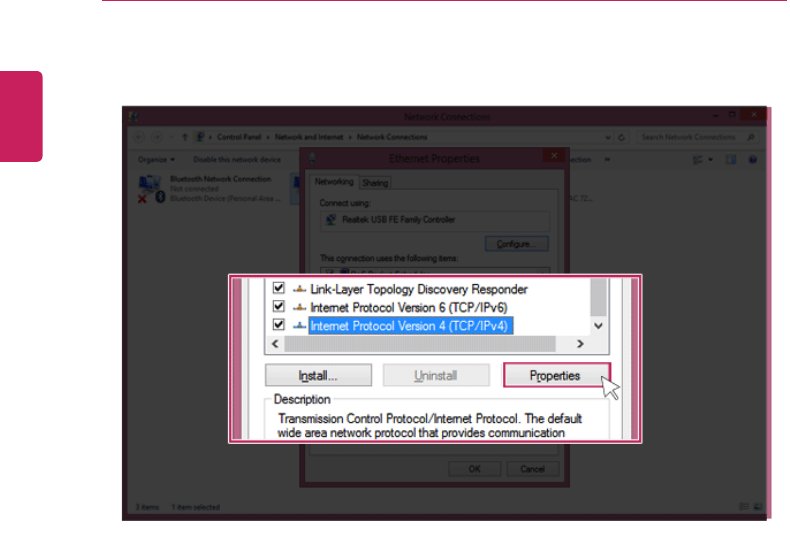
194 FAQ
7Select [Internet Protocol Version 4 (TCP/IPv4)] and click [Properties].
ENGLISH

FAQ 195
8If you want to use an automatic IP(DHCP), select [Obtain an IP Address
Automatically]. If you want to use a manual IP, select [Use Following IP Address] to
enter the address.
Please ask the network administrator about obtaining a manual IP.
9Press [OK] to complete the network setup.
10 Click the [Internet Explorer] icon in the taskbar to check whether the internet is operating
normally.
ENGLISH