LG Electronics USA E2742VA Part15 Subpart B-LCD Monitor User Manual BEJE2742VA 1
LG Electronics USA Part15 Subpart B-LCD Monitor BEJE2742VA 1
Contents
- 1. BEJE2742VA_User Manual 1
- 2. BEJE2742VA_User Manual 2
- 3. BEJE2742VA_User Manual 3
- 4. BEJE2742VA_User Manual
- 5. BEJE2742VA_User Manual 1
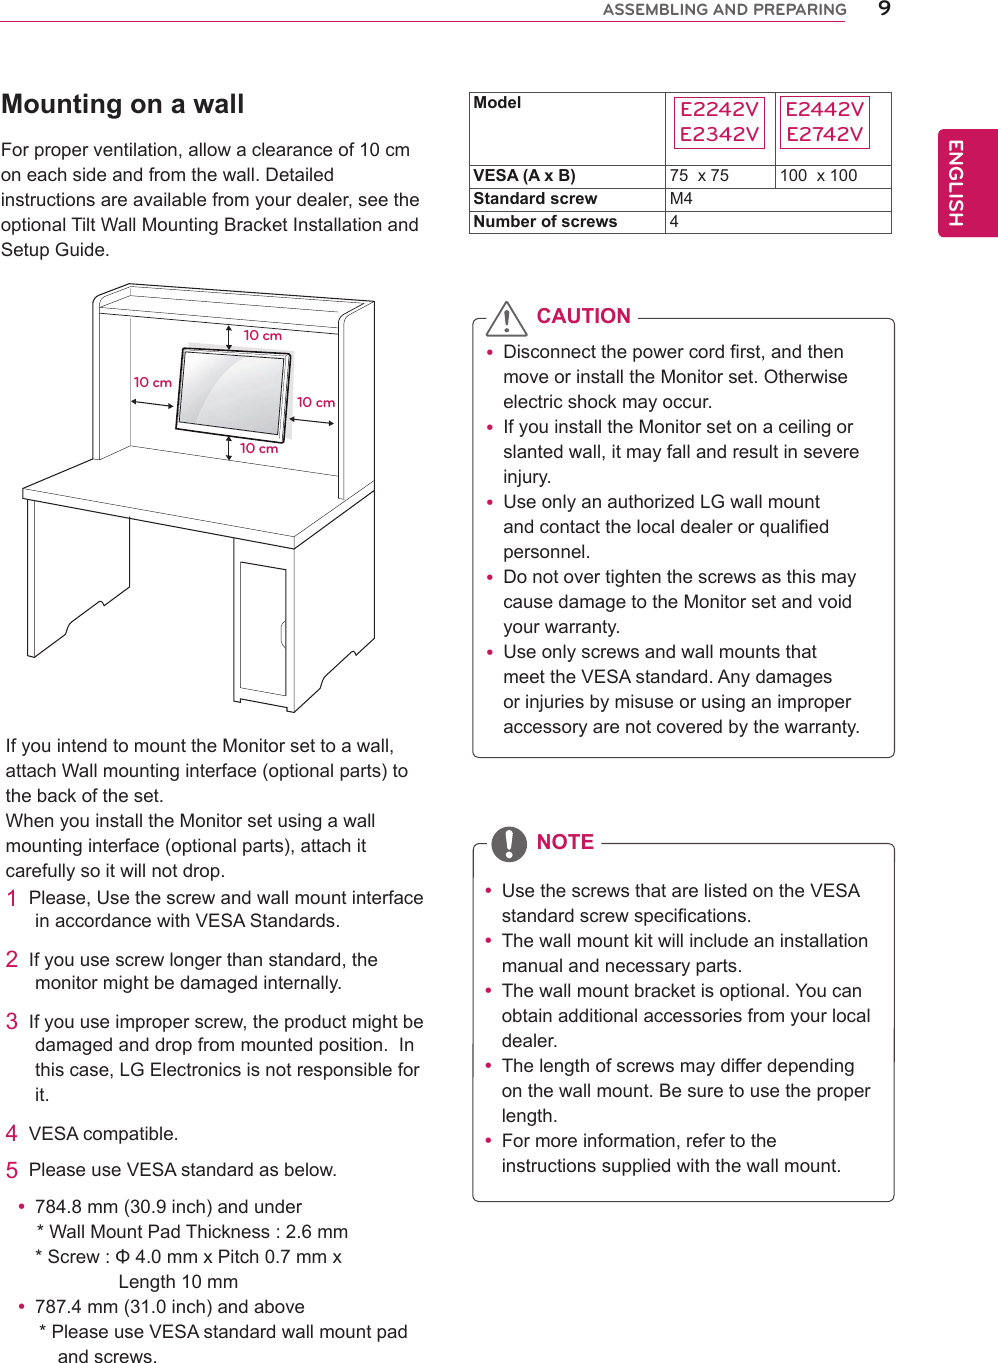
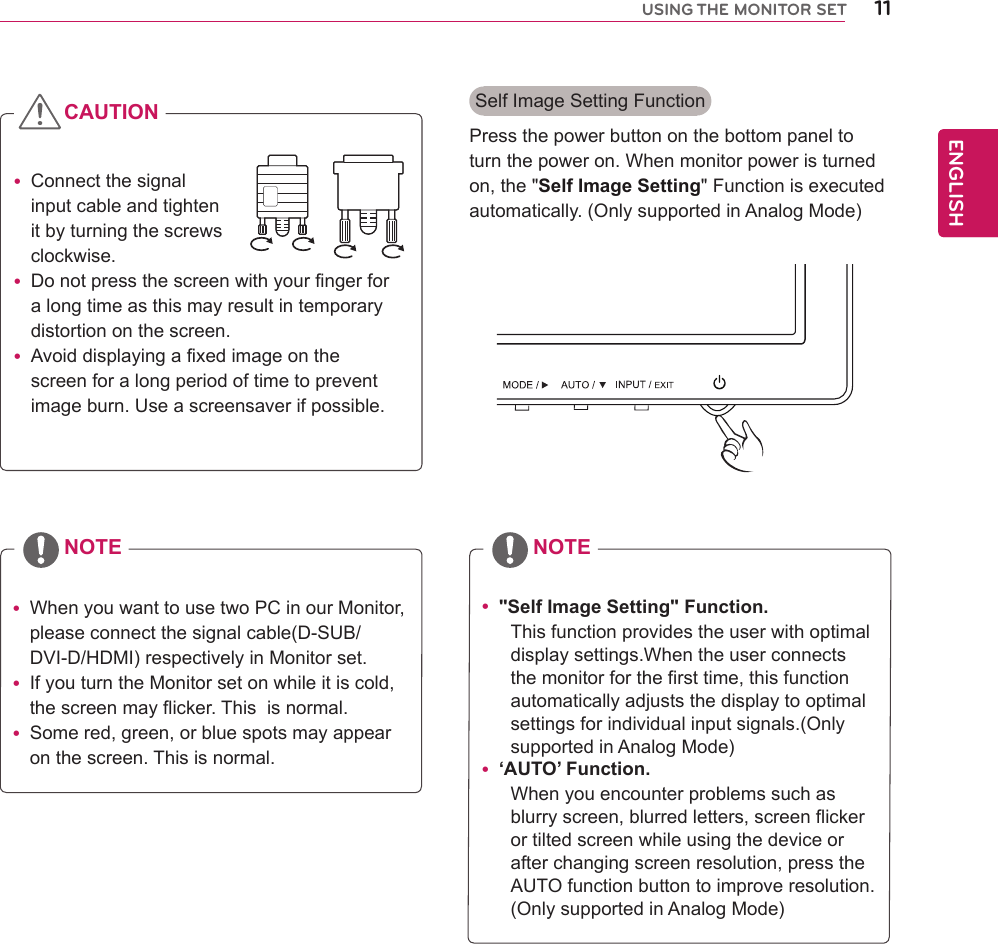
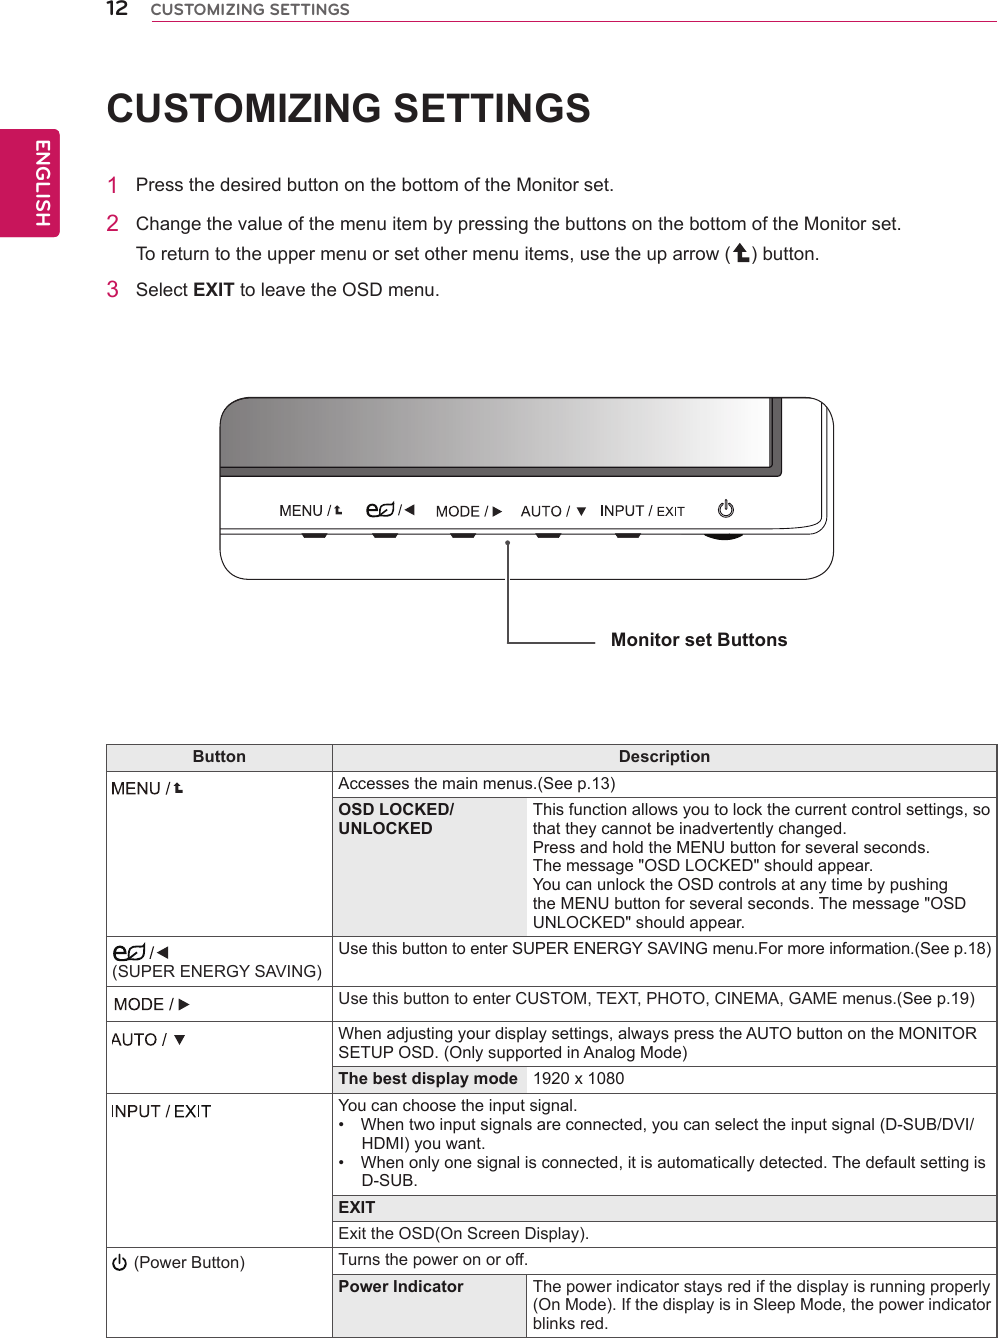
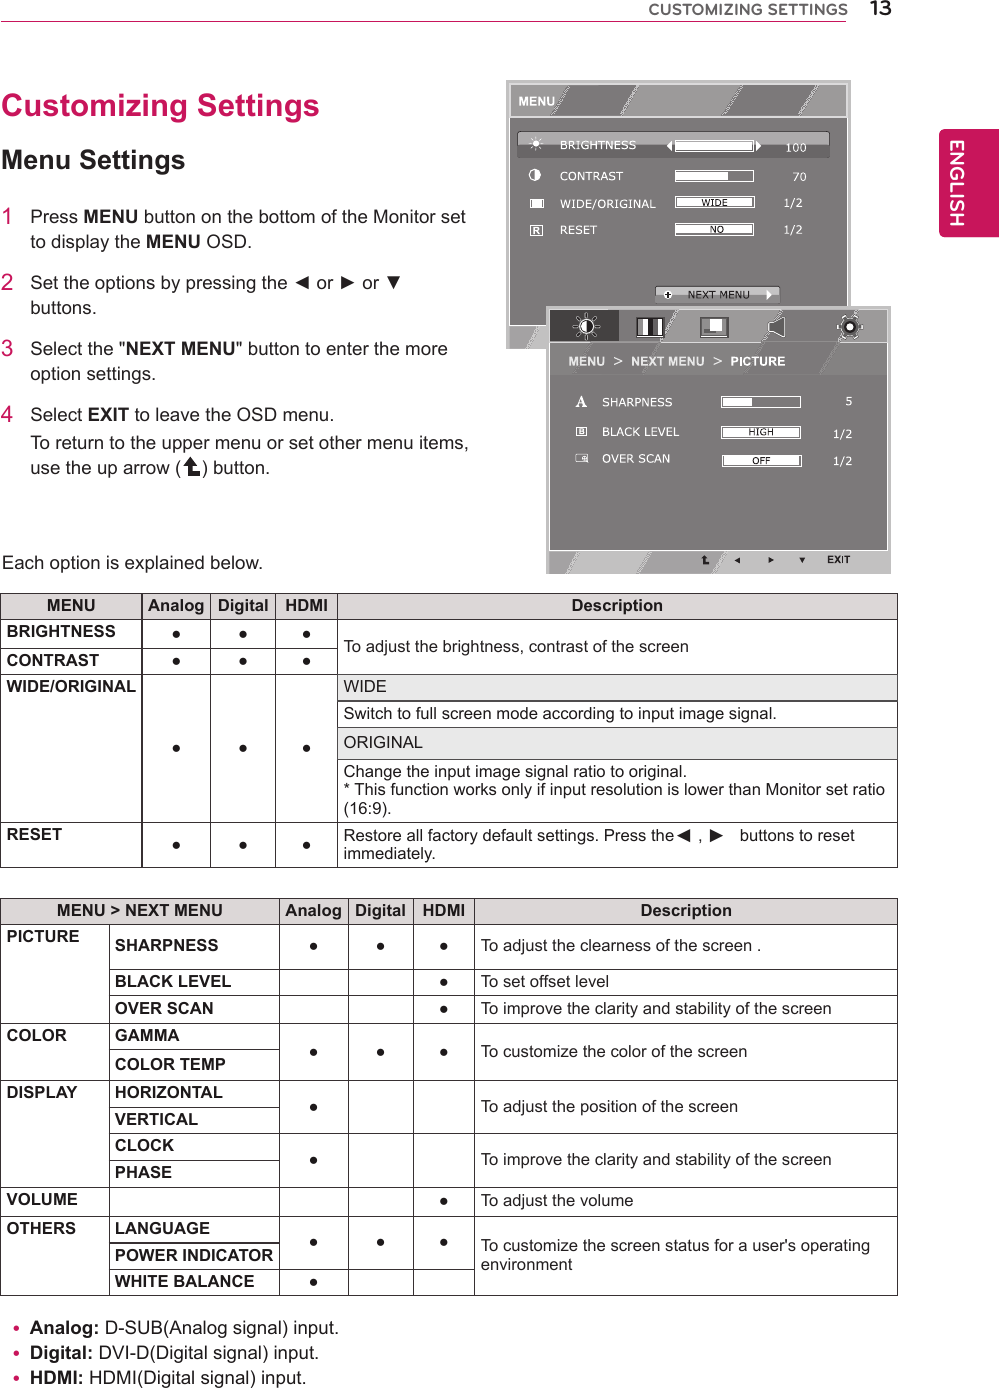
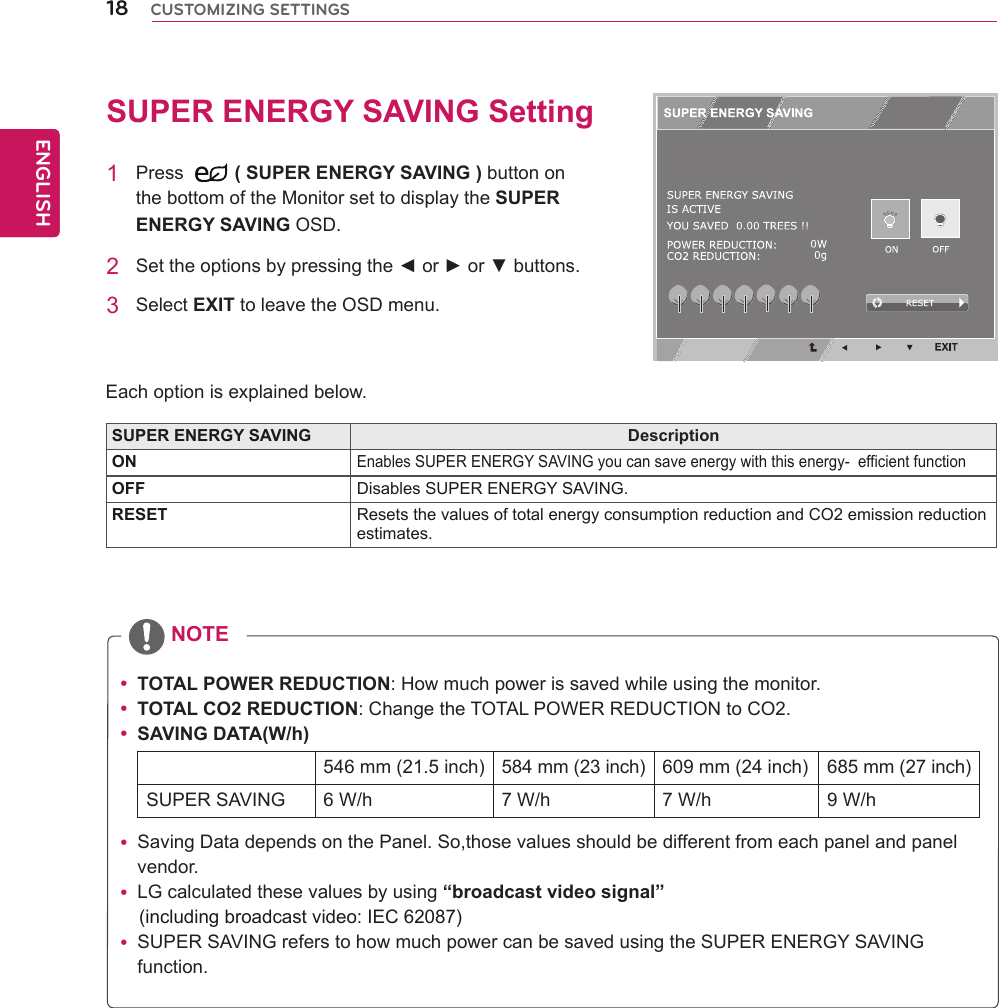
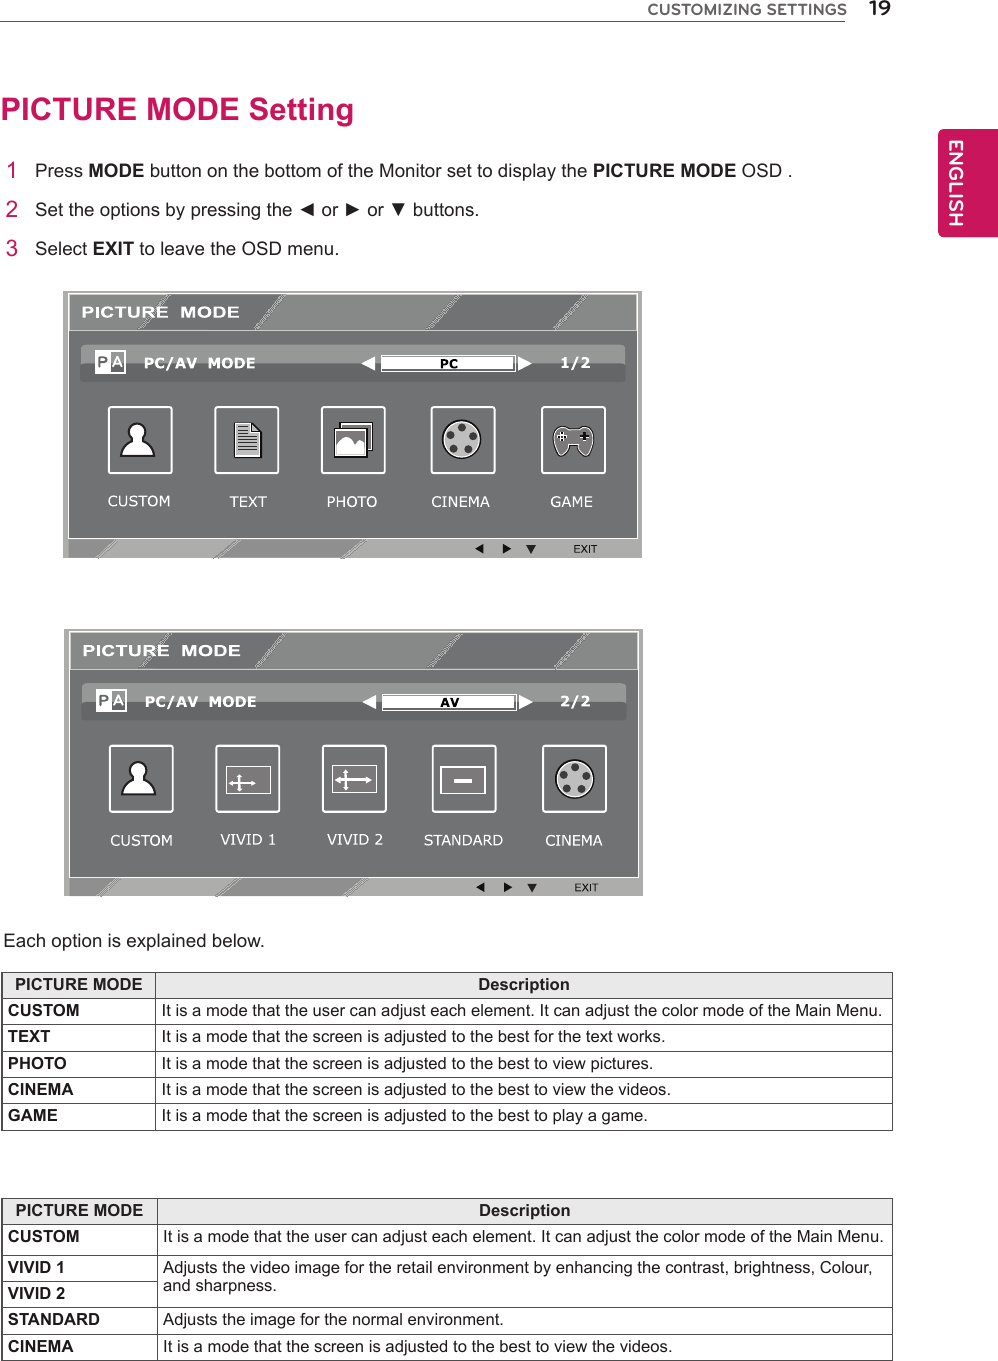
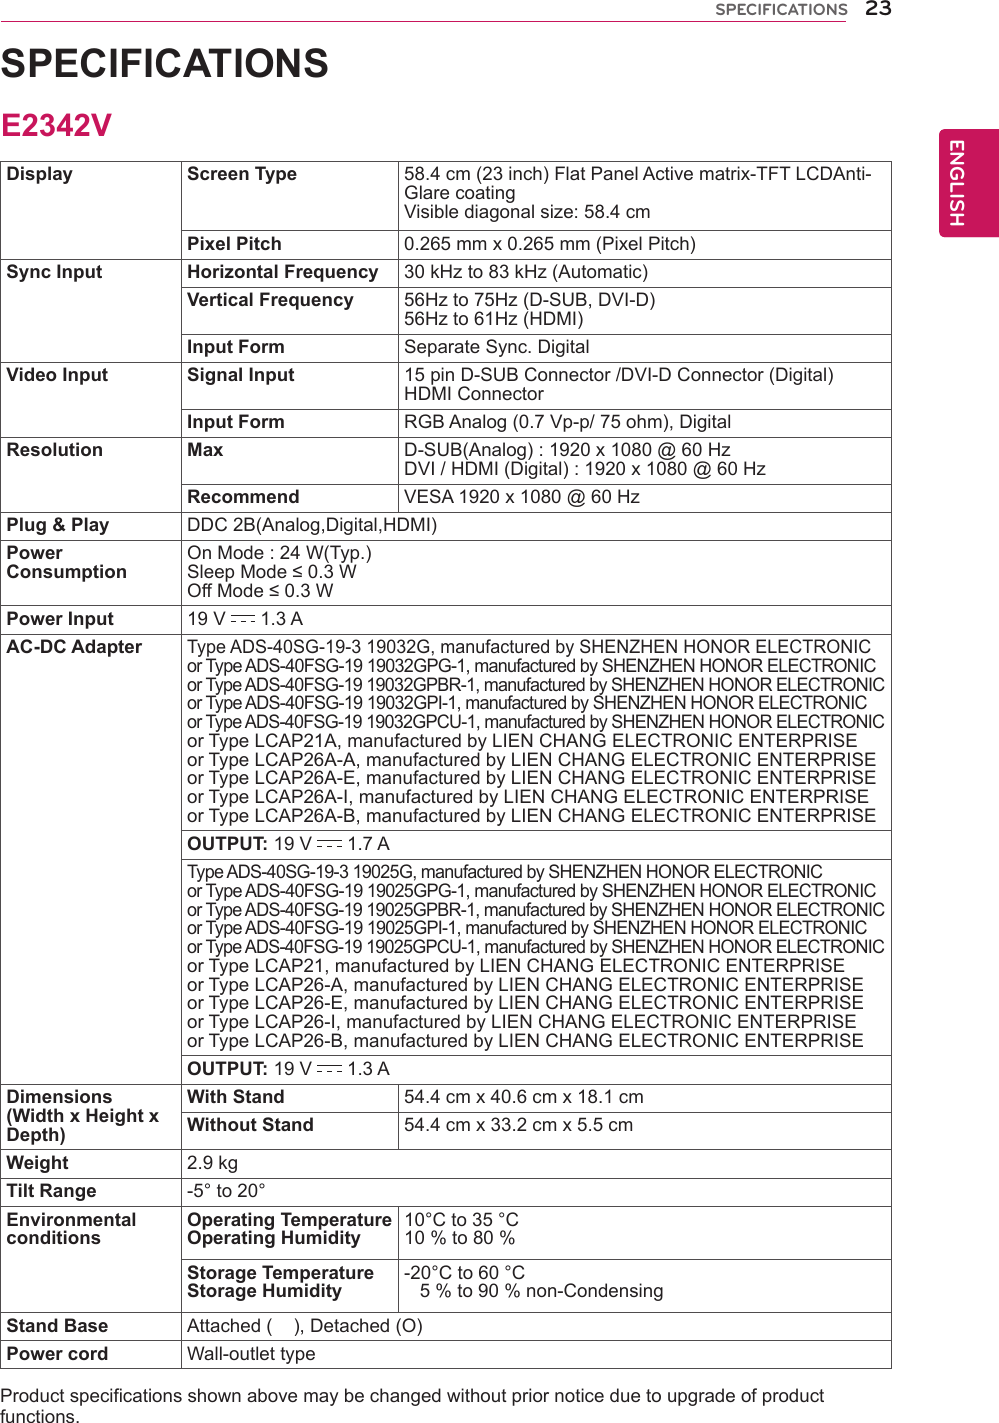
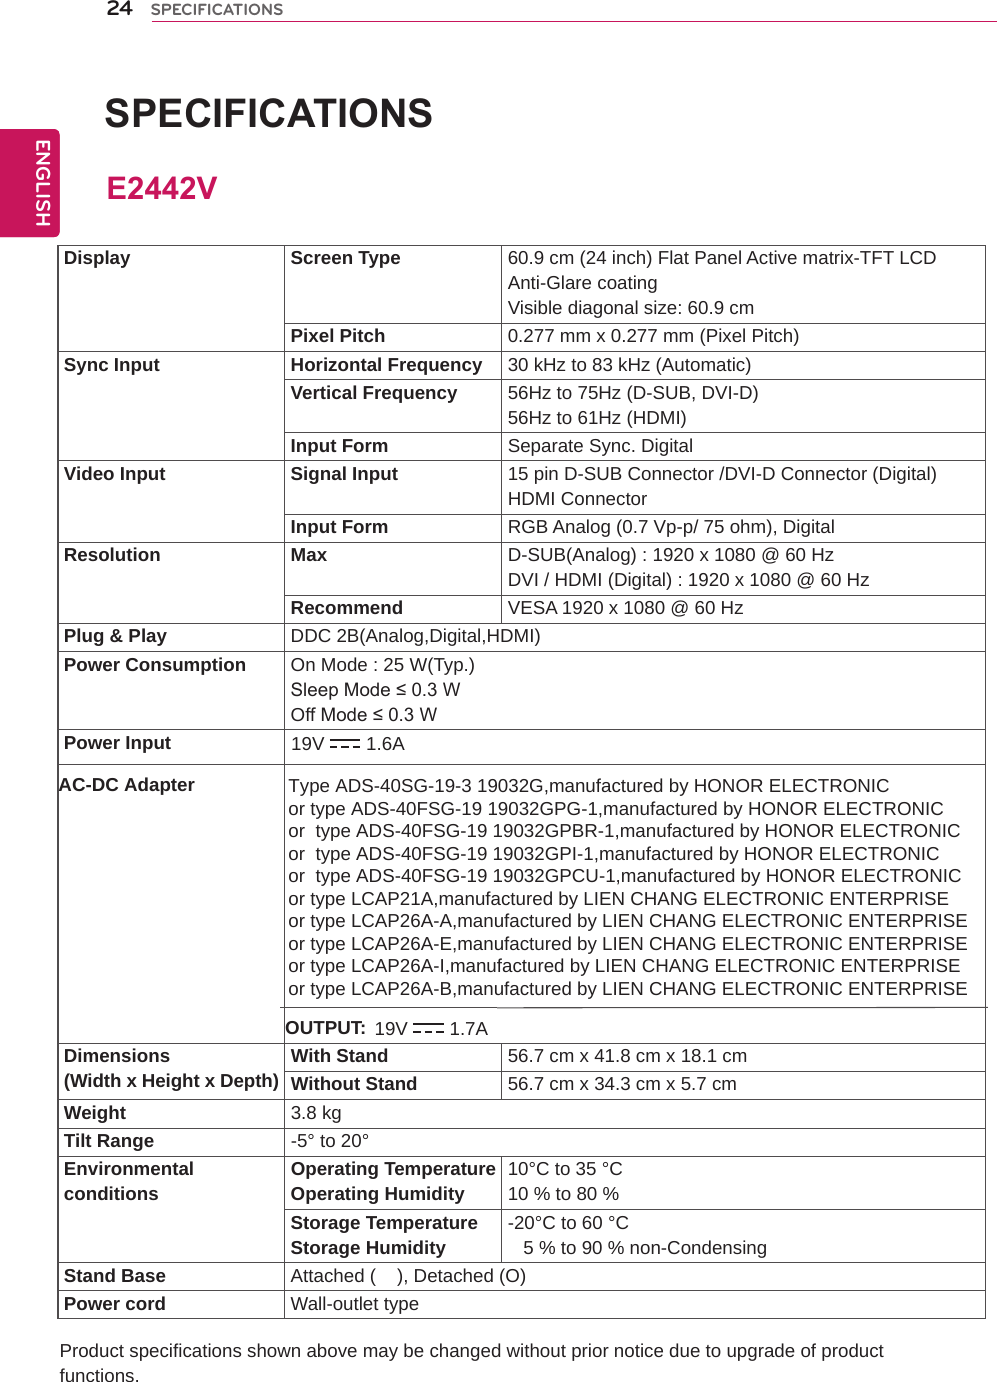
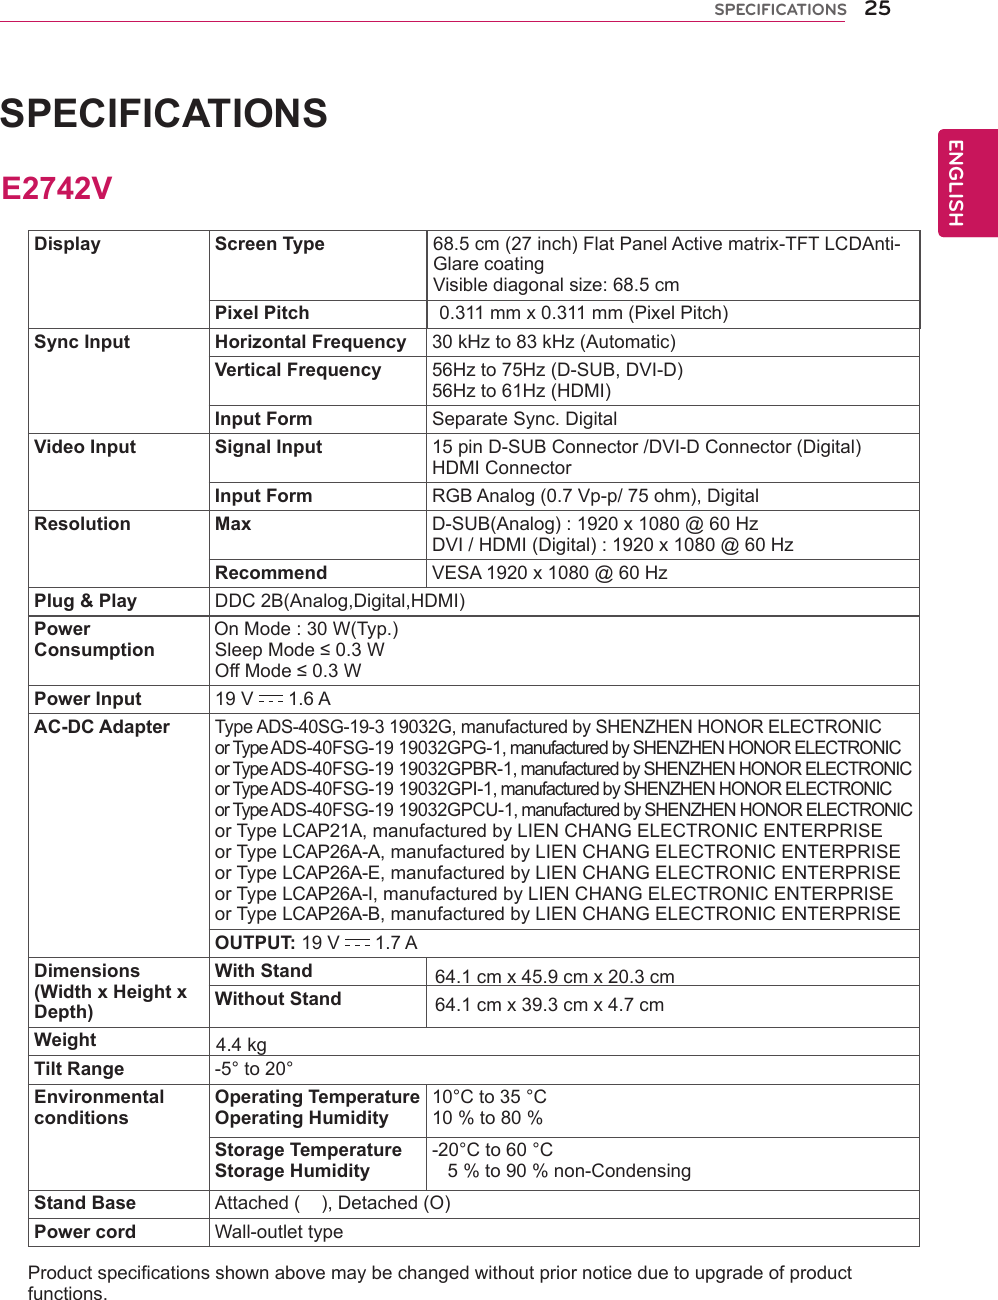
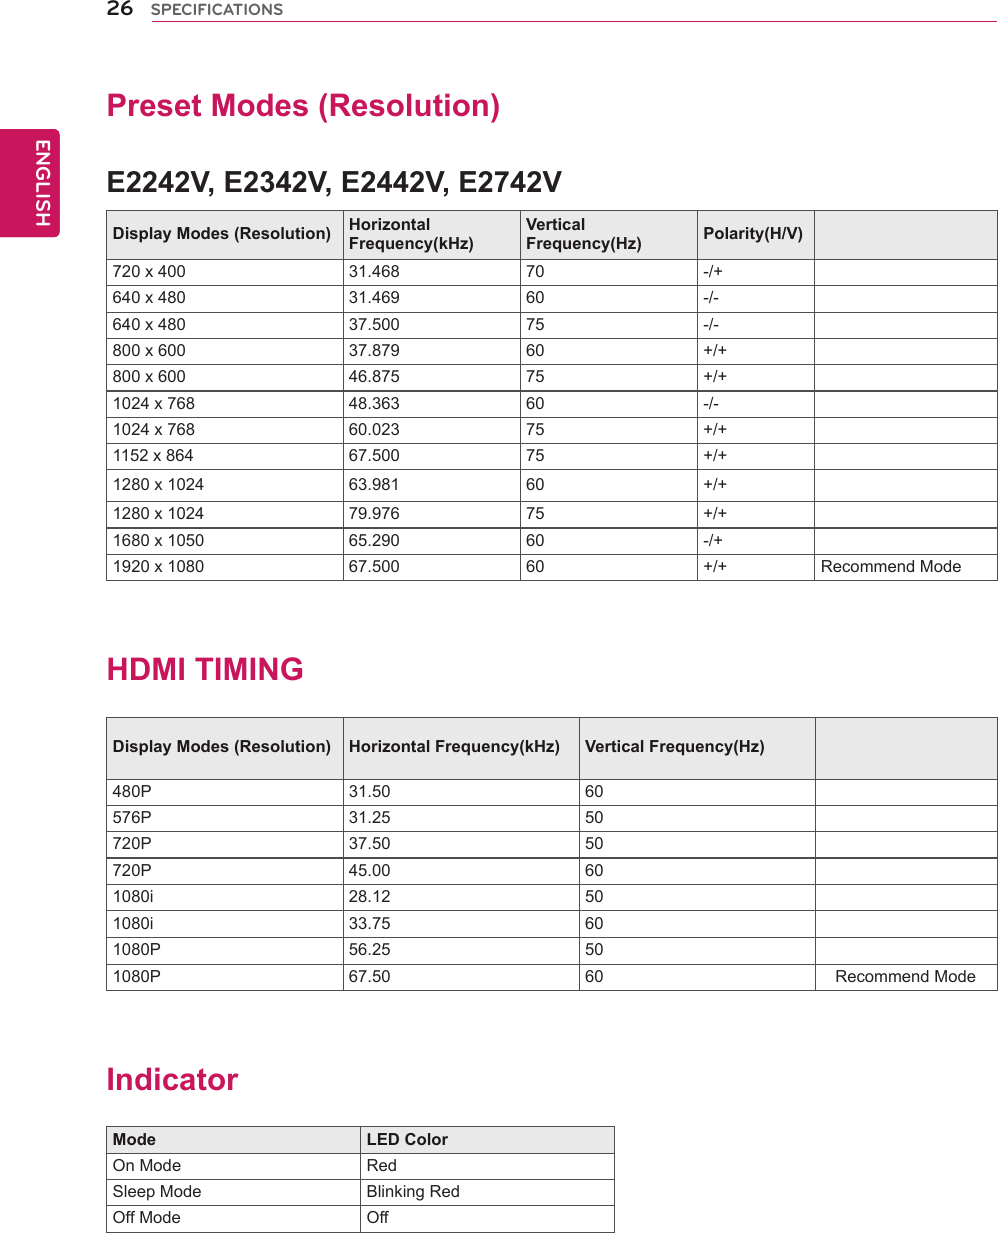
BEJE2742VA_User Manual 1


BEJE2742VA_User Manual 1