LG Electronics USA E410G Cellular/PCS GSM/UMTS Phone with WLAN and Bluetooth User Manual 2
LG Electronics MobileComm USA, Inc. Cellular/PCS GSM/UMTS Phone with WLAN and Bluetooth Users Manual 2
Contents
- 1. Users Manual 1
- 2. Users Manual 2
- 3. Users Manual 3
Users Manual 2

53
Contacts
Add contacts to your phone and synchronize them with the contacts in your Google
account or other accounts that support contact syncing.
Searching for a contact
On the Home screen
1 Touch to open your contacts.
2 Touch Search contacts and enter the contact name using the keyboard.
Adding a new contact
1 Touch , enter the new contact's number, then touch the Menu key . Touch
Add to Contacts > Create new contact.
2 If you want to add a picture to the new contact, touch the image area.
Choose from Take photo or Select from Gallery.
3 Select the contact type by touching .
4 Touch a category of contact information and enter the details about your contact.
5 Touch Save.
Favorite contacts
You can classify frequently called contacts as favorites.
Adding a contact to your favorites
1 Touch to open your contacts.
2 Touch a contact to view its details.
3 Touch the star to the right corner of the contact's name. The star will turn to yellow
color.
54
Contacts
Removing a contact from your favorites list
1 Touch to open your contacts.
2 Touch the tab, and choose a contact to view its details.
3 Touch the yellow color star to the right corner of the contact's name. The star turns
to grey color and the contact is removed from your favorites.
Creating a group
1 Touch to open your contacts.
2 Touch Groups and touch the Menu key . Select New group.
3 Enter a name for the new group.You can also set a ringtone for the newly created
group.
4 Touch Save to save the group.
NOTE: If you delete a group, the contacts assigned to that group will not be
lost. They will remain in your contacts.
55
Messaging
Your phone combines SMS and MMS into one intuitive, easy-to-use menu.
Sending a message
1 Touch on the Home screen and touch to open a blank message.
2 Enter a contact name or contact number in the To field. As you enter the contact
name, matching contacts will appear. You can touch a suggested recipient. You can
add more than one contact.
NOTE: You will be charged for a text message for every person you send the
message to.
3 Touch the Enter message field and begin composing your message.
4 Touch to open the Options menu. Choose from Quick message, Insert
smiley, Schedule sending, Add subject and Discard.
TIP! You can touch the icon to attach the file you want to share to your
message.
5 Touch Send to send your message.
6 Responses will appear on the screen. As you view and send additional messages, a
message thread is created.
WARNING: The 160-character limit may vary from country to country,
depending on the language and how the SMS is coded.
WARNING: If an image, video or audio file is added to an SMS
message, it is automatically converted into an MMS message and you are
charged accordingly.
56
Messaging
Threaded box
Unread messages (SMS, MMS) are located on the top. And the others exchanged with
another party can be displayed in chronological order so that you can conveniently see
an overview of your conversation.
Changing your message settings
Your phone message settings are pre-defined, so you can send messages immediately.
You can change the settings according to your preferences.
• Touch the Messaging icon on the Home screen, touch and then tap Settings.
57
E-mail
You can use the Email application to read emails from services like Gmail. The Email
application supports the following account types: POP3, IMAP and Exchange.
Your service provider or system administrator can provide you with the account settings
you need.
Managing an email account
The first time you open the E-mail application, a set-up wizard opens to help you to set
up an email account.
After the initial set-up, E-mail displays the contents of your inbox. If you have added
more than one account, you can switch among accounts.
To add another email account:
• Touch > Apps tab > E-mail > touch > Accounts > in the Accounts
screen, touch > Add account.
To change an email account's settings:
• Touch > Apps tab > E-mail > touch > Accounts > in the Accounts
screen, touch > Entire settings.
To delete an email account:
• Touch > Apps tab > E-mail > touch > Accounts > in the Accounts
screen, touch > Remove account > touch an account you want to delete >
Remove > select Yes.
Working with account folders
Touch > Apps tab > E-mail > touch and select Folders.
Each account has an Inbox, Outbox, Sent and Drafts folder. Depending on the features
supported by your account's service provider, you may have additional folders.
58
E-mail
Composing and sending email
To compose and send a message
1 While in the E-mail application, touch .
2 Enter an address for the message's intended recipient. As you enter text, matching
addresses will be proposed from your Contacts. Separate multiple addresses using
semicolon.
3 Touch the Cc/Bcc field to add Cc/Bcc and Touch to attach files, if required.
4 Enter the text of the message.
5 Touch .
If you aren't connected to a network, for example, if you're working in airplane
mode, the messages that you send will be stored in your Outbox folder until you
connect to a network again. If it contains any pending messages, the Outbox will be
displayed on the Accounts screen.
TIP! When a new email arrives in your Inbox, you will be notified by a sound
or vibration.
59
Camera
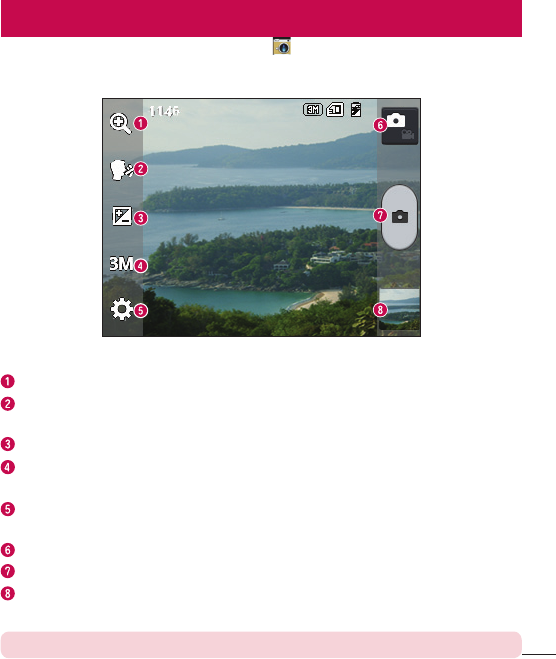
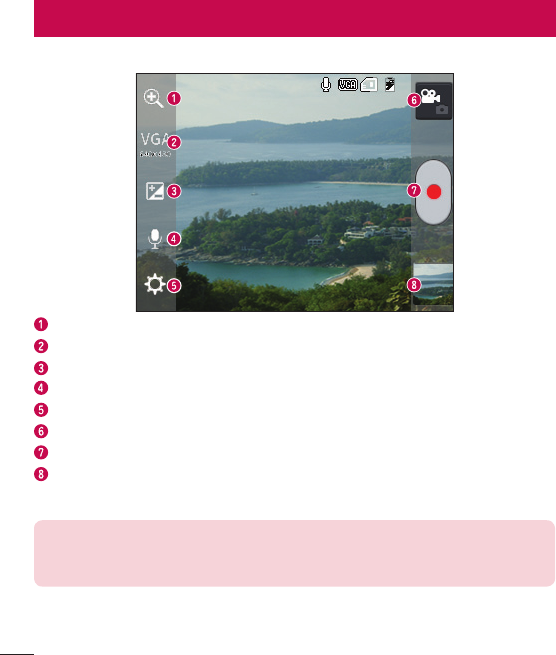
To open the Camera application, tap Camera on the Home screen.
Getting to know the viewfinder
Zoom – Zoom in or zoom out.
Cheese shutter – To take a photo, say one of the following words: Cheese, Smile,
Whisky, Kimchi or LG.
Brightness – Defines and controls the amount of sunlight entering the image.
Camera size – Selects photo resolution. If you choose high resolution, file size will
increase, which means you will be able to store fewer photos in the memory.
Settings – Touch this icon to open the settings menu. See Using the advanced
settings.
Video mode – Touch this icon to switch to video mode.
Taking a photo
Gallery – Touch to view the last photo you captured. This enables you to access
your gallery and view saved photos while in camera mode.
NOTE: Please ensure the camera lens is clean before taking pictures.
60
Camera
Using the advanced settings
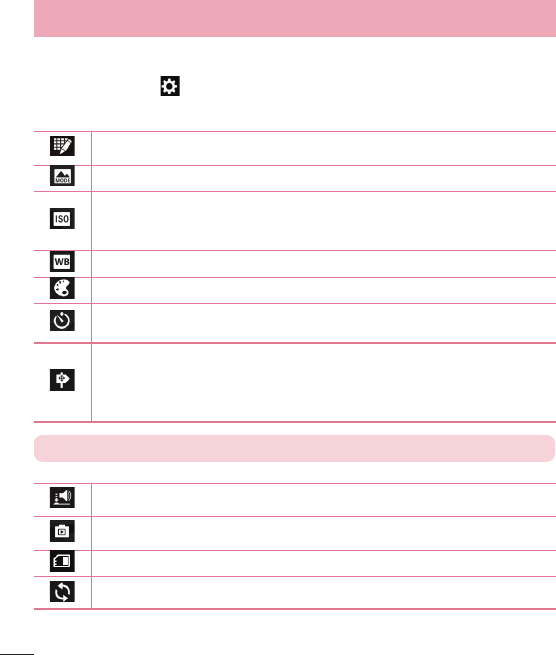
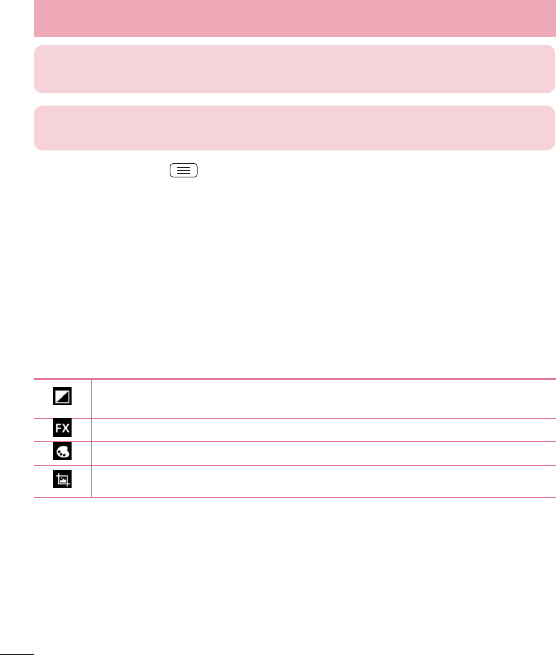
In the viewfinder, tap to open the advanced options. You can change the camera
settings by scrolling through the list. After selecting the option, tap the Back key.
Touch if you want to change the viewfinder menu.
Finds the color and light settings for the current environment.
The ISO rating determines the sensitivity of the camera's light sensor. The
higher the ISO, the more sensitive the camera. This is useful in darker
conditions when you cannot use the flash.
Improves colour quality in various lighting conditions.
Applies artistic effects to your pictures.
Sets a delay after the capture button is pressed. This is ideal if you want to
be in the photo.
Activate this to use your phone's location-based services. Take pictures
wherever you are and tag them with the location. If you upload tagged
pictures to a blog that supports geotagging, you can see the pictures
displayed on a map.
NOTE: This function is only available when the GPS function is active.
Selects a shutter sound.
Automatically shows you the picture you just took.
Select storage to save images.
Restore all camera default settings.
61
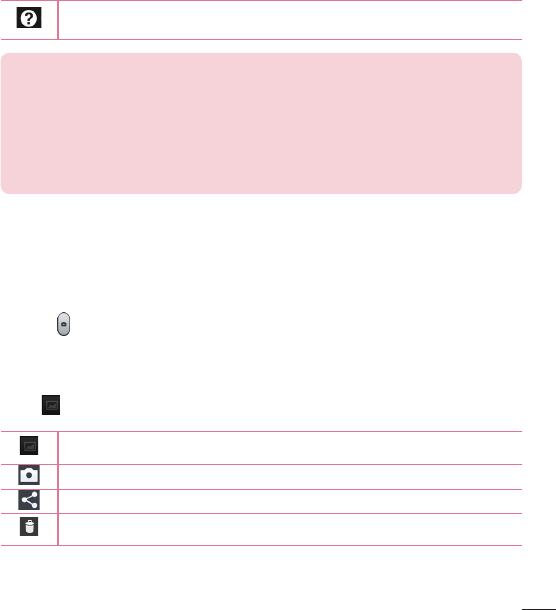
Touch this whenever you want to know how a function works. This icon will
provide you with a quick guide.
TIP!
• When you exit the camera, some settings return to their defaults, such as
white balance, color effect, timer and scene mode. Check these before you
take your next photo.
• The setting menu is superimposed over the viewfinder so, when you change
photo color or quality elements, you will see a preview of the changed
image behind the Settings menu.
Taking a quick photo
1 Open the Camera application.
2 Holding the phone horizontally, point the lens towards the subject you want to
photograph.
3 Touch to capture the photo.
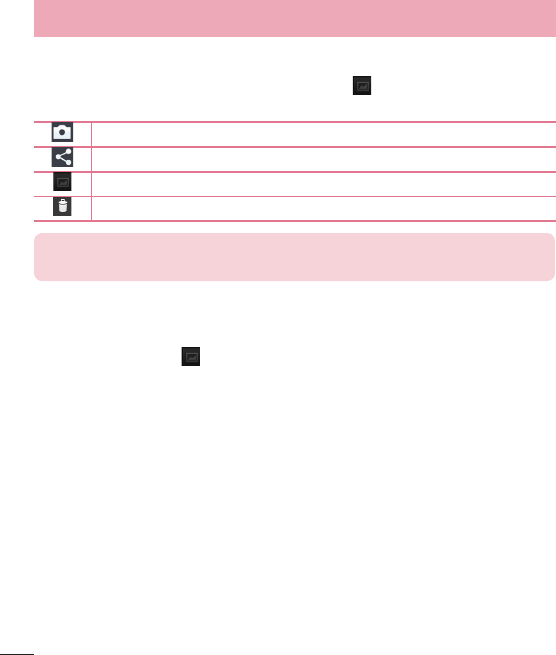
Once you've taken a photo
Touch to view the last photo you took.
Tap to view the Gallery of your saved photos.
Touch to take another photo immediately.
Touch to send your photo to others or share it via social network services.
Touch to delete the photo.
62
Camera
TIP! If you have an SNS account and set it up on your phone, you can share
your photo with your SNS community.
NOTE: Additional charges may apply when MMS messages are downloaded
while roaming.
Touch the Menu key to open all advanced options.
Set image as – Touch to use the photo as a Contact photo, Home screen wallpaper
or Lock screen wallpaper.
Move – Touch to move the photo to another place.
Copy – Touch to copy the selected photo and save it to another album.
Rename – Touch to edit the name of the selected photo.
Rotate left/right – To rotate left or right.
Crop – Crop your photo. Move your finger across the screen to select the area to be
cropped.
Edit – View and edit the photo.
Select photo resolution. If you choose high resolution, file size will increase,
which means you will be able to store fewer photos in the memory.
Improves color quality in various lighting conditions.
Applies artistic effects to your photos.
Applies additional options to your photos.
Slideshow – Automatically shows you the images in the current folder one after the
other.
Details – Find out more information about the contents.

63
Viewing your saved photos
You can access your saved photos when in camera mode. Just tap the Gallery icon
and your Gallery will be displayed.
• To view more photos, scroll left or right.
• To zoom in or out, double-tap the screen or place two fingers and spread them apart
(move your fingers closer together to zoom out).
64
Video camera
Getting to know the viewfinder
Zoom – Zoom in or zoom out.
Video size – Touch to set the size (in pixels) of the video you are recording.
Brightness – This defines and controls the amount of sunlight entering the video.
Voice On/Off – Choose Off to record a video without sound.
Settings – Touch this icon to open the settings menu.
Camera mode – Touch this icon to switch to camera mode.
Start recording
Gallery – Touch to view the last video you recorded. This enables you to access your
gallery and view your saved videos while in video mode.
TIP!
When recording a video, place two fingers on the screen and pinch to use the
Zoom function.
65
Using the advanced settings
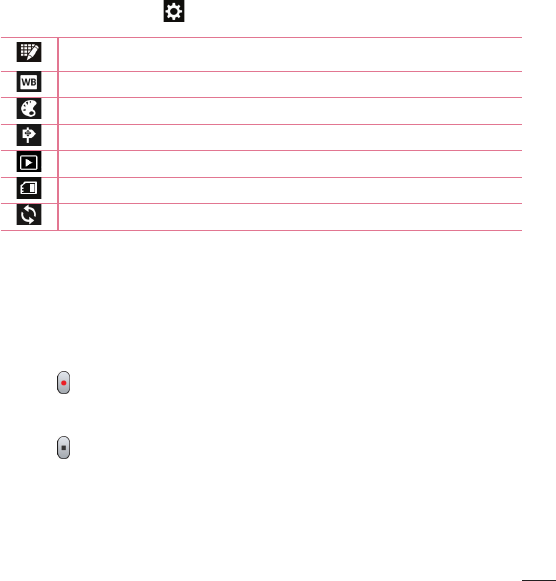
Using the viewfinder, touch to open all the advanced options.
Touch if you want to change the viewfinder menu.
Improves color quality in various lighting conditions.
Choose a color tone to use for your new view.
Activate this to use your phone's location-based services.
Auto review automatically shows you the video you just recorded.
Select storage to save videos.
Restore all video camera default settings.
Recording a quick video
1 Open the Camera application and touch the Video mode button.
2 The video camera viewfinder appears on the screen.
3 Hold the phone, point the lens towards the subject you wish to capture in your
video.
4 Touch once to start recording.
5 A red light will appear at the top corner of the viewfinder with a timer showing the
length of the video.
6 Touch on the screen to stop recording.
66
Video camera
After recording a video
Your captured video will appear on the Gallery. Touch to view the last video you
captured.
Touch to record another video immediately.
Touch to send your video to others or share it via social network services.
Touch to view the Gallery of your saved videos.
Touch to delete the video.
NOTE: Additional charges may apply when MMS messages are downloaded
while roaming.
Watching your saved videos
1 In the viewfinder, tap .
2 Your Gallery will appear on the screen.
3 Tap a video to play it automatically.
Adjusting the volume when viewing a video
To adjust the volume of a video while it is playing, use the volume keys on the left-hand
side of the phone.
67
LG Unique Function
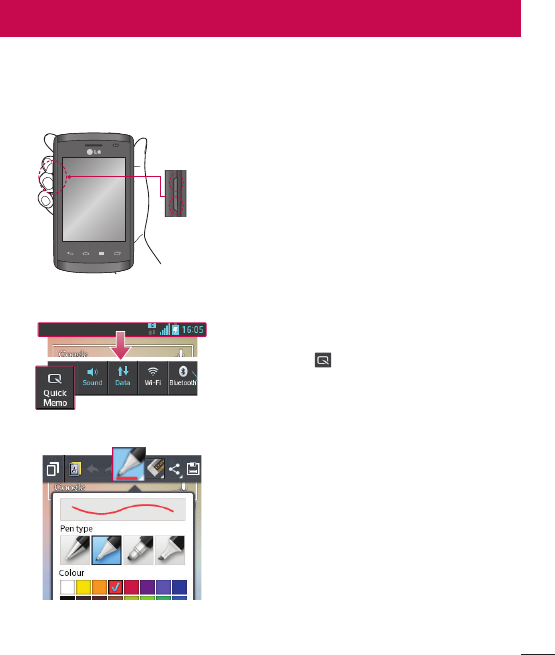
QuickMemo function
Use the QuickMemo function practicallfy and efficiently; create memos during a call,
with a saved picture or on the current phone screen.
OR
1 Enter the QuickMemo screen by
pressing both the Volume up and
down keys for one second on the
screen you want to capture.
OR
Touch and slide down the status bar and
touch .
2 Select the desired menu option from
Pen type, Colour, Eraser and create
a memo.
68
LG Unique Function
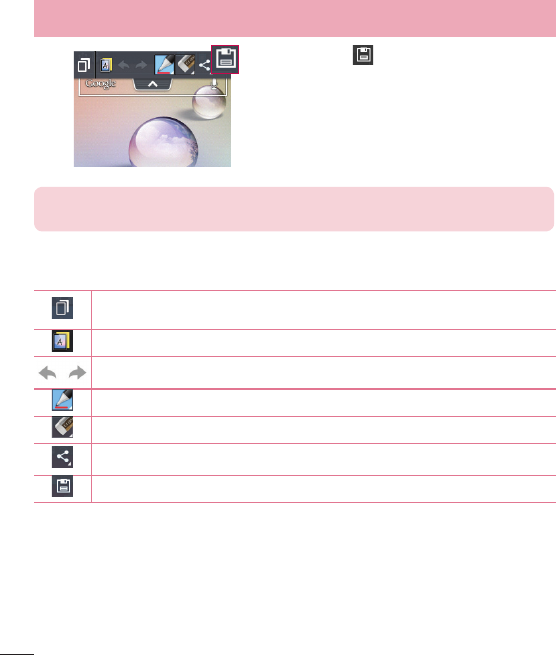
3 Touch in the Edit menu to save the
memo with the current screen.
NOTE: Please use a fingertip while using the QuickMemo function. Do not
use your fingernail.
Using the QuickMemo options
You can easily use the QuickMenu options when using the QuickMemo function.
Touch to keep the current memo on the screen and use the phone
simultaneously.
Selects whether to use the background screen or not.
Undo or Redo.
Selects the pen type and the colour.
Erases the memo that you created.
Touch to send your memo to others or share it via social network services.
Saves the memo with the current screen in the Gallery.
Viewing the saved QuickMemo
Touch Gallery and select the QuickMemo album.
69
LG SmartWorld
LG SmartWorld offers an assortment of exciting content - games, applications,
wallpaper and ringtones - giving LG phone users the chance to enjoy richer "Mobile
Life" experiences.
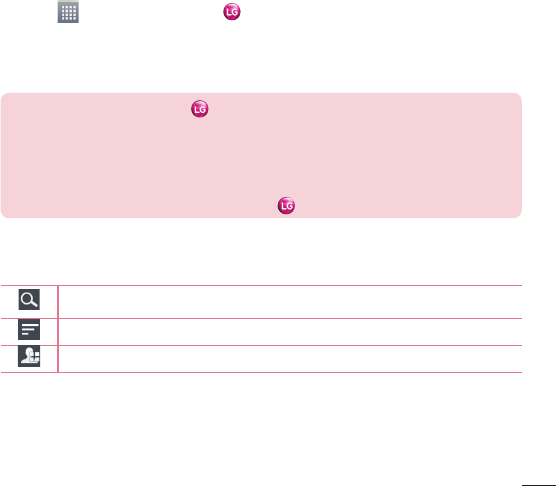
How to Get to LG SmartWorld from Your Phone
1 Touch > Apps tab > tap the icon to access LG SmartWorld.
2 Tap Sign in and enter ID/PW for LG SmartWorld. If you have not signed up yet, tap
Register to receive your LG SmartWorld membership.
3 Download the content you want.
NOTE: What if there is no icon?
1 Using a mobile Web browser, access LG SmartWorld (www.lgworld.com)
and select your country.
2 Download the LG SmartWorld App.
3 Run and install the downloaded file.
4 Access LG SmartWorld by tapping the icon.
How to use LG SmartWorld
• Participate in monthly LG SmartWorld promotions.
Search content.
Find content by category (e.g. Games, Education, Entertainment etc).
List of downloaded/to-be updated content.

70
LG Unique Function
• Try the easy Menu buttons to find what you’re looking for fast.
Apps for you – Recommended content based on your previous choices.
Settings – Set Profile and Display.
Sign in – Set your ID and Password.
• Try other useful functions as well. (Content Detail screen)
NOTE: LG SmartWorld may not be available from all carriers or in all
countries.