LG Electronics USA E510 Cellular/PCS GSM/EDGE Phone with WLAN and Bluetooth User Manual LG E510 VDF 110704 indd
LG Electronics MobileComm USA, Inc. Cellular/PCS GSM/EDGE Phone with WLAN and Bluetooth LG E510 VDF 110704 indd
UserManual.wiki
>
LG Electronics USA
>
E510 User Manual
Users Manual
Navigation menu
Upload a User Manual
Namespaces
Wiki Guide
HTML
PDF
Info
Views
User Manual
Discussion / Help
Navigation
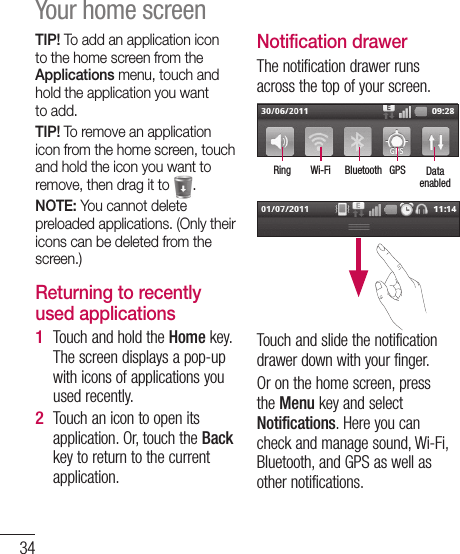
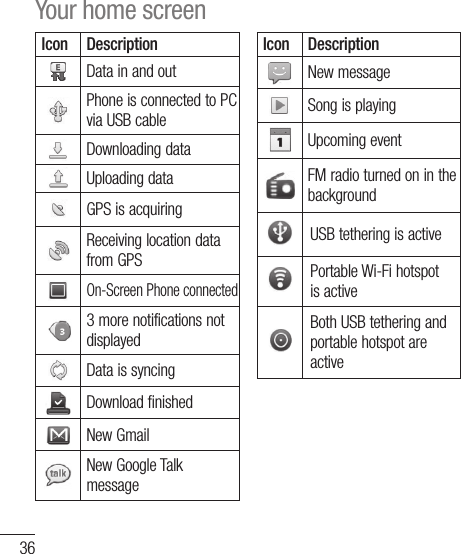
![35Viewing the status barThe status bar uses different icons to display phone information, such as signal strength, new messages, battery life and active Bluetooth and data connections.Below is a table explaining the meaning of icons you’re likely to see in the status bar.[Status bar]Icon DescriptionNo SIM cardNo signalAirplane modeConnected to a Wi-Fi networkWired headsetIcon DescriptionCall in progressCall holdSpeakerphonePhone microphone is mutedMissed callBluetooth is onConnected to a Bluetooth deviceSystem warningAlarm is setNew voicemailRinger is silencedVibrate modeBattery fully chargedBattery is charging](https://usermanual.wiki/LG-Electronics-USA/E510/User-Guide-1542979-Page-13.png)