LG Electronics USA G710V Handset with WLAN, BT, and RFID User Manual
LG Electronics MobileComm USA, Inc. Handset with WLAN, BT, and RFID Users Manual
Users Manual
www.lg.com
USER GUIDE
/0*9
ENGLISH

Custom-designed
Features
01
Custom-designed Features
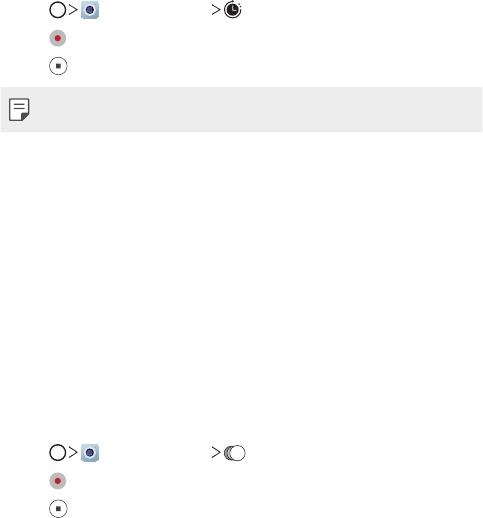
Video recording features
Wide-angle camera
You can take photos or record videos with a wider range than your actual
field of vision by using the wide-angle on the front and rear camera.
Tap , then tap / or / to switch between the
standard and wide-angle.
• See
Starting the camera
for details.
Custom-designed Features
Cine Video
You can record a movie-like video.
1 Tap , then tap MODE Cine Video .
2 Tap to record a video.
• : Record a video by selecting the point zoom feature to zoom in/
out around a specific desired area.
• : Select an effect to apply to the recording. You can also adjust
the vignette and strength for each Cine effect. This feature cannot
be changed after you have started recording.
• The Point zoom feature supports a zoom speed of up to 3x.
• This feature only supports video recordings in standard angle.
Graphy
You can apply the recommended values for the white balance, ISO and
shutter speed as if taken by an expert.
1 Tap , then tap MODE Manual ( ).
2 Tap and then tap Graphy photos to activate the feature.
3 Tap and select the desired scene from the recommended images.
4 Tap to take a photo.
• This feature is available only in Manual camera mode.
• You can add more scenes by tapping and downloading the Graphy
app from the Play Store. You may be charged for data usage, depending
on your pricing plan.
Custom-designed Features
Match shot
Link two photos or videos together and then save it as a single content
unit.
1 Tap , then tap MODE .
2 To take a photo, tap . To record a video, tap .
• : Record two split screens at the same time.
• : Record two split screens individually.
• : Import previous photos, videos, or images to create a match
shot.
• : Rotate the imported photos or images.
• : Change the order of the imported photos or images.
3 Tap to save (if necessary).
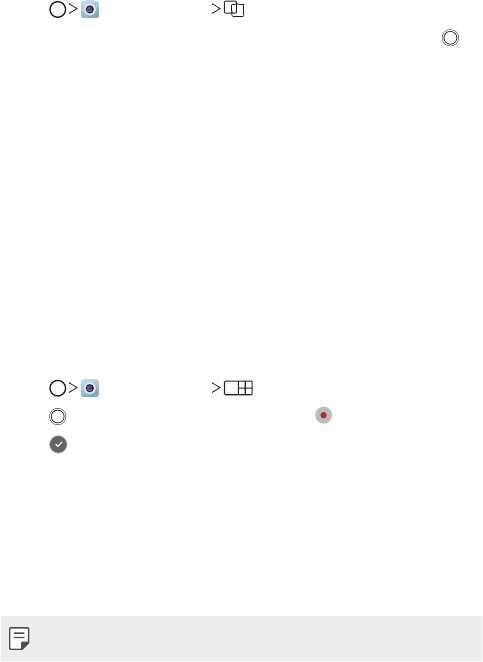
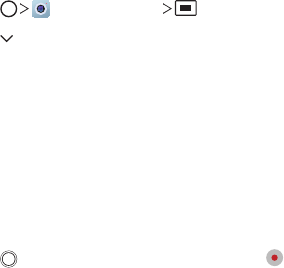
Snap shot
You can take a photo or record a video and preview it right away.
1 Tap , then tap MODE .
2 Tap to take a photo. To record a video, tap .
Custom-designed Features
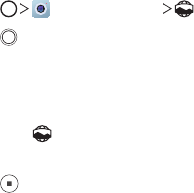
Guide shot
You can use an image as a guide to take photos with the same
composition. Any photo in the Gallery can be used as a guide.
1 Tap , then tap MODE .
2 Place the desired subject on a translucent guide image, then tap .
• Use the slide bar to control the background transparency.
Grid shot
You can take photos or record videos for 4 different scenes in a row and
save them as a single content.
Take photos or 3-second-long videos in sequence and then save them as
a single file.
1 Tap , then tap MODE .
2 Tap to take a photo. To record a video, tap .
3 Tap to save.
• Tap a previously taken photo/video to retake it.
Custom-designed Features
Tracking focus while using the camera
You can track and maintain focus on an object while taking photos or
recording videos.
1 Tap , then tap Tracking focus.
2 Before recording a video or taking a photo, lightly tap the screen to
select an object to focus on.
3 Take the photo or start recording your video.
• See
Starting the camera
for details.
• To use this feature, select the standard camera ( ) for taking photos
or recording videos.
• This feature is unavailable when you use the front camera or the wide-
angle camera.
• This feature is unavailable in the following cases:
- Video size limitation: Resolution is set as UHD 16:9.
- FPS limitation: FPS is set as 60 FPS.
Steady recording
You can use the Steady recording feature to minimise motion blur while
recording a video.
Tap , then tap Steady recording.
• See
Starting the camera
for details.
• This feature is available only in specific modes.

Custom-designed Features
Hi-Fi video recording
You can record a high quality video with Hi-Fi sound.
Tap , then tap MODE Manual ( ) Hi-Fi.
• See
Starting the camera
for details.
• Hi-Fi videos can only be played in apps that support Hi-Fi.
Camera roll
You can view the photos and videos you have taken on the camera
preview screen.
Tap , then tap Camera roll.
• When you take photos or record videos, you can view the thumbnails
for the saved pictures along the side of the screen.
• Scroll the thumbnail lists up or down to browse the photos and videos.
• Tap a thumbnail to view the photo or video on the camera screen.
• Tap the thumbnail again to return to the camera viewfinder.
• This feature is not supported when you take a photo or record a video in
the 18:9 aspect ratio.
• This feature is available only in the Auto camera mode.

Custom-designed Features
Gallery features
Floating button
You can use the floating button at the lower part of the Gallery app
screen in landscape mode.
• After dragging the button upwards, release it when you reach the
button to return to the Home screen.
• You can drag the button to the left or right to move the floating
button as desired.

Custom-designed Features
Related content
You can edit and customise related content in the Gallery.
1 While viewing a picture preview, tap .
2 When the icon related with the date or location where you took the
photo appears, touch the screen.
• You can view the photos related with the date or location where
you chose.
• Tap to access additional options.
Custom-designed Features
Making a GIF
You can create a GIF file from the Gallery.
1 While viewing an album, tap Create GIF.
2 Select the desired photos and videos to create a GIF file and then tap
NEXT.
• You can add more images and adjust the GIF speed, screen ratio,
and file order.
3 Tap SAVE.
• A maximum of 100 images can be used to create a GIF file.
Making a collage
You can make a collage from the associated content.
1 While viewing an album, tap Make collage.
2 Select the desired images to add to the a collage and then tap NEXT.
• Select the desired layout from the bottom of the screen.
3 Tap MAKE.
• A maximum of 9 images can be used to create a collage.
Custom-designed Features
Making a video from the related content
You can gather related content to make a video clip by tapping on the
video displaying the date or location.
Select the theme and background music, adjust caption effects and order
or add date and your signature and then tap SAVE.
• : Select the video theme.
- To download the theme, tap .
• : Add background music or adjust the playback time.
- To select a file for the background music, tap .
- To download a file for the background music, tap .
- To adjust the volume of background music and original video, tap .
• : Select a font face.
- To download a font, tap .
• : Change the order of files to play as a video.
- To add files, tap .
Custom-designed Features
• Download the VASSET app from the Play Store to add video themes,
background music or font faces.
If you use mobile data without Wi-Fi connection, you may be charged
for data usage.
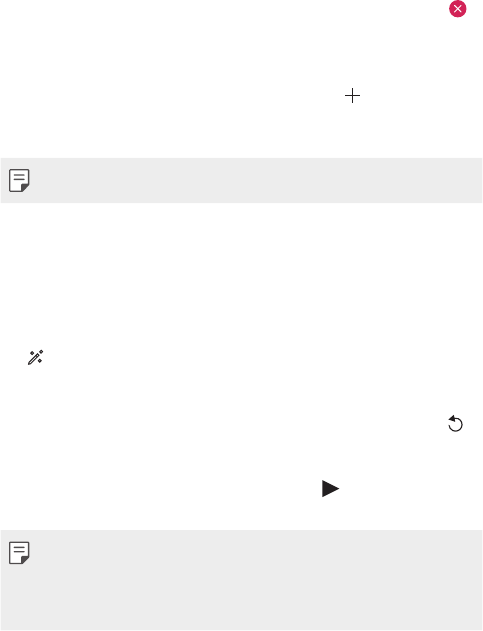
Creating a movie
You can create a new movie by putting images and videos together.
1 Tap , then tap Create movie.
2 Select images or videos for your movie and tap NEXT.
3 Edit the selected images and videos and then tap SAVE.
Custom-designed Features
Deleting files
You can select images or videos to delete from your video by tapping
at the top right corner of its thumbnail.
Adding files
You can select images or videos to add after tapping at the bottom
of the screen. You can also select the images or videos you have already
previously added.
• Touch and hold a file, and then tap another file for multiple selection.
Rearranging files
To rearrange the images and videos, touch and hold the file you want to
move, then dragging it to the desired location.
Adding file effects
Tap to add a theme or background music, change the font.
Resetting the movie edits
You can reset the edits made to the movie (e.g. play time) by tapping .
Previewing a file
Check your new video before saving it by tapping . After the playback
time elapses, the next file is played automatically.
• A maximum of 50 images and videos can be used to create a video.
• The playback time for an image is 3 seconds by default and it cannot be
changed. Videos can be trimmed down to a minimum of 1 second.
• This feature may not support some image or video formats.
Custom-designed Features
Making a GIF
You can easily make a GIF file using recorded video.
1 At the desired starting point while watching a video, tap .
2 Select the length of the GIF you want to create.
• GIF is generated for the time selected from the current time.
• For videos less than 5 seconds, GIF images are automatically
generated for the remaining time.
• You may use this feature solely for creative purposes. The use of this
feature involving infringement of any other person’s rights, such as
copyright or defamatory or offensive statements, may be subject to civil,
criminal, or administrative liabilities and/or penalties under applicable
laws. You shall not copy, reproduce, distribute, or otherwise make illegal
use of any copyrighted materials without permission of the rightful
owner or copyright holder. To the fullest extent permitted by applicable
law, LG Electronics disclaims all expressed and implied warranties as well
as liabilities associated thereto.
Custom-designed Features
Floating Bar
Floating Bar overview
You can activate frequently used features, including shortcuts,
screenshots, music player, and quick contacts, by touching and then
swiping the Floating Bar on the screen.
To enable the Floating Bar feature, tap Settings General
Floating Bar .
Opening and closing the Floating Bar
• To open the Floating Bar: Tap or .
• To close the Floating Bar: Tap or .
Custom-designed Features
Moving the Floating Bar position
• Floating bar open: Touch and hold the Floating Bar, then drag it to the
desired location.
• Floating bar closed: Touch and hold the Floating Bar, then drag it to
the desired location along the edge of the screen.
• The Floating Bar can only be moved within the area between the Status
bar and Quick access bar. See
Home screen layout
for details.
Disabling the Floating Bar
You can disable the Floating Bar by using one of the following methods:
• Touch and hold or on the Floating Bar and then drag it to the
delete area at the top of the screen.
• Tap or on the Floating Bar, then tap at the top of the
screen.
• Tap Settings General Floating Bar .
Custom-designed Features
Setting the Floating Bar
You can select content to display on the Floating Bar and change its
display order. Tap from the Floating Bar or tap Settings General
Floating Bar.
• Shortcuts: Quickly access frequently used apps or features.
• Screen capture: Capture the screen to crop the desired part or to
create a GIF file.
Launch Capture+ on the desired screen.
Launch Extended capture to capture a scrolling screen.
Capture a desired part of a screen.
Save a current screen as a GIF file. You can adjust the size of the
image you want to capture.
•To move to the desired location, drag .
•To start recording a GIF, tap .
•To stop recording a GIF, tap .
• Quick contacts: Call or message people set as quick contacts.
• Music player: Control the music you are listening to.
• A maximum of 5 apps or features can be added to the shortcuts.
• A maximum of 5 contacts can be added as quick contacts.
• You may use this feature solely for creative purposes. The use of this
feature involving infringement of any other person’s rights, such as
copyright or defamatory or offensive statements, may be subject to civil,
criminal, or administrative liabilities and/or penalties under applicable
laws. You shall not copy, reproduce, distribute, or otherwise make illegal
use of any copyrighted materials without permission of the rightful
owner or copyright holder. To the fullest extent permitted by applicable
law, LG Electronics disclaims all expressed and implied warranties as well
as liabilities associated thereto.
• A GIF can be created up to 15 seconds long.
Custom-designed Features
Audio recording features
The HD Audio Recorder allows you to configure the audio settings
manually so that you can record audio based on your environment.
Recording modes
You can record a high definition audio file by selecting and configuring the
desired audio mode to suit the recording environment.
Tap Essentials HD Audio Recorder .
Normal
You can record audio without extra settings.
Concert
You can record audio in a concert or other music event.
Custom
You can manually configure the desired settings to record audio.
Studio Mode
With Studio mode, you can play an audio file or music and record your
voice at the same time, create a chord by recording your voice multiple
times, and record your comments over the presenter’s or speaker’s original
audio file.
1 Tap Essentials HD Audio Recorder Custom.
2 Tap .
3 Select an audio file to use as background music.
4 Tap to record voice.
5 Tap to save the recorded file.
• Background music can only be played through earphones. Make sure to
plug in earphones before using this feature.

Custom-designed Features
Other useful features for use of the HD Audio
Recorder app
GAIN
You can adjust the sensitivity of the sound recorded by the microphone.
The higher the GAIN value is set, the more sensitively the sound is
recorded.
LCF
You can filter any low-pitched noises such as the low hum of the air
conditioner.
The higher the LCF (Low Cut Filter) value is set, the better high-frequency
noises are filtered.
LMT
It can prevent clipping of the recorded sound. The higher the LMT (Limiter)
value is set, the more low frequency sounds that will not get clipped.
• To change additional settings, tap Settings, then customise the file
type, bit depth, sampling rate and other settings.
• When you select a mode from Concert and Custom, appears. Tap.
and then select the microphone to use.
• You can monitor sound quality with the connected earpiece while
recording audio. While recording audio in Studio mode, sound
monitoring is not supported. You can hear only the background music.

Custom-designed Features
Fingerprint recognition
Fingerprint recognition overview
You must register your fingerprint on your device first before using the
fingerprint recognition function.
You can use the fingerprint recognition function in the following cases:
• To unlock the screen.
• To view the locked content in the Gallery or QuickMemo+.
• Confirm a purchase by signing in to an app or identifying yourself with
your fingerprint.
• Your fingerprint can be used by the device for user identification. Very
similar fingerprints from different users may be recognised by the
fingerprint sensor as the same fingerprint.
• If the device cannot detect your fingerprint, or you forgot the value
specified for registration, visit the nearest LG Customer Service Centre
with your device and ID card.
Precautions for fingerprint recognition
Fingerprint recognition accuracy may decrease due to a number of
reasons. To maximise the recognition accuracy, check the following before
using the device.
• The device’s Power/Lock key has a fingerprint sensor. Ensure that the
Power/Lock key is not damaged by a metallic object, such as coin or
key.
• When water, dust or other foreign substance is on the Power/Lock key
or your finger, the fingerprint registration or recognition may not work.
Clean and dry your finger before having the fingerprint recognised.
• A fingerprint may not be recognised properly if the surface of your
finger has a scar or is not smooth due to being soaked in water.
• If you bend your finger or use the fingertip only, your fingerprint may
not be recognised. Make sure that your finger covers the entire surface
of the Power/Lock key.
Custom-designed Features
• Scan only one finger for each registration. Scanning more than one
finger may affect fingerprint registration and recognition.
• The device may generate static electricity if the surrounding air is
dry. If the surrounding air is dry, avoid scanning fingerprints, or touch
a metallic object such as coin or key before scanning fingerprints to
remove static electricity.
Registering fingerprints
You can register and save your fingerprint on the device to use fingerprint
identification.
1 Tap Settings General Fingerprints & security Fingerprints.
• A lock screen must be set in order to be able to use this feature.
• If the screen lock is not active, configure the lock screen by following the
on-screen instructions. See
Setting a screen lock
for details.
2 Locate the Power/Lock key on the back of the device and gently put
your finger on it to register the fingerprint.
• Gently press the Power/Lock key so that the sensor can recognise your
fingerprint. If you press the Power/Lock key with an excessive force, the
screen lock function may start or the screen may be turned off.
• Ensure that your fingertip covers the entire surface of the sensor of the
Power/Lock key.
Custom-designed Features
3 Follow the on-screen instructions.
• Repeat scanning the fingerprint by moving your finger little by little
until the fingerprint registers.
4 When the fingerprint registration is done, tap OK.
• Tap ADD MORE to register another fingerprint. If you register
only one fingerprint and the corresponding finger is not in a good
condition, the fingerprint recognition may not work well. As the
preventive measure against this kind of situation, register multiple
fingerprints.
Managing fingerprints
You can edit or delete registered fingerprints.
1 Tap Settings General Fingerprints & security Fingerprints.
2 Unlock according to the specified lock method.
3 From the fingerprint list, tap a fingerprint to rename it. To delete it, tap
.
Unlocking the screen with a fingerprint
You can unlock the screen or view the locked content by using your
fingerprint. Activate the desired function:
1 Tap Settings General Fingerprints & security Fingerprints.
2 Unlock according to the specified lock method.
3 On the fingerprint settings screen, activate the desired function:
• Screen lock: Unlock the screen with a fingerprint.
• Content lock: Unlock content with a fingerprint. To do this, make
sure that the content lock is set.

Custom-designed Features
Face Recognition
Face Recognition overview
You can unlock the screen lock by using the saved facial data.
• This feature may be more vulnerable to security than the other screen
locks, such as Knock Code, Pattern, PIN, and Password.
• When a similar face or a photo of your face is used, the screen may be
unlocked.
• The recognised facial data is securely stored in your device.
• When the face recognition is selected for screen lock, you must enter
the Knock Code, Pattern, PIN, or Password that has been used for face
registration without directly using the face recognition after the power
is turned on. Accordingly, be careful not to forget the specified value.
• If the device cannot detect your face, or you forgot the value specified
for registration, visit the nearest LG Customer Service Centre with your
device and ID card.
• To save power, the Face Recognition feature will not work when the
battery level is below 5 %.
Precautions for Face Recognition
Face Recognition accuracy may decrease in the following cases. To
increase its accuracy, check the following before using the device.
• When your face is covered with a hat, eyeglasses, or mask, or your face
is significantly different due to heavy makeup or beard.
• When there are fingerprints or foreign substances on the front of the
camera lens, or your device cannot detect your face due to a too bright
or dark light.
Custom-designed Features
Registering facial data
Before using the Face Recognition feature, register your facial data on
your device.
1 Tap Settings Display Lock screen Face Recognition.
• To use this feature, the screen lock must be set with a Knock Code,
Pattern, PIN, or Password.
• When the screen lock is not set, register the data by following the
on-screen instructions. See
Setting a screen lock
for details.
2 Raise your device in the front of your eyes.
3 Register your face by following the on-screen instructions.
• Register your face in a room that is not too bright or dark.
• Position your entire face inside the guideline on the screen, and then
adjust it by slowly moving up, down, left, or right.
4 When the face registration is done, tap OK.
Unlocking the screen with your face
You can release the screen lock with your face instead of a Knock Code,
Pattern, PIN, or Password.
1 Tap Settings Display Lock screen Select screen lock.
2 Unlock the screen according to the specified method.
3 Tap Allow face recognition to allow you to unlock the screen
using facial recognition.
Custom-designed Features
Improving the Face Recognition
You can add facial data in various conditions to improve Face Recognition.
1 Tap Settings Display Lock screen Face Recognition.
2 Unlock the screen according to the specified method.
3 Select Improve face recognition.
4 Register your face by following on-screen instructions.
5 When the face registration is done, tap OK.
Deleting facial data
You can delete the registered facial data and register it again if the Face
Recognition does not work properly.
1 Tap Settings Display Lock screen Face Recognition.
2 Unlock the screen according to the specified method.
3 Select Delete face to delete the facial data.
Unlocking the screen with your face when the screen
is turned off
With the screen turned off, raise your device and look at the front of the
screen. The device can detect your face and the screen is unlocked.
To deactivate this feature, follow the instruction below.
1 Tap Settings Display Lock screen Face Recognition.
2 Unlock the screen according to the specified method.
3 Drag Allow when screen is off to deactivate the feature.
• Face Recognition feature is available only when the screen is locked.

Custom-designed Features
Unlocking the screen with Face Recognition and then
screen swiping
With the screen turned off, you can unlock the screen by performing Face
Recognition and then swiping the screen.
1 Tap Settings Display Lock screen Face Recognition.
2 Unlock the screen according to the specified method.
3 Drag Swipe to unlock after face recognized to activate the
feature.
Enhancing the Face Recognition
You can prevent your device from being unlocked by photos, images, or
videos.
1 Tap Settings Display Lock screen Face Recognition.
2 Unlock the screen according to the specified method.
3 Drag Advanced face recognition to activate the feature.
• Face Recognition speed may decrease when you activate this feature.

Custom-designed Features
Voice Recognition
Voice Recognition overview
You can unlock the screen by using your voice.
• This feature may be more vulnerable to security than the other screen
locks, such as Knock Code, Pattern, PIN, and Password.
• When a similar voice or your recorded voice is used, the screen may be
unlocked.
• When the voice recognition is selected for screen lock, enter the Knock
Code, Pattern, PIN or Password that has been used for voice registration
instead of voice recognition after your device is turned on. Accordingly,
be careful not to forget the specified value.
• If the device cannot detect your voice or you forgot the value specified
for registration, visit the nearest LG Customer Service Centre with your
device and ID card.
• The recognised voice data is securely stored in your device.
Precautions for Voice Recognition
Voice Recognition accuracy may decrease in the following cases. To
increase its accuracy, check the following before using the device.
• When you speak different from the registered voice command.
• When you speak in a noisy place.
• When the microphone hole is covered with your hand or any foreign
substances.
• When the registered voice command is too short (3 to 5 syllables are
recommended).
Custom-designed Features
Registering a voice command
Before using the Voice Recognition feature, you must register your voice
commands on your device.
1 Tap Settings Display Lock screen Voice Recognition.
• To use this feature, the screen lock must be set with a Knock Code,
Pattern, PIN, or Password.
• When the screen lock is not set, register the data by following the on-
screen instructions. See
Setting a screen lock
for details.
2 Tap START.
3 Follow the on-screen instructions to register a voice command.
• Say a voice command 4 times with a clear and loud voice.
• Register the voice command in a quiet place.
• Register a voice command within 2 - 3 words. (e.g. ‘Hi, LG’ or ‘LG
Mobile’)
4 When the voice command has been registered, tap OK.
Changing a voice command
You can change the previously registered voice command.
1 Tap Settings Display Lock screen Voice Recognition.
2 Unlock the screen according to the specified method.
3 Tap Change voice.
4 Follow the on-screen instructions to register the voice command
again.
5 When the voice command has been changed, tap OK.
Custom-designed Features
Deleting a voice command
You can delete a registered voice command.
1 Tap Settings Display Lock screen Voice Recognition.
2 Unlock the screen according to the specified method.
3 Tap Delete voice.
• In this case, you cannot use the unlock function for Voice
Recognition lock.
• To register the voice command again after you have deleted it, see
Registering a voice command
.
Selecting the voice recognition method
You can select how to use the voice recognition.
1 Tap Settings Display Lock screen Voice Recognition.
2 Unlock the screen according to the specified method.
3 Tap Voice recognition used to.
• Unlock: Unlock the device via voice command.
• Turn on screen: Turn on the screen via voice command.
Displaying the slide lock screen after Voice
Recognition
Even with the screen off, you can recognise your voice and then release
the lock screen by swiping.
1 Tap Settings Display Lock screen Voice Recognition.
2 Unlock the screen according to the specified method.
3 Drag Swipe to unlock after voice recognized to activate the
feature.
Custom-designed Features
Multi-tasking feature
Multi window
You can use two apps at the same time by separating the screen into the
multiple windows.
1 Tap from the Home touch buttons.
• Recently-used apps appear.
2 Tap at the top of the desired app to use the Multi window feature.
• The selected app appears at the top half of the screen.
Alternatively,
1 Touch and hold while using an app.
• Recently-used apps appear on the split screen.
2 Tap at the top of the desired app to use the Multi window feature.
• The selected app appears at the top half of the screen.
Custom-designed Features
• To deactivate the Multi window feature, touch and hold on the
Home touch button.
• To adjust the size of the split screen, drag at the center of the
screen.
• The Multi window feature is not supported by some LG apps and the
apps downloaded from the Play Store.
Overview screen
The Overview screen provides a preview of your recently used apps.
To view the list of recently used apps, tap on the Home, then tap the
displayed app.
• Touch and hold an app and drag it to the top of the screen to start the
app with the Multi window feature. You can also tap at the top of
each app.
Always-on display
You can view the date, time or signature when the main screen is turned
off.
Swipe the top of the Always-on display screen to activate features
including Camera, Capture+, Wi-Fi, sound settings, Bluetooth
®
, Flash,
Music and more.
1 Tap Settings Display Always-on display.
2 Tap Content and select an item you want to display.
• When Signature is selected, write the desired sentence.
• When Image is selected, tap on the desired image.
• To set the time period not to activate Always-on display feature, tap
Daily timeout.
• To enhance brightness for the Always-on display feature, tap
Brighter Display.

Custom-designed Features
• The battery may drain faster when you use Always-on display. Turn this
feature off to save battery power.
Quick Help
You can view help information about the main features of the device,
frequently asked questions or the user guide. Search for help information
using keywords. You can solve your problems quickly by consulting
one-on-one with a specialist.
1 Tap Quick Help.
2 Search for help information by entering keywords in the search field.
• This feature is periodically updated utilising user feedback.
• Available menu items may vary depending on the area or service
provider.
• You can view the user manual online from the Quick Help app to view
detailed information about the device’s features.

Basic Functions
02
Basic Functions
Product components and
accessories
The following items are included with your device.
• Device
• Stereo headset
• USB cable
• Charger
• Quick Start Guide
• Ejection pin
• The items described above may be optional.
• The items supplied with the device and any available accessories may
vary depending on the area and service provider.
• Always use genuine LG Electronics accessories. Using accessories made
by other manufacturers may affect your device's call performance or
cause malfunctions. This may not be covered by LG's repair service.
• Some of the device parts are made of tempered glass. If you drop your
device on a hard surface or subject it to severe impact, the tempered
glass may be damaged. If this happens, stop using your device
immediately and contact an LG Customer Service Centre.
• If any of these basic items are missing, contact the dealer from which
you purchased your device.
• To purchase additional items, contact an LG Customer Service Centre.
• Some items in the product box are subject to change without notice.
• The appearance and specifications of your device are subject to change
without notice.
• Device specifications may vary depending on the area or service provider.

Basic Functions
• Press and hold the volume down (-) key and Power/Lock key at the
same time for a second to take a screenshot.
• Proximity/Ambient light sensor
- Proximity sensor: During a call, the proximity sensor turns off the
screen and disables touch functionality when the device is in close
proximity to the human body. It turns the screen back on and enables
touch functionality when the device is outside a specific range.
- Ambient light sensor: The ambient light sensor analyses the ambient
light intensity when the auto-brightness control mode is turned on.
• Laser detection auto-focus
- Detect the distance from the camera to your subject for automatic
focusing.
- Quickly focus on closer or farther objects when you use the rear
camera to take photos.
• Volume keys
- Adjust the volume for ringtones, calls or notifications.
- While using the Camera, gently press a Volume key to take a photo.
To take continuous photos, press and hold the Volume key.
- Press the Volume Down (-) key twice to launch the Camera app
when the screen is locked or turned off. Press the Volume Up (+) key
twice to launch Capture+.
• Power/Lock key (Fingerprint sensor)
- Briefly press the key when you want to turn the screen on or off.
- Press and hold the key when you want to select a power control
option.
- Turn on the fingerprint recognition feature to simplify the process
of unlocking the screen. See
Fingerprint recognition overview
for
details.

Basic Functions
• Your device has an internal rechargeable battery. For your safety, do not
remove the embedded battery.
• Some functions may be restricted for access, depending on the device
specifications.
• The rear of the device includes a built-in NFC antenna. Be cautious when
handling the device to avoid damaging or covering the NFC antenna.
• Do not put heavy objects on the device or sit on it. Failure to do so may
damage the touch screen.
• Screen-protective film or accessories may interfere with the proximity
sensor.
• If your device is wet or is being used in a humid place, the touch screen
or buttons may not function properly.
Hold the device correctly as shown below. If you cover the microphone
hole with a hand, finger, or protective case while using the device, you may
sound unclear during a call.

Basic Functions
Turning the power on or off
Turning the power on
When the power is turned off, press and hold the Power/Lock key.
• When the device is turned on for the first time, initial configuration
takes place. The first booting time for the smart phone may be longer
than usual.
Turning the power off
Press and hold the Power/Lock key, then select Power off.
Restarting the device
When the device is not working properly or does not respond, restart it by
following the instructions below.
1 Press and hold the Power/Lock key and the Volume Down (-) key at
the same time until the power is turned off.
2 When the device is restarted, release the key.
Power control options
Press and hold the Power/Lock key, then select an option.
• Power off: Turn the device off.
• Power off and restart: Restart the device.
• Turn on Airplane mode: Block telecommunication-related functions,
including making phone calls, messaging and browsing the Internet.
Other functions remain available.
Basic Functions
Removing the memory card
Unmount the memory card before removing it for safety.
1 Tap Settings General Storage .
2 Insert the ejection pin into the hole in the card tray and then pull out
the card tray from the device.
3 Remove the memory card from the card tray.
4 Insert the card tray back into the slot.
• Do not remove the memory card while the device is transferring or
accessing information. This may cause data to be lost or corrupted, or
may damage the memory card or the device. LG is not responsible for
losses that result from the abuse or improper use of memory cards,
including the loss of data.
Battery
Charging the battery
Before using the device, fully charge the battery.
Charge the device with the USB Type-C cable.
Basic Functions
• Do not use the external terminal, charging cable or gender for the
device in presence of moisture. This may cause fire, electric shock,
injury, or device malfunction. If there is moisture, stop using the device
immediately and remove the moisture completely.
• Make sure to use the USB cable provided with your device.
• Make sure to use an LG-approved charger and charging cable. Charging
the battery with a third-party charger may cause the battery to explode
or may damage the device.
• Your device has an internal rechargeable battery. For your safety, do not
remove the embedded battery.
• Using the device when it is charging may cause electric shock. To use the
device, stop charging it.
• Remove the charger from the power socket after the device is fully
charged. This prevents unnecessary power consumption.
• A charging adapter that supports fast charging is included with the
product.
• The fast charging feature may not work if a fast charging adapter other
than the genuine adapter provided with the product is used.
• Another way to charge the battery is by connecting a USB cable
between the device and a desktop or laptop computer. This may take a
longer time than plugging the adapter to a wall outlet.
• Do not charge the battery by using a USB hub that is unable to maintain
the rated voltage. Charging may fail or unintentionally stop.
Precautions when using the device
• Make sure to use the USB cable provided; do not use third party USB
cables or chargers with your device. The LG limited warranty does not
cover the use of third party accessories.
• Failure to follow the instructions in this guide and improper use may
damage the device.
Basic Functions
Using the battery efficiently
Battery lifespan may decrease if you keep many apps and functions
running simultaneously and continuously.
Cancel background operations to increase battery life.
To minimise battery consumption, follow these tips:
• Turn off the Bluetooth or Wi-Fi network function when not using
them.
• Set the screen timeout to as short a time as possible.
• Minimise the screen brightness.
• Set a screen lock when the device is not used.
• Check the battery level while using any downloaded apps.
Touch screen
You can familiarise yourself with how to control your device by using
touch screen gestures.
Tapping
Lightly tap with your fingertip to select or run an app or option.

Basic Functions
Touching and holding
Touch and hold for several seconds to display a menu with available
options.
Double-tapping
Tap twice quickly to zoom in or out on a web page or map.
Dragging
Touch and hold an item, such as an app or widget, then move your finger
to another location in a controlled motion. You can use this gesture to
move an item.
Basic Functions
Swiping
Touch the screen with your finger and move it quickly without pausing.
You can use this gesture to scroll through a list, a web page, photos,
screens, and more.
Pinching and spreading
Pinch two fingers to zoom out such as on a photo or map. To zoom in,
spread your fingers apart.
• Do not expose the touch screen to excessive physical shock. You might
damage the touch sensor.
Basic Functions
• A touch screen failure may occur if you use the device near a magnetic,
metallic or conductive material.
• If you use the device under bright lights, such as direct sunlight, the
screen may not be visible, depending on your position. Use the device
in a shady location or a location with an ambient light that is not too
bright and bright enough to read books.
• Do not press the screen with excessive force.
• Gently tap with your fingertip on the option you want.
• Touch control may not work properly if you tap while wearing a glove or
by using the tip of your fingernail.
• Touch control may not work properly if the screen is moist or wet.
• The touch screen may not function properly if a screen-protective film
or accessory purchased from a third party store is attached to the
device.
• Displaying a static image for extended periods of time may result in
after-images or screen burn-in. Turn off the screen or avoid displaying
the same image for a long time when you do not use the device.
Home screen
Home screen overview
The Home screen is the starting point for accessing various functions
and apps on your device. Tap on any screen to directly go to the Home
screen.
You can manage all apps and widgets on the Home screen. Swipe the
screen left or right to view all installed apps at a glance.

Basic Functions
Home screen layout
You can view all apps and organise widgets and folders on the Home
screen.
• The Home screen may differ depending on the manufacturer policy, user
settings, software version or service provider.
• Status bar: View status icons, the time and the battery level.
• Weather widget: View the information of weather and time for a
specific area.
• Google search widget: Perform a Google search by inputting spoken
or written keywords.
• Page icon: Display the total number of Home screen canvases. You
can tap the desired page icon to go to the page you selected. The icon
reflecting the current canvas will be highlighted.
• Quick access area: Fix main apps at the bottom of the screen so that
they can be accessed from any Home screen canvas.

Basic Functions
• Home touch buttons
- : Return to the previous screen. Close the keypad or pop-up
windows.
- : Tap to go to the Home screen. To launch Google search, touch
and hold.
- : Tap to view a list of recently used apps or run an app from the
list. To delete all the recently used apps, tap CLEAR ALL. To use two
apps at the same time with the Multi window feature, touch and
hold the button while using an app.
Editing the Home touch buttons
You can rearrange the Home touch buttons or add frequently used
functions to the Home touch buttons area.
Tap Settings Display Home touch buttons Button
combination and customise the settings.
• Several functions, including QSlide, Notification and Capture+, are
provided. A maximum of one additional item can be added.
Basic Functions
Notifications panel
You can open the notifications panel by dragging the status bar
downward on the main screen.
• To open the quick access icons list, drag the notifications panel
downwards or tap .
• To rearrange, add, or remove icons, tap EDIT.
• If you touch and hold the icon, the settings screen for the
corresponding function appears.
• You can use the notifications panel even on the lock screen. Drag the
notifications panel while the screen is locked to quickly access the
desired features.
Basic Functions
Switching the screen orientation
You can set the screen orientation to automatically switch according to
the device's physical orientation.
On the notification panel, tap Rotation from the quick access icon list.
You can also tap Settings Display and activate Auto-rotate
screen.
Editing the Home screen
On the Home screen, touch and hold on an empty space, then select the
desired action from below.
• To rearrange the Home screen canvases, touch and hold on a canvas,
then drag it to another location.
• To add a widget to the Home screen, touch and hold on a blank area of
the Home screen, then select Widgets.
• To change a theme, touch and hold on a blank area of the Home
screen, then select Theme.
You can also tap Settings Display Theme, then select a
theme to apply to the device.

Basic Functions
• To configure the Home screen settings, touch and hold on a blank area
of the Home screen, then select Home screen settings. See
Home
screen settings
for details.
• To view or reinstall the uninstalled apps, touch and hold on a blank area
of the Home screen, then select App trash. See
App trash
for details.
• To change the default screen, touch and hold on a blank area of the
Home screen, move to desired screen, tap , then tap the screen once
more.
Basic Functions
Viewing the background theme
You can view only the background image by hiding the apps and widgets
on the Home screen.
Spread two fingers apart on the Home screen.
• To return to the original screen, which displays apps and widgets, pinch
your fingers on the Home screen or tap .
Moving apps on the Home screen
On the Home screen, touch and hold an app, then drag it to another
location.
• To keep frequently used apps at the bottom of the Home screen, touch
and hold an app, then drag it to the quick access area at the bottom.
• To remove an icon from the quick access area, drag the icon to the
Home screen.

Basic Functions
Using folders from the Home screen
Creating folders
On the Home screen, touch and hold an app, then drag it over another
app.
• A new folder is created and the apps are added to the folder.
Editing folders
On the Home screen, tap a folder and do one of the following actions.
• To edit the folder name and colour, tap the folder name.
• To add apps, touch and hold an app, then drag it over the folder and
release it.
• To remove an app from the folder, touch and hold the app and drag it to
outside the folder. If the removed app is the only one app that existed
in the folder, the folder is removed automatically.
• You can also add or remove apps after tapping in the folder.
• You cannot change the folder colour while using downloaded theme.
Home screen settings
You can customise the Home screen settings.
1 Tap Settings Display Home screen.
2 Customise the following settings:
• Select Home: Select a Home screen mode.
• Wallpaper: Change the Home screen background wallpaper.
• Wallpaper motion: Make the wallpaper move as you move the
phone. Excludes live and multi-screen wallpapers.
• Screen swipe effect: Select an effect to apply when the Home
screen canvas switches.

Basic Functions
• Icon shape: Choose if you want icons to have square or rounded
corners.
• Sort apps by: Set how apps are sorted on the Home screen.
• Grid: Change the app arrangement mode for the Home screen.
• Hide apps: Select which apps you want to hide from the Home
screen.
• Loop Home screen: Enable to allow continuous Home screen
scrolling (loop back to first screen after the last screen).
• Smart Bulletin: Use the Home screen to view information
customised to your needs.
• Search: Search by swiping down on the Home screen.
Screen lock
Screen lock overview
Your device's screen turns off and locks itself if you press the Power/Lock
key. This also happens after the device is left idle for a specified period of
time.
If you press the Power/Lock key when a screen lock is not set, the Home
screen appears immediately.
To ensure security and prevent unwanted access to your device, set a
screen lock.
• A screen lock prevents unnecessary touch input on the device screen
and reduces battery consumption. We recommend that you activate the
screen lock while not using the device.

Basic Functions
Setting a screen lock
There are several options available for configuring the screen lock settings.
1 Tap Settings Display Lock screen Select screen lock and
then select the method you prefer.
2 Customise the following settings:
• None: Deactivate the screen lock function.
• Swipe: Swipe on the screen to unlock the screen.
• Knock Code: Tap the screen in a pattern to unlock the screen.
• Pattern: Draw a pattern to unlock the screen.
• PIN: Enter a numeric password to unlock the screen.
• Password: Enter an alphanumeric password to unlock the screen.
• Fingerprints: Unlock the screen by using your fingerprint.
• Allow face recognition: Unlock the screen by allowing the device to
recognise your face.
• Allow voice recognition: Unlock the screen by allowing the device
to recognise specific voice commands.
Secure start-up settings
When you select Knock Code, Pattern, PIN or Password as a screen lock
method, you can configure your device to be locked whenever turning on
the device in order to secure your data.
• You cannot use all functions, except for emergency calls until you
unlock the device.
• If you forget your decryption password, you cannot restore encrypted
data and personal information.

Basic Functions
Precautions for the secure start-up feature
• If you forget your decryption password, you cannot restore encrypted
data and personal information.
• Be sure to keep your screen lock passwords separately.
• If you enter the screen lock passwords incorrectly more than the
specified times, the device automatically resets itself and the encrypted
data and your personal information are deleted automatically and they
cannot be restored.
• Be cautious not to enter incorrect screen lock passwords more than
the specified times.
• When you turn on the device right after the device resets, encryption
also starts. If you stop the encryption arbitrarily, the data may be
damaged. Be sure to wait until the reset is completed.
Lock screen settings
You can customise the following lock screen settings.
1 Tap Settings Display Lock screen.
2 Customise the following settings:
• Select screen lock: Select a screen lock method.
• Face Recognition: Unlock the lock screen by recognising your face.
See
Face Recognition overview
for details.
• Voice Recognition: Release the lock screen by recognising your
voice command. See
Voice Recognition overview
for details.
• Smart Lock: Select trusted items so that if one of them occurs, the
device is automatically unlocked.
• Wallpaper: Change the lock screen background wallpaper.
• Clock: Select the position of the clock on the locked screen.
• Shortcuts: Add an app shortcut and directly access the app from
the lock screen by dragging the app shortcut on the screen.
• Screen swipe effect: Set screen transition effects to apply when
the screen is unlocked.
Basic Functions
• Weather animation: Display weather animations for the current
location on the lock screen.
• Contact info for lost phone: Display emergency contact
information on the lock screen.
• Lock timer: Set the amount of idle time after which the device
automatically locks.
• Power key instantly locks: Instantly lock the screen when the
Power/Lock key is pressed.
• Available setting items may vary, depending on the selected screen lock
method.
KnockON
You can turn the screen on or off by double-tapping the screen.
• This option is available only on the Home screen provided by LG. It may
not function properly on a custom launcher or on the Home screen
installed by the user.
• When tapping the screen, use your fingertip. Do not use a fingernail.
• To use the KnockON feature, make sure that the proximity/light sensor
is not blocked by a sticker or any other foreign substance.
Turning the screen on
Double-tap the middle of the screen.
• Tapping the top or bottom of the screen may decrease the recognition
rate.
Turning the screen off
Double-tap on an empty space on the Home screen and Lock screen.
You can also double-tap an empty space on the status bar.
Basic Functions
Knock Code
You can unlock the screen by creating your own Knock Code. When the
screen is locked, you can directly access the Home screen by tapping the
screen in a specified sequence.
• You can use your Knock Code together with the KnockOn feature.
• Make sure to use your fingertip when tapping the screen.
Creating a Knock Code
1 Tap Settings Display Lock screen Select screen lock
Knock Code.
2 Tap the squares in a pattern of your choice to create a Knock Code
and tap NEXT.
3 Input the created Knock Code again for verification, then tap
CONFIRM.
Unlocking the screen with a Knock Code
Unlock the screen by inputting the Knock Code you have created.
You can also input your Knock Code on the touch screen when the screen
is turned off.
• It is also possible to enter a Knock Code when the lock screen is turned
on.

Basic Functions
Making collage wallpapers
You can make your own collage image to display it as a lock screen.
You can select multiple collage images as a wallpaper that changes each
time you turn the screen on and off.
1 Tap Settings Display Lock screen Wallpaper Collage
Wallpapers.
2 Select the image for the lock screen and then tap SET WALLPAPER.
Basic Functions
Memory card encryption
You can encrypt and protect data saved on the memory card. The
encrypted data in the memory card cannot be accessed from another
device.
1 Tap Settings General Fingerprints & security Encrypt SD
card.
2 Read the on-screen overview of memory card encryption and then tap
CONTINUE to continue.
3 Select an option and tap ENCRYPT NOW.
• New data encryption: Encrypt only data that is saved on the
memory card after encryption.
• Full encryption: Encrypt all the data currently saved on the memory
card.
• Exclude media files: Encrypt all files, except for media files such as
music, photos and videos.
• To encrypt the memory card, make sure that a screen lock is set using a
PIN or password.
• Once memory card encryption starts, some functions are not available.
• If the device is turned off while encryption is underway, the encryption
process will fail, and some data may be damaged. Therefore, be sure to
check if the battery level is sufficient before starting encryption.
• Encrypted files are accessible only from the device where the files were
encrypted.
• The encrypted memory card cannot be used on another LG device. To
use the encrypted memory card on another mobile device, format the
card.
• You can activate memory card encryption even when no memory card
is installed into the device. Any memory card that is installed after
encryption will automatically be encrypted.
Basic Functions
Taking screenshots
You can take screenshots of the current screen you are viewing.
Via a shortcut
Press and hold the Power/Lock key and the Volume Down (-) key at the
same time for at least two seconds.
• Screenshots can be viewed from the Screenshots folder in the
Gallery.
Via Capture+
On the screen where you want to take a screenshot, drag the status bar
downwards, then tap .
• When the screen is turned off or locked, you can access Capture+ by
pressing the Volume Up (+) key twice. To use this feature, tap
Settings General and turn on Shortcut keys.
• See
Writing notes on a screenshot
for details.

Basic Functions
Entering text
Using the Smart keyboard
You can use the Smart keyboard to enter and edit text.
With the Smart keyboard, you can view text as you type without
bothering to alternate between the screen and a conventional keyboard.
This allows you to easily find and correct errors when typing.
Moving the cursor
With the Smart keyboard, you can move the cursor to the exact position
you want. When typing text, touch and hold on the space bar and then
drag left or right.
• This option is available only on the QWERTY keyboard.
Basic Functions
Suggesting words
Smart keyboard automatically analyses your usage patterns to suggest
frequently used words as you type. The longer you use your device, the
more precise the suggestions are.
Enter text, then tap a suggested word or gently drag the left or right side
of the keyboard upwards.
• The selected word is automatically entered. You do not need to
manually type every letter of the word.
Changing the QWERTY keyboard layout
You can add, delete or rearrange keys on the bottom row of the keyboard.
1 Tap Settings General Language & keyboard LG Keyboard
Keyboard height and layout QWERTY keyboard layout.
You can also tap on the keyboard and tap Keyboard height and
layout QWERTY keyboard layout.
2 Tap a key on the bottom row, then drag it to another position.
Basic Functions
• This option is available on the QWERTY, QWERTZ and AZERTY
keyboards.
• This function may not be supported for some languages.
Customising the keyboard height
You can customise the keyboard height to maximise hand comfort when
typing.
1 Tap Settings General Language & keyboard LG Keyboard
Keyboard height and layout Keyboard height.
You can also tap on the keyboard and tap Keyboard height and
layout Keyboard height.
2 Adjust the keyboard height.
Selecting a landscape keyboard mode
You can select a landscape keyboard mode from several choices.
1 Tap Settings General Language & keyboard LG Keyboard
Keyboard height and layout Keyboard type in landscape.
You can also tap on the keyboard and tap Keyboard height and
layout Keyboard type in landscape.
2 Select a keyboard mode.
Basic Functions
Splitting the keyboard
You can split the keyboard in half and place each piece on either side of
the screen when the screen is in landscape mode.
To split the keyboard, turn the device horizontally and spread it apart
on both sides with holding the keyboard with two fingers. To attach the
keyboard, close it with pressing with two fingers.
One-handed operation mode
You can move the keyboard to one side of the screen so that you can use
the keyboard with one hand.
1 Tap Settings General Language & keyboard LG Keyboard
Keyboard height and layout One-handed operation.
You can also tap on the keyboard and tap Keyboard height and
layout One-handed operation.
2 Press the arrow displayed next to the keyboard to move the keyboard
in the direction you want.
Basic Functions
Adding languages to the keyboard
You can make additional languages available for keyboard input.
1 Tap Settings General Language & keyboard LG Keyboard
Select languages.
2 Select the languages you want to make available.
Copy and Paste
You can cut or copy text from an app, and then paste the text into the
same app. Or, you can run other apps and paste the text into them.
1 Touch and hold around the text you want to copy or cut.
2 Drag / to specify the area to copy or cut.
3 Select either CUT or COPY.
• Cut or copied text is automatically added to the clipboard.
4 Touch and hold the text input window, then select PASTE.
• If there is no item that has been copied or cut, the PASTE option will
not appear.
Entering text by using voice
On the keyboard, touch and hold and then select .
• To maximise the voice command recognition, speak clearly.
• To enter text with your voice, make sure that your device is connected
to a network.
• To select the language for voice recognition, tap Languages on the
voice recognition screen.
• This function may be not supported, or the supported languages may
differ depending on the service area.
Basic Functions
Clip Tray
If you copy or cut an image or text, it is automatically saved to the clip tray
and can be pasted to any space at any time.
1 On the keyboard, touch and hold and select .
You can also touch and hold the text input window, then select CLIP
TRAY.
2 Select and paste an item from the clip tray.
• A maximum of 20 items can be saved to the clip tray.
• Tap to lock saved items in order not to delete them, even when
the maximum quantity is exceeded. A maximum of ten items can be
locked. To delete locked items, unlock them first.
• Tap to delete the items saved to the clip tray.
• The clip tray may not be supported by some downloaded apps.
Content sharing
Playing content from another device
You can play photos, videos or songs saved on your device from a TV.
1 Connect the TV and your device to the same Wi-Fi network.
2 While viewing the items from the Gallery or Music app, tap Play
on other device.
3 Select the TV you want to connect to.
• For use with Chromecast, Google Play services should be up to date.
Basic Functions
Viewing content from nearby devices
You can view content from various devices, such as a computer, NAS or
mobile device, by using the Gallery or Music apps.
Connecting the devices
Connect both your device and another device that support DLNA function
to the same wireless network.
• Make sure that File sharing (DLNA) is activated on both the device and
the connected device.
Searching for nearby devices
You can view a list of DLNA devices on the same network by selecting the
Nearby devices menu in each app.
Use content from nearby devices as if you were using it on your device.
Sending or receiving files
You can share files between your device and another LG device, or a tablet
or computer.
Sending files
From the Gallery, File Manager or Music app, tap Share or , then
select a device on the file sharing list.
Receiving files
Drag the status bar downward and tap , then tap File sharing.
If your device does not support the file sharing feature, tap Settings
Networks Share & connect File sharing SmartShare Beam .
• Make sure that your device is connected to the same wireless network
as the file transfer target device.
• Make sure that File sharing is activated on both the device and the
target device.
Basic Functions
Sending files to a computer
You can quickly send large files to your computer.
1 Install LG Bridge on your computer.
2 Start LG Bridge on the computer, then sign in using your LG account.
3 Tap Settings Networks Share & connect LG AirDrive,
then sign in using your LG account.
4 Select a computer on the sharing list from the Gallery, File Manager
and Music apps.
• You can download LG Bridge from the LG Electronics website
(
www.lg.com
).
• When you transfer files from the device to the computer while
LG Bridge is not running, they are stored for 7 days in the temporary
storage.
Temporarily stored files are automatically saved on the computer when
you launch LG Bridge within 7 days.
Viewing content from your cloud
You can directly view the content saved on your cloud account, without
downloading it to your device.
1 From the Gallery, Music or File Manager app, select Cloud.
2 Select a cloud account and sign in.
3 Save or play content in your cloud.

Basic Functions
Do not disturb
You can limit or mute notifications to avoid disturbances for a specific
period of time.
1 Tap Settings Sound & notification Do not disturb.
2 Tap Mode and select the mode you want:
• Priority only: Receive sound or vibrate notifications for the selected
apps. Even when Priority only is turned on, alarms still sound.
• Total silence: Disable both the sound and vibration.

Useful Apps
03
Useful Apps
Installing and uninstalling apps
Installing apps
Access an app store to search and download apps.
• You can use SmartWorld, Play Store or the app store provided by your
service provider.
• Some app stores may require you to create an account and sign in.
• Some apps may charge fees.
• If you use mobile data, you may be charged for data usage, depending
on your pricing plan.
• SmartWorld may not be supported depending on the area or service
provider.
Uninstalling apps
Uninstall apps that you no longer use from your device.
Uninstalling with the touch and hold gesture
On the Home screen, touch and hold the app to uninstall, then drag it over
Delete at the top of the screen.
• If apps were uninstalled within 24 hours from now, you can reinstall
them. See
App trash
for details.
Uninstalling by using the settings menu
Tap Settings General Apps, select an app, then tap Uninstall.
Uninstalling apps from the app store
To uninstall an app, access the app store from which you download the
app and uninstall it.
• Some apps cannot be uninstalled by users.
Useful Apps
Installing and uninstalling apps during the
setup
When you turn on the device for the first time, you can download
recommended apps.
You can skip to the next step without installation.
App trash
You can view the uninstalled apps on the Home screen. You can also
reinstall apps which were uninstalled within 24 hours from now.
1 Tap Management App trash.
You can also touch and hold an empty area of the Home screen, then
tap App trash.
2 Activate the desired function:
• Restore: Reinstall the selected app.
• : Remove the uninstalled apps permanently from the device.
• Uninstalled apps are automatically removed from the device 24 hours
after they were uninstalled. If you want to reinstall the uninstalled apps,
you must download them again from the app store.
• This feature is activated on the default Home screen only. If you
uninstall apps while using the EasyHome screen or other launcher, they
are immediately and permanently removed from the device.

Useful Apps
App Shortcuts
On the Home screen, touch and hold an app icon such as Call, Message,
Camera, Gallery and Settings to display a quick access menu. Use apps
more easily through App Shortcuts.
• This feature is available only on some apps.
Useful Apps
Camera
Starting the camera
You can take a photo or record a video to cherish all of your memorable
moments.
Tap .
• Before taking a photo or recording a video, wipe the camera lens with a
soft cloth.
• Be careful not to stain the camera lens with your fingers or other
foreign substance.
• Images included in this user guide may be different from the actual
device.
• Photos and videos can be viewed or edited from the Gallery. See
Gallery
overview
for details.
Useful Apps
Changing the camera mode
You can select a camera mode that suits your environment to take a
photo or record a video easily and conveniently.
Tap , then select the desired mode.
Auto mode
You can take photos or record videos by selecting a variety of camera
modes and options.
1 Tap , then tap MODE Auto (
A
).
2 To take a photo, tap . To record a video, tap .
Useful Apps
Taking a photo
1 Select a camera mode and tap the subject to focus the camera on.
2 Tap to take a photo.
• You can also press the Volume Down (-) or Volume Up (+) key to
take a photo.
• When the screen is turned off or locked, start the camera by pressing
the Volume Down (-) key twice. Tap Settings General
Shortcut keys.
Recording a video
1 Select a camera mode and tap the subject to focus the camera on.
2 Tap .
• To take a photo while recording a video, tap .
• To pause the video recording, tap . To resume the video recording,
tap .
3 Tap to end the video recording.
Customising the camera options
You can customise a variety of camera options to suit your preferences.
Tap on the screen.
• Available options vary depending on the selected camera (front or rear
camera) and the selected camera mode.

Useful Apps
Photo size Select values for aspect ratio and size for taking photos.
Video resolution Select values for resolution and size for recording
videos.
Camera roll Display your recent photos and videos along the side of
the screen.
HDR
Obtain photos in vivid colours and get compensated
effects even when they are taken against the light.
These functions are provided by the high dynamic range
(HDR) technology equipped in the camera.
Timer Set the timer to automatically take photos after a
specified period of time.
Cheese shutter Take photos with voice commands.
Tracking focus
When the subject is touched, the camera tracks and
maintains focus on a moving object.
(Available when the standard camera is in use.)
Steady recording Minimise motion blur while recording a video.
Covered lens Lets you know when the rear wide-angle lens is
covered.
Tag locations Save the image with GPS location data.
Grid
Display guide grids so that you can take photos or
record videos based on the horizontal and vertical
reference lines.
Add signature Display a personalised signature on the photos.
Storage
Select if you want to store the pictures and videos in
the Internal storage or SD card.
(Available when the memory card is inserted.)
Simple view Hide all menus from the camera screen.
Help Provide Help for each camera menu.
Useful Apps
Additional options on the front camera
Selfie shot Take a selfie by selecting its option between Gesture
shot and Auto shot.
Gesture view Allows you to view the photo immediately after taking
a photo.
Save as flipped Save as flipped images after taking selfies.
• When using the front camera, you can adjust the filter, lighting effect,
and skin tone.
Various camera modes
Food
You can take a photo or record a video with adjusting the colour slide bar
and white balance.
1 Tap , then tap MODE .
2 To take a photo, tap .
• Drag the colour slide bar on the screen to adjust the white balance
and select the best colour.
• If the slide bar is not displayed, tap to adjust the white balance.
Useful Apps
Snap movie
You can record short videos clips and assemble them into a 60-second
short film.
1 Tap , then tap MODE .
2 Tap .
• Tap the icon once to record a three-second video clip. Touch and
hold the icon to create a longer video clip (maximum length: one
minute).
3 Tap SAVE.
Useful Apps
Time-lapse
You can take a sequence of frames at set intervals to record changes that
take place slowly over time, such as cloud movements, celestial motions,
traffic, and more.
1 Tap , then tap MODE .
2 Tap and record a video.
3 Tap to end the video recording.
• While recording a Time-lapse, voices are not recorded.
Slo-mo
You can create an entertaining video by changing the moving speeds of
subjects in your video. This feature allows you to record a video at a faster
rate of speed and then play it at the standard speed so that the video
appears to be slowed down.
1 Tap , then tap MODE .
2 Tap and record a video.
3 Tap to end the video recording.
Useful Apps
Popout
You can take a photo or record a video by using both the standard and
wide-angle of the dual camera at the back of the device to record the
scenes as if they were put in the frame. The scenes shown in the small,
front screen are shot by using the standard camera, and the scenes
shown in the large, background screen are shot by using the wide-angle
camera. Change the front screen to a different shape or apply various
effects to take a sensuous photo or video.
1 Tap , then tap MODE .
2 Tap and select the desired layout.
3 Select the desired effect:
• Fisheye: Apply a convex lens effect to the area captured by the
wide-angle camera.
• B&W: Apply grayscale to the area captured by the wide-angle
camera.
• Vignette: Darken the edges of the area captured by the wide-angle
camera.
• Lens blur: Blur the area captured by the wide-angle camera.
4 Tap to take a photo. To record a video, tap .
Useful Apps
360 Panorama
You can create a 360° panorama photo by moving the camera in one
direction.
1 Tap , then tap MODE .
2 Tap and then slowly move the camera in one direction.
• Move the device by following the direction of the arrow in the
guideline.
• A 360 panorama photo is automatically saved on the Gallery.
• Touch and drag the screen up or down from the Gallery to view a
360 panorama photo from various angles.
3 Tap to stop capturing the 360 panoramic.

Useful Apps
Panorama
You can create a panoramic photo by moving the camera in one direction
to photograph and stitch continuous shots of a wide view.
1 Tap , then tap MODE .
2 Tap and then slowly move the camera in one direction.
• Move the device by following the direction of the arrow in the
guideline.
3 Tap to stop capturing the panoramic.
Burst shot
You can take continuous shots of photos to create moving pictures.
In the Auto mode, touch and hold .
• Continuous shots are taken at a fast speed while is held down.
• When the storage is set as Internal storage, you can take up to
100 photos. When the storage is set as SD card, you can take up to
30 photos in a row.
• This feature is available only in specific modes.
Simple view
In the Auto mode, tap Simple view to hide menus on the camera
screen. Tap to display them.
Useful Apps
Manual camera mode
You can create photos featuring professional touch by using a variety
of advanced features. Adjust the white balance, focus, brightness, ISO,
shutter speed and other options.
1 Tap , then tap MODE Manual ( ).
2 Customise the following camera settings.
3 Tap to take the photo.
Customising the camera options
You can customise a variety of camera options to suit your preferences.
Tap on the screen.
Photo size Select values for aspect ratio and size for taking photos.
Timer Set the timer to automatically take photos after a
specified period of time.
Graphy photos Adjust the white balance, ISO and shutter speed for the
recommended photo. See
Graphy
for details.
Cheese shutter Take photos with voice commands.
Tracking focus
When the subject is touched, the camera tracks and
maintains focus on a moving object.
(Available when the standard camera is in use.)
Useful Apps
Tag locations Save the image with GPS location data.
Guide Display guide grids so that you can take photos based on
the horizontal and vertical reference lines.
Save as RAW
The image is stored as a RAW file format so that you can
modify it. The DNG and JPEG files are created while taking
a photo, then saved as a non compressed high resolution
image.
Covered lens Lets you know when the rear wide-angle lens is covered.
Noise reduction Reduce noise at high ISO settings.
Add signature Display a personalized signature on the photos.
Storage
Select if you want to store the pictures and videos in the
Internal storage or SD card.
(Available when the memory card is inserted.)
Help Provide Help for each camera menu.
Manual video mode
You can record a video by using various features such as controls for white
balance, focus, brightness, ISO, shutter speed and more.
1 Tap , then tap MODE Manual ( ).
2 Customise the camera settings.
3 Tap to record a video.
Useful Apps
Customising the camera options
You can customise a variety of camera options to suit your preferences.
Tap on the screen.
Video resolution Select values for aspect ratio and size for videos.
Frame rate Select the frames per second value.
Bit rate Select the image quality for videos.
Hi-Fi Record a video with Hi-Fi quality sound.
Timer Set the timer to automatically take photos after a
specified period of time.
Steady recording Minimise motion blur while recording a video.
Covered lens Lets you know when the rear wide-angle lens is covered.
Tracking focus
When the subject is touched, the camera tracks and
maintains focus on a moving object.
(Available when the standard camera is in use.)
Tag locations Save the image with GPS location data.
Grid Display guide grids so that you can record videos based
on the horizontal and vertical reference lines.
Save as LG-Cine
Log Save a video in LOG file format for image correction.
Storage Select if you want to store the pictures and videos in the
Internal storage or SD card.
Help Provide Help for each camera menu.
• You can edit a video in LOG file format by using LUT (Lookup Table) for
professionals. To download the LUT, visit the LG SmartWorld website
(
www.lgworld.com
) and select the LUT banner.
• You can edit only videos by using LUT on your computer.
Useful Apps
Other useful features in the Camera app
Auto-Exposure/Auto-Focus lock
You can fix the current exposure level and focus position by touching and
holding the screen in the Auto mode. To turn off the feature, tap a blank
area on the screen.
• This feature is available only in specific modes.
Focus peaking
You can adjust the focus on the subject with the focus peaking feature.
Access Focus peaking by tapping the Manual focus (MF) button. When
Focus peaking is enabled, the subject you focus on appears green. Move
the the toggle wheel up and down to focus on the desired area, then take
the photo.
• This feature is only available in Manual camera mode and Manual video
mode.
• Disable this feature by tapping the Focus peaking button once more.
• This feature is not available using the wide-angle camera.
Useful Apps
Switching between cameras
You can switch between the front and rear cameras to suit your
environment.
On the camera screen, tap or drag the screen in any direction to switch
between the front and rear cameras.
• Use the front camera to take selfies. See
Selfie shot
for details.
Zoom in or out
You can use zoom in or out on the camera screen while taking a photo or
recording a video.
• On the camera screen, pinch or spread two fingers to zoom in or out,
then use the displayed +/- slide bar.
• You can also drag the button up or down. This feature is available
only in Auto mode and Manual camera mode.
• The zoom feature is not available when using the front camera in selfie
mode.
Useful Apps
Selfie shot
You can use the front camera to view your face on the screen and take
selfies.
Gesture shot
You can take selfies by using gestures.
Show your palm to the front camera and then clench your fist.
You can also clench your fist and then open it towards the front camera.
• In three seconds, a photo is taken.
• To use this feature, switch to the front camera mode, then tap
Selfie shot Gesture shot.
• Make sure that your palm and fist are within the reference line so that
the camera can detect them.
• This feature may not be available while using some of the camera
features.

Useful Apps
Auto shot
You can use the face detection feature to take selfies easily and
conveniently. You can set the device so that, when you look at the screen,
the front camera detects your face and takes a selfie automatically.
• The white coloured guide frame appears when the front camera
detects your face. If the subject within the guide frame stops moving,
the guide frame colour turns blue, then the camera takes a photo.
• Tap Selfie shot Auto shot to enable the Auto shot feature.
Interval shot
You can take selfies at an interval.
While using the front camera, you can show your palm to the camera,
then clench your fist twice quickly.
• Four photos are taken at regular intervals after a timer delay of three
seconds.
Useful Apps
Gesture view
After taking a selfie with the front camera, you can preview the selfie
immediately by placing the screen close to your face.
• Tap Gesture view to enable the Gesture view feature.
• Only one preview is available each time a photo is taken.
• If you rotate the device while in preview screen, the screen switches to
camera mode.
Save as flipped
Before taking a photo with the front camera, tap Save as flipped.
The image is flipped horizontally.
• When using the front camera, you can change how selfies are taken in
the camera options. See
Customising the camera options
for details.

Useful Apps
Signature
You can create a personalised photo by using your signature.
1 Tap , then tap Add signature.
2 Enter the signature as desired and tap ADD.
Useful Apps
quick share
You can share a photo or video to the app you want immediately after
taking it.
1 Tap , then take a photo or record a video.
2 Tap the app icon that appears on the screen to share it using that app.
You can also swipe the icon towards the opposite direction to see
what other apps you can use to share your photos and videos.
• The app displayed by the quick share icon may vary, depending on the
type and frequency of access to the apps installed on the device.
• This feature is available only in specific modes.

Useful Apps
Gallery
Gallery overview
You can view and manage photos and videos saved on your device.
1 Tap .
• Saved photos and videos are displayed by folder.
2 Tap a folder and select a file.
• View the selected file in full-screen mode.
• While viewing a photo, swipe left or right to view the previous or
next photo.
• While viewing a video, swipe left or right to rewind or fast-forward
the video.
• Some file formats may not be supported, depending on the installed
software.
• Some files may not be opened due to encoding.
• Files that exceed the size limit may cause an error.
Viewing photos
• To display the menu items, gently tap the screen. To hide the menu
items, tap the screen again.
Useful Apps
Floating button
While viewing the Gallery app in landscape mode, you can use the floating
button. See
Floating button
for details.
Writing a memo on the photo
1 While viewing a photo, tap .
2 Write a memo on the photo and tap SAVE.
• The memo is applied to the photo.
• Some photos may not support the photo memo feature.
Related content
You can edit the related photos in the Gallery.
See
Related content
for details.
Editing photos
1 While viewing a photo, tap .
2 Use a variety of effects and tools to edit the photo.
3 Tap SAVE to save changes.
• The changes are overwritten to the original file.
• To save the edited photo as another file, tap Save copy.
Useful Apps
Playing a video
• To adjust the sound volume, drag the right side of the video screen up
or down.
• To adjust the screen brightness, drag the left side of the screen up or
down.
Editing videos
1 While viewing a video, tap .
2 Use a variety of effects and edit tools to edit the video.
3 Tap SAVE to save changes.
Useful Apps
Creating a movie
You can create a new movie by putting images and videos together.
See
Creating a movie
for details.
Making a GIF
You can easily make a GIF file using recorded video.
See
Making a GIF
for details.
Deleting files
You can delete files by using one of the following options:
• Touch and hold a file from the file list, then tap Delete.
• Tap from the file list and delete the desired files.
• Deleted files are automatically moved to Trash and they can be
restored to the Gallery within 7 days.
• Tap to completely delete the files. In this case, the files cannot be
restored.
Sharing files
You can share files by using one of the following options:
• While viewing a photo, tap to share the file by using the method
you want.
• While viewing a video, Share to share the file by using the method
you want.
• Tap from the file list to select files and share them using the method
you want.
Useful Apps
Creating groups
1 On the contacts group list, tap .
2 Enter a new group name.
3 Tap Add members, select contacts, then tap ADD.
4 Tap SAVE to save the new group.
QuickMemo+
QuickMemo+ overview
You can make creative notes by using a variety of options on this
advanced notepad feature, such as image management and screenshots,
which are not supported by the conventional notepad.
Creating a note
1 Tap QuickMemo+.
2 Tap to create a note.
• : Save a note.
• : Undo the previous edit.
• : Redo the recently deleted edits.
• : Enter a note by using the keypad.
• : Write notes by hand.
• : Erase handwritten notes.
• : Zoom in or out, rotate or erase the parts of a handwritten note.
• : Access additional options.
3 Tap to save the note.
Useful Apps 123
Writing notes on a photo
1 Tap QuickMemo+.
2 Tap to take a photo, then tap OK.
• The photo is automatically attached into the notepad.
3 Tap or to write notes on the photo.
• Write notes by hand on the photo.
• Enter text below the photo.
4 Tap to save the note.
Writing notes on a screenshot
1 While viewing the screen you want to capture, drag the status bar
downwards and then tap .
• The screenshot appears as the notepad background theme. Memo
tools appear at the top of the screen.
2 Crop the image (if necessary) and take notes as desired.
• Write notes by hand on the photo.
3 Tap and save the notes to the location you want.
• Saved notes can be viewed in either QuickMemo+ or Gallery.
• To save notes in the same location all the time, select the Use as
default app checkbox and select an app.
• You can capture the entire screen by using the scroll capture feature.
• While using an app such as Message and Chrome, drag the notifications
panel downwards and then tap Capture+ Extended to capture the
entire screen you are currently viewing as a single file.
• This feature is available only on some apps that support the scroll
capture feature.
Useful Apps
Clock
Alarm
You can set an alarm to trigger it at a specified time.
1 Tap Clock Alarm.
2 Tap to add a new alarm.
3 Configure the alarm settings and tap SAVE.
• If you select a previously set alarm, you can edit the alarm.
• To delete an alarm, tap at the top of the screen. You can also touch
and hold the alarm.
World clock
You can view the current time in cities around the world.
1 Tap Clock World clock.
2 Tap and add a city.
Timer
You can set the timer to trigger an alarm after a specified period of time.
1 Tap Clock Timer.
2 Set the time and tap Start.
• To suspend the timer, tap Pause. To resume the timer, tap Resume.
3 Tap Stop to stop the timer alarm.

Useful Apps
Stopwatch
You can use the stopwatch to record a lap time.
1 Tap Clock Stopwatch.
2 Tap Start to initiate the stopwatch.
• To record a lap time, tap Lap.
3 Tap Pause to suspend the stopwatch.
• To resume the stopwatch, tap Resume.
• To clear all the records and restart the stopwatch, tap Reset.
Calendar
Calendar overview
You can use the calendar to manage events and tasks.
Adding events
1 Tap Essentials Calendar.
2 Select a date and then tap .
3 Enter event details and tap SAVE.
Syncing events
Tap Calendars to sync, and select a calendar to sync.
• When your events are saved from the device to your Google account,
they are automatically synced with the Google calendar, too. Then, you
can sync other devices with the Google calendar in order to make those
devices have the same events that your device has and to manage your
events on those devices.
Useful Apps
Event pocket
You can use the event pocket to create events.
Tap to open the event pocket and then drag content to a date in the
calendar.
• : Manage images, text, memos and temporarily saved events. You
can also share text, images and memos from another app and save
them to the pocket. If you tap POCKET when creating an event, the
event is temporarily saved to the pocket.
• : Add a Facebook account to view information on Facebook events.
Some devices may not support the Facebook event information
function.
• : View tourism information about the surrounding area, such as
restaurants and convenient facilities, to plan an event.
• : Manage tasks that have no deadline, such as events.
Tasks
You can register tasks to your device to easily manage schedules.
1 Tap Essentials Tasks.
2 Tap to add a task.
3 Enter task details and then tap SAVE.
Useful Apps
Music
You can play and manage songs or music albums.
1 Tap Essentials Music.
2 Select a category.
3 Select a music file.
• Some file formats may not be supported, depending on the installed
software.
• Files that exceed the size limit may cause an error.
• Music files may be protected by international copyright owners or
copyright laws. You may have to obtain legal permission before copying
a music file. To download or copy a music file, first check the copyright
law for the relevant country.
• This model supports Hi-Fi audio playback. Hi-Fi audio files display the
Hi-Fi icon.
Useful Apps
Calculator
You can use two types of calculators: the simple calculator and the
scientific calculator.
1 Tap Essentials Calculator.
2 Use the keypad to make a calculation.
• To use scientific calculator, drag the green coloured slide bar located
in the right side of the screen to the left.
• To restart a calculation, touch and hold the DEL button.
LG Health
LG Health overview
You can manage your health and maintain good exercise habits by
keeping track of the exercises you do.
Getting started with LG Health
You can configure LG Health when launching the app for the first time or
after resetting it.
1 Tap Essentials LG Health.
2 Follow the on-screen instructions to complete configuration.

Useful Apps
Using LG Health
You can view main information on LG Health and manage the amount of
physical exercise and health information.
1 Tap Essentials LG Health.
2 The following options are available.
• : View your exercise log on the day you want to check.
• : Begin tracking an exercise. The route and amount of your
physical exercise are recorded for each exercise type.
• : Set your daily exercise goals including calories and steps, or set
various LG Health settings.
• Health-related information provided by LG Health is designed for user
convenience and cannot be used for purposes of disease prevention,
treatment, diagnosis or other medical issues.
• LG Health may vary or may not be available, depending on the country
and service provider. LG Health functions that are available and apps
that can be added to LG Health may vary, depending on the country. This
is due to differing laws and regulations.
Useful Apps
SmartWorld
You can download a variety of games, audio content, apps and fonts
provided by LG Electronics. Customise your device to suit your preferences
by using Home themes and fonts.
• If you use mobile data, you may be charged for data usage depending
on your pricing plan.
• This feature may not be supported depending on the area or service
provider.
1 Tap Services SmartWorld.
2 Tap LG Account, then sign in.
3 Select and download the desired content items.
Downloading SmartWorld app
If the SmartWorld app is not installed, follow these steps to download it.
1 Tap Settings General About phone Update centre App
Updates.
2 From the list, select SmartWorld and tap Download.

Useful Apps
Google apps
You can use Google apps by setting a Google account. The Google account
registration window appears automatically when you use a Google app for
the first time. If you do not have a Google account, create one from your
device. For details on how to use an app, see the Help in the app.
• Some apps may not work depending on the area or service provider.
Docs
Create documents or edit documents created online or from another
device. Share and edit documents together with others.
Drive
Upload, save, open, share and organise files from your device. Files
accessible from apps can be accessed from anywhere, including online and
offline environments.
Duo
Make a video call with your family, friends and anyone else who uses the
app.
Google
Use the Google to search for web pages, images, news and more by
entering or speaking keywords.
Maps
Find your location or the location of a place on the map. View geographical
information.
Photos
View or share photos or albums saved on your device.

Useful Apps
Play Movies & TV
Use your Google account to rent or purchase movies. Purchase content
and play it anywhere.
Play Music
Purchase music files from the Play Store. Play music files saved on your
device.
Sheets
Create spreadsheets or edit spreadsheets created online or from another
device. Share and edit spreadsheets together with others.
Slides
Create presentation material or edit presentation material created online
or from another device. Share and edit presentation material together
with others.
YouTube
Search and play videos. Upload videos on YouTube to share them with
people around the world.
Google Assistant
Your device has the Google Assistant built in. Ask it questions. Tell it to do
things. It’s your own personal Google. Touch and hold the and then you
will see "Hi, how can I help?", after which you can say your voice command.
• The Google Assistant is not available in all languages.

Settings
04
Settings
Settings
You can customise the device settings in accordance with your
preferences.
Tap Settings.
• Tap and enter a keyword in the search box to access a setting item.
• Tap to change the view mode. This user guide assumes that you are
using the Tab view.
Networks
Wi-Fi
You can connect to nearby devices over a Wi-Fi network.
Connecting to a Wi-Fi network
1 On the settings screen, tap Networks Wi-Fi.
2 Tap to activate it.
• Available Wi-Fi networks appear automatically.
3 Select a network.
• You may need to enter the network's Wi-Fi password.
• The device skips this process for previously accessed Wi-Fi
networks. If you do not want to automatically connect to a certain
Wi-Fi network, tap the network and then tap Forget network.
Settings
Wi-Fi network settings
On the settings screen, tap Networks Wi-Fi.
• Switch to mobile data: If the mobile data connection function is
activated but the device cannot connect to the Internet via Wi-Fi
connection, the device automatically connects to the Internet via the
mobile data connection.
• This feature depends on the service provider.
• : Customise Wi-Fi network settings.
Wi-Fi Direct
You can connect your device to other devices that support Wi-Fi Direct to
share data directly with them. You do not need an access point. You can
connect with more than two devices by using Wi-Fi Direct.
1 On the settings screen, tap Networks Wi-Fi Advanced Wi-Fi
Wi-Fi Direct.
• Nearby devices that support Wi-Fi Direct automatically appear.
2 Select a device.
• Connection occurs when the device accepts the connection request.
• The battery may drain faster when using Wi-Fi Direct.
Settings
Bluetooth
You can connect your device to nearby devices that support Bluetooth to
exchange data with them. Connect your device to a Bluetooth headset
and a keyboard. This makes it easier to control the device.
Pairing with another device
1 On the settings screen, tap Networks Bluetooth.
2 Tap to activate it.
• Available devices appear automatically.
• To refresh the device list, tap SEARCH.
• Only devices set as visible are displayed on the list.
3 Select a device from the list.
4 Follow the on-screen instructions to perform authentication.
• This step is skipped for previously accessed devices.
Sending data via Bluetooth
1 Select a file.
• You can send multimedia files or contacts.
2 Tap Bluetooth.
3 Select a target device for the file.
• The file is sent as soon as the target device accepts it.
• File sharing processes may differ, depending on the file.
Settings
Share & connect
NFC
You can use the device as a transportation card or credit card. You can also
share data with the other device.
1 On the settings screen, tap Networks Share & connect NFC.
2 Tap to activate it.
• Touch your device with other device that supports NFC to allow
sharing data.
• NFC antenna may be located differently depending on the device type.
See
Parts overview
for details about the NFC antenna area.
Android Beam
You can share files by touching the back of the device to other device. You
can also share files including music, videos or contacts and open a web
page or launch an app from the other device.
1 On the settings screen, tap Networks Share & connect Android
Beam.
2 Touch the back of the device with another device.
• NFC antenna may be located differently depending on the device type.
Settings
File sharing
You can send and receive files between your device and other LG devices
or tablets.
1 On the settings screen, tap Networks Share & connect File
sharing.
2 Customise the following settings:
• V30: Change the device name.
• Save to: Set the destination folder to save files sent from other
devices in.
• File sharing: Permit receipt of files sent from other devices.
• SmartShare Beam: Share files with other devices via SmartShare
Beam.
• Help: You can view help on sharing files.
Media server
You can share media content on your device with nearby devices that
support DLNA.
1 On the settings screen, tap Networks Share & connect Media
server.
2 Customise the following settings:
• Content sharing: Share content on your device with nearby devices.
• Content to share: Select the type of media content to share with
other devices.
• Allowed devices: View a list of devices permitted to access content
on your device.
• Not-allowed devices: View a list of devices not permitted to access
content on your device.
Settings
Sharing panel
You can share contents from Gallery, Music and File Manager with nearby
devices. Also you can share content with specific people in apps that work
with Google Direct Share.
1 On the settings screen, tap Networks Share & connect Sharing
panel.
2 Tap to deactivate each option.
Screen sharing
You can play the screen and sound of the device on a different device,
such as a TV, that supports the Miracast function.
1 On the settings screen, tap Networks Share & connect Screen
sharing.
2 Tap to activate it.
3 Select a device from the list of nearby devices.
• If the desired device does not appear, tap SEARCH to refresh the
list.
• After connecting to the device, the device displays the screen of
your device.
• Screen sharing turns off automatically if there is no sharing-compatible
device in the vicinity.
Settings
MirrorLink
You can connect the device to a car via USB to use the MirrorLink app
installed on the device from the infotainment system or the head unit of
the car.
• This app is available only in cars that support MirrorLink.
• Download the MirrorLink app from an app store or market.
1 On the settings screen, tap Networks Share & connect
MirrorLink.
2 Connect the device to an automobile via USB and turn on Use
MirrorLink.
• If your device is connected to a device that supports automatic
MirrorLink connection, Use MirrorLink is automatically activated on
your device.
LG AirDrive
You can use your LG account to manage files saved on the device from a
computer. You do not need a USB connection.
1 On the settings screen, tap Networks Share & connect LG
AirDrive.
2 Use a single LG account to sign in to LG Bridge on the computer and
LG AirDrive on the device.
• LG Bridge software can be downloaded from
www.lg.com
.
3 Manage files on the device from the computer.

Settings
Printing
You can connect your device to a Bluetooth printer and print photos or
documents saved on the device.
1 On the settings screen, tap Networks Share & connect Printing.
• If the desired printer is not in the list, install the printer driver from the
app store.
2 Tap to activate it.
3 Select a printer from the printer list screen.
• To add a printer, tap Add printer.
• To search for a printer name, tap Search.
• Tap Settings from the printer list screen.
4 Select a file and tap Print.
• The document prints.
• If you do not have a Google account, tap ADD ACCOUNT to create an
account.
Settings
Wi-Fi Sharing
When you activate this feature with the device connected via Wi-Fi, the
shared devices are connected to the network by using the device’s Wi-Fi.
If this feature is deactivated, the mobile data features is used for network
connection.
Bluetooth tethering
A Bluetooth-connected device can connect to the Internet by using your
device's mobile data.
1 On the settings screen, tap Networks Tethering Bluetooth
tethering and then tap to activate it.
2 Turn on Bluetooth on both devices and pair them.
• This option uses mobile data and may incur data usage fees, depending
on your pricing plan. Consult with your service provider for more
information.
• More information is available at this web site:
http://www.android.com/tether#Bluetooth_tethering
Help
You can view help on using tethering and hotspots.
On the settings screen, tap Networks Tethering Help.
More
Airplane mode
You can turn off the call and mobile data functions. When this mode is
on, functions that do not involve data, such as games and music playback,
remain available.
1 On the settings screen, tap Networks More Airplane mode.
2 Tap TURN ON in the confirmation screen.
Settings
Mobile networks
You can customise the mobile networks settings.
1 On the settings screen, tap Networks More Mobile networks.
2 Customise the following settings:
• Mobile data: Turn mobile data on or off.
• Data roaming: Browse the web, use emails, multimedia messages
and other data services overseas.
• Network mode: Select a network type.
• Access Point Names: View or change the access point for using
mobile data services. To change the access point, select a choice
from the access point list.
• Network operators: Search for network operators and connect
automatically to a network.
VPN
You can connect to a safe virtual network, such as an intranet. You can
also manage connected virtual private networks.
Adding VPN
1 On the settings screen, tap Networks More VPN.
2 Tap Add VPN.
• This feature is available only when the screen lock is activated. If the
screen lock is deactivated, a notification screen appears. Tap CHANGE
from the notification screen to activate the screen lock. See
Setting a
screen lock
for details.
3 Enter VPN details and tap SAVE.
Configuring VPN settings
1 Tap a VPN from the VPNS list.
2 Enter the VPN user account details and tap CONNECT.
• To save the account details, select the Save account information
checkbox.

Settings
Sound & notification
You can customise sound, vibrate and notification settings.
On the settings screen, tap Sound & notification and customise the
following settings:
• Sound profile: Change the sound mode to Sound, Vibrate only, or
Silent.
• Volume: Adjust the sound volume for various items.
• Ringtone: Select a ringtone for incoming calls. Add or delete ringtones.
• Ringtone ID: Create a ringtone for an incoming call from a particular
contact.
• Vibration strength: Adjust the vibration intensity.
• Sound with vibration: Set the device to vibrate and play a ringtone
simultaneously.
• Vibration type: You can select the type of vibration when receiving
calls.
• Do not disturb: Set the time, range and app type to receive
notification messages. Receive notification messages only on particular
days of the week.
• Lock screen: Display or hide a notification message on the lock screen.
You can also hide private information.
• Apps: Select the apps that can show their notification messages on
the screen, and set the priorities of those apps in regard to notification
messages.
• Hi-Fi Quad DAC: Connect to the earpiece, speaker or other external
audio devices and use any of them as a Hi-Fi Quad DAC.
• More Notification sound: Select a notification ringtone. Set music
saved on the device as a notification ringtone.
• More Vibrate on tap: Set the device to vibrate when you tap certain
items on the screen.
• More Sound effects: Select a sound effect to play when you tap the
dialpad or keyboard, select an option, or lock or unlock the screen.
Settings
Display
You can customise detailed settings for each screen type.
On the settings screen, tap Display and customise the following settings:
• Home screen: Customise settings for the Home screen. See
Home
screen settings
for details.
• Lock screen: Customise lock screen settings. See
Lock screen settings
for details.
• Theme: Select a screen theme for your device.
• Home touch buttons: Rearrange Home touch buttons or change their
background colours.
• Font type: Change the font face.
• Font size: Change the font size.
• Bold text: Bold the text on the screen.
• App scaling: Adjust the screen size of apps.
Aspect ratio
• This device uses 18:9 aspect ratio.
- Some downloaded apps may not support 18:9 aspect ratio.
In this case, select the most optimal screen ratio for the app or
consult the app provider for more information.
- You can select the aspect ratio for individual apps by tapping
Settings Display App scaling. Select the desired aspect
ratio from Compatibility (16:9), Standard (16.7:9), and
Full screen (18:9).
• Display size: Set the items on the screen to a size easy for you to see.
Some items may change position.
• Screen resolution: Adjust the screen resolution.
• When you change the screen resolution, currently running apps are
closed.

Settings
• Comfort view: Set the device to reduce amount of blue light on screen
to reduce eye strain.
• Screen colour: Adjust the screen color for the desired screen mode.
Choose from Normal, Best for movies, Best for photos, Best for
web, and Custom.
• To adjust the colour temperature and RGB values, tap Custom and tap
. To return to default settings, tap .
• When you play a video in full screen, you can enjoy a brighter and more
vivid screen by selecting the Enhanced video colour feature. This
feature may not be available on some video players.
• Brightness: Use the slide bar to change the device's screen brightness.
To automatically adjust screen brightness according to ambient light
intensity, tap the Auto switch.
• Auto: Set the device so that the screen brightness is automatically
adjusted in accordance with the ambient light intensity.
• Always-on display: Always display information, such as the date, time
and notifications, even when the screen is turned off. For details, see
Always-on display
.
• Auto-rotate screen: Automatically rotate the screen according to the
device's orientation.
• Screen timeout: Automatically turn off the screen when the device is
left idle for a specified period of time.
• More KnockON: Turn the screen on or off by tapping the screen
twice.
• More Screen saver: Display a screen saver when the device is
connected to the holder or charger. Select a screen saver type to
display.
• More Mini view: Make the screen size smaller to conveniently use
the device with one hand. Drag the Home touch button at the bottom
of the screen to the left or right.
• More View VR content with: You can view VR content with less blur
or less flicker.

Settings
General
Language & keyboard
You can customise language and keyboard settings for your device.
1 On the settings screen, tap General Language & keyboard.
2 Customise the following settings:
• Language: Select a language to apply for the device.
• Current keyboard: View the keyboard currently in use. Select a
keyboard to use when entering text.
• LG Keyboard: Customise the LG keyboard settings.
• Google voice typing: Configure the options for text dictation by
Google.
• Text-to-speech output: Configure the settings for text-to-speech
output.
• Pointer speed: Adjust the pointer speed of a mouse or trackpad.
• Reverse buttons: Reverse the right mouse button to perform
primary direct-manipulation actions.
Location
You can customise how your location information is used by particular
apps.
1 On the settings screen, tap General Location.
2 Customise the following settings:
• Mode: Select a method to provide your location information.
• My place: Set the device to analyse frequently visited places so that
it can automatically recognise a residential address.
• RECENT LOCATION REQUEST: View apps that recently requested
location information.

Settings
• Low power location estimation: Estimate the device location by
using low power consumption.
• Google Location History: Configure the Google location history
settings.
• Google Location Sharing: Share your real-time location with
others.
Accounts & sync
You can add or manage accounts, including a Google account. You can also
sync particular apps or user information automatically.
1 On the settings screen, tap General Accounts & sync.
2 Customise the following settings:
• Auto-sync data: Sync all the registered accounts automatically.
• ACCOUNTS: View a list of registered accounts. To view or change
details of an account, tap the account.
• ADD ACCOUNT: Add accounts.
Cloud
You can register a cloud account and view content saved on cloud from
the device.
1 On the settings screen, tap General Cloud.
2 Customise the settings.
Users
You can add users to share your device with them.
1 On the settings screen, tap General Users.
2 Customise the settings.

Appendix
Open Source Software Notice
Information
To obtain the source code under GPL, LGPL, MPL, and other open
source licenses, that is contained in this product, please visit
http://opensource.lge.com
.
In addition to the source code, all referred license terms, warranty
disclaimers and copyright notices are available for download.
LG Electronics will also provide open source code to you on CD-ROM
for a charge covering the cost of performing such distribution (such
as the cost of media, shipping, and handling) upon email request to
opensource@lge.com
.
This offer is valid for a period of three years after our last shipment of this
product. This offer is valid to anyone in receipt of this information.
Regulatory information
(Regulation ID number, E-labeling, etc.)
For regulatory details, go to Settings General Regulatory & Safety.
Trademarks
•Copyright ©2018 LG Electronics, Inc. All rights reserved. LG and the
LG logo are registered trademarks of LG Group and its related entities.
•Google™, Google Maps™, Gmail™, YouTube™, Duo™ and Google
Play™ store are trademarks of Google, Inc.
•Bluetooth
®
is a registered trademark of Bluetooth SIG, Inc. worldwide.
•Wi-Fi
®
and the Wi-Fi logo are registered trademarks of the Wi-Fi
Alliance.
•All other trademarks and copyrights are the property of their
respective owners.
Appendix
Laser safety statement
Caution!
This product employs a Laser system. To ensure proper use of this
product, please read this owner’s manual carefully and retain for future
reference. Should the unit require maintenance, contact an authorised
service centre.
Use of controls, adjustments, or the performance of procedures other
than those specified herein may result in hazardous radiation exposure.
To prevent direct exposure to laser beam, do not try to open the enclosure
or make direct contact with the laser.
Appendix
More information
Tempered glass parts
Tempered glass parts of this device are not permanent and they may wear
out over time.
• If you drop your device on a hard surface or subject it to severe impact,
the tempered glass may be damaged.
If this happens, stop using your device immediately and contact an LG
Customer Service Centre.
• You can purchase protective cases to protect your device from damage
on the market.
Note that these protective cases are not covered under the warranty
service provided by LG Electronics and safety is not guaranteed.
Aspect ratio
This device uses 18:9 aspect ratio.
• Some downloaded apps may not support 18:9 aspect ratio.
In this case, select the most optimal screen ratio for the app or consult
the app provider for more information.

Appendix
Disposal of your old appliance
1. This crossed-out wheeled bin symbol indicates that waste electrical
and electronic products (WEEE) should be disposed of separately
from the municipal waste stream.
2. Old electrical products can contain hazardous substances so correct
disposal of your old appliance will help prevent potential negative
consequences for the environment and human health. Your old
appliance may contain reusable parts that could be used to repair
other products, and other valuable materials that can be recycled to
conserve limited resources.
3. You can take your appliance either to the shop where you purchased
the product, or contact your local government waste office for
details of your nearest authorised WEEE collection point. For
the most up to date information for your country please see
www.lg.com/global/recycling
Disposal of waste batteries/accumulators
1. This symbol may be combined with chemical symbols for mercury
(Hg), cadmium (Cd) or lead (Pb) if the battery contains more than
0.0005% of mercury, 0.002% of cadmium or 0.004% of lead.
2. All batteries/accumulators should be disposed separately from the
municipal waste stream via designated collection facilities appointed
by the government or the local authorities.
3. The correct disposal of your old batteries/accumulators will help
to prevent potential negative consequences for the environment,
animal and human health.
4. For more detailed information about disposal of your old batteries/
accumulators, please contact your city office, waste disposal service
or the shop where you purchased the product.

ENGLISH
Consumer Information on SAR
(Specific Absorption Rate)
This Model Phone Meets the Government’s Requirements for Exposure to Radio Waves.
Your wireless phone is a radio transmitter and receiver. It is designed and manufactured not
to exceed the emission limits for exposure to radiofrequency (RF) energy set by the Federal
Communications Commission (FCC) of the U.S. Government. These limits are part of comprehensive
guidelines and establish permitted levels of RF energy for the general population. The guidelines are
based on standards that were developed by independent scientic organizations through periodic
and thorough evaluation of scientic studies. The standards include a substantial safety margin
designed to assure the safety of all persons, regardless of age and health.
The exposure standard for wireless mobile phones employs a unit of measurement known as the
Specic Absorption Rate, or SAR. The SAR limit set by the FCC is 1.6 W/kg. * Tests for SAR are
conducted using standard operating positions specied by the FCC with the phone transmitting at
its highest certied power level in all tested frequency bands.
Although SAR is determined at the highest certied power level, the actual SAR level of the phone
while operating can be well below the maximum value. Because the phone is designed to operate at
multiple power levels to use only the power required to reach the network, in general, the closer you
are to a wireless base station antenna, the lower the power output.
Before a phone model is available for sale to the public, it must be tested and certied to the FCC
that it does not exceed the limit established by the government adopted requirement for safe
exposure. The tests are performed in positions and locations (e.g., at the ear and worn on the body)
as required by the FCC for each model.
While there may be differences between SAR levels of various phones and at various positions, they
all meet the government requirement for safe exposure.
The FCC has granted an Equipment Authorization for this model phone with all reported SAR
levels evaluated as in compliance with the FCC RF emission guidelines. SAR information on
this model phone is on le with the FCC and can be found under the Display Grant section of
http://www.fcc.gov/oet/ea/fccid after searching on FCC ID: ZNFG710V.
* In the United States and Canada, the SAR limit for mobile phones used by the public is
1.6 watts/kg (W/kg) averaged over one gram of tissue. The standard incorporates a substantial
margin of safety to give additional protection for the public and to account for any variations in
measurements.
* Product meets current FCC & ISEDC Radio Frequency Exposure Guidelines.
FCC ID: ZNFG710V
IC: 2703C-G710V
Body-worn operation
This device was tested for typical bodyworn operations with the back of the phone kept
0.39inches (1cm) between the user’s body and the back of the phone. To comply with FCC/ISEDC
RF exposure requirements, a minimum separation distance of 0.39inches (1cm) must be maintained
between the user’s body and the back of the phone.
Any beltclips, holsters, and similar accessories containing metallic components may not be used.
Body-worn accessories that cannot maintain 0.39inches (1cm) separation distance between the
user's body and the back of the phone, and have not been tested for typical body-worn operations
may not comply with FCC/ISEDC RF exposure limits and should be avoided.
Printed in Korea.
FCC Part 15 Class B Compliance
This device complies with part 15 of FCC rules and ISEDC license-exempt RSS standard(s).
Operation is subject to the following two conditions:
(1) this device may not cause interference, and
(2) this device must accept any interference, including interference that may cause undesired
operation of the device.
Part15.19 statement
This device complies with part 15 of the FCC Rules. Operation is subject to the following two
conditions:
(1) This device may not cause harmful interference, and
(2) this device must accept any interference received, including interference that may cause
undesired operation.
Part15.21 statement
Changes or modications not expressly approved by the manufacturer (or party responsible) for
compliance could void the user’s authority to operate the equipment.
Part15.105 statement
This equipment has been tested and found to comply with the limits for a Class B digital device,
pursuant to part 15 of the FCC Rules. These limits are designed to provide reasonable protection
against harmful interference in a residential installation. This equipment generates, uses and can
radiate radio frequency energy and, if not installed and used in accordance with the instructions,
may cause harmful interference to radio communications. However, there is no guarantee that
interference will not occur in a particular installation.
If this equipment does cause harmful interference to radio or television reception, which can be
determined by turning the equipment off and on, the user is encouraged to try to correct the
interference by one or more of the following measures:
•
Reorient or relocate the receiving antenna.
•
Increase the separation between the equipment and receiver.
•
Connect the equipment into an outlet on a circuit different from that to which the receiver is
connected.
•
Consult the dealer or an experienced radio/TV technician for help.
Trademarks
•
Bluetooth
®
is a registered trademark of BluetoothSIG, Inc. worldwide.
•
Wi-Fi
®
and the Wi-Fi logo are registered trademarks of the Wi-Fi Alliance.
•
Copyright ©2018 LG Electronics, Inc. All rights reserved. LG and the LG logo are registered
trademarks of LG Group and its related entities.
Open Source Software Notice Information
To obtain the source code under GPL, LGPL, MPL, and other open source licenses, that is contained in
this product, please visit http://opensource.lge.com.
In addition to the source code, all referred license terms, warranty disclaimers and copyright notices
are available for download.
LG Electronics will also provide open source code to you on CD-ROM for a charge covering the
cost of performing such distribution (such as the cost of media, shipping, and handling) upon email
request to opensource@lge.com. This offer is valid for three (3) years from the date on which you
purchased the product.
Regulatory information
(Regulatory ID number, FCC/IC ID, E-labeling, etc.)
For regulatory details, go to Settings > General > Regulatory & safety.
FRANÇAIS
Renseignements sur le DAS (débit d'absorption
spécifique) à l'intention des consommateurs
Ce modèle de téléphone est conforme aux exigences gouvernementales en matière d'exposition
aux ondes radioélectriques.
Votre téléphone sans l est un émetteur-récepteur radio. Il a été conçu et fabriqué de façon à ne pas dépasser
les limites d'émission d'énergie de radiofréquences (RF) xées par la Federal Communications Commission
(FCC) du gouvernement des États-Unis. Ces limites font partie d'un ensemble complet de directives
établissant les niveaux autorisés d'énergie de radiofréquences pour la population en général. Ces directives
sont fondées sur des normes élaborées par des organisations scientiques indépendantes au moyen d'une
évaluation périodique et rigoureuse des études scientiques menées dans ce domaine. Ces normes appliquent
une marge de sécurité importante de façon à assurer la sécurité de toutes les personnes, quels que soient
leur âge et leur état de santé.
La norme d'exposition pour les téléphones sans l utilise une unité de mesure appelée débit d'absorption
spécique ou DAS. La limite DAS xée par la FCC est de 1,6W/kg. * Les essais portant sur le DAS sont
effectués en utilisant les positions de fonctionnement standard spéciées par la FCC; le téléphone transmet au
niveau de puissance homologuée le plus élevé, sur toutes les bandes de fréquences testées.
Bien que le DAS soit déterminé selon le niveau de puissance homologuée le plus élevé, le niveau réel du DAS
du téléphone lorsqu'il fonctionne est parfois très inférieur à cette valeur maximale. En général, étant donné
que le téléphone est conçu pour fonctionner à des niveaux de puissance multiples de façon à n'utiliser que la
puissance nécessaire pour accéder au réseau, plus vous êtes près de l'antenne de la station de base, plus la
puissance de sortie est faible.
Avant qu'un téléphone ne soit proposé sur le marché, il doit être testé et homologué par la FCC an de
garantir qu'il n'excède pas la limite xée dans le cadre des exigences du gouvernement en matière d'exposition
sécuritaire. Des essais sont effectués en tenant compte des positions et des emplacements (utilisation près de
l'oreille, appareil porté sur soi, par exemple), conformément aux exigences de la FCC pour chaque modèle.
Bien que les niveaux de DAS puissent varier selon le téléphone et la position, dans chaque cas les exigences
gouvernementales en matière d'exposition sécuritaire sont respectées.
La FCC a accordé une «autorisation de matériel» (Equipment Authorization) pourcetéléphone, reconnaissant
ainsi que tous les niveaux de DAS signalés sont conformes aux directives de la FCC en matière d'émission de
radiofréquences(RF). Lesdonnées deDAS pour ce modèle ont été déposées auprès de laFCC et peuvent
êtreconsultées dans la section intitulée Display Grant du site Web de la FCC (http://www.fcc.gov/oet/fccid),
sous le codeFCC: ZNFG710V.
D'autres renseignements sur le DAS sont offerts sur le site Web de la Cellular Telecommunications Industry
Association (CTIA), à l'adresse http://www.ctia.org/.
* Au Canada et aux États-Unis, le DAS limite pour les téléphones mobiles utilisés par le grand public est de
1,6W/kg en moyenne par gramme de tissu. Cette limite prévoit une marge de sécurité importante pour
assurer au public une protection supplémentaire et tenir compte des variations dans les mesures.
* Ce produit est conforme aux directives de laFCC et ISEDC concernant l'exposition aux radiofréquences.
Code FCC: ZNFG710V
IC: 2703C-G710V
Utilisation comme appareil portatif
Ce téléphone a été testé en vue d'une utilisation type comme appareil portatif, avec une distance de 1cm
(0,39po) entre l'arrière de l'appareil et le corps de l'utilisateur. Pour satisfaire aux exigences de laFCC/
ISEDC en matière d'exposition aux radiofréquences, l'utilisateur doit maintenir une distance d'au moins 1cm
(0,39po) entre son corps et l'arrière du téléphone.
Tout les pinces de ceinture, les étuis et autres accessoires semblables d'autres marques et contenant des
composantes métalliques ne peuvent pas être utilisés. Les accessoires portatifs qui empêchent le maintien
d'une distance de 1cm (0,39po) entre le corps de l'utilisateur et l'arrière du téléphone et qui n'ont pas
été testés en vue d'une utilisation type comme accessoires portatifs peuvent ne pas satisfaire aux limites
d'exposition aux radiofréquences stipulées par laFCC/ISEDC et, par conséquent, ne doivent pas être utilisés.
Conformité à la partie 15 Classe B du règlement de
la FCC
Cet appareil est conforme à la partie 15 du règlement de la FCC et aux normes CNR d'ISEDC applicables aux
dispositifs exempts de licence.
Son fonctionnement est sujet aux deux conditions suivantes :
(1) Cet appareil et ses accessoires ne peuvent pas causer l'interférence nuisible, et
(2) Cet appareil et ses accessoires doivent accepter n'importe quelle interférence reçue, y compris
l'interférence qui peut causer l'opération non désirée.
Déclaration de la section 15.19
Cet appareil est conforme aux limites imposées par la partie 15 de la réglementation de la FCC et aux normes CNR
d’ISEDC applicables aux dispositifs exempts de licence. Son fonctionnement est sujet aux deux conditions suivantes :
(1) Cet appareil ne doit pas provoquer d’interférences nuisibles.
(2) Cet appareil doit accepter toutes les interférences reçues, y compris celles pouvant causer un fonctionnement
indésirable.
Déclaration de la section 15.21
Les modi cations non approuvées expressément par le fabricant peuvent annuler l’autorisation accordée à
l’utilisateur de faire fonctionner l’équipement.
Déclaration de la section 15.105
Cet équipement a été testé et déclaré conforme aux limites pour un appareil numérique de classe B,
conformément à la section 15 du règlement de la FCC. Ces limites sont conçues pour assurer une protection
raisonnable contre les interférences nocives dans une installation résidentielle. Cet équipement génère, utilise
et peut émettre des radiofréquences et, s’il n’est pas installé et utilisé conformément aux instructions, peut
provoquer des interférences nocives avec les communications radio. Cependant, il ne peut être exclu que des
interférences se produisent dans une installation donnée. Si cet équipement cause des interférences nocives ou
gêne à la réception de la télévision, ce qui peut se déterminer en mettant l’appareil sous et hors tension, vous
pouvez essayer d’éliminer les interférences en appliquant une ou plusieurs des mesures suivantes :
Réorientez ou déplacez l’antenne de réception.
Augmentez la distance séparant l’appareil de l’émetteur.
Connectez l’appareil à une prise située sur un circuit différent de celui auquel l’émetteur est connecté.
Contactez le vendeur ou un technicien expérimenté en radio/télévision pour obtenir de l’aide.
Marques de commerce
•
Bluetooth
®
est une marque déposée de Bluetooth SIG, Inc. dans le monde entier.
•
Wi-Fi
®
et le logo Wi-Fi sont des marques déposées de Wi-Fi Alliance.
•
Copyright ©2018 LG Electronics, Inc. Tous droits réservés. LG et le logo LG logo sont des marques
déposées du Groupe LG et de ses liales.
Informations sur les logiciels libres
Pour obtenir le code source conformément aux dispositions de la licence publique générale, de la licence
publique générale limitée, de la licence publique Mozilla et de toute autre licence régissant les logiciels à code
source libre contenus dans cet appareil, visitez le site http://opensource.lge.com.
En plus du code source, toutes les dispositions de licence, les exonérations de garantie et les avis de droits
d’auteurs peuvent aussi être téléchargés.
LG Electronics mettra également à votre disposition le code source libre sur CD-ROM pour un prix couvrant
le coût de la distribution (coût du support, de l’expédition et de la manutention) sur simple demande par
courriel à l’adresse opensource@lge.com. Cette offre est valable pendant trois (3)années à compter de la
date d’achat du produit.
Renseignements relatifs à la réglementation
(Numéro d'ID de réglementation, FCC/IC ID, étiquette
électronique, etc.)
Pour les détails concernant la réglementation, sélectionnez Paramètres > Généralités > Réglementations
et sécurité.