LG Electronics USA GD910 PCS GSM/ EDGE Watch Phone with Bluetooth User Manual
LG Electronics USA PCS GSM/ EDGE Watch Phone with Bluetooth Users Manual
Contents
- 1. Users Manual RF Warning Addendum
- 2. Users Manual
Users Manual

GD910
User Guide
- ENGLISH
Congratulations on your purchase of the advanced
and compact GD910 phone by LG, designed to
operate with the latest digital mobile communication
technology.
Some of contents in this manual may differ from your
phone depending on the software of the phone or your
service provider.
Disposal of your old appliance
1 When this crossed-out wheeled bin symbol is attached to
a product it means the product is covered by the European
Directive 2002/96/EC.
2 All electrical and electronic products should be disposed of
separately from the municipal waste stream via designated
collection facilities appointed by the government or the local
authorities.
3 The correct disposal of your old appliance will help prevent
potential negative consequences for the environment and
human health.
4 For more detailed information about disposal of your old
appliance, please contact your city office, waste disposal
service or the shop where you purchased the product.
5. Complies with EEE regulations.

Part 15.21 statement
" Change or Modifications that are not expressly approved by the manufacturer could void
the user's authority to operate the equipment. “
Part 15.105 statement
This equipment has been tested and found to comply with the limits for a class B digital
device, pursuant to Part 15 of the FCC Rules.
These limits are designed to provide reasonable protection against harmful interference in
a residential installation. This equipment generates uses and can radiate radio frequency
energy and, if not installed and used in accordance with the instructions, may cause harmful
interference to radio communications. However, there is no guarantee that interference will
not occur in a particular installation. If this equipment does cause harmful interference or
television reception, which can be determined by turning the equipment off and on, the user
is encouraged to try to correct the interference by one or more of the following measures:
- Reorient or relocate the receiving antenna.
- Increase the separation between the equipment and receiver.
- Connect the equipment into an outlet on a circuit different from that to
which the receiver is connected.
- Consult the dealer or an experienced radio/TV technician for help.
This device is not intended for sale in the USA.

Part 15 Class B Compliance
This device and its accessories comply with part15 of FCC rules.
Operation is subject to the following two conditions:
(1) This device & its accessories may not cause harmful interference.
(2) This device & its accessories must accept any interference received,
including interference that may cause undesired operation.
Body-worn Operation
This device has been tested for typical body-worn operations
with the distance of 0.79inches (2.0cm) from the user’s body.
To comply with FCC RF exposure requirements, a minimum separation distance
of 0.79inches(2.0cm) must be maintained from the user's body.
Additionally, Belt clips, holsters & other body-worn accessories may not contain
metallic components.
※ Warning Statement
This device is approved for wrist-worn only. To ensure compliance with FCC RF exposure
requirements, a separation of 1.0cm or more should be kept between the front of the watch
and the rest of the user's body while it is transmitting. The device should NOT be worn on
the inside of the wrist(palm side) or in any other configurations during transmission.
All applicable operating configurations are specified by three types; first mode is hands-free
wireless Bluetooth mode, the second mode is Speaker mode, the third mode is data transmission mode.
We'll provide these similar information and instructions separately to the user on
a single page pamphlet, within the product packing, to ensure that users are aware of the
operating requirements even if they choose not to read the manual instructions.
11
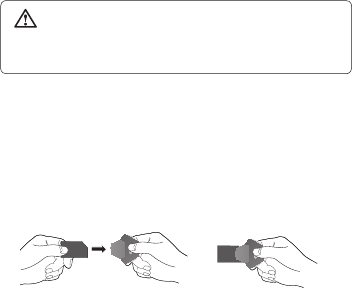
Installing the SIM card
1. Remove the SIM cap cover.
- Use the SIM cap tool to open the SIM cap cover.
WARNING: Do not remove the SIM cap cover when the
phone is switched on, as this may damage the phone. SIM
cap cover is related with power of phone.
2. Install the SIM card.
Use your SIM cap tool when installing the SIM card.
Insert the SIM card into the SIM cap tool. Make sure the
gold contact area on the SIM card is facing downwards.
Slide the SIM card into the SIM card holder.
A B
12 LG GD910 | User Guide
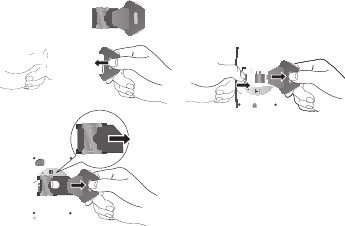
* Remove the SIM card.
- To remove the SIM card, gently push the edge of the SIM
card and lift it away from the SIM card holder.
A B
C
3. Replace the SIM cap cover.
Place the cover over the SIM
card holder and close the SIM
cap cover. Ensure that the SIM
cap cover align with the SIM card
holder.
Installing the SIM card

13
Getting to know your phone
Parts of the phone
Send key
- Dials a phone number and answers
incoming calls.
- Open the call history menu in your home
screen. Calls to the recent number by
pressing for two seconds.
- Opens the option list when using the menu.
Back/Clear key
- Go to previous menu when using the
menu.
- Open the voice commend menu in your
home screen by pressing for two seconds.
- Use for quick access to Voice command
feature in your home screen by pressing for
two seconds.
End/Power key
- End menu and go to main clock.
- Turns the phone on/off by pressing for two
seconds.
Main screen
Speaker
Camera lens
Send key
Back/Clear key
End/Power key
Microphone
14 LG GD910 | User Guide
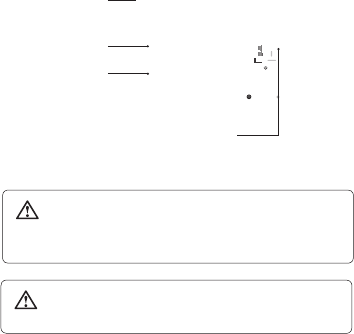
Getting to know your phone
Charging Pin
SIM cap release
SIM cap cover
SIM card socket
WARNING: Do not remove the SIM cap cover when the
phone is switched on, as this may damage the phone.
SIM cap cover is related with power of the phone.
WARNING: Do not use your fingernail when removing
the SIM cap cover.
15
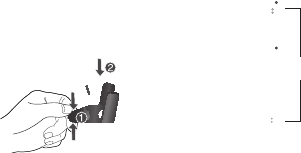
Charging your phone
1. Plug the power adapter into a working electrical outlet.
2. Connect the power adapter to the charging clip.
A B C
3. Connect the charging clip to back of the phone. Make
sure that charging pins are properly aligned with the
pins on the clip.
C
A B
D
Charging Pin
16 LG GD910 | User Guide
4. When connecting the charger, the battery will begin to
charge. If the “Battery full” message appears on the
screen, charging battery is completed.
WARNING: SIM cap cover is related with power of the
phone. Before charging, please check the SIM cap cover is
placed on your phone.
NOTE: The battery must be fully charged initially to improve
battery lifetime. Disregard the first “Battery full” message
and keep the phone on charge overnight.
Your home screen
Your GD910 has a touchscreen. From here
you can access menu options, make a
quick call and change your profile - as well
as many other things.
Touchscreen tips
• There’s no need to press too hard, the touch screen is
sensitive enough to pick up on a light touch.
• Use the tip of your finger to touch the option you require.
Be careful not to touch any other keys around it.
• Don’t cover the phone with a case or cover as the touch
screen will not work with any material covering it.
Getting to know your phone
17
• When the screen light is off, to prevent indiscreet action
of the touch keys, the touch protection function is
automatically enabled. (In this case, the touch screen
will not work even if they are pressed.) To disable touch
protection, press and hold the any keys on the right side
of the phone.
• Whenever your GD910 is not in use, it will return to the
lock screen.
Get in touch with your GD910
The controls on the GD910 touch screen change
dynamically, depending on the task you are carrying out.
Home screen: The User Interface is based on five types
of Home screens. To swap between the home screens just
wipe quickly over display from left to right or from right to
left.
18 LG GD910 | User Guide
Opening Applications: To open any application, simply
touch its icon.
Scrolling: Drag from side to side to scroll. On some
screens, you can also scroll up or down.
Getting to know your phone
19
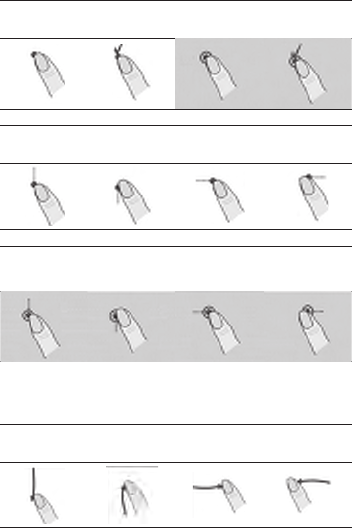
Touch interaction legend
Tuch Down Touch
Down & up
Touch
Down & Hold
Touch
Hold & Up
Tuch Down & Drag
(Up o Down)
Tuch Down & Drag
(Down o Up )
Tuch Down & Drag
(Left o Right)
Tuch Down & Drag
(Right o Lift)
Tuch Down &
Hold & Drag
(Up o Down)
Tuch Down &
Hold & Drag
(Down o Up )
Tuch Down &
Hold & Drag
(Left o Right)
Tuch Down &
Hold & Drag
(Right o Lift)
Flicking interaction legend
Flicking
(Up o Down)
Flicking
(Down o Up )
Flicking
(Left o Right)
Flicking
(Right o Lift)

20 LG GD910 | User Guide
When the screen light is off, press the
clear key for twice on the right side of
the phone to disable touch protection
and enter the home screen.
The home screen will provide a four
way arrow pad. To open your top
menu, slide your finger across from
right to left for twice.
Menu map
Contacts
1. New contact
2. Search
3. Speed dials
4. Groups
5. Settings
6. Information
Utilities
1. Tools
2. Organiser
3. Alarms
4. Voice recorder
5. Multimedia
Messaging
1. New message
2. Inbox
3. Draft
4. Outbox
5. Sent items
6. Templates
7. Emoticons
8. Settings
Settings
1. Bluetooth
2. Profiles
3. Screen
4. Phone
5. Call
6. Connectivity
21
Calls
Making a call or a video call
1 To open your top menu, slide your finger across from
right to left.
2 Select Video call or Voice call.
3 Type in the number on the keypad screen. To delete a
digit, press the Clear key .
4 Press the Send key to make the call.
5 To end the call, press the End key .
NOTE: Your phone has a Voice command feature that also
lets you make calls by phone number or name.
TIP! To enter + in order to make international calls,
touch and hold down 0 key.
TIP!
You can Save number, Send message, Search contacts
or set Alphabet on/off by touching and tapping .
Calling your contacts
It’s easy to call anyone whose number you have stored in
your Contacts.
1 From the home screen, slide your finger across from
right to left for twice. Touch Contacts and select
Search.
2 Scroll through the contact list or enter the first letter(s) of
the contact you want to call.
22 LG GD910 | User Guide
Calls
3 From the list, touch the contact you want to call and
select the number to use if there is more than one for
that contact.
4 Press the Send key and choose Voice call or Video
call from the options menu.
Answering and rejecting a call
When your phone rings, press the Send key to answer.
Press the End key to reject the incoming call.
TIP! You can send a message to explain why you
do not receive an incoming call by selecting and using
Excuse message before you reject an incoming call.
Adjusting call volume
To adjust the volume during a call, press the Clear key
and scroll up and down.
In-call options
You can hold a call by pressing the number displayed in
your home screen.
Touch to search your contacts during a call.
Touch to turn the speaker phone on.
To open the options menu during a call, press the Send key
. You can choose from the following:

23
Mute - You can turn the microphone off so the person you
are talking to cannot hear you.
Dialpad - You can open a numerical keypad for typing in
numbers, e.g. when dialing call centres or other automated
telephone services.
Add call - You can make a second call. Dial the number
or search your contacts then touch to connect the call.
Both calls will be displayed on the call screen. Your initial
call will be locked and put on hold. To end one or both calls
press the End key .
NOTE: You will be charged for each call you make.
Record - You can record the clip during a call.
Go to message - You can check your messages.
DTMF off - You can turn off the DTMF during a call. DTMF
lets you use numerical commands to navigate within
automated calls. DTMF default is set to on.
End call - You can end the call.
Speed dialling
You can assign a frequently-called contact to a speed dial
number.
1 From the home screen, slide your finger across from
right to left for twice. Touch Contacts and select Speed
dials.
2 Your voicemail is already set to speed dial 1. You cannot
change this. Touch any other number to assign it to a
speed dial contact.
24 LG GD910 | User Guide
3 Your address book will open. Select the contact you
want to assign to that number by touching their phone
number once. To find a contact tap the search field
box and enter the first letter of the name of the contact
required.
To call a speed dial number, from a numerical keypad
screen, press and hold the assigned number until the
contact appears on the screen.
Viewing your call logs
From the home screen, press the send key then scroll left
and right. Choose to view:
All calls - View a complete list of all your dialled, received
and missed calls.
Dialled calls - View a list of all the numbers you have
called.
Received calls - View a list of all the numbers that have
called you.
Missed calls - View a list of any calls you have missed.
TIP! From any call log select the Send key to open the
options menu and then select Delete to delete selected items.
TIP! Touch any single call log entry to view the date, time and
duration of the call.
Calls

25
Changing the call settings
1 From the home screen, slide your finger across from
right to left for twice. Touch Settings and select Call.
2 From here you can adjust the settings for:
Call divert - Choose whether to divert your calls.
Call waiting - If call waiting is activated, the handset is
also able to warn you about an incoming call when you
are already on a call.
Call barring - Select which calls you would like to be
barred.
Fixed dial numbers - Select Fixed dial number to turn
on and compile a list of numbers which can be called
from your phone. You’ll need your PIN2 code, which is
available from your operator. Only numbers within the
fixed dial list can be called from your phone.
Excuse message - You can send a message to explain
why you do not receive an incoming call by touching
and using “Excuse message” before you reject an
incoming call.
Call costs - View the charges applied to your dialled
calls. This service is network dependent; some operators
are unable to support this.
Call durations - View the amount in kilobytes of all
received data, sent data or both.

26 LG GD910 | User Guide
Common setting
• Call reject - Slide the switch to On to highlight the Reject
list. You can touch the text box to choose from all calls,
specific contacts or groups, those from unregistered
numbers (those not in your contacts), or no caller ID.
Touch Save to change this setting.
• Send my number – Choose whether to display your
number on an outgoing call.
• Auto redial - Slide the switch left for On or right for Off.
• Answer mode - Choose whether to answer the phone
using the send key or any key.
• Minute minder - Slide the switch left to On to hear a
tone every minute during a call.
• BT answer mode - Select Handsfree to be able to
answer a call using a Bluetooth headset, or select
Handset to press a handset key to answer a call.
• Save new number - Select Yes to save a new number.
TIP! To scroll through a list of options, touch the
last item visible and slide your finger up the screen. The list
will move up to display more items.
Video call setting - Touch Video call setting and select
the settings for your video calls. Decide whether to use still
image, then select one and/or switch on the mirror to see
yourself on screen when making a video call.
Calls
27
Searching for a contact
1 From the home screen, slide your finger across from
right to left for twice. Touch Contacts and select
Search.
TIP! From a numerical keypad screen, you can touch to
open the contacts and search for a contact you want.
2 Scroll through the contact list or enter the first letter(s) of
the contact you want to call.
Your contacts will bring up a list of contacts
corresponding to the letters you have entered.
3 From the list, touch the contact you want to call and
select the number to use if there is more than one for
that contact.
4 Press the Send key and choose Voice call or Video
call from the options menu.
Adding a new contact
1 From the home screen, slide your finger across from
right to left for twice. Touch Contacts and select New
contact.
2 Choose whether to save the contact to your Handset
or USIM.
3 Enter the first and last name of your new contact. You do
not have to enter both, but you must enter at least one.
Contact
28 LG GD910 | User Guide
Contact
4 If you want to add a picture to the new contact, touch
and select Edit image.
5 You can enter up to five different numbers per contact.
Each entry is assigned a preset type: Mobile, Home,
Office, Pager, Fax or General.
6 Add an email address.
7 Assign the contact to one or more groups, choosing
between No group, Family, Friends, Colleagues,
School or VIP.
TIP! You can create customised groups for your contacts.
8 You can also add a Ringtone, Birthday, Anniversary,
Homepage, Home address, Company name, Job
title, Company address or a Memo.
9 Press the Send key and touch Save to save the
contact.
TIP! When viewing a contact, you can access the
options menu by pressing the Send key .
Creating a group
1 From the home screen, slide your finger across from
right to left for twice. Touch Contacts and select Group
then touch New group.
2 Enter a name for your new group in the Name field. You
can also assign a ringtone to the group.

29
3 Press the Send key and touch Save to save new
group.
NOTE: Even if you delete a group, the contacts which were
assigned to that group will not be lost. They will remain in
your contacts.
Changing your contact settings
You can adapt your contact settings to suits your own
preferences.
1 From the home screen, slide your finger across from
right to left for twice. Touch Contacts and select Group
then touch Settings.
2 From here, you can adjust the following settings:
Contact list settings - Choose whether to view contacts
saved to both Handset and USIM, Handset only or
USIM only. You can also choose to show the first name
or last name of a contact first and whether to display a
quick command key next to the contact or not.
Copy - Copy your contacts from your handset to your
USIM or from your USIM to your handset.
You can choose all contacts by touching Select all or
select each contact to copy one by one.
Move - This works in the same way as Copy, but the
contact will only be saved to the location you’ve moved
it to. So if you move a contact from the USIM to the
handset it will be deleted from the USIM memory.

30 LG GD910 | User Guide
Send all contacts via Bluetooth - Send all your
contacts to another device using Bluetooth. Bluetooth will
be automatically turned on if you select this option.
Clear contacts - Delete all your contacts on your
handset or USIM. Touch Yes if you are sure you want to
delete all your contacts from your contacts.
Viewing information
1 From the home screen, slide your finger across from
right to left for twice. Touch Contacts and select Group
then touch Information.
2 From here you can view your Service dial numbers,
your Own number, your Memory info. (how much
memory space you’ve got left) and My business card.
TIP! To add your own business card, select My business card
and enter your details as you would for any contact. Press the
Send key and touch Save to finish.
Contact

31
Messaging
Sending a message
1 To open your top menu, slide your finger across from
right to left for twice. Touch Messaging and select New
message.
2 When you touch a message field, the keypad screen will
be popup. You can enter the text message by using the
keypad screen.
3 On the keypad screen, you can press the Send key
to open the options menu. You can choose from Writing
language, Add to dictionary, Insert, Save to drafts or
Writing font size.
4 Press the Send key and touch Insert to add a
Template, Emoticons or Name & Number.
5 Touch To to enter the recipient’s number, or touch the
search icon to open your contacts. You can add multiple
contacts. Touch Send when ready.
32 LG GD910 | User Guide
Messaging
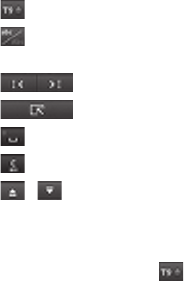
Entering text
- Touch to turn T9 predictive text on or off.
- Touch to change between the number, symbol and
text keypad.
- Touch to move the cursor.
- Go back to the message field.
- Touch to add a space.
- Touch to delete a character or remove the sentence.
/ - Touch to open or close the popup screen.
* T9 predictive mode
In T9 mode, you will see . T9 uses a built-in
dictionary to recognise your words based on the key
sequences you touch. Simply touch the number key
associated with the letter you want to enter, and the
dictionary will predict the word you want to use.

33
* Abc manual mode
In Abc mode, you will see . In Abc mode you must
touch the key repeatedly to enter a letter if T9 mode is
switched off. ( )
Message folders
You’ll recognise the folder structure used on your GD910,
and it is fairly self-explanatory.
Inbox - All the messages you receive are placed into your
inbox. From here you can view, delete and more.
Draft - If you do not finish writing a message, you can save
what you have done in this folder.
Outbox - This is a temporary storage folder while
messages are being sent.
Sent items - All the messages you have sent are placed
in this folder.
Templates - A list of pre written useful messages, useful
for a quick reply. There are already some templates on the
phone, which you can edit.
Emoticons - You can add, edit and delete emoticons. You
can insert the emoticon which you preferred on writing
a message. There are some commonly used emoticons
already on your phone.
Settings - You can configure your Text message/Voicemail
related options.
34 LG GD910 | User Guide
Managing your messages
1 To open your top menu, slide your finger across from
right to left for twice. Touch Messaging and select
Inbox.
2 Press the Send key to open the options menu and
choose to:
Reply - Send a reply to the selected message.
Delete - Delete the selected message.
Forward - Send the selected message on to another
person.
Make call - Call the person who sent you the message.
Save number - Save the number of the message.
Extract - You can extract the information such as a
number or email address from the selected message.
New message - Write a new message or email
regardless who sent you message.
Make voice call - You can make a voice call to the
contact.
Make video call - You can make a video call to the
contact.
Copy&Move - Choose to copy or move the selected
message to the USIM card or phone.
Message info - You can check the message info of its
type, subject, where it is from and its date.
35
If you see the message No space for USIM message, you
should delete some messages from your inbox to create
space.
If you see the message No space for messages, you can
delete either messages or saved files to create more space.
Changing your text message settings
To open your top menu, slide your finger across from right
to left for twice. Touch Messaging and select Settings,
then choose Text message.
You can make changes to:
Text message centre - Enter the details for your message
centre.
Delivery report - Choose to receive confirmation that your
message have been delivered.
Validity period - Choose how long your messages are
stored at the message centre.
Changing your voicemail setting
To open your top menu, slide your finger across from right
to left for twice. Touch Messaging and select Settings,
then choose Voicemail. You can view and edit the
voicemail name and number.

36 LG GD910 | User Guide
Voice command
Your GD910 supports enhanced voice commands, so
you can use a voice command to control your device.
This feature allow you to do things by verbal command
(e.g., make calls, confirm new messages or voicemail,
check your schedule, time, listen to the music, etc.) with
advanced voice recognition technology.
NOTE:
• Using a Voice command may be difficult in a noisy
environment or during an emergency.
• When you use a voice command feature, the loudspeaker
is in use. Hold the GD910 at a short distance away when
you say.
Access
For using a Voice command feature, press and hold the Clear
key from the home screen, then follow the prompts.
Using a Voice command feature
Call - Say “Call” and then call someone simply by saying
the phone number or name. Speak clearly and exactly as in
your Contacts list. When you have more than one contact
number, you can state the name and number type of the
contact (for example, ‘Call John Work’).
New Message - The ‘New Message’ command allows you
to check out a new message you received.
Utilities

37
Listen voice mail - The ‘Listen voice mail’ command
allows you to check out a new voicemail if you received.
Today schedule - The ‘Today schedule’ command allows
you to access and check out the schedule you saved.
Time - The ‘Time’ command allows you to check out the
time.
Music - The ‘Music’ command allows you to play songs
Help - Provides a general guideline to using Voice
commands.
Voice command settings
1 From the home screen, press and hold the Clear key .
2 Press the Send key to open the settings.
3 Change the settings as necessary.
Sensitivity - Control the sensitivity as Reject more /
Automatic / Reject less.
Train words - If the phone often asks you to repeat
voice command, train the phone to recognize your voice
patterns.
Timeout - Set 5 seconds or 10 seconds.
Using your calculator
1 From the home screen, slide your finger across from
right to left for twice. Touch Utilities and select Tools
then choose Calculator.

38 LG GD910 | User Guide
2 Touch the number keys to enter numbers.
3 For simple calculations, touch the function you require
(+, –, x or ÷), followed by =.
4 For more complex calculations, touch and choose
from sin, cos, tan, log, ln, exp, deg or rad, etc.
Converting a unit
1 From the home screen, slide your finger across from
right to left for twice. Touch Utilities and select Tools
then choose Converter.
2 Choose whether you would like to convert Currency,
Surface, Weight, Length, Temperature, Volume or
Velocity.
3 You can then select the unit, and enter the value you
would like to convert from; followed by the unit you
would like to convert to.
4 The corresponding value will appear on the screen.
Adding a city to your world clock
1 From the home screen, slide your finger across from
right to left for twice. Touch Utilities and select Tools
then choose World clock.
2 Press the Send key , and select New city. Choose
continent and select the city from the map. Or touch
Select city and choose from the list or type the name
of the city you require, and it will be displayed on the
screen.
Utilities

39
3 Touch the city to select it. This will add it to your World
time list.
Using the stopwatch
1 From the home screen, slide your finger across from
right to left for twice. Touch Utilities and select Tools
then choose Stopwatch.
2 Touch Start to begin timing.
3 Touch Lap if you want to record a lap time.
4 Touch Stop to end the timer.
5 Touch Resume to restart the stopwatch from the time
you stopped it, or touch Reset to start the time again.
STK
This menu may be different, depending on whether you
have STK support services on the SIM card or not (i.e. SIM
Application Toolkit).
Adding an event to your calendar
1 From the home screen, slide your finger across
from right to left for twice. Touch Utilities and select
Organiser then choose Calendar.
2 Select the date to which you want to add an event.
3 Press the Send key then Add event.
40 LG GD910 | User Guide
Utilities
TIP! You can set holiday dates in your calendar. Touch each
day you are on holiday one at time, then press the Send key
and select Set holiday.
Adding an item to your To Do list
1 From the home screen, slide your finger across
from right to left for twice. Touch Utilities and select
Organiser then choose To do.
2 Touch Add to do.
3 Set the date for the task, add notes and select a priority
level: High, Medium or Low.
4 Save your task by selecting Save.
TIP! You can edit an item by selecting it, touching the tab and
entering the changes. Confirm the changes by selecting Save.
Adding a memo
1 From the home screen, slide your finger across
from right to left for twice. Touch Utilities and select
Organiser then choose Memo.
2 Touch Add memo.
3 Type your memo, then touch Save.
4 Your memo will appear on the screen.
41
Using date finder
Date finder is a handy tool to help you calculate what the
date will be once a certain number of days have passed.
This helps you keep track of deadlines.
1 From the home screen, slide your finger across
from right to left for twice. Touch Utilities and select
Organiser then choose Date finder.
2 Set the required date in the From tab.
3 Set the number of days in the After tab.
4 The Target date will be shown below.
Setting your alarm
1 From the home screen, slide your finger across from
right to left for twice. Touch Utilities and select Alarms.
2 Touch New alarm.
3 Set the time you would like the alarm to sound and
touch Save. The screen then automatically returns to
the alarm list.
4 Select the item on the list and choose whether you
would like your alarm to repeat Once, Daily, Mon - Fri,
Mon - Sat, Sat - Sun, Except holiday or Choose
weekday. The icons indicate the weekday you select.
5 Select Alarm type to select the type of alarm you want.
6 Touch Alarm bell. You can choose a sound from the
media album list. To listen to sounds touch on the right
of the sound.

42 LG GD910 | User Guide
Utilities
7 Add a memo to the alarm.
8 Finally, you can set the snooze interval to 5, 10, 20 or
30 minutes or 1 hour, or turn it off.
9 After setting the alarm, touch Save.
NOTE: You can set up to 5 alarms.
Voice recorder
Use your voice recorder to record voice memos or other
audio files.
To record a sound or voice memo;
1 From the home screen, slide your finger across from
right to left for twice. Touch Utilities and select Voice
recorder.
2 Touch to begin recording.
3 Touch to end recording.
4 Touch to listen to recording.
My folders
You can store any multimedia files on your phone’s
memory so that you have easy access to all of your
pictures, sounds and others.
My images - It contains a list of pictures, including default
images preloaded onto your phone, images taken on your
phone’s camera. By using a saved image, you can allocate
an image to a particular person in your contacts list so that
their picture shows when they call you.
43
My sounds - It contains Default sounds and Voice
recordings.
Others - This folder is used to store files which are not
pictures or sounds.
Music
Your GD910 has a built-in music player so you can play all
your favourite music. To access the music player, slide your
finger across from right to left for twice. Touch Utilities and
select Music.
From here, you can access a number of folders:
Recently played - View all of the songs you have played
recently.
All tracks - Contains all the songs you have on your
phone.
Artists - Browse your music collection by artist.
Albums - Browse your music collection by album.
Genres - Browse your music collection by genre.
Playlists - Contains all playlists you have created.
Shuffle tracks - Play your tracks in a random order.
Transferring music onto your phone
The easiest way to transfer music onto your phone is via
Bluetooth or your sync cable.
To transfer using Bluetooth:
44 LG GD910 | User Guide
Utilities
1 Make sure both devices have Bluetooth switched on and
can see each other.
2 Select the music file on the other device and select send
via Bluetooth.
3 When the file is ready to be sent you should accept it on
your phone by touching Yes.
4 The file should appear in All tracks.
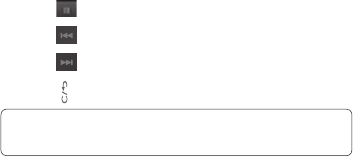
Playing a song
1 From the home screen, slide your finger across from
right to left for twice. Touch Utilities and select Music.
2 Touch All tracks.
3 Select the song you want to play.
4 Touch to the song.
5 Touch to the next song.
6 Touch to the previous song.
7 Touch to return the Music list.
TIP! To adjust the volume when you listen to the music, press
the Clear key and scroll up and down.
Creating a playlist
You can create your own playlists by choosing a selection
of songs from the All tracks folder.
1 From the home screen, slide your finger across from
right to left for twice. Touch Utilities and select Music.

45
2 Touch Playlists.
3 Touch Add new playlist, enter the playlist name and
touch Save.
4 The All tracks folder will show all the songs on your
phone. Touch all the songs that you want to indude in
your playlist. A tick will appear on the left-hand side of
the track names.
5 Touch Done.
Taking your self camera
1 From the home screen, slide your finger across from
right to left for twice. Touch Utilities and select Camera.
2 Then viewfinder will appear on screen. Touch to take
a photo.
* In your viewfinder, you can select the following options
before taking a photo.
Gallery - Touch to move to your gallery.
Brightness - Set the brightness of the image in
the viewfinder of the camera. Slid e the contrast
indicator along the bar - left for a lower exposure
and hazier image, or right for a higher exposure and
sharper image.
3 Your captured photo will appear on screen. The name of
the image runs along the bottom of the screen.

46 LG GD910 | User Guide
Personalising your profiles
You can quickly change your profile on the home screen.
From the home screen, slide your finger across from left to
right, then touch the profile icon.
TIP! Using flight mode Turn flight mode on by selecting .
Flight mode prevents you making calls, sending messages or
using Bluetooth.
You can personalise each profile setting using the settings
menu.
1 From the home screen, slide your finger across from
right to left for twice. Touch Settings and select
Profiles.
2 Choose the profile you want to edit.
3 You can then change all of the sounds and alert options
available in the list, including your Ringtone and
Volume, Message alerts settings and more.
Changing your network settings
1 From the home screen, slide your finger across from
right to left for twice. Touch Settings and select Screen.
2 Choose from:
Top Menu - Choose the style of the top menu.
Font - Adjust the font style and size.
Backlight - Choose how long the backlight stays on for.
Settings
47
NOTE: The longer the backlight stays on, the more
battery power it uses and so you may need to recharge
your phone more often.
Brightness - Adjust the screen brightness.
Lock screen - Choose the clock type on the lock
screen.
Action guide - Select the action guide on or off.
Changing your phone settings
Enjoy the freedom of adapting the GD910 to your own
preferences.
1 From the home screen, slide your finger across from
right to left for twice. Touch Settings and select Phone.
2 Choose from the list below.
Date & Time - Adjust your date and time settings or
choose to auto update the time when travelling or for
daylight saving.
Power save - Choose to switch the factory set power
saving settings: Off, Night only and Always on.
Languages - Change the language on your GD910
display.
Security - Adjust your security settings, including PIN
codes and handset lock.
Memory manager - You can use memory manager
to determine how each memory is used and see how
much space is available.
48 LG GD910 | User Guide
Handset common memory - View the memory
available on your GD910 for Pictures, Sounds and
others.
Handset reserved memory - View the memory
available on your handset for SMS, Contacts, Calendar,
To do list, Memos, Alarms, Call history, Bookmarks and
Miscellaneous items.
USIM memory - View the memory available on your
SIM Card.
Reset settings - Restores all settings to their factory
defaults.
Information - View the technical information for your
GD910.
Changing your connectivity settings
Your connectivity settings have already been set up by
your network operator, so you can enjoy your new phone
immediately. To change any settings, use this menu:
From the home screen, slide your finger across from right
to left for twice. Touch Settings and select Connectivity.
Choose Network settings.
Select network - If you set to Automatic, the GD910
automatically searches for the network and registers the
handset to the network. This is recommended for best
service and quality.
NOTE: When your handset loses the network in manual
mode, the popup message to select the available network
will be shown on the Idle screen.
Settings

49
Network mode - You can set a type of network to search
for when networks are searched in the Select network
menu.
Preferred lists - If the network is searching automatically,
you can add a preferred network to be connected to.
Changing your Bluetooth settings
1 From the home screen, slide your finger across from
right to left for twice. Touch Settings and select
Bluetooth.
2 Choose Bluetooth then press the Send key and
select Settings. Make your changes to:
My device visibility - Set Visible or Visible for 1 min so
that other devices can detect your phone when they are
searching for a Bluetooth device. If you select Hidden,
other devices will not be able to detect your phone when
they are searching for a Bluetooth device.
My device name - You can name or rename your phone
as it will appear on other devices. Your phone’s name will
be shown on other devices only when My device visibility
is set to Visible.
Supported services - You can view the list of devices
such as headsets and handsfree supported by Bluetooth
enabled phone.
Remote SIM Mode - Activate the remote SIM mode.
My address - Check your Bluetooth address here.
50 LG GD910 | User Guide
NOTE: To improve security, we recommend that once you
have configured or paired with a device, Visibility be set to
Hidden. For incoming connections, regardless of whether or
not the other device has been paired with your phone, you
can choose to accept or reject the connection.
Pairing with another Bluetooth device
By pairing your GD910 and another device, you can set up
a passcode protected connection. This means your pairing
is more secure.
1 Check your Bluetooth is Turn on and Visible. You can
change your visibility in the Settings menu, by selecting
My device visibility, then Visible.
2 Touch Search.
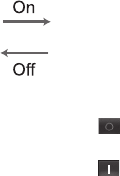
* To switch Bluetooth on:
1 From the Bluetooth menu, touch Bluetooth to turn on.
2 To switch Bluetooth off, touch Bluetooth again.
If Bluetooth is set to off, you can see the icon in
your screen.
If Bluetooth is set to on, you can see the icon in
your screen.
Settings

51
3 Your GD910 will search for devices. When the search is
completed Add and Refresh will appear on screen.
4 Choose the device you want to pair with, select Add and
enter a passcode then choose OK.
5 Your phone will then connect to the other device, on
which you should enter the same passcode.
6 Your passcode protected Bluetooth connection is now
ready.
Using a Bluetooth headset
1 Check your Bluetooth is turn on and Visible.
2 Follow the instructions that came with your headset to
place it in pairing mode and pair your devices.
3 Touch Ask always or Allow without ask, and then
touch Yes to connect now. Your GD910 will automatically
switch to Headset profile.
Sending and receiving your files using
Bluetooth
Bluetooth is a great way to send and receive files as no
wires are needed and connection is quick and easy.
You can also connect to a Bluetooth headset to make and
receive calls.
Before you can start sharing files using Bluetooth, you will
need to pair your phone with another Bluetooth device. For
information on pairing devices, see Pairing with another
Bluetooth device.

52 LG GD910 | User Guide
NOTE: The Bluetooth® word mark and logos are owned by
the Bluetooth SIG, Inc. and any use of such marks by LG
Electronics is under licence. Other trademarks and trade
names are those of their respective owners.
To send a file:
1 Open the file you want to send, which will typically be
a photo.
2 Press the Send key and select Send.
Choose Bluetooth.
3 If you have already paired the Bluetooth device, your
GD910 will not automatically search for other Bluetooth
devices. If not, your GD910 will search for other
Bluetooth enabled devices within range.
4 Choose the device you want to send the file to and
touch Select.
5 Your file will be sent.
TIP! Check the progress bar to make sure your file
is sent.
To receive a file:
1 To receive files, your Bluetooth must be both On and
Visible. See Changing your Bluetooth settings on the
right for more information.
2 A message will prompt you to accept the file from the
sender. Touch Yes to receive the file.
Settings
53
You can synchronise your PC with your phone. This will
ensure all your important details and dates match, and also
act as a back up to help your mind at ease.
TIP! To do this, you will need to install the PC
Suite application provided on the CD-ROM or available as
a download from http://update.lgmobile. com. (From www.
lgmobile. com PRODUCTS > Manual & Software > Go to
Manual & S/W Download Section)
Installing the LG PC Suite on your computer
1 From the home screen, slide your finger across from
right to left for twice. Touch Settings and select
Connectivity.
2 Touch USB connection mode.
3 Connect handset and PC via USB cable and wait for a
while.
4 Installation guide message will be displayed.
Caution! If installation guide message is not
displayed in your PC, please check your CD-ROM setting on
Windows.
5 Insert the supplied CD or click download button to
directly download LG PC Suite program from website.
6 Click on the LG PC Suite Installer which will appear on
your screen.
PC Suite

54 LG GD910 | User Guide
Connecting your phone and PC
1 Select PC Suite mode in Connectivity menu and then
connect the USB cable to your phone and your PC.
2 LG PC Suite will be automatically activated on your PC.
Caution! If LG PC Suite is not activated
automatically in your PC, please check your CD-ROM setting
on PC.
3 Your phone and PC are now connected.
Backing up and restoring your phone‘s
information
1 Connect your phone to your PC as outlined above.
2 Click on the Backup icon, and select Backup or
Restore.
3 Choose whether to back up Contents Data and/or
Phonebook/Schedule/Todo/Memo Data. Select the
location you want to back up the information to, or
restore it from. Click OK.
4 Your information will be backed up.
Viewing phone files on your PC
1 Connect your phone to your PC as outlined above.
2 Click on the Manage Files icon.
3 All the documents, flash contents, images, audio files
and videos you have saved on your phone will be
displayed on the screen in the LG Phone folder.
PC Suite

55
TIP! Viewing the contents of your phone on your PC
helps you to arrange fi les, organise documents and remove
content you no longer need.
Synchronising your contacts
1 Connect the phone to your PC.
2 Click on the Contacts icon.
3 Your PC will now import and display all the contacts
saved on your SIM card and handset.
4 Click on File and select Save. You can now select where
you want to save your contacts to.
NOTE: To back up contacts saved to your SIM card, click
on the SIM card folder on the left side of the PC screen.
Right click on one of your contacts and choose Select all,
then Copy or Move to phone memory.
Right-click your contacts and select Copy to contact. Now
click on the Handset folder on the left side of the screen
and all your numbers will be displayed.
Synchronising your messages
1 Connect the phone to your PC.
2 Click on the Messages icon.
3 All your PC and phone messages will be displayed in
folders on the screen.
4 Use the tool bar at the top of your screen to edit and
rearrange messages.
56 LG GD910 | User Guide
Using your phone as a mass storage device
Your phone can be used as a mass storage device.
1 Disconnect your phone from your PC.
2 From the home screen, slide your finger across from
right to left for twice. Touch Settings and select
Connectivity.
3 Touch USB connection mode.
4 Touch Mass storage. This mode will be saved.
5 Connect the phone to your PC. Your phone will read:
Connected.
6 All of your phone files will automatically be stored onto
your PC hard drive.
NOTE: Your phone must be unplugged from your PC to
initiate Mass Storage.
PC Suite
57
Software Upgrade
LG Mobile Phone Software
Upgrade Program For more information on installing and
using this program, please visit http://update.lgmobile.com.
This feature allows you to upgrade your software to the
latest version quickly and conveniently on the Internet
without needing to visit our service center.
As the mobile phone software upgrade program requires
the user’s full attention for the duration of the upgrade
process, please be sure to check any instructions and
notes that appear at each step before proceeding.
Please note that removing the USB data communication
cable or batteries during the upgrade may seriously
damage your mobile phone.
As the manufacturer takes no responsibility for loss of data
during the upgrade process, you are advised to note down
any important information in advance for safekeeping.

58 LG GD910 | User Guide
Trouble Shooting
This chapter lists some problems that you might encounter
while using your phone. Some problems require that
you call your service provider, but most of problems you
encounter are easy to correct yourself.
Message Possible causes Possible Corrective
measures
USIM
error
There is no USIM
card in the phone
or you may
have inserted it
incorrectly.
Make sure that the USIM
card is correctly inserted.
No
connection
to the
network
Signal weak
Outside GSM
network
Move higher to a window
or open space. Check
service provider coverage
map.
Codes do
not match
When you want to
change a security
code you have to
confirm the new
code by entering
it again. The two
codes that you
have entered do not
match.
Contact your service
provider.
Function
cannot be
set
Not supported by
service provider
or registration
required
Contact your service
provider.
Calls not
available
Dialling error
New USIM card
inserted Charge limit
reached
New network not
authorised. Check for
new restrictions. Contact
service provider or reset
limit with PIN 2.

59
Message Possible causes Possible Corrective
measures
Phone
cannot be
switched
on
On/Off key
pressed too briefly
Battery empty
Battery contacts
dirty
Press On/Off key for at
least two seconds.
Charge battery. Check
charging indicator in the
display.
Clean contacts.
Charging
error
Battery totally
empty
Temperature out
of range
Contact problem
No mains voltage
Charger defective
Wrong charger
Battery defective
Charge battery.
Make sure the ambient
temperature is right, wait
for a while, and then
charge again.
Check power supply
and connection to the
phone. Check the battery
contacts, clean them if
necessary.
Plug in to a different
socket or check voltage.
If the charger does not
warm up, replace it.
Only use original LG
accessories.
Replace battery.
Phone
loses
network
Signal too weak Reconnection to another
service provider is
automatic.
Number
not
permitted
The fixed dial
number function
is on.
Check settings.