LG Electronics USA GR500 Cellular/PCS GSM/EDGE/WCDMA Phone with Bluetooth User Manual
LG Electronics USA Cellular/PCS GSM/EDGE/WCDMA Phone with Bluetooth Users Manual
UserManual.wiki
>
LG Electronics USA
>
GR500 User Manual
Users Manual
Navigation menu
Upload a User Manual
Namespaces
Wiki Guide
HTML
PDF
Info
Views
User Manual
Discussion / Help
Navigation
![8For Your SafetyImportant InformationThis user guide contains important information on the use andoperation of this phone. Please read all the informationcarefully for optimal performance and to prevent any damageto or misuse of the phone. Any changes or modifications notexpressly approved in this user guide could void your warrantyfor this equipment.Before You StartSafety InstructionsWARNING! To reduce the possibility of electric shock, do notexpose your phone to high humidity areas, such as thebathroom, swimming pool, etc.Always store your phone away from heat. Never store yourphone in settings that may expose it to temperatures less than32°F or greater than 104°F, such as outside during extremeweather conditions or in your car on a hot day. Exposure toexcessive cold or heat will result in malfunction, damageand/or catastrophic failure.Be careful when using your phone near other electronicdevices. RF emissions from your mobile phone may affectnearby in adequately shielded electronic equipment. Youshould consult with manufacturers of any personal medicaldevices such as pacemakers and hearing aides to determine ifthey are susceptible to interference from your mobile phone.Turn off your phone in a medical facility or at a gas station.Never place your phone in a microwave oven as this willcause the battery to explode.IMPORTANT! Please read the TIA SAFETY INFORMATION onpage 78 before using your phone.Safety InformationRead these simple guidelines. Breaking the rules may bedangerous or illegal. Further detailed information is given in thisuser guide.]Never use an unapproved battery since this could damagethe phone and/or battery and could cause the battery toexplode.]Never place your phone in a microwave oven as it willcause the battery to explode.]Do not dispose of your battery by fire or with hazardous orflammable materials.]Make sure that no sharp-edged items come into contactwith the battery. There is a risk of this causing a fire.]Store the battery in a place out of reach of children.]Be careful that children do not swallow any parts such asrubber plugs (earphone, connection parts of the phone,etc.). This could cause asphyxiation or suffocation.](https://usermanual.wiki/LG-Electronics-USA/GR500/User-Guide-1033924-Page-3.png)
![9For Your Safety]Unplug the power cord and charger during lightning stormsto avoid electric shock or fire.]When riding in a car, do not leave your phone or set up thehands-free kit near to the air bag. If wireless equipment isimproperly installed and the air bag is activated, you may beseriously injured.]Do not use a hand-held phone while driving.]Do not use the phone in areas where its use is prohibited.(For example: aircraft).]Do not expose the battery charger or adapter to directsunlight or use it in places with high humidity, such as abathroom.]Never store your phone in temperatures less than- 4°F orgreater than 122°F.]Do not use harsh chemicals (such as alcohol, benzene,thinners, etc.) or detergents to clean your phone. There is arisk of this causing a fire.]Do not drop, strike, or shake your phone severely. Suchactions may harm the internal circuit boards of the phone.]Do not use your phone in high explosive areas as the phonemay generate sparks.]Do not damage the power cord by bending, twisting, pulling,or heating. Do not use the plug if it is loose as it may causea fire or electric shock.]Do not place any heavy items on the power cord. Do notallow the power cord to be crimped as it may cause fire orelectric shock.]Do not handle the phone with wet hands while it is beingcharged. It may cause an electric shock or seriouslydamage your phone.]Do not disassemble the phone.]Do not place or answer calls while charging the phone as itmay short-circuit the phone and/or cause electric shock orfire.]Only use the batteries, antennas, and chargers provided byLG. The warranty will not be applied to products provided byother suppliers.]Only authorized personnel should service the phone and itsaccessories. Faulty installation or service may result inaccidents and consequently invalidate the warranty.]Do not hold or let the antenna come in contact with yourbody during a call.]An emergency call can be made only within a service area.For an emergency call, make sure that you are within aservice area and that the phone is turned on.](https://usermanual.wiki/LG-Electronics-USA/GR500/User-Guide-1033924-Page-4.png)
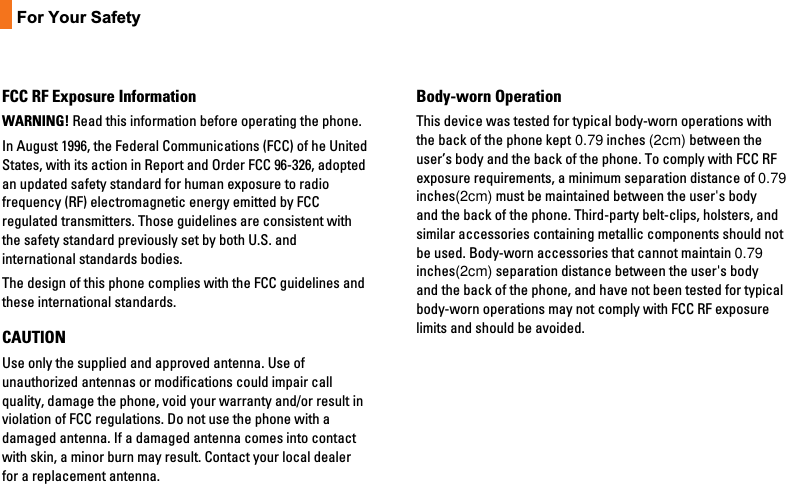
![11For Your SafetyVehicle Mounted External Antenna(optional, if available)A minimum separation distance of 8 inches (20cm) must bemaintained between the user/bystander and the vehiclemounted external antenna to satisfy FCC RF exposurerequirements. For more information about RF exposure, visitthe FCC website at www.fcc.govFCC Part 15 Class B ComplianceThis device and its accessories comply with part 15 of FCCrules. Operation is subject to the following two conditions: (1) This device and its accessories may not cause harmfulinterference, and (2) this device and its accessories mustaccept any interference received, including interference thatmay cause undesired operation.Cautions for Battery]Do not disassemble.]Do not short-circuit.]Do not expose to high temperature: 60°C (140°F).]]Do not incinerate.Battery Disposal]Please dispose of your battery properly or bring to yourlocal wireless carrier for recycling.]Do not dispose in fire or with hazardous or flammablematerials.Adapter (Charger) Cautions]Using the wrong battery charger could damage your phoneand void your warranty.]The adapter or battery charger is intended for indoor useonly.Do not expose the adapter or battery charger to direct sunlightor use it in places with high humidity, such as the bathroom.](https://usermanual.wiki/LG-Electronics-USA/GR500/User-Guide-1033924-Page-6.png)
![10In-Call MenuYour phone provides a number of control functions that you can use during a call. To access these functions during a call, press the right soft key [Options].During a CallThe menu displayed on the handset screen during a call is different from the default main menu displayed when in idle screen, and the options are described below.Making a Second CallYou can select a number you wish to dial from the Address Book to make a second call. Press the right soft key then select Contacts.Swapping Between Two CallsBy using three methods, you can switch between two calls. 1. Press the [Send] key.2. Press the left/right navigation key.3. Press the right soft key and then select “Swap Calls”.](https://usermanual.wiki/LG-Electronics-USA/GR500/User-Guide-1033924-Page-7.png)
![In-Call Menu11Answering an Incoming CallTo answer an incoming call when the handset is ringing, simply press the [SEND] key. The handset is also able to warn you of an incoming call while you are already on a call. A tone sounds in the earpiece, and the display will show that a second call is waiting. This feature, known as Call Waiting, is only available if your network supports it.If Call Waiting is on, you can put the first call on hold and answer the second call, by pressing the [SEND] key.Rejecting an Incoming CallYou can reject an incoming call without answering by simply pressing the [END] key.During a call, you can reject an incoming call by pressing the [END] key.](https://usermanual.wiki/LG-Electronics-USA/GR500/User-Guide-1033924-Page-8.png)
![In-Call Menu12Muting the MicrophoneYou can mute the microphone during a call by pressing the left soft key [Mute]. The handset can be unmuted by pressing the left soft key [Unmute]. When the handset is muted, the caller cannot hear you, but you can still hear the caller.Using the SpeakerphoneYou can use the integrated Speakerphone during a call by pressing the key. The loudspeaker is automatically deactivated when you end the call.n WarningDue to higher volume levels, don’t place the phone near your ear while the speakerphone is enabled.Conference CallsThe conference service provides you with the ability to have a simultaneous conversation with more than one caller. The conference call feature can be used only if your network service provider supports this feature. A conference call can only be set up when you have one call active and one call on hold, meaning both calls must have been answered. Once a conference call is set up, calls may be added, disconnected or separated (that is, removed from the conference call but still connected to you) by the person who set up the conference call. These options are all available from the In-Call menu. The maximum number of callers in a conference call is five. Once started, you are in control of the conference call, and only you can add calls to the conference call.](https://usermanual.wiki/LG-Electronics-USA/GR500/User-Guide-1033924-Page-9.png)
![In-Call Menu13Making a Second CallYou can make a second call while currently on a call simply by entering the second number and pressing the [SEND] key. When the second call is connected, the first call is automatically placed on hold. You can swap between calls, by pressing the [SEND] key.Setting Up a Conference CallTo set up a conference call, place one call on hold, conference in the second active call by pressing the right soft key and select the Join Calls sub menu option from the Conference Call menu. Activate the Conference Call on HoldTo activate a conference call on hold, press the [SEND] key.Adding Call to the Conference CallTo add a call to an existing conference call, press the right soft key, and then select the Join Calls sub menu from the Conference Call option.Private Call in a Conference CallTo have a private call with one caller from a conference call, press the right soft key and select the Private Menu from the Conference Call option. When the numbers of the callers are displayed, select the one you wish to speak in private.Ending a Conference CallCurrently active conference call can be disconnected by pressing the [END] key.](https://usermanual.wiki/LG-Electronics-USA/GR500/User-Guide-1033924-Page-10.png)
![In-Call Menu14Video Share CallingMaking and Answering a Video Share CallYou can make or answer a Video Share call with other 3G video phones. In order to start a Video Share call, both sides must have 3G Video Share capable phone and both must be in 3G coverage area. n NoteBefore you start a Video Share Call you must check the following:• Phone must be in a AT&T 3G service area.• The icon should be present on top left corner of the screen.To use Video Share follow these steps:1. Make a phone call by dialing a number, or selecting a number either from contact list or recent call list. From Recent call or Contact list, you can also directly make a Video Share by selecting [Options] > [Video Share Call] and selecting Video Type (Live or Recorded). In this case skip step 2-3.2. A few seconds after the connection is established, “Video Share Ready” prompt will appear on the screen given other party is ready to use Video Share service. 3. To start Video Share with other party, you can press the right soft key [Video] or Camera key and select Video type (Live or Recorded).](https://usermanual.wiki/LG-Electronics-USA/GR500/User-Guide-1033924-Page-11.png)
![In-Call Menu15n NoteThe Speakerphone will be automatically activated when a Video Share session begins, unless a hands-free (Bluetooth or wired head set) is connected.] Live: You can share a real-time video stream with the other party while having a conversation.] Recorded: You can share a pre-recorded video clip with the other party while having a conversation. (Note that H.263 video format in 176x144 size is supported)4. If the other party press the right soft key [Accept], the Video Share will begin. (After accepting, it may take several seconds before actual Video Share starts)During the Video Share, you can do followings via the right soft key [Options].] Spk. On: You can turn the integrated Speakerphone on while you are using Bluetooth] Mute/Unmute: You can mute/unmute the microphone by selecting mute/unmute.] Stop Video Share: You can stop video sharing and proceeds with voice call only by selecting Stop Video Share.] Brightness: You can adjust the brightness of the screen by selecting Brightness.] Zoom in/out: You can zoom in/out the video by selecting Zoom in/out.] Audio to Bluetooth/Audio to Phone: When Audio to Bluetooth is selected, you can have a conversation using Bluetooth. When Audio to Phone is selected, you can have a conversation using either speakerphone or headset.](https://usermanual.wiki/LG-Electronics-USA/GR500/User-Guide-1033924-Page-12.png)
![In-Call Menu16] Record Video Share/Stop Recording: You can start recording the live video by selecting ‘Record Video Share’. Once you are recording the video, you can stop recording by selecting ‘Stop Recording’.] End Call: You can end phone call by selecting ‘End Call’. (Note: Video Share will stop as well) ] Hold Call: You can hold phone call by selecting ‘Hold Call’. (Note: Video Share will stop when you select ‘Hold Call’)During the Video Share session, you can turn on/off speakerphone using Spk. off / Spk. on key .You can record a current video clip via Options menu, and the recorded video will be saved in [My stuff] > [Video].5.1. You can stop Video Share call and proceed to voice call by 1. Press the left soft key [Stop] or 2. Press the right soft key [Opton] > [Stop Video share]5.2. You can End Voice call along with Video Share call by 1. Press End Key or 2. Press the right soft key [Option] > [End Call]n Note1. A Video Share Call will be terminated in the following cases: • When trying to make a conference call / second call during a call. • When voice call is placed on hold. • When the voice call is disconnected. • When moving out of a AT&T 3G service area. • When the network connection is poor.](https://usermanual.wiki/LG-Electronics-USA/GR500/User-Guide-1033924-Page-13.png)
![In-Call Menu172. A Video Share Call will be unavailable in the following cases (“Video Share Ready” message will be disapeared). • When trying to make a conference call / second call during a Video Share Call. • When voice call is placed on hold. • When moving out of a AT&T 3G service area.To receive a Video Share session:1. If you receive a Video Share request during a call, select the left soft key [Accept] to accept the request. If you don’t want to accept the request, press the right soft key [Decline]. When you’re a recipient of a Video Share call, the followings are available via [Options]:] Spk. On: You can turn the integrated Speakerphone on while you are using Bluetooth] Mute/Unmute: You can mute/unmute the microphone by selecting mute/unmute.] Stop Video Share: You can stop video sharing and proceeds with voice call only by selecting Stop Video Share.] Landscape mode: When Landscape mode is selected you can watch shared video in landscape mode.] Audio to Bluetooth/Audio to Phone: When Audio to Bluetooth is selected, you can have a conversation using Bluetooth. When Audio to Phone is selected, you can have a conversation using either speakerphone or headset.] End Call: You can end phone call by selecting ‘End Call’. (Note: Video Share will stop as well)] Hold Call: You can hold phone call by selecting ‘Hold Call’. (Note: Video Share will stop when you select ‘Hold Call’)n Note• The speakerphone will be automatically turned on when a Video Share Call begins, and automatically back to the previous mode when a Video Share Call ends.• If a hands-free or a Bluetooth headset is connected, then the speakerphone menu will be deactivated.](https://usermanual.wiki/LG-Electronics-USA/GR500/User-Guide-1033924-Page-14.png)
![In-Call Menu18Making a Video Share Call from Camera, Camcoder or Video GalleryWhen you are in Camera or Video Recording mode, you can easily make a Video Share Call to a person in your Contact List.1. Start Video Share call as followings: In ‘Take Photo’ /'Record Video' mode, select Video Share icon at the last of the right icon list. In [My stuff] > [Video], press right soft key [Options] and select [Video Share Call]. (This menu item is active only in 3G coverage and video share capable)2. This screen provides you with two options to make a Video Share Call: - Enter a number directly. - Select a number from the list.n NoteIf the other party is not ready for Video Share, call will proceed to ordinary voice call.](https://usermanual.wiki/LG-Electronics-USA/GR500/User-Guide-1033924-Page-15.png)
![In-Call Menu19Saving your Video ShareSender can record video during the Video Share session by 1. Selecting [Option]> [Record Video Share] during live Video Share call.2. Setting Auto Record to ‘ON’ (See Application Settings).Sender can save the recorded video by1. Selecting [Optoin] > [Stop Recording] during live Video Share call.2. Ending Video Share call.Recorded video will be saved in [My Stuff] > [Videos] folder in the phone.](https://usermanual.wiki/LG-Electronics-USA/GR500/User-Guide-1033924-Page-16.png)
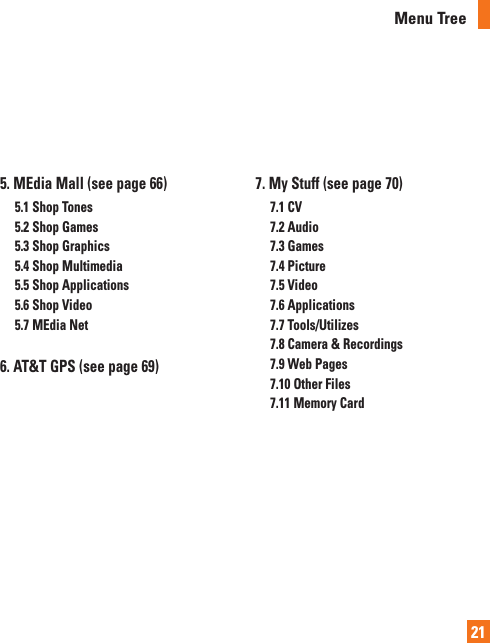
![20Menu Tree1. AT&T Music1.1 Music Player1.2 Shop Music1.3 MusicID1.4 XM Radio1.5 Music Videos1.6 Make UR Tones1.7 Company1.8 Music Apps2. Messaging (see page 51)2.1 Create Message2.2 Inbox2.3 IM2.4 Mobile Email2.5 Drafts2.6 Outbox2. Messaging (continued)2.7 Voicemail2.8 Message Settings2.8.1 Message Alert2.8.2 Signature2.8.3 Text Message2.8.4 Multimedia Message2.8.5 Voicemail Number2.8.6 Service Message3. YELLOWPAGES.COM (see page 64)4. MEdia Net (see page 65)The following illustration shows the available menu structure and indicates the:] Number assigned to each menu option.] Page where you can find the feature description.](https://usermanual.wiki/LG-Electronics-USA/GR500/User-Guide-1033924-Page-17.png)

![24AT&T MusicMusic Player Menu 1.1] All Songs: You can view the entire playlist in the internal/external memory.] Playlists: You can create your own playlists by choosing songs from the All Songs menu list.] Artists: Shows the list of artists of all the songs in internal/external memory, and shows the song of chosen artist. ] Albums: Shows the list of albums of all the songs in internal/external memory, and shows the song of chosen album. ] Genres: Shows the list of genres of all the songs in internal/external memory, and shows the song of chosen genre.] Shuffle Songs: You can listen to the songs in random.n NoteCopyrights of music files may be protected by copyright and intellectual property laws. Therefore, it may be required to obtain necessary permissions or licenses before you can reproduce or copy the materials. In some countries, national law prohibits copying of copyrighted materials for personal archive as well. Prior to downloading or copying the files, please ensure that you adhere to the applicable laws and laws of corresponding countries or regions regarding the Terms of Use of materials.](https://usermanual.wiki/LG-Electronics-USA/GR500/User-Guide-1033924-Page-21.png)
![AT&T Music26n NoteNot compatible with iTunes and/or iTunes files.Drag and Drop Music Using GR500 As A Mass Storage Device1. Insert a MicroSD memory card. 2. Power on the phone. 3. Connect the device to a PC using a GR500 USB data cable. 4. A bubble may appear, “Found New Hardware LG USB Modem”.5. Access My Computer on the PC.6. The phone’s memory card will be listed under “Devices with Removable Storage” in the same location as an optical drive.n NoteThe PC will automatically assign a drive letter.7. File explore in a new window for desired music files. 8. Drag and drop the desired music content from the PC window to the “Storage Card” window.9. Disconnect the device from the cable. 10. Access the Music Player on the phone.n NoteSideloading is not supported via Bluetooth.n NoteIf the target computer does not detect the newly connected handset as Mess Storage, please follow steps 11 - 16. 11. When the Idle screen displays, press the Menu soft key.12. Select Settings and press the Select soft key or the [OK] key.13. Select Connection and press the Select soft key or the [OK] key.14. Use the Up or Down Navigation key to highlight Select USB Connection Mode and press the Select soft key or the [OK] key.](https://usermanual.wiki/LG-Electronics-USA/GR500/User-Guide-1033924-Page-23.png)
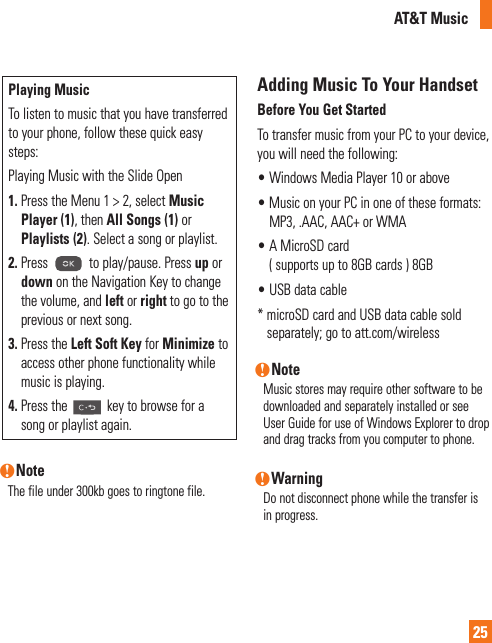
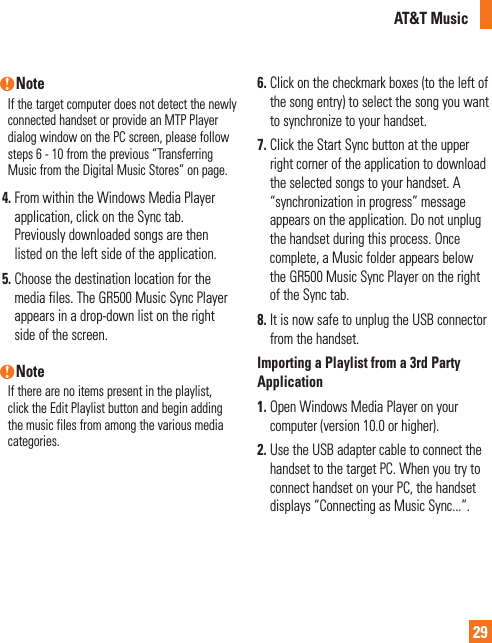
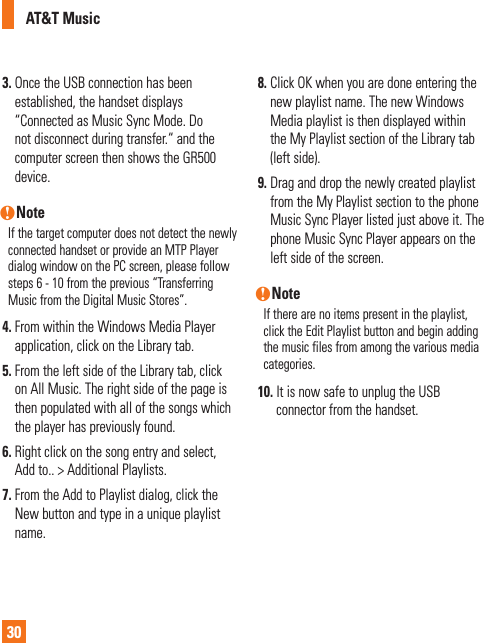
![AT&T Music2715. Use the Up or Down Navigation key to highlight Mass Storage and press the Select soft key or the [OK] key.16. Reconnect the device to a PC.Adding Music to your HandsetMusic files can be added to your handset by using one or more of the following methods:• Download music and ringtones over the AT&T network directly to your device by using the shopping for music feature.• From your existing digital media collection thru Windows Media Player®.• From music stores through the applicable music client.Transferring Music from the Digital Music StoresIn order to download music from the computer to your phone, handset, a microSD card and USB data cable are required. These items are sold separately; go to att.com/wireless1. Using your computer, open your preferred WMDRM PC music management client.2. Download the selected song to your library.3. Insert the microSD card into the handset.4. Use the USB adapter cable to connect the handset to the target PC. When you try to connect handset on your PC, the handset displays “Connecting as Music Sync...”.5. Once the USB connection has been established, the handset displays “Connected as Music Sync Mode. Do not disconnect during transfer.“ and the computer screen then shows the GR500 device. If the detection occurs, skip to step 11. n NoteIf the target computer does not detect the newly connected handset or provide an MTP Player dialog window on the PC screen, please follow steps 6 - 10.](https://usermanual.wiki/LG-Electronics-USA/GR500/User-Guide-1033924-Page-24.png)
![AT&T Music286. When the Idle screen displays, press the Menu soft key.7. Select Settings and press the Select soft key or the [OK] key.8. Select Connection and press the Select soft key or the [OK] key.9. Use the Up or Down Navigation key to highlight Select USB Connection Mode and press the Select soft key or the [OK] key.10. Use the Up or Down Navigation key to highlight Music Sync and press the Select soft key or the [OK] key.11. Highlight the song you wish to download to the handset.12. Using your right mouse button, click on the highlighted song and select Transfer Track(s) to Portable Device from the drop-down menu. This step begins the download process. Transferring Music using Windows Media PlayerA USB cable, microSD card, and a current version of the Windows Media Player are required for this procedure.1. Open Windows Media Player on your computer (version 10.0 or higher).2. Use the USB adapter cable to connect the handset to the target PC. When you try to connect handset on your PC, the handset displays “Connecting as Music Sync...”.3. Once the USB connection has been established, the handset displays “Connected as Music Sync Mode. Do not disconnect during transfer.“ and the computer screen then shows the GR500 device.](https://usermanual.wiki/LG-Electronics-USA/GR500/User-Guide-1033924-Page-25.png)
![AT&T Music33] ID song!: Allows you to find out information of unknown music by sending the sound of the unknown music to the web. If the web identifies the song, it returns with relevant information of the song. ] manage IDs: Once a song has been identified through the MusicID, you can see the list of songs in this folder.] help me out: Information for how to use this java application.] exit: Ends the application and exits.XM Radio Menu 1.4Selecting XM Radio from the AT&T Music sub menu launches a preinstalled java application. The application allows the user to listen to dozens of channels of digital radio on your mobile phone. Get unlimited access to commercial-free music, the latest Hip Hop, R&B, Rock, Jazz, Country anywhere you go. WARNING! This product will use a large amount of data and you are responsible for all data charges incurred. AT&T strongly recommends that you subscribe to a MEdia Max data bundle IN ADDITION to this purchase. Call AT&T at 611 to sign up for the MEdia Max package if needed. Music Videos Menu 1.5Selecting Music Videos from the AT&T Music sub menu launches MobiVJ which takes you directly into the Music Video section of Cellular Video. From this menu, you will have access to music videos from the latest artist as well as programming from AT&T, MTV,VHI, and CMT among others. Simply click on a video and begin watching!n NoteAdditional charges may incur when downloading music video contents. Contact your service provider for further information.](https://usermanual.wiki/LG-Electronics-USA/GR500/User-Guide-1033924-Page-30.png)
![35MessagingThis menu includes functions related to SMS (Short Message Service), MMS (Multimedia Message Service), voice mail, as well as the network’s service messages.Create Message Menu 2.1n NoteIf you select a graphic or an audio file while writing a multimedia message, the file loading time will take about 5 seconds. You will not be able to activate any key during the file loading time. When the file loading is complete, you will be able to write a multimedia message. Editing a messageThe following options are available for Editing a Message. (Press the left soft key [Insert])] Symbol: You can insert symbols ranging from sentence notes to emoticons. Select the one you want by navigating the left/right soft keys [Previous/Next].] Picture: You can select a graphic image by using the left/right navigation keys. You can preview the selected picture by pressing the left soft key [View].] Audio: You can insert various ringtones.n NotevCard, vCalendar, vNote and vTask are created by Address Book, Calendar, Notepad and Tasks respectively. Go to the Tools and Address Book sections for more detailed information.] Video: You can insert a video clip by using the center key [Insert].] Take New Picture: You can insert a new image taken from the camera by pressing Center Key. The following camera options are available when you press [Settings]. For further details, go to the Camera section. [See page XX.]](https://usermanual.wiki/LG-Electronics-USA/GR500/User-Guide-1033924-Page-32.png)
![Messaging36] Record New Audio: You can record a new audio by pressing the center key [Record]. After recording a new audio, you can cancel it by pressing the right key [Cancel]. To control the new audio menu, choose [Options] by pressing the right key. Under [Options], choose one of following • Quality: Set the audio’s quality to Fine, Normal or Economy. • Set Storage Defaults: You can assign the primary storage to Phone Memory or Memory Card.] Record New Video: You can record new video by pressing the center key [Record].] Template - Text: You can easily insert the frequently used sentences in the text message. - Multimedia: The preset multimedia templates are available. - Signature: Input your own signature created in (Menu 2.8.2). For further details, see page 65.] More: You can insert Subject, vCard, vCalendar, vNote, vTask, or Contact.Using OptionsPress right soft key [Options]. • Text Entry Mode: Sets the text input mode. For more details, refer to Entering Text (page 23). • Text Entry Settings: Text Entry Language allows you to set the text entry language to English, Spanish or French. T9 Word Candidate list is availabel when it is set to On. T9 Next Word Prediction is available when it is set to On. Use T9 Dictionary to add words or delete/ reset/modify words.• Delivery Options- *Delivery Receipt: If it is set to On in this menu, you can check whether your message is sent successfully. (Not available with SIM card AT&T provided)- Request Read Receipt: This menu allows you to determine whether to request a read confirmation mail to a recipient.](https://usermanual.wiki/LG-Electronics-USA/GR500/User-Guide-1033924-Page-33.png)
![Messaging37 • Save to Drafts: Saves the selected message to draft. • Cancel Message: Allows you to exit the text input mode without saving your input message.Sending a MessageAfter completing a message using the Insert/Options, select Send To to send a message. • Enter the recipient(s) as To, Cc and Bcc. You can use the Contacts option to choose a recipient. • Press the right soft key [Options].You can Enter Number, Enter Email and insert symbols, refer to recent message, recent calls and caller groups to set as a recipient, and edit your message. For the Save to Drafts, Delivery Options, Text Entry Mode, Text Entry Settings and Cancel Message options, see the descriptions above.Inbox Menu 2.2You will be alerted when you receive a message. They will be stored in the Inbox. In the Inbox, you can identify each message by icons. If you are notified that you have received a multimedia message, you can download the whole multimedia message by selecting it in the Receive menu.The following [Options] are available in the Inbox list.] Add to Address Book: You can save the sender’s phone number in the Contact List.] Delete: You can delete the current message.](https://usermanual.wiki/LG-Electronics-USA/GR500/User-Guide-1033924-Page-34.png)
![Messaging38] Forward: You can forward the selected message to another party.] Copy to Phone: Allows you to copy this to the phone. ] Message Details: You can view information about received messages; Message type, Subject, Sender’s address, Message date & time, Priority, Message size, Attached Files (Only for Multimedia messages).] Delete All Read Messages: You can delete all read messages.IM Menu 2.3The Instant Messaging feature can only be used with the support of the network operator or communities such as AIM, Windows Live and Y! Messenger. For Instant Messaging users, a valid User ID and Password will be required in order to login and exchange messages as well as checking the online status.1. Through the Main Menu.2. Through the IM hotkey (the right navigation key). Short pressing the hotkey will bring up the available IM clients. The menu items below might not appear since not all IM communities support the various options. Also the menu strings may appear differently based on the selected IM communities. The keywords such as User ID, Login and Contact will be used as general terms in IM menus according to the currently selected communities such as AIM, Windows Live and Y! Messenger.Offline MenuSign OnThis allows users to login by filling in the User ID and Password.n NoteOnce the User ID and Password are saved, you will not be required to type them in again during Login process. This feature is optional.](https://usermanual.wiki/LG-Electronics-USA/GR500/User-Guide-1033924-Page-35.png)
![Messaging39Saved ConversationsThis is where a user can view saved conversations.Settings] Set Sound: Allows you to set on/off an alert for the Contact when they have activity on their session.] Default Provider: Allows you to set the default IM community to login.] Auto Sign In: You may set the automatic IM Login process by choosing between the ’When Power On’ or ’When IM Start’ options.] Network: You may check your IM Network Profiles or Server Address information.IM InformationThis indicates the Instant Messaging Client Information such as Client Name and Version Number.Online Menu / 1 to 1 conversationAfter a successful Login, a list of contacts with Screen Names will appear on screen. Depending on the cursor location in the contacts, the following menu options will be available.When cursor is located on a Conversations Listn NoteThe Conversations List contains both the active contact where a conversation has taken place as well as an unknown contact.n NoteWhen you select the left/right navigation key or the Confirm key on the Conversation List, it offers the ability to view or hide conversations.](https://usermanual.wiki/LG-Electronics-USA/GR500/User-Guide-1033924-Page-36.png)
![Messaging40] Send to Others: This offers the ability to send a message to an unknown contact. When selected, a User ID must be typed in prior to starting an IM session or conversation.] Saved Conversations: You may view or delete the stored conversation session.] Settings • My Status: Allows you to set your status to Available, Busy or Invisible. • Set Sound: Allows you to set an alert for the Contact when they have activity on their session. • Auto Sign On: You may Login to an IM client automatically with the ‘When Power On’ or ‘When IM Start’ options.] Log Out: This begins the Logout process.When cursor is located on a Conversation] End Conversation: This closes the selected conversation. If an unknown contact was selected, that contact is deleted.] Block/Unblock Contact: This allows you to block/unblock the selected Conversations Contact.] View Information: This allows you to view the User ID and Status Text information. ] Settings: Please refer to the previous Settings Menu.] Log Out: This begins the Logout process.](https://usermanual.wiki/LG-Electronics-USA/GR500/User-Guide-1033924-Page-37.png)
![Messaging41When cursor is located on a Contact List] Add Contact: This adds a new contact to the selected contacts’ list; in the meantime this searches for the contact on the basis of E-mail Address, First Name, or Last Name.] Refresh List: This refreshes the present information on the contacts within the contacts.] Send to Others: This offers the ability to send a message to an unknown contact. When selected, the User ID must be typed in prior to starting an IM session or conversation.] Saved Conversations: This is where a user can view saved conversations.] Settings: Please refer to the previous Settings Menu.] Log Out: This begins the Logout process.When cursor is located on a Contact] Add Contact: This adds a new contact to the selected contacts list; in the meantime this searches for the contact on the basis of E-mail Address, First Name, or Last Name.] Delete Contact: This deletes the selected Contact.] Block/Unblock Contact: This allows or blocks conversation with the selected Contact.] Refresh Contact: This refreshes the present information on the selected contact.] View Information: This allows you to view information. It provides User ID, Status Text.] Settings: Please refer to the previous Settings Menu.] Log Out: This begins the Logout process.](https://usermanual.wiki/LG-Electronics-USA/GR500/User-Guide-1033924-Page-38.png)
![Messaging42Menu options available in the Conversation screen] Back To List: This brings the screen back to the contacts.] Insert: You can insert Symbol, Template and emoticons in the conversation screen.] Block/Unblock Contact: This allows or blocks conversation with the selected Contact.] Save Conversation: Stores the currently active conversation.] End Conversation: This ends the active conversation and clears the conversation buffer.] Settings: Please refer to the previous Settings Menu.] Text Entry Mode: Sets the text input mode such as abc, Abc, ABC, T9 abc, T9 Abc, T9 ABC and 123.] Text Entry Mode Settings: This selects the T9 predictive mode Language.n Note• In the conversation window, you can use the up/down navigation key for scrolling through the conversation.• Maximum number of characters supported by a message is 800 characters for receiving and 127 characters for sending.• The present information might not update in real time so the “Refresh List”/“Refresh Contact” option can be used for the most up to date status.Mobile Email Menu 2.4Mobile Email allows you to access your Yahoo! Mail, AOL Mail, AIM Mail, Windows Live Mail, AT&T Yahoo!, BellSouth Mail and Other providers accounts on your phone. So, now you can quickly and easily check your email while you’re away from your computer.](https://usermanual.wiki/LG-Electronics-USA/GR500/User-Guide-1033924-Page-39.png)
![Messaging43To Set Up Mobile Email] Open Mobile Email: Slide out the keyboard, highlight Mobile Email and press OK.] Select an Email Provider: Use the navigation key to highlight the email provider you wish to use and press OK.] Log In 1. Highlight the ID entry field, press down on the navigation key, and then type in your existing email ID. 2. Scroll down and highlight the Password field, press down on the navigation key, and enter your password. Quick Tip: Your password is case sensitive. Press the on the keypad to change to lower case or upper case. 3. To save your password scroll down to Remember Me and press down on the navigation key to check the box. 4. Select Sign In.] Opening an Email: Just scroll down and highlight the email subject line you want to open and press down on the navigation key. Once the email opens, just select Options to reply, forward, or delete.] Deleting an Email: Just scroll down to the email you want to delete, press Options, then Delete.For additional details, visit www.att.com/emailDrafts Menu 2.5You can view the messages saved as a draft. The draft messages are listed with the date and time of when the messages were saved.The following [Options] are available.] Select Multiple: Allows you to delete multiple messages you select from the folder.] Message Details: Allows you to view the information on the message.](https://usermanual.wiki/LG-Electronics-USA/GR500/User-Guide-1033924-Page-40.png)
![Messaging44Outbox Menu 2.6Outbox is a temporary storage place for messages waiting to be sent and where you can view the lists and contents of sent messages and also verify if transmission was successful.When you press the [SEND] key, you can make a call to the number of the recipient number of the selected message.If the message is not sent from the Outbox, you will receive a sound alert along with a Message Sending Fail notice on the screen. Another attempt will be made to send the failed message and after two unsuccessful attempts, the message will no longer be sent automatically order to send the message that has failed, you must press Resend from the Options menu.After the maximum number of Send attempts has been reached the Send function has failed.If you were trying to send a text message, open the message and check that the Sending options are correct.When the message Send has failed, the following [Options] are available.] Delete: Deletes the selected message which has failed.] Edit: Allows you to edit the selected message.] Select Multiple: You can delete selectively. ] Message Details: Shows you Type and subject.] View Status: Allows you to check the view status.Voicemail Menu 2.7This menu provides you with a quick way of accessing your voice mailbox (if provided by your network).Before using this feature, you must enter the voice server number obtained from your service provider.This may already be available; to check the voicemail, press and hold the key.When new voicemail is received, the symbol will be displayed on the screen.](https://usermanual.wiki/LG-Electronics-USA/GR500/User-Guide-1033924-Page-41.png)
![Messaging45n NotePlease check with your network service provider for details of their service in order to configure the handset accordingly.Message Settings Menu 2.8Message Alert (Menu 2.8.1)Allows you to choose Sounds and Alert Type. Signature (Menu 2.8.2)This feature allows you to create your Text signature.You can use symbols, text templates and contacts as part of the signature.Text Message (Menu 2.8.3)] Text Template: There are 6 predefined messages in the list. You can view and edit the template messages or create new messages. The following [Options] are available. - Send: Allows you to send the selected template via Message. - Delete: Allows you to delete the selected template message. - Edit: Allows you to write a new message or edit the selected template message. - Delete All: Deletes all messages in the folder.] Message Center Number: If you want to send a text message, you can get the address of the SMS center by using this menu.] Email Gateway: You can send the text message to an Email Address via this gateway.] Message Subject: You can enter the SMS Subject when this menu is on.](https://usermanual.wiki/LG-Electronics-USA/GR500/User-Guide-1033924-Page-42.png)
![Messaging46] *Message Types: Allows you to choose Text, Voice, Fax, X.400 or Email. (Not available with SIM card AT&T provided) ] *Validity Period: This network service allows you to set how long your multimedia messages will be stored at the message center.] *Delivery Receipt: If it is set to Yes in this menu, you can check whether your message is sent successfully. (Not available with SIM card AT&T provided) Reply via Same Message Center This menu allows you to determine whether to request a read confirmation mail to a recipient. (Not available with SIM card AT&T provided)] Insert Signature: You can insert your own signature (Menu X.X.X) that you created.Multimedia Message (Menu 2.8.4)] Multimedia Templates: Allows you to add new multimedia templates by choosing [New]. The following [Options] are available. - Insert: Allows you insert Symbol, Picture, Audio, Video, Take New Picture, Record New Audio, Record New Video and More. - Text Entry Mode: Sets the text input mode as abc, Abc, ABC, T9 abc, T9 Abc, T9 ABC and 123. - Text Entry Settings: Allows you to choose Text Entry Language, T9 Word Candidate List, T9 Next Word Prediction and T9 Dictionary. ] Priority: You can set the priority of the message you choose.] Message Subject: You can enter the MMS Subject when this menu is on.] Validity Period: This network service allows you to set how long your multimedia messages will be stored at the message center. (Not available with SIM card AT&T provided)] Send Delivery Receipt: Allows you to send a delivery confirmation mail for a Multimedia Message.] Send Read Receipt: Allows you to send a message read confirmation mail for a Multimedia Message.](https://usermanual.wiki/LG-Electronics-USA/GR500/User-Guide-1033924-Page-43.png)
![Messaging47] Download Options - Download Without Ask: Allows Multimedia Message to be downloaded automatically. - Ask Always: You can download a multimedia message manually. - Discard: Used when user reject to download Multimedia Message.] Message Center: The details for the Multimedia gateway are pre-loaded onto your handset and should not be changed.Voicemail Number (Menu 2.8.5)This menu allows you to set the voicemail center number if this feature is supported by the network service provider. Please check with your network service provider for details of their service in order to configure the handset accordingly.Service Message (Menu 2.8.6)You can set the Service option to determine whether you will receive service messages or not.](https://usermanual.wiki/LG-Electronics-USA/GR500/User-Guide-1033924-Page-44.png)
![48YELLOWPAGES.COMUnleash the power of YELLOWPAGES.COM local search on your mobile phone. Find a business, get maps and directions, and save your favorites: our YPmobile app gives you what you need, whenever and wherever you need it.] Search for local businesses. ] View ratings and call businesses. ] Save businesses for future access. ] Get maps and view step-by-step directions.* For more information, refer to the www.yellowpage.com](https://usermanual.wiki/LG-Electronics-USA/GR500/User-Guide-1033924-Page-45.png)
![52AT&T GPSThe AT&T Navigator application on your device uses GPS position determination technology and access to your carrier’s data network to provide you with driving directions and a host of other services, including:] GPS navigation that gives you turn-by-turn directions to any destination address in the continental United States. If you miss a turn or get off-track, AT&T Navigator will calculate a new route for you. You can enter a destination address by using AT&T Navigator’s automatic voice recognition system or by typing on the device’s keypad.] Audio and visual traffic alerts while driving or viewing maps, as well as traffic re-routing capabilities to minimize delays on your trip.] A Search feature that allows you to find businesses or points of interest near your current location, an airport, a waypoint, or any other entered address. You can read ratings and reviews for businesses and easily call the business that you have found to check on the availability of an item or to make a reservation. You can navigate to the business location now or save the address for later use.] Maps of the area around your current location, around a marked waypoint, or around an address that you had previously entered. You can pan the map (adjust left, right, up, or down) and zoom in or out. You can also mark a point under the cursor as a waypoint.] A compass-like indicator presenting your direction of travel, location, and speed.](https://usermanual.wiki/LG-Electronics-USA/GR500/User-Guide-1033924-Page-49.png)
![AT&T GPS53] The ability to personalize your application preferences by selecting U.S. customary or metric distance units, the language for audible guidance, and so on.You can also use many of AT&T Navigator’s features on the TeleNav website, such as getting driving directions (Route Planning) and using the Search function to find businesses, churches, schools, and government offices. You can also use the TeleNav website to add an address to your My Favorites list, manage your My Favorites and Recent Places lists, and shop at the TeleNav Store.n NoteFor best GPS performance ] In order to improve GPS antenna sensitivity, do not hold the GPS antenna area of the mobile. ] Your RF antenna sensitivity might be decreased in case that you stay in the high rising building, in underground, or locations surrounded by metal or concrete.] Had better use it near the window indoor for better GPS antenna sensitivity.] Use windshield holder while you are driving. ] For battery durability, please use vehicle power adapter on your car.] It could take 2~3 minutes to get your GPS position depending on the condition of environment or network.](https://usermanual.wiki/LG-Electronics-USA/GR500/User-Guide-1033924-Page-50.png)
![54My StuffCV Menu 7.1Cellular Video (CV) brings you quick, on-demand access to crystal clear news, sports, weather and entertainment video clips. Catch up on TV’s hottest shows, funniest comedians, biggest headlines and latest sports scores. You can even personalize your homepage for quick access to your favorites. In addition, the CV service automatically streams localized weather information to your personalized “News & Weather” page each and every day. To access CV:1. From standby mode, press the Left Soft Key to access the Menu.2. Scroll to and select CV (option 6).3. Select a category and play a clip.Audio Menu 7.2] Shop Tones: This menu option connects to AT&T’s ringtone download site.] Answer Tones: This menu option conncecnt to AT&T’s answer tone download site.] Record Voice: You can record your own audio by pressing the center key [OK].] Files: You can view the audio files in the list.Games Menu 7.3Java is a technology developed by Sun Microsystems. Similar to the way you would download the Java Applet using the standard Netscape or MS Internet Explorer browsers, Java MIDIet can be downloaded using a WAP enabled phone. Depending on the service provider, Java based programs such as Java games can be downloaded and run on a phone. Once downloaded, the Java program can be viewed within the Games menu where you can select, execute or delete. Java program files saved in the phone or memory card are in .JAD and .JAR formats.](https://usermanual.wiki/LG-Electronics-USA/GR500/User-Guide-1033924-Page-51.png)
![My Stuff55n NoteThe JAR file is a compressed format of the Java program and the JAD file is a description file that includes all detailed information. From the network, prior to download, you can view all detailed file descriptions from the JAD file.n WarningOnly J2ME (Java 2 Micro Edition) based programs will run in a phone environment.J2SE (Java 2 Standard Edition) based programs will only run in a PC environment.] Shop Games: This menu option connects to AT&T’s game download site.] Games List: You can see the default and downloaded games in the list.Picture Menu 7.4] Shop Graphics: This menu option connects to AT&T’s graphic download site.n NoteAdditional charges may be incurred when downloading graphics. Contact your service provider for further information.] Take Photo: You can take your own photo by pressing the center key [OK].] Make Animated GIF: You can make an animation file with the selected images in the list.] Files: You can view the graphic files in the list.Video Menu 7.5] Shop Videos: This menu option connects to AT&T’s video download site. This allows users to download the various videos by connecting to the Internet.] Record Video: You can record your own video by pressing the center key [OK].] Files: You can view the video files in the list.](https://usermanual.wiki/LG-Electronics-USA/GR500/User-Guide-1033924-Page-52.png)
![My Stuff56n NoteDRM (Digital Rights Management) Contents Copyright protected contents.DRM sometimes restricts some functions, such as send, and edit. The indicates content controlled by DRM protection.Applications Menu 7.6This menu displays the list of Java programs downloaded using WAP. All previous downloaded programs can be selected, deleted, or viewed in detail within the Application menu.] Shop Applications: This menu option connects to AT&T’s application download site.] Applications List: You can see the downloaded applications in the list.Tools/Utilizes Menu 7.7Recent Calls (Menu 7.6.1)You can check the record of missed, received, and dialed calls only if the network supports Calling Line Identification (CLI) within the service area.The number and name (if available) are displayed together with the date and time of the call. You can also view call times.Missed Calls (Menu 7.6.1.1)• View the number, if available, and call it or save it in the Address Book.• Enter a new name for the number and save both in the Address Book.• Send a message using this number.• Delete the call from the list.](https://usermanual.wiki/LG-Electronics-USA/GR500/User-Guide-1033924-Page-53.png)

![My Stuff58Alarm Clock (Menu 7.6.2)The alarm function allows you to set up multiple separate alarms. You can also set the time, repetition interval and alarm sound.Select your desired alarm setting to configure from the alarm list. If there is no alarm setting, press the left soft key [New] to add a new alarm.] Time: Select the desired set time mode using the navigation key. Input your desired alarm time by specifying the hour and minute. If the time is in 12 hour clock format, you have to select either ‘am’ or ‘pm’ using the center soft key.] Repeat: Select the desired repeat mode using the navigation key.] Alarm Tone: Select the alarm sound to use for the alarm using the key.] Memo: Input alarm name.Calendar (Menu 7.6.3)When you enter this menu a calendar will be displayed. The square cursor is used to locate a particular day. The bottom bar on the calendar indicates schedule(s) for that day. This function helps to remind you of the schedule. The phone will sound an alarm tone if it has been set for a specific schedule item.Key Descriptionup/down navigation key Weeklyleft/right navigation key Daily key / key Annually key / key MonthlyThe following [Options] are available:] Search: Allows you to search the saved schedule(s) by pressing the character keys.] Delete: Allows you to delete the selected schedule.](https://usermanual.wiki/LG-Electronics-USA/GR500/User-Guide-1033924-Page-55.png)
![My Stuff59] Send Schedule Via: Sends the selected schedule by Message or Bluetooth.] Set Holiday: Allows you to set your personal holiday for the selected date.] Selective Delete: Deletes the defined schedules such as Old Schedules or All Schedules.] View All: Allows you to view all saved schedules.] Go to Date: Allows you to jump to a specific date.] Select Multiple: Allows you to choose various selections. Notepad (Menu 7.6.4)You can create up to a maximum of 30 memos.1. Select a memo pad you want to edit.2. Press the left soft key [New] to create a new memo.3. Input the memo and press the center key [Save] to save.Calculator (Menu 7.6.5)The calculator function allows you to add, subtract, multiply and divide. You can input numbers using the number keys, and input operators using the up, down, left, and right navigation keys.You can input a decimal point by pressing the [Star] key.Whenever you press the key, characters are sequentially deleted in reverse order.World Clock (Menu 7.6.6)The World clock function provides time information on major cities worldwide.1. You can select a desired city as a base using the left soft key [Map].2. You can view the time of desired city using the right soft key [Options] - [Change City].](https://usermanual.wiki/LG-Electronics-USA/GR500/User-Guide-1033924-Page-56.png)
![My Stuff60Tasks (Menu 7.6.7)This feature allows you to save and manage a task. 1. To add a new To do item, select the left soft key [New] in the Task enquiry screen.2. Input due date, notes, priority and status for the new Task. 3. Press the left soft key [Save] to save the Task item.The following [Options] are available in the Task list.] Status: Allows you to change the status of the selected task as In Progress or Completed.] Edit: Allows you to edit a saved task.] Delete: Deletes the selected task.] Selective Delete: Deletes All Completed, All Past Tasks or All Tasks. ] Send Task Via: Enables the selected task to be sent via Message and Bluetooth.] View Calendar: The calendar pop-up window is displayed.Stop Watch (Menu 7.6.8)This menu allows you to record the elapsed time of an event. The duration of an individual lap time (up to 20 times) and the total time can be displayed.] New Time 1. To start timing, press the center key [Start]. The running time is displayed as HH.MM.SS.hh (hours, minutes, seconds, hundredths of a second). 2. During the timing, you can record an individual lap time by pressing the right soft key [Lap]. Up to 20 lap times can be recorded. 3. You can stop or restart timing by pressing the key. 4. To reset the stop watch, press the left soft key [Reset].](https://usermanual.wiki/LG-Electronics-USA/GR500/User-Guide-1033924-Page-57.png)
![My Stuff61] Saved Times: You can see the saved recorded times which are in the lap time list of the New Time option. Tip Calculator (Menu 7.6.9)This feature allows you to quickly and easily calculate the tip amount based on the total bill as well as the split of the total bill based on the number of people. Unit Converter (Menu 7.6.0)This function converts any measurement into a unit you want.There are 6 types of units that can be converted: Area, Length, Weight, Temperature, Volume, and Velocity.n NoteYou can input a decimal number by pressing the [Star] key.Camera & Recordings Menu 7.8Web Pages Menu 7.9Bookmarks (Menu 7.7.1)This function allows you to store and edit frequently accessed sites. The following [Options] are available.n NoteYour phone may have some pre-installed bookmarks for sites not affiliated with LG. LG does not warrant or endorse these sites. If you choose to access them, you should take the same precautions for security or content as you would with any site.] View: Display the bookmark title and URL.] Connect: Connect to the selected bookmark site.] New Bookmark: Add a new bookmark manually.] New Folder: Add a new folder manually.] Move: Move a bookmark to another folder which you added manually.](https://usermanual.wiki/LG-Electronics-USA/GR500/User-Guide-1033924-Page-58.png)
![My Stuff62] Edit: Modify the existing bookmark item.] Delete: Allows you to erase the selected bookmark.] Send URL: Allows the bookmark information to be sent via SMS to another person.] Select Multiple: Allows you to select multiple bookmarks for moving or deleting.n NotePre-installed bookmarks cannot be deleted or edited by users. In order to change the text input mode for symbol input, please refer to the General Functions section.Saved Pages (Menu 7.7.2)This saves the page on display as an off-line file. A maximum of 20 pages can be saved.Recent Pages (Menu 7.7.3)You can manage the list of the Internet pages you visited. Other Files Menu 7.10When you receive files of an undefined format (such as .vcs, .vcf, etc.) via E-mail, the files are saved in this folder.The following [Options] are available.] Delete: You can delete the selected file.] Rename: You can edit the name of the selected file.] New Folder: You can create a new folder.] Sort By: You can sort the folders by name, date and type.] Delete All: You can delete all files.] Select multiple: You can delete several files at once.] Information: You can view information about the selected folder.Memory Card Menu 7.11This function shows the status of the external microSD card memory.](https://usermanual.wiki/LG-Electronics-USA/GR500/User-Guide-1033924-Page-59.png)
![Address Book64Contact Management Menu 8.5You can copy and delete contacts between SIM and Phone. Service Dial Numbers Menu 8.6You can view the list of Service Dialing Numbers (SDN) assigned by your network provider. Such numbers could include the emergency, directory assistance and voice mail numbers.1. Select the Service dial number option.2. The names of the available services will be shown.3. Use the up/down navigation keys to select a service. Press the [SEND] key.My Numbers Menu 8.7This displays your phone numbers stored in the SmartChip.](https://usermanual.wiki/LG-Electronics-USA/GR500/User-Guide-1033924-Page-61.png)
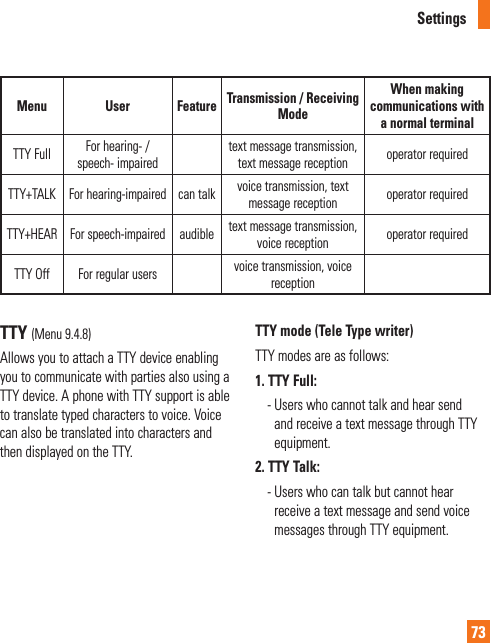
![65SettingsAudio & Ringtones Menu 9.1There can be 5 sound modes: General, Vibrate All, Alarm Only, Silent All and Ear Mic. General, Vibrate All, Alarm Only and All Silent modes can be changed from the Volume menu under Ring tone. In addition, pressing and holding the [Star] key on idle screen mode can swap Normal and Manner mode. Ear Mic is available when respective instruments are attached.Shop Tones (Menu 9.1.1)Connects to AT&T Ring tone Shops.Volume (Menu 9.1.2)This menu controls Ringtone, Multimedia, Call and Keypad volume.Ringtone (Menu 9.1.3)] Sounds: Shows and plays ring tones. These can be downloaded ring tones from Ring tone shops.] Alert Type: Supports 3 ring alert types. Ring, Ring and Vibration, and Ring after Vibration.] Increasing Ringtone: Allows you to select an Increasing Ringtone type which is played when you receive an incoming call. You can elect to turn this On of Off.Message Tone (Menu 9.1.4)] Sounds: Shows and plays message tones. These can be downloaded ring tones from Ring tone shops.] Alert Type: Supports 6 message alert types. Ring Once, Ring Every 2 Min., Ring Every 15 Min., Ring & Vibrate, Vibrate, Silent.n NoteFull length music tracks cannot be set as ringtones.Alert Tone (Menu 9.1.5)] Sounds: Allows you to select a set of alert tones. Supports 2 alert tone types, Alert Tone 1 and Alert Tone 2.] Alert Type: You can select to turn Alert Tones to Ring or Silent.](https://usermanual.wiki/LG-Electronics-USA/GR500/User-Guide-1033924-Page-62.png)

![Settings67Auto Key Lock (Menu 9.2.4)This menu allows to set the time of Auto Key Lock.Set Flight Mode (Menu 9.2.5)This allows you to use only the phone’s features that do not require the use of the wireless network when you are in an airplane or in places where the wireless network is prevented.If you set the flight mode on, the icon will be displayed on the screen instead of the network signal icon.] On: You cannot make (or receive) any calls, including emergency calls, or use other features that require network coverage] Off: You can deactivate the flight mode and restart your handset to access the network.Security (Menu 9.2.6)Various codes and passwords are used to protect the features and settings of your phone. They are described in the following sections.Phone lock You can use a security code to avoid unauthorized use of the phone.If you set phone lock to When Power On, the phone will request a security code whenever you switch the phone on. If you set the phone lock to When SIM Card Changed, your phone will request a security code only when you change your SIM Card. If you set the phone lock to Lock Phone Now, your phone will lock immediately.](https://usermanual.wiki/LG-Electronics-USA/GR500/User-Guide-1033924-Page-64.png)
![Settings68PIN Code RequestWhen the PIN code request feature is set to ‘On’, you must enter your PIN each time you switch the phone on. Consequently, any person who does not have your PIN cannot use your phone without your approval.n NoteBefore setting the PIN code request feature to Off, you must enter your PIN.The following [Options] are available:] On: You must enter the PIN each time the phone is switched on.] Off: The phone connects directly to the network when you switch it on.Fixed Dial NumberThis allows you to restrict your outgoing calls to selected phone numbers, if this function is supported by your SIM Card. The PIN2 code is required.] FDN On/Off - On: You can only call phone numbers stored in the FDN List. You must enter your PIN2. - Off: You can call any number.] FDN Listn NoteNot all SIM Cards have a PIN2. If your SmartChip does not, this menu option is not displayed.Change CodesThe Change codes feature allows you to change your current password to a new one. You must enter the current password before you can specify a new one.You can change the access codes for: Security Code, PIN1, PIN2n NotePIN: Personal Identification Number.](https://usermanual.wiki/LG-Electronics-USA/GR500/User-Guide-1033924-Page-65.png)
![Settings69Reset Settings (Menu 9.2.7)This function allows you to restore factory settings. To do this, you need the security code.Master Reset Restores the settings (e.g.: Audio, Display, Language, Date & Time, Bluetooth Settings) stored in the handset memory to default values.Master ClearDeletes downloaded/user created contents (e.g.: images, videos) from Handset content and the External Memory card.] Phone - Deletes all downloaded/user created Images, Videos & Sounds from the Handset Memory. - Restores Personal Information stored in the handset memory (e.g.: address book, messages, tasks, alarm, Calendar schedules) to default values. - Resetores the settings stored in the handset memory to default values.] Memory Card: Deletes all contents from the External Memory Card.WARNING! Be careful when you insert Micro SD Card that is 2GB or under 2GB of memory on GR500.It could be limited with the number of files under root directory of Memory Card, since the Micro SD card is formatted by FAT16 that is inserted on the phone. Therefore, you should create a folder under root directory and use that folder when you send/copy a file.Display Menu 9.3Shop Graphics (Menu 9.3.1)Connects to AT&T’s graphic download site.Wallpapers (Menu 9.3.2)You can select the background picture in standby mode.](https://usermanual.wiki/LG-Electronics-USA/GR500/User-Guide-1033924-Page-66.png)
![Settings70Font (Menu 9.3.3)You can configure the size of Lists and the font size & color of the numbers which appear in the home screen when you make a call.Clocks & Calendar (Menu 9.3.4)This feature allows you to select the internal LCD clock or Calendar display on the standby screen.Brightness (Menu 9.3.5)You can set the brightness of display screen(Internal LCD and External LCD).Backlight Timer (Menu 9.3.6)Use this to select whether or not the phone uses the backlight.Color Schemes (Menu 9.3.7)You can change the color of the menu, soft key area, title bar area, and cursor by changing the Color Schemes.You can select the Color Schemes from Black and White.Menu Styles (Menu 9.3.8)You can configure the menu style to Icon style or List style.Call Menu 9.4Call Forwarding (Menu 9.4.1)When this network service is activated, you can direct your incoming calls to another number, for example, to your voice mailbox number. For details, contact your service provider. Select one of the divert options, for example, select If Busy to divert voice calls when your number is busy or when you reject incoming calls. The following options are available:] All Voice Calls: Diverts voice calls unconditionally.] If Busy: Diverts voice calls when the phone is in use.] If No Answer: Diverts voice calls which you do not answer.](https://usermanual.wiki/LG-Electronics-USA/GR500/User-Guide-1033924-Page-67.png)
![Settings71] If Out of Reach: Diverts voice calls when the phone is switched off or out of coverage.] All Data Calls: Diverts to a number with a PC connection unconditionally.] All Fax Calls: Diverts to a number with a fax connection unconditionally.Send My Number (Menu 9.4.2)This network service allows you to set your phone number to be displayed On or hidden Off from the person you are calling. You can select Set by Network if you prefer to have different settings for different service providers.Auto Redial (Menu 9.4.3)Select On, your phone redials the number you’re trying to call up to 10 times after you hear a quick, engaged signal. Press [END] to stop the call attempts.This feature attempts to redial numbers that are engaged due to the wireless network. It does not redial numbers to an engaged party.n NoteThere will be no alert indicating the call has been connected. You must stay on the line to hear when the call is connected.Answer Mode (Menu 9.4.4)This allows you to determine how to answer the phone.] Any Key: You can answer an incoming call by pressing any key, except the [END] key.] Send Key Only: You can only answer an incoming call by pressing the [SEND] key.] Slide Open: When the phone rings, you can answer a call simply by opening the flip.Minute Minder (Menu 9.4.5)This option allows you to specify whether the phone will beep every minute during an outgoing call to keep you informed of the length of the call.](https://usermanual.wiki/LG-Electronics-USA/GR500/User-Guide-1033924-Page-68.png)
![Settings72Call Waiting (Menu 9.4.6)The network will notify you of a new incoming call while you have a call in progress. Select Activate to request the network to activate call waiting, Deactivate to request the network to deactivate call waiting, or View Status, to check if the function is active or not.Call Reject (Menu 9.4.7)This menu allows you to enable or disable call reject for all numbers or a specific number.] Call Reject On/Off: This feature allows you to reject or not the incoming calls unconditionally by disconnecting. When the Reject All Calls option is set, all incoming calls are routed directly to Voicemail.] Call Reject List: Configures conditional call reject mode. Press the left soft key [New] to add the phone number to be rejected to the list. When you add a number to the list, you can add the number by entering it directly or by searching for the number in the Contact List.](https://usermanual.wiki/LG-Electronics-USA/GR500/User-Guide-1033924-Page-69.png)
![Settings75The following timers are available:] Last call: Length of the last call.] Dialed calls: Length of the outgoing calls.] Received calls: Length of the incoming calls.] All calls: Total length of all calls made and incoming calls since the timer was last reset.Data Counter (Menu 9.4.*.2)You can check the Sent, Received or All data volumes and Reset data counter.Connection Menu 9.5Bluetooth (Menu 9.5.1)Your phone has built-in Bluetooth wireless technology, which makes it possible for you to connect your phone wirelessly to other Bluetooth devices such as a hands free device, PC, PDA, a remote screen, or other phones. Only one of the devices registered in your phone can be connected at a time. (To make a connection to the same type of device or change Bluetooth preferences, disconnect the existing device first.)You can have a conversation via a cordless Bluetooth hands-free phone or browse the Internet, wirelessly connected via a mobile phone.You can also exchange, for example, business cards, calendar items and pictures.MobiTV or XMRadio is supported through Only Stereo Bluetooth.Bluetooth A2DP Music Playing is available in the Music Player Menu. Hands-free profileThis icon appears when the hands-free profile is used between the hands-free device and the phone. This allows you to call using a Bluetooth connection.A2DP profileThis icon appears when the A2DP profile is used between the stereo headset device and the phone. This allows you to listen to an audio clip. A2DP is the Advanced Audio Distribution Profile, which provides support for streaming either mono or stereo audio using Bluetooth.](https://usermanual.wiki/LG-Electronics-USA/GR500/User-Guide-1033924-Page-72.png)
![Settings76Hand-free +A2DP profileThis icon appears when both profiles of the hands-free and the A2DP are used between the compatible device and the phone. This allows you to call and listen to an audio clip using a Bluetooth connection.For using each device, see a manual that comes with the device.n NoteWe recommend that your phone and the Bluetooth device you are communicating with be no more than 10 meters apart. The connection may be improved if there are no solid objects in between your phone and the other Bluetooth device.Turn On/OffThis menu sets the Bluetooth on or off using the navigation key. Search New DeviceThis function allows you to search and add new device at once.My DevicesThis function allows you to view the list of all devices that are paired with your phone at once.To add a new device, press the left soft key [New].1. Select the [New] key to search the device that can be connected and which is within range. 2. If you want to stop searching, press the right soft key [Cancel].3. All of the devices found are displayed in the pop-up menu.Select the desired device by pressing the OK key, and entering the password.My Visibility On/Off toggle1. Selecting the Visible option exposes your phone to other Bluetooth devices.2. Selecting Hidden shows your phone only to already paired devices.My Bluetooth InfoThis menu allows you to configure the profile for a Bluetooth.](https://usermanual.wiki/LG-Electronics-USA/GR500/User-Guide-1033924-Page-73.png)
![Settings77] My Device Name: Allows you to change the handset’s name that can be seen by other Bluetooth devices. My Address: You can check your Bluetooth address. You cannot change the default setting.] Supported Services: Shows you all services that GR500 supports.USB Connection Mode (Menu 9.5.2)You can transfer files from a compatible PC to the memory in your phone using the Mass Storage. When you connect the phone to a PC using the USB cable, this will be displayed as a removable disk through Windows Explorer.Internet Profiles (Menu 9.5.3)This menu shows the Internet Profiles. You can add, delete and edit Internet Profiles by using the Options Menu.However, you cannot delete or edit default configurations provided by AT&T.Access Points (Menu 9.5.4)This menu shows the Access Points. You can register, delete and edit by using the Options Menu. However, you cannot delete or edit default configurations provided by AT&T.Network Selection (Menu 9.5.5)Preferred Network Lists (Menu 9.5.6)Memory Menu 9.6Used Space (Menu 9.6.1)Phone Common: This function shows the status of the user memory of the handset.Memory Card: If your phone has a multimedia memory card in the card slot, you can save images, sounds, and videos on the memory card. You can check the current status of the external memory card in the Memory status menu.Phone Reserved: This function shows the status of the reserved memory for the user (Text Message, Contact List, Calendar, Tasks, Memo).](https://usermanual.wiki/LG-Electronics-USA/GR500/User-Guide-1033924-Page-74.png)
![Settings78SIM Card: This function shows the status of the SmartChip card user memory.Set Storage Defaults (Menu 9.6.2)Restores the settings (e.g.: Audio, Display, Language, Date & Time, Bluetooth Settings) stored in the handset memory to default values.Application Settings Menu 9.7Video ShareAudio Alert: Enable/Disable Auditory alert when Video Share is available. Auto Record: Enable/Disable automatically recording Video clip during live Video Share call.MessagingFor more details, refer to Message Settings (Page. 66)Browser SettingsAccountsThis includes the network information used to connect the browser to the Internet. Select the desired account by pressing the soft key, which is labeled as “Activate”. This will activate the account that will be used for future connection. MEdia Net is the predefined account that is set as default.] Activate: Select the account among the list of accounts, so it can be used for future connection.] View: Allows you to see the specific account information.] Edit: Allows you to change the account information.] Delete: Allows you to delete the account.] New: Allows you to create a maximum of 20 new accounts.](https://usermanual.wiki/LG-Electronics-USA/GR500/User-Guide-1033924-Page-75.png)
![Settings79n NoteYou cannot edit and delete pre-installed accounts. In order to create a new account, please fill in the network information.1. Account Name: Name associated with new account.2. Homepage: Homepage URL.3. Internet Profile: You can choose one from the Internet profiles.Note you can choose a Internet profile by selecting the list option on the center key.n Note1. The account information will be available from your operator.2. Creating or editing an account requires care. The browser cannot connect to the Internet if the account information is not correct.AppearanceYou can change the settings of browser apperance(Text size, Character Encoding, Scrolling Control, Show Image, Java Script).Cache SettingsThe web pages you have accessed are stored in the memory of the phone.] Clear Cache: Remove all cached data in the memory.] Allow Cache: Set a value to determine whether a connection attempt is made through the cache or not.n NoteA cache is a buffer memory, which is used to store data temporarily, especially when it is online.Cookie SettingsThe information or services you have accessed are stored in the cookie.] Delete Cookies: Remove all cookies.] Allow Cookies: Set a value to determine whether a connection attempt is made through the cookie or not.](https://usermanual.wiki/LG-Electronics-USA/GR500/User-Guide-1033924-Page-76.png)
![Settings80QpassIf set to On, the user’s personal information such as ID and Password used to access the Internet site will be saved automatically for future use.Screen SettingsYou can change the settings of browser screen (Rendering mode, Zoom).SecurityShows the pre-installed certificates and clear the secure session information.Navigation ModeYou can change the methods of browser navigation.] 4 Way Navigation: The cursor of browser moves scroll amounts or follows hyper links.] Mouse Pointer: You can move the cursor like a mouse pointer.Secure Pop-upYou can control the popup which indicates secure page or not.Browser ShortcutIf set On, you can use the browser more quickly and convenient with the key pad in the phone. If Shortcut is on, the following number of buttons is available.1: Enter URL3: Add This Page5: Full Screen7: Page Down9: Search Text*: View Bookmarks2: Recent Page4: Page up6: View Bookmarks8: Zoom Out0: Zoom In#: Zoom Out](https://usermanual.wiki/LG-Electronics-USA/GR500/User-Guide-1033924-Page-77.png)
![Settings81Online menuOnce you are connected to the Internet, the following menu options are available:] Back: Moves to the previous page.] Forward: Moves to the next page.] Refresh: Loads the current page again.] Home: Moves to the initial homepage.] EnterURL: Connects to the specific URL after editing.] Bookmarks: You can add or save the current page to Bookmark or view the list saved under Bookmark.] Search Text: You can search the text what you want to find.] Recent Pages: You can manage the list of the Internet pages you visited.] Settings: Allows you to set options such as Full Screen View, Cache, Cookie, Qpass and other Browser Settings.Software Update Menu 9.8This menu is used to resume a postponed software update. If new software exists, the AT&T server notifies devices using a WAP push message. Before updating new software after downloading it from the AT&T server, users will whether they would like to postpone the operation. Reminder times can be set to 30 minutes, 1 hour, and 4 hours. When the time is up, users are prompted again or users can resume the postponed operation using this menu at any time.Phone Information Menu 9.9This menu is used to view My Numbers, Manufacturer and Model Name information etc.](https://usermanual.wiki/LG-Electronics-USA/GR500/User-Guide-1033924-Page-78.png)
![82Q&AQHow do I view the list of outgoing calls, incoming calls and missed calls?APress the [SEND] key.QHow do I view all numbers stored in the memory?APress the down navigation key.QWhy is the connection inconsistent or not audible in certain areas?AWhen the frequency environment is unstable in a certain area, connection may be inconsistent and not audible. Relocate to another area and try again.QWhy is the connection not consistent or abruptly disconnects even when established?AWhen frequency is unstable or weak or if there are too many users, connection may be cut off even after it was established. Please try again later or attempt after relocating to other areas.QWhy does the LCD not turn on?ARemove the battery and turn on the power after placing it back in. If there is no change, fully charge the battery and try again.QWhy is there an echo when a connection is made with certain telephones in a certain area?AThis is called the ‘Echo Phenomenon’, which occurs if the connection volume is too high or caused by special properties (semi-electronic telephone exchange) of the equipment on the other end.QWhy does the phone heat up?AThe phone may get hot when there is a very long call duration or when games are played or even when surfing the Internet for a long time. This has no effect upon the life of the product or performance.There are a variety of accessories available for your mobile phone. You can select these options according to your personal communication requirements. Consult your local dealer for availability.](https://usermanual.wiki/LG-Electronics-USA/GR500/User-Guide-1033924-Page-79.png)
